sprint user guide user guide a downloadable, printable guide to your sprint phone connect 4 and its...
TRANSCRIPT

Available applications and services are subject to change at any time.
Sprint User GuideA downloadable, printable guide to your Sprint Phone Connect 4 and its features.

i
Table of Contents
GETTING STARTED 1Introduction 2
Before You Begin 2Package Contents 2
Set Up Your Device 3Parts and Functions 3Indicators 4Battery Use 5
Insert the Battery 5Charge the Battery 6
Turn Your Device On and Off 7Resetting Your Device 7SIM Card 8
USING YOUR DEVICE 10Basics 11
Device Installation 11Connect the Device to a Phone 11Make a Test Call 12Common Settings 12
Voicemail 13Voicemail Setup 13Message Waiting 13Retrieving Messages 13
Calling 14Making a Call 14Adjusting Volume 14Three-Way Calling 14Call Waiting 15Call Forwarding 15TTY Mode 16
GETTING HELP 18For Assistance 19
Troubleshooting 19

ii
Specifications 20Sprint Account Information and Help 21
Sprint Account Passwords 21Manage Your Account 21Sprint Support Services 22
Copyright Information 22INDEX 23

Getting Started 1
Getting StartedThe following set of topics will introduce you to your device, help you get set up with service, provide an overview of the device, and get you started with basic device operations.

Getting Started Introduction 2
IntroductionThe following topics describe the basics of using this guide and your new device.
Before You BeginThank you for purchasing your new device. The following topics explain how best to use this guide to get the most out of your device.
Before Using Your DeviceRead the Quick Start Guide and Important Information Booklet that were packaged with your device thoroughly for proper usage.
Accessible services may be limited by subscription contract conditions.
Guide Usage NotesNote that most descriptions in this guide are based on your device's default settings at the time of purchase.
Screenshots and Key LabelsIllustrations and labels in this user guide may appear differently on your device.
Other NotationsIn the user guide, the device may be referred to either as "Phone Connect 4," "device," or " WF723S."
Package ContentsSee below for details on everything you will find in the box for your device.
n WF723S Wireless Home Phone Base Station (Phone Connect 4)
n Standard Lithium Ion (Li-ion) Battery
n AC Charger
n Quick Start Guide
n Important Information Booklet

Getting Started Set Up Your Device 3
Set Up Your DeviceThe following topics give you all the information you need to set up your device the first time.
Parts and FunctionsThese illustrations outline your device’s primary parts and key functions.
Device Layout Note: Your device's layouts are subject to change. The user guide uses sample images only.
Note: The micro-USB jack is only used for manufacturer.
Interface Description

Getting Started Set Up Your Device 4
Part DescriptionReset button (below back cover; not shown)
Reset your device
External antenna connector
To strengthen signal reception; antennas are pre-installed
Telephone ports RJ11 connector for connection to telephone
Power socket Connector for the external power supply
Power switch Turn your device on or off
Indicators Indicates the status of your device
CAUTION! Inserting an accessory into the incorrect jack may damage the device.
IndicatorsThe following table describes your device’s indicators and their significance.
Indicator Indicator State
Power
Green solid Power on
Green blinking Shutting down
Off Power off
Voicemail
Green blinking New voicemail waiting
Off No new voicemail
Information
Green blinking(2S) Update pending
Green solid Update is in process
Green blinking(10S) Update end or activation success
Red blinking(10S) Update failed
Green blinking Activating
Red blinking Activation fail

Getting Started Set Up Your Device 5
Indicator Indicator State
Battery Charge
(solid = plugged in/charging; blinking = using battery)
Green solid More than 50% charging
Green blinking More than 50% discharging
Yellow solid 20%~49% charging
Yellow blinking 20%~49% discharging
Red solid Less than 20% charging
Red blinking Less than 20%
discharging
Off No battery installed
Signal Strength Network
Network and 1-4 bars solid green
Weak (1 bar) to strong (4 bars) signal
Network and bars blinking red
Device unable to be used as normal
Network steady red, bars off Limited or no service, searching, CDMA register failed
Battery UseThe following topics explain how to insert and remove your device’s battery.
Battery Cautions
Storage: Avoid storing or leaving battery with no charge remaining. Saved information and settings may become lost or changed, or battery may become unusable. Charge once every six months before storing or leaving unused for a long period.
Bulges: Depending on use, bulges may appear near end of battery life. This does not affect safety.
Replacing Battery: The battery is a consumable item. It needs to be replaced if operating time shortens noticeably. Purchase a new battery.
Cleaning: Clean soiled terminals between battery and device with a clean, dry cotton swab. Soiled terminals can result in a poor connection and prevent charging, etc.
Insert the BatteryFollow these instructions to insert your device’s battery safely and properly.
1. Remove the battery cover.

Getting Started Set Up Your Device 6
l Slide gently in the direction shown.
2. Insert the battery.
l Align the contacts of the battery with the contacts in the device.
3. Attach the battery cover.
l Make sure all the tabs are secure and there are no gaps around the cover.
Charge the BatteryFollow these instructions to charge your device’s battery using the AC adapter.
1. Insert the small end of the power adapter into the power socket of your device.

Getting Started Set Up Your Device 7
2. Plug the AC adapter into an electrical outlet.
3. After charging, disconnect the device from the charger.
Turn Your Device On and OffThe instructions below explain how to turn your device on and off.
Turn Your Device On n Slide the On/Off switch to the On position.
Your device will power on. Depending on the indicators, you may use the device.
Turn Your Device Off n Slide the On/Off switch to the Off position.
Your device will power off.
Your indicators will not be on while your device is off (unless the battery is charging).
Resetting Your DeviceIf your device malfunctions, it may be necessary to reset it to the factory default settings.
1. Remove the back cover.

Getting Started Set Up Your Device 8
2. Use a pin to press and hold the Reset button (shown below) for 3-10 seconds.
SIM CardThe SIM card is an IC card containing phone number and other customer information.
Handling a SIM CardKeep the following in mind when handling a SIM card.
You are responsible for any damage caused by inserting the SIM card in another-brand IC card reader, etc. Sprint is not responsible in such a case.
n Always keep the IC chip clean.
n Wipe clean with a dry, soft cloth.
n Avoid applying labels. May damage SIM card.
n See instructions included with SIM card for handling.
n The SIM card is the property of Sprint.
n The SIM card is replaceable (at cost) in case of loss/damage.
n Return the SIM card to Sprint when canceling subscription.
n Returned SIM cards are recycled for environmental purposes.
n Note that SIM card specifications and performance may change without notice.
n It is recommended that you keep a separate copy of information that is stored on SIM card. Sprint is not responsible for damages from stored information that is lost.
n Always follow emergency procedures to suspend service if your SIM card or phone (SIM card

Getting Started Set Up Your Device 9
inserted) is lost or stolen. For details, contact Customer Service.
n Always power off the phone before inserting/removing the SIM card.
Note: Your device’s SIM card is preinstalled and in the device. These instructions are for reference only.

Using Your Device 10
Using Your DeviceThe following topics outline basic features and operations of your Sprint Phone Connect 4.

Using Your Device Basics 11
BasicsThe following topics offer an overview of your device’s basic operations.
Device InstallationThe Phone Connect 4 works with your wireless service provider’s cellular network instead of your phone jacks.
Put the Phone Connect 4 in a place where there is a strong signal from a signal tower, typically near a window or outside wall.
Connect the Device to a PhoneThis topic outlines how to connect a phone to your Phone Connect 4.
1. Unplug your phone from the phone wall jack.
2. Plug your phone into the ‘PHONE 1’ port on the device using the phone cable.

Using Your Device Basics 12
Note: The “Phone 2” port can be used to connect an additional phone, or cordless base station. All telephones connected to the Phone Connect 4 will use the same telephone number.
Make a Test CallOnce you have connected a phone to the Phone Connect 4, make a call to confirm your service.
1. Use the connected phone to dial a phone number.
2. Wait a few seconds for the call to be connected.
Note: You will need to dial 10 digits (area code plus 7-digit phone number) even for local numbers.
Common SettingsThe following table lists common keyboard settings options for your Phone Connect 4.
Command Description*983*3284# Reset your device to factory mode.
*983*238*xx# Set the auto-dialing time.
"XX" means the time range: 4~12s.The default time is 2.5s.
*983*338*xx# Set the flash diagnosing time.
"XX" means the time range: 200~1200(ms). The default time is 700ms.
*983*866*xx# Set up your voicemail number.
"XX" means the voicemail number.
*983*889*n# Set TTY mode.
"n" equals to 0 (TTY Off), 1 (TTY Full) , 2 (TTY VCO) or 3 (TTY HCO).
*983*808*n# Set the method of caller ID display.
"n" equals to 0 (FSK) or 1 (DTMF). The default mode is FSK.

Using Your Device Voicemail 13
VoicemailYour Phone Connect 4 supports wireless voicemail. Follow the steps below to set up and use your voicemail.
Voicemail SetupFollow these steps to set up voicemail with your Phone Connect 4.
1. Dial *86 on any home phone connected to your device to be connected to your wireless voicemail.
Your phone dials the voicemail access number.
2. Follow the system prompts to:
l Create your passcode.
l Record your name announcement.
l Record your greeting.
Important: Voicemail Passcode – It is strongly recommended that you create a passcode when setting up your voicemail to protect against unauthorized access. Without a passcode, anyone who has access to your phone is able to access your voicemail messages.
Message WaitingYour Phone Connect 4 lets you know when there are voicemail messages waiting. There are two indicators for a new message waiting: 1) the voicemail indicator ; and 2) an intermittent dial tone.
n The voicemail indicator on your device flashes when a voicemail message is waiting. You will also hear an intermittent dial tone on any connected phone handset before placing a call.
Retrieving MessagesIt’s easy to retrieve stored voicemail messages through phones attached to your Phone Connect 4.
1. To retrieve voice messages, dial *86 on any home phone connected to your device and wait about few seconds to connect to your wireless voicemail box.
2. Simply follow the voice prompts to listen to and manage your messages. (Alternately, you may dial your 10-digit home phone number to access your voicemail box.)

Using Your Device Calling 14
Calling The following topics explain how to make phone calls and use other calling options with the Phone Connect 4.
Making a CallUsing a phone connected to your device allows you to place and receive calls as you normally would. The device supports both cordless and corded phone dialing methods.
Note: Make sure to dial the 10-digit phone number, including area code.
Adjusting VolumeYou can adjust call volume using the volume controls of any connected phone. You can also adjust call volume using the Phone Connect 4 menus.
1. When you are on a call, press ** or ## to enter Volume Setting Mode.
2. Press * or # to turn volume down or up.
3. Press any other key or wait 5 seconds to exit Volume Setting Mode.
Note: Four volume levels are available (level 1 to level 4). When you're at the highest level 4 or lowest level 1, you can't adjust the volume anymore and will hear the indicating voice.
Your home phone(s) may have a separate volume level setting function that is independent of the Phone Connect 4.
Three-Way CallingWith 3-way calling, also known as conference calling, you can talk to two people at the same time. When using this feature, the normal airtime rates will be charged for each of the two calls.
1. While on an existing call, press the Flash (or Talk) key on your phone to put the first party on hold. When you hear a dial tone, dial the second party’s number.
2. When the second party answers, press the Flash (or Talk) key again to complete the three-way connection. If the second party does not answer, press the Flash (or Talk) key to end the connection and return to the first party.
Notes: If your phone does not have a Flash (or Talk) key, use the off-hook mechanism supported by your phone instead.
If one of the people you called hangs up during your call, you and the remaining caller stay connected. If you initiated the call and are the first to hang up, all callers are disconnected.

Using Your Device Calling 15
Call WaitingWhen you’re on a call, Call Waiting alerts you to incoming calls by sounding two beeps.
n To hold the current call and accept the waiting call, press the Flash (or Talk) key. You can press the Flash (or Talk) key anytime to switch back and forth between calls.
For those calls where you don’t want to be interrupted, you can temporarily disable Call Waiting by pressing *70 before placing your call. Call Waiting is automatically reactivated once you end the call.
Notes: Your device comes with standard three-way calling and call waiting. Operation of these features will vary depending on your home phone equipment.
If your phone does not have a Flash (or Talk) key, then use the off-hook mechanism supported by your phone.
Call ForwardingCall Forwarding lets you forward all your incoming calls to another phone number – even when your phone is turned off. You can continue to make calls from your phone when you have activated Call Forwarding.
Note: You are charged a higher rate for calls you have forwarded.
Always forward 1. Press *72 on your connected phone.
2. Dial the 10-digit number to which you wish to forward your calls.
3. Press the “#” key.
Example: *721234567890# forwards your calls to the phone number 123-456-7890.
4. Wait for about 3 seconds until you hear a confirmation tone for the forwarding process to complete before hanging up.
Note: To un-forward calls, press *720, wait for 3 seconds until you hear a confirmation tone for the un-forwarding process to complete before hanging up.
Forward when busy 1. Press *74 on your connected phone.
2. Dial the 10-digit number to which you wish to forward your calls.
3. Press the “#” key.

Using Your Device Calling 16
4. Wait for 3 seconds until you hear a confirmation tone for the forwarding process to complete before hanging up.
Note: Press *740 to un-forward calls.
Forward when unanswered 1. Press *73 on your connected phone.
2. Dial the 10-digit number to which you wish to forward your calls.
3. Press “#” key.
Example: *731234567890# forwards your calls to the phone number 123-456-7890, if you don't answer the calls for 10 seconds.
4. Wait for 3 seconds until you hear a confirmation tone for the forwarding process to complete before hanging up.
Note: Press *730 to un-forward calls.
TTY Mode A TTY (teletypewriter, also known as a TDD or Text Telephone) is a telecommunications device that allows people who are deaf, hard of hearing, or who have speech or language disabilities, to communicate by telephone.
Your Phone Connect 4 is compatible with select TTY devices. Please check with the manufacturer of your TTY device to ensure that it supports digital wireless transmission.
Your device’s TTY mode is set to TTY Off.
n TTY Off: Users who can hear and talk can disable TTY support.
n TTY Full: Users who cannot talk or hear may use this mode to send and receive text messages through TTY device.
n TTY HCO: Users who can hear, but cannot talk, may use this mode to listen to conversation of the other party, and respond via text messages.
n TTY VCO: Users who can talk, but cannot hear, may use this mode to talk through the phone and receive responses via text messages.
Warning: 9-1-1 Emergency CallingIt is recommended that TTY users make emergency calls by other means, including Telecommunications Relay Services (TRS), analog cellular, and landline communications. Wireless TTY calls to 9-1-1 may be corrupted when received by public safety answering points (PSAPs), rendering some communications unintelligible. The problem encountered appears related to TTY

Using Your Device Calling 17
equipment or software used by PSAPs. This matter has been brought to the attention of the FCC, and the wireless industry and the PSAP community are currently working to resolve this.

Getting Help 18
Getting HelpThe following set of topics will cover troubleshooting tips and device specifications.
Getting Help For Assistance 19
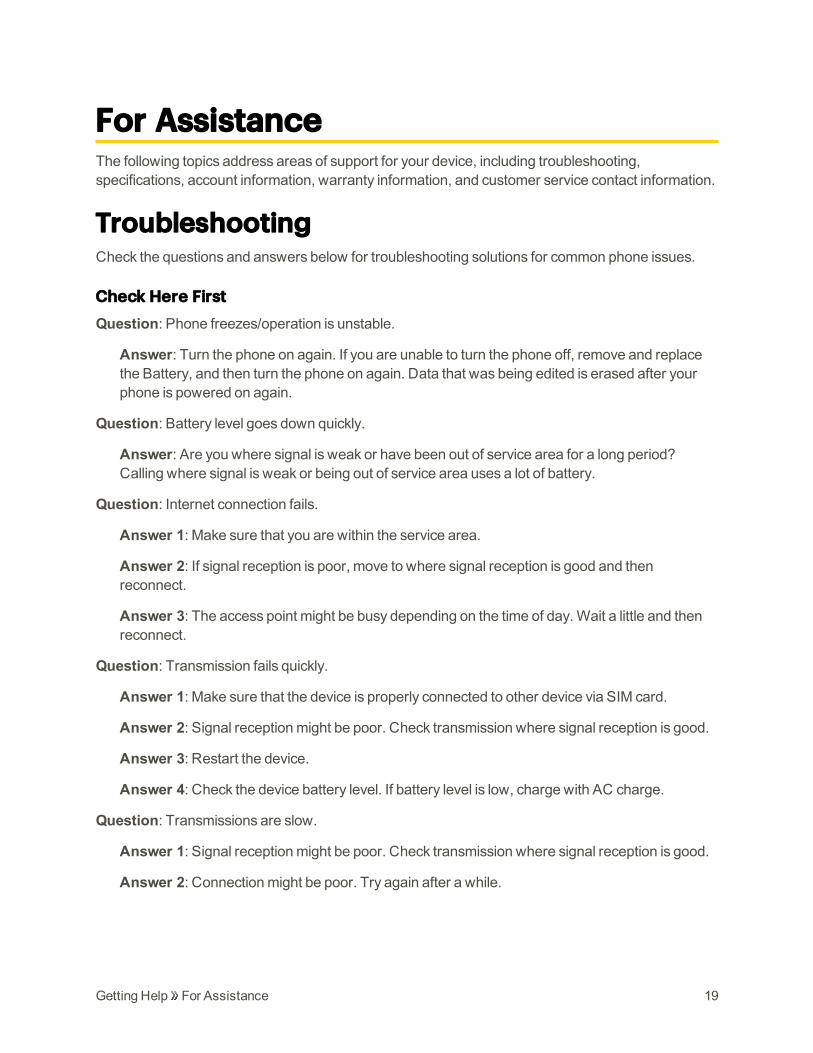
For AssistanceThe following topics address areas of support for your device, including troubleshooting, specifications, account information, warranty information, and customer service contact information.
TroubleshootingCheck the questions and answers below for troubleshooting solutions for common phone issues.
Check Here FirstQuestion: Phone freezes/operation is unstable.
Answer: Turn the phone on again. If you are unable to turn the phone off, remove and replace the Battery, and then turn the phone on again. Data that was being edited is erased after your phone is powered on again.
Question: Battery level goes down quickly.
Answer: Are you where signal is weak or have been out of service area for a long period? Calling where signal is weak or being out of service area uses a lot of battery.
Question: Internet connection fails.
Answer 1: Make sure that you are within the service area.
Answer 2: If signal reception is poor, move to where signal reception is good and then reconnect.
Answer 3: The access point might be busy depending on the time of day. Wait a little and then reconnect.
Question: Transmission fails quickly.
Answer 1: Make sure that the device is properly connected to other device via SIM card.
Answer 2: Signal reception might be poor. Check transmission where signal reception is good.
Answer 3: Restart the device.
Answer 4: Check the device battery level. If battery level is low, charge with AC charge.
Question: Transmissions are slow.
Answer 1: Signal reception might be poor. Check transmission where signal reception is good.
Answer 2: Connection might be poor. Try again after a while.
Getting Help For Assistance 20
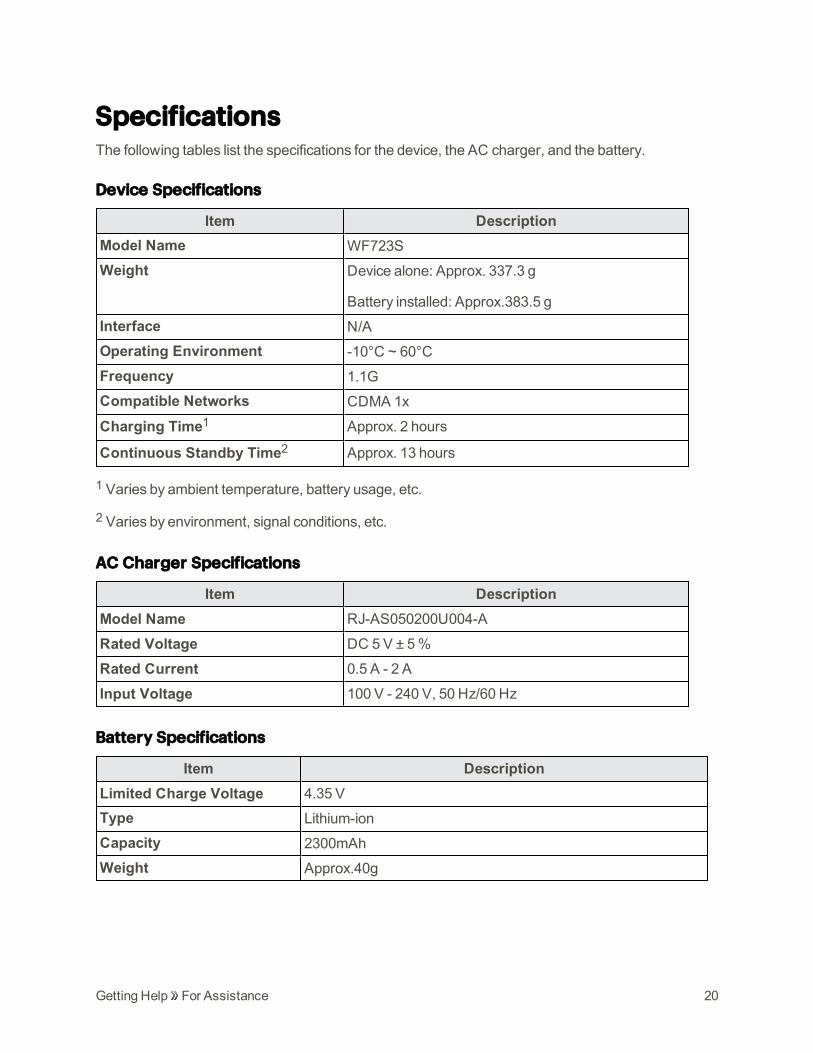
SpecificationsThe following tables list the specifications for the device, the AC charger, and the battery.
Device Specifications
Item DescriptionModel Name WF723S
Weight Device alone: Approx. 337.3 g
Battery installed: Approx.383.5 g
Interface N/A
Operating Environment -10°C ~ 60°C
Frequency 1.1G
Compatible Networks CDMA 1x
Charging Time1 Approx. 2 hours
Continuous Standby Time2 Approx. 13 hours
1 Varies by ambient temperature, battery usage, etc.
2 Varies by environment, signal conditions, etc.
AC Charger Specifications
Item DescriptionModel Name RJ-AS050200U004-A
Rated Voltage DC 5 V ± 5 %
Rated Current 0.5 A - 2 A
Input Voltage 100 V - 240 V, 50 Hz/60 Hz
Battery Specifications
Item DescriptionLimited Charge Voltage 4.35 V
Type Lithium-ion
Capacity 2300mAh
Weight Approx.40g

Getting Help For Assistance 21
Sprint Account Information and Help Find out about account passwords and information about managing your account and finding help.
Sprint Account Passwords You will need to create passwords to protect access to your personal account information, your voicemail account, and your data services account. As a Sprint customer, you enjoy unlimited access to all your information.
Account User Name and PasswordIf you are the account owner, you will create an account user name and password when you sign on to sprint.com/mysprint. (Click Register and follow the prompts to get started.) If you are not the account owner (if someone else receives the bill for your Sprint service), you can get a sub-account password at sprint.com/mysprint.
Voicemail PasscodeYou’ll create your voicemail passcode when you set up your voicemail. See Voicemail for more information on your voicemail passcode.
Data Services PasswordWith your Sprint phone, you may elect to set up an optional data services password to control access and authorize purchases.
For more information, or to change your passwords, sign on to sprint.com/mysprint.
Manage Your Account Manage your Sprint account online.
Online: sprint.com/mysprint
n Access your account information.
n Check your usage (depending on your Sprint service plan).
n View and pay your bill.
n Enroll in Sprint online billing and automatic payment.
n Purchase accessories.
n Shop for the latest Sprint phones.
n View available Sprint service plans and options.
n Learn more about data services and other Sprint products.

Getting Help For Assistance 22
Sprint Support Services Sprint 411 and Sprint Operator Services let you easily access information and calling assistance from your Sprint phone.
Sprint 411Sprint 411 gives you access to a variety of services and information, including residential, business, and government listings; movie listings or showtimes; driving directions, restaurant reservations, and major local event information. You can get up to three pieces of information per call, and the operator can automatically connect your call at no additional charge.
There is a per-call charge to use Sprint 411, and you will be billed for airtime.
n Dial 411 from any connected phone.
Sprint Operator ServicesSprint Operator Services provides assistance when you place collect calls or when you place calls billed to a local telephone calling card or third party.
n From any connected phone, dial 0 to access Sprint Operator Services.
For more information or to see the latest in products and services, visit us online at sprint.com/mysprint.
Copyright Information©2017 Sprint. Sprint and the logo are trademarks of Sprint. Other marks are trademarks of their respective owners.

Index 23
B
BatteryCharge 6Insert 5Specifications 20
C
CallsCall Forwarding 15Call Waiting 15Make Calls 14Test Call 12Three-Way Calling 14
Common Settings 12Connecting to a Phone 11
D
Data ServicesPassword 21
Device Layout (illustration) 3
I
Indicators 4Installation 11
M
Message Waiting 13
P
Package Contents 2Power Off 7Power On 7
R
Reset Your Device 7Retrieving Messages 13
S
SIM Card 8Specifications
AC charger 20
Battery 20Mobile broadband device 20
Sprint 411 22Sprint Account
Management 21Passwords 21
Sprint Operator Services 22
T
Troubleshooting 19TTY Mode 16Turn Device Off 7Turn Device On 7
U
USIM Card 8
V
VoicemailPasscode 21Setup 13
Volume 14
Index