sonicwall secure mobile access 12.4 common criteria
TRANSCRIPT
Secure Mobile Access 12.4
Common CriteriaConfiguration Guide
Contents
Introduction 4About This Document 4Other Related Documents 4About Secure Mobile Access 5
Target of Evaluation 5Description 5Management Interfaces 6Physical Interfaces 6
Assumptions 7
Common Criteria Configuration 10Initial access and network configuration 10Configuring the SMA 8200v 12
Installing the SMA 8200v 12Powering the SMA 8200v On or Off 14Configuring Host Settings on the Console 14
Using the Setup Wizard 15Accessing the Secure Mobile Access Management Console 21
Evaluated Configuration 23Create a New Local Authentication Server and Configure the Password Policy 24Create a New Local Administrator 26Configure Administrator Account User Name and Password Restrictions and Lockout 29Configure Idle Timeout 31Configure the Login Banner 33Disable Services Not Required for the Evaluated Configuration 34Enable FIPS mode 34Configure Trusted Certificate Authorities 35Configure the SMAWeb Server Certificate 37Configure TLS Settings 39Configure Audit Policy 41Configure External Audit Server (Syslog) 42
Certificate Requirements 43Troubleshooting 45
Configure TLS Mutual Authentication 45Set Other Useful Web Security Options 49
SMA 12.4 Common Criteria Configuration GuideContents
2
Forcing the use of the HTTPS Protocol 49Preventing the Display of EmbeddedWeb Content 51
Auditable Events 54
Configuring TLS Certificates on the Client 60
Client Certificate Validation 61
Certificate Types 62
About This Document 63
SMA 12.4 Common Criteria Configuration GuideContents
3
IntroductionTopics:
l About This Documentl Other Related Documentsl About Secure Mobile Accessl Assumptions
About This DocumentThis configuration guide provides the information needed to set up SonicWall Secure Mobile Access version 12.4in the Common Criteria-evaluated configuration that is Network Device collaborative Protection Profile (NDcPP)v2.1 conformant. This guide also includes additional information mandated by the Supporting Document forNetwork Devices v2.1. Information contained in this document is designed to supplement these documents:
l SonicWall Secure Mobile Access 12.4 Administration Guide
l SonicWall Secure Mobile Access 6210/7210 Getting Started Guide
l SonicWall Secure Mobile Access 8200v Getting Started Guide
Other Related Documents
Item Identifier Short Form
Security Target SonicWall SMA v12.4 Security Target v0.x ST
Protection Profile collaborative Protection Profile for Network Devices Version2.2e, 27 March 2020 (NDcPP)
NDcPP
Administration Guide SonicWall Secure Mobile Access 12.4 Administration Guide ADMIN
Getting Started Guide SonicWall Secure Mobile Access 6210/7210 Getting StartedGuide
START
Getting Started Guide SonicWallSecure Mobile Access 8200v Getting Started Guide START
OTHER RELATED DOCUMENTS
SMA 12.4 Common Criteria Configuration GuideIntroduction
1
4
About Secure Mobile AccessTopics:
l Target of Evaluationl Descriptionl Management Interfacesl Physical Interfaces
Target of EvaluationDeveloper: SonicWall
Identification: SonicWall Secure Mobile Access (SMA) 12.4
Series Platforms Build
SonicWall Secure Mobile Access l SMA 6210
l SMA 7210
l SMA 8200v
12.4.1-02451
PLATFORMS AND DEVICES
Claimed Protection Profile: collaborative Protection Profile for Network Devices v2.2e.
DescriptionThe SonicWall Secure Mobile Access (SMA) 12.4 in the evaluated configuration consists of these appliances:
l SMA 6210
l SMA 7210
l SMA 8200v
SMA is an access gateway that enables an organization to provide anytime, anywhere and any device access toany internal application. It consists of a hardware appliance with embedded software components. All SMAappliances are shipped ready for immediate access through a Command Line Interface (CLI) and after basicnetwork configuration through a web-based Appliance Management Console (AMC).
SMA 12.4 Common Criteria Configuration GuideIntroduction
5
Management InterfacesThe TOE is configured and managed via a web-based Appliance Management Console (AMC) or a localCommand Line Interface (CLI). The CLI is accessible from a directly- connected terminal while AMC is accessedremotely via a web browser.
To access the AMC login page after the initial network configuration, point your browser to https://<IPaddress>:8443, where <IP address>matches the address you defined for the internal network interface. Thedefault internal network interface IP address is 192.168.0.10.
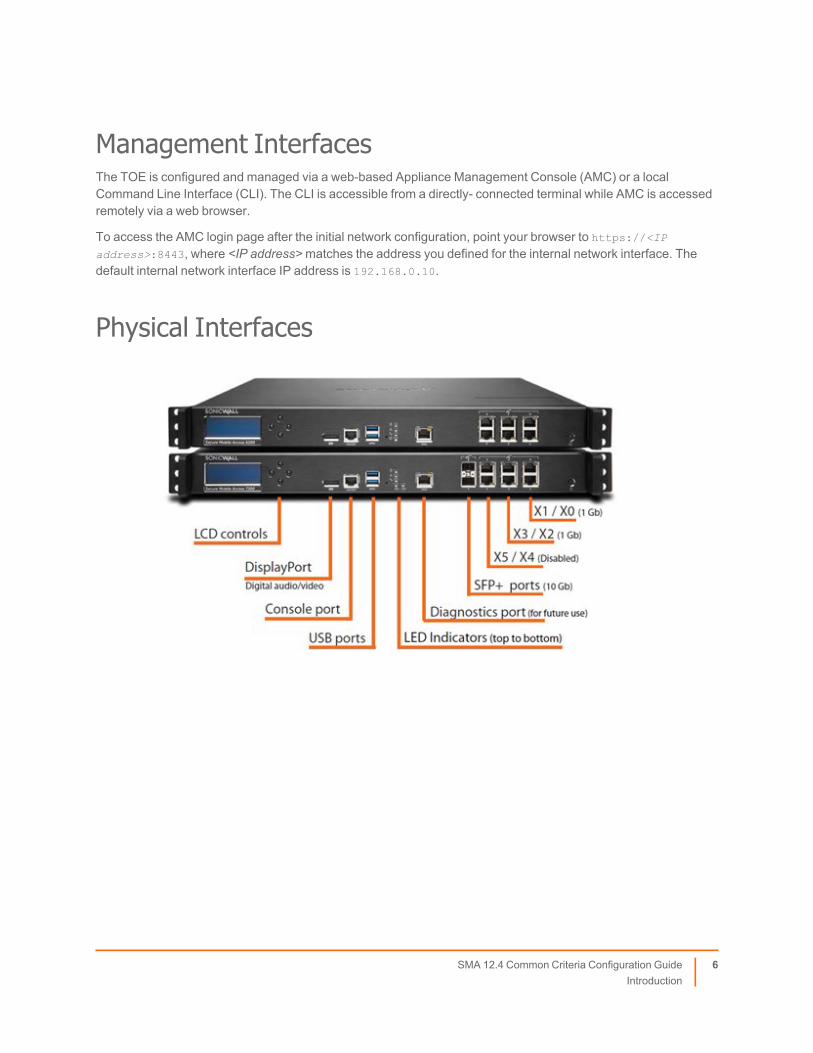
Physical Interfaces
SMA 12.4 Common Criteria Configuration GuideIntroduction
6

SMA PHYSICAL INTERFACES
Assumptions
Assumption Name Assumption Definition
A.PHYSICAL_PROTECTION The network device is assumed to be physicallyprotected in its operational environment and not subjectto physical attacks that compromise the security and/orinterfere with the device’s physical interconnectionsand correct operation. This protection is assumed to besufficient to protect the device and the data it contains.As a result, the cPP will not include any requirementson physical tamper protection or other physical attackmitigations. The cPP will not expect the product todefend against physical access to the device thatallows unauthorized entities to extract data, bypassother controls, or otherwise manipulate the device.
A.LIMITED_FUNCTIONALITY The device is assumed to provide networkingfunctionality as its core function and not providefunctionality/ services that could be deemed as generalpurpose computing. For example, the device shouldnot provide a computing platform for general-purposeapplications (unrelated to networking functionality).
In the case of vNDs, the VS is considered part of theTOE with only one vND instance for each physicalhardware platform. The exception being wherecomponents of the distributed TOE run inside morethan one virtual machine (VM) on a single VS. Thereare no other guest VMs on the physical platformproviding non-Network Device functionality.
A.NO_THRU_TRAFFIC_PROTECTION A standard/generic network device does not provideany assurance regarding the protection of traffic thattraverses it. The intent is for the network device toprotect data that originates on, or is destined to, thedevice itself, to include administrative data and auditdata. Traffic that is traversing the network device,destined for another network entity, is not covered bythe ND cPP. It is assumed that this protection will becovered by cPPs for particular types of network devices(e.g., firewall).
ASSUMPTIONS
SMA 12.4 Common Criteria Configuration GuideIntroduction
7
Assumption Name Assumption Definition
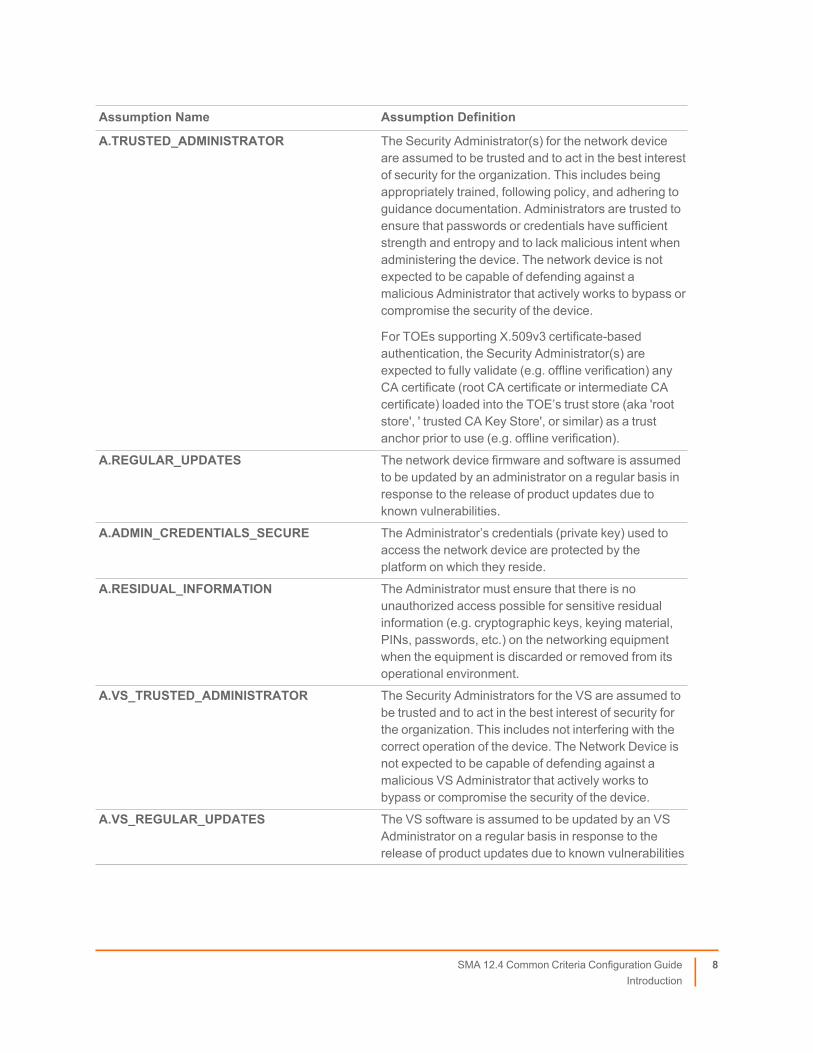
A.TRUSTED_ADMINISTRATOR The Security Administrator(s) for the network deviceare assumed to be trusted and to act in the best interestof security for the organization. This includes beingappropriately trained, following policy, and adhering toguidance documentation. Administrators are trusted toensure that passwords or credentials have sufficientstrength and entropy and to lack malicious intent whenadministering the device. The network device is notexpected to be capable of defending against amalicious Administrator that actively works to bypass orcompromise the security of the device.
For TOEs supporting X.509v3 certificate-basedauthentication, the Security Administrator(s) areexpected to fully validate (e.g. offline verification) anyCA certificate (root CA certificate or intermediate CAcertificate) loaded into the TOE’s trust store (aka 'rootstore', ' trusted CA Key Store', or similar) as a trustanchor prior to use (e.g. offline verification).
A.REGULAR_UPDATES The network device firmware and software is assumedto be updated by an administrator on a regular basis inresponse to the release of product updates due toknown vulnerabilities.
A.ADMIN_CREDENTIALS_SECURE The Administrator’s credentials (private key) used toaccess the network device are protected by theplatform on which they reside.
A.RESIDUAL_INFORMATION The Administrator must ensure that there is nounauthorized access possible for sensitive residualinformation (e.g. cryptographic keys, keying material,PINs, passwords, etc.) on the networking equipmentwhen the equipment is discarded or removed from itsoperational environment.
A.VS_TRUSTED_ADMINISTRATOR The Security Administrators for the VS are assumed tobe trusted and to act in the best interest of security forthe organization. This includes not interfering with thecorrect operation of the device. The Network Device isnot expected to be capable of defending against amalicious VS Administrator that actively works tobypass or compromise the security of the device.
A.VS_REGULAR_UPDATES The VS software is assumed to be updated by an VSAdministrator on a regular basis in response to therelease of product updates due to known vulnerabilities
SMA 12.4 Common Criteria Configuration GuideIntroduction
8
Assumption Name Assumption Definition
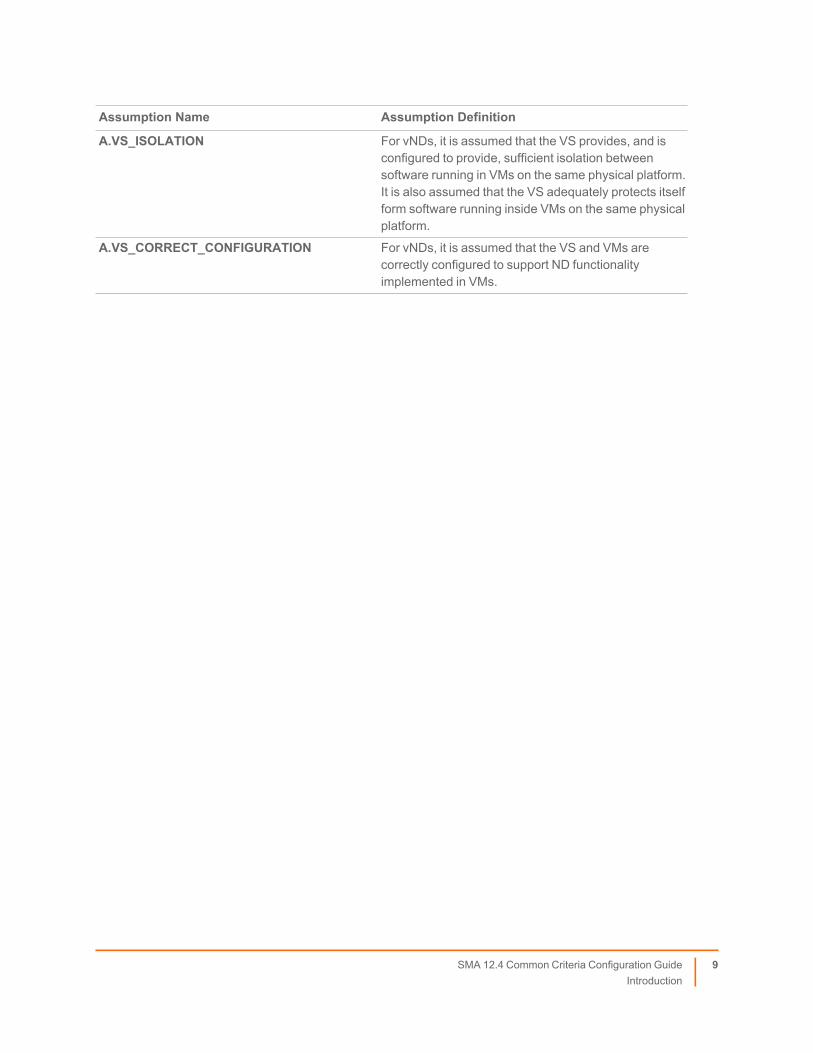
A.VS_ISOLATION For vNDs, it is assumed that the VS provides, and isconfigured to provide, sufficient isolation betweensoftware running in VMs on the same physical platform.It is also assumed that the VS adequately protects itselfform software running inside VMs on the same physicalplatform.
A.VS_CORRECT_CONFIGURATION For vNDs, it is assumed that the VS and VMs arecorrectly configured to support ND functionalityimplemented in VMs.
SMA 12.4 Common Criteria Configuration GuideIntroduction
9

Common Criteria ConfigurationTopics:
l Initial access and network configurationl Configuring the SMA 8200vl Using the Setup Wizardl Accessing the Secure Mobile Access Management Consolel Evaluated Configuration
Initial access and network configurationNOTE: Prior to configuration, download and install the evaluated software version as defined in the Target ofEvaluation section above.
To configure the network interface:
1. Attach the included null modem cable to the appliance port marked Console Port:
SMA 12.4 Common Criteria Configuration GuideCommon Criteria Configuration
2
10
Attach the other end of the null modem cable to a serial port of the management workstation computer.
2. Launch a terminal emulation application that supports serial port communications, such as PuTTY orHyperTerminal.
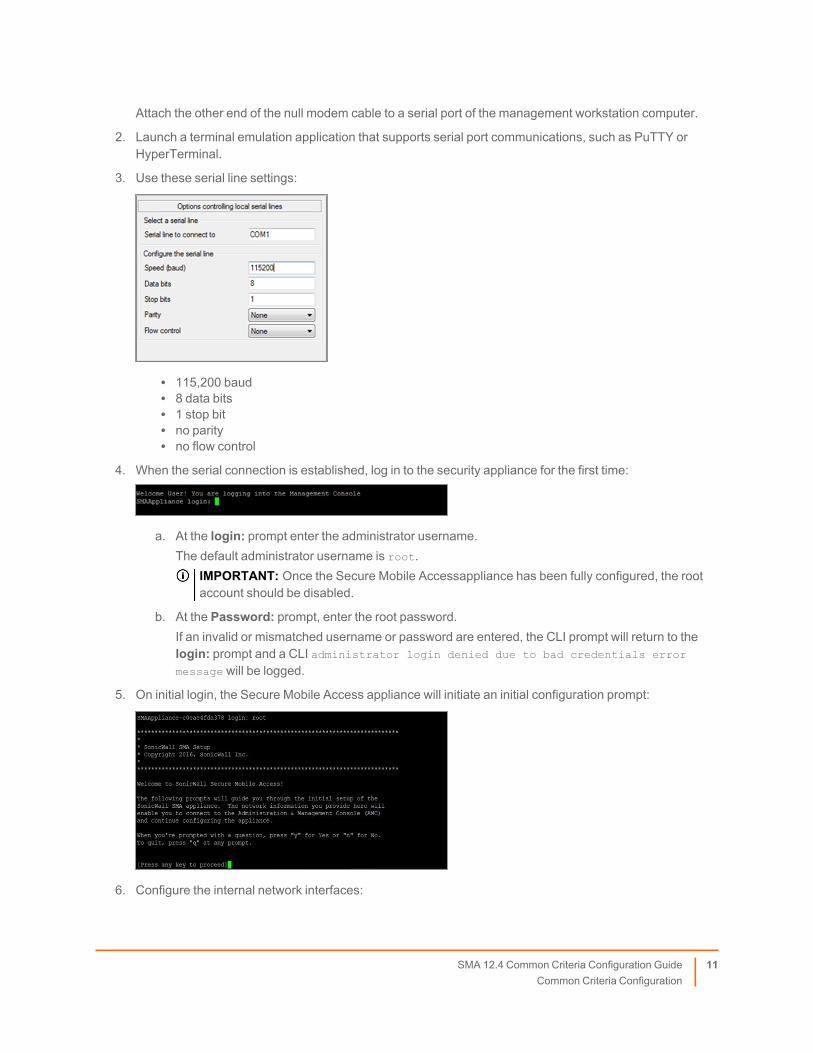
3. Use these serial line settings:
l 115,200 baudl 8 data bitsl 1 stop bitl no parityl no flow control
4. When the serial connection is established, log in to the security appliance for the first time:
a. At the login: prompt enter the administrator username.The default administrator username is root.
IMPORTANT: Once the Secure Mobile Accessappliance has been fully configured, the rootaccount should be disabled.
b. At the Password: prompt, enter the root password.If an invalid or mismatched username or password are entered, the CLI prompt will return to thelogin: prompt and a CLI administrator login denied due to bad credentials error
message will be logged.
5. On initial login, the Secure Mobile Access appliance will initiate an initial configuration prompt:
6. Configure the internal network interfaces:
SMA 12.4 Common Criteria Configuration GuideCommon Criteria Configuration
11
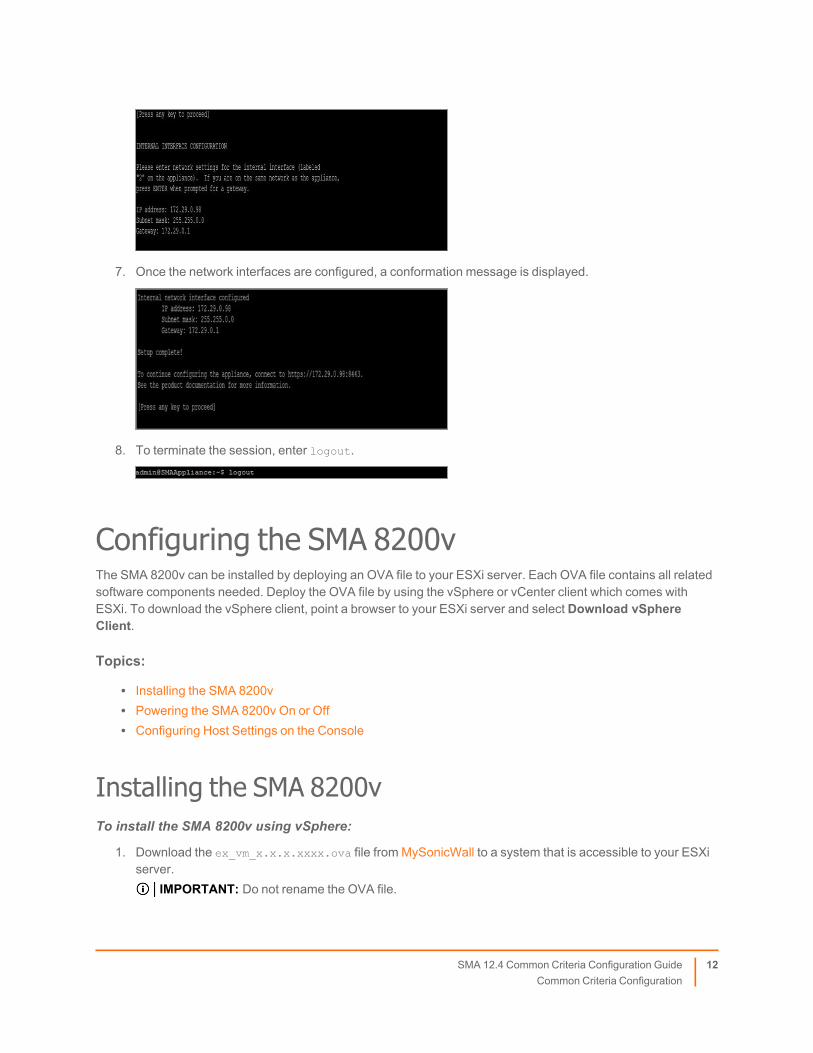
7. Once the network interfaces are configured, a conformation message is displayed.
8. To terminate the session, enter logout.
Configuring the SMA 8200vThe SMA 8200v can be installed by deploying an OVA file to your ESXi server. Each OVA file contains all relatedsoftware components needed. Deploy the OVA file by using the vSphere or vCenter client which comes withESXi. To download the vSphere client, point a browser to your ESXi server and select Download vSphereClient.
Topics:
l Installing the SMA 8200vl Powering the SMA 8200v On or Offl Configuring Host Settings on the Console
Installing the SMA 8200vTo install the SMA 8200v using vSphere:
1. Download the ex_vm_x.x.x.xxxx.ova file from MySonicWall to a system that is accessible to your ESXiserver.
IMPORTANT: Do not rename the OVA file.
SMA 12.4 Common Criteria Configuration GuideCommon Criteria Configuration
12

2. Launch vSphere and use it to log on to your ESXi server.
3. In the Home screen, navigate to a view that shows the virtual machines running on your ESXi server.
4. To begin the import process:
a. Click File.
b. Select Deploy OVF Template.
5. Select Browse to locate the OVA file either from a URL to download from or locate it on your system.
6. Click Next.
7. Review the details inOVF Template Details.
8. Click Next.
9. Review the End User License Agreement.
10. Click Accept.
11. Click Next.
12. In the Name field, enter a descriptive name for the SMA 8200v appliance.The name can contain up to 80 characters and must be unique.
13. From the Inventory Location list, select the desired location.
14. Click Next.
15. On the Host / Cluster page, select the host or cluster on which your virtual appliance is being built.
16. Select Next.
17. On the Resource Pool page, select the resource pool where you want to deploy the template.
18. Select Next.
19. On the Storage page, select a destination where you want to store the virtual machine files.
20. Click Next.
21. On the Disk Format page, review and verify the displayed information.
22. Select the type of provisioning for your disk space.
23. Select Next.
24. On the Network Mapping pages, select which networks are mapped to this virtual appliance.
25. 23 Select Next.
26. On the Ready to Complete page:
a. Review the options listed.
b. Click:
l Next to continue.l Back to navigate back through the screens to make any changes.
27. Click Finish to create your new appliance. The name of the new SMA 8200v appears in the left pane ofthe vSphere window when complete.
SMA 12.4 Common Criteria Configuration GuideCommon Criteria Configuration
13

28. The Deploying dialog box displays the progress and informs you when the deployment has completedsuccessfully.
Powering the SMA 8200v On or OffTo power the SMA 8200v on or off:
Use one of these methods to power the SMA 8200v on or off:
l Method One
1. Right-click the SMA 8200v in the left pane.
2. Navigate to Power > Power On or Power > Power Off.l Method Two
1. Select the SMA 8200v in the left pane.
2. Navigate to theGetting Started tab.
3. Click Power on the virtual machine or Shut down the virtual machine.l Method Three
1. Select the SMA 8200v in the left pane.
2. Navigate to the Summary tab.
3. Click Power On or Shut down guest.
Configuring Host Settings on the ConsoleTo configure the IP address and default route settings:
1. Power on the SMA 8200v. (Refer to Powering the SMA 8200v On or Off for more information.)
2. In vSphere:
a. Right-click the SMA 8200v in the left pane.
b. SelectOpen Console from the menu.
3. If the virtual machine is not powered on, click the green Power On arrow button in the top control bar ofthe console window.
4. Click inside the window:
a. At the login prompt, type root.
b. Press Enter.The first time you access the console, the Setup Tool automatically runs.
NOTE: Your mouse pointer disappears when you click in the console window. To release it, pressCtrl+Alt.
5. After the welcome message displays, press any key to proceed.
SMA 12.4 Common Criteria Configuration GuideCommon Criteria Configuration
14

6. At the IP address prompt, enter the local IP address for the SMA 8200v.
7. At the Subnetmask prompt, enter the subnet mask.
8. At theGateway prompt, enter the IP address of the default gateway used to access the local interface.
9. Review the information your provided.
10. Press Enter to accept these value:l IP addressl Subnet maskl Gateway
11. To confirm that you want to save and apply the settings:
a. Type y.
b. Press Enter.It may take a few minutes for the initialization process to complete.
12. After the settings are applied, a message is displayed to continue configuration at: https://<IPaddress>:8443 (where <IP address> is the IP address that you provided).
13. Press Ctrl+Alt to activate your cursor.
14. Click the X to close the console window.
Setup and basic installation of the SMA 8200v virtual appliance is complete
Using the Setup WizardTo use the Setup Wizard to configure the SMAappliance:
1. Access the SMA web management interface using a browser by entering the URL: https://<IPaddress>:8443 (where <IP address>matches the address configured in the previous section).
NOTE: The default internal IP address is 192.168.0.10.Once connected, you will interact with a Setup Wizard to configure the external interfaces and otherconfigurations for the SMA appliance.
SMA 12.4 Common Criteria Configuration GuideCommon Criteria Configuration
15
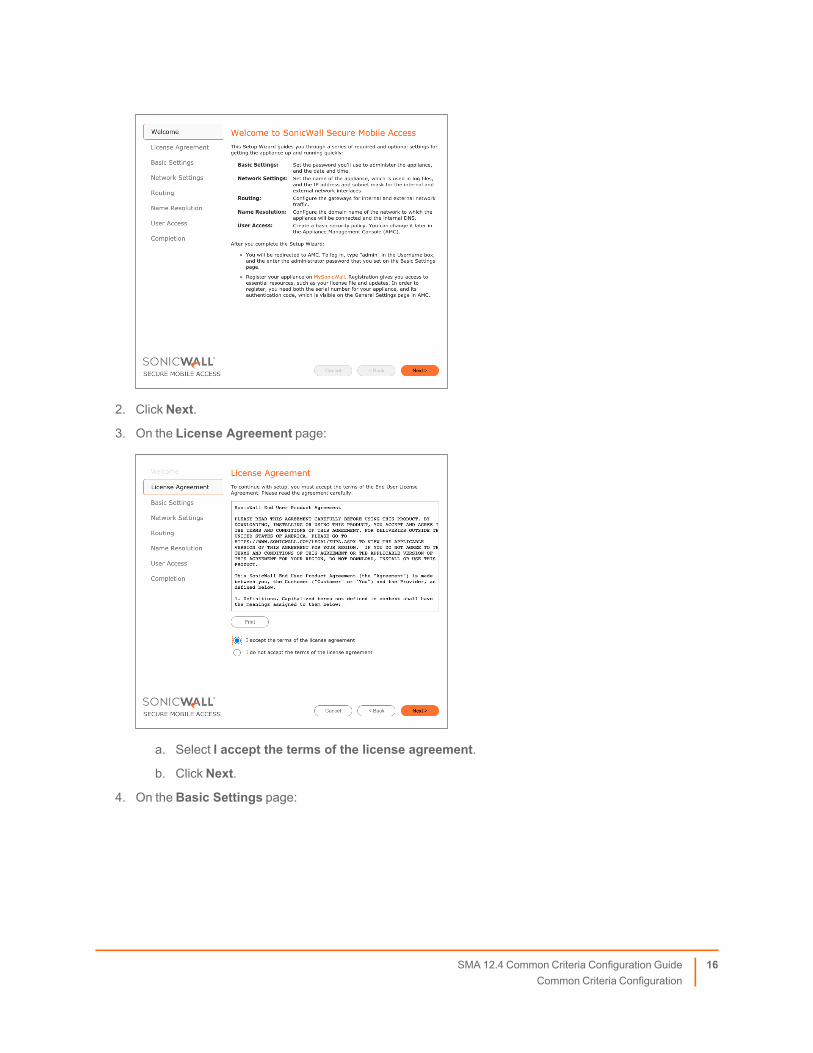
2. Click Next.
3. On the License Agreement page:
a. Select I accept the terms of the license agreement.
b. Click Next.
4. On the Basic Settings page:
SMA 12.4 Common Criteria Configuration GuideCommon Criteria Configuration
16

a. In the Administrator password fields, enter and confirm the administrator password.
b. In the Date and time section, from the Time zone list, select the time zone associated with theappliance.
c. Click Next.
5. On the Network Settings page, in the External Interface section:
a. In the IP address field, enter the external IP address.
b. In the Subnet mask field, enter for the external subnet mask.
c. Click Next.NOTE: The values in the Internal Interface section will be already filled in based on the values setduring the initial configuration using the AMC setup tool.
SMA 12.4 Common Criteria Configuration GuideCommon Criteria Configuration
17
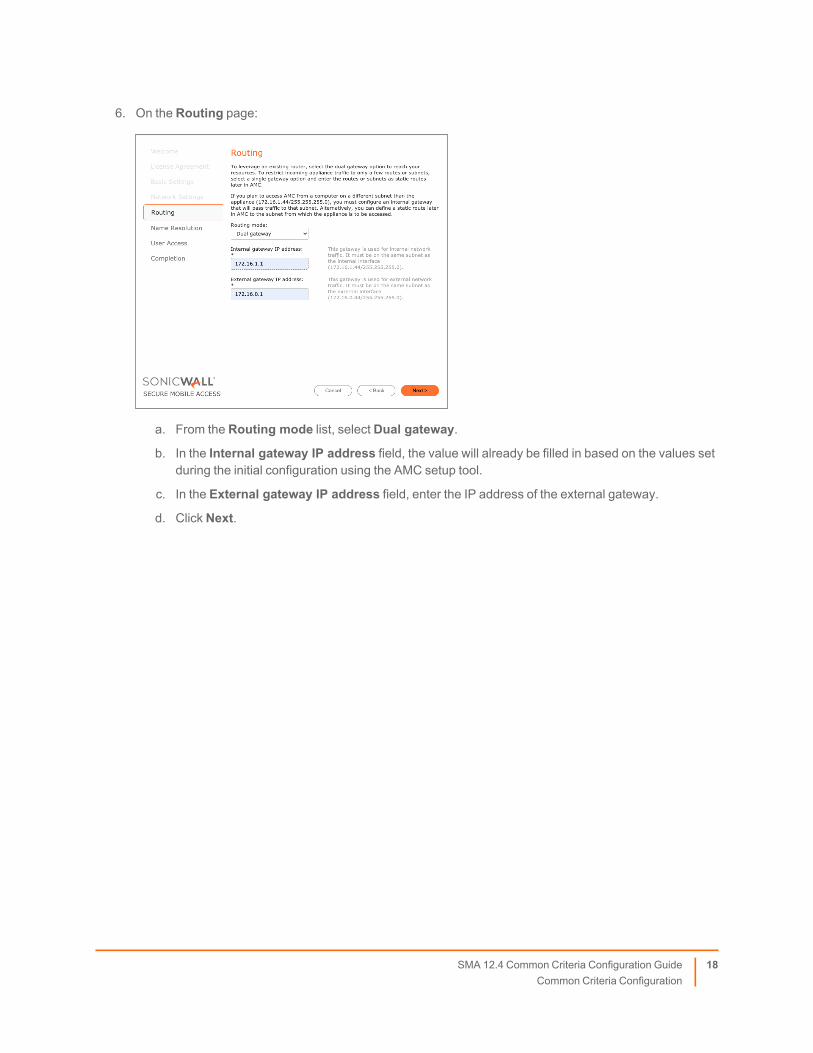
6. On the Routing page:
a. From the Routing mode list, select Dual gateway.
b. In the Internal gateway IP address field, the value will already be filled in based on the values setduring the initial configuration using the AMC setup tool.
c. In the External gateway IP address field, enter the IP address of the external gateway.
d. Click Next.
SMA 12.4 Common Criteria Configuration GuideCommon Criteria Configuration
18

7. On the Name Resolution page:
a. In the Default domain field, enter the domain in which the appliance is located.
b. In the DNS Server field, enter the IP address for the primary DNS server.
c. Click Next.
8. On the User Access page:
a. Enter an IP address for NAT address for network tunnel traffic and select an Access Policy.
b. Click Next.NOTE: These settings are optional can be configured later.
9. On the Completion page, review all of the configured settings.
SMA 12.4 Common Criteria Configuration GuideCommon Criteria Configuration
19

l Click Back to go back and change any of the settings.l Click Finish to apply the changes.
SMA 12.4 Common Criteria Configuration GuideCommon Criteria Configuration
20
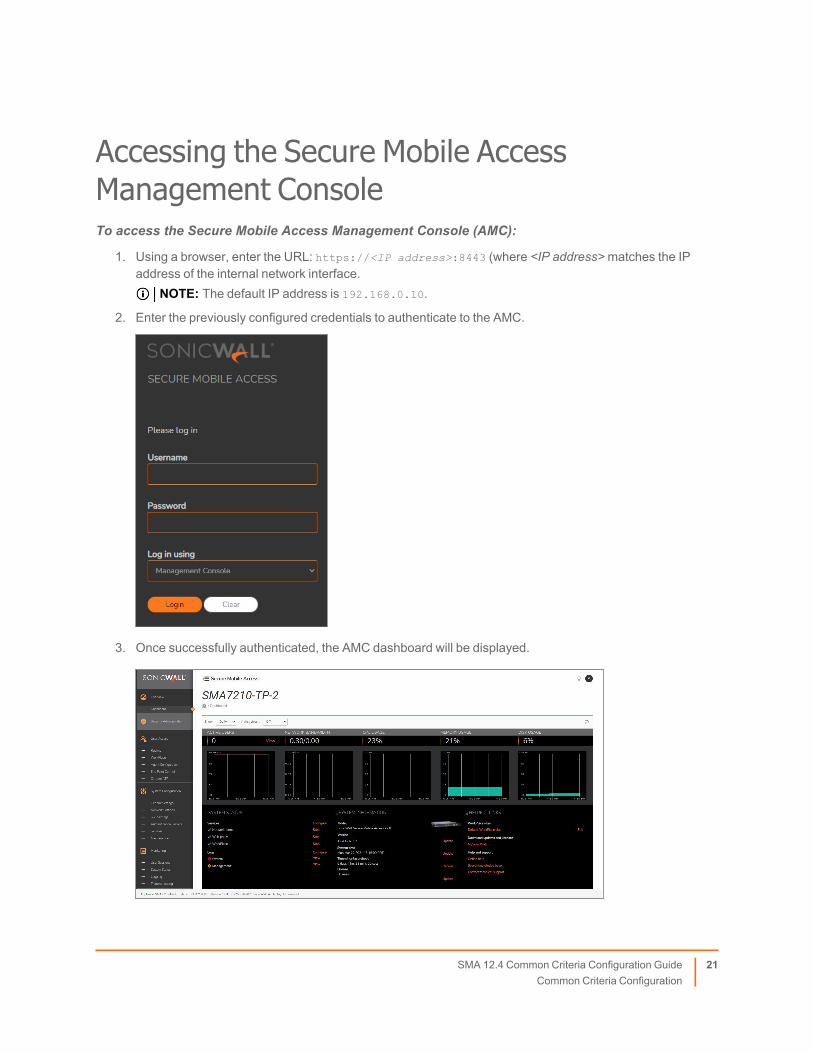
Accessing the Secure Mobile AccessManagement ConsoleTo access the Secure Mobile Access Management Console (AMC):
1. Using a browser, enter the URL: https://<IP address>:8443 (where <IP address>matches the IPaddress of the internal network interface.
NOTE: The default IP address is 192.168.0.10.
2. Enter the previously configured credentials to authenticate to the AMC.
3. Once successfully authenticated, the AMC dashboard will be displayed.
SMA 12.4 Common Criteria Configuration GuideCommon Criteria Configuration
21
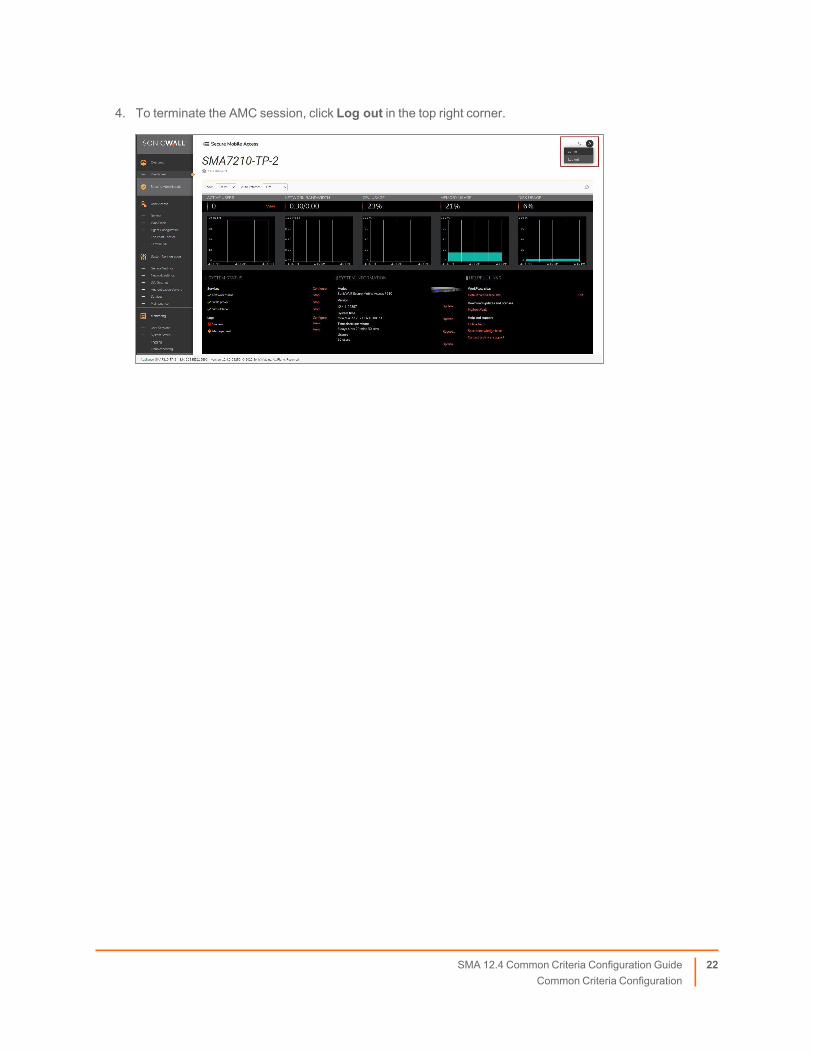
4. To terminate the AMC session, click Log out in the top right corner.
SMA 12.4 Common Criteria Configuration GuideCommon Criteria Configuration
22
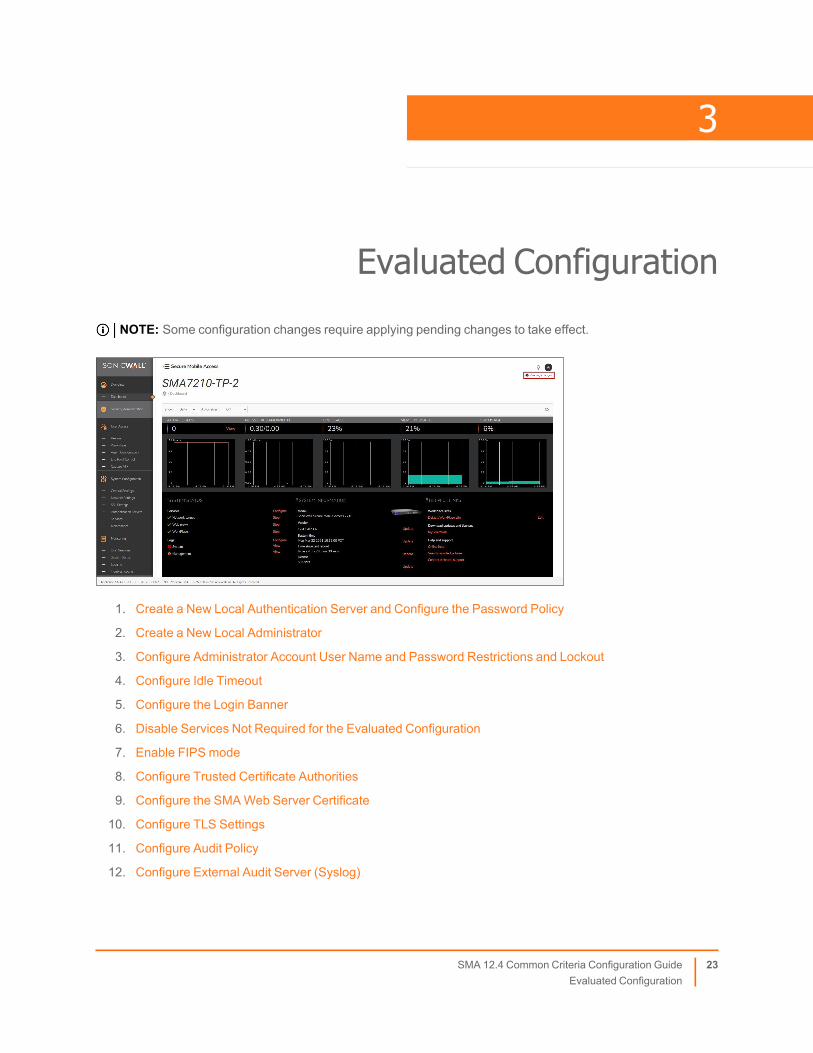
Evaluated ConfigurationNOTE: Some configuration changes require applying pending changes to take effect.
1. Create a New Local Authentication Server and Configure the Password Policy
2. Create a New Local Administrator
3. Configure Administrator Account User Name and Password Restrictions and Lockout
4. Configure Idle Timeout
5. Configure the Login Banner
6. Disable Services Not Required for the Evaluated Configuration
7. Enable FIPS mode
8. Configure Trusted Certificate Authorities
9. Configure the SMAWeb Server Certificate
10. Configure TLS Settings
11. Configure Audit Policy
12. Configure External Audit Server (Syslog)
SMA 12.4 Common Criteria Configuration GuideEvaluated Configuration
3
23

13. Configure TLS Mutual Authentication
14. Improve Performance on Isolated Networks
Create a New Local Authentication Server andConfigure the Password PolicyTo create a new local Authentication Server and configure the Password Policy:
1. Log in to the Appliance Management Console using administrator credentials.
2. Navigate to System Configuration > Authentication Servers.
3. In the Authentication Servers section, click New….
4. In the User Store section, under Local users storage, select Local users. Leave the other settingsunchanged.
5. Click Continue….
SMA 12.4 Common Criteria Configuration GuideEvaluated Configuration
24

6. On the Edit Authentication Server page:
a. In the Name field, enter local-auth.
b. In the Password Policy section, select all of these options:l Lowercase lettersl Uppercase lettersl Numeric digits (0-9)l Symbols (~`!@#$%^&*()_-+={}[]|\:;"'<,>.?/)
c. Click Save.
7. Navigate to System Configuration > General Settings.
8. In the Administrators section, click Edit.
9. Click Authentication.
SMA 12.4 Common Criteria Configuration GuideEvaluated Configuration
25
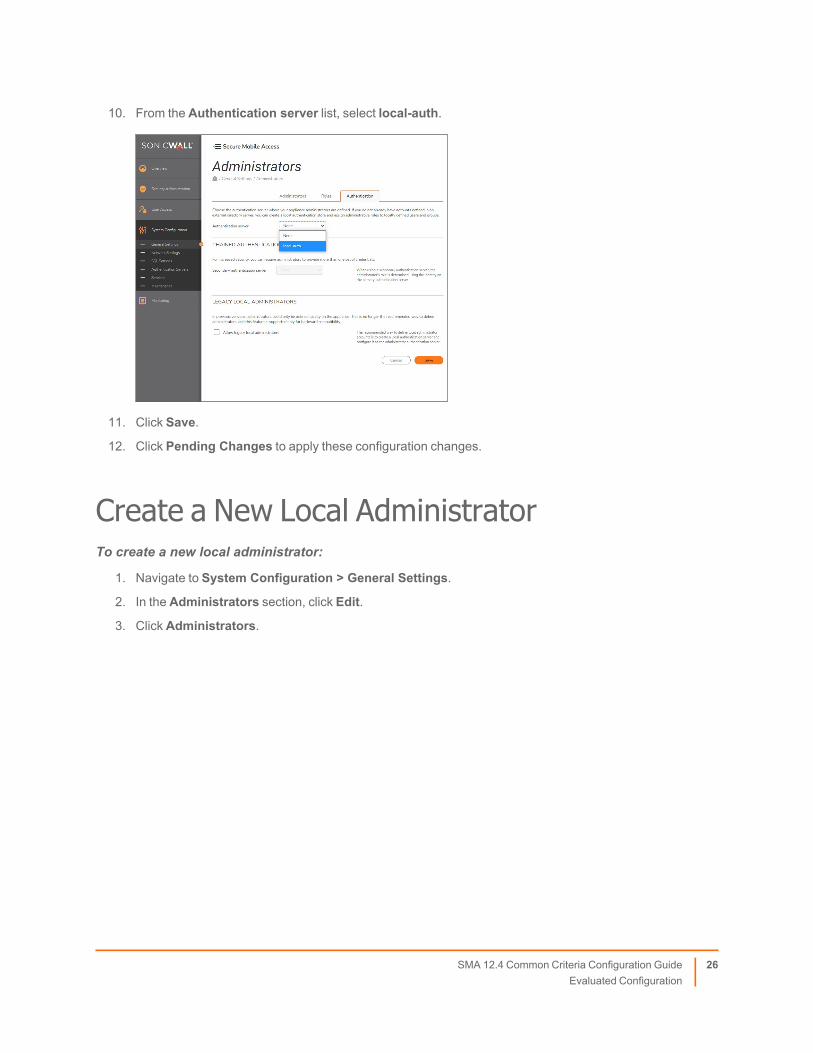
10. From the Authentication server list, select local-auth.
11. Click Save.
12. Click Pending Changes to apply these configuration changes.
Create a New Local AdministratorTo create a new local administrator:
1. Navigate to System Configuration > General Settings.
2. In the Administrators section, click Edit.
3. Click Administrators.
SMA 12.4 Common Criteria Configuration GuideEvaluated Configuration
26

4. Click the New (+) icon.
5. From the list, select Administrator.
6. On the Add Administrator page:
a. From the User list, select the user account you want to assign as the local administrator.
b. From the Role list, select the type of administrator for the new local administrator.
c. Click Save.
SMA 12.4 Common Criteria Configuration GuideEvaluated Configuration
27
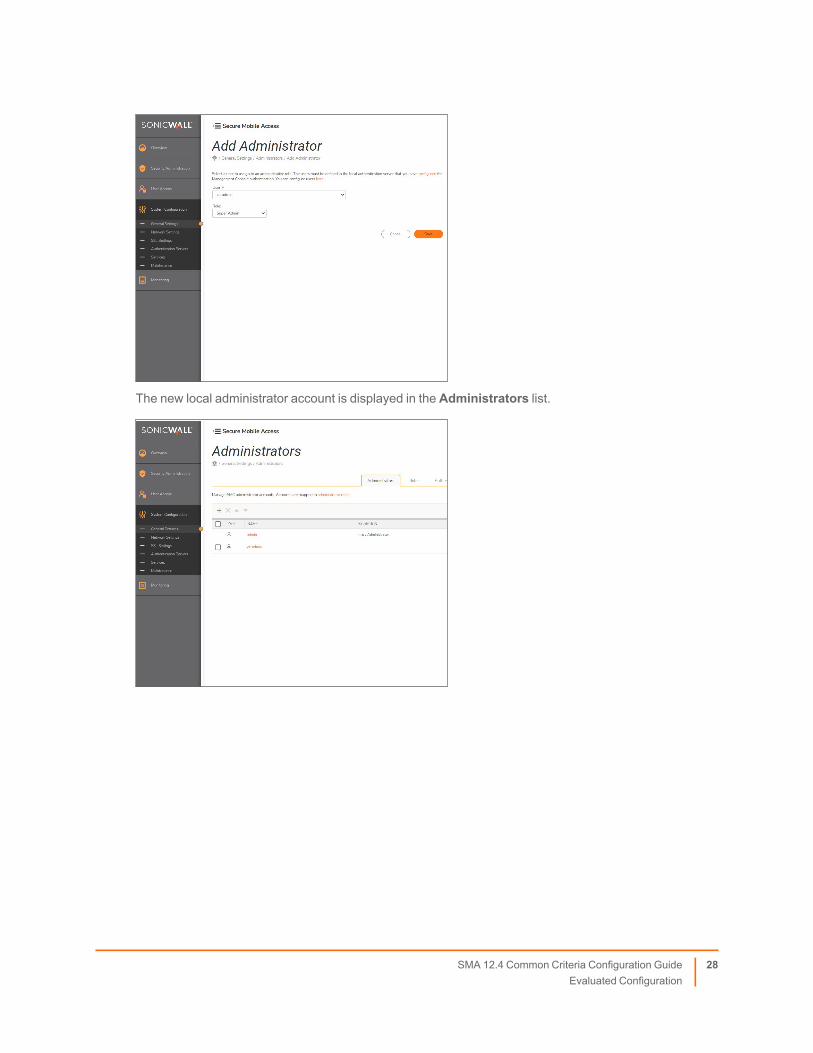
The new local administrator account is displayed in the Administrators list.
SMA 12.4 Common Criteria Configuration GuideEvaluated Configuration
28
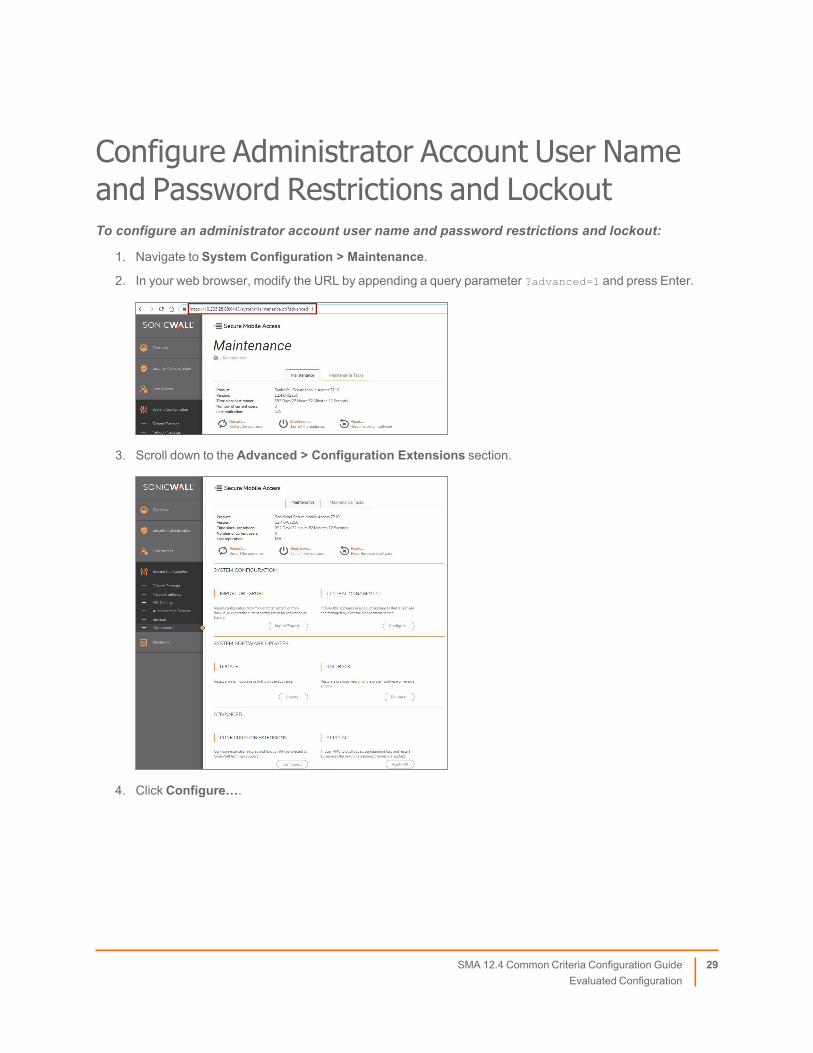
Configure Administrator Account User Nameand Password Restrictions and LockoutTo configure an administrator account user name and password restrictions and lockout:
1. Navigate to System Configuration > Maintenance.
2. In your web browser, modify the URL by appending a query parameter ?advanced=1 and press Enter.
3. Scroll down to the Advanced > Configuration Extensions section.
4. Click Configure….
SMA 12.4 Common Criteria Configuration GuideEvaluated Configuration
29
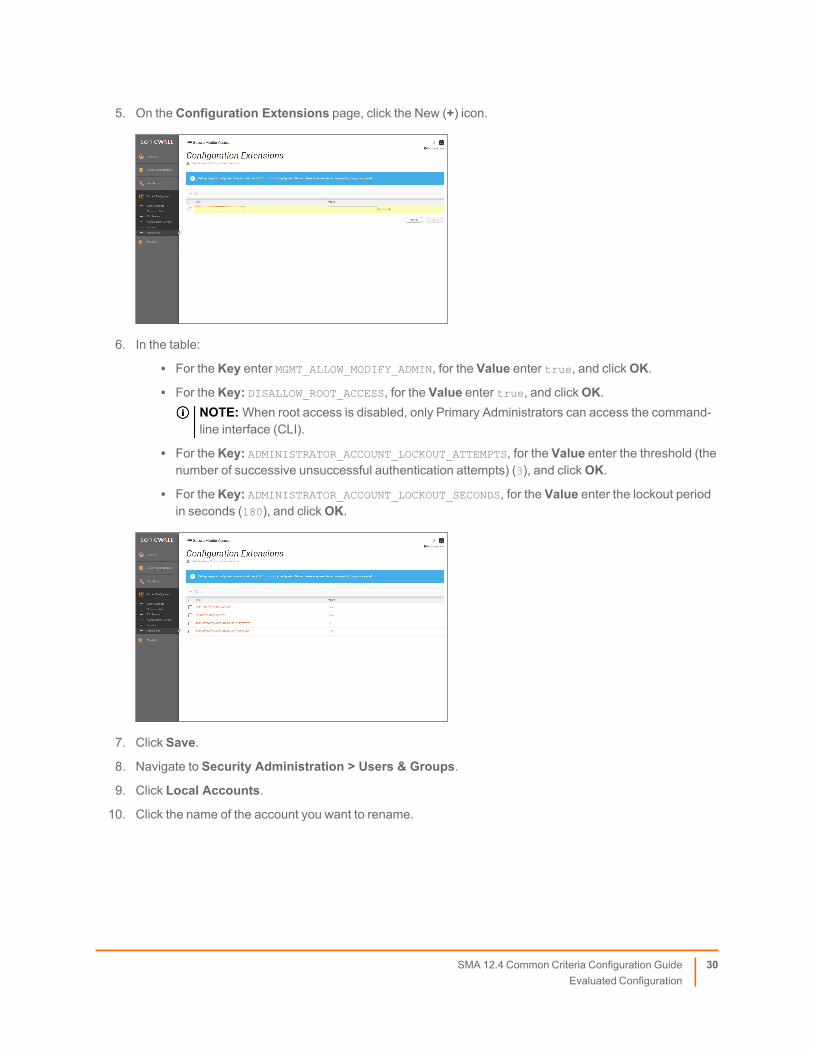
5. On the Configuration Extensions page, click the New (+) icon.
6. In the table:
l For the Key enter MGMT_ALLOW_MODIFY_ADMIN, for the Value enter true, and clickOK.l For the Key: DISALLOW_ROOT_ACCESS, for the Value enter true, and clickOK.
NOTE:When root access is disabled, only Primary Administrators can access the command-line interface (CLI).
l For the Key: ADMINISTRATOR_ACCOUNT_LOCKOUT_ATTEMPTS, for the Value enter the threshold (thenumber of successive unsuccessful authentication attempts) (3), and clickOK.
l For the Key: ADMINISTRATOR_ACCOUNT_LOCKOUT_SECONDS, for the Value enter the lockout periodin seconds (180), and clickOK.
7. Click Save.
8. Navigate to Security Administration > Users & Groups.
9. Click Local Accounts.
10. Click the name of the account you want to rename.
SMA 12.4 Common Criteria Configuration GuideEvaluated Configuration
30

11. On the Edit Local User page, in the Username field, enter a custom user name.
12. Click Save.
Configure Idle TimeoutTo configure the idle timeout:
1. Navigate to System Configuration > Maintenance.
2. In your web browser, modify the URL by appending a query parameter ?advanced=1 and press Enter.
SMA 12.4 Common Criteria Configuration GuideEvaluated Configuration
31

3. Scroll down to the Advanced > Configuration Extensions section.
4. Click Configure….
5. On the Configuration Extensions page, click the New (+) icon.
6. In the table:
l For the Key enter AMC_SESSION_TIMEOUT_SECS, for the Value enter idle timeout in seconds (180),and clickOK.
SMA 12.4 Common Criteria Configuration GuideEvaluated Configuration
32

7. Click Save.
8. Click Pending Changes to apply these configuration changes.
Configure the Login BannerTo configure the login banner:
1. Navigate to System Configuration > General Settings > Administrators > Authentication.
2. In the Acceptable Use Banner section, enter the content you want displayed when an administrator logsin to the appliance.
3. Click Save.
4. Click Pending Changes to apply these configuration changes.
SMA 12.4 Common Criteria Configuration GuideEvaluated Configuration
33

Disable Services Not Required for theEvaluated ConfigurationTo check the status of services:
1. Navigate to System Configuration > Services.
2. Verify that these services are disabled:
l SNMPl SMTPl SSH
To disable a service:
1. Navigate to System Configuration > Services.
2. For each service you want to disable:
a. Click Configure.
b. Select Disable <service name>.
3. Click Save.
4. The status for the service should display as Disabled.
Enable FIPS modeCAUTION: Enabling FIPS mode will delete any existing keys and certificates.
SMA 12.4 Common Criteria Configuration GuideEvaluated Configuration
34
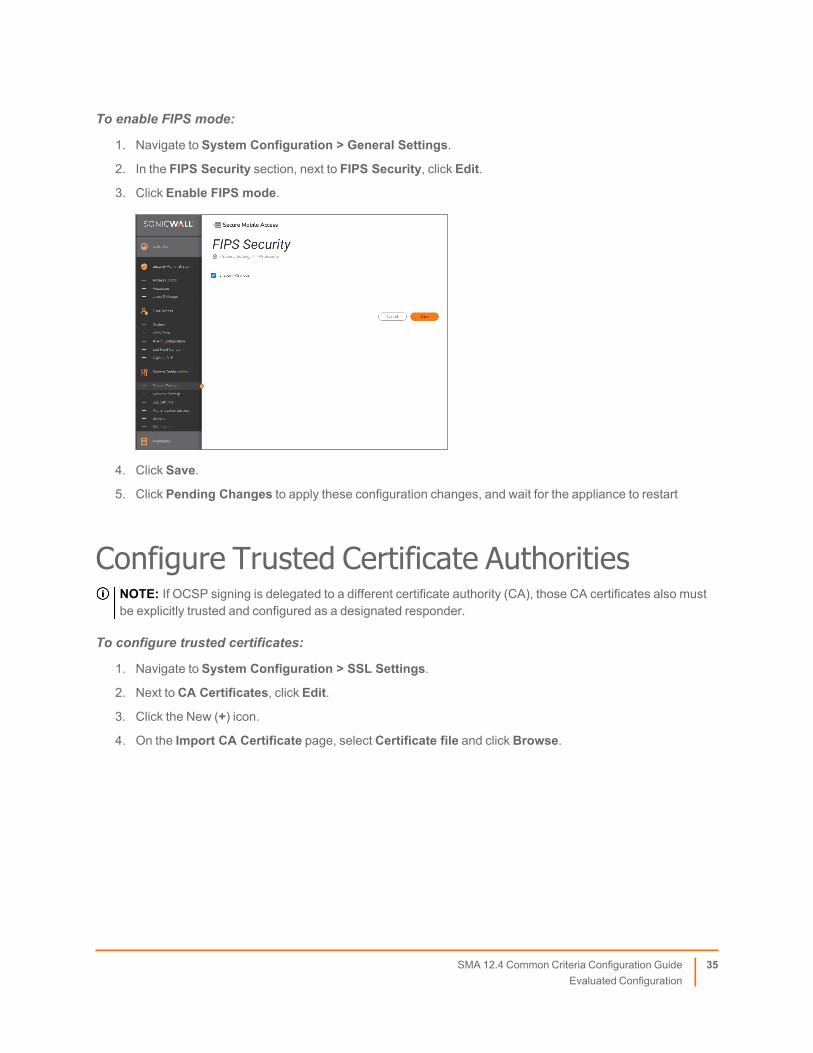
To enable FIPS mode:
1. Navigate to System Configuration > General Settings.
2. In the FIPS Security section, next to FIPS Security, click Edit.
3. Click Enable FIPS mode.
4. Click Save.
5. Click Pending Changes to apply these configuration changes, and wait for the appliance to restart
Configure Trusted Certificate AuthoritiesNOTE: If OCSP signing is delegated to a different certificate authority (CA), those CA certificates also mustbe explicitly trusted and configured as a designated responder.
To configure trusted certificates:
1. Navigate to System Configuration > SSL Settings.
2. Next to CA Certificates, click Edit.
3. Click the New (+) icon.
4. On the Import CA Certificate page, select Certificate file and click Browse.
SMA 12.4 Common Criteria Configuration GuideEvaluated Configuration
35

5. In the Usage section, select:l Web Server connections (HTTPS)l OCSP response verificationNOTE: Other Usage settings may be applicable, depending on your specific deployment scenario.
6. Click Import.
NOTE: SMA comes preloaded with a set of public Certificate Authorities. Review and remove themaccording to your organizational policies. Any certificates issued by any CA on this list would be trusted bySMA.
SMA 12.4 Common Criteria Configuration GuideEvaluated Configuration
36

Configure the SMA Web Server CertificateNOTE: The SMA web certificate must be signed by a trusted Certificate Authority and must not be expired orrevoked at the time of loading.
To configure a SMA web server certificate:
1. Navigate to System Configuration > SSL Settings.
2. Next to SSL Certificates, click Edit.
3. On the SSL Certificates page, click Certificate Signing Requests.
4. Click the New (+) icon.
SMA 12.4 Common Criteria Configuration GuideEvaluated Configuration
37

5. In the Certificate Information section enter the required information in the fields.IMPORTANT: Verify that Alternative names field that corresponds to SAN extension contains aunique identifier in form of FQDN or IPv4 address.
6. From the Key type list, select the key type. This can be either RSA or EC (elliptic curve). The default valueis RSA.
l When generating an RSA key:
1. From the Key size list, select the key length you want to use for the key:
1. 2048 bits (default)
2. 3072 bits
3. 4096 bitsNOTE: Larger keys increase security.
2. From the Signature list, select the algorithm used for the certificate.
l When generating an EC key, from the Prime size list, select a size:l 256 bits: selects the P-256 curve.l 384 bits: selects the P-384 curve.
NOTE: 4096-bit keys were not evaluated or tested during the evaluation.
7. Click Save.
8. Securely transfer the new certificate request to the trusted Certificate Authority for signing.NOTE: The Certificate Signing request includes ---- BEGIN and ----- END lines, and is typically a.csr or .pem binary file.
9. Receive signed certificate back from a trusted Certificate Authority (CA).
10. Navigate to System Configuration > SSL Settings.
11. Next to SSL Certificates, click Edit.
12. Click Certificate Signing Request.
SMA 12.4 Common Criteria Configuration GuideEvaluated Configuration
38

13. Click Process CSR Responsenext to the name of the newly created Certificate Signing Request.
14. Securely upload the signed certificate request.NOTE: A signed certificate includes ---- BEGIN CERTIFICATE and ----- END CERTIFICATE lines,and is typically a .pem binary file.
15. Click Save.
16. In the Certificate Usage section, next to AMC, confirm that the new certificate is selected.
17. Click Pending Changes to apply these configuration changes
Configure TLS SettingsTo configure the TLS settings:
1. Navigate to System Configuration > Maintenance.
2. In your web browser, modify the URL by appending a query parameter ?advanced=1 and press Enter.
SMA 12.4 Common Criteria Configuration GuideEvaluated Configuration
39

3. Scroll down to the Advanced > Configuration Extensions section.
4. On the Configuration Extensions page, click the New (+) icon.
5. In the table:
l For the Key enter MGMT_STRICT_CERTIFICATE_VALIDATION, for the Value enter true, and clickOK.
l For the Key enter DISABLE_TLS13, for the Value enter true, and clickOK.
SMA 12.4 Common Criteria Configuration GuideEvaluated Configuration
40

6. Click Save.
7. Click Pending Changes to apply these configuration changes.
8. Navigate to System Configuration > SSL Settings.
9. Next to SSL Encryption, click on Edit.
10. In the Security Level section, select Secure.IMPORTANT: Only select Secure for this setting.
11. Click Save.
12. Click Pending Changes to apply these configuration changes
Configure Audit PolicyTo configure the audit policy:
1. Navigate toMonitoring > Logging.
2.
3. Click Configure Logging.
SMA 12.4 Common Criteria Configuration GuideEvaluated Configuration
41

4. In the Service Log Level section:
a. Verify thatWeb proxy and Network tunnel log levels are set to Info.
b. From theManagement list, select Debug.
5. Click Save.
Configure External Audit Server (Syslog)To configure an external audit server:
1. Navigate to System Configuration > SSL Settings.
2. In the CA Certificates section, click Edit next to the number of certificates.
3. Click the New (+) icon.
4. Select Certificate file.
5. Click Choose File.
6. Navigate to and select the CA certificate issued by syslog server.
7. In the Usage section, selectOCSP response verification.
8. Click Import.
9. Click Pending Changes to apply these configuration changes.
10. When the Apply Pending Changes dialog displays, click Apply Changes. All pending changes will beapplied to the appliance.
11. Click Close.
12. Navigate toMonitoring > Logging.
13. Click Configure Logging.
14. In the Syslog Configuration section, enter the IP address and port number of a syslog server.
15. From the Protocol list, select TLS.
SMA 12.4 Common Criteria Configuration GuideEvaluated Configuration
42

16. Click Save.
17. Click Pending Changes to apply these configuration changes.
Topics:
l Certificate Requirementsl Troubleshooting
Certificate RequirementsSeveral checks are performed when connecting to a remote syslog server using TLS.
X509v3 Attribute Required value
extendedKeyUsage serverAuth
subjectAltName A list of hostnames or IP addresses that the certificate is valid for. If theconfigured syslog server name does not appear in this list, then theconnection is rejected. See RFC6125 for details.
NOTE: Deploying a certificate with an IP address in the certificate ishighly discouraged.
notValidBefore / notValidAfter Standard expiration checksbasicConstraints The CA basic constraint must be FALSESubject name The MGMT_CSFC_CERTIFICATE_REQUIRED_OUTBOUND_ATTRIBUTES CEM
extension can be used to require an attribute to have a certain value.Please see documentation of MGMT_CSFC_CERTIFICATE_REQUIRED_
ATTRIBUTES in Configure TLS Mutual Authentication for details on theformat.
authorityInfoAccess An OCSP URL must be specified. The OCSP status of the certificate ischecked during initial TLS handshake. If anything other than a GOODstatus is received, the connection will be rejected.
SMA 12.4 Common Criteria Configuration GuideEvaluated Configuration
43

A valid certificate would look like this (results of openssl x509 -in FILENAME.CERT -noout -text):
Certificate:
Data:
Version: 3 (0x2)
Serial Number:
0a:a5:c8:97:83:3f:27:e0:44:20:53:0e:18:4b:cf:b3:7e:91:54:4f
Signature Algorithm: sha384WithRSAEncryption
Issuer: C = US, ST = Washington, L = Seattle, O = SonicWall, OU = Engineering, CN =
Testing Intermediate CA
Validity
Not Before: Feb 17 17:43:19 2021 GMT
Not After : Feb 28 17:43:19 2021 GMT
Subject: C = US, ST = Washington, L = Seattle, O = SonicWall, OU = Engineering, CN =
172.16.1.101
Subject Public Key Info:
Public Key Algorithm: rsaEncryption
RSA Public-Key: (2048 bit)
Modulus: [....]
Exponent: 65537 (0x10001)
X509v3 extensions:
X509v3 Basic Constraints: critical
CA:FALSE
X509v3 Extended Key Usage:
TLS Web Server Authentication
X509v3 Key Usage: critical
Digital Signature, Key Encipherment
X509v3 Subject Alternative Name: critical
DNS:foo.bar.com
Authority Information Access:
OCSP - URI:http://172.16.1.101:65290/OCSP
X509v3 Subject Key Identifier:
F3:70:38:40:55:46:87:14:D4:95:EA:F0:D5:79:9D:09:B6:76:7C:7A
X509v3 Authority Key Identifier:
keyid:9F:4D:57:A6:6B:31:C3:F4:85:B5:71:A3:D1:FD:66:75:21:5F:D9:A7
Signature Algorithm: sha384WithRSAEncryption [...]
SMA 12.4 Common Criteria Configuration GuideEvaluated Configuration
44

TroubleshootingIf messages from the SMA appliance are not appearing on the remote syslog server, it usually indicates aconfiguration problem relating to the certificate. Relevant messages would be in /var/log/syslog. Mostfrequent errors and their solutions include:
Message Solution
syslog-ng: Certificate subject does not matchconfigured hostname;subject='/C=US/ST=Washington/L=Seattle/O=SonicWall/OU=Engineering/CN=172.16.1.101',hostname='172.16.1.101',certificate=’syslog.example.com'
The SAN of the certificate on the syslog server doesnot match the hostname configured in the AMC.Make sure that the hostname used in the AMCsyslog configuration is a hostname (not an IPaddress) and is a name that is included in the SANlist.
syslog-ng: TLS handshake failure - no mutuallyacceptable protocol could be negotiated source(172.16.1.77:1171) destination(172.16.1.101:9999);
The syslog server rejected the TLS handshake.Make sure that the remote syslog server acceptsTLS1.2 or TLS1.3 connections.
syslog-ng: TLS handshake failure - no mutuallyacceptable cipher could be negotiated source(172.16.1.77:1171) destination(172.16.1.101:9999);
The syslog server rejected the TLS handshake.Make sure that the remote syslog server acceptsECDHE cipher suites.
syslog-ng: X509_NAME outbound attributemismatch (countryName) - expected(CA) subject(/C=US/ST=Washington/L=Seattle/O=SonicWall/OU=Engineering/CN=172.16.1.101);
The certificate subject did not contain the properattributes. Please check the MGMT_CSFC_CERTIFICATE_ REQUIRED_OUTBOUND_ATTRIBUTES
setting.
Configure TLS Mutual AuthenticationFor more information on configuration TLS mutual authentication (“PKI authentication”), refer to “Configuring aPKI Authentication Server” in the Secure Mobile Access12.4 Administration Guide.
NOTE: To use mutual authentication on an authentication server as well, an authentication realm must beconfigured on the appliance.
To configure TLS mutual authentication:
1. Login to the AMC.
2. Navigate to System Configuration > Authentication Servers.
3. In the Authentication Servers section, click New.
SMA 12.4 Common Criteria Configuration GuideEvaluated Configuration
45

4. On the Add Authentication Server page:
a. In the User Store section, under Authentication directory, select Public key infrastructure(PKI).
b. Under Credential Type, select Digital Certificate.
c. Click Continue.
d. In the Name field, provide a name for the server for easy reference later, such as Certificates.
e. Select the certificate authorities you wish to trust for mutual authentication in the pick-list on the leftpane (All CA Certificates) and click the checkmark. The CAs will be moved into the right pane(Trusted CA Certificates).
f. Click to expand the Advanced section.
1. Enable Use OCSP to verify client certificates.
2. Enable User certificate's AIA extension.
3. Disable Allow certificate if responder is unavailable.
4. Enable Verify response.
5. Click Save.
6. Navigate to User Access > Realms.
7. Click + New realm at the upper right of the page.
8. On the Configure Realm page:
a. Provide a name for the realm to be displayed to the user (“Client Certificates”)
b. Enable the checkbox next to Display this realm
c. Select the authentication server in the dropdown for Authentication server
d. Click Finish.
9. Navigate to System Configuration > Maintenance.
10. In your web browser, modify the URL by appending a query parameter ?advanced=1 and press Enter.
SMA 12.4 Common Criteria Configuration GuideEvaluated Configuration
46

11. Scroll down to the Advanced > Configuration Extensions section.
12. Click Configure….
13. On the Configuration Extensions page, click the New (+) icon.
14. In the table:
l For the Key enter MGMT_CSFC_CERTIFICATE_VALIDATION, for the Value enter true, and clickOK.l For the Key enter MGMT_CSFC_CERTIFICATE_REQUIRED_ATTRIBUTES, for the Value enter at leastone attribute and a required value that must be present in all certificates that should be acceptedfor client authentication.
SMA 12.4 Common Criteria Configuration GuideEvaluated Configuration
47
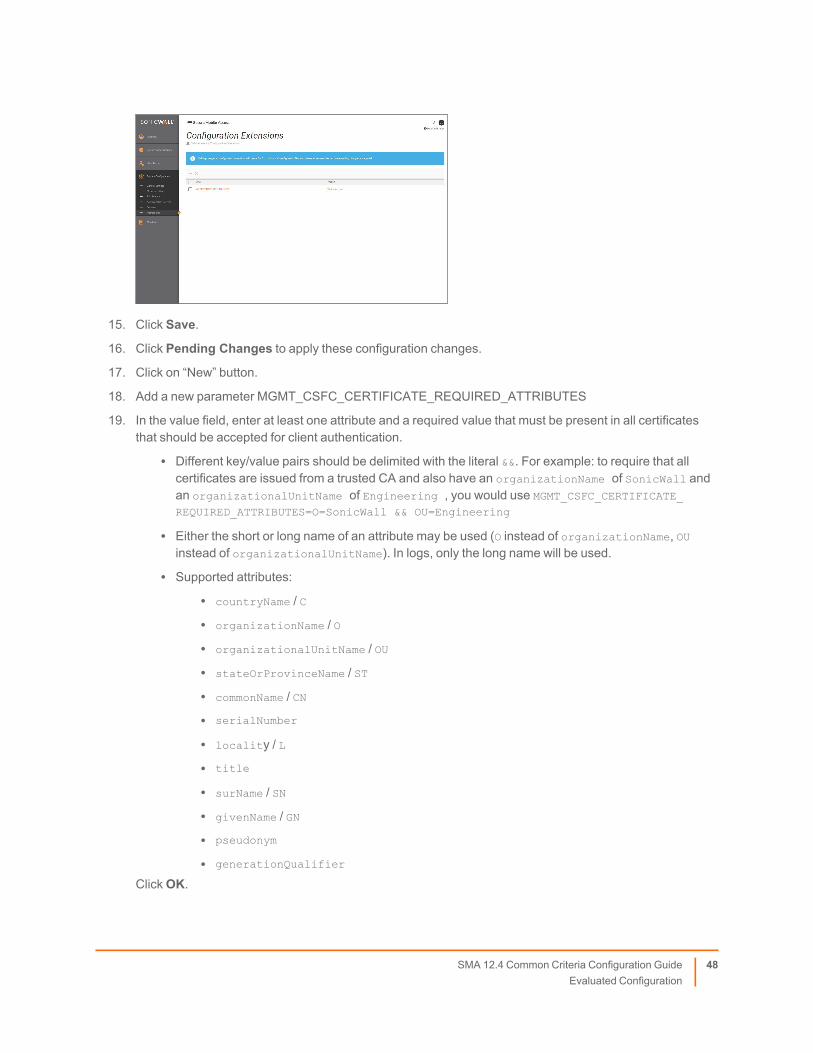
15. Click Save.
16. Click Pending Changes to apply these configuration changes.
17. Click on “New” button.
18. Add a new parameter MGMT_CSFC_CERTIFICATE_REQUIRED_ATTRIBUTES
19. In the value field, enter at least one attribute and a required value that must be present in all certificatesthat should be accepted for client authentication.
l Different key/value pairs should be delimited with the literal &&. For example: to require that allcertificates are issued from a trusted CA and also have an organizationName of SonicWall andan organizationalUnitName of Engineering , you would use MGMT_CSFC_CERTIFICATE_REQUIRED_ATTRIBUTES=O=SonicWall && OU=Engineering
l Either the short or long name of an attribute may be used (O instead of organizationName, OUinstead of organizationalUnitName). In logs, only the long name will be used.
l Supported attributes:
l countryName / C
l organizationName / O
l organizationalUnitName / OU
l stateOrProvinceName / ST
l commonName / CN
l serialNumber
l locality / L
l title
l surName / SN
l givenName / GN
l pseudonym
l generationQualifier
ClickOK.
SMA 12.4 Common Criteria Configuration GuideEvaluated Configuration
48

20. Click Save.
21. Click Pending Changes to apply these configuration changes.
After these steps, the Client Certificates option will be available in the authentication sequence (for both webaccess methods and tunnel clients).
NOTE:When using client certificates for a realm, only client certificates can be used to authenticate for thatrealm. If you wish to have a ‘fallback’ authentication for when someone does not have a client certificate, thatrequires a separate authentication server and realm. Please refer to the online documentation for details.
Set Other Useful Web Security OptionsThere are other web security options you might want to set as well, depending on your environment.
Topics:
l Forcing the use of the HTTPS Protocoll Preventing the Display of EmbeddedWeb Content
Forcing the use of the HTTPS ProtocolYou can forces clients to only use the HTTPS protocol to connect to the appliance. All HTTP traffic isautomatically redirected to HTTPS, but setting this option prevents a client from even attempting to communicatewithout encryption if a user manually types in a URL such as http://vpnserver.com/.
To enable force the usage of the HTTPS protocol:
1. Navigate to System Configuration > Maintenance.
2. In your web browser, modify the URL by appending a query parameter ?advanced=1 and press Enter.
SMA 12.4 Common Criteria Configuration GuideEvaluated Configuration
49

3. Scroll down to the Advanced > Configuration Extensions section.
4. On the Configuration Extensions page, click the New (+) icon.
5. In the table:
l For the Key enter EW_ENABLE_HSTS, for the Value enter 1, and clickOK.
SMA 12.4 Common Criteria Configuration GuideEvaluated Configuration
50
6. Click Save.
7. Click Pending Changes to apply these configuration changes.
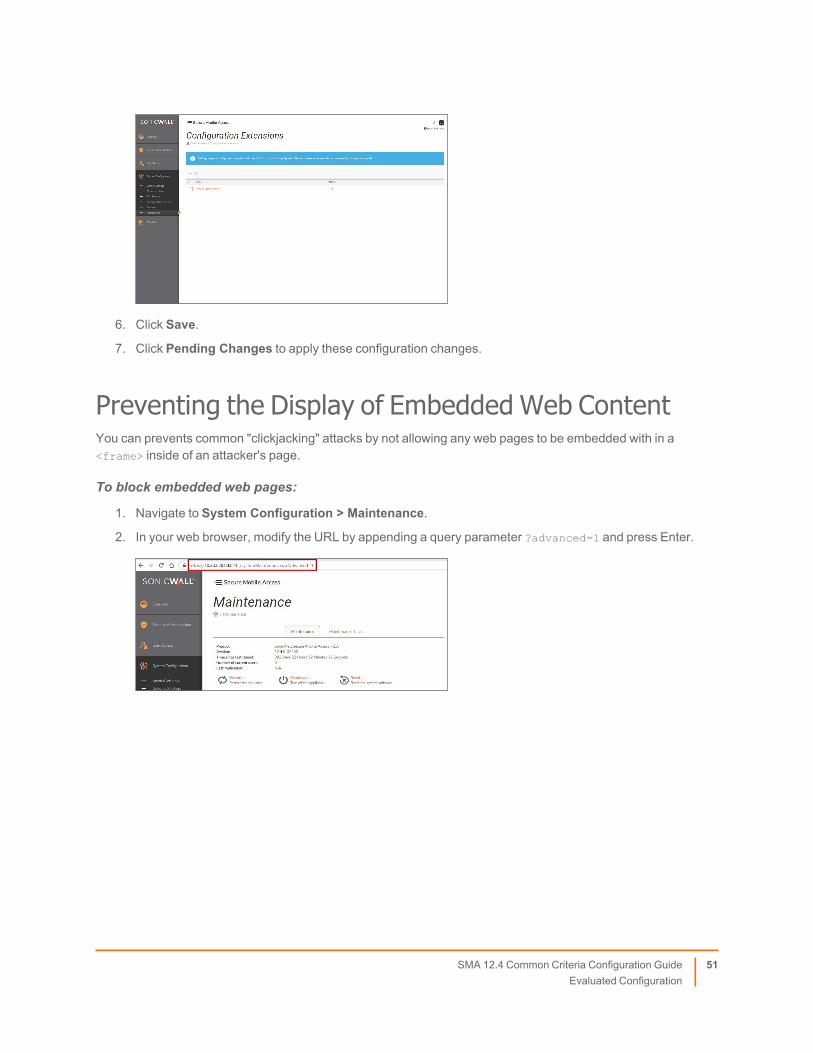
Preventing the Display of Embedded Web ContentYou can prevents common "clickjacking" attacks by not allowing any web pages to be embedded with in a<frame> inside of an attacker's page.
To block embedded web pages:
1. Navigate to System Configuration > Maintenance.
2. In your web browser, modify the URL by appending a query parameter ?advanced=1 and press Enter.
SMA 12.4 Common Criteria Configuration GuideEvaluated Configuration
51

3. Scroll down to the Advanced > Configuration Extensions section.
4. On the Configuration Extensions page, click the New (+) icon.
5. In the table:
l For the Key enter EW_ENABLE_X_FRAME_OPTIONS, for the Value enter 1, and clickOK.
SMA 12.4 Common Criteria Configuration GuideEvaluated Configuration
52

6. Click Save.
7. Click Pending Changes to apply these configuration changes.
SMA 12.4 Common Criteria Configuration GuideEvaluated Configuration
53
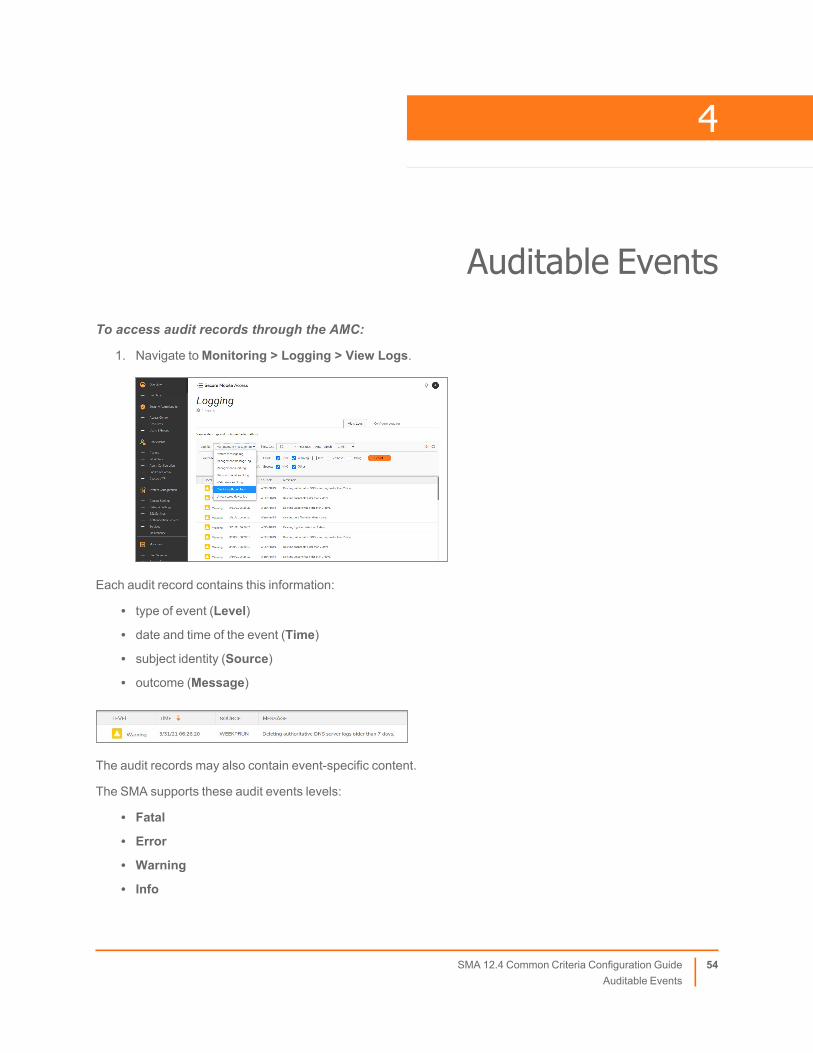
Auditable EventsTo access audit records through the AMC:
1. Navigate toMonitoring > Logging > View Logs.
Each audit record contains this information:
l type of event (Level)l date and time of the event (Time)l subject identity (Source)l outcome (Message)
The audit records may also contain event-specific content.
The SMA supports these audit events levels:
l Fatall Errorl Warningl Info
SMA 12.4 Common Criteria Configuration GuideAuditable Events
4
54
l Verbosel Debug
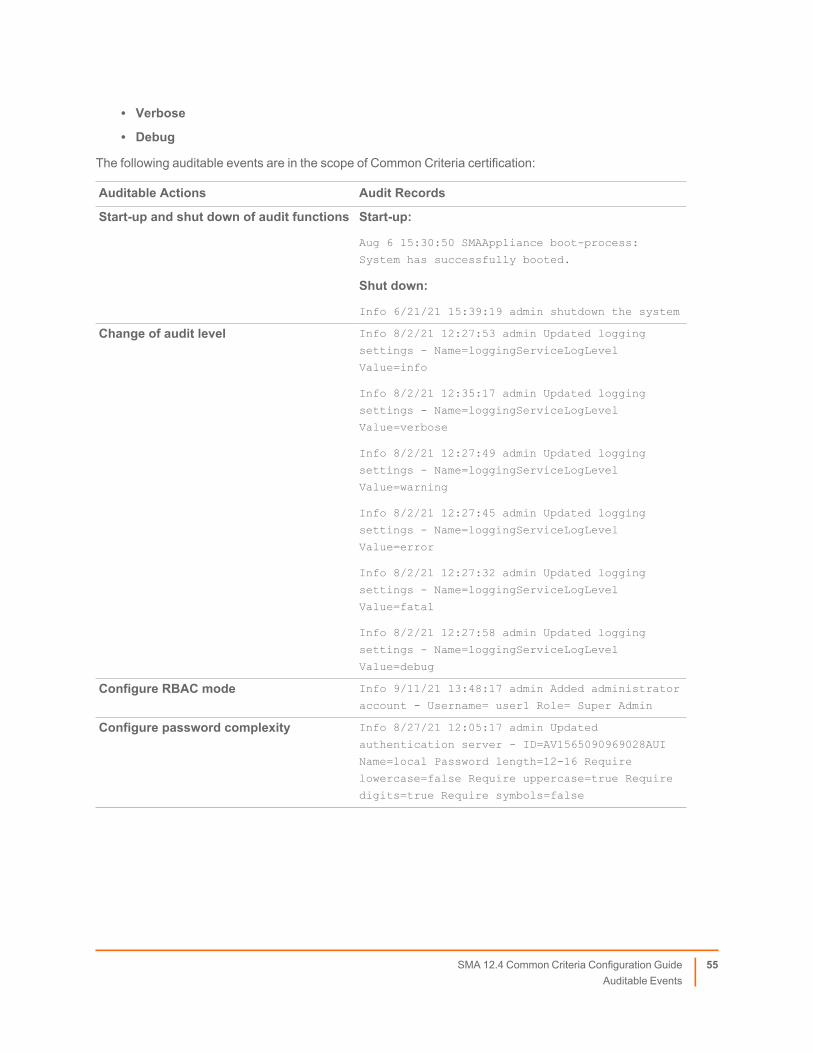
The following auditable events are in the scope of Common Criteria certification:
Auditable Actions Audit Records
Start-up and shut down of audit functions Start-up:
Aug 6 15:30:50 SMAAppliance boot-process:
System has successfully booted.
Shut down:
Info 6/21/21 15:39:19 admin shutdown the system
Change of audit level Info 8/2/21 12:27:53 admin Updated logging
settings - Name=loggingServiceLogLevel
Value=info
Info 8/2/21 12:35:17 admin Updated logging
settings - Name=loggingServiceLogLevel
Value=verbose
Info 8/2/21 12:27:49 admin Updated logging
settings - Name=loggingServiceLogLevel
Value=warning
Info 8/2/21 12:27:45 admin Updated logging
settings - Name=loggingServiceLogLevel
Value=error
Info 8/2/21 12:27:32 admin Updated logging
settings - Name=loggingServiceLogLevel
Value=fatal
Info 8/2/21 12:27:58 admin Updated logging
settings - Name=loggingServiceLogLevel
Value=debug
Configure RBAC mode Info 9/11/21 13:48:17 admin Added administrator
account - Username= user1 Role= Super Admin
Configure password complexity Info 8/27/21 12:05:17 admin Updated
authentication server - ID=AV1565090969028AUI
Name=local Password length=12-16 Require
lowercase=false Require uppercase=true Require
digits=true Require symbols=false
SMA 12.4 Common Criteria Configuration GuideAuditable Events
55
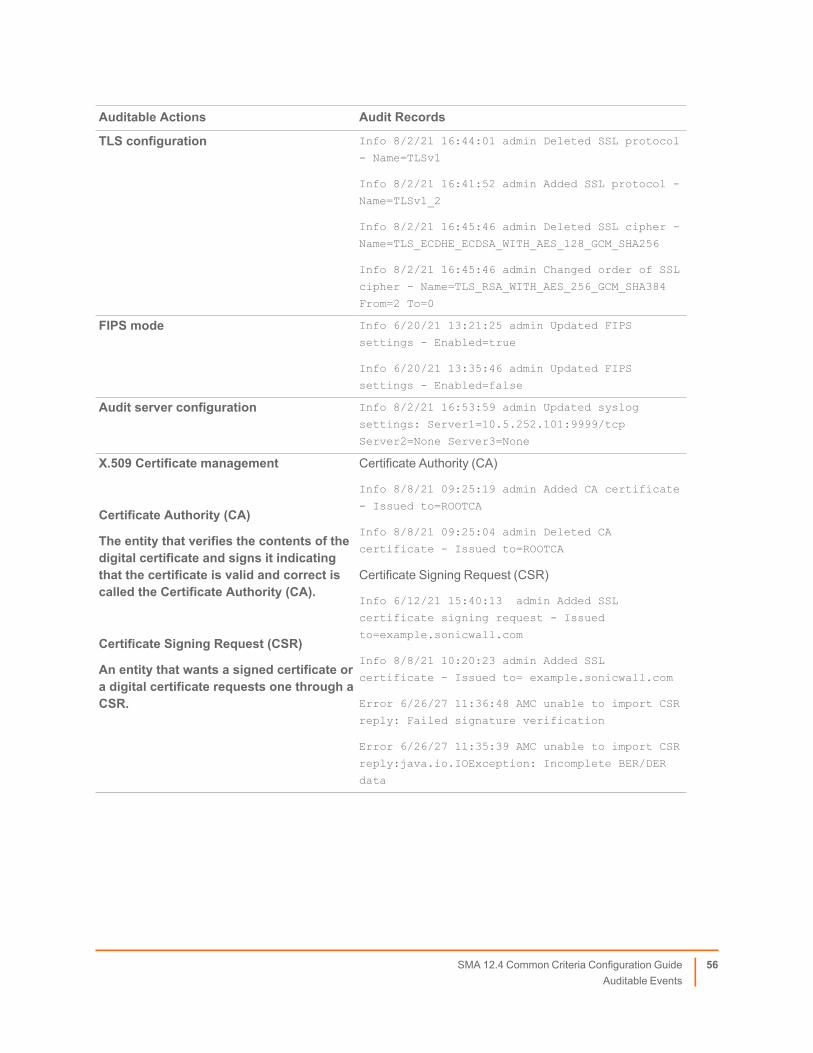
Auditable Actions Audit Records
TLS configuration Info 8/2/21 16:44:01 admin Deleted SSL protocol
- Name=TLSv1
Info 8/2/21 16:41:52 admin Added SSL protocol -
Name=TLSv1_2
Info 8/2/21 16:45:46 admin Deleted SSL cipher -
Name=TLS_ECDHE_ECDSA_WITH_AES_128_GCM_SHA256
Info 8/2/21 16:45:46 admin Changed order of SSL
cipher - Name=TLS_RSA_WITH_AES_256_GCM_SHA384
From=2 To=0
FIPS mode Info 6/20/21 13:21:25 admin Updated FIPS
settings - Enabled=true
Info 6/20/21 13:35:46 admin Updated FIPS
settings - Enabled=false
Audit server configuration Info 8/2/21 16:53:59 admin Updated syslog
settings: Server1=10.5.252.101:9999/tcp
Server2=None Server3=None
X.509 Certificate management
Certificate Authority (CA)
The entity that verifies the contents of thedigital certificate and signs it indicatingthat the certificate is valid and correct iscalled the Certificate Authority (CA).
Certificate Signing Request (CSR)
An entity that wants a signed certificate ora digital certificate requests one through aCSR.
Certificate Authority (CA)
Info 8/8/21 09:25:19 admin Added CA certificate
- Issued to=ROOTCA
Info 8/8/21 09:25:04 admin Deleted CA
certificate - Issued to=ROOTCA
Certificate Signing Request (CSR)
Info 6/12/21 15:40:13 admin Added SSL
certificate signing request - Issued
to=example.sonicwall.com
Info 8/8/21 10:20:23 admin Added SSL
certificate - Issued to= example.sonicwall.com
Error 6/26/27 11:36:48 AMC unable to import CSR
reply: Failed signature verification
Error 6/26/27 11:35:39 AMC unable to import CSR
reply:java.io.IOException: Incomplete BER/DER
data
SMA 12.4 Common Criteria Configuration GuideAuditable Events
56

Auditable Actions Audit Records
Verifying and applying updates Uploading a Valid hotfix file:
Info 6/24/21 10:47:57 admin Installed hotfix
pform-hotfix-12.1.0-06163
Uploading an Invalid hotfix file:
Error 8/2/21 17:36:15 admin Hotfix update
failed: Hotfix file integrity check failed.
Configuring system time Info 6/12/21 12:59:17 admin Set time to Wed
Jun 12 12:59:17 IST 2019
Configuring and modifying access banner Info 6/23/21 11:57:32 admin Updated acceptable
use banner
Configuring termination of interactiveremote session
Info 8/2/21 18:05:18 admin Added configuration
extension - Key=AMC_SESSION_TIMEOUT_SECS
Value=30
Operations related to cryptographic keysor certificates
Commands to delete TOE’s identity (i.e. web) certificate:
Info 8/5/21 09:21:01 admin Added SSL
certificate - Issued to=192.168.0.10
Info 8/5/21 09:21:07 admin Updated SSL
certificate - Usage=AMC Issued to=192.168.0.10
Info 8/5/21 10:02:36 admin Deleted SSL
certificate - Issued to=172.29.0.204
Commands to delete trusted CA:
Info 8/5/21 10:08:07 admin Deleted CA
certificate - Issued to=Unit Testing CA
SMA 12.4 Common Criteria Configuration GuideAuditable Events
57

Auditable Actions Audit Records
Administrative login Successful administrative login:
Info 6/11/21 09:00:14 admin Login succeeded -
Address=10.1.101.10
Unsuccessful administrative login:
Warning 6/11/21 06:26:28 AMC Authentication
failed: Username=admin, Address=10.1.101.10
Unsuccessful login attempt limit is met or exceeded:
Info 7/25/21 14:52:50 admin Added configuration
extension - Key=ADMINISTRATOR_ACCOUNT_LOCKOUT_
SECONDS Value=180
Info 7/25/21 14:52:50 admin Added configuration
extension - Key=ADMINISTRATOR_ACCOUNT_LOCKOUT_
ATTEMPTS Value=4
Error 8/5/21 11:58:13 admin Administrator
account locked due to 3 successive login
failures
Timeout of local administrative session:
Sep 3 15:55:04 SMAAppliance -bash: Timeout,
session closed for user(root)
Sep 3 15:55:04 SMAAppliance login[4754]: pam_
unix(login:session): session closed for user
root
Timeout of remote administrative session:
Logout - Address=192.168.56.1 Duration=03:15:57
Expired=true
Administrator logging off:
Info 6/21/21 13:24:57 admin Logout -
Address=10.5.22.125 Duration=00:00:26
Expired=false
SMA 12.4 Common Criteria Configuration GuideAuditable Events
58

Auditable Actions Audit Records
Account management Creation of a new user:
Info 6/24/21 19:32:12 admin Added administrator
account - Username=user1
Disabling of user account by administrative action:
Info 8/26/21 12:26:15 admin Updated local user
- ID=AV1565098985406CPP Name=user1 Password
changed=false Enabled=false
Deletion of existing account:
Info 6/24/21 20:12:34 admin Deleted
administrator account - ID=AV1561384932759GQT
Username=user1
Reset of User Password:
Info 8/6/21 19:07:46 admin Updated
administrator account - ID=PrimaryAdmin
Username=admin Role=Primary Admin Password
changed=true
Failure to establish a TLS session Error 6/24/21 15:41:31 AMC SSL handshake
failed: Client requested protocol TLSv1 not
enabled or not supported.
Error 6/25/21 15:26:35 AMC SSL handshake
failed: no cipher suites in common
Unsuccessful attempt to validate an X509certificate
Aug 8 18:56:24 syslog-ng@SMAAppliance
syslog.err syslog-ng: Certificate subject does
not match configured hostname;
subject='/DC=com/DC=sma1000/CN=ROOT',
hostname='10.1.111.101', certificate='ROOT'
SMA 12.4 Common Criteria Configuration GuideAuditable Events
59
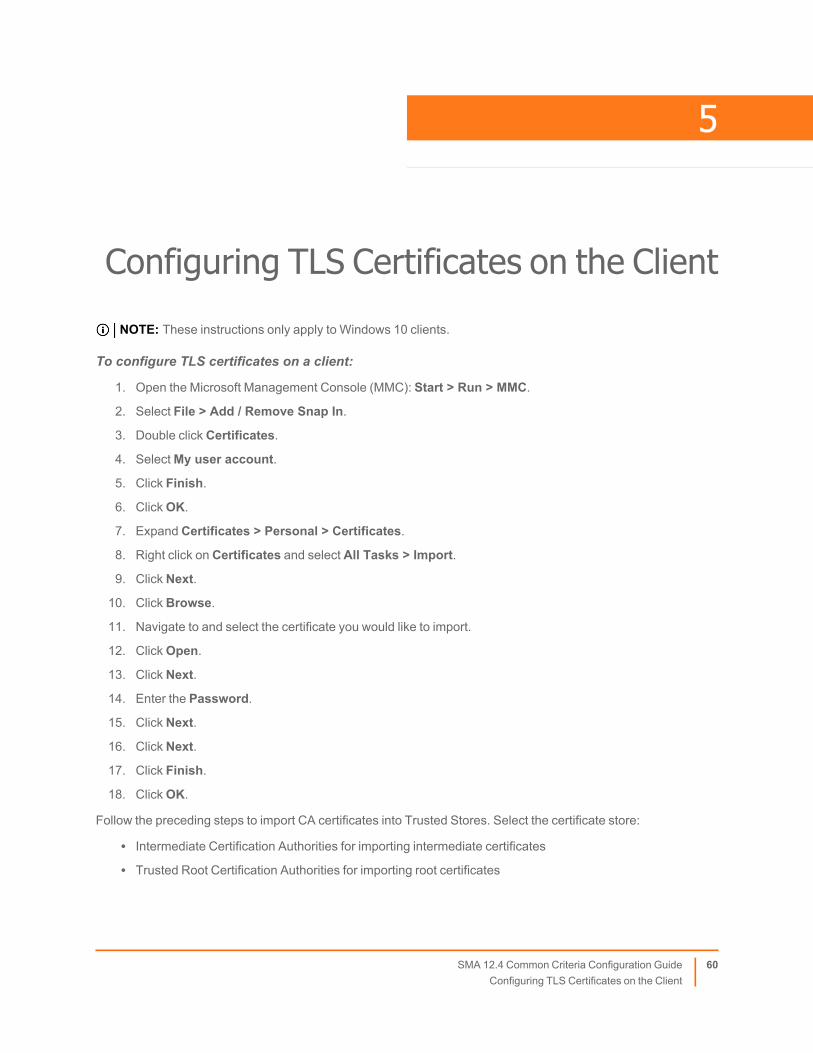
Configuring TLS Certificates on the ClientNOTE: These instructions only apply to Windows 10 clients.
To configure TLS certificates on a client:
1. Open the Microsoft Management Console (MMC): Start > Run > MMC.
2. Select File > Add / Remove Snap In.
3. Double click Certificates.
4. SelectMy user account.
5. Click Finish.
6. ClickOK.
7. Expand Certificates > Personal > Certificates.
8. Right click on Certificates and select All Tasks > Import.
9. Click Next.
10. Click Browse.
11. Navigate to and select the certificate you would like to import.
12. ClickOpen.
13. Click Next.
14. Enter the Password.
15. Click Next.
16. Click Next.
17. Click Finish.
18. ClickOK.
Follow the preceding steps to import CA certificates into Trusted Stores. Select the certificate store:
l Intermediate Certification Authorities for importing intermediate certificates
l Trusted Root Certification Authorities for importing root certificates
SMA 12.4 Common Criteria Configuration GuideConfiguring TLS Certificates on the Client
5
60

Client Certificate ValidationA client certificate is validated when it is presented during the initial TLS handshake.
The validation process consists of these phases:
1. Certificate authority validation – is the certificate signed by one of the certificate authorities that the SMAappliance is configured to trust?
2. Expiration validation – is the certificate still within its notValidBefore and notValidAfter window?
3. OCSP validation – Does the certificate have an authorityInfoAccess attribute, and does the OCSPserver return a GOOD response for it? If there is no OCSP server set, it responds with an error, or respondswith unknown or revoked status, the certificate is rejected.
These checks are performed for all certificate authorities in the chain.
The client certificate itself must also contain the clientAuth extendedKeyUsage attribute. The MGMT_CSFC_CERTIFICATE_REQUIRED_ ATTRIBUTES CEM extension can be used to require an attribute to have a certainvalue. Refer to Configure TLS Mutual Authentication for details on the format required for MGMT_CSFC_CERTIFICATE_REQUIRED_ATTRIBUTES .
SMA 12.4 Common Criteria Configuration GuideClient Certificate Validation
6
61
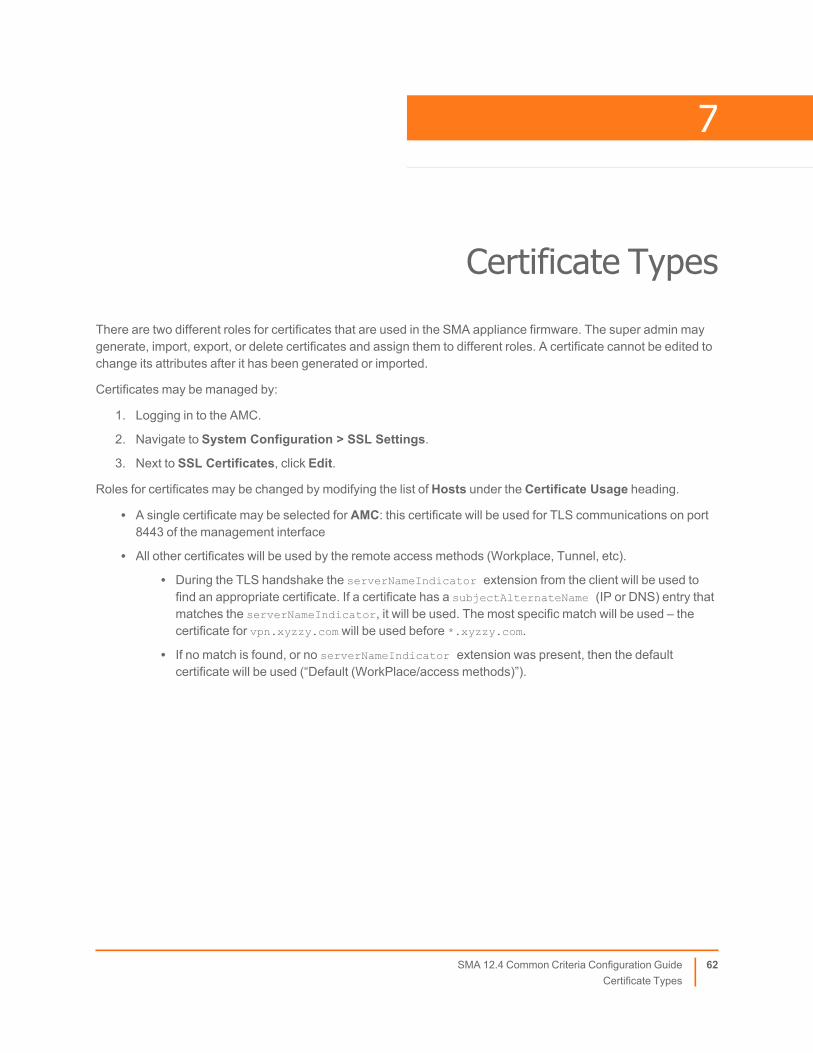
Certificate TypesThere are two different roles for certificates that are used in the SMA appliance firmware. The super admin maygenerate, import, export, or delete certificates and assign them to different roles. A certificate cannot be edited tochange its attributes after it has been generated or imported.
Certificates may be managed by:
1. Logging in to the AMC.
2. Navigate to System Configuration > SSL Settings.
3. Next to SSL Certificates, click Edit.
Roles for certificates may be changed by modifying the list of Hosts under the Certificate Usage heading.
l A single certificate may be selected for AMC: this certificate will be used for TLS communications on port8443 of the management interface
l All other certificates will be used by the remote access methods (Workplace, Tunnel, etc).
l During the TLS handshake the serverNameIndicator extension from the client will be used tofind an appropriate certificate. If a certificate has a subjectAlternateName (IP or DNS) entry thatmatches the serverNameIndicator, it will be used. The most specific match will be used – thecertificate for vpn.xyzzy.com will be used before *.xyzzy.com.
l If no match is found, or no serverNameIndicator extension was present, then the defaultcertificate will be used (“Default (WorkPlace/access methods)”).
SMA 12.4 Common Criteria Configuration GuideCertificate Types
7
62

About This DocumentNOTE: A NOTE icon indicates supporting information.
IMPORTANT: An IMPORTANT icon indicates supporting information.
TIP: A TIP icon indicates helpful information.
CAUTION: A CAUTION icon indicates potential damage to hardware or loss of data if instructionsare not followed.
WARNING: A WARNING icon indicates a potential for property damage, personal injury, or death.
Secure Mobile Access Common Criteria Configuration GuideUpdated - September 2021Software Version - 12.4232-005623-00 Rev 1.2
Copyright © 2021 SonicWall Inc. All rights reserved.
The information in this document is provided in connection with SonicWall and/or its affiliates’ products. No license, express or implied,by estoppel or otherwise, to any intellectual property right is granted by this document or in connection with the sale of products.EXCEPT AS SET FORTH IN THE TERMS AND CONDITIONS AS SPECIFIED IN THE LICENSE AGREEMENT FOR THISPRODUCT, SONICWALL AND/OR ITS AFFILIATES ASSUME NO LIABILITYWHATSOEVER AND DISCLAIMS ANY EXPRESS,IMPLIED OR STATUTORYWARRANTY RELATING TO ITS PRODUCTS INCLUDING, BUT NOT LIMITED TO, THE IMPLIEDWARRANTY OFMERCHANTABILITY, FITNESS FOR A PARTICULAR PURPOSE, OR NON-INFRINGEMENT. IN NO EVENTSHALL SONICWALL AND/OR ITS AFFILIATES BE LIABLE FOR ANY DIRECT, INDIRECT, CONSEQUENTIAL, PUNITIVE,SPECIAL OR INCIDENTAL DAMAGES (INCLUDING, WITHOUT LIMITATION, DAMAGES FOR LOSS OF PROFITS, BUSINESSINTERRUPTION OR LOSS OF INFORMATION) ARISING OUT OF THE USE OR INABILITY TO USE THIS DOCUMENT, EVEN IFSONICWALL AND/OR ITS AFFILIATES HAVE BEEN ADVISED OF THE POSSIBILITY OF SUCH DAMAGES. SonicWall and/or itsaffiliates make no representations or warranties with respect to the accuracy or completeness of the contents of this document andreserves the right to make changes to specifications and product descriptions at any time without notice. and/or its affiliates do notmake any commitment to update the information contained in this document.
For more information, visit https://www.sonicwall.com/legal.
SMA 12.4 Common Criteria Configuration GuideAbout This Document
63