solarnapl manual july 2010 - durhamgeo.com · chapter 2 about the solarrem the solarrem is a solar...
TRANSCRIPT

Installation, Operation and Maintenance Guide
SolarREM – Solar Powered Remediation Technologies. The fi rst truly “environmental” remediation product.
Version 2.1
SolarNAPLTR-51600

Table of Contents:
Chapter 1Installation, Operation and Maintenance ............................... 1Specifi cations ........................................................................ 2Technical Support .................................................................. 3
Chapter 2About the SolarRem .............................................................. 4
Chapter 3About the Components .......................................................... 5
Chapter 4Safety Information ................................................................. 6
Chapter 5Installation Instructions .......................................................... 7F.A.Q.’s .................................................................................. 8
Chapter 6Setup Instructions .................................................................. 10
Chapter 7System Confi guration / Operation ......................................... 23
Chapter 8Troubleshooting ..................................................................... 24
Chapter 9Additional Components ......................................................... 26

SolarREM identifi es the three provided for assistance in bioremediation of contaminated sites, remote from an economical power supply, not quickly accessible, and subject to long term remediation requirements.
1) The SolarNAPL provides pneumatic pumping capabilities for removal of LNAPL contaminants laying on the ground water table. It is provided with a storage tank level sensor to shut the system down when full to prevent a surface spill.
2) The SolarPurge provides pneumatic pumping capabilities for low fl ow groundwater pumping.3) The SolarSPARGE provides higher air fl ow into the ground water table to promote bioremediation and
volatilization of LNAPL contaminants in the groundwater.
Chapter 1
About the SolarRem Product Family
Inspection
Installation, Operation and Maintenance Guide IntroductionSolarREM – The First Truly Environmental Remediation Product
Upon receipt of shipment at the job site, carefully check the shipment against the bill of lading. Make sure all units have been received. Inspect the carton or crating of each unit and inspect each unit for damage. Repackage unit after verifying that all components are included. Assure that the carrier makes proper notation of any shortages or damage on all copies of the freight bill and that he completes a Carrier Inspection Report. Concealed damage not discovered during unloading must be reported to the carrier within 15 days of receipt of shipment. NOTE: It is the responsibility of the purchaser to fi le all necessary claims with the carrier. Notify DGSI of all damage within fi fteen (15) days of shipment.
Unit Protection
Cover units on the job site with either shipping cartons, vinyl fi lm, or an equivalent protective covering. Cap the open ends of pipes stored on the job site. In areas where painting, plastering, or the spraying of fi reproof material has not been completed, all due precautions must be taken to avoid physical damage to the units and contami-nation by foreign material. Physical damage and contamination may prevent proper start-up and may result in costly equipment clean-up. Examine all pipes, fi ttings, and valves before installing any of the system components. Remove any dirt found on these components.
Storage
Upon the arrival of equipment at the job site, immediately store solar panel units in their shipping cartons in a clean, dry area. Store units in an upright position at all times.
CAUTION: Do not store or install units in corrosive environments. Corrosive conditions and high temperature or humidity can signifi cantly reduce performance, reliability and service life.
1.
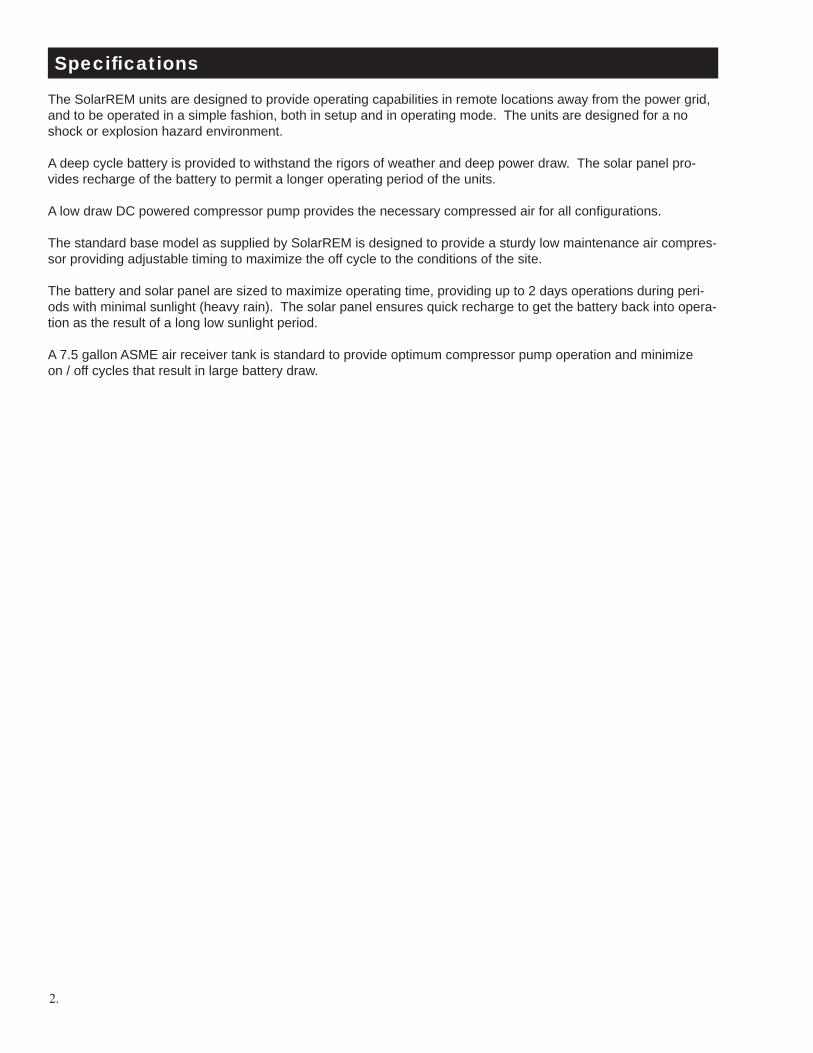
Specifi cations
The SolarREM units are designed to provide operating capabilities in remote locations away from the power grid, and to be operated in a simple fashion, both in setup and in operating mode. The units are designed for a no shock or explosion hazard environment.
A deep cycle battery is provided to withstand the rigors of weather and deep power draw. The solar panel pro-vides recharge of the battery to permit a longer operating period of the units.
A low draw DC powered compressor pump provides the necessary compressed air for all confi gurations.
The standard base model as supplied by SolarREM is designed to provide a sturdy low maintenance air compres-sor providing adjustable timing to maximize the off cycle to the conditions of the site.
The battery and solar panel are sized to maximize operating time, providing up to 2 days operations during peri-ods with minimal sunlight (heavy rain). The solar panel ensures quick recharge to get the battery back into opera-tion as the result of a long low sunlight period.
A 7.5 gallon ASME air receiver tank is standard to provide optimum compressor pump operation and minimizeon / off cycles that result in large battery draw.
2.

Technical Support
Information presented in this publication has been carefully checked for reliability. However, no responsibility is assumed for inaccuracies. The information contained in this document is subject to change without notice.
If a problem arises with your system, you should turn to your dealer or the manufacturer for help fi rst. Your sys-tem has most likely been confi gured by them, and they should have the best idea of what your system contains. Hence, they should be of the most assistance. Further, if you purchased your system from a dealer near you, you can bring your system in to them to have it serviced instead of attempting to do so yourself (which can have expensive consequences).
Our web page: www.durhamgeo.com Technical support phone line: (800) 837-0864
Durham Geo Slope Indicator2175 West Park CT. Stone Mountain, Ga 30087
Returning Merchandise for Service
During the warranty period, contact your distributor or system vendor FIRST for any product problems. This war-ranty only covers normal customer use and does not cover damages incurred during shipping or failure due to the alteration, misuse, abuse, or improper maintenance of products.
For Resellers Only:
A receipt or copy of your invoice marked with the date of purchase is required before any warranty service can be rendered. You can obtain service by calling the manufacturer for a Return Merchandise Authorization (RMA) number. The RMA number should be prominently displayed on the outside of the shipping carton and the package should be mailed prepaid, or hand-carried to the manufacturer. SolarREM will pay to have the unit shipped back to you.
Disclaimer
Information presented in this publication has been carefully checked for reliability. However, no responsibility is assumed for inaccuracies. The information contained in this document is subject to change without notice.
3.

Chapter 2About the SolarREM
The SolarREM is a solar powered remediation unit capable of either free product recovery system (SolarNAPL, SolarPURGE, SolarSKIM), fl uid injection (SolarDRIP) or pressurized air (SolarVent, SolarSPARGE). The unit is capable of running up to 2 days without sunlight. By relying on solar power, SolarNAPL can be installed in any location where a power supply necessary to run traditional pumping systems is not economically available. SolarNAPL is a self-contained remediation system consisting of a solar panel, battery, air compressor and pump and associated wiring and controls. The solar panel charges the battery, which serves as the power supply for the air compressor and the system controls. When activated, the compressed air is discharged to the pneumatic pump, forcing the product up the pump dis-charge hose and into a holding tank. The operating characteristics and performance of the SolarNAPL is deter-mined in part by the specifi cations of the solar panel, battery and pump. Operating parameters such as the reset time (no air to pumps) is adjusted with the electronic timer.
To operate correctly and effi ciently, air must be pumped into the pneumatic pump at a pressure suffi cient to dis-place the water column and overcome frictional losses in the system. The injected air displaces the product col-lected in the pump and discharges it to the collection system. This air and product cycling continues in the pump while the air is available.
Technical Description - Overview
The power supply for SolarNAPL consists of a photo-voltaic array and battery. The photovoltaic cells use sunlight to charge the battery. The battery in turn powers the system controls and, the air compressor pump. The pump fi lls an air receiver tank that provides the pressure and volume of air required to displace the product in the pneu-matic pump.
A voltage regulator is used to prevent the battery from overcharging. The voltage regulator also prevents draining of the battery when there is not enough sunlight (e.g., at night) to sustain fl ow of electricity from the solar panel to the battery. The SolarNAPL is operated by an adjustable (air-off) timer. After an on-site pilot test to determine optimum operat-ing conditions including injection pressure and air fl ow rate, the air-off time is optimized.
When the system is activated, the compressor pump pressurizes the air receiver tank. When the pressure inside the tank drops below the lower set value, the pump turns on to re-pressurize the tank until the air pressure reach-es the high set value. When the pump starts running, the air supply to the pump(s) are shut off for the amount of time the operator has set on the adjustable electronic timer (up to 60 min).
4.

Chapter 3About the Components
External Components
1) Solar Panel: The solar panel is capable of producing a minimum of 16 to 20 amp-hours per day at 75 percent sunlight for a minimum of six hours.. A minimum confi guration is a 60 Watt panel, with larger panels used as necessary for particular sites or applications.
2) Battery: The battery supplies 12-volt DC power to the unit. It is capable of providing back up power for up to two days for a typical SolarREM installation. The battery is an industrial 12-volt deep cycle battery designed for use with solar panels. The minimum size provides 120 amp-hours. The battery is an absorbed glass mat (AGM) construction. We do not recommend use of typical lead acid batteries.
3) Weatherproof Enclosure: The lockable weatherproof enclosure is designed to house and protect all equipment. The fi berglass, NEMA 4 enclosure provides weather protection as well as vandalism protection of less durable equipment. Dimensions are 19.6 inches high by 17.6 inches wide by 8.8 inches deep, with a front opening, locking panel.
4) Air Receiver Tank: The air receiver tank equalizes air fl ow and eliminates pulsing of fl ow from the air compressor to the well point. The air receiver tank is a 7.5 gallon tank. ASME rated tank optional.
5) Battery Enclosure: The lockable battery enclosure is designed to secure the 12 Volt battery and is constructed of heavy gauge welded aluminum. All hardware is stainless steel and can be mounted on a 3 inch pipe pole using an optional hardware kit.
Internal Components
1) Photovoltaic Charge Controller: Also known as a charge regulator, this part of the system provides safe charging of the battery by the solar panel and regulates the charge fl ow to maximize the operat ing life of the battery. The charge regulator also prevents discharge of the battery back through the solar panel during periods of no sunlight. The charge regulator shall be a Prostar 30, manu- factured by Morningstar Corporation.
2) Time Delay Relay: The time delay relay (air-off timer) is adjusted by moving the numbered dip switch es to the right. The air solenoid valve will be closed and air will not go out of the tank until the timer has timed out. The delay time is the sum of the numbers that have been pushed to the right. The max off time is 60 minutes. Do not shift any of the dip switches above the numbered dip switch.
3) Solenoid Valve: The solenoid valve is the open/close control point for air supply to the well point. The solenoid valve is controlled by the timer and is placed in line after the air receiver tank.
4) Pressure Switches: The high pressure switch shall have a range of 80-100 psi and be equipped with a dual manual lever (automatic-off). The low pressure unit shall have a range of 0 to 40 psi and operate on an automatic setting. The pressure switches shall be supplied by Pumptrol, Grainger, or the equivalent.
5) Air Compressor Pump: The air compressor shall be one of two options, depending on site conditions or user specifi cations. A Thomas diaphragm compressor, model # 405ADC 38/12, rated at 124 cfm at 100 psi, or a Thomas, model # 910CDC22, rated at 148 cfm at 40 psi.
6) Piping: All internal piping shall be high-pressure fl exible hosing with schedule 40 brass pipe fi ttings and hose barbs. All fi ttings shall be wrapped with Tefl on tape to minimize air loss.
5.

Chapter 4General Safety Information
The SolarREM Equipment is designed to be safe when handled correctly. It is important that all site safety proce-dures be followed, including all Occupational Heath and Safety Administration (OSHA) site requirements, national electric codes and all applicable state and local regulations.
Whenever working around any electrical equipment, care must be taken to avoid shock or worse injury.
The solar panel cells are encapsulated between a tempered glass cover and an EVA pottant, with PVF back sheet to provide maximum protection from the most severe environmental conditions. The entire laminate is installed in an anodized aluminum frame to provide structural strength and ease of installation.
6.

Chapter 5Installation InstructionsWhat’s the fi rst thing I should do?
The fi rst thing you should do is read this user’s manual. It contains important information which will make confi gura-tion and setup much easier.
The following depicts an installation of a solar system being mounted on a 3 inch schedule 40 steel pipe that has been grouted to the earth. In some instances this type of installation may not be practical or desired, however in all installations the electrical and pneumatic components must be interconnected as shown in the following instructions. If there are longer distances than the supplied wiring may allow between the control panel and the battery or solar panel, the wire size and splicing will need to be adjusted as required.The wiring diagram and parts list for the unit can be found in the document holder inside the front cover of the con-trol box and on the DGSI web site.
Pole Installation and Mounting
Properly attach the SolarREM unit and equipment to a secure mounting pole. We recommend a three inch Sched-ule 40 steel pole mounted a minimum of three feet into the ground with a concrete base of a least one foot around. The pole should extend about seven feet high to allow for clearance of the solar panel from the box. Electrical Wiring
Once the SolarREM unit, solar panel(s) and battery have been installed as per the installation confi guration, all com-ponents must be electrically connected and grounded.
Once the SolarREM unit is mounted, connect the wires that are labeled for the battery and for the solar panel from the bottom of the control box. BLACK is for positive and WHITE is for negative. Connect each of the wires to the ap-propriate terminals on the battery and solar panel, ensuring a tight connection is made.Place the tank-full fl oat sensor into the product storage tank. The sensor has a 2-inch male pipe thread. Connect the quick-connect cable connector to the control box. If the optional water sensor shut-off has been purchased, screw the 2-inch PVC bushing into the tank and slip the tank overfi ll / water sensor into the bushing.
To adjust the water sensor open the sensor’s enclosure by removing the two screws then loosen the cable strain relief on the water sensor’s cable. Lower the water sensor until it hits the tanks bottom then pull the sensor up a few inches and tighten the sensor strain relief. Reinstall the enclosure’s cover and tighten both screws. See attached photo’s for more detail.
Once this is completed, open the control box and familiarize yourself with each of the components. Your will note that power should now be on at the Solar Controller and the compressor may be running.
After the SolarREM unit is mounted and electrically connected, check that the solar controller is signaling a battery charge, and the solar panel is charging the battery. If this is the case, you are ready for the initial setup of the oper-ating parameters. Refer to the next detailed section for installation and operating procedures.
WARNING! To avoid possible injury or death due to electrical shock, carefully examine the wiring, and connect to the appropriate battery and solar panel lead. The solar controller will prevent cross connections from damaging the solarREM unit.
CAUTION! Use only copper conductors for fi eld installed electrical wiring. All fi eld installed wiring, including electrical ground, must comply with the National Electrical Code (NEC) as well as all applicable local codes. In addition, all fi eld wiring must conform to Class II temperature limitations described in the NEC. Consult the unit wiring diagram located on the inside of the compressor access panel to ensure proper electrical hookup.
7.

Q: Why don’t I get a display after I connect the wiring?
A: Check for cross connections with the wiring. If you have inadvertently connected either the battery or the solar panel to the wrong leads, you will not get a signal on the solar controller. If the wiring is crossed, the same will apply, you will not get a signal.
Q: Why don’t I get an indication the solar panel is charging the battery?
A: First check the solar panel is connected to the solar controller, and with the correct polarity. Second, check the solar panel is pointed at the correct angle and location to receive the maximum sunlight during the day.
Q: What is a solar cell?
A: A solar cell is a kind of semiconductor device that takes advantage of the photo-voltaic effect, in which electricity is produced when the semiconductor's PN junction is irradiated. When light strikes a solar cell, part of it is refl ected, part of it is absorbed, and part of it passes through the cell. The absorbed light excites the bound electrons into a higher energy state, making them free electrons. These free electrons move about in all directions within the crystal, leaving holes where the electrons used to be, and the holes also shift around the crystal. The electrons (-) collect in the N-layer, the holes (+) in the P-layer. When the outside circuit is closed, electricity fl ows.
Frequently Asked Questions
8.

Q: What about grounding of the SolarREM unit?
A: The SolarREM unit is to be grounded to the mounting pole with the provided ground wire.
Frequently Asked Questions, Cont.
9.

Chapter 6Initial Setup of the SolarNAPL
Introduction to Setup
100 watt solar panel
Pole mounting hardware for 180 watt solar panel to 3-inch pipe support
3 inch pole mount hardware kit (shown installed)
1. Be careful unpacking the solar panel. Make sure no damage oc-cured to the shipment.
2. The solar panel can be mounted to small or large diameter poles but the user will need to supply their own clamps.
3. Tighten the U-bolt. Notice that the steel plate is on the inside of the aluminum channel. Tighten the 2 hose clamps.
10.

4. After concreting the 3-inch pipe into the ground, mount the solar panel to the pole and adjust to the direction that will provide the most sunlight.
The National Renewable Energy Laboratory (NREL) is a good resource to use for positioning the solar panel in the USA. www.nrel.gov/pv/
5. Tilt the panel to achieve maximum output.
Control box pole mounting kit.
6. Mount the control box pole struts as shown.
11.
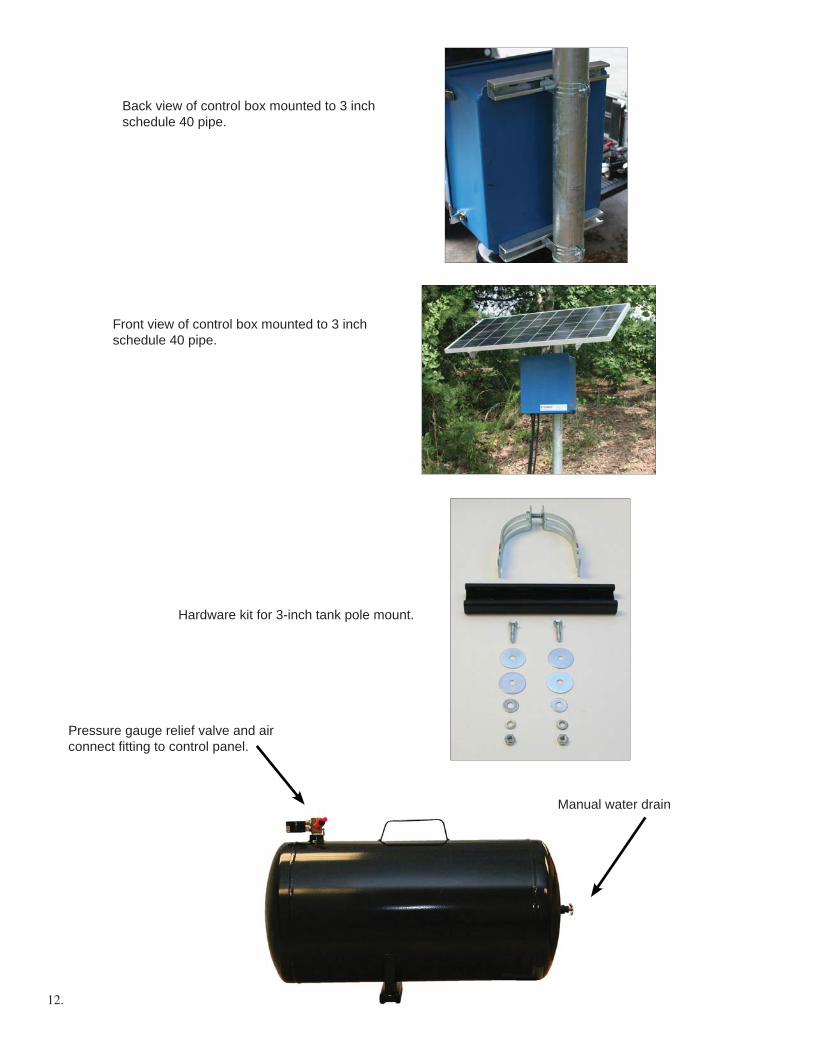
Back view of control box mounted to 3 inch schedule 40 pipe.
Front view of control box mounted to 3 inch schedule 40 pipe.
Pressure gauge relief valve and air connect fi tting to control panel.
Manual water drain
Hardware kit for 3-inch tank pole mount.
12.

Front view of air tank mounted to pipe.
Back view of tank mounting hardware attached to 3 inch pipe.
Battery box pole mounting hardware kit for 3 inch schedule 40 pipe.
If the tank is not pole mounted, orient it as shown so the manual condensate drain will function properly.
Sideview of control box and battery box pole mounting hardware.
13.

Mounted battery box with battery installed.
Bottom view of control panel.
7. Run the 10-2 S.O. cord from the bottom of the control box through the water-tight strain relief located on the bottom of the battery box.
Connect these to the plus (+) and minus (-) terminals to the battery, then tighten the strain relief on the cable. Excess cable can be stored in the battery box.
Pressure gauge
Hose barb to tank
Pressure relief valve
Hose clamp
3/8 Buna-N hose from control box
Shut off valve. Make sure this is fully open.
8. Connect the 3/8 inch Buna-N hose from the control box to the air tank.
14.

9. To connect the control box to the solar panel, open the junction box under the solar panel by loosening the four screws located on the cover.
Red: + (positive)Black: - (negative)
CAUTION: Solar panel WILL GENERATE POWER when in contact with a light source. Electrical junction box,
back of solar panel.
11. Close enclosure with 4 attached screws.
10. Loosen the watertight strain relief and insert the 10-2 cord through and tighten. Connect the 2 wires to their proper poles.
Front view of air line connection to tank.
10-2 cord, 15 ft supplied
water-tight strain relief
Red(pos)
Green(neg)
15.

12. The tank-full sensor has a 2 inch male pipe thread bushing. Thread the bushing into the tank top. If your tank has a larger pipe thread opening you will need to obtain the proper reducer (not supplied by DGSI).
Caution: If the tank is not level, make sure you install the tank-full sensor on the lowest end of the tank.
Quick-connect to control panel
NOTE: Most units will be prewired into
the control box.
Cord strain relief
2 inch pipe bushing
Tank-full fl oat
Water sensor probe
Tefl on coated cable
30 ft cable (standard) Longer lengths available
Water-resistant enclosure
13. To install the dual tank sensor, thread the 2 inch plastic bushing into the tank opening. If the tank used has a larger pipe opening you will need to obtain the correct reducing fi ttings (not supplied by DGSI).
13. Optional dual sensor tank-full and water sensor.
16.

14. Carefully insert the conductivity probe into the 2 inch PVC bushing.
15. Next insert the high level fl oat sensor into the 2 inch pipe bushing followed by rest of the sensor assembly.
16. Remove the top cover of the sensor as-sembly by removing the 2 screws. Loosen the conductivity sensor cable strain relief / seal and lower the probe until it makes contact with the tank bottom. Raise the probe 2 to 3 inches and tighten the strain relief.
17.

18. Connect the tank full or dual tank sensor to the control box using the quick connect twist to connect if the unit was supplied with one.
17. Reinstall the cover on the dual sensor and tighten the two screws. For added safety DGSI reccommends that a silicon-type sealant be ap-plied to the top of both screws.
19. Attach the earth-ground to the 3 inch sched-ule 40 pole or a properly installed grounding rod.
NOTE: This is mandatory for the proper function of the sensor relay.
Close-up of earth ground lug.
18.

Front of control panel
Control box components and function
NOTE: All components can be removed from the enclo-sure by unscrewing them from the back plate. There are no hidden fasteners located behind the mounting plate.
Pressure switch Air compressor
Sensor relayRelaysTimerFuses
Air solenoid valve
Solar controller15 amp max. input
19.

Pressure switch cover(remove nut and cover to adjust)
Air solenoid valve
Pressure switch (without cover)
Turn the nut clockwise to increase the pressure that the com-pressor will shut off at.
NEVER EXCEED 100 PSI
The pressure that the tank will drop to before the compressor will restart is 15 to 20 psi below the shut-off pressure.
20.

Always leave the battery type set to 1.
The battery status gives the operator a general idea of the charge status of the battery
The display changes from battery volts to solar amps (the amps the solar panel is collecting. To convert to watts multiply by 12) then to load amps. You will normally see no load amps displayed unless the compressor is running because the controls are drawing only a few watts. The LED’s to the right of the display indicate the value being displayed.
Push button switch that will turn off the load function of the solar panel controller. This will turn off the compres-sor and all controls.
Solar panel controller:
The logic for the controls are as follows. When the pressure in the tank is low enough, the pressure switch will close. The air com-pressor will then start running to refi ll the tank. At the same time the air solenoid valve will shut the air supply off to the recovery pumps. The air supply will then remain off for the duration that was set on the relay. When the duration has ended the air solenoid valve will open, allowing air to be delivered to the recovery pumps.
The delay time will allow the solar panel time to recharge the bat-tery and will also allow for 24 hour operation of the pump. DGSI suggests that you start with a 60 minute delay and see if you are recovering the amount of product that is recharging the well. Give this initial delay several days of testing prior to adjusting. Only then should it be reduced. DGSI recommends never to set the delay to less than 15 minutes.
Timing delay relay:
NOTE: Do not change A, B, C or D dip switches.
When these dip switches are moved to the right they add up to the sum of the delay (off) time. In the image the delay is set to 63 minutes.
21.

Status Lights:
“Power” LED should always be on.
Will be on when water is in the tank.
Tank fl oat indicator LEDWhen on, fl oat is down, Off when tank is full.
Conductivity LED When On water has been detected in tank.
22.

Chapter 7System Confi guration / Operational LogicThe solar panel generates electricity which is regulated by the solar controller. The solar controller monitors and charges the 12 Volt AGM battery. The solar controller will shut off the electrical power to the compressor and con-trols if the battery’s voltage (stored electrical energy) drops too low. Electrical power will only be restored to the systems controls and air compressor when the solar panel thru the solar controller has recharged the battery.
The systems operational logic and how it operates is as follows.
When the pressure in the air tank falls to the pressure switches low setting (factory set to approximately 75 psi) the pressure switch closes and the compressor will refi ll the air tank to the factory setting of approximately 95 psi.
Note: Never adjust the pressure switch above 100 psi. Setting it above 100 psi will damage the air compressor.
When the pressure switch closes and starts the compressor it also starts the delay timer. The delay timer shuts off the air supply to the air-out until the timer times out. The factory setting for this function is 63 minutes.
Note: Do not decrease the delay time to less than 15 minutes.
After the delay time the air solenoid valve will open, supplying compressed air to the air-out connection. This cycle is repeated 24 hours per day unless one of the following occurs:
1. The solar controller shuts off power to the controls and compressor because the solar panel cannot produceenough power to keep the battery charged. To alleviate this problem, one or more of the following steps mayneed to be be performed.• Increase the delay time to give the solar panel enough time to charge the battery.• Increase the size of the solar panel. Note: the systems solar controller is rated at 15 amps or 180 watts. If a
solar panel rated at more than 180 watts is required, consult the manufacturer for advice.• Increase the number or size of the batteries. Note: The battery may need to be replaced and a weak battery
can cause a system shut-down.2. The product storage tank is full or the cable to the tank sensor has been cut.
• When the product tank is full, the “A” LED on the sensor relay will be off, the power LED will be on and relay#62 will be on.
• If the cable is cut, the status of the LED’s listed above will be the same, however the tank will not be fullenough to lift the tank-full fl oat.
3. Water has been detected by the optional tank conductivity probe.• When water has been detected the “B” LED and the “Power” LED will be on. Either remove the water from
the tank or remove the sensor from the water to re-start the system. Note: The product recovery operatorwill need to determine which skimming system is pumping water and adjust its height or check it for damagethat could result in water being pumped.
• If the cable to the conductivity probe is cut it will not shut off the air supply to the skimmer pumps.
23.
Note: A filter-regulator (provided) must be used between the controller and pump. If no back pressure is present when the controller begins to supply air to the pump, the unit will discontinue the supply phase and begin the delay phase.
Note: At initial start up, back off filter-regularator pressure to zerio psi. After supply cycle begins, increase air to pump to desired pressure.

Chapter 8System TroubleshootingSymptom:The air compressor will not run.
Probable Cause:1. The solar controller has shut off power to the controls and compressor.2. The battery is dead and cannot be charged.3. The fuse in fuse holder #56 is blown.4. The compressor has failed.5. The pressure switch has failed.6. The solar controller has failed.
Corrective Action:1. Increase the delay time to allow the solar panel to fully charge the battery.2. Increase the size or number of solar panels and/or batteries.3. Remove the battery and recharge with a 110 Volt AC charge, and load test. Voltage is not a fool-proof way of
testing the amp hour charge in a battery, only load-testing is. This can be performed at most auto parts storesor can be done with an inexpensive 100 amp load tester.
4. Replace the fuse. If the system continues to blow fuses, look for any loose wires.5. Replace any failed components. All of the components can be easily removed from the aluminum backing plate
by unscrewing the fasteners. The backing plate does not need to be removed from the enclosure to gain accessto any of the components.
6. Replace the pressure switch or dress the contacts with a points fi le that can be purchased at most auto partsretailers.
7. Replace the solar controller.
Symptom:The sensor relay power LED is off.
Probable Cause:1. The fuse to the relay is blown.2. The sensor relay has failed.3. Loose wire connection(s).
Corrective Action:1. Check fuse holder #54 for a blown fuse and replace if necessary.2. Replace the sensor relay if 12 Volt power is verifi ed between terminals 1 and 2 and the relay LED is off.3. Look for loose wiring connections if the fuse is not blown and there is no power between the sensor relays and
terminals 1 and 2.
24.

System Troubleshooting, Cont.Symptom:The air tank is full (at high pressure) but air is not exiting from the air-out port / fi tting.
Probable Cause:1. The solenoid and / or solenoid valve is bad.2. The air valve is shut on the tank.3. The delay timer has failed.4. Relay #61 or #62 has failed.5. The product storage tank is full.6. The optional conductivity probe has detected water.7. The tank sensor relay has failed.8. Loose wire connection(s).
Corrective Action:1. Verify that 12 Volts is being received at the solenoid. If it is, then remove the solenoid valve, disassemble and
clean the internal components. Reassemble and reinstall. If still not functioning properly, replace.2. Open the air valve on the tank.3. Replace the delay timer.4. Replace the #61 and #62 relays.5. Empty the product storage tank.6. Remove the water or raise the conductivity probe.7. Replace the tank sensor relay.8. Check for loose wiring. Consult the wiring diagram for details.
25.

DGSI recommends the following skimming systems to use in conjunction with the SolarNAPL system.
DGSI manufactures two pneumatically-powered skimming systems; the FAP+ and the P.O.D. (Pump On Demand).Both can be used with the DGSI SolarNAPL, however the P.O.D. is fi rst recommended for use with the SolarNAPL for the following reasons:
1. Unlike the FAP+, the P.O.D. skimming system only uses the stored, compressed air when it has collected a volume of the skimmed, free product.
2. When the supply of compressed air has been shut off by the SolarNAPL’s delay timer, the P.O.D. pump con-tinues to collect free product until it is completely full. When the delay timer is timed out and the air supply is returned to the P.O.D. pump, it will immediately pump the recovered productthat is stored in the pump to the product storage tank.
3. Another important feature of the P.O.D. pump that compliments its use with the SolarNAPL is that it can operate at pressures as low as 10 psi. By supplying just enough air pressure to lift the product out of the recovery well and into the product storage tank, the operator maximizes the stored energy of the compressed air that was produced by the SolarNAPL system. This results in more product recovery and less run time for the compres-sor, additionally increasing the life expectancy of the air compressor.
4. The P.O.D. pump can accept wet / liquid water in the air supply without damaging the pump.5. The P.O.D. comes standard with a cycle counter that counts the pump cycle and thus indirectly the volume
of recovered product. This is important on slow-yielding gasoline recovery projects where evaporation of the recovered product may exceed that of recovered product.
If for some reason the P.O.D. skimmer cannot be used in a particular well, i.e. not enough well depth below the product / water interface, then the recommended skimmer is the FAP+ with the adjustable timer.
The FAP+ pump cycles to pump the product to the product storage tank, regardless of the product level in the well. By using the FAP+ adjustable timer, the cycling time can be reduced from 10 - 12 cycles per minute (standard FAP+) to a cycling time as slow as 1 cycle every 2 minutes. This reduction in the cycle rate allows the free product to enter the well and increases the possibility that each dumping cycle would be full of product.
A disadvantage of using the FAP+ skimmer with the SolarNAPL is that the minimum air pressure to operate the pump is 60 psi. This pressure would lift free product to over 120 vertical feet and will consume more volume of com-pressed air than needed in any well that is less than 120 feet deep.
The FAP+ pump also requires the use of a coalescing fi lter/regulator to remove moisture from the air supply because the on-off cycle timer uses air logic.
Chapter 9Recommended Components
26.