simplex plus professional series and bevel …...bevel cutting heads, logan screwdriver and 1 five...
TRANSCRIPT
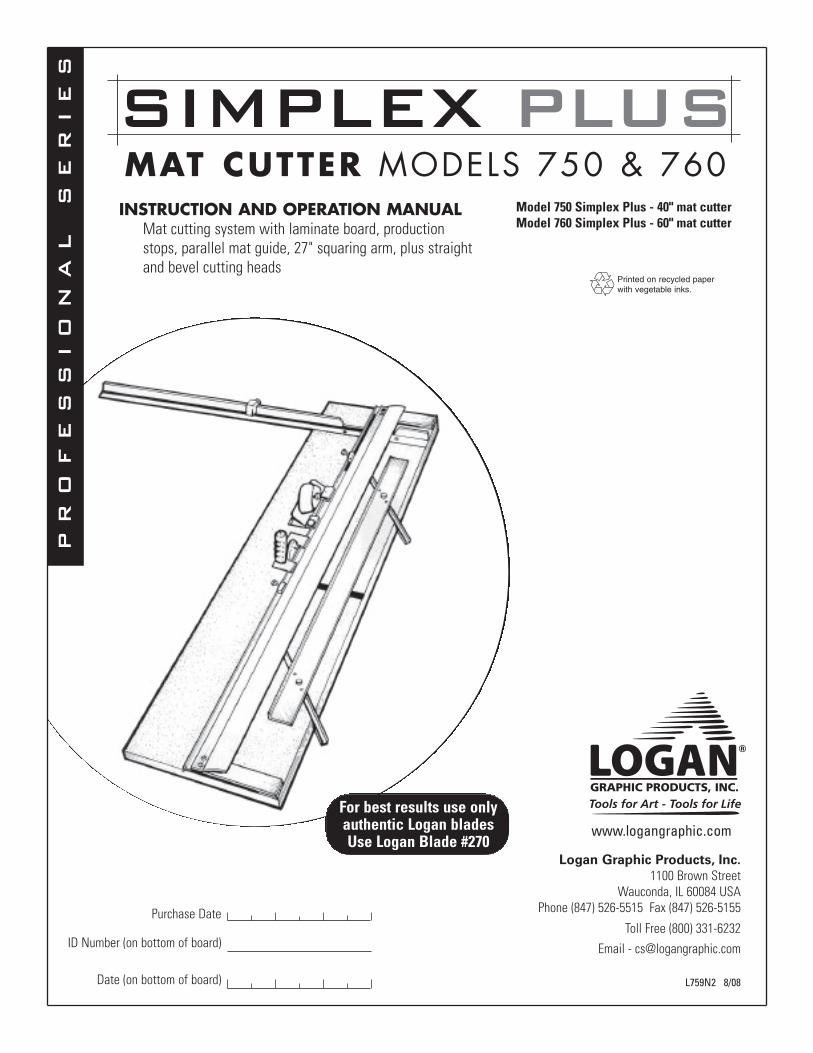
SIMPLEX PLUSMAT CUTTER MODELS 750 & 760
www.logangraphic.com
Purchase Date
ID Number (on bottom of board)
Date (on bottom of board)
INSTRUCTION AND OPERATION MANUALMat cutting system with laminate board, productionstops, parallel mat guide, 27" squaring arm, plus straightand bevel cutting heads
PR
OF
ES
SI
ON
AL
SE
RI
ES
For best results use onlyauthentic Logan bladesUse Logan Blade #270
Logan Graphic Products, Inc.
1100 Brown StreetWauconda, IL 60084 USA
Phone (847) 526-5515 Fax (847) 526-5155
Toll Free (800) 331-6232
L759N2 8/08
Email - [email protected]
Model 750 Simplex Plus - 40" mat cutterModel 760 Simplex Plus - 60" mat cutter
Printed on recycled paperwith vegetable inks.

SIMPLEX PLUS M AT C U T T E R M O D E L S 7 5 0 & 7 6 0
Congratulations on your purchase of theLogan Simplex Plus Mat Cutter. TheSimplex Plus is a well designed mat cutterwith professional features to produceprofessional results. Features likeproduction stops, parallel mat guide inaluminum channels and anti-crawl pinmake the Simplex Plus an efficient yet costeffective tool for artists, photographers andcrafters alike. This instruction manual iswritten to acquaint you thoroughly with thisproduct. Please take some time tofamiliarize yourself with it before cutting.You will find that the time taken will bewell worth it and you will be cutting qualitymats in no time.
Parts schematic available online at www.logangraphic.com
INTRODUCTION: TABLE OF CONTENTS:
Warranty
Logan Graphic Products, Inc. (“Logan”) warrants the 750 SIMPLEX PLUS to be free from defects in parts andworkmanship for a period of two years from the date of original purchase. Logan warrants that it will either repair orreplace, in its sole discretion, any necessary replacement parts found to be defective. Should the product need to bereturned to Logan for repair or replacement parts, authorization for any return must come from Logan in writing. Costsof returning the product to Logan, including insurances, shall be borne by the purchaser. Logan shall not be liable forany damages or losses, incidental or consequential, direct or indirect, arising from the use of this product. Thiswarranty extends only to the original purchaser and is not assignable or transferable. This warranty is in lieu of allother warranties, expressed or implied.
Introduction 1
Warranty 1
Product Description 2
Identification Of Machine Components 2
Orientation
A. Unpacking/Check of Contents 3
B. Assembly 3
C. Blade Installation 4
Operation
A. Straight Cutting a Board To Size 4
B. Cutting a Beveled Opening Using Marked Lines 5
C. Cutting a Beveled Opening Using One Production Stop 6
D. Cutting a Beveled Opening Using Two Production Stops 7
E. Cutting a Straight Opening 7
Adjustments & Maintenance
A. Blade Depth Adjustment 8
B. Re-Parallel The Mat Guide 8
C. Re-Square the Squaring Arm 8
D. Helpful Hints 9
Trouble Shooting 9
Creative Matting Guide
A. Double Mat 10
B. Off-Set Corner Mat 10
C. Inlay Mat 10
Logan Graphic Products Inc. , 1100 Brown Street , Wauconda, IL 60084 Tol l Free 1 800 331 6232 www. logangraphic .com
1

SIMPLEX PLUS M AT C U T T E R M O D E L S 7 5 0 & 7 6 0
750 Simplex Plus - 40” Laminated Cutting Board with Mat Guide in aluminum channels, two guide rail stops, 27” Squaring Arm, Squaring Arm Stop, Slip Sheet, Straight andBevel Cutting Heads, Logan Screwdriver and 1 five pack of Logan #270 blades.
760 Simplex Plus - 60” Laminated Cutting Board with Mat Guide in aluminum channels, two guide rail stops, 27” Squaring Arm, Squaring Arm Stop, Slip Sheet, Straight andBevel Cutting Heads, Logan Screwdriver and 1 five pack of Logan #270 blades.
IDENTIFICATION OF MACHINE COMPONENTS
Simplex Plus Cutting Board
Guide Rail - Used to guide cutting heads while in use.
Mat Guide - Used to set the border width of a mat and keep the mat inposition.
Squaring Arm - 27” board mounted 90 degree bar used to hold mats squarewhen cutting and as stop when bevel cutting.
Cutting Board - Laminated surface base board of machine.
Production Stops - Used when production cutting to speed up the process ofmat cutting.
Slip Sheet - Scrap piece of mat board placed underneath the mat being cut.Produces a cleaner cut and longer blade life.
Squaring Arm Stop - Used when downsizing mat board.
702 Bevel Cutting Head
Start and Stop Indicator - Line which shows where to begin and end cut.
Retaining Screw - Screw which keeps blade safely in slot when not in use.
Anti-Crawl Pin - Prevents cutting head from creeping forward during initial penetration of bladeinto mat.
Nylon Guides - Guides which allow Bevel Cutting Head to hook ontoGuide Rail.
701 Straight Cutting Head
Blade Holder - Block which holds blade in place while cutting. Has threeseparate depth settings.
Blade Cover - Covers blade on Blade Holder.
Blade Screw - Holds blade in place inside Blade Holder.
Guide Rail
Mat Guide
Cutting Board
Nylon Guides
Start and Stop Indicator
Retaining Screw
Anti-Crawl Pin
Blade Holder
Blade Cover
Blade Screw
PRODUCT DESCRIPTION
ProductionStops
27” Squaring Arm
Slip Sheet
Squaring Arm Stop
Logan Graphic Products Inc. , 1100 Brown Street , Wauconda, IL 60084 Tol l Free 1 800 331 6232 www. logangraphic .com
2

Logan Graphic Products Inc. , 1100 Brown Street , Wauconda, IL 60084 Tol l Free 1 800 331 6232 www. logangraphic .com
3
SIMPLEX PLUS M AT C U T T E R M O D E L S 7 5 0 & 7 6 0
A. UNPACKING/CHECK OF CONTENTS
Items packed loose in the box include:1. Straight Cutting Head2. Bevel Cutting Head3. 27” Squaring Arm4. Mat Guide5. Aluminum Guide Channels (2)6. Channel Screws (4)7. Guide Rail Stops (2)8. Squaring Arm Stop (1)9. Logan Screwdriver10. Five Pack of #270 blades11. #750 Base Board (not shown)12. Slip Sheet (not shown)13. Instruction Manual (not shown)
If there are any missing or damaged items please call customer serviceimmediately at 1-800-331-6232
ORIENTATION
The procedure detailed in the followinginstructions refer to the right and left side, andthe top and bottom of the machine as shown.Fig. 1
B. ASSEMBLY
Mat Guide
1. Press each aluminum mat guide channel into boardslots with rounded end towards the Guide Rail.Insert the four small guide rail channel screws fromthe UNDERSIDE of the board and tighten. Fig. 3
2. To install the Mat Guide loosen each knob three fullturns. Hold the mat guide at either end and evenlydrop the Mat Guide into the aluminum channels andtighten the knobs.
3. To loosen, turn knobs counterclockwise and slide.Fig. 4
Fig. 1
Fig. 3 Fig. 4
Top
RightLeft
BottomFig. 2
1.
2.
3. 4.
5.
6.
7.8.
9.
10.
Squaring Arm
Use the line-up tool found in the squaring arm slot to line upthe slot in the board with the slot in the squaring arm. Use thetwo larger machine screws provided to tighten the squaringarm into the board slot. These machine screws are foundscrewed into the board for shipping purposes. Fig. 4
Slip Sheet
A Slip Sheet is a piece of scrap matboard placed underneaththe mat to be cut when bevel cutting. The Slip Sheet must beat least as long as the mat being cut and at least 4” wide. Thisprotects the blades while cutting and produces a better cut.Fig. 5NOTE: It is important not to continue to cut in the samespot of the Slip Sheet as this can cause curves in thecut. Replace Slip Sheet as necessary.
Fig. 5Line-Up Tool
Fig. 4
Mat Board Slip Sheet

Logan Graphic Products Inc. , 1100 Brown Street , Wauconda, IL 60084 Tol l Free 1 800 331 6232 www. logangraphic .com
4
SIMPLEX PLUS M AT C U T T E R M O D E L S 7 5 0 & 7 6 0
C. BLADE INSTALLATION
701 Straight Cutting Head
Remove the Blade Screw and the Blade Cover from the Blade Holder. Place one #270 blade, sharp edgedown, in the slot on the Blade Holder and line up the hole in the blade with the desired depth setting.Replace the Blade Cover and Blade Screw. Fig. 4
The #701 has three depth settings:
Top setting - safety settingMiddle setting - standard thickness mat board (4 ply)Bottom setting - 3/16” foamboard
NOTE: Always have the three holes on the Blade Cover lined up exactly with the three holeson the Blade Holder before replacing the Blade Screw.
702 Bevel Cutting Head
NOTE: The following must be done before loosening blade knob.
Loosen the Retaining Screw found on the back side of the Cutting Head until flush with the surface ofthe base. This allows the Blade Holder to tilt back all the way for blade change. Slide one #270 bladeall the way in the back of the Blade Holder as shown. Fig. 5
NOTE: The hole in the blade is not designed to line up with the Blade Screw.
Re-tighten the Blade Knob and tilt the Blade Holder down allowing the tip of the blade to enter theBlade Slot. Retighten the Retaining Screw.
Fig. 4
Fig. 5 Blade Slot
OPERATION
A. STRAIGHT CUTTING A BOARDTO SIZE
1. Remove the Mat Guide and Slip Sheet before straight cutting.
2. Set the Squaring Arm Stop at the number on the scale which you want your mat to be cutdown to.
3. Lift the Guide Rail and place a sheet of matboard against the Squaring Arm and slide the matboard to the right against the stop. Make sure that it is squarely against the Squaring Arm.
4. Hook the Straight Cutting Head onto the Guide Rail past the end of the board to be cut. Graspthe handle as shown in the picture and pull the Straight Cutting head towards you. Keepconstant downward pressure on the Straight Cutting Head and the Guide Rail as you makeyour cut. Fig. 1
CAUTION: Be careful to control the Straight Cutting Head as it breaks through the end of thematboard as it will tend to “jump” towards you.
Fig. 1
SquaringArm Stop

SIMPLEX PLUS M AT C U T T E R M O D E L S 7 5 0 & 7 6 0
Logan Graphic Products Inc. , 1100 Brown Street , Wauconda, IL 60084 Tol l Free 1 800 331 6232 www. logangraphic .com
5
B. CUTTING A BEVELED OPENING USING MARKED LINES
EXAMPLE: Cutting a mat with a 2” border.
1. To re-install the Mat Guide, loosen the black knobs three turns and with the raised edgetowards the Guide Rail, line up the Mat Guide with the parallel slots. Hold the Mat Guide ateither end and evenly drop the Mat Guide into the aluminum channels and then tighten theblack knobs.
2. Set the Mat Guide to the desired border width. For example for a 2” border align the front ofthe Mat Guide at the 2” mark and tighten the black knobs. Fig. 2
3. Make sure the Slip Sheet is in place before bevel cutting. You must use a Slip Sheet. Thestraight cut slot underneath the Guide Rail is used for straight cutting only.
4. Place the mat color side down under the Guide Rail, against the Mat Guide and down againstthe Squaring Arm. Fig. 3
5. Using a pencil, draw a line down the full length of the back of the matboard. Repeat this forthe remaining three sides. Fig. 4
6. Hook the 702 Bevel Cutter on to the Guide Rail.
7. Position the cutter so that the Start and Stop Indicator line lines up with the marked lineclosest to the top of the machine. Fig. 5
8. With the left hand depress the Anti-Crawl Pin and firmly pivot the Blade Holder down into themat. Fig. 5
9. Release the Anti-Crawl Pin and pull the cutting head towards you until the Start and StopIndicator line lines up with the line on the matboard closest to you. DO NOT GO PAST THELINE! Fig. 6
NOTE: It is essential to keep even downward pressure on the Blade Holder as you cut.
10. Rotate the Blade Holder back up to the neutral position, turn the mat 1/4 turn to the right andrepeat steps 7 through 9 for the remaining three sides to finish the mat.
Fig. 2
2”
Fig. 3
Mat Board Slip Sheet
Fig. 4
Fig. 5 Fig. 6

Logan Graphic Products Inc. , 1100 Brown Street , Wauconda, IL 60084 Tol l Free 1 800 331 6232 www. logangraphic .com
6
SIMPLEX PLUS M AT C U T T E R M O D E L S 7 5 0 & 7 6 0
Fig. 2
C. CUTTING A BEVELED OPENING USING ONE PRODUCTION
STOP
EXAMPLE: Cutting a mat with a 2” border.
1. Set the Mat Guide to the desired border width. For example, for a 2”border, align the front of the Mat Guide at the 2” mark and tighten the Black Knobs. Fig. 1
2. Place the mat to be cut into the machine colored side down with theSlip Sheet underneath and lower the guide rail.
3. Install the guide rail stop onto the guide rail and tighten at the 2” mark on the scale. Fig. 2
4. Using a pencil, mark a line along the full length of the mat board using the guide rail as aguide. Fig. 3. Turn the mat 1/4 turn to the right before cutting.
5. Hook the bevel cutting head onto the guide rail and slide it up until the Start and Stopindicator lines up with the marked line closest to the top of the machine.
6. With the left hand, depress the anti-crawl pin and pivot the blade holder to insert the bladeinto the mat. Fig. 4
7. Release the anti-crawl pin and pull the bevel cutting head towards you until it gently contactsthe guide rail stop. Pivot the blade holder up to remove the blade from the mat.
8. Lift the guide rail and turn the mat 1/4 turn to the right.
9. Slide the bevel cutting head up to the cut just made in the mat and line up the start and stopindicator for the next cut. Continue steps 6 through 9 to finish mat.
NOTE: In order for the production stops to be accurate, the blade depth must be set properly.If using the stop produces an overcut or undercut, a blade depth adjustment may be needed.(see page 8) 2”
Fig. 1
2”
Fig. 3
Fig. 4

SIMPLEX PLUS M AT C U T T E R M O D E L S 7 5 0 & 7 6 0
Logan Graphic Products Inc. , 1100 Brown Street , Wauconda, IL 60084 Tol l Free 1 800 331 6232 www. logangraphic .com
7
Fig. 5
D. CUTTING A BEVELED OPENING USINGTWO PRODUCTION
STOPS
EXAMPLE: Cutting a mat with a 2” border.
NOTE: This method should only be used when cutting multiple numbers of mats that have thesame outside and inside dimensions.
1. Set the Mat Guide to the desired border width. For example for a 2”border align the front of the Mat Guide at the 2” mark and tighten the Black Knobs.
2. Place the mat to be cut into the machine colored side down with theSlip Sheet underneath and lower the guide rail.
3. Using a pencil, mark a line along the full length of the mat board using the guide rail as aguide. Fig. 3. Turn the mat 1/4 turn to the right before cutting.
4. Install the first guide rail stop onto the guide rail and slide it past the far end of the matboardbut do not tighten it.
5. Install the second guide rail stop onto the guide rail and tighten at the 2” mark on the guiderail scale.
6. Hook the bevel cutting head onto the guide rail and slide up until the start & stop indicatorlines up with the marked line closest to the top of the machine. Fig. 4
7. Slide the top guide rail stop towards you until it makes contact against the bevel cutting headand tighten. Fig. 5
8. Both guide rail stops are now set to make repeated opposite side cuts on a multiple numberof mats of the same size. To then cut the other sides of the mats, reset the top stop as youdid in step 6. and cut the remaining sides.
E. CUTTING A STRAIGHT OPENING
Example: Cutting a mat with a 2” border
1. Set the Mat Guide to the 2” mark on the scale and retighten the black knobs.
2. Place the mat to be cut into the machine colored side down with the Slip Sheetunderneath and lower the Guide Rail.
3. Using a pencil, mark a line along the full length of the matboard using the Guide Railas a guide. Fig. 1. Repeat this for remaining three sides.
4. Using the Straight Cutting Head, align the top scribe line with the top border lineand press down on the handle until the cutting head sits flat on the matboard so theNylon Guides hook onto the Guide Rail lip. Fig. 2
5. Pull the Straight Cutting Head until the bottom scribe line lines up with the bottomborder line. Repeat until all borders are cut. Fig. 3 Fig. 3Fig. 2
Fig. 1

Logan Graphic Products Inc. , 1100 Brown Street , Wauconda, IL 60084 Tol l Free 1 800 331 6232 www. logangraphic .com
8
SIMPLEX PLUS M AT C U T T E R M O D E L S 7 5 0 & 7 6 0
ADJUSTMENTS & MAINTENANCE
A. BLADE DEPTH ADJUSTMENT- BEVEL CUTTING HEAD
Tools needed: Screwdriver, Ruler
1. Hold the 702 Bevel Cutter upside down in your hand with the blade activated in the cutting position.
2. Looking at the tip of the blade, measure the exposed amount with a ruler at the same angle as the blade. Forstandard thickness mat board (4 ply) only 1/8” of blade should be seen. To adjust, find the screw head recessedbelow the bottom of the surface of the cutting head near where the blade is coming out. Fig. 4
3. Turning the screw to the right (clockwise) will decrease the blade depth, the left (counterclockwise) will increasethe blade depth. Not all matboard requires 1/8”. Thicker matboard will require more. Always have the blade depthset so that the Slip Sheet is scored only slightly. Cutting even half way through the Slip Sheet is entirely too muchblade depth. This extra blade depth allows the blade tip to flex and cause hooks and curves in the cut.
Extra blade depth can also cause the Start and Stop indicator to be incorrect which results in overcuts. This test andadjustment needs to be done periodically as mat board has many variances of thickness and the depth can increaseitself over time with regular use.
1/8”
Blade DepthScrew
Fig. 4
B. RE-PARALLELTHE MAT GUIDE
Tools needed: Phillips Screwdriver, Ruler.
To re-parallel the Mat Guide, first determine that the Mat Guide is out of parallel by doing a parallel test.Parallel Test:
1. Lock the Mat Guide at the 2" mark on the scale. Fig. 12. Place a scrap piece of matboard under the Guide Rail and up against the Mat Guide at the top end of the machine.3. Using a pencil, mark a line across the mat.4. Slide the mat all the way down to the bottom where you are standing keeping the mat against the mat guide but
not against the Squaring Arm.5. Draw a line across the mat.6. The piece of matboard should now appear to only have one single line across it. If the two lines drawn do not line
up with each other, the Mat Guide needs to be re-paralleled.To Re-parallel:
1. Release the Mat Guide.2. Use a Phillips head screwdriver to loosen the screws on either side of the black knobs one turn each. There are
four screws total to be loosened this way.3. Place a metal ruler or suitable straight edge between the Mat Guide and the Guide Rail. Fig. 24. Slide the Mat Guide against the straight edge and the Guide Rail. Make sure both the Mat Guide and the Guide
Rail are making solid contact on both sides of the straight edge.5. Re-tighten the Black Knobs first.6. Then re-tighten the four screws. Do another parallel test to ensure that the Mat Guide is now parallel.
Fig. 1
Fig. 2
Place straight edge here
2”
C. RE-SQUARETHE SQUARING ARM
Tools needed: Screwdriver, Carpenter’s Square.
ATTENTION: It is common for 32” x 40” sheets of mat board to be un-square when bought. Takethis into account before making any adjustments to the Squaring Arm.
Before making any adjustments to the squaring arm, make sure that the machine is truly out of square, notthe mat board, by using the squareness test.
Squareness Test
1. Place the carpenter’s square against the right hand side of the guide rail and down against thesquaring arm. Fig. 1 Look to see if there are any gaps between the framing square and thesquaring arm. If so, the squaring arm needs to be adjusted.
Fig. 1
Place square here

SIMPLEX PLUS M AT C U T T E R M O D E L S 7 5 0 & 7 6 0
Logan Graphic Products Inc. , 1100 Brown Street , Wauconda, IL 60084 Tol l Free 1 800 331 6232 www. logangraphic .com
9
Fig. 2To re-square
1. By looking at where the gap is you can determine which way the squaring arm needs to go inorder to be square again.
2. Remove the squaring arm and locate the three screws inside of the slot.
3. Adjust only two screws A&B. DO NOT ADJUST C. To adjust, you must turn screws A & B inequal but opposite directions. To move the far right end of the squaring arm towards the topend of the machine, turn adjustment screw B inward (clockwise) about a quarter turn andadjustment screw A outward (counter-clockwise) a quarter turn. Fig. 2
4. Re-install the squaring arm and check for square. This is a trial and error method, in somecases more than a quarter turn is needed, in some cases less.
D. HELPFUL HINTS
1. Always store your Simplex Plus Mat Cutter flat. Never stand the Mat Cutter up against a wallfor any period of time. This can cause the Mat Cutter base to bow.
2. If you need to clean the Guide Rail, only use an evaporating solvent (lighter fluid, alcohol)that will leave no residue. Do not lubricate the Guide Rail as the substance will soften theNylon Guides on the cutting heads causing them to bind on the Guide Rail.
3. The Bevel Cutting head has a “spring back” feature installed. This spring action is notintended to pull the blade up out of the mat after a cut. It is a safety device to prevent theblade from dropping down into the blade slot and cutting into a table, your hand, etc. whennot in use.
4. A NOTE ON BLADE LIFE:No two blades may last the same. It is a good idea to install a new blade before starting anew project to insure best cutting results.Note: Use only authentic Logan blades
Problem
Hooks or Curves
Overcut on Top Cut
TROUBLE SHOOTING
Solution
■ Use authentic Logan blades only.■ Blade depth set too deep. (see page 8)■ Blade is dull.■ Blade is catching on previous cut in Slip
Sheet. (see page 4)■ Uneven pressure being applied to Cutting
Head during cut.(see page 6)
■ Cutting Head crawling forward as youinsert the blade. Use Anti-Crawl Pin. (seepage 6)
■ Blade depth set too deep.(see page 8)
■ Stops not set properly.
Problem
Overcut on Bottom Cut
Mat Borders Uneven
Ragged Bevel Cut
Not Cutting Through
Solution
■ Adjust where you start and stop in relation to Start and Stop indicator.
■ Not keeping mat squarely against squaring arm when cutting.■ Mat Guide not parallel. (see page 8)
■ Cutting without a Slip Sheet. (see page 4)■ Slip Sheet is worn out. (see page 4)■ Not changing the blade often enough.
■ Machine not on a level surface. (see page 9)■ Not using a Slip Sheet at least as long as the mat you are cutting.
(see page 4)■ Slip Sheet not as wide as Guide Rail.■ Blade depth set too shallow. (see page 8)■ Uneven pressure being applied to cutting head during cut.
(See page 6)

SIMPLEX PLUS M AT C U T T E R M O D E L S 7 5 0 & 7 6 0
Logan Graphic Products Inc. , 1100 Brown Street , Wauconda, IL 60084 Tol l Free 1 800 331 6232 www. logangraphic .com
10
DOUBLE RECTANGLE MAT
(Example: 8” x 10” with 31/2” x 51/2” opening)
Step 1 Set the Mat Guide to 2” and cut an opening in the mat from the BACK.
Step 2 Keeping the fallout piece in place, run double sided tape around the back of the window border. Do not put tapeon cut line. Also put a small swatch of tape in the center of the fallout.
Step 3 Straight cut a second piece of matboard of desired color to an outside dimension 71/2” x 91/2”.
Step 4 Affix the second mat FACE DOWN to the taped back of the first mat being sure it is centered reasonably well.
Step 5 Set the Mat Guide to 21/4” and cut the second opening. The double fallout will drop from the window and the matwill be finished and perfectly aligned. NOTE: Triple mats can be achieved by repeating the above procedures again.
OFF-SET CORNER MAT
(Example: 8” x 10” with 5” x 7” opening)
Step 1 Set the mat guide at 2” and draw all four lines.
Step 2 Reset the Mat Guide at 11/2” and draw another set of lines.
Step 3 Leaving the Mat Guide at 11/2”, place the mat in the cutter, put on the Bevel Cutting Head and line up the silverindicator line with the bottom pencil line closest to center of the mat. Cut until the silver indicator lines up with thetop pencil line closest to the center of the mat. Using the same procedure, cut all four sides. IMPORTANT: At thispoint the fallout will not drop from the window.
Step 4 Remove the mat and reset the Mat Guide to 2”. Reinsert the mat.
Step 5 Line up the silver indicator line on the Bevel Cutting Head with the drawn pencil line furthest from the center of themat. Cut until the silver indicator line lines up with the line at the top of the mat furthest from the center of the mat.Using the same procedure, cut all four sides. NOTE: Be careful to hold the fallout piece in place as you turn the matfor the last cut.
Double Mat
Off-Set Corner Mat
Inlay Mat
INLAY MAT
(Example: 8” x 10” with 5” x 7” opening)
Step 1 Set the Mat Guide at 2” and cut as per regular instructions.
Step 2 Reset the Mat Guide at 11/2”. Keeping the fallout in place, cut the mat again as per regular instructions. You maykeep the fallout piece in place by taping it on the back.
Step 3 Discard the outer border piece and fallout. Retain the inside border cutout.
Step 4 Leaving the Mat Guide in place at 11/2”, cut a second mat of a different color as per regular procedures.IMPORTANT: The second mat must be of the exact same outside dimension as the first mat.
Step 5 Remove the fallout piece from the second mat and place the inside border cutout from the first mat in the windowopening from the second mat. The two pieces should fit together like a puzzle creating a flush surface across thefront of the mat. Put tape on back to hold it in place.
Detailed Instructions on how to cut more creative style mats.

Logan Graphic Products Inc. , 1100 Brown Street , Wauconda, IL 60084 Tol l Free 1 800 331 6232 www. logangraphic .com
11
SIMPLEX PLUS M AT C U T T E R M O D E L S 7 5 0 & 7 6 0
For more creative ideas in matting, pick up acopy of Logan’s“How To Cut Mats” DVD byVivian C. Kistler, CPF. - Model 237-D
Complete and detailed directions featuring Logan'sPicture Framing Tools System. Learn inside secretsfrom professional framers for creating your owncustom framed art.
Home Picture Framing - Model F245
Also available are 3 different books on matting and framing alsoby Vivian C. Kistler, CPF.
Do It Yourself Picture Framing- Model 241Mat Decoration Book- Model 240Basic Mat Cutting - Model 238
3-Step Oval and Circle Mat Cutter is easy to use, fastand portable. Cuts ovals or circles on the surface of thematboard using a patented 3-step mechanism forgradual increase of blade depth.
Converts from oval to circle cutter with a turn of aknob.
Oval from 31/4 in. x 43/4 in. to 20 in. x 23 in. Circles from41/2 in. to 20 in.
3-Step Oval & Circle Mat Cutter -Model 201
Replacement Blades - Model 324
Simplex V-Groover offers a way to cut surface V-Groovesquickly and accurately with zero overcuts.
Push-Pull action cuts V-Grooves right on the surface of thematboard eliminating any need for trimming or taping.Works entirely with stops.
Simplex V-Groover - Model 703
Replacement Blades - Model 1258
Secure artwork, backing board and glass into hard orsoft wood frames. Spring-loaded action drives both rigidand flexible points. For successful operation, use onlyauthentic Logan points.
Dual-Drive Point Driver - Model F500-1
Replacement Points:
F53 - Flex Point Strip 600 pcs.
F54 - Rigid Point Strip 600 pcs.
F55 - Flex Point Strip 2,500 pcs.
F56 - Rigid Point Strip 2,500 pcs.
See your local Logan Dealer for availability or call at 800/331-6232 for a dealer near you, or please check our 'where to buy'section on Logan's website www.logangraphic.com
Also available from Logan…
Take the guess work out of glass cutting simply by usingthe Model 704 Glass Cutter with the Model 750 and760 Simplex Plus mat cutters. The 704 mounts ontothe cutting rail in the same way as the standard straightand bevel cutting heads supplied with the Simplex Plus,providing quick and easy glass cutting.
Glass Cutter - Model 704