simple upholstery methods - msu libraryarc.lib.montana.edu/msu-extension/objects/ext1-000249.pdf ·...
TRANSCRIPT

i.'3ulletin No. 198 August, 1941
i
I". Simple Upholstery Methods[ MARGARET HUSTON TULLER"I!i,~IiIIi
MON'l'ANA EXTENSION SERVICEBOZEMAN
TABLE OF CONTENTS
Introduction 3
Upholstering a Footstocl with Springs 3Tools Required for Upholstering 4Materials Required for Upholstering 4Steps in Upholstering 8
Placing the Webbing 8Setting and Fastening the Springs 9Tying the Springs 10Covering the Springs 12Arranging the Padding 13
Covering the Padding 13Putting on the Outside Cover 14Attaching the Lining 16
Upholstering a Footstool Without Springs 16
Finishing Footstool Legs and Frame 17
Reconditioning Upholstered Furniture 17Complete Reupholstery 17 .Renewing Webbing 17Replacing Metal Supports 17Retying Springs _ 17Repairing Enclosed Spring Units _ _ _ 18Replacing Worn Outside Upholstery Covering _.._ 18
SlJecial Reupholstering Problems 18
Montana Extension Service in Agriculture and Rome Economics, J. C. Taylor director.Montana State College and Uniterl States Depal,tment of AgriCUlture cooperating.
Distributed in ful.'therance of the Acts of Congress, May 8 and June 30, 1914.5M"".8'41

Simple Upholstery MethodsBy
Margaret Huston Tuller
Home Management Specialist
Almost every home has at least one piece of upholstered furniture which
is neither comfortable nor presentable because of the need of upholstery
l·epairs. Worn coverings, sagging webbing, or "broken springs" have no
place in a well furnished home and can be corrected easily with a knowledge
of simple upholstery methods.
The pl'ofessional upholsterer possessing unusual ability can demand a
high price for his work, not because upholstery supplies are expensive but
rather because hours of hand labor are put into the task of upholstering.
The craft is not too difficult for the average individual to master. As in
any other form of craftwork, the best results in upholstering will be obtained
. by that person who chooses good materials, practices proper methods, and
exel'cises the greatest care in workmanship.
Upholstering a Footstool With Springs
All the fundamental steps in upholstering any piece of furniture, with a
frame deep enough for springs, are included in the making of an upholstered
footstool with springs. The footstool offel'S a splendid means of learning
upholstery principles, It is small enough to be transported easily to a
demonstration meeting, simple enough in -construction to be completed in a
clay's time, inexpensive, and a welcome addition to the comfort of the home,

4 MONTANA EXTENSION SERVICE
'rools Required for Upholstering
Strong Shears
Hammer
Tack Puller
Large-eyed Darning Needle,Mattress Needle, or StraightUpholstery Needle.
Curved Upholstery Needle
PliersFig. 1
Webbing Stretcher. The webbing stretcher may be made from a piece
of wood *" x 3 Ih" X 7", prefel'ably with the sides of the block curved in
slightly to make it easy to grasp in the hand. Five or six 8-penny nails are
driven into one end of the block, the heads are cut off, and the ends of the
nails are filed to make sharp teeth about % inch long. The other end of the
~tl'etcher is covered with rough leather, felt, or old velvet to prevent the
stretcher from slipping and to keep it from marring the side of the frame,
in case the wood is to be finished.
Materials Required for Upholstering
A
Fig. 2
B
blocks of wood not more than 1 inc',h
on a liide (Fig. 2 A), or with metal cornel' plates (Fig. 2 B).
Footstool Frame. The outside measurements of the frame should be 18"
long, 12/1 wide, and 3" deep. The
frame may be made of white pine
lumber, 1%" thick, to hold the larg'e
number of tacks which will be driven
into the edges of the frame and to
provide adequate support for the foot·
stool legs. The inside corners of the
frame should be reinforced with small

SIMPLE UPHOLSTERY METHODS 5
Legs. Turned legs, 6 to 8 inches in height, may be pl'ocured fromcompanies dealing in upholstery materials or may be made locally, Theygive a professional appearance to the finished footstool. As they are gluedand screwed in place when the stool is ready for the outside cover, theiruse makes easier the handling of the frame during the process of upholstering. Square legs, tapered slightly toward the bottom and also 6 -to 8inches high, may be built into the frame, a continuation of the inside portionof each leg extending into the corner and taking the place of the frame reinforcement mentioned in the paragraph on the footstool frame.
Screws. Eight screws at least :lh inch longer than the holes in thelegs are needed for attaching legs to frame.
Taeks. Upholsterer's tacks in the follewing sizes are used:3 ounce (small for muslin and for outside cover);8 ounce (medium for webbing and burlap);12 ounce (large for spring twine);Gimp tacks or large-headed finishing tacks.
'Vebbing. Two and one-fourth yards of 31h-inch webbing are requiredfor one footstool. The quality of the webbing selected affects greatly thedurability of the finished product. Webbing made of good material andrlosely woven will support the weight to which it is subjected. Poor qualitywebbing (made of jute, loosely woven, and sized to give the appearance ofhetter quality) win be a bad investment both from the standpoint of moneyand of time spent on the upholstering job.
Springs~ Six strong springs, the same size top and bottom, are neededfor the footstool. Springs should be twice the heig'ht of the box in whichthey are to be used, provided the springs are sufficiently strong. Weakersprings should be taller or should be used double. New springs of strongmaterial may be procured at very small cost from upholstery dealers. Oldautomobile seats may yield springs which will serve the purpose very well.Care should be taken to match these springs for size and to stretch themback into shape if any of the coils have been mashed down.
A good test for a spring is to stand it on a flat surface and press downupon it with the palm of the hand. If the two end -coils do not come together,if the coils do not bend sidewise, and if the spI'ing pushes strongly againstthe hand as the pl'essure is released, that spring will wear well in the upholstered article,

6 MONTANA EXTENSION SERVICE
Twine. Two kinds of twine are needed for upholstering:
Flax mattress twine (a medium weight twine of great strength)for sewing springs and padding;
Italian flax twine (heavy weight, strong, smooth twine) for tyingthe springs. The greatest wear in a piece of upholsteredfurniture comes on the spring twine, as it is subjected to stl'ainand to rubbing against the wires every time the piece offurniture is used. It is therefore most advisable that verystrong spring twine be procured. For the sake of the upholsterer's hands, spring twine should be smooth.
Covering for Springs. The springs should be covered with closely wovenburlap, either new material bought by the yard or a burlap bag' in goodcondition. A piece 24" x 30 11 is the correct size for the footstool.
Padding. Two layers of padding are used over the spring covering:
(1) For the :first layer one pound of coarse padding is required.
(a) Curled horsehair is best for the first layer but it is expensive. Often curled hair may be obtained from oldautomobile seats, in which case it should be cleaned. If the
hair is in good condition, it may be cleaned by beating outthe dust and sterilizing in a 3000 oven for one heul'; ifquite dusty and dirty, the hair should be packed veryloosely in a light weight muslin bag, washed in mild soapsuds, rinsed well, and hung in the air to dry.
(b) The next best material is moss.
(c) Least desirable of the acceptable materials is tow.
(d) Excelsior should never be used for padding as it matswithin a short time.
(2) For the second layer of padding a gcod grade of upholsterer'scotton is best. Common cotton wadding or batting may be usedwith fair success. One-half sheet of cotton wadding or battingwill be required for one footsteol.
SIMPLE UPHOLSTERY METHODS 7
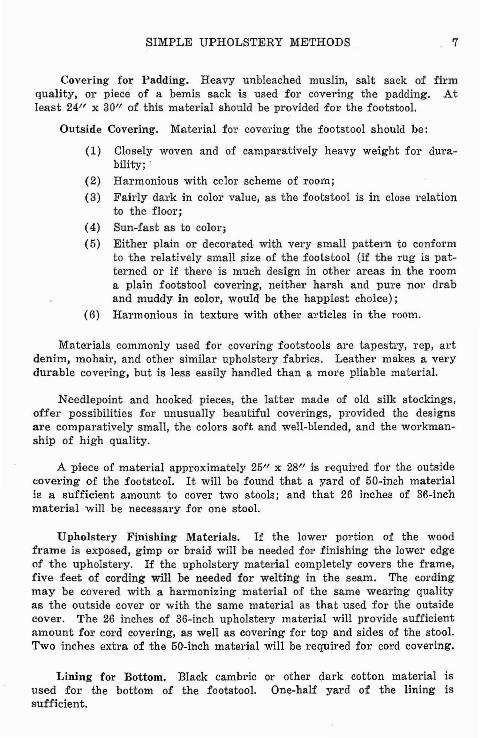
Covering for Padding. Heavy unbleached muslin, salt sack of fh'mquality, or piece of a bemis sack is used for covering the padding. Atleast 24" x 30" of this material should be provided for the footstool.
Outside Covering. Material for covering the footstool should ~e:
(1) Closely woven and of camparatively heavy weight for durability;
(2) HaTmonious with color scheme of Toom;(3) Fairly daTk in color value, as the footstool is in close relation
to the floor;(4) Sun-fast as to color;(5) Either plain or decorated· with very small pattern to conform
to the relatively small size of the footstool (if the rug is patterned or if there is much design in other areas in the rooma plain footstool covering, neither harsh and pure nor draband muddy in coloI', would be the happiest choice);
(6) Harmonious in texture with other articles in the room.
Materials. commonly used for covering footstools are tapestry, rep, artdenim, mohair, and other similar upholstery fabrics. Leather makes a verydurable covering, but is less easily handled than a more pliable material.
Needlepoint and hooked pieces, the latter made of old silk stockings,offer possibilities for unusuaIly beautiful coverings, provided the designsare comparatively smaIl, the colors soft and well-blended, and the workmanship of high quality.
A piece of material approximately 25" x 28" is required for the outsidecovering of the footstcol. It will be found that a yard of 50-inch materiali~ a sufficient amount to cover two stools; and that 26 inches of 36-inchmaterial will be necessary for one stool.
Upholstery Finishing Materials. If the lower portion of the woodframe is exposed, gimp or braid will be needed for finishing the lower edgeof the upholstery. If the upholstery material completely covers the frame,five feet of cording will be needed for welting in the seam. The cordingmay be covered with a harmonizing material of the same wearing qualityas the outside cover or with the same material as that used for the outsidecover. The 26 inches of 36-inch upholstery material will provide sufficientamount for cord covering, as well as covering for top and sides of the stool.Two inches extra of the 50-inch material will be required for cord covering.
Lining for Bottom. Black cambric or other dark cotton material isused for the bottom of the footstool. One-half yard of the lining issufficient.

MONTAt'l'A EXTENSION SERVICE
Steps in Upholstering
Placing the Webbing. Three strips of webbing run crosswise and twolengthwise on the bottom of the footstocl frame. These strips should beso placed that the outer edges of the springs are approximately 2 inches fromthe inside edges of the frame.
Fig. 3
Using the uncut roll of webbing, the centel' crosswise strip is placedfirst. One inch of muteriul is allowed to extend beyond the center of the
frame edge (or rail), the webbingis tacked with four 8-ounce tacksto the center of the rail (Fig. 3 A),and the end of the webbing' is thenturned back over the first row oftacks and secured with five moretacks (Fig. 3 B), The fold of thewebbing should not extend to theouter edge of the fl'ame, as an irregular line on the bottom of thefootstool would result.
",
The webbing stretcher is uesd to pull the webbing tightly across thebottom 'of the frame. The smooth end of the stretcher is placed ag'ainstthe side of the frmne slightly below the rail. The opposite end of thEl'tl'etcher extends ant from the frame in line with the rail. The webbing
is pushed over the nails of the stretch.er and the outer end of the stretcheris pushed down until the webbingis taut (Fig, 4). If the webbing islong enough. for the space but tooshort to be stretched in this manner,a band made of several thicknessesof burlap may be sewed with mattress twine to the end of the webbing
Fig. 4 and removed after the webbing istacked,
When the webbing has been tightly stretched, iour tacks are used tofasten it to the center of the rail. The webbing is cut off 1 inch from theI.ucks. This inch of material is folded ovel' the tacks, and five more tacks
secUl'ely fasten the fold to the rail.
'1'he two remaining crosswise strips are placed one on either side of the('cnter string, the outer edge of each being 1% to 2 inches from the inside edgeof the frame,

SIMPLE UPHOLSTERY METHODS 9
The two lengthwise strips are
laced with basket weave through the
crosswise strips before the loose end
is attached in each 'ease (Fig. 5).
Spacing between lengthwise strips
'should correspond with that between
crosswise strips.
Setting and Fastening the Springs.
each intersection of webbing (Fig. 6).
that end of the spring with the wire
curving ,downward is considered the
top of the spring, The springs are
so placed that the ends of the wire
ceme close to, but not at, points
where the springs will be tied.
Fig. 5
One spring is set in the center of
If the ends of the wire are loose,
Fig. 6
After all the springs are placed, they are sewed to the webbing
with a large-eyed straight needle and a long double strand of flax mattress
twine. Three stitches are used for each spring and al'e so placed that the
sewing can proceed from one spring to the next (Fig. 7). In beginning
the first stitch, the needle is brought
up through the webbing close to one
side of the wire. The thread is pulled
through, leaving a short, loose end
on the bottom, The needle is ex
tended down through the webbing
very close to the opposite side of the Fig. 7
. 'same wire. The thread is again drawn through, making a tight stitch over
the wire. The loose end of thread is then tied with a double knot to the
long end on the under side of the webbing. Each succeeding stitch is made
similarly close to the wire, the thread being drawn tightly to hold the spring
securely in place. Long stitches are made on the bottom side from one
point of fastening to the next.·

10 MONTANA EXTENSION SERVICE
Fig. 8
Fig. 9
Tying' the Springs. Spring twine is used for tying the springs, eachspring being crossed by foul' cords. Measuring over the top centers of thespring's in one row across the frame, the amount of twine corresponding tobetween 11/2 and 2 times the distance is determined and cut off. This lengthmay be remembered mOl'e easily by the sing-song, "Once and a half and alit-tle bit more." Measuring in this manner, three lengths are cut for thecrosswise tying; two lengths, for lengthwise tying; and the foul' diagonalsrunning in one direction. Twice the length of each of the four remainingdiag'onals is cut for the final twine of the spring's in which step there willbe more knots than in the previous steps.
The next procedure is to drive two 12-ounce tacks partially into thecenter of the top rail in line with the middle of each row of springs and farenough alJart to accommodate two thicknesses of spring twine (Fig. 8).
These groups of tacks will be used in
fastening both crosswise and length
wise cords. Similar groups of tacks
arl3 placed for the two ends of each
diagenal at the time of tying' the
diagonal -cords, the positions of the
tacks being determined by the points
on the rail crossed by a piece of twine
laid over the centers of the springs
for each diag·onal.
Beginning' with the middle row of springs running' across the frame,
the end of one of the lengths of twine measured for that row is looped
around the two tacks nearer the
worker. In fastening the twine to the
rail, a bight formed in the twine about
1 inch frem the end is laid between
the two tacks (Fig. 9 A); the bight'
is then folded back over the two
tacks to form a loop around each
tack (Fig'. 9 B); the twine is drawn
tightly al'ound the tacks; and the
tacks are driven in.

SIMPLE UPHOLSTERY METHODS
Proceeding in the directicn away from the
wOl'kel', the spring is pushed down firmly with the
left hand so that the edge of the top coil nearer the
rail is approxi,mately 1 inch lower than the op
posite edge, and the clove hitch is then made to
hold the spring' in place. Following are the stepsin making the clove hitch, or knot:
(1) The spring is held in position with the
palm of the left hand;
(2) With the right hand the free end of the
twine is passed over the edge of the spring
nearer the rail, back under the wire and
drawn out to the left (Fig. 10);
(3) The twine is drawn sufficiently tig'ht to
get the spring in propel' position and it
is then held firmly in place with the left
thumb pressed down on the twine over
the wire and the left index finger held
under the wire;
(4) The long end of the twine is again passed
over the wire to the right of the thumb,
a loop of this twine is left behind the
wire, the long end of the twine is passed
back under the wire and through the loop
(Fig. 11), and the twine is pulled tightly
away from the worker, the thumb and
index finger being released only when the
knot is complete (Fig. 12).
This knot cannot slip and will not pull out if
the twin~ wears through at any point.
11
Fig. 10
Fig. 11
Fig. 12

12 MONTANA EXTENSION SERVICE
Fig. 13
The twine is stl'etched across the top of the spring and a similar knotmade on the opposite side of the coil.
The second spring in the row is pushed into a position correspondingto the one given the first spring. There should be the same spacing' betweenthe springs at the top as at the bottom. This spring is tied in the samemanner as the first spring, The row of two springs is pushed down intoproper shape with the help of an assistant, and the end of the twine is securedby means of the two tacks previously placed in the rail.
In malting the double hight over the tacks after the completion of one
row of tying', the frame is turned so that the end of the cord is towardthe worker. The cord is brought between the two tacks and is passed
:lround the tack on the left. The left-hand tack is driven in. Holding thetwine in the left hand a few inches from the first loop, an outward twistmade by the right hand places a similar loop over the second nail. Thesecond nail is then driven in. The end of the cord is left "as is" within theframe, in order that the knots may be taken out and retied if the contour ofthe tied spring's is not satisfactory.
Before the first tack is driven down over its leop of twine, it isadvisable to check carefully the symmetrical shape of the curve made bythe row of springs jm.t tied and to make adjustments if necessary, Thecontour of this middle l'OW of spring's will serve as a guide for that of allthe other rows in the footstool.
Proceeding in similar manner the springs are tied in the two additionalcrosswise rows, two lengthwise rows, and four diagonals in one direction.The four diagonals in the othel' direction are knotted over all cords as wellas over the wires, including the crossed cords in the center of each spring,
A general rule to remember is thatthe twine is Imotted at every wireand cord which is not to be crossedagain. When the tying is complete,the seat should present a slightly
rounded appearance with every springstanding erect (Fig. 13),
Covering the Spring·s. 'I'he burlap provided for the spring covering islaid over the springs, drawn tightly enough to insure smoothness, and tackeddown (with 8-ounce tacks) just inside the edge of the rail on all sides. Theburlap may be held more securely in place by being sewed to the top coilsof the springs with a curved upholstel'Y needle and flax. mattress twine,

SIMPLE UPHOLSTERY METHODS 13
Fig. 16
Arranging the Padding. The sharp edge of the footstool is padded by~l'l'anging a small, even layer of horsehair, moss or tow on top of the tacks
bolding the burlap cover and turning~ack the edge of burlap on each side~o make an even, tight roll, secured~y tacks driven into the rail close~o the inside of the roll. At the~orners the burlap should be miteredJ,nd the padding adjusted to make~his portion of the roll the same sizeJ,s that on the sides of the frame(Fig. 14). Fig. 14
The top padding is placed next. The coarse padding material, used for~he roll, is fluffed by pulling apart all lumps and is laid in an even layer
)ver the burlap cover, just covering~he outer l'olls (Fig. 15 A). Enough)f this padding should be used tokeep the springs from being felt;hrough the padding. To prevent the;>adding from slipping or settling, itmay be sewed down firmly to the~urlap with a curved upholstery:J.eedle and mattress twine:
A layer of upholster's cotton or3heet wadding is placed over thepadding to insure smoothness and to Fig. 15prevent ends of the coarse padding from working through the outside covel'(Fig. 15 B).
Covering the Padding. The padding is covered with a piece of :£h'mmuslin. It is important to draw this covering quite tightly in order thatthe finished upholstery will be smoothand tailored in appearance (Fig. 16).The muslin is tacked (with 3-ouncetacks) first in the middle of eachside and then in either directiontoward the corners, care being takento have the threads of the muslinI'un straight with the lines of thestool. Tacks for securing this covel'should be placed high enough on theframe to be entirely covered by the

14 MONTANA EXTENSION SERVICE
Fig, 18
outer covering material. As it may be necessary to readjust the muslin
covering, it is advisable to drive the tacks in only part way until the material
is satisfactorily fitted. All fulness is pulled out at the corners to give a
~mooth, rounded contour. The secrets of good fitting are (1) to pull the
muslin with the thread of the material in opposite directions at the same
time, the strongest pull being toward the line of tacking, and (2) to use a
large number of small tacks placed fairly close together.
After the muslin covel' has been smoothly fitted and all the tacks have
been driven in, the muslin should be trimmed evenly below the tacks.
Putting On the Outside Cover. There are two cllstomary methcds offinishing the outside of the upholstered footstool.
(1) If the frame is made of hardwood and the wOI'leer desires to let
the lower part of the frame remain exposed, the wood should· be finished
before the upholstering is begun (see page 17). In that case, the outside
cover should be put on in a similar manner to that used for the muslin
cover, except that the row of tacks
securing the outside cover is just
below the tacks fOl' the muslin ·cover.
A strip of gimp or braid, harmcnizing
in color with the upholstering
material, is then tacked over the raw
edge of the upholstery material with
gimp tacks, placed in fencer ow fash
ion, or with large-headed finishingtacks, evenly and rather closely
Fig. 17 spaced (Fig, 17).
(2) If the frame is to be completely covered with the upholsterymaterial (Fig. 18), the first step is to place the top cover in the same
manner as that described in the preceding paragraph, with the omissionof the gimp or braid. A. piece of cablecord long enough to extend aroundthe frame is covered with a 2-inchwide bias strip of the same materialas the outside cover or of harmonizingmaterial having the same wearingquality as the outside cover. The·cording is placed above the row oftacks securing the top cover and highenough to lie just above the edge of

SIMPLE UPHOLSTERY METHODS 15
the rail. It is then sewed in placewith a curved upholstery needle andstrong thread (Fig. 19). A band ofthe upholstery material, cut 2 incheswider than the width of the frame,is turned with the right side towardthe stool and with one raw edge inline with the edges of the cable cordcovering. After securing this bandwith a very few tacks, a I-inch widestrip of light weight cardboard is placed over the edge of the band, pushedtightly against the lower side of thecording, and tacked at intervals of1 inch slightly below the upper edgeof the cardboard strip. Seams in theband of upholstery material shouldcome at the corners and are best madewith a backhand stitch while thematerial is still wrong side out(Fig. 20). A fairly thin band ofcotton padding, wide enough to extend
l from the top of the cardboard, strip~, to the bottom of the frame, is laid
over the frame; and the band ofr~
upholstery material is turned down over this cottonIi
padding. The lower edge of the upholstery bandt·
should be slit diag'onally out toward the junction off.
the outer corners of the footstool leg's and the lowersr.16' edge of the frame (Fig. 21 A). The material is
folded, under at this point, so that the fold fitsaround the upper edge of the leg without showing
]S, any of the wooden frame; and gimp or large-g
headed finishing tacks are driven in around theer,lUi, corners near the fold of upholstery material atf~ intervals of % inch (Fig. 21 B). The flaps ofnil' material left on the ends of each straight side of2·r the upholstery band are turned under (Fig. 21 C).al<
The bottom edge is drawn under the frame (Fig'.)Dt7ea~ 21 D), and is held in place by tacks at least 1 inch
I from the outer edge of the frame.rOi
ldl~dgi
Fig. 19.
Fig. 20
~~
", .... -
B'
*~
Fig. 21

16 MONTANA EXTENSION SERVICE
Needlepoint and hooked COVel'S present peculial' problems when thewooden frame is to be entirely covered with the material. Perhaps themost satisfactory method of applying Ii needlepoint cover is to bring thematerial in one piece from the top down over the sides, and to miter allfour corners. It is advisable to complete the needlepoint at the corners afterthe canvas has been mitered, in order that the seam will not be heavy andthat the canvas threads may all be covered where the corner is mitered.Because a hooked cover is too heavy to make neat mitered ~orners, the topmay be fitted as recommended for upholstery material and a band, hookedin the same color as the background of the top, may be applied without acord trim. In this case, the band should be tUl'ned down over the nal'l'OWstrip of light weight cardboard to give a straight fold where the band joinsthe top cover.
Attaching the Lining. When all the work of upholstering has beencompleted, the footstool should be turned upside-down and lined with a piece
of black cambric or other similarmaterial, cut the size of the frame,turned under % inch on all edges,and tacked in place (Fig. 22). Thelining gives the footstool a finishedappearance and also prevents particlesof padding from falling out onto thefloor.
Fig. 22
Upholstering a Footstool Without Springs
It is possible to obtain a footstool frame like one for the footstool'.lpholstered with springs, except that the top of the frame is covered witha solid wood foundation for padding. This type of construction gives asatisfactory product from the standpoint of appearance but one which offersfar less comfol't than does the spring construction.
The fil'st step in upholstering a solid construction footstool is to tada piece of burlap over the wooden top, Coarse padding is then arrange<on the burlap and sewed in place. Over the coarse padding is laid a sheeof cotton padding. The muslin -cover and the outside cover, both applielin the same manner as with a spring construction footstool, complete thprocess.
The chair with a padded section on a solid wood bottom is a commOlexample of this type of upholstery.

SIMPLE UPHOLSTERY METHODS
Finishing Footstool Legs and Frome
17
It is more convenient to finish an exposed -footstool frame before anyone of the steps of upholstering is undertaken; legs al'e more easily handledin finishing if the work is done before the legs are attached to the frame.
The best finish for beautifully grained hardwood is the rubbed oil finish,which is inexpensive, easily applied, permanent, and complime,ntary t? .thewood. For any wood of less durable quality and less attractIve grammg,stain adds beauty and shellac 01' varnish gives a protective eovering.Instructions for finishing both types of wood may be found in the MontanaExtension Circular entitled, "Refinishing Furniture."
Reconditioning Upholstered Furniture
The principles of footstool upholstery can be applied with few changesto nearly all the problems of reconditioning upholstered furniture,
Complete Reupholstery. In some cases it is necessary to remOVe nIl upholstery materials from a chair or couch, refinish the frame of the article, andreuphclster the piece with new materials. All tacks should be removed carefully to prevent marring the frame. An excellent practice, also, is toobserve how each step in the original upholstery had been made and thusmake easier the reupholstering of the al'ticle. Ordinarily it is necessary touse smaller tacks and more of them in reupholstering a piece of furniture,as the old nail holes and· the age of the wood have weakened the frmne.
Renewing Webbing. If webbing has sagged or loosened and the l'C
mainder of the upholstery is in good condition, either new webbing may beput on the bottcm of the article or the old webbing restretched withoutdisturbing the upper portion of the upholstery. For replacement of webbing,the piece of furniture is tUl'ned upside-down. The tacks holding the webbingand the mattress twine used for sewing the springs to the webbing are~·emoved. New webbing is stretched on the bottom of the piece in thecustomary manner, except that smaller tacks are placed closer together thanwith a new wood fI'ame. Lastly, the springs are sewed to the webbingfrom the under side by means of a curved needle.
Replacing Metal Supports. Metal strips sometimes take the place ofwebbing to support rows of springs. Such a construction is less comfortablethan the webbing foundation and is more difficult to replace in the eventc support breaks or bends. A new metal strip must be ordered throughan upholsterer, or a furniture dealer, and the springs mounted on the newstrip.

18 MONTANA EXTENSION SERVICE
. Retying Springs. When the spring twine used to tie springs has broken,the spring nearest the break pushes up against the padding, producing bothan uncomfortable and an unsightly upholstery. This fault is erroneouslycalled a "broken spring." To correct the difficulty, the covers and paddingabove the springs should be removed; the length' of twine, where the breakoccurred-, untied; new twine used to tie the row of springs affected; ancl theupholstery materials, previously removed, put back in place.
Repairing Enclosed Spring Units. When springs in couch or chaircushicns have "broken," it is possible to rip the ,cushion apart and l'ese",the small muslin sacks (or make new sacks) which hold the spring's in place.The unit should be repadded and slipped, back, first into its muslin covel'and then into the outside covel'. A piece of heavy cardboard, folded aroundthe top, one side, and the bottom of the padded spring unit and tied tightlywith heavy cerci to compress the unit, will allow the unit to slip easily intothe muslin covel'. The cardboard and cord may be removed before the endof the ,cover is reseamed.
New spring units, ready for padding, may be procured at small cost fromdealers in upholstery supplies.
Replacing Worn Outside Upholstery Covering. If no change is to bemade in the reuphc1stery of an article except the replacement of the outsidecovering, the old cover may be carefully removed and used as a patternfor the new covel', with the additional allowance of liz to 1 inch on alledges, to enable the worker to pull the material tightly and to have sufficientmaterial for tacking and seaming.
If any ,changes are made in the tying or the padding of springs, theshape and size of the article may be slightly altered. In this case, it 'is'advisable to lay the upholstery material on the article itself and cut eachpiece to fit its particular section.
Special Reupholstering Problems
Although the usual methods of reupholstel.'Y are met in the making ofa small foostool with springs, there are occasions when knowledge of moreadvanced upholstery methods is necessal'Y. Such a case may arise in theconstruction of a studio couch or in the transforming of an old-style chairt.o one of modern lines and greater comfort. Two excellent references forinformation on the application of special upholstery methods are:
Stephenson, John W., Modern Furniture Upholstering.Published by Clifford &- Lawton, New York.
Wright, Florence E., Old Furniture Restored.Published by The Farmer's Wife, Saint Paul, Minnesota.