setting up the virtual environment for coldfusion summit · setting up the virtual environment for...
TRANSCRIPT

Setting up the Virtual Environment for ColdFusion Summit
In this document Setting up the Virtual Environment for ColdFusion Summit ......................................................................... 1
Pre-requisites ............................................................................................................................................. 1
Downloading the Virtual Environment ..................................................................................................... 1
Downloading VirtualBox ........................................................................................................................... 1
Installing VirtualBox in Windows OS ......................................................................................................... 2
Importing the CFSummit workshop environment into VirtualBox ........................................................... 6
What does the OVA contain ...................................................................................................................... 9
Starting the ColdFusion Server ................................................................................................................ 10
Starting the ColdFusion API Manager ..................................................................................................... 11
Known issues while importing the virtual environment ......................................................................... 12
Pre-requisites • Hard disk - at least 15 GB available. • Memory – 8 GB RAM, out of which at least 4 GB must be free.
Downloading the Virtual Environment Download the virtual image that is pre-installed with all the conference prerequisites from the location https://s3.amazonaws.com/cfsummit2016-v3/cfsummit2016-v3.ova. The size is ~3.0 GB.
Checksum: aedfcf842fdf6d50c45e7e696b09e819
Downloading VirtualBox Navigate to https://www.virtualbox.org/wiki/Downloads and download the latest stable release of VirtualBox according to your Operating System. We recommend downloading version 5.1.6.

Installing VirtualBox in Windows OS Browse to the location where you had downloaded the VirtualBox installer. Double-click to start the installation.
1. Click Next.
2. Click Next.

3. Select or uncheck items and click Next.

4. Click Yes in the Network Interfaces warning wizard.
5. To start the installation of VirtualBox, click Install.
6. On the Windows UAC screen, click Yes.
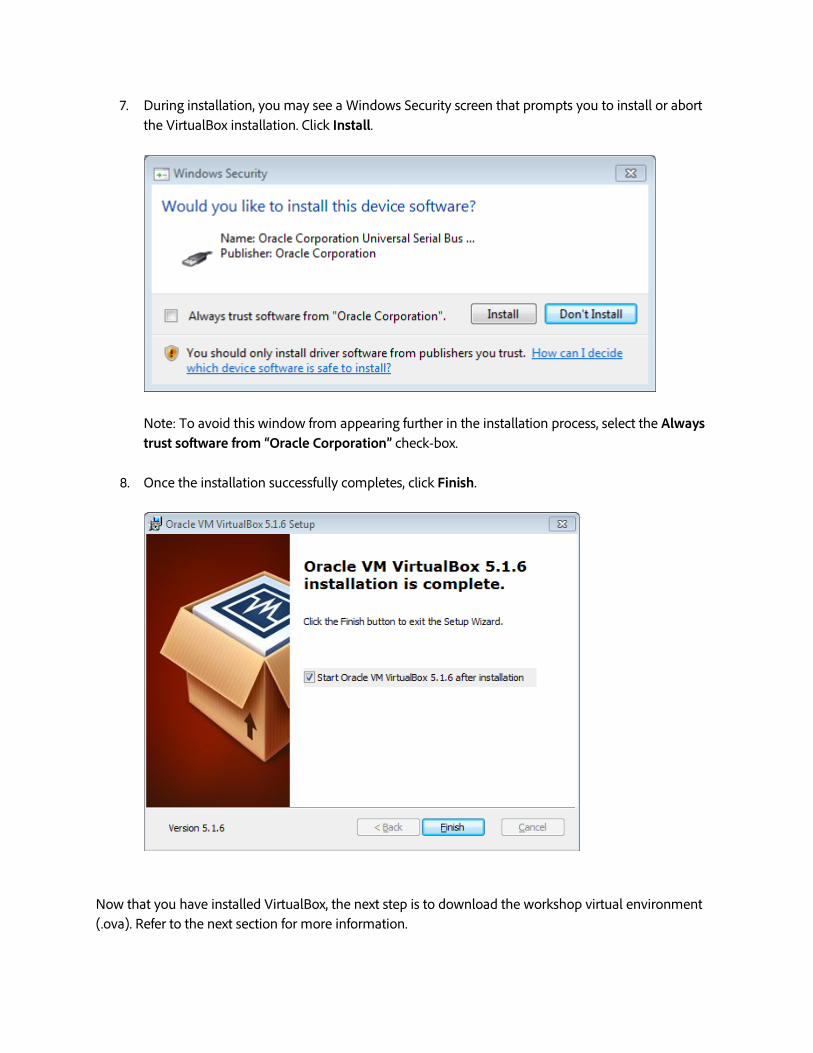
7. During installation, you may see a Windows Security screen that prompts you to install or abort the VirtualBox installation. Click Install.
Note: To avoid this window from appearing further in the installation process, select the Always trust software from “Oracle Corporation” check-box.
8. Once the installation successfully completes, click Finish.
Now that you have installed VirtualBox, the next step is to download the workshop virtual environment (.ova). Refer to the next section for more information.
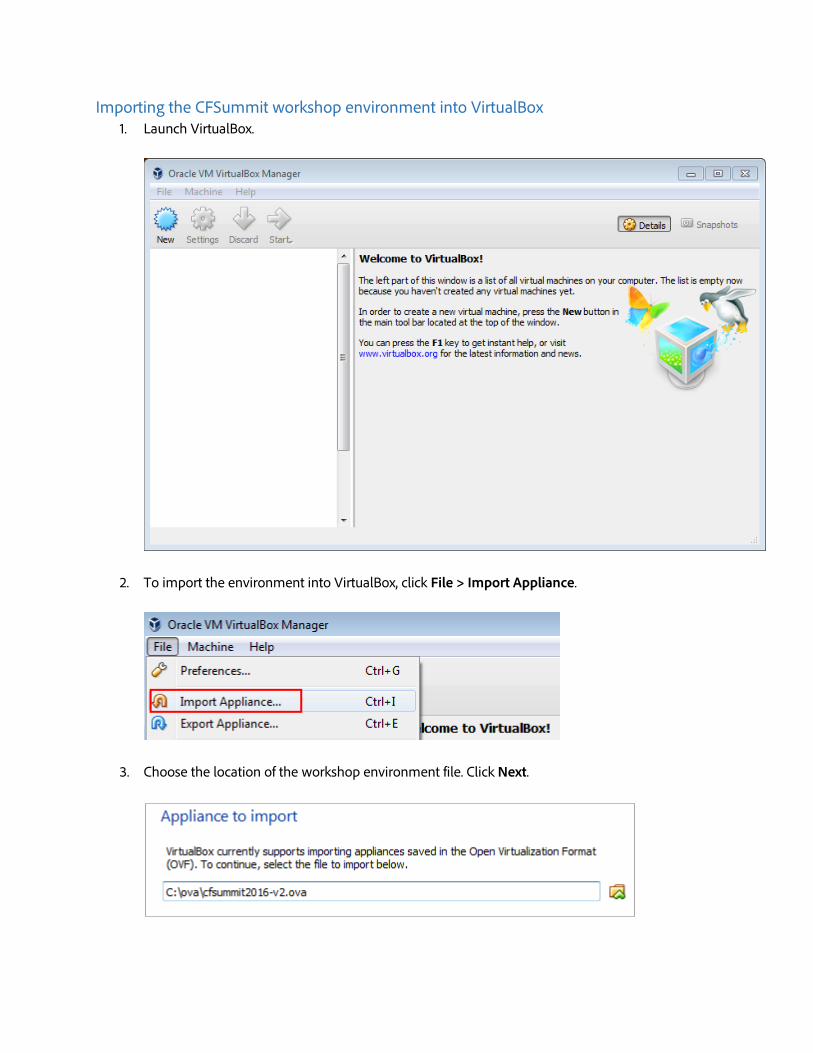
Importing the CFSummit workshop environment into VirtualBox 1. Launch VirtualBox.
2. To import the environment into VirtualBox, click File > Import Appliance.
3. Choose the location of the workshop environment file. Click Next.

4. VirtualBox now shows the settings of the VM. Enable the option Reinitialize the MAC address of all network cards.
5. To start importing the environment, click Import. 6. Once the import process completes, choose the virtual machine and click Start.

Once the Ubuntu OS loads, if you are logging in for the first time, you will not see the prompt to enter your password.
However, the following prompt appears if you log in to the OS after session idle time or a logout. In such cases, log in to the environment using the following credentials:
• User name: cfuser • Password: cfuser

What does the OVA contain For the CFSummit workshop, we have pre-installed the following:
1. ColdFusion (2016 release) a. User name: admin b. Password: admin
2. ColdFusion Builder (2016 release) 3. ColdFusion API Manager
a. User name for API Manager Administrator portal: admin b. Password: admin
4. MySQL Server a. User name: root b. Password: password
5. Chrome and Firefox browser 6. Postman REST client 7. Notes.txt
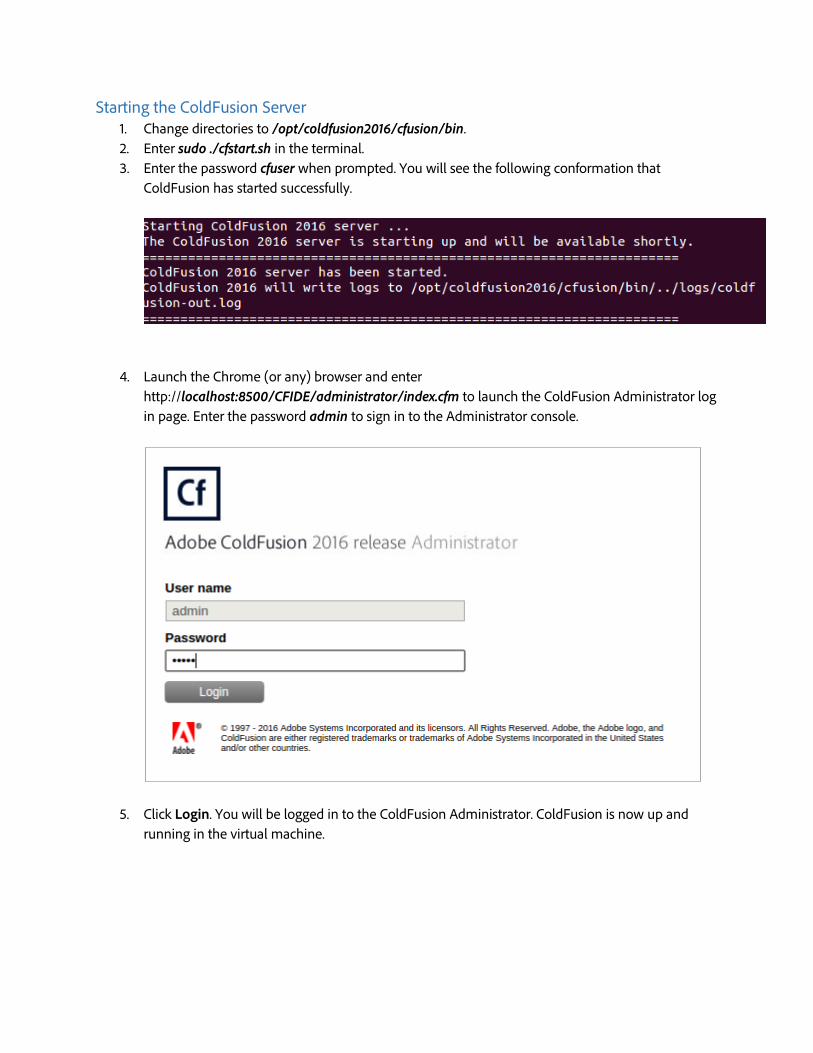
Starting the ColdFusion Server 1. Change directories to /opt/coldfusion2016/cfusion/bin. 2. Enter sudo ./cfstart.sh in the terminal. 3. Enter the password cfuser when prompted. You will see the following conformation that
ColdFusion has started successfully.
4. Launch the Chrome (or any) browser and enter http://localhost:8500/CFIDE/administrator/index.cfm to launch the ColdFusion Administrator log in page. Enter the password admin to sign in to the Administrator console.
5. Click Login. You will be logged in to the ColdFusion Administrator. ColdFusion is now up and running in the virtual machine.
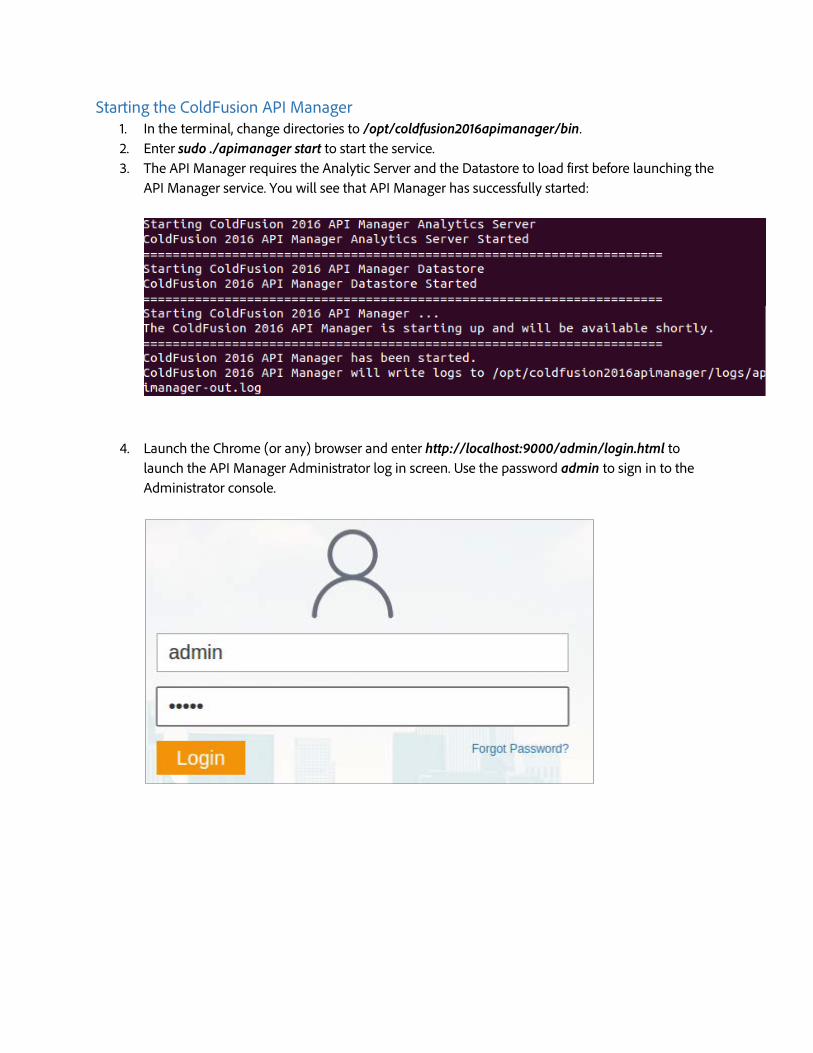
Starting the ColdFusion API Manager 1. In the terminal, change directories to /opt/coldfusion2016apimanager/bin. 2. Enter sudo ./apimanager start to start the service. 3. The API Manager requires the Analytic Server and the Datastore to load first before launching the
API Manager service. You will see that API Manager has successfully started:
4. Launch the Chrome (or any) browser and enter http://localhost:9000/admin/login.html to launch the API Manager Administrator log in screen. Use the password admin to sign in to the Administrator console.

Known issues while importing the virtual environment 1. When starting the virtual machine, you may run see an error message related to virtualization.
If you see this error message, perform the following steps:
1. Restart the machine. 2. Go to the boot menu. 3. Go to the security tab. 4. Enable both the virtualization options in the menu. 5. Press F10 to save and exit.

2. When starting the virtual machine, you may also encounter the following popup:
If you see this error message, perform the following steps:
1. Restart the machine. 2. Go to the boot menu. 3. Go to the security tab. 4. Enable both the virtualization options in the menu. 5. Press F10 to save and exit.
If you encounter any issues in installing the VM or loading the environment, please contact Nimit Sharma ([email protected]).