setting up opencv for use in an ubuntu environment · setting up opencv for use in an ubuntu...
TRANSCRIPT

1
Setting Up OpenCV for Use in an Ubuntu
Environment
Jeremy Martin
11/8/2013
Abstract OpenCV is an open source package to aid in image processing with real-time
computer vision. It contains plenty of functions including: motion tracking, gesture
recognition, segmentation, object identification, and many others. In order to get started
with the package, many other libraries are required for full use and compilation of
programs. This document will provide you with all steps leading up to your own
experimentation of coding with OpenCV

2
Table of Contents
Abstract........................................................................................... 1
Useful Ubuntu Terminal Commands........................................... 3 Sudo............................................................................................................. 3
Apt-get ......................................................................................................... 3
Required Packages for OpenCV .................................................. 3 GCC............................................................................................................. 3
CMake ......................................................................................................... 5
Git ................................................................................................................ 6
GTK+........................................................................................................... 7
Pkg-config ................................................................................................... 8
Python & Numpy......................................................................................... 9
FFmpeg........................................................................................................ 9
Setting up OpenCV........................................................................ 9 Creating a Stable OpenCV Folder............................................................... 9
Building OpenCV...................................................................................... 10
Conclusion .................................................................................... 11
References ..................................................................................... 12
3
Useful Ubuntu Terminal Commands
Sudo
In Ubuntu, the sudo command (substitute user do) is a command used for
privilege authorization. With the installation of many different packages, this command is
critical if authorization is an issue. Sudo allows for programs to be run with the priveleges
of a superuser. The only input required is a user password instead of the root password.
Apt-get
As with all computer science, installing packages should be clean and simple. The
apt-get (advanced packaging tool) command allows for clean and simple installations of
packages. Initially, users had to unzip and compile .tar.gz files manually to use a given
program. Because users wanted a faster approach to this method, apt was created. By
using apt-get install <package_name>, many packages can be easily installed and
monitored. With the simple commands apt-get update and apt-get upgrade, apt will make
sure your source list is up to date, and that all installed packages are at their latest stable
release.
Required Packages for OpenCV
GCC
The first package required for OpenCV is GCC. Luckily, GCC is included with
the build-essential package. Build-essential will install all packages needed to compile a
Debian package. All packages currently included within build-essential can be found in
the Debian Policy Manual (www.debian.org/doc/debian-policy/).
What is a Debian package? From the Debian GNU/Linux FAQ Chapter 7:
Packages generally contain all of the files necessary to implement a set of related
commands or features. There are two types of Debian packages:
• Binary packages, which contain executables, configuration files, man/info pages,
copyright information, and other documentation. These packages are distributed

4
in a Debian-specific archive format (see What is the format of a Debian binary
package?, Section 7.2); they are usually distinguished by having a '.deb' file
extension. Binary packages can be unpacked using the Debian utility dpkg
(possibly via a frontend like aptitude); details are given in its manual page.
• Source packages, which consist of a .dsc file describing the source package
(including the names of the following files), a .orig.tar.gz file that contains
the original unmodified source in gzip-compressed tar format and usually a
.diff.gz file that contains the Debian-specific changes to the original source.
The utility dpkg-source packs and unpacks Debian source archives; details are
provided in its manual page. (The program apt-get can get used a frontend for
dpkg-source.)
Running the following line of code will install all essential packages for Debian
compilation, including GCC:
The package GCC is the GNU Compiler Collection. It is used to generate executables
that can be used on many different operating systems. Thanks to this package, the
software developed within OpenCV can be used cross-platform very easily.

5
CMake
CMake (cross-platform make) will manage the building of software. Although we
will be using it specifically for Linux, the cross-platform compatibility makes it a very
versatile piece of software. Examples of the different makefiles and workspaces it
simulates are given in figure 1. With the ability to support programs made from many
directories and multiple libraries, this is a critical piece of OpenCV. With massive
libraries filled with plenty of different codes and programs, it can be very difficult to
manage without a dedicated builder. In order to incorporate CMake, a CMakeLists.txt file
must be created in each source directory and used when compiling programs. A
CMakeLists.txt file will have the following format:
6
The above example was taken from a tutorial project within OpenCV. The DisplayImage
file is in C++ format, and OpenCV is required to use it. An executable is made after
running the following commands:
No matter the operating system, CMake will always give consistent executables. This is
the benefit of a cross-platform make program. Install CMake with the following line of
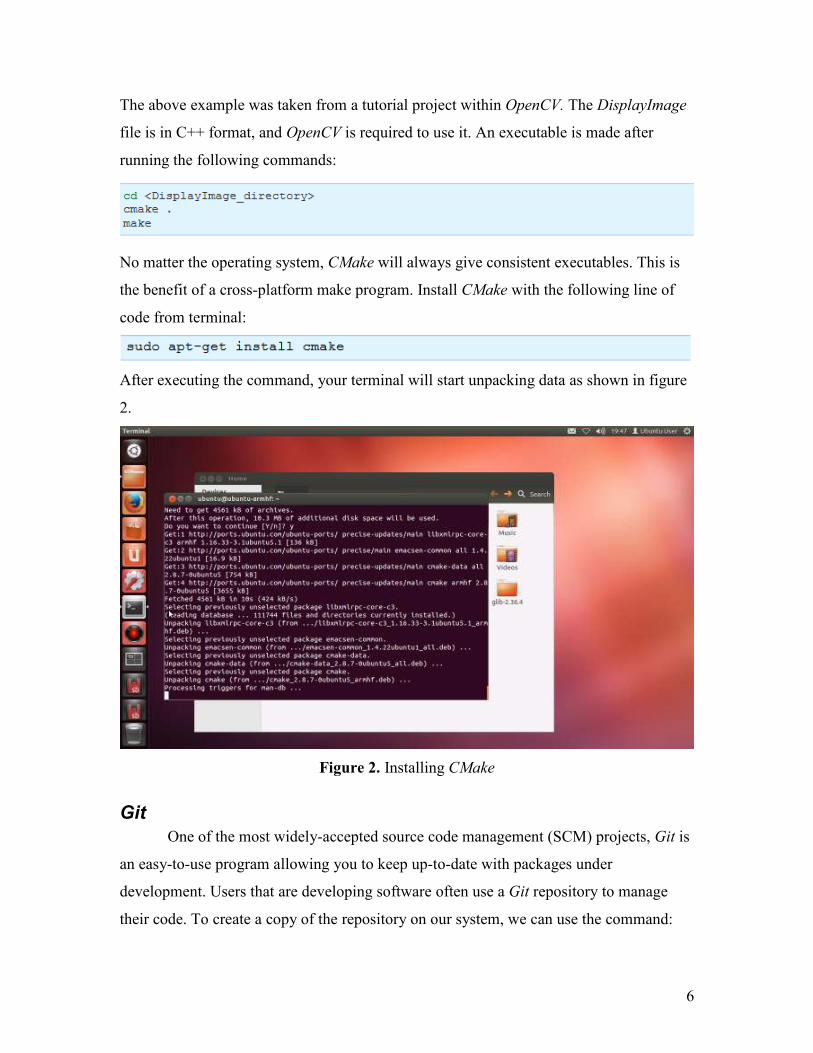
code from terminal:
After executing the command, your terminal will start unpacking data as shown in figure
2.
Figure 2. Installing CMake
Git
One of the most widely-accepted source code management (SCM) projects, Git is
an easy-to-use program allowing you to keep up-to-date with packages under
development. Users that are developing software often use a Git repository to manage
their code. To create a copy of the repository on our system, we can use the command:

7
This will create an identical folder to the online repository. In the case of the OpenCV
repository, we would use the following commands taken from the OpenCV tutorial:
If you would like to learn more on building software packages with Git, more can be read
at: http://git-scm.com/docs/gittutorial. We have only covered copying a repository
because that is what is needed to use the cutting-edge version of OpenCV.
Git can be installed directly from terminal using:
GTK+
GTK+ (GIMP Toolkit) is a package used for developing graphic user interfaces
(GUIs). It is open source, and the cross-platform compatibility and makes its usefulness
on-par with CMake. Creating GUIs is another expansive topic, and will not be covered in
this document. GTK+ can be installed with the terminal using the command:
Once executed, terminal will start unpacking and installing as shown in figure 3.

8
Figure 3. Installing GTK+
Pkg-config
Pkg-config aids in the insertion of compiler options on a command line. A .pc file
can be created that holds all the library data for a program being compiled. An example
of a .pc file for libpng taken from Wikipedia:
Then to use pkg-config on the command line during compilation:
To install pkg-config, use the following command in terminal:

9
Python & Numpy
Python is a language that can be used with OpenCV. It is an easy-to-understand
programming language with a syntax much more simple in comparison to C and C++.
Numpy is an additional module for Python, creating a more MATLAB-type of
environment. Numpy documentation can be found at:
http://docs.scipy.org/doc/numpy/user/
To install both Python and Numpy, run the following commands in terminal:
FFmpeg
From the about page on http://www.ffmpeg.org:
“FFmpeg is the leading multimedia framework, able to decode, encode, transcode, mux,
demux, stream, filter and play pretty much anything that humans and machines have
created. It supports the most obscure ancient formats up to the cutting edge. No matter if
they were designed by some standards committee, the community or a corporation. It
contains libavcodec, libavutil, libavformat, libavfilter, libavdevice, libswscale and
libswresample which can be used by applications. As well as ffmpeg, ffserver, ffplay and
ffprobe which can be used by end users for transcoding, streaming and playing”
For OpenCV, this package is very useful for handling multimedia data such as
audio and video. To install FFmpeg, run the following command in terminal:
Afterwards, we are ready to move on to downloading and installing OpenCV.
Setting up OpenCV
Creating a Stable OpenCV Folder
As discussed in the Git section, creating your directory is as easy as running the
following line of code in terminal:

10
This will get you the latest stable version of OpenCV, and it can be updated at any time
using simple Git commands. Cloning into the repository will look similar to figure 4
inside of the terminal.
Figure 4. Cloning the OpenCV Repository
Building OpenCV
Now that we have our OpenCV folder, we can build the entire directory for use.
Again from the OpenCV Linux tutorial, run the following commands in terminal:
Afterwards, the terminal will start running tests and look similar to figure 5. To continue
the installation, type the following lines of code in terminal:
Once this has completed, terminal should look similar to figure 6. At this point, the
building and installation of OpenCV is completed, and users are able to create their own
programs.

11
Figure 5. Performing Tests with CMake
Figure 6. Final Step in Building OpenCV
Conclusion Now that OpenCV and the required packages are built and installed, it is up to the
user to continue to broaden their knowledge on the programs available to them. OpenCV
has almost endless possibilities and takes time to learn. Additional knowledge on CMake
and the building process will also be needed, available at www.cmake.org.

12
References
About CMake:
http://www.cmake.org/cmake/project/about.html
How to use apt-get:
https://help.ubuntu.com/community/AptGet/Howto
Installing OpenCV on Linux:
http://docs.opencv.org/doc/tutorials/introduction/linux_install/linux_install.html