setting in a sleeve - the sewing workshop pattern...
TRANSCRIPT

Setting in a Sleeve(and fitting, too)
By Linda Lee

The Sleeve
Liberty Shirt with a set-in sleeve.
The set of a sleeve is the telltale sign of a quality garment. Men’s suits in all price ranges have perfect sleeve settings. We can, too.
Whether you are tailoring a jacket or making a casual linen top, the sleeves should hang gracefully without drag lines, have enough room for comfort and movement, and be pucker-free.
This tutorial takes the mystery out of setting in perfect sleeves in any fabric.
2

Anatomy of a Sleeve These terms will help you
understand the elements of a sleeve that are important in fitting and sewing a good-looking sleeve.
Capline - Line drawn from one side to the other at the underarm.
Sleeve Cap - Sleeve section above the capline ranging in height from 8” for a set-in sleeve to 2” or less for a dropped shoulder sleeve. The cap width should measure your arm girth plus ease. See slide 4 for sleeve ease chart.
Cap Seamline - Stitching line from front underarm to top of cap and back down to underarm.
Sleeve Grainline - Placed perpendicular to the capline extending from top of sleeve to the hem.
Capline
3
Sleeve CapCap Seamline
Grainline
Top of Sleeve/Shoulder Seam

Check Arm GirthPlace the tape measure under the arm and measure the upper arm circumference over a hand that is inserted under the tape. This adds the appropriate ease for most sleeves.
NOTE: If measuring without the hand, add ease to the measurement.
3-thread stitch formation with a line of straight stitches to stabilize the edge.
Garment Minimum Upper Arm Ease
Blouse 1" to 1½"
Dress 1½" to 2"
Unlined jacket 3" to 4"
Lined jacket 3" to 4½"
Coat 4" to 5½"
4

Adjust Arm Girth Draw a vertical line through the
sleeve center. Draw a horizontal line perpendicular to the vertical line between the top corners of the underarm seam.
Cut along these lines up to, but not through, the outer edges, leaving a hinge at the four edges.
Pull the pattern apart the desired amount of increase and tape in place. Allow the upper sections to overlap the lower ones, forming a diamond shape in the center of the sleeve. Tape in place.
Spread here first
5
Top sections overlap bottoms sections
Adjust to original length
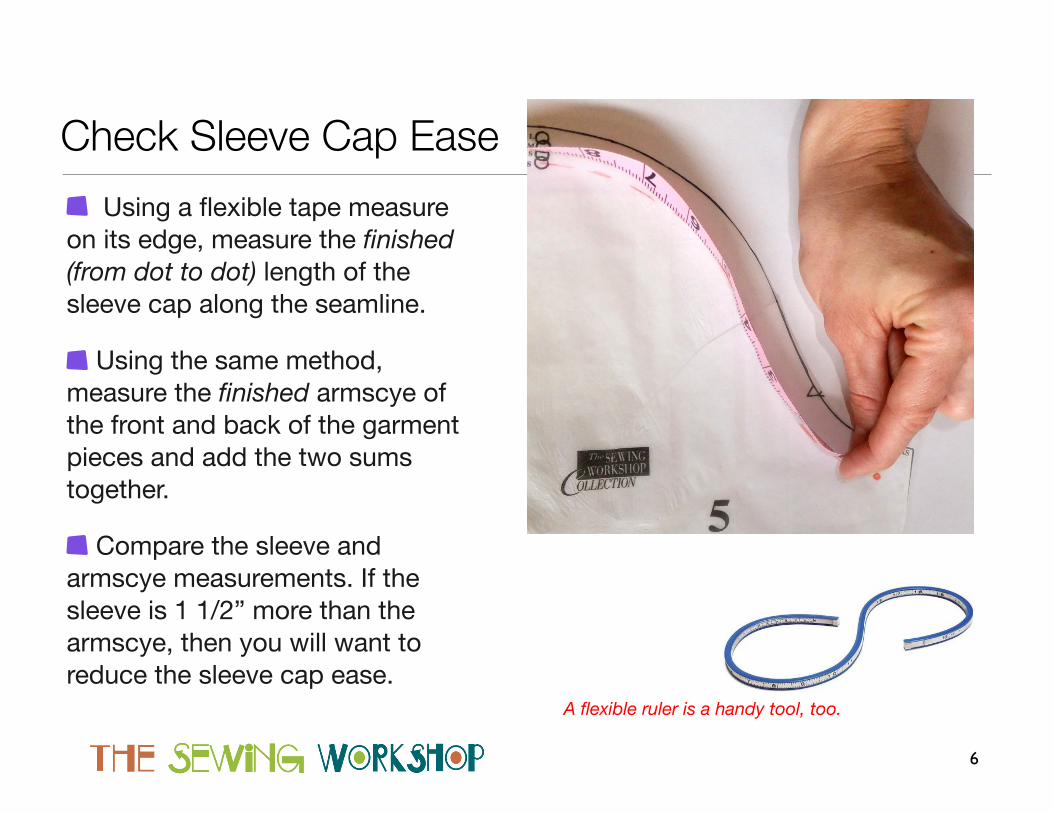
Check Sleeve Cap Ease Using a flexible tape measure
on its edge, measure the finished (from dot to dot) length of the sleeve cap along the seamline.
Using the same method, measure the finished armscye of the front and back of the garment pieces and add the two sums together.
Compare the sleeve and armscye measurements. If the sleeve is 1 1/2” more than the armscye, then you will want to reduce the sleeve cap ease.
A flexible ruler is a handy tool, too.
6
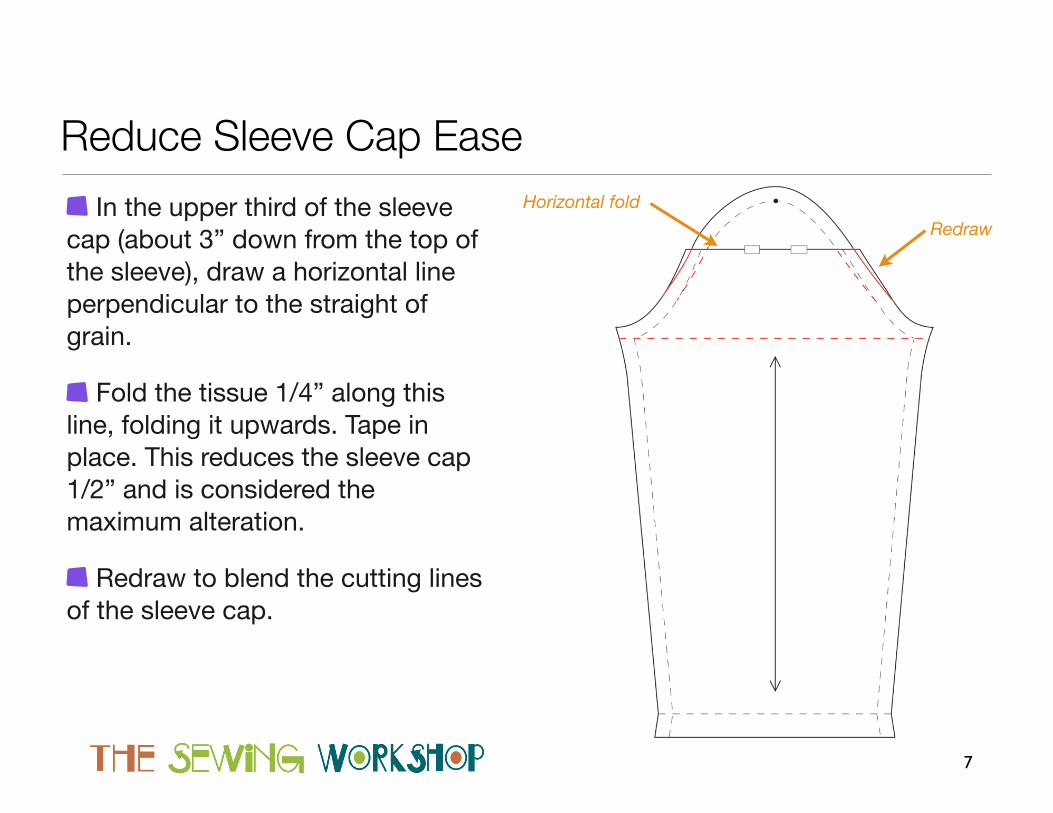
Reduce Sleeve Cap Ease In the upper third of the sleeve
cap (about 3” down from the top of the sleeve), draw a horizontal line perpendicular to the straight of grain.
Fold the tissue 1/4” along this line, folding it upwards. Tape in place. This reduces the sleeve cap 1/2” and is considered the maximum alteration.
Redraw to blend the cutting lines of the sleeve cap.
7
Horizontal foldRedraw

Mark After you have checked your
sleeve pattern and made any fitting alterations, it is time to cut out the sleeves, making sure to follow the straight of grain line on your pattern piece.
Before moving the pieces from your cutting table, mark the fabric pieces.
Use tailor tacks to mark the dots at the top of the sleeve cap, and snip into the seam allowances to mark the notches.
One snip for a single notch (front). Two snips for double notches (back).
Knotted tailor tacks are more accurate.
8
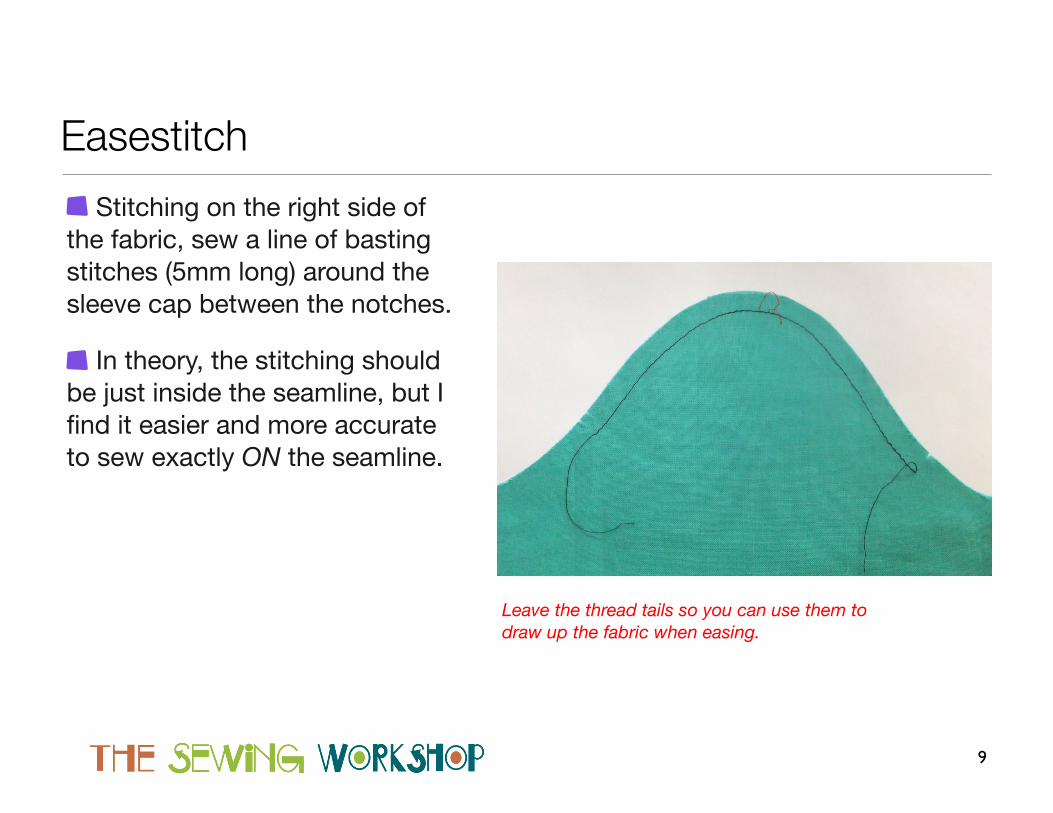
Easestitch Stitching on the right side of
the fabric, sew a line of basting stitches (5mm long) around the sleeve cap between the notches.
In theory, the stitching should be just inside the seamline, but I find it easier and more accurate to sew exactly ON the seamline.
Leave the thread tails so you can use them to draw up the fabric when easing.
9

Ease with Steam It is important to give the sleeve
some shape before beginning to pin it into the armscye.
Hold onto the bobbin thread of the easestitching and begin to draw up the sleeve cap, making sure to even out the ease with no puckers.
“Hang” the sleeve on the narrow end of a ham, aligning the sleeve seamline on the seam of the ham.
Steam the seam allowance. Hand press to remove as much of the rippled seam allowance as possible.
Use your fingers to flatten and smooth the stitches along the seamline. Don’t press beyond the seam allowance into the crown of the sleeve.
10

Pin in Place
Placing four pins to start is all you need before beginning the easing process.
To start, match the sleeve seam to the side seam of the garment and pin.
Match the top of the sleeve to the shoulder seam and pin.
Place pins to match the single and double notches.
11

Pin with Ease Starting at the top of the sleeve
(dot) and working on the sleeve side, place your finger under the fabric about 5/8” to one of the top pin.
Roll the seam allowance over your finger and place a pin through both layers of fabric, straddling the stitching line.
Continue down one side of the sleeve to the side seam, pinning about every 5/8”.
Start at the top again and pin the remaining side. This technique of rolling the fabric over your
finger automatically builds in the necessary ease.It’s magic!
12

Sew Sleeve to Garment Working on the inside of
the sleeve and beginning at one notch, machine stitch the sleeve just to the left of the original basting stitch.
Sew 1/8” from the seamline in the seam allowance from notch to notch through the underarm. This is an optional step and is used if there will be a lot of strain on a fitted garment.
Sew slowly and carefully to retain an even seam allowance width, and remove the pins as you sew.
13

Finish Raw Edges Position the sleeve opening so
you are sewing on the sleeve side and the opening forms a tube.
Serge the seam together using a 3-thread stitch formation.
If you do not own a serger, pink the seam to prevent raveling.
14

Final Steam You do not want to “iron” the
sleeve after it is sewn in place.
Working over a press mitt, hold the iron near the sleeve seam and steam the area.
Use your hand to press the sleeve through the cap area from notch to notch.
Press Mitt
15
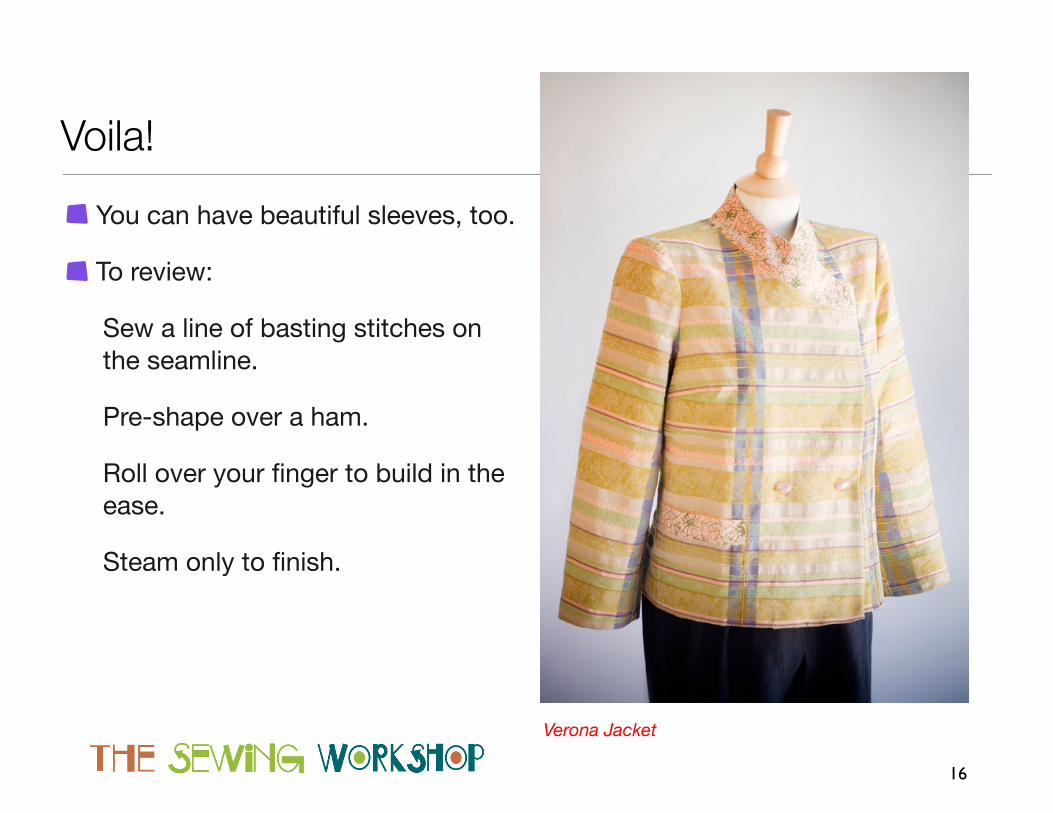
Voila! You can have beautiful sleeves, too.
To review:
Sew a line of basting stitches on the seamline.
Pre-shape over a ham.
Roll over your finger to build in the ease.
Steam only to finish.
Verona Jacket
16

Setting in a Sleeve(and fitting, too)
By Linda Lee