session 2 the touch sensor the colour sensor
TRANSCRIPT

Session 2
The Touch Sensor The Colour Sensor
LEGO MINDSTORM

Your EV3 brick has already been configured for the lesson today.
Pair up with a friend and find a suitable space to work.
You will need a laptop and an brick with a large motor, touch sensor and a light sensor.
SETUP

The Touch Sensor is an analogue sensor that can detect when the sensor’s red button has been pressed and when it is released. That means the Touch Sensor can be programmed to action using three conditions—pressed, released, or bumped (both pressed and released).
Using input from the Touch Sensor, a robot can be programmed to see the world as a blind person might, reaching a hand out and responding when it touches something (pressed). You might build a robot with a Touch Sensor pressed against the surface beneath it. You might then program the robot to respond (Stop!) when your robot is about to drive off the edge of a table (when the sensor is released).
A fighting robot might be programmed to keep pushing forward against its challenger until the challenger retreats. That pair of actions—pressed, then released—would constitute bumped.
Touch Sensor

Build the blocks below: remember to check the port you are using for the sensor.
Think about scenario where we would use this function?
Touch Sensor

Try changing the functions so that a sound plays when the button is released and when the button is bumped. Think about a practical application of these states.
Touch Sensor

In Colour Mode, the Colour Sensor recognizes seven colours—black, blue, green, yellow, red, white, and brown—plus No Colour. This ability to differentiate between colours means your robot might be programmed to sort coloured balls or blocks, speak the names of colours as they are detected, or stop action when it sees red.
Colour Sensor

Build the blocks below. The EV3 unit should speak the colours once they are detected. Use the colour sheet provided or download the sheet from the digitaltech website. Please check the port you are using for the sensor.
Colour Mode
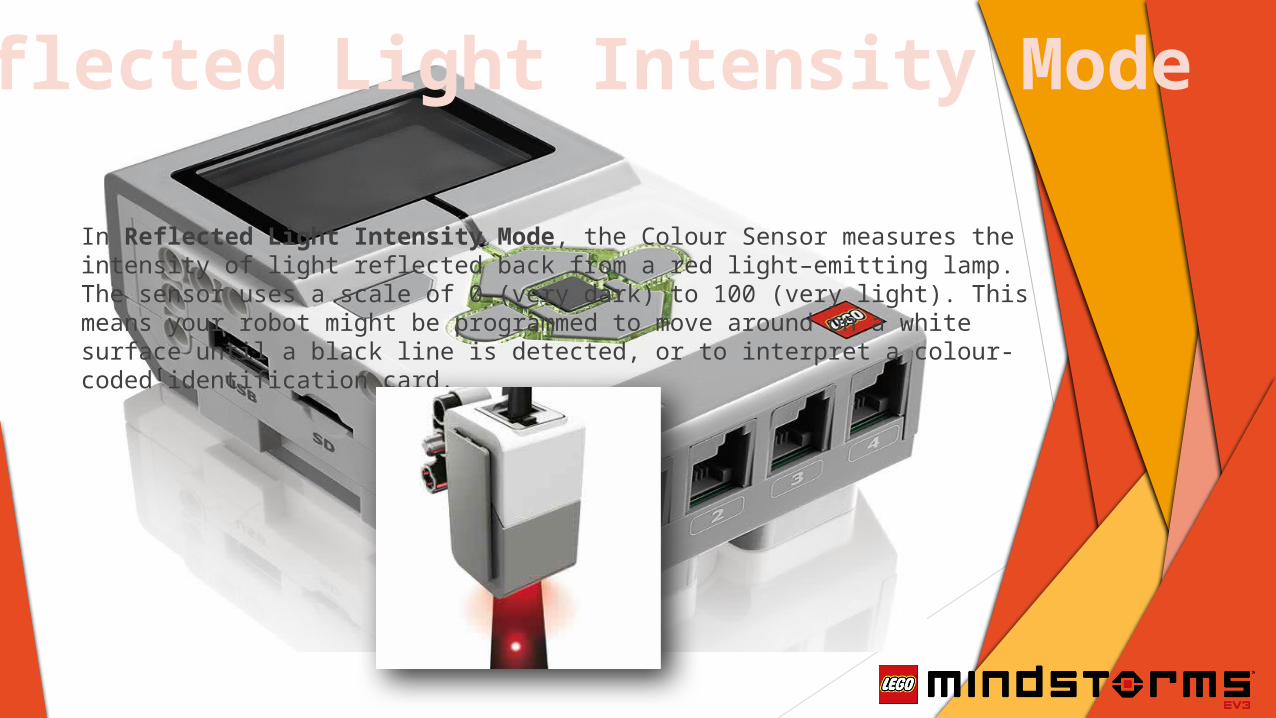
In Reflected Light Intensity Mode, the Colour Sensor measures the intensity of light reflected back from a red light–emitting lamp. The sensor uses a scale of 0 (very dark) to 100 (very light). This means your robot might be programmed to move around on a white surface until a black line is detected, or to interpret a colour-coded identification card.
Reflected Light Intensity Mode

Reflected Light Intensity Mode
Build the blocks below. The brick status light should pulse orange when you cover the sensor or when you introduce it to a black line. If not, set the sensor threshold…

In Ambient Light Intensity Mode, the Colour Sensor measures the strength of light that enters the window from its environment, such as sunlight or the beam of a torch.
The sensor uses a scale of 0 (very dark) to 100 (very light). This means your robot might be programmed to set off an alarm when the sun rises in the morning, or stop action if the lights go out.
The sample rate of the Colour Sensor is 1 kHz/sec. For the best accuracy, when in Colour Mode or Reflected Light
Intensity Mode, the sensor must be held at a right angle, close to—but not touching—the surface it is examining.
Ambient Light Intensity Mode
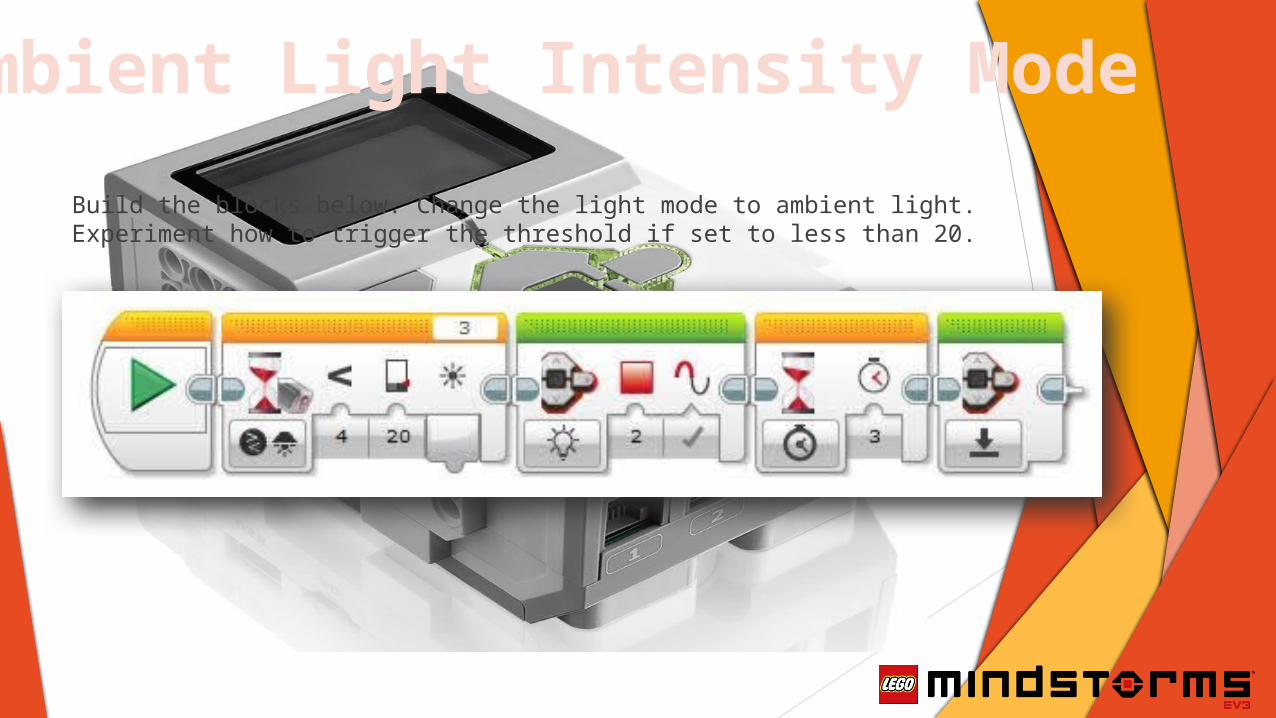
Ambient Light Intensity Mode
Build the blocks below. Change the light mode to ambient light. Experiment how to trigger the threshold if set to less than 20.

Program the EV3 unit to make the large motor perform specific rotations once a colour has been detected. Eg RED = 2 clockwise rotations
Extension

Open your Mindstorm Diary Presentation.
Reflect on the sensors we have covered today. Explain the purpose of each sensor and explain how the different colour senses are used. You should divide your colour sensor slide into 3 sections eg. Colour, reflective light and ambient light.
Remember, your home slide should be interactive. When you click on a sensor it should take you to the slide providing information on the sensor. Each slide should also have a home button which links to the first slide.
Save your work
Reflection