security toolkit - sjtuftp.sjtu.edu.cn/sites/ftp.openpkg.org/sources/dst/cryptlib/manual.pdf ·...
TRANSCRIPT

Security ToolkitVersion 3.2
Copyright Peter Gutmann 1992-2005
April 2005


cryptlib Overview i
INTRODUCTION 1cryptlib Overview 1cryptlib features 2
Architecture 2S/MIME 3PGP/OpenPGP 3Secure Sessions 4Plug-and-play PKI 4Certificate Management 4CA Operations 6Crypto Devices and Smart Card Support 8Certificate Store Interface 8User Interface 9Security Features 9Embedded Systems 10Performance 10Cryptographic Random Number Management 11Programming Interface 11Documentation 11Algorithm Support 12Standards Compliance 12Y2K Compliance 13Configuration Options 13cryptlib Applications 13Encryption Code Example 14Secure Session Code Example 14Certificate Management Code Example 15
Document conventions 15Recommended Reading 15
INSTALLATION 17AMX 17BeOS 17DOS 17DOS32 17eCOS 17Embedded Linux 17µITRON 17Macintosh OS X 18MVS 18OS2 18PalmOS 18QNX Neutrino 19RTEMS 19Tandem 19uClinux 19Unix 19VM/CMS 20Windows 3.x 20Windows 95/98/ME and Windows NT/2000/XP 20Windows CE / Pocket PC / SmartPhone 21Xilinx XMK 22Other Systems 22Key Database Setup 22Certificate Installation 23Customised and Cut-down cryptlib Versions 24Debug vs. Release Versions of cryptlib 24Support for Vendor-specific Algorithms 25

Introductionii
CRYPTLIB BASICS 26Programming Interfaces 27
Container Object Interface 27Mid-level Interface 27Action Object Interface 27
Objects and Interfaces 27Objects and Attributes 28Interfacing with cryptlib 29
Initialisation 29C / C++ 30C# / .NET 30Delphi 30Java 31Python 32Tcl 32Visual Basic 32Return Codes 32
Working with Object Attributes 33Attribute Types 35Attribute Lists and Attribute Groups 37Attribute Cursor Management 38
Object Security 41Role-based Access Control 43
Managing User Roles 43Creating and Destroying Users and Roles 44
Security and Usability 45Ease of Use 45Safe Defaults 45Interaction with other Systems 46Automation vs. Explicitness 46User Interface Issues 47Use of Visual Cues 47Security Testing 48
Miscellaneous Issues 49Multi-threaded cryptlib Operation 49Interaction with External Events 50
DATA ENVELOPING 51Creating/Destroying Envelopes 51The Data Enveloping Process 52
Data Size Considerations 54Basic Data Enveloping 55Compressed Data Enveloping 56Password-based Encryption Enveloping 57Conventional Encryption Enveloping 59De-enveloping Mixed Data 60De-enveloping with a Large Envelope Buffer 61Obtaining Envelope Security Parameters 61
Enveloping Large Data Quantities 62Alternative Processing Techniques 63Enveloping with Many Enveloping Attributes 64
ADVANCED ENVELOPING 66Public-Key Encrypted Enveloping 66Digitally Signed Enveloping 70Enveloping with Multiple Attributes 72
Processing Multiple De-enveloping Attributes 73

cryptlib Overview iii
Nested Envelopes 75
S/MIME 77S/MIME Enveloping 77
Encrypted Enveloping 78Digitally Signed Enveloping 80Detached Signatures 81Alternative Detached Signature Processing 82Extra Signature Information 83
Timestamping 84
PGP 86PGP Enveloping 86
Encrypted Enveloping 86Digitally Signed Enveloping 88Detached Signatures 88
FROM ENVELOPES TO EMAIL 91S/MIME email 91
Data 91Signed Data 91Detached Signature 91Encrypted Data 92Nested Content 92
PGP email 92Implementing S/MIME and PGP email using cryptlib 93
c-client/IMAP4 93Eudora 94MAPI 94Windows 95/98/ME and NT/2000/XP Shell 94
SECURE SESSIONS 96Creating/Destroying Session Objects 96Client vs. Server Sessions 98
Server Names/URLs 98Server Private Keys 99
Establishing a Session 100Persistent Connections 100
SSH Sessions 101SSH Client Sessions 101SSH Server Sessions 102SSH Channels 104SSH Subsystems 105SSH Port Forwarding 106SSH Multiple Channels 107
SSL/TLS Sessions 108SSL/TLS Client Sessions 109SSL/TLS with Shared Keys 110SSL/TLS with Client Certificates 110SSL/TLS Server Sessions 111SSL/TLS Servers with Shared Keys 111SSL/TLS Servers with Client Certificates 112
Request/Response Protocol Sessions 113RTCS Server Sessions 113OCSP Server Sessions 114TSP Server Sessions 114
Obtaining Session Status Information 115Obtaining Session Security Parameters 115

Introductioniv
Authenticating the Host with Key Fingerprints 115Authenticating the Host or Client using Certificates 115Authenticating the Client via Port and Address 116
Exchanging Data 116Network Issues 118
Secure Sessions with Proxies 118Network Timeouts 118Managing your Own Network Sockets 119
KEY GENERATION 121Creating/Destroying Encryption Contexts 121Generating a Key into an Encryption Context 121
Asynchronous Key Generation 122
KEY STORAGE 123Keyset Types 123Creating/Destroying Keyset Objects 124
File Keysets 125HTTP Keysets 126Database Keysets 127LDAP Keysets 128
Reading a Key from a Keyset 131Obtaining a Key for a User 131General Keyset Queries 133Handling Multiple Certificates with the Same Name 135Key Group Management 135
Writing a Key to a Keyset 136Changing a Private Key Password 137
Deleting a Key 138
CERTIFICATES AND CERTIFICATE MANAGEMENT 139High-level vs. Low-level Certificate Operations 139
Plug-and-play PKI 139Mid-level Certificate Management 139Low-level Certificate Management 139
Certificates and Keys 140Using Separate Signature and Encryption Certificates 140
Plug-and-play PKI 141Simple Certificate Creation 142The Certification Process 144Obtaining Certificates using CMP 147
CMP Certificate Requests 148CMP Operation Types 149CMP Sessions 150
Obtaining Certificates using SCEP 152SCEP Certificate Requests 152SCEP Sessions 152
Certificate Status Checking using RTCS 154Basic RTCS Queries 154Creating an RTCS Request 155Communicating with an RTCS Responder 156Advanced RTCS Queries 157
Certificate Revocation Checking using OCSP 158Basic OCSP Queries 158Creating an OCSP Request 158Communicating with an OCSP Responder 159

cryptlib Overview v
Advanced OCSP Queries 160
MANAGING A CERTIFICATION AUTHORITY 161Creating the Top-level (Root) CA Key 161Initialising PKI User Information 163
Other PKI User Information 164PKI User IDs 165
Managing a CA using CMP or SCEP 166Making Certificates Available Online 167Managing a CA Directly 169
Recording Incoming Requests 169Retrieving Stored Requests 169CA Management Operations 170Issuing and revoking a Certificate 171Issuing a CRL 171Expiring Certificates 171Recovering after a Restart 171
ENCRYPTION AND DECRYPTION 173Creating/Destroying Encryption Contexts 173Generating a Key into an Encryption Context 174Deriving a Key into an Encryption Context 175Loading a Keys into an Encryption Context 176Working with Initialisation Vectors 176Loading Public/Private Keys 177
Loading Multibyte Integers 177Querying Encryption Contexts 179Using Encryption Contexts to Process Data 179
Conventional Encryption 180Public-key Encryption 181Hashing 181
EXCHANGING KEYS 183Exporting a Key 183
Exporting using Conventional Encryption 184Importing a Key 185
Importing using Conventional Encryption 185Querying an Exported Key Object 186Extended Key Export/Import 186Key Agreement 187
SIGNING DATA 189Querying a Signature Object 190Extended Signature Creation/Checking 190
CERTIFICATES IN DETAIL 193Overview of Certificates 193
Certificates and Standards Compliance 193Certificate Compliance Level Checking 194
The Certification Process 196Creating/Destroying Certificate Objects 196Working with Certificate Attributes 197Certificate Structures 197
Attribute Certificate Structure 198Certificate Structure 199

Introductionvi
Certification Request Structure 201CRL Structure 201
Basic Certificate Management 202Certificate Identification Information 204
DN Structure for Business Use 205DN Structure for Private Use 205DN Structure for Use with a Web Server 206Other DN Structures 206Working with Distinguished Names 206Creating Customised DNs 207
Extended Certificate Identification Information 209Working with GeneralName Components 210Certificate Fingerprints 210
Importing/Exporting Certificates 211Signing/Verifying Certificates 213Certificate Chains 215
Working with Certificate Chains 215Signing Certificate Chains 216Checking Certificate Chains 217Exporting Certificate Chains 218
Certificate Revocation using CRLs 218Working with CRLs 218
Creating CRLs 219Advanced CRL Creation 219
Checking Certificates against CRLs 220Automated CRL Checking 221
Certificate Trust Management 221Controlling Certificate Usage 221Implicitly Trusted Certificates 222Working with Trust Settings 222
CERTIFICATE EXTENSIONS 224Extension Structure 224Working with Extension Attributes 224
Extension Cursor Management 225Composite Extension Attributes 227
X.509 Extensions 228Alternative Names 228Basic Constraints 228Certificate Policies, Policy Mappings, and Policy Constraints, and Policy Inhibiting 229CRL Distribution Points/Freshest CRL and Subject/Authority Information Access 230Directory Attributes 231Key Usage, Extended Key Usage, and Netscape certificate type 231Name Constraints 234Private Key Usage Period 235Subject and Authority Key Identifiers 235
CRL Extensions 235CRL Reasons, CRL Numbers, Delta CRL Indicators 235Hold Instruction Code 236Invalidity Date 237Issuing Distribution Point and Certificate Issuer 237
Digital Signature Legislation Extensions 238Certificate Generation Date 238Other Restrictions 238Reliance Limit 238Signature Delegation 238

cryptlib Overview vii
Qualified Certificate Extensions 239Biometric Info 239QC Statements 239
SET Extensions 239SET Card Required and Merchant Data 239SET Certificate Type, Hashed Root Key, and Tunnelling 240
Application-specific Extensions 241OCSP Extensions 241
Vendor-specific Extensions 241Netscape Certificate Extensions 241Thawte Certificate Extensions 242
Generic Extensions 242
OTHER CERTIFICATE OBJECT EXTENSIONS 243CMS/SMIME Attributes 243
Content Type 243Countersignature 244Message Digest 244Signing Description 244Signing Time 244
Extended CMS/SMIME Attributes 244AuthentiCode Attributes 245Content Hints 246DOMSEC Attributes 246Mail List Expansion History 246Nonce 247Receipt Request 247SCEP Attributes 247Security Label, Equivalent Label 248Signature Policy 249S/MIME Capabilities 250Signing Certificate 250
OCSP Attributes 251
CRYPTLIB USER INTERFACE COMPONENTS 252Displaying Certificates 252Key/Certificate Generation 252
ENCRYPTION DEVICES AND MODULES 255Creating/Destroying Device Objects 255Activating and Controlling Cryptographic Devices 256
Device Initialisation 256User Authentication 257Device Zeroisation 257
Working with Device Objects 258Key Storage in Crypto Devices 258Querying Device Information 259Considerations when Working with Devices 260
Fortezza Cards 261PKCS #11 Devices 261
Installing New PKCS #11 Modules 261Accessing PKCS #11 Devices 262
CryptoAPI 262
MISCELLANEOUS TOPICS 263Querying cryptlib’s Capabilities 263Working with Configuration Options 263

Introductionviii
Querying/Setting Configuration Options 266Saving Configuration Options 267
Obtaining Information About Cryptlib 267Random Numbers 268
Gathering Random Information 268Obtaining Random Numbers 269
Working with Newer Versions of cryptlib 269
ERROR HANDLING 271Extended Error Reporting 273
EMBEDDED SYSTEMS 276Embedded OS Types 276
AMX 276eCOS 277Embedded Linux 277µITRON 277Palm OS 277QNX Neutrino 277RTEMS 278uClinux 278Windows CE 278VxWorks 278Xilinx XMK 278
Embedded cryptlib Configuration Options 279Debugging with Embedded cryptlib 280Porting to Devices without a Filesystem 280Porting to Devices without Dynamic Memory Allocation 280
Memory Allocation Strategy 280cryptlib Memory Usage 281Tracking Memory Usage 281
Porting to Devices without Randomness/Entropy Sources 281
DATABASE AND NETWORKING PLUGINS 283The Database Plugin Interface 283
Database Plugin Functions 284The Network Plugin Interface 287
Network Plugin Functions 287
ALGORITHMS 289AES 289Blowfish 289CAST-128 289DES 289Triple DES 289Diffie-Hellman 289DSA 290Elgamal 290HMAC-MD5 290HMAC-SHA1 290HMAC-RIPEMD-160 290IDEA 290MD2 291MD4 291

cryptlib Overview ix
MD5 291RC2 291RC4 291RC5 291RIPEMD-160 292RSA 292SHA 292Skipjack 292
DATA TYPES AND CONSTANTS 293CRYPT_ALGO_TYPE 293CRYPT_ATTRIBUTE_TYPE 294CRYPT_CERTFORMAT_TYPE 294CRYPT_CERTTYPE_TYPE 295CRYPT_DEVICE_TYPE 295CRYPT_FORMAT_TYPE 295CRYPT_KEYID_TYPE 296CRYPT_KEYOPT_TYPE 296CRYPT_KEYSET_TYPE 296CRYPT_MODE_TYPE 297CRYPT_OBJECT_TYPE 297CRYPT_SESSION_TYPE 297Data Size Constants 298Miscellaneous Constants 298
DATA STRUCTURES 300CRYPT_OBJECT_INFO Structure 300CRYPT_PKCINFO_xxx Structures 300CRYPT_QUERY_INFO Structure 301
FUNCTION REFERENCE 302cryptAddCertExtension 302cryptAddPrivateKey 302cryptAddPublicKey 302cryptAddRandom 303cryptAsyncCancel 303cryptAsyncQuery 303cryptCAAddItem 303cryptCACertManagement 304cryptCAGetItem 304cryptCheckCert 305cryptCheckSignature 305cryptCheckSignatureEx 305cryptCreateCert 306cryptCreateContext 306cryptCreateEnvelope 306cryptCreateSession 307cryptCreateSignature 307cryptCreateSignatureEx 307cryptDecrypt 308

Introductionx
cryptDeleteAttribute 308cryptDeleteCertExtension 309cryptDeleteKey 309cryptDestroyCert 309cryptDestroyContext 310cryptDestroyEnvelope 310cryptDestroyObject 310cryptDestroySession 310cryptDeviceClose 310cryptDeviceCreateContext 311cryptDeviceOpen 311cryptDeviceQueryCapability 311cryptEncrypt 312cryptEnd 312cryptExportCert 312cryptExportKey 313cryptExportKeyEx 313cryptFlushData 314cryptGenerateKey 314cryptGenerateKeyAsync 315cryptGetAttribute 315cryptGetAttributeString 315cryptGetCertExtension 316cryptGetPrivateKey 316cryptGetPublicKey 317cryptImportCert 317cryptImportKey 318cryptInit 318cryptKeysetClose 318cryptKeysetOpen 318cryptPopData 319cryptPushData 319cryptQueryCapability 320cryptQueryObject 320cryptSetAttribute 320cryptSetAttributeString 321cryptSignCert 321cryptUIDisplayCert 321cryptUIGenerateKey 322
STANDARDS CONFORMANCE 323AES 323Blowfish 323CAST-128 323DES 323Triple DES 324Diffie-Hellman 324DSA 324Elgamal 325HMAC-MD5 325HMAC-SHA1 325

cryptlib Overview xi
IDEA 325MD2 325MD4 325MD5 326RC2 326RC4 326RC5 326RIPEMD-160 326RSA 327SHA/SHA1 327SHA2/SHA-256/SHA-384/SHA-512 327Skipjack 327
ACKNOWLEDGEMENTS 328


cryptlib Overview 1
IntroductionThe information age has seen the development of electronic pathways that carry vastamounts of valuable commercial, scientific, and educational information betweenfinancial institutions, companies, individuals, and government organisations.Unfortunately the unprecedented levels of access provided by systems like theInternet also expose this data to breaches of confidentiality, disruption of service, andoutright theft. As a result, there is an enormous (and still growing) demand for themeans to secure these online transactions. One report by the Computer SystemsPolicy Project (a consortium of virtually every large US computer company,including Apple, AT&T, Compaq, Digital, IBM, Silicon Graphics, Sun, and Unisys)estimated that the potential revenue arising from these security requirements in theUS alone could be as much as US$30-60 billion in the next few years, and thepotential exposure to global users from a lack of this security is projected to reachbetween US$320 and 640 billion.
Unfortunately the security systems required to protect data are generally extremelydifficult to design and implement, and even when available tend to requireconsiderable understanding of the underlying principles in order to be used. This haslead to a proliferation of “snake oil” products that offer only illusionary security, or to organisations holding back from deploying online information systems because themeans to secure them aren’t readily available, or because they employed weak, easilybroken security that was unacceptable to users.
The cryptlib security toolkit provides the answer to this problem. A completedescription of the capabilities provided by cryptlib is given below.
cryptlib Overviewcryptlib is a powerful security toolkit that allows even inexperienced cryptoprogrammers to easily add encryption and authentication services to their software.The high-level interface provides anyone with the ability to add strong securitycapabilities to an application in as little as half an hour, without needing to know anyof the low-level details that make the encryption or authentication work. Because ofthis, cryptlib dramatically reduces the cost involved in adding security to new orexisting applications.
At the highest level, cryptlib provides implementations of complete security servicessuch as S/MIME and PGP/OpenPGP secure enveloping, SSL/TLS and SSH securesessions, CA services such as CMP, SCEP, RTCS, and OCSP, and other securityoperations such as secure timestamping (TSP). Since cryptlib uses industry-standardX.509, S/MIME, PGP/OpenPGP, and SSH/SSL/TLS data formats, the resultingencrypted or signed data can be easily transported to other systems and processedthere, and cryptlib itself runs on virtually any operating system— cryptlib doesn’t tie you to a single platform. This allows email, files, and EDI transactions to beauthenticated with digital signatures and encrypted in an industry-standard format.
cryptlib provides an extensive range of other capabilities including full X.509/PKIXcertificate handling (all X.509 versions from X.509v1 to X.509v4) with additionalsupport for SET, Microsoft AuthentiCode, Identrus, SigG, S/MIME, SSL, andQualified certificates, PKCS #7 certificate chains, handling of certification requestsand CRLs including automated checking of certificates against CRLs and onlinechecking using RTCS and OCSP, and issuing and revoking certificates using CMPand SCEP. In addition cryptlib implements a full range of certification authority(CA) functions, as well as providing complete CMP, SCEP, RTCS, and OCSP serverimplementations to handle online certificate enrolment/issue/revocation andcertificate status checking. Alongside the certificate handling, cryptlib provides asophisticated key storage interface that allows the use of a wide range of key databasetypes ranging from PKCS #11 devices, PKCS #15 key files, and PGP/OpenPGP keyrings through to commercial-grade RDBMS’ and LDAP directories with optional SSL protection.

Introduction2
In addition to its built-in capabilities, cryptlib can make use of the crypto capabilitiesof a variety of external crypto devices such as hardware crypto accelerators, Fortezzacards, PKCS #11 devices, hardware security modules (HSMs), and crypto smartcards. For particularly demanding applications cryptlib can be used with a variety ofcrypto devices that have received appropriate FIPS 140 or ITSEC/Common Criteriacertification. The crypto device interface also provides a convenient general-purposeplug-in capability for adding new functionality that will be automatically used bycryptlib.
cryptlib is supplied as source code for AMX, BeOS, DOS, DOS32, eCOS, embeddedLinux, IBM MVS, µITRON, Macintosh/OS X, OS/2, PalmOS, RTEMS, Tandem, avariety of Unix versions (including AIX, Digital Unix, DGUX,FreeBSD/NetBSD/OpenBSD, HP-UX, IRIX, Linux, MP-RAS, OSF/1, QNX,SCO/UnixWare, Solaris, SunOS, Ultrix, and UTS4), uClinux, VM/CMS, VxWorks,Windows 3.x, Windows 95/98/ME, Windows CE/PocketPC/SmartPhone, WindowsNT/2000/XP, and Xilinx XMK. cryptlib’s highly portable nature means that it is also being used in a variety of custom embedded system environments. In addition,cryptlib is available as a standard Windows DLL and an ActiveX control.. cryptlibcomes with language bindings for C / C++, C# / .NET, Delphi, Java, Python, andVisual Basic (VB).
cryptlib featurescryptlib provides a standardised interface to a number of popular encryptionalgorithms, as well as providing a high-level interface that hides most of theimplementation details and uses operating-system-independent encoding methods thatmake it easy to transfer secured data from one operating environment to another.Although use of the high-level interface is recommended, experienced programmerscan directly access the lower-level encryption routines for implementing customencryption protocols or methods not directly provided by cryptlib.
Architecturecryptlib consists of a set of layered security services and associated programminginterfaces that provide an integrated set of information and communications securitycapabilities. Much like the network reference model, cryptlib contains a series oflayers that provide each level of abstraction, with higher layers building on thecapabilities provided by the lower layers.
At the lowest level are basic components such as core encryption and authenticationroutines, which are usually implemented in software but may also be implemented inhardware (due to the speed of the software components used in cryptlib, the softwareis usually faster than dedicated hardware). At the next level are components thatwrap up the specialised and often quite complex core components in a layer thatprovides abstract functionality and ensures complete cross-platform portability ofdata. These functions typically cover areas such as “create a digital signature” or “exchange an encryption key”. At the highest level are extremely powerful and easy-to-use functions such as “encrypt a message”, “sign a message”, “open a secure link”, and “create a digital certificate” that require no knowledge of encryption techniques, and that take care of complex issues such as key management, data encoding,en/decryption, and digital signature processing.

cryptlib features 3
Secure dataenveloping
Secure communicationssessions
Certificatemanagement
Security services interface
Keyexchange
Digitalsignature
Keygeneration
Key management
Encryption services interface Key store interface
Nativedatabaseservices
Adaptationlayer
Third-partydatabaseservices
High-level interface
Nativeencryptionservices Third-party
encryptionservices
Third-partyencryptionservices
Adaptationlayer
Adaptationlayer
cryptlib’s powerful object management interface provides the ability to add encryption and authentication capabilities to an application without needing to knowall the low-level details that make the encryption or authentication work. Theautomatic object-management routines take care of encoding issues and cross-platform portability problems, so that a handful of function calls is all that’s needed to wrap up data in signed or encrypted form with all of the associated information andparameters needed to recreate it on the other side of a communications channel. Thisprovides a considerable advantage over other encryption toolkits that often requirehundreds of lines of code and the manipulation of complex encryption data structuresto perform the same task.
S/MIMEcryptlib employs the IETF-standardised Cryptographic Message Syntax (CMS,formerly called PKCS #7) format as its native data format. CMS is the underlyingformat used in the S/MIME secure mail standard, as well as a number of otherstandards covering secure EDI and related systems like HL7 medical messaging andthe Session Initiation Protocol (SIP) for services such as Internet telephony andinstant messaging. As an example of its use in secure EDI, cryptlib provides securityservices for the Symphonia EDI messaging toolkit which is used to communicatemedical lab reports, patient data, drug prescription information, and similarinformation requiring a high level of security.
The S/MIME implementation uses cryptlib’s enveloping interface which allows simple, rapid integration of strong encryption and authentication capabilities intoexisting email agents and messaging software. The resulting signed enveloped dataformat provides message integrity and origin authentication services, the encryptedenveloped data format provides confidentiality. In addition cryptlib’s S/MIME implementation allows external services such as trusted timestamping authorities(TSAs) to be used when a signed message is created, providing externally-certifiedproof of the time of message creation. The complexity of the S/MIME format meansthat the few other toolkits that are available require a high level of programmerknowledge of S/MIME processing issues. In contrast cryptlib’s enveloping interface makes the process as simple as pushing raw data into an envelope and popping theprocessed data back out, a total of three function calls, plus one more call to add theappropriate encryption or signature key.
PGP/OpenPGPAlongside the PKCS #7/CMS/SMIME formats, cryptlib supports the PGP/OpenPGPmessage format, allowing it to be used to send and receive PGP-encrypted email and

Introduction4
data. As with the S/MIME implementation, the PGP implementation uses cryptlib’s enveloping interface to allow simple, rapid integration of strong encryption andauthentication capabilities into existing email agents and messaging software. Sincethe enveloping interface is universal, the process involved in creating PGP andS/MIME messages is identical except for the envelope format specifier, allowing aone-off development effort to handle any secure message format.
Secure Sessionscryptlib secure sessions can include SSH, SSL, and TLS sessions, and generalcommunications sessions can include protocols such as the certificate managementprotocol (CMP), simple certificate enrolment protocol (SCEP), real-time certificatestatus protocol (RTCS), online certificate status protocol (OCSP), and timestamping(TSP). As with envelopes, cryptlib takes care of the session details for you so that allyou need to do is provide basic communications information such as the name of theserver or host to connect to and any other information required for the session such asa password or certificate. cryptlib takes care of establishing the session andmanaging the details of the communications channel and its security parameters.
cryptlib provides both client and server implementations of all session types. Bytying a key or certificate store to the session, you can let cryptlib take care of any keymanagement issues for you. For example, with an SSH, SSL or TLS server sessioncryptlib will use the key/certificate store to authenticate incoming connections, andwith a CMP or SCEP server session cryptlib will use the certificate store to handle thecertificate management process. In this way a complete CMP-based CA that handlesenrolment, certificate update and renewal, and certificate revocation, can beimplemented with only a handful of function calls.
Plug-and-play PKIWorking with certificates can be complex and painful, requiring the use of a numberof arcane and difficult-to-use mechanisms to perform even the simplest operations.To eliminate this problem, cryptlib provides a plug-and-play PKI interface thatmanages all certificate processing and management operations for you, requiring nospecial knowledge of certificate formats, protocols, or operations. Using the plug-and-play PKI interface with an appropriately-configured CA means that cryptlib willautomatically and transparently handle key generation, certificate enrolment, securelyobtaining trusted CA certificates, and certifying the newly-generated keys for theuser, all in a single operation. Similarly, certificate validity checking can beperformed using an online real-time status check that avoids the complexity anddelayed status information provided by mechanisms such as CRLs. The plug-and-play PKI interface removes most of the complexity and difficulty involved inworking with certificates, making it easier to use certificates than with any of theconventional certificate management mechanisms.
Certificate Managementcryptlib implements full X.509 certificate support, including all X.509 version 3 andX.509 version 4 extensions as well as extensions defined in the IETF PKIX certificateprofile. cryptlib also supports additional certificate types and extensions includingSET certificates, Microsoft AuthentiCode and Netscape and Microsoft server-gatedcrypto certificates, Identrus certificates, qualified certificates, S/MIME and SSLclient and server certificates, SigG extensions, and various vendor-specific extensionssuch as Netscape certificate types and the Thawte secure extranet.
In addition to certificate handling, cryptlib allows the generation of certificationrequests suitable for submission to certification authorities (CAs) in order to obtain acertificate. Since cryptlib is itself capable of processing certification requests intocertificates, it is also possible to use cryptlib to provide full CA services. cryptlibalso supports the creating and handling of the certificate chains required for S/MIME,SSL, and other applications, and the creation of certificate revocation lists (CRLs)with the capability to check certificates against existing or new CRLs eitherautomatically or under programmer control. In addition to CRL-based revocation

cryptlib features 5
checking, cryptlib also supports online status protocols such as RTCS and OCSP.cryptlib also implements the CMP protocol which fully automates the management ofcertificates, allowing online certificate enrolment, issue, update/replacement, andrevocation of certificates, and the SCEP protocol, which automates the certificateissue process. Using CMP removes from the user any need for technical knowledgeof certificate management, since all details are managed by the CA.
cryptlib can import and export certification requests, certificates, certificate chains,and CRLs, covering the majority of certificate transport formats used by a widevariety of software such as web browsers and servers. The certificate types that aresupported include:
Basic X.509 version 1 and 2 certificates
Extended X.509 version 3 and 4 certificates
Certificates conformant to the IETF PKIX profile
SSL/TLS server and client certificates
S/MIME email certificates
SET certificates
SigG certificate extensions
AuthentiCode code signing certificates
Identrus certificates
Qualified certificates
IPsec server, client, end-user, and tunnelling certificates
Server-gated crypto certificates
Timestamping certificates
In addition cryptlib supports X.509v3, X.509v4, IETF, S/MIME, SET, and SigGcertificate extensions and many vendor-specific extensions including ones coveringpublic and private key usage, certificate policies, path and name constraints, policyconstraints and mappings, and alternative names and other identifiers. Thiscomprehensive coverage makes cryptlib a single solution for almost all certificateprocessing requirements.
The diagram below shows a typical cryptlib application, in which it provides the fullfunctionality of both a CA (processing certification requests, storing the issuedcertificates locally in a certificate database, and optionally publishing the certificateson the web or in an LDAP directory) and an end entity (generating certificationrequests, submitting them to a CA, and retrieving the result from the web or adirectory service).

Introduction6
cryptlib CASSL
server LDAPdirectory
Webserver
UserRetrieve
PublishCert request/
retrieve
CArepository
Localcertificaterepository
To handle certificate trust and revocation issues, cryptlib includes a certificate trustmanager that can be used to automatically manage CA trust settings. For example aCA can be designated as a trusted issuer that will allow cryptlib to automaticallyevaluate trust along certificate chains. Similarly, cryptlib can automatically checkcertificates against RTCS and OCSP responders and CRLs published by CAs,removing from the user the need to perform complex manual checking.
CA Operationscryptlib includes a scalable, flexible Certificate Authority (CA) engine built on thetransaction-processing capabilities of a number of proven, industrial-strengthrelational databases running on a variety of hardware platforms. The CA facilityprovides an automated means of handling certificate issuance without dealing directlywith the details of processing request, signing certificates, saving the resultingcertificates in keys stores, and assembling CRLs. This constitutes a complete CAsystem for issuance and management of certificates and CRLs. A typical cryptlib CAconfiguration is shown below.

cryptlib features 7
cryptlib CA HSM
Certificatestore
LDAP
RTCS/OCSP
CMP/SCEP/PKCS #10
Certificateclient
Statusclient
Smartcard
Certificates/CRLs
Available CA operations include:
Certificate enrolment/initialisation operations
Certificate issue
Certificate update/key update
Certificate expiry management
Revocation request processing
CRL issue
All CA operations are recorded to an event log using cryptlib’s built-in CAlogging/auditing facility, which provides a full account of certificate requests,certificates issued or renewed, revocations requested and issued, certificates expired,and general CA management operations. The logs may be queried for information onall events or a specified subset of events, for example all certificates that were issuedon a certain day.
cryptlib contains a full implementation of a CMP server (to handle online certificatemanagement), and SCEP server (to handle online certificate issue), a RTCS server (tohandle real-time certificate status checking), and an OCSP server (to handlerevocation checking). All of these servers are fully automated, requiring little userintervention beyond the initial enrolment process in which user eligibility for acertificate is established. These services make it easier than ever to manage your ownCA. Certificate expiration and revocation are handled automatically by the CAengine. Expired certificates are removed from the certificate store, and CRLs areassembled from previously processed certificate revocation requests. Theseoperations are handled with a single function call.
The CA keys can optionally be generated and held in tamper-resistant hardwaresecurity modules, with certificate signing being performed by the hardware module.Issued certificates can be stored on smart cards or similar crypto devices in additionto being managed using software-only implementations. The CA facility supports thesimultaneous operation of multiple CAs, for example to manage users served through

Introduction8
divisional CAs certified by a root CA. Each CA can issue multiple certificates tousers, allowing the use of separate keys bound to signature and encryptioncertificates.
Crypto Devices and Smart Card SupportIn addition to its built-in capabilities, cryptlib can make use of the crypto capabilitiesof a variety of external crypto devices such as:
Hardware crypto accelerators
Fortezza cards
PKCS #11 devices
Crypto smart cards
Hardware security modules (HSMs)
PCI crypto cards
Dallas iButtons
Datakeys/iKeys
PCMCIA crypto tokens
USB tokens
These devices will be used by cryptlib to handle functions such as key generation andstorage, certificate creation, digital signatures, and message en- and decryption.Typical applications include:
Running a certification authority inside tamper-resistant hardware
Smart-card based digital signatures
Message encryption/decryption in secure hardware
cryptlib manages any device-specific interfacing requirements so that theprogramming interface for any crypto device is identical to cryptlib’s native interface, allowing existing applications that use cryptlib to be easily and transparently migratedto using crypto devices. The ability to mix and match crypto devices and thesoftware-only implementation allows appropriate tradeoffs to be chosen betweenflexibility, cost, and security.
Certificate Store Interfacecryptlib utilizes commercial-strength RDBMS’ to store keys in the internationally standardised X.509 format. The certificate store integrates seamlessly into existingdatabases and can be managed using existing tools. For example a key databasestored on an MS SQL Server might be managed using Visual Basic or MS Access; akey database stored on an Oracle server might be managed through SQL*Plus.
In addition to standard certificate stores, cryptlib supports the storage and retrieval ofcertificates in LDAP directories, HTTP access for keys accessible via the web, andexternal flat-file key collections such as PKCS #15 soft-tokens and PGP/OpenPGPkey rings. The key collections may be freely mixed (so for example a private keycould be stored in a PKCS #15 soft-token, a PGP/OpenPGP key ring or on a smartcard with the corresponding X.509 certificate being stored in a certificate store, anLDAP directory, or on the web).
Private keys may be stored on disk encrypted with an algorithm such as triple DES orAES (selectable by the user), with the password processed using several thousanditerations of a hashing algorithm such as SHA-1 (also selectable by the user). Wherethe operating system supports it, cryptlib will apply system security features such asACLs under Windows NT/2000/XP and file permissions under Unix to the privatekey file to further restrict access.

cryptlib features 9
User InterfaceIn addition to its general security functionality, cryptlib includes a number of userinterface components that simplify the task of working with keys and certificates.Components such as the certificate viewer shown below allow users to browse thecontents of certificates, certificate chains, requests, and other certificate objects. Thekey generation wizard simplifies the task of key and certificate generation byhandling most of the details of the process automatically, producing a completepublic/private key pair and certificate request suitable for submission to a CA, or aself-signed certificate for immediate use. These user interface components removemuch of the complexity of the key and certificate management process, allowingdevelopers to concentrate on applying the completed keys and certificates towardssecuring data, email, or communications sessions rather than on the process needed tocreate them.
Security Featurescryptlib is built around a security kernel with Orange Book B3-level security featuresto implement its security mechanisms. This kernel provides the interface between theoutside world and the architecture’s objects (intra-object security) and between theobjects themselves (inter-object security). The security kernel is the basis of theentire cryptlib architecture— all objects are accessed and controlled through it, andall object attributes are manipulated through it. The kernel is implemented as aninterface layer that sits on top of the objects, monitoring all accesses and handling allprotection functions.
Each cryptlib object is contained entirely within the security perimeter, so that dataand control information can only flow in and out in a very tightly-controlled manner,and objects are isolated from each other within the perimeter by the security kernel.For example once keying information has been sent to an object, it can’t be retrieved

Introduction10
by the user except under tightly-controlled conditions. In general keying informationisn’t even visible to the user, since it’s generated inside the object itself and never leaves the security perimeter. This design is ideally matched to hardwareimplementations that perform strict red/black separation, since sensitive informationcan never leave the hardware.
Associated with each object is a set of mandatory ACLs that determine who canaccess a particular object and under which conditions the access is allowed. If theoperating system supports it, all sensitive information used will be page-locked toensure that it’s never swapped to disk from where it could be recovered using adiskeditor. All memory corresponding to security-related data is managed by cryptlib andwill be automatically sanitised and freed when cryptlib shuts down even if the callingprogram forgets to release the memory itself.
Where the operating system supports it, cryptlib will apply operating system securityfeatures to any objects that it creates or manages. For example under WindowsNT/2000/XP cryptlib private key files will be created with an access control list(ACL) that allows only the key owner access to the file; under Unix the filepermissions will be set to achieve the same result.
Embedded Systemscryptlib’s high level of portability and configurability makes it ideal for use in embedded systems with limited resources or specialised requirements, including onesbased on ARM7, ARM9, ARM TDMI, Fujitsu FR-V, Hitachi SuperH, MIPS IV,MIPS V, Motorola ColdFire, NEC V8xx series, NEC VRxxxx series,Panasonic/Matsushita AM33/AM34, PowerPC, Samsung CalmRISC, SH3, SH4, SPARC, SPARClite, StrongArm, TI OMAP, and Intel XScale processors. cryptlibdoesn’t perform any floating-point operations and runs directly on processors withoutan FPU.
The code is fully independent of any underlying storage or I/O mechanisms, andworks just as easily with abstractions such as named memory segments in flashmemory as it does with standard key files on disk. It has been deployed on embeddedsystems without any conventional I/O capabilities (stdio) or dynamic memoryallocation facilities, with proprietary operating system architectures and servicesincluding ATMs, printers, web-enabled devices, POS systems, embedded devicecontrollers, and similar environments, and even in devices with no operating systemat all (cryptlib runs on the bare metal). It can also run independent of any form ofoperating system, and has been run on the bare metal in environments with minimalavailable resources, in effect functioning as a complete crypto operating system forthe underlying hardware.
Because cryptlib functions identically across all supported environments, it’s possible to perform application development in a full-featured development environment suchas Windows or Unix and only when the application is complete and tested move it tothe embedded system. This flexibility saves countless hours of development time,greatly reducing the amount of time that needs to be spent with embedded systemsdebuggers or in-circuit emulators since most of the development and code testing canbe done on the host system of choice.
If required the cryptlib developers can provide assistance in moving the code to anynew or unusual environments.
Performancecryptlib is re-entrant and completely thread-safe, allowing it to be used withmultithreaded applications under BeOS, OS/2, Windows 95/98/ME, WindowsNT/2000/XP, Windows CE, and Unix systems that support threads. Because it isthread-safe, lengthy cryptlib operations can be run in the background if requiredwhile other processing is performed in the foreground. In addition cryptlib itself ismultithreaded so that computationally intensive internal operations take place in thebackground without impacting the performance of the calling application.

cryptlib features 11
Most of the core algorithms used in cryptlib have been implemented in assemblylanguage in order to provide the maximum possible performance, and will takeadvantage of crypto hardware acceleration facilities present in some CPUs such as theVia C3 family. These routines provide an unprecedented level of performance, inmost cases running faster than expensive, specialised encryption hardware designedto perform the same task. This means that cryptlib can be used for high-bandwidthapplications such as video/audio encryption and online network and disk encryptionwithout the need to resort to expensive, specialised encryption hardware.
Cryptographic Random Number Managementcryptlib contains an internal secure random data management system that providesthe cryptographically strong random data used to generate session keys andpublic/private keys, in public-key encryption operations, and in various other areasthat require secure random data. The random data pool is updated with unpredictableprocess-specific information as well as system-wide data such as current disk I/O andpaging statistics, network, assorted client/server network protocol traffic, packet filterstatistics, multiprocessor statistics, process information, users, VM statistics, processstatistics, battery/power usage statistics, system thermal management data, open files,inodes, terminals, vector processors, streams, and loaded code, objects in the globalheap, loaded modules, running threads, process, and tasks, and an equally largenumber of system performance-related statistics covering virtually every aspect of theoperation of the system.
The exact data collected depends on the hardware and operating system, but generallyincludes extremely detailed and constantly changing operating statistics andinformation. In addition if a /dev/random, EGD, or PRNGD-style stylerandomness driver (which continually accumulates random data from the system) isavailable, cryptlib will use this as a source of randomness. Finally, cryptlib supportsa number of cryptographically strong hardware random number generators, eitherbuilt into the CPU or system chipset or available as external crypto devices, that canbe used to supplement the internal generator. As a post-processing stage, cryptlibemploys an ANSI X9.17/X9.31 generator for additional security and for FIPS 140compliance. This level of secure random number management ensures that securityproblems such as those present in Netscape’s web browser (which allowed encryption keys to be predicted without breaking the encryption because the “random” data wasn’t at all random) can’t occur with cryptlib.
Programming InterfaceThe application programming interface (API) serves as an interface to a range ofplug-in encryption modules that allow encryption algorithms to be added in a fairlytransparent manner, so that adding a new algorithm or replacing an existing softwareimplementation with custom encryption hardware can be done without any trouble.The standardised API allows any of the algorithms and modes supported by cryptlibto be used with a minimum of coding effort. In addition the easy-to-use high-levelroutines allow for the exchange of encrypted or signed messages or the establishmentof secure communications channels with a minimum of programming overhead.Language bindings are available for C / C++, C# / .NET, Delphi, Java, Python, Tcl,and Visual Basic (VB).
cryptlib has been written to be as foolproof as possible. On initialisation it performsextensive self-testing against test data from encryption standards documents, and theAPIs check each parameter and function call for errors before any actions areperformed, with error reporting down to the level of individual parameters. Inaddition logical errors such as, for example, a key exchange function being called inthe wrong sequence, are checked for and identified.
Documentationcryptlib comes with extensive documentation in the form of a 310-page user manualand a 320-page technical reference manual. The user manual is intended foreveryday cryptlib use and contains detailed documentation on every aspect of

Introduction12
cryptlib’s functionality. In most cases the code needed to secure an application canbe cut and pasted directly from the appropriate section of the manual, avoiding theneed to learn yet another programming API. The user manual concludes with areference section covering the various cryptlib API functions, constants, and datatypes.
The technical reference manual covers the design and internals of cryptlib itself,including the cryptlib security model and security mechanisms that protect every partof cryptlib’s operation. In additionthe technical manual provides a wealth ofbackground information to help users understand the security foundations on whichcryptlib is built.
Algorithm SupportIncluded as core cryptlib components are implementations of the most popularencryption and authentication algorithms, AES, Blowfish, CAST, DES, triple DES,IDEA, RC2, RC4, RC5, and Skipjack, conventional encryption, MD2, MD4, MD5,RIPEMD-160, SHA-1, and SHA-2 hash algorithms, HMAC-MD5, HMAC-SHA, andHMAC-RIPEMD-160 algorithms, and Diffie-Hellman, DSA, Elgamal, and RSApublic-key encryption, with elliptic-curve encryption under development. Thealgorithm parameters are summarised below:
Algorithm Key size Block sizeAES 128/192/256 128Blowfish 448 64CAST-128 128 64DES 56 64Triple DES 112 / 168 64IDEA 128 64RC2 1024 64RC4 2048 8RC5 832 64Skipjack 80 64MD2 — 128MD4 — 128MD5 — 128RIPEMD-160 — 160SHA-1 — 160SHA-2 — 256HMAC-MD5 128 128HMAC-SHA 160 160HMAC-RIPEMD-160 160 160Diffie-Hellman 4096 —DSA 40961 —Elgamal 4096 —RSA 4096 —
Unlike many similar products sourced from the US, cryptlib contains no deliberatelyweakened encryption or other backdoors, and allows worldwide use of keys of up to4096 bits. This makes such products unsuited for protecting sensitive, confidentialdata, and gives cryptlib an automatic advantage.
Standards ComplianceAll algorithms, security methods, and data encoding systems in cryptlib either complywith one or more national and international banking and security standards, or areimplemented and tested to conform to a reference implementation of a particularalgorithm or security system. Compliance with national and international securitystandards is automatically provided when cryptlib is integrated into an application.These standards include ANSI X3.92, ANSI X3.106, ANSI X9.9, ANSI X9.17, ANSI
1 The DSA standard only defines key sizes from 512 to 1024 bits, cryptlib supports longer keys but there is noextra security to be gained from using these keys.

cryptlib features 13
X9.30-1, ANSI X9.30-2, ANSI X9.31-1, ANSI X9.42, ANSI X9.52, ETSI TS 101733, ETSI TS 101 861, ETSI TS 101 862, ETSI TS 102, FIPS PUB 46-2, FIPS PUB46-3, FIPS PUB 74, FIPS PUB 81, FIPS PUB 113, FIPS PUB 180, FIPS PUB 180-1,FIPS PUB 186, FIPS PUB 198, ISO/IEC 8372, ISO/IEC 8731 ISO/IEC 8732,ISO/IEC 8824/ITU-T X.680, ISO/IEC 8825/ITU-T X.690, ISO/IEC 9797, ISO/IEC10116, ISO/IEC 10118, ITU-T X.842, ITU-T X.843, PKCS #1, PKCS #3, PKCS #5,PKCS #7, PKCS #9, PKCS #10, PKCS #11, PKCS #15, RFC 1319, RFC 1320, RFC1321, RFC 1750, RFC 1991, RFC 2040, RFC 2104, RFC 2144, RFC 2202, RFC2246, RFC 2268, RFC 2311 (cryptography-related portions), RFC 2312, RFC 2313,RFC 2314, RFC 2315, RFC 2437, RFC 2440, RFC 2459, RFC 2510, RFC 2511, RFC2528, RFC 2560, RFC 2585, RFC 2630, RFC 2631, RFC 2632, RFC 2633(cryptography-related portions), RFC 2634, RFC 2785, RFC 2876, RFC 2898, RFC2984, RFC 2985, RFC 2986, RFC 3039, RFC 3058, RFC 3114, RFC 3126, RFC3161, RFC 3174, RFC 3183, RFC 3211, RFC 3218, RFC 3261 (cryptography-relatedportions), RFC 3268, RFC 3274, RFC 3279, RFC 3280, RFC 3281, RFC 3369, RFC3370, RFC 3447, RFC 3546, and RFC 3565. Because of the use of internationallyrecognised and standardised security algorithms, cryptlib users will avoid theproblems caused by home-grown, proprietary algorithms and security techniques thatoften fail to provide any protection against attackers, resulting in embarrassing badpublicity and expensive product recalls.
Y2K Compliancecryptlib handles all date information using the ANSI/ISO C time format, which doesnot suffer from Y2K problems. Although earlier versions of the X.509 certificateformat do have Y2K problems, cryptlib transparently converts the dates encoded incertificates to and from the ANSI/ISO format, so cryptlib users will never see this.cryptlib’s own time/date format is not affected by any Y2K problems, and cryptlib itself conforms to the requirements in the British Standards Institution’s DISC PD2000-1:1998 Y2K compliance standard.
Configuration Optionscryptlib works with a configuration database that can be used to tune its operation fordifferent environments. This allows a system administrator to set a consistentsecurity policy which is then automatically applied by cryptlib to operations such askey generation and data encryption and signing, although they can be overridden on aper-application or per-user basis if required.
cryptlib ApplicationsThe security services provided by cryptlib can be used in virtually any situation thatrequires the protection or authentication of sensitive data. Some areas in whichcryptlib is currently used include:
Protection of medical records transmitted over electronic links.
Protection of financial information transmitted between branches of banks.
Transparent disk encryption.
Strong security services added to web browsers with weak, exportablesecurity.
Running a CA.
Encrypted electronic mail.
File encryption.
Protecting content on Internet servers.
Digitally signed electronic forms.
S/MIME mail gateway.
Secure database access.

Introduction14
Protection of credit card information.
Encryption Code ExampleThe best way to illustrate what cryptlib can do is with an example. The followingcode encrypts a message using public-key encryption.
/* Create an envelope for the message */cryptCreateEnvelope( &cryptEnvelope, cryptUser, CRYPT_FORMAT_SMIME );
/* Push in the message recipient's name */cryptSetAttributeString( cryptEnvelope, CRYPT_ENVINFO_RECIPIENT,
recipientName, recipientNameLength );
/* Push in the message data and pop out the signed and encryptedresult */
cryptPushData( cryptEnvelope, message, messageSize, &bytesIn );cryptFlushData( cryptEnvelope );cryptPopData( cryptEnvelope, encryptedMessage, encryptedSize,
&bytesOut );
/* Clean up */cryptDestroyEnvelope( cryptEnvelope );
This performs the same task as a program like PGP using just 6 function calls (tocreate a PGP/OpenPGP message, just change the CRYPT_FORMAT_SMIME toCRYPT_FORMAT_PGP). All data management is handled automatically bycryptlib, so there’s no need to worry about encryption modes and algorithms and key lengths and key types and initialisation vectors and other details (although cryptlibprovides the ability to specify all this if you feel the need).
The code shown above results in cryptlib performing the following actions:
Generate a random session key for the default encryption algorithm (usuallytriple DES or AES).
Look up the recipient’s public key in a key database.
Encrypt the session keyusing the recipient’s public key.
Encrypt the signed data with the session key.
Pass the result back to the user.
However unless you want to call cryptlib using the low-level interface, you neverneed to know about any of this. cryptlib will automatically know what to do with thedata based on the resources you add to the envelope— if you add a signature key itwill sign the data, if you add an encryption key it will encrypt the data, and so on.
Secure Session Code ExampleEstablishing a secure session using SSL/TLS is similarly easy:
CRYPT_SESSION cryptSession;
/* Create the session */cryptCreateSession( &cryptSession, cryptUser, CRYPT_SESSION_SSL );
/* Add the server name and activate the session */cryptSetAttributeString( cryptSession, CRYPT_SESSINFO_SERVER_NAME,
serverName, serverNameLength );cryptSetAttribute( cryptSession, CRYPT_SESSINFO_ACTIVE, 1 );
If you prefer SSH to SSL, just change the CRYPT_SESSION_SSL to CRYPT_-SESSION_SSH and add a user name and password to log on. As with the encryptioncode example above, cryptlib provides a single unified interface to its secure sessionmechanisms, so you don’t have to invest a lot of effort in adding special-casehandling for different security protocols and mechanisms.
The corresponding SSL/TLS (or SSH if you prefer) server is:

Document conventions 15
CRYPT_SESSION cryptSession;
/* Create the session */cryptCreateSession( &cryptSession, cryptUser, CRYPT_SESSION_SSL_SERVER
);
/* Add the server key/certificate and activate the session */cryptSetAttribute( cryptSession, CRYPT_SESSINFO_PRIVATEKEY, privateKey
);cryptSetAttribute( cryptSession, CRYPT_SESSINFO_ACTIVE, 1 );
As with the secure enveloping example, cryptlib is performing a large amount ofwork in the background, but again there’s no need to know about this since it’s all taken care of automatically.
Certificate Management Code ExampleThe following code illustrates cryptlib’s plug-and-play PKI interface:
CRYPT_SESSION cryptSession;
/* Create the CMP session and add the server name/address */cryptCreateSession( &cryptSession, cryptUser, CRYPT_SESSION_CMP );cryptSetAttributeString( cryptSession, CRYPT_SESSINFO_SERVER, server,
serverLength );
/* Add the username, password, and smart card */cryptSetAttributeString( cryptSession, CRYPT_SESSINFO_USERNAME,
userName, userNameLength );cryptSetAttributeString( cryptSession, CRYPT_SESSINFO_PASSWORD,
password, passwordLength );cryptSetAttribute( cryptSession, CRYPT_SESSINFO_CMP_PRIVKEYSET,
cryptDevice );
/* Activate the session */cryptSetAttribute( cryptSession, CRYPT_SESSINFO_ACTIVE, TRUE );
This code takes a smart card and generates separate encryption and signing keys in it,requests a signature certificate from the CA for the signing key, uses that to obtain acertificate for the encryption key, obtains any further certificates that may be neededfrom the CA (for example for S/MIME signing or SSL server operation), and storeseverything in the smart card. Compare this to the hundreds or even thousands of linesof code required to do the same thing using other toolkits.
Oh yes, and cryptlib provides the CA-side functionality as well— there’s no need to pay an expensive commercial CA for your certificates, since cryptlib can perform thesame function.
Document conventionsThis manual uses the following document conventions:
Example Description
cryptlib.h This font is used for filenames.
cryptCreateContext Bold type indicates cryptlib function names.
Value Words or portions of words in italics indicateplaceholders for information that you need tosupply.
if( i == 0 ) This font is used for sample code and operatingsystem commands.
Recommended ReadingOne of the best books to help you understand how to use cryptlib is Network Securityby Charlie Kaufman, Radia Perlman, and Mike Speciner, which covers generalsecurity principles, encryption techniques, and a number of potential cryptlibapplications such as X.400/X.500 security, PEM/S/MIME/PGP, Kerberos, andvarious other security, authentication, and encryption techniques. The book also

Introduction16
contains a wealth of practical advice for anyone considering implementing acryptographic security system. Security Engineering: A Guide to BuildingDependable Distributed Systems by Ross Anderson also contains a large amount ofuseful information and advice on engineering secure systems. Building SecureSoftware by John Viega and Gary McGraw and Writing Secure Software by MichaelHoward and David LeBlanc contain a wealth of information on safe programmingtechniques and related security issues.
Cryptographic Security Architecture Design and Verification by Peter Gutmann is thetechnical documentation for cryptlib and complements the cryptlib user manual. Itcontains full details of the architectural and security features of cryptlib, as well as awealth of background material to help you understand the security foundations onwhich cryptlib is built.
A tutorial in 8 parts totalling over 700 slides and covering all aspects of encryptionand general network security, including encryption and security basics, algorithms,key management and certificates, CAs, certificate profiles and policies, PEM, PGP,S/MIME, SSL, SSH, SET, smart cards, and a wide variety of related topics, isavailable from http://www.cs.auckland.ac.nz/~pgut001/tutorial/. Ifyou want to do anything with certificates, you should definitely read Everything youNever Wanted to Know about PKI but were Forced to Find Out, available fromhttp://www.cs.auckland.ac.nz/~pgut001/pubs/-pkitutorial.pdf, to find out what you’re in for if you have to work with certificates.
In addition to this, there are a number of excellent books available that will help youin understanding the cryptography used in cryptlib. The foremost of these areApplied Cryptography by Bruce Schneier and the Handbook of Applied Cryptographyby Alfred Menezes, Paul van Oorschot, and Scott Vanstone. Applied Cryptographyprovides an easy-to-read overview while the Handbook of Applied Cryptographyprovides extremely comprehensive, in-depth coverage of the field.
For general coverage of computer security issues, Security in Computing by CharlesPfleeger provides a good overview of security, access control, and secure operatingsystems and databases, and also goes into a number of other areas such as ethicalissues that aren’t covered by most books on computer security. Computer Security:Art and Science by Matt Bishop provides in-depth coverage of all aspects ofcomputer security modelling and design, with a particular emphasis on access controland security models and high-assurance systems.

Recommended Reading 17
InstallationThis chapter describes how to install cryptlib for a variety of operating systems.
AMXThe AMX Multitasking Executive is a real-time OS (RTOS) with developmenthosted under Unix or Windows. You can build cryptlib for AMX using the cross-compilation capabilities of the standard makefile, see the entry for Unix on page 19for more details on working with the makefile. The make target for AMX istarget-amx, so you’d build cryptlib with make target-amx. Details on buildingand using cryptlib for AMX, and on embedded cryptlib in general, are given in“Embedded Systems” on page 276.
BeOSThe BeOS version of cryptlib can be built using a procedure which is identical to thatgiven for Unix on page 19. Any current version of BeOS can build the code directlyfrom the Unix makefile. Old versions of BeOS using the Be developmentenvironment will require that you edit the Unix makefile slightly by un-commentingthe marked lines at the start of the file.
DOSThe 16-bit DOS version of cryptlib can be built from the same files as the 16-bitWindows version, so no separate makefile is provided. Any attempt to use high-levelroutines that require random data will fail with a CRYPT_ERROR_RANDOM errorcode unless a /dev/random-style driver is available because there isn’t any way to reliably obtain random data under DOS. You can however treat DOS as anembedded systems environment and use the random seeding capability described in“Porting to Devices without Randomness/Entropy Sources” on page 281.
DOS32The 32-bit DOS version of cryptlib can be built using the supplied makefile, whichrequires the djgpp compiler. The DOS32 version of cryptlib uses the same 32-bitassembly language code used by the Win32 and 80x86 Unix versions, so it runssignificantly faster than the 16-bit DOS version. Like the 16-bit DOS version, anyattempt to use the high-level key export routines will fail with a CRYPT_ERROR_-RANDOM error code unless a /dev/random-style driver is available because thereisn’t any way to reliably obtain random data under DOS.
eCOSeCOS is an embedded/real-time OS (RTOS) with development hosted under Unix orWindows. You can build cryptlib for eCOS using the cross-compilation capabilitiesof the standard makefile, see the entry for Unix on page 19 for more details onworking with the makefile. The make target for eCOS is target-ecos, so you’d build cryptlib with make target-ecos. Details on building and using cryptlib foreCOS, and on embedded cryptlib in general, are given in “Embedded Systems” on page 276.
Embedded LinuxThe embedded Linux version of cryptlib can be built using the standard Linuxdevelopment tools. Since this environment is identical to the generic Unix one, theinstallation instructions for Unix on page 19 apply here.
µITRONµITRON is an embedded/real-time OS (RTOS) with development usually hostedunder Unix or a Unix-like OS. You can build cryptlib for µITRON using the cross-compilation capabilities of the standard makefile, see the entry for Unix on page 19for more details on working with the makefile. The make target for µITRON istarget-itron, so you’d build cryptlib with make target-itron. Details on

Installation18
building and using cryptlib for µITRON, and on embedded cryptlib in general, aregiven in “Embedded Systems” on page 276.
Macintosh OS XThe standard Macintosh build environment uses Apple’s Mac OS X Developer Tools, driven by the standard makefile, for which the instructions in the section on buildingcryptlib for Unix on page 19 apply. Alternatively, you can build cryptlib usingMetroworks’ Codewarrior with the Mac.mcp project file. This can build cryptlibeither as a static or shared library for both 68K and PowerPC Macs, although sincethis isn’t the primary build environment the project file may apply to a slightly older cryptlib release and require a little updating to match the current configuration (thestandard makefile will always be current). In addition it’s possible to build it usingApple’s free MrC compiler, with the same caveat about updating of configuration files.
MVSThe MVS version of cryptlib can be built using the standard IBM C/C++ compilerand accompanying tools. Since this environment is very similar to the Unix one, theinstallation instructions for Unix on page 19 apply here also. Note that PTFUQ50384 (which fixes a bug in the macro version of the strcat function asdescribed in APAR PQ43130) is required if you’re using the V2R10 C/C++ compiler.
You can control the use of ddnames with the DDNAME_IO define. If DDNAME_IOis defined when building the code, cryptlib will use ddnames for all I/O, and useroptions will be saved in dynamically allocated datasets userid.CRYPTLIB.filename.If DDNAME_IO is not defined when building the code, cryptlib will use HFS for allI/O, and user options will be saved in $HOME/.cryptlib.
After you’ve built cryptlib, you should run the self-test program to make sure thateverything is working OK. You can use the ussalloc USS shell script to allocateMVS data sets for testlib, and the usscopy shell script to copy the files in the testdirectory to the MVS data sets allocated with ussalloc. testlib.jcl is the JCL neededto execute testlib.
OS2The OS/2 version of cryptlib can be built using the command-line version of the IBMcompiler. The supplied makefile will build the DLL version of cryptlib, and can alsobuild the cryptlib self-test program, which is a console application. You should runthe self-test program after you’ve built cryptlib to make sure that everything is working OK.
If you’re using the IBM OS/2 compiler you should set enumerated types to always be 32-bit values because the compiler by default uses variable-length types depending onthe enum range (so one enum could be an 8-bit type and another 32). cryptlib isimmune to this “feature”, and function calls from your code to cryptlib should also be unaffected because of type promotion to 32-bit integers, but the variable-range enumsmay cause problems in your code if you try to work with them under the assumptionthat they have a fixed type.
PalmOSPalmOS is the operating system for the Palm series of PDAs, with developmenthosted under Unix or Windows. You can build cryptlib for PalmOS using thePalmOS 6 SDK and the cross-compilation capabilities of the standard makefile, seethe entry for Unix on page 19 for more details on working with the makefile. Themake target for the PalmOS SDK is target-palmos and for the alternative PRCdevelopment tools is target-palmos-prc, so you’d build cryptlib with maketarget-palmos or make target-palmos-prc. Details on building and using cryptlibfor PalmOS, and on embedded cryptlib in general, are given in “Embedded Systems” on page 276.

Recommended Reading 19
QNX NeutrinoThe QNX Neutrino version of cryptlib can be built using the standard QNXdevelopment tools. Since this environment is identical to the generic Unix one, theinstallation instructions for Unix on page 19 apply here.
RTEMSThe Real-Time Operating System for Multiprocessor Systems (RTEMS) is a real-time OS (RTOS) with development hosted under Unix or Windows. You can buildcryptlib for RTEMS using the cross-compilation capabilities of the standard makefile,see the entry for Unix on page 19 for more details on working with the makefile. Themake target for RTEMS is target-rtems, so you’d build cryptlib with maketarget-rtems. Details on building and using cryptlib for RTEMS, and on embeddedcryptlib in general, are given in “Embedded Systems” on page 276.
TandemThe Tandem version of cryptlib can be built using the standard c89 compiler andaccompanying tools under the OSS environment. Since this environment is verysimilar to the Unix one, the installation instructions for Unix on page 19 apply herealso. The default target is Tandem OSS, you can re-target the built for NSK using the-Wsystype=guardian directive in the makefile.
The Guardian sockets implementation changed in newer releases of the OS. Olderreleases required the use of nonstandard nowait sockets handled via AWAITIOX()instead of the standard BSD sockets interface. If you’re running an older version of the OS and need to use any of the secure networking protocols such as SSL/TLS,SSH, CMP, SCEP, RTCS, or OCSP, please contact the cryptlib developers for furtherinformation.
uClinuxuClinux is a real-mode/embedded version of Linux with development hosted underUnix. You can build cryptlib for uClinux using the cross-compilation capabilities ofthe standard makefile, see the entry for Unix on page 19 for more details on workingwith the makefile. The make target for uClinux is target-uclinux, so you’d build cryptlib with make target-uclinux. Details on building and using cryptlib foruClinux, and on embedded cryptlib in general, are given in“Embedded Systems” on page 276.
Unix
To unzip the code under Unix use the -a option to ensure that the text files areconverted to the Unix format. The makefile by default will build the statically-linkedlibrary when you invoke it with make. To build the shared library, use makeshared. Once cryptlib has been built, use make testlib to build the cryptlibself-test program testlib, or make stestlib to build the shared-library self-testprogram stestlib. This will run fairly extensive self-tests of cryptlib that you shouldrun after you’ve built it to make sure that everything is working OK. testlib needs tobe run from the cryptlib root directory (the one that the main data files are in) since ituses a large number of pre-generated data files that are located in a subdirectorybelow this one. Depending on your system setup and privileges you may need toeither copy the shared library to /usr/lib or set the LD_LIBRARY_PATHenvironment variable (or an OS-specific equivalent) to make sure that the sharedlibrary is used.
If your system doesn’t come pre-configured with a /dev/random, EGD, orPRNGD-style style randomness driver (which continually accumulates random datafrom the system), you may want to download one and install it, since cryptlib willmake use of it for gathering entropy. cryptlib has a built-in randomness pollingsubsystem so it will function without an external randomness driver, but it never hurtsto have one present to supplement the internal entropy polling.

Installation20
If you’re using a key database or certificate store, you need to enable the use of the appropriate interface module for the database backend. Details are given in “KeyDatabase Setup” on page 22. For the cryptlib self-test code you can define thedatabase libraries using the TESTLIBS setting at the start of the makefile. If youdon’t enable the use of a database interface, the self-test code will issue a warningthat no key database is present and continue without testing the database interface.
If you’re using an LDAP directory, you need to install the required LDAP client library on your system, enable the use of LDAP using the USE_LDAP define beforeyou build cryptlib, and link the LDAP client library into your executable. If youdon’t enable the use of an LDAP directory interface, the self-test code will issue awarning that no LDAP directory interface is present and continue without testing theLDAP interface.
If you’re using special encryption hardware or an external encryption device such as aPCMCIA card or smart card, you need to install the required device drivers on yoursystem and enable their use when you build cryptlib by linking in the requiredinterface libraries. If you don’t enable the use of a crypto device, the self-test codewill issue a warning that no devices are present and continue without testing thecrypto device interface.
For any common Unix system, cryptlib will build without any problems, but in somerare cases you may need to edit random/unix.c and possibly io/file.h and io/tcp.h ifyou’re running an unusual Unix variant that puts include files in strange places or has broken Posix or sockets support.
VM/CMSThe VM/CMS version of cryptlib can be built using the standard C/370 compiler andaccompanying tools. The supplied EXEC2 file VMBUILD EXEC will build cryptlibas a TXTLIB and then build the self-test program as an executable MODULE file.Since VM sites typically have different system configurations, this file and possiblyportions of the source code may require tuning in order to adjust it to suit the buildprocess normally used at your site.
Windows 3.xThe 16-bit cryptlib DLL can be built using the cl16.mak makefile, which is forversion 1.5x of the Visual C++ compiler. The mixed C/assembly languageencryption and hashing code will give a number of warnings, the remaining codeshould compile without warnings. Once the DLL has been built, test.mak will buildthe cryptlib self-test program, which is a console application. You should run thisafter you’ve built cryptlib to make sure that everything is working OK.
If you’re using a key database or certificate store, you need to set up an ODBC data source for this. Details are given in “Key Database Setup” on page 22.
If you’re using special encryption hardware or an external encryption device such as a PCMCIA card or smart card, you need to install the required device drivers on yoursystem, and if you’re using a generic PKCS #11 device you need to configure the appropriate driver for it as described in “Encryption Devices and Modules” on page 255. cryptlib will automatically detect and use any devices that it recognises and thathave drivers present. If you don’t enable the use of a crypto device, the self-test codewill issue a warning that no devices are present and continue without testing thecrypto device interface.
Windows 95/98/ME and Windows NT/2000/XPThe 32-bit cryptlib DLL can be built using the crypt32 project file, which is forVisual C++ 6 and Visual C++ .NET. Once the DLL has been built, the test32project file will build the cryptlib self-test program test32, which is a consoleapplication. You should run this after you’ve built cryptlib to make sure that everything is working OK. test32 needs to be run from the cryptlib root directory(the one that the main data files are in) since it uses a large number of pre-generateddata files that are located in a subdirectory below this one. If you will be using the

Recommended Reading 21
cryptlib user interface components you need to install the cryptlib user interfacelibrary cl32ui.dll alongside cryptlib itself.
If you’re using Visual C++ .NET, a bug in its version 6 project file import processresults in files having the $(NoInherit) property set, so that a define made at theproject level won’t be passed down to other files. If you want to enable options based on global defines, you need to disable this property before the defines will propagatedown to other files.
If you’re using a key database or certificate store, you need to set up an ODBC data source for this. Details are given in “Key Database Setup” on page 22.
If you’re using an LDAP directory, you may need to install the required LDAP client DLL on your system. By default cryptlib will use Windows’ built-in LDAP client,however some rather old versions of Windows don’t contain this and you’ll need touse the Netscape LDAP client DLL which is available for download from theNetscape web site. To use this client instead of the Windows one, you need to defineNETSCAPE_CLIENT when you build cryptlib. If you don’t have the Windows LDAP client present and don’t use the Netscape one, the self-test code will issue awarning that no LDAP directory interface is present and continue without testing theLDAP interface.
If you’re using special encryption hardware or an external encryption device such asaPCMCIA card or smart card, you need to install the required device drivers on yoursystem, and if you’re using a generic PKCS #11 device you need to configure the appropriate driver for it as described in “Encryption Devices and Modules” on page 255. cryptlib will automatically detect and use any devices that it recognises and thathave drivers present. If you don’t enable the use of a crypto device, the self-test codewill issue a warning that no devices are present and continue without testing thecrypto device interface.
Personal firewall products from some vendors can interfere with network operationsfor devices other than standard web browsers and mail clients. If you’re experiencing odd behaviour when using cryptlib for network operations (for example you canconnect but can’t exchange data, or you get strange error messages when you connect), you can try temporarily disabling the personal firewall to see if this fixesthe problem. If it does, you should contact the personal firewall vendor to fix theirproduct, or switch to a different product.
If you’re using Borland C++ rather than Visual C++, you’ll need to set up the .defand .lib files for use with the Borland compiler. To do this, run the followingcommands in the cryptlib directory:
impdef cl32 cl32implib cl32 cl32.def
The first one will produce a Borland-specific .def file from the DLL, the second onewill produce a Borland-specific .lib file from the DLL and .def file.
To install the ActiveX control, put the cryptlib DLL and the ActiveX wrapperclcom.dll into the Windows system directory and register the ActiveX wrapper with:
regsvr32 clcom.dll
To use it with Visual Basic, use Project | Reference to add clcom.dll, after which VBwill recognise the presence of the ActiveX wrapper.
Windows CE / Pocket PC / SmartPhoneThe 32-bit cryptlib DLL for Windows CE/PocketPC can be built using the crypt32ceproject file, which is for version 3 or 4 of the eMbedded Visual C++ compiler. Oncethe DLL has been built, the test32ce project file will build the cryptlib self-testprogram test32ce, which is a (pseudo-)console application that produces its outputon the debug console. You should run this after you’ve built cryptlib to make sure that everything is working OK. test32ce needs to be run from the cryptlib rootdirectory (the one that the main data files are in) since it uses a large number of pre-generated data files that are located in a subdirectory below this one.

Installation22
The cryptlib Windows CE self-test uses the ‘Storage Card’ pseudo-folder to accessthe files needed for the self-test. Depending on the system setup, you need to eithercopy the files to the storage card or (the easier alternative) use folder sharing toaccess the directory containing the test files. From the Windows CE menu, selectFolder Sharing and share the testdata subdirectory, which will appear as \\StorageCard\ on the Windows CE device.
Windows CE is a Unicode environment, which means that all text strings are passedto and from cryptlib as Unicode strings. For simplicity the examples in this manualare presented using the standard char data type used on most systems, howeverunder Windows CE all character types and strings are Unicode in line with standardWindows CE practice. When you’re using the examples, you should treat any occurrence of characters and strings as standard Unicode data types.
A few older versions of eVC++ for some platforms don’t include the ANSI/ISO C standard time.h header, which is a required file for a conforming ANSI/ISO Ccompiler. If you have a version of eVC++ that doesn’t include this standard header, you need to add it from another source, for example an eVC++ distribution that doesinclude it or the standard (non-embedded) VC++ distribution.
Xilinx XMKThe Xilinx Microkernel (XMK) is a real-time OS (RTOS) with development hostedunder Unix or Windows. You can build cryptlib for XMK using the cross-compilation capabilities of the standard makefile, see the entry for Unix on page 19for more details on working with the makefile. The make target for XMK istarget-xmk-mb for the MicroBlaze core and target-xmk-ppc for thePowerPC core, so you’d build cryptlib with make target-xmk-mb or make target-xmk-ppc. Details on building and using cryptlib for XMK, and on embeddedcryptlib in general, are given in “Embedded Systems” on page 276.
Other Systemscryptlib should be fairly portable to other systems, the only part that needs specialattention is the randomness-gathering in random/os_name.c (cryptlib won’t work without this, the code will produce a link error). The idea behind the randomness-gathering code is to perform a comprehensive poll of every possible entropy source inthe system in a separate thread or background task (“slowPoll”), as well as providing a less useful but much faster poll of quick-response sources (“fastPoll”). In addition the filesystem I/O code in io/file.c may need system-specific code and definitionsadded to it if the system you’re running on doesn’t use a standard form of file I/O, for example a system that has its own file I/O layer that isn’t compatible with standard models or one that doesn’t have file I/O at all such as an embedded device that usesflash memory for storage.
To find out what to compile, look at the Unix makefile, which contains all of thenecessary source files (the group_name_OBJS dependencies) and compileroptions. Link all of these into a library (as the makefile does) and then compile andlink the testxxx.c modules in the test subdirectory with the library to create the self-test program. There is additional assembly-language code included that will lead tonoticeable speedups on some systems, you should modify your build options asappropriate to use these if possible.
Depending on your compiler you may get a few warnings about some of theencryption and hashing code (one or two) and the bignum code (one or two). Thiscode mostly relates to the use of C as a high-level assembler and changing thingsaround to remove the warnings on one system could cause the code to break onanother system.
Key Database SetupIf you want to work with a key database or certificate store, you need to configure adatabase for cryptlib to use. Under Windows, go to the Control Panel and click onthe ODBC/ODBC32 item. Click on “Add” and select the ODBC data source (that is,

Recommended Reading 23
the database type) that you want to use. If it’s on the local machine, this will probably be an Access database, if it’s a centralised database on a network this will probably be SQL Server. Once you’ve selected the data source type, you need to give it a name for cryptlib to use. “Public Keys” is a good choice (the self-test code usestwo sources called testkeys and testcertstore during the self-test procedure, andwill create these itself if possible). In addition you may need to set up otherparameters like the server that the database is located on and other accessinformation. Once the data source is set up, you can access it as a CRYPT_-KEYSET_ODBC keyset using the name that you’ve assigned to it.
Under Unix or similar systems the best way to work with a key database or certificatestore is to use the ODBC interface, either via a layered driver such as unixODBC oriODBC, or directly via interfaces such as MyODBC. Alternatively, you can use thecryptlib generic database interface to compile database-specific support code directlyinto cryptlib, or the database network plugin capability to make a network connectionto a database server such as IBM DB2, Informix, Ingres, Oracle, Postgres, or Sybase.
The easiest interface to use is the ODBC one, which hides all of the low-leveldatabase interface details. The ODBC configuration process follows the same patternas the one given above for ODBC under Windows, with OS-specific variationsdepending on the platform that you’re running it under. You can enable the use of the ODBC interface using the USE_ODBC define before you build cryptlib, and if you’re not using Windows (which uses dynamic binding to the ODBC interface) you need tolink the ODBC client library into your executable.
For Unix and Unix-like systems the two most common ODBC implementations areunixODBC and iODBC, although a variety of other products are also available, andsome databases have native ODBC support, examples being MySQL (via MyODBC)and IBM DB2. These interfaces support a wide range of commercial databaseincluding AdabasD, IBM DB2, Informix, Ingres, Interbase, MySQL, Oracle,Postgres, and Sybase. unixODBC uses the ODBCConfig GUI application toconfigure data sources and drivers in a manner identical to the standard Windowsinterface, and also provides the odbcinst CLI utility to configure data sources anddrivers. odbcinst can be used to automatically install and configure database driversfor ODBC using template files that contain information about the driver such as thelocation of the driver binaries, usually somewhere under /usr/local. For example toconfigure the Oracle drivers for ODBC using a prepared template file you’d use:
odbcinst –i –d –f oracle.tmpl
iODBC provides drivers as platform-specific binaries that are installed using theiODBC installation shell scripts. See the documentation for the particular ODBCinterface that you’re using for more information on installation and configuration issues.
If you don’t want to use the ODBC interface, you can either compile database-specific interface code directly into cryptlib or use the database network plugincapability to make a network connection to a database server. To use the cryptlibgeneric database interface you need to enable the appropriate database via theconfiguration build file (see “Customised and Cut-down cryptlib Versions” on page 24) before you build cryptlib. In addition you need to link the database library orlibraries (for example libmysql.a) into your executable.
To use the database plugin capability to make a network connection to a databaseserver such as Informix, Ingres, Oracle, Postgres, or Sybase, you need to create theappropriate plugin for your server as described in “Database and NetworkingPlugins” on page 283.
Certificate InstallationBefore you use cryptlib, you can optionally build and run the certificate installationprogram certinst from the cryptlib directory. This will install default certificationauthority (CA) certificates into a certificate store and update cryptlib’s trust information to make the certificates trusted by cryptlib. Without these standard

Installation24
certificates installed and marked as trusted by cryptlib, it becomes difficult toautomatically verify signatures in certificate chains signed by widely-recognised CAssuch as Verisign and Thawte.
To install the default certificates, run certinst with the option -i to install thecertificates and -t to mark them as trusted. When you install the certificates you alsoneed to use the -n option to specify the name of the certificate store you want to useto store the certificates in. For example to install the default certificates into the“Public Keys” certificate store and mark them as trusted, you would use:
certinst -i -n"Public Keys"certinst -t
Note that fact that the database name is quoted since it contains a space. To mark thecertificates as trusted without installing them, you would use:
certinst -t
certinst has a number of other options, run it without any arguments for a helpscreen.
Customised and Cut-down cryptlib VersionsIn some cases you may want to customise the cryptlib build or create a cut-downversion that omits certain capabilities in order to reduce code size for constrainedenvironments. You can do this by editing the configuration build file cryptini.h,which allows almost every part of cryptlib’s functionality to be selectively enabled or disabled (some functionality is used by all of cryptlib and can’t be disabled). Each portion of functionality is controlled by a USE_name define, by undefining the valuebefore you build cryptlib the named functionality will be removed. For example,undefining USE_SSH1 would disable the use of SSHv1 (this is disabled by default,since it’s been superseded by SSHv2); undefining USE_SKIPJACK would disable the use of the Skipjack algorithm. In addition you can use the build file to disable theuse of the two patented algorithms IDEA and RC5 (see “Algorithms” on page 289 formore information on whether these two patents affect your use of cryptlib) byundefining USE_PATENTED_ALGORITHMS.
If you’re using cryptlib’s generic internal database interface rather than ODBC or the network database plugin capability to communicate with a key database, you canenable the appropriate interface code with the USE_database_type defines.
Debug vs. Release Versions of cryptlibcryptlib can be built in one of two forms, a debug version and a release version. Themain difference between the two is that the release version is built with the NDEBUGvalue defined, which disables the large number of internal consistency checks that arepresent in the debug build of cryptlib. These consistency checks are used to catchconditions such as inappropriate error codes being returned from internal functions,invalid data values being passed to functions inside cryptlib, configuration errors, andgeneral sanity checks that ensure that everything is operating as it should. If one ofthese internal checks is triggered, cryptlib will throw an exception and display anerror message indicating that an assertion in the code has failed. These assertions areuseful for tracking down areas of code that may need revision in later releases.
If you don’t want to see these diagnostic messages, you should build cryptlib with theNDEBUG value defined (this is the default under Unix and is done automaticallyunder Windows when you build a release version of the code with Visual C++).Building a version in this manner will disable the extra consistency checks that arepresent in the debug version so that, for example, error conditions will be indicatedby cryptlib returning an error code for a function call rather than throwing anexception. This will have the slight downside that it’ll make tracking the exact location of a problem a bit more complex, since the error code which is returnedprobably won’t be checked until the flow of execution has progressed a long way from where the problem was detected. On the other hand the release version of thecode is significantly smaller than the debug version.

Recommended Reading 25
As always, if you’re working with a debug build of the code and perform an operation that triggers an internal consistency check you should report the details andthe code necessary to recreate it to the cryptlib developers in order to allow theexception condition to be analysed and corrected.
Support for Vendor-specific Algorithmscryptlib supports the use of vendor-specific algorithm types with the predefinedvalues CRYPT_ALGO_VENDOR1, CRYPT_ALGO_VENDOR2, andCRYPT_ALGO_VENDOR3. For each of the algorithms you use, you need to addthe appropriate cryptlib capability definitions as used in device/dev_sys.c to a filecalled vendalgo.c, which will be automatically compiled into cryptlib. Finally,rebuild cryptlib with the preprocessor define USE_VENDOR_ALGOS set, whichwill include the new algorithm types in cryptlib’s capabilities.
For example if you wanted to add support for the Foo256 cipher to cryptlib youwould create the file vendalgo.c containing the capability definitions and thenrebuild cryptlib with USE_VENDOR_ALGOS defined. The Foo256 algorithmwould then become available as algorithm type CRYPT_ALGO_VENDOR1.

cryptlib Basics26
cryptlib Basicscryptlib works with two classes of objects, container objects and action objects. Acontainer object is an object that contains one or more items such as data, keys orcertificates. An action object is an object which is used to perform an action such asencrypting or signing data. The container types used in cryptlib are envelopes (fordata), sessions (for communications sessions), keysets (for keys), and certificates (forattributes such as key usage restrictions and signature information). Containerobjects can have items such as data or public/private keys placed in them andretrieved from them. In addition to containing data or keys, container objects canalso contain other objects that affect the behaviour of the container object. Forexample pushing an encryption object into an envelope container object will result inall data which is pushed into the envelope being encrypted or decrypted using theencryption object.
Encryption contexts are the action objects used by cryptlib. Action objects are usedto act on data, for example to encrypt or decrypt a piece of data or to digitally sign orcheck the signature on a piece of data.
The usual mechanism for processing data is to use an envelope or session containerobject. The process of pushing data into an envelope and popping the processed databack out is known as enveloping the data. The reverse process is known as de-enveloping the data. Session objects work in a similar manner, but are used toencapsulate a secure session with a remote client or server rather than a local datatransformation. The first section of this manual covers the basics of enveloping data,which introduces the enveloping mechanism and covers various aspects of theenveloping process such as processing data streams of unknown length and handlingerrors. Once you have the code to perform basic enveloping in place, you can addextra functionality such as password-based data encryption to the processing. Afterthe basic concepts behind enveloping have been explained, more advanced techniquessuch as public-key based enveloping and digital signature enveloping for S/MIMEand PGP are covered.
Session objects are very similar to envelope objects except that they represent acommunications session with a remote client or server. The next section covers theuse of session objects for protocols such as SSL, TLS, and SSH to securecommunications or work with protocols such as CMS, SCEP, RTCS, OCSP, and TSPthat handle functions such as certificate status information and timestamping.
The use of public keys for enveloping requires the use of key management functions,and the next section covers key generation and storing and retrieving keys fromkeyset objects and crypto devices. The public portions of public/private key pairs aretypically managed using X.509 certificates and certificate revocation lists. The nextsections cover the management of certificates including certificate issue, certificatestatus checking, and certificate revocation list (CRL) creation and checking, as wellas the full CA management process. This covers the full key life cycle from creationthrough certification to revocation and/or destruction.
So far all the objects that have been covered are container objects. The next sectioncovers the creation of action objects that you can either push into a container object orapply directly to data, including the various ways of loading or generating keys intothem. The next sections explain how to apply the action objects to data and cover theprocess of encryption, key exchange, and signature generation and verification,working at a much lower level than the encryption or session interface.
The next sections cover certificates and certificate-like objects in more detail than theearlier ones, covering such topics as DN structures, certificate chains, trustmanagement, and certificate extensions. This deals with certificates at a very lowlevel at which they’re rather harder to manage than with the high-level certificatemanagement functions.
The next section covers the use of encryption devices such as smart cards, cryptodevices, HSMs, and Fortezza cards, and explains how to use them to perform many of

Programming Interfaces 27
the tasks covered in previous sections. Finally, the last sections cover miscellaneoustopics such as random number management, the cryptlib configuration database,database and network plugins, and use in embedded systems.
Programming Interfacescryptlib provides three levels of interface, of which the highest-level one is the easiestto use and therefore the recommended one. At this level cryptlib works withenvelope and session container objects, an abstract object into which you can insertand remove data which is processed as required while it is in the object. Usingenvelopes and session objects requires no knowledge of encryption or digitalsignature techniques. At an intermediate level, cryptlib works with encryption actionobjects, and requires some knowledge of encryption techniques. In addition you willneed to handle some of the management of the encryption objects yourself. At thevery lowest level cryptlib works directly with the encryption action objects andrequires you to know about algorithm details and key and data management methods.
Before you begin you should decide which interface you want to use, as each one hasits own distinct advantages and disadvantages. The three interfaces are:
Container Object InterfaceThis interface requires no knowledge of encryption and digital signature techniques,and is easiest for use with languages like Visual Basic and Java that don’t interface to C data structures very well. The container object interface provides services to createand destroy envelopes and secure sessions, to add security attributes such asencryption information and signature keys to a container object, and to move datainto and out of a container. Because of its simplicity and ease of use, it’s strongly recommended that you use this interface if at all possible.
Mid-level InterfaceThis interface requires some knowledge of encryption and digital signaturetechniques. Because it handles encoding of things like session keys and digitalsignatures but not of the data itself, it’s better suited for applications that require high-speed data encryption, or encryption of many small data packets (such as anencrypted terminal session). The mid-level interface provides services such asroutines to export and import encrypted keys and to create and check digitalsignatures. The container object interface is built on top of this interface.
Action Object InterfaceThis interface requires quite a bit of knowledge of encryption and digital signaturetechniques. It provides a direct interface to the raw encryption capabilities ofcryptlib. The only reason for using these low-level routines is if you need them asbuilding blocks for your own custom encryption protocol. Note though that cryptlibis designed to benefit the application of encryption in standard protocols and not theraw use of crypto in home-made protocols. Getting such security protocols right isvery difficult, with many “obvious” and “simple” approaches being quite vulnerableto attack. This is why cryptlib encourages the use of vetted security protocols, anddoes not encourage roll-your-own security mechanisms. In particular if you don’t know what PKCS #1 padding is, what CBC does, or why you need an IV, youshouldn’t be using this interface.
The low-level interface serves as an interface to a range of plug-in encryptionmodules that allow encryption algorithms to be added in a fairly transparent manner,with a standardised interface allowing any of the algorithms and modes supported bycryptlib to be used with a minimum of coding effort. As such the main function ofthe action object interface is to provide a standard, portable interface between theunderlying encryption routines and the user software. The mid-level interface is builton top of this interface.
Objects and InterfacesThe cryptlib object types are as follows:

cryptlib Basics28
Type Description
CRYPT_CERTIFICATE A key certificate objects that usually contain akey certificate for an individual or organisationbut can also contain other information such ascertificate chains or digital signature attributes.
CRYPT_CONTEXT A encryption context objects that containencryption, digital signature, hash, or MACinformation.
CRYPT_DEVICE A device object that provide a mechanism forworking with crypto devices such as cryptohardware accelerators and PCMCIA and smartcards.
CRYPT_ENVELOPE An envelope container object that provide anabstract container for performing encryption,signing, and other security-related operations onan item of data.
CRYPT_KEYSET A key collection container object that containcollections of public or private keys.
CRYPT_SESSION A secure session object that manage a securesession with a server or client.
These objects are referred to via arbitrary integer values, or handles, which have nomeaning outside of cryptlib. All data pertaining to an object is managed internally bycryptlib, with no outside access to security-related information being possible. Thereis also a generic object handle of type CRYPT_HANDLE which is used in caseswhere the exact type of an object is not important. For example most cryptlibfunctions that require keys can work with either encryption contexts or key certificateobjects, so the objects they use have a generic CRYPT_HANDLE which is equivalentto either a CRYPT_CONTEXT or a CRYPT_CERTIFICATE.
Objects and AttributesEach cryptlib object has a number of attributes of type CRYPT_ATTRIBUTE_TYPEthat you can get, set, and in some cases delete. For example an encryption contextwould have a key attribute, a certificate would have issuer name and validityattributes, and an envelope would have attributes such as passwords or signatureinformation, depending on the type of the envelope. Most cryptlib objects arecontrolled by manipulating these attributes.
The attribute classes are as follows:
Type Description
CRYPT_ATTRIBUTE_name Generic attributes that apply to all objects.
CRYPT_CERTINFO_name Certificate object attributes.
CRYPT_CTXINFO_name Encryption context attributes.
CRYPT_DEVINFO_name Crypto device attributes.
CRYPT_ENVINFO_name Envelope attributes.
CRYPT_KEYINFO_name Keyset attributes.
CRYPT_OPTION_name cryptlib-wide configuration options.
CRYPT_PROPERTY_name Object properties.
CRYPT_SESSINFO_name Session attributes.
Some of the attributes apply only to a particular object type but others may applyacross multiple objects. For example a certificate contains a public key, so the keysize attribute, which is normally associated with a context, would also apply to a

Interfacing with cryptlib 29
certificate. To determine the key size for the key in a certificate, you would read itskey size attribute as if it were an encryption context.
Attribute data is either a single numeric value or variable-length data consisting of a(data, length) pair. Numeric attribute values are used for objects, boolean values andintegers. Variable-length data attribute values are used for text strings, binary datablobs, and representations of time using the ANSI/ISO standard seconds-since-1970format.
Interfacing with cryptlibAll necessary constants, types, structures, and function prototypes are defined in alanguage-specific header file as described below. You need to use these files for eachmodule that makes use of cryptlib. Although many of the examples given in thismanual are for C/C++ (the more widely-used ones are given for other languages aswell), they apply equally for the other languages.
All language bindings for cryptlib are provided in the bindings subdirectory. Beforeyou can use a specific language interface, you may need to copy the file(s) for thelanguage that you’re using into the cryptlib main directory or the directory containing the application that you’re building. Alternatively, you can refer to the file(s) in the bindings directory by the absolute pathname.
InitialisationBefore you can use any of the cryptlib functions, you need to call the cryptInitfunction to initialise cryptlib. You also need to call its companion function cryptEndat the end of your program after you’ve finished using cryptlib. cryptInit initialisescryptlib for use, and cryptEnd performs various cleanup functions includingautomatic garbage collection of any objects you may have forgotten to destroy. Youdon’t have to worry about inadvertently calling cryptInit multiple times (for exampleif you’re calling it from multiple threads), it will handle the initialisation correctly. However you should only call cryptEnd once when you’ve finished using cryptlib.
If you call cryptEnd and there are still objects in existence, it will return CRYPT_-ERROR_INCOMPLETE to inform you that there were leftover objects present.cryptlib can tell this because it keeps track of each object so that it can erase anysensitive data that may be present in the object (cryptEnd will return a CRYPT_-ERROR_INCOMPLETE error to warn you, but will nevertheless clean up and freeeach object for you).
To make the use of cryptEnd in a C or C++ program easier, you may want to use theC atexit() function or add a call to cryptEnd to a C++ destructor in order to havecryptEnd called automatically when your program exits.
If you’re going to be doing something that needs encryption keys (which is pretty much everything), you should also perform a randomness poll fairly early on to givecryptlib enough random data to create keys:
cryptAddRandom( NULL, CRYPT_RANDOM_SLOWPOLL );
Randomness polls are described in more detail in “Random Numbers” on page 268.The randomness poll executes asynchronously, so it won’t stall the rest of your code while it’s running. The one possible exception to this polling on startup is when you’re using cryptlib as part of a larger application where you’re not certain that cryptlib will actually be used. For example a PHP script that’s run repeatedly from the command line may only use the encryption functionality on rare occasions (or notat all), so that it’s better to perform the slow poll only when it’s actually needed rather than unconditionally every time the script is invoked. This is a somewhat specialcase though, and normally it’s better practice to always perform the slow poll on startup.
As the text above mentioned, you should initialise cryptlib when your program firststarts and shut it down when your program is about to exit, rather than repeatedlystarting cryptlib up and shutting it down again each time you use it. Since cryptlib

cryptlib Basics30
consists of a complete crypto operating system with extensive initialisation, internalsecurity self-tests, and full resource management, repeatedly starting and stopping itwill unnecessarily consume resources such as processor time during eachinitialisation and shutdown. It can also tie up host operating system resources if thehost contains subsystems that leak memory or handles (under Windows, ODBC andLDAP are particularly bad, with ODBC leaking memory and LDAP leaking handles.DNS is also rather leaky— this is one of the reasons why programs like webbrowsers and FTP clients consume memory and handles without bounds). To avoidthis problem, you should avoid repeatedly starting up and shutting down cryptlib:
Right Wrong
cryptInit();serverLoop:process data;
cryptEnd();
serverLoop:cryptInit();process data;cryptEnd();
C / C++To use cryptlib from C or C++ you would use:
#include "cryptlib.h"
cryptInit();
/* Calls to cryptlib routines */
cryptEnd();
C# / .NETTo use cryptlib from C# / .NET, add cryptlib.cs to your .NET project and the cryptlibDLL to your path, and then use:
using cryptlib;
crypt.Init();
// Calls to cryptlib routines
crypt.End();
If you’re using a .NET language other than C# (for example VB.NET), you’ll need to build cryptlib.cs as a class library first. From Visual Studio, create a new C# projectof type Class Library, add cryptlib.cs to it, and compile it to create a DLL. Now goto your VB project and add the DLL as a Reference. The cryptlib classes andmethods will be available natively using VB (or whatever .NET language you’re using).
All cryptlib functions are placed in the crypt class, so that standard cryptlibfunctions like:
cryptSetAttribute( cryptContext, CRYPT_CTXINFO_KEYSIZE, 1024 / 8 );
become:
crypt.SetAttribute( cryptContext, crypt.CTXINFO_KEYSIZE, 1024 / 8 );
In general when calling cryptlib functions you can use Strings wherever the cryptlibinterface requires a null-terminated C string, and byte arrays wherever the cryptlibinterface requires binary data.
Instead of returning a status value like the native C interface, the .NET version throwsCryptException for error status returns, and returns integer or string data returnvalues as the return value:
value = crypt.GetAttribute( cryptContext, crypt.CTXINFO_ALGO );stringValue = crypt.GetAttributeString( cryptContext,
crypt.CTXINFO_ALGO_NAME );
DelphiTo use cryptlib from Delphi, add the cryptlib DLL to your path and then use:

Interfacing with cryptlib 31
implementationuses cryptlib;
cryptInit;
{ Calls to cryptlib routines }
cryptEnd;end;
The Delphi interface to cryptlib is otherwise mostly identical to the standard C/C++one.
JavaTo build the JNI version of cryptlib, uncomment the USE_JAVA define in cryptini.h(see “Customised and Cut-down cryptlib Versions” on page 24) or define it when youinvoke the build command, and build cryptlib. You’ll need to have the JDK include directories set in your compiler’s settings, and will need at least JDK 1.4. Once this is done, you can put cryptlib.jar on your classpath and use System.-LoadLibrary() to load the cryptlib shared library. To use cryptlib with Java youcan then use:
import cryptlib.*;
class Cryptlib{public static void main( String[] args )
{System.loadLibrary( "cl" ); // cryptlib library name
try{crypt.Init();
//Calls to cryptlib routines
crypt.End();}
catch( CryptException e ){// cryptlib returned an errore.printStackTrace();}
}};
All cryptlib functions are placed in the crypt class, so that standard cryptlibfunctions like:
cryptSetAttribute( cryptContext, CRYPT_CTXINFO_KEYSIZE, 1024 / 8 );
become:
crypt.SetAttribute( cryptContext, crypt.CTXINFO_KEYSIZE, 1024 / 8 );
In general when calling cryptlib functions you can use Java strings wherever thecryptlib interface requires a null-terminated C string, and Java byte arrays whereverthe cryptlib interface requires binary data. In addition as of JDK 1.4 there is anio.ByteBuffer class that can be “direct”, which provides a more efficient alternative to standard byte arrays since there’s no need to perform any copying.
Instead of returning a status value like the native C interface, the JNI version throwsCryptException for error status returns, and returns integer or string data returnvalues as the return value:
value = crypt.GetAttribute( cryptContext, crypt.CTXINFO_ALGO );stringValue = crypt.GetAttributeString( cryptContext,
crypt.CTXINFO_ALGO_NAME );

cryptlib Basics32
Python
To build the Python interface to cryptlib, run python setup.py install tobuild and install the python.c extension module. On a Unix platform you may needto create a symlink from cl to the actual shared library before you do this. Onceyou’ve done this you can use:
from cryptlib_py import *
cryptInit()
# Calls to cryptlib routines
cryptEnd()
TclTo use cryptlib from Tcl, you use the Cryptkit extension. Cryptkit is a stubs-enabledextension that can be used with any modern Tcl interpreter (at least, Tcl 8.4 or later).To build Cryptkit you’ll need a copy of Tcl that can interpret Starkits, either Tclkit, the single file Tcl/Tk executable available fromhttp://www.equi4.com/pub/tk, or ActiveTcl fromhttp://www.activestate.com. You’ll also need to download the Critcl Starkit from http://mini.net/sdarchive/critcl.kit, and make surethat the current directory contains cryptlib.h and a copy of the cryptlib static library,named libcl_$platfom.a, where $platform is the current platform name as providedby the Critcl platform command. For example under x86 Linux the library would becalled libcl_Linux-x86.a. Then run the following Critcl command:
critcl -pkg cryptkit
This will leave you with a lib directory containing the information ready for use inany Tcl application. Once you’ve done this you can use:
package require Cryptkit
cryptInit
# Calls to cryptlib routines
cryptEnd
Since Tcl objects already contain length information, there’s no need to pass lengthparameters to cryptlib function calls. This applies for the AddCertExtension,CheckSignature, CheckSignatureEx, CreateSignature, CreateSignatureEx, Decrypt,Encrypt, ExportCert, ExportKey, ExportKeyEx, GetCertExtension, ImportKey,PushData, and SetAttributeString functions.
Visual BasicTo use cryptlib from Visual Basic you would use:
' Add cryptlib.bas to your project
cryptInit
' Calls to cryptlib routines
cryptEnd
The Visual Basic interface to cryptlib is otherwise mostly identical to the standardC/C++ one.
Return CodesEvery cryptlib function returns a status code to tell you whether it succeeded orfailed. If a function executes successfully, it returns CRYPT_OK. If it fails, itreturns one of the status values detailed in “Error Handling” on page 271. Thesample code used in this manual omits the checking of status values for clarity, butwhen using cryptlib you should check return values, particularly for critical functions

Working with Object Attributes 33
such as any that perform active crypto operations like processing data in envelopes,activating and using secure sessions, signing and checking certificates, andencryption and signing in general.
The previous initialisation code, rewritten to include checking for returned statusvalues, is:
int status;
status = cryptInit();if( status != CRYPT_OK )
/* cryptlib initialisation failed */;
/* Calls to cryptlib routines */
status = cryptEnd();if( status != CRYPT_OK )
/* cryptlib shutdown failed */;
The C/C++ versions of cryptlib provide the cryptStatusOK() andcryptStatusError() macros to make checking of these status values easier.The C#, Java, and Python versions throw exceptions of type CryptExceptioninstead of returning error codes. These objects contain both the status code and anEnglish error message. In C# the CryptException class has Status and Messageproperties:
try{crypt.Init();
crypt.End();}
catch( CryptException e ){int status = e.Status;String message = e.Message;}
In Java the CryptException class has getStatus() and getMessage()accessors:
try{crypt.Init();
crypt.End();}
catch( CryptException e ){int status = e.getStatus();String message = e.getMessage();}
In Python the exception value is a tuple containing the status code, then the message:
try:cryptInit()
cryptEnd()except CryptException, e:
status, message = e
Working with Object AttributesAll object attributes are read, written, and deleted using a common set of functions:cryptGetAttribute/cryptGetAttributeString to get the value of an attribute,cryptSetAttribute/cryptSetAttributeString to set the value of an attribute, andcryptDeleteAttribute to delete an attribute. Attribute deletion is only valid for asmall subset of attributes for which it makes sense, for example you can delete thevalidity date attribute from a certificate before the certificate is signed but not afterit’s signed, and you can never delete the algorithm-type attribute from an encryptioncontext.

cryptlib Basics34
cryptGetAttribute and cryptSetAttribute take as argument an integer value or apointer to a location to receive an integer value:
int keySize;
cryptSetAttribute( cryptEnvelope, CRYPT_ENVINFO_PUBLICKEY, cryptKey );cryptGetAttribute( cryptContext, CRYPT_CTXINFO_KEYSIZE, &keySize );
cryptGetAttributeString and cryptSetAttributeString take as argument a pointerto the data value to get or set and a length value or pointer to a location to receive thelength value:
char emailAddress[ 128 ]int emailAddressLength;
cryptSetAttributeString( cryptEnvelope, CRYPT_ENVINFO_PASSWORD,"1234", 4 );
cryptGetAttributeString( cryptCertificate, CRYPT_CERTINFO_RFC822NAME,emailAddress, &emailAddressLength );
This leads to a small problem: How do you know how big to make the buffer? Theanswer is to use cryptGetAttributeString to tell you. If you pass in a null pointerfor the data value, the function will set the length value to the size of the data, but notdo anything else. You can then use code like:
char *emailAddress;int emailAddressLength;
cryptGetAttributeString( cryptCertificate, CRYPT_CERTINFO_RFC822NAME,NULL, &emailAddressLength );
emailAddress = malloc( emailAddressLength );cryptGetAttributeString( cryptCertificate, CRYPT_CERTINFO_RFC822NAME,
emailAddress, &emailAddressLength );
to obtain the data value. In most cases this two-step process isn’t necessary, the standards that cryptlib conforms to generally place limits on the size of mostattributes so that cryptlib will never return more data than the fixed limit. Forexample most strings in certificates are limited to a maximum length set by theCRYPT_MAX_TEXTSIZE constant. More information on these sizes is given withthe descriptions of the different attributes.
The Visual Basic version is:
Dim emailAddress as StringDim emailAddressLength as Integer
cryptGetAttributeString cryptCertificate, CRYPT_CERTINFO_RFC822NAME, _0, emailAddressLength
emailAddress = String( emailAddressLength, vbNullChar )cryptGetAttributeString cryptCertificate, CRYPT_CERTINFO_RFC822NAME, _
emailAddress, emailAddressLength
In Python you can use cryptGetAttributeString and cryptSetAttributeString asusual, or use a shortcut syntax to make accessing attributes less verbose. The normalsyntax follows the C form but migrates the integer output values (the length fromcryptGetAttributeString or the output value from cryptGetAttribute) to returnvalues, and doesn’t require a length for cryptSetAttributeString:
from array import *
emailAddress = array( 'c', 'x' * 128 )
cryptSetAttributeString( cryptEnvelope, CRYPT_ENVINFO_PASSWORD,"1234" )
emailAddressLength = cryptGetAttributeString( cryptCertificate,CRYPT_CERTINFO_RFC822NAME, emailAddress )
The shortcut syntax allows you to get/set attributes as if they were integer and stringmembers of the object (without the CRYPT_ prefix):
cryptEnvelope.ENVINFO_PASSWORD = "1234"emailAddress = cryptCertificate.CERTINFO_RFC822NAME

Working with Object Attributes 35
Just as with Python, C# and Java also migrate returned data to return values. In theC# and Java cases the string functions take byte arrays or Strings. When passing abyte array, you can optionally specify an offset following it forcryptGetAttributeString and an offset and length following it forcryptSetAttributeString. There is also a special version ofcryptGetAttributeString that returns Strings for convenience:
crypt.SetAttributeString( cryptEnvelope, crypt.ENVINFO_PASSWORD,"1234" );
String emailAddress = crypt.GetAttributeString( cryptCertificate,crypt.CERTINFO_RFC822NAME );
Finally, cryptDeleteAttribute lets you delete an attribute in the cases where that’s possible:
cryptDeleteAttribute( cryptCertificate, CRYPT_CERTINFO_VALIDFROM );
All access to objects and object attributes is enforced by cryptlib’s security kernel. If you try to access or manipulate an attribute in a manner that isn’t allowed (for example by trying to read a write-only attribute, trying to assign a string value to anumeric attribute, trying to delete an attribute that can’t be deleted, trying to set a certificate-specific attribute for an envelope, or some similar action) cryptlib willreturn an error code to tell you that this type of access is invalid. If there’s a problem with the object that you’re trying to manipulate, cryptlib will return CRYPT_-ERROR_PARAM1 to tell you that the object handle parameter passed to the functionis invalid. Ifthere’s a problem with the attribute type (typically because it’s invalid for this object type) cryptlib will return CRYPT_ERROR_PARAM2. If there’s a problem with the attribute value, cryptlib will return CRYPT_ERROR_PARAM3,and if there’s a problem with the length (for the functions that take a lengthparameter) cryptlib will return CRYPT_ERROR_PARAM4. If you try to perform anattribute access which is disallowed (reading an attribute that can’t be read, writing to or deleting a read-only attribute, or something similar) cryptlib will returnCRYPT_ERROR_PERMISSION.
Finally, if you try to access an attribute that hasn’t been initialised or isn’t present, cryptlib will return CRYPT_ERROR_NOTINITED or CRYPT_ERROR_-NOTFOUND, the only real distinction between the two is that the former is typicallyreturned for fixed attributes that haven’t had a value assigned to them yet while the latter is returned for optional attributes that aren’t present in the object.
Attribute TypesAttribute values can be boolean or numeric values, cryptlib objects, time values, textstrings, or binary data:
Type Description
Binary A binary data string that can contain almost anything.
Boolean Flags that can be set to ‘true’ (any nonzero value) or ‘false’ (a zero value), and control whether a certain option or operationis enabled or not. For example the CRYPT_CERTINFO_CAattribute in a certificate controls whether a certificate ismarked as being a CA certificate or not. Note that cryptlibuses the value 1 to represent ‘true’, somelanguages mayrepresent this by the value–1.
Numeric A numeric constant such as an integer value or a bitflag. Forexample the CRYPT_CTXINFO_KEYSIZE attribute specifiesthe size of a key (in bytes) and the CRYPT_CERTINFO_-CRLREASON attribute specifies a bitflag that indicates why aCRL was issued.
Object A handle to a cryptlib object. For example the CRYPT_-CERTINFO_SUBJECTPUBLICKEYINFO attribute specifiesthe public key to be added to a certificate.

cryptlib Basics36
Type DescriptionString A text string that contains information such as a name,
message, email address, or URL. Strings are encoded usingthe standard system local character set, usually ASCII orlatin-1 or UTF-8 (depending on the system), however underWindows CE, which is a Unicode environment, these areUnicode strings. In (very rare) cases where the standardsystem character set doesn’t support the characters used in the string (for example when encoding Asian characters), thecharacters used will be Unicode or widechars. For all intentsand purposes you can assume that all strings are encoded inthe standard character set that you’d normally use, cryptlib will perform all conversions for you.
An example string attribute is CRYPT_CTXINFO_LABEL,which contains a human-readable label used to identify privatekeys.
The most frequently used text string components are those thatmake up a certificate’s distinguished name, which identifies the certificate owner. Most of these components are limited toa maximum of 64 characters by the X.500 standard that coverscertificates and their components, and cryptlib provides theCRYPT_MAX_TEXTSIZE constant for use with thesecomponents (this value is also used for most other strings suchas key labels). Since this value is specified in characters ratherthan bytes, Unicode strings can be several times as long as thisvalue when their length is expressed in bytes, depending onwhich data type the system uses to represent Unicodecharacters.
Time The ANSI/ISO C standard time value containing the local timeexpressed as seconds since 1970. This is a binary (rather thannumeric) field, with the data being the time value (in C andC++ this is a time_t, usually a signed long integer).
Due to the vagaries of international time zones and daylightsavings time adjustments, it isn’t possible to accuratelycompare two local times from different time zones, or madeacross a DST switch (consider for example a countryswitching to DST, which has two 2am times while anothercountry only has one). Because of this ambiguity, times readfrom objects such as certificates may appear to be out by anhour or two.
Since most text strings have a fixed maximum length, you can use code like:
char commonName[ CRYPT_MAX_TEXTSIZE + 1 ];int commonNameLength;
/* Retrieve the component and null-terminate it */cryptGetAttributeString( cryptCertificate, CRYPT_CERTINFO_COMMONNAME,
commonName, &commonNameLength );commonName[ commonNameLength ] = '\0';
to read the value, in this case the common name of a certificate owner.
Note the explicit addition of the terminating null character, since the text stringsreturned aren’t null-terminated.
In Visual Basic this is:
Dim commonName As StringDim commonNameLength As Long

Working with Object Attributes 37
commonName = String( CRYPT_MAX_TEXTSIZE + 1 , vbNullChar )cryptGetAttributeString cryptCertificate, CRYPT_CERTINFO_COMMONNAME, _
commonName, commonNameLengthcommonName = Left( commonName, InStr( commonName, vbNullChar ) - 1 )
The description above assumes that the common name is expressed in a single-bytecharacter set. Since the values passed to cryptGetAttributeString andcryptSetAttributeString are untyped, their length is given in bytes and not incharacters (which may not be byte-sized). For Unicode strings, you need to multiplythe size of the buffer by the size of a Unicode character on your system to get theactual size to pass to the function, or divide by the size of a Unicode character to getthe number of characters returned. For example to perform the same operation asabove in a Unicode environment you’d use:
wchar_t commonName[ CRYPT_MAX_TEXTSIZE + 1 ];int commonNameLength;
/* Retrieve the component and null-terminate it */cryptGetAttributeString( cryptCertificate, CRYPT_CERTINFO_COMMONNAME,
commonName, &commonNameLength );commonName[ commonNameLength / sizeof( wchar_t ) ] = L'\0';
Attribute Lists and Attribute GroupsSeveral of the container object types (certificates, envelopes, and sessions) containlarge collections of attributes that you can process as a list rather than having toaccess each attribute individually by type. The list of attributes is managed throughthe use of an attribute cursor that cryptlib maintains for each container object. Youcan set or move the cursor either to an absolute position in the list of attributes orrelative to the current position.
Object attributes are usually grouped into collections of related attributes. Forexample an envelope object may contain a group of attributes consisting of asignature, the key that generated the signature, associated signing attributes such asthe time and data type being signed, and even a timestamp on the signature itself.Similarly, a session object may have a group of attributes consisting of a server name,server port, and server key. So instead of a straight linear list of attributes:
Object Attr Attr Attr Attr
the attributes are arranged by group:
Object
Group
Group
Group
Attr Attr Attr
Attr
Attr Attr
Some objects may contain multiple instances of attribute groups, each of whichcontains its own set of attributes. For example an envelope could contain severalsignature attribute groups, and each attribute group will contain its own signing keys,certificates, signature information such as the signing time, and so on. One particularinstance of the abstract group/attribute view shown above would be:

cryptlib Basics38
Envelope
Signature
Signature
Signature
Key Sig.Info
Time-stamp
Key
Key Sig.Info
In order to navigate across attribute groups, and across attributes within a group,cryptlib provides the attribute cursor functionality described in the section thatfollows. As well as moving the cursor back and forth across attribute groups andattributes within the group, you can also position it directly on a group or attribute. Inthe common case where only a single attribute group is present, for example anenvelope object that contains a single signature or a session object that contains userinformation for a single user:
Envelope SignatureKey
SignatureInfo
you can treat the attributes as a single flat list of attributes and not worry about thehierarchical arrangement into groups.
Attribute Cursor ManagementYou can move the attribute cursor by setting an attribute that tells cryptlib where tomove it to. This attribute, either CRYPT_ATTRIBUTE_CURRENT_GROUP whenmoving by attribute group or CRYPT_ATTRIBUTE_CURRENT when moving byattribute within the current group, takes as value a cursor movement code that movesthe cursor either to an absolute position (the first or last group or attribute in the list)or relative to its current position. The movement codes are:
Code Description
CRYPT_CURSOR_FIRST Move the cursor to the first group or attribute.
CRYPT_CURSOR_LAST Move the cursor to the last group or attribute.
CRYPT_CURSOR_NEXT Move the cursor to the next group or attribute.
CRYPT_CURSOR_PREV Move the cursor to the previous group orattribute.
Moving by attribute group or attribute then works as follows:
Object
Group
Group
Group
Attr Attr Attr
Attr
Attr Attr
CRYPT_ATTRIBUTE_CURRENT_GROUP
CRYPT_ATTRIBUTE_CURRENT

Working with Object Attributes 39
Note that CRYPT_ATTRIBUTE_CURRENT only moves the cursor within thecurrent group. Once you get to the start or end of the group, you need to useCRYPT_ATTRIBUTE_CURRENT_GROUP to move on to the next one. Movingthe cursor from one group to another will reset the cursor position to the first attributewithin the group if it’s been previously moved to some other attribute within the group. For example to move the cursor to the start of the first attribute group in acertificate, you would use:
cryptSetAttribute( cryptCertificate, CRYPT_ATTRIBUTE_CURRENT_GROUP,CRYPT_CURSOR_FIRST );
To advance the cursor to the start of the next group, you would use:
cryptSetAttribute( cryptCertificate, CRYPT_ATTRIBUTE_CURRENT_GROUP,CRYPT_CURSOR_NEXT );
To advance the cursor to the next attribute in the current group, you would use:
cryptSetAttribute( cryptCertificate, CRYPT_ATTRIBUTE_CURRENT,CRYPT_CURSOR_NEXT );
In some cases multiple instances of the same attribute can be present, in which caseyou can use a third level of cursor movement, handled via the CRYPT_-ATTRIBUTE_CURRENT_INSTANCE attribute, and relative cursor movement tostep through the different instances of the attribute. Since the use of multi-valuedattributes is rare, it’s safe to assume one value per attribute in most cases, so that stepping through multiple attribute instances is unnecessary.
Once you’ve set the cursor position, you can work with the attribute group or attribute at that position in the usual manner. To obtain the group or attribute type at thecurrent position, you would use:
CRYPT_ATTRIBUTE_TYPE groupID;
cryptGetAttribute( cryptCertificate, CRYPT_ATTRIBUTE_CURRENT_GROUP,&groupID );
This example obtains the attribute group type, to obtain the attribute type you wouldsubstitute CRYPT_ATTRIBUTE_CURRENT in place of CRYPT_ATTRIBUTE_-CURRENT_GROUP. Attribute accesses are relative to the currently selected group,so for example if you move the cursor in an envelope to a signature attribute groupand thenread the signature key/certificate or signing time, it’ll be the one for the currently-selected signature attribute group. Since there can be multiple signaturespresent in an envelope, you can use this mechanism to read the signing informationfor each of the ones that are present.
To delete the attribute group at the current cursor position you would use:
cryptDeleteAttribute( cryptCertificate,CRYPT_ATTRIBUTE_CURRENT_GROUP );
Deleting the attribute group at the cursor position will move the cursor to the start ofthe group that follows the deleted one, or to the start of the previous group if the onebeing deleted was the last one present. This means that you can delete every attributegroup simply by repeatedly deleting the one under the cursor.
The attribute cursor provides a convenient mechanism for stepping through everyattribute group and attribute which is present in an object. For example to iteratethrough every attribute group you would use:
if( cryptSetAttribute( cryptCertificate,CRYPT_ATTRIBUTE_CURRENT_GROUP, CRYPT_CURSOR_FIRST ) == CRYPT_OK )do
{CRYPT_ATTRIBUTE_TYPE groupID;
/* Get the ID of the attribute group under the cursor */cryptGetAttribute( cryptCertificate,
CRYPT_ATTRIBUTE_CURRENT_GROUP, &groupID );

cryptlib Basics40
/* Handle the attribute if required *//* ... */}
while( cryptSetAttribute( cryptCertificate,CRYPT_ATTRIBUTE_CURRENT_GROUP, CRYPT_CURSOR_NEXT ) ==CRYPT_OK );
The Visual Basic equivalent is:
Dim groupID As CRYPT_ATTRIBUTE_TYPE
If cryptSetAttribute( cryptCertificate, _CRYPT_ATTRIBUTE_CURRENT_GROUP, CRYPT_CURSOR_FIRST ) == CRYPT_OKThenDo
' Get the type of the attribute group under the cursorcryptGetAttribute cryptCertificate, CRYPT_ATTRIBUTE_CURRENT, _
groupID
' Handle the attribute if required' ...
Loop While cryptSetAttribute( cryptCertificate, _CRYPT_ATTRIBUTE_CURRENT_GROUP, CRYPT_CURSOR_NEXT ) == CRYPT_OK
End If
To extend this a stage further and iterate through every attribute in every group in theobject, you would use:
if( cryptSetAttribute( cryptCertificate,CRYPT_ATTRIBUTE_CURRENT_GROUP, CRYPT_CURSOR_FIRST ) == CRYPT_OK )do
{do
{CRYPT_ATTRIBUTE_TYPE attributeID;
/* Get the ID of the attribute under the cursor */cryptGetAttribute( cryptCertificate, CRYPT_ATTRIBUTE_CURRENT,
&attributeID );}
while( cryptSetAttribute( cryptCertificate,CRYPT_ATTRIBUTE_CURRENT, CRYPT_CURSOR_NEXT ) == CRYPT_OK );
}while( cryptSetAttribute( cryptCertificate,
CRYPT_ATTRIBUTE_CURRENT_GROUP, CRYPT_CURSOR_NEXT ) ==CRYPT_OK );
Note that iterating attribute by attribute works within the current attribute group, butas mentioned earlier won’t jump from one group to the next — to do that, you need toiterate by group.
You can also position the attribute cursor directly by telling cryptlib which attributeyou want to move the cursor to. For example to move the cursor in a certificateobject to the extended key usage attribute group you would use:
cryptSetAttribute( cryptCertificate, CRYPT_ATTRIBUTE_CURRENT_GROUP,CRYPT_CERTINFO_EXTKEYUSAGE );
Usually the absolute cursor-positioning capability is only useful for certificate objectswhere you know that certain attributes will be present, for envelope and sessionobjects you generally can’t tell this in advance and will need to use the attribute cursor to walk the list to see what’s there.
Using this absolute cursor positioning in a variation of the attribute enumerationoperation given earlier, you can enumerate only the attributes of a single attributegroup (rather than all groups) by first selecting the group and then stepping throughthe attributes in it. For example to read all of a certificate’s extended key usage types you would use:
if( cryptSetAttribute( cryptCertificate,CRYPT_ATTRIBUTE_CURRENT_GROUP, CRYPT_CERTINFO_EXTKEYUSAGE ) ==CRYPT_OK )do
{CRYPT_ATTRIBUTE_TYPE attributeID;

Object Security 41
/* Get the ID of the attribute under the cursor */cryptGetAttribute( cryptCertificate, CRYPT_ATTRIBUTE_CURRENT,
&attributeID );}
while( cryptSetAttribute( cryptCertificate,CRYPT_ATTRIBUTE_CURRENT, CRYPT_CURSOR_NEXT ) == CRYPT_OK );
Object SecurityEach cryptlib object has its own security settings that affect the way you can use theobject. You can set these attributes, identified by CRYPT_PROPERTY_name, afteryou create an object to provide enhanced control over how it is used. For example ona system that supports threads you can bind an object to an individual thread within aprocess so that only the thread that owns the object can see it. For any other thread inthe process, the object handle is invalid.
You can get and set an object’s properties using cryptGetAttribute andcryptSetAttribute, passing as arguments the object whose property attribute youwant to change, the type of property attribute to change, and the attribute value or apointer to a location to receive the attribute’s value. The object property attributesthat you can get or set are:
Property/Description TypeCRYPT_PROPERTY_FORWARDCOUNT NumericThe number of times an object can be forwarded (that is, the number oftimes the ownership of the object can be changed). Each time the object’s ownership is changed, the forwarding count decreases by one; once itreaches zero, the object can’t be forwarded any further. For example if you set this attribute’s value to 1 then you can forward the object to another thread, but that thread can’t forward it further.
After you set this attribute (and any other security-related attributes), youshould set the CRYPT_PROPERTY_LOCKED attribute to ensure that itcan’t be changed later.
CRYPT_PROPERTY_HIGHSECURITY BooleanThis is a composite value that sets all general security-related attributes totheir highest security setting. Setting this value will make an object owned,non-exportable (if appropriate), non-forwardable, and locked. Since this is acomposite value representing a number of separate attributes, its value can’t be read or unset after being set.
CRYPT_PROPERTY_LOCKED BooleanLocks the security-related object attributes so that they can no longer bechanged. You should set this attribute once you’ve set other security-relatedattributes such as CRYPT_PROPERTY_FORWARDCOUNT.
This attribute is a write-once attribute, once you’ve set it can’t be reset.
CRYPT_PROPERTY_NONEXPORTABLE BooleanWhether a key in an encryption action object can be exported from the objectin encrypted form. Normally only session keys can be exported, and only inencrypted form, however in some cases private keys are also exported inencrypted form when they can are saved to a keyset. By setting this attributeyou can make them non-exportable in any form (some keys, such as thoseheld in crypto devices, are non-exportable by default).
This attribute is a write-once attribute, once you’ve set it can’t be reset.
CRYPT_PROPERTY_OWNER NumericThe identity of the thread that owns the object. The thread’s identity is specified using a value that depends on the operating system, but is usually athread handle or thread ID. For example under Windows 95/98/ME,NT/2000/XP, and Windows CE the thread ID is the value returned by theGetCurrentThreadID function, which returns a system-wide unique

cryptlib Basics42
Property/Description Typehandle for the current thread.
You can also pass in a value of CRYPT_UNUSED, which unbinds theobject from the thread and makes it accessible to all threads in the process.
CRYPT_PROPERTY_USAGECOUNT NumericThe number of times an action object can be used before it deletes itself andbecomes unusable. Every time an action object is used (for example when asignature encryption object is used to create a signature), its usage count isdecremented; once the usage count reaches zero, the object can’t be used to perform any further actions (although you can still perform non-actionoperations such as reading its attributes).
This attribute is useful when you want to restrict the number of times anobject can be used by other code. For example, before you change theownership of a signature object to allow it to be used by another thread, youwould set the usage count to 1 to ensure that it can’t be used to sign arbitrary numbers of messages or transactions. This eliminates a troubling securityproblem with objects such as smart cards where, once a user hasauthenticated themselves to the card, the software can ask the card to signarbitrary numbers of (unauthorised) transactions alongside the authorisedones.
This attribute is a write-once attribute, once you’ve set it can’t be reset.
For example to create a triple DES encryption context in one thread and transferownership of the context to another thread you would use:
CRYPT_CONTEXT cryptContext;
/* Create a context and claim it for exclusive use */cryptCreateContext( &cryptContext, cryptUser, CRYPT_ALGO_3DES );cryptSetAttribute( cryptContext, CRYPT_PROPERTY_OWNER, threadID );
/* Generate a key into the context */cryptGenerateKey( cryptContext );
/* Transfer ownership to another thread */cryptSetAttribute( cryptContext, CRYPT_PROPERTY_OWNER,
otherThreadID );
The other thread now has exclusive ownership of the context containing the loadedkey. If you wanted to prevent the other thread from transferring the context further,you would also have to set the CRYPT_PROPERTY_FORWARDCOUNT propertyto 1 (to allow you to transfer it) and then set the CRYPT_PROPERTY_LOCKEDattribute (to prevent the other thread from changing the attributes you’ve set).
Note that in the above code the object is claimed as soon as it’s created (and before any sensitive data is loaded into it) to ensure that another thread isn’t given a chance to use it when it contains sensitive data. The use of this type of object binding isrecommended when working with sensitive information under Windows 95/98/ME,Windows NT/2000/XP, and Windows CE, since the Win32 API provides severalsecurity holes whereby any process in the system may interfere with resources ownedby any other process in the system. The checking for object ownership which isperformed typically adds a few microseconds to each call, so in extremely time-critical applications you may want to avoid binding an object to a thread. On theother hand for valuable resources such as private keys, you should always considerbinding them to a thread, since the small overhead becomes insignificant compared tothe cost of the public-key operation.
Although the example shown above is for encryption contexts, the same applies toother types of objects such as keysets and envelopes (although in that case theinformation they contain isn’t as sensitive as it is for encryption contexts). For container objects that can themselves contain objects (for example keysets), if thecontainer is bound to a thread then any objects that are retrieved from it are alsobound to the thread. For example if you’re reading a private key from a keyset, you

Role-based Access Control 43
should bind the keyset to the current thread after you open it (but before you read anykeys) so that any keys read from it will also automatically be bound to the currentthread. In addition if a key which is used to generate another key (for example thekey that imports a session key) is bound, then the resulting generated key will also bebound.
On non-multithreaded systems, CRYPT_PROPERTY_OWNER and CRYPT_-PROPERTY_FORWARDCOUNT have no effect, so you can include them in yourcode for any type of system.
Role-based Access Controlcryptlib implements a form of access control called role-based access control orRBAC in which operations specific to a certain user role can’t be performed by a user acting in a different role. For example in many organisations a cheque can only beissued by an accountant and can only be signed by a manager, which prevents adishonest accountant or manager from both issuing a cheque to themselves and thensigning it as well. This security measure is referred to as separation of duty, in whichit takes at least two people to perform a critical operation. Similarly, cryptlib usesRBAC to enforce a strong separation of duty between various roles, providing thesame effect as the corporate accounting controls that prevent an individual fromwriting themselves cheques.
cryptlib recognises a variety of user types or roles. The default user type has accessto most of the standard functions in cryptlib but can’t perform CA management operations or specialised administrative functions that are used to manage certainaspects of cryptlib’s operation. When you use cryptlib in the role of a standard user, it functions as a normal crypto/security toolkit.
In addition to the standard user role, it’s also possible to use cryptlib in the role of a security officer (SO), a special administrative user who can create new users andperform other administrative functions but can’t perform general crypto operationslike a normal user. This provides a clear separation of duty between administrativeand end-user functionality.
Another role recognised by cryptlib is that of a certification authority that can makeuse of cryptlib’s certificate management functionality but can’t perform general administrative functions or non-CA-related crypto operations. Again, this provides aclear separation of duty between the role of the CA and the role of a general user orSO.
Managing User RolesWhen a cryptlib object is created, it is associated with a user role which is specified atcreation time and can’t be accessed by any other user. For example if a private key is created by a CA for signing certificates, it can’t be accessed by a normal userbecauseit’s only visible to the user acting in the role of the CA. Similarly, although a normal user may be able to see a certificate store, only a CA user can use it for the purpose ofissuing certificates. The use of RBAC therefore protects objects from misuse byunauthorised users.
The identity of the user who owns the object is specified as a parameter for the objectcreation function. Throughout the rest of the cryptlib documentation this parameter isdenoted through the use of the cryptUser variable. Usually this parameter is set toCRYPT_UNUSED to indicate that the user is acting in the role of a normal user anddoesn’t care about role-based controls. This is typically used in cases where there’s only one cryptlib user, for example where cryptlib is running on an end-user PC (e.g.Windows, Macintosh) or a multi-user system that provides each user with the illusionof being on a single-user machine (e.g. Unix). In almost all cases therefore you’d pass in CRYPT_UNUSED as the user identity parameter.
In a few specialised cases where the user is acting in a role other than that of a normaluser the default user role isn’t enough. For example when you want to access a CA certificate store you can’t use the role of a normal user to perform the accessbecause

cryptlib Basics44
only a CA can manipulate a certificate store. This prevents a normal user fromissuing themselves certificates in the name of the CA and assorted other mischiefsuch as revoking another user’s certificate.
When acting in a different role than that of the default, normal user, you specify theidentity of the user whose role you’re acting in as a parameter of the object creation function as before, this time passing in the handle of the user identity instead ofCRYPT_UNUSED. When the object is created, it is associated with the given userand role instead of the default user. The creation and use of user objects is covered inthe next section.
Creating and Destroying Users and RolesThe following section is provided purely for forwards compatibility with functionalityincluded in future versions of cryptlib. For the current version of cryptlib the useridentity parameter should always be CRYPT_UNUSED since user objectmanagement isn’t enabled in this version.
User objects can only be created and destroyed by an SO user, this being one of thespecial administrative functions mentioned earlier that can only be performed by anSO. You create a user object with cryptCreateUser, specifying the identity of theSO who is creating the user object, type of user role that the object is associated with,the name of the user, and a password that protects access to the user object:
CRYPT_USER cryptUser;
cryptCreateUser( &cryptUser, cryptSO, type, name, password );
The available user types or roles are:
Role Description
CRYPT_USER_CA A certification authority who can perform CAmanagement functions but can’t perform general-purpose crypto operations.
CRYPT_USER_NORMAL A standard cryptlib user.
CRYPT_USER_SO A security officer who can performadministrative functions such as creating ordeleting users but who can’t perform any other type of operation.
For example to create a normal user object for “John Doe” with the password “password” and a CA user object for “John’s Certificate Authority” with the password “CA password” you would use:
CRYPT_USER cryptUser, cryptCAUser;
cryptCreateUser( &cryptUser, cryptSO, CRYPT_USER_NORMAL, "John Doe","password" );
cryptCreateUser( &cryptUser, cryptSO, CRYPT_USER_CA, "John'sCertification Authority", "CA password" );
Oncea user object is created it can’t be used immediately because it’s still under the nominal control of the SO who created it rather than the user it’s intended for. Before it can be used, control over the object needs to be handed over to the user that it’sintended for. After the object is created by the SO, it is said to be in the SO initialisedstate. Any attempt to use an object when it’s in the SO initialised state will result in cryptlib returning CRYPT_ERROR_NOTINITED.
To move the newly-created object into a usable state, it’s necessary to change its password from the initial one set by the SO to one chosen by the user. Once thischange occurs, the object is moved into the user initialised state and is ready for use.You can change the password from the initial one set by the SO to a user-chosen onewith cryptChangePassword:
cryptChangePassword( userObject, oldPassword, newPassword );

Security and Usability 45
When the password has been changed from the one set by the SO to the one chosenby the user, the user object is ready for use.
User objects can also be destroyed by the SO who created them:
cryptDeleteUser( "John Doe" );
Security and UsabilityAn important consideration when you’re building an application is the usability of the security features that you’ll be employing. Users think about security in terms ofgoals such as “I want my medical records kept private” or “I want to be sure that the person/organisation that I’m talking to really is who they claim to be”, rather than technology such as “I want to use an X.509 certificate in conjunction with triple-DESencryption to secure my communications”. Your application should therefore present the task involving security in terms of the users’ goals rather than of the underlying security technology, and in terms that the users can understand (most users won’t speak security jargon). This both makes it possible for users to understand what it isthey’re doing, and encourages them to make use of the security mechanisms that are available.
Ease of UseUsers hate configuring things, especially complex security technology that they don’t understand. One usability study of a PKI found that a set of highly technical users,most with PhDs in computer science, took over two hours to set up a certificate fortheir own use, and rated it as the most difficult computer task they’d ever been asked to perform. To avoid problems like this, your application should auto-configure itselfas much as possible, leaving only a minimal set of familiar operations for the user.For example a network server can automatically generate a self-signed certificate oninstallation and use that to secure communications to it, avoiding the complexity andexpense of obtaining a certificate from an external CA (even if you consider this to bea lowering of theoretical security, it’s raising its effective security because now it’ll actually be used).
On the client side, your application can use cryptlib’s plug-and-play PKI facility toautomatically locate and communicate with a CA server, requiring that the user enternothing more than a name and password to authenticate themselves (this processtakes less than a minute, and doesn’t require a PhD in computer science). For embedded devices, the operation can occur automatically when the device isconfigured at the time of manufacture.
Since all users are quite used to entering passwords, your application can use thetraditional user name and password (tunnelled over a secure channel such asSSL/TLS or SSH) rather than more complex mechanisms like PKI, which in mostcases is just an awkward form of user name and password (the user name andpassword unlock the private key, which is then used to authenticate the user). Manyusers choose poor passwords, so protocols like TLS’ password-based authentication,which never transmit the password even over the secured link, should be preferred toones that do. An additional benefit of TLS’ password-based authentication is that itperforms mutual authentication of both parties, identifying not only the client to theserver but also the server to the client, without any of the expense, overhead, orcomplexity of certificates and a PKI.
Safe DefaultsYour application should provide sensible security defaults, and in particular ensurethat the default/most obvious action is the safest one. In other words if the userchooses to click “OK” for every action (as most users will do), they should be kept from harming themselves or others. Remember that if you present the user with adialog box that asks “A possible security problem has been detected, do you want tocontinue [Yes/No]”, what the user will read is “Do you want this message to go away [Yes/No]” (or more directly “Do you want to continue doing your job [Yes/No]”).

cryptlib Basics46
Ensuring that the Yes option is the safe one helps prevent the user from harmingthemselves (and others) when they click it automatically.
cryptlib already enforces this secure-by-default rule by always choosing safe settingsfor security options, algorithms, and mechanisms, but you should carefully checkyour application to ensure that any actions that it takes (either implicitly, or explicitlywhen the user chooses the default action in response to a query) are the safest ones.The use of safe defaults is also preferable to endless dialogs asking users to confirmevery action that needs to be taken, which rapidly becomes annoying and trains usersto dismiss them without reading them.
Interaction with other SystemsSecure systems don’t exist in a vacuum, but need to interact not only with users but also other, possibly insecure systems. What assumptions is your design making aboutthese other systems? Which ones does it trust, and what happens if that trust isviolated, either deliberately (it’s compromised by an attacker) or accidentally (it’s running buggy software)? For example a number of SSH implementations assumedthat when the other system had successfully completed an SSH handshake thisconstituted proof that it would only behave in a friendly manner, and were completelyvulnerable to any malicious action taken by the other system. On a similar note, thereis more spam coming from compromised “good” systems than “bad” ones. Trust but verify— a digitally signed virus is still a virus, even if it has a valid digital signatureattached.
Going beyond the obvious “trust nobody” approach, your application can also provide different levels of functionality under different conditions. Just as many fileservers will allow read-only access or access to a limited subset of files under a lowlevel of user authentication and more extensive access or write/update access onlyunder a higher level of authentication, so your application can change its functionalitybased on how safe (or unsafe) it considers the situation to be. So instead of simplydisallowing all communications to a server whose authentication key has changed (or,more likely, connecting anyway to avoid user complaints), you can run in a “safe mode” that disallows uploads of (potentially sensitive) data to the possibly-compromised server and is more cautious about information coming from the serverthan usual.
Automation vs. ExplicitnessWhen you’re planning the level of automation that you want to provide for users, consider the relative tradeoffs between making things invisible and automated vs.obvious but obtrusive. The more that users have to sign/encrypt data, the more theywant shortcuts to doing so, which means either making it mostly (or completely)automated, with a concomitant drop in security, or having them avoidsigning/encrypting altogether. So a mechanism that requires the use of a smart cardand PIN or biometrics will inevitably end up being rarely-used, while one thatautomatically processes anything that floats by will be.
There are however cases where obtrusive security measures are warranted, such aswhen the user is being asked to make important security decisions. In situations likethis, the user should be required to explicitly authorise an action before the action canproceed. In other words any security-relevant action that’s taken should represent a conscious expression of the will of the user. Silently signing a message behind theuser’s back is not only bad practice (it’s the equivalent of having them sign a contract without reading it), but is also unlikely to stand up in a court of law, thus voiding thereason usually given for signing a document. If the user is being asked to make asecurity-relevant decision of this kind, make sure that the action of proceeding reallydoes represents an informed, conscious decision on their part. Clear the mouse andkeyboard buffers to make sure that a keystroke or mouse click still present fromearlier on doesn’t get accepted as a response for the current decision. If necessary, consult with a lawyer about requirements for the wording and presentation of requestsfor security-related decisions that may end up being challenged in court.

Security and Usability 47
User Interface IssuesIn conjunction with this particular user interface issue, consider how requests forsecurity-related information are presented to the user. For example manyapplications, when connecting to a server whose key (which is usually tied to itsidentity) has changed will present the user with either too little information (“The key has changed, continue?”), too much information (a pile of incomprehensible X.509technobabble, in one PKI usability study not a single user was able to make any senseof the certificate information that Windows displayed to them), or the wrong kind ofinformation (“The sky is falling, run away”). Consider the problem from the point ofview of the user. They’re connecting to a server that they’ve connected to many times in the past and that they need to get to now in order to do their job. Theirnatural inclination will be to do whatever it takes to get rid of the warning andconnect anyway, making it another instance of the “Do you want this message to go away” problem presented earlier.
Your user interface should therefore explain the problem to them, for example “The server’s identification has changed since the last time that you connected to it. Thismay be a fake server pretending to be the real thing, or it could just mean that theserver software has been reinstalled”. Depending on the severity of the consequences of connecting to a fake server, you can then allow them to connect anyway, connectin a reduced-functionality “safe” mode such as one that disallows uploads of (potentially sensitive) data to the possibly-compromised server and is more cautiousabout information coming from the server than usual, or perhaps even require thatthey first verify the server’s authenticity by checking it with the administrator who runs it. If you like, you can also include an “Advanced” option that displays the usual X.509 gobbledigook.
The ability to select basic and advanced versions of the user interface helps reduceusability problems by giving most users a set of sensible (and safe) defaults withoutoverloading them with complexity while still allowing power users to tweak settingsto their heart’s content.For example certificate enrolment using the plug-and-playPKI facility can be done with nothing more than a user name and password, or withdozens of dialog boxes for choosing the algorithm type, key size, X.500 distinguishedname components, certificate attributes, key file name, storage location, and so onand so on, for advanced users that really require this.
Use of Visual CuesThe use of colour can play an important role in alerting users to safe/unsafesituations. For this reason, Mozilla-based web browsers updated their SSL indicationmechanism from the original easily-overlooked tiny padlock at the bottom of thescreen to changing the background colour of the browser’s location bar when SSL is active and the certificate is verified. Changing the background colour or border of theobject that the user is looking at or working with is an extremely effective way ofcommunicating security information to them, since they don’t have to remember to explicitly look elsewhere to try and find the information. The colour change alsomakes it very explicit that something special has occurred with the object that’s being highlighted (one usability study found that the number of users who were able toavoid a security problem doubled when different colours were used to explicitlyhighlight security properties).
If you decide to use colour or similar highlighting methods in your application,remember that the user has to be aware of the significance of the different colours inorder to be able to make a decision based on them, that some users may be colour-blind to particular colour differences, and that colours have different meanings acrossdifferent cultures. For example the colour red won’t automatically be interpreted to indicate danger in all parts of the world. Making the colour settings configurable isone way of avoiding these problems.
Finally, make sure that you display the security state in a manner that it can’t be spoofed by an attacker. For example web browsers are vulnerable to many levels ofuser interface spoofing using methods such as HTML to change the appearance of the

cryptlib Basics48
browser or web page, or Javascript or XUL to modify or over-draw browser UIelements. To protect against these types of attack, you should ensure that yoursecurity-status display mechanism can’t be spoofed or overridden by external means.
Security TestingFinally, test the usability of your design on real users. This is a two-phase process,pre-implementation testing (trying to figure out what you want to build) and post-implementation testing (verifying that what you eventually built— which given theusual software development process could be quite different from what was planned— is actually the right thing). Usability testing at the design stage (before you evenbegin implementation, for example using a mockup on paper or a GUI developmentkit) can be enormously useful in assessing the users’ reactions to the interface and as a driver for further design effort (Carolyn Snyder’s book Paper Prototyping: TheFast and Easy Way to Design and Refine User Interfaces provides further guidance inthis area). Consider having the designers/developers play the part of the computerwhen interacting with test users, to allow them to see what their planned interfaceneeds to cope with.
Another useful pre-implementation testing technique is to imagine a stereotypical enduser (or several types of stereotypical users if this applies) and think about howthey’d use the software. What sort of things would they want to do with it? How well would they cope with the security mechanisms? How would they react tosecurity warnings? The important thing here is that you don’t just add a pile of features that you think are cool and then try and figure out how to justify their use bythe end user, but that you look at it from the user’s point of view and only add those features that they’ll actually need and be able to understand.
Once you’ve finished your application, take a few non-technical people, sit them in aroom with a copy of the software running, and see how they handle it. Which partstake them the longest? At what points do they have to refer to the manual, or evenask for help? Did they manage to get the task done in a secure manner, meaning thattheir expectations of security (not just yours) were met? Can a section that causedthem problems be redesigned or even eliminated by using a safe default setting? Realtesting before deployment (rather than shipping a version provisionally tagged as abeta release and waiting for user complaints) is an important part of the securityusability evaluation process.
As an example of the conflict between user expectations and security design, securityusability studies have shown that email users typically aren’t aware that (a) messages can be modified as they move across the Internet, (b) encrypting a message doesn’t provide any protection, and (c) signing a message does protect it. The users hadassumed that encrypting a message provided integrity protection, but signing itsimply appended the equivalent of a pen-and-paper signature to the end of it. Real-world testing and user feedback is required to identify these issues so that they can beaddressed, for example by explaining signing as protecting the message fromtampering rather than the easily-misunderstood “signing”. Similarly, the fact that encryption doesn’t provide integrity protection can be addressed either at the user interface level by warning the user that the encrypted message isn’t protected from modification, or at the technical level by adding a MDC (modification detection code)inside the encryption layer or a MAC (message authentication code) outside it. Ofthese two, the latter is the better option since it “fixes” the encryption to do what users expect without additionally burdening the user.
User interface design is usually a highly iterative process, so that the standard{ design, implement, test} cycle described above probably won’t be enough to shake out all potential problems, particularly in the case of something as complex and hardto predict as security user interface design. Instead of a single cycle, you may need touse multiple cycles of user testing, starting with a relatively generic design(sometimes known as low-fi prototyping) and then refining it based on user feedbackand experience.

Miscellaneous Issues 49
Miscellaneous IssuesThis section contains additional information that may be useful when working withcryptlib.
Multi-threaded cryptlib Operationcryptlib is re-entrant and completely thread-safe (the threading model used issometimes known as the free-threading model), allowing it to be used withmultithreaded applications in systems that support threading. When you use cryptlibin a multithreaded application, you should take standard precautions to ensure that asingle resource shared across multiple threads doesn’t become a bottleneck, with all threads being forced to wait on a single shared object. For example if you’re timestamping large numbers of messages then creating a single timestamping sessionobject (see “Secure Sessions” on page 96) and using that for all timestampingservices will result in all of the operations waiting on a single session object, whichcan often take several seconds to turn around a transaction with a remote server. Abetter option in this case would be to create a pool of timestamping session objectsand use the next free one when required.
A similar situation occurs with other objects such as crypto devices and keysets thatmay be shared across multiple threads. For example cryptlib provides a facility forautomatically fetching a decryption key from a keyset in order to decrypt data (see“Public-Key Encrypted Enveloping” on page 66). This is convenient when handlingone or two messages since cryptlib will automatically take care of all of theprocessing for you, however if you’re processing large numbers of messages then the need to read and decrypt the same private key for each message is very inefficient,not only in terms of CPU overhead but also because every message must wait foreach of the previous messages to be processed before it gets its turn at the keyset.
A better alternative in this case is to read the private key from the keyset just onceand then use it with each envelope, rather than having each envelope read and decryptthe key itself. Extending this even further, if you’re using a very large private key, running on a slower processor, or processing large numbers of transactions, you maywant to instantiate multiple copies of the private-key object to avoid the single privatekey again becoming a bottleneck.
In general most private-key operations, when performed on modern processors, arefairly quick, so there’s no need to create large numbers of private-key objects for fearof them becoming a bottleneck. In this case the primary bottleneck is the need to readand decrypt the key for each message processed. However, when run on a multiple-CPU system, you should make some attempt to match objects to CPUs— creating asingle private-key object on a four-CPU system guarantees that the overallperformance will be no better than that of a single-CPU system, since the singleobject instance acts as a mutex that can only be acquired by one CPU at a time.Standard programming practice for efficient utilisation of resources on multiprocessorsystems applies to cryptlib just as it does for other applications. Creating a pool ofobjects that can be picked up and used as required would be one standard approach tothis problem. Some operating systems provide special support for this with functionsfor thread pooling management. For example, Windows 2000 and XP provide theQueueUserWorkItem function, which submits a work item to a thread pool forexecution when the next thread becomes available.
In order to protect against potential deadlocks when multiple threads are waiting on asingle object, cryptlib includes a watchdog timer that triggers after a certain amountof time has been spent waiting on the object. Once this occurs, cryptlib will returnCRYPT_ERROR_TIMEOUT to indicate that an object is still in use after waiting forit to become available. If you experience timeouts of this kind, you should checkyour code to see if there are any bottlenecks due to a single object with a longresponse time being shared by several fast-response-time objects. Note that timeoutsare also possible with normal cryptlib object use, for example when communicatingdata over a slow or stalled network link, so a CRYPT_ERROR_TIMEOUT statusdoesn’t automatically mean that the watchdog timer signalled a problem.

cryptlib Basics50
To help diagnose situations of this kind, the debug build of cryptlib will display onthe console output an indication that it waited on a particular object, along with theobject type that it waited on. You can use this information to identify potentialbottlenecks in your application.
Linux has a somewhat unusual threading implementation built around the clone()system call that can lead to unexpected behaviour with some kernel and/or glibcversions. Two common symptoms of glibc/kernel threading problems are phantomprocesses (which are actually glibc-internal threads created via clone()) being leftbehind when you application exits, and cryptlib’s internal consistency-checkingthrowing an exception in the debug build when it detects an problem with threading.If you run into either of these situations, you can try different glibc and/or kernelversions to find a combination that works. Searching Internet newsgroups willprovide a wealth of information and advice on problems with glibc and Linuxthreads.
Interaction with External EventsInternally, cryptlib consists of a number of security-related objects, some of whichcan be controlled by the user through handles to the objects. These objects may alsobe acted on by external forces such as information coming from encryption andsystem hardware, which will result in a message related to the external action beingsent to any affected cryptlib objects. An example of such an event is the withdrawalof a smart card from a card reader, which would result in a card removal messagebeing sent to all cryptlib objects that were created using information stored on thecard. This can affect quite a number of objects.
Typically, the affected cryptlib objects will destroy any sensitive information held inmemory and disable themselves from further use. If you try to use any of the objects,cryptlib will return CRYPT_ERROR_SIGNALLED to indicate that an external eventhas caused a change in the state of the object.
After an object has entered the signalled state, the only remaining operation you canperform with the object is to destroy it using the appropriate function.

Creating/Destroying Envelopes 51
Data EnvelopingEncryption envelopes are the easiest way to use cryptlib. An envelope is a containerobject whose behaviour is modified by the data and resources that you push into it.To use an envelope, you add to it other container and action objects and resourcessuch as passwords that control the actions performed by the envelope, and then pushin data and pop out data which is processed according to the resources you’ve pushed in. cryptlib takes care of the rest. For example to encrypt the message “This is a secret” with the password “Secret password” you would do the following:
create the envelope;add the password attribute "Secret password" to the envelope;push data "This is a secret" into the envelope;pop encrypted data from the envelope;destroy the envelope;
That’s all that’s necessary. Since you’ve added a password attribute, cryptlib knows that you want to encrypt the data in the envelope with the password, so it encrypts thedata and returns it to you. This process is referred to as enveloping the data.
The opposite, de-enveloping process consists of:
create the envelope;push encrypted data into the envelope;add the password attribute "Secret password" to the envelope;pop decrypted data from the envelope;destroy the envelope;
cryptlib knows the type of encrypteddata that it’s working with (it can inform you that you need to push in a password if you don’t know that in advance), decrypts it with the provided password, and returns the result to you.
This example illustrates a feature of the de-enveloping process that may at first seemslightly unusual: You have to push in some encrypted data before you can add thepassword attribute needed to decrypt it. This is because cryptlib will automaticallydetermine what to do with the data you give it, so if you added a password before youpushed in the encrypted data cryptlib wouldn’t know what to do with the password.
Signing data is almost identical, except that you add a signature key attribute insteadof a password. You can also add a number of other encryption attributes dependingon the type of functionality you want. Since all of these require further knowledge ofcryptlib’s capabilities, only basic data, compressed-data, and password-basedenveloping will be covered in this section.
Due to constraints in the underlying data formats that cryptlib supports, you can’t perform more than one of compression, encryption, or signing using a singleenvelope (the resulting data stream can’t be encoded using most of the common data formats supported by cryptlib). If you want to perform more than one of theseoperations, you need to use multiple envelopes, one for each of the processing stepsyou want to perform. If you try and add an encryption attribute to an envelope whichis set up for signing, or a signing attribute to an envelope which is set up forencryption, or some other conflicting combination, cryptlib will return a parametererror to indicate that the attribute type is invalid for this envelope since it is alreadybeing used for a different purpose.
Creating/Destroying EnvelopesEnvelopes are accessed through envelope objects that work in the same generalmanner as the other container objects used by cryptlib. Before you can envelope orde-envelope data you need to create the appropriate type of envelope for the job. Ifyou want to envelope some data, you would create the envelope withcryptCreateEnvelope, specifying the user who is to own the device object orCRYPT_UNUSED for the default, normal user, and the format for the enveloped data(for now you should use CRYPT_FORMAT_CRYPTLIB, the default format):

Data Enveloping52
CRYPT_ENVELOPE cryptEnvelope;
cryptCreateEnvelope( &cryptEnvelope, cryptUser,CRYPT_FORMAT_CRYPTLIB );
/* Perform enveloping */
cryptDestroyEnvelope( cryptEnvelope );
The Visual Basic version is:
Dim cryptEnvelope As Long
cryptCreateEnvelope cryptEnvelope, cryptUser, CRYPT_FORMAT_CRYPTLIB
' Perform enveloping
cryptDestroyEnvelope cryptEvelope
The C#, Java, and Python versions (here as elsewhere) migrate the output value to thereturn value, and return errors by throwing exceptions. The Python version is:
cryptEnvelope = cryptCreateEnvelope( cryptUser,CRYPT_FORMAT_CRYPTLIB )
The C# and Java version is:
int cryptEnvelope;
cryptEnvelope = crypt.CreateEnvelope( cryptUser,crypt.FORMAT_CRYPTLIB );
If you want to de-envelope the result of the previous enveloping process, you wouldcreate the envelope with format CRYPT_FORMAT_AUTO, which tells cryptlib toautomatically detect and use the appropriate format to process the data:
CRYPT_ENVELOPE cryptEnvelope;
cryptCreateEnvelope( &cryptEnvelope, cryptUser, CRYPT_FORMAT_AUTO );
/* Perform de-enveloping */
cryptDestroyEnvelope( cryptEnvelope );
Note that the CRYPT_ENVELOPE is passed to the cryptCreateEnvelope byreference as the function modifies it when it creates the envelope. In all otherroutines in cryptlib, CRYPT_ENVELOPE is passed by value.
Sometimes when you’re processing data in an envelope, you may not be able to add all of the data in an envelope, for example when you’re trying to de-envelope amessage that has been truncated due to a transmission error, or when you don’t retrieve all of the processed data in the envelope before destroying it. When youdestroy the envelope cryptlib will return CRYPT_ERROR_INCOMPLETE as awarning that not all of the data has been processed. The envelope will be destroyedas usual, but the warning is returned to indicate that you should have added furtherdata or retrieved processed data before destroying the envelope.
The Data Enveloping ProcessAlthough this section only covers basic data and password-based enveloping, theconcepts it covers apply to all the other types of enveloping as well, so you shouldfamiliarise yourself with this section even if you’re only planning to use the more advanced types of enveloping such as digitally signed data enveloping. The generalmodel for enveloping data is:
add any attributes such as passwords or keyspush in datapop out processed data
To de-envelope data:

The Data Enveloping Process 53
push in data(cryptlib will inform you what resource(s) it needs to process the
data)add the required attribute such as a password or keypop out processed data
The enveloping/de-enveloping functions perform a lot of work in the background.For example when you add a password attribute to an envelope and follow it withsome data, the function hashes the variable-length password down to create a fixed-length key for the appropriate encryption algorithm, generates a temporary sessionkey to use to encrypt the data you’ll be pushing into the envelope, uses the fixed-length key to encrypt the session key, encrypts the data (taking into account the factthat most encryption modes can’t encrypt individual bytes but require data to be present in fixed-length blocks), and then cleans up by erasing any keys and othersensitive information still in memory. This is why it’s recommended that you use the envelope interface rather than trying to do the same thing yourself.
The cryptPushData and cryptPopData functions are used to push data into and popdata out of an envelope. For example to push the message “Hello world” into an envelope, you would use:
cryptPushData( envelope, "Hello world", 11, &bytesCopied );
The same operation in C# and Java is:
int bytesCopied = crypt.PushData( envelope, "Hello world" );
In Python this is:
bytesCopied = cryptPushData( envelope, "Hello world" )
The function will return an indication of how many bytes were copied into theenvelope in bytesCopied. Usually this is the same as the number of bytes youpushed in, but if the envelope is almost full or you’re trying to push in a very largeamount of data, only some of the data may be copied in. This is useful when youwant to process a large quantity of data in multiple sections, which is explainedfurther on.
Popping data works similarly to pushing data:
cryptPopData( envelope, buffer, bufferSize, &bytesCopied );
In this case you supply a buffer to copy the data to, and an indication of how manybytes you want to accept, and the function will return the number of bytes actuallycopied in bytesCopied. This could be anything from zero up to the full buffersize, depending on how much data is present in the envelope.
Once you’ve pushed the entire quantity of data that you want to process into an envelope, you need to use cryptFlushData to tell the envelope object to wrap up thedata processing. If you try to push in any more data after this point, cryptlib willreturn a CRYPT_ERROR_COMPLETE error to indicate that processing of the datain the envelope has been completed and no more data can be added. Since theenveloped data contains all the information necessary to de-envelope it, it isn’t necessary to perform the final flush during de-enveloping.
You can add enveloping and de-enveloping attributes to an envelope in the usualmanner with cryptSetAttribute and cryptSetAttributeString. For example to addthe password “password” to an envelope, you would set the CRYPT_ENVINFO_-PASSWORD attribute:
cryptSetAttributeString( cryptEnvelope, CRYPT_ENVINFO_PASSWORD,"password", 8 );
The same operation in Visual Basic is:
cryptSetAttributeString cryptEnvelope, CRYPT_ENVINFO_PASSWORD, _"password", 8
The various types of attributes that you can add are explained in more detail furtheron.

Data Enveloping54
Data Size ConsiderationsWhen you add data to an envelope, cryptlib processes and encodes it in a manner thatallows arbitrary amounts of data to be added. If cryptlib knows in advance how muchdata will be pushed into the envelope, it can use a more efficient encoding methodsince it doesn’t have to take into account an indefinitely long datastream. You cannotify cryptlib of the overall data size by setting the CRYPT_ENVINFO_DATASIZEattribute:
cryptSetAttribute( envelope, CRYPT_ENVINFO_DATASIZE, dataSize );
This tells cryptlib how much data will be added, and allows it to use the moreefficient encoding format. If you push in more data than this before you wrap up theprocessing with cryptFlushData, cryptlib will return CRYPT_ERROR_-OVERFLOW; if you push in less, it will return CRYPT_ERROR_UNDERFLOW.
There is one exception to this rule which occurs when you’re using the PGP/OpenPGP data format. PGP requires that the length be indicated at the start ofevery message, so you always have to set the CRYPT_ENVINFO_DATASIZEattribute when you perform PGP enveloping. If you try and push data into a PGPenvelope without setting the data size, cryptlib will return CRYPT_ERROR_-NOTINITED to tell you that it can’t envelope the data without knowing its overall size in advance. PGP/OpenPGP enveloping is explained in more detail in “PGP” on page 86.
The amount of data popped out of an envelope never matches the amount pushed in,because the enveloping process adds encryption headers, digital signatureinformation, and assorted other paraphernalia which is required to process a message.In many cases the overhead involved in wrapping up a block of data in an envelopecan be noticeable, so you should always push and pop as much data at once into andout of an envelope as you can. For example if you have a 100-byte message and pushit in as 10 lots of 10 bytes, this is much slower than pushing a single lot of 100 bytes.This behaviour is identical to the behaviour in applications like disk or network I/O,where writing a single big file to disk is a lot more efficient than writing 10 smallerfiles, and writing a single big network data packet is more efficient than writing 10smaller data packets.
Push and popping unnecessarily small blocks of data when the total data size isunknown can also affect theoverall enveloped data size. If you haven’t told cryptlib how much data you plan to process with CRYPT_ENVINFO_DATASIZE then eachtime you pop a block of data from an envelope, cryptlib has to wrap up the currentblock and add header information to it to allow it to be de-enveloped later on.Because this encoding overhead consumes extra space, you should again try to pushand pop a single large data block rather than many small ones (to prevent worst-casebehaviour, cryptlib will coalesce adjacent small blocks into a minimum block size of10 bytes, so it won’t return an individual block containing less than 10 bytes unless it’s the last block in the envelope). This is again like disk data storage or network I/O, where many small files or data packets lead to greater fragmentation and wastedstorage space or network overhead than a single large file or packet.
By default the envelope object which is created will have a 16K data buffer on DOSand 16-bit Windows systems, and a 32K buffer elsewhere. The size of the internalbuffer affects the amount of extra processing that cryptlib needs to perform; a largebuffer will reduce the amount of copying to and from the buffer, but will consumemore memory (the ideal situation to aim for is one in which the data fits completelywithin the buffer, which means that it can be processed in a single operation). Sincethe process of encrypting and/or signing the data can increase its overall size, youshould make the buffer 1-2K larger than the total data size if you want to process thedata in one go. The minimum buffer size is 4K, and on 16-bit systems the maximumbuffer size is 32K-1.
If want to use a buffer which is smaller or larger than the default size, you can specifyits size using the CRYPT_ATTRIBUTE_BUFFERSIZE attribute after the envelopehas been created. For example if you knew you were going to be processing a single

The Data Enveloping Process 55
80K message on a 32-bit system (you can’t process more than 32K-1 bytes at once ona 16-bit system) you would use:
CRYPT_ENVELOPE cryptEnvelope;
cryptCreateEnvelope( &cryptEnvelope, cryptUser,CRYPT_FORMAT_CRYPTLIB );
cryptSetAttribute( cryptEnvelope, CRYPT_ATTRIBUTE_BUFFERSIZE,90000L );
/* Perform enveloping */
cryptDestroyEnvelope( cryptEnvelope );
(the extra 10K provides a generous safety margin for message expansion due to theenveloping process). When you specify the size of the buffer, you should try andmake it as large as possible, unless you’re pretty certain you’ll only be seeing messages up to a certain size. Remember, the larger the buffer, the less processingoverhead is involved in handling data. However, if you make the buffer excessivelylarge it increases the probability that the data in it will be swapped out to disk, so it’s a good idea not to go overboard on buffer size. You don’t have to process the entire message at once, cryptlib provides the ability to envelope or de-envelope data inmultiple sections to allow processing of arbitrary amounts of data even on systemswith only small amounts of memory available.
Basic Data EnvelopingIn the simplest case the entire message you want to process will fit into theenvelope’s internal buffer. The simplest type of enveloping does nothing to the data at all, but just wraps it and unwraps it:
CRYPT_ENVELOPE cryptEnvelope;int bytesCopied;
/* Create the envelope */cryptCreateEnvelope( &cryptEnvelope, cryptUser,
CRYPT_FORMAT_CRYPTLIB );
/* Add the data size information and data, wrap up the processing, andpop out the processed data */
cryptSetAttribute( cryptEnvelope, CRYPT_ENVINFO_DATASIZE,messageLength );
cryptPushData( cryptEnvelope, message, messageLength, &bytesCopied );cryptFlushData( cryptEnvelope );cryptPopData( cryptEnvelope, envelopedData, envelopedDataBufferSize,
&bytesCopied );
/* Destroy the envelope */cryptDestroyEnvelope( cryptEnvelope );
The Visual Basic equivalent is:
Dim cryptEnvelope As LongDim bytesCopied As Long
' Create the envelopecryptCreateEnvelope cryptEnvelope, cryptUser, CRYPT_FORMAT_CRYPTLIB
' Add the data size information and data, wrap up the processing, and' pop out the processed datacryptSetAttribute cryptEnvelope, CRYPT_ENVINFO_DATASIZE, messageLengthcryptPushData cryptEnvelope, message, messageLength, bytesCopiedcryptFlushData cryptEnvelopecryptPopData cryptEnvelope, envelopedData, envelopedDataBufferSize, _
bytesCopied
' Destroy the envelopecryptDestroyEnvelope cryptEnvelope
The Python version is:
# Create the envelopecryptEnvelope = cryptCreateEnvelope( cryptUser,
CRYPT_FORMAT_CRYPTLIB )

Data Enveloping56
# Add the data size information and data, wrap up the processing, and# pop out the processed datacryptEnvelope.ENVINFO_DATASIZE = len( message )bytesCopied = cryptPushData( cryptEnvelope, message )cryptFlushData( cryptEnvelope )bytesCopied = cryptPopData( cryptEnvelope, envelopedData,
envelopedDataBufferSize )
# Destroy the envelopecryptDestroyEnvelope( cryptEnvelope )
The C# or Java version is:
int bytesCopied;
// Create the envelopecryptEnvelope = crypt.CreateEnvelope( cryptUser,
crypt.FORMAT_CRYPTLIB );
// Add the data size information and data, wrap up the processing, and// pop out the processed datacrypt.SetAttribute( cryptEnvelope, crypt.ENVINFO_DATASIZE,
message.Length );bytesCopied = crypt.PushData( cryptEnvelope, message );crypt.FlushData( cryptEnvelope );bytesCopied = crypt.PopData( cryptEnvelope, envelopedData,
envelopedDataBufferSize );
// Destroy the envelopecrypt.DestroyEnvelope( cryptEnvelope );
(the above code is for C#, the Java version is virtually identical except that themessage.Length of a C# byte array is message.length in Java).
To de-envelope the resulting data you would use:
CRYPT_ENVELOPE cryptEnvelope;int bytesCopied;
/* Create the envelope */cryptCreateEnvelope( &cryptEnvelope, cryptUser, CRYPT_FORMAT_AUTO );
/* Push in the enveloped data and pop out the recovered message */cryptPushData( cryptEnvelope, envelopedData, envelopedDataSize,
&bytesCopied );cryptFlushData( cryptEnvelope );cryptPopData( cryptEnvelope, message, messageBufferSize,
&bytesCopied );
/* Destroy the envelope */cryptDestroyEnvelope( cryptEnvelope );
The Visual Basic form is:
Dim cryptEnvelope As LongDim bytesCopied As Long
' Create the envelopecryptCreateEnvelope cryptEnvelope, cryptUser, CRYPT_FORMAT_AUTO
' Push in the enveloped data and pop out the recovered messagecryptPushData cryptEnvelope, envelopedData, envelopedDataSize, _
bytesCopiedcryptFlushData cryptEnvelopecryptPopData cryptEnvelope, message, messageBufferSize, bytesCopied
' Destroy the envelopecryptDestroyEnvelope cryptEnvelope
This type of enveloping isn’tterribly useful, but it does demonstrate how theenveloping process works.
Compressed Data EnvelopingA variation of basic data enveloping is compressed data enveloping whichcompresses or decompresses data during the enveloping process. Compressing data

The Data Enveloping Process 57
before signing or encryption improves the overall enveloping throughput(compressing data and encrypting the compressed data is faster than just encryptingthe larger, uncompressed data), increases security by removing known patterns in thedata, and saves storage space and network bandwidth.
To tell cryptlib to compress data that you add to an envelope, you should set theCRYPT_ENVINFO_COMPRESSION attribute before you add the data. Thisattribute doesn’t take a value, so you should set it to CRYPT_UNUSED. The code tocompress a message is then:
CRYPT_ENVELOPE cryptEnvelope;int bytesCopied;
cryptCreateEnvelope( &cryptEnvelope, cryptUser,CRYPT_FORMAT_CRYPTLIB );
/* Tell cryptlib to compress the data */cryptSetAttribute ( cryptEnvelope, CRYPT_ENVINFO_COMPRESSION,
CRYPT_UNUSED );
/* Add the data size information and data, wrap up the processing, andpop out the processed data */
cryptSetAttribute( cryptEnvelope, CRYPT_ENVINFO_DATASIZE,messageLength );
cryptPushData( cryptEnvelope, message, messageLength, &bytesCopied );cryptFlushData( cryptEnvelope );cryptPopData( cryptEnvelope, envelopedData, envelopedDataBufferSize,
&bytesCopied );
cryptDestroyEnvelope( cryptEnvelope );
De-enveloping compressed data works exactly like decompressing normal data,cryptlib will transparently decompress the data for you and return the decompressedresult when you call cryptPopData.
The compression/decompression process can cause a large change in data sizebetween what you push and what you pop back out, so you typically end up pushingmuch more than you pop or popping much more than you push. In particular, youmay end up pushing multiple lots of data before you can pop any compressed dataout, or pushing a single lot of compressed data and having to pop multiple lots ofdecompressed data. This applies particularly to the final stages of enveloping whenyou flush through any remaining data, which signals the compressor to wrap upprocessing and move any remaining data into the envelope. This means that the flushcan return CRYPT_ERROR_OVERFLOW to indicate that there is more data to beflushed, requiring multiple iterations of flushing and copying out data:
/* ... */
/* Flush out any remaining data */do
{cryptFlushData( cryptEnvelope );cryptPopData( cryptEnvelope, outBuffer, BUFFER_SIZE, &bytesCopied
);}
while( bytesCopied );
To handle this in a more general manner, you should use the processing techniquesdescribed in “Enveloping Large Data Quantities” on page 62.
Password-based Encryption EnvelopingTo do something useful (security-wise) to the data, you need to add a container oraction object or other type of attribute to tell the envelope to secure the data in someway. For example if you wanted to encrypt a message with a password you woulduse:
CRYPT_ENVELOPE cryptEnvelope;int bytesCopied;
cryptCreateEnvelope( &cryptEnvelope, cryptUser,CRYPT_FORMAT_CRYPTLIB );

Data Enveloping58
/* Add the password */cryptSetAttributeString( cryptEnvelope, CRYPT_ENVINFO_PASSWORD,
password, passwordLength );
/* Add the data size information and data, wrap up the processing, andpop out the processed data */
cryptSetAttribute( cryptEnvelope, CRYPT_ENVINFO_DATASIZE,messageLength );
cryptPushData( cryptEnvelope, message, messageLength, &bytesCopied );cryptFlushData( cryptEnvelope );cryptPopData( cryptEnvelope, envelopedData, envelopedDataBufferSize,
&bytesCopied );
cryptDestroyEnvelope( cryptEnvelope );
The same operation in Java (for C# replace the .length with .Length) is:
int cryptEnvelope = crypt.CreateEnvelope( cryptUser,crypt.FORMAT_CRYPTLIB );
/* Add the password */crypt.SetAttributeString( cryptEnvelope, crypt.ENVINFO_PASSWORD,
password );
/* Add the data size information and data, wrap up the processing, andpop out the processed data */
crypt.SetAttribute( cryptEnvelope, crypt.ENVINFO_DATASIZE,message.length );
int bytesCopied = crypt.PushData( cryptEnvelope, message );crypt.FlushData( cryptEnvelope );bytesCopied = crypt.PopData( cryptEnvelope, envelopedData,
envelopedData.length );
crypt.DestroyEnvelope( cryptEnvelope );
To de-envelope the resulting data you would use:
CRYPT_ENVELOPE cryptEnvelope;int bytesCopied;
cryptCreateEnvelope( &cryptEnvelope, cryptUser, CRYPT_FORMAT_AUTO );
/* Push in the enveloped data and the password required to de-envelopeit, and pop out the recovered message */
cryptPushData( cryptEnvelope, envelopedData, envelopedDataLength,&bytesCopied );
cryptSetAttributeString( cryptEnvelope, CRYPT_ENVINFO_PASSWORD,password, passwordLength );
cryptFlushData( cryptEnvelope );cryptPopData( cryptEnvelope, message, messageBufferSize,
&bytesCopied );
cryptDestroyEnvelope( cryptEnvelope );
The de-enveloping process in Java is:
int cryptEnvelope = crypt.CreateEnvelope( cryptUser,crypt.FORMAT_AUTO );
int bytesCopied;
// Push in the enveloped data and the password required to// de-envelope it, and pop out the recovered messagetry {
bytesCopied = crypt.PushData( cryptEnvelope, envelopedData );}catch ( CryptException e ) {
if( e.getStatus() != crypt.ENVELOPE_RESOURCE )throw e;
}crypt.SetAttributeString( cryptEnvelope, crypt.ENVINFO_PASSWORD,
password );crypt.FlushData( cryptEnvelope );crypt.PopData( cryptEnvelope, messageBuffer, messageBuffer.length );
// Destroy the envelopecrypt.DestroyEnvelope( cryptEnvelope );

The Data Enveloping Process 59
The Visual Basic equivalent is:
Dim cryptEnvelope As LongDim bytesCopied As Long
cryptCreateEnvelope cryptEnvelope, cryptUser, CRYPT_FORMAT_AUTO
' Push in the enveloped data and the password required to' de-envelope it, and pop out the recovered messagecryptPushData cryptEnvelope, envelopedData, envelopedDataSize, _
bytesCopiedcryptSetAttributeString cryptEnvelope, CRYPT_ENVINFO_PASSWORD, _
password, Len( password )cryptFlushData cryptEnvelopecryptPopData cryptEnvelope, message, messageBufferSize, bytesCopied
' Destroy the envelopecryptDestroyEnvelope cryptEnvelope
If you add the wrong password, cryptlib will return a CRYPT_ERROR_-WRONGKEY error. You can use this to request a new password from the user andtry again. For example to give the user the traditional three attempts at getting thepassword right you would replace the code to add the password with:
for( i = 0; i < 3; i++ ){password = ...;if( cryptSetAttributeString( envelope, CRYPT_ENVINFO_PASSWORD,
password, passwordLength ) == CRYPT_OK )break;
}
Conventional Encryption EnvelopingIn addition to encrypting enveloped data with a password, it’s possible to bypass the password step and encrypt the data directly using an encryption context. This contextcan either be used to encrypt the data directly (CRYPT_ENVINFO_SESSIONKEY)or indirectly by wrapping up a session key (CRYPT_ENVINFO_KEY). For exampleto encrypt data directly using IDEA with a raw session key you would do thefollowing:
CRYPT_ENVELOPE cryptEnvelope;CRYPT_CONTEXT cryptContext;int bytesCopied;
cryptCreateEnvelope( &cryptEnvelope, cryptUser,CRYPT_FORMAT_CRYPTLIB );
/* Create the session key context and add it */cryptCreateContext( &cryptContext, cryptUser, CRYPT_ALGO_IDEA );cryptSetAttributeString( cryptContext, CRYPT_CTXINFO_KEY,
"0123456789ABCDEF", 16 );cryptSetAttribute( cryptEnvelope, CRYPT_ENVINFO_SESSIONKEY,
cryptContext );cryptDestroyContext( cryptContext );
/* Add the data size information and data, wrap up the processing, andpop out the processed data */
cryptSetAttribute( cryptEnvelope, CRYPT_ENVINFO_DATASIZE,messageLength );
cryptPushData( cryptEnvelope, message, messageLength, &bytesCopied );cryptFlushData( cryptEnvelope );cryptPopData( cryptEnvelope, envelopedData, envelopedDataBufferSize,
&bytesCopied );
cryptDestroyEnvelope( cryptEnvelope );
To de-envelope the resulting data you would use:
CRYPT_ENVELOPE cryptEnvelope;CRYPT_CONTEXT cryptContext;int bytesCopied;
cryptCreateEnvelope( &cryptEnvelope, cryptUser, CRYPT_FORMAT_AUTO );

Data Enveloping60
/* Push in the enveloped data and the session key context required tode-envelope it, and pop out the recovered message */
cryptPushData( cryptEnvelope, envelopedData, envelopedDataLength,&bytesCopied );
cryptCreateContext( &cryptContext, cryptUser, CRYPT_ALGO_IDEA );cryptSetAttributeString( cryptContext, CRYPT_CTXINFO_KEY,
"0123456789ABCDEF", 16 );cryptSetAttribute( cryptEnvelope, CRYPT_ENVINFO_SESSIONKEY,
cryptContext );cryptDestroyContext( cryptContext );cryptFlushData( cryptEnvelope );cryptPopData( cryptEnvelope, message, messageBufferSize,
&bytesCopied );
cryptDestroyEnvelope( cryptEnvelope );
Encrypting the data directly by using the context to wrap up the session key and thenencrypting the data with that functions identically, except that the context is added asCRYPT_ENVINFO_KEY rather than CRYPT_ENVINFO_SESSIONKEY. Theonly real difference between the two is the underlying data format that cryptlibgenerates.
Raw session-key based enveloping isn’t recommended since it bypasses much of the automated key management which is performed by the enveloping code, and requiresthe direct use of low-level encryption contexts. If all you want to do is change theunderlying encryption algorithm used from the default triple DES, it’s easier to do this by setting the CRYPT_OPTION_ENCR_ALGO attribute for the envelope asdescribed in “Working with Configuration Options” on page 263.
De-enveloping Mixed DataSometimes you won’t know exactly what type of processing has been applied to thedata you’re trying to de-envelope, so you can let cryptlib tell you what to do. Whencryptlib needs some sort of resource (such as a password or an encryption key) toprocess the data that you’ve pushed into an envelope, it will return a CRYPT_-ENVELOPE_RESOURCE error if you try and push in any more data or pop out theprocessed data. This error code is returned as soon as cryptlib knows enough aboutthe data you’re pushing into the envelope to be able to process it properly. Typically,as soon as you start pushing in encrypted, signed, or otherwise processed data,cryptPushData will return CRYPT_ENVELOPE_RESOURCE to tell you that itneeds some sort of resource in order to continue.
If you knew that the data you were processing was either plain, unencrypted orcompressed data or password-encrypted data created using the code shown earlier,you could de-envelope it with:
CRYPT_ENVELOPE cryptEnvelope;int bytesCopied, status;
cryptCreateEnvelope( &cryptEnvelope, cryptUser, CRYPT_FORMAT_AUTO );
/* Push in the enveloped data and pop out the recovered message */status = cryptPushData( cryptEnvelope, envelopedData,
envelopedDataLength, &bytesCopied );if( status == CRYPT_ENVELOPE_RESOURCE )
cryptSetAttributeString( cryptEnvelope, CRYPT_ENVINFO_PASSWORD,password, passwordLength );
cryptFlushData( cryptEnvelope );cryptPopData( cryptEnvelope, message, messageBufferSize, &bytesCopied
);
cryptDestroyEnvelope( cryptEnvelope );
If the data is enveloped without any processing or is compressed data, cryptlib willde-envelope it without requiring any extra input. If the data is enveloped usingpassword-based encryption, cryptlib will return CRYPT_ENVELOPE_RESOURCEto indicate that it needs a password before it can continue.
This illustrates the manner in which the enveloped data contains enough informationto allow cryptlib to process it automatically. If the data had been enveloped using

The Data Enveloping Process 61
some other form of processing (for example public-key encryption or digitalsignatures), cryptlib would ask you for the private decryption key or the signaturecheck key at this time (it’s actually slightly more complex than this, the details are explained in “Enveloping with Multiple Attributes” on page 72).
De-enveloping with a Large Envelope BufferIf you’ve increased the envelope buffer size to allow the processing of large data quantities, the de-enveloping process may be slightly different. When de-envelopingdata, cryptlib only reads an initial fixed amount of data before stopping and asking foruser input such as the password or private key which is required to process the data.This is to avoid the situation where an envelope absorbs megabytes or even gigabytesof data only to report that it can’t even begin to process it for lack of a decryption key. In this case the envelope will return CRYPT_ERROR_RESOURCE to indicatethat it requires further information in order to continue. Once you’ve added the necessary de-enveloping attribute(s), youcan either pop what’s already been processed and continue as normal (see “Enveloping Large Data Quantities” on page 62) or, for a sufficiently large envelope buffer, push in the remaining data beforepopping it all at once:
CRYPT_ENVELOPE cryptEnvelope;int bytesCopied, status;
cryptCreateEnvelope( &cryptEnvelope, cryptUser, CRYPT_FORMAT_AUTO );
/* Push in the enveloped data and see if we need any special handling*/
status = cryptPushData( cryptEnvelope, envelopedData,envelopedDataLength, &bytesCopied );
if( status == CRYPT_ENVELOPE_RESOURCE ){/* Add the necessary de-enveloping attributes *//* ... */
/* If only some of the data was accepted because the envelopestopped to request further instructions, push in the rest now */
if( bytesCopied < envelopedDataLength ){int remainingBytesCopied;
status = cryptPushData( cryptEnvelope, envelopedData + bytesIn,envelopedDataLength - bytesIn, &remainingBytesCopied );
bytesIn += remainingBytesCopied;}
}cryptFlushData( cryptEnvelope );cryptPopData( cryptEnvelope, message, messageBufferSize, &bytesCopied
);
cryptDestroyEnvelope( cryptEnvelope );
This code checks whether the envelope has absorbed all of the enveloped data and, ifnot, pushes the remainder after adding the attribute(s) necessary for processing it.Once all the data has been pushed, it pops the result as usual.
Obtaining Envelope Security ParametersIf you want to know the details of the encryption mechanism which is being used toprotect the enveloped data, you can read various CRYPT_CTXINFO_xxx attributesfrom the envelope object which will return information from the encryptioncontext(s) that are being used to secure the data. For example if you’re encrypting or decrypting data you can get the encryption algorithm and mode and the key sizebeing used with:
CRYPT_ALGO_TYPE cryptAlgo;CRYPT_MODE_TYPE cryptMode;int keySize;
cryptGetAttribute( cryptEnvelope, CRYPT_CTXINFO_ALGO, &cryptAlgo );cryptGetAttribute( cryptEnvelope, CRYPT_CTXINFO_MODE, &cryptMode );cryptGetAttribute( cryptEnvelope, CRYPT_CTXINFO_KEYSIZE, &keySize );

Data Enveloping62
Enveloping Large Data QuantitiesSometimes, a message may be too big to process in one go or may not be available inits entirety, an example being data which is being sent or received over a networkinterface where only the currently transmitted or received portion is available.Although it’s much easier to process a message in one go, it’s also possible to envelope and de-envelope it a piece at a time (bearing in mind the earlier commentthat the enveloping is most efficient when you push and pop data a single large blockat a time rather than in many small blocks). With unknown amounts of data to beprocessed it generally isn’t possible to use CRYPT_ENVINFO_DATASIZE, so inthe sample code below this is omitted.
There are several strategies for processing data in multiple parts. The simplest onesimply pushes and pops a fixed amount of data each time:
looppush datapop data
Since there’s a little overhead added by the enveloping process, you should alwayspush in slightly less data than the envelope buffer size. Alternatively, you can use theCRYPT_ATTRIBUTE_BUFFERSIZE to specify an envelope buffer which is slightlylarger than the data block size you want to use. The following code uses the firsttechnique to password-encrypt a file in blocks of BUFFER_SIZE–4K bytes:
CRYPT_ENVELOPE cryptEnvelope;void *buffer;int bufferCount;
/* Create the envelope with a buffer of size BUFFER_SIZE and add thepassword attribute */
cryptCreateEnvelope( &cryptEnvelope, cryptUser,CRYPT_FORMAT_CRYPTLIB );
cryptSetAttribute( cryptEnvelope, CRYPT_ATTRIBUTE_BUFFERSIZE,BUFFER_SIZE );
cryptSetAttributeString( cryptEnvelope, CRYPT_ENVINFO_PASSWORD,password, passwordLength );
/* Allocate a buffer for file I/O */buffer = malloc( BUFFER_SIZE );
/* Process the entire file */while( !endOfFile( inputFile ) )
{int bytesCopied;
/* Read a (BUFFER_SIZE - 4K) block from the input file, envelopeit, and write the result to the output file */
bufferCount = readFile( inputFile, buffer, BUFFER_SIZE - 4096 );cryptPushData( cryptEnvelope, buffer, bufferCount, &bytesCopied );cryptPopData( cryptEnvelope, buffer, BUFFER_SIZE, &bytesCopied );writeFile( outputFile, buffer, bytesCopied );}
/* Flush the last lot of data out of the envelope */cryptFlushData( cryptEnvelope );cryptPopData( cryptEnvelope, buffer, BUFFER_SIZE, &bytesCopied );if( bytesCopied )
writeFile( outputFile, buffer, bytesCopied );free( buffer );
cryptDestroyEnvelope( cryptEnvelope );
The Visual Basic version is:
Dim cryptEnvelope As LongDim buffer() As ByteDim bufferCount As IntegerDim bytesCopied As Long

Enveloping Large Data Quantities 63
' Create the envelope with a buffer of size BUFFER_SIZE and add the' password attributecryptCreateEnvelope cryptEnvelope, cryptUser, CRYPT_FORMAT_CRYPTLIBcryptSetAttribute cryptEnvelope, CRYPT_ATTRIBUTE_BUFFERSIZE, _
BUFFER_SIZEcryptSetAttributeString cryptEnvelope, CRYPT_ENVINFO_PASSWORD, _
password, Len( password )
' Allocate a buffer for file I/Obuffer = String( BUFFER_SIZE, vbNullChar )
Do While Not EndOfFile( inputFile )' Read a (BUFFER_SIZE - 4K) block from the input file, envelope' it, and write the result to an output filebufferCount = ReadFile inputFile, buffer, BUFFERSIZE - 4096cryptPushData cryptEnvelope, buffer, bufferCount, bytesCopiedcryptPopData cryptEnvelope, buffer, BUFFER_SIZE, bytesCopiedWriteFile outputFile, buffer, bytesCopied
LoopcryptFlushData cryptEnvelope, buffer, BUFFER_SIZE, bytesCopiedIf bytesCopied > 0 Then WriteFile outputFile, buffer, bytesCopied
cryptDestroyEnvelope cryptEnvelope
The code allocates a BUFFER_SIZE byte I/O buffer, reads up to BUFFER_SIZE–4K bytes from the input file, and pushes it into the envelope. It then tells cryptlib topop up to BUFFER_SIZE bytes of enveloped data back out into the buffer, takeswhatever is popped out, and writes it to the output file. When it has processed theentire file, it pushes in the usual zero-length data block to flush any remaining dataout of the buffer.
Note that the upper limit on BUFFER_SIZE depends on the system you’re running the code on. If you need to run it on a 16-bit system, BUFFER_SIZE is limited to32K–1 bytes because of the length limit imposed by 16-bit integers, and the defaultenvelope buffer size is 16K bytes unless you specify a larger default size using theCRYPT_ATTRIBUTE_BUFFERSIZE attribute.
Going to a lot of effort to exactly match a certain data size such as a power of twowhen pushing and popping data isn’t really worthwhile, since the overhead added by the envelope encoding will always change the final encoded data length.
When you’re performing compressed data enveloping or de-enveloping, theprocessing usually results in a large change in data size, in which case you may needto use the technique described below that can handle arbitrarily-sized input andoutput quantities.
Alternative Processing TechniquesA slightly more complex technique is to always stuff the envelope as full as possiblebefore trying to pop anything out of it:
loopdo
push datawhile push status != CRYPT_ERROR_OVERFLOWpop data
This results in the most efficient use of the envelope’s internal buffer, but is probably overkill for the amount of code complexity required:
CRYPT_ENVELOPE cryptEnvelope;void *inBuffer, *outBuffer;int bytesCopiedIn, bytesCopiedOut, bufferCount;
cryptCreateEnvelope( &cryptEnvelope, cryptUser,CRYPT_FORMAT_CRYPTLIB );
cryptSetAttributeString( cryptEnvelope, CRYPT_ENVINFO_PASSWORD,password, passwordLength );
/* Allocate input and output buffers */inBuffer = malloc( BUFFER_SIZE );outBuffer = malloc( BUFFER_SIZE );

Data Enveloping64
/* Process the entire file */while( !endOfFile( inputFile ) )
{int offset = 0;
/* Read a buffer full of data from the file and push and pop itto/from the envelope */
bufferCount = readFile( inputFile, inBuffer, BUFFER_SIZE );while( bufferCount )
{/* Push as much as we can into the envelope */cryptPushData( cryptEnvelope, inBuffer + offset, bufferCount,
&bytesCopiedIn );offset += bytesCopiedIn;bufferCount -= bytesCopiedIn;
/* If we couldn't push everything in, the envelope is full, sowe empty a buffers worth out */
if( bufferCount ){cryptPopData( cryptEnvelope, outBuffer, BUFFER_SIZE,
&bytesCopiedOut );writeFile( outputFile, outBuffer, bytesCopiedOut );}
}}
/* Flush out any remaining data */do
{cryptFlushData( cryptEnvelope );cryptPopData( cryptEnvelope, outBuffer, BUFFER_SIZE,
&bytesCopiedOut );if( bytesCopiedOut)
writeFile( outputFile, outBuffer bytesCopiedOut );}
while( bytesCopiedOut );free( inBuffer );free( outBuffer );
cryptDestroyEnvelope( cryptEnvelope );
Running the code to fill/empty the envelope in a loop is useful when a transformationsuch as data compression, which dramatically changes the length of theenveloped/de-enveloped data, is being applied. In this case it’s not possible to tell how much data can still be pushed into or popped out of the envelope because thelength is transformed by the compression operation. It’s also generally good practice to not write code that makes assumptions about the amount of internal buffer spaceavailable in the envelope, the above code will make optimal use of the envelopebuffer no matter what its size.
Enveloping with Many Enveloping AttributesThere may be a special-case condition when you begin the enveloping that occurs ifyou have added a large number of password, encryption, or keying attributes to theenvelope so that the header prepended to the enveloped data is particularly large. Forexample if you encrypt a message with different keys or passwords for several dozenrecipients, the header information for all the keys could become large enough that itoccupies a noticeable portion of the envelope’s buffer. In this case you can push in a small amount of data to flush out the header information, and then push and pop dataas usual:
add many password/encryption/keying attributes;push a small amount of data;pop data;loop
push data;pop data;
If you use this strategy then you can trim the difference between the envelope buffersize and the amount of data you push in at once down to about 1K; the 4K difference

Enveloping Large Data Quantities 65
shown earlier took into account the fact that a little extra data would be generated thefirst time data was pushed due to the overhead of adding the envelope header:
CRYPT_ENVELOPE cryptEnvelope;void *buffer;int bufferCount;
/* Create the envelope and add many passwords */cryptCreateEnvelope( &cryptEnvelope, cryptUser,
CRYPT_FORMAT_CRYPTLIB );cryptSetAttributeString( cryptEnvelope, CRYPT_ENVINFO_PASSWORD,
password1, password1Length );/* ... */
cryptSetAttributeString( cryptEnvelope, CRYPT_ENVINFO_PASSWORD,password100, password100Length );
buffer = malloc( BUFFER_SIZE );
/* Read up to 100 bytes from the input file, push it into the envelopeto flush out the header data, and write all the data in theenvelope to the output file */
bufferCount = readFile( inputFile, buffer, 100 );cryptPushData( cryptEnvelope, buffer, bufferCount, &bytesCopied );cryptPopData( cryptEnvelope, buffer, BUFFER_SIZE, &bytesCopied );writeFile( outputFile, buffer, bytesCopied );
/* Process the entire file */while( !endOfFile( inputFile ) )
{int bytesCopied;
/* Read a BUFFER_SIZE block from the input file, envelope it, andwrite the result to the output file */
bufferCount = readFile( inputFile, buffer, BUFFER_SIZE );cryptPushData( cryptEnvelope, buffer, bufferCount, &bytesCopied );cryptPopData( cryptEnvelope, buffer, BUFFER_SIZE, &bytesCopied );writeFile( outputFile, buffer, bytesCopied );}
/* Flush the last lot of data out of the envelope */cryptFlushData( cryptEnvelope );cryptPopData( cryptEnvelope, buffer, BUFFER_SIZE, &bytesCopied );if( bytesCopied )
writeFile( outputFile, buffer, bytesCopied );free( buffer );
cryptDestroyEnvelope( cryptEnvelope );
In the most extreme case (hundreds or thousands of passwords, encryption, or keyingattributes added to an envelope), the header could fill the entire envelope buffer, andyou would need to pop the initial data in multiple sections before you could processany more data using the usual push/pop loop. If you plan to use this many resources,it’s better to specify the use of a larger envelope buffer using CRYPT_ATTRIBUTE_BUFFERSIZE in order to eliminate the need for suchspecial-case processing for the header.
De-enveloping data that has been enveloped with multiple keying resources also hasspecial requirements and is covered in the next section.

Advanced Enveloping66
Advanced EnvelopingThe previous chapter covered basic enveloping concepts and simple password-basedenveloping. Extending beyond these basic forms of enveloping, you can alsoenvelope data using public-key encryption or digitally sign the contents of theenvelope. These types of enveloping require the use of public and private keys thatare explained in various other chapters that cover key generation, key databases, andcertificates.
cryptlib automatically manages objects such as public and private keys and keysets,so you can destroy them as soon as you’ve pushed them into the envelope. Although the object will appear to have been destroyed, the envelope maintains its ownreference to it which it can continue to use for encryption or signing. This means thatinstead of the obvious:
create the key object;create the envelope;add the key object to the envelope;push data into the envelope;pop encrypted data from the envelope;destroy the envelope;destroy the key object;
it’s also quite safe to use something like:
create the envelope;create the key object;add the key object to the envelope;destroy the key object;push data into the envelope;pop encrypted data from the envelope;destroy the envelope;
Keeping an object active for the shortest possible time makes it much easier to track,it’s a lot easier to let cryptlib manage these things for you by handing them off to the envelope.
Public-Key Encrypted EnvelopingPublic-key based enveloping works just like password-based enveloping except thatinstead of adding a password attribute you add a public key or certificate (whenencrypting) or a private decryption key (when decrypting). For example if youwanted to encrypt data using a public key contained in pubKeyContext, youwould use:
CRYPT_ENVELOPE cryptEnvelope;int bytesCopied;
cryptCreateEnvelope( &cryptEnvelope, cryptUser,CRYPT_FORMAT_CRYPTLIB );
/* Add the public key */cryptSetAttribute( cryptEnvelope, CRYPT_ENVINFO_PUBLICKEY,
pubKeyContext );
/* Add the data size information and data, wrap up the processing, andpop out the processed data */
cryptSetAttribute( cryptEnvelope, CRYPT_ENVINFO_DATASIZE,messageLength );
cryptPushData( cryptEnvelope, message, messageLength, &bytesCopied );cryptFlushData( cryptEnvelope );cryptPopData( cryptEnvelope, envelopedData, envelopedDataBufferSize,
&bytesCopied );
cryptDestroyEnvelope( cryptEnvelope );
You can also use a certificate in place of the public key, the envelope will handle bothin the same way. The certificate is typically obtained by reading it from a keyset,either directly using cryptGetPublicKey as described in “Reading a Key from aKeyset” on page 131, or by setting the CRYPT_ENVINFO_RECIPIENT attribute asdescribed in “S/MIME Enveloping” on page 77. Using the CRYPT_ENVINFO_-

Public-Key Encrypted Enveloping 67
RECIPIENT attribute is the preferred option since it lets cryptlib handle a number ofthe complications that arise from reading keys for you.
When cryptlib encrypts the data in the envelope, it will use the algorithm specifiedwith the CRYPT_OPTION_ENCR_ALGO option. If you want to change theencryption algorithm which is used, you can set the CRYPT_OPTION_ENCR_-ALGO attribute for the envelope (or as a global configuration option) to the algorithmtype you want, as described in “Working with Configuration Options” on page 263.Alternatively, you can push a raw session-key context into the envelope before youpush in a public key, in which case cryptlib will use the context to encrypt the datarather than generating one itself.
The same operation in Java (for C# replace the .length with .Length) is:
int cryptEnvelope = crypt.CreateEnvelope( cryptUser,crypt.FORMAT_CRYPTLIB );
/* Add the public key */crypt.SetAttribute( cryptEnvelope, crypt.ENVINFO_PUBLICKEY,
pubKeyContext );
/* Add the data size information and data, wrap up the processing, andpop out the processed data */
crypt.SetAttribute( cryptEnvelope, crypt.ENVINFO_DATASIZE,message.length );
int bytesCopied = crypt.PushData( cryptEnvelope, message );crypt.FlushData( cryptEnvelope );bytesCopied = crypt.PopData( cryptEnvelope, envelopedData,
envelopedData.length );
crypt.DestroyEnvelope( cryptEnvelope );
De-enveloping is slightly more complex since, unlike password-based enveloping,there are different keys used for enveloping and de-enveloping. In the simplest caseif you know in advance which private decryption key is required to decrypt the data,you can add it to the envelope in the same way as with password-based enveloping:
CRYPT_ENVELOPE cryptEnvelope;int bytesCopied;
cryptCreateEnvelope( &cryptEnvelope, cryptUser, CRYPT_FORMAT_AUTO );
/* Push in the enveloped data and the private decryption key requiredto de-envelope it, and pop out the recovered message */
cryptPushData( cryptEnvelope, envelopedData, envelopedDataLength,&bytesCopied );
cryptSetAttribute( cryptEnvelope, CRYPT_ENVINFO_PRIVATEKEY,privKeyContext );
cryptFlushData( cryptEnvelope );cryptPopData( cryptEnvelope, message, messageBufferSize, &bytesCopied
);
cryptDestroyEnvelope( cryptEnvelope );
Although this leads to very simple code, it’s somewhat awkward since you may notknow in advance which private key is required to decrypt a message. To make theprivate key handling process easier, cryptlib provides the ability to automaticallyfetch decryption keys from a private key keyset for you, so that instead of adding aprivate key, you add a private key keyset object and cryptlib takes care of obtainingthe key for you. Alternatively, you can use a crypto device such as a smart card orFortezza card to perform the decryption.
Using a private key from a keyset is slightly more complex than pushing in theprivate key directly since the private key stored in the keyset is usually encrypted orPIN-protected and will require a password or PIN supplied by the user to access it.This means that you have to supply a password to the envelope before the private keycan be used to decrypt the data in it. This works as follows:

Advanced Enveloping68
create the envelope;add the decryption keyset;push encrypted data into the envelope;if( required resource = private key )
add password to decrypt the private key;pop decrypted data from the envelope;destroy the envelope;
When you add the password, cryptlib will use it to try to recover the private keystored in the keyset you added previously. If the password is incorrect, cryptlib willreturn CRYPT_ERROR_WRONGKEY, otherwise it will recover the private key andthen use that to decrypt the data. The full code to decrypt public-key enveloped datais therefore:
CRYPT_ENVELOPE cryptEnvelope;CRYPT_ATTRIBUTE_TYPE requiredAttribute;int bytesCopied, status;
/* Create the envelope and add the private key keyset and data */cryptCreateEnvelope( &cryptEnvelope, cryptUser, CRYPT_FORMAT_AUTO );cryptSetAttribute( cryptEnvelope, CRYPT_ENVINFO_KEYSET_DECRYPT,
privKeyKeyset );cryptPushData( cryptEnvelope, envelopedData, envelopedDataLength,
&bytesCopied );
/* Find out what we need to continue and, if it's a private key, addthe password to recover it from the keyset */
cryptGetAttribute( cryptEnvelope, CRYPT_ATTRIBUTE_CURRENT,&requiredAttribute );
if( requiredAttribute != CRYPT_ENVINFO_PRIVATEKEY )/* Error */;
cryptSetAttributeString( cryptEnvelope, CRYPT_ENVINFO_PASSWORD,password, passwordLength );
cryptFlushData( cryptEnvelope );
/* Pop the data and clean up */cryptPopData( cryptEnvelope, message, messageLength, &bytesCopied );cryptDestroyEnvelope( cryptEnvelope );
The Visual Basic equivalent is:
Dim cryptEnvelope As LongDim requiredAttribute As CRYPT_ATTRIBUTE_TYPEDim bytesCopied As LongDim status As Long
' Create the envelope and add the private key and datacryptCreateEnvelope cryptEnvelope, cryptUser, CRYPT_FORMAT_AUTOcryptSetAttribute cryptEnvelope, CRYPT_ENVINFO_KEYSET_DECRYPT, _
privateKeysetcryptPushData cryptEnvelope, envelopedData, envelopedDataLength, _
bytesCopied
' Find out what we need to continue, and if it's a private key,' add the password to recover it from the keysetcryptGetAttribute cryptEnvelope, CRYPT_ATTRIBUTE_CURRENT, _
requiredAttributeIf ( requredAttribute <> CRYPT_ENVINFO_PRIVATEKEY ) Then
' ErrorEnd IfcryptSetAttributeString cryptEnvelope, CRYPT_ENVINFO_PASSWORD, _
password, len( password )cryptFlushData cryptEnvelope
' Pop the data and clean upcryptPopData cryptEnvelope, message, messageLength, bytesCopiedcryptDestroyEnvelope cryptEnvelope
In the unusual case where the private key isn’t protected by a password or PIN, there’s no need to add the password since cryptlib will use the private key as soon as you access the attribute information by reading it using cryptGetAttribute.
In order to ask the user for a password, it can be useful to know the name or labelattached to the private key so you can display it as part of the password request

Public-Key Encrypted Enveloping 69
message. You can obtain the label for the required private key by reading theenvelope’s CRYPT_ENVINFO_PRIVATEKEY_LABEL attribute:
char label[ CRYPT_MAX_TEXTSIZE + 1 ];int labelLength;
cryptGetAttributeString( cryptEnvelope,CRYPT_ENVINFO_PRIVATEKEY_LABEL, label, &labelLength );
label[ labelLength ] = '\0';
You can then use the key label when you ask the user for the password for the key.
Using a crypto device to perform the decryption is somewhat simpler since the PINwill already have been entered after cryptDeviceOpen was called, so there’s no need to supply it as CRYPT_ENVINFO_PASSWORD. To use a crypto device, you addthe device in place of the private key keyset:
CRYPT_ENVELOPE cryptEnvelope;CRYPT_ATTRIBUTE_TYPE requiredAttribute;int bytesCopied, status;
/* Create the envelope and add the crypto device and data */cryptCreateEnvelope( &cryptEnvelope, cryptUser, CRYPT_FORMAT_AUTO );cryptSetAttribute( cryptEnvelope, CRYPT_ENVINFO_KEYSET_DECRYPT,
cryptDevice );cryptPushData( cryptEnvelope, envelopedData, envelopedDataLength,
&bytesCopied );
/* Find out what we need to continue. Since we've told the envelopeto use a crypto device, it'll perform the decryption as soon as weask it to using the device, so we shouldn't have to supply anythingelse */
cryptGetAttribute( cryptEnvelope, CRYPT_ATTRIBUTE_CURRENT,&requiredAttribute );
if( requiredAttribute != CRYPT_ATTRIBUTE_NONE )/* Error */;
cryptFlushData( cryptEnvelope );
/* Pop the data and clean up */cryptPopData( cryptEnvelope, message, messageLength, &bytesCopied );cryptDestroyEnvelope( cryptEnvelope );
Note how cryptGetAttribute now reports that there’s nothing further required (sincethe envelope has used the private key in the crypto device to performed thedecryption), and you can continue with the de-enveloping process.
Code that can handle the use of either a private key keyset or a crypto device for thedecryption is a straightforward extension of the above:
CRYPT_ENVELOPE cryptEnvelope;CRYPT_ATTRIBUTE_TYPE requiredAttribute;int bytesCopied, status;
/* Create the envelope and add the keyset or crypto device and data */cryptCreateEnvelope( &cryptEnvelope, cryptUser, CRYPT_FORMAT_AUTO );cryptSetAttribute( cryptEnvelope, CRYPT_ENVINFO_KEYSET_DECRYPT,
cryptKeysetOrDevice );cryptPushData( cryptEnvelope, envelopedData, envelopedDataLength,
&bytesCopied );
/* Find out what we need to continue. If what we added was a cryptodevice, the decryption will occur once we query the envelope. Ifwhat we added was a keyset, we need to supply a password for thedecryption to happen */
cryptGetAttribute( cryptEnvelope, CRYPT_ATTRIBUTE_CURRENT,&requiredAttribute );
if( requiredAttribute != CRYPT_ATTRIBUTE_NONE ){char label[ CRYPT_MAX_TEXTSIZE + 1 ];int labelLength;
if( requiredAttribute != CRYPT_ENVINFO_PASSWORD )/* Error */;

Advanced Enveloping70
/* Get the label for the private key and obtain the requiredpassword from the user */
cryptGetAttributeString( cryptEnvelope,CRYPT_ENVINFO_PRIVATEKEY_LABEL, label, &labelLength );
label[ labelLength ] = '\0';getPassword( label, password, &passwordLength );
/* Add the password required to decrypt the private key */cryptSetAttributeString( cryptEnvelope, CRYPT_ENVINFO_PASSWORD,
password, passwordLength );}
cryptFlushData( cryptEnvelope );
/* Pop the data and clean up */cryptPopData( cryptEnvelope, message, messageLength, &bytesCopied );cryptDestroyEnvelope( cryptEnvelope );
Digitally Signed EnvelopingDigitally signed enveloping works much like the other enveloping types except thatinstead of adding an encryption or decryption attribute you supply a private signaturekey (when enveloping) or a public key or certificate (when de-enveloping). Forexample if you wanted to sign data using a private signature key contained insigKeyContext, you would use:
CRYPT_ENVELOPE cryptEnvelope;int bytesCopied;
cryptCreateEnvelope( &cryptEnvelope, cryptUser,CRYPT_FORMAT_CRYPTLIB );
/* Add the signing key */cryptSetAttribute( cryptEnvelope, CRYPT_ENVINFO_SIGNATURE,
sigKeyContext );
/* Add the data size information and data, wrap up the processing, andpop out the processed data */
cryptSetAttribute( cryptEnvelope, CRYPT_ENVINFO_DATASIZE,messageLength );
cryptPushData( cryptEnvelope, message, messageLength, &bytesCopied );cryptFlushData( cryptEnvelope );cryptPopData( cryptEnvelope, envelopedData, envelopedDataBufferSize,
&bytesCopied );
cryptDestroyEnvelope( cryptEnvelope );
The signature key could be a native cryptlib key, but it could also be a key from acrypto device such as a smart card or Fortezza card. They both work in the same wayfor signing data.
The Java version of the signed enveloping process (for C# replace the .length with.Length) is:
int cryptEnvelope = crypt.CreateEnvelope( cryptUser,crypt.FORMAT_CRYPTLIB );
/* Add the public key */crypt.SetAttribute( cryptEnvelope, crypt.ENVINFO_SIGNATURE,
sigKeyContext );
/* Add the data size information and data, wrap up the processing, andpop out the processed data */
crypt.SetAttribute( cryptEnvelope, crypt.ENVINFO_DATASIZE,message.length );
int bytesCopied = crypt.PushData( cryptEnvelope, message );crypt.FlushData( cryptEnvelope );bytesCopied = crypt.PopData( cryptEnvelope, envelopedData,
envelopedData.length );
crypt.DestroyEnvelope( cryptEnvelope );
The Visual Basic equivalent is:
cryptCreateEnvelope cryptEnvelope, cryptUser, CRYPT_FORMAT_CRYPTLIB

Digitally Signed Enveloping 71
' Add the signing keycryptSetAttribute cryptEnvelope, CRYPT_ENVINFO_SIGNATURE, _
sigKeyContext
' Add the data size information and data, wrap up the processing,' and pop out the processed datacryptSetAttribute cryptEnvelope, CRYPT_ENVINFO_DATASIZE, messageLengthcryptPushData cryptEnvelope, message, messageLength, bytesCopiedcryptFlushData cryptEnvelopecryptPopData cryptEnvelope, envelopedData, envelopedDataBufferSize, _
bytesCopied
cryptDestroyEnvelope cryptEnvelope
When cryptlib signs the data in the envelope, it will hash it with the algorithmspecified with the CRYPT_OPTION_ENCR_HASH option. If you want to changethe hashing algorithm which is used, you can set the CRYPT_OPTION_ENCR_-HASH attribute for the envelope (or as a global configuration option) to the algorithmtype you want, as described in “Working with Configuration Options” on page 263.Alternatively, you can push a hash context into the envelope before you push in asignature key, in which case cryptlib will associate the signature key with the lasthash context you pushed in.
If you’re worried about some obscure (and rather unlikely) attacks on private keys, you can enable the CRYPT_OPTION_MISC_SIDECHANNELPROTECTIONoption as explained in “Working with Configuration Options” on page 263. Note thatenabling this option will slow down all private-key operations by up to 10%.
As with public-key based enveloping, verifying the signed data requires a differentkey for this part of the operation, in this case a public key or key certificate. In thesimplest case if you know in advance which public key is required to verify thesignature, you can add it to the envelope in the same way as with the other envelopetypes:
CRYPT_ENVELOPE cryptEnvelope;int bytesCopied;
cryptCreateEnvelope( &cryptEnvelope, cryptUser, CRYPT_FORMAT_AUTO );
/* Add the enveloped data and the signature check key required toverify the signature, and pop out the recovered message */
cryptPushData( cryptEnvelope, envelopedData, envelopedDataLength,&bytesCopied );
cryptFlushData( cryptEnvelope );cryptSetAttribute( cryptEnvelope, CRYPT_ENVINFO_SIGNATURE,
sigCheckKeyContext );cryptPopData( cryptEnvelope, message, messageBufferSize, &bytesCopied
);
cryptDestroyEnvelope( cryptEnvelope );
Although this leads to very simple code, it’s somewhat awkward since you may not know in advance which public key or key certificate is required to verify thesignature on the message. To make the signature verification process easier, cryptlibprovides the ability to automatically fetch signature verification keys from a public-key keyset for you, so that instead of supplying a public key or key certificate, youadd a public-key keyset object before you start de-enveloping and cryptlib will takecare of obtaining the key for you. This option works as follows:
create the envelope;add the signature check keyset;push signed data into the envelope;pop plain data from the envelope;if( required resource = signature check key )
read signature verification result;
The full code to verify signed data is therefore:

Advanced Enveloping72
CRYPT_ENVELOPE cryptEnvelope;int bytesCopied, signatureResult, status;
/* Create the envelope and add the signature check keyset */cryptCreateEnvelope( &cryptEnvelope, cryptUser, CRYPT_FORMAT_AUTO );cryptSetAttribute( cryptEnvelope, CRYPT_ENVINFO_KEYSET_SIGCHECK,
sigCheckKeyset );
/* Push in the signed data and pop out the recovered message */cryptPushData( cryptEnvelope, envelopedData, envelopedDataLength,
&bytesCopied );cryptFlushData( cryptEnvelope );cryptPopData( cryptEnvelope, message, messageBufferSize,
&bytesCopied );
/* Determine the result of the signature check */cryptGetAttribute( cryptEnvelope, CRYPT_ENVINFO_SIGNATURE_RESULT,
&signatureResult );
The same process in Java (for C# replace the .length with .Length) is:
/* Create the envelope and add the signature check keyset */int cryptEnvelope = crypt.CreateEnvelope(cryptUser,
crypt.FORMAT_AUTO );crypt.SetAttribute( cryptEnvelope, crypt.ENVINFO_KEYSET_SIGCHECK,
sigCheckKeyset );
/* Push in the signed data and pop out the recovered message */int bytesCopied = crypt.PushData( cryptEnvelope, envelopedData );crypt.FlushData( cryptEnvelope );bytesCopied = crypt.PopData( cryptEnvelope, message, message.length );
/* Determine the result of the signature check */int signatureResult = crypt.GetAttribute( cryptEnvelope,
crypt.ENVINFO_SIGNATURE_RESULT );
The Visual Basic version is:
Dim signatureResult As Long
' Create the envelope and add the signature check keysetcryptCreateEnvelope cryptEnvelope, cryptUser, CRYPT_FORMAT_AUTOcryptSetAttribute cryptEnvelope, CRYPT_ENVINFO_KEYSET_SIGCHECK, _
sigCheckKeyset
' Push in the signed data and pop out the recovered messagecryptPushData cryptEnvelope, envelopedData, envelopedDataLength, _
bytesCopiedcryptPopData cryptEnvelope, message, messageBufferSize, bytesCopied
' Determine the result of the signature checkcryptGetAttribute cryptEnvelope, CRYPT_ENVINFO_SIGNATURE_RESULT, _
signatureResult
The signature result will typically be CRYPT_OK (the signature verified), CRYPT_-ERROR_SIGNATURE (the signature did not verify), or CRYPT_ERROR_-NOTFOUND (the key needed to check the signature wasn’t found in the keyset).
Most signed data in use today uses a format popularised in S/MIME that includes thesignature verification key with the data being signed as a certificate chain. For thistype of data you don’t need to provide a signature verification key, since it’s already included with the signed data. Details on creating and processing data in this formatis given in “S/MIME Enveloping” on page 77.
Enveloping with Multiple AttributesSometimes enveloped data can have multiple sets of attributes applied to it, forexample encrypted data might be encrypted with two different passwords to allow itto be decrypted by two different people:
CRYPT_ENVELOPE cryptEnvelope;int bytesCopied
cryptCreateEnvelope( &cryptEnvelope, cryptUser,CRYPT_FORMAT_CRYPTLIB );

Enveloping with Multiple Attributes 73
/* Add two different passwords to the envelope */cryptSetAttributeString( cryptEnvelope, CRYPT_ENVINFO_PASSWORD,
password1, password1Length );cryptSetAttributeString( cryptEnvelope, CRYPT_ENVINFO_PASSWORD,
password2, password2Length );
/* Add the data size information and data, wrap up the processing, andpop out the processed data */
cryptSetAttribute( cryptEnvelope, CRYPT_ENVINFO_DATASIZE,messageLength );
cryptPushData( cryptEnvelope, message, messageLength, &bytesCopied );cryptFlushData( cryptEnvelope );cryptPopData( cryptEnvelope, envelopedData, envelopedDataBufferSize,
&bytesCopied );
cryptDestroyEnvelope( cryptEnvelope );
In this case either of the two passwords can be used to decrypt the data. This can beextended indefinitely, so that 5, 10, 50, or 100 passwords could be used (of coursewith 100 different passwords able to decrypt the data, it’s questionable whether it’s worth the effort of encrypting it at all, however this sort of multi-user encryptioncould be useful for public-key encrypting messages sent to collections of people suchas mailing lists). The same applies for public-key enveloping, in fact the variousencryption types can be mixed if required so that (for example) either a privatedecryption key or a password could be used to decrypt data.
Similarly, an envelope can have multiple signatures applied to it:
CRYPT_ENVELOPE cryptEnvelope;int bytesCopied
cryptCreateEnvelope( &cryptEnvelope, cryptUser,CRYPT_FORMAT_CRYPTLIB );
/* Add two different signing keys to the envelope */cryptSetAttribute ( cryptEnvelope, CRYPT_ENVINFO_SIGNATURE,
cryptSigKey1 );cryptSetAttribute ( cryptEnvelope, CRYPT_ENVINFO_SIGNATURE,
cryptSigKey2 );
/* Add the data size information and data, wrap up the processing, andpop out the processed data */
cryptSetAttribute( cryptEnvelope, CRYPT_ENVINFO_DATASIZE,messageLength );
cryptPushData( cryptEnvelope, message, messageLength, &bytesCopied );cryptFlushData( cryptEnvelope );cryptPopData( cryptEnvelope, envelopedData, envelopedDataBufferSize,
&bytesCopied );
cryptDestroyEnvelope( cryptEnvelope );
In this case the envelope will be signed by both keys. As with password-basedenveloping, this can also be extended indefinitely to allow additional signatures onthe data, although it would be somewhat unusual to place more than one or twosignatures on a piece of data.
When de-enveloping data that has been enveloped with a choice of multipleattributes, cryptlib builds a list of the attributes required to decrypt or verify thesignature on the data, and allows you to query the required attribute information andchoose the one you want to work with.
Processing Multiple De-enveloping AttributesThe attributes required for de-enveloping are managed through the use of an attributecursor as described in “Attribute Lists and” on page 37. You can use the attributecursor to determine which attribute is required for the de-enveloping process. Onceyou’re iterating through the attributes, all that’s left to do is to plug in the appropriate handler routines to manage each attribute requirement that could be encountered. Assoon as one of the attributes required to continue is added to the envelope, cryptlibwill delete the required-attribute list and continue, so the attempt to move the cursorto the next entry in the list will fail and the program will drop out of the processing

Advanced Enveloping74
loop. For example to try a password against all of the possible passwords that mightdecrypt the message that was enveloped above, you would use:
int status
/* Get the decryption password from the user */password = ...;
if( cryptSetAttribute( envelope, CRYPT_ATTRIBUTE_CURRENT_GROUP,CRYPT_CURSOR_FIRST ) == CRYPT_OK )do
{CRYPT_ATTRIBUTE_TYPE requiredAttribute;
/* Get the type of the required attribute at the cursor position*/
cryptGetAttribute( envelope, CRYPT_ATTRIBUTE_CURRENT,&requiredAttribute );
/* Make sure we really do require a password resource */if( requiredAttribute != CRYPT_ENVINFO_PASSWORD )
/* Error */;
/* Try the password. If everything is OK, we'll drop out of theloop */
status = cryptSetAttributeString( envelope,CRYPT_ENVINFO_PASSWORD, password, passwordLength );
}while( status == CRYPT_WRONGKEY && \
cryptSetAttribute( envelope, CRYPT_ATTRIBUTE_CURRENT_GROUP,CRYPT_CURSOR_NEXT ) == CRYPT_OK );
This steps through each required attribute in turn and tries the supplied password tosee if it matches. As soon as the password matches, the data can be decrypted, andwe drop out of the loop and continue the de-enveloping process.
To extend this a bit further, let’s assume that the data could be enveloped using a password or a public key (requiring a private decryption key to decrypt it, either onefrom a keyset or a crypto device such as a smart card or Fortezza card). The codeinside the loop above then becomes:
CRYPT_ATTRIBUTE_TYPE requiredAttribute;
/* Get the type of the required resource at the cursor position */cryptGetAttribute( envelope, CRYPT_ATTRIBUTE_CURRENT,
&requiredAttribute );
/* If the decryption is being handled via a crypto device, we don'tneed to take any further action, the data has already beendecrypted */
if( requiredAttribute != CRYPT_ATTRIBUTE_NONE ){/* Make sure we really do require a password attribute */if( requiredAttribute != CRYPT_ENVINFO_PASSWORD && \
requiredAttribute != CRYPT_ENVINFO_PRIVATEKEY )/* Error */;
/* Try the password. If everything is OK, we'll drop out of theloop */
status = cryptSetAttributeString( envelope, CRYPT_ENVINFO_PASSWORD,password, passwordLength );
}
If what’s required is a CRYPT_ENVINFO_PASSWORD, cryptlib will apply itdirectly to decrypt the data. If what’s required is a CRYPT_ENVINFO_-PRIVATEKEY, cryptlib will either use the crypto device to decrypt the data if it’s available, or otherwise use the password to try to recover the private key from thekeyset and then use that to decrypt the data.
Iterating through each required signature attribute when de-enveloping signed data issimilar, but instead of trying to provide the necessary decryption information youwould provide the necessary signature check information (if requested, manyenvelopes carry their own signature verification keys with them) and display the

Nested Envelopes 75
resulting signature information. Unlike encryption de-enveloping attributes, cryptlibwon’t delete the signature information once it has been processed, so you can re-readthe information multiple times:
int status
if( cryptSetAttribute( envelope, CRYPT_ATTRIBUTE_CURRENT_GROUP,CRYPT_CURSOR_FIRST ) == CRYPT_OK )do
{CRYPT_ATTRIBUTE_TYPE requiredAttribute;int sigResult;
/* Get the type of the required attribute at the cursor position*/
cryptGetAttribute( envelope, CRYPT_ATTRIBUTE_CURRENT,&requiredAttribute );
/* Make sure we really do have signature */if( requiredAttribute != CRYPT_ENVINFO_SIGNATURE )
/* Error */;
/* Get the signature result */status = cryptSetAttribute( envelope,
CRYPT_ENVINFO_SIGNATURE_RESULT, & sigResult );}
while( cryptStatusOK( status ) && \cryptSetAttribute( envelope, CRYPT_ATTRIBUTE_CURRENT_GROUP,
CRYPT_CURSOR_NEXT ) == CRYPT_OK );
This steps through each signature in turn and reads the result of the signatureverification for that signature, stopping when an invalid signature is found or when allsignatures are processed.
Nested EnvelopesSometimes it may be necessary to apply multiple levels of processing to data, forexample you may want to both sign and encrypt data. cryptlib allows enveloped datato be arbitrarily nested, with each nested content type being either further envelopeddata or (finally) the raw data payload. For example to sign and encrypt data youwould do the following:
create the envelope;add the signature key;push in the raw data;pop out the signed data;destroy the envelope;
create the envelope;add the encryption key;push in the previously signed data;pop out the signed, encrypted data;destroy the envelope;
This nesting process can be extended arbitrarily with any of the cryptlib contenttypes.
Since cryptlib’s enveloping isn’t sensitive to the content type (that is, you can push in any type of data and it’ll be enveloped in the same way), you need to notify cryptlibof the actual content type being enveloped if you’re using nested envelopes. You can set the content type being enveloped using the CRYPT_ENVINFO_-CONTENTTYPE attribute, giving as value the appropriate CRYPT_CONTENT_-type. For example to specify that the data being enveloped is signed data, you woulduse:
cryptSetAttribute( cryptEnvelope, CRYPT_ENVINFO_CONTENTTYPE,CRYPT_CONTENT_SIGNEDDATA );
The default content type is plain data, so if you don’t explicitly set a content typecryptlib will assume it’s just raw data. The other content types are described in “Other Certificate Object Extensions” on page 243.

Advanced Enveloping76
Using the nested enveloping example shown above, the full enveloping procedurewould be:
create the envelope;add the signature key;(cryptlib sets the content type to the default 'plain data')push in the raw data;pop out the signed data;destroy the envelope;
create the envelope;set the content type to 'signed data';add the encryption key;push in the previously signed data;pop out the signed, encrypted data;destroy the envelope;
This will mark the innermost content as plain data (the default), the next level assigned data, and the outermost level as encrypted data.
Unwrapping nested enveloped data is the opposite of the enveloping process. Foreach level of enveloped data, you can obtain its type (once you’ve pushed enough of it into the envelope to allow cryptlib to decode it) by reading theCRYPT_ENVINFO_CONTENTTYPE attribute:
CRYPT_ATTRIBUTE_TYPE contentType;
cryptGetAttribute( cryptEnvelope, CRYPT_ENVINFO_CONTENTTYPE,&contentType );
Processing nested enveloped data therefore involves unwrapping successive layers ofdata until you finally reach the raw data content type.

S/MIME Enveloping 77
S/MIMES/MIME is a standard format for transferring signed, encrypted, or otherwiseprocessed data as a MIME-encoded message (for example as email or embedded in aweb page). The MIME-encoding is only used to make the result palatable to mailers,it’s also possible to process the data without the MIME encoding.
The exact data formatting and terminology used requires a bit of further explanation.In the beginning there was PKCS #7, a standard format for signed, encrypted, orotherwise processed data. When the earlier PEM secure mail standard failed to takeoff, PKCS #7 was wrapped up in MIME encoding and christened S/MIME version 2.Eventually PKCS #7 was extended to become the Cryptographic Message Syntax(CMS), and when that’s wrapped in MIME it’s called S/MIME version 3.
In practice it’s somewhat more complicated than this since there’s significant blurring between S/MIME version 2 and 3 (and PKCS #7 and CMS). The main effectivedifference between the two is that PKCS #7/SMIME version 2 is completely tied toX.509 certificates, certification authorities, certificate chains, and other paraphernalia,CMS can be used without requiring all these extras if necessary, and S/MIME version3 restricts CMS back to requiring X.509 for S/MIME version 2 compatibility.
The cryptlib native format is CMS used in the configuration that doesn’t tie it to the use of certificates (so it’ll work with PGP/OpenPGP keys, raw public/private keys, and other keying information as well as with X.509 certificates). In addition to thisformat, cryptlib also supports the S/MIME format which is tied to X.509— this isjust the cryptlib native format restricted so that the full range of key managementoptions aren’t available. If you want to interoperatewith other implementations, youshould use this format since many implementations can’t work with the newer key management options that were added in CMS.
You can specify the use of the restricted CMS/SMIME format when you create anenvelope with the formatting specifier CRYPT_FORMAT_CMS or CRYPT_-FORMAT_SMIME (they’re almost identical, the few minor differences are explained in “Extra Signature Information” on page 83), which tells cryptlib to use the restrictedCMS/SMIME rather than the (default) unrestricted CMS format. You can also usethe format specifiers with cryptExportKeyEx and cryptCreateSignatureEx (whichtake as their third argument the format specifier) as explained in “Exchanging Keys” on page 183, and “Signing Data” on page 189.
S/MIME EnvelopingAlthough it’s possible to use the S/MIME format directly with the mid-level signatureand encryption functions, S/MIME requires a considerable amount of extraprocessing above and beyond that required by cryptlib’s default format, so it’s easiest to let cryptlib take care of this extra work for you by using the enveloping functionsto process S/MIME data.
To create an envelope that uses the S/MIME format, call cryptCreateEnvelope asusual but specify a format type of CRYPT_FORMAT_SMIME instead of the usualCRYPT_FORMAT_CRYPTLIB:
CRYPT_ENVELOPE cryptEnvelope;
cryptCreateEnvelope( &cryptEnvelope, cryptUser, CRYPT_FORMAT_SMIME );
/* Perform enveloping */
cryptDestroyEnvelope( cryptEnvelope );
Creating the envelope in this way restricts cryptlib to using the standard X.509-basedS/MIME data format instead of the more flexible data format which is used forenvelopes by default.

S/MIME78
Encrypted EnvelopingS/MIME supports password-based enveloping in the same way as ordinary cryptlibenvelopes (in fact the two formats are identical). Public-key encrypted enveloping issupported only when the public key is held in an X.509 certificate. Because of thisrestriction the private decryption key must also have a certificate attached to it. Apartfrom these restrictions, public-key based S/MIME enveloping works the same way asstandard cryptlib enveloping. For example to encrypt data using the key contained inan X.509 certificate you would use:
CRYPT_ENVELOPE cryptEnvelope;int bytesCopied;
cryptCreateEnvelope( &cryptEnvelope, cryptUser, CRYPT_FORMAT_SMIME );
/* Add the certificate */cryptSetAttribute( cryptEnvelope, CRYPT_ENVINFO_PUBLICKEY,
certificate );
/* Add the data size information and data, wrap up the processing, andpop out the processed data */
cryptSetAttribute( cryptEnvelope, CRYPT_ENVINFO_DATASIZE,messageLength );
cryptPushData( cryptEnvelope, message, messageLength, &bytesCopied );cryptFlushData( cryptEnvelope );cryptPopData( cryptEnvelope, envelopedData, envelopedDataBufferSize,
&bytesCopied );
cryptDestroyEnvelope( cryptEnvelope );
Since the certificate will originally come from a keyset, a simpler alternative toreading the certificate yourself and explicitly adding it to the envelope is to letcryptlib do it for you by first adding the keyset to the envelope and then specifyingthe email address of the recipient or recipients of the message with the CRYPT_-ENVINFO_RECIPIENT attribute:
CRYPT_ENVELOPE cryptEnvelope;int bytesCopied;
cryptCreateEnvelope( &cryptEnvelope, cryptUser, CRYPT_FORMAT_SMIME );
/* Add the encryption keyset and recipient email address */cryptSetAttribute( cryptEnvelope, CRYPT_ENVINFO_KEYSET_ENCRYPT,
cryptKeyset );cryptSetAttributeString( cryptEnvelope, CRYPT_ENVINFO_RECIPIENT,
"[email protected]", 18 );
/* Add the data size information and data, wrap up the processing, andpop out the processed data */
cryptSetAttribute( cryptEnvelope, CRYPT_ENVINFO_DATASIZE,messageLength );
cryptPushData( cryptEnvelope, message, messageLength, &bytesCopied );cryptFlushData( cryptEnvelope );cryptPopData( cryptEnvelope, envelopedData, envelopedDataBufferSize,
&bytesCopied );
cryptDestroyEnvelope( cryptEnvelope );
The same thing in Java (for C# replace the .length with .Length) is:
int cryptEnvelope = crypt.CreateEnvelope( cryptUser,crypt.FORMAT_SMIME );
/* Add the encryption keyset and recipient email address */crypt.SetAttribute( cryptEnvelope, crypt.ENVINFO_KEYSET_ENCRYPT,
cryptKeyset );crypt.SetAttributeString( cryptEnvelope, crypt.ENVINFO_RECIPIENT,
"[email protected]" );

S/MIME Enveloping 79
/* Add the data size information and data, wrap up the processing, andpop out the processed data */
crypt.SetAttribute( cryptEnvelope, crypt.ENVINFO_DATASIZE,message.length );
int bytesCopied = crypt.PushData( cryptEnvelope, message );crypt.FlushData( cryptEnvelope );bytesCopied = crypt.PopData( cryptEnvelope, envelopedData,
envelopedData.length );
crypt.DestroyEnvelope( cryptEnvelope );
The Visual Basic equivalent is:
cryptCreateEnvelope cryptEnvelope, cryptUser, CRYPT_FORMAT_SMIME
' Add the encryption keyset and recipient email addresscryptSetAttribute cryptEnvelope, CRYPT_ENVINFO_KEYSET_ENCRYPT, _
cryptKeysetcryptSetAttributeString cryptEnvelope, CRYPT_ENVINFOR_RECIPIENT, _
"[email protected]", 18
' Add the data size information and data, wrap up the processing,' and pop out the processed datacryptSetAttribute cryptEnvelope, CRYPT_ENVINFO_DATASIZE, messageLengthcryptPushData cryptEnvelope, message, messageLength, bytesCopiedcryptFlushData cryptEnvelopecryptPopData cryptEnvelope, envelopedData, envelopedDataBufferSize, _
bytesCopied
cryptDestroyEnvelope cryptEnvelope
For each message recipient that you add, cryptlib will look up the key in theencryption keyset and add the appropriate information to the envelope to encrypt themessage to that person. This is the recommended way of handling public-keyencrypted enveloping, since it lets cryptlib handle the certificate details for you andmakes it possible to manage problem areas such as cases where the same emailaddress is present in multiple certificates of which only one is valid for messageencryption. If you want to handle this case yourself, you have to use a keyset queryto search the duplicate certificates and select the appropriate one as described in“Handling Multiple Certificates with the Same Name” on page 135.
The encryption keyset doesn’t have to be local. If you use an HTTP keyset as described in “HTTP Keysets” on page 126, cryptlib will fetch the required certificatedirectly from the remote CA, saving you the effort of having to maintain and update alocal set of certificates. This use of HTTP keysets makes it very easy to distributecertificates over the Internet.
De-enveloping works as for standard enveloping:
CRYPT_ENVELOPE cryptEnvelope;CRYPT_ATTRIBUTE_TYPE requiredAttribute;int bytesCopied, status;
/* Create the envelope and add the private key keyset and data */cryptCreateEnvelope( &cryptEnvelope, cryptUser, CRYPT_FORMAT_AUTO );cryptSetAttribute( cryptEnvelope, CRYPT_ENVINFO_KEYSET_DECRYPT,
privKeyKeyset );cryptPushData( cryptEnvelope, envelopedData, envelopedDataLength,
&bytesCopied );
/* Find out what we need to continue and, if it's a private key, addthe password to recover it */
cryptGetAttribute( cryptEnvelope, CRYPT_ATTRIBUTE_CURRENT,&requiredAttribute );
if( requiredAttribute != CRYPT_ENVINFO_PRIVATEKEY )/* Error */;
cryptSetAttributeString( cryptEnvelope, CRYPT_ENVINFO_PASSWORD,password, passwordLength );
cryptFlushData( cryptEnvelope );
/* Pop the data and clean up */cryptPopData( cryptEnvelope, message, messageLength, &bytesCopied );cryptDestroyEnvelope( cryptEnvelope );

S/MIME80
More information on public-key encrypted enveloping, including its use with cryptodevices such as smart cards and Fortezza cards, is given in “Public-Key EncryptedEnveloping” on page 66.
Digitally Signed EnvelopingS/MIME digitally signed enveloping works just like standard enveloping except thatthe signing key is restricted to one that has a full chain of X.509 certificates (or atleast a single certificate) attached to it. For example if you wanted to sign data usinga private key contained in sigKeyContext, you would use:
CRYPT_ENVELOPE cryptEnvelope;int bytesCopied;
cryptCreateEnvelope( &cryptEnvelope, cryptUser, CRYPT_FORMAT_SMIME );
/* Add the signing key */cryptSetAttribute( cryptEnvelope, CRYPT_ENVINFO_SIGNATURE,
sigKeyContext );
/* Add the data size information and data, wrap up the processing, andpop out the processed data */
cryptSetAttribute( cryptEnvelope, CRYPT_ENVINFO_DATASIZE,messageLength );
cryptPushData( cryptEnvelope, message, messageLength, &bytesCopied );cryptFlushData( cryptEnvelope );cryptPopData( cryptEnvelope, envelopedData, envelopedDataBufferSize,
&bytesCopied );
cryptDestroyEnvelope( cryptEnvelope );
When you sign data in this manner, cryptlib includes any certificates attached to thesigning key alongside the message. Although you can sign a message using a keywith a single certificate attached to it, it’s safer to use one that has a full certificatechain associated with it because including only the key certificate with the messagerequires that the recipient locate any other certificates that are required to verify thesignature. Since there’s no easy way to do this, signing a message using only astandalone certificate can cause problems when the recipient tries to verify thesignature.
Verifying the signature on the data works slightly differently from the normalsignature verification process since the signed data already carries with it thecomplete certificate chain required for verification. This means that you don’t have to push a signature verification keyset or key into the envelope because the requiredcertificate is already included with the data:
CRYPT_ENVELOPE cryptEnvelope;int bytesCopied, sigCheckStatus;
cryptCreateEnvelope( &cryptEnvelope, cryptUser, CRYPT_FORMAT_AUTO );
/* Push in the enveloped data and pop out the recovered message */cryptPushData( cryptEnvelope, envelopedData, envelopedDataLength,
&bytesCopied );cryptFlushData( cryptEnvelope );cryptPopData( cryptEnvelope, message, messageBufferSize, &bytesCopied
);
/* Determine the result of the signature check */cryptGetAttribute( cryptEnvelope, CRYPT_ENVINFO_SIGNATURE_RESULT,
&sigCheckStatus );
cryptDestroyEnvelope( cryptEnvelope );
Since the certificate is included with the data, anyone could alter the data, re-sign itwith their own certificate, and then attach their certificate to the data. To avoid thisproblem, cryptlib provides the ability to verify the chain of certificates, which worksin combination with cryptlib’s certificate trust manager. You can obtain the certificate object containing the signing certificate chain with:
S/MIME Enveloping 81
CRYPT_CERTIFICATE cryptCertChain;
cryptGetAttribute( cryptEnvelope, CRYPT_ENVINFO_SIGNATURE,&cryptCertChain );
You can work with this certificate chain as usual, for example you may want todisplay the certificates and any related information to the user. At the least, youshould verify the chain using cryptCheckCert. You may also want to perform avalidity check using RTCS, revocation checking using CRLs or OCSP, and any othercertificate checks that you consider necessary. More details on working withcertificate chains are given in “Certificate Chains” on page 215, details on basicsigned enveloping (including its use with crypto devices like smart cards andFortezza cards) are given in “Digitally Signed Enveloping” on page 70, details onvalidity checking with RTCS are given in “Certificate Status Checking using RTCS” on page 152, and details on revocation checking with OCSP are given in “CertificateRevocation Checking using OCSP” on page 157.
Detached SignaturesSo far, the signature for the signed data has always been included with the data itself,allowing it to be processed as a single blob. cryptlib also provides the ability tocreate detached signatures in which the signature is held separate from the data. Thisleaves the data being signed unchanged and produces a standalone signature as theresult of the encoding process.
To specify that an envelope should produce a detached signature rather than standardsigned data, you should set the envelope’s CRYPT_ENVINFO_DETACHED-SIGNATURE attribute to ‘true’ (any nonzero value) before you push in any data
cryptSetAttribute( cryptEnvelope, CRYPT_ENVINFO_DETACHEDSIGNATURE,1 );
Apart from that, the creation of detached signatures works just like the creation ofstandard signed data, with the result of the enveloping process being the standalonesignature (without the data attached):
CRYPT_ENVELOPE cryptEnvelope;int bytesCopied;
cryptCreateEnvelope( &cryptEnvelope, cryptUser, CRYPT_FORMAT_SMIME );
/* Add the signing key and specify that we're using a detachedsignature */
cryptSetAttribute( cryptEnvelope, CRYPT_ENVINFO_SIGNATURE,sigKeyContext );
cryptSetAttribute( cryptEnvelope, CRYPT_ENVINFO_DETACHEDSIGNATURE,1 );
/* Add the data size information and data, wrap up the processing, andpop out the detached signature */
cryptSetAttribute( cryptEnvelope, CRYPT_ENVINFO_DATASIZE,messageLength );
cryptPushData( cryptEnvelope, message, messageLength, &bytesCopied );cryptFlushData( cryptEnvelope );cryptPopData( cryptEnvelope, detachedSignature,
detachedSignatureBufferSize, &bytesCopied );
cryptDestroyEnvelope( cryptEnvelope );
Verifying a detached signature requires an extra processing step since the signature isno longer bundled with the data. First, you need to push in the detached signature (totell cryptlib what to do with any following data). After you’ve pushed in the signature and followed it up with the usual cryptFlushData to wrap up theprocessing, you need to push in the data that was signed by the detached signature asthe second processing step:
CRYPT_ENVELOPE cryptEnvelope;int bytesCopied, sigCheckStatus;
cryptCreateEnvelope( &cryptEnvelope, cryptUser, CRYPT_FORMAT_AUTO );

S/MIME82
/* Push in the detached signature */cryptPushData( cryptEnvelope, detachedSignature, detachedSigLength,
&bytesCopied );cryptPushData( cryptEnvelope, NULL, 0, NULL );
/* Push in the data */cryptPushData( cryptEnvelope, data, dataLength, NULL );cryptFlushData( cryptEnvelope );
/* Determine the result of the signature check */cryptGetAttribute( cryptEnvelope, CRYPT_ENVINFO_SIGNATURE_RESULT,
&sigCheckStatus );
cryptDestroyEnvelope( cryptEnvelope );
Since the data wasn’t enveloped to begin with, there’s nothing to de-envelope, whichmeans there’s nothing to pop out of the envelope apart from the signing certificate chain that you can obtain as before by reading the CRYPT_ENVINFO_SIGNATUREattribute.
In case you’re not sure whether a signature includes data or not, you can query itsstatus by checking the value of the CRYPT_ENVINFO_DETACHEDSIGNATUREattribute after you’ve pushed in the signature:
int isDetachedSignature;
/* Push in the signed enveloped data */cryptPushData( cryptEnvelope, signedData, signedDataLength,
&bytesCopied );
/* Check the signed data type */cryptGetAttribute( cryptEnvelope, CRYPT_ENVINFO_DETACHEDSIGNATURE,
&isDetachedSignature );if( isDetachedSignature )
/* Detached signature */;else
/* Signed data + signature */;
Alternative Detached Signature ProcessingBesides the method described above there is a second way to verify a detachedsignature which involves hashing the data yourself and then adding the hash to theenvelope rather than pushing the data into the envelope and having it hashed for you.This is useful in situations where the signed data is present separate from thesignature, or is in a non-standard format (for example an AuthentiCode signed file)that can’t be recognised by the enveloping code.
Verifying a detached signature in this manner is a slight variation of the standarddetached signature verification process in which you first add to the envelope thehash value for the signed data and then push in the detached signature:
CRYPT_CONTEXT hashContext;CRYPT_ENVELOPE cryptEnvelope;int bytesCopied, sigCheckStatus;
/* Create the hash context and hash the signed data */cryptCreateContext( &hashContext, cryptUser, CRYPT_ALGO_SHA );cryptEncrypt( hashContext, signedData, dataLength );cryptEncrypt( hashContext, signedData, 0 );
/* Create the envelope and add the hash */cryptCreateEnvelope( &cryptEnvelope, cryptUser, CRYPT_FORMAT_AUTO );cryptSetAttribute( cryptEnvelope, CRYPT_ENVINFO_HASH, hashContext );cryptDestroyContext( hashContext );
/* Add the detached signature */cryptPushData( cryptEnvelope, signatureData, signatureDataLength,
&bytesCopied );cryptFlushData( cryptEnvelope );
/* Determine the result of the signature check */cryptGetAttribute( cryptEnvelope, CRYPT_ENVINFO_SIGNATURE_RESULT,
&sigCheckStatus );

S/MIME Enveloping 83
cryptDestroyEnvelope( cryptEnvelope );
When you push in the detached signature cryptlib will verify that the hashinformation in the signature matches the hash that you’ve supplied. If the two don’t match, cryptlib will return CRYPT_ERROR_SIGNATURE to indicate that thesignature can’t be verified using the given values. Because of this check, you must add the hash before you push in the detached signature.
Extra Signature InformationS/MIME signatures can include with them extra information such as the time atwhich the message was signed. Normally cryptlib will add and verify thisinformation for you automatically, with the details of what’s added based on the setting of the CRYPT_OPTION_CMS_DEFAULTATTRIBUTES option asdescribed in “Working with Configuration Options” on page 263. If this option is setto false (zero), cryptlib won’t add any additional signature information, which minimises the size of the resulting signature. If this option is set to true (any nonzerovalue), cryptlib will add default signing attributes such as the signing time for you.
You can also handle the extra signing information yourself if you require extracontrol over what’s included with the signature. The extra information is specified asa CRYPT_CERTTYPE_CMS_ATTRIBUTES certificate object. To include thisinformation with the signature you should add it to the envelope alongside the signingkey as CRYPT_ENVINFO_SIGNATURE_EXTRADATA:
CRYPT_ENVELOPE cryptEnvelope;CRYPT_CERTIFICATE cmsAttributes;
/* Create the CMS attribute object */cryptCreateCert( &cmsAttributes, cryptUser,
CRYPT_CERTTYPE_CMS_ATTRIBUTES );/* ... */
/* Create the envelope and add the signing key and signatureinformation */
cryptCreateEnvelope( &cryptEnvelope, cryptUser, CRYPT_FORMAT_CMS );cryptSetAttribute( cryptEnvelope, CRYPT_ENVINFO_SIGNATURE,
sigKeyContext );cryptSetAttribute( cryptEnvelope, CRYPT_ENVINFO_SIGNATURE_EXTRADATA,
cmsAttributes );cryptDestroyCert( cmsAttributes );
/* Add the data size information and data, wrap up the processing, andpop out the processed data */
cryptSetAttribute( cryptEnvelope, CRYPT_ENVINFO_DATASIZE,messageLength );
cryptPushData( cryptEnvelope, message, messageLength, &bytesCopied );cryptFlushData( cryptEnvelope );cryptPopData( cryptEnvelope, envelopedData, envelopedDataBufferSize,
&bytesCopied );
cryptDestroyEnvelope( cryptEnvelope );
You can also use this facility to extend or overwrite the attributes added by cryptlib.For example if you wanted to add a security label to the data being signed, you wouldadd it to the CMS attribute object and add that to the envelope. cryptlib will then addany additional required information (for example the signing time) and finallygenerate the signature using the combined collection of attributes. This means thatyou can fill in whatever attributes you want, and cryptlib till take care of the rest foryou.
Verifying a signature that includes this extra information works just like standardsignature verification since cryptlib handles it all for you. Just as you can obtain acertificate chain from a signature, you can also obtain the extra signature informationfrom the envelope:
CRYPT_CERTIFICATE cmsAttributes;
cryptGetAttribute( cryptEnvelope, CRYPT_ENVINFO_SIGNATURE_EXTRADATA,&cmsAttributes );

S/MIME84
You can now work with the signing attributes as in the same manner as standardcertificate attributes, for example you may want to display any relevant informationto the user. More details on working with these attributes are given in “CertificateExtensions” on page 224, and the attributes themselves are covered in “OtherCertificate Object Extensions” on page 243.
The example above created a CRYPT_FORMAT_CMS envelope, which means thatcryptlib will add certain default signing attributes to the signature when it creates it.If the envelope is created with CRYPT_FORMAT_SMIME instead ofCRYPT_FORMAT_CMS, cryptlib will add an extra set of S/MIME-specificattributes that indicate the preferred encryption algorithms for use when an S/MIMEenabled mailer is used to send mail to the signer. This information is used forbackwards-compatibility reasons because many S/MIME mailers will quietly defaultto using very weak 40-bit keys if they’re not explicitly told to use proper encryption such as triple DES or AES (cryptlib will never use weakened encryption since itdoesn’t even provide this capability).
Because of this default-to-insecure encryption problem, cryptlib includes with aCRYPT_FORMAT_SMIME signature additional information to indicate that thesender should use a non-weakened algorithm such as triple DES, AES, CAST-128, orIDEA. With a CRYPT_FORMAT_CMS signature this additional S/MIME-specificinformation isn’t needed so cryptlib doesn’t include it.
TimestampingIn addition to the standard signature information which is provided by the signer,cryptlib also supports the use of a message timestamp which is provided by anexternal timestamp authority (TSA). Timestamping signed data in an envelope isvery simple and requires only the addition of a CRYPT_ENVINFO_TIMESTAMPattribute to tell cryptlib which TSA to obtain the timestamp from. The TSA isspecified as a TSP session object as described in “Secure Sessions” on page 96. Forexample to specify a TSA located at http://www.timestamp.com/-tsa/request.cgi, you would create the TSP session with:
CRYPT_SESSION cryptSession;
/* Create the TSP session and add the server name */cryptCreateSession( &cryptSession, cryptUser, CRYPT_SESSION_TSP );cryptSetAttributeString( cryptSession, CRYPT_SESSINFO_SERVER_NAME,
"http://www.timestamp.com/tsa/request.cgi", 40 );
You can also specify additional session information in the usual manner for cryptlibsessions, after which you add the session to the envelope. Once you’ve added it, you can destroy it since it’s now managed by the envelope:
cryptSetAttribute( cryptEnvelope, CRYPT_ENVINFO_TIMESTAMP,cryptSession );
cryptDestroySession( cryptSession );
When cryptlib signs the data in the envelope, it will communicate with the TSA toobtain a timestamp on the signature, which is then included with the other signeddata. This timestamp can be verified at a later date to prove that the envelope wasindeed signed at the indicated time.
Since communicating with a TSA over a network can be a slow process, the signaturegeneration may take somewhat longer than usual. When the timestamp is createdcryptlib doesn’t communicate any part of the message or any indication of its contents to the TSA, it merely sends it the message signature information which isthen countersigned by the TSA. In this way no confidential or sensitive informationis leaked to the outside world through the timestamping process.
A time-stamped message appears the same as a standard signed message, with theexception that the timestamp data is present as additional signature information oftype CRYPT_ENVINFO_TIMESTAMP. You can read the timestamp data in thesame way that you read other extra signature information:

Timestamping 85
CRYPT_ENVELOPE timeStamp;
cryptGetAttribute( cryptEnvelope, CRYPT_ENVINFO_TIMESTAMP,×tamp );
The returned timestamp is a standard signed envelope object that you can check in theusual manner, for example by verifying the signature on the timestamp data andchecking the certificates used for the timestamp signature.

PGP86
PGPPGP is a standard format for encrypting, signing, and compressing data. The originalformat, PGP 2.x or PGP classic, has since been superseded by OpenPGP, partiallyimplemented in PGP 5.0 and later fully in NAI PGP, GPG, and various variationssuch as the ckt builds. cryptlib can read both the PGP 2.x and OpenPGP formats,including handling for assorted variations and peculiarities of differentimplementations. As output cryptlib produces data in the OpenPGP format, whichcan be read by any recent PGP implementation. Note that PGP 2.x used the patentedIDEA encryption algorithm (see “Algorithms” on page 289 for details), if you’re using the code for commercial purposes you need to either obtain a license for IDEAor use only the OpenPGP format (which cryptlib does by default anyway, so thisusually isn’t a concern).
You can specify the use of the PGP format when you create an envelope with theformatting specifier CRYPT_FORMAT_PGP, which tells cryptlib to use the PGPformat rather than the (default) CMS format. cryptlib doesn’t restrict the use of PGP envelopes to PGP keys. Any type of keys, including standard cryptlib keys andX.509 certificates, can be used with PGP envelopes. By extension it’s also possible to use smart cards, crypto accelerators, and Fortezza cards with PGP envelopes (as anextreme example, it’s possible to use a Fortezza card to create a PGP envelope).
PGP EnvelopingTo create an envelope that uses the PGP format, call cryptCreateEnvelope as usualbut specify a format type of CRYPT_FORMAT_PGP instead of the usualCRYPT_FORMAT_CRYPTLIB:
CRYPT_ENVELOPE cryptEnvelope;
cryptCreateEnvelope( &cryptEnvelope, cryptUser, CRYPT_FORMAT_PGP );
/* Perform enveloping */
cryptDestroyEnvelope( cryptEnvelope );
Creating the envelope in this way restricts cryptlib to using the PGP data formatinstead of the more flexible data format which is used for envelopes by default. Thisimposes a number of restrictions on the use of envelopes that are described in moredetail in the sections that cover individual PGP enveloping types. One restriction thatapplies to all enveloping types is that PGP requires the presence of theCRYPT_ENVINFO_DATASIZE attribute before data can be enveloped. Thisattribute is described in more detail in “Data Size Considerations” on page 54. If youtry to push data into an envelope without setting the CRYPT_ENVINFO_-DATASIZE attribute, cryptlib will return CRYPT_ERROR_NOTINITED to indicatethat you haven’t provided the information which is needed for the enveloping toproceed.
Encrypted EnvelopingPGP supports password-based enveloping in the same general way as ordinarycryptlib envelopes. However, due to constraints imposed by the PGP format, it’s not possible to mix password- and public-key-based key exchange actions in the sameenvelope. In addition it’s not possible to specify more than one password for an envelope. If you try to add more than one password, or try to add a password whenyou’ve already added a public key or vice versa, cryptlib will returnCRYPT_ERROR_INITED to indicate that the key exchange action has already beenset.
Public-key based PGP enveloping works the same way as standard cryptlibenveloping. For example to encrypt data using the a public key you would use:
CRYPT_ENVELOPE cryptEnvelope;int bytesCopied;
cryptCreateEnvelope( &cryptEnvelope, cryptUser, CRYPT_FORMAT_PGP );

PGP Enveloping 87
/* Add the public key */cryptSetAttribute( cryptEnvelope, CRYPT_ENVINFO_PUBLICKEY,
publicKey );
/* Add the data size information and data, wrap up the processing, andpop out the processed data */
cryptSetAttribute( cryptEnvelope, CRYPT_ENVINFO_DATASIZE,messageLength );
cryptPushData( cryptEnvelope, message, messageLength, &bytesCopied );cryptFlushData( cryptEnvelope );cryptPopData( cryptEnvelope, envelopedData, envelopedDataBufferSize,
&bytesCopied );
cryptDestroyEnvelope( cryptEnvelope );
Since the key will originally have come from a keyset, a simpler alternative toreading the key yourself and explicitly adding it to the envelope is to let cryptlib do itfor you by first adding the keyset to the envelope and then specifying the emailaddress of the recipient or recipients of the message with the CRYPT_ENVINFO_-RECIPIENT attribute:
CRYPT_ENVELOPE cryptEnvelope;int bytesCopied;
cryptCreateEnvelope( &cryptEnvelope, cryptUser, CRYPT_FORMAT_PGP );
/* Add the encryption keyset and recipient email address */cryptSetAttribute( cryptEnvelope, CRYPT_ENVINFO_KEYSET_ENCRYPT,
cryptKeyset );cryptSetAttributeString( cryptEnvelope, CRYPT_ENVINFO_RECIPIENT,
"[email protected]", 18 );
/* Add the data size information and data, wrap up the processing, andpop out the processed data */
cryptSetAttribute( cryptEnvelope, CRYPT_ENVINFO_DATASIZE,messageLength );
cryptPushData( cryptEnvelope, message, messageLength, &bytesCopied );cryptFlushData( cryptEnvelope );cryptPopData( cryptEnvelope, envelopedData, envelopedDataBufferSize,
&bytesCopied );
cryptDestroyEnvelope( cryptEnvelope );
For each message recipient that you add, cryptlib will look up the key in theencryption keyset and add the appropriate information to the envelope to encrypt themessage to that person. This is the recommended way of handling public-keyencrypted enveloping, since it lets cryptlib handle the key details for you and makes itpossible to manage problem areas such as cases where the same email address ispresent for multiple keys of which only one is valid for message encryption.
De-enveloping works as for standard enveloping:
CRYPT_ENVELOPE cryptEnvelope;CRYPT_ATTRIBUTE_TYPE requiredAttribute;int bytesCopied, status;
/* Create the envelope and add the private key keyset and data */cryptCreateEnvelope( &cryptEnvelope, cryptUser, CRYPT_FORMAT_AUTO );cryptSetAttribute( cryptEnvelope, CRYPT_ENVINFO_KEYSET_DECRYPT,
privKeyKeyset );cryptPushData( cryptEnvelope, envelopedData, envelopedDataLength,
&bytesCopied );
/* Find out what we need to continue and, if it's a private key, addthe password to recover it */
cryptGetAttribute( cryptEnvelope, CRYPT_ATTRIBUTE_CURRENT,&requiredAttribute );
if( requiredAttribute != CRYPT_ENVINFO_PRIVATEKEY )/* Error */;
cryptSetAttributeString( cryptEnvelope, CRYPT_ENVINFO_PASSWORD,password, passwordLength );
cryptFlushData( cryptEnvelope );

PGP88
/* Pop the data and clean up */cryptPopData( cryptEnvelope, message, messageLength, &bytesCopied );cryptDestroyEnvelope( cryptEnvelope );
More information on public-key encrypted enveloping, including its use with cryptodevices such as smart cards, is given in “Public-Key Encrypted Enveloping” on page 66.
Digitally Signed EnvelopingPGP digitally signed enveloping works just like standard enveloping. For example ifyou wanted to sign data using a private key contained in sigKeyContext, youwould use:
CRYPT_ENVELOPE cryptEnvelope;int bytesCopied;
cryptCreateEnvelope( &cryptEnvelope, cryptUser, CRYPT_FORMAT_PGP );
/* Add the signing key */cryptSetAttribute( cryptEnvelope, CRYPT_ENVINFO_SIGNATURE,
sigKeyContext );
/* Add the data size information and data, wrap up the processing, andpop out the processed data */
cryptSetAttribute( cryptEnvelope, CRYPT_ENVINFO_DATASIZE,messageLength );
cryptPushData( cryptEnvelope, message, messageLength, &bytesCopied );cryptFlushData( cryptEnvelope );cryptPopData( cryptEnvelope, envelopedData, envelopedDataBufferSize,
&bytesCopied );
cryptDestroyEnvelope( cryptEnvelope );
Verifying the signature works in the usual way:
CRYPT_ENVELOPE cryptEnvelope;int bytesCopied, signatureResult, status;
/* Create the envelope and add the signature check keyset */cryptCreateEnvelope( &cryptEnvelope, cryptUser, CRYPT_FORMAT_AUTO );cryptSetAttribute( cryptEnvelope, CRYPT_ENVINFO_KEYSET_SIGCHECK,
sigCheckKeyset );
/* Push in the signed data and pop out the recovered message */cryptPushData( cryptEnvelope, envelopedData, envelopedDataLength,
&bytesCopied );cryptFlushData( cryptEnvelope );cryptPopData( cryptEnvelope, message, messageBufferSize,
&bytesCopied );
/* Determine the result of the signature check */cryptGetAttribute( cryptEnvelope, CRYPT_ENVINFO_SIGNATURE_RESULT,
&signatureResult );
The signature result will typically be CRYPT_OK (the signature verified), CRYPT_-ERROR_SIGNATURE (the signature did not verify), or CRYPT_ERROR_-NOTFOUND (the key needed to check the signature wasn’t found in the keyset).
When you sign data in the PGP format, the nested content type is always set to plaindata. This is a limitation of the PGP format that always signs data as the innermoststep, so that what’s signed is always plain data. In addition to this restriction, it’s not possible to have more than one signer per envelope. Multiple signers requires the useof nested envelopes, however it’s necessary to intersperse a layer of encryption or compression between each signature pass since PGP can’t easily distinguish which signature belongs to which signature pass. In general it’s best not to try to apply multiple signatures to a piece of data.
Detached SignaturesSo far, the signature for the signed data has always been included with the data itself,allowing it to be processed as a single blob. cryptlib also provides the ability tocreate detached signatures in which the signature is held separate from the data. This

PGP Enveloping 89
leaves the data being signed unchanged and produces a standalone signature as theresult of the encoding process.
To specify that an envelope should produce a detached signature rather than standardsigned data, you should set the envelope’s CRYPT_ENVINFO_DETACHED-SIGNATURE attribute to ‘true’ (any nonzero value) before you push in any data
cryptSetAttribute( cryptEnvelope, CRYPT_ENVINFO_DETACHEDSIGNATURE, 1);
Apart from that, the creation of detached signatures works just like the creation ofstandard signed data, with the result of the enveloping process being the standalonesignature (without the data attached):
CRYPT_ENVELOPE cryptEnvelope;int bytesCopied;
cryptCreateEnvelope( &cryptEnvelope, cryptUser, CRYPT_FORMAT_PGP );
/* Add the signing key and specify that we're using a detachedsignature */
cryptSetAttribute( cryptEnvelope, CRYPT_ENVINFO_SIGNATURE,sigKeyContext );
cryptSetAttribute( cryptEnvelope, CRYPT_ENVINFO_DETACHEDSIGNATURE, 1);
/* Add the data size information and data, wrap up the processing, andpop out the detached signature */
cryptSetAttribute( cryptEnvelope, CRYPT_ENVINFO_DATASIZE,messageLength );
cryptPushData( cryptEnvelope, message, messageLength, &bytesCopied );cryptFlushData( cryptEnvelope );cryptPopData( cryptEnvelope, detachedSignature,
detachedSignatureBufferSize, &bytesCopied );
cryptDestroyEnvelope( cryptEnvelope );
Verifying a detached signature works somewhat differently from standard cryptlibdetached signature processing since the PGP format doesn’t differentiate between standard and detached signatures. Because of this lack of differentiation, it’s not possible for cryptlib to automatically determine whether a signature should have dataassociated with it or not. Normally, cryptlib assumes that a signature is associatedwith the data being signed, which is the most common case. When verifying adetached signature, you need to use the alternative signature processing techniquethat involves hashing the data yourself and then adding the hash to the enveloperather than pushing the data into the envelope and having it hashed for you. SincePGP hashes further information after hashing the data to be signed, you shouldn’t complete the hashing before you push the hash context into the envelope. This is incontrast to standard cryptlib detached signature processing which requires that youcomplete the hashing before pushing the context into the envelope:
CRYPT_CONTEXT hashContext;CRYPT_ENVELOPE cryptEnvelope;int bytesCopied, sigCheckStatus;
/* Create the hash context and hash the signed data without completingthe hashing */
cryptCreateContext( &hashContext, cryptUser, CRYPT_ALGO_SHA );cryptEncrypt( hashContext, data, dataLength );
/* Create the envelope and add the signature check keyset */cryptCreateEnvelope( &cryptEnvelope, cryptUser, CRYPT_FORMAT_AUTO );cryptSetAttribute( cryptEnvelope, CRYPT_ENVINFO_KEYSET_SIGCHECK,
sigCheckKeyset );
/* Add the hash and follow it with the detached signature */cryptSetAttribute( cryptEnvelope, CRYPT_ENVINFO_HASH, hashContext );cryptPushData( cryptEnvelope, data, dataLength, &bytesCopied );cryptFlushData( cryptEnvelope );cryptDestroyContext( hashContext );

PGP90
/* Determine the result of the signature check */cryptGetAttribute( cryptEnvelope, CRYPT_ENVINFO_SIGNATURE_RESULT,
&sigCheckStatus );
cryptDestroyEnvelope( cryptEnvelope );
When you push in the detached signature cryptlib will verify that the hashinformation in the signature matches the hash that you’ve supplied. If the two don’t match, cryptlib will return CRYPT_ERROR_SIGNATURE to indicate that thesignature can’t be verified using the given values. Because of this check, you mustadd the hash before you push in the detached signature.

S/MIME email 91
From Envelopes to emailThe enveloping process produces binary data as output that then needs to be wrappedup in the appropriate MIME headers and formatting before it can really be calledS/MIME or PGP mail. The exact mechanisms used depend on the mailer code orsoftware interface to the mail system you’re using. General guidelines for the different enveloped data types are given below.
Note that cryptlib is a security toolkit and not a mail client or server. Althoughcryptlib provides all the crypto functionality needed to implement S/MIME and PGP,it cannot send or receive email, process MIME message parts or base64 or PGPASCII encoding, or otherwise act as a mail agent. These functions are performed ymail-handling software. For mail-processing operations you need to combine it withmail-handling software of the kind described further on.
S/MIME emailMIME is the Internet standard for communicating complex data types via email, andprovides for tagging of message contents and safe encoding of data to allow it to passover data paths that would otherwise damage or alter the message contents. EachMIME message has a top-level type, subtype, and optional parameters. The top-leveltypes are application, audio, image, message, multipart, text, andvideo.
Most of the S/MIME secured types have a content type of application/pkcs7-mime, except for detached signatures that have a content type ofapplication/pkcs7-signature. The content type usually also includes anadditional smime-type parameter whose value depends on the S/MIME type and isdescribed in further detail below. In addition it’s usual to include a content-disposition field whose value is also explained below.
Since MIME messages are commonly transferred via email and this doesn’t handle the binary data produced by cryptlib’s enveloping, MIME also defines a means of encoding binary data as text. This is known as content-transfer-encoding.
DataThe innermost, plain data content should be converted to canonical MIME format andhave a standard MIME header which is appropriate to the data content, with optionalencoding as required. For the most common type of content (plain text), the headerwould have a content-type of text/plain, and possibly optional extra informationsuch as a content transfer encoding (in this case quoted-printable), contentdisposition, and whatever other MIME headers are appropriate. This formatting isnormally handled for you by the mailer code or software interface to the mail systemyou’re using.
Signed Data
For signed data the MIME type is application/pkcs7-mime, the smime-typeparameter is signed-data, and the extensions for filenames specified asparameters is .p7m. A typical MIME header for signed data is therefore:
Content-Type: application/pkcs7-mime; smime-type=signed-data;name=smime.p7m
Content-Transfer-Encoding: base64Content-Disposition: attachment; filename=smime.p7m
encoded signed data
Detached SignatureDetached signatures represent a special instance of signed data in which the data to besigned is carried as one MIME body part and the signature is carried as another bodypart. The message is encoded as a multipart MIME message with the overall messagehaving a content type of multipart/signed and a protocol parameter of

From Envelopes to email92
application/pkcs7-signature, and the signature part having a content typeof application/pkcs7-signature.
Since the data precedes the signature, it’s useful to include the hash algorithm usedfor the data as a parameter with the content type (cryptlib processes the signaturebefore the data so it doesn’t require it, but other implementations may not be able to do this). The hash algorithm parameter is given by micalg=sha1 ormicalg=md5 as appropriate. When receiving S/MIME messages you can ignorethis value since cryptlib will automatically use the correct type based on thesignature.
A typical MIME header for a detached signature is therefore:
Content-Type: multipart/signed; protocol=application/pkcs7-signature;micalg=sha1; boundary=boundary
--boundaryContent-Type: text/plain Content-Transfer-Encoding: quoted-printable
signed text
--boundaryContent-Type: application/pkcs7-signature; name=smime.p7sContent-Transfer-Encoding: base64Content-Disposition: attachment; filename=smime.p7s
encoded signature
--boundary—
Encrypted Data
For encrypted data the MIME type is application/pkcs7-mime, the smime-type parameter is enveloped-data, and the extension for filenames specified asparameters is .p7m. A typical MIME header for encrypted data is therefore:
Content-Type: application/pkcs7-mime; smime-type=enveloped-data;name=smime.p7m
Content-Transfer-Encoding: base64Content-Disposition: attachment; filename=smime.p7m
encoded encrypted data
Nested ContentUnlike straight CMS nested content, S/MIME nested content requires a new level ofMIME encoding for each nesting level. For the minimum level of nesting (straightsigned or encrypted data) you need to first MIME-encode the plain data, thenenvelope it to create CMS signed or encrypted data, and then MIME-encode it again.For the typical case of signed, encrypted data you need to MIME-encode, sign,MIME-encode again, encrypt, and then MIME-encode yet again (rumours thatS/MIME was designed by a consortium of network bandwidth vendors and disk drivemanufacturers are probably unfounded).
Since the nesting information is contained in the MIME headers, you don’t have to specify the nested content type using CRYPT_ENVINO_CONTENTTYPE as you dowith straight CMS enveloped data (this is one of the few actual differences betweenCRYPT_FORMAT_CMS and CRYPT_FORMAT_SMIME), cryptlib willautomatically set the correct content type for you. Conversely, you need to use theMIME header information rather than CRYPT_ENVINFO_CONTENTTYPE whende-enveloping data (this will normally be handled for you by the mailer code orsoftware interface to the mail system you’re using).
PGP emailTraditionally, PGP has employed its own email encapsulation format that predatesMIME and isn’t directly compatible with it. A PGP message is delimited with the string -----BEGIN PGP MESSAGE----- and -----END PGP MESSAGE-----, with the (binary) message body present in base64-encoded format between the

Implementing S/MIME and PGP email using cryptlib 93
delimiters. The body is followed by a base64-encoded CRC24 checksum calculatedon the message body before base64-encoding. In addition the body may be precededby one or more lines of type-and-value pairs containing additional information suchas software version information, and separated from the body by a blank line. Moredetails on the format are given in the PGP standards documents.
An example of a PGP email message is:
-----BEGIN PGP MESSAGE-----Version: cryptlib 3.1
base64-encoded message bodybase64-encoded CRC24 checksum-----END PGP MESSAGE-----
Signed data with a detached signature is delimited with -----BEGIN PGPSIGNED MESSAGE----- at the start of the message, followed by -----BEGINPGP SIGNATURE----- and -----END PGP SIGNATURE----- around thesignature that follows. The signature follows the standard PGP message-encodingrules given above:
-----BEGIN PGP SIGNED MESSAGE-----Hash: SHA1
message body-----BEGIN PGP SIGNATURE-----Version: cryptlib 3.1
base64-encoded signaturebase64-encoded CRC24 checksum-----END PGP SIGNATURE-----
The example above shows another use for the type-and-value lines, in this case toindicate the hashing algorithm used in the signature to allow one-pass processing ofthe message.
In addition to the traditional PGP format, there exists a mechanism for encapsulatingthe traditional PGP format in an additional layer of MIME wrapping. This isn’t true MIME message handling since it merely wraps MIME headers around the existingPGP email encapsulation rather than using the full MIME capabilities directly as doesS/MIME. This format is almost never used, with software expected to use thetraditional PGP format instead. If you need more information about PGP/MIME, youcan find it in the PGP standards documentation.
Implementing S/MIME and PGP email using cryptlibMost of the MIME processing and encoding issues described above will be handledfor you by the mail software that cryptlib is used with. To use cryptlib to handleS/MIME and PGP email messages, you would typically register the various MIMEtypes with the mail software and, when they are encountered, the mailer will hand themessage content (the data that remains after the MIME wrapper has been removed) tocryptlib. cryptlib can then process the data and hand the processed result back to themailer. The same applies for generating S/MIME and PGP email messages.
Note that cryptlib is a security toolkit and not a mail client or server. Althoughcryptlib provides all the crypto functionality needed to implement S/MIME and PGP,it cannot send or receive email, process MIME message parts, or otherwise act as amail agent. For mail-processing operations you need to combine it with mail-handling software of the kind described below.
c-client/IMAP4c-client is a portable Swiss army chainsaw interface to a wide variety of mail andnews handling systems. One of the services it provides is full handling of MIMEmessage parts which involves breaking a message down into a sequence of BODYstructures each of which contains one MIME body part. The type member containsthe content type (typically TYPEMULTIPART or TYPEAPPLICATION for thetypes used in S/MIME or PGP), the subtype member contains the MIME subtype,

From Envelopes to email94
the parameter list contains any required parameters, and thecontents.binary member contains outgoing binary data straight from thecryptlib envelope (c-client will perform any necessary encoding such as base64 ifrequired). All of this information is converted into an appropriately-formatted MIMEmessage by c-client before transmission.
Since IMAP supports the fetching of individual MIME body parts from a server,contents.binary can’t be used to access incoming message data since only the header information may have been fetched, with the actual content still residing onthe server. To fetch a particular body part, you need to use mail_fetchbody. Ifthe body part is base64-encoded (denoted by the encoding member of the BODYhaving the value ENCBASE64) then you also need to call rfc822_base64 todecode the data so cryptlib can process it. In the unlikely event that the binary data isencoded as quoted-printable (denoted by ENCQUOTEDPRINTABLE, at least onebroken mailer occasionally does this) you need to call rfc822_qprint instead. Ineither case the output can be pushed straight into a cryptlib envelope.
EudoraEudora handles MIME content types through plug-in translators that are calledthrough two functions, ems_can_translate and ems_translate_file.Eudora calls ems_can_translate with an emsMIMEtype parameter thatcontains information on the MIME type contained in the message. If this is anS/MIME or PGP type (for example application/pkcs7-mime) the functionshould return EMSR_NOW to indicate that it can process this MIME type, otherwise isreturns EMSR_CANT_TRANSLATE.
Once the translator has indicated that it can process a message, Eudora callsems_translate_file with input and output files to read the data from and writethe processed result to. The translation is just the standard cryptlib enveloping or de-enveloping process depending on whether the translator is an on-arrival or on-displayone (used for de-enveloping incoming messages) or a Q4-transmission or Q4-completion one (used for enveloping outgoing messages).
MAPIMAPI (Microsoft’s mail API) defines two types ofmailer extensions that allowcryptlib-based S/MIME and PGP functionality to be added to Windows mailapplications. The first type is a spooler hook or hook provider, which can be calledon delivery of incoming messages and on transmission of outgoing messages. Thesecond type is a preprocessor, which is less useful and operates on outgoing messagesonly. The major difference between the two in terms of implementation complexityis that hook providers are full (although simple) MAPI service providers while pre-processors are extensions to transport providers (that is, if you’ve already written a transport provider you can add the preprocessor without too much effort; if you don’t have a transport provider available, it’s quite a bit more work). In general it’s probably easiest to use a single spooler hook to handle inbound and outboundmessages. You can do this by setting both the HOOK_INBOUND andHOOK_OUTBOUND flags in the hook’s PR_RESOURCE_FLAGS value.
Messages are passed to hooks via ISpoolerHook::OutboundMsgHook (foroutgoing messages) and ISpoolerHook::InboundMsgHook (for incomingmessages). The hook implementation itself is contained in a DLL that contains theHPProviderInit entry point and optional further entry points used to configure it,for example a message service entry point for program-based configuration and aWIZARDENTRY for user-based configuration.
Windows 95/98/ME and NT/2000/XP ShellWindows allows a given MIME content type to be associated with an application toprocess it. You can set up this association by calling MIMEAssociationDialogand setting the MIMEASSOCDLG_FL_REGISTER_ASSOC flag in thedwInFlags parameter, which will (provided the user approves it) create an

Implementing S/MIME and PGP email using cryptlib 95
association between the content type you specify in the pcszMIMEContentTypeparameter and the application chosen by the user. This provides a somewhat crudebut easy to set up mechanism for processing S/MIME and PGP data using a cryptlib-based application.

Secure Sessions96
Secure Sessionscryptlib’s secure session interface provides a session-oriented equivalent to envelopeobjects that can be used to secure a communications link with a host or server orotherwise communicate with another system over a network. Secure sessions caninclude SSH, SSL, and TLS sessions, general request/response-style communicationssessions can include protocols such as the certificate management protocol (CMP),simple certificate enrolment protocol (SCEP), real-time certificate status protocol(RTCS), online certificate status protocol (OCSP), and timestamping protocol (TSP).As with envelopes, cryptlib takes care of all of the session details for you so that allyou need to do is provide basic communications information such as the name of theserver or host to connect to and any other information required for the session such asa password or certificate. cryptlib takes care of establishing the session andmanaging the details of the communications channel and its security parameters.
Secure sessions are very similar to envelopes, with the main difference being thatwhile an envelope is a pure data object into which you can push data and pop theprocessed form of the same data, a session is a communications object into which youpush data and then pop data that constitutes a response from a remove server orclient. This means that a session object can be viewed as a bottomless envelopethrough which you can push or pop as much data as the other side can accept orprovide.
As with an envelope, you use a session object by adding to it action objects andresources such as user names and passwords that control the interaction with theremote server or client and then push in data intended for the remote system and popout data coming from the remote system. For example to connect to a server usingSSH and obtain a directory of files using the ls command you would do thefollowing:
create the session;add the server name, user name, and password;activate the session;push data "ls";pop the result of the ls command;destroy the session
That’s all that’s necessary. Since you’ve added a user name and password, cryptlib knows that it should establish an encrypted session with the remote server and log onusing the given user name and password. From then on all data which is exchangedwith the server is encrypted and authenticated using the SSH protocol.
Creating an SSH server session is equally simple. In this case all you need is theserver key:
create the session;add the server key;activate the session;pop client data;push server response;destroy the session
When you activate the session, cryptlib will listen for an incoming connection from aclient and return once a secure connection has been negotiated, at which pointcommunication proceeds as before.
Creating/Destroying Session ObjectsSecure sessions are accessed as session objects that work in the same general manneras other cryptlib objects. You create a session using cryptCreateSession, specifyingthe user who is to own the session object or CRYPT_UNUSED for the default,normal user, and the type of session that you want to create. This creates a sessionobject ready for use in securing a communications link or otherwise communicatingwith a remote server or client. Once you’ve finished with the session, you use cryptDestroySession to end the session and destroy the session object:

Creating/Destroying Session Objects 97
CRYPT_SESSION cryptSession;
cryptCreateSession( &cryptSession, cryptUser, sessionType );
/* Communicate with the remote server or client */
cryptDestroySession( cryptSession );
The available session types are:
Session Description
CRYPT_SESSION_CMP Certificate management protocol (CMP).
CRYPT_SESSION_OCSP Online certificate status protocol (OCSP).
CRYPT_SESSION_RTCS Real-time certificate status protocol (RTCS).
CRYPT_SESSION_SCEP Simple certificate enrolment protocol (SCEP).
CRYPT_SESSION_SSH Secure shell (SSH).
CRYPT_SESSION_SSL Secure sockets layer (SSL and TLS).
CRYPT_SESSION_TSP Timestamping protocol (TSP).
This section will mainly cover the secure communications session types such as SSH,SSL, and TLS. CMP, SCEP, RTCS, and OCSP client sessions are certificatemanagement services that are covered in “Obtaining Certificates using CMP”, “Obtaining Certificates using SCEP”, “Certificate Status Checking using RTCS”, and “Certificate Revocation Checking using OCSP” on pages 157, 152, 152, and 158, andaTSP client session is an S/MIME service which is covered in “Timestamping” on page 84. RTCS, OCSP and TSP server sessions are standard session types and arealso covered here. CMP and SCEP server sessions are somewhat more complex andare covered in “Managing a CA using CMP or SCEP” on page 166. The generalprinciples covering sessions apply to all of these session types, so you shouldfamiliarise yourself with the operation of session objects and associated issues suchas network proxies and timeouts before trying to work with these other session types.
By default the secure communications session object which is created will have aninternal buffer whose size is appropriate for the type of security protocol which isbeing employed. The size of the buffer may affect the amount of extra processingthat cryptlib needs to perform, so that a large buffer can reduce the amount ofcopying to and from the buffer, but will consume more memory. If want to use abuffer for a secure communications session which is larger than the default size, youcan specify its size using the CRYPT_ATTRIBUTE_BUFFERSIZE attribute afteryou’ve created the session. For example if you wanted to set the buffer for an SSHsession to 64 kB you would use:
CRYPT_SESSION cryptSession;
cryptCreateSession( &cryptSession, cryptUser, CRYPT_SESSION_SSH );cryptSetAttribute( cryptSession, CRYPT_ATTRIBUTE_BUFFERSIZE, 65536L );
/* Communicate with the remote server or client */
cryptDestroySession( cryptSession );
Since cryptlib streams data through the session object, the internal buffer size doesn’t limit how much data you can push and pop (for example you could push 1 MB ofdata intoa session object with a 32 kB internal buffer), the only reason you’d want to change the size is to provide tighter control over memory usage by session objects.Unless you’re absolutely certain that the other side will only send very small data quantities, you shouldn’t shrink the buffer below the default size set by cryptlib since the protocols that cryptlib implements have certain fixed bounds on packet sizes thatneed to be met, making the buffer too small would make it impossible to process databeing sent by the other side.

Secure Sessions98
Note that the CRYPT_SESSION is passed to cryptCreateSession by reference as thefunction modifies it when it creates the session. In all other routines in cryptlib,CRYPT_SESSION is passed by value.
Client vs. Server Sessionscryptlib distinguishes between two types of session objects, client sessions and serversessions. Client sessions establish a connection to a remote server while serversessions wait for incoming communications from a remote client. To distinguishbetween client and server objects, you use a session type ending in _SERVER whenyou create the session object. For example to create an SSL/TLS server objectinstead of an SSL/TLS client you would specify its type on creation as CRYPT_-SESSION_SSL_SERVER instead of CRYPT_SESSION_SSL.
Because server sessions wait for an incoming connection request to arrive, you needto run each one in its own thread if you want to handle multiple connectionssimultaneously (cryptlib is fully thread-safe so there’s no problem with havingmultiple threads processing incoming connections). For example to handle up to 10connections at once you would do the following:
for i = 1 to 10 dostart_thread( server_thread );
where the server_thread is:
loopcreate the session;add required information to the session;activate the session;process client request(s);destroy the session;
More information on using cryptlib with multiple threads is given in “Multi-threadedcryptlib Operation” on page 49.
Binding to the default ports used by the various session protocols may require specialprivileges on some systems that don’t allow normal users to bind to ports below 1024. If you need to bind to a reserved port you should consult your operating system’s documentation for details on any restrictions that may apply, and may need to takespecial precautions if binding to one of these ports requires the use of elevatedsecurity privileges. Alternatively, you can bind to a non-default port outside thereserved range by specifying the port using the CRYPT_SESSINFO_SERVER_-PORT attribute. You can also specify which interface you want to bind to if thesystem has more than one by using the CRYPT_SESSINFO_SERVER_NAMEattribute. If you’re testing code before deploying it, it’s a good idea to specify that you want to bind to localhost to avoid listening on arbitrary externally-visibleinterfaces. For example to listen on local port 2000 you would use:
cryptSetAttributeString( cryptSession, CRYPT_SESSINFO_SERVER_NAME,"localhost", 9 );
cryptSetAttribute( cryptSession, CRYPT_SESSINFO_SERVER_PORT, 2000 );
Server Names/URLsServer names can be given using IP addresses (in dotted-decimal form for IPv4 orcolon-delimited form for IPv6), DNS names, or full URLs, with optional ports andother information provided in the usual manner. You can specify the server name orURL using the CRYPT_SESSINFO_SERVER_NAME attribute and the port (ifyou’re not using the default port fro the protocol and it isn’t already specified in theURL) using the CRYPT_SESSINFO_SERVER_PORT attribute. For example tospecify a connection to the server www.server.com on port 80 you would use:
cryptSetAttributeString( cryptSession, CRYPT_SESSINFO_SERVER_NAME,"www.server.com", 14 );
cryptSetAttribute( cryptSession, CRYPT_SESSINFO_SERVER_PORT, 80 );
Alternatively, you could specify both in the same name:
cryptSetAttributeString( cryptSession, CRYPT_SESSINFO_SERVER_NAME,"www.server.com:80", 17 );

Client vs. Server Sessions 99
Since this is a web server for which port 80 is the default port, you could also use themore common:
cryptSetAttributeString( cryptSession, CRYPT_SESSINFO_SERVER_NAME,"http://www.server.com", 20 );
SSL and TLS use a predefined port and are often used in conjunction with HTTP, soyou can specify these URLs with or without the http:// or https:// schemaprefixes. SSH similarly uses a predefined port and can be used with or without thessh://, scp://, or sftp:// schema prefixes. All of these protocols allow youto specify user information before the host name, separated with an ‘@’ sign. For example to connect as “user” to the SSH server ssh.server.com you could use:
cryptSetAttributeString( cryptSession, CRYPT_SESSINFO_SERVER_NAME,"ssh://[email protected]", 25 );
which saves having to explicitly specify the user name with the CRYPT_-SESSINFO_USERNAME attribute.
All of the PKI protocols use HTTP as their transport mechanism, so cryptlib willautomatically default to using HTTP transport whether you include the http://schema specifier or not. The CMP and TSP protocols also have alternative,deprecated transport mechanisms identified bycmp://…(for CMP) andtcp://…(for TSP) instead ofhttp://…. These are occasionally used by CAs or timestampservers, you may need to use these instead of the HTTP default.
Server Private KeysMost server sessions require the use of a private key in one form or another to decryptdata from the client or sign responses returned to the client. The server key istypically stored in a private key file, but for extra security may be held in a cryptodevice such as a crypto coprocessor or accelerator. In addition, for most sessiontypes the server key needs to be associated with a certificate or certificate chainleading up to a trusted root certificate, so that you can’t usejust a raw private key asthe server key. You can obtain the required certificate or certificate chain by creatingit yourself using cryptlib or by obtaining it from a commercial CA (it’s generally much cheaper and easier to create it yourself than to obtain one from a third-partyCA).
When you create or obtain the certificate for your server, you may need to specify theserver name in the common name field of the certificate (the intricacies of certificatenames and how to create your own certificates are explained in “Certificates” on page 193). For example if your server was www.companyname.com then the certificatefor the server would contain this as its common name component (you can actuallyput in anything you like as the common name component, but this will result in someweb browsers that use your server displaying a warning message when they connect).
SSH server sessions require a raw RSA (or optionally DSA for SSHv2) key, althoughyou can also use one with a certificate or certificate chain attached. All other sessiontypes require one with certificate(s) attached. You add the server key as theCRYPT_SESSINFO_PRIVATEKEY attribute, for example to use a private key heldin a crypto device as the server key you would use:
CRYPT_CONTEXT privateKey;
cryptGetPrivateKey( cryptDevice, &privateKey, CRYPT_KEYID_NAME,serverKeyName, NULL );
cryptSetAttribute( cryptSession, CRYPT_SESSINFO_PRIVATEKEY,privateKey );
cryptDestroyContext( privateKey );
Note that, as with envelopes, the private key object can be destroyed as soon as it’s added to the session, since the session maintains its own copy of the object internally.
If you’re worried about some obscure (and rather unlikely) attacks on private keys,you can enable the CRYPT_OPTION_MISC_SIDECHANNELPROTECTIONoption as explained in “Working with Configuration Options” on page 263. Note thatenabling this option will slow down all private-key operations by up to 10%.

Secure Sessions100
Establishing a SessionMuch of the secure session process is identical to the enveloping process, so youshould familiarise yourself with the general concept of enveloping as described in“Data Enveloping” on page 51 if you haven’t already done so. The secure session establishment process involves adding the information which is required to connect tothe remote server as a client or to establish a server, and then activating the session toestablish the secure session or wait for incoming connections. This process ofactivating the session has no real equivalent for envelopes because envelopes areactivated automatically the first time data is pushed into them.
Client sessions can also be activated automatically, however the initial handshakeprocess which is required to activate a session with a remote server is usually lengthyand complex so it’s generally better to explicitly activate the session under controlled conditions and have the ability to react to errors in an appropriate manner rather thanto have the session auto-activate itself the first time that data is pushed. Serversessions that wait for an incoming connection must be explicitly activated, whichcauses them to wait for a client connection.
You can activate a session by setting its CRYPT_SESSINFO_ACTIVE attribute totrue (any nonzero value). You can also determine the activation state of a session byreading this attribute, if it’s set to true then the session is active, otherwise it’s not active.
Persistent ConnectionsSome cryptlib session types such as CMP, SCEP, RTCS, OCSP, and TSP providerequest/response protocols rather than continuous secure sessions like SSH andSSL/TLS. In many cases it’s possible to perform more than one request/responsetransaction per session, avoiding the overhead of creating a new connection for eachtransaction. To handle persistent connections for client sessions, cryptlib uses theCRYPT_SESSINFO_CONNECTIONACTIVE attribute to indicate that theconnection is still active and is ready to accept further transactions. Transactionsafter the initial one are handled in exactly the same way as the first one, except thatthere’s no need to create a new session object for them:
CRYPT_SESSION cryptSession;int connectionActive;
/* Create the session and add the server name */cryptCreateSession( &cryptSession, cryptUser, CRYPT_SESSION_xxx );cryptSetAttributeString( cryptSession, CRYPT_SESSINFO_SERVER_NAME,
serverName, serverNameLength );
/* Perform the first transaction */cryptSetAttribute( cryptSession, CRYPT_SESSINFO_REQUEST,
cryptRequest1 );cryptSetAttribute( cryptSession, CRYPT_SESSINFO_ACTIVE, 1 );cryptGetAttribute( cryptSession, CRYPT_SESSINFO_RESPONSE,
&cryptResponse1 );
/* Check whether the session connection is still open */cryptGetAttribute( cryptSession, CRYPT_SESSINFO_CONNECTIONACTIVE,
&connectionActive );if( !connectionActive )
/* The other side has closed the connection, exit */;
/* Perform the second transaction */cryptSetAttribute( cryptSession, CRYPT_SESSINFO_REQUEST,
cryptRequest2 );cryptSetAttribute( cryptSession, CRYPT_SESSINFO_ACTIVE, 1 );cryptGetAttribute( cryptSession, CRYPT_SESSINFO_RESPONSE,
&cryptResponse2 );
Note the check of the CRYPT_SESSINFO_CONNECTIONACTIVE attribute. Sincenot all servers support persistent connections or may time out and close theconnection after a period of inactivity, it’s a good idea to check that the connection is still open before trying to submit further transactions. Note also that there’s no need to explicitly delete the request from the first activation of the session, cryptlib

SSH Sessions 101
automatically does this for you once the session activation has completed. This doesmean, however, that if you want to repeat the session transaction using the same dataas before (which would be somewhat unusual), you need to re-add the request to thesession, since the previous activation will have cleared it in preparation for the nextactivation.
The process on the server side is similar, after a successfully-completed clienttransaction you can either destroy the session or, if you want to support persistentconnections, recycle the connection as for the client-side example above.
SSH SessionsSSH is a secure data transfer protocol that provides confidentiality, integrity-protection, protection against replay attacks, and a variety of other services. The SSHserver is authenticated via the server’s public key and the client is authenticated either via a user name and password or (less frequently) a public key-based digitalsignature. cryptlib supports both versions 1 and 2 of the SSH protocol, although theobsolete version 1 is disabled by default.
The SSH protocol exhibits a design flaw (informally known as the SSH performancehandbrake) that can lead to poor performance when transferring data, which isparticularly noticeable with applications such as SFTP. Although cryptlib avoids thehandbrake, many other implementations don’t, restricting data transfer rates to as little as one tenth of the network link speed (the actual slowdown depends on the linkcharacteristics and varies from one situation to another). In order to obtain themaximum performance from SSH, you need to either use cryptlib at both ends of thelink (that is, both the client and server must be ones that avoid the performancehandbrake), or use another protocol like SSL that doesn’t have the handbrake.
SSH Client SessionsEstablishing a session with an SSH server requires adding the server name or IPaddress, an optional port number if it isn’t using the standard SSH port, and the user name and password which is needed to log on to the server via the CRYPT_-SESSINFO_USERNAME and CRYPT_SESSINFO_PASSWORD attributes(occasionally the server will use public-key based authentication instead of apassword, which is covered later). Once you’ve added this information, you can activate the session and establish the connection:
CRYPT_SESSION cryptSession;
/* Create the session */cryptCreateSession( &cryptSession, cryptUser, CRYPT_SESSION_SSH );
/* Add the server name, user name, and password */cryptSetAttributeString( cryptSession, CRYPT_SESSINFO_SERVER_NAME,
serverName, serverNameLength );cryptSetAttributeString( cryptSession, CRYPT_SESSINFO_USERNAME,
username, usernameLength );cryptSetAttributeString( cryptSession, CRYPT_SESSINFO_PASSWORD,
password, passwordLength );
/* Activate the session */cryptSetAttribute( cryptSession, CRYPT_SESSINFO_ACTIVE, 1 );
The equivalent operation in Java or C# is:
/* Create the session */int cryptSession = crypt.CreateSession( cryptUser,
crypt.SESSION_SSH );
/* Add the server name, user name, and password */crypt.SetAttributeString( cryptSession, crypt.SESSINFO_SERVER_NAME,
serverName );crypt.SetAttributeString( cryptSession, crypt.SESSINFO_USERNAME,
username );crypt.SetAttributeString( cryptSession, crypt.SESSINFO_PASSWORD,
password );

Secure Sessions102
/* Activate the session */crypt.SetAttribute( cryptSession, crypt.SESSINFO_ACTIVE, 1 );
In Visual Basic this is:
Dim cryptSession As Long
' Create the sessioncryptCreateSession cryptSession, cryptUser, CRYPT_SESSION_SSH
' Add the server name, user name, and passwordcryptSetAttributeString cryptSession, CRYPT_SESSINFO_SERVER_NAME, _
serverName, Len( serverName )cryptSetAttributeString cryptSession, CRYPT_SESSINFO_USERNAME, _
userName, Len( userName )cryptSetAttributeString cryptSession, CRYPT_SESSINFO_PASSWORD, _
password, Len( password )
' Activate the sessioncryptSetAttribute cryptSession, CRYPT_SESSINFO_ACTIVE, 1
When it connects, cryptlib will automatically negotiate the highest protocol versionsupported by the server and use that to secure the session. You can determine whichversion is in use once the session has been established by reading the CRYPT_-SESSINFO_VERSION attribute, a value of 1 indicates SSH version 1 and a value of2 indicates SSH version 2. You can also force the use of a particular version(typically you’d want to ensure that SSHv2 is used) by setting the protocol version attribute before you activate the connection.
Activating a session results in cryptlib performing a lot of work in the background.For example when activating the SSH session shown above cryptlib will connect tothe remote host, read the host and server keys used for authentication and encryption,generate a secret data value to exchange with the host using its host and server keys,create the appropriate encryption contexts and load keys based on the secret datavalue into them, negotiate general session parameters, and log on over the encryptedlink using the given user name and password.
If the server that you’re connecting to requires public-key authentication instead ofpassword authentication, you need to provide a private key via the CRYPT_-SESSINFO_PRIVATEKEY attribute to authenticate yourself to the server before youactivate the session. The private key could be a native cryptlib key, but it could alsobe a key from a crypto device such as a smart card or Fortezza card:
CRYPT_SESSION cryptSession;
/* Create the session */cryptCreateSession( &cryptSession, cryptUser, CRYPT_SESSION_SSH );
/* Add the server name, user name, and client key and activate thesession */
cryptSetAttributeString( cryptSession, CRYPT_SESSINFO_SERVER_NAME,serverName, serverNameLength );
cryptSetAttributeString( cryptSession, CRYPT_SESSINFO_USERNAME,username, usernameLength );
cryptSetAttribute( cryptSession, CRYPT_SESSINFO_PRIVATEKEY,cryptPrivateKey );
cryptSetAttribute( cryptSession, CRYPT_SESSINFO_ACTIVE, 1 );
When cryptlib connects to the server, it will use the provided private key as part ofthe SSH handshake to authenticate the client to the server, with the private key takingthe place of the more usual password. If you’re not sure which of the two options you need, you can provide both and cryptlib will use the appropriate one when itconnects to the server.
SSH Server SessionsEstablishing an SSH server session requires specifying that the session is a serversession and adding the SSH server key. Once you’ve added this information you can activate the session and wait for incoming connections:

SSH Sessions 103
CRYPT_SESSION cryptSession;int bytesCopied;
/* Create the session */cryptCreateSession( &cryptSession, cryptUser,
CRYPT_SESSION_SSH_SERVER );
/* Add the server key and activate the session */cryptSetAttribute( cryptSession, CRYPT_SESSINFO_PRIVATEKEY,
privateKey );cryptSetAttribute( cryptSession, CRYPT_SESSINFO_ACTIVE, 1 );
/* Process any remaining control messages from the client */cryptPopData( cryptSession, buffer, bufferSize, &bytesCopied );
The Visual Basic form is:
Dim cryptSession As LongDim bytesCopied as Long
' Create the sessioncryptCreateSession cryptSession, cryptUser, _
CRYPT_SESSION_SSH_SERVER
' Add the server key and activate the sessioncryptSetAttribute cryptSession, CRYPT_SESSINFO_PRIVATEKEY, privateKeycryptSetAttribute cryptSession, CRYPT_SESSINFO_ACTIVE, 1
' Process any remaining control messages from the clientcryptPopData cryptSession, buffer, bufferSize, bytesCopied
Note the use of the data pop call after the activation has been completed. SSH clientsoften send additional session control information such as channel requests or portforwarding information after the session has been activated. Telling cryptlib to tryand read any additional messages that may have arrived from the client allows it toprocess these requests and respond to them as appropriate. In particular, your servershouldn’t send data to the client immediately after the session has been established without first performing a data pop to respond to client requests, since the client mayinterpret the data that you send as an (incorrect) response to its request.
cryptlib supports both SSH version 1 and 2 (although the obsolete version 1 isdisabled by default) and by default will function as a version 2 server. If you want touse the (obsolete) SSH version 1 protocol, you need to enable SSHv1 in the build andthen set the CRYPT_SESSINFO_VERSION attribute to 1 to have the server respondas a version 1 rather than version 2 server.
Once you activate the session, cryptlib will block until an incoming client connectionarrives, at which point it will negotiate a secure connection with the client. When theclient connects, cryptlib will ask for a user name and password before it allows theconnection to proceed. The handling of the user authentication process is controlledby the CRYPT_SESSINFO_AUTHRESPONSE attribute, by default cryptlib willreturn a CRYPT_ENVELOPE_RESOURCE status when it receives the user nameand password, allowing you to verify the information before continuing. If it’s valid, you should set the CRYPT_SESSINFO_AUTHRESPONSE attribute to true andresume the session activation by setting the CRYPT_SESSINFO_ACTIVE responseto true again. If not, you can either set the CRYPT_SESSINFO_AUTHRESPONSEattribute to false and resume the session activation (which will give the user anotherchance to authenticate themselves), or close the session:
int status;
status = cryptSetAttribute( cryptSession, CRYPT_SESSINFO_ACTIVE, 1 );if( status == CRYPT_ENVELOPE_RESOURCE )
{char username[ CRYPT_MAX_TEXTSIZE + 1 ];char password[ CRYPT_MAX_TEXTSIZE + 1 ];int usernameLength, passwordLength

Secure Sessions104
/* Get the user name and password */cryptGetAttributeString( cryptSession, CRYPT_SESSINFO_USERNAME,
username, &usernameLength );cryptGetAttributeString( cryptSession, CRYPT_SESSINFO_PASSWORD,
password, &passwordLength );username[ usernameLength ] = '\0';password[ passwordLength ] = '\0';
/* Check the user details and allow or deny the response asappropriate */
if( checkUser( username, password ) )cryptSetAttribute( cryptSession, CRYPT_SESSINFO_AUTHRESPONSE,
1 );else
cryptSetAttribute( cryptSession, CRYPT_SESSINFO_AUTHRESPONSE,0 );
/* Resume the session activation, sending the authenticationresponse to the client and completing the handshake */
cryptSetAttribute( cryptSession, CRYPT_SESSINFO_ACTIVE, 1 );}
To give the user the traditional three attempts at getting their name and passwordright, you would run the session activation code in a loop:
int status;
for( i = 0; i < 3; i++ ){status = cryptSetAttribute( cryptSession, CRYPT_SESSINFO_ACTIVE,
1 );if( cryptStatusOK( status ) )
break; /* User authenticated, exit */if( status == CRYPT_ENVELOPE_RESOURCE )
/* Perform password check as before */;else
break; /* Some other type of error, exit */}
Alternatively, you can set the CRYPT_SESSINFO_AUTHRESPONSE attribute totrue before you activate the session and cryptlib will automatically allow the accessand complete the activation, so you’ll never need to handle the CRYPT_-ENVELOPE_RESOURCE response. In this case you need to check the user detailsafter the session has been activated and shut it down if the authorisation check fails.
SSH ChannelsBy default, cryptlib provides the most frequently-used SSH service, a directencrypted connection from client to server. When you establish the SSH connection,cryptlib creates an SSH communications channel that’s used to exchange data. This process is entirely transparent, and you don’t have to worry about it if you don’t want to— just treat the SSH session as a secure data pipe from one system to another.
There are however cases where you may need to explicitly deal with SSH channels,and that’s when you’re using special-purpose SSH facilities such as port forwarding,subsystems, or even user-defined channel types. In this case you need to explicitlycreate the special-purpose channel and add information describing its use before thechannel can be activated. This process consists of three steps, creating the channelusing the CRYPT_SESSINFO_SSH_CHANNEL attribute, specifying its type usingthe CRYPT_SESSINFO_SSH_CHANNEL_TYPE attribute, and finally specifyingany optional channel arguments using the CRYPT_SESSINFO_SSH_CHANNEL_-ARG1 and CRYPT_SESSINFO_SSH_CHANNEL_ARG2 attributes. For example tocreate a channel of the default type (which is normally done automatically bycryptlib, and that has no optional arguments) you would use:
cryptSetAttribute( cryptSession, CRYPT_SESSINFO_SSH_CHANNEL,CRYPT_UNUSED );
cryptSetAttributeString( cryptSession,CRYPT_SESSINFO_SSH_CHANNEL_TYPE, "session", 7 );
Setting the CRYPT_SESSINFO_SSH_CHANNEL attribute to CRYPT_UNUSEDtells cryptlib to create a new channel (rather than trying to select an existing one,

SSH Sessions 105
which is what the attribute is normally used for), and the CRYPT_SESSINFO_SSH_-CHANNEL_TYPE attribute specifies its type. Once you’ve created a new channel in this manner you can read back the CRYPT_SESSINFO_SSH_CHANNEL attribute toget the channel ID that was assigned for the newly-created channel:
int channelID;
cryptGetAttribute( cryptSession, CRYPT_SESSINFO_SSH_CHANNEL,&channelID );
This value is used to uniquely identify a particular channel, but it’s only needed in the presence of multiple channels, which are described in “SSH Multiple Channels” on page 107.
On the server side, reading the details of a channel that’s been opened by the client works similarly:
char channelType[ CRYPT_MAX_TEXTSIZE + 1 ];char channelArg1[ CRYPT_MAX_TEXTSIZE + 1 ];int channelID, channelTypeLength, channelArg1Length, status;
/* Get the channel ID and type */cryptGetAttribute( cryptSession, CRYPT_SESSINFO_SSH_CHANNEL,
&channelID );cryptGetAttributeString( cryptSession,
CRYPT_SESSINFO_SSH_CHANNEL_TYPE, channelType, &channelTypeLength );channelType[ channelTypeLength ] = '\0';
/* Get the optional channel argument */status = cryptGetAttributeString( cryptSession,
CRYPT_SESSINFO_SSH_CHANNEL_ARG1, channelArg1, &channelArg1Length );if( cryptStatusOK( status ) )
channelArg1[ channelArg1Length ] = '\0';
If you don’t specify otherwise, cryptlib will open a channel of the default type when it connects. If you want to instead use a special-purpose SSH facility, you shouldprovide the information necessary for creating it before you activate the connection.You can also open further channels after the connection has been completed, theprocess is described in “SSH Multiple Channels” on page 107. If you try to specifythe use of more than one channel before the session has been activated, cryptlib willreturn CRYPT_ERROR_INITED when you try to create any channel after the firstone, since it’s only possible to request further channels once the initial channel has been successfully established.
SSH SubsystemsAlongside the default encrypted link service, SSH provides additional services suchas SFTP, an application-level file transfer protocol tunnelled over the SSH link via asubsystem channel. If you plan to use SFTP, note the comment about the SSHperformance handbrake at the start of this section. Although cryptlib avoids thisproblem, non-cryptlib implementations frequently don’t, so that the performance of SFTP can be quite poor (as much as ten times slower than the network link speed) insome cases.
You can specify the use of a subsystem by setting the channel type to “subsystem” and the first channel argument to the subsystem name, in this case “sftp”:
CRYPT_SESSION cryptSession;
/* Create the session */cryptCreateSession( &cryptSession, cryptUser, CRYPT_SESSION_SSH );
/* Add the server name, user name, and password */cryptSetAttributeString( cryptSession, CRYPT_SESSINFO_SERVER_NAME,
serverName, serverNameLength );cryptSetAttributeString( cryptSession, CRYPT_SESSINFO_USERNAME,
username, usernameLength );cryptSetAttributeString( cryptSession, CRYPT_SESSINFO_PASSWORD,
password, passwordLength );

Secure Sessions106
/* Request the creation of the subsystem channel */cryptSetAttribute( cryptSession, CRYPT_SESSINFO_SSH_CHANNEL,
CRYPT_UNUSED );cryptSetAttributeString( cryptSession,
CRYPT_SESSINFO_SSH_CHANNEL_TYPE, "subsystem", 9 );cryptSetAttributeString( cryptSession,
CRYPT_SESSINFO_SSH_CHANNEL_ARG1, "sftp", 4 );
/* Activate the session */cryptSetAttribute( cryptSession, CRYPT_SESSINFO_ACTIVE, 1 );
Note that SFTP is not a part of the SSH protocol (it can also be run over SSL orIPsec, or directly over raw sockets), but simply an RPC mechanism for the Posixfilesystem API. The handling of this RPC mechanism, and support for features suchas translation of filenames, types, attributes, and operations to and from the Posixinterface, is an application-specific issue outside the scope of cryptlib.
SSH Port ForwardingAlongside standard SSH connections and SSH subsystems, it’s also possible to perform port-forwarding using SSH channels. Port forwarding allows you to tunnelan arbitrary network connection over SSH to avoid having the data being sent overthe network in the clear. For example you could use this to tunnel mail (SMTP tosend, POP3 or IMAP to receive) over SSH to and from a remote host. SSH providestwo types of port forwarding, forwarding from the client to the server, identified by achannel type of “direct-tcpip”, and forwarding from the server to the client, identified by a channel type of “tcpip-forward”. The only one that’s normally used is client-to-server forwarding.
For client-to-server forwarding with a channel type of “direct-tcpip”, the first channel argument is the remote host and port that you want to forward to. For example if youwanted to tunnel SMTP mail traffic to mailserver.com with SMTP being on port 25(so the forwarding string would be mailserver.com:25), you would use:
CRYPT_SESSION cryptSession;
/* Create the session */cryptCreateSession( &cryptSession, cryptUser, CRYPT_SESSION_SSH );
/* Add the server name, user name, and password */cryptSetAttributeString( cryptSession, CRYPT_SESSINFO_SERVER_NAME,
serverName, serverNameLength );cryptSetAttributeString( cryptSession, CRYPT_SESSINFO_USERNAME,
username, usernameLength );cryptSetAttributeString( cryptSession, CRYPT_SESSINFO_PASSWORD,
password, passwordLength );
/* Request the creation of the port-forwarding channel */cryptSetAttribute( cryptSession, CRYPT_SESSINFO_SSH_CHANNEL,
CRYPT_UNUSED );cryptSetAttributeString( cryptSession,
CRYPT_SESSINFO_SSH_CHANNEL_TYPE, "direct-tcpip", 12 );cryptSetAttributeString( cryptSession,
CRYPT_SESSINFO_SSH_CHANNEL_ARG1, "mailserver.com:25", 17 );
/* Activate the session */cryptSetAttribute( cryptSession, CRYPT_SESSINFO_ACTIVE, 1 );
When cryptlib activates the connection, it will indicate to the remote SSH server thatit should forward data sent over the SSH link to port 25 on mailserver.com. Youcan now either push data directly into the session to tunnel it to the remote server, orcreate a socket to listen on port 25 on the local machine and push data received on itinto the session, creating a local to remote system port forwarding over the SSHchannel.
Before you forward the data on the server as requested by the client, you shouldcheck to make sure that the requested forwarding is in fact permitted. For example amalicious user could use port forwarding to attack a machine inside your firewall byforwarding connections through the firewall over an SSH tunnel. Because of this,cryptlib will never open a forwarded connection by itself, but requires that you

SSH Sessions 107
explicitly forward the data. In other words it will indicate that port forwarding hasbeen requested, but will never of its own volition open and/or forward arbitrary portsjust because a client has requested it.
If you don’t want to allow the port forwarding, all you need to do is ignore the port-forwarding channel. cryptlib’s default action is to not allow forwarded connections, making it impossible for a client to remotely access internal machines or ports unlessyou explicitly allow it.
SSH Multiple ChannelsAlthough SSH is usually used to provide a straightforward secure link from onesystem to another, it’s also possible to use it to multiplex multiple virtual sessionsacross a single logical session. This is done by tunnelling multiple data channelsacross the SSH link.
SSH implements this using in-band signalling, which means that control informationand data share the same link. With a single data channel (the standard case) this isn’t a problem, but with multiple data channels control information for one channel can beimpeded by data being sent or received on another channel. For example if you needto send or receive control information (channel close/channel open/statusinformation) and there’s a data transfer in progress on another channel, the control information can’t be sent or received until the data transfer has been completed. This is why virtually all networking protocols use out-of-band signalling, with a separatemechanism for control signalling that can’t be impeded by data transfers on the link.
Because of the in-band signalling problem, there are a number of special-caseconsiderations that you need to take into account when using multiple SSH datachannels. The primary one is: Don’t do it. Unless you really have a strong need to run with multiple channels, just stick to a single channel and everything will be OK.
If you really need to use multiple channels, your code will need to take some extrasteps to handle the problems caused by SSH’s in-band signalling. The standardapproach to this problem is to run the SSH implementation as a standalone service ordaemon, with a full-time thread or task dedicated to nothing but handling any controlmessages that may arrive. These standalone applications are capable of opening portsto local and remote systems, logging on users, initiating data transfers, and so on.Since it’s probably not a good idea for cryptlib to open arbitrary ports or transfer fileswithout any additional checking, your application needs to explicitly manage thesecontrol messages. This requires doing the following:
Try and open all channels and send all control messages right after the connect,before any data transfers are initiated. This means that the control signallingwon’t be stalled behind data signalling.
Avoid using the session in non-blocking mode or with a very small timeout.Using a very short timeout increases the chances of some data remainingunwritten or unread, which will cause control information to become stalledbehind it.
Periodically try and pop data to handle any new control messages that may havearrived on other channels. In standalone SSH implementations that run asservices or daemons, this is handled by having a full-time thread or taskdedicated to this function. If you want to take this approach in your application,you can use a user-supplied socket that you can wait on in your application asdescribed in “Network Issues” on page 118.
Trying to perform channel control actions can result in a CRYPT_ERROR_-INCOMPLETE status if there’s data still waiting to be read or written. This occurs because it’s not possible to send or receive control information for anotherchannel until the data for the current channel has been cleared. Since new datacan arrive after you’ve cleared the existing data but before you can send the control message, you may need to run this portion of your code in a loop toensure that the channel is clear so that you can send the control information.
Secure Sessions108
Note that both the send and receive sides of the channel have to be cleared toallow the control message to be sent and a response received.
If you’ve decided that you really do need to use multiple SSH channels, you canmanage them using the CRYPT_SESSINFO_SSH_CHANNEL attribute, whichcontains an integer value that uniquely identifies each channel. You can select thechannel to send on by setting this attribute before you push data, and determine thechannel that data is being received on by reading it before you pop data:
int receiveChannelID, bytesCopied;
/* Send data over a given channel */cryptSetAttribute( cryptSession, CRYPT_SESSINFO_SSH_CHANNEL,
sendChannelID );cryptPushData( cryptSession, data, dataSize, &bytesCopied );
/* Receive data sent over a channel */cryptGetAttribute( cryptSession, CRYPT_SESSINFO_SSH_CHANNEL,
&receiveChannelID );cryptPopData( cryptSession, buffer, bufferSize, &bytesCopied );
Read andwrite channels are distinct, so setting the write channel doesn’t change the read channel, which is specified in incoming data messages that arrive.
If you’re opening additional channels after the session handshake has completed, you need to tell cryptlib when to activate the newly-created channel. To do this, you setits CRYPT_SESSINFO_SSH_CHANNEL_ACTIVE attribute to true, which activatesthe channel by sending the details to the remote system. Using the previous exampleof a port-forwarding channel, if you wanted to open this additional channel after thesession had already been established you would use:
/* Request the creation of the port-forwarding channel */cryptSetAttribute( cryptSession, CRYPT_SESSINFO_SSH_CHANNEL,
CRYPT_UNUSED );cryptSetAttributeString( cryptSession,
CRYPT_SESSINFO_SSH_CHANNEL_TYPE, "direct-tcpip", 12 );cryptSetAttributeString( cryptSession,
CRYPT_SESSINFO_SSH_CHANNEL_ARG1, "mailserver.com:25", 17 );
/* Activate the newly-created channel */cryptSetAttribute( cryptSession, CRYPT_SESSINFO_SSH_CHANNEL_ACTIVE,
1 );
If you want to close one of the additional channels, you can select it in the usualmanner and then deactivate it by setting its CRYPT_SESSINFO_SSH_CHANNEL_-ACTIVE attribute to false:
cryptSetAttribute( cryptSession, CRYPT_SESSINFO_SSH_CHANNEL,channelID );
cryptSetAttribute( cryptSession, CRYPT_SESSINFO_SSH_CHANNEL_ACTIVE,0 );
If you try to deactivate the last remaining channel, which corresponds to the sessionitself, cryptlib will return a CRYPT_ERROR_PERMISSION status. To close thefinal channel, you need to close the overall session.
SSL/TLS SessionsSSL/TLS is a secure data transfer protocol that provides confidentiality, integrity-protection, protection against replay attacks, and a variety of other services. The SSLserver is authenticated via a certificate, and the client isn’t authenticated (in rare circumstances client certificates may be used, but these are usually avoided due to thehigh degree of difficulty involved in working with them). Alternatively, the clientand server may be mutually authenticated via a secret-key mechanism such as a username and password, which avoids the need for certificates altogether. cryptlibsupports SSL version 3, TLS version 1.0 (a.k.a SSL version 3.1), and TLS version 1.1(a.k.a SSL version 3.2).
SSL and TLS are actually variations of the same protocol, the protocol known by thegeneric term SSL is SSL v3.0 and TLS is SSL v3.1. A newer revision of TLS, TLSversion 1.1, is SSL v3.2. cryptlib will automatically negotiate the highest protocol

SSL/TLS Sessions 109
version supported by the other side and use that to secure the session. You candetermine which version is in use once the session has been established by readingthe CRYPT_SESSINFO_VERSION attribute, a value of 0 indicates version 3.0 orSSL, a value of 1 indicates version 3.1 or TLS, and a value of 2 indicates version 3.2or TLS version 1.1. You can also force the use of a particular version by setting theprotocol version attribute before you activate the connection, for example you canhave cryptlib function as an SSL-only server by setting the CRYPT_SESSINFO_-VERSION to 0 to indicate the use of SSL version 3.0 rather than TLS version 3.1. A(fortunately) small number of buggy servers will fail the SSL handshake if theprotocol version is advertised as TLS, if you receive a handshake failure alert whenyou try to activate the session (as indicated by the CRYPT_ATTRIBUTE_INT_-ERRORMESSAGE attribute) you can try forcing the use of SSL to see if the servercan handle a connect using only the older protocol version.
Because TLS v1.1 is relatively new and not widely supported yet (meaning that someclients and servers will break if they encounter a server or client that advertises thisprotocol version), cryptlib by default advertises TLS v1.0 as its highest protocol level.If you want to explicitly advertise TLS v1.1, you can set the CRYPT_SESSINFO_-VERSION attribute to 2 before you activate the session to indicate the use of SSLv3.2 or TLS v1.1.
SSL/TLS Client SessionsEstablishing a session with an SSL/TLS server requires adding the server name or IPaddress and an optional port number if it isn’t using the standard SSL/TLS port. Once you’ve added this information, you can activate the session and establish the connection:
CRYPT_SESSION cryptSession;
/* Create the session */cryptCreateSession( &cryptSession, cryptUser, CRYPT_SESSION_SSL );
/* Add the server name and activate the session */cryptSetAttributeString( cryptSession, CRYPT_SESSINFO_SERVER_NAME,
serverName, serverNameLength );cryptSetAttribute( cryptSession, CRYPT_SESSINFO_ACTIVE, 1 );
The same operation in Java or C# is:
/* Create the session */int cryptSession = crypt.CreateSession( cryptUser,
crypt.SESSION_SSL );
/* Add the server name and activate the session */crypt.SetAttributeString( cryptSession, crypt.SESSINFO_SERVER_NAME,
serverName );crypt.SetAttribute( cryptSession, crypt.SESSINFO_ACTIVE, 1 );
The Visual Basic form of the code is:
Dim cryptSession As Long
' Create the sessioncryptCreateSession cryptSession, cryptUser, CRYPT_SESSION_SSL
' Add the server name and activate the sessioncryptSetAttributeString cryptSession, CRYPT_SESSIONFO_SERVER_NAME, _
serverName, Len( serverName )cryptSetAttribute cryptSession, CRYPT_SESSINFO_ACTIVE, 1
Activating a session results in cryptlib performing a lot of work in the background.For example when activating the SSL/TLS session shown above cryptlib will connectto the remote host, read the server’s certificate, generate a secret data value to exchange with the server using the key contained in the certificate, create theappropriate encryption contexts and load keys based on the secret data value intothem, negotiate general session parameters, and complete negotiating the encryptedlink with the server.
Secure Sessions110
SSL/TLS with Shared KeysNote: The use of SSL/TLS sessions using shared keys is based on a draft standardfrom the TLS working group that may be subject to further changes before the finalstandard is adopted. You should avoid deploying solutions based on this mechanismuntil the standard has been finalised by the TLS working group.
If the server you’re connecting to uses shared keys (for example a user name and password), you need to provide this information via the CRYPT_SESSINFO_-USERNAME and CRYPT_SESSINFO_PASSWORD attributes to authenticateyourself to the server before you activate the connection:
CRYPT_SESSION cryptSession;
/* Create the session */cryptCreateSession( &cryptSession, cryptUser, CRYPT_SESSION_SSL );
/* Add the server name, user name, and password */cryptSetAttributeString( cryptSession, CRYPT_SESSINFO_SERVER_NAME,
serverName, serverNameLength );cryptSetAttributeString( cryptSession, CRYPT_SESSINFO_USERNAME,
username, usernameLength );cryptSetAttributeString( cryptSession, CRYPT_SESSINFO_PASSWORD,
password, passwordLength );
/* Activate the session */cryptSetAttribute( cryptSession, CRYPT_SESSINFO_ACTIVE, 1 );
The equivalent operation in Java or C# is:
/* Create the session */int cryptSession = crypt.CreateSession( cryptUser,
crypt.SESSION_SSL );
/* Add the server name, user name, and password */crypt.SetAttributeString( cryptSession, crypt.SESSINFO_SERVER_NAME,
serverName );crypt.SetAttributeString( cryptSession, crypt.SESSINFO_USERNAME,
username );crypt.SetAttributeString( cryptSession, crypt.SESSINFO_PASSWORD,
password );
/* Activate the session */crypt.SetAttribute( cryptSession, crypt.SESSINFO_ACTIVE, 1 );
In Visual Basic this is:
Dim cryptSession As Long
' Create the sessioncryptCreateSession cryptSession, cryptUser, CRYPT_SESSION_SSL
' Add the server name, user name, and passwordcryptSetAttributeString cryptSession, CRYPT_SESSINFO_SERVER_NAME, _
serverName, Len( serverName )cryptSetAttributeString cryptSession, CRYPT_SESSINFO_USERNAME, _
userName, Len( userName )cryptSetAttributeString cryptSession, CRYPT_SESSINFO_PASSWORD, _
password, Len( password )
' Activate the sessioncryptSetAttribute cryptSession, CRYPT_SESSINFO_ACTIVE, 1
Authenticating yourself using shared keys avoids the need for both server and clientcertificates, providing mutual authentication for both client and server (conventionalSSL only authenticates the server using a server certificate). This type of keymanagement also avoids the high CPU overhead of public-key encryption, making itideal for use in resource-constrained environments or ones where you’re charged for CPU usage.
SSL/TLS with Client CertificatesIf the server you’re connecting to requires a client certificate, you need to provide a private key with an attached signing certificate via the CRYPT_SESSINFO_-

SSL/TLS Sessions 111
PRIVATEKEY attribute to authenticate yourself to the server before you activate thesession. The private key could be a native cryptlib key, but it could also be a keyfrom a crypto device such as a smart card or Fortezza card. They both work in thesame way for client authentication:
CRYPT_SESSION cryptSession;
/* Create the session */cryptCreateSession( &cryptSession, cryptUser, CRYPT_SESSION_SSL );
/* Add the server name and client key/certificate and activate thesession */
cryptSetAttributeString( cryptSession, CRYPT_SESSINFO_SERVER_NAME,serverName, serverNameLength );
cryptSetAttribute( cryptSession, CRYPT_SESSINFO_PRIVATEKEY,cryptPrivateKey );
cryptSetAttribute( cryptSession, CRYPT_SESSINFO_ACTIVE, 1 );
When cryptlib connects to the server, it will use the provided private key andcertificate as part of the SSL/TLS handshake to authenticate the client to the server.If the server doesn’t require the use of a client certificate, cryptlib won’t do anything with the private key, so it’s OK to add this even if you’re not sure whether it’ll be needed or not.
Note that client certificates are very rarely used in practice because of the high levelof difficulty involved in working with them. If you require client authentication, a farbetter solution is to either use a traditional authentication mechanism such as sendingan authenticator like a password over the SSL connection, or to use SSL with sharedkeys, which provides mutual authentication of both client and server.
SSL/TLS Server SessionsEstablishing an SSL/TLS server session requires adding the server key/certificate,activating the session, and waiting for incoming connections:
CRYPT_SESSION cryptSession;
/* Create the session */cryptCreateSession( &cryptSession, cryptUser,
CRYPT_SESSION_SSL_SERVER );
/* Add the server key/certificate and activate the session */cryptSetAttribute( cryptSession, CRYPT_SESSINFO_PRIVATEKEY,
privateKey );cryptSetAttribute( cryptSession, CRYPT_SESSINFO_ACTIVE, 1 );
The same procedure in Visual Basic is:
Dim cryptSession As Long
' Create the sessioncryptCreateSession cryptSession, cryptUser, _
CRYPT_SESSION_SSL_SERVER
' Add the server key/certificate and activate the sessioncryptSetAttribute cryptSession, CRYPT_SESSIONFO_PRIVATEKEY, privateKeycryptSetAttribute cryptSession, CRYPT_SESSINFO_ACTIVE, 1
Once you activate the session, cryptlib will block until an incoming client connectionarrives, at which point it will negotiate a secure connection with the client.
SSL/TLS Servers with Shared KeysNote: The use of SSL/TLS sessions using shared keys is based on a draft standardfrom the TLS working group that may be subject to further changes before the finalstandard is adopted. You should avoid deploying solutions based on this mechanismuntil the standard has been finalised by the TLS working group.
If you’re using shared keys (for example a user name and password) to provide security, you need to provide this information via the CRYPT_SESSINFO_-USERNAME and CRYPT_SESSINFO_PASSWORD attributes. For example if youhave a server that allows one of three users/clients to connect to it you would use:

Secure Sessions112
CRYPT_SESSION cryptSession;
/* Create the session */cryptCreateSession( &cryptSession, cryptUser,
CRYPT_SESSION_SSL_SERVER );
/* Add the user names and passwords */cryptSetAttributeString( cryptSession, CRYPT_SESSINFO_USERNAME,
username1, username1Length );cryptSetAttributeString( cryptSession, CRYPT_SESSINFO_PASSWORD,
password1, password1Length );cryptSetAttributeString( cryptSession, CRYPT_SESSINFO_USERNAME,
username2, username2Length );cryptSetAttributeString( cryptSession, CRYPT_SESSINFO_PASSWORD,
password2, password2Length );cryptSetAttributeString( cryptSession, CRYPT_SESSINFO_USERNAME,
username3, username3Length );cryptSetAttributeString( cryptSession, CRYPT_SESSINFO_PASSWORD,
password3, password3Length );
/* Activate the session */cryptSetAttribute( cryptSession, CRYPT_SESSINFO_ACTIVE, 1 );
Using shared keys in this manner avoids the need for both server and clientcertificates, providing mutual authentication for both client and server (conventionalSSL only authenticates the server via a server certificate). This type of keymanagement also avoids the high CPU overhead of public-key encryption, making itideal for use in resource-constrainedenvironments or ones where you’re charged for CPU usage.
If you have clients who need to connect without providing a user name and password,you can still provide a server certificate in the usual manner using the CRYPT_-SESSINFO_PRIVATEKEY attribute, andclients who don’t provide a user name and password will connect using public-key encryption. Note though that a client thatuses the server certificate rather than a user name and password loses the benefits ofmutual client/server authentication, as well as incurring a higher CPU overhead dueto the use of public-key encryption.
Once a client has authenticated themselves using a shared key, you can determinetheir identity by reading back the CRYPT_SESSINFO_USERNAME attribute:
char username[ CRYPT_MAX_TEXTSIZE + 1 ];int usernameLength
/* Get the user name */cryptGetAttributeString( cryptSession, CRYPT_SESSINFO_USERNAME,
username, &usernameLength );username[ usernameLength ] = '\0';
If the attempt by the client to connect fails (typically due to the use of an incorrectpassword), the password information for that user will be reset to prevent password-guessing attacks in which an attacker repeatedly reconnects using every possiblepassword until they succeed. If the password is reset, you need to re-add the user andpassword to the session before that particular user can connect again. In order toprotect against password-guessing attacks you should employ standard precautionssuch as allowing a maximum of three incorrect attempts or inserting a time delaybefore another connect attempt is allowed.
SSL/TLS Servers with Client CertificatesIf you want to use client certificates to authenticate incoming connections, you needto provide a public-key keyset or certificate store for cryptlib to use to checkcertificates provided by client connections. When a client tries to establish aconnection, cryptlib will check that their certificate is present in the keyset. If it isn’t present, the connection isn’t permitted. This provides a very fine-grained level ofaccess control through which individual end users can be permitted or denied accessto the host. Since cryptlib uses the keyset to verify incoming connections, you cancontrol who is allowed in by adding or removing their certificate to or from thekeyset. Note that you must provide a public-key keyset that stores certificates (not a

Request/Response Protocol Sessions 113
private-key keyset) to the session since SSL/TLS uses certificates for the accesscontrol functionality.
You can specify the public-key keyset to use for checking incoming connections withthe CRYPT_SESSINFO_KEYSET attribute:
CRYPT_SESSION cryptSession;
/* Create the session */cryptCreateSession( &cryptSession, cryptUser,
CRYPT_SESSION_SSL_SERVER );
/* Add the server key and public-key keyset and activate thesession */
cryptSetAttribute( cryptSession, CRYPT_SESSINFO_PRIVATEKEY,privateKey );
cryptSetAttribute( cryptSession, CRYPT_SESSINFO_KEYSET, cryptKeyset );cryptSetAttribute( cryptSession, CRYPT_SESSINFO_ACTIVE, 1 );
When you set this attribute for a server session, cryptlib will require the use of clientcertificates for connections to the server, and won’t allow connections from clients that aren’t able to authenticate themselves using a certificate that was previously added to the keyset.
Request/Response Protocol Sessionscryptlib supports a variety of request/response protocols including protocols such asthe certificate management protocol (CMP), simple certificate enrolment protocol(SCEP), real-time certificate status protocol (RTCS), online certificate status protocol(OCSP), and timestamping protocol (TSP). CMP, SCEP, RTCS, and OCSP clientsessions are certificate management services that are covered in “ObtainingCertificates using CMP”, “Obtaining Certificates using SCEP”, “Certificate StatusChecking using RTCS”, and “Certificate Revocation Checking using OCSP” on pages 157, 152, 152, and 158, and a TSP client session is an S/MIME service whichis covered in “Timestamping” on page 84. RTCS, OCSP and TSP server sessions arestandard session types and are also covered here, CMP and SCEP server sessions aresomewhat more complex and are covered in “Managing a CA using CMP or SCEP” on page 166.
RTCS Server SessionsAn RTCS server session is a protocol-specific session type that returns a real-timecertificate status to a client. RTCS client sessions are used for certificate statuschecks and are described in “Certificate Status Checking using RTCS” on page 152.
Establishing an RTCS server session requires adding a certificate store that cryptlibcan query for certificate status information, specified as the CRYPT_SESSINFO_-KEYSET attribute, and an optional RTCS responder key/certificate if you wantcryptlib to sign the responses it provides. Certificate stores are described in moredetail in “Managing a Certification Authority” on page 161. Once you’ve added this information you can activate the session and wait for incoming connections:
CRYPT_SESSION cryptSession;
/* Create the session */cryptCreateSession( &cryptSession, cryptUser,
CRYPT_SESSION_RTCS_SERVER );
/* Add the certificate store and activate the session */cryptSetAttribute( cryptSession, CRYPT_SESSINFO_KEYSET,
cryptCertStore );cryptSetAttribute( cryptSession, CRYPT_SESSINFO_ACTIVE, 1 );
Once you activate the session, cryptlib will block until an incoming client connectionarrives, at which point it will read the RTCS request from the client and return aresponse optionally signed with the RTCS responder key.

Secure Sessions114
OCSP Server SessionsAn OCSP server session is a protocol-specific session type that returns certificaterevocation information to a client. OCSP client sessions are used for certificaterevocation checks and are described in “Certificate Revocation Checking usingOCSP” on page 152.
The difference between RTCS and OCSP is that RTCS provides real-time, livecertificate status information while OCSP provides delayed revocation information,usually based on CRLs. In other words RTCS answers the question “Is this certificate OK to use right now?” while OCSP answers the question “Was this certificate revoked at some point in the past?”. OCSP can’t return true validity information, so that if fed a freshly-issued certificate and asked “Is this a valid certificate”, it can't say “Yes” (a CRL can only answer “revoked”), and if fed a forged certificate it can't say “No” (it won’t be present in any CRL). In addition OCSP will often return a status result drawn from stale information hours or even days old, whileRTCS (as the name implies) will always return real-time information. Finally, OCSPuses a peculiar means of identifying certificates that some implementations disagreeover, with the result that a certificate may be regarded as valid even if it isn’t because client and server are talking about different things. In contrast RTCS returns anunambiguous yes-or-no response drawn from live certificate data. For these reasonsRTCS is the cryptlib preferred certificate status protocol.
Establishing an OCSP server session requires adding the OCSP responderkey/certificate and a certificate store that cryptlib can query for certificate statusinformation, specified as the CRYPT_SESSINFO_KEYSET attribute. Certificatestores are described in more detail in “Managing a Certification Authority” on page 161. Once you’ve added this information you can activate the session and wait forincoming connections:
CRYPT_SESSION cryptSession;
/* Create the session */cryptCreateSession( &cryptSession, cryptUser,
CRYPT_SESSION_OCSP_SERVER );
/* Add the OCSP responder key/certificate and certificate store andactivate the session */
cryptSetAttribute( cryptSession, CRYPT_SESSINFO_PRIVATEKEY,privateKey );
cryptSetAttribute( cryptSession, CRYPT_SESSINFO_KEYSET,cryptCertStore );
cryptSetAttribute( cryptSession, CRYPT_SESSINFO_ACTIVE, 1 );
Once you activate the session, cryptlib will block until an incoming client connectionarrives, at which point it will read the OCSP request from the client and return aresponse signed with the OCSP responder key.
TSP Server SessionsA TSP server session is a protocol-specific session type that returns timestampinformation to a client. TSP client sessions are used with S/MIME and are describedin “Timestamping” on page 84. Establishing a TSP server session requires adding thetimestamping authority (TSA) key/certificate, activating the session, and waiting forincoming connections:
CRYPT_SESSION cryptSession;
/* Create the session */cryptCreateSession( &cryptSession, cryptUser,
CRYPT_SESSION_TSP_SERVER );
/* Add the TSA key/certificate and activate the session */cryptSetAttribute( cryptSession, CRYPT_SESSINFO_PRIVATEKEY, privateKey
);cryptSetAttribute( cryptSession, CRYPT_SESSINFO_ACTIVE, 1 );
The TSA certificate must be one that has the CRYPT_CERTINFO_EXTKEY_-TIMESTAMPING extended key usage attribute set to indicate that it can be used for

Obtaining Session Status Information 115
generating timestamps. Extended key usage attributes are described in “Key Usage,Extended Key Usage, and Netscape certificate type” on page 231. If you add akey/certificate without this attribute, cryptlib will return CRYPT_ERROR_PARAM3to indicate that the key parameter is invalid.
Once you activate the session, cryptlib will block until an incoming client connectionarrives, at which point it will read the timestamp request from the client and return atimestamp signed with the TSA key.
Obtaining Session Status InformationWhen a session is established a lot of state information is exchanged between theclient and server and status information is generated by both sides. After the sessionhas been activated you can query the session object for information such as thesession status, which security parameters are being used, the identity of the remoteclient that connected to your server (the identity of the remote server is alreadyknown if you’re the client), and authentication and identification information that was obtained from the client or server during the session establishment process.
Obtaining Session Security ParametersIf you want to know the details of the encryption mechanism which is being used toprotect the session, you can read various CRYPT_CTXINFO_xxx attributes from thesession object, which will return information from the encryption context(s) that arebeing used to secure the session. For example once you’ve activated the session you can get the encryption algorithm, mode, and the key size being used with:
CRYPT_ALGO_TYPE cryptAlgo;CRYPT_MODE_TYPE cryptMode;int keySize;
cryptGetAttribute( cryptSession, CRYPT_CTXINFO_ALGO, &cryptAlgo );cryptGetAttribute( cryptSession, CRYPT_CTXINFO_MODE, &cryptMode );cryptGetAttribute( cryptSession, CRYPT_CTXINFO_KEYSIZE, &keySize );
Authenticating the Host with Key FingerprintsOnce you’ve connected to a server, you can verify the server’s certificate or key fingerprint by reading the CRYPT_SESSINFO_SERVER_FINGERPRINT attribute,which contains a fingerprint value that uniquely identifies the server’s certificate or key. You can compare this to a stored copy of the fingerprint, or format it for displayto the user.
If you set the CRYPT_SESSINFO_SERVER_FINGERPRINT attribute before youconnect to the server, cryptlib will verify it against the server key when it connectsand break off the connection attempt with a CRYPT_ERROR_WRONGKEY status ifthe server’s certificate or key doesn’t match the fingerprint you’ve specified. This allows you to filter out bogus servers and/or keys before you try to send any sensitiveinformation to them.
To determinethe server’s key fingerprint (without having to connect to it first), you can read the CRYPT_SESSINFO_SERVER_FINGERPRINT attribute from the SSHserver session after you’ve added the server’s private key, and the CRYPT_-CERTINFO_FINGERPRINT attribute from the SSL/TLS server certificate.
Using fingerprints for authentication is the most reliable of the methods covered here,since it provides a guaranteed match to a known key that can’t be spoofed or forged.
Authenticating the Host or Client using CertificatesIn addition to providing integrity and privacy protection for a communicationssession, some session protocols also provide a means of verifying that the host orclient you’re connecting to really is who they claim to be. For everything but the SSH protocol this authentication is performed by having the host supply a certificateor certificate chain signed by a trusted CA which is used during the protocolinitialisation phase to establish the session. The general idea is that the certificatecontains the name of the host that you’re connecting to or the name of the entity

Secure Sessions116
which is providing a particular service (for example an RTCS responder), so you canuse the returned certificate to verify that you really are communicating with this hostand not a machine that has been set up by an attacker to masquerade as the host. Inaddition if you’re using SSL or TLS with client certificates, you can use the certificate provided by the client when they connect to verify their identity, and ifyou’re using SSL or TLS with shared keys you already have mutual authentication ofclient and server without the need for certificates.
In practice due to factors such as outsourcing of web hosting services and therelocation of servers, the host certificate frequently doesn’tcorrespond to the serveryou’re supposed to be connecting to (which is why most browsers only display a warning and then connect anyway, or don’t even warn). cryptlib doesn’t place any restrictions on what it will and won’t connect to or accept responsesfrom, leaving itup to you to determine whether you want to continue the session if the server doesn’t match what’s given in the host certificate or expected by the client.
Once the session has been activated, you can read the host or client’s certificatechainas the CRYPT_SESSINFO_RESPONSE attribute:
CRYPT_CERTIFICATE cryptCertificate;
cryptGetAttribute( cryptSession, CRYPT_SESSINFO_RESPONSE,&cryptCertificate );
You can then work with the certificate chain as usual, for example you can verify itusing cryptCheckCert or fetch the subject name information as explained in“Certificate Identification Information” on page 204.
Authenticating the Client via Port and AddressIn addition to the stronger fingerprint and certificate authentication mechanisms, youcan also determine the IP address and port that a client is connecting from if you’re running as a server (if you’re the client, you already known which server and port you’re connecting to). You can obtain this information by reading the CRYPT_-SESSINFO_CLIENT_NAME and CRYPT_SESSINFO_CLIENT_PORT attributes,which work in a similar manner to the CRYPT_SESSINFO_SERVER_NAME andCRYPT_SESSINFO_SERVER_PORT attributes:
char name[ CRYPT_MAX_TEXTSIZE + 1 ];int nameLength, port
cryptGetAttributeString( cryptSession, CRYPT_SESSINFO_CLIENT_NAME,name, &nameLength );
name[ nameLength ] = '\0';cryptGetAttribute( cryptSession, CRYPT_SESSINFO_CLIENT_PORT, &port );
The same operation in Visual Basic is:
Dim name as StringDim nameLength as LongDim port as Long
name = String( CRYPT_MAX_TEXTSIZE, vbNullChar );cryptGetAttributeString cryptSession, CRYPT_SESSINFO_CLIENT_NAME, _
name, nameLengthname = Left( name, nameLength )cryptGetAttribute cryptSession, CRYPT_SESSINFO_CLIENT_PORT, port
Note that cryptlib returns the client’s IP address in dotted-decimal form (for IPv4) orcolon-delimited form (for IPv6) rather than its full name, since a single IP address canbe aliased to multiple names and may require complex name resolution strategies. Ifyou require a full name rather than an IP address you’ll need to resolve it yourself, taking into account the multiple hostname issue, the fact that the client may be usingNAT, and the possibility of DNS spoofing.
Exchanging DataOnce a general-purpose secure communications session has been established, you canexchange data with the remote client or server over the encrypted, authenticated linkthat it provides. This works exactly like pushing and popping data to and from an

Exchanging Data 117
envelope, except that the session is effectively a bottomless envelope that can acceptor return (depending on the remote system) an endless stream of data. In many casesthe overhead involved in wrapping up a block of data and exchanging it with a remoteclient or server can be noticeable, so you should always push and pop as much data atonce into and out of a session as you can. For example if you have a 100-bytemessage and communicate it to the remote host as 10 lots of 10 bytes, this is muchslower than sending a single lot of 100 bytes. This behaviour is identical to thebehaviour in applications like disk I/O, where writing a single big file to disk is a lotmore efficient than writing 10 smaller files.
cryptlib helps to eliminate this problem as much as possible by not wrapping up anddispatching session data until you explicitly tell it to by flushing the data through justas you would with an envelope:
cryptPushData( cryptSession, data, dataSize, &bytesCopied );cryptFlushData( cryptSession );
In Visual Basic this is:
cryptPushData cryptSession, data, dataSize, bytesCopiedcryptFlushData cryptSession
This means that cryptlib will accumulate as much data as possible in the session’s internal buffer before encrypting and integrity-protecting it and sending it through tothe remote system, avoiding the inefficiency of processing and sending many smallblocks of data. Note that you only need to flush data through in this manner whenyou explicitly want to force all of the data in the session buffer to be sent to theremote system. If you don’t force a flush cryptlib handles this automatically in the most efficient manner possible using its built-in buffering mechanisms.
When you close a session, cryptlib will immediately shut down the session as is,without flushing data in internal session buffers. This is done to handle cases where asession is aborted (for example because the user cancels the transaction or because ofa network error), and it becomes necessary to exit without sending further data. Ifyou want to send any remaining data before destroying the session, you need toexplicitly flush the data through before you destroy the session object (remember tocheck the return status of the final flush to make sure that all of your data was indeedsent).
Reading the response from the remote client or server works in a similar manner:
cryptPopData( cryptSession, buffer, bufferSize, &bytesCopied );
Unless you specify otherwise, all of cryptlib’s network operations are non-blockingand near-asynchronous, waiting only the minimum amount of time for data to be sentor received before returning to the caller (you can make this fully asynchronous ifyou want, see the next section). cryptlib will provide whatever data is available fromthe remote client or server or write whatever is possible to the remote client or serverand then return, which is particularly important for interactive sessions where smallamounts of data are flowing back and forth simultaneously. The amount of datawhich is returned is indicated by the bytesCopied parameter. If this value is zerothen no data is available or was written at the current time. Since the interface is non-blocking, your application can perform other processing while it waits for data toarrive.
If you’dprefer to have cryptlib not block at all or block for a longer amount of timewhen waiting for data to arrive or be sent, you can enable this behaviour as describedin “Network Issues” on page 118. With blocking network operations enabled,cryptlib will wait for a user-defined amount of time for data to arrive before returningto the caller. If data arrives or is sent during the timeout interval, cryptlib returnsimmediately. With non-blocking behaviour it will return immediately withoutwaiting for data to become available.
Since cryptlib reads and writes are asynchronous, you shouldn’t assume that all the data you’ve requested has been transferred when the push or pop returns. cryptlib will only transfer as much data as it can before the timeout, which may be less than

Secure Sessions118
the total amount. In particular if data is flowing in both directions at once (that is,both sides are writing data and not reading it), the network buffers will eventually fillup, resulting in no more data being written. If this happens you need to occasionallyinterleave a read with the writes to drain the buffers and allow further data to betransferred.
Network IssuesSometimes a machine won’t connect directly to the Internet but has to access itthrough a proxy. cryptlib supports common proxy servers such as socks, and alsosupports HTTP proxies if the protocol being used is HTTP-based. In addition it maybe necessary to adjust other network-related parameters such as timeout values inorder to accommodate slow or congested network links or slow clients or servers.The following sections explain how to work with the various network-related optionsto handle these situations.
Secure Sessions with ProxiesUsing a socks proxy requires that you tell cryptlib the name of the socks server andan optional user name (most servers don’t bother with the user name). You can set the socks server name with the CRYPT_OPTION_NET_SOCKS_SERVER attributeand the optional socks user name with the CRYPT_OPTION_NET_SOCKS_-USERNAME attribute. For example to set the socks proxy server to the host calledsocks (which is the name traditionally given to socks servers) you would use:
cryptSetAttributeString( CRYPT_UNUSED, CRYPT_OPTION_NET_SOCKS_SERVER,"socks", 5 );
before activating the session. When you activate the session, cryptlib willcommunicate with the proxy using the socks protocol.
Using an HTTP proxy works in a similar manner, with the name of the proxy beingspecified with the CRYPT_OPTION_NET_HTTP_PROXY attribute. Note thatHTTP proxies require that the protocol being used employs HTTP as its transportmechanism, so they’re not used with any other protocol type.
Network TimeoutsWhen connecting to a server and carrying out other portions of a protocol such assecurity parameter and session key negotiation (for which cryptlib knows that aresponse must arrive within a certain time) cryptlib sets an interval timer and reportsa connect or read error if no response arrives within that time interval. This meansthat if there’s a network problem such as a host being down or a network outage, cryptlib won’t hang forever but will give up after a certain amount of time, defaulting to 30 seconds. You can change the connect timeout value using the CRYPT_-OPTION_NET_CONNECTTIMEOUT attribute, which specifies the connect timeoutdelay in seconds. For example to set a longer timeout for a remote host or clientwhich is slow in responding you would use:
cryptSetAttribute( CRYPT_UNUSED, CRYPT_OPTION_NET_CONNECTTIMEOUT,60 );
to set a one minute timeout when activating the session. If you want to set theconnect timeout for a specific session rather than system-wide for all sessions, youcan set the attribute only for the session object in question:
cryptSetAttribute( cryptSession, CRYPT_OPTION_NET_CONNECTTIMEOUT,60 );
In addition to the connect timeout cryptlib has a separate timeout setting for networkcommunications, specified using the CRYPT_OPTION_NET_READTIMEOUT andCRYPT_OPTION_NET_WRITETIMEOUT attributes. Since cryptlib sessionobjects normally use non-blocking I/O once the session has been established and datais being exchanged, the read and write timeouts are set to minimal values during anygeneral data exchanges that occur after the connection negotiation process hascompleted. This means that all communications after that point are near-asynchronous and non-blocking, however by changing the read/write timeout settings

Network Issues 119
you can make cryptlib wait for a certain amount of time for data to arrive or bewritten before returning. For example to wait up to 30 seconds for data to arrive youwould use:
cryptSetAttribute( CRYPT_UNUSED, CRYPT_OPTION_NET_READTIMEOUT, 30 );
If data arrives during the wait interval, cryptlib will return as soon as the databecomes available, otherwise it’ll wait for up to 30 seconds for data to arrive.
As with the connect timeout, you can also apply these options directly to sessionobjects, which means that they’ll only apply to that particular session rather than being a system-wide setting for all session objects:
cryptSetAttribute( cryptSession, CRYPT_OPTION_NET_READTIMEOUT, 30 );
If you need the quickest possible response (usually only interactive sessions needthis), you can set network read/write timeouts of zero, which will result in cryptlibreturning immediately if no data can be read or written. The downside to using a zerotimeout is that it reduces data transfers to polled I/O, requiring repeated read or writeattempts to transfer data. For write timeouts it’s better to set at least a small non-zerotimeout rather than a zero timeout to ensure that the data is successfully written. Inalmost all cases the write will complete immediately even with a non-zero timeout,only in very rare cases such as when network congestion occurs will it be necessaryto wait for data to be sent. In other words during a read wait the session is frequentlyjust idling waiting for something to happen, but during a write wait it’s actively trying to move the data out, so setting a non-zero timeout will increase the chances of thenetwork layer moving the data out during the current write attempt rather than havingto retry the write later.
A second problem with very short timeouts occurs when you close a session. Sincewrites are fully asynchronous, the network session can be closed before all of the datais written. Although the network stack tries to flush the data through, if there’s an error during transmission there’s no way to indicate this since the session has already been closed. cryptlib tries to mitigate this by setting a minimum (non-zero) networktimeout when it closes a session, but there’s no way to guarantee that everything will be sent during the timeout interval (in general this is an unsolveable problem, forexample if an intermediate router crashes and is rebooted or the routing protocolshunt around for an alternative route, the transfer will eventually complete, but it couldtake several minutes for this to happen, which would require an excessively longtimeout setting).
To avoid this issue, you should avoid writing a large amount of data with a very smallnetwork timeout setting and then immediately closing the session. You can do this bywriting data at a measured pace (with a non-zero timeout) during the session or bysetting a reasonable write timeout before you flush the last lot of data through andclose the session.
Managing your Own Network SocketsInstead of having cryptlib automatically manage network connections, it’s possible for you to manage them yourself. This can be useful when you want to customisesession establishment and connection management, for example to handle aSTARTTLS upgrade during an SMTP or IMAP session, an STLS upgrade during aPOP session, or an AUTH TLS upgrade during an FTP session.
You can handle your own network connections by adding them to a cryptlib sessionas the CRYPT_SESSINFO_NETWORKSOCKET attribute before you activate thesession. When you activate the session, cryptlib will use the socket that you’ve supplied rather than opening its own connection. Once you shut down the session,you can continue to use the socket or close it as required:
int socket;
/* Connect the network socket */socket = ...;

Secure Sessions120
/* Add the socket to the session and activate the session */cryptSetAttribute( cryptSession, CRYPT_SESSINFO_NETWORKSOCKET,
socket );cryptSetAttribute( cryptSession, CRYPT_SESSINFO_ACTIVE, 1 );
Before you hand the socket over to cryptlib, you should disable Nagle’s algorithm, since cryptlib provides its own optimised packet management. cryptlib leaves thistask to the caller to ensure that it doesn’t have to make any changes to the socket settings itself. In other words, it will leave the socket exactly as it found it. Inaddition if you’re running under Windows you need to use a blocking socket to avoidfalse reports of the other side closing the connection. This is due to bugs in someversions of Winsock, cryptlib does its own timeout handling and doesn’t need non-blocking sockets. Note that if you use certain Winsock functions such asWSAAsyncSelect and WSAEventSelect on the socket, Windows will quietlyswitch the socket back to non-blocking mode, so you need to be careful aboutinadvertently changing the state of a socket behind cryptlib’s back.
In addition to managing the connection process, you can also use externally-suppliedsockets to handle network reads by waiting until data is available to be read on thesocket and only then calling cryptPopData:
/* Wait for data to become available */select( ... );
/* Read data from the session */cryptPopData( cryptSession, ... );
This allows you to use your own connection-management/socket-multiplexing codewith select() or poll() or some similar facility, rather than using the facilitiesprovided by cryptlib.
If you supply the network socket yourself and the socket is a server socket, you canno longer read the CRYPT_SESSINFO_CLIENT_NAME and CRYPT_SESSINFO_-CLIENT_PORT attributes, since these are recorded when the incoming clientconnection is established, and won’t be presentwith a user-supplied socket.

Creating/Destroying Encryption Contexts 121
Key GenerationThe previous sections on enveloping and secure sessions mentioned the use ofencryption contexts containing public and private keys. The creation and generationof public/private keys in encryption contexts is covered in this section. Moreadvanced uses of contexts such as the direct loading of key data and conventionalencryption and hashing are covered in “Encryption and Decryption” on page 173.
Creating/Destroying Encryption ContextsTo create an encryption context, you must specify the user who is to own the objector CRYPT_UNUSED for the default, normal user, and the algorithm you want to usefor that context. The available public-key algorithms are given in “Algorithms” on page 283. For example, to create and destroy an RSA context you would use:
CRYPT_CONTEXT cryptContext;
cryptCreateContext( &cryptContext, cryptUser, CRYPT_ALGO_RSA );
/* Load key, perform en/decryption */
cryptDestroyContext( cryptContext );
Note that the CRYPT_CONTEXT is passed to cryptCreateContext by reference, ascryptCreateContext modifies it when it creates the encryption context. In almost allother cryptlib routines, CRYPT_CONTEXT is passed by value. The contexts thatwill be created are standard cryptlib contexts, to create a context which is handled viaa crypto device such as a smart card or Fortezza card, you should usecryptDeviceCreateContext, which tells cryptlib to create a context in a cryptodevice. The use of crypto devices is explained in “Encryption Devices and Modules” on page 255.
Generating a Key into an Encryption ContextOnce you’ve created an encryption context the next step is to generate a key into it.Before you can generate the key you need to set the CRYPT_CTXINFO_LABELattribute which is later used to identify the key when it’s written to or read from a keyset or a crypto device such as a smart card or a Fortezza card using functions likecryptAddPrivateKey and cryptGetPrivateKey. If you try to generate a key into acontext without first setting the key label, cryptlib will return CRYPT_ERROR_-NOTINITED to indicate that the label hasn’t been set yet. The process of generatinga public/private key pair is then:
CRYPT_CONTEXT privKeyContext;
cryptCreateContext( &privKeyContext, cryptUser, CRYPT_ALGO_RSA );cryptSetAttributeString( privKeyContext, CRYPT_CTXINFO_LABEL, label,
labelLength );cryptGenerateKey( privKeyContext );
To do this in Java or C# you would use:
int privKeyContext = crypt.CreateContext( cryptUser, crypt.ALGO_RSA );crypt.SetAttributeString( privKeyContext, crypt.CTXINFO_LABEL,
label );crypt.GenerateKey( privKeyContext );
The Visual Basic equivalent is:
Dim privKeyContext As Long
cryptCreateContext privKeyContext, cryptUser, CRYPT_ALGO_RSAcryptSetAttributeString privKeyContext, CRYPT_CTXINFO_LABEL, label, _
Len( label )cryptGenerateKey privKeyContext
If you want to generate a key of a particular length, you can set the CRYPT_-CTXINFO_KEYSIZE attribute before calling cryptGenerateKey. For example togenerate a 1536-bit (192-byte) key you would use:

Key Generation122
CRYPT_CONTEXT privKeyContext;
cryptCreateContext( &privKeyContext, cryptUser, CRYPT_ALGO_RSA );cryptSetAttributeString( privKeyContext, CRYPT_CTXINFO_LABEL, label,
labelLength );cryptSetAttribute( cryptContext, CRYPT_CTXINFO_KEYSIZE, 1536 / 8 );cryptGenerateKey( cryptContext );
You can also change the default encryption and signature key sizes using the cryptlibconfiguration options CRYPT_OPTION_PKC_KEYSIZE and CRYPT_OPTION_-SIG_KEYSIZE as explained in “Working with Configuration Options” on page 263.
Once a key is generated into a context, you can’t load or generate a new key over the top of it. If you try to do this, cryptlib will return CRYPT_ERROR_INITED toindicate that a key is already loaded into the context.
Although cryptlib can work directly with public/private keys, other formats likeX.509 certificates, S/MIME messages, and SSL require complex and convolutednaming and identification schemes for their keys. Because of this, you can’t immediately use a newly-generated private key with these formats for anything otherthan signing a certification request or a self-signed certificate. To use it for any otherpurpose, you need to obtain an X.509 certificate that identifies the key and then storethe certificate alongside the private key in a cryptlib private key file or crypto device.The process of obtaining a certificate and updating a keyset or device with it iscovered in more detail in “Certificates and Certificate Management” on page 139.Once you’ve obtained the certificate, you can add it to the keyset or device in whichthe key is stored, and cryptlib will automatically associate it with the key when youread the key.
Asynchronous Key GenerationBecause the generation of larger public/private keys may take some time, cryptlibprovides an asynchronous key generation capability that allows the key to begenerated as a background task or thread on those systems that provide thiscapability. You can generate a key asynchronously with cryptGenerateKeyAsync,which works in the same way as cryptGenerateKey. You can check the status of anasynchronous key generation with cryptAsyncQuery, which will returnCRYPT_ERROR_TIMEOUT if the key generation operation is in progress orCRYPT_OK if the operation has completed. Any attempt to use the context while thekey generation operation is still in progress will also return CRYPT_ERROR_-TIMEOUT:
cryptGenerateKeyAsync( privKeyContext );do
{/* Perform other task(s) *//* ... */}
while( cryptAsyncQuery( privKeyContext ) == CRYPT_ERROR_TIMEOUT );
You can cancel the asynchronous key generation using cryptAsyncCancel.
Since the background key generation depends on how the operating system schedulesthreads, you shouldn’t call cryptAsyncQuery immediately after callingcryptGenerateKeyAsync because the thread that performs the key generation maynot have had time to run yet. The code example given above (which performs otherwork before querying the key generation progress) avoids any OS thread schedulingissues by performing another task while the OS starts the key generation thread in thebackground.
In general generating a (weak) 512-bit key is instantaneous, generating a 1024 bit keytypically takes a second or two, and generating a 2048 bit key takes anywhere fromseconds to minutes depending on the algorithm type and machine speed.

Keyset Types 123
Key StorageThe most practical way of working with public and private keys is to generate them inthe context and then store them in a keyset, an abstract container that can hold one ormore keys. In practice a keyset might be a cryptlib key file, a PGP/OpenPGP keyring, a database, an LDAP directory, or a URL accessed via HTTP. cryptlib accessesall of these keyset types using a uniform interface that hides all of the backgrounddetails of the underlying keyset implementations. In addition you can generate andstore keys in crypto devices such as smart cards, crypto accelerators, and Fortezzacards. Crypto devices are explained in more detail in “Encryption Devices andModules” on page 255.
Keyset Typescryptlib supports a wide variety of keyset types. Most of these are public-keykeysets, which means that you can only store X.509 certificates (and by extension thepublic keys associated with them) in them, but not private keys. These keyset typesinclude database keysets (the cryptlib native format for storing certificates), LDAPdirectories, and web pages accessed via HTTP.
In addition to the public-key keysets, cryptlib also supports the storage of privatekeys in cryptlib private key files (which use the PKCS #15 crypto token format) andcrypto devices such as smart cards, Fortezza cards, and hardware crypto accelerators.cryptlib keysets can also be used to store certificates, but only those that already havea corresponding private key stored in the keyset. cryptlib private key keysets can’t be used as general-purpose public-key or certificate stores, they can only storecertificates associated with an existing private key.
The following table summarises the different keyset types and the operations that arepossible with each one. Unless you have a strong reason not to do so, it’s recommended that you use cryptlib private key files to store private keys and theirassociated certificates and database keysets to store standalone certificates.
Type Access Allowed
cryptlib Read/write access to public/private keys and any associatedcertificates stored in a file using the PKCS #15 crypto tokenformat, with the private key portion encrypted. This is thecryptlib native keyset format for private keys.
Cryptodevice
Read access to public/private keys and read/write access tocertificates stored in the device. Devices aren’t general-purpose keysets but can act like them for keys containedwithin them. More information on crypto devices and ongenerating private keys in them is given in “EncryptionDevices and Modules” on page 255.
Database Read/write access to X.509 certificates stored in a database.This is the cryptlib native keyset format for public keys andcertificates and provides a fast, scalable key storagemechanism. The exact database format used depends on theplatform, but would typically include any ODBC databaseunder Windows, and Informix, Ingres, Oracle, Postgres, andSybase databases under other platforms.
HTTP Read access to X.509 certificates and CRLs accessed viaURLs.
LDAP Read/write access to X.509 certificates and CRLs stored in anLDAP directory.
PGP Read access to PGP/OpenPGP key rings.
The recommended method for certificate storage is to use a database keyset, whichusually outperforms the other keyset types by a large margin, is highly scalable, and

Key Storage124
is well suited for use in cases where data is already administered through existingdatabase servers.
Creating/Destroying Keyset ObjectsKeysets are accessed as keyset objects that work in the same general manner as theother container objects used by cryptlib. You create a keyset object withcryptKeysetOpen, specifying the user who is to own the device object orCRYPT_UNUSED for the default, normal user, the type of keyset you want to attachit to, the location of the keyset, and any special options you want to apply for thekeyset. This opens a connection to the keyset. Once you’ve finished with the keyset, you use cryptKeysetClose to sever the connection and destroy the keyset object:
CRYPT_KEYSET cryptKeyset;
cryptKeysetOpen( &cryptKeyset, cryptUser, keysetType, keysetLocation,keysetOptions );
/* Load/store keys */
cryptKeysetClose( cryptKeyset );
The available keyset types are:
Keyset Type Description
CRYPT_KEYSET_FILE A flat-file keyset, either a cryptlibprivate key file or a PGP/-OpenPGP key ring.
CRYPT_KEYSET_HTTP URL specifying the location of acertificate or CRL.
CRYPT_KEYSET_LDAP LDAP directory.
CRYPT_KEYSET_PLUGIN Generic RDBMS accessed via thedatabase network plugin interface
CRYPT_KEYSET_DATABASE Generic RDBMS interface.CRYPT_KEYSET_ODBC Generic ODBC RDBMS
interface.
CRYPT_KEYSET_DATABASE_-STORE
CRYPT_KEYSET_PLUGIN_STORECRYPT_KEYSET_ODBC_STORE
As for the basic keyset types, butrepresenting a certificate store foruse by a CA rather than a simplekeyset. The user who creates andupdates these keyset types mustbe a CA user.
These keyset types and any special conditions and restrictions on their use arecovered in more detail below.
The keyset location varies depending on the keyset type and is explained in moredetail below. Note that the CRYPT_KEYSET is passed to cryptKeysetOpen byreference, as the function modifies it when it creates the keyset object. In all otherroutines, CRYPT_KEYSET is passed by value.
The keyset options are:
Keyset Option Description
CRYPT_KEYOPT_-CREATE
Create a new keyset. This option is only validfor writeable keyset types, which includeskeysets implemented as databases and cryptlibkey files.
CRYPT_KEYOPT_NONE No special access options (this option impliesread/write access).
CRYPT_KEYOPT_- Read-only keyset access. This option is

Creating/Destroying Keyset Objects 125
Keyset Option DescriptionREADONLY automatically enabled by cryptlib for keyset
types that have read-only restrictions enforcedby the nature of the keyset, the operatingsystem, or user access rights.
Unless you specifically require write access tothe keyset, you should use this option since itallows cryptlib to optimise its buffering andaccess strategies for the keyset.
These options are also covered in more detail below.
File KeysetsFor cryptlib private key files and PGP/OpenPGP key rings, the keyset location is thepath to the disk file. For example to open a connection to a cryptlib key file key.p15located in /users/dave/, you would use:
CRYPT_KEYSET cryptKeyset;
cryptKeysetOpen( &cryptKeyset, cryptUser, CRYPT_KEYSET_FILE,"/users/dave/keys.p15", CRYPT_KEYOPT_READONLY );
cryptlib will automatically determine the file type and access it in the appropriatemanner. Since cryptlib uses the PKCS #15 crypto token format to store private keys,the files are given a .p15 extension or an appropriate equivalent as dictated by theoperating system being used. As another example, to open a connection to a cryptlibprivate key file located in the Keys share on the Windows server FileServer, youwould use:
CRYPT_KEYSET cryptKeyset;
cryptKeysetOpen( &cryptKeyset, cryptUser, CRYPT_KEYSET_FILE,"\\FileServer\Keys\key.p15", CRYPT_KEYOPT_READONLY );
The same operation in Visual Basic is:
Dim cryptKeyset As Long
cryptKeysetOpen cryptKeyset, cryptUser, CRYPT_KEYSET_FILE, _"\\FileServer\Keys\key.p15", CRYPT_KEYOPT_READONLY
When you open a PGP/OpenPGP keyset, cryptlib will automatically set the accessmode to read-only even if you don’t specify the CRYPT_KEYOPT_READONLY option, since writes to this keyset type aren’t supported. If you try to write a key to this keyset type, cryptlib will return CRYPT_ERROR_PERMISSION to indicate thatyou don’t have permission to write to the file. The only file keyset type that can be written to is a cryptlib private key file. This keyset contains one or more encryptedprivate keys and any associated certificates. To create a new cryptlib keyset youwould use:
CRYPT_KEYSET cryptKeyset;
cryptKeysetOpen( &cryptKeyset, cryptUser, CRYPT_KEYSET_FILE,"Private key file.p15", CRYPT_KEYOPT_CREATE );
The equivalent in Java or C# is:
int cryptKeyset = crypt.KeysetOpen( cryptUser, crypt.KEYSET_FILE,"Private key file.p15", crypt.KEYOPT_CREATE );
If a cryptlib keyset of the given name already exists and you open it with CRYPT_-KEYOPT_CREATE, cryptlib will erase it before creating a new one in its place. Theerasure process involves overwriting the original keyset with random data andcommitting the write to disk to ensure that the data really is overwritten, truncating itslength to 0 bytes, resetting the file timestamp and attributes, and deleting the file toensure that no trace of the previous key remains. The new keyset is then created in itsplace.

Key Storage126
For security reasons, cryptlib won’t write to a file if it isn’t a normal file (for example if it’s a hard or symbolic link, if it’s a device name, or if it has other unusual properties such as having a stream fattach()’d to it).
Where the operating system supports it, cryptlib will set the security options on thekeyset so that only the person who created it (and, in some cases, the systemadministrator) can access it. For example under Unix the file access bits are set toallow only the file owner to access the file, and under Windows NT/2000/XP thefile’s access control list is set so that only the user who owns the file can access or change it. Since not even the system administrator can access the keyset underWindows NT/2000/XP, the user may need to manually enable access for others toallow the file to be backed up or copied.
If your application is running as another user (for example if it’s running as a dæmon under Unix or a service under Windows), the keyset will be owned by the dæmon orservice that creates it, following standard security practice. If you want to make thekeyset accessible to standard users, you need to either change the security options toallow the required user access (for example by changing the file access permissionsor running in the context of the intended user when you create it), or provide aninterface to your dæmon/service to allow access to the keyset. The latter is generallythe preferred option, since it allows your dæmon/service to control exactly what theuser can do with the keyset.
When you open a keyset that contains private keys, you should bind it to the currentthread for added security to ensure that no other threads can access the file or the keysread from it:
CRYPT_KEYSET cryptKeyset;
/* Open a keyset and claim it for exclusive use */cryptKeysetOpen( &cryptKeyset, cryptUser, CRYPT_KEYSET_FILE,
"Private key file.p15", CRYPT_KEYOPT_READONLY );cryptSetAttribute( cryptKeyset, CRYPT_PROPERTY_OWNER, threadID );
You can find out more about binding objects to threads in “Object Security” on page 41.
HTTP KeysetsFor keys accessed via an HTTP URL, the keyset name is the URL:
CRYPT_KEYSET cryptKeyset;
cryptKeysetOpen( &cryptKeyset, cryptUser, CRYPT_KEYSET_HTTP, url,CRYPT_KEYOPT_READONLY );
HTTP keysets normally behave just like any other keysets, however if you’re reading a key from a fixed URL (with no per-key ID) you need to use the special ID [none]to indicate that the keyset URL points directly at the certificate. For example to reada certificate from the static URL http://www.server.com/cert.der youwould use:
CRYPT_KEYSET cryptKeyset;CRYPT_HANDLE publicKey;
cryptKeysetOpen( &cryptKeyset, cryptUser, CRYPT_KEYSET_HTTP,"http://www.server.com/cert.der", CRYPT_KEYOPT_READONLY );
cryptGetPublicKey( cryptKeyset, &cryptCertificate, CRYPT_KEYID_NAME,"[none]" );
The CRLs provided by some CAs can become quite large, so you may need to playwith timeouts in order to allow the entire CRL to be downloaded if the link is slow orcongested.
If you want to publish certificates online, the best way to do this is with an HTTPkeyset. The server side of HTTP certificate access is handled as a standard cryptlibsession, and is covered in “Making Certificates Available Online” on page 167.

Creating/Destroying Keyset Objects 127
Database KeysetsFor keys (strictly speaking, X.509 certificates) that are stored in a database, the keysetlocation is the access path to the database. The nature of the access path depends onthe database type, and ranges from an alias or label that identifies the database (forexample an ODBC data source) through to a complex combination of the name oraddress of the server that contains the database, the name of the database on theserver, and the user name and password required to access the database.
The exact keyset type also depends on the operating system with which cryptlib isbeing used. Under Windows, all database keyset types are accessed as ODBC datasources with the keyset type CRYPT_KEYSET_ODBC. The ODBC interface is alsoavailable for most database types under Unix through various Unix ODBC drivers.For the few system that don’t provide a vendor-independent database access system,database keysets are accessed either directly or via a generic network plugin interfacethat allows cryptlib to communicate with any type of database backend. The directdatabase interface, which compiles the database interface into cryptlib, has a keysettype CRYPT_KEYSET_DATABASE. All other databases are accessed through anRPC mechanism specified using a keyset type of CRYPT_KEYSET_PLUGIN. Withsome systems that don’t support any type of database access (for example someembedded systems have no database capability), cryptlib can’t be used with a database keyset and is restricted to the simpler keyset types such as cryptlib privatekey files.
The simplest type of keyset to access is a local database that requires no extraparameters such as a user name or password. An example of this is an ODBC datasource on the local machine. For example if the keyset is stored in a database such asIngres, MySQL, Oracle, SQL Server, Sybase, or Postgres, which is accessed throughthe“PublicKeys” data source, you would access it with:
CRYPT_KEYSET cryptKeyset;
cryptKeysetOpen( &cryptKeyset, cryptUser, CRYPT_KEYSET_ODBC,"PublicKeys", CRYPT_KEYOPT_READONLY );
The same operation in Visual Basic is:
Dim cryptKeyset As Long
cryptKeysetOpen cryptKeyset, cryptUser, CRYPT_KEYSET_ODBC,"PublicKeys", CRYPT_KEYOPT_READONLY
The second type of database keyset is one which is accessed through a plugin thatconverts cryptlib data accesses to the format used by the database backend. Thegeneric plugin interface takes as parameters the name of the server that cryptlib is toconnect to and an optional port number separated by a colon. For example if thedatabase ran on the server keyserver.company.com, the keyset would be accessedwith:
CRYPT_KEYSET cryptKeyset;
cryptKeysetOpen( &cryptKeyset, cryptUser, CRYPT_KEYSET_PLUGIN,"keyserver.company.com", CRYPT_KEYOPT_READONLY );
Through the use of the plugin interface, cryptlib can access any type of databaseacross any OS platform. Details on writing the required plugin are given in“Database and Networking Plugins” on page 283.
The database name parameter used above was a simple ODBC data source ordatabase name, but this can also contain a user name, password, and server name, inthe format user:pass@server. For example, you can specify a combination ofdatabase user name and password as user:pass, and a user name and server asuser@server. Other, database-specific combinations and parameters may also bepossible, depending on the database backend you’re using.
In the examples shown above, the keyset was opened with the CRYPT_KEYOPT_-READONLY option. The use of this option is recommended when you’ll use the keyset to retrieve a certificate but not store one (which is usually the case) since it

Key Storage128
allows cryptlib to optimise its transaction management with the database backend.This can lead to significant performance improvements due to the different databuffering and locking strategies that can be employed if the back-end knows that thedatabase won’t be updated. If you try to write a certificate to a keyset that has been opened in read-only mode, cryptlib will return CRYPT_ERROR_PERMISSION toindicate that you don’t have permission to write to thedatabase.
To create a new certificate database, you can use the CRYPT_KEYOPT_CREATEoption. If a keyset of the given name already exists, cryptlib will return CRYPT_-ERROR_DUPLICATE, otherwise it will create a new certificate database ready tohave certificates added to it.
Database keysets can also be used as certificate stores, an extended type of keysetwhich is required in order to perform CA operations such as issuing certificates andCRLs. In order to create this type of keyset instead of a conventional one you mustbe a CA user and you need to specify its type as CRYPT_KEYSET_DATABASE_-STORE, CRYPT_KEYSET_ODBC_STORE, or CRYPT_KEYSET_PLUGIN_-STORE instead of the basic database keyset type. Certificate stores have a higheroverhead than normal keysets because they meet a number of special CA-specificrequirements, so you should only create one if you are using it to run a CA. Inaddition, certificates and CRLs can’t be directly added to or deleted from a certificate store but have to be processed using cryptlib’s certificate management functionality. More information on certificate stores and their use is given in “Managing aCertification Authority” on page 161.
In order to create or open a certificate store, you must be a CA user. If you try toaccess a certificate store and aren’t a CA user, cryptlib will return CRYPT_ERROR_PARAM2 to indicate that the user type isn’t valid for accessing this type of keyset. Normal users can’t update a certificate store in any way, howeverthey can access them in read-only mode as normal database keysets. For examplewhile a CA could open a certificate store as:
CRYPT_KEYSET cryptKeyset;
cryptKeysetOpen( &cryptKeyset, cryptUser, CRYPT_KEYSET_PLUGIN_STORE,"certstore.company.com", CRYPT_KEYOPT_NONE );
and perform updates on the store, a non-CA user could only access it in read-onlymode as a standard database keyset:
CRYPT_KEYSET cryptKeyset;
cryptKeysetOpen( &cryptKeyset, cryptUser, CRYPT_KEYSET_PLUGIN,"certstore.company.com", CRYPT_KEYOPT_READONLY );
When opened in this manner the certificate store appears as a standard databasekeyset rather than as a full certificate store.
To provide additional security alongside the precautions taken by cryptlib, you shouldapply standard database security measures to ensure that all database keyset accessesare carried out with least privileges. For example if your application only needs readaccess to a keyset, you can use the SQL GRANT/REVOKE mechanism to allowread-only access of the appropriate kind for the application. An SQL statement likeREVOKE ALL ON certificates FROM user; GRANT SELECT ON certificates TOuser would allow only read accesses to the certificate keyset. You can also useserver-specific security measures such as accessing the keyset through SQL Server’s built-in db_datareader account, which only allows read access to tables, and theability to run the application under a dedicated low-privilege account (a standardfeature of Unix systems).
LDAP KeysetsFor keys stored in an LDAP directory, the keyset location is the name of the LDAPserver, with an optional port if access is via a non-standard port. For example if theLDAP server was called directory.ldapserver.com, you would access thekeyset with:

Creating/Destroying Keyset Objects 129
CRYPT_KEYSET cryptKeyset;
cryptKeysetOpen( &cryptKeyset, cryptUser, CRYPT_KEYSET_LDAP,"directory.ldapserver.com", CRYPT_KEYOPT_READONLY );
If the server is configured to allow access on a non-standard port, you can append theport to the server namein the usual manner for URL’s. For example if the server mentioned above listened on port 8389 instead of the usual 389 you would use:
CRYPT_KEYSET cryptKeyset;
cryptKeysetOpen( &cryptKeyset, cryptUser, CRYPT_KEYSET_LDAP,"directory.ldapserver.com:8389", CRYPT_KEYOPT_READONLY );
You can also optionally include the ldap:// protocol specifier in the URL, this isignored by cryptlib.
The storage of certificates in LDAP directories is haphazard and vendor-dependent,and you may need to adjust cryptlib’s LDAP configuration options to work with aparticular vendor’s idea of how certificates and CRLs should be stored on a server. In order to make it easier to adapt cryptlib to work with different vendor’s ways of storing information in a directory, cryptlib provides various LDAP-relatedconfiguration options that allow you to specify the X.500 objects and attributes usedfor certificate storage. These options are:
Configuration Option Description
CRYPT_OPTION_KEYS_-LDAP_CERTNAME
CRYPT_OPTION_KEYS_-LDAP_CACERTNAME
The X.500 attribute that certificates are storedas. For some reason certificates belonging tocertification authorities (CAs) are storedunder their own attribute type, so if a searchfor a certificate fails cryptlib will try againusing the CA certificate attribute (there’s no easy way to tell in advance how a certificatewill be stored, so it’s necessary to do it this way). In addition a number of other attributetypes have been invented to hide certificatesunder, it may require a bit of experimentationto determine how the server you’re using stores things.
The default settings for these options areuserCertificate;binary andcACertificate;binary, a variety of otherchoices also exist. Note the use of thebinary qualifier, this is required for anumber of directories that would otherwisetry and encode the returned information astext rather than returning the raw certificate.
CRYPT_OPTION_KEYS_-LDAP_CRLNAME
The X.500 attribute that certificate revocationlists (CRLs) are stored as, defaulting tocertificateRevocationList;binary.
CRYPT_OPTION_KEYS_-LDAP_EMAILNAME
The X.500 attribute that email addresses arestored as, defaulting to mail. Since X.500never defined an email address attribute,various groups defined their own ones, mailis the most common one but there are anumber of other alternatives around,including emailAddress, rfc822Name,rfc822MailBox, and email. As usual,some experimentation will be necessary tofind out what works.
CRYPT_OPTION_KEYS_- The filter used to selected returned LDAP

Key Storage130
Configuration Option DescriptionLDAP_FILTER attributes during a query, defaulting to
(objectclass=*). Experimentation willbe necessary to determine what’s required for this value.
CRYPT_OPTION_KEYS_-LDAP_OBJECTCLASS
The X.500 object class, defaulting toinetOrgPerson. Again, there is noconsistency among servers, the usual amountof guesswork will be required to find outwhat works.
CRYPT_OPTION_KEYS_-LDAP_OBJECTTYPE
The object type to fetch, defaulting toCRYPT_CERTTYPE_NONE to fetch allobject types. Setting this to CRYPT_-CERTTYPE_CERTIFICATE or CRYPT_-CERTTYPE_CRL will fetch only certificatesor CRLs.
These configuration options apply to all LDAP keysets, you can also apply them to anindividual keyset object rather than as a general configuration option, which meansthat they’ll affect only the one LDAP keyset object.
There is no consistency in the configuration of LDAP directories, and since the queryused to retrieve a certificate depends on how the directory is configured, it’s often impossible to tell what to submit without asking the directory administrators for thecorrect formula. Since the actual values depend on the server configuration, there isno way that cryptlib can determine which ones to use for a given server.
Two examples of magic formulae that are required by different CAs running LDAPdirectories are “searchDN = CN=Norway Post Organizational CA, O=CA, C=NO, filter = (&(objectclass=*)(pssSubjectDNString=CN=RTV EDI-server 2, O=RTV,C=NO)), attributes = certificateRevocationList;binary” and “(&(|(&(objectclass=-inetorgperson)(objectclass=organizationalperson)) (objectClass=Strong-AuthenticationUser))(usercertificate;binary=*)(|(commonname=name)(rfc822-mailbox=email address)))”. In order to handle some of these combinations you will have to set a selection of the CRYPT_OPTION_KEYSET_LDAP_xxx attributes aswell as modifying the key ID you use when you actually read a key.
To allow even more flexibility in specifying LDAP access parameters, cryptlib willalso accept RFC 1959 LDAP URLs as key IDs (see “Obtaining a Key for a User” on page 131). These have the general form ldap://host:port/dn?-attributes?scope?filter, and can be used to specify arbitrarily complexcombinations of DN components (see RFC 1485), search scope, and filter (see RFC1558). For example to specify the Norway post magic formula above as a key ID theLDAP URL would be ldap:///CN=Norway%20Post%20-Organizational%20CA,%20O=CA,%20C=NO?certificate-RevocationList;binary??(&(objectclass=*)(pssSubjectDN-String=%20CN=RTV%20EDI-server%202,%20O=RTV,%20C=NO)). Notethat the ability to use an LDAP URL for lookup in this manner may not be availablein some LDAP client implementations.
The default settings used by cryptlib have been chosen to provide the best chance ofworking, however given that everyone who stores certificates in an LDAP serverconfigures it differently it’s almost guaranteed that trying to use LDAP to store certificates will require reconfiguration of the client, the server, the certificates beingstored, or several of the above in order to function. In effect the LDAP configurationacts as a form of access control mechanism that makes it impossible to accesscertificates or CRLs until the CA reveals the correct magic formula. For this reasonthe use of LDAP is not recommended for storing certificates.

Reading a Key from a Keyset 131
Reading a Key from a KeysetOnce you’ve set up a connection to a keyset, you can read one or more keys from it. Some keysets such as HTTP URLs can contain only one key, whereas cryptlib privatekey files, PGP/OpenPGP key rings, databases, and LDAP keysets may containmultiple keys.
You can also use a crypto device such as a smart card, Fortezza card, or cryptohardware accelerator as a keyset. Reading a key from a device creates an encryptioncontext which is handled via the crypto device, so that although it looks just like anyother encryption context it uses the device to perform any encryption or signing.
The two functions that are used to read keys are cryptGetPublicKey andcryptGetPrivateKey, which get a public and private key respectively. The key to beread is identified through a key identifier, either the name or the email address of thekey’s owner, specified as CRYPT_KEYID_NAME and CRYPT_KEYID_EMAIL, or the label assigned to the key as the CRYPT_CTXINFO_LABEL attribute when it’s generated or loaded into a context, also specified as CRYPT_KEYID_NAME.
cryptGetPublicKey returns a generic CRYPT_HANDLE that can be either aCRYPT_CONTEXT or a CRYPT_CERTIFICATE depending on the keyset type.Most public-key keysets will return an X.509 certificate, but some keysets (likePGP/OpenPGP key rings) don’t store the full certificate information and will return only an encryption context rather than a certificate. You don’t have to worry aboutthe difference between the two, they are interchangeable in most cryptlib functions.
Obtaining a Key for a UserThe rules used to match the key ID to a key depend on the keyset type, and are asfollows:
Type User ID Handling
Cryptlib
Cryptodevice
The key ID is a label attached to the key via the CRYPT_-CTXINFO_LABEL attribute when it’s generated or loaded into the context, and is specified using CRYPT_KEYID_-NAME. Alternatively, if a certificate is associated with thekey, the key ID can also be the name or email addressindicated in the certificate.
The key ID is matched in full in a case-insensitive manner.
Database The key ID is either the name or the email address of the keyowner, and is matched in full in a case-insensitive manner.
HTTP The key ID is either the name or the email address of the keyowner, and is matched in full in a case-sensitive manner. Theone exception is when the location is specified by a staticURL, in which case the key ID has the special value [none].
LDAP The key ID is an X.500 distinguished name (DN), which isneither a name nor an email address but a peculiarconstruction that (in theory) uniquely identifies a key in theX.500 directory. Since a DN isn’t really a name or an email address, it’s possible to match an entry using eitherCRYPT_KEYID_NAME or CRYPT_KEYID_EMAIL.
The key ID is matched in a manner which is controlled by theway the LDAP server is configured (usually the match is case-insensitive).
You can also specify an LDAP URL as the key ID asdescribed in “LDAP Keysets” on page 128.
PGP The key ID is a name with an optional email address which isusually given inside angle brackets. Since PGP keys usuallycombine the key owner’s name and email address into a single

Key Storage132
Type User ID Handlingvalue, it’s possible to match an email address using CRYPT_KEYID_NAME, and vice versa.
The key ID is matched as a substring of any of the names andemail addresses attached to the key, with the match beingperformed in a case-insensitive manner. This is the same asthe matching performed by PGP.
Note that, like PGP, this will return the first key in the keysetfor which the name or email address matches the given keyID. This may result in unexpected matches if the key ID thatyou’re using isa substring of a number of names or emailaddresses that are present in the key ring. Since emailaddresses are more likely to be unique than names, it’s a good idea to specify the email address to guarantee a correct match.
Assuming that you wanted toread Noki Crow’s public key from a keyset, you would use:
CRYPT_HANDLE publicKey;
cryptGetPublicKey( cryptKeyset, &publicKey, CRYPT_KEYID_NAME,"Noki S.Crow" );
In Java or C# this is:
int publicKey = crypt.GetPublicKey( cryptKeyset, crypt.KEYID_NAME,"Noki S.Crow" );
In Visual Basic the operation is:
Dim publicKey As Long
cryptGetPublicKey cryptKeyset, publicKey, CRYPT_KEYID_NAME, _"Noki S.Crow"
Note that the CRYPT_HANDLE is passed to cryptGetPublicKey by reference, asthe function modifies it when it creates the public key context. Reading a key from acrypto device works in an identical fashion:
CRYPT_HANDLE publicKey;
cryptGetPublicKey( cryptDevice, &publicKey, CRYPT_KEYID_NAME,"Noki S.Crow" );
The only real difference is that any encryption performed with the key is handled viathe crypto device, although cryptlib hides all of the details so that the key looks andfunctions just like any other encryption context.
You can use cryptGetPublicKey not only on straight public-key keysets but also onprivate key keysets, in which case it will return the public portion of the private keyor the certificate associated with the key.
The other function which is used to obtain a key is cryptGetPrivateKey, whichdiffers from cryptGetPublicKey in that it expects a password alongside the user IDif the key is being read from a keyset. This is required because private keys areusually stored encrypted and the function needs a password to decrypt the key. If thekey is held in a crypto device (which requires a PIN or password when you open asession with it, but not when you read a key), you can pass in a null pointer in placeof the password. For example if Noki Crow’s email address was [email protected] you wanted to read their private key, protected by the password “Password”, from a keyset, you would use:
CRYPT_CONTEXT privKeyContext;
cryptGetPrivateKey( cryptKeyset, &privKeyContext, CRYPT_KEYID_EMAIL,"[email protected]", "Password" );
The same operation in Visual Basic is:
Reading a Key from a Keyset 133
Dim privKeyContext As Long
cryptGetPrivateKey cryptKeyset, privKeyContext, CRYPT_KEYID_EMAIL, _"[email protected]", "Password"
If you supply the wrong password to cryptGetPrivateKey, it will return CRYPT_-ERROR_WRONGKEY. You can use this to automatically handle the case where thekey might not beprotected by a password (for example if it’s stored in a crypto device or a non-cryptlib keyset that doesn’t protect private keys) by first trying the call without a password and then retrying it with a password if the first attempt failswith CRYPT_ERROR_WRONGKEY. cryptlib caches key reads, so the overhead ofthe second key access attempt is negligible:
CRYPT_CONTEXT privKeyContext;
/* Try to read the key without a password */if( cryptGetPrivateKey( cryptKeyset, &privKeyContext,
CRYPT_KEYID_NAME, name, NULL ) == CRYPT_ERROR_WRONGKEY ){/* Ask the user for the keys' password and retry the read */password = ...;cryptGetPrivateKey( cryptKeyset, &privKeyContext, CRYPT_KEYID_NAME,
name, password );}
cryptGetPrivateKey always returns an encryption context.
General Keyset QueriesWhere the keyset is implemented as a standard database, you can use cryptlib toperform general queries to obtain one or more certificates that fit a given matchcriterion. For example you could retrieve a list of all the keys that are set to expirewithin the next fortnight (to warn their owners that they need to renew them), or thatbelong to a company or a division within a company. You can also perform morecomplex queries such as retrieving all certificates from a division within a companythat are set to expire within the next fortnight. cryptlib will return all certificates thatmatch the query you provide, finally returning CRYPT_ERROR_COMPLETE onceall matching certificates have been obtained.
The general strategy for performing queries is as follows:
submit queryrepeat
read query resultwhile query status != CRYPT_COMPLETE
You can cancel a query in progress at any time by submitting a new query consistingof the command “cancel”.
Queries are submitted by setting the CRYPT_KEYINFO_QUERY attribute for akeyset, which tells it how to perform the query. Let’s look at a very simple query which is equivalent to a straight cryptGetPublicKey:
CRYPT_CERTIFICATE certificate;
cryptSetAttributeString( keyset, CRYPT_KEYINFO_QUERY,"$email='[email protected]'", 22 );
dostatus = cryptGetPublicKey( keyset, &certificate, CRYPT_KEYID_NONE,
NULL );while( cryptStatusOK( status ) );
This will read each certificate corresponding to the given email address from thedatabase. Note that the key ID is unused because the keys that are returned areselected by the initial query and not by the key identifier.
This example is an artificially simple one, it’s possible to submit queries of arbitrary complexity in the form of full SQL queries. Since the key databases that are beingqueried can have arbitrary names for the certificate attributes (corresponding todatabase columns), cryptlib provides a mapping from certificate attribute to databasefield names. An example of this mapping is shown in the code above, in which

Key Storage134
$email is used to specify the email address attribute, which may have a completelydifferent name once it reaches the database backend. The certificate attribute namesare as follows:
Attribute Field
$C, $SP, $L, $O,$OU, $CN
Certificate country, state or province, locality,organisation, organisational unit, and common name.
$date Certificate expiry date
$email Certificate email address
You can use these attributes to build arbitrarily complex queries to retrieve particulargroups of certificates from a key database. For example to retrieve all certificatesissued for US users (obviously this is only practical with small databases) you woulduse:
cryptSetAttributeString( keyset, CRYPT_KEYINFO_QUERY, "$C='US'", 7 );
Extending this one stage further, you could retrieve all certificates issued toCalifornian users with:
cryptSetAttributeString( keyset, CRYPT_KEYINFO_QUERY, "$C='US' AND$SP='CA'", 20 );
Going another step beyond this, you could retrieve all certificates issued to users inSan Francisco:
cryptSetAttributeString( keyset, CRYPT_KEYINFO_QUERY, "$C='US' AND$SP='CA' AND $L='San Francisco'", 43 );
Going even further than this, you could retrieve all certificates issued to users in SanFrancisco whose names begin with an ‘a’:
cryptSetAttributeString( keyset, CRYPT_KEYINFO_QUERY, "$C='US' AND$SP='CA' AND $L='San Francisco' AND $CN LIKE 'A%'", 61 );
These queries will return the certificates in whatever order the underlying databasereturns them in. You can also specify that they be returned in a given order, forexample to order the certificates in the previous query by user name you would use:
cryptSetAttributeString( keyset, CRYPT_KEYINFO_QUERY, "$C='US' AND$SP='CA' AND $L='San Francisco' ORDER BY $CN", 56 );
To return them in reverse order, you would use:
cryptSetAttributeString( keyset, CRYPT_KEYINFO_QUERY, "$C='US' AND$SP='CA' AND $L='San Francisco' ORDER BY $CN DESCENDING", 67 );
The ability to selectively extract collections of certificates provides a convenientmechanism for implementing a hierarchical certificate database browsing capability.You can also use it to perform general-purposes queries and certificate extractions,for example to return all certificates that will expire within the next week (and thattherefore need to be replaced or renewed), you would use:
cryptSetAttributeString( keyset, CRYPT_KEYINFO_QUERY, "$date < today +1 week", length );
To sort the results in order of urgency of replacement, you would use:
cryptSetAttributeString( keyset, CRYPT_KEYINFO_QUERY, "$date < today +1 week ORDER BY $date", length );
To retrieve all certificates that don’t need replacement within the next week, you could negate the previous query to give:
cryptSetAttributeString( keyset, CRYPT_KEYINFO_QUERY, "NOT $date <today + 1 week", length );
As these examples show, cryptlib’s keyset query capability provides the ability to perform arbitrary general-purpose queries on keysets.
Once a query has begun running, it can return a considerable number of certificates.If you try to initiate another query while the first one is in progress or perform a

Reading a Key from a Keyset 135
standard read, write, or delete operation, cryptlib will return a CRYPT_ERROR_-INCOMPLETE error to indicate that the query is still active. You can cancel thecurrently active query at any point by setting the CRYPT_KEYINFO_QUERYattribute to “cancel”:
cryptSetAttributeString( keyset, CRYPT_KEYINFO_QUERY, "cancel", 6 );
This will clear the current query and prepare the keyset for another query or analternative operation such as a key read, write, or delete.
Handling Multiple Certificates with the Same NameSometimes a keyset may contain multiple certificates issued to the same person.Whether this situation will occur varies by CA, some CAs won’t issue multiple certificates with the same name, some will, and some may modify the name toeliminate conflicts, for example by adding unique ID values to the name or usingmiddle initials to disambiguate names. If multiple certificates exist, you can performa keyset query to read each in turn and try and find one that matches yourrequirements, for example you might be able to filter them based on key usage orsome other parameter held in the certificate. The general idea is to issue a querybased on the name and then read each certificate that matches the query until you findan appropriate one:
cryptSetAttributeString( keyset, CRYPT_KEYINFO_QUERY, "…", … );while( cryptGetPublicKey( &certificate, keyset, … ) == CRYPT_OK && \
certificate doesn't match required usage )/* Continue */;
cryptSetAttributeString( keyset, CRYPT_KEYINFO_QUERY, "cancel", 6 );
This use of general queries allows the maximum flexibility in selecting certificates incases when multiple choices are present.
Key Group ManagementSometimes it may be desirable to treat a group of keys in the same way. For exampleif a collection of servers use keys to protect their communications with each otherthen compromise of one key may require the revocation of all keys in the group andthe issuance of a new group of keys. The easiest way to handle key groups is byassigning a common identifier to all the keys in the group when you issue certificatesfor them, and then replacing all keys with that identifier when it comes time to updatethe key group.
The first part of the process involves assigning a key group identifier to certificates.The easiest way to do this is to specify it as part of the PKI user information that’s used with the CMP and SCEP protocols. For example to specify that a PKI userbelongs to the remote access users key group using the organisational unit portion ofthe user DN, you would use:
/* ... */
/* Add PKI user identification information */cryptSetAttributeString( cryptPKIUser, CRYPT_CERTINFO_COUNTRYNAME,
countryName, 2 );cryptSetAttributeString( cryptPKIUser,
CRYPT_CERTINFO_ORGANIZATIONNAME, organizationName,organizationNameLength );
cryptSetAttributeString( cryptPKIUser,CRYPT_CERTINFO_ORGANIZATIONALUNITNAME, "Remote access key group",23 );
cryptSetAttributeString( cryptPKIUser, CRYPT_CERTINFO_COMMONNAME,commonName, commonNameLength );
/* ... */
When the user requests their certificate, the key group will be given as theorganisational unit component (alongside the other components such as theorganisation name and country) in their DN. More information on working with PKIusers is given in “Initialising PKI User Information” on page 163. Alternatively, youcan manually set the key group identifier when you issue a certificate to someone in

Key Storage136
the key group if you’re manually issuing certificates rather than using an automated mechanism like CMP or SCEP.
The second part of the process involves identifying all of the certificates in a keygroup that need to be revoked or replaced. This is handled through cryptlib’s keyset query capability, retrieving each certificate in the group in turn:
CRYPT_CERTIFICATE certificate;
cryptSetAttributeString( keyset, CRYPT_KEYINFO_QUERY, "$OU='Remoteaccess key group'", 30 );
dostatus = cryptGetPublicKey( keyset, &certificate, CRYPT_KEYID_NONE,
NULL );while( cryptStatusOK( status ) );
Once the certificate has been fetched, you can revoke it or notify the owner that theyneed to replace it as required. More information on keyset queries is given in“General Keyset Queries” on page 133.
Writing a Key to a KeysetWriting a key to a keyset isn’t as complex as reading it since there’s no need to specify the key identification information which is needed to read a key, howeverthere are some restrictions on the type of key you can write to a keyset. Public-keykeysets such as database and LDAP keysets store full certificates, so the object thatyou write to these keysets must be a CRYPT_CERTIFICATE and not just aCRYPT_CONTEXT. In contrast, keysets such as cryptlib private key files primarilystore public/private key pairs but can also store the certificate or certificates that areassociated with the private key. If you try to write the incorrect type of object to akeyset (for example a private key to a certificate keyset), cryptlib will return aCRYPT_ERROR_PARAM2 error to indicate that the object you are trying to add isof the incorrect type for this keyset.
If you try to write a key to a read-only keyset, cryptlib will return CRYPT_ERROR_-PERMISSION to indicate that you can’t write to the keyset. If you try to write a certificate to a cryptlib private key file or a crypto device that doesn’t already have a corresponding private key present, cryptlib will return CRYPT_ERROR_PARAM2to indicate that you can’t add this type of object if there isn’t already a matching private key present. If you just want to write a certificate to a file, you can usecryptExportCert to obtain the certificate and then write that to a file.
You can write a certificate to a public key keyset with cryptAddPublicKey, whichtakes as parameters the keyset and the key certificate to write:
cryptAddPublicKey( cryptKeyset, cryptCertificate );
Since all identification information is contained in the certificate, there’s no need to specify any extra data such as the certificate owner’s name or email address.
Writing a private key requires one extra parameter, the password which is used toencrypt the private key components. cryptlib will use the default encryption method(usually three-key triple DES) to encrypt the key with the given password. If you’re writing the private key to a crypto device, the password parameter should be set toNULL since the device provides its own protection for the key (not all devicessupport direct key loading, some require the key to be generated inside the device).
To write a private key to a keyset you would use the correspondingcryptAddPrivateKey function:
cryptAddPrivateKey( cryptKeyset, privKeyContext, password );
If the certificate you are trying to write is already present in the keyset, cryptlib willreturn CRYPT_ERROR_DUPLICATE. If the keyset is a public-key keyset, you canuse cryptDeleteKey to delete the existing certificate so you can write the new one inits place. If the keyset is a cryptlib key file or crypto device, this would delete boththe certificate and the key it corresponds to. Finally, certificate stores can’t be directly manipulated by adding or deleting certificates and CRLs but must be

Writing a Key to a Keyset 137
managed using cryptlib’s certificate management functionality. If you try to directly insert or delete a certificate or CRL, cryptlib will return CRYPT_ERROR_-PERMISSION to indicate that this operation isn’t allowed.
There is one instance in which it’spossible to add a new certificate to a cryptlibprivate key file when there’s already an existing certificate present, and that’s when the new certificate updates the existing one. For example some CAs will re-issue acertificate with a newer expiry date (rather than using a new key and certificate), ifyou add this new certificate to the keyset cryptlib will replace the existing, oldercertificate with the newer one and use the newer one in all future operations.
You can’t create a key inside a standard cryptlib context and then move it to thedevice later on since the security features of the device won’t allow this, and you can’t take a key created via a crypto device and write it to a keyset, because it can’t be exported from the device. By using crypto hardware to handle your keys you’re guaranteeing that the key is never exposed outside the hardware, keeping it safe fromany malicious code that might be present in your system.
Although cryptlib can work directly with private keys, other formats like X.509certificates, S/MIME messages, and SSL require complex and convoluted namingand identification schemes for their keys. Because of this, you can’t immediately use a newly-generated private key with these formats for anything other than signing acertification request or a self-signed certificate. To use it for any other purpose, youneed to obtain an X.509 certificate that identifies the key and then store the certificatealongside the private key in a cryptlib private key file or crypto device. The processof obtaining a certificate and updating a keyset or device with it is covered in moredetail in “Certificates and Certificate Management” on page 139. Once you’ve obtained the certificate, you can add it to the keyset or device and cryptlib willautomatically associate it with the key when you read the key.
If you are working with a database keyset, you can also add a certificate revocationlist (CRL) to the keyset. Since a CRL isn’t an actual key, you can’t read it back out of the keyset (there’s nothing to read), but you can use it to check the revocation state of certificates. CRLs and their uses are explained in more detail in “CertificateRevocation using CRLs” on page 218.
Changing a Private Key PasswordChanging the password on a private key file involves reading the key from a keysetusing the old password, deleting the key from the keyset, and writing the in-memorycopy back again using the new password:
read key from keyset using old password;delete key from keyset;re-write key to keyset using new password;
All cryptlib key file updates are atomic all-or-nothing operations, which means that ifthe computer crashes between deleting the old key and writing the new one, the oldkey will still be present when the machine is rebooted (specifically, all changes arecommitted when the keyset is closed, which minimises the risk of losing data due to asystem crash or power outage in the middle of a long sequence of update operations).
To update a private key with a new password, you would use:
CRYPT_KEYSET cryptKeyset;CRYPT_CONTEXT cryptKey;
/* Read the key from the keyset using the old password */cryptKeysetOpen( &cryptKeyset, cryptUser, CRYPT_KEYSET_FILE,
keysetName, CRYPT_KEYOPT_NONE );cryptGetPrivateKey( cryptKeyset, &cryptKey, CRYPT_KEYID_NAME, label,
oldPassword );
/* Delete the current copy of the key from the keyset */cryptDeleteKey( cryptKeyset, label );
/* Write the key back to the keyset using the new password */cryptAddPrivateKey( cryptKeyset, cryptKey, newPassword );cryptKeysetClose( cryptKeyset );

Key Storage138
The same operation in Visual Basic is:
Dim cryptKeyset As LongDim cryptKey As Long
' Read the key from the keyset using the old passwordcryptKeysetOpen cryptKeyset, cryptUser, CRYPT_KEYSET_FILE, keysetName,
CRYPT_KEYOPT_NONEcryptGetPrivateKey cryptKeyset, cryptKey, CRYPT_KEYID_NAME, label,
oldPassword
' Delete the current copy of the key from the keysetcryptDeleteKey cryptKeyset, label
' Write the key back to the keyset using the new passwordcryptAddPrivateKey cryptKeyset, cryptKey, newPasswordcryptKeysetClose cryptKeyset
Deleting a KeyDeleting a key with cryptDeleteKey works in the same manner as reading a key,with the key to delete being identified by a key ID in the usual manner. For exampleif you wanted to delete S.Crow’s key from a keyset, you would use:
cryptDeleteKey( cryptKeyset, CRYPT_KEYID_NAME, "S.Crow" );
Deleting a key from a crypto device is identical:
cryptDeleteKey( cryptDevice, CRYPT_KEYID_NAME, "S.Crow" );
In the case of an LDAP directory, this will delete the entire entry, not just thecertificate attribute or attributes for the entry. In the case of a cryptlib private key fileor crypto device, this will delete the key and any certificates that may be associatedwith it. If you try to delete a key from a read-only keyset, cryptlib will returnCRYPT_ERROR_PERMISSION. If the key you’re trying to delete isn’t present in the keyset, cryptlib will return CRYPT_ERROR_NOTFOUND.

High-level vs. Low-level Certificate Operations 139
Certificates and Certificate ManagementAlthough cryptlib can work directly with private keys, other formats like X.509certificates, S/MIME messages, and SSL require complex and convoluted namingand identification schemes for theirkeys. Because of this, you can’t immediately use a newly-generated private key with these formats for anything other than signing acertification request or a self-signed certificate. To use it for any other purpose, youneed to obtain an X.509 certificate that identifies the key. Once you’ve obtained the certificate, you can update the keyset or device that contains the basic public/privatekey data with additional certificate information. This additional information can be astandalone certificate or a full certificate chain from a trusted root CA down to theend user certificate. This chapter covers the details of obtaining a certificate orcertificate chain and attaching it to a private key.
The certificate management message exchange is usually carried out via HTTP oremail or through some other unspecified mechanism, however cryptlib also supportsthe Certificate Management Protocol (CMP) and Simple Certificate EnrolmentProtocol (SCEP), which define a mechanism for communicating with a CA to obtaincertificates and request the revocation of existing certificates. This chapter explainshow to use CMP and SCEP to obtain a certificate or request a revocation from a CA.In order to check a certificate’s status, you can use the real-time certificate statusprotocol (RTCS) to perform a certificate status check, or the online certificate statusprotocol (OCSP) to perform a certificate revocation check only. The RTCS andOCSP checking processes are also covered in this chapter.
High-level vs. Low-level Certificate OperationsAs with the general cryptlib programming interface, cryptlib supports certificatemanagement operations at three levels:
Plug-and-play PKIThe highest level is the plug-and-play PKI level, which is the easiest one to use andtherefore the recommended one. At this level, cryptlib handles all certificateprocessing and management operations for you, requiring no special knowledge ofcertificate formats, protocols, or operations. Because of its simplicity and ease of use,it’s strongly recommended that you use this interface if at all possible.
Mid-level Certificate ManagementThe intermediate level requires some knowledge of key generation procedures andcertificate management operations. This level involves the use of CMP and SCEP toobtain certificates and manage a CA, and RTCS and OCSP for certificate statuschecking. Most of the details of certificate management are taken care of for you bycryptlib, but you’ll need to perform some manual handling of certificate management operations.
Low-level Certificate ManagementThe lowest level involves manually managing certificates and certificate revocations,and requires dealing with an entire range of arcane, difficult-to-use, and largelydysfunctional mechanisms such as Distinguished Names, X.500 directories,certificate revocation lists, and assorted other paraphernalia. Working withcertificates at this level is extraordinarily difficult, and you should be absolutelycertain that you’re prepared for the large amount of effort that willbe required tomake anything work. At a minimum, you should read through and understand thecertificate tutorials mentioned in “Recommended Reading” on page 15 before tryingto do anything with low-level certificate operations.
If you’re absolutely certain that you must work with certificates at a low level, and that you understand just how much effort will be involved, you can find out moreabout low-level certificate operations in “Certificates in Detail” on page 193 and“Certificate Extensions” on page 224.

Certificates and Certificate Management140
Certificates and KeysOnce a public/private key pair is saved to a private key keyset, cryptlib allows extracertificate information to be added to the keyset. For example the process of creatinga keyset containing a certificate and private key is:
generate public/private key pair;write key pair to keyset;submit certification request to CA;receive certificate from CA;update keyset to include certificate;
If the certificate is a self-signed CA certificate, there’s no need to obtain the certificate from an external CA and you can add it directly to the keyset after youcreate it. If the key pair is being generated in a crypto device such as a smart card orFortezza card, this process is:
generate public/private key pair;submit certification request to CA;receive certificate from CA;update device to include certificate;
This example assumes that the certificate is immediately available from a CA, whichis not always the case. The full range of possibilities are covered in more detailfurther on.
Once you’ve updated the private key with a certificate (which is the only time you can write a public key certificate to a private key keyset), cryptlib will automaticallyassociate the certificate with the private key so that when you read it withcryptGetPrivateKey cryptlib will recreate the certificate alongside the key andattach it to the key. You can then use the combined certificate and key to performoperations that require the use of certificates such as certificate signing, S/MIMEemail decryption and signing, and user authentication. If you update the private keywith a complete certificate chain instead of just a single certificate, cryptlib willattach the full certificate chain to the key when you read it withcryptGetPrivateKey.
The update process involves adding the certificate information to the keyset ordevice, which updates it with the certificate object (either a certificate or a certificatechain):
cryptAddPublicKey( cryptKeyset, cryptCertificate );
The certificate object which is being written must match a private key stored in thekeyset or device. If it doesn’t match an existing private key, cryptlib will return aCRYPT_ERROR_PARAM2 error to indicate that the information in the certificateobject being added is incorrect. If there’s already a certificate for this key present, cryptlib will return a CRYPT_ERROR_DUPLICATE error to indicate that one keycan’t have two different certificates associated with it. See “Writing a Key to aKeyset” on page 136 for more on writing keys to keysets.
Using Separate Signature and Encryption CertificatesIt’s good security practice to use different keys for signing and encryption, and most digital signature laws contain some requirement that the two capabilities beimplemented with separate keys. cryptlib supports the use of two (or more) keysbelonging to a single user, the only issue to be aware of is that you should give eachkey a distinct label to allow it to be selected with cryptGetPrivateKey. For examplethe process of creating a keyset containing separate signature and encryption keyswith the signature key labelled “My signature key” and the encryption key labelled “My encryption key” would be:

Plug-and-play PKI 141
set key label to "Signature key";generate public/private signature key pair;set key label to "Encryption key";generate public/private encryption key pair;write key pairs to keyset;submit certification requests to CA;receive signature certificate from CA;receive encryption certificate from CA;update keyset to include certificates;
When you want to sign data, you would call cryptGetPrivateKey specifying the useof “Signature key”; when you want to decrypt data you would call cryptGetPrivateKey specifying the use of “Encryption key” (or cryptlib’s automatic key management will find it for you if you’re using it with a cryptlib envelope).
Plug-and-play PKIThe easiest way to set up keys and certificates is through cryptlib’s plug-and-playPKI facility, which performs the operations described above for you. To set up keysand certificates in this manner, cryptlib requires a private-key keyset or crypto tokensuch as a smart card or Fortezza card to store keys and certificates in, the URL of aplug-and-play PKI-capable CA, and a user name and password to authorise theissuing of the certificates. The session type for the plug-and-play PKI is CRYPT_-SESSION_CMP, the same type as a standard CMP session except that cryptlibmanages everything for you. The private-key keyset or crypto token is specified asCRYPT_SESSINFO_CMP_PRIVKEYSET, and the user name and password toauthorise the operation are provided as the CRYPT_SESSINFO_USERNAME andCRYPT_SESSINFO_PASSWORD:
CRYPT_SESSION cryptSession;CRYPT_KEYSET cryptKeyset;
/* Create the CMP session and private-key keyset */cryptCreateSession( &cryptSession, cryptUser, CRYPT_SESSION_CMP );cryptKeysetOpen( &cryptKeyset, cryptUser, CRYPT_KEYSET_FILE,
keysetName, CRYPT_KEYOPT_CREATE );
/* Add the server name/address */cryptSetAttributeString( cryptSession, CRYPT_SESSINFO_SERVER, server,
serverLength );
/* Add the username, password, and private-key keyset */cryptSetAttributeString( cryptSession, CRYPT_SESSINFO_USERNAME,
userName, userNameLength );cryptSetAttributeString( cryptSession, CRYPT_SESSINFO_PASSWORD,
password, passwordLength );cryptSetAttribute( cryptSession, CRYPT_SESSINFO_CMP_PRIVKEYSET,
cryptKeyset );
/* Activate the session */cryptSetAttribute( cryptSession, CRYPT_SESSINFO_ACTIVE, TRUE );
The same operation in Visual Basic is:
Dim cryptSession As LongDim cryptKeyset As Long
' Create the CMP session and private-key keysetcryptCreateSession cryptSession, cryptUser, CRYPT_SESSION_CMPcryptKeysetOpen cryptKeyset, cryptUser, CRYPT_KEYSET_FILE, _
keysetName, CRYPT_KEYOPT_CREATE
' Add the server name/addresscryptSetAttributeString cryptSession CRYPT_SESSINFO_SERVER, _
server, Len( server )
' Add the username, password, and private-key keysetcryptSetAttributeString cryptSession, CRYPT_SESSINFO_USERNAME, _
userName, Len( userName )cryptSetAttributeString cryptSession, CRYPT_SESSINFO_PASSWORD, _
password, Len( password )cryptSetAttribute cryptSession, CRYPT_SESSINFO_CMP_PRIVKEYSET, _
cryptKeyset

Certificates and Certificate Management142
' Activate the sessioncryptSetAttribute cryptSession, CRYPT_SESSINFO_ACTIVE, 1
Once this process has been completed, the private-key keyset or crypto token that youprovided will contain a signature key identified by the label “Signature key”, and an encryption key identified by the label “Encryption key” if the public-key algorithmbeing used is capable of encryption, along with any additional certificates and CAcertificates that are required to use the keys. Both keys will be protected using thepassword that you provided to authenticate the certification process. If you want tochange the password for either of the keys you can do so as described in “Changing aPrivate Key Password” on page 137 before you close the keyset and commit the datato disk. Alternatively, if you want to retain the password that you used for thecertificate issue to protect the keys and certificates, you can close the keysetimmediately after you add it to the session and cryptlib will manage it for you.
If the CA is issuing you a CA certificate of your own, the keyset or crypto token willcontain a single CA signing key identified by the label “Signature key”.Since CAkeys can’t be used for encryption or general-purpose signing but only for signingother certificates, only the single CA signing key is created.
In addition to returning your own certificates, the plug-and-play PKI mechanism alsoperforms a PKIBoot certificate bootstrap operation that downloads an initial trustedcertificate set for you to use. This trusted certificate set only contains a small numberof known-good certificates trusted by the CA that provided you with your owncertificates, rather than the 100+ certificates that you’d be forced to automatically trust when you use a web browser (some of these browser certificates have weak 512-bit keys, or are owned by CAs that have gone out of business, or whose private keyshave been on-sold to third parties when the original owner went bankrupt, sometimespassing through multiple owners). The PKIBoot operation allows an end user,starting with nothing more than the user name and password used for the plug-and-play PKI operation to acquire all of the information necessary to use the PKI, withouthaving to manually download and install certificates, or being forced to trust a largecollection of certificates from unknown CAs.
Once the PKIBoot process has completed, the trusted certificates will be present inmemory as standard cryptlib trusted certificates (see “Certificate Trust Management” on page 221). To commit them to permanent storage and make them available forfuture cryptlib sessions, you need to save the cryptlib configuration data as explainedin “Working with Trust Settings” on page 222:
cryptSetAttribute( CRYPT_UNUSED, CRYPT_OPTION_CONFIGCHANGED, FALSE );
If you don’t want to rely on the PKIBoot trusted certificates, don’t commit the configuration data to permanent storage and they’ll be deleted from memory the next time cryptlib is restarted.
At this point the keys are ready for use for encryption, signing, email protection,authentication, and so on. Because of the ease of use provided by the plug-and-playPKI facility, it’s strongly recommended that you use this in place of any other certificate management process, since the alternatives require significantly largeramounts of effort in order to do more or less the same thing.
Simple Certificate CreationThe process of creating a certificate is a rather complicated task that can be somewhatdaunting when all you want to do is exchange a public key with someone. In order tosimplify the process, cryptlib provides a facility to create simplified certificates thatdon’t require you to go through all of the steps outlined in the following sections. These simplified certificates are valid for any type of usage (including encryption,signing, use in SSL servers and S/MIME, and issuing other certificates and CRLs)and have a long enough lifetime that you don’t have to worry about them expiring or becoming invalid while you’re still using them.

Simple Certificate Creation 143
To create one of these simplified certificates, you set the CRYPT_CERTINFO_-XYZZY attribute after creating the certificate object to tell cryptlib to create asimplified certificate, add a name via the CRYPT_CERTINFO_COMMONNAMEattribute (and an email address via the CRYPT_CERTINFO_RFC822NAMEattribute if you plan to use the certificate for email purposes), and sign it. The nameis usually the name of the certificate owner, but if you want to use it with an SSLserver then it’s the name of the SSL server. For example to create a simplified certificate for Dave Smith you would use:
CRYPT_CERTIFICATE cryptCertificate;
/* Create a simplified certificate */cryptCreateCert( &cryptCertificate, cryptUser,
CRYPT_CERTTYPE_CERTIFICATE );cryptSetAttribute( cryptCertificate, CRYPT_CERTINFO_XYZZY, 1 );
/* Add the public key and certificate owner name and sign thecertificate with the private key */
cryptSetAttribute( cryptCertificate,CRYPT_CERTINFO_SUBJECTPUBLICKEYINFO, pubKeyContext );
cryptSetAttributeString( cryptCertificate, CRYPT_CERTINFO_COMMONNAME,"Dave Smith", 10 );
cryptSignCert( cryptCertificate, cryptContext );
To create a simplified certificate for the SSL server www.sslserver.com you wouldgo through the same steps but give the server name instead of the user’s name:
/* ... */cryptSetAttributeString( cryptCertificate, CRYPT_CERTINFO_COMMONNAME,
"www.sslserver.com", 17 );/* ... */
Finally, if you wanted to use the certificate for email purposes you also need to addthe certificate owner’s email address:
/* ... */cryptSetAttributeString( cryptCertificate, CRYPT_CERTINFO_RFC822NAME,
"[email protected]", 14 );/* ... */
The same operation in Java or C# is:
/* Create a simplified certificate */int cryptCertificate = crypt.CreateCert( cryptUser,
crypt.CERTTYPE_CERTIFICATE );crypt.SetAttribute( cryptCertificate, crypt.CERTINFO_XYZZY, 1 );
/* Add the public key and certificate owner name and sign thecertificate with the private key */
crypt.SetAttribute( cryptCertificate,crypt.CERTINFO_SUBJECTPUBLICKEYINFO, pubKeyContext );
crypt.SetAttributeString( cryptCertificate, crypt.CERTINFO_COMMONNAME,"Dave Smith" );
crypt.SignCert( cryptCertificate, cryptContext );
The Visual Basic version is:
Dim cryptCertificate As Long
' Create a simplified certificatecryptCreateCert cryptCertificate, cryptUser,
CRYPT_CERTTYPE_CERTIFICATEcryptSetAttribute cryptCertificate, CRYPT_CERTINFO_XYZZY, 1
' Add the public key and certificate owner name and' sign the certificate with the private keycryptSetAttribute cryptCertificate,
CRYPT_CERTINFO_SUBJECTPUBLICKEYINFO, _ pubKeyContextcryptSetAttributeString cryptCertificate, CRYPT_CERTINFO_COMMONNAME, _
"Dave Smith", 10cryptSignCert cryptCertificate, cryptContext
Since these certificates can be used for any purpose and (effectively) never expire,you can use them without having to worry about certificate requests, communicatingwith (and paying money to) a CA, proof of possession protocols, X.500 distinguished

Certificates and Certificate Management144
names, key usages, certificate extensions, and all the other paraphernalia that comeswith X.509 certificates.
In order to distinguish these simplified certificates from normal certificates, cryptlibindicates that they were issued under a simplified-certificate policy using thecertificatePolicies attribute, which is described in more detail in “Certificate Policies,Policy Mappings, and Policy Constraints” on page 229.
The Certification ProcessCreating a private key and an associated certificate involves two separate processes:generating the public/private key pair, and obtaining a certificate for the public keywhich is then attached to the public/private key. The key generation process is:
generate public/private key pair;write key pair to keyset;
For a crypto device such as a smart card or Fortezza card, the key is generated insidethe device, so this step simplifies to:
generate public/private key pair;
The generated key is already stored inside the device, so there’s no need to explicitly write it to any storage media.
The certification process varies somewhat, a typical case has already been presentedearlier:
create certification request;submit certification request to CA;receive certificate from CA;update keyset or device to include certificate;
Now that the general outline has been covered, we can look at the individual steps inmore detail. Generating a public/private key pair and saving it to a keyset isrelatively simple:
CRYPT_CONTEXT cryptContext;CRYPT_KEYSET cryptKeyset;
/* Create an RSA public/private key context, set a label for it, andgenerate a key into it */
cryptCreateContext( &cryptContext, cryptUser, CRYPT_ALGO_RSA );cryptSetAttributeString( cryptContext, CRYPT_CTXINFO_LABEL,
"Private key", 11 );cryptGenerateKey( cryptContext );
/* Save the generated public/private key pair to a keyset */cryptKeysetOpen( &cryptKeyset, cryptUser, CRYPT_KEYSET_FILE, fileName,
CRYPT_KEYOPT_CREATE );cryptAddPrivateKey( cryptKeyset, cryptContext, password );cryptKeysetClose( cryptKeyset );
/* Clean up */cryptDestroyContext( cryptContext );
The same operation in Java or C# is:
/* Create an RSA public/private key context, set a label for it, andgenerate a key into it */
int cryptContext = crypt.CreateContext( cryptUser, crypt.ALGO_RSA );crypt.SetAttributeString( cryptContext, crypt.CTXINFO_LABEL, "Private
key" );crypt.GenerateKey( cryptContext );
/* Save the generated public/private key pair to a keyset */int cryptKeyset = crypt.KeysetOpen( cryptUser, crypt.KEYSET_FILE,
fileName, crypt.KEYOPT_CREATE );crypt.AddPrivateKey( cryptKeyset, cryptContext, password );crypt.KeysetClose( cryptKeyset );
/* Clean up */crypt.DestroyContext( cryptContext );
The Visual Basic equivalent is:

The Certification Process 145
Dim cryptContext As LongDim cryptKeyset As Long
' Create an RSA public/private key context, set a label for it,' and generate a key into itcryptCreateContext cryptContext, cryptUser, CRYPT_ALGO_RSAcryptSetAttributeString cryptContext, CRYPT_CTXINFO_LABEL, _
"Private key", 11cryptGenerateKey cryptContext
' Save the generated public/private key pair to a keysetcryptKeysetOpen cryptKeyset, cryptUser, CRYPT_KEYSET_FILE, filename, _
CRYPT_KEYOPT_CREATEcryptAddPrivateKey cryptKeyset, cryptContext, password
' Clean upcryptKeysetClose cryptKeysetcryptDestroyContext cryptContext
The process for a crypto device is identical except that the keyset write is omitted,since the key is already held inside the device.
In practice you’d probably use cryptGenerateKeyAsync so that the user can performother actions while the key is being generated, although for typical key sizes on amodern PC the key generation is practically instantaneous. If you want to usecryptGenerateKeyAsync, you’d run the key generation and the certification request creation in parallel so that by the time the certificate details have been filled in thekey is ready for use.
At the same time that you create and save the public/private key pair, you wouldcreate a certification request:
CRYPT_CERTIFICATE cryptCertRequest;
/* Create a certification request */cryptCreateCert( &cryptCertRequest, cryptUser,
CRYPT_CERTTYPE_CERTREQUEST );
/* Fill in the certification request details *//* ... */
/* Sign the request */cryptSignCert( cryptCertRequest, cryptContext );
The equivalent in Visual Basic is:
Dim cryptCertRequest As Long
' Create a certification requestcryptCreateCert cryptCertRequest, cryptUser, _
CRYPT_CERTTYPE_CERTREQUEST
' Fill in the certification request details'...
' Sign the requestcryptSignCert cryptCertRequest, cryptContext
The next step depends on the speed with which the certification request can be turnedinto a certificate. If the CA’s turnaround time is very quick (for example if it’s operated in-house) then you can submit the request directly to the CA to convert itinto a certificate. In this case you can keep the keyset that you wrote the key to openand update it immediately with the certificate:
CRYPT_CERTIFICATE cryptCertificate;
/* Send the certification request to the CA and obtain the returnedcertificate */
/* ... */
/* Import the certificate and check its validity */cryptImportCert( cert, certLength, cryptUser, &cryptCertificate );cryptCheckCert( cryptCertificate, caCertificate );
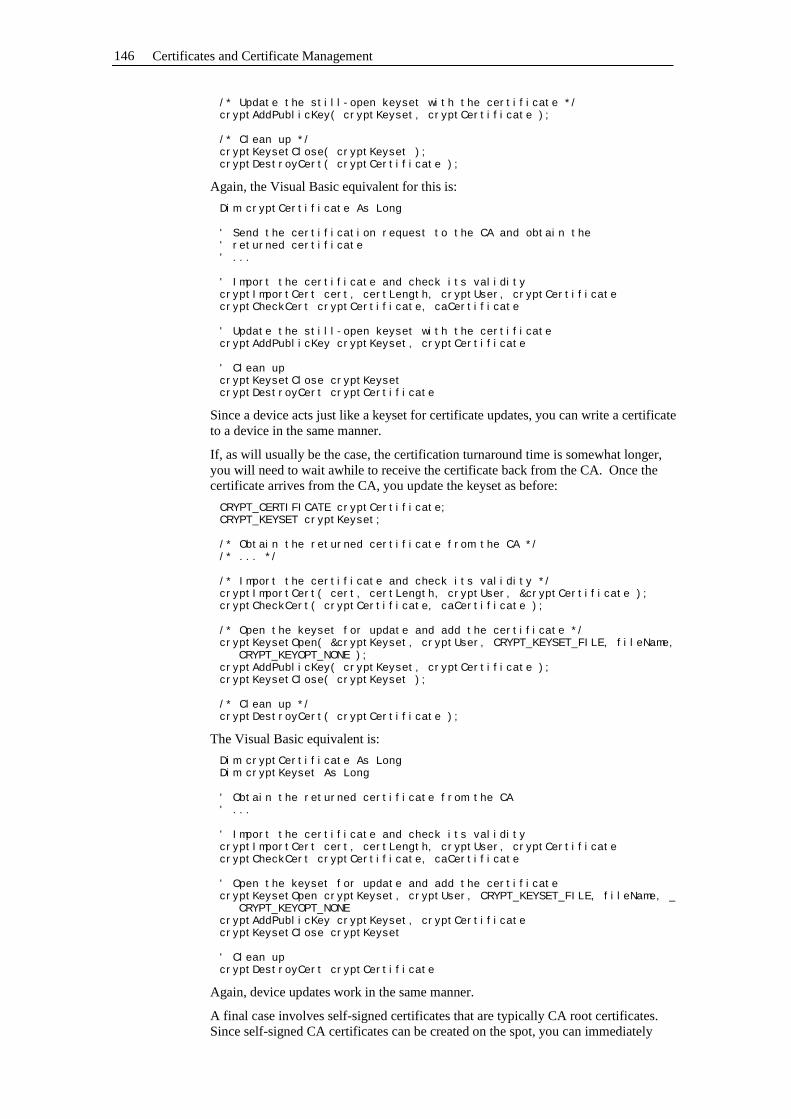
Certificates and Certificate Management146
/* Update the still-open keyset with the certificate */cryptAddPublicKey( cryptKeyset, cryptCertificate );
/* Clean up */cryptKeysetClose( cryptKeyset );cryptDestroyCert( cryptCertificate );
Again, the Visual Basic equivalent for this is:
Dim cryptCertificate As Long
' Send the certification request to the CA and obtain the' returned certificate' ...
' Import the certificate and check its validitycryptImportCert cert, certLength, cryptUser, cryptCertificatecryptCheckCert cryptCertificate, caCertificate
' Update the still-open keyset with the certificatecryptAddPublicKey cryptKeyset, cryptCertificate
' Clean upcryptKeysetClose cryptKeysetcryptDestroyCert cryptCertificate
Since a device acts just like a keyset for certificate updates, you can write a certificateto a device in the same manner.
If, as will usually be the case, the certification turnaround time is somewhat longer,you will need to wait awhile to receive the certificate back from the CA. Once thecertificate arrives from the CA, you update the keyset as before:
CRYPT_CERTIFICATE cryptCertificate;CRYPT_KEYSET cryptKeyset;
/* Obtain the returned certificate from the CA *//* ... */
/* Import the certificate and check its validity */cryptImportCert( cert, certLength, cryptUser, &cryptCertificate );cryptCheckCert( cryptCertificate, caCertificate );
/* Open the keyset for update and add the certificate */cryptKeysetOpen( &cryptKeyset, cryptUser, CRYPT_KEYSET_FILE, fileName,
CRYPT_KEYOPT_NONE );cryptAddPublicKey( cryptKeyset, cryptCertificate );cryptKeysetClose( cryptKeyset );
/* Clean up */cryptDestroyCert( cryptCertificate );
The Visual Basic equivalent is:
Dim cryptCertificate As LongDim cryptKeyset As Long
' Obtain the returned certificate from the CA' ...
' Import the certificate and check its validitycryptImportCert cert, certLength, cryptUser, cryptCertificatecryptCheckCert cryptCertificate, caCertificate
' Open the keyset for update and add the certificatecryptKeysetOpen cryptKeyset, cryptUser, CRYPT_KEYSET_FILE, fileName, _
CRYPT_KEYOPT_NONEcryptAddPublicKey cryptKeyset, cryptCertificatecryptKeysetClose cryptKeyset
' Clean upcryptDestroyCert cryptCertificate
Again, device updates work in the same manner.
A final case involves self-signed certificates that are typically CA root certificates.Since self-signed CA certificates can be created on the spot, you can immediately

Obtaining Certificates using CMP 147
update the still-open keyset with the self-signed certificate without any need to gothrough the usual certification process. When you create a CA certificate you need toset the CRYPT_CERTINFO_CA attribute to true (any nonzero value) to indicate thatthe certificate (and by extension the private key associated with it) is a CA certificate.If you don’t do this and then try to sign a certificate using the key, cryptlib will return CRYPT_ERROR_INVALID to indicate that the key can’t sign certificates because it isn’t a CA key. To create a self-signed CA certificate you would do the following:
CRYPT_CERTIFICATE cryptCertificate;
/* Create a self-signed CA certificate */cryptCreateCert( &cryptCertificate, cryptUser,
CRYPT_CERTTYPE_CERTIFICATE );cryptSetAttribute( cryptCertificate, CRYPT_CERTINFO_SELFSIGNED, 1 );cryptSetAttribute( cryptCertificate, CRYPT_CERTINFO_CA, 1 );/* ... */
/* Sign the certificate with the private key and update the still-openkeyset with it*/
cryptSignCert( cryptCertificate, cryptContext );cryptAddPublicKey( cryptKeyset, cryptCertificate );
/* Clean up */cryptKeysetClose( cryptKeyset );cryptDestroyCert( cryptCertificate );
When you sign a certificate for which the CRYPT_CERTINFO_CA attribute hasbeen set, cryptlib will enable the key usages CRYPT_KEYUSAGE_KEYCERTSIGNand CRYPT_KEYUSAGE_CRLSIGN to indicate that the key can be used to signcertificates and CRLs. Since this is a CA key it will by default only be usable forthese purposes and not for any other purpose such as encryption or general-purposesigning. You can override this by setting the key usage yourself, however CA keysshouldn’t really be used for a purpose other than one or both of certificate and/or CRL signing.
Obtaining Certificates using CMPThe discussion so far has covered the means of communicating with the CA in verygeneral terms. Typically the message exchange is carried out via HTTP or email orthrough some other, unspecified mechanism. In addition to these very flexiblecommunications options, cryptlib also supports the Certificate MismanagementProtocol (CMP), which defines a mechanism for communicating with a CA to obtaincertificates and request the revocation of existing certificates. CMP makes use ofsession objects as described in “Secure Sessions” on page 96, the followingdescription assumes that you’re familiar with the operation and use of cryptlib session objects.
The general process involved in a CMP session is a two-step one of which the firststep is creating the appropriate request, for example a request for a new, updated, oradditional certificate or a revocation of an existing certificate, and the second step issubmitting it to a CA for processing. The result of the processing (typically a signedcertificate) is returned at the end of the session:
create a CMP request;fill in the request details;sign the request;
create a CMP session;add the CMP server address and request type;add user name and password or signature key;add the issuing CA's certificate;add the CMP request;activate the CMP session;obtain the result from the CMP session;destroy the CMP session;
The process involved in creating a request for use in CMP is mostly identical tocreating a normal certification request (although the formats are incompatible cryptlibhides the details so the programming interface is identical) and is covered below.

Certificates and Certificate Management148
cryptlib also implements a full CMP server that allows you to issue certificates usingCMP. This process is described in “Managing a CA using CMP or SCEP” on page 166.
CMP Certificate RequestsCMP uses a generic certificate request object to handle requests for new certificatesand certificate renewals and updates. The creation of a CMP certificate request oftype CRYPT_CERTTYPE_REQUEST_CERT is as follows:
CRYPT_CERTIFICATE cryptCMPRequest;
/* Create a certification request */cryptCreateCert( &cryptCMPRequest, cryptUser,
CRYPT_CERTTYPE_REQUEST_CERT );
/* Fill in the standard certification request details *//* ... */
/* Sign the request */cryptSignCert( cryptCMPRequest, cryptContext );
If you’re requesting a new certificate, you generally only need to provide the public key to be certified. Since cryptlib will only copy across the appropriate keycomponents, there’s no need to have a separate public and private key context, you can add the same private key context that you’ll be using to sign the certification request to supply the CRYPT_CERTINFO_SUBJECTPUBLICKEYINFOinformation and cryptlib will use the appropriate data from it. If the CA doesn’t handle the certificate identification information for you, you’ll also need to provide that. This is rather more complex, and is explained in “Certificate IdentificationInformation” on page 204.
If you’re requesting an update of an existing certificate, you can add information from the existing certificate to the request for use in the new certificate. If you wantto renew only the public key in the existing certificate, you should add it asCRYPT_CERTINFO_SUBJECTPUBLICKEYINFO, if you want to renew the entirecertificate you should add it as a CRYPT_CERTINFO_CERTIFICATE. For exampleto renew an entire certificate you would use:
CRYPT_CERTIFICATE cryptCMPRequest;
/* Create a certification request and add the existing certificatedetails */
cryptCreateCert( &cryptCMPRequest, cryptUser,CRYPT_CERTTYPE_REQUEST_CERT );
cryptSetAttribute( cryptCMPRequest, CRYPT_CERTINFO_CERTIFICATE,cryptCertificate );
/* Sign the request */cryptSignCert( cryptCMPRequest, cryptContext );
When you add a CRYPT_CERTINFO_CERTIFICATE cryptlib only copies acrossthe public key and certificate owner DN, but not any other attributes such as keyusage information (if everything was copied across then the new certificate would beidentical to the existing one). This allows you to configure the new certificate inwhichever manner you choose, for example to set new or different options from thosepresent in the original certificate.
Requesting the revocation of an existing certificate is very similar to requesting acertificate using a CMP request, the only difference being that the request type is nowCRYPT_CERTTYPE_REQUEST_REVOCATION. Creating a revocation requestinvolves adding the certificate to be revoked to the request and adding any extrainformation such as the revocation reason that must be present in the CRL which isissued by the CA:
CRYPT_CERTIFICATE cryptCMPRequest;
/* Create a revocation request */cryptCreateCert( &cryptCMPRequest, cryptUser,
CRYPT_CERTTYPE_REQUEST_REVOCATION );

Obtaining Certificates using CMP 149
/* Fill in the revocation request details */cryptSetAttribute( cryptCMPRequest CRYPT_CERTINFO_CERTIFICATE,
certToRevoke );cryptSetAttribute( cryptCMPRequest, CRYPT_CERTINFO_CRLREASON,
revocationReason );
Note that a revocation request isn’t signed since the key required to sign it may not be available any more (loss of the corresponding private key is one of the reasons forrevoking a certificate). Once the revocation request has been completed you cansubmit it to the CA as usual.
CMP Operation TypesThe CMP protocol provides for a confusing variety of certificate issue operationswith in some cases no clear distinction as to which request type is appropriate forwhich situation. Because of this, cryptlib will always generate the most genericrequest type possible, as with other certificate operations it may be necessary toexperiment with request types in order to determine the type which is being expectedby a CA (some CAs may behave differently for different request types even if therequest data is otherwise identical). Since the same uncertainty over which CMPrequest type to use exists among CAs, it’s quite likely that the CAs you’ll be interacting with will also accept a variety of requests for a particular situation, so thatthe generic type generated by cryptlib should work in most cases.
The different CMP certificate request operations are:
Operation Description
CRYPT_REQUESTTYPE_-INITIALISATION
Initial request to a CA, protected by a username and password supplied by the CA.
CRYPT_REQUESTTYPE_-CERTIFICATE
CRYPT_REQUESTTYPE_-KEYUPDATE
Subsequent requests to the CA, protected bya signature created with an existing CA-certified key. The message contents for thesetwo request types are identical, the onlydifference is that one is called a certificaterequest and the other a key update request.
CRYPT_REQUESTTYPE_-REVOCATION
Request for revocation of an existingcertificate, protected either by a passwordsupplied by the CA or by a signature createdwith an existing CA certified key.
When you submit a CMP request, you need to specify the request type before youactivate the session. If it’s an initialisation or (for some CAs) revocation request the session is authenticated using a user name and password that was previously obtainedfrom the CA. If it’s a certificate or key update or (for some CAs) revocation request, the session is authenticated using a signature created with a key that was previouslycertified by the CA.
Note that some CAs will treat the password which is used during the initialisationstage as a one-time password, so that all subsequent requests have to be signedcertificate or key update requests. In addition some CAs require the DN used insubsequent certificates to be the same as the one used in the initialisation requestwhile others don’t, some CAs allow a user-specified DN while others require the useof a fixed DN or set it themselves (overriding the user-supplied value), and some CAsrequire revocation requests to be protected by a signature rather than a password,which means that if no signature certificate is available (for example you want torevoke a certificate because you’ve lost the private key, or you have an encryption-only certificate), the certificate can’t be revoked. CAs will also perform CA policy-specific operations during the certificate issue process, for example some CAs willautomatically revoke a certificate which is superseded by a new one via an updaterequest to prevent a situation in which two otherwise identical certificates exist at thesame time.

Certificates and Certificate Management150
CMP SessionsOnce a CMP request has been prepared, it’s ready for submission to the CA. This is done via a CMP session object, which manages the details of communicating with theCA, authenticating the user, and verifying the data being exchanged. You need toprovide the CA server using the CRYPT_SESSINFO_SERVER attribute and either auser name and password using the CRYPT_SESSINFO_USERNAME and CRYPT_-SESSINFO_PASSWORD attributes (for an initialisation or revocation request) or aprivate signing key using the CRYPT_SESSINFO_PRIVATEKEY attribute (for acertificate or key update or revocation request). Finally, you need to provide thecertificate of the issuing CA and the request type and data. Once all of this is done,you can activate the session to request the certificate or revocation.
You can submit an initialisation request and obtain an initial certificate from a CA asfollows:
CRYPT_SESSION cryptSession;
/* Create the CMP session */cryptCreateSession( &cryptSession, cryptUser, CRYPT_SESSION_CMP );
/* Add the server name/address and request type */cryptSetAttributeString( cryptSession, CRYPT_SESSINFO_SERVER, server,
serverLength );cryptSetAttribute( cryptSession, CRYPT_SESSINFO_CMP_REQUESTTYPE,
CRYPT_REQUESTTYPE_INITIALISATION );
/* Add the username and password or private signing key. Since thisis an initialisation request, we add the user name and password */
cryptSetAttributeString( cryptSession, CRYPT_SESSINFO_USERNAME,userName, userNameLength );
cryptSetAttributeString( cryptSession, CRYPT_SESSINFO_PASSWORD,password, passwordLength );
/* Add the certificate of the CA who is to issue the certificate orrevocation and the request itself */
cryptSetAttribute( cryptSession, CRYPT_SESSINFO_CACERTIFICATE,cryptCACert );
cryptSetAttribute( cryptSession, CRYPT_SESSINFO_REQUEST,cryptCmpRequest );
/* Activate the session */cryptSetAttribute( cryptSession, CRYPT_SESSINFO_ACTIVE, TRUE );
The same operation in Visual Basic is:
Dim cryptSession As Long
' Create the CMP sessioncryptCreateSession cryptSession, cryptUser, CRYPT_SESSION_CMP
' Add the server name/address and request typecryptSetAttributeString cryptSession CRYPT_SESSINFO_SERVER, _
server, Len( server )cryptSetAttribute cryptSession CRYPT_SESSINFO_CMP_REQUESTTYPE, _
CRYPT_REQUESTTYPE_INITIALIZATION
' Add the username and password or private signing key. Since this' is an initialisation request, we add the user name and password.cryptSetAttributeString cryptSession, CRYPT_SESSINFO_USERNAME, _
userName, Len( userName )cryptSetAttributeString cryptSession, CRYPT_SESSINFO_PASSWORD, _
password, Len( password )
' Add the certificate of the CA who is to issue the certificate or' revocation and the request itselfcryptSetAttribute cryptSession, CRYPT_SESSINFO_CACERTIFICATE, _
cryptCACertcryptSetAttribute cryptSession, CRYPT_SESSINFO_REQUEST, _
cryptCmpRequest
' Activate the sessioncryptSetAttribute cryptSession, CRYPT_SESSINFO_ACTIVE, 1

Obtaining Certificates using CMP 151
If the server that you’re communicating with is a cryptlib CMP server, the usernameand password contain a built-in checksum mechanism which is used by cryptlib tocheck for data entry errors. If cryptlib returns a CRYPT_ERROR_BADDATA whenyou set the CRYPT_SESSINFO_USERNAME or CRYPT_SESSINFO_-PASSWORD attributes then the user has made a mistake when they entered the nameor password. More details on the format and error checking process used for usernames and passwords is given in “PKI User IDs” on page 165.
You can submit subsequent certificate or key update requests to obtain furthercertificates from a CA as follows:
CRYPT_SESSION cryptSession;
/* Create the CMP session */cryptCreateSession( &cryptSession, cryptUser, CRYPT_SESSION_CMP );
/* Add the server name/address and request type */cryptSetAttributeString( cryptSession, CRYPT_SESSINFO_SERVER, server,
serverLength );cryptSetAttribute( cryptSession, CRYPT_SESSINFO_CMP_REQUESTTYPE,
CRYPT_REQUESTTYPE_CERTIFICATE );
/* Add the username and password or private signing key. Since thisis a certification request, we add the private key */
cryptSetAttribute ( cryptSession, CRYPT_SESSINFO_PRIVATEKEY,privateKey );
/* Add the certificate of the CA who is to issue the certificate orrevocation and the request itself */
cryptSetAttribute( cryptSession, CRYPT_SESSINFO_CACERTIFICATE,cryptCACert );
cryptSetAttribute( cryptSession, CRYPT_SESSINFO_REQUEST,cryptCmpRequest );
/* Activate the session */cryptSetAttribute( cryptSession, CRYPT_SESSINFO_ACTIVE, TRUE );
The Java or C# equivalent is:
/* Create the CMP session */int cryptSession = crypt.CreateSession( cryptUser,
crypt.SESSION_CMP );
/* Add the server name/address and request type */crypt.SetAttributeString( cryptSession, crypt.SESSINFO_SERVER,
server );crypt.SetAttribute( cryptSession, crypt.SESSINFO_CMP_REQUESTTYPE,
crypt.REQUESTTYPE_CERTIFICATE );
/* Add the username and password or private signing key. Since this isa certification request, we add the private key */
crypt.SetAttribute ( cryptSession, crypt.SESSINFO_PRIVATEKEY,privateKey );
/* Add the certificate of the CA who is to issue the certificate orrevocation and the request itself */
crypt.SetAttribute( cryptSession, crypt.SESSINFO_CACERTIFICATE,cryptCACert );
crypt.SetAttribute( cryptSession, crypt.SESSINFO_REQUEST,cryptCmpRequest );
/* Activate the session */crypt.SetAttribute( cryptSession, crypt.SESSINFO_ACTIVE, 1 );
Submitting a request for a certificate revocation works in an identical manner, withauthentication being performed using a user name and password as it is for aninitialisation request or a private key as it is for a certification request.
If the session is successfully activated the CMP object will contain the response fromthe CA, typically a newly-issued certificate. Revocation requests return no dataexcept the status code resulting from the activation of the session. If you’re requesting a certificate you can read it from the session as a CRYPT_SESSINFO_-RESPONSE attribute:

Certificates and Certificate Management152
CRYPT_CERTIFICATE cryptCertificate;int status;
/* Activate the session */status = cryptSetAttribute( cryptSession, CRYPT_SESSINFO_ACTIVE,
TRUE );if( cryptStatusError( status ) )
/* Couldn't obtain certificate from CA */;
/* Get the returned certificate */cryptGetAttribute( cryptSession, CRYPT_SESSINFO_RESPONSE,
&cryptCertificate );
Once you’ve obtained the certificate, you should save it with the private key it’s associated with as described in “Certificates and Keys” on page 140. Because CMPis a complex protocol with a large number of variations and options, it can fail for avariety of reasons. The error-handling techniques described in “Secure Sessions” on page 96 may be useful in determining the exact nature of the problem.
Obtaining Certificates using SCEPObtaining a certificate using the Simple Certificate Enrolment Protocol (SCEP)works much like it does for CMP. The general process involved in an SCEP sessionis a two-step one of which the first step is creating a certification request and thesecond step is submitting it to a CA for processing. The result of the processing(typically a signed certificate) is returned at the end of the session. SCEP makes useof session objects as described in “Secure Sessions” on page 96, the followingdescription assumes that you’re familiar with the operation and use of cryptlib session objects:
create a PKCS #10 request;fill in the request details;
create an SCEP session;add the SCEP server address;add user name and password;add the issuing CA's certificate;add the PKCS #10 request;add the private key matching the PKCS #10 request;activate the SCEP session;obtain the result from the SCEP session;destroy the SCEP session;
The process involved in creating a request for use in SCEP is mostly identical to theone for CMP, with a few differences as noted below. cryptlib also implements a fullSCEP server that allows you to issue certificates using SCEP. This process isdescribed in “Managing a CA using CMP or SCEP” on page 166.
SCEP Certificate RequestsSCEP uses a PKCS #10 certificate request object to handle requests for certificates.The creation of a PKCS #10 certificate request of type CRYPT_CERTTYPE_-CERTREQUEST is as follows:
CRYPT_CERTIFICATE cryptCertRequest;
/* Create a certification request */cryptCreateCert( &cryptCertRequest, cryptUser,
CRYPT_CERTTYPE_CERTREQUEST );
/* Fill in the standard certification request details *//* ... */
Note that, unlike CMP requests, the SCEP request isn’t signed. This is because cryptlib has to fill in further details in the request as part of the SCEP messageexchange process.
SCEP SessionsOnce a PKCS #10 request has been prepared, it’s ready for submission to the CA. This is done via a SCEP session object, which manages the details of communicating

Obtaining Certificates using SCEP 153
with the CA, authenticating the user, and verifying the data being exchanged. Youneed to specify the CA server and a user name and password using the CRYPT_-SESSINFO_SERVER, CRYPT_SESSINFO_USERNAME and CRYPT_-SESSINFO_PASSWORD attributes in the usual manner. In addition you need tosupply the private key that was used to create the request using the CRYPT_-SESSINFO_PRIVATEKEY attribute. The private key is never sent to the server, butis used to for signing and encryption purposes by the SCEP client. Finally, you needto provide the certificate of the issuing CA and the request data. Once all of this isdone, you can activate the session to obtain the certificate:
CRYPT_SESSION cryptSession;
/* Create the SCEP session */cryptCreateSession( &cryptSession, cryptUser, CRYPT_SESSION_SCEP );
/* Add the server name/address */cryptSetAttributeString( cryptSession, CRYPT_SESSINFO_SERVER, server,
serverLength );
/* Add the username, password, and private key */cryptSetAttributeString( cryptSession, CRYPT_SESSINFO_USERNAME,
userName, userNameLength );cryptSetAttributeString( cryptSession, CRYPT_SESSINFO_PASSWORD,
password, passwordLength );cryptSetAttribute( cryptSession, CRYPT_SESSINFO_PRIVATEKEY, privateKey
);
/* Add the certificate of the CA who is to issue the certificate andthe request itself */
cryptSetAttribute( cryptSession, CRYPT_SESSINFO_CACERTIFICATE,cryptCACert );
cryptSetAttribute( cryptSession, CRYPT_SESSINFO_REQUEST, cryptRequest);
/* Activate the session */cryptSetAttribute( cryptSession, CRYPT_SESSINFO_ACTIVE, TRUE );
The same operation in Visual Basic is:
Dim cryptSession As Long
' Create the SCEP sessioncryptCreateSession cryptSession, cryptUser, CRYPT_SESSION_SCEP
' Add the server name/addresscryptSetAttributeString cryptSession CRYPT_SESSINFO_SERVER, _
server, Len( server )
' Add the username, password, and private key.cryptSetAttributeString cryptSession, CRYPT_SESSINFO_USERNAME, _
userName, Len( userName )cryptSetAttributeString cryptSession, CRYPT_SESSINFO_PASSWORD, _
password, Len( password )cryptSetAttribute cryptSession, CRYPT_SESSINFO_PRIVATEKEY, _
privateKey
' Add the certificate of the CA who is to issue the certificate andthe request itself
cryptSetAttribute cryptSession, CRYPT_SESSINFO_CACERTIFICATE, _cryptCACert
cryptSetAttribute cryptSession, CRYPT_SESSINFO_REQUEST, _cryptRequest
' Activate the sessioncryptSetAttribute cryptSession, CRYPT_SESSINFO_ACTIVE, 1
If the server that you’re communicating with is a cryptlib SCEP server, the username and password contain a built-in checksum mechanism which is used by cryptlib tocheck for data entry errors. If cryptlib returns a CRYPT_ERROR_BADDATA whenyou set the CRYPT_SESSINFO_USERNAME or CRYPT_SESSINFO_-PASSWORD attributes then the user has made a mistake when they entered the nameor password. More details on the format and error checking process used for user

Certificates and Certificate Management154
names and passwords is given in “Managing a CA using CMP or SCEP” on page 166.
Unlike CMP, SCEP only recognises a basic certification request for a new certificate,so there’s no need to specify a request type before you activate the session. In addition, SCEP can only certify keys capable of both encryption and signing, whichmeans that you can only certify RSA keys with no usage restrictions that would limitthem to being used only for encryption or only for signing. The returned certificatewill contain a combined key usage allowing both encryption and signing.
The SCEP CA certificate must also be capable of encryption and signing, which isn’t normally done with a CA certificate but is required by the SCEP protocol. If you adda CA certificate or private key that isn’t capable of both encryption and signing, cryptlib will return a CRYPT_ERROR_PARAM3 to indicate that the CA certificateor key can’t be used for SCEP.
If the session is successfully activated the SCEP object will contain the response fromthe CA, which will be a newly-issued certificate that you can read from the session asa CRYPT_SESSINFO_RESPONSE attribute:
CRYPT_CERTIFICATE cryptCertificate;int status;
/* Activate the session */status = cryptSetAttribute( cryptSession, CRYPT_SESSINFO_ACTIVE, TRUE
);if( cryptStatusError( status ) )
/* Couldn't obtain certificate from CA */;
/* Get the returned certificate */cryptGetAttribute( cryptSession, CRYPT_SESSINFO_RESPONSE,
&cryptCertificate );
Once you’ve obtained the certificate, you should save it with the private key it’s associated with as described in “Certificates and Keys” on page 140. Because SCEPis a complex protocol with a large number of variations and options, it can fail for avariety of reasons. The error-handling techniques described in “Secure Sessions” on page 96 may be useful in determining the exact nature of the problem.
Certificate Status Checking using RTCSIn order to check the validity of a certificate, cryptlib supports the real-time certificatestatus protocol (RTCS). The simplest way to use RTCS is with cryptCheckCert,which returns a straightforward valid/not valid status and is described in the nextsection. More complex RTCS usage, including obtaining detailed status informationand querying the status of multiple certificates at once is covered in the sections thatfollow.
Basic RTCS QueriesThe simplest way to work with RTCS is to use it with cryptCheckCert to check thevalidity of a certificate. Since RTCS is an online protocol, communicating with theresponder requires the use of a cryptlib session object which is described in moredetail in “Secure Sessions” on page 96, the following description assumes that you’re familiar with the operation and use of cryptlib session objects. Establishing an RTCSclient session requires adding the RTCS responder name or IP address and anoptional port number if it isn’t using the standard port. Once this is done, you can check the certificate using cryptCheckCert, with the second parameter being theRTCS responder.
CRYPT_SESSION cryptSession;int status;
/* Create the RTCS session and add the responder name */cryptCreateSession( &cryptSession, cryptUser, CRYPT_SESSION_RTCS );cryptSetAttributeString( cryptSession, CRYPT_SESSINFO_SERVER_NAME,
serverName, serverNameLength );

Certificate Status Checking using RTCS 155
/* Check the certificate */status = cryptCheckCert( cryptCertificate, cryptSession );if( cryptStatusOK( status ) )
/* Certificate is OK */;
/* Clean up the session object */cryptDestroySession( cryptSession );
Note that the RTCS session isn’t activated in the usual manner by setting the CRYPT_SESSINFO_ACTIVE attribute to true, since this is done bycryptCheckCert when it performs the validity check.
If cryptCheckCert returns OK this means that the certificate is valid right now. If itreturns CRYPT_ERROR_INVALID (or some other error) the certificate isn’t valid, either because it has expired, has been revoked, is a forged certificate, or for someother reason. Usually all that matters is whether a certificate is OK to use or not, butif you require detailed information as to why a certificate isn’t OK to use you need to perform a manual RTCS check without the help of cryptCheckCert, as describedbelow.
Creating an RTCS RequestPerforming an RTCS status check without the help of cryptCheckCert involvescreating an RTCS request object, adding a copy of the certificate to be checked to therequest, submitting the request to the RTCS responder and receiving the responder’s reply, and finally checking the certificate’s status in the RTCS reply:
create RTCS request;add certificate to be checked to request;exchange data with RTCS responder;check certificate using RTCS response;
An RTCS request is a standard certificate object of type CRYPT_CERTTYPE_-RTCS_REQUEST. You create this in the usual manner and add the certificate as aCRYPT_CERTINFO_CERTIFICATE attribute. Since RTCS queries don’t have to be signed, there’s no need to perform any further operations on the request object, and it’s ready for submission to the responder:
CRYPT_CERTIFICATE cryptRTCSRequest;
/* Create the RTCS request */cryptCreateCert( &cryptRTCSRequest, cryptUser,
CRYPT_CERTTYPE_RTCS_REQUEST );
/* Add the certificate to be queried to the request */cryptSetAttribute( cryptRTCSRequest, CRYPT_CERTINFO_CERTIFICATE,
cryptCertificate );
Sometimes a user’s certificate will contain the information required for cryptlib to communicate with the responder, but often this is missing or incorrect. You cancheck for the presence of RTCS information in the certificate by checking for theexistence of the CRYPT_CERTINFO_AUTHORITYINFO_RTCS attribute, whichcontains information about the RTCS responder, usually in the form of a URL. If youwant to read the location of the responder, you can obtain it by reading theCRYPT_CERTINFO_UNIFORMRESOURCEIDENTIFIER attribute from withinthe RTCS information. Since the RTCS attribute is a composite GeneralName field,you need to first select it and then read the URL from within the GeneralName:
char url[ CRYPT_MAX_TEXTSIZE + 1 ];int urlLength;
cryptSetAttribute( cryptCertificate,CRYPT_CERTINFO_AUTHORITYINFO_RTCS, CRYPT_UNUSED );
cryptGetAttributeString( cryptCertificate,CRYPT_CERTINFO_UNIFORMRESOURCEIDENTIFIER, url, &urlLength );
url[ urlLength ] = '\0';
If the RTCS responder location isn’t present or is incorrect, you’ll need to add the responder URL manually before you can submit the request, as explained in the nextsection.

Certificates and Certificate Management156
Communicating with an RTCS ResponderSince RTCS is an online protocol, communicating with the responder requires the useof a cryptlib session object which is described in more detail in “Secure Sessions” on page 96, the following description assumes that you’re familiar with the operation and use of cryptlib session objects. If the name of the RTCS responder is specified inthe certificate which is being checked you can directly submit the request to an RTCSsession object as a CRYPT_SESSINFO_REQUEST attribute without requiring anyfurther setup of the session object. If the responder isn’t specified in the certificate, you’ll have to specify it yourself as described further on. In either case cryptlib will contact the responder, submit the status query, and obtain the response from theresponder. If the query was successful, the session object will contain the RTCSresponse object in the form of a CRYPT_SESSINFO_RESPONSE that contains thereply from the server:
CRYPT_SESSION cryptSession;CRYPT_CERTIFICATE cryptRTCSResponse;int status;
/* Create the RTCS session */cryptCreateSession( &cryptSession, cryptUser, CRYPT_SESSION_RTCS );
/* Add the RTCS request and activate the session with the RTCSresponder */
cryptSetAttribute( cryptSession, CRYPT_SESSINFO_REQUEST,cryptRTCSRequest );
status = cryptSetAttribute( cryptSession, CRYPT_SESSINFO_ACTIVE,TRUE );
if( cryptStatusError( status ) )/* Couldn't establish session with RTCS responder */;
/* Clean up the RTCS request object, which isn't needed any more */cryptDestroyCert( cryptRTCSRequest );
/* Obtain the response information */status = cryptGetAttribute( cryptSession, CRYPT_SESSINFO_RESPONSE,
&cryptRTCSResponse );if( cryptStatusError( status ) )
/* No response available from responder */;
/* Clean up the session object */cryptDestroySession( cryptSession );
Once you’ve got the response from the server, you can get the certificate status from it by reading the CRYPT_CERTINFO_CERTSTATUS attribute:
int certStatus;
cryptGetAttribute( cryptRTCSResponse, CRYPT_CERTINFO_CERTSTATUS,&certStatus );
if( certStatus == CRYPT_CERTSTATUS_VALID )/* Certificate is valid */;
/* Clean up the RTCS response */cryptDestroyCert( cryptRTCSResponse );
The possible certificate status values are CRYPT_CERTSTATUS_VALID,CRYPT_CERTSTATUS_NOTVALID, and CRYPT_CERTSTATUS_UNKNOWN,with obvious meanings.
As mentioned above, you may need to set the RTCS responder URL if it isn’t present in the certificate or if the value given in the certificate is incorrect. You can set theresponder URL as the CRYPT_SESSINFO_SERVER_NAME:
CRYPT_SESSION cryptSession;
/* Create the RTCS session */cryptCreateSession( &cryptSession, cryptUser, CRYPT_SESSION_RTCS );

Certificate Status Checking using RTCS 157
/* Add the responder URL and RTCS request and activate the sessionwith the RTCS responder */
cryptSetAttributeString( cryptSession, CRYPT_SESSINFO_SERVER_NAME,serverName, serverNameLength );
cryptSetAttribute( cryptSession, CRYPT_SESSINFO_REQUEST,cryptRTCSRequest );
/* ... */
Advanced RTCS QueriesIn addition to querying the status of individual certificates, you can query the status ofa number of certificates at once by adding more than one certificate to the RTCSrequest. The response will contain information for each certificate in the query,which you can use to verify each certificate using cryptCheckCert. If the responseinformation indicates that the certificate is invalid, cryptlib will return CRYPT_-ERROR_INVALID and leave the entry for the certificate in the RTCS response asthe selected one, allowing you to obtain further information about the certificate ifany is available:
CRYPT_CERTIFICATE cryptRTCSResponse;time_t revocationTime;int revocationReason;
/* Check the certificate against the RTCS response */cryptCheckCert( cryptCertificate, cryptRTCSResponse );if( status == CRYPT_ERROR_INVALID )
{int revocationTimeLength;
/* The certificate has been revoked, get the revocation time andreason */
cryptGetAttributeString( cryptRTCSResponse,CRYPT_CERTINFO_REVOCATIONDATE, &revocationTime,&revocationTimeLength );
cryptGetAttribute( cryptRTCSResponse, CRYPT_CERTINFO_CRLREASON,&revocationReason );
}
If all you’re interested in is an overall validity indication for a collection of certificates then an alternative technique that doesn’t require calling cryptCheckCertfor each certificate is to step through the responses using the extension cursormanagement, checking the status for each certificate and recording whether any oneindicates that the certificate is invalid:
int certsValid = TRUE;
cryptSetAttribute( cryptRTCSResponse,CRYPT_CERTINFO_CURRENT_CERTIFICATE, CRYPT_CURSOR_FIRST );
do{int certStatus;
/* Check the status of the currently selected certificate */cryptGetAttribute( cryptRTCSResponse, CRYPT_CERTINFO_CERTSTATUS,
&certStatus );if( certStatus != CRYPT_CERTSTATUS_VALID )
certsValid = FALSE;}
while( certsValid &&cryptSetAttribute( cryptRTCSResponse,CRYPT_CERTINFO_CURRENT_CERTIFICATE, CRYPT_CURSOR_NEXT ) ==CRYPT_OK );
if( !certsValid )/* At least one certificate is invalid */;
This will step through all of the responses checking for an indication that a certificateis invalid. Once the loop terminates, the certsValid variable will contain thecomposite status of the complete set of certificates.

Certificates and Certificate Management158
Certificate Revocation Checking using OCSPIn order to check whether a certificate is present in a CRL, cryptlib supports theonline certificate status protocol (OCSP). The simplest way to use OCSP is withcryptCheckCert, which returns a straightforward revoked/not revoked statuscorresponding to a certificate’s presence in a CRL, and is described in the next section. More complex OCSP usage, including obtaining detailed status informationand querying the status of multiple certificates at once is covered in the sections thatfollow. Note that OCSP can only return an approximate certificate status (it can’t truly determine whether a certificate is really valid), and will often return a responsebased on out-of-date CRL information. If you require a true online certificate validitycheck, you should use the real-time certificate status protocol (RTCS) as described in“Certificate Status Checking using RTCS” on page 152.
Basic OCSP QueriesThe simplest way to work with OCSP is to use it with cryptCheckCert to check therevocation status of a certificate. The process is identical to the one used for theRTCS status check described in “Certificate Status Checking using RTCS” on page 152, except that the session type is CRYPT_SESSION_OCSP instead ofCRYPT_SESSION RTCS.
If cryptCheckCert returns CRYPT_OK this means that the certificate hasn’t been revoked. This doesn’t mean the same as saying that the certificate is OK, a bogus certificate that exists but isn’t recognised by the CA as having been issued, or an expired certificate, or a certificate which is invalid for some other reason or isn’t even a certificate (for example an Excel spreadsheet) would also be given a status of “not revoked” since that’s all that the responder is capable of saying about it. In addition OCSP responders are often fed from stale CRL information, so a not-revokedresponse doesn’t necessarily mean that the certificate is really not revoked, merely that at the time the information was last updated it hadn’t been revoked. OCSP is purely an online CRL query mechanism, not a general-purpose certificate validitychecker.
Creating an OCSP RequestOCSP requests work just like RTCS requests described in “Creating an RTCSRequest” on page 155, except that the request type is CRYPT_CERTTYPE_OCSP_-REQUEST instead of CRYPT_CERTTYPE_RTCS_REQUEST, however in additionto the certificate being queried an OCSP request also needs to have the CA certificatethat issued the certificate being queried added to the request before the certificateitself is added. The CA certificate is added as a CRYPT_CERTINFO_-CACERTIFICATE attribute:
CRYPT_CERTIFICATE cryptOCSPRequest;
/* Create the OCSP request */cryptCreateCert( &cryptOCSPRequest, cryptUser,
CRYPT_CERTTYPE_OCSP_REQUEST );
/* Add the certificate to be queried and the CA certificate thatissued it to the request */
cryptSetAttribute( cryptOCSPRequest, CRYPT_CERTINFO_CACERTIFICATE,cryptCACert );
cryptSetAttribute( cryptOCSPRequest, CRYPT_CERTINFO_CERTIFICATE,cryptCertificate );
As with RTCS requests, the certificate being queried may contain responder details inthe CRYPT_CERTINFO_AUTHORITYINFO_OCSP attribute, or you may need toadd them manually as explained in “Creating an RTCS Request” on page 155.
OCSP requests can also be signed, if you’re working with a CA that uses this capability then you can sign the request before submitting it in the standard way usingcryptSignCert:

Certificate Revocation Checking using OCSP 159
CRYPT_CERTIFICATE cryptOCSPRequest;
/* Create the OCSP request */cryptCreateCert( &cryptOCSPRequest, cryptUser,
CRYPT_CERTTYPE_OCSP_REQUEST );
/* Add the certificate to be queried to the request and sign it */cryptSetAttribute( cryptOCSPRequest, CRYPT_CERTINFO_CERTIFICATE,
cryptCertificate );cryptSignCert( cryptOCSPRequest, privateKey );
OCSP requests can also include signing certificates alongside the signature, you canspecify the amount of additional information to include with the signature by settingthe CRYPT_CERTINFO_SIGNATURELEVEL attribute as described in“Signing/Verifying Certificates” on page 213.
Communicating with an OCSP ResponderCommunicating with an OCSP responder works in exactly the same way ascommunicating withan RTCS responder described in “Communicating with anRTCS Responder” on page 156, except that the session type is CRYPT_SESSION_-OCSP rather than CRYPT_SESSION_RTCS. Once you’ve successfully activatedthesession, you can read the certificate revocation status from the returned OCSPresponse by reading the CRYPT_CERTINFO_REVOCATIONSTATUS attribute:
int revocationStatus;
cryptGetAttribute( cryptOCSPResponse, CRYPT_CERTINFO_REVOCATIONSTATUS,&revocationStatus );
if( revocationStatus == CRYPT_OCSPSTATUS_NOTREVOKED )/* Certificate hasn't been revoked */;
/* Clean up the OCSP response */cryptDestroyCert( cryptOCSPResponse );
The possible certificate status values are CRYPT_OCSPSTATUS_NOTREVOKED,CRYPT_OCSPSTATUS_REVOKED, and CRYPT_OCSPSTATUS_UNKNOWN.Note that since OCSP is purely a revocation checking protocol, CRYPT_-OCSPSTATUS_NOTREVOKED means exactly that, that the certificate hasn’t been revoked. This doesn’t mean the same as saying that the certificate is OK, a boguscertificate that exists but isn’t recognised by the CA as having been issued (for example a forged certificate created by an attacker), or an expired certificate, or acertificate which is invalid for some other reason or isn’t even a certificate (forexample an Excel spreadsheet) would also be given a status of “not revoked” since that’s all that the responder is capable of saying about it. In addition OCSP responders are often fed from stale CRL information, so a not-revoked responsedoesn’t necessarily mean that the certificate is really not revoked, merely that at the time the information was last updated it hadn’t been revoked. OCSP is purely an online CRL query mechanism, not a general-purpose certificate validity checker.
In addition to the certificate status, the OCSP response also contains informationrelating to the CRL that the responder used to create the response, includingCRYPT_CERTINFO_THISUPDATE, the time of the current CRL, an optionalCRYPT_CERTINFO_NEXTUPDATE, the time of the next CRL, and CRYPT_-CERTINFO_REVOCATIONDATE, the time at which the certificate was revoked. Ifthe OCSP responder is using a direct query of a certificate store rather thanassembling the information indirectly using CRLs then the current CRL time willusually be set to the current time even if it’s assembled from stale information hours or days old. In addition the next update time may be set to the current time, or to afuture time. None of these fields are particularly useful and different CAs assigndifferent meanings to them, so they can be ignored in most circumstances, they relatemainly to the CRL-based origins of certain portions of OCSP. In addition, whileRTCS uses times relative to the local system time, OCSP uses the absolute time onthe responder, so time values will vary based on time differences between the OCSPresponder and the local machine.

Certificates and Certificate Management160
Advanced OCSP QueriesSome OCSP responders can resolve multiple certificate status queries in a singlerequest, however because of the data format used in OCSP this doesn’t work properly for OCSP version 1 responders so it’s better to submit a number of separate queries rather than trying to query the status of a set of certificates in a single request. Inaddition some responders can’t handle multiple certificates, or will ignore all but thefirst certificate, making it even more advisable to restrict queries to a singlecertificate. Although a planned future revision of OCSP may not have this problem,it’s still prudent to only query a single certificate per request unless you’re sure that the responder you’re using will handle multi-certificate queries correctly.
If you submit a query containing multiple certificates, the response from theresponder constitutes a mini-CRL that contains revocation information only for thecertificates submitted in the query (assuming that the responder can handle multiplecertificates in a query). Because of this you can treat the response as if it were anormal CRL and check the certificates you submitted against it with cryptCheckCertjust like a CRL. If the certificate has been revoked, cryptlib will returnCRYPT_ERROR_INVALID and leave the certificate’s revocation entry in the OCSP response as the selected one, allowing you to obtain further information on therevocation (for example the revocation date or reason):
CRYPT_CERTIFICATE cryptOCSPResponse;time_t revocationTime;int revocationReason;
/* Check the certificate against the OCSP response */cryptCheckCert( cryptCertificate, cryptOCSPResponse );if( status == CRYPT_ERROR_INVALID )
{int revocationTimeLength;
/* The certificate has been revoked, get the revocation time andreason */
cryptGetAttributeString( cryptOCSPResponse,CRYPT_CERTINFO_REVOCATIONDATE, &revocationTime,&revocationTimeLength );
cryptGetAttribute( cryptOCSPResponse, CRYPT_CERTINFO_CRLREASON,&revocationReason );
}
Note that, as with standard CRLs, the revocation reason is an optional component andmay not be present in the OCSP response. If the revocation reason isn’t present,cryptlib will return CRYPT_ERROR_NOTFOUND. If all you’re interested in is a revoked/not revoked status for a collection of certificates then you can step throughthe responses checking the status for each one in turn in the same way as for RTCS.

Creating the Top-level (Root) CA Key 161
Managing a Certification AuthorityAlthough it’s possible to manually manage the operation of a CA and issue certificates and CRLs using cryptSignCert, it’s much easier to use cryptlib’s built-inCA management capabilities to do this for you. In order to use the CA managementcapabilities you need to create a certificate store as explained in “Creating/DestroyingKeyset Objects” on page 124. The keyset type for a certificate store can only beCRYPT_KEYSET_DATABASE_STORE, CRYPT_KEYSET_ODBC_STORE, orCRYPT_KEYSET_PLUGIN_STORE, since cryptlib requires a full relationaldatabase with transaction processing capabilities in order to manage the CAoperations. The use of a transaction-capable certificate store results in a high degreeof scalability and provides the level of reliability, availability, and error recoveryrequired of such an application and stipulated in a number of standards that cover CAoperation.
Once you’ve created a certificate store, you can open aconnection to it like a normalkeyset. Since all accesses that open the keyset for write access are logged, it’s better to open the connection to the keyset once and then leave it open for ongoingoperations than to open and close it for each operation, since this would lead to anexcessive number of log entries.
A certificate store doesn’t work like a standard keyset in which it’s possible to insert and delete certificates and CRLs at random. Instead, it’s used in combination with various certificate management functions that use the certificate store as a mechanismfor managing the operations performed by a CA. The CA operations consist ofrecording incoming certificate requests, converting them into certificates, and issuingCRLs for revoked certificates. All of these operations are managed automatically foryou by cryptlib using the transaction processing capabilities of the certificate store tohandle the data storage, reliability, and auditing requirements of the CA.
There are two ways in which you can run a CA. The easiest option is to usecryptlib’s built-in CMP or SCEP servers to handle all CA operations. The morecomplex option is to use cryptlib’s CA management functions to handle the CA operations yourself. Of the two CA management protocols, CMP is the morecomplete, allowing you to request new certificates, update/replace existing ones, andrevoke existing certificates, works with special-purpose certificates such as signing-only or encryption-only types, and provides flexibility in the authorisationmechanisms used, with the request authorised either with a user name and passwordor signed with an existing certificate. SCEP on the other hand is a relatively simpleprotocol that allows for a single type of operation, issuing a new certificate, and asingle certificate type, an RSA certificate capable of both encryption and signing,with the request authorised with a user name and password.
Before you begin you’ll need to decide which of the two best meets your needs. Usually it’ll be CMP, which is more flexible than SCEP. Alternatively, you can runboth a CMP and SCEP server, although you’ll have to run them on different ports since both protocols use HTTP for their communications.
Creating the Top-level (Root) CA KeyThe first thing that you need to do when you set up your CA is to create your top-level (root) CA key. This involves creating the public/private key pair, addingidentification information to it, signing it to create the CA root certificate, andoptionally storing it to diskit you’re not holding it in a crypto token such as a smart card or hardware security module (HSM). You can generate the root CA key asfollows:

Managing a Certification Authority162
CRYPT_CONTEXT cryptContext;
/* Create an RSA public/private key context, set a label for it, andgenerate a key into it */
cryptCreateContext( &cryptContext, cryptUser, CRYPT_ALGO_RSA );cryptSetAttributeString( cryptContext, CRYPT_CTXINFO_LABEL,
"Private key", 11 );cryptGenerateKey( cryptContext );
More details on keys and key generation are given in “Key Generation” on page 121.
Once you’ve generated the key, you can create the root CA certificate and add the CA’s identification information to it, which usually consists of the country, organisation name, organisational unit name, and finally the actual CA name, referredto as the common name in PKI terminology:
CRYPT_CERTIFICATE cryptCertificate;
/* Create the CA certificate */cryptCreateCert( &cryptCertificate, cryptUser,
CRYPT_CERTTYPE_CERTIFICATE );
/* Add identification information */cryptSetAttributeString( cryptCertificate, CRYPT_CERTINFO_COUNTRYNAME,
countryName, 2 );cryptSetAttributeString( cryptCertificate,
CRYPT_CERTINFO_ORGANIZATIONNAME, organizationName,organizationNameLength );
cryptSetAttributeString( cryptCertificate,CRYPT_CERTINFO_ORGANIZATIONALUNITNAME, organizationalUnitName,organizationalUnitNameLength );
cryptSetAttributeString( cryptCertificate, CRYPT_CERTINFO_COMMONNAME,commonName, commonNameLength );
More details on certificate naming are given in “Certificate IdentificationInformation” on page 204.
Once the CA name is set, you need to mark the certificate as a self-signed CAcertificate:
cryptSetAttribute( cryptCertificate, CRYPT_CERTINFO_SELFSIGNED, 1 );cryptSetAttribute( cryptCertificate, CRYPT_CERTINFO_CA, 1 );
Finally, you may want to add two URLs that indicate to users where further CAservices may be found, in particular CRYPT_CERTINFO_AUTHORITYINFO_-CERTSTORE to tell users where to go to find further certificates and CRYPT_-CERTINFO_AUTHORITYINFO_RTCS to tell users where to go for real-timecertificate status information: Since these attributes are a composite GeneralNamefield, you need to first select them and then add the URL as a CRYPT_CERTINFO_-UNIFORMRESOURCEIDENTIFIER attribute within the GeneralName:
cryptSetAttribute( cryptCertificate,CRYPT_CERTINFO_AUTHORITYINFO_CERTSTORE, CRYPT_UNUSED );
cryptSetAttributeString( cryptCertificate,CRYPT_CERTINFO_UNIFORMRESOURCEIDENTIFIER, certstoreUrl,certstoreUrlLength );
cryptSetAttribute( cryptCertificate,CRYPT_CERTINFO_AUTHORITYINFO_RTCS, CRYPT_UNUSED );
cryptSetAttributeString( cryptCertificate,CRYPT_CERTINFO_UNIFORMRESOURCEIDENTIFIER, rtcsUrl, rtcsUrlLength );
With the URLs present in the resulting certificate, users will automatically knowwhere to go to obtain further certificate-related information.
You can also set these URLs on a per-user basis when you set up each user’s information, although putting it in the CA certificate allows you to set it just oncewithout having to set it up for each user (cryptlib will automatically propagate it fromthe CA certificate to the user certificates when they’re issued). More details on certificate store access are given in “HTTP Keysets” on page 126, and details on real-time certificate status checking are given in “Certificate Status Checking usingRTCS” on page 154.
Your root CA certificate is now ready to be signed:

Initialising PKI User Information 163
cryptSignCert( cryptCertificate, cryptContext );
If you’re storing the CA information on disk, you now need to save the keys and certificates to a password-protected private-key file:
CRYPT_KEYSET cryptKeyset;
/* Save the generated public/private key pair to a keyset */cryptKeysetOpen( &cryptKeyset, cryptUser, CRYPT_KEYSET_FILE, fileName,
CRYPT_KEYOPT_CREATE );cryptAddPrivateKey( cryptKeyset, cryptContext, password );cryptAddPublicKey( cryptKeyset, cryptCertificate );cryptKeysetClose( cryptKeyset );
/* Clean up */cryptDestroyContext( cryptContext );cryptDestroyCert( cryptCertificate );
If you’re storing the information in a crypto device, the keys will already be in the device, and all you need to do is update it with the newly-created certificate:
cryptAddPublicKey( cryptDevice, cryptCertificate );
/* Clean up */cryptDestroyCert( cryptCertificate );
At this point your root CA key is ready to use for issuing certificates.
Initialising PKI User InformationIn order to be able to issue certificates to an end user (called a PKI user in CMPterminology), cryptlib first needs to know various pieces of information about them.You supply this information via a PKI user certificate object, providing a partial orcomplete DN for the issued certificate, as well as any other information that’s required for the certificate such as an email address or URL, an indication as towhether the user is a CA capable of issuing their own certificates, and so on. Onceyou’veprovided the information for the PKI user, you add it to the certificate storethat will be used by the CMP or SCEP CA session, after which the CA server willconsult the certificate store when it needs to issue a certificate. cryptlib willautomatically generate the user ID and password for you when you’ve finished creating the PKI user object.
When you add the DN information to the PKI user object, you can specify either acomplete DN or a partial DN that omits the user’s common name. The PKI user object acts both as a template for the DN in the user’s certificate and as a constraint on the actual DN that a user can choose, preventing them from choosing an arbitraryDN for their certificate. It’s strongly recommended that you specify the user’s full DN in the PKI user object, so that they aren’t required to know the DN but can simply submit a request and have the CA take care of assigning a DN for them.Alternatively, you can specify all DN components except the common name and letthe user specify the common name in the request. The least preferable option, since itboth requires that the user know their full DN and specify it in the request, and allowsthem to request any type of DN, is to omit setting a DN in the PKI user object, whichallows the user to specify any DN value.
Taking the simplest option, in which the CA supplies the full DN and the user doesn’t need to know any DN details, you would use:
CRYPT_CERTIFICATE cryptPKIUser;
/* Create the PKI user */cryptCreateCert( &cryptPKIUser, cryptUser, CRYPT_CERTTYPE_PKIUSER );

Managing a Certification Authority164
/* Add identification information */cryptSetAttributeString( cryptPKIUser, CRYPT_CERTINFO_COUNTRYNAME,
countryName, 2 );cryptSetAttributeString( cryptPKIUser,
CRYPT_CERTINFO_ORGANIZATIONNAME, organizationName,organizationNameLength );
cryptSetAttributeString( cryptPKIUser,CRYPT_CERTINFO_ORGANIZATIONALUNITNAME, organizationalUnitName,organizationalUnitNameLength );
cryptSetAttributeString( cryptPKIUser, CRYPT_CERTINFO_COMMONNAME,commonName, commonNameLength );
/* Add the user information to the certificate store */cryptCAAddItem( cryptCertStore, cryptPKIUser );
/* Clean up */cryptDestroyCert( cryptPKIUser );
The same operation in Visual Basic is:
Dim cryptPKIUser As Long
' Create the PKI usercryptCreateCert cryptPKIUser, cryptUser, CRYPT_CERTTYPE_PKIUSER
' Add identification informationcryptSetAttributeString cryptPKIUser, CRYPT_CERTINFO_COUNTRYNAME, _
countryName, 2cryptSetAttributeString cryptPKIUser, _
CRYPT_CERTINFO_ORGANIZATIONNAME, organizationName, _organizationNameLength
cryptSetAttributeString cryptPKIUser, _CRYPT_CERTINFO_ORGANIZATIONALUNITNAME, organizationalUnitName, _organizationalUnitNameLength
cryptSetAttributeString cryptPKIUser, CRYPT_CERTINFO_COMMONNAME, _commonName, commonNameLength
' Add the user information to the certificate storecryptCAAddItem cryptCertStore, cryptPKIUser
' Clean upcryptDestroyCert cryptPKIUser
A simple way to handle this type of operation is to automatically populate thecertificate store with information from a source such as a personnel databasecontaining all of the required user information.
Other PKI User InformationIn addition to the user DN, you can may also want to add further information to allowthe user to automatically locate resources such as further certificates issued by the CAand RTCS responders. By adding these URLs to the PKI user information (whichensures that it’ll be present in the certificate once it’s issued), anyone using the certificate can automatically determine where to go to find further certificates andcertificate status information without requiring any manual configuration.
The easiest way to get this information into user certificates is to add it to the issuingCA’s certificate, from which it’ll be automatically propagated into any certificatesthat the CA issues. You can however also add this information on a per-user basis asthe CRYPT_CERTINFO_AUTHORITYINFO_CERTSTORE and CRYPT_-CERTINFO_AUTHORITYINFO_RTCS attributes, which contain information aboutthe location of the certificate store and RTCS responder, usually in the form of aURL. Since these attributes are composite GeneralName fields, you need to firstselect them and then add the URL as a CRYPT_CERTINFO_-UNIFORMRESOURCEIDENTIFIER attribute within the GeneralName:

Initialising PKI User Information 165
cryptSetAttribute( cryptPKIUser,CRYPT_CERTINFO_AUTHORITYINFO_CERTSTORE, CRYPT_UNUSED );
cryptSetAttributeString( cryptPKIUser,CRYPT_CERTINFO_UNIFORMRESOURCEIDENTIFIER, certstoreUrl,certstoreUrlLength );
cryptSetAttribute( cryptPKIUser, CRYPT_CERTINFO_AUTHORITYINFO_RTCS,CRYPT_UNUSED );
cryptSetAttributeString( cryptPKIUser,CRYPT_CERTINFO_UNIFORMRESOURCEIDENTIFIER, rtcsUrl, rtcsUrlLength );
With the URL present in the resulting certificate, users will automatically knowwhere to go to obtain further certificates and certificate status information.
In addition to the CA-related information, you can also specify additional userinformation that will appear in the issued certificate. The most common additionalinformation would be an email address that’s used to identify the user alongside theirDN:
cryptSetAttributeString( cryptPKIUser, CRYPT_CERTINFO_RFC822NAME,emailAddr, emailAddrLength );
although since this may change over time you may want to let the user specify it intheir certificate request. A downside of this flexibility is that the user can thenrequest a certificate with any email address they want rather than the one that you’ve got recorded for them.
In addition to the standard identification information, you can also specify otherinformation that should appear in all certificates issued to this particular user. Onepiece of certificate information that can only be specified in the PKI user data iswhether the user is to be a CA or not. To create a CA user, you set the CA flag forthe user:
cryptSetAttribute( cryptPKIUser, CRYPT_CERTINFO_CA, 1 );
This is the only way in which a CA certificate can be issued, since allowing a user tospecify the issuing of a CA certificate in a user request would allow any user to makethemselves a CA. If cryptlib receives a request from a user for the creation of a CAcertificate it will either reject the request, since the CA capability can only bepermitted by the issuing CA and not the requesting user.
Because a CA-enabled user has special privileges, you should take extra care inmanaging passwords and related information for them, and may want to delete theuser after their CA certificate has been issued to prevent them from being re-used toobtain further CA certificates. This makes the sub-CA creation capability a one-shotprocess that requires explicit manual intervention by the issuing CA every time a sub-CA is created.
PKI User IDsCertificate initialisation requests are identified through a user ID (to locate theappropriate PKI user information) and a password (to authenticate the request). Oncethe user information has been entered into the certificate store, you can read back thePKI user ID, identified by CRYPT_CERTINFO_PKIUSER_ID, the password used toauthenticate the initialisation operation, identified by CRYPT_CERTINFO_-PKIUSER_ISSUEPASSWORD, and the password used to authenticate certificaterevocation (if you’re using CMP), CRYPT_CERTINFO_PKIUSER_-REVPASSWORD. Use of the revocation password is optional, the CA may usesigned revocation requests rather than password-protected ones:
char userID[ CRYPT_MAX_TEXTSIZE + 1 ];char issuePW[ CRYPT_MAX_TEXTSIZE + 1 ];char revPW[ CRYPT_MAX_TEXTSIZE + 1 ];int userIDlength, issuePWlength, revPWlength;
cryptGetAttributeString( cryptPKIUser, CRYPT_CERTINFO_PKIUSER_ID,userID, &userIDlength );
userID[ userIDlength ] = '\0';cryptGetAttributeString( cryptPKIUser,
CRYPT_CERTINFO_PKIUSER_ISSUEPASSWORD, issuePW, &issuePWlength );issuePW[ issuePWlength ] = '\0';

Managing a Certification Authority166
cryptGetAttributeString( cryptPKIUser,CRYPT_CERTINFO_PKIUSER_REVPASSWORD, revPW, &revPWlength );
revPW[ revPWlength ] = '\0';
The CA needs to communicate this information to the user via some out-of-bandmeans, typically through the use of a PIN mailer or via some other directcommunication means during the certificate sign-up process. Once this informationis communicated, the user can use it to obtain their initial certificate. Any furthercertificates are typically obtained by signing the request with the initial certificate orwith subsequently-obtained certificates.
cryptlib uses a standard format for the user ID and password that follows the styleused for software registration codes and serial numbers. The user ID is in the formXXXXX-XXXXX-XXXXX and the password is in the form XXXXX-XXXXX-XXXXX-XXXXX. Characters that might cause confusion (for example O and 0 or 1and l) aren’t present, and the data contains a checksum which is used to catch typing errors when the user enters the information. An example of a user ID and passwordis:
user ID = 293XU-NZMSN-DC5J3password = G3DKZ-DR79M-L6AGY-X6H6X
If the user enters either of these incorrectly, the cryptlib client will returnCRYPT_ERROR_BADDATA when you try to set the user name or passwordattribute for the CMP or SCEP client session.
Managing a CA using CMP or SCEPCMP and SCEP servers that allow you to issue certificates to a CMP or SCEP clientmake use of session objects as described in “Secure Sessions” on page 96, thefollowing description assumes that you’re familiar with the operation and use of cryptlib session objects. Once the PKI user information has been set up for each user,there isn’t anything further that needs to be done. Because the CA management process is completely automated and entirely handled by cryptlib, the CA more orless runs itself. The only operations that you still need to perform yourself areperiodic ones such as expiring old certificates with CRYPT_CERTACTION_-EXPIRE_CERT, issuing CRLs with CRYPT_CERTACTION_ISSUE_CRL(assuming you’re not using the much more sensible option of allowing online queries of the certificate store which is used by the CA), and handling restart recoveries withCRYPT_CERTACTION_CLEANUP (the manual certificate management operationsare described in “CA Management Operations” on page 170). All other operationsare handled for you by the CMP or SCEP server.
Establishing a CMP or SCEP server session requires adding the CA certificate storeand CA server key/certificate as the CRYPT_SESSINFO_KEYSET and CRYPT_-SESSINFO_PRIVATEKEY attributes, activating the session, and waiting forincoming connections. The CMP server session is denoted by CRYPT_SESSION_-CMP_SERVER, the SCEP server session is denoted by CRYPT_SESSION_SCEP_-SERVER:
CRYPT_SESSION cryptSession;
/* Create the session */cryptCreateSession( &cryptSession, cryptUser,
CRYPT_SESSION_CMP_SERVER );
/* Add the CA certificate store and CA server key and activate thesession */
cryptSetAttribute( cryptSession, CRYPT_SESSINFO_KEYSET,cryptCertStore );
cryptSetAttribute( cryptSession, CRYPT_SESSINFO_PRIVATEKEY,privateKey );
cryptSetAttribute( cryptSession, CRYPT_SESSINFO_ACTIVE, 1 );
The same operation in Java or C# is:

Making Certificates Available Online 167
/* Create the session */int cryptSession = crypt.CreateSession( cryptUser,
crypt.SESSION_CMP_SERVER );
/* Add the CA certificate store and CA server key and activate thesession */
crypt.SetAttribute( cryptSession, crypt.SESSINFO_KEYSET,cryptCertStore );
crypt.SetAttribute( cryptSession, crypt.SESSINFO_PRIVATEKEY,privateKey );
crypt.SetAttribute( cryptSession, crypt.SESSINFO_ACTIVE, 1 );
The Visual Basic equivalent is:
' Create the sessioncryptCreateSession cryptSession, cryptUser, CRYPT_SESSION_CMP_SERVER
' Add the CA certificate store and CA server key and activate the' sessioncryptSetAttribute cryptSession, CRYPT_SESSINFO_KEYSET, cryptCertStorecryptSetAttribute cryptSession, CRYPT_SESSINFO_PRIVATEKEY, privateKeycryptSetAttribute cryptSession, CRYPT_SESSINFO_ACTIVE, 1
Once you activate the session, cryptlib will block until an incoming client connectionarrives, at which point it will negotiate the certificate issue or revocation process withthe client. All checking and certificate processing operations are taken care of bycryptlib. There is no need for you to perform any further processing operations whenrunning a CA in this way, although you may want to occasionally perform some ofthe maintenance operations described in “Managing a CA Directly” on page 169.
If you plan to use the PKIBoot certificate bootstrap mechanism to communicatetrusted certificates to the user, you need to mark the certificates that you want cryptlibto supply to the user as trusted certificates as described in “Certificate TrustManagement” on page 221. At a minimum, you should mark your CA’s certificates as trusted to ensure that the user will get the CA certificates alongside their owncertificates when they have a certificate issued for them. In addition you can supplyadditional certificates (for example ones for certificate status responders or timestampservers) to the user by marking them as trusted by the CA.
The cryptlib CMP and SCEP implementations run on top of a certificate store thatimplements consistent transactions (as far as the underlying software and hardwareallows it), so that any incomplete CA transaction which is aborted by a software orhardware failure or network error will be either cleanly rolled back if it hasn’t been confirmed yet (for example a certificate issue request for which no acknowledgementwas received from the user) or completed if it was confirmed (for example arevocation request that has been validated by cryptlib). This means that if (forexample) the server on which the CA is running crashes halfway through a revocationoperation, the revocation will be cleanly completed after the server is restarted. Thisbehaviour may differ from the behaviour exhibited by other CAs, which (dependingon CA policy) may simply abort all incomplete transactions, or may try and completesome transactions.
In addition to ensuring transactional integrity, cryptlib also enforces certificate statusintegrity constraints, which means that if it receives and successfully processes anupdate request for a certificate, it will revoke the certificate that was being updated toprevent two otherwise identical certificates from existing at the same time. As withthe other transaction types, the replacement operation is atomic so that either the newcertificate will cleanly replace the old one, or no overall change will take place.
Making Certificates Available OnlineOnce you’ve issued a certificate, you can make it available online using a standardHTTP keyset. This allows users to fetch certificates over the Internet by performing astandard keyset access. Although the interface is to a keyset, it’s handled as a cryptlib session of type CRYPT_SESSION_CERTSTORE_SERVER because itworks with a variety of session interfaces and attributes that aren’t normally used with keysets.

Managing a Certification Authority168
Since a cert store session doesn’t perform any crypto operations like the other session types, all that you need to add before you activate the session is the cert store keyset:
CRYPT_SESSION cryptSession;
/* Create the session */cryptCreateSession( &cryptSession, cryptUser,
CRYPT_SESSION_CERTSTORE_SERVER );
/* Add the CA certificate store and activate the session */cryptSetAttribute( cryptSession, CRYPT_SESSINFO_KEYSET,
cryptCertStore );cryptSetAttribute( cryptSession, CRYPT_SESSINFO_ACTIVE, 1 );
The Visual Basic equivalent is:
' Create the sessioncryptCreateSession cryptSession, cryptUser, _
CRYPT_SESSION_CERTSTORE_SERVER
' Add the CA certificate store and activate the' sessioncryptSetAttribute cryptSession, CRYPT_SESSINFO_KEYSET, cryptCertStorecryptSetAttribute cryptSession, CRYPT_SESSINFO_ACTIVE, 1
Since the client-side of this session is a standard HTTP keyset, you can use it directlyin crypto operations like signed or encrypted enveloping:
CRYPT_ENVELOPE cryptEnvelope;int bytesCopied;
cryptCreateEnvelope( &cryptEnvelope, cryptUser, CRYPT_FORMAT_SMIME );
/* Add the encryption keyset and recipient email address */cryptSetAttribute( cryptEnvelope, CRYPT_ENVINFO_KEYSET_ENCRYPT,
cryptKeyset );cryptSetAttributeString( cryptEnvelope, CRYPT_ENVINFO_RECIPIENT,
"[email protected]", 18 );
/* Add the data size information and data, wrap up the processing, andpop out the processed data */
cryptSetAttribute( cryptEnvelope, CRYPT_ENVINFO_DATASIZE,messageLength );
cryptPushData( cryptEnvelope, message, messageLength, &bytesCopied );cryptFlushData( cryptEnvelope );cryptPopData( cryptEnvelope, envelopedData, envelopedDataBufferSize,
&bytesCopied );
cryptDestroyEnvelope( cryptEnvelope );
Although the interface is identical to the standard enveloping interface with a localkeyset, in this case cryptlib is fetching the certificate that’s required for encryption from the remote CA. Having the keyset available online and managed directly by theCA avoids requiring each user to manage their own individual store of certificates,and allows a single consistent certificate collection to be maintained at a centrallocation.
For both security and performance reasons, you should always open the keyset inread-only mode and access it as a general certificate keyset (CRYPT_KEYSET_-DATABASE, CRYPT_KEYSET_ODBC, or CRYPT_KEYSET_PLUGIN) ratherthan a CA certificate store (CRYPT_KEYSET_DATABASE_STORE, CRYPT_-KEYSET_ODBC_STORE, or CRYPT_KEYSET_PLUGIN_STORE). cryptlib willcheck to make sure that it’s a read-only standard keyset when you add it to thesession, and return a CRYPT_ERROR_PARAM3 error if it’s of the incorrect type.
For additional security, you can apply standard database security measures to protectthe certificate database against (potentially malicious) access. Some ways of doingthis include using the database’s REVOKE/GRANT capability to allow only SELECT access (read-only, no write or update capability), and accessing the databaseas a low-privilege user with only read access. cryptlib will automatically use thelowest level of access available to perform the task, in this case minimal read-onlyaccess combined with basic SELECT point queries (no views, joins, or other

Managing a CA Directly 169
complexity). Finally, cryptlib both filters its input data and uses parameterisedqueries/bound query data to prevent hostile users from inserting malicious escapesequences into the query.
The CRYPT_SESSION_CERTSTORE_SERVER server type employs cryptlib aslittle more than a web interface to a certificate store. Since most databases are web-enabled, a simpler option is to use the database itself to provide certificate access tousers— it’s just a straight HTTP query of the database. This means that you cancreate standalone HTTP certificate store servers using nothing more than the databaseengine that you use to store the certificates.
Managing a CA DirectlyIn addition to the mostly-automated process of running a CA via CMP or SCEP,cryptlib also lets you manage a CA directly using various certificate managementoperations. This process isn’t as convenient as using CMP or SCEP since a lot of the automation provided by cryptlib’s automated CA handling is lost by working at this lower level.
A CA issues certificates and certificate revocations in response to requests fromusers, so that when an incoming request arrives the first thing you need to do is storeit in the certificate store so that cryptlib can work with it. After that you can use theCA management functions to convert the request into a certificate or revocation andoptionally return the result of the operation to the user.
Recording Incoming RequestsTo store an incoming request you use cryptCAAddItem, which takes the request andadds it to the store, updating the audit log and performing any other necessarymanagement operations. Once it’s stored, cryptlib generates a log entry recording the arrival of the request and can use it to recover the request or any subsequent data suchas certificates created from it even in the event of a system crash or failure, so that noinformation will be lost once it has entered the store:
CRYPT_CERTIFICATE cryptCertRequest;
/* Obtain the cert request from the user */cryptCertRequest = ...;
/* Verify that the request is in order *//* ... */
/* Add the request to the cert store */cryptCAAddItem( cryptCertStore, cryptCertRequest );
Once this process has been completed the request has been entered into the store andwill be subject to the CA management operations provided by cryptlib. This stepmust be completed before the certificate management process can be applied to therequest, even if it’ll immediately be used to generate a certificate or revocation, since it’s needed to ensure that the operation of the CA can be recovered and continued inthe event of a software or system failure.
Retrieving Stored RequestsOnce a request has been recorded in the store, some time may elapse before it can beprocessed, during which time the certificate object that contains the request may bedestroyed. When the certificate is ready for issue, you can recreate the request byretrieving it from the store using cryptCAGetItem in the same way that you can usecryptGetPublicKey to obtain a certificate from a standard certificate store:
CRYPT_CERTIFICATE cryptCertRequest;
/* Obtain the cert request from the user */cryptCertRequest = ...;
/* Verify that the request is in order *//* ... */

Managing a Certification Authority170
/* Add the request to the cert store and destroy it */cryptCAAddItem( cryptCertStore, cryptCertRequest );cryptDestroyCert( cryptCertRequest );
/* Perform other operations *//* ... */
/* Recreate the request so that it can be processed */cryptCAGetItem( cryptCertStore, &cryptCertRequest,
CRYPT_CERTTYPE_REQUEST_CERT, CRYPT_CERTINFO_CRYPT_KEYID_NAME,name );
Once the request has been recreated, you can subject it to the CA managementprocess in the usual manner.
CA Management Operationscryptlib provides a wide variety of CA management operations that include issuingand revoking certificates and creating CRLs, as well as general managementoperations such as clearing up expired certificates and CRL entries. All of theseoperations are performed by cryptlib using cryptCACertManagement with nofurther input necessary from the user. The general concept of the certificatemanagement function is:
CRYPT_CERTIFICATE cryptCertificate;
cryptCACertManagement( &cryptCertificate, action, cryptCertStore,cryptCAKey, cryptCertRequest );
with some of the parameters being optional depending on the type of action beingperformed. The certificate management actions that can be performed are:
Cert Management Action Description
CRYPT_CERTACTION_-EXPIRE_CERT
Remove all expired certificates from the activecertificate collection and remove all expiredCRL entries from the active CRL entrycollection in the certificate store.
CRYPT_CERTACTION_-CLEANUP
Perform certificate store cleanup/recoveryactions after a restart (for example a systemcrash), processing or deleting any leftoverincomplete actions as appropriate.
CRYPT_CERTACTION_-ISSUE_CERT
Issue a certificate by signing a certificaterequest with the given CA key, updating thecertificate store to contain the newly-issuedcertificate.
CRYPT_CERTACTION_-ISSUE_CRL
Issue a CRL for the CA indicated by the givenCA key.
CRYPT_CERTACTION_-REVOKE_CERT
Revoke the certificate indicated in therevocation request. Since submitting thecorresponding revocation request requiresinteraction with the CMP protocol this actioncan’t be performeddirectly but is initiated inconjunction with CMP.
The first parameter for the function can optionally return the newly-issued certificateor CRL, if you don’t want to do anything with this at the current time you can set it to null and read it later with cryptGetPublicKey. In all cases cryptlib will carry out theoperations in a safe, all-or-nothing manner that leaves the certificate store in aconsistent state after the operation has completed. This guarantees the reliableoperation of the CA even in the presence of hardware or software failures in theunderlying components.
The details of each type of CA management operation are given in the followingsections.

Managing a CA Directly 171
Issuing and revoking a CertificateThe process of issuing a certificate converts a previously stored certificate requestinto a certificate via the certificate store. To issue a certificate, you need to provide acertificate store, a CA key to use to sign the certificate, and a copy of the (previouslystored) certificate request:
CRYPT_CERTIFICATE cryptCertificate;
cryptCACertManagement( &cryptCertificate, CRYPT_CERTACTION_ISSUE_CERT,cryptCertStore, cryptCAKey, cryptCertRequest );
Once the operation has completed, the new certificate will be available as thecryptCertificate value.
Revoking a certificate works in a similar manner, except that it takes a revocationrequest rather than a certificate request. Since this operation updates the certificatestore without creating any kind of certificate object, the first parameter is set to null:
cryptCACertManagement( NULL, CRYPT_CERTACTION_REVOKE_CERT,cryptCertStore, cryptCAKey, cryptRevocationRequest );
This operation requires the use of a revocation request that can only be processed aspart of the CMP protocol, so it’s not possible to directly submit a revocation requestto the store.
Issuing a CRLThe process of issuing a CRL takes the revocation information held in the certificatestore and turns it into a finished CRL. To issue a CRL, you need to provide acertificate store and a CA key (specifically, one capable of signing CRLs) to use tosign the CRL. Since there’s no request involved, the request parameter is set to CRYPT_UNUSED. If you try to use a CA key that can’t sign CRLs, cryptlib will return CRYPT_ERROR_PARAM4 to indicate that the key is invalid for issuingCRLs:
CRYPT_CERTIFICATE cryptCRL;
cryptCACertManagement( &cryptCRL, CRYPT_CERTACTION_ISSUE_CRL,cryptCertStore, cryptCAKey, CRYPT_UNUSED );
The CA key must be the one that issued the certificates that are in the CRL (this is arequirement of the way certificates in CRLs are identified). If you try and use a keyfrom a different CA, the resulting CRL will either be empty (since no revocationentries for the other CA will be present) or will contain only entries for the other CA(if both CAs are sharing the same certificate store, and entries from the other CA arepresent in it).
Expiring CertificatesExpiring certificates is a passive process that doesn’t create or destroy any certificate objects, but merely updates the certificate store state information so that expiredcertificates are no longer considered active. You can run this as a background or low-priority operation at periodic intervals to keep the certificate store up to date:
cryptCACertManagement( &cryptCRL, CRYPT_CERTACTION_EXPIRE_CERT,cryptCertStore, CRYPT_UNUSED, CRYPT_UNUSED );
This will remove any expired certificates from the store and also removes any CRLentries for certificates that have expired anyway. Depending on your CA’s policy on expiry you can run this frequently to ensure only current certificates and CRL entriesare present or less frequently in case there’s some reason to keep expired certificates around.
Recovering after a RestartSometimes the machine on which you’re running your CA may go down duetoproblems like a hardware failure or a system crash. cryptlib carries out all operationsin a manner that ensures the certificate store won’t be left in an inconsistent state, but having the machine die in the middle of an update can leave some requests in an

Managing a Certification Authority172
incomplete state (for example if an incoming request is received and system power islost before the corresponding certificate is issued, the unprocessed request will be leftin the certificate store). In order to clean up any leftover requests you can tell cryptlibto clean up the state of the certificate store by removing or processing any leftoverrequests as appropriate:
cryptCACertManagement( &cryptCRL, CRYPT_CERTACTION_CLEANUP,cryptCertStore, CRYPT_UNUSED, CRYPT_UNUSED );
If a pending request hasn’t been approved yet, it will be rolled back; if a request has been approved but wasn’t fully processed, it will be completed.
In general it’s a good idea to perform this action when you start your CA (if you shut it down for any reason), and you should do it if there’s a system failure or other problem that causes the CA to shut down without cleaning up. Note that you shouldnever perform this operation while the CA is running, since it’ll clean up any currently un-processed requests and operations, including ones that may currently beawaiting processing by the CA.
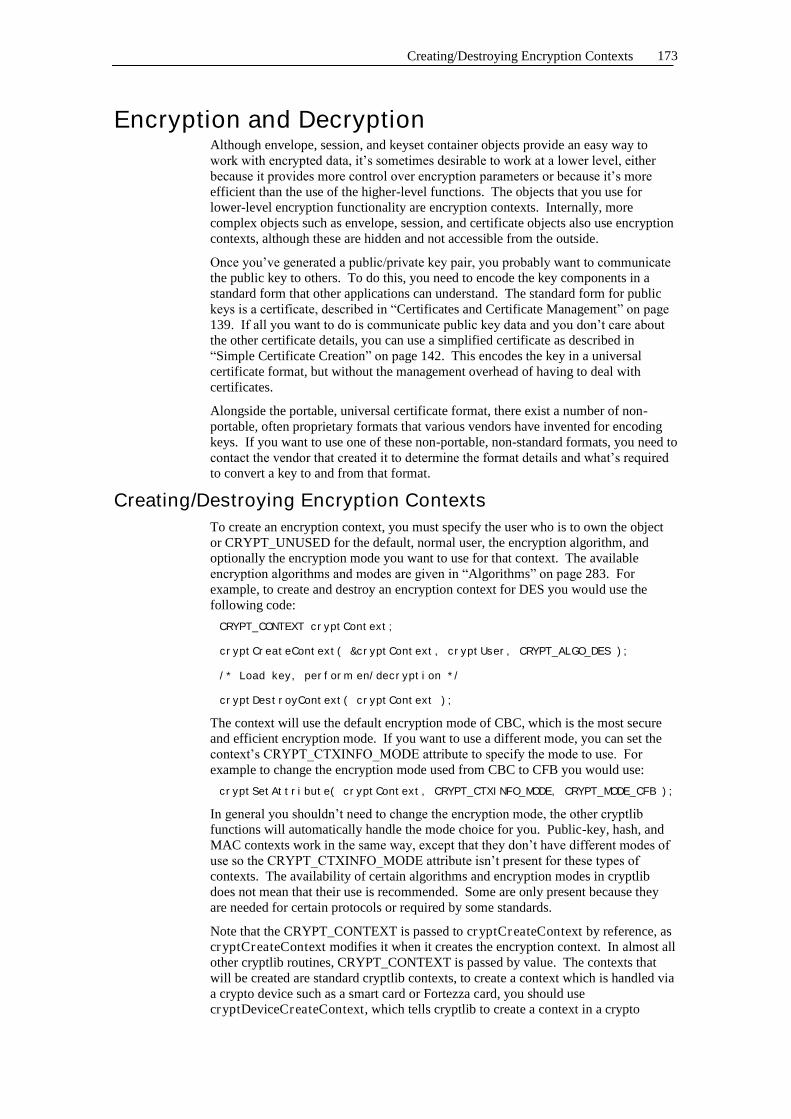
Creating/Destroying Encryption Contexts 173
Encryption and DecryptionAlthough envelope, session, and keyset container objects provide an easy way towork with encrypted data, it’s sometimes desirable to work at a lower level, eitherbecause it provides more control over encryption parameters or because it’s more efficient than the use of the higher-level functions. The objects that you use forlower-level encryption functionality are encryption contexts. Internally, morecomplex objects such as envelope, session, and certificate objects also use encryptioncontexts, although these are hidden and not accessible from the outside.
Once you’ve generated a public/private key pair, you probably want to communicate the public key to others. To do this, you need to encode the key components in astandard form that other applications can understand. The standard form for publickeys is a certificate, described in “Certificates and Certificate Management” on page 139. If all you want to do is communicate public key data and you don’t care about the other certificate details, you can use a simplified certificate as described in“Simple Certificate Creation” on page 142. This encodes the key in a universalcertificate format, but without the management overhead of having to deal withcertificates.
Alongside the portable, universal certificate format, there exist a number of non-portable, often proprietary formats that various vendors have invented for encodingkeys. If you want to use one of these non-portable, non-standard formats, you need tocontact the vendor that created it to determine the format details and what’s required to convert a key to and from that format.
Creating/Destroying Encryption ContextsTo create an encryption context, you must specify the user who is to own the objector CRYPT_UNUSED for the default, normal user, the encryption algorithm, andoptionally the encryption mode you want to use for that context. The availableencryption algorithms and modes are given in “Algorithms” on page 283. Forexample, to create and destroy an encryption context for DES you would use thefollowing code:
CRYPT_CONTEXT cryptContext;
cryptCreateContext( &cryptContext, cryptUser, CRYPT_ALGO_DES );
/* Load key, perform en/decryption */
cryptDestroyContext( cryptContext );
The context will use the default encryption mode of CBC, which is the most secureand efficient encryption mode. If you want to use a different mode, you can set thecontext’s CRYPT_CTXINFO_MODE attribute to specify the mode to use. For example to change the encryption mode used from CBC to CFB you would use:
cryptSetAttribute( cryptContext, CRYPT_CTXINFO_MODE, CRYPT_MODE_CFB );
In general you shouldn’t need to change the encryption mode, the other cryptlib functions will automatically handle the mode choice for you. Public-key, hash, andMAC contexts work in the same way, except that they don’t have different modes of use so the CRYPT_CTXINFO_MODE attribute isn’t present for these types of contexts. The availability of certain algorithms and encryption modes in cryptlibdoes not mean that their use is recommended. Some are only present because theyare needed for certain protocols or required by some standards.
Note that the CRYPT_CONTEXT is passed to cryptCreateContext by reference, ascryptCreateContext modifies it when it creates the encryption context. In almost allother cryptlib routines, CRYPT_CONTEXT is passed by value. The contexts thatwill be created are standard cryptlib contexts, to create a context which is handled viaa crypto device such as a smart card or Fortezza card, you should usecryptDeviceCreateContext, which tells cryptlib to create a context in a crypto

Encryption and Decryption174
device. The use of crypto devices is explained in “Encryption Devices and Modules” on page 255.
cryptDestroyContext has a generic equivalent function cryptDestroyObject thattakes a CRYPT_HANDLE parameter instead of a CRYPT_CONTEXT. This isintended for use with objects that are referred to using generic handles, but can alsobe used to specifically destroy encryption contexts— cryptlib’s object management routines will automatically sort out what to do with the handle or object.
Generating a Key into an Encryption ContextOnce you’ve created an encryption context, the next step is to generate a key into it. These keys will typically be either one-off session keys that are discarded after use, orlong-term storage keys that are used to protect fixed data such as files or private keys.You can generate a key with cryptGenerateKey:
cryptGenerateKey( cryptContext );
which will generate a key of a size which is appropriate for the encryption algorithm.If you want to generate a key of a particular length, you can set the CRYPT_-CTXINFO_KEYSIZE attribute before calling cryptGenerateKey. For example togenerate a 256-bit (32-byte) key you would use:
cryptSetAttribute( cryptContext, CRYPT_CTXINFO_KEYSIZE, 256 / 8 );cryptGenerateKey( cryptContext );
Keys generated by cryptlib are useful when used with cryptExportKey/cryptImportKey. Since cryptExportKey usually encrypts the generated key usingpublic-key encryption, you shouldn’t make it too long or it’ll be too big to be encrypted. Unless there’s a specific reason for choosing the key length you should use the cryptGenerateKey function and let cryptlib choose the correct key length foryou.
The only time when you may need to explicitly specify a key length is when you’re using very short (in the vicinity of 512 bits) public keys to export Blowfish, RC2,RC4, or RC5 keys. In this case the public key isn’t large enough to export the full-length keys for these algorithms, and cryptExportKey will return the error codeCRYPT_ERROR_OVERFLOW to indicate that there’s too much data to export. The solution is to either specify a shorter key length using the CRYPT_CTXINFO_-KEYSIZE attribute or, preferably, to use a longer public key. This is only a problemwith very short public keys, when using the minimum recommended public key sizeof 1024 bits this situation will never occur.
Calling cryptGenerateKey only makes sense for conventional, public-key, or MACcontexts and will return the error code CRYPT_ERROR_NOTAVAIL for a hashcontext to indicate that this operation is not available for hash algorithms. Thegeneration of public/private key pairs has special requirements and is covered in“Key Generation” on page 121.
To summarise the steps so far, you can set up an encryption context in its simplestform so that it’s ready to encrypt data with:
CRYPT_CONTEXT cryptContext;
cryptCreateContext( &cryptContext, cryptUser, CRYPT_ALGO_3DES );cryptGenerateKey( cryptContext );
/* Encrypt data */
cryptDestroyContext( cryptContext );
Once a key is generated into a context, you can’t load or generate a new key over the top of it or change the encryption mode (for conventional encryption contexts). Ifyou try to do this, cryptlib will return CRYPT_ERROR_INITED to indicate that akey is already loaded into the context.

Deriving a Key into an Encryption Context 175
Deriving a Key into an Encryption ContextSometimes you will need to obtain a fixed-format encryption key for a context from avariable-length password or passphrase, or from any generic keying material. Youcan do this by deriving a key into a context rather than loading it directly. Deriving akey converts arbitrary-format keying information into the particular form required bythe context, as well as providing extra protection against password-guessing attacksand other attacks that might take advantage of knowledge of the keying materials’ format.
The key derivation process takes two sets of input data, the keying material itself(typically a password), and a salt value which is combined with the password toensure that the key is different each time (so even if you reuse the same passwordmultiple times, the key obtained from it will change each time). This ensures thateven if one password-based key is compromised, all the others remain secure.
The salt attribute is identified by CRYPT_CTXINFO_KEYING_SALT and ranges inlength from 64 bits (8 bytes) up to CRYPT_MAX_HASHSIZE. Using an 8-byte saltis a good choice. The keying information attribute is identified by CRYPT_-CTXINFO_KEYING_VALUE and can be of any length. To derive a key into acontext you would use:
cryptSetAttributeString( cryptContext, CRYPT_CTXINFO_KEYING_SALT,salt, saltLength );
cryptSetAttributeString( cryptContext, CRYPT_CTXINFO_KEYING_VALUE,passPhrase, passPhraseLength );
which takes the supplied passphrase and salt and converts them into an encryptionkey in a format suitable for use with the encryption context. Use of the keyderivation capability is strongly recommended over loading keys directly into anencryption context by setting the CRYPT_CTXINFO_KEY attribute since this oftenrequires intimate knowledge of algorithm details such as how keys of differentlengths are handled, how key bits are used, special considerations for key material,and so on.
Note that you have to set a salt value before you set the keying information attribute.If you don’t supply a salt, cryptlib will return CRYPT_ERROR_NOTINITED when you try to supply the keying information to indicate that the salt hasn’t been set yet. If you don’t want to manage a unique salt value per key, you can set the salt to a fixed value (for example 64 bits of zeroes), although this is strongly discouraged since itmeans each use of the password will produce the same encryption key.
By default the key derivation process will repeatedly hash the input salt and keyinginformation with the HMAC-SHA1 MAC function to generate the key, and williterate the hashing process 500 times to make a passphrase-guessing attack moredifficult2. If you want to change these values you can set the CRYPT_CTXINFO_-KEYING_ALGO and CRYPT_CTXINFO_KEYING_ITERATIONS attributes forthe context before setting the salt and keying information attributes. For example tochange the number of iterations to 1000 for extra security before setting the salt andkey you would use:
cryptSetAttribute( cryptContext, CRYPT_CTXINFO_KEYING_ITERATIONS,1000 );
cryptSetAttributeString( cryptContext, CRYPT_CTXINFO_KEYING_SALT,salt, saltLength );
cryptSetAttributeString( cryptContext, CRYPT_CTXINFO_KEYING_VALUE,passPhrase, passPhraseLength );
cryptlib will then use this value when deriving the key. You can also change thedefault hash algorithm and iteration count using the cryptlib configuration optionsCRYPT_OPTION_KEYING_ALGO and CRYPT_OPTION_KEYING_-ITERATIONS as explained in “Working with Configuration Options” on page 263.
2It actually does a lot more than just hashing the passphrase, including performing processing steps designed todefeat various sophisticated attacks on the key-hashing process.

Encryption and Decryption176
To summarise the steps so far, you can set up an encryption context in its simplestform so that it’s ready to encrypt data with:
CRYPT_CONTEXT cryptContext;
cryptCreateContext( &cryptContext, cryptUser, CRYPT_ALGO_3DES );cryptSetAttributeString( cryptContext, CRYPT_CTXINFO_KEYING_SALT,
salt, saltLength );cryptSetAttributeString( cryptContext, CRYPT_CTXINFO_KEYING_VALUE,
passPhrase, strlen( passPhrase ) );
/* Encrypt data */
cryptDestroyContext( cryptContext );
Since public-key encryption uses a different type of key than other context types, youcan’t derive a key into a public or private key context.
Once a key is derived into a context, you can’t load or generate a new key over the top of it or change the encryption mode (for conventional encryption contexts). Ifyou try to do this, cryptlib will return CRYPT_ERROR_INITED to indicate that akey is already loaded into the context.
Loading a Keys into an Encryption ContextIf necessary you can also manually load a raw key into an encryption context bysetting the CRYPT_CTXINFO_KEY attribute. For example to load a raw 128-bitkey “0123456789ABCDEF” into an IDEA conventional encryption context you would use:
cryptSetAttributeString( cryptContext, CRYPT_CTXINFO_KEY,"0123456789ABCDEF", 16 );
Unless you need to perform low-level key management yourself, you should avoidloading keys directly in this manner. The previous key load should really have beendone by setting the CRYPT_CTXINFO_KEYING_SALT and CRYPT_CTXINFO_-KEYING_VALUE attributes to derive the key into the context.
For public-key encryption a key will typically have a number of components so youcan’t set the key directly. More information on working with CRYPT_PKCINFO data structures is given in “Loading Public/Private Keys” on page 177.
Once a key is loaded into a context, you can’t load or generate a new key over the top of it or change the encryption mode (for conventional encryption contexts). If you tryto do this, cryptlib will return CRYPT_ERROR_INITED to indicate that a key isalready loaded into the context.
If you need to reserve space for conventional and public/private keys, you can use theCRYPT_MAX_KEYSIZE and CRYPT_MAX_PKCSIZE defines to determine themount of memory you need. No key used by cryptlib will ever need more storagethan the settings given in these defines. Note that the CRYPT_MAX_PKCSIZEvalue specifies the maximum size of an individual key component. Sincepublic/private keys are usually composed of a number of components the overall sizeis larger than this.
Working with Initialisation VectorsFor conventional-key encryption contexts you can also load an initialisation vector(IV) into the context if the encryption mode being used supports an IV, althoughwhen you’re using a context to encrypt data you can leave this to cryptlib to performautomatically when you call cryptEncrypt for the first time. IVs are required for theCBC, CFB, and OFB encryption modes. To load an IV you set theCRYPT_CTXINFO_IV attribute:
cryptSetAttributeString( cryptContext, CRYPT_CTXINFO_IV, iv, ivSize );
To retrieve the IV that you have loaded or that has been generated for you by cryptlibyou read the value of the attribute:

Loading Public/Private Keys 177
unsigned char iv[ CRYPT_MAX_IVSIZE ];int ivSize;
cryptGetAttributeString( cryptContext, CRYPT_CTXINFO_IV, iv,&ivSize );
Trying to get or set the value of this attribute will return the error code CRYPT_-ERROR_NOTAVAIL for a hash, MAC, or public key encryption context orconventional encryption context with an encryption mode that doesn’t use an IV to indicate that these operations are not available for this type of context.
If you need to reserve space for IVs, you can use the CRYPT_MAX_IVSIZE defineto determine the mount of memory you need. No IV used by cryptlib will ever needmore storage than the setting given in this define.
Loading Public/Private KeysSince public/private keys typically have multiple components, you can’t set them directly as a CRYPT_CTXINFO_KEY attribute. Instead, you load them into aCRYPT_PKCINFO structure and then set that as a CRYPT_CTXINFO_KEY_-COMPONENTS attribute. There are several CRYPT_PKCINFO structures, one foreach class of public-key algorithm supported by cryptlib. The CRYPT_PKCINFOstructures are described in “CRYPT_PKCINFO_xxx Structures” on page 300.
As with public/private key pair generation, you need to set the CRYPT_CTXINFO_-LABEL attribute to a unique value used to identify the key before you can load a keyvalue. If you try to load a key into a context without first setting the key label,cryptlib will return CRYPT_ERROR_NOTINITED to indicate that the label hasn’t been set yet.
Once a key is loaded into a context, you can’t load or generate a new key over the top of it. If you try to do this, cryptlib will return CRYPT_ERROR_INITED to indicatethat a key is already loaded into the context.
If you need to reserve space for public/private key components, you can use theCRYPT_MAX_PKCSIZE define to determine the mount of memory you need. Nokey used by cryptlib will ever need more storage than the settings given in thesedefines. Note that the CRYPT_MAX_PKCSIZE value specifies the maximum sizeof an individual key component, Since public/private keys are usually composed of anumber of components the overall size is larger than this.
Unless you explicitly need to load raw public/private key components into anencryption context, you should avoid loading keys directly in this manner and shouldinstead either generate the key inside the context or use the key database accessfunctions to load the key for you. These operations are described in “KeyGeneration” on page 121 and “Key Storage” on page 123.
In addition, because the public key component manipulation functions need toperform low-level access to the CRYPT_PKCINFO data structures, they areimplemented as C preprocessor macros and can’t be translated into other languages such as Visual Basic and Delphi. If you’re programming in a language other than C or C++, you should always use key generation or keyset objects to load and storekeys rather than trying to load them using CRYPT_CTXINFO_KEY_-COMPONENTS.
Loading Multibyte IntegersThe multibyte integer strings that make up public and private keys are stored in big-endian format with the most significant digit first:
0000000000000000000000000000000xxxxxxxxxxxxxxxxxxx
For example the number 123456789 would be stored in big-endian format as:
00000000000000000000000000000000000000000123456789
(with the remainder of the value padded with zeroes). In practice the numbers won’t be stored with excessively long precision as they are in the above examples, so

Encryption and Decryption178
instead of being stored with 50 digits of precision of which 41 bytes contain zeropadding, they would be stored with 9 digits of precision:
123456789
A multibyte integer therefore consists of two parameters, the data itself and theprecision to which it is stored, specified in bits. When you load multibyte integercomponents into a CRYPT_PKCINFO structure you need to specify both of theseparameters.
Before you can use the CRYPT_PKCINFO structure, you need to initialise it withcryptInitComponents(), which takes as parameters a pointer to theCRYPT_PKCINFO structure and the type of the key, either CRYPT_KEYTYPE_-PRIVATE or CRYPT_KEYTYPE_PUBLIC:
CRYPT_PKCINFO_RSA rsaKey;
cryptInitComponents( &rsaKey, CRYPT_KEYTYPE_PRIVATE );
Now you can load the multibyte integer strings by using cryptSetComponent(),specifying a pointer to the value to be loaded, the multibyte integer data, and theinteger length in bits:
cryptSetComponent( ( &rsaKey )->n, modulus, 1024 );cryptSetComponent( ( &rsaKey )->e, pubExponent, 17 );cryptSetComponent( ( &rsaKey )->d, privExponent, 1024 );
Since cryptSetComponent() takes as parameter a pointer to the value to beloaded, it’s necessary to pass in the address as shown above when the CRYPT_PKCINFO structure is declared statically. If it’s dynamically allocated asinthe example below, this extra step isn’t necessary.
Once all the parameters are set up, you can use the result as the CRYPT_CTXINFO_-KEY_COMPONENTS as explained above. Once you’ve finished working with the CRYPT_PKCINFO information, use cryptDestroyComponents to destroy theinformation:
cryptDestroyComponents( &rsaKey );
The Diffie-Hellman, DSA, and Elgamal algorithms share the same key format and alluse the CRYPT_PKCINFO_DLP structure to store their key components. DLP isshort for Discrete Logarithm Problem, the common underlying mathematicaloperation for the three cryptosystems.
When loading key components, cryptlib performs a validity check on the data todetect invalid or suspicious key values. These can be used to compromise thesecurity of the key, for example to leak the private key in signatures made with it. Ifcryptlib detects suspicious key components, it will return CRYPT_ERROR_-PARAM3 to indicate that the key components are invalid.
To summarise the steps so far, you would load a public key into a DSA context with:
CRYPT_CONTEXT cryptContext;CRYPT_PKCINFO_DLP *dlpKey;
cryptCreateContext( &cryptContext, cryptUser, CRYPT_ALGO_DSA );cryptSetAttributeString( cryptContext, CRYPT_CTXINFO_LABEL, "DSA key",
7 );dlpKey = malloc( sizeof( CRYPT_PKCINFO_DLP ) );cryptInitComponents( dlpKey, CRYPT_KEYTYPE_PUBLIC );cryptSetComponent( dlpKey->p, ... );cryptSetComponent( dlpKey->g, ... );cryptSetComponent( dlpKey->q, ... );cryptSetComponent( dlpKey->y, ... );cryptSetAttributeString ( cryptContext, CRYPT_CTXINFO_KEY_COMPONENTS,
dlpKey, sizeof( CRYPT_PKCINFO_DLP ) );cryptDestroyComponents( dlpKey );
The context is now ready to be used to verify a DSA signature on a piece of data. Ifyou wanted to load a DSA private key (which consists of one extra component), youwould add:

Querying Encryption Contexts 179
cryptSetComponent( dlpKey->x, ... );
after the y component is loaded. This context can then be used to sign a piece of data.
Querying Encryption ContextsA context has a number of attributes whose values you can get to obtain informationabout it. These attributes contain details such as the algorithm type and name, the keysize (if appropriate), the key label (if this has been set), and various other details. Theinformation attributes are:
Value Type Description
CRYPT_CTXINFO_ALGOCRYPT_CTXINFO_MODE
N Algorithm and mode
CRYPT_CTXINFO_BLOCKSIZE N Cipher block size in bytes
CRYPT_CTXINFO_IVSIZE N Cipher IV size in bytes
CRYPT_CTXINFO_KEYING_-ALGO
CRYPT_CTXINFO_KEYING_-ITERATIONS
CRYPT_CTXINFO_KEYING_-SALT
N/S The algorithm and number ofiterations used to transform auser-supplied key or passwordinto an algorithm-specific key forthe context, and the salt valueused in the transformation process
CRYPT_CTXINFO_KEYSIZE N Key size in bytes
CRYPT_CTXINFO_LABEL S Key label
CRYPT_CTXINFO_NAME_ALGO
CRYPT_CTXINFO_NAME_MODE
S Algorithm and mode name
For example to obtain the algorithm and mode used by an encryption context, youwould use:
CRYPT_ALGO_TYPE cryptAlgo;CRYPT_MODE_TYPE cryptMode;
cryptGetAttribute( cryptContext, CRYPT_CTXINFO_ALGO, &cryptAlgo );cryptGetAttribute( cryptContext, CRYPT_CTXINFO_MODE, &cryptMode );
Although these attributes are listed as context attributes, they also apply to anythingelse that can act as a context action object, for example you can obtain algorithm,mode, and key size values from a certificate since it can be used to encrypt or signjust like a context:
CRYPT_ALGO_TYPE cryptAlgo;CRYPT_MODE_TYPE cryptMode;
cryptGetAttribute( cryptCertificate, CRYPT_CTXINFO_ALGO, &cryptAlgo );cryptGetAttribute( cryptCertificate, CRYPT_CTXINFO_MODE, &cryptMode );
If any of the user-supplied attributes haven’t been set and you try to read their value, cryptlib will return CRYPT_ERROR_NOTINITED.
Using Encryption Contexts to Process DataTo encrypt or decrypt a block of data using an encryption context action object youuse:
cryptEncrypt( cryptContext, buffer, length );
and:
cryptDecrypt( cryptContext, buffer, length );
The data is encrypted in place, so that plaintext data is replaced by encrypted data andvice versa. If the encryption context doesn’t support the operation you are trying to perform (for example calling cryptEncrypt with a DSA public key), the function will

Encryption and Decryption180
return CRYPT_ERROR_NOTAVAIL to indicate that this functionality is notavailable. If the key loaded into an encryption context doesn’t allow the operation you are trying to perform (for example calling cryptDecrypt with an encrypt-onlykey), the function will return CRYPT_ERROR_PERMISSION to indicate that thecontext doesn’t have the required key permissions to perform the requested operation.
Conventional EncryptionIf you’re using a block cipher in ECB or CBC mode, the encrypted data length must be a multiple of the block size. If the encrypted data length is not a multiple of theblock size, the function will return CRYPT_ERROR_PARAM3 to indicate that thelength is invalid. To encrypt a byte at a time you should use a stream encryptionmode such as CFB or OFB, or better yet use an envelope which avoids the need tohandle algorithm-specific details.
If an IV is required for the decryption and you haven’t loaded one into the context by setting the CRYPT_CTXINFO_IV attribute, cryptDecrypt will return CRYPT_-ERROR_NOTINITED to indicate that you need to load an IV before you can decryptthe data. If the first 8 bytes of decrypted data are corrupted then you haven’t set up the IV properly for the decryption. More information on setting up IVs is given in“Working with Initialisation Vectors” on page 176. The general concept behindusing IVs (in this case with automatic IV generation) is:
unsigned char iv[ CRYPT_MAX_IVSIZE ];int ivSize;
/* Encrypt data */cryptEncrypt( cryptContext, data, dataLength );cryptGetAttributeString( cryptContext, CRYPT_CTXINFO_IV, iv, &ivSize
);
/* Communicate the encrypted data and IV to the recipient *//* ... */
/* Decrypt data */cryptSetAttributeString( cryptContext, CRYPT_CTXINFO_IV, iv, ivSize );cryptDecrypt( cryptContext, data, dataLength )
Once an encryption context is set up, it can only be used for processing a single datastream in an operation such as encrypting data, decrypting data, or hashing amessage. A context can’t be reused to encrypt a second message after the first one has been encrypted, or to decrypt data after having encrypted data. This is becausethe internal state of the context is determined by the operation being performed withit, and performing two different operations with the same context causes the statefrom the first operation to affect the second operation. For example if you use anencryption context to encrypt two different files, cryptlib will see a single continuousdata stream (since it doesn’t know or care about the structure of the data being encrypted). As a result the second file is treated as a continuation of the first one, andcan’t be decrypted unless the context is used to decrypt the first file before decrypting the second one. Because of this you should always create a new encryption contextfor each discrete data stream you will be processing, and never reuse contexts toperform different operations. The one exception to this rule is when you’re using cryptlib envelopes (described in “Data Enveloping” on page 51), where you can pusha single encryption context into as many envelopes as you like. This is because anenvelope takes its own copy of the encryption context, leaving the originaluntouched.
In practice this isn’t strictly accurate, you can encrypt multiple independent datastreams with a single context by loading a new IV for each new stream using theCRYPT_CTXINFO_IV attribute:
/* Set an IV and encrypt data */cryptSetAttributeString( cryptContext, CRYPT_CTXINFO_IV, iv1,
iv1Length );cryptEncrypt( cryptContext, data1, data1Length );

Using Encryption Contexts to Process Data 181
/* Set a new IV and encrypt more data */cryptSetAttributeString( cryptContext, CRYPT_CTXINFO_IV, iv2,
iv2Length );cryptEncrypt( cryptContext, data2, data2Length );
If you don’t understand how this would work then it’s probably best to use a new context for each data stream.
Public-key EncryptionThe public-key algorithms encrypt a single block of data equal in length to the size ofthe public key being used. For example if you are using a 1024-bit public key thenthe length of the data to be encrypted should be 128 bytes. If the encrypted datalength isn’t the same as the key size, the function will return CRYPT_ERROR_-PARAM3 to indicate that the length is invalid. Preparation of the block of data to beencrypted requires special care and is covered in appropriate security standards. Ifcryptlib detects that it’s being passed incorrectly-formatted input data, it will returnCRYPT_ERROR_BADDATA to indicate that the data being passed to theen/decryption function is invalid. In general you should use high-level functions suchas cryptExportKey/cryptImportKey and cryptCreateSignature/cryptCheckSignature rather than cryptEncrypt and cryptDecrypt when workingwith public-key algorithms.
If you’re using a public or private key context which is tied to a certificate or cryptodevice, the direct use of cryptEncrypt and cryptDecrypt could be used to bypasssecurity constraints placed on the context (for example by changing the dataformatting used with an encryption-only RSA private key context it’s possible to misuse it to generate signatures even if the context is specifically intended for non-signature use). Because of this, if a context is tied to a certificate or a crypto device,it can’t be used directly with these low-level functions but only with a higher-levelfunction like cryptCreateSignature or with the enveloping code, which guaranteethat a context can’t be misused for a disallowed purpose. If you try to use a constrained context of this type directly, the function will return CRYPT_ERROR_-PERMISSION to indicate that the context doesn’t have the required permissions to perform the requested operation.
HashingHash and MAC algorithms don’t actually encrypt the data being hashed and can be called via cryptEncrypt or cryptDecrypt. They require a final call with the lengthset to 0 as a courtesy call to indicate to the hash or MAC function that this is the lastdata block and that the function should take whatever special action is necessary forthis case:
cryptEncrypt( hashContext, buffer, length );cryptEncrypt( hashContext, buffer, 0 );
If you call cryptEncrypt or cryptDecrypt after making the final call with the lengthset to 0, the function will return CRYPT_ERROR_COMPLETE to indicate that thehashing has completed and cannot be continued. Once the hashing is complete, thehash value is made available as the CRYPT_CTXINFO_HASHVALUE attribute thatyou can read in the usual manner:
unsigned char hash[ CRYPT_MAX_HASHSIZE ];int hashLength;
cryptGetAttributeString( cryptContext, CRYPT_CTXINFO_HASHVALUE, hash,&hashLength );
You can reset a hash or MAC context by deleting the CRYPT_CERTINFO_-HASHVALUE attribute, which allows you to reuse the context to generate anotherhash or MAC value. Reusing a context in this manner avoids the overhead ofcreating a context, and in the case of a MAC context the somewhat complex keyprocessing which is required when the context is first used:

Encryption and Decryption182
unsigned char hash1[ CRYPT_MAX_HASHSIZE ];unsigned char hash2[ CRYPT_MAX_HASHSIZE ];int hash1Length, hash2Length;
/* Hash or MAC data *//* ... */cryptGetAttributeString( cryptContext, CRYPT_CTXINFO_HASHVALUE, hash1,
&hash1Length );
/* Delete the attribute to allow the context to be reused */cryptDeleteAttribute( cryptContext, CRYPT_CTXINFO_HASHVALUE );
/* Hash or MAC more data *//* ... */cryptGetAttributeString( cryptContext, CRYPT_CTXINFO_HASHVALUE, hash2,
&hash2Length );

Exporting a Key 183
Exchanging KeysAlthough you can encrypt/decrypt or MAC data with an encryption context, the keyyou’re using is locked inside the context and (if you used cryptGenerateKey tocreate it) won’t be known to you or the person you’re trying to communicate with. To share the key with another party, you need to export it from the context in a securemanner and the other party needs to import it into an encryption context of their own.Because the key is a very sensitive and valuable resource, you can’t just read it out of the context, but need to take special steps to protect the key once it leaves the context.This is taken care of by the key export/import functions.
These functions deal only with the export and import of keys for conventionalencryption or MAC contexts. Public/private keys have specialised requirements andcan’t be exported directlyin the same manner as conventional encryption or MACkeys. Public keys, which are composite values consisting of multiple components,must be converted into certificates in order to be shared with another party.Certificates are covered in “Certificates and Certificate Management” on page 139.Private keys can’t be exported as such, but can only be stored in keysets or crypto devices. Keysets are covered in “Key Storage” on page 123, and crypto devices arecovered in “Encryption Devices and Modules” on page 255.
Exporting a KeyTo exchange a conventional encryption or MAC key with another party, you use thecryptExportKey and cryptImportKey functions in combination with a conventionalor public-key encryption context or public key certificate. Let’s say you’ve created a key in an encryption context cryptContext and want to send it to someone whosepublic key is in the encryption context pubKeyContext (you can also pass in aprivate key if you want, cryptExportKey will only use the public key components).To do this you’d use:
CRYPT_CONTEXT pubKeyContext, cryptContext;void *encryptedKey;int encryptedKeyLength;
/* Generate a key */cryptCreateContext( &cryptContext, cryptUser, CRYPT_ALGO_3DES );cryptGenerateKey( cryptContext );
/* Allocate memory for the encrypted key */encryptedKey = malloc( encryptedKeyMaxLength );
/* Export the key using a public-key encrypted blob */cryptExportKey( encryptedKey, encryptedKeyMaxLength,
&encryptedKeyLength, pubKeyContext, cryptContext );
The resulting public-key encrypted blob is placed in the memory buffer pointed to byencryptedKey of maximum size encryptedKeyMaxLength, and the actuallength is stored in encryptedKeyLength. This leads to a small problem: How doyou know how big to make the buffer? The answer is to use cryptExportKey to tellyou. If you pass in a null pointer for encryptedKey, the function will setencryptedKeyLength to the size of the resulting blob, but not do anything else.You can then use code like:
cryptExportKey( NULL, 0, &encryptedKeyMaxLength, pubKeyContext,cryptContext );
encryptedKey = malloc( encryptedKeyMaxLength );cryptExportKey( encryptedKey, encryptedKeyMaxLength,
&encryptedKeyLength, pubKeyContext, cryptContext );
to create the exported key blob. Note that due to encoding issues for some algorithmsthe final exported blob may be one or two bytes smaller than the size which isinitially reported, since the true size can’t be determined until the key is actually exported. Alternatively, you can just reserve a reasonably sized block of memory anduse that to hold the encrypted key. “Reasonably sized” means a few Kb, a 4K block

Exchanging Keys184
is plenty (an encrypted key blob for a 1024-bit public key is only about 200 byteslong).
You can also use a public key certificate to export a key. If, instead of a public keycontext, you had a key certificate contained in the certificate objectcryptCertificate, the code for the previous example would become:
CRYPT_CERTIFICATE cryptCertificate;CRYPT_CONTEXT cryptContext;void *encryptedKey;int encryptedKeyLength;
/* Generate a key */cryptCreateContext( &cryptContext, cryptUser, CRYPT_ALGO_3DES );cryptGenerateKey( cryptContext );
/* Allocate memory for the encrypted key */encryptedKey = malloc( encryptedKeyMaxLength );
/* Export the key using a public-key encrypted blob */cryptExportKey( encryptedKey, encryptedKeyMaxLength,
&encryptedKeyLength, cryptCertificate, cryptContext );
The use of key certificates is explained in “Certificates and Certificate Management” on page 139.
If the encryption context contains too much data to encode using the given public key(for example trying to export an encryption context with a 600-bit key using a 512-bitpublic key) the function will return CRYPT_ERROR_OVERFLOW. As a rule ofthumb a 1024-bit public key should be large enough to export the default key sizesfor any encryption context.
If the public key is stored in an encryption context with a certificate associated with itor in a key certificate, there may be constraints on the key usage that are imposed bythe certificate. If the key can’t be used for the export operation, the function willreturn CRYPT_ERROR_PERMISSION to indicate that the key isn’t valid for this operation, you can find out more about the exact nature of the problem by reading theerror-related attributes as explained in “Extended Error Reporting” on page 273.
Exporting using Conventional EncryptionYou don’t need to use public-key encryption to export a key blob, it’s also possible to use a conventional encryption context to export the key from another conventionalencryption context. For example if you were using the key derived from thepassphrase “This is a secret key” (which was also known to the other party) in an encryption context keyContext you would use:
CRYPT_CONTEXT sharedContext, keyContext;void *encryptedKey;int encryptedKeyLength;
/* Derive the export key into an encryption context */cryptCreateContext( &keyContext, cryptUser, CRYPT_ALGO_3DES );cryptSetAttributeString( keyContext, CRYPT_CTXINFO_KEYING_SALT, salt,
saltLength );cryptSetAttributeString( keyContext, CRYPT_CTXINFO_KEYING_VALUE, "This
is a secret key", 20 );
/* Generate a key */cryptCreateContext( &cryptContext, cryptUser, CRYPT_ALGO_3DES );cryptGenerateKey( cryptContext );
/* Allocate memory for the encrypted key */encryptedKey = malloc( encryptedKeyMaxLength );
/* Export the key using a conventionally encrypted blob */cryptExportKey( encryptedKey, encryptedKeyMaxLength,
&encryptedKeyLength, keyContext, cryptContext );
You don’t need to use a derived key to export the session key, you could have loadedthe context in some other manner (for example from a crypt device such as a smart

Importing a Key 185
card), but the sample code shown above, and further on for the key import phase,assumes that you’ll be deriving the export/import key from a password.
This kind of key export isn’t as convenient as using public keys since it requires that both sides know the encryption key in keyContext (or at least know how to deriveit from some other keying material). Onecase where it’s useful is when you want to encrypt data such as a disk file that will be decrypted later by the same person whooriginally encrypted it. By prepending the key blob to the start of the encrypted file,you can ensure that each file is encrypted with a different session key (this is exactlywhat the cryptlib enveloping functions do). It also means you can change thepassword on the file by changing the exported key blob, without needing to decryptand re-encrypt the entire file.
Importing a KeyNow that you’ve exported the conventional encryption or MAC key, the other party needs to import it. This is done using the cryptImportKey function and the privatekey corresponding to the public key used by the sender:
CRYPT_CONTEXT privKeyContext, cryptContext;
/* Create a context for the imported key */cryptCreateContext( &cryptContext, cryptUser, CRYPT_ALGO_3DES );
/* Import the key from the public-key encrypted blob */cryptImportKey( encryptedKey, encryptedKeyLength, privKeyContext,
cryptContext );
Note the use of CRYPT_ALGO_3DES when creating the context for the importedkey, this assumes that both sides have agreed in advance on the use of a commonencryption algorithm to use (in this case triple DES). If the algorithm informationisn’t available, you’ll have to negotiate the details in some other way. This is normally done for you by cryptlib’s enveloping code but isn’t available when operating at this lower level.
To summarise, sharing an encryption context between two parties using public-keyencryption involves the following steps:
/* Party A creates the required encryption context and generates a keyinto it */
cryptCreateContext( &cryptContext, cryptUser, CRYPT_ALGO_3DES );cryptGenerateKey( cryptContext );
/* Party A exports the key using party B's public key */cryptExportKey( encryptedKey, encryptedKeyMaxLength,
&encryptedKeyLength, pubKeyContext, cryptContext );
/* Party B creates the encryption context to import the key into */cryptCreateContext( &cryptContext, cryptUser, CRYPT_ALGO_3DES );
/* Party B imports the key using their private key */cryptImportKey( encryptedKey, encryptedKeyLength, privKeyContext,
cryptContext );
If the public key is stored in an encryption context with a certificate associated with itor in a key certificate, there may be constraints on the key usage that are imposed bythe certificate. If the key can’t be used for the import operation, the function will return CRYPT_ERROR_PERMISSION to indicate that the key isn’t valid for this operation. You can find out more about the exact nature of the problem by readingthe error-related attributes as explained in “Extended Error Reporting” on page 273.
Importing using Conventional EncryptionIf the key has been exported using conventional encryption, you can again useconventional encryption to import it. Using the same key derived from thepassphrase “This is a secret key” that was used in the key export example, you would use:

Exchanging Keys186
CRYPT_CONTEXT keyContext, cryptContext;
/* Derive the import key into an encryption context */cryptCreateContext( &keyContext, cryptUser, CRYPT_ALGO_3DES );cryptSetAttributeString( keyContext, CRYPT_CTXINFO_KEYING_SALT, salt,
saltLength );cryptSetAttributeString( keyContext, CRYPT_CTXINFO_KEYING_VALUE, "This
is a secret key", 20 );
/* Create a context for the imported key */cryptCreateContext( &cryptContext, cryptUser, CRYPT_ALGO_3DES );
/* Import the key from the conventionally encrypted blob */cryptImportKey( encryptedKey, encryptedKeyLength, keyContext,
cryptContext );
Since the salt is a random value that changes for each key you derive, you won’t know it in advance so you’ll have to obtain it by querying the exported key object as explained below. Once you’ve queried the object, you can use the salt which isreturned with the query information to derive the import key as shown in the abovecode.
Querying an Exported Key ObjectSo far it’s been assumed that you know what’s required to import the exported key blob you’re given (that is, you know which type of processing to use to create theencryption context needed to import a conventionally encrypted blob). Howeversometimes you may not know this in advance, which is where the cryptQueryObjectfunction comes in. cryptQueryObject is used to obtain information on the exportedkey blob that might be required to import it. You can also use cryptQueryObject toobtain information on signature blobs, as explained in “Querying a Signature Object” on page 190.
The function takes as parameters the object you want to query, and a pointer to aCRYPT_OBJECT_INFO structure which is described in “CRYPT_OBJECT_INFOStructure” on page 300. The object type will be either a CRYPT_OBJECT_-ENCRYPTED_KEY for a conventionally encrypted exported key, a CRYPT_-OBJECT_PKCENCRYPTED_KEY for a public-key encrypted exported key, or aCRYPT_OBJECT_KEYAGREEMENT for a key-agreement key. If you were givenan arbitrary object of an unknown type you’d use the following code to handle it:
CRYPT_OBJECT_INFO cryptObjectInfo;
cryptQueryObject( object, objectLength, &cryptObjectInfo );if( cryptObjectInfo.objectType == CRYPT_OBJECT_ENCRYPTED_KEY )
/* Import the key using conventional encryption */;else
if( cryptObjectInfo.objectType == CRYPT_OBJECT_PKCENCRYPTED_KEY ||cryptObjectInfo.objectType == CRYPT_OBJECT_KEYAGREEMENT )/* Import the key using public-key encryption */;
else/* Error */;
Any CRYPT_OBJECT_INFOfields that aren’t relevant for this type of object are set to null or zero as appropriate.
Once you’ve found out what type of object you have, you can use the other information returned by cryptQueryObject to process the object. For bothconventional and public-key encrypted exported objects you can find out whichencryption algorithm and mode were used to export the key using the cryptAlgoand cryptMode fields. For conventionally encrypted exported objects you canobtain the salt needed to derive the import key from the salt and saltSize fields.
Extended Key Export/ImportThe cryptExportKey and cryptImportKey functions described above export andimport conventional encryption or MAC keys in the cryptlib default format (which,for the technically inclined, is the Cryptographic Message Syntax format with keyidentifiers used to denote public keys). The default cryptlib format has been chosen

Key Agreement 187
to be independent of the underlying key format, so that it works equally well with anykey type including X.509 certificates, PGP/OpenPGP keys, and any other key storageformat.
Alongside the default format, cryptlib supports the export and import of keys in otherformats using cryptExportKeyEx. cryptExportKeyEx works like cryptExportKeybut takes an extra parameter that specifies the format to use for the exported keys.The formats are:
Format Description
CRYPT_FORMAT_CMSCRYPT_FORMAT_SMIME
These are variations of the CryptographicMessage Syntax and are also known asS/MIME version 2 or 3 and PKCS #7.This format only allows public-key-basedexport, and the public key must be storedas an X.509 certificate.
CRYPT_FORMAT_CRYPTLIB This is the default cryptlib format and canbe used with any type of key. When usedfor public-key based key export, thisformat is also known as a newer variationof S/MIME version 3.
CRYPT_FORMAT_PGP This is the OpenPGP format and can beused with any type of key.
cryptImportKeyEx takes one extra parameter, a pointer to the imported key, whichis required for OpenPGP key import. For all other formats this value is set to NULL,for OpenPGP the imported key parameter is set to CRYPT_UNUSED and the key isreturned in the extra parameter:
/* Import a non-PGP format key */cryptImportKeyEx( encryptedKey, encryptedKeyLength, importContext,
cryptContext, NULL );
/* Import a PGP-format key */cryptImportKeyEx( encryptedKey, encryptedKeyLength, importContext,
CRYPT_UNUSED, &cryptContext );
This is required because PGP’s handling of keys differs somewhat from that used with other formats.
Key AgreementThe Diffie-Hellman key agreement capability is currently disabled since, unlike RSAand conventional key exchange, there’s no widely-accepted standard format for it(DH with SSL is virtually never used, SSHv2 is handled internally by cryptlib, andCMS is never used by anything). If a widely-accepted standard emerges, cryptlib willuse that format. Previous versions of cryptlib used a combination of PKCS #3, PKCS#5, and PKCS #7 formats and mechanisms to handle DH key agreement.
cryptlib supports a third kind of key export/import that doesn’t actually export or import a key but merely provides a means of agreeing on a shared secret key withanother party. You don’t have to explicitly load of generate a session key for this one since the act of performing the key exchange will create a random, secret shared key.To use this form of key exchange, both parties call cryptExportKey to generate theblob to send to the other party, and then both in turn call cryptImportKey to importthe blob sent by the other party.
The use of cryptExportKey/cryptImportKey for key agreement rather than keyexchange is indicated by the use of a key agreement algorithm for the context thatwould normally be used to export the key. The key agreement algorithm used bycryptlib is the Diffie-Hellman (DH) key exchange algorithm, CRYPT_ALGO_DH.In the following code the resulting Diffie-Hellman context is referred to asdhContext.

Exchanging Keys188
Since there’s a two-way exchange of messages, both parties must create an identical“template” encryption context so cryptExportKey knows what kind of key to export.Lets assume that both sides know they’ll be using Blowfish in CFB mode. The first step of the key exchange is therefore:
/* Create the key template */cryptCreateContext( &cryptContext, cryptUser, CRYPT_ALGO_BLOWFISH );cryptSetAttribute( cryptContext, CRYPT_CTXINFO_MODE, CRYPT_MODE_CFB );
/* Export the key using the template */cryptExportKey( encryptedKey, encryptedKeyMaxLength,
&encryptedKeyLength, dhContext, cryptContext );cryptDestroyContext( cryptContext );
Note that there’s no need to load a key into the template, since this is generated automatically as part of the export/import process. In addition the template isdestroyed once the key has been exported, since there’s no further use for it— itmerely acts as a template to tell cryptExportKey what to do.
Both parties now exchange encryptedKey blobs, and then use:
cryptImportKey( encryptedKey, encryptedKeyLength, dhContext,cryptContext );
to create the cryptContext containing the shared key.
The agreement process requires that both sides export their own encryptedKeyblobs before they import the other sides encryptedKey blob. A side-effect of thisis that it allows additional checking on the key agreement process to be performed toguard against things like triple DES turning into 40-bit RC4 during transmission. Ifyou try to import another party’s encryptedKey blob without having first exportedyour own encryptedKey blob, cryptImportKey will returnCRYPT_ERROR_NOTINITED.

Key Agreement 189
Signing DataMost public-key encryption algorithms can be used to generate digital signatures ondata. A digital signature is created by signing the contents of a hash context with aprivate key to create a signature blob, and verified by checking the signature blobwith the corresponding public key.
To do this, you use the cryptCreateSignature and cryptCheckSignature functionsin combination with a public-key encryption context. Let’s say you’ve hashed some data with an SHA-1 hash context hashContext and want to sign it with yourprivate key in the encryption context sigKeyContext. To do this you’d use:CRYPT_CONTEXT sigKeyContext, hashContext;void *signature;int signatureLength;
/* Create a hash context */cryptCreateContext( &hashContext, cryptUser, CRYPT_ALGO_SHA );
/* Hash the data */cryptEncrypt( hashContext, data, dataLength );cryptEncrypt( hashContext, data, 0 );
/* Allocate memory for the signature */signature = malloc( signatureMaxLength );
/* Sign the hash to create a signature blob */cryptCreateSignature( signature, signatureMaxLength, &signatureLength,
sigKeyContext, hashContext );cryptDestroyContext( hashContext );
The resulting signature blob is placed in the memory buffer pointed to bysignature of maximum size signatureMaxLength, and the actual length isstored in signatureLength. This leads to the same problem with allocating thebuffer that was described for cryptExportKey, and the solution is again the same:You use cryptCreateSignature to tell you how big to make the buffer. If you pass ina null pointer for signature, the function will set signatureLength to the sizeof the resulting blob, but not do anything else. You can then use code like:
cryptCreateSignature( NULL, 0, &signatureMaxLength, sigKeyContext,hashContext );
signature = malloc( signatureMaxLength );cryptCreateSignature( signature, signatureMaxLength, &signatureLength,
sigKeyContext, hashContext );
to create the signature blob. Note that due to encoding issues for some algorithms thefinal exported blob may be one or two bytes smaller than the size which is initiallyreported, since the true size can’t be determined until the signature is actually generated. Alternatively, you can just allocate a reasonably sized block of memoryand use that to hold the signature. “Reasonably sized” means a few Kb, a 4K block is plenty (a signature blob for a 1024-bit public key is only about 200 bytes long).
Now that you’ve created the signature, the other party needs to check it. This is done using the cryptCheckSignature function and the public key or key certificatecorresponding to the private key used to create the signature (you can also pass in aprivate key if you want, cryptCheckSignature will only use the public keycomponents, although it’s not clear why you’d be in possession of someone else’s private key). To perform the check using a public key context you’d use:
CRYPT_CONTEXT sigCheckContext, hashContext;
/* Create a hash context */cryptCreateContext( &hashContext, cryptUser, CRYPT_ALGO_SHA );
/* Hash the data */cryptEncrypt( hashContext, data, dataLength );cryptEncrypt( hashContext, data, 0 );

Signing Data190
/* Check the signature using the signature blob */cryptCheckSignature( signature, signatureLength, sigCheckContext,
hashContext );cryptDestroyContext( hashContext );
If the signature is invalid, cryptlib will return CRYPT_ERROR_SIGNATURE. Asignature check using a key certificate is similar, except that it uses a public keycertificate object rather than a public key context. The use of certificates is explainedin “Certificates and Certificate Management” on page 139.
If the public key is stored in an encryption context with a certificate associated with itor in a key certificate, there may be constraints on the key usage that are imposed bythe certificate. If the key can’t be used for the signature or signature check operation, the function will return CRYPT_ERROR_PERMISSION to indicate that the key isn’t valid for this operation, you can find out more about the exact nature of the problemby reading the error-related attributes as explained in “Extended Error Reporting” on page 273.
Querying a Signature ObjectJust as you can query exported key blobs, you can also query signature blobs usingcryptQueryObject, which is used to obtain information on the signature. You canalso use cryptQueryObject to obtain information on exported key blobs as explainedin “Querying an Exported Key Object” on page 186.
The function takes as parameters the object you want to query, and a pointer to aCRYPT_OBJECT_INFO structure which is described in “CRYPT_OBJECT_INFOStructure” on page 300. The object type will be a CRYPT_OBJECT_SIGNATUREfor a signature object. If you were given an arbitrary object of an unknown typeyou’d use the following code to handle it:
CRYPT_OBJECT_INFO cryptObjectInfo;
cryptQueryObject( object, objectLength, &cryptObjectInfo );if( cryptObjectInfo.objectType == CRYPT_OBJECT_SIGNATURE )
/* Check the signature */;else
/* Error */;
Any CRYPT_OBJECT_INFO fields that aren’t relevant for this type of object are set to null or zero as appropriate.
Once you’vefound out what type of object you have, you can use the otherinformation returned by cryptQueryObject to process the object. The informationthat you need to obtain from the blob is the hash algorithm that was used to hash thesigned data, which is contained in the hashAlgo field. To hash a piece of databefore checking the signature on it you would use:
CRYPT_CONTEXT hashContext;
/* Create the hash context from the query info */cryptCreateContext( &hashContext, cryptUser,
cryptObjectInfo.hashAlgo );
/* Hash the data */cryptEncrypt( hashContext, data, dataLength );cryptEncrypt( hashContext, data, 0 );
Extended Signature Creation/CheckingThe cryptCreateSignatureEx and cryptCheckSignatureEx functions describedabove create and verify signatures in the cryptlib default format (which, for thetechnically inclined, is the Cryptographic Message Syntax format with key identifiersused to denote public keys). The default cryptlib format has been chosen to beindependent of the underlying key format, so that it works equally well with any keytype including raw keys, X.509 certificates, PGP/OpenPGP keys, and any other keystorage format.

Extended Signature Creation/Checking 191
Alongside the default format, cryptlib supports the generation and checking ofsignatures in other formats using cryptCreateSignatureEx andcryptCheckSignatureEx. cryptCreateSignatureEx works likecryptCreateSignature but takes two extra parameters, the first of which specifies theformat to use for the signature. The formats are:
Format Description
CRYPT_FORMAT_CMSCRYPT_FORMAT_SMIME
These are variations of the CryptographicMessage Syntax and are also known asS/MIME version 2 or 3 and PKCS #7.The key used for signing must have anassociated X.509 certificate in order togenerate this type of signature.
CRYPT_FORMAT_CRYPTLIB This is the default cryptlib format and canbe used with any type of key. This formatis also known as a newer variation ofS/MIME version 3.
CRYPT_FORMAT_PGP This is the OpenPGP format and can beused with any type of key.
The second extra parameter required by cryptCreateSignatureEx depends on thesignature format being used. With CRYPT_FORMAT_CRYPTLIB andCRYPT_FORMAT_PGP this parameter isn’t used and should be set to CRYPT_-UNUSED. With CRYPT_FORMAT_CMS/CRYPT_FORMAT_SMIME, thisparameter specifies optional additional information which is included with thesignature. The only real difference between the CRYPT_FORMAT_CMS andCRYPT_FORMAT_SMIME signature format is that CRYPT_FORMAT_SMIMEadds a few extra S/MIME-specific attributes that aren’t added by CRYPT_-FORMAT_CMS. This additional information includes things like the type of databeing signed (so that the signed content can’t be interpreted the wrong way), the signing time (so that an old signed message can’t be reused), and any other information that the signer might consider worth including.
The easiest way to handle this extra information is to let cryptlib add it for you. Ifyou set the parameter to CRYPT_USE_DEFAULT, cryptlib will generate and add theextra information for you:
void *signature;int signatureMaxLength, signatureLength;
cryptCreateSignatureEx( NULL, 0, &signatureMaxLength,CRYPT_FORMAT_CMS, sigKeyContext, hashContext, CRYPT_USE_DEFAULT );
signature = malloc( signatureMaxLength );cryptCreateSignatureEx( signature, signatureMaxLength,
&signatureLength, CRYPT_FORMAT_CMS, sigKeyContext, hashContext,CRYPT_USE_DEFAULT );
If you need more precise control over the extra information, you can specify ityourself in the form of a CRYPT_CERTTYPE_CMS_ATTRIBUTES certificateobject, which is described in more detail in “CMS/SMIME Attributes” on page 243.By default cryptlib will include the default signature attributes CRYPT_-CERTINFO_CMS_SIGNINGTIME and CRYPT_CERTINFO_CMS_-CONTENTTYPE for you if you don’t specify it yourself, and for S/MIME signatures it will also include CRYPT_CERTINFO_CMS_SMIMECAPABILITIES. You candisable this automatic including with the cryptlib configuration option CRYPT_-OPTION_CMS_DEFAULTATTRIBUTES/CRYPT_OPTION_SMIME_-DEFAULTATTRIBUTES as explained in “Working with Configuration Options” on page 263, this will simplify the signature somewhat and reduce its size andprocessing overhead:

Signing Data192
CRYPT_CERTIFICATE signatureAttributes;void *signature;int signatureMaxLength, signatureLength;
/* Create the signature attribute object */cryptCreateCert( &signatureAttributes, cryptUser,
CRYPT_CERTTYPE_CMS_ATTRIBUTES );/* ... */
/* Create the signature including the attributes as extra information*/
cryptCreateSignatureEx( NULL, 0, &signatureMaxLength,CRYPT_FORMAT_CMS, sigKeyContext, hashContext, signatureAttributes);
signature = malloc( signatureMaxLength );cryptCreateSignatureEx( signature, signatureMaxLength,
&signatureLength, CRYPT_FORMAT_CMS, sigKeyContext, hashContext,signatureAttributes );
cryptDestroyCert( signatureAttributes );
In general if you’re sending signed data to a recipient who is also using cryptlib-based software, you should use the default cryptlib signature format which is moreflexible in terms of key handling and far more space-efficient (CMS/SMIMEsignatures are typically ten times the size of the default cryptlib format whileproviding little extra information, and have a much higher processing overhead thancryptlib signatures).
As with encrypted key export, PGP handles signing somewhat differently to any otherformat. In particular, when you hash the data you can’t complete the processing by hashing a zero-length value as with normal signatures, since PGP needs to hash inassorted other data before it writes the signature. The same holds for signatureverification.
Extended signature checking follows the same pattern as extended signaturegeneration, with the extra parameter to the function being a pointer to the locationthat receives the additional information included with the signature. With theCRYPT_FORMAT_CRYPTLIB format type, there’s no extra information present and the parameter should be set to null. With CRYPT_FORMAT_CMS/CRYPT_FORMAT_SMIME, you can also set the parameter to null if you’re not interested in the additional information, and cryptlib will discard it after using it aspart of the signature checking process. If you are interested in the additionalinformation, you should set the parameter to a pointer to a CRYPT_CERTIFICATEobject that cryptlib will create for you and populate with the additional signatureinformation. If the signature check succeeds, you can work with the resultinginformation as described in “Other Certificate Object Extensions” on page 243:
CRYPT_CERTIFICATE signatureAttributes;int status;
status = cryptCheckSignatureEx( signature, signatureLength,sigCheckCertificate, hashContext, &signatureAttributes );
if( cryptStatusOK( status ) ){/* Work with extra signature information in signatureAttributes *//* ... */
/* Clean up */cryptDestroyCert( signatureAttributes );}

Overview of Certificates 193
Certificates in DetailAlthough a public/private key context can be used to store basic key components, it’s not capable of storing any additional information such as the key owner’s name, usage restrictions, and key validity information. This type of information is stored ina key certificate, which is encoded according to the X.509 standard and sundryamendments, corrections, extensions, profiles, and related standards. A certificateconsists of the encoded public key, information to identify the owner of thecertificate, other data such as usage and validity information, and a digital signaturethat binds all this information to the key.
There are a number of different types of certificate objects, including actualcertificates, certification requests, certificate revocation lists (CRLs), certificationauthority (CA) certificates, certificate chains, attribute certificates, and others. Forsimplicity the following text refers to all of these items using the general term“certificate”. Only where a specific type of item such as a CA certificate or a certification request is required will the actual name be used.
cryptlib stores all of these items in a generic CRYPT_CERTIFICATE containerobject into which you can insert various items such as identification information andkey attributes, as well as public-key encryption contexts or other certificate objects.Once everything has been added, you can fix the state of the certificate by signing it,after which you can’t change it except by starting again with a fresh certificate object.
Working with certificates at the level described in this and the following chapters isextraordinarily difficult and painful. Before you decide to work with certificates atthis level, you should read “High-level vs. Low-level Certificate Operations” on page 139 to make absolutely certain you don’t want to use cryptlib’s high-level certificatemanagement capabilities instead.
Overview of CertificatesPublic key certificates are objects that bind information about the owner of a publickey to the key itself. The binding is achieved by having the information in thecertificate signed by a certification authority (CA) that protects the integrity of thecertificate information and allows it to be distributed over untrusted channels andstored on untrusted systems.
You can request a certificate from a CA with a certification request, which encodes apublic key and identification information and binds them together for processing bythe CA. The CA responds to a certificate request with a signed certificate.
In addition to creating certificates, you may occasionally need to revoke them.Revoked keys are handled via certificate revocation lists (CRLs), which work like1970’s-vintage credit card blacklists by providing users with a list of certificates thatshouldn’t be honoured any more. In practice the blacklist approach was never practical (it was for this reason that it was abandoned by credit card vendors twentyyears ago), has little support in actual implementations, and is typically handled bygoing through the motions of a CRL check for form’s sake without really taking it seriously. Revocations can only be issued by a CA, so to revoke a certificate youeither have to be a CA or have the co-operation of a CA. This chapter covers thedetails of creating and issuing CRLs.
Certificates and Standards ComplianceThe key certificates used by most software today were originally specified in theCCITT (now ITU) X.509 standard, and have been extended via assorted ISO, ANSI,ITU, IETF, and national standards (generally referred to as “X.509 profiles”), along with sundry amendments, meeting notes, draft standards, committee drafts, workingdrafts, and other work-in-progress documents. X.509 version 1 (X.509v1) definedthe original, very basic certificate format, the latest version of the standard is version4 (X.509v4), which defines all manner of extensions and additions and is still in theprocess of being finalised and profiled. Compliance with the various certificate

Certificates in Detail194
standards varies greatly. Most implementations manage to get the decade-oldX.509v1 more or less correct, and cryptlib includes special code to allow it to processmany incorrectly-formatted X.509v1-style certificates as well as all correctlyformatted ones. However compliance with X.509v3 and X.509v4 profiles isextremely patchy. Because of this, it is strongly recommended that you test thecertificates you plan to produce with cryptlib against any other software you want tointeroperate with. Although cryptlib produces certificates that comply fully withX.509v3 and X.509v4 and related standards and recommendations, many otherprograms (including several common web browsers and servers) either can’t process these certificates or will process them incorrectly. Note that even if the othersoftware loads your certificate, it frequently won’t process the information contained in it correctly, so you should verify that it’s handling it in the way you expect it to.
If you need to interoperate with a variety of other programs, you may need to find thelowest common denominator that all programs can accept, which is usually X.509v1,sometimes with one or two basic X.509v3 extensions. Alternatively, you can issuedifferent certificates for different software, a technique which is currently used bysome CAs that have a different certificate issuing process for Netscape, MSIE, andeverything else.
Much current certificate management software produces an amazing collection ofgarbled, invalid, and just plain broken certificates that will be rejected by cryptlib asnot complying with the relevant security standards. To bypass this problem, it’s possible to disable various portions of the certificate checking code in order to allowthese certificates to be processed. If a certificate fails to load you can try disablingmore and more certificate checking in cryptlib until the certificate can be loaded,although disabling these checks will also void any guarantees about correct certificatehandling.
Finally, implementations are free to stuff anything they feel like into certain areas ofthe certificate. cryptlib goes to some lengths to take this into account and process thecertificate no matter what data it finds in there, however sometimes it may findsomething that it can’t handle. If you require support for special certificatecomponents (either to generate them or to process them), please contact the cryptlibdevelopers.
Certificate Compliance Level CheckingIn order to allow cryptlib to process broken certificates, you can vary the level ofstandards compliance checking that it performs on certificates. The level of checkingis controlled by the CRYPT_OPTION_CERT_COMPLIANCELEVEL configurationoption, with configuration options being explained in more detail in “Working withConfiguration Options” on page 263. This option can be set to one of the followingvalues:
Compliance Level Description
CRYPT_-COMPLIANCELEVEL_PKIX_FULL
Full compliance with X.509 and PKIXstandards. This checks and enforces all PKIXextensions and requirements (note the warningfurther down about what this entails). This levelof checking will reject a significant number ofcertificates/certificate chains in use today.

Overview of Certificates 195
CRYPT_-COMPLIANCELEVEL_PKIX_PARTIAL
Reduced level of compliance with X.509 andPKIX standards. This omits handling ofproblematic extensions such as name and policyconstraints, whose semantics no-one can quiteagree on, and a few other problematicextensions defined in various certificatestandards, but checks and enforces all otherPKIX requirements. As with CRYPT_-COMLPIANCELEVEL_PKIX_FULL, thislevel of checking will reject a number ofcertificates in use today.
CRYPT_-COMPLIANCELEVEL_STANDARD
Moderate level of checking equivalent to thatperformed by most software in use today. Manyof the more complex and/or obscure extensionsare ignored, which makes it possible to processcertificates generated by other software thatsimilarly ignores them. In addition many X.509and PKIX compliance requirements aresignificantly relaxed, so that (for example) themandatory key usage extension, if absent, maybe synthesised from other information present inthe certificate.
CRYPT_-COMPLIANCELEVEL_REDUCED
Minimal level of checking required to handleseverely broken certificates. All extensionsexcept the ones controlling certificate andcertificate key usage are ignored, allowingcertificates with invalid or garbled contents tobe processed.
CRYPT_-COMPLIANCELEVEL_OBLIVIOUS
No checking of certificate contents except for aminimal check of the certificate key usage. Thislevel of checking merely confirms that theobject looks vaguely like a certificate, and thatits signature verifies. This allows expired andotherwise invalid certificates to be processed.
These reduced levels of checking are required in order to successfully processcertificates generated by other software. Although cryptlib-generated certificates canbe processed at the CRYPT_COMPLIANCELEVEL_PKIX_FULL compliance level,it may be necessary to lower the level all the way down to CRYPT_-COMPLIANCELEVEL_OBLIVIOUS in order to handle certificates from otherapplications. If you encounter a certificate that can’t be processed at a given compliance level, for example one that generates a CRYPT_ERROR_BADDATA onimport or a CRYPT_ERROR_INVALID when checked, you can either request thatthe originator of the certificate fix it (this is unlikely to happen) or lower thecompliance level until the certificate can be imported/checked.
At reduced compliance levels, cryptlib skips potentially problematic certificateextensions, so that these will seem to disappear from the certificate as the compliancelevel is lowered. For example, the name constraints extension will be decoded atCRYPT_COMPLIANCELEVEL_PKIX_FULL, but not at any lower level, so thatunless the certificate is processed at that level the extension will appear to be absent.In some rare cases CAs may place the user’s email address in the subject altName instead of the subject DN. Setting the compliance level to one where this extension isskipped will cause the email address to appear to vanish from the certificate, whichyou need to take into account when you add the certificate to a keyset, since you’ll no longer be able to fetch it from the keyset based on the email address. Conversely,extra extensions that were skipped at lower levels may appear as the compliance levelis increased and they are processed by cryptlib.

Certificates in Detail196
One significant difference between CRYPT_COMPLIANCELEVEL_PKIX_FULLand the levels below it is that this level implements every quirk and peculiarityrequired by the standard. As a result, the levels below this one process certificates ina straightforward, consistent manner, while CRYPT_COMPLIANCELEVEL_-PKIX_FULL can produce apparently inconsistent and illogical results when the moreunusual and peculiar requirements of the standard are applied. Compliance levelsbelow the highest one aren’t fully compliant with the standard but will never produce unexpected results, while the highest compliance level is fully compliant but willproduce unexpected results where the standard mandates odd behaviour in handlingcertain types of extensions or certificate paths.
The Certification ProcessObtaining a public key certificate involves generating a public key, creating acertificate request from it, transmitting it to a CA who converts the certificationrequest into a certificate and signs it, and finally retrieving the completed certificatefrom the CA:
User CA
Generatecertificate request
Convert certificaterequest to certificate
Add (optional) attributesand sign certificate
Verify newcertificate
These steps can be broken down into a number of individual operations. The firststep, generating a certification request, involves the following:
generate public/private key pair;create certificate object;add public key to certificate object;add identification information to certificate object;sign certificate object with private key;export certification request for transmission to CA;destroy certificate object;
The CA receives the certification request and turns it into a certificate as follows:
import certification request;check validity and signature on certification request;create certificate object;add certification request to certificate object;add any extra information (e.g. key usage constraints) to certificate
object;sign certificate object;export certificate for transmission to user;destroy certificate objects;
Finally, the user receives the signed certificate from the CA and processes it asrequired, typically writing it to a public key keyset or updating a private key keyset:
import certificate;check validity and signature on certificate;write certificate to keyset;destroy certificate object;
The details on performing these operations are covered in the following sections.
Creating/Destroying Certificate ObjectsCertificates are accessed as certificate objects that work in the same general manneras the other container objects used by cryptlib. You create the certificate object withcryptCreateCert, specifying the user who is to own the device object orCRYPT_UNUSED for the default, normal user, the type of certificate you want to

Working with Certificate Attributes 197
create. Once you’ve finished with the object, you use cryptDestroyCert to destroyit:
CRYPT_CERTIFICATE cryptCertificate;
cryptCreateCert( &cryptCertificate, cryptUser, certificateType );
/* Work with the certificate */
cryptDestroyCert( cryptCertificate );
The available certificate types are:
Certificate Type Description
CRYPT_CERTTYPE_ATTRCERT Attribute certificate.
CRYPT_CERTTYPE_CERTCHAIN Certificate chain
CRYPT_CERTTYPE_CERTIFICATE Certificate or CA certificate.
CRYPT_CERTTYPE_CERTREQUEST Certification request
CRYPT_CERTTYPE_CRL Certificate revocation.
Note that the CRYPT_CERTIFICATE is passed to cryptCreateCert by reference, asthe function modifies it when it creates the certificate object. In all other routines,CRYPT_CERTIFICATE is passed by value.
You can also create a certificate object by reading a certificate from a public keydatabase, as explained in “Reading a Key from a Keyset” on page 131. UnlikecryptCreateCert, this will read a complete certificate into a certificate object, whilecryptCreateCert only creates a certificate template that still needs various detailssuch as the public key and key owner’s name filled in.
A third way to create a certificate object is to import an encoded certificate usingcryptImportCert, which is explained in more detail in “Importing/ExportingCertificates” on page 211. Like the public key read functions, this imports acomplete certificate into a certificate object.
Working with Certificate AttributesCertificate objects contain a number of basic attributes and an optional collection ofoften complex data structures and components. cryptlib provides a variety ofmechanisms for working with them. The attributes in a certificate object can bebroken up into three basic types:
1. Basic certificate attributes such as the public key and timestamp/validityinformation.
2. Identification information such as the certificate subject and issuer name.
3. Certificate extensions that can contain almost anything. These are covered in“Certificate Extensions” on page 224.
Although cryptlib provides the ability to manipulate all of these attributes, in practiceyou only need to handle a small subset of them yourself. The rest will be set tosensible defaults by cryptlib.
Apart from this, certificate attributes are handled in the standard way described in“Working with Object Attributes” on page 33.
Certificate StructuresCertificates, attribute certificates, certification requests, and CRLs have their own,often complex, structures that are encoded and decoded for you by cryptlib.Although cryptlib provides the ability to control the details of each certificate objectin great detail if you require this, in practice you should leave the certificatemanagement to cryptlib. If you don’t fill in thenon-mandatory fields, cryptlib will fillthem in for you with default values when you sign the certificate object.

Certificates in Detail198
Certificate chains are composite objects that contain within them one or morecomplete certificates. These are covered in more detail in “Certificate Chains” on page 215.
Attribute Certificate StructureAn X.509 attribute certificate has the following structure:
Field Description
Version The version number defines the attribute certificateversion and is filled in automatically by cryptlib whenthe certificate is signed.
HolderName The holder name identifies the holder of the attributecertificate and is explained in more detail further on. Ifyou add a certificate request using CRYPT_-CERTINFO_CERTREQUEST or a certificate usingCRYPT_CERTINFO_CERTIFICATE, this field willbe filled in for you.
This is a composite field that you must fill in yourselfunless it has already been filled in from a certificationrequest or certificate.
IssuerName The issuer name identifies the attribute certificatesigner (usually an authority, the attribute-certificateversion of a CA), and is filled in automatically bycryptlib when the certificate is signed.
SignatureAlgorithm The signature algorithm identifies the algorithm used tosign the attribute certificate, and is filled inautomatically by cryptlib when the certificate is signed.
SerialNumber The serial number is unique for each attributecertificate issued by an authority, and is filled inautomatically by cryptlib when the certificate is signed.You can obtain the value of this field withCRYPT_CERTINFO_SERIALNUMBER, but youcan’t set it. If you try to set it, cryptlib will return CRYPT_ERROR_PERMISSION to indicate that youdon’t have permission to set this field. The serialnumber is returned as a binary string and not as anumeric value, since it is often 15-20 bytes long.
cryptlib doesn’t use strict sequential numbering for the certificates it issues since this would make it very easyfor a third party to determine how many certificates aCA is issuing at any time.
Validity The validity period defines the period of time overwhich an attribute certificate is valid. CRYPT_-CERTINFO_VALIDFROM specifies the validity startperiod, and CRYPT_CERTINFO_VALIDTO specifiesthe validity end period. If you don’t set these, cryptlib will set them for you when the attribute certificate issigned so that the certificate validity starts on the day ofissue and ends one year later. You can change thedefault validity period using the cryptlib configurationoption CRYPT_OPTION_CERT_VALIDITY asexplained in “Working with Configuration Options” on page 263.
cryptlib enforces validity period nesting whengenerating an attribute certificate, so that the validityperiod of an attribute certificate will be constrained to

Certificate Structures 199
Field Descriptionlie within the validity period of the authority certificatethat signed it. If this isn’t done, some software will treat the certificate as being invalid, or will regard it ashaving expired once the authority certificate that signedit expires.
Due to the vagaries of international time zones anddaylight savings time adjustments, it isn’t possible to accurately compare two local times from different timezones, or made across a DST switch (consider forexample a country switching to DST, which has two2am times while another country only has one).Because of this ambiguity, times read from objectssuch as certificates may be out by an hour or two.
Attributes The attributes field contains a collection of attributesfor the certificate owner. Since no standard attributeshad been defined at the time of the last X.509 attributecertificate committee draft, cryptlib doesn’t currently support attributes in this field. When attributes aredefined, cryptlib will support them.
IssuerUniqueID The issuer unique ID was added in X.509v2, but its usehas been discontinued. If this string field is present inexisting attribute certificates you can obtain its valueusing CRYPT_CERTINFO_ISSUERUNIQUEID, butyou can’t set it. If you try to set it, cryptlib will return CRYPT_ERROR_PERMISSION to indicate that youhave no permission to set this field.
Extensions Certificate extensions allow almost anything to beadded to an attribute certificate and are covered in moredetail in “Certificate Extensions” on page 224.
Certificate StructureAn X.509 certificate has the following structure:
Field Description
Version The version number defines the certificate version andis filled in automatically by cryptlib when thecertificate is signed. It is used mainly for marketingpurposes to claim that software is X.509v3 compliant(even when it isn’t).
SerialNumber The serial number is unique for each certificate issuedby a CA, and is filled in automatically by cryptlib whenthe certificate is signed. You can obtain the value ofthis field with CRYPT_CERTINFO_-SERIALNUMBER, but you can’t set it. If you try toset it, cryptlib will return CRYPT_ERROR_-PERMISSION to indicate that you don’t have permission to set this field. The serial number isreturned as a binary string and not as a numeric value,since it is often 15-20 bytes long.
cryptlib doesn’t usestrict sequential numbering for thecertificates it issues since this would make it very easyfor a third party to determine how many certificates aCA is issuing at any time.
SignatureAlgorithm The signature algorithm identifies the algorithm used tosign the certificate, and is filled in automatically by

Certificates in Detail200
Field Descriptioncryptlib when the certificate is signed.
IssuerName The issuer name identifies the certificate signer(usually a CA), and is filled in automatically bycryptlib when the certificate is signed.
Validity The validity period defines the period of time overwhich a certificate is valid. CRYPT_CERTINFO_-VALIDFROM specifies the validity start period, andCRYPT_CERTINFO_VALIDTO specifies the validityend period. If you don’t set these, cryptlib will set them for you when the certificate is signed so that thecertificate validity starts on the day of issue and endsone year later. You can change the default validityperiod using the cryptlib configuration optionCRYPT_OPTION_CERT_VALIDITY as explained in“Working with Configuration Options” on page 263.
cryptlib enforces validity period nesting whengenerating a certificate, so that the validity period of acertificate will be constrained to lie within the validityperiod of the CA certificate that signed it. If this isn’t done, some software will treat the certificate as beinginvalid, or will regard it as having expired once the CAcertificate that signed it expires.
Due to the vagaries of international time zones anddaylight savings time adjustments, it isn’t possible to accurately compare two local times from different timezones, or made across a DST switch (consider forexample a country switching to DST, which has two2am times while another country only has one).Because of this ambiguity, times read from objectssuch as certificates may be out by an hour or two.
SubjectName The subject name identifies the owner of the certificateand is explained in more detail further on. If you addthe subject public key info from a certification requestusing CRYPT_CERTINFO_CERTREQUEST, thisfield will be filled in for you.
This is a composite field that you must fill in yourselfunless it has already been filled in from a certificationrequest.
SubjectPublicKey-Info
The subject public key info contains the public key forthis certificate. You can specify the public key withCRYPT_CERTINFO_SUBJECTPUBLICKEYINFO,and provide either an encryption context or a certificateobject that contains a public key. You can also add acertification request with CRYPT_CERTINFO_-CERTREQUEST, which fills in the subject public keyinfo, subject name, and possibly some certificateextensions.
This is a numeric field that you must fill in yourself.
IssuerUniqueIDSubjectUniqueID
The issuer and subject unique ID were added inX.509v2, but their use has been discontinued. If thesestring fields are present in existing certificates you canobtain their values using CRYPT_CERTINFO_-ISSUERUNIQUEID and CRYPT_CERTINFO_-SUBJECTUNIQUEID, but you can’t set them. If you

Certificate Structures 201
Field Descriptiontry to set them, cryptlib will return CRYPT_ERROR_-PERMISSION to indicate that you have no permissionto set these fields.
Extensions Certificate extensions were added in X.509v3.Extensions allow almost anything to be added to acertificate and are covered in more detail in “CertificateExtensions” on page 224.
Certification Request StructurePKCS #10 and CRMF certification requests have the following structure:
Field Description
Version The version number defines the certification requestversion and is filled in automatically by cryptlib whenthe request is signed.
SubjectName The subject name identifies the owner of thecertification request and is explained in more detailfurther on.
This is a composite field that you must fill in yourself.
SubjectPublicKey-Info
The subject public key info contains the public key forthis certification request. You can specify the publickey with CRYPT_CERTINFO_-SUBJECTPUBLICKEYINFO, and provide either anencryption context or a certificate object that contains apublic key.
This is a composite field that you must fill in yourself.
Extensions Extensions allow almost anything to be added to acertification request and are covered in more detail in“Certificate Extensions” on page 224.
CRL StructureAn X.509 CRL has the following structure:
Field Description
Version The version number defines the CRL version and isfilled in automatically by cryptlib when the CRL issigned.
SignatureAlgorithm The signature algorithm identifies the algorithm used tosign the CRL, and is filled in automatically by cryptlibwhen the CRL is signed.
IssuerName The issuer name identifies the CRL signer, and is filledin automatically by cryptlib when the CRL is signed.
ThisUpdateNextUpdate
The update time specifies when the CRL was issued,and the next update time specifies when the next CRLwill be issued. CRYPT_CERTINFO_THISUPDATEspecifies the current CRL issue time, andCRYPT_CERTINFO_NEXTUPDATE specifies thenext CRL issue time. If you don’t set these, cryptlib will set them for you when the CRL is signed so thatthe issue time is the day of issue and the next updatetime is 90 days later. You can change the defaultupdate interval using the cryptlib configuration optionCRYPT_OPTION_CERT_UPDATEINTERVAL as

Certificates in Detail202
Field Descriptionexplained in “Working with Configuration Options” on page 263.
Due to the vagaries of international time zones anddaylight savings time adjustments, it isn’t possible to accurately compare two local times from different timezones, or made across a DST switch (consider forexample a country switching to DST, which has two2am times while another country only has one).Because of this ambiguity, times read from objectssuch as certificates may be out by an hour or two.
UserCertificate The user certificate identifies the certificates that arebeing revoked in this CRL. The certificates must beones that were issued using the CA certificate which isbeing used to issue the CRL. If you try to revoke acertificate that was issued using a different CAcertificate, cryptlib will return a CRYPT_ERROR_-INVALID error when you add the certificate or signthe CRL to indicate that the certificate can’t be revoked using this CRL. You can specify the certificates to berevoked with CRYPT_CERTINFO_CERTIFICATE.
This is a numeric field, and the only one that you mustfill in yourself.
RevocationDate The revocation date identifies the date on which acertificate was revoked. You can specify therevocation date with CRYPT_CERTINFO_-REVOCATIONDATE. If you don’t set it, cryptlib will set it for you to the date on which the CRL was signed.
The revocation date you specify applies to the lastcertificate added to the list of revoked certificates. Ifno certificates have been added yet, it will be used as adefault date that applies to all certificates for which norevocation date is explicitly set.
Due to the vagaries of international time zones anddaylight savings time adjustments, it isn’t possible to accurately compare two local times from different timezones, or made across a DST switch (consider forexample a country switching to DST, which has two2am times while another country only has one).Because of this ambiguity, times read from objectssuch as certificates may be out by an hour or two.
Basic Certificate ManagementWith the information from the previous section, it’s now possible to start creatingbasic certificate objects. To create a PKCS #10 certification request, you would dothe following:
CRYPT_CERTIFICATE cryptCertRequest;void *certRequest;int certRequestMaxLength, certRequestLength;
/* Create a certification request and add the public key to it */cryptCreateCert( &cryptCertRequest, cryptUser,
CRYPT_CERTTYPE_CERTREQUEST );cryptSetAttribute( cryptCertRequest,
CRYPT_CERTINFO_SUBJECTPUBLICKEYINFO, pubKeyContext );
/* Add identification information *//* ... */

Basic Certificate Management 203
/* Sign the certification request with the private key and export it*/
cryptSignCert( cryptCertRequest, privKeyContext );cryptExportCert( NULL, 0, &certRequestMaxLength,
CRYPT_CERTFORMAT_CERTIFICATE, cryptCertRequest );certRequest = malloc( certRequestMaxLength );cryptExportCert( certRequest, certRequestMaxLength,
&certRequestLength, CRYPT_CERTFORMAT_CERTIFICATE, cryptCertRequest);
/* Destroy the certification request */cryptDestroyCert( cryptCertRequest );
This simply takes a public key, adds some identification information to it (the detailsof this will be covered later), signs it, and exports the encoded certification requestfor transmission to a CA. Since cryptlib will only copy across the appropriate keycomponents, there’s no need to have a separate public and private key context, youcan add the same private key context that you’ll be using to sign the certification request to supply the CRYPT_CERTINFO_SUBJECTPUBLICKEYINFOinformation and cryptlib will use the appropriate data from it.
To process the certification request and convert it into a certificate, the CA does thefollowing:
CRYPT_CERTIFICATE cryptCertificate, cryptCertRequest;void *cert;int certMaxLength, certLength;
/* Import the certification request and check its validity */cryptImportCert( certRequest, certRequestLength, cryptUser,
&cryptCertRequest );cryptCheckCert( cryptCertRequest, CRYPT_UNUSED );
/* Create a certificate and add the information from the certificationrequest to it */
cryptCreateCert( &cryptCertificate, cryptUser,CRYPT_CERTTYPE_CERTIFICATE );
cryptSetAttribute( cryptCertificate, CRYPT_CERTINFO_CERTREQUEST,cryptCertRequest );
/* Sign the certificate with the CA’s private key and export it */cryptSignCert( cryptCertificate, caPrivateKey );cryptExportCert( NULL, 0, &certMaxLength,
CRYPT_CERTFORMAT_CERTIFICATE, cryptCertificate );cert = malloc( certMaxLength );cryptExportCert( cert, certMaxLength, &certLength,
CRYPT_CERTFORMAT_CERTIFICATE, cryptCertificate );
/* Destroy the certificate and certification request */cryptDestroyCert( cryptCertificate );cryptDestroyCert( cryptCertRequest );
In this case the CA has put together a minimal certificate that can be processed bymost software but which is rather limited in the amount of control that the CA andend user has over the certificate, since no specific control information has been addedto the certificate. By default cryptlib adds the necessary fields for a full X.509v3certificate, but this won’t contain all the information that would be available ifthe CAexplicitly handles the fields for the certificate itself. Creating full X.509v3certificates involves the use of certificate extensions and is covered in more detaillater.
To check the signed certificate returned from the CA and add it to a keyset, the userdoes the following:
CRYPT_CERTIFICATE cryptCertificate;
/* Import the certificate and check its validity */cryptImportCert( cert, certLength, cryptUser, &cryptCertificate );cryptCheckCert( cryptCertificate, caCertificate );
/* Add the certificate to a keyset *//* ... */

Certificates in Detail204
/* Destroy the certificate */cryptDestroyCert( cryptCertificate );
To obtain information about the key contained in a certificate you can read theappropriate attributes just like an encryption context, for exampleCRYPT_CTXINFO_ALGO will return the encryption/signature algorithm type,CRYPT_CTXINFO_NAME_ALGO will return the algorithm name, andCRYPT_CTXINFO_KEYSIZE will return the key size.
Certificate Identification InformationTraditionally, certificate objects have been identified by a construct called an X.500Distinguished Name (DN). In ISO/ITU terminology, the DN defines a path throughan X.500 directory information tree (DIT) via a sequence of Relative DistinguishedName (RDN) components which in turn consist of a set of one or more AttributeValue Assertions (AVAs) per RDN. The description then goes on in this manner foranother hundred-odd pages, and includes diagrams that are best understood whenheld upside down in front of a mirror.
To keep things manageable, cryptlib goes to some lengths to hide the complexityinvolved by handling the processing of DNs for you. A cryptlib DN can contain thefollowing text string components:
Component Description
CountryName (C) The two-letter international country code (specifiedin ISO 3166 in case you ever need to look it up).Examples of country codes are ‘US’ and ‘NZ’. You can specify the country withCRYPT_CERTINFO_COUNTRYNAME.
This is a field that you must fill in.
Organization (O) The organisation for which the certificate will beissued. Examples of organisations are ‘Microsoft Corporation’ and ‘Verisign, Inc’. You can specify the organisation with CRYPT_CERTINFO_-ORGANIZATIONNAME.
OrganisationalUnit-Name (OU)
The division of the organisation for which thecertificate will be issued. Examples oforganisational units are ‘Sales and Marketing’ and ‘Purchasing’. You can specify the organisational unit with CRYPT_CERTINFO_-ORGANIZATIONALUNITNAME.
StateOrProvinceName(SP)
The state or province in which the certificate owneris located. Examples of state or province names are‘Utah’, ‘Steyrmark’, and ‘Puy de Dôme’. You can specify the state or province with CRYPT_-CERTINFO_STATEORPROVINCENAME.
LocalityName (L) The locality in which the certificate owner islocated. Examples of localities are ‘San Jose’, ‘Seydisfjördur’, and ‘Mönchengladbach’. You can specify the locality with CRYPT_CERTINFO_-LOCALITYNAME.
CommonName (CN) The name of the certificate owner, which can beeither a person such as ‘John Doe’, a business rolesuch as ‘Accounts Manager’, or even an entity like ‘Laser Printer #6’. You can specify the common name with CRYPT_CERTINFO_-COMMONNAME.

Certificate Identification Information 205
Component DescriptionThis is a field that you must fill in.
All DN components except the country name are limited to a maximum of 64characters (this is a requirement of the X.500 standard that defines the certificateformat and use). cryptlib provides the CRYPT_MAX_TEXTSIZE constant for thislimit. Note that this defines the number of characters and not the number of bytes, sothat a Unicode string could be several times as long in bytes as it would be incharacters, depending on which data type the system uses to represent Unicodecharacters.
The complete DN can be used for a personal key used for private purposes (forexample to perform home banking or send private email) or for a key used forbusiness purposes (for example to sign business agreements). The differencebetween the two key types is that a personal key will identify someone as a privateindividual, whereas a business key will identify someone terms of the organisation forwhich they work.
A DN must always contain a country name and a common name, and shouldgenerally also contain one or more of the other components. If a DN doesn’t contain at least the two minimum components, cryptlib will return CRYPT_ERROR_-NOTINITED with an extended error indicating the missing component when you tryto sign the certificate object.
Realising that DNs are too complex and specialised to handle many types of currentcertificate usage, more recent revisions of the X.509 standard were extended toinclude a more generalised name format called a GeneralName, which is explained inmore detail in “Extended Certificate Identification Information” on page 209.
DN Structure for Business UseFor business use, the DN should include the country code, the organisation name, anoptional organisational unit name, and the common name. An example of a DNstructured for business use would be:
C = USO = Cognitive Cybernetics IncorporatedOU = Research and DevelopmentCN = Paul Johnson
This is a key which is used by an individual within an organisation. It might alsodescribe a role within the organisation, in this case a class of certificate issuer in aCA:
C = DEO = Kommunikationsnetz Franken e.V. Certification AuthorityCN = Class 1 CA
It might even describe an entity with no direct organisational role:
C = ATO = Erste Allgemeine VerunsicherungCN = Mail Gateway
In this last case the certificate might be used by the mail gateway machine toauthenticate data transmitted through it.
DN Structure for Private UseFor private, non-business use, the DN should include the country code, an optionalstate or province name, the locality name, and the common name. An example of aDN structured for private use would be:
C = USSP = CaliforniaL = El CerritoCN = Dave Taylor

Certificates in Detail206
DN Structure for Use with a Web ServerFor use with a web server the DN should include whatever is appropriate for thecountry and state, province, or organisation, and the domain name of the web serveras the common name. An example of a DN for a web server certificate for the serverwww.servername.com, used by the organisation given in the earlier example,would be:
C = USO = Cognitive Cybernetics IncorporatedOU = Research and DevelopmentCN = www.servername.com
Other DN StructuresIt’s also possible to combine components of the above DN structures, for example if an organisation has divisions in multiple states you might want to include the state orprovince name component in the DN:
C = USSP = MichiganO = Last National BankCN = Personnel Manager
Another example would be:
C = USL = Area 51O = Hanger 18OU = X.500 Standards DesignersCN = John Doe
Working with Distinguished NamesNow that the details of DNs have been covered, you can use them to addidentification information to certification requests and certificates. For example toadd the business DN shown earlier to a certification request you would use:
CRYPT_CERTIFICATE cryptCertRequest;
/* Create certification request and add other components *//* ... */
/* Add identification information */cryptSetAttributeString( cryptCertRequest, CRYPT_CERTINFO_COUNTRYNAME,
"US", 2 );cryptSetAttributeString( cryptCertRequest,
CRYPT_CERTINFO_ORGANIZATIONNAME, "Cognitive CyberneticsIncorporated", 34 );
cryptSetAttributeString( cryptCertRequest,CRYPT_CERTINFO_ORGANIZATIONALUNITNAME, "Research and Development",24 );
cryptSetAttributeString( cryptCertRequest, CRYPT_CERTINFO_COMMONNAME,"Paul Johnson", 12 );
/* Sign certification request and transmit to CA *//* ... */
The same process applies for adding other types of identification information to acertification request or certificates. Note that cryptlib sorts the DN components intothe correct order when it creates the certification request or certificate, so there’s no need to specify them in strict order as in the above code.
By default, cryptlib will work with the subject name, if you want to access the issuername you need to select it first so that DN components can be read from it instead ofthe subject name (issuer names are only present in some certificate object types, forexample the certification request above doesn’t contain an issuer name). To tell cryptlib to use the issuer name, you set the currently active DN attribute to the issuername:

Certificate Identification Information 207
cryptSetAttribute( certificate, CRYPT_CERTINFO_ISSUERNAME,CRYPT_UNUSED );
Since there are no arguments to this selection attribute, the value that you supply isset to CRYPT_UNUSED. Once you’ve selected a different DN in this manner, it remains selected until you select a different one, so if you wanted to move back toworking with the subject name you’d need to use:
cryptSetAttribute( certificate, CRYPT_CERTINFO_SUBJECTNAME,CRYPT_UNUSED );
otherwise attempts to query further DN attributes will apply to the selected issuername attribute instead of the subject name.
Creating Customised DNsAlthough the DN-handling mechanisms provided by cryptlib are extremely flexible,they enforce a few restrictions on the format of the DN to ensure that the resultingvalue can be processed properly by other applications. Sometimes it may benecessary to create customised, non-standard DNs for certain applications that requirean unusual DN structure or the use of odd DN components. cryptlib allows thecreation of arbitrary DNs by specifying them as a string representation of thecomplete DN, identified by CRYPT_CERTINFO_DN. The following section isintended for advanced users and assumes some knowledge of X.500 terminology.
Complete DNs are specified using the LDAP-style string representation of the DNthat contains one or more “label = value” pairs specifying a DN component and its value, for example the DN:
C = USO = Cognitive Cybernetics IncorporatedOU = Research and DevelopmentCN = Paul Johnson
that was used earlier would be represented in string form as “cn=Paul Johnson, ou=Research and Development, o=Cognitive Cybernetics Incorporated, c=US”, with each RDN being separated by a comma. Note that the encoding of the RDNs in thestring is backwards, this is a requirement of the LDAP DN string format. To set theDN for the previous certificate request in one step using a DN string you would use:
CRYPT_CERTIFICATE cryptCertRequest;
/* Create certification request and add other components *//* ... */
/* Add identification information */cryptSetAttributeString( cryptCertRequest, CRYPT_CERTINFO_DN, "cn=Paul
Johnson, ou=Research and Development, o=Cognitive CyberneticsIncorporated, c=US", 88 );
/* Sign certification request and transmit to CA *//* ... */
This sets the entire DN at once rather than setting it component by component. Onceyou’ve set the DN in this manner you can’t modify or delete any components because cryptlib preserves the exact ordering and format of the DN components, an orderingthat would be destroyed with some of the more complex DNs that will be presentedfurther down. You can also obtain the complete DN in string form by reading thevalue of this attribute.
The string DN form contains a number of special-case characters that are used tobreak up the RDNs and AVAs, if you want to use these in a DN component you needto escape them with ‘\’ so that for example ‘cn=a = b’ would be specified as ‘cn=a \=b’. cryptlib will automatically add these escape sequences to the DN components ifrequired when you read the attribute value.
The example shown above will result in the creation of a DN which is no different toone created in the usual manner, however since the DN string can contain arbitrarynumbers of RDNs in arbitrary order, it’s possible to create DNs that wouldn’t be

Certificates in Detail208
possible in the usual manner. For example to add a second OU “AI Lab” to the DN given above you would specify the DN as “cn=Paul Johnson, ou=Research andDevelopment, ou=AI Lab, o=Cognitive Cybernetics Incorporated, c=US”. Note again the backwards encoding, which means that “AI Lab” occurs higher up in the hierarchy than “Research and Development” even though it comes after it in the DN string.
It’s also possible to group multiple AVAs into an RDN by connecting them with a ‘+’ instead of the usual comma, for example to add Paul Johnson’s serial number to the above DN you would use “cn=Paul Johnson + sn=12345678, ou=Research and Development, o=CognitiveCybernetics Incorporated, c=US”. Once encoded in the certificate, the final RDN will contain two AVAs, one with the common name andthe other with the serial number.
The labels that are used to identify DN components are:
Label Component
Bc businessCategory
C countryName
cn commonName
D Description
dc domainComponent
email emailAddress (PKCS #9)
G givenName
I Initials
isdn internationalISDNNumber
L Locality
O organisationName
ou organisationalUnitName
S Surname
sn serialNumber
sp stateOrProvinceName
st streetAddress
T Title
There exist many more DN components beyond those shown in the table above, butlabels for them were never defined and it’s necessary to refer to them by object identifier with the prefix oid. to denote the use of an OID rather than a text label.The remaining DN components and their OID labels are aliasObjectName,oid.2.5.4.1, communicationsNetwork oid.2.5.4.67,communicationsService oid.2.5.4.66, destinationIndicator, oid.2.5.4.27,distinguishedName, oid.2.5.4.49, dnQualifier, oid.2.5.4.46,facsimileTelephoneNumber, oid.2.5.4.23, generationQualifier,oid.2.5.4.44, houseIdentifier, oid.2.5.4.51, knowledgeInformation,oid.2.5.4.2, member, oid.2.5.4.31, name, oid.2.5.4.41,nameDistinguisher, oid.0.2.262.1.10.7.20, owner, oid.2.5.4.32,physicalDeliveryOfficeName, oid.2.5.4.19, postalAddress, oid.2.5.4.16,postalCode, oid.2.5.4.17, postOfficeBox, oid.2.5.4.18,preferredDeliveryMethod, oid.2.5.4.28, presentationAddress,oid.2.5.4.29, pseudonym oid.2.5.4.65, registeredAddress,oid.2.5.4.26, rfc822Mailbox, oid.0.9.2342.19200300.100.1.3,roleOccupant, oid.2.5.4.33, searchGuide, oid.2.5.4.14, seeAlso,

Extended Certificate Identification Information 209
oid.2.5.4.34, supportedApplicationContext, oid.2.5.4.30, telephone-Number, oid.2.5.4.20, telexNumber, oid.2.5.4.21, teletexTerminal-Identifier, oid.2.5.4.22, uniqueIdentifier, oid.2.5.4.45, uniqueMember,oid.2.5.4.50, userid, oid.0.9.2342.19200300.100.1.1, andx121Address, oid.2.5.4.24.
Note that a number of different and often incompatible naming schemes for X.500attributes exist. X.500 only defined a handful of names, and as a result many otherstandards and implementations invented their own, a number of which conflict witheach other, and several of which conflict with the original X.500 names. cryptlib usesthe names that are most widely used with certificates. Since many of the names usedby different standards conflict, it’s not possible to have cryptlib handle multiple aliases for the same attribute, however if you require custom names to conform to aparticular standard or interpretation of a standard, you can change the values in thecode to reflect whatever names you want.
The CRYPT_CERTINFO_DN provides a powerful means of creating completelycustom DNs, note though that this can result in DNs that can’t be correctly processedor displayed by many applications, so you should only create non-standard DNs inthis manner where it’s absolutely necessary.
Extended Certificate Identification InformationIn the early to mid 1990’s when it became clear that the Internet was going to be thedriving force behind certificate technology, X.509 was amended to allow a moregeneral-purpose type of identification than the complex and specialised DN. Thisnew form was called the GeneralName, since it provided far more flexibility than theoriginal DN. A GeneralName can contain an email address, a URL, an IP address, analternative DN that doesn’t follow the strict rules for the main certificate DN (it could for example contain a postal or street address), less useful components like X.400 andEDI addressing information, and even user-defined information that might be used ina certificate, for example medical patient, taxpayer, or social security ID’s.
As with DNs, cryptlib goes to some lengths to hide the complexity involved inhandling GeneralNames (recall the previous technical description of a DN, and thenconsider that this constitutes only a small portion of the entire GeneralName). Like aDN, a GeneralName can contain a number of components. Unless otherwise noted,the components are all text strings.
Component Description
DirectoryName A DN that can contain supplementary informationthat doesn’t fit easily into the main certificate DN. You can specify this value with CRYPT_-CERTINFO_DIRECTORYNAME.
DNSName An Internet host’s fully-qualified domain name.You can specify this value with CRYPT_-CERTINFO_DNSNAME.
EDIPartyName.Name-Assigner
EDIPartyName.Party-Name
An EDI assigner-and-value pair with the EDI nameassigner specified by CRYPT_CERTINFO_-EDIPARTYNAME_NAMEASSIGNER and theparty name specified by CRYPT_CERTINFO_-EDIPARTYNAME_PARTYNAME.
IPAddress An IP address as per RFC 791, containing a 4-bytebinary string in network byte order. You canspecify this value with CRYPT_CERTINFO_-IPADDRESS.
OtherName.TypeIDOtherName.Value
A user-defined type-and-value pair with the typespecified by CRYPT_CERTINFO_-OTHERNAME_TYPEID and the value specifiedby CRYPT_CERTINFO_OTHERNAME_VALUE.

Certificates in Detail210
Component DescriptionThe type is an ISO object identifier and thecorresponding value is a binary string that cancontain anything, identified by the object identifier(if you know what this is then you should also knowhow to obtain one).
RegisteredID An object identifier (again, if you know what this isthen you should know how to obtain one). You canspecify this value with CRYPT_CERTINFO_-REGISTEREDID.
RFC822Name An email address. You can specify this value withCRYPT_CERTINFO_RFC822NAME. Forcompatibility with the older (obsolete) PKCS #9emailAddress attribute, cryptlib will also acceptCRYPT_CERTINFO_EMAIL to specify this field.
UniformResource-Identifier
A URL for either FTP, HTTP, or LDAP access asper RFC 1738. You can specify this value withCRYPT_CERTINFO_-UNIFORMRESOURCEIDENTIFIER.
Of the above GeneralName components, the most useful ones are the RFC822Name(to specify an email address), the DNSName (to specify a server address), and theUniformResourceIdentifier (to specify a web page or FTP server). Somewhat lessuseful is the DirectoryName, which can specify additional information that doesn’t fit easily into the main certificate DN. The other components should be avoided unlessyou have a good reason to require them (that is, don’t use them just because they’re there).
Working with GeneralName ComponentsNow that the details of GeneralNames have been covered, you can use them to addadditional identification information to certificate requests and certificates. Forexample to add an email address and home page URL to the certification requestshown earlier you would use:
CRYPT_CERTIFICATE cryptCertRequest;
/* Create certification request and add other components *//* ... */
/* Add identification information *//* ... */
/* Add additional identification information */cryptSetAttributeString( cryptCertRequest, CRYPT_CERTINFO_RFC822NAME,
"[email protected]", 12 );cryptSetAttributeString( cryptCertRequest,
CRYPT_CERTINFO_UNIFORMRESOURCEIDENTIFIER,"http://www.cci.com/~paul", 23 );
/* Sign certification request and transmit to CA *//* ... */
Although GeneralNames are commonly used to identify a certificates owner just likea DN, they are in fact a certificate extension rather than a basic attribute. Eachcertificate can contain multiple extensions that contain GeneralNames. The variousextensions that can contain GeneralNames are covered in “Certificate Extensions” on page 224, and the details of working with them are explained in “CompositeExtension Attributes” on page 227.
Certificate FingerprintsCertificates are sometimes identified through “fingerprints” that constitute either an MD5 or SHA-1 hash of the certificate data (the most common form is an MD5 hash).You can obtain a certificate’s fingerprint by reading its CRYPT_CERTINFO_-

Importing/Exporting Certificates 211
FINGERPRINT attribute, which yields the default (MD5) fingerprint for thecertificate. You can also explicitly query a particular fingerprint type with CRYPT_-CERTINFO_FINGERPRINT_MD5 and CRYPT_CERTINFO_FINGERPRINT_-SHA:
unsigned char fingerprint[ CRYPT_MAX_HASHSIZE ]int fingerprintSize;
cryptGetAttributeString( certificate, CRYPT_CERTINFO_FINGERPRINT,&fingerprint, &fingerprintSize );
This will return the certificate fingerprint.
Importing/Exporting CertificatesIf you have an encoded certificate that was obtained elsewhere, you can import it intoa certificate object using cryptImportCert. There are more than a dozen mostlyincompatible formats for communicating certificates, of which cryptlib will handle allthe generally useful and known ones. This includes straight binary certificationrequests, certificates, attribute certificates, and CRLs (usually stored with a .der fileextension when they are saved to disk), PKCS #7 certificate chains, and Netscapecertificate sequences. Certificates can also be protected with base64 armouring andBEGIN/END CERTIFICATE delimiters, which is the format used by some webbrowsers and other applications. When transferred via HTTP using the Netscape-specific format, certificates, certificate chains, and Netscape certificate sequences areidentified with have the MIME content types application/x-x509-user-cert, application/x-x509-ca-cert, and application/x-x509-email-cert, depending on the certificate type (cryptlib doesn’t use the MIME content type since the certificate itself provides a far more reliable indication of itsintended use than the easily-altered MIME content type).. Finally, certificationrequests and certificate chains can be encoded with the MIME / S/MIME contenttypes application/pkcs-signed-data, application/x-pkcs-signed-data, application/pkcs-certs-only, application/x-pkcs-certs-only, application/pkcs10, or application/x-pkcs10.These are usually stored with a .p7c extension (for pure certificate chains), a .p7sextension (for signatures containing a certificate chain), or a .p10 extension (forcertification requests) when they are saved to disk.
cryptlib will import any of the previously described certificate formats if they areencoded in this manner. To import a certificate object you would use:
CRYPT_CERTIFICATE cryptCertificate;
/* Import the certificate object from the encoded certificate */cryptImportCert( cert, certLength, cryptUser, &cryptCertificate );
Note that the CRYPT_CERTIFICATE is passed to cryptImportCert by reference, asthe function modifies it when it creates the certificate object.
Some certificate objects may contain unrecognised critical extensions (certificateextensions are covered in “Certificate Extensions” on page 224) which require thatthe certificate be rejected by cryptlib. If a certificate contains an unrecognised criticalextension, cryptlib will return a CRYPT_ERROR_PERMISSION error to indicatethat you have no permission to use this object.
All the parameters and information needed to create the certificate object are a part ofthe certificate, and cryptImportCert takes care of initialising the certificate objectand setting up the attributes and information inside it. The act of importing acertificate simply decodes the information and initialises a certificate object, itdoesn’t check the signature on the certificate. To check the certificate’s signature you need to use cryptCheckCert, which is explained in “Signing/Verifying Certificates” on page 213.
There may be instances in which you’re not exactly certain of the type of certificate object you have imported (for example importing a file with a .der or .cer extensioncould create a certificate request, a certificate, an attribute certificate, or a certificate

Certificates in Detail212
chain object depending on the file contents). In order to determine the exact type ofthe object, you can read its CRYPT_CERTINFO_CERTTYPE attribute:
CRYPT_CERTTYPE_TYPE certType;
cryptGetAttribute( certificate, CRYPT_CERTINFO_CERTTYPE, &certType );
This will return the type of the imported object.
You can export a signed certificate from a certificate object using cryptExportCert:
CRYPT_CERTIFICATE cryptCertificate;void *certificate;int certLength
/* Allocate memory for the encoded certificate */certificate = malloc( certMaxLength );
/* Export the encoded certificate from the certificate object */cryptExportCert( certificate, certMaxLength, &certLength,
certFormatType, cryptCertificate );
cryptlib will export certificates in any of the formats in which it can import them.The available certFormat types are:
Format Type Description
CRYPT_CERTFORMAT_-CERTCHAIN
A certificate encoded as a PKCS #7certificate chain.
CRYPT_CERTFORMAT_-CERTIFICATE
A certification request, certificate, or CRL inbinary data format. The certificate object isencoded according to the ASN.1distinguished encoding rules. This is thenormal certificate encoding format.
CRYPT_CERTFORMAT_-TEXT_CERTCHAIN
As CRYPT_CERTFORMAT_CERTCHAINbut with base64 armouring of the binarydata.
CRYPT_CERTFORMAT_-TEXT_CERTIFICATE
As CRYPT_CERTFORMAT_-CERTIFICATE but with base64 armouringof the binary data.
If the object that you’re exporting is a complete certificate chain rather than an individual certificate then these options work somewhat differently. The details ofexporting certificate chains are covered in “Exporting Certificate Chains” on page 218.
The resulting encoded certificate is placed in the memory buffer pointed to bycertificate of maximum size certificateMaxLength, and the actuallength is stored in certLength. This leads to a small problem: How do you knowhow big to make the buffer? The answer is to use cryptExportCert to tell you. Ifyou pass in a null pointer for certificate, the function will set certLength tothe size of the resulting encoded certificate, but not do anything else. You can thenuse code like:
cryptExportCert( NULL, 0, &certMaxLength, certFormatType,cryptCertificate );
certificate = malloc( certMaxLength );cryptExportCert( certificate, certMaxLength, &certLength,
certFormatType, cryptCertificate );
to create the encoded certificate.
Alternatively, you can just reserve a reasonably sized block of memory and use thatto hold the encoded certificate. “Reasonably sized” means a few Kb, a 4K block is plenty (a certificate for a 1024-bit key without certificate extensions is typically about700 bytes long if encoded using any of the binary formats, or 900 bytes long ifencoded using any of the text formats).

Signing/Verifying Certificates 213
If the certificate is one that you’ve created yourself rather than importing it from an external source, you need to add various data items to the certificate and then sign itbefore you can export it. If you try to export an incompletely prepared certificatesuch as a certificate in which some required fields haven’t been filled in or one that hasn’t been signed, cryptExportCert will return the error CRYPT_ERROR_-NOTINITED to tell you that the certificate information hasn’t been completely set up.
Signing/Verifying CertificatesOnce a certificate object contains all the information you want to add to it, you needto sign it in order to transform it into its final state in which the data in it can bewritten to a keyset (if the object’s final state is a key certificate or CA certificate) or exported from the object. Before you sign the certificate, the information within itexists only in a very generic and indeterminate state. After signing it, the informationis turned into a fixed certificate, CA certificate, certification request, or CRL, and nofurther changes can be made to it.
You can sign the information in a certificate object with cryptSignCert:
CRYPT_CONTEXT privKeyContext;
/* Sign the certificate object */cryptSignCert( cryptCertificate, privKeyContext );
There are some restrictions on the types of keys that can be used to sign certificateobjects. These restrictions are imposed by the way in which certificates andcertificate-related items are encoded, and are as follows:
CertificateType
Can be Signed By
Attributecertificate
Private key associated with an authority certificate.
Certificate Private key associated with a CA certificate. This can alsobe a self-signed (non-CA) certificate, but some software willthen decide that the resulting certificate is a CA certificateeven though it isn’t.
CA certificate Private key associated with a CA certificate (when one CAcertifies another) or the private key from which thecertificate being signed was created (when the CA certifiesitself).
Certificationrequest
Private key associated with the certification request.
Certificatechain
Private key associated with a CA certificate.
CRL Private key associated with the CA certificate that was usedto issue the certificates that are being revoked.
OCSP request/response
Private key associated with a certificate and authorised ortrusted to sign requests/responses.
In order to sign any type of certificate object other than a self-signed one, you mustuse a private key belonging to a CA. This means that the certificate associated withthe signing key must have its CRYPT_CERTINFO_CA attribute set to true (anonzero value) and must have a key usage value that indicates that it’s valid for signing certificates (or CRLs if the object being signed is a CRL). If you try to signan object other than a self-signed certificate or cert request with a non-CA key,cryptlib will return an error status indicating the nature of the problem. If the status isCRYPT_ERROR_PARAM2, the private key you’re using doesn’t have a certificate associated with it (that is, you’re trying to sign the certificate with a raw private key without an associated CA certificate). If the status is CRYPT_ERROR_INVALID,

Certificates in Detail214
the key you’re using doesn’t have the ability to sign certificates, for example because it isn’t a CA key or because it doesn’t contain a key usage value that indicates that it’s valid for signing certificates or CRLs. In the latter case you can read the CRYPT_-ATTRIBUTE_ERRORTYPE and CRYPT_ATTRIBUTE_ERRORLOCUS attributesto get more information about the nature of the problem as described in “ErrorHandling” on page 271.
Some certificate objects (for example OCSP requests and responses) can have signingcertificate information included with the object, although by default only thesignature itself is included. You can specify the amount of information which isincluded using the CRYPT_CERTINFO_SIGNATURELEVEL attribute. Setting thisto CRYPT_SIGNATURELEVEL_NONE (the default) includes only the signature,setting it to CRYPT_SIGNATURELEVEL_SIGNERCERT includes the immediatesigning certificate, and setting it to CRYPT_SIGNATURELEVEL_ALL includes allrelevant information, for example the complete certificate chain. You should alwaysuse the default signing level unless you specifically know that you need to provideextra information such as signing certificates or a certificate chain.
Once a certificate item has been signed, it can no longer be modified or updated usingthe usual certificate manipulation functions, and any attempt to update information init will return CRYPT_ERROR_PERMISSION to indicate that you have nopermission to modify the object. If you want to add or delete data to or from thecertificate item, you have to start again with a new certificate object. You candetermine whether a certificate item has been signed and can therefore no longer bechanged by reading its CRYPT_CERTINFO_IMMUTABLE attribute:
int isImmutable;
cryptGetAttribute( certificate, CRYPT_CERTINFO_IMMUTABLE,&isImmutable );
If the result is set to true (a nonzero value), the certificate item can no longer bechanged.
If you’re creating a self-signed certificate signed by a raw private key with nocertificate information associated with it, you need to set the CRYPT_CERTINFO_-SELFSIGNED attribute before you sign it otherwise cryptlib will flag the attempt tosign using a non-certificate key as an error. Non-certificate private keys can only beused to create self-signed certificates (if CRYPT_CERTINFO_SELFSIGNED is set)or certification requests.
If the object being signed contains unrecognised extensions, cryptlib will not includethem in the signed object (signing extensions of unknown significance is a riskypractice for a CA, which in some jurisdictions can be held liable for any arisingproblems). If you want to be able to sign unrecognised extensions, you can enablethis with the cryptlib configuration option CRYPT_OPTION_CERT_-SIGNUNRECOGNISEDATTRIBUTES as explained in “Working withConfiguration Options” on page 263.
You can verify the signature on a certificate object using cryptCheckCert and thepublic key or certificate corresponding to the private key that was used to sign thecertificate (you can also pass in a private key if you want, cryptCheckCert will onlyuse the public key components, although you shouldn’t really be in possession of someone else’s private key). To perform the check using a public key context you’d use:
CRYPT_CONTEXT pubKeyContext;
/* Check the signature on the certificate object information using thepublic key */
cryptCheckCert( cryptCertificate, pubKeyContext );
A signature check using a certificate is similar, except that it uses a certificate objectrather than a public key context.
If the certificate object is self-signed, you can pass in CRYPT_UNUSED as thesecond parameter and cryptCheckCert will use the key contained in the certificate

Certificate Chains 215
object to check its validity. You can determine whether a certificate object is self-signed by reading its CRYPT_CERTINFO_SELFSIGNED attribute. Certificationrequests are always self-signed, and certificate chains count as self-signed if theycontain a self-signed top-level certificate that can be used to recursively check the restof the chain. If the certificate object is a CA certificate which is signing itself (inother words if it’s a self-signed certificate), you can also pass the certificate as thesecond parameter in place of CRYPT_UNUSED, this has the same effect since thecertificate is both the signed and signing object.
If the certificate is invalid (for example because it has expired or because somecertificate usage constraint hasn’t been met), cryptlib will return CRYPT_ERROR_-INVALID to indicate that the certificate isn’t valid. This value is returned regardless of whether the signature check succeeds or fails. You can find out the exact nature ofthe problem by reading the extended error attributes as explained in “Error Handling” on page 271.
If the signing/signature check key is stored in an encryption context with a certificateassociated with it or in a certificate, there may be constraints on the key usage that areimposed by the certificate. If the key can’t be used for the signature or signature check operation, the function will return CRYPT_ERROR_INVALID to indicate thatthe key isn’t valid for this operation. You can findout more about the exact nature ofthe problem by reading the extended error attributes as explained in “Error Handling” on page 271.
If you’re acting as a CA and issuing significant numbers of certificates then a mucheasier alternative to signing each certificate yourself using cryptSignCert is to usecryptlib’s certificate management capabilities as described in “Managing aCertification Authority” on page 161.
Certificate ChainsBecause of the lack of availability of a general-purpose certificate directory, manysecurity protocols (most notable S/MIME and SSL) transmit not individualcertificates but entire certificate chains that contain a complete certificate path fromthe end user’s certificate up to some widely-trusted CA certificate (referred to as aroot CA certificate if it’s a self-signed CA certificate) whose trust will be handled foryou by cryptlib’s trust manager. cryptlib supportsthe creation, import, export, andchecking of certificate chains as CRYPT_CERTTYPE_CERTCHAIN objects, withindividual certificates in the chain being accessed as if they were standard certificatescontained in a CRYPT_CERTTYPE_CERTIFICATE object.
Working with Certificate ChainsIndividual certificates in a chain are addressed through a certificate cursor thatfunctions in the same way as the attribute cursor discussed in “Attribute Lists and” on page 37. Although a certificate chain object appears as a single object, it consistsinternally of a collection of certificates of which the first in the chain is the end user’s certificate and the last is a root CA certificate or at least an implicitly trusted CAcertificate.
You can move the certificate cursor using the CRYPT_CERTINFO_CURRENT_-CERTIFICATE attribute and the standard cursor movement codes. For example tomove the cursor to the first (end-user) certificate in the chain, you would use:
cryptSetAttribute( certificate, CRYPT_CERTINFO_CURRENT_CERTIFICATE,CRYPT_CURSOR_FIRST );
To advance the cursor to the next certificate, you would use:
cryptSetAttribute( certificate, CRYPT_CERTINFO_CURRENT_CERTIFICATE,CRYPT_CURSOR_NEXT );
The certificate cursor and the extension/extension attribute cursor are two completelyindependent objects, so moving the certificate cursor from one certificate to anotherdoesn’t affect the extension cursor setting for each certificate. If you select a particular extension in a certificate, then move to a different certificate and select an

Certificates in Detail216
extension in that, and then move back to the first certificate, the original extensionwill still be selected.
Once you’ve selected a particular certificate in the chain, you can work with itas if itwere the only certificate contained in the certificate object. The initially selectedcertificate is the end user’s certificate at the start of the chain. For example to read the commonName from the subject name for the end user’s certificate and for thenext certificate in the chain you would use:
char commonName[ CRYPT_MAX_TEXTSIZE + 1 ];int commonNameLength;
/* Retrieve the commonName from the end user's certificate */cryptGetAttributeString( cryptCertChain, CRYPT_CERTINFO_COMMONNAME,
commonName, &commonNameLength );commonName[ commonNameLength ] = '\0';
/* Move to the next certificate in the chain */cryptSetAttribute( cryptCertChain, CRYPT_CERTINFO_CURRENT_CERTIFICATE,
CRYPT_CURSOR_NEXT );
/* Retrieve the commonName from the next certificate */cryptGetAttributeString( cryptCertChain, CRYPT_CERTINFO_COMMONNAME,
commonName, &commonNameLength );commonName[ commonNameLength ] = '\0';
Apart from this, certificate chains work just like certificates— you can import them,export them, verify the signatures on them (which verifies the entire chain ofcertificates until a trusted certificate is reached), and write them to and read themfrom a keyset in exactly the same manner as an individual certificate.
Signing Certificate ChainsWhen you sign a single subject certificate using cryptSignCert, a small amount ofinformation is copied from the signing certificate (the issuer cert) to the subjectcertificate as part of the signing process, and the result is a single, signed subjectcertificate. In contrast signing a single subject certificate contained in a certificatechain object results in the signing certificates (either a single issuer certificate or anentire chain of certificates) being copied over to the certificate chain object so that thesigned certificate ends up as part of a complete chain. The exact details are asfollows:
Object to sign Signing object Result
Certificate Certificate Certificate
Certificate Certificate chain Certificate
Certificate chain Certificate Certificate chain, length = 2
Certificate chain Certificate chain Certificate chain, length =length of signing chain + 1
For example the following code produces a single signed certificate:
CRYPT_CERTIFICATE cryptCertificate;
/* Build a certificate from a cert request */cryptCreateCert( &cryptCertificate, cryptUser,
CRYPT_CERTTYPE_CERTIFICATE );cryptSetAttribute( cryptCertificate, CRYPT_CERTINFO_CERTREQUEST,
cryptCertRequest );
/* Read a private key with cert chain from a private key keyset *//* ... */
/* Sign the certificate */cryptSignCert( cryptCertificate, caPrivateKey );
In contrast the following code produces a complete certificate chain, since the objectbeing created is a CRYPT_CERTTYPE_CERTCHAIN (which can hold a complete

Certificate Chains 217
chain) rather than a CRYPT_CERTTYPE_CERTIFICATE (which only holds a singlecertificate):
CRYPT_CERTIFICATE cryptCertChain;
/* Build a certificate from a cert request */cryptCreateCert( &cryptCertChain, cryptUser,
CRYPT_CERTTYPE_CERTCHAIN );cryptSetAttribute( cryptCertChain, CRYPT_CERTINFO_CERTREQUEST,
cryptCertRequest );
/* Read a private key with cert chain from a private key keyset *//* ... */
/* Sign the certificate chain */cryptSignCert( cryptCertChain, caPrivateKey );
By specifying the object type to be signed, you can choose between creating a singlesigned certificate or a complete certificate chain.
Checking Certificate ChainsWhen verifying a certificate chain with cryptCheckCert, you don’t have to supply an issuer certificate since the chain should contain all the issuer certificates up to onewhich is trusted by cryptlib:
CRYPT_CERTIFICATE cryptCertChain;
/* Verify an entire cert chain */cryptCheckCert( cryptCertChain, CRYPT_UNUSED );
As with self-signed certificates, you can also pass in the certificate chain as thesigning certificate instead of using CRYPT_UNUSED, this has the same effect sincethe certificate chain is both the signed and signing object.
If a certificate in the chain is invalid or the chain doesn’t contain a trusted certificate at some point in the chain, cryptlib will return an appropriate error code and leave theinvalid certificate as the currently selected one, allowing you to obtain informationabout the nature of the problem by reading the extended error attributes as explainedin “Error Handling” on page 271.
If the error encountered is the fact that the chain doesn’t contain a trusted certificate somewhere along the line, cryptlib will either mark the top-level certificate as havinga missing CRYPT_CERTINFO_TRUSTED_IMPLICIT attribute if it’s a CA root certificate (that is, there’s a root certificate present but it isn’t trusted) or mark the chain as a whole as having a missing certificate if there’s no CA root certificate present and no trusted certificate present either. Certificate trust management isexplained in more detail in “Certificate Trust Management” on page 221.
Certificate chain validation is an extremely complex process that takes into accountan enormous amount of validation information that may be spread across an entirecertificate chain. For example in a chain of 10 certificates, the 3rd certificate from theroot may place a constraint that doesn’t take effect until the 7th certificate from theroot is reached. Because of this, a reported validation problem isn’t necessary related to a given certificate and its immediate issuing certificate, but may have been causedby a different certificate a number of steps further along the chain.
Some certificate chains contain CA certificates that specify certificate policies. Bydefault cryptlib requires that a policy that’s set by a CA is matched by the certificates that the CA issues (in other words the CA sets policies for certificates further downthe chain). If you want to allow policies to change going down the chain once the CAhas set them, you can set the CRYPT_OPTION_CERT_REQUIREPOLICY option tofalse (0). When it’s set to this value cryptlib won’t verify that policies match up as itgoes down the chain. You wouldn’t normally need to use this configuration option, it’s used to provide an optional capability that’s covered in some certificate standards documents.
Some certificate chains may not contain or be signed by a trusted CA certificate, butmay end in a root CA certificate with an unknown trust level. Since the cryptlib trust

Certificates in Detail218
manager can’t provide any information about this certificate, it won’t be possible to verify the chain. If you want to trust the root CA certificate you can use the cryptlibtrust management mechanisms to handle this, as explained in “Certificate TrustManagement” on page 221.
Exporting Certificate ChainsAs is the case when signing certificates and certificate chains, cryptlib gives you ahigh degree of control over what part of the chain you want to export. By specifyingan export format of CRYPT_CERTFORMAT_CERTIFICATE or CRYPT_-CERTFORMAT_CERTCHAIN, you can control whether a single certificate or anentire chain is exported. The exact details are as follows:
Object type Export format Result
Certificate Certificate Certificate
Certificate Certificate chain Certificate chain, length = 1
Certificate chain Certificate Currently selected certificate inthe chain
Certificate chain Certificate chain Certificate chain
For example the following code exports the currently selected certificate in the chainas a single certificate:
CRYPT_CERTIFICATE cryptCertChain;void *certificate;int certificateLength;
/* Allocate memory for the encoded certificate */certificate = malloc( certificateMaxLength );
/* Export the currently selected certificate from the certificatechain */
cryptExportCert( certificate, certificateMaxLength,&certificateLength, CRYPT_CERTFORMAT_CERTIFICATE, cryptCertChain );
In contrast the following code exports the entire certificate chain:
CRYPT_CERTIFICATE cryptCertChain;void *certChain;int certChainLength;
/* Allocate memory for the encoded certificate chain */certChain = malloc( certChainMaxLength );
/* Export the entire certificate chain */cryptExportCert( certChain, certChainMaxLength, &certChainLength,
CRYPT_CERTFORMAT_CERTCHAIN, cryptCertChain );
Certificate Revocation using CRLsOnce a certificate has been issued, you may need to revoke it before its expiry date ifthe private key it corresponds to is lost or stolen, or if the details given in thecertificate (for example your job role or company affiliation) change. Certificaterevocation is done through a certificate revocation list (CRL) that contains referencesto one or more certificates that have been revoked by a CA. cryptlib supports thecreation, import, export, and checking of CRLs as CRYPT_CERTTYPE_CRLobjects, with individual revocation entries accessed as if they were standardcertificate components. Note that these entries are merely references to revokedcertificates and not the certificates themselves, so all they contain is a certificatereference, the date of revocation, and possibly various optional extras such as thereason for the revocation.
Working with CRLsIndividual revocation entries in a CRL are addressed through a certificate cursor thatfunctions in the same way as the attribute cursor discussed in “Attribute Lists and” on page 37. Although a CRL appears as a single object, it consists internally of a

Creating CRLs 219
collection of certificate revocation entries that you can move through using thestandard cursor movement codes. For example to move the cursor to the first entry inthe CRL, you would use:
cryptSetAttribute( cryptCRL, CRYPT_CERTINFO_CURRENT_CERTIFICATE,CRYPT_CURSOR_FIRST );
To advance the cursor to the next entry, you would use:
cryptSetAttribute( cryptCRL, CRYPT_CERTINFO_CURRENT_CERTIFICATE,CRYPT_CURSOR_NEXT );
Since each revocation entry can have its own attributes, moving the entry cursor fromone entry to another can change the attributes that are visible. This means that ifyou’re working with a particular entry, the attributes for that entry will be visible, butattributes for other entries won’t be. To complicate this further, CRLs can also contain global attributes that apply to, and are visible for, all entries in the CRL.cryptlib will automatically handle these for you, allowing access to all attributes (bothper-entry and global) that apply to the currently selected revocation entry.
Creating CRLsTo create a CRL, you first create the CRL certificate object as usual and then pushone or more certificates to be revoked into it.
CRYPT_CERTIFICATE cryptCRL;
/* Create the (empty) CRL */cryptCreateCert( &cryptCRL, cryptUser, CRYPT_CERTTYPE_CRL );
/* Add the certificates to be revoked */cryptSetAttribute( cryptCRL, CRYPT_CERTINFO_CERTIFICATE,
revokedCert1 );cryptSetAttribute( cryptCRL, CRYPT_CERTINFO_CERTIFICATE,
revokedCert2 );/* ... */cryptSetAttribute( cryptCRL, CRYPT_CERTINFO_CERTIFICATE,
revokedCertN );
/* Sign the CRL */cryptSignCertificate( cryptCRL, caPrivateKey );
As has already been mentioned, you must be a CA in order to issue a CRL, and youcan only revoke certificates that you have issued using the certificate used to sign theCRL (you can’t, for example, revoke a certificate issued by another CA, or revoke a certificate issued with one CA certificate using a different CA certificate). If you tryto add certificates issued by multiple CAs to a CRL, or try to sign a CRL with a CAcertificate that differs from the one that signed the certificates in the CRL, cryptlibwill return a CRYPT_ERROR_INVALID error to indicate that the certificate you aretrying to add to the CRL or sign the CRL with is from the wrong CA. To reiterate:Every certificate in a given CRL must have been issued using the CA certificatewhich is used to sign the CRL. If your CA uses multiple certificates (for example aClass 1 certificate, a Class 2 certificate, and a Class 3 certificate) then it must issueone CRL for each certificate class. cryptlib will perform the necessary checking foryou to ensure you don’t issue an invalid CRL.
If you’re acting as a CA and issuing CRLs for certificates then a much easier way tohandle this is to use cryptlib’s certificate management capabilities as described in “Issuing a CRL” on page 171, since this takes care of all of these details for you.
Advanced CRL CreationThe code shown above creates a relatively straightforward, simple CRL with no extrainformation included with the revocation. You can also include extra attributes suchas the time of the revocation (which may differ from the time the CRL was issued, ifyou don’t specify a time then cryptlib will use the CRL issuing time), the reason for the revocation, and the various other CRL-specific information as described in “CRLExtensions” on page 235.

Certificates in Detail220
If you set a revocation time with no revoked certificates present in the CRL, cryptlibwill use this time for any certificates you add to the CRL for which you don’t explicitly set the revocation time so you can use this to set a default revocation timefor any certificates you add. If you set a revocation time and there are revokedcertificates present in the CRL, cryptlib will set the time for the currently selectedcertificate, which will be either the last one added or the one selected with thecertificate cursor commands.
For example to revoke a list of certificates, setting the revocation date for each oneindividually, you would use:
CRYPT_CERTIFICATE cryptCRL;
while( moreCerts ){CRYPT_CERTIFICATE revokedCert;time_t revocationTime;
/* Get the certificate to revoke and its revocation time */revokedCert = ...;revocationTime = ...;
/* Add them to the CRL */cryptSetAttribute( cryptCRL, CRYPT_CERTINFO_CERTIFICATE,
revokedCert );cryptSetAttributeString( cryptCRL, CRYPT_CERTINFO_REVOCATIONDATE,
&revocationTime, sizeof( time_t ) );
/* Clean up */cryptDestroyCert( revokedCert );}
You can also add additional attributes such as the reason for the revocation to eachrevoked certificate, a number of standards recommend that a reason is given for eachrevocation. The revocation codes are specified in “CRL Extensions” on page 235.
CRLs can be signed, verified, imported, and exported just like other certificateobjects.
Checking Certificates against CRLsVerifying a certificate against a CRL with cryptCheckCert works just like astandard certificate check, with the second parameter being the CRL that thecertificate is being checked against:
CRYPT_CERTIFICATE cryptCRL;
/* Check the certificate against the CRL */cryptCheckCert( cryptCertificate, cryptCRL );
If the certificate has been revoked, cryptlib will return CRYPT_ERROR_INVALID.If the certificate has not been revoked (in other words if it is not on the CRL), cryptlibwill return CRYPT_OK. Note that the only thing a CRL can say with certainty is“revoked”, so it can’t provide a true validity check for a certificate. For example, if you perform a CRL check on an Excel spreadsheet, a CRL will report it as being avalid certificate, since it’s not listed in the CRL. Similarly, a forged certificate can’t be handled by a CRL since it can’t be handled through a blacklist mechanism such as a CRL. If you require a true certificate validity check, you need to use a alternativemechanism such as RTCS.
If the certificate is revoked, the certificate’s revocation entry in the CRL will be left as the selected one, allowing you to obtain further information on the revocation (forexample the revocation date or reason):
time_t revocationTime;int revocationReason;
status = cryptCheckCert( cryptCertificate, cryptCRL );if( status == CRYPT_ERROR_INVALID )
{int revocationTimeLength;

Certificate Trust Management 221
/* The certificate has been revoked, get the revocation time andreason */
cryptGetAttributeString( cryptCRL, CRYPT_CERTINFO_REVOCATIONDATE,&revocationTime, &revocationTimeLength );
cryptGetAttribute( cryptCRL, CRYPT_CERTINFO_CRLREASON,&revocationReason );
}
Note that the revocation reason is an optional CRL component, so this may not bepresent in the CRL. If the revocation reason isn’t present, cryptlib will return CRYPT_ERROR_NOTFOUND.
Automated CRL CheckingAs you can see from the description of the revocation checking process above, itquickly becomes unmanageable as the number of CRLs and the size of each CRLincreases, since what should be a simple certificate validation check now involveschecking the certificate against any number of CRLs (CRLs are generally regarded asa rather unsatisfactory solution to the problem of certificate revocation, but we’re stuck with them for the foreseeable future).
In order to ease this complex and long-winded checking process, cryptlib provides theability to automatically check a certificate against CRLs stored in a cryptlib databasekeyset. To do this you first need to write the CRL or CRLs to the keyset as if theywere normal certificates, as explained in “Writing a Key to a Keyset” on page 136.cryptlib will take each complete CRL and record all of the individual revocationscontained in it for later use.
Once you have a keyset containing revocation information, you can use it to checkthe validity of a certificate using cryptCheckCert, giving the keyset as the secondparameter:
CRYPT_KEYSET cryptKeyset;
/* Check the certificate using the keyset */cryptCheckCert( cryptCertificate, cryptKeyset );
As with the check against a CRL, cryptlib will return CRYPT_ERROR_INVALID ifthe certificate has been revoked.
This form of automated checking considerably simplifies the otherwise arbitrarilycomplex CRL checking process since cryptlib can handle the check with a simplekeyset query rather than having to locate and search large numbers of CRLs.
Certificate Trust ManagementIn order to provide extended control over certificate usage, cryptlib allows you toboth further restrict the usage given in the certificate’s CRYPT_CERTINFO_-KEYUSAGE attribute and to specify whether a given certificate should be implicitlytrusted, avoiding the requirement to process a (potentially large) chain of certificatesin order to determine the certificate’s validity.
Controlling Certificate UsageYou can control the way a certificate can be used by setting its CRYPT_-CERTINFO_TRUSTED_USAGE attribute, which provides extended control over theusage types that a certificate is trusted for. This attribute works by further restrictingthe usage specified by the CRYPT_CERTINFO_KEYUSAGE attribute, acting as amask for the standard key usage so that a given usage is only permitted if it’s allowed by both the key usage and trusted usage attributes. If the trusted usage attribute isn’t present (which is the default setting) then all usage types specified in the key usageattribute are allowed.
For example assume a certificate’s key usage attribute is set to CRYPT_-KEYUSAGE_DIGITALSIGNATURE and CRYPT_KEYUSAGE_-KEYENCIPHERMENT. By setting the trusted usage attribute to CRYPT_-KEYUSAGE_DIGITALSIGNATURE only, you can tell cryptlib that you only trust

Certificates in Detail222
the certificate to be used for signatures, even though the certificate’s standard usage would also allow encryption. This means that you can control precisely how acertificate is used at a level beyond that provided by the certificate itself.
Implicitly Trusted CertificatesTo handle certificate validation trust issues, cryptlib has a built-in trust manager thatrecords whether a given CA’s or end user’s certificate is implicitly trusted. When cryptlib gets to a trusted certificate during the certificate validation process (forexample as it’s validating the certificates in a certificate chain), it knows that it doesn’t have to go any further in trying to get to an ultimately trusted certificate. If you installed the default cryptlib certificates when you installed cryptlib itself thenyou’ll have a collection of top-level certificates from the world’s largest CAs already present and marked as trusted by cryptlib, so that if cryptlib is asked to process acertificate chain ending in one of these trusted CA certificates, the cryptlib trustmanager will determine that the top-level certificate is implicitly trusted and use it toverify the lower-level certificates in the chain.
The trust manager provides a convenient mechanism for managing not only CAcertificates but also any certificates that you decide you can trust implicitly. Forexample if you’ve obtained a certificate from a trusted source such as direct communication with the owner or from a trusted referrer, you can mark the certificateas trusted even if it doesn’t have a full chain of CA certificates in tow. This is anatural certificate handling model in many situations (for example trading partnerswith an existing trust relationship), and avoids the complexity and expense of usingan external CA to verify something that both parties know already. When scaled upto thousands of users (and certificates), this can provide a considerable savings bothin terms of managing the certification process and in the cost of obtaining andrenewing huge numbers of certificates each year.
Working with Trust SettingsYou can get and set a certificate’s trusted usage using CRYPT_CERTINFO_-TRUSTED_USAGE, which takes as value the key usage(s) for which the certificateis trusted. To mark a certificate as trusted only for encryption, you would use:
cryptSetAttribute( certificate, CRYPT_CERTINFO_TRUSTED_USAGE,CRYPT_KEYUSAGE_KEYENCIPHERMENT );
This setting will now be applied automatically to the certificate’s usage permissions, so that even if its CRYPT_CERTINFO_KEYUSAGE attribute allowed signing andencryption, the CRYPT_CERTINFO_TRUSTED_USAGE attribute would restrictthis to only allow encryption.
To remove any restrictions and allow all usages specified by CRYPT_CERTINFO_-KEYUSAGE, delete the CRYPT_CERTINFO_TRUSTED_USAGE attribute, whichallows the full range of usage types that are present in CRYPT_CERTINFO_-KEYUSAGE:
cryptDeleteAttribute( cryptCertificate, CRYPT_CERTINFO_TRUSTED_USAGE);
You can get and set a certificate’s implicitly trusted status using the CRYPT_-CERTINFO_TRUSTED_IMPLICIT attribute, which takes as value a boolean flagthat indicates whether the certificate is implicitly trusted or not. To mark a certificateas trusted, you would use:
cryptSetAttribute( certificate, CRYPT_CERTINFO_TRUSTED_IMPLICIT, 1 );
Be careful when marking certificate chains (rather than individual certificates) asimplicitly trusted. Since a chain usually contains multiple certificates, setting theCRYPT_CERTINFO_TRUSTED_IMPLICIT attribute affects the currently selectedcertificate in the chain. Typically you want to trust the root CA, while the certificatewhich is normally active when the chain is used is the end-user/leaf certificate. Inorder to select the root CA certificate, you should move the certificate cursor to itusing the CRYPT_CURSOR_LAST movement code before marking the chain as

Certificate Trust Management 223
trusted. This will explicitly make the top-level CA certificate trusted, rather thansome arbitrary certificate in the chain.
To check whether a certificate is trusted you would use:
int isTrusted;
cryptGetAttribute( certificate, CRYPT_CERTINFO_TRUSTED_IMPLICIT,&isTrusted );
Since the trust of a CA propagates down to the certificates it issues, the trust setting inthis case applies to the whole chain rather than just one certificate in it. In otherwords if the chain is signed by a trusted CA, the entire chain beyond that point will beregarded as trusted.
If the result is set to true (a nonzero value) then the certificate is implicitly trusted bycryptlib. In practice you won’t need to bother with this checking, since cryptlib willdo it for you when it verifies certificate chains.
The certificate trust settings are part of cryptlib’s configuration options, which are explained in more detail in “Working with Configuration Options”on page 263. Likeall configuration options, changes to the trust settings only remain in effect during thecurrent session with cryptlib unless you explicitly force them to be committed topermanent storage by resetting the configuration changed flag. For example if youchange the trust settings for various certificates and want the new trust values to beapplied when you use cryptlib in the future, you would use code like:
/* Mark various certificates as trusted and one as untrusted */cryptSetAttribute( certificate1, CRYPT_CERTINFO_TRUSTED_IMPLICIT, 1 );cryptSetAttribute( certificate2, CRYPT_CERTINFO_TRUSTED_IMPLICIT, 1 );cryptSetAttribute( certificate3, CRYPT_CERTINFO_TRUSTED_IMPLICIT, 1 );cryptSetAttribute( certificate4, CRYPT_CERTINFO_TRUSTED_IMPLICIT, 0 );
/* Save the new settings to permanent storage */cryptSetAttribute( CRYPT_UNUSED, CRYPT_OPTION_CONFIGCHANGED, FALSE );
Marking a certificate as untrusted doesn’t mean that it can never be trusted, but merely that its actual trust status is currently unknown. If the untrusted certificate issigned by a trusted CA certificate (possibly several levels up a certificate chain) thenthe certificate will be regarded as trusted when cryptlib checks the certificate chain.In practice an untrusted certificate is really a certificate whose precise trust level hasyet to be determined rather than a certificate which is explicitly not trusted. If youwant to explicitly not trust a certificate for one or more types of usage, you can dothis using the CRYPT_CERTINFO_TRUSTED_USAGE attribute.

Certificate Extensions224
Certificate ExtensionsCertificate extensions form by far the most complicated portion of certificates. Bydefault, cryptlib will add appropriate certificate extension attributes to certificates foryou if you don’t add any, but sometimes you may want to add or change these yourself. cryptlib supports extensions in two ways, through the usual add/get/deleteattribute mechanism for extensions that it recognises, and throughcryptAddCertExtension, cryptGetCertExtension, and cryptDeleteCertExtensionfor general extensions that it doesn’t recognise. The general extension handling mechanism allows you to add, query, and delete any kind of extension to a certificate,including ones that you define yourself.
Extension StructureX.509 version 3 introduced a mechanism by which additional information could beadded to certificates through the use of certificate extensions. The X.509 standarddefined a number of extensions, and over time other standards organisations definedtheir own additions and amendments to these extensions. In addition privateorganisations, businesses, and individuals have all defined their own extensions, someof which (for example the extensions from Netscape and Microsoft) have seen areasonably wide amount of use. An extension contains three main pieces ofinformation:
Field Description
Type The extension type, a unique identifier called an objectidentifier. This is given as a sequence of numbers that tracea path through an object identifier tree. For example theobject identifier for the keyUsage extension is 2 5 29 15.The object identifier for cryptlib is 1 3 6 1 4 1 3029 32.
Critical Flag A flag that defines whether the extension is importantenough that it must be processed by an application. If thecritical flag is set and an application doesn’t recognise the extension, it will reject the certificate.
Since some standards (including X.509 itself) allowimplementations to selectively ignore non-critical extensions,and support for extensions is often haphazard, it may benecessary to mark an extension as critical in order to ensurethat other implementations process it. As usual, you shouldcheck to see whether your intended target correctly processesthe extensions that you plan to use.
Value The extension data, corresponding to a cryptlib attributegroup for more complex composite extensions, or a singlecryptlib attribute for a few very simple extensions.
For the extensions that cryptlib recognises, the handling of the critical flag isautomatic. For extensions that cryptlib doesn’t handle itself, you need to set the critical flag yourself when you add the extension data usingcryptAddCertExtension.
Working with Extension AttributesCertificate extensions correspond to cryptlib attribute groups, with individualcomponents of each certificate extension being represented by attributes within thegroup. Since this section applies specifically to certificates, the certificate-specificterminology referring to extensions rather than the general term attribute group willbe used here.
cryptlib can identify attributes in extensions/attribute groups in one of three ways:

Working with Extension Attributes 225
1. Through an extension identifier that denotes the entire extension/attribute group.For example CRYPT_CERTINFO_CERTPOLICIES denotes thecertificatePolicies extension/attribute group.
2. Through an attribute identifier that denotes a particular attribute within anextension/attribute group. For example CRYPT_CERTINFO_CERTPOLICYdenotes the policyIdentifier attribute contained within the certificatePoliciesextension/attribute group.
Some extensions/groups only contain a single attribute, in which case theextension identifier is the same as the attribute identifier. For example theCRYPT_CERTINFO_KEYUSAGE extension contains a single attribute which isalso identified by CRYPT_CERTINFO_KEYUSAGE.
3. Through the attribute cursor mechanism that allows you to step through a set ofextensions extension by extension or attribute by attribute. Attribute cursormanagement is explained in more detail in “Attribute Lists and” on page 37.
You can use the extension/group identifier to determine whether a particularextension is present with cryptGetAttribute (it will return CRYPT_ERROR_-NOTFOUND if the extension isn’t present), to delete an entire extension with cryptDeleteAttribute, and to position the extension cursor at a particular extension.
Attributes within extensions/group are handled in the usual manner, for example toretrieve the value of the basicConstraints CA attribute (which determines whether acertificate is a CA certificate) you would use:
int isCA;
cryptGetAttribute( certificate, CRYPT_CERTINFO_CA, &isCA );
To determine whether the entire basicConstraints extension is present, you would use:
int basicConstraintsPresent;
status = cryptGetAttribute( certificate,CRYPT_CERTINFO_BASICCONSTAINTS, &basicConstraintsPresent );
if( cryptStatusOK( status ) )/* basicConstraints extension is present */;
You don’t have to worry about the structure of individual extensions since cryptlib will handle this for you. For example to make a certificate a CA certificate, all thatyou need to do is:
cryptSetAttribute( certificate, CRYPT_CERTINFO_CA, 1 );
and cryptlib will construct the basicConstraints extension for you and set up the CAattribute as required. Because the basicConstraints extension is a fundamentalX.509v3 extension, cryptlib will in fact always add this by default even if you don’t explicitly specify it.
Extension Cursor ManagementNote: Starting with cryptlib 3.2, all cryptlib objects will have a unified cursormanagement system. At this point the certificate-specific cursor attributes will bemoved to CRYPT_ATTRIBUTE_CURRENT_GROUP, CRYPT_ATTRIBUTE_-CURRENT, and CRYPT_ATTRIBUTE_CURRENT_INSTANCE, in place of thecurrent CRYPT_CERTINFO_CURRENT_EXTENSION, CRYPT_CERTINFO_-CURRENT_FIELD, and CRYPT_CERTINFO_CURRENT_COMPONENT. The newattributes are already present in the current release, so you should plan to moveexisting code to using the new names (this can be done with a simple search andreplace), and use the new attribute names in any new code that you write.
Extensions and extension attributes can also be managed through the use of anextension cursorthat works just like the attribute cursor discussed in “Attribute Listsand” on page 37. Since certificates are significantly more complex than othercryptlib objects, the cursor is handled through three levels of attributes instead of theusual one. These attributes are CRYPT_CERTINFO_CURRENT_EXTENSION forthe extension, CRYPT_CERTINFO_CURRENT_FIELD for the attribute within the

Certificate Extensions226
extension, and CRYPT_CERTINFO_CURRENT_COMPONENT for the componentwithin the attribute if the attribute can contain more than one value (for example analtName can contain one or more email addresses, URLs, and other information).When you set the attribute values, this moves the cursor to the particular extension orattribute. The attribute value that you specify is the extension or extension attributethat you want to move the cursor to. For example:
cryptSetAttribute( certificate, CRYPT_CERTINFO_CURRENT_EXTENSION,CRYPT_CERTINFO_CA );
would move the extension cursor to the start of the extension containing the givenattribute (in this case the start of the basicConstraints extension). In contrast:
cryptSetAttribute( certificate, CRYPT_CERTINFO_CURRENT_FIELD,CRYPT_CERTINFO_CA );
would move the cursor to the extension attribute (in this case the CA attribute in thebasicConstraints extension). Setting the CRYPT_CERTINFO_CURRENT_-COMPONENT attribute is identical to setting the CRYPT_CERTINFO_-CURRENT_FIELD except in the special case of using attribute cursor movementcodes, where it can be used to access sub-components within an attribute.
You can also position the cursor using the standard attribute cursor movement codes.For example to move the cursor to the start of the first extension, you would use:
cryptSetAttribute( certificate, CRYPT_CERTINFO_CURRENT_EXTENSION,CRYPT_CURSOR_FIRST );
To advance the cursor to the start of the next extension, you would use:
cryptSetAttribute( certificate, CRYPT_CERTINFO_CURRENT_EXTENSION,CRYPT_CURSOR_NEXT );
To advance the cursor to the next attribute in the extension, you would use:
cryptSetAttribute( certificate, CRYPT_CERTINFO_CURRENT_FIELD,CRYPT_CURSOR_NEXT );
In some cases multiple instances of the same attribute can be present, in which caseyou can use the CRYPT_CERTINFO_CURRENT_COMPONENT attribute andrelative cursor movement to step through the different instances of the attribute.Since the use of multi-valued attributes is rare, it’s safe to assume one value per attribute in most cases, so that stepping through multiple attribute instances isunnecessary.
Once you’ve set the cursor position, you can work with the extension or attribute at the cursor position in the usual manner. For example to delete the entire extension atthe current cursor position you would use:
cryptDeleteAttribute( certificate, CRYPT_CERTINFO_CURRENT_EXTENSION );
Deleting the extension at the cursor position will move the cursor to the start of theextension that follows the deleted one, or to the start of the previous extension if theone being deleted was the last one present. This means that you can delete everyextension simply by repeatedly deleting the one under the cursor.
To obtain the extension or attribute type at the current cursor position, you would use:
CRYPT_ATTRIBUTE_TYPE extensionAttributeID;
cryptGetAttribute( certificate, CRYPT_CERTINFO_CURRENT_EXTENSION,&extensionAttributeID );
This example obtains the extension, to obtain the attribute type you would substituteCRYPT_CERTINFO_CURRENT_FIELD in place of CRYPT_CERTINFO_-CURRENT_EXTENSION.
The attribute cursor provides a convenient mechanism for stepping through everyextension which is present in a certificate object. For example to iterate throughevery extension you would use:

Working with Extension Attributes 227
if( cryptSetAttribute( certificate, CRYPT_CERTINFO_CURRENT_EXTENSION,CRYPT_CURSOR_FIRST ) == CRYPT_OK )do
{CRYPT_ATTRIBUTE_TYPE extensionID;
/* Get the ID of the extension under the cursor */cryptGetAttribute( certificate,
CRYPT_CERTINFO_CURRENT_EXTENSION, &extensionID );}
while( cryptSetAttribute( certificate,CRYPT_CERTINFO_CURRENT_EXTENSION, CRYPT_CURSOR_NEXT ) ==CRYPT_OK );
To extend this a stage further and iterate through every attribute in every extension inthe certificate object, you would use:
if( cryptSetAttribute( certificate, CRYPT_CERTINFO_CURRENT_EXTENSION,CRYPT_CURSOR_FIRST ) == CRYPT_OK )do
{do
{CRYPT_ATTRIBUTE_TYPE extensionAttributeID;
/* Get the ID of the extension attribute under the cursor */cryptGetAttribute( certificate, CRYPT_CERTINFO_CURRENT_FIELD,
&extensionAttributeID );}
while( cryptSetAttribute( certificate,CRYPT_CERTINFO_CURRENT_FIELD, CRYPT_CURSOR_NEXT ) == CRYPT_OK);
}while( cryptSetAttribute( certificate,
CRYPT_CERTINFO_CURRENT_EXTENSION, CRYPT_CURSOR_NEXT ) ==CRYPT_OK );
Note that iterating attribute by attribute works within the current extension, but won’t jump from one extension to the next— to do that, you need to iterate by extension.
To restrict the above operation slightly so that only the attributes of a single extension(rather than all extensions) are enumerated, you first select the extension and thenstep through the attributes in it. For example to read all extended key usage types youwould use:
if( cryptSetAttribute( certificate, CRYPT_CERTINFO_CURRENT_EXTENSION,CRYPT_CERTINFO_EXTKEYUSAGE ) == CRYPT_OK )do
{CRYPT_ATTRIBUTE_TYPE extensionAttributeID;
/* Get the ID of the extension attribute under the cursor */cryptGetAttribute( certificate, CRYPT_CERTINFO_CURRENT_FIELD,
&extensionAttributeID );}
while( cryptSetAttribute( certificate,CRYPT_CERTINFO_CURRENT_FIELD, CRYPT_CURSOR_NEXT ) == CRYPT_OK );
Composite Extension AttributesAttributes that contain complete GeneralNames and/or DNs are composite attributesthat have further items within them. These are handled in the standard way using theattribute cursor: You first move the cursor to the attribute that contains theGeneralName or DN that you want to work with and then get, set, or delete attributeswithin it:
cryptSetAttribute( certificate, CRYPT_CERTINFO_CURRENT_FIELD,CRYPT_CERTINFO_PERMITTEDSUBTREES );
cryptSetAttributeString( certificate, CRYPT_CERTINFO_RFC822NAME,rfc822Name, rfc822NameLength );
cryptSetAttributeString( certificate, CRYPT_CERTINFO_DNSNAME, dnsName,dnsNameLength );
This code first moves the cursor to the nameConstraints permittedSubtreesGeneralName and then sets the GeneralName attributes as usual. Since a

Certificate Extensions228
GeneralName contains its own DN, moving the attribute cursor onto a GeneralNamemeans that any DN accesses will now refer to the DN in the GeneralName rather thanthe certificate subject or issuer name:
/* Select the permittedSubtrees GeneralName */cryptSetAttribute( certificate, CRYPT_CERTINFO_CURRENT_FIELD,
CRYPT_CERTINFO_PERMITTEDSUBTREES );
/* Set the DN components within the GeneralName */cryptSetAttributeString( certificate, CRYPT_CERTINFO_COUNTRYNAME,
countryName, countryNameLength );cryptSetAttributeString( certificate, CRYPT_CERTINFO_LOCALITYNAME,
localityName, localityNameLength );
This code first identifies the nameConstraints permittedSubtrees GeneralName as theone to be modified and then sets the DN components as usual. cryptlib uses thismechanism to access all DNs and GeneralNames, although this is usually hiddenfrom you— when you modify a certificate object’s DN, cryptlib automatically uses the subject DN if you don’t explicitly specify it, and when you modify the GeneralName cryptlib uses the subject altName if you don’t explicitly specify it. In this way you can work with subject names and altNames without having to knowabout the DN and GeneralName selection mechanism.
Once you’ve selected a different GeneralName and/or DN, it remains selected until you select a different one or move the attribute cursor off it, so if you wanted to moveback to working with the subject name after performing the operations shown aboveyou’d need to use:
cryptSetAttribute( certificate, CRYPT_CERTINFO_SUBJECTNAME,CRYPT_UNUSED );
otherwise attempts to add, delete, or query further DN (or GeneralName) attributeswill apply to the selected nameConstraints excludedSubtrees attribute instead of thesubject name. Conversely, if you move the attribute cursor off the GeneralName thatyou’re working with, subsequent attempts to work with GeneralName or DN fields will fail with a CRYPT_ERROR_NOTFOUND, since there’s no GeneralNamecurrently selected.
X.509 ExtensionsX.509 version 3 and assorted additional standards and revisions specify a largenumber of extensions, all of which are handled by cryptlib. In addition there are anumber of proprietary and vendor-specific extensions that are also handled bycryptlib.
In the following descriptions only the generally useful attributes have been described.The full range of attributes is enormous, requires several hundred pages of standardsspecifications to describe them all, and will probably never be used in real life. Theseattributes are marked with “See certificate standards documents” to indicate that you should refer to other documents to obtain information about their usage (this is also agood indication that you shouldn’t really be using this attribute).
Alternative NamesThe subject and issuer altNames are used to specify all the things that aren’t suitable for the main certificate DNs. The issuer altName is identified by CRYPT_-CERTINFO_ISSUERALTNAME and the subject altName is identified by CRYPT_-CERTINFO_SUBJECTALTNAME. Both consist of a single GeneralName whoseuse is explained in “Extended Certificate Identification Information” on page 209.This extension is valid in certificates, certification requests, and CRLs, and cancontain one of each type of GeneralName component.
Basic ConstraintsThis is a standard extension identified by CRYPT_CERTINFO_-BASICCONSTRAINTS and is used to specify whether a certificate is a CAcertificate or not. If you don’t set this extension, cryptlib will set it for you and mark

X.509 Extensions 229
the certificate as a non-CA certificate. This extension is valid in certificates, attributecertificates, and certification requests, and has the following attributes:
Attribute/Description Type
CRYPT_CERTINFO_CA BooleanWhether the certificate is a CA certificate or not. When used with attributecertificates, the CA is called an authority, so cryptlib will also accept thealternative CRYPT_CERTINFO_AUTHORITY, which has the samemeaning as CRYPT_CERTINFO_CA. If this attribute isn’t set, the certificate is treated as a non-CA certificate.
CRYPT_CERTINFO_PATHLENCONSTRAINT NumericSee certificate standards documents.
For example to mark a certificate as a CA certificate you would use:
cryptSetAttribute( certificate, CRYPT_CERTINFO_CA, 1 );
Certificate Policies, Policy Mappings, and Policy Constraints, and PolicyInhibiting
The certificate policy extensions allow a CA to provide information on the policiesgoverning a certificate, and to control the way in which a certificate can be used. Forexample it allows you to check that each certificate in a certificate chain was issuedunder a policy you feel comfortable with (certain security precautions taken, vettingof employees, physical security of the premises, and so on). The certificate policiesattribute is identified by CRYPT_CERTINFO_CERTIFICATEPOLICIES and isvalid in certificates.
The certificate policies attribute is a complex extension that allows for all sorts ofqualifiers and additional modifiers. In general you should only use thepolicyIdentifier attribute in this extension, since the other attributes are difficult tosupport in user software and are ignored by many implementations:
Attribute/Description Type
CRYPT_CERTINFO_CERTPOLICYID StringThe object identifier that identifies the policy under which this certificatewas issued.
CRYPT_CERTINFO_CERTPOLICY_CPSURI StringThe URL for the certificate practice statement (CPS) for this certificatepolicy.
CRYPT_CERTINFO_CERTPOLICY_ORGANIZATIONCRYPT_CERTINFO_CERTPOLICY_NOTICENUMBERSCRYPT_CERTINFO_CERTPOLICY_EXPLICITTEXT
StringNumericString
These attributes contain further qualifiers, modifiers, and text informationthat amend the certificate policy information. Refer to certificate standardsdocuments for more information on these attributes.
Since various CAs that would like to accept each other’s certificates may have differing policies, there is an extension that allows a CA to map its policies to thoseof another CA. The policyMappings extension provides a means of mapping onepolicy to another (that is, for a CA to indicate that policy A, under which it is issuinga certificate, is equivalent to policy B, which is required by the certificate user). Thisextension is identified by CRYPT_CERTINFO_POLICYMAPPINGS and is valid incertificates:
Attribute/Description Type
CRYPT_CERTINFO_ISSUERDOMAINPOLICY StringThe object identifier for the source (issuer) policy.
CRYPT_CERTINFO_SUBJECTDOMAINPOLICY StringThe object identifier for the destination (subject) policy.

Certificate Extensions230
A CA can also specify acceptable policy constraints for use in certificate chainvalidation. The policyConstraints extension is identified by CRYPT_CERTINFO_-POLICYCONSTRAINTS and is valid in certificates:
Attribute/Description Type
CRYPT_CERTINFO_REQUIREEXPLICITPOLICY NumericSee certificate standards documents.
CRYPT_CERTINFO_INHIBITPOLICYMAPPING NumericSee certificate standards documents.
Finally, a CA can inhibit the use of the special-case anyPolicy policy. TheinhibitAnyPolicy extension is identified by CRYPT_CERTINFO_-INHIBITANYPOLICY and is valid in certificates:
Attribute/Description Type
CRYPT_CERTINFO_INHIBITANYPOLICY NumericSee certificate standards documents.
CRL Distribution Points/Freshest CRL and Subject/Authority InformationAccess
These extensions specify how to obtain CRL information and information on the CAthat issued a certificate. The cRLDistributionPoint extension is valid in certificatesand is identified by CRYPT_CERTINFO_CRLDISTRIBUTIONPOINT:
Attribute/Description Type
CRYPT_CERTINFO_CRLDIST_FULLNAME GeneralNameThe location at which CRLs may be obtained. You should use the URLcomponent of the GeneralName for this, avoiding the other possibilities.
CRYPT_CERTINFO_CRLDIST_REASONSCRYPT_CERTINFO_CRLDIST_CRLISSUER
NumericGeneralName
See certificate standards documents.
Note that the CRYPT_CERTINFO_CRLDIST_REASONS attribute has the sameallowable set of values as the cRLReasons reasonCode, but in this case is given as aseries of bit flags rather than the reasonCode numeric value (because X.509 says so,that’s why). Because of this you must use CRYPT_CRLREASONFLAGS_nameinstead of CRYPT_CRLREASON_name when getting and setting these values.
If you plan to use this extension, you should be aware of the fact that it exists solelyas a kludge created to work around problems involved in finding CRLs in X.500directories, and thus presents a rather poor mechanism for distributing and obtainingrevocation information. Unless it’s absolutely imperative that you use this extension, it’s better to use RTCS or OCSP as explained in “Certificate Status Checking usingRTCS” on page 152, “RTCS Server Sessions” on page 113, “Certificate RevocationChecking using OCSP” on page 152, and “OCSP Server Sessions” on page 113.
The freshestCRL extension is valid in certificates and is identified by CRYPT_-CERTINFO_FRESHESTCRL. The structure is identical to cRLDistributionPoint,with the subfields named with FRESHESTCRL instead of CRLDIST. As withcRLDistributionPoint, this is a kludge used to work with delta CRLs.
The subjectInfoAccess extension is valid in certificates and is identified byCRYPT_CERTINFO_SUBJECTINFOACCESS:
Attribute/Description Type
CRYPT_CERTINFO_SUBJECTINFO_CAREPOSITORY GeneralNameThe location at which the CA publishes certificates and CRLs, if thecertificate is for a CA. You should use the URL component of theGeneralName for this, avoiding the other possibilities.
CRYPT_CERTINFO_SUBJECTINFO_TIMESTAMPING GeneralName

X.509 Extensions 231
The location at which timestamping services using the timestamp protocol(TSP) are available. You should use the URL component of theGeneralName for this, avoiding the other possibilities.
The authorityInfoAccess extension is valid in certificates and CRLs and is identifiedby CRYPT_CERTINFO_AUTHORITYINFOACCESS:
Attribute/Description TypeCRYPT_CERTINFO_AUTHORITYINFO_CAISSUERS GeneralNameThe location at which information on CAs located above the CA that issuedthis certificate can be obtained. You should use the URL component of theGeneralName for this, avoiding the other possibilities.
CRYPT_CERTINFO_AUTHORITYINFO_CERTSTORE GeneralNameThe location at which further certificates issued by the CAs that issued thiscertificate can be obtained. You should use the URL component of theGeneralName for this, avoiding the other possibilities.
CRYPT_CERTINFO_AUTHORITYINFO_CRLS GeneralNameThe location at which further certificates issued by the CAs that issued thiscertificate can be obtained. You should use the URL component of theGeneralName for this, avoiding the other possibilities.
CRYPT_CERTINFO_AUTHORITYINFO_OCSP GeneralNameThe location at which certificate revocation information can be obtained.You should use the URL component of the GeneralName for this, avoidingthe other possibilities.
CRYPT_CERTINFO_AUTHORITYINFO_RTCS GeneralNameThe location at which certificate validity information can be obtained. Youshould use the URL component of the GeneralName for this, avoiding theother possibilities.
Directory AttributesThis extension, identified by CRYPT_CERTINFO_SUBJECTDIRECTORY-ATTRIBUTES, allows additional X.500 directory attributes to be specified for acertificate. This extension is valid in certificates, and has the following attributes:
Attribute/Description Type
CRYPT_CERTINFO_SUBJECTDIR_TYPE StringThe object identifier that identifies the type of the directory attribute.
CRYPT_CERTINFO_SUBJECTDIR_VALUES StringThe value of the directory attribute.
Key Usage, Extended Key Usage, and Netscape certificate typeThese extensions specify the allowed usage for the key contained in this certificate.The keyUsage attribute is a standard extension identified by CRYPT_CERTINFO_-KEYUSAGE and is used to specify general-purpose key usages such as keyencryption, digital signatures, and certificate signing. If you don’t set this attribute, cryptlib will set it for you to a value appropriate for the key type (for example a keyfor a signature-only algorithm such as DSA will be marked as a signature key).
The extKeyUsage attribute is identified by CRYPT_CERTINFO_EXTKEYUSAGEand is used to specify additional special-case usage such as code signing and SSLserver authentication.
The Netscape certificate type attribute is a vendor-specific attribute identified byCRYPT_CERTINFO_NS_CERTTYPE and was used to specify certain types of webbrowser-specific certificate usage before the extKeyUsage attribute was fullyspecified. This attribute has now been superseded by extKeyUsage, but is still foundin a number of certificates.

Certificate Extensions232
The keyUsage extension has a single numeric attribute with the same identifier as theextension itself (CRYPT_CERTINFO_KEYUSAGE). This extension is valid incertificates and certification requests, and contains a bit flag that can contain any ofthe following values:
Value Description
CRYPT_KEYUSAGE_-DATAENCIPHERMENT
The key can be used for data encryption. Thisimplies using public-key encryption for bulkdata encryption, which is almost never done.
CRYPT_KEYUSAGE_-DIGITALSIGNATURE
The key can be used for digital signaturegeneration and verification. This is thestandard flag to set for digital signature use.
CRYPT_KEYUSAGE_-ENCIPHERONLY
CRYPT_KEYUSAGE_-DECIPHERONLY
These flags modify the keyAgreement flag toallow the key to be used for only one part ofthe key agreement process.
CRYPT_KEYUSAGE_-KEYAGREEMENT
The key can be used for key agreement. Thisis the standard flag to set for key-agreementalgorithms such as Diffie-Hellman.
CRYPT_KEYUSAGE_-KEYCERTSIGN
CRYPT_KEYUSAGE_-CRLSIGN
The key can be used to sign certificates andCRLs. Using these flags requires thebasicConstraint CA value to be set.
CRYPT_KEYUSAGE_-KEYENCIPHERMENT
The key can be used for key encryption/keytransport. This is the standard flag to set forencryption use.
CRYPT_KEYUSAGE_-NONREPUDIATION
The key can be used for nonrepudiationpurposes. Note that this use is usuallydifferent to CRYPT_KEYUSAGE_-DIGITALSIGNATURE and is interpreted invarious incompatible ways by differentstandards and profiles.
For example to mark the key in a certificate as being usable for digital signatures andencryption you would use:
cryptSetAttribute( certificate, CRYPT_CERTINFO_KEYUSAGE,CRYPT_KEYUSAGE_DIGITALSIGNATURE | CRYPT_KEYUSAGE_KEYENCIPHERMENT );
The extKeyUsage attribute contains a collection of one or more values that specify aspecific type of extended usage that extends beyond the general keyUsage.
This extension is used by applications to determine whether a certificate is meant fora particular purpose such as timestamping or code signing. The extension is valid incertificates and certification requests and can contain any of the following values:
Value Used in
CRYPT_CERTINFO_EXTKEY_-CODESIGNING
Code-signing certificate.
CRYPT_CERTINFO_EXTKEY_-DIRECTORYSERVICE
Directory service certificate.
CRYPT_CERTINFO_EXTKEY_-EMAILPROTECTION
email encryption/signingcertificate.

X.509 Extensions 233
CRYPT_CERTINFO_EXTKEY_-IPSECENDSYSTEM
CRYPT_CERTINFO_EXTKEY_-IPSECTUNNEL
CRYPT_CERTINFO_EXTKEY_-IPSECUSER
Various IPSEC certificates.
CRYPT_CERTINFO_EXTKEY_-MS_CERTTRUSTLISTSIGNING
CRYPT_CERTINFO_EXTKEY_-MS_TIMESTAMPSIGNING
Microsoft certificate trust listsigning and timestampingcertificate, used for AuthentiCodesigning.
CRYPT_CERTINFO_EXTKEY_-MS_ENCRYPTEDFILESYSTEM
Microsoft encrypted file systemcertificate.
CRYPT_CERTINFO_EXTKEY_-MS_INDIVIDUALCODESIGNING
CRYPT_CERTINFO_EXTKEY_-MS_COMMERCIALCODESIGNING
Microsoft individual andcommercial code-signingcertificate, used for AuthentiCodesigning.
CRYPT_CERTINFO_EXTKEY_-MS_SERVERGATEDCRYPTO
Microsoft server-gated crypto(SGC) certificate, used to enablestrong encryption on non-USservers.
CRYPT_CERTINFO_EXTKEY_-NS_SERVERGATEDCRYPTO
Netscape server-gated crypto(SGC) certificate, used to enablestrong encryption on non-USservers.
CRYPT_CERTINFO_EXTKEY_-SERVERAUTH
CRYPT_CERTINFO_EXTKEY_-CLIENTAUTH
SSL server and clientauthentication certificate.
CRYPT_CERTINFO_EXTKEY_-TIMESTAMPING
Timestamping certificate.
CRYPT_CERTINFO_EXTKEY_-VS_SERVERGATEDCRYPTO_CA
Verisign server-gated crypto CAcertificate, used to sign SGCcertificates.
For example to mark the key in a certificate as being used for SSL serverauthentication you would use:
cryptSetAttribute( certificate, CRYPT_CERTINFO_EXTKEY_SERVERAUTH,CRYPT_UNUSED );
Like the keyUsage extension, the Netscape certificate type extension has a singlenumeric attribute with the same identifier as the extension itself (CRYPT_-CERTINFO_NS_CERTTYPE). This extension is valid in certificates andcertification requests and contains a bit flag that can contain any of the followingvalues:
Value Used in
CRYPT_NS_CERTTYPE_-OBJECTSIGNING
Object signing certificate (equivalent toMicrosoft’s AuthentiCode use).
CRYPT_NS_CERTTYPE_-SMIME
S/MIME email encryption/signingcertificate.
CRYPT_NS_CERTTYPE_-SSLCLIENT
CRYPT_NS_CERTTYPE_-SSLSERVER
SSL client and server certificate.

Certificate Extensions234
CRYPT_NS_CERTTYPE_-SSLCA
CRYPT_NS_CERTTYPE_-SMIMECA
CRYPT_NS_CERTTYPE_-OBJECTSIGNINGCA
CA certificates corresponding to the abovecertificate types. Using these flags requiresthe basicConstraint CA value to be set.
This extension is obsolete and is supported as a read-only attribute by cryptlib. If youtry to set this extension cryptlib will return CRYPT_ERROR_PERMISSION toindicate that you can’t set this attribute value.
Name ConstraintsThe nameConstraints extension is used to constrain the certificate’s subjectName and subject altName to lie inside or outside a particular DN subtree or substring, with theexcludedSubtrees attribute taking precedence over the permittedSubtrees attribute.The principal use for this extension is to allow control of the certificate namespace, sothat a CA can restrict the ability of any CAs it certifies to issue certificates outside avery restricted domain (for example corporate headquarters might constrain adivisional CA to only issue certificates for its own business division). This extensionis identified by CRYPT_CERTINFO_NAMECONSTRAINTS, and is valid incertificates:
Attribute/Description Type
CRYPT_CERTINFO_PERMITTEDSUBTREES GeneralNameThe subtree within which the subjectName and subject altName of anyissued certificates must lie.
CRYPT_CERTINFO_EXCLUDEDSUBTREES GeneralNameThe subtree within which the subjectName and subject altName of anyissued certificates must not lie.
Due to ambiguities in the encoding rules for strings contained in DNs, it is possible toavoid the excludedSubtrees for DNs by choosing unusual (but perfectly valid) stringencodings that don’t appear to match the excludedSubtrees. Because of this you should rely on permittedSubtrees rather than excludedSubtrees for DN constraintenforcement.
The nameConstraints are applied to both the certificate subject name and the subjectaltName. For example if a CA run by Cognitive Cybernetics Incorporated wanted toissue a certificate to a subsidiary CA that was only permitted to issue certificates forCognitive Cybernetics’ marketing division, it would set DN name constraints with:
cryptSetAttribute( certificate, CRYPT_CERTINFO_PERMITTEDSUBTREES,CRYPT_UNUSED );
cryptSetAttribute( certificate, CRYPT_CERTINFO_DIRECTORYNAME,CRYPT_UNUSED );
cryptSetAttributeString( certificate, CRYPT_CERTINFO_COUNTRYNAME,"US", 2 );
cryptSetAttributeString( certificate, CRYPT_CERTINFO_ORGANIZATIONNAME,"Cognitive Cybernetics Incorporated", 32 );
cryptSetAttributeString( certificate,CRYPT_CERTINFO_ORGANIZATIONALUNITNAME, "Marketing", 9 );
This means that the subsidiary CA can only issue certificates to employees of themarketing division. Note that since the excludedSubtrees attribute is a GeneralName,the DN is selected through a two-level process, first to select the excludedSubtreesGeneralName and then to select the DN within the GeneralName.
GeneralName components that have a flat structure (for example email addresses) canhave constraints specified through the ‘*’ wildcard. For example to extend the above constraint to also include email addresses, the issuing CA would set a name constraintwith:
cryptSetAttribute( certificate, CRYPT_CERTINFO_PERMITTEDSUBTREES,CRYPT_UNUSED );
cryptSetAttributeString( certificate, CRYPT_CERTINFO_RFC822NAME,"*@marketing.cci.com", 19 );

CRL Extensions 235
This means that the subsidiary CA can only issue certificates with email addresseswithin the marketing division. Note again the selection of the excludedSubtreesGeneralName followed by the setting of the email address (if the GeneralName is stillselected from the earlier code, there’s no need to re-select it at this point).
Private Key Usage PeriodThis extensions specifies the date on which the private key for this certificate expires.This extension is identified by CRYPT_CERTINFO_-PRIVATEKEYUSAGEPERIOD and is valid in certificates. This is useful where acertificate needs to have a much longer lifetime than the private key it corresponds to,for example a long-term signature might have a lifetime of 10-20 years, but theprivate key used to generate it should never be retained for such a long period. TheprivateKeyUsagePeriod extension is used to specify a (relatively) short lifetime forthe private key while allowing for a very long lifetime for the signatures it generates:
Attribute/Description Type
CRYPT_CERTINFO_PRIVATEKEY_NOTBEFORECRYPT_CERTINFO_PRIVATEKEY_NOTAFTER
TimeTime
The private key usage period defines the period of time over which theprivate key for a certificate object is valid. CRYPT_CERTINFO_-PRIVATEKEY_NOTBEFORE specifies the validity start period, andCRYPT_CERTINFO_PRIVATEKEY_NOTAFTER specifies the validityend period.
Subject and Authority Key IdentifiersThese extensions are used to provide additional identification information for acertificate, and are usually generated automatically by certificate management code.For this reason the extensions are marked as read-only.
The authorityKeyIdentifier is identified by CRYPT_CERTINFO_-AUTHORITYKEYIDENTIFIER and has the following attributes:
Attribute/Description Type
CRYPT_CERTINFO_AUTHORITY_KEYIDENTIFIER Binary dataBinary data identifying the public key in the certificate that was used to signthis certificate.
CRYPT_CERTINFO_AUTHORITY_CERTISSUERCRYPT_CERTINFO_AUTHORITY_-
CERTSERIALNUMBER
GeneralNameBinary data
The issuer name and serial number for the certificate that was used to signthis certificate. The serial number is treated as a binary string and not as anumeric value, since it is often 15-20 bytes long.
The subjectKeyIdentifier is identified by CRYPT_CERTINFO_-SUBJECTKEYIDENTIFIER and contains binary data identifying the public key inthe certificate.
CRL ExtensionsCRLs have a number of CRL-specific extensions that are described below.
CRL Reasons, CRL Numbers, Delta CRL IndicatorsThese extensions specify various pieces of information about CRLs. The reasonCodeextension is used to indicate why a certificate was revoked. The cRLNumberextension provides a serial number for CRLs. The deltaCRLIndicator indicates adelta CRL that contains changes between a base CRL and a delta-CRL (this is used toreduce the overall size of CRLs).
The reasonCode extension is identified by CRYPT_CERTINFO_CRLREASON andis valid in CRLs. The extension has a single numeric attribute with the same

Certificate Extensions236
identifier as the extension itself (CRYPT_CERTINFO_CRLREASON) whichcontains a bit flag that can contain one of the following values:
Value Description
CRYPT_CRLREASON_-AFFILIATIONCHANGED
The affiliation of the certificate ownerhas changed, so that the subjectName orsubject altName is no longer valid.
CRYPT_CRLREASON_-CACOMPROMISE
CRYPTCRLREASON_-AACOMPROMISE
The CA or attribute authority that issuedthe certificate was compromised.
CRYPT_CRLREASON_-CERTIFICATEHOLD
The certificate is to be placed on holdpending further communication from theCA (the further communication may beprovided by the holdInstructionCodeextension).
CRYPT_CRLREASON_-CESSATIONOFOPERATION
The certificate owner has ceased tooperate in the role that requires the use ofthe certificate.
CRYPT_CRLREASON_-KEYCOMPROMISE
The key for the certificate wascompromised.
CRYPT_CRLREASON_-PRIVILEGEWITHDRAWN
The privilege granted in an attributecertificate is no longer valid.
CRYPT_CRLREASON_-REMOVEFROMCRL
The certificate should be removed fromthe certificate revocation list.
CRYPT_CRLREASON_-SUPERSEDED
The certificate has been superseded.
CRYPT_CRLREASON_-UNSPECIFIED
No reason for the CRL. You shouldavoid including a reasonCode at all ratherthan using this code.
To indicate that a certificate is being revoked because the key it corresponds to hasbeen compromised, you would use:
cryptSetAttribute( certificate, CRYPT_CERTINFO_CRLREASON,CRYPT_CRLREASON_KEYCOMPROMISE );
The cRLNumber extension is identified by CRYPT_CERTINFO_CRLNUMBER andis valid in CRLs. The extension has a single attribute with the same identifier as theextension itself (CRYPT_CERTINFO_CRLNUMBER) which contains amonotonically increasing sequence number for each CRL issued. This allows anapplication to check that it has received and processed each CRL that was issued.
The deltaCRLIndicator extension is identified by CRYPT_CERTINFO_-DELTACRLINDICATOR and is valid in CRLs. The extension has a single attributewith the same identifier as the extension itself (CRYPT_CERTINFO_-DELTACRLINDICATOR) which contains the cRLNumber of the base CRL fromwhich this delta CRL is being constructed (see certificate standards documents formore information on delta CRLs).
Hold Instruction CodeThis extension contains a code that specifies what to do with a certificate that hasbeen placed on hold through a CRL (that is, its revocation reasonCode isCRYPT_CRLREASON_CERTIFICATEHOLD). The extension is identified byCRYPT_CERTINFO_HOLDINSTRUCTIONCODE, is valid in CRLs, and cancontain one of the following values:

CRL Extensions 237
Value Description
CRYPT_HOLDINSTRUCTION_-CALLISSUER
Call the certificate issuer fordetails on the certificate hold.
CRYPT_HOLDINSTRUCTION_NONE No hold instruction code. Youshould avoid including aholdInstructionCode at all ratherthan using this code.
CRYPT_HOLDINSTRUCTION_-REJECT
Reject the transaction that therevoked/held certificate was to beused for.
As the hold code descriptions indicate, this extension was developed mainly for usein the financial industry. To indicate that someone should call the certificate issuerfor further information on a certificate hold, you would use:
cryptSetAttribute( certificate, CRYPT_CERTINFO_HOLDINSTRUCTIONCODE,CRYPT_HOLDINSTRUCTION_CALLISSUER );
You shouldn’t use this extension (or the CRYPT_CRLREASON_-CERTIFICATEHOLD reasonCode) unless you really need to because although amechanism was defined for placing a certificate on hold, no-one ever defined one forremoving it from this state, so once it’s on hold it’s revoked no matter what the reasonCode says.
Invalidity DateThis extension contains the date on which the private key for a certificate becameinvalid. The extension is identified by CRYPT_CERTINFO_INVALIDITYDATEand is valid in CRLs:
Attribute/Description Type
CRYPT_CERTINFO_INVALIDITYDATE TimeThe date on which the key identified in a CRL became invalid.
Note that a CRL contains both its own date and a date for each revoked certificate, sothis extension is only useful if there’s some reason for communicating the fact that a key compromise occurred at a time other than the CRL issue time or the certificaterevocation time.
Issuing Distribution Point and Certificate IssuerThese extensions specify the CRL distribution point for a CRL and provide variouspieces of additional information about the distribution point. TheissuingDistributionPoint specifies the distribution point for a CRL, and thecertificateIssuer specifies the issuer for an indirect CRL as indicated by theissuingDistributionPoint extension.
The issuingDistributionPoint extension is identified by CRYPT_CERTINFO_-ISSUINGDISTRIBUTIONPOINT and is valid in CRLs:
Attribute/Description Type
CRYPT_CERTINFO_ISSUINGDIST_FULLNAME GeneralNameThe location at which CRLs may be obtained. You should use the URLcomponent of the GeneralName for this, avoiding the other possibilities.
CRYPT_CERTINFO_ISSUINGDIST_USERCERTSONLYCRYPT_CERTINFO_ISSUINGDIST_CACERTSONLYCRYPT_CERTINFO_ISSUINGDIST_SOMEREASONSONLYCRYPT_CERTINFO_ISSUINGDIST_INDIRECTCRL
BooleanBooleanNumericBoolean
See certificate standards documents.
Note that the CRYPT_CERTINFO_ISSUINGDIST_SOMEREASONSONLYattribute has the same allowable set of values as the cRLReasons reasonCode, but inthis case is given as a series of bit flags rather than the reasonCode numeric value

Certificate Extensions238
(because X.509 says so, that’s why). Because of this you must use CRYPT_-CRLREASONFLAGS_name instead of CRYPT_CRLREASON_name when gettingand setting these values.
The certificateIssuer extension contains the certificate issuer for an indirect CRL.The extension is identified by CRYPT_CERTINFO_CERTIFICATEISSUER and isvalid in CRLs:
Attribute/Description Type
CRYPT_CERTINFO_CERTIFICATEISSUER GeneralNameSee certificate standards documents.
Digital Signature Legislation ExtensionsVarious digital signature laws specify extensions beyond the X.509v3 and X.509v4ones that are described below.
Certificate Generation DateThe German signature law specifies an extension containing the date at which thecertificate was generated. This is necessary for post-dated certificates to avoidproblems if the CA’s key is compromised between the time the certificate is issued and the time it takes effect. The extension is identified by CRYPT_CERTINFO_-SIGG_DATEOFCERTGEN and contains the following attributes:
Attribute/Description Type
CRYPT_CERTINFO_SIGG_DATEOFCERTGEN TimeThe date on which the certificate was issued.
Other RestrictionsThe German signature law specifies an extension containing any other general free-form restrictions that may be imposed on the certificate. The extension is identifiedby CRYPT_CERTINFO_SIGG_RESTRICTION and contains the followingattributes:
Attribute/Description Type
CRYPT_CERTINFO_SIGG_RESTRICTION StringText containing any further restrictions not already handled via certificatepolicies or constraints.
Reliance LimitThe German signature law specifies an extension containing a reliance limit for thecertificate, which specifies the (recommended) monetary reliance limit for thecertificate. The extension is identified by CRYPT_CERTINFO_SIGG_-MONETARYLIMIT and contains the following attributes:
Attribute/Description Type
CRYPT_CERTINFO_SIGG_MONETARY_CURRENCY StringThe three-letter currency code.
CRYPT_CERTINFO_SIGG_MONETARY_AMOUNT IntegerThe amount, specified as an integer in the range 1…200.
CRYPT_CERTINFO_SIGG_MONETARY_EXPONENT IntegerThe exponent for the amount, specified as an integer 1…200, so that the actual value is amount 10exponent.
Signature DelegationThe German signature law specifies an extension containing details about signaturedelegation, in which one party may sign on behalf of another (for example someone’s

Qualified Certificate Extensions 239
secretary signing correspondence on their behalf). The extension is identified byCRYPT_CERTINFO_SIGG_PROCURATION and contains the following attributes:
Attribute/Description Type
CRYPT_CERTINFO_SIGG_PROCURE_-TYPEOFSUBSTITUTION
String
The type of signature delegation being performed (for example “Signed on behalf of”).
CRYPT_CERTINFO_SIGG_PROCURE_SIGNINGFOR GeneralNameThe identity of the person or organisation the signer is signing on behalf of.
Qualified Certificate ExtensionsQualified certificates contain additional extensions beyond the X.509v3 ones that aredescribed below.
Biometric InfoThe biometricInfo extension contains biometric information in the form of a hash of abiometric template. The extension is identified by CRYPT_CERTINFO_-BIOMETRICINFO and is valid in certificates and certification requests:
Attribute/Description Type
CRYPT_CERTINFO_BIOMETRICINFO_TYPE NumericThe type of the biometric data, see certificate standards documents.
CRYPT_CERTINFO_BIOMETRICINFO_HASHALGO StringThe object identifier for the hash algorithm used to hash the biometrictemplate.
CRYPT_CERTINFO_BIOMETRICINFO_HASH StringThe hash of the biometric template.
CRYPT_CERTINFO_BIOMETRICINFO_URL StringAn optional URL at which the biometric data may be found.
QC StatementsThe qcStatements extension contains defined statements for a qualified certificate.The extension is identified by CRYPT_CERTINFO_QCSTATEMENT and is valid incertificates and certification requests:
Attribute/Description Type
CRYPT_CERTINFO_QCSTATEMENT_SEMANTICS StringAn object identifier identifying the defined statement for this certificate.
CRYPT_CERTINFO_QCSTATEMENT_-REGISTRATIONAUTHORITY
String
See certificate standards documents.
SET ExtensionsSET specifies a number of extensions beyond the X.509v3 ones that are describedbelow.
SET Card Required and Merchant DataThese extensions specify various pieces of general information used in the SETelectronic payment protocol.
The cardRequired extension contains a flag indicating whether a card is required for atransaction. The extension is identified by CRYPT_CERTINFO_SET_-CERTCARDREQUIRED, and is valid in certificates and certification requests. Theextension contains a single boolean attribute with the same identifier as the extension

Certificate Extensions240
itself (CRYPT_CERTINFO_SET_CARDREQUIRED) which is explained in the SETstandards documents.
The merchantData extension contains further information on a merchant. Theextension is identified by CRYPT_CERTINFO_SET_MERCHANTDATA and isvalid in certificates and certification requests:
Attribute/Description Type
CRYPT_CERTINFO_SET_MERACQUIRERBINCRYPT_CERTINFO_SET_MERAUTHFLAGCRYPT_CERTINFO_SET_MERCOUNTRYCRYPT_CERTINFO_SET_MERID
StringBooleanNumericString
Merchant’s 6-digit BIN, authorisation flag, ISO country code, and merchantID.
CRYPT_CERTINFO_SET_MERCHANTCITYCRYPT_CERTINFO_SET_MERCHANTCOUNTRYNAMECRYPT_CERTINFO_SET_MERCHANTLANGUAGECRYPT_CERTINFO_SET_MERCHANTNAMECRYPT_CERTINFO_SET_MERCHANTPOSTALCODECRYPT_CERTINFO_SET_MERCHANTSTATEPROVINCE
StringStringStringStringStringString
Merchant’s language, name, city, state or province, postal code, and countryname.
SET Certificate Type, Hashed Root Key, and TunnellingThese extensions specify various pieces of certificate management information usedin the SET electronic payment protocol.
The certificateType extension contains the SET certificate type. The extension isidentified by CRYPT_CERTINFO_SET_CERTIFICATETYPE and is valid incertificates and certification requests. The extension contains a single bit flagattribute with the same identifier as the extension itself (CRYPT_CERTINFO_SET_-CERTIFICATETYPE) and can contain any of the following values that are explainedin the SET standards documentation:
Value
CRYPT_SET_CERTTYPE_ACQ
CRYPT_SET_CERTTYPE_BCA
CRYPT_SET_CERTTYPE_CARD
CRYPT_SET_CERTTYPE_CCA
CRYPT_SET_CERTTYPE_GCA
CRYPT_SET_CERTTYPE_MCA
CRYPT_SET_CERTTYPE_MER
CRYPT_SET_CERTTYPE_PCA
CRYPT_SET_CERTTYPE_PGWY
CRYPT_SET_CERTTYPE_RCA
The hashedRootKey extension contains a thumbprint (SET-speak for a hash) of aSET root key. The extension is identified by CRYPT_CERTINFO_SET_-HASHEDROOTKEY and is valid in certificates and certification requests. Theextension contains a single attribute:
Attribute/Description Type
CRYPT_CERTINFO_SET_ROOTKEYTHUMBPRINT Binary dataBinary string containing the root key thumbprint (see the SET standardsdocuments).

Application-specific Extensions 241
You can obtain the key hash which is required for the thumbprint from anothercertificate by reading its CRYPT_CERTINFO_SUBJECTKEYIDENTIFIER attributeand then adding it to the certificate you’re working with as the CRYPT_-CERTINFO_SET_ROOTKEYTHUMBPRINT attribute. cryptlib will perform thefurther work required to convert this attribute into the root key thumbprint.
The tunnelling extension contains a tunnelling indicator and algorithm identifier. Theextension is identified by CRYPT_CERTINFO_SET_TUNNELING and is valid incertificates and certification requests.
Attribute/Description Type
CRYPT_CERTINFO_SET_TUNNELINGFLAGCRYPT_CERTINFO_SET_TUNNELINGALGID
BooleanString
See SET standards documents.
Application-specific ExtensionsVarious applications such as certificate management protocols have their ownextensions that extend or complement the X.509 ones. These are described below.
OCSP ExtensionsThese extensions specify various pieces of certificate management information usedin the OCSP certificate management protocol.
The noCheck extension indicates that the certificate should be automatically trustedwhen used to sign OCSP responses. The extension is identified by CRYPT_-CERTINFO_OCSP_NOCHECK and is valid in certificates and certification requests.The extension contains a numeric attribute with the same identifier as the extensionitself (CRYPT_CERTINFO_OCSP_NOCHECK) which is always set toCRYPT_UNUSED since it has no inherent value associated with it.
Attribute/Description Type
CRYPT_CERTINFO_OCSP_NOCHECK NumericSee OCSP standards documents.
Vendor-specific ExtensionsA number of vendors have defined their own extensions that extend or complementthe X.509 ones. These are described below.
Netscape Certificate ExtensionsNetscape defined a number of extensions that mostly predate the various X.509v3extensions that now provide the same functionality. The various Netscape certificateextensions are:
Extension/Description Type
CRYPT_CERTINFO_NS_BASEURL StringA base URL which, if present, is added to all partial URL’s in Netscape extensions to create a full URL.
CRYPT_CERTINFO_NS_CAPOLICYURL StringThe URL at which the certificate policy under which this certificate wasissued can be found.
CRYPT_CERTINFO_NS_CAREVOCATIONURL StringThe URL at which the revocation status of a CA certificate can be checked.
CRYPT_CERTINFO_NS_CERTRENEWALURL StringThe URL at which a form allowing renewal of this certificate can be found.
CRYPT_CERTINFO_NS_COMMENT StringA comment which should be displayed when the certificate is viewed.

Certificate Extensions242
CRYPT_CERTINFO_NS_REVOCATIONURL StringThe URL at which the revocation status of a server certificate can bechecked.
CRYPT_CERTINFO_NS_SSLSERVERNAME StringA wildcard string containing a shell expression that matches the hostname ofthe SSL server using this certificate.
Note that each of these entries represent a separate extension containing a single textstring, they have merely been listed in a single table for readability. You shouldavoid using these extensions if possible and instead use one of the standard X.509v3extensions.
Thawte Certificate ExtensionsThawte Consulting have defined an extension that allows the use of certificates withsecure extranets. This extension is identified by CRYPT_CERTINFO_-STRONGEXTRANET and is valid in certificates and certification requests:
Attribute/Description Type
CRYPT_CERTINFO_STRONGEXTRANET_ZONECRYPT_CERTINFO_STRONGEXTRANET_ID
NumericBinary data
Extranet zone and ID.
Generic ExtensionsBeyond the standardised extensions listed above there exist any number of obscure ornon-standard certificate extensions. cryptlib allows you to work with theseextensions using cryptAddCertExtension, cryptGetCertExtension, andcryptDeleteCertExtension, which allow you to add, retrieve, or delete a completeencoded extension identified by its ASN.1 object identifier. The extension data mustbe a complete DER-encoded ASN.1 object without the OCTET STRING wrapperwhich is used for all extensions (cryptlib will add this itself). For example if youwanted to add a 4-byte UTF8 string as an extension the data would be 0C 04 xxxx xx xx. If you pass in extension data to cryptAddCertExtension that isn’t a valid ASN.1-encoded object, cryptlib will return CRYPT_ERROR_PARAM4 toindicate that the data is in an invalid format.
If a certificate object contains a non-standard extension, cryptlib won’t include it in the object when you sign it unless you set the CRYPT_OPTION_CERT_-SIGNUNRECOGNISEDATTRIBUTES option to true. This is to avoid problemswhere a CA could end up signing arbitrary data in an unrecognised certificateextension.
If the extension you are trying to add is already handled as a standard extension,cryptlib will return CRYPT_ERROR_PERMISSION to indicate that you can’t add the extension in this manner but have to add it using cryptSetAttribute/cryptSetAttributeString.

CMS/SMIME Attributes 243
Other Certificate Object ExtensionsCertificate objects other than certificates and CRLs can also contain extensions. Inthe following descriptions only the generally useful attributes have been described.The full range of attributes is enormous and will probably never be used in real life.These attributes are marked with “See standards documents” to indicate that you should refer to other documents to obtain information about their usage (this is also agood indication that you shouldn’t really be using this attribute).
CMS/SMIME AttributesThe CMS and S/MIME standards specify various attributes that can be included withsignatures. In addition there are a variety of proprietary and vendor-specificattributes that are also handled by cryptlib. In the following description only thegenerally useful attributes have been described, the full range of attributes isenormous and requires a number of standards specifications (often followed by criesfor help on mailing lists) to interpret them. These attributes are marked with “See S/MIME standards documents” to indicate that you should refer to other documents to obtain information about their use (this is also a good indication that you shouldn’t really be using this attribute).
Content TypeThis is a standard CMS attribute identified by CRYPT_CERTINFO_CMS_-CONTENTTYPE and is used to specify the type of data which is being signed. Thisis used because some signed information could be interpreted in different waysdepending on the data type it’s supposed to represent (for example something viewed as encrypted data could be interpreted quite differently if viewed as plain data). Ifyou don’t set this attribute, cryptlib will set it for you and mark the signed content as plain data.
The content-type CMS attribute can contain one of the following CRYPT_-CONTENT_TYPE values:
Value Description
CRYPT_CONTENT_DATA Plain data.
CRYPT_CONTENT_-SIGNEDDATA
Signed data.
CRYPT_CONTENT_-ENVELOPEDDATA
Data encrypted using a password orpublic-key or conventional encryption.
CRYPT_CONTENT_-SIGNEDANDENVELOPED-DATA
Data which is both signed and enveloped(this is an obsolete composite contenttype thatshouldn’t be used).
CRYPT_CONTENT_-DIGESTEDDATA
Hashed data.
CRYPT_CONTENT_-ENCRYPTEDDATA
Data encrypted directly with a sessionkey.
CRYPT_CONTENT_-COMPRESSEDDATA
Compressed data.
CRYPT_CONTENT_TSTINFO Timestamp token generated by atimestamp authority (TSA).
CRYPT_CONTENT_-SPCINDIRECTDATA-CONTEXT
Indirectly signed data used inAuthenticode signatures.
The distinction between the different types arises from the way they are specified inthe standards documents, as a rule of thumb if the data being signed is encrypted thenuse CRYPT_CONTENT_ENVELOPEDDATA (rather than CRYPT_CONTENT_-

Other Certificate Object Extensions244
ENCRYPTEDDATA, which is slightly different), if it’s signed then use CRYPT_-CONTENT_SIGNEDDATA, and if it’s anything else then use CRYPT_-CONTENT_DATA. For example to identify the data you’re signing as encrypted data, you would use:
cryptSetAttribute( cmsAttributes, CRYPT_CERTINFO_CMS_CONTENTTYPE,CRYPT_CONTENT_ENVELOPEDDATA );
If you’re generating the signature via the cryptlib enveloping code then cryptlib will set the correct type for you so there’s no need to set it yourself.
CountersignatureThis CMS attribute contains a second signature that countersigns one of thesignatures on the data (that is, it signs the other signature rather than the data). Theattribute is identified by CRYPT_CERTINFO_CMS_COUNTERSIGNATURE:
Attribute/Description Type
CRYPT_CERTINFO_CMS_COUNTERSIGNATURE Binary dataSee S/MIME standards documents.
Message DigestThis read-only CMS attribute is used as part of the signing process and is generatedautomatically by cryptlib. The attribute is identified by CRYPT_CERTINFO_-CMS_MESSAGEDIGEST:
Attribute/Description Type
CRYPT_CERTINFO_CMS_MESSAGEDIGEST Binary dataThe hash of the content being signed.
Signing DescriptionThis CMS attribute contains a short text message with an additional description of thedata being signed. For example if the signed message was a response to a receivedsigned message, the signing description might contain an indication of the type ofmessage it’s being sent in response to. Note that CMS has a number of special-purpose signing attributes such as message receipt information that allow automatedprocessing of messages that contain them, so you should only use this free-formhuman-readable attribute for cases that aren’t covered by special-case attributesdesigned for the purpose.
The attribute is identified by CRYPT_CERTINFO_CMS_SIGNINGDESCRIPTION:
Attribute/Description Type
CRYPT_CERTINFO_CMS_SIGNINGDESCRIPTION StringFree-form text annotation for the message being signed.
Signing TimeThis is a standard CMS attribute identified by CRYPT_CERTINFO_CMS_-SIGNINGTIME and is used to specify the time at which the signature was generated.If you don’t set this attribute, cryptlib will set it for you.
Attribute/Description Type
CRYPT_CERTINFO_CMS_SIGNINGTIME TimeThe time at which the signature was generated.
Extended CMS/SMIME AttributesThe attributes given above are the standard CMS attributes. Extending beyond thisare further attributes that are defined in additional standards documents and that applymostly to S/MIME messages, as well as vendor-specific and proprietary attributes.

Extended CMS/SMIME Attributes 245
Before you use these additional attributes you should ensure that any software youplan to interoperate with can process them, since currently almost nothing willrecognise them (for example it’s not a good idea to put a security label on your data and expect other software to handle it correctly).
AuthentiCode AttributesAuthentiCode code-signing uses a number of attributes that apply to signedexecutable content. These attributes are listed below.
The agency information CMS attribute, identified by CRYPT_CERTINFO_CMS_-SPCAGENCYINFO, is used to provide extra information about the signer of the dataand has the following attributes:
Attribute/Description Type
CRYPT_CERTINFO_CMS_SPCAGENCYURL StringThe URL of a web page containing more information about the signer.
The statement type CMS attribute, identified by CRYPT_CERTINFO_CMS_-SPCSTATEMENTTYPE, is used to identify whether the content was signed by anindividual or a commercial organisation, and has the following attributes:
Attribute/Description Type
CRYPT_CERTINFO_CMS_SPCSTMT_INDIVIDUAL-CODESIGNING
Numeric
The data was signed by an individual.
CRYPT_CERTINFO_CMS_SPCSTMT_COMMERCIAL-CODESIGNING
Numeric
The data was signed by a commercial organisation.
The opus info CMS attribute, identified by CRYPT_CERTINFO_CMS_-SPCOPUSINFO, is used to identify program details for AuthentiCode use, and hasthe following attributes:
Attribute/Description Type
CRYPT_CERTINFO_CMS_SPCOPUSINFO_NAME StringProgram name/version.
CRYPT_CERTINFO_CMS_SPCOPUSINFO_URL StringAuthentiCode information URL.
Note that the CRYPT_CERTINFO_CMS_SPCOPUSINFO_NAME attribute is aUnicode string, as used by Windows NT/2000/XP and Windows CE.
For example to indicate that the data was signed by an individual, you would use:
cryptSetAttribute( cmsAttributes,CRYPT_CERTINFO_CMS_SPCSTMT_COMMERCIALCODESIGNING, CRYPT_UNUSED );
For example to create an AuthentiCode signature as a commercial organisation youwould use:
CRYPT_CERTIFICATE cmsAttributes;
/* Create the CMS attribute object and add the AuthentiCode attributes*/
cryptCreateCert( &cmsAttributes, cryptUser,CRYPT_CERTTYPE_CMS_ATTRIBUTES );
cryptSetAttributeString( cmsAttributes,CRYPT_CERTINFO_CMS_SPCAGENCYURL,"http://homepage.organisation.com", 32 );
cryptSetAttribute( cmsAttributes,CRYPT_CERTINFO_CMS_SPCSTMT_COMMERCIALCODESIGNING, CRYPT_UNUSED );
/* Add the content-type required for AuthentiCode data */cryptSetAttribute( cmsAttributes, CRYPT_CERTINFO_CMS_CONTENTTYPE,
CRYPT_CONTENT_SPCINDIRECTDATACONTEXT );

Other Certificate Object Extensions246
/* Sign the data with the attributes included */cryptCreateSignatureEx( ... );
cryptDestroyCert( cmsAttributes );
The other attributes used when signing are standard attributes that will be addedautomatically for you by cryptlib.
Content HintsThis CMS attribute can be supplied in the outer layer of a multi-layer message toprovide information on what the innermost layer of the message contains. Theattribute is identified by CRYPT_CERTINFO_CMS_CONTENTHINTS and has thefollowing attributes:
Attribute/Description Type
CRYPT_CERTINFO_CMS_CONTENTHINT_-DESCRIPTION
String
A human-readable description that may be useful when processing thecontent.
CRYPT_CERTINFO_CMS_CONTENTHINT_TYPE NumericThe type of the innermost content, specified as a CRYPT_CONTENT_-content-type value.
DOMSEC AttributesThe domain security (DOMSEC) attributes are used to handle delegated signing bysystems such as mail gateways. The signature type CMS attribute, identified byCRYPT_CERTINFO_CMS_SIGTYPEIDENTIFIER, is used to identify the signaturetype, and has the following attributes:
Attribute/Description Type
CRYPT_CERTINFO_CMS_SIGTYPEID_-ADDITIONALATTRIBUTES
Numeric
Additional attributes for a domain signature.
CRYPT_CERTINFO_CMS_SIGTYPEID_DOMAINSIG NumericDomain signature by a gateway on behalf of a user.
CRYPT_CERTINFO_CMS_SIGTYPEID_ORIGINATORSIG NumericIndication that the signer is the originator of the message. Thisattribute isn’t normally used, since it corresponds to a standard (non-DOMSEC) signature..
CRYPT_CERTINFO_CMS_SIGTYPEID_REVIEWSIG NumericReview signature to indicate that the domain signer has reviewed themessage.
Mail List Expansion HistoryThis CMS attribute contains information on what happened to a message when it wasprocessed by mailing list software. It is identified by CRYPT_CERTINFO_CMS_-MLEXPANSIONHISTORY and contains the following attributes:

Extended CMS/SMIME Attributes 247
Attribute/Description Type
CRYPT_CERTINFO_CMS_MLEXP_ENTITYIDENTIFIER Binary dataSee S/MIME standards documents.
CRYPT_CERTINFO_CMS_MLEXP_TIME TimeThe time at which the mailing-list software processed the message.
CRYPT_CERTINFO_CMS_MLEXP_NONECRYPT_CERTINFO_CMS_MLEXP_INSTEADOFCRYPT_CERTINFO_CMS_MLEXP_INADDITIONTO
—General-Name
This attribute can have one of the three values specified above, and is usedto indicate a receipt policy that overrides the one given in the originalmessage. See the S/MIME standards documents for more information.
NonceThis CMS attribute nonce is used to prevent replay attacks. The attribute is identifiedby CRYPT_CERTINFO_CMS_NONCE:
Attribute/Description Type
CRYPT_CERTINFO_CMS_NONCE Binary dataNonce to prevent replay attacks.
Receipt RequestThis CMS attribute is used to request a receipt from the recipient of a message and isidentified by CRYPT_CERTINFO_CMS_RECEIPT_REQUEST. As with thesecurity label attribute, you shouldn’t rely on the recipient of a message being able to do anything with this information, which consists of the following attributes:
Attribute/Description Type
CRYPT_CERTINFO_CMS_RECEIPT_-CONTENTIDENTIFIER
Binary data
A magic value used to identify a message, see the S/MIME standardsdocuments for more information.
CRYPT_CERTINFO_CMS_RECEIPT_FROMCRYPT_CERTINFO_CMS_RECEIPT_TO
NumericGeneral-Name
An indication of who receipts should come from and who they should go to,see the S/MIME standards documents for more information.
SCEP AttributesThe Simple Certificate Enrolment Protocol uses a variety of protocol-specificattributes that are attached to CMS signed data and are used to manage the operationof the protocol. These attributes are not normally used with CMS but are providedfor use by cryptlib’s SCEP implementation. The SCEP attributes are:

Other Certificate Object Extensions248
Attribute/Description Type
CRYPT_CERTINFO_SCEP_MESSAGETYPE StringThe SCEP message type.
CRYPT_CERTINFO_SCEP_PKISTATUS StringThe processing status of an SCEP request.
CRYPT_CERTINFO_SCEP_FAILINFO StringExtended error information if the SCEP processing status indicates that anerror occurred.
CRYPT_CERTINFO_SCEP_SENDERNONCECRYPT_CERTINFO_SCEP_RECIPIENTNONCE
Binary data
Nonce values used to protect against message replay attacks. Note that thesevalues duplicate the more usual CRYPT_CERTINFO_CMS_NONCEattribute, which should be used in place of these attributes unless they’re specifically being used for SCEP.
CRYPT_CERTINFO_SCEP_TRANSACTIONID StringA value that uniquely identifies the entity requesting a certificate.
In addition to these attributes, SCEP also uses an additional attribute which is addedto PKCS #10 requests even though it’s a CMS attribute. It therefore acts as a certificate attribute rather than a CMS attribute. The attribute is identified byCRYPT_CERTINFO_CHALLENGEPASSWORD:
Attribute/Description Type
CRYPT_CERTINFO_CHALLENGEPASSWORD StringPassword used to authorise certificate issue requests.
Security Label, Equivalent LabelThese CMS attributes specify security information for the content contained in themessage, allowing recipients to decide how they should process it. For example animplementation could refuse to display a message to a recipient who isn’t cleared to see it (this assumes that the recipient software is implemented at least in part usingtamper-resistant hardware, since a pure software implementation could be set up toignore the security label). These attributes originate (in theory) in X.400 and (inpractice) in DMS, the US DoD secure email system, and virtually no implementationsoutside this area understand them so you shouldn’t rely on them to ensure proper processing of a message.
The basic security label on a message is identified by CRYPT_CERTINFO_CMS_-SECURITYLABEL. Since different organisations have different ways of handlingsecurity policies, their labelling schemes may differ, so the equivalent labels CMSattribute, identified by CRYPT_CERTINFO_CMS_EQUIVALENTLABEL, can beused to map from one to the other. These contain the following attributes:

Extended CMS/SMIME Attributes 249
Attribute/Description Type
CRYPT_CERTINFO_CMS_SECLABEL_POLICY StringThe object identifier for the security policy that the security label is issuedunder.
CRYPT_CERTINFO_CMS_SECLABEL_-CLASSIFICATION
Numeric
The security classification for the content identified relative to the securitypolicy being used. There are six standard classifications (described below)and an extended number of user-defined classifications, for moreinformation see the S/MIME standards documents and X.411.
CRYPT_CERTINFO_CMS_SECLABEL_PRIVACYMARK NumericA privacy mark value that unlike the security classification isn’t used for access control to the message contents. See S/MIME standards documentsfor more information.
CRYPT_CERTINFO_CMS_SECLABEL_CATTYPECRYPT_CERTINFO_CMS_SECLABEL_CATVALUE
StringBinary data
See S/MIME standards documents.
The security classification can have one of the following predefined values (whichare relative to the security policy and whose interpretation can vary from oneorganisation to another), or policy-specific, user-defined values that lie outside thisrange:
Value
CRYPT_CLASSIFICATION_UNMARKED
CRYPT_CLASSIFICATION_UNCLASSIFIED
CRYPT_CLASSIFICATION_RESTRICTED
CRYPT_CLASSIFICATION_CONFIDENTIAL
CRYPT_CLASSIFICATION_SECRET
CRYPT_CLASSIFICATION_TOP_SECRET
Signature PolicyThis CMS attribute is used to identify the policy under which a signature wasgenerated, and is identified by CRYPT_CERTINFO_CMS_-SIGNATUREPOLICYID. The signature policies extension allows a signer toprovide information on the policies governing a signature, and to control the way inwhich a signature can be interpreted. For example it allows you to check that asignature was issued under a policy you feel comfortable with (certain securityprecautions taken, vetting of employees, physical security of the premises, and so on).
The certificate policies attribute is a complex extension that allows for all sorts ofqualifiers and additional modifiers (several of them exist only because this extensionwas a cut & paste of a similar-looking extension that’s used with certificates). Ingeneral you should only use the policyIdentifier attribute in this extension, since theother attributes are difficult to support in user software and are ignored by manyimplementations:
Attribute/Description Type
CRYPT_CERTINFO_CMS_SIGPOLICYID StringThe object identifier that identifies the policy under which this certificatewas issued.
CRYPT_CERTINFO_CMS_SIGPOLICYHASH Binary dataThe hash algorithm identifier and hash of the signature policy, see signaturestandards documents.

Other Certificate Object Extensions250
CRYPT_CERTINFO_CMS_SIGPOLICY_CPSURI StringThe URL for the certificate practice statement (CPS) for this signaturepolicy.
CRYPT_CERTINFO_CMS_SIGPOLICY_ORGANIZATIONCRYPT_CERTINFO_CMS_SIGPOLICY_-
NOTICENUMBERSCRYPT_CERTINFO_CMS_SIGPOLICY_EXPLICITTEXT
StringNumericString
These attributes contain further qualifiers, modifiers, and text informationthat amend the signature policy information. Refer to signature standardsdocuments for more information on these attributes.
S/MIME CapabilitiesThis CMS attribute provides additional information about the capabilities andpreferences of the sender of a message, allowing them to indicate their preferredencryption algorithm(s) and . The attribute is identified by CRYPT_CERTINFO_-CMS_SMIMECAPABILITIES and can contains any of the following values:
Value Description
CRYPT_CERTINFO_CMS_-SMIMECAP_3DES
CRYPT_CERTINFO_CMS_-SMIMECAP_AES
CRYPT_CERTINFO_CMS_-SMIMECAP_CAST128
CRYPT_CERTINFO_CMS_-SMIMECAP_DES
CRYPT_CERTINFO_CMS_-SMIMECAP_IDEA
CRYPT_CERTINFO_CMS_-SMIMECAP_RC2
CRYPT_CERTINFO_CMS_-SMIMECAP_RC5
CRYPT_CERTINFO_CMS_-SMIMECAP_SKIPJACK
The sender supports the use of thesealgorithms. When encoding them,cryptlib will order them by algorithmstrength so that triple DES will bepreferred over Skipjack which will bepreferred over DES.
CRYPT_CERTINFO_CMS_-SMIMECAP_-PREFERSIGNEDDATA
The sender would prefer to be sentsigned data.
CRYPT_CERTINFO_CMS_-SMIMECAP_-CANNOTDECRYPTANY
The sender can’t handle any form of encrypted data.
To indicate that you can support messages encrypted with triple DES and Cast-128,you would use:
cryptSetAttribute( certificate, CRYPT_CERTINFO_CMS_SMIMECAP_3DES,CRYPT_UNUSED );
cryptSetAttribute( certificate, CRYPT_CERTINFO_CMS_SMIMECAP_CAST128,CRYPT_UNUSED );
If you’re using CRYPT_FORMAT_SMIME data, cryptlib will automatically add theappropriate attributes for you so there’s no need to set these attributes yourself.
Signing CertificateThis CMS attribute provides additional information about the certificate used to signa message, is identified by CRYPT_CERTINFO_SIGNINGCERTIFICATE, andcontains the following attributes:

OCSP Attributes 251
Attribute/Description Type
CRYPT_CERTINFO_CMS_SIGNINGCERT_ESSCERTID Binary dataSee S/MIME standards documents.
CRYPT_CERTINFO_CMS_SIGNINGCERT_POLICIES StringThe object identifier for the policy that applies to the signing certificate.
OCSP AttributesLike certificates, OCSP requests and responses can contain extensions that containadditional information relating to the request or response. The ocspNonce extensionis used to prevent replay attacks on OCSP requests and is set automatically bycryptlib. The ocspArchiveCutoff extension indicates the time limit to which anOCSP responder will store revocation information for a certificate. TheocspResponseType extension indicates the type of response you’d like to receive from a responder.
The ocspNonce extension is identified by CRYPT_CERTINFO_OCSP_NONCE andis valid in OCSP requests and responses. The extension has a single binary dataattribute with the same identifier as the extension itself (CRYPT_CERTINFO_-OCSP_NONCE). Since cryptlib sets this value automatically, you can’t set it yourself:
Attribute/Description Type
CRYPT_CERTINFO_OCSP_NONCE Binary dataNonce to prevent replay attacks.
The ocspArchiveCutoff extension is identified by CRYPT_CERTINFO_OCSP_-ARCHIVECUTOFF and is valid in OCSP responses:
Attribute/Description Type
CRYPT_CERTINFO_OCSP_ARCHIVECUTOFF TimeThe date beyond which revocation information will no longer be archived bythe responder.
The ocspResponseType extension is identified by CRYPT_CERTINFO_-OCSP_RESPONSE and is valid in OCSP requests. This extension contains acollection of one or more values that indicate the type of response which is beingrequested from the OCSP responder. The values are:
Value Description
CRYPT_CERTINFO_OCSP_-RESPONSE_OCSP
OCSP response containing onlyrevocation information but no actualcertificate status.
CRYPT_CERTINFO_OCSP_-RESPONSE_RTCS
RTCS response containing OK/not OKcertificate status.
CRYPT_CERTINFO_OCSP_-RESPONSE_RTCS_-EXTENDED
Extended RTCS response containingcertificate status and additionalinformation such as revocationinformation.
In addition to OCSP-specific attributes, OCSP responses can also contain the CRLattributes reasonCode, holdInstructionCode, invalidityDate, and certificateIssuer,which are described in “CRL Extensions” on page 235.

cryptlib User Interface Components252
cryptlib User Interface ComponentsUnder Win32 cryptlib provides user interface functionality via the cryptlib userinterface library cryptui.dll, which contains functions to display certificate objectsand to generate keys and obtain information needed to create or obtain a certificate.The certificate display function takes the contents of a certificate object and displaysthe various fields to the user in a standard resizeable, tabbed dialog, adjusting theformat and contents as required by the certificate object. For example a certificatechain would be displayed as a collection of certificates, where each certificate has itscontents broken down and displayed as described above.
Displaying CertificatesTo display a certificate object, you use cryptUIDisplayCert, passing in the handle ofthe certificate object to display and the handle of the owner window, or NULL if thewindow has no owner:
cryptUIDisplayCert( cryptCertificate, hWnd );
A certificate might look as follows when displayed by cryptUIDisplayCert:
If you set the certificate parameter for cryptUIDisplayCert to CRYPT_UNUSED, itwill allow the user to choose a certificate file to load with a standard file open dialog:
cryptUIDisplayCert( CRYPT_UNUSED, hWnd );
Key/Certificate GenerationThe key generation function is a powerful operation that encompasses much of thefunctionality covered in the chapters on key and certificate management, allowing thegeneration of keys for the full range of public-key algorithms supported by cryptlib,with support for the use of crypto devices such as smart cards and Fortezza cards. In

Key/Certificate Generation 253
addition this function obtains from the user all the information needed to create acertificate or certification request ready for submission to a CA for signing.
The user interface is a standard wizard that takes the user through the steps ofchoosing an algorithm, key size, password, and various identification componentsneeded for a certificate such as a name and email address. The general idea behindusing the wizard is:
create a certificate object to contain the certificate information;add any fixed certificate details if required;call the key generation wizard;make any required changes to the certificate contents;use the returned key to sign the certificate object;store the key and/or certificate in a keyset using the returned
password;
One stage in the cryptUIGenerateKey key generation process might look as follows:
In the simplest case, which involves generating a key with a certificate request readyfor submission to a CA, you’d do the following:
CRYPT_CERTIFICATE cryptCertRequest;CRYPT_CONTEXT cryptContext;password[ CRYPT_MAX_TEXTSIZE + 1 ];
/* Generate the cert request */cryptCreateCert( &cryptCertRequest, CRYPT_UNUSED,
CRYPT_CERTTYPE_CERTREQUEST );
/* Generate the key and fill in the cert request via the keygeneration wizard */
cryptUIGenerateKey( CRYPT_UNUSED, &cryptContext, cryptCertRequest,password, hWnd );
/* Sign the cert request */cryptSignCert( cryptCertRequest, cryptContext );
Once the key has been generated by cryptlib it needs to be saved to a private keykeyset as described in“Certificates and Certificate Management” on page 139. Thekey can also be generated using a smart card or other crypto device, in which case thefirst parameter is the handle to the device object:
cryptUIGenerateKey( cryptDevice, &cryptContext, cryptCertRequest,password, hWnd );
Since the key is in this case generated and securely stored in the crypto device,there’s no need (or indeed possibility) to store it in a keyset.

cryptlib User Interface Components254
The code presented so far has assumed that the user will be filling in all of thecertificate request details such as the country, location, and organisation. If you wantto use pre-set values for any of the certificate object components, you can fill these inbefore calling cryptUIGenerateKey. For example to default to using the companyname Foo Corporation located in Canada with the certificate object you would use:
CRYPT_CERTIFICATE cryptCertRequest;CRYPT_CONTEXT cryptContext;password[ CRYPT_MAX_TEXTSIZE + 1 ];
/* Generate the cert request and fill in pre-set values */cryptCreateCert( &cryptCertRequest, cryptUser,
CRYPT_CERTTYPE_CERTREQUEST );cryptSetAttributeString( cryptCertRequest,
CRYPT_CERTINFO_ORGANISATIONNAME, "Foo Corporation", 15 );cryptSetAttributeString( cryptCertRequest, CRYPT_CERTINFO_COUNTRYNAME,
"CA", 2 );
/* Generate the key and fill in the cert request via the keygeneration wizard using the pre-set organisation and country name*/
cryptUIGenerateKey( CRYPT_UNUSED, &cryptContext, cryptCertRequest,password, hWnd );
/* Sign the cert request */cryptSignCert( cryptCertRequest, cryptContext );
In addition to a certification request it’s possible to use other types of certificate objects like CMP or SCEP requests and standard certificates withcryptUIGenerateKey. For example if you wanted to create a self-signed CAcertificate you would create a CRYPT_CERTTYPE_CERTIFICATE object insteadof a CRYPT_CERTTYPE_CERTREQUEST one and set the CRYPT_CERTINFO_-CA attribute to true to indicate that this is a CA certificate. Once the key has beengenerated and the other certificate details filled in, you can sign the certificate in thesame manner as a cert request and save the result to a cryptlib private key keyset asdescribed in “Certificates” on page 139.

Creating/Destroying Device Objects 255
Encryption Devices and Modulescryptlib’s standard cryptographic functionality is provided through its built-inimplementations of the required algorithms and mechanisms, however in some casesit may be desirable to use external implementations contained in cryptographichardware or portable cryptographic devices like smart cards or PCMCIA cards.Examples of external implementations are:
Cryptographic hardware accelerators
PCMCIA crypto cards such as Fortezza cards
Cryptographic smart cards
Datakeys
PKCS #11 crypto tokens
Dallas iButtons
Software encryption modules
The most common use for an external implementation is one where the hardwareprovides secure key storage and management functions, or where it provides specificalgorithms or performance that may not be available in software.
Using an external implementation involves conceptually plugging in the externalhardware or software alongside the built-in capabilities provided by cryptlib and thencreating cryptlib objects (for example encryption contexts) via the device. Theexternal cryptographic implementation is viewed as a logical device, although the“device” may be just another software implementation.
Creating/Destroying Device ObjectsDevices are accessed as device objects that work in the same general manner as othercryptlib objects. You open a connection to a device using cryptDeviceOpen,specifying the user who is to own the device object or CRYPT_UNUSED for thedefault, normal user, the type of device you want to use and the name of the particulardevice if required or null of there’s only one device type possible. This opens a connection to the device. Once you’ve finished with the device, you use cryptDeviceClose to sever the connection and destroy the device object:
CRYPT_DEVICE cryptDevice;
cryptDeviceOpen( &cryptDevice, cryptUser, deviceType, deviceName );
/* Use the services provided by the device */
cryptDeviceClose( cryptDevice );
The available device types are:
Device Description
CRYPT_DEVICE_FORTEZZA Fortezza PCMCIA card.
CRYPT_DEVICE_PKCS11 PKCS #11 crypto token. These devicesare accessed via their names, see thesection on PKCS #11 devices for moredetails.
Most of the devices are identified implicitly so there’s no need to specify a devicename and you can pass null as the name parameter (the exception is PKCS #11devices, which are covered in more detail further on). Once you’ve finished with the device, you use cryptDeviceClose to deactivate it and destroy the device object. Forexample to work with a Fortezza card you would use:

Encryption Devices and Modules256
CRYPT_DEVICE cryptDevice;
cryptDeviceOpen( &cryptDevice, cryptUser, CRYPT_DEVICE_FORTEZZA,NULL );
/* Use the services provided by the device */
cryptDeviceClose( cryptDevice );
If the device can’tbe accessed, cryptlib will return CRYPT_ERROR_OPEN toindicate that it couldn’t establish a connection and activate the device. Note that the CRYPT_DEVICE is passed to cryptDeviceOpen by reference, as it modifies it whenit activates the device. In all other routines in cryptlib, CRYPT_DEVICE is passedby value.
Some devices have built-in real-time clocks, if cryptlib detects that the device has abuilt-in clock it’ll use the device clock to obtain the time for operations such as creating signed timestamps. Since device clocks can drift over time, cryptlib willperform a consistency check of the device time against the system time and will fallback to using the system time if the device time is too far out of step. In addition thedebug build will throw an exception if it detects a problem with the device time.
Activating and Controlling Cryptographic DevicesOnce cryptlib has established a connection to the device, you may need toauthenticate yourself to it or perform some other control function with it before it willallow itself to be used. You can do this by setting various device attributes,specifying the type of action you want to perform on the device and any additionalinformation that may be required. In the case of user authentication, the additionalinformation will consist of a PIN or password that enables access. Many devicesrecognise two types of access code, a user-level code that provides standard access(for example for encryption or signing) and a supervisor-level code that providesextended access to device control functions, for example key generation and loading.An example of someone who may require supervisor-level access is a site securityofficer (SSO) who can load new keys into a device or re-enable its use after a user hasbeen locked out.
Device InitialisationBy setting the CRYPT_DEVINFO_INITIALISE attribute, you can initialise thedevice. This clears keys and other information in the device and prepares it for use.In devices that support supervisor access you need to supply the initialisation orinitial supervisor PIN when you call this function:
cryptSetAttributeString( cryptDevice, CRYPT_DEVINFO_INITIALISE,initialPin, initialPinLength );
Once you’ve initialised the device, you may need to set the supervisor PIN if thedevice uses a distinct initialisation PIN:
cryptSetAttributeString( cryptDevice,CRYPT_DEVINFO_SET_AUTHENT_SUPERVISOR, supervisorPin,supervisorPinLength );
At this point you can carry out device-specific initialisation actions while the deviceis still in the supervisor state. For example if you’re working with a Fortezza card, you would load the CA root (PAA) certificate at this point, since it can only be loadedwhen the card is first moved into the supervisor-initialised state. Since this is theultimately-trusted certificate in the card, it can only be loaded when the card is in thisstate.
Once you’ve finished performing any optional further initialisation, you need to set a user PIN, unless the device uses a combined user/supervisor role:
cryptSetAttributeString( cryptDevice, CRYPT_DEVINFO_SET_AUTHENT_USER,userPin, userPinLength );
Finally, you’ll need to log on as a user with the PIN you’ve just set if the device doesn’t do this automatically when you initially set the PIN:

Activating and Controlling Cryptographic Devices 257
cryptSetAttributeString( cryptDevice, CRYPT_DEVINFO_AUTHENT_USER,userPin, userPinLength );
The exact initialisation details vary from device to device and driver to driver. Somedevices don’t distinguish between supervisor and user roles and so only have a single role and PIN. Some devices require a PIN to initialise the device and then set thesupervisor PIN using a separate call, others set the supervisor PIN as part of theinitialisation call. Some devices will automatically switch over to user mode whenyou set the user PIN while others require you to explicitly log on in user mode aftersetting the user PIN. Finally, some devices can’t be initialised through PKCS #11 but require proprietary vendor software to initialise them.
When the device is initialised, it usually moves through a number of states goingfrom uninitialised to supervisor initialised to user initialised, with strict restrictions onwhat can be done in each state. For example once a supervisor has set the user PIN,they can usually no longer change it,since the supervisor isn’t supposed to be able to take on the user role and manipulate the device. This is why some devicesautomatically log the supervisor out once the user PIN has been set. In addition somemaintenance operations such as loading initial trusted certificates can only beperformed after the device has been initialised and is still in the initial supervisor-initialised state. Again, this prevents modification of trusted keys after the user hasbeen given access to the device.
A general rule of thumb is that when you go through an initialisation you have toperform all of the steps in sequence without logging out in between, and once you’ve initialised the device you usually can’t change any settings without re-initialising itand starting from scratch. Individual devices may diverge from this in places, but ingeneral you shouldn’t assume that you can go back later and change things once you’ve set them.
User AuthenticationBefore you can use the device you generally need to authenticate yourself to it with aPIN or password. To authenticate yourself as supervisor, set the CRYPT_-DEVINFO_AUTHENT_SUPERVISOR attribute; to authenticate yourself as user, setthe CRYPT_DEVINFO_AUTHENT_USER attribute. For example to authenticateyourself to the device using a PIN as a normal user you would use:
cryptSetAttributeString( cryptDevice, CRYPT_DEVINFO_AUTHENT_USER, pin,pinLength );
To authenticate yourself to the device using a PIN for supervisor-level access youwould use:
cryptSetAttributeString( cryptDevice,CRYPT_DEVINFO_AUTHENT_SUPERVISOR, pin, pinLength );
If the PIN or password that you’ve supplied is incorrect, cryptlib will return CRYPT_ERROR_WRONGKEY. If the device doesn’t support this type of access, it will return CRYPT_ERROR_PARAM2. Note that, as is traditional for most PIN andpassword checking systems, some devices may only allow a limited number of accessattempts before locking out the user, requiring CRYPT_DEVINFO_AUTHENT_-SUPERVISOR access to re-enable user access.
Device ZeroisationThe CRYPT_DEVINFO_ZEROISE attribute works much like CRYPT_DEVINFO_-INITIALISE except that its specific goal is to clear any sensitive information such asencryption keys from the device (it’s often the same as device initialisation, but sometimes will only specifically erase the keys and in some cases may even disablethe device). In some devices you may need to supply a zeroisation PIN or the initialsupervisor PIN when you call this function, otherwise you should set the data value toan empty string:
cryptSetAttributeString( cryptDevice, CRYPT_DEVINFO_ZEROISE, "", 0 );

Encryption Devices and Modules258
Working with Device ObjectsWith the device activated and the user authenticated, you can use its cryptographiccapabilities in encryption contexts as if it were a standard part of cryptlib. In order tospecify the use of the cryptographic device rather than cryptlib’s built-infunctionality, cryptlib provides the cryptDeviceCreateContext andcryptDeviceQueryCapability functions that are identical to cryptCreateContextand cryptQueryCapability but take as an additional argument the handle to thedevice. For example to create a standard RSA encryption context you would use:
cryptCreateContext( &cryptContext, cryptUser, CRYPT_ALGO_RSA );
To create an RSA encryption context using an external cryptographic device youwould use:
cryptDeviceCreateContext( cryptDevice, &cryptContext,CRYPT_ALGO_RSA );
After this you can use the encryption context as usual, both will function in anidentical manner with cryptlib keeping track of whether the implementation is via thebuilt-in functionality or the external device. In this way the use of any form ofexternal hardware for encryption is completely transparent after the initial step ofactivating and initialising the hardware.
Note that, unlike the other functions that create cryptlib objects,cryptDeviceCreateContext doesn’t require you to specify the identity of the user who is to own the context which is being created. This is because the device isalready associated with a user, so there’s no need to specify this again when creatingan object within it.
For an example of how you might utilise external hardware, let’s use a generic DES/triple DES hardware accelerator (identified by the label “DES/3DES accelerator”) accessed as a PKS #11 device. Touse the triple DES hardware insteadof cryptlib’s built-in triple DES implementation you would use:
CRYPT_DEVICE cryptDevice;CRYPT_CONTEXT cryptContext;
/* Activate the DES hardware and create a context in it */cryptDeviceOpen( &cryptDevice, cryptUser, CRYPT_DEVICE_PKCS11,
"DES/3DES accelerator" );cryptDeviceCreateContext( cryptDevice, &cryptContext,
CRYPT_ALGO_3DES );
/* Generate a key in the DES hardware */cryptGenerateKey( cryptContext );
/* Encrypt data using the hardware */cryptEncrypt( cryptContext, data, dataLength );
/* Destroy the context and shut down the DES hardware */cryptDestroyContext( cryptContext );cryptDeviceClose( cryptDevice );
After the context has been created with cryptDeviceCreateContext, the use of thecontext is identical to a standard encryption context. There is no other (perceptual)difference between the use of a built-in implementation and an externalimplementation.
Key Storage in Crypto DevicesWhen you create a normal public-key context and load or generate a key into it, thecontext goes away when you destroy it or shut down cryptlib. If the context iscreated in a crypto device, the public and private keys from the context don’t go away when the context is destroyed but are stored inside the device for later use. You canlater recreate the context using the key stored in the device by treating the device as akeyset containing a stored key. For example to create an RSA key in a device youwould use:

Working with Device Objects 259
CRYPT_CONTEXT privKeyContext;
/* Create the RSA context, set a label for the key, and generate a keyinto it */
cryptCreateContext( &privKeyContext, cryptUser, CRYPT_ALGO_RSA );cryptSetAttributeString( privKeyContext, CRYPT_CTXINFO_LABEL, label,
labelLength );cryptGenerateKey( privKeyContext );
/* Destroy the context */cryptDestroyContext( privKeyContext );
Although the context has been destroyed, the key itself is still held inside the device.To recreate the context at a later date, you can treat the device as if it were a keyset,using the label as the key ID:
CRYPT_CONTEXT privKeyContext;
cryptGetPrivateKey( cryptDevice, &privKeyContext, CRYPT_KEYID_NAME,label, NULL );
Since you’ve already authenticated yourself to the device, you don’t need to specify a password.
Key storage is crypto devices has additional special considerations that are covered in“Considerations when Working with Devices” on page 260. The most notable ofthese is that many devices don’t allow direct key loads into devices, and virtually alldon’t allow them to be extracted, so that the key has to be generated inside the device (as the example code given earlier shows) and can’t leave the device except (for conventional encryption keys) in encrypted form.
Querying Device InformationCrypto devices come in a wide range of configurations and with varying capabilities,which can include facilities that bypass the normal device-handling operationsdescribed here. For example a device may have a built-in keypad or otherauthentication mechanism that bypasses the need to provide a PIN or password fromsoftware. In this case it’s not necessary to log in to the device because the login process is handled via an external mechanism. You can determine whether a deviceis already logged in, or doesn’t require a login, by reading the CRYPT_DEVINFO_-LOGGEDIN attribute. If this is set to true (any nonzero value) then the device isalready logged in, otherwise you need to provide a PIN or password to log in to thedevice:
int deviceLoggedIn;
/* Check whether we're logged in to the device and if not, log in */cryptGetAttribute( cryptDevice, CRYPT_DEVINFO_LOGGEDIN,
&deviceLoggedIn );if( !deviceLoggedIn )
/* Get PIN from user and log in */;
Since some devices represent removable tokens such as smartcards, it’s possible for the user to unplug one token and plug in a new one in its place. To help youdetermine which token was plugged in at the time it was accessed withcryptDeviceOpen, you can read the device’s CRYPT_DEVINFO_LABEL attribute, which returns the label or name of the token which is accessible via the device:
char label[ CRYPT_MAX_TEXTSIZE ];int labelLength;
cryptGetAttributeString( cryptDevice, CRYPT_DEVINFO_LABEL, label,&labelLength );
label[ labelLength ] = '\0';
Once you’ve read the label you can use it to determine whether the required cryptotoken is available via the device.
Some readers and device interfaces aren’t very good at detecting the removal of a crypto token, or the removal of a token and insertion of a new one. For example,many smart card readers only have a simple sensor to detect whether there’s

Encryption Devices and Modules260
something present in the reader, but can’t tell whether what’s present is the original smart card or a piece of cardboard. In addition some low-level reader drivers can’t report the presence (or absence) of a card to the higher-level code. cryptlib will try tocontact the crypto token to check whether it’s still present and active, but can only go as far as the underlying hardware and software will let it.
Considerations when Working with DevicesThere are several considerations to be taken into account when using crypto devices,the major one being that requiring that crypto hardware be present in a systemautomatically limits the flexibility of your application. There are some cases wherethe use of certain types of hardware (for example Fortezza cards) may be required,but in many instances the reliance on specialised hardware can be a drawback.
The use of crypto devices can also complicate key management, since keys generatedor loaded into the device usually can’t be extracted again afterwards. This is a security feature that makes external access to the key impossible, and works in thesame way as cryptlib’s own storing of keys inside it’s security perimeter. This meansthat if you have a crypto device that supports (say) DES and RSA encryption, then toexport an encrypted DES key from a context stored in the device, you need to use anRSA context also stored inside the device, since a context located outside the devicewon’t have access to the DES context’s key.
Another consideration that needs to be taken into account is the data processing speedof the device. In most cases it’s preferable to use cryptlib’s built-in implementationof an algorithm rather than the one provided by the device because the built-inimplementation will be much faster. For example when hashing data prior to signingit, cryptlib’s built-in hashing capabilities should be used in preference to any providedby the device, since cryptlib can process data at the full memory bandwidth using aprocessor clocked at several gigahertz while a crypto device has to move data over aslow I/O bus to be processed by a processor typically clocked at tens of megahertz oreven a few megahertz. In addition whenencrypting or decrypting data it’s generally preferable to use cryptlib’s high-speed encryption capabilities, particularly withdevices such as smart cards and to a lesser extent PCMCIA cards, which are severelylimited by their slow I/O throughput. As a general rule of thumb, if your systemprocessor is running at 500 MHz or higher then it’s always faster to perform the crypto in software rather than using crypto hardware. Because of this it’s usual to only perform private-key operations in the crypto device.
A final consideration concerns the limitations of the encryption engine in the deviceitself. Although cryptlib provides a great deal of flexibility in its software cryptoimplementations, most hardware devices have only a single encryption enginethrough which all data must pass (possibly augmented by the ability to store multipleencryption keys in the device). What this means is that each time a different key isused, it has to be loaded into the device’s encryption engine before it can be used toencrypt or decrypt data, a potentially time-consuming process. For example if twoencryption contexts are created via a device and both are used alternately to encryptdata, the key corresponding to each context has to be loaded by the device into itsencryption engine before the encryption can begin (while most devices can storemultiple keys, few can keep more than one at a time ready for use in their encryptionengine).
As a result of this, although cryptlib will allow you to create as many contexts via adevice as the hardware allows, it’s generally not a good idea to have more than a single context of each type in use at any one time. For example you could have asingle conventional encryption context (using the device’s crypto engine), a single digital signature context (using the device’s public-key engine), and a single hashcontext (using the device’s CPU or hash engine, or preferably cryptlib itself) active, but not two conventional encryption contexts (which would have to share theencryption engine) or two digital signature contexts (which would have to share thepublic-key engine).

Fortezza Cards 261
Fortezza Cardscryptlib provides complete Fortezza card management capabilities, allowing you toinitialise and program a card, generate or load keys into it, add certificates for thegenerated/loaded keys, update and change PINs, and perform other managementfunctions. This provides full certificate authority workstation (CAW) capabilities.
The steps involved in programming a blank Fortezza card are given in “Activatingand Controlling Cryptographic Devices” on page 256. Once the card is in the SSOinitialised state (after you’ve set the SSO PIN), you should install the CA root (PAA) certificate in the card, since this operation is only permitted in the SSO initialisedstate. The use of PAA certificates is somewhat specific to the use of Fortezza’s by the US Government, you may want to simply load a dummy certificate at this pointand use standard CA certificates with any keys that you’ll be storing on the card.
Note that the Fortezza control firmware requires that all of the steps in theinitialisation/programming process be performed in a continuous sequence ofoperations, without removing the card or closing the device. If you interrupt theprocess halfway through, you’ll need to start again.
After the above programming process has completed, you can generate further keysinto the device, load certificates, and so on. This provides the same functionality as aFortezza CAW.
PKCS #11 DevicesAlthough most of the devices that cryptlib interfaces with have specialised, single-purpose interfaces, PKCS #11 provides a general-purpose interface that can be usedwith a wide selection of parameters and in a variety of ways. The following sectioncovers the installation of PKCS #11 modules and documents the way in whichcryptlib interfaces to PKCS #11 modules.
Installing New PKCS #11 ModulesYou can install new PKCS #11 modules by setting the names of the drivers incryptlib’s configuration database. The module names are specified using the configuration options CRYPT_OPTION_DEVICE_PKCS11_DVR01 ...CRYPT_OPTION_DEVICE_PKCS11_DVR05, cryptlib will step through the list andload each module in turn. Once you’ve specified the module name, you need tocommit the changes in order for cryptlib to use them the next time it’s loaded. For example to use the Gemplus GemSAFE driver, you would use:
cryptSetAttributeString( CRYPT_UNUSED,CRYPT_OPTION_DEVICE_PKCS11_DVR01, "w32pk2ig.dll", 12 );
cryptSetAttribute( CRYPT_UNUSED, CRYPT_OPTION_CONFIGCHANGED, FALSE );
The first line of code updates the configuration information to point to the PKCS #11driver DLL, and the second line makes the changes permanent by flushing theconfiguration information to disk.
Since the drivers are dynamically loaded on start-up by cryptlib, specifying a driveras a configuration option won’t immediately make it available for use. To make the driver available, you have to restart cryptlib or the application using it so that cryptlibcan load the driver on start-up, whereupon cryptlib will load the specified modulesand make them available as CRYPT_DEVICE_PKCS11 devices. When the moduleis loaded, cryptlib will query each module for the device name, this is the name thatyou should use to access it using cryptDeviceOpen.
Some devices don’t implement all of their crypto functionality in the device but instead emulate it in software on the host PC. If you have a PKCS #11 module thatdoes then it’s better to use cryptlib’s native crypto capabilities because they’ll be more efficient than those in the driver and possibly more secure as well, depending onhow carefully the driver has been written. In order to use only the real devicecapabilities (rather than those emulated on the host PC), you can set the configurationoption CRYPT_OPTION_DEVICE_PKCS11_HARDWAREONLY to true (anynonzero value) as explained in “Working with Configuration Options” on page 263.

Encryption Devices and Modules262
If this option is set, cryptlib will only use capabilities that are provided by the cryptotoken any not any that are emulated in software.
Accessing PKCS #11 DevicesPKCS #11 devices are identified by the device name, for example the Litronix PKCS#11driver identifies itself as “Litronix CryptOki Interface” so you would create a device object of this type with:
CRYPT_DEVICE cryptDevice;
cryptDeviceOpen( &cryptDevice, cryptUser, CRYPT_DEVICE_PKCS11,"Litronix CryptOki Interface" );
If you don’t know the device name or there’s only one device present, you can use the special device name [Autodetect] to have cryptlib auto-detect the device for you.If there’s more than one device present, cryptlib will use the first one it finds:
CRYPT_DEVICE cryptDevice;
cryptDeviceOpen( &cryptDevice, cryptUser, CRYPT_DEVICE_PKCS11,"[Autodetect]" );
Some PKCS #11 devices allow the use of multiple physical or logical crypto tokensas part of a single device, for example a smart card reader device might have twoslots that can each contain a smart card, or the reader itself might function as a cryptotoken alongside the smart card which is inserted into it. To identify a particular tokenin a device, you can specify its name after the device name, separated with a doublecolon. For example if the Litronix reader given in the example above contained twosmart cards, you would access the one called “Signing smart card” with:
CRYPT_DEVICE cryptDevice;
cryptDeviceOpen( &cryptDevice, cryptUser, CRYPT_DEVICE_PKCS11,"Litronix CryptOki Interface::Signing smart card " );
Some PKCS #11 devices and drivers have special-case requirements that need to betaken into account when you use them. For example some removeable tokens mayrequire special handling for token changes if the reader doesn’t support automatic insertion detection, some drivers may have problems if the application forks (underUnix), and so on. You should consult the vendor documentation for the crypto deviceand drivers that you’ll be using to check for any special requirements that you need tomeet when you use the device.
CryptoAPIThe following section is intended for forwards-compatibility with future versions ofcryptlib. Although some portions of this interface may be implemented, they shouldnot be relied upon in applications.
The CryptoAPI interface provides access to the encryption, signature, and hashingcapabilities of the underlying CryptoAPI implementation. All of these facilities arealready provided by cryptlib, so it’s primary purpose is to provideaccess to PKCS#12/PFX private keys and certificates held in Windows’ internal (proprietary) key store, and by extension keys imported to it from other applications. Using theCryptoAPI interface provides full access to all keys generated by and stored insideWindows, while still allowing the use of all standard cryptlib functionality andfacilities.
Since CryptoAPI is a software implementation managed entirely by the hostoperating system, there is no need to perform any initialisation, user authentication, orother operations like zeroisation, when using a CryptoAPI device. Initialisation wasperformed when the operating system was installed, and authentication is performedwhen the user logs in or the dæmon or service that uses the keys is activated. Thismeans that using the CryptoAPI device consists of no more than creating the deviceobject and then utilising it in subsequent crypto operations. All keys and certificatesthat are accessed through the device will be ones stored in CryptoAPI, giving cryptlibfull access to the host operating system’s keys and crypto capabilities.

Queryingcryptlib’sCapabilities 263
Miscellaneous TopicsThis chapter covers various miscellaneous topics not covered in other chapters suchas how to obtain information about the encryption capabilities provided by cryptlib,how to obtain information about a particular encryption context, and how to ensurethat your code takes advantage of new encryption capabilities provided with futureversions of cryptlib.
Querying cryptlib’s Capabilitiescryptlib provides two functions to query encryption capabilities, one of which returnsinformation about a given algorithm and mode and the other which returnsinformation on the algorithm and mode used in an encryption context. In both casesthe information returned is in the form of a CRYPT_QUERY_INFO structure, whichis described in “CRYPT_QUERY_INFO Structure” on page 301.
You can interrogate cryptlib about the details of a particular encryption algorithm andmode using cryptQueryCapability:
CRYPT_QUERY_INFO cryptQueryInfo;
cryptQueryCapability( algorithm, &cryptQueryInfo );
If you just want to check whether a particular algorithm is available (withoutobtaining further information on them), you can set the query information parameterto null:
cryptQueryCapability( algorithm, NULL );
This will simply return a status value without trying to return algorithm information.
Working with Configuration OptionsIn order to allow extensive control over its security and operational parameters,cryptlib provides a configuration database that can be used to tune its operation fordifferent environments using portable configuration files that function similarly toUnix .rc files. This allows cryptlib to be customised on a per-user basis (for exampleit can remember which key the user usually uses to sign messages and offer to usethis key by default), allows a system administrator or manager to set a consistentsecurity policy (for example mandating the use of 1024-or 2048 bit public keys on acompany-wide basis instead of unsafe 512-bit keys), and provides information on theuse of optional features such as smart card readers, encryption hardware, andcryptographically strong random number generators. The configuration options thataffect encryption parameter settings are automatically applied by cryptlib tooperations such as key generation and data encryption and signing.
The configuration database can be used to tune the way cryptlib works, with optionsranging from algorithms and key sizes through to preferred public/private keys to usefor signing and encryption and what to do when certain unusual conditions areencountered. The available options are listed below, with the data type associatedwith each value being either a boolean (B), numeric (N), or string (S) value:
Value Type Description
CRYPT_OPTION_CERT_-SIGNUNRECOGNISED-ATTRIBUTES
B Whether to sign a certificatecontaining unrecognisedattributes. If this option is set tofalse, the attributes will be omittedfrom the certificate when it issigned. Default = false.

Miscellaneous Topics264
Value Type DescriptionCRYPT_OPTION_CERT_-
COMPLIANCELEVELN The amount of checking for
standards-compliance to apply tocertificates, certificate requests,and other certificate objects.Default = CRYPT_-COMPLIANCELEVEL_-STANDARD,
CRYPT_OPTION_CERT_-REQUIREPOLICY
B Whether to require matchingcertificate policies for certificatesin a cert chain once a CA sets apolicy. Default = true.
CRYPT_OPTION_CERT_-UPDATEINTERVAL
N The update interval in days forCRLs. Default = 90.
CRYPT_OPTION_CERT_-VALIDITY
N The validity period in days forcertificates. Default = 365.
CRYPT_OPTION_CMS_-DEFAULTATTRIBUTES
CRYPT_OPTION_SMIME_-DEFAULTATTRIBUTES
B Whether to add the default CMS/S/MIME attributes to signatures(these are alternative names forthe same option, since S/MIMEuses CMS as the underlyingformat). Default = true.
CRYPT_OPTION_-CONFIGCHANGED
B Whether any configurationoptions have been changed fromtheir original settings (see notebelow).
CRYPT_OPTION_DEVICE_-PKCS11_DVR01...
CRYPT_OPTION_DEVICE_-PKCS11_DVR05
S The module names of any PKCS#11 drivers that cryptlib shouldload on start-up.
CRYPT_OPTION_DEVICE_-PKCS11_HARDWAREONLY
B Whether cryptlib should use onlythe hardware capabilities of thedevice and not capabilitiesemulated in software on the hostPC by the PKCS #11 driver.Default = false.
CRYPT_OPTION_ENCR_ALGO N Encryption algorithm given as aconventional-encryptionCRYPT_ALGO_TYPE. Default= CRYPT_ALGO_3DES.
CRYPT_OPTION_ENCR_HASH N Hash algorithm given as a hashCRYPT_ALGO_TYPE. Default= CRYPT_ALGO_SHA.
CRYPT_OPTION_ENCR_HASH N MAC algorithm given as a MACCRYPT_ALGO_TYPE. Default= CRYPT_ALGO_HMAC_SHA.
CRYPT_OPTION_INFO_-COPYRIGHT
S cryptlib copyright notice.

Working with Configuration Options 265
Value Type DescriptionCRYPT_OPTION_INFO_-
DESCRIPTIONS cryptlib description.
CRYPT_OPTION_INFO_-MAJORVERSION
CRYPT_OPTION_INFO_-MINORVERSION
CRYPT_OPTION_INFO_-STEPPING
N cryptlib major and minor versionnumbers and stepping number.
CRYPT_OPTION_KEYING_ALGO N Key processing algorithm given asa hash CRYPT_ALGO_TYPE.Default = CRYPT_ALGO_SHA.
CRYPT_OPTION_KEYING_-ITERATIONS
N Number of times to iterate thekey-processing algorithm. Notethat key processing when used forprivate-key encryption uses amuch higher value than thisgeneral-purpose value. Default =500.
CRYPT_OPTION_KEYS_LDAP_-CACERTNAME
CRYPT_OPTION_KEYS_LDAP_-CERTNAME
CRYPT_OPTION_KEYS_LDAP_-CRLNAME
CRYPT_OPTION_KEYS_LDAP_-EMAILNAME
CRYPT_OPTION_KEYS_LDAP_-FILTER
CRYPT_OPTION_KEYS_LDAP_-OBJECTCLASS
S The names of various LDAPattributes and object classes usedfor certificate storage/retrieval.
CRYPT_OPTION_MISC_-ASYNCINIT
B Whether to bind in various driversasynchronously when cryptlib isinitialised. This performs theinitialisation in a backgroundthread rather than blocking onstart-up until the initialisation hascompleted. Default = true.
CRYPT_OPTION_MISC_-SIDECHANNELPROTECTION
B Whether to perform additionaloperations that add protectionagainst some obscure (and ratherunlikely) side-channel attacks onprivate keys. Enabling this optionwill slow down all private-keyoperations by up to 10%. Default= false.
CRYPT_OPTION_NET_HTTP_-PROXY
S HTTP proxy used for accessingweb pages. Default = none.
CRYPT_OPTION_NET_SOCKS_-SERVER
CRYPT_OPTION_NET_SOCKS_-USERNAME
S Socks server and user name usedfor Internet access. Default =none.

Miscellaneous Topics266
Value Type DescriptionCRYPT_OPTION_NET_-
CONNECTTIMEOUTCRYPT_OPTION_NET_-
READTIMEOUTCRYPT_OPTION_NET_-
WRITETIMEOUT
N Timeout in seconds whenconnecting to a remote server andwhen transferring data after aconnection has been established.Default = 30 seconds for theconnect timeout, 0 seconds for theread timeout, 2 seconds for thewrite timeout.
CRYPT_OPTION_PKC_ALGO N Public-key encryption algorithmgiven as a public-keyCRYPT_ALGO_TYPE. Default= CRYPT_ALGO_RSA.
CRYPT_OPTION_PKC_KEYSIZE N Public-key encryption key size inbytes. Default = 128 (1024 bits).
CRYPT_OPTION_SELFTESTOK N The current algorithm self-teststatus (see note below).
CRYPT_OPTION_SIG_ALGO N Signature algorithm given as apublic-key encryptionCRYPT_ALGO_TYPE. Default= CRYPT_ALGO_RSA.
CRYPT_OPTION_SIG_KEYSIZE N Signature key size in bytes.Default = 128 (1024 bits).
CRYPT_OPTION_CONFIGCHANGED has special significance in that it containsthe current state of the configuration options. If this value is FALSE, the current in-memory configuration options are still set to the same value that they had whencryptlib was started. If set to TRUE, one or more options have been changed andthey no longer match the values saved in permanent storage such as a hard disk orflash memory. Writing this value back to FALSE forces the current in-memoryvalues to be committed to permanent storage so that the two match up again.
CRYPT_OPTION_SELFTEST also has special significance, controlling cryptlib’s built-in self-test functionality. If you want to perform a self-test of any cryptlibalgorithm, you can set this attribute to the algorithm that you want to test. If the self-test succeeds, cryptlib will return an OK status, otherwise it’ll return a failure error code. For example to perform the internal self-test of the DSA implementation you’d use:
cryptSetAttribute( cryptEnvelope, CRYPT_OPTION_SELFTESTOK,CRYPT_ALGO_DSA );
To test all of the implementations, you can set the attribute to CRYPT_USE_-DEFAULT. If one (or more) of the algorithm self-tests fails, you can use the per-algorithm test to determine which algorithm(s) failed the self-test.
In addition to these manually-triggered self-tests, cryptlib automatically tests its built-in SHA-1 and DES/3DES implementation and random number generator every timeit starts, and won’t start if there’s a problem with any of them.
Querying/Setting Configuration OptionsYou can manipulate the configuration options by getting or setting the appropriateattribute values. Since these apply to all of cryptlib rather than to any specific object,you should set the object handle to CRYPT_UNUSED. For example to query thecurrent default encryption algorithm you would use:
CRYPT_ALGO_TYPE cryptAlgo;
cryptGetAttribute( CRYPT_UNUSED, CRYPT_OPTION_ENCR_ALGO, &cryptAlgo );

Obtaining Information About Cryptlib 267
To set the default encryption algorithm to CAST-128, you would use:
cryptSetAttribute( CRYPT_UNUSED, CRYPT_OPTION_ENCR_ALGO,CRYPT_ALGO_CAST );
Some configuration options which contain values that apply to individual objects canalso be set for that one object type rather than as a global setting. These optionsinclude timeouts for session objects, key size and key setup parameters for encryptioncontexts, and encryption and hash algorithms for envelopes. For example to set theencryption algorithm to be used when enveloping data in one particular envelope toIDEA, you would use:
cryptSetAttribute( cryptEnvelope, CRYPT_OPTION_ENCR_ALGO,CRYPT_ALGO_IDEA );
A few of the options are used internally by cryptlib and are read-only (this isindicated in the options’ description). These will return CRYPT_ERROR_-PERMISSION if you try to modify them to indicate that you don’t have permission to change this option.
Saving Configuration OptionsThe changes you make to the configuration options only last while your program isrunning or while cryptlib is loaded. In order to make the changes permanent, you cansave them to a permanent storage medium such as a hard disk by setting theCRYPT_OPTION_CONFIGCHANGED option to FALSE, indicating that the in-memory settings will be synced to disk so that the two match up. cryptlib willautomatically reload the saved options when it starts.
The location of the saved configuration options depend on the system type on whichcryptlib is running:
System Location
BeOSUnix
$(HOME)/.cryptlib/cryptlib.p15
DOSOS/2
./cryptlib.p15
MVSVM/CMS
CRYPTLIB P15
Tandem $system.system.cryptlib
Windows 3.x Windows/cryptlib/cryptlib.p15
Windows 95/-98/ME
Windows NT/-2000/XP
Windows CE
\Documents and Settings\user_name\ApplicationData\cryptlib\cryptlib.p15 or \Windows\AllUsers\Application Data\cryptlib\cryptlib.p15 or\Windows\Profiles\user_name\ApplicationData\cryptlib.p15 (this varies depending on the OS typeand version, and is determined by the Windowsapplication data CSIDL)
Where the operating system supports it, cryptlib will set the security options on theconfiguration information so that only the person who created it (and, usually, thesystem administrator) can access it. For example under Unix the file access bits areset to allow only the file owner (and, by extension, the superuser) to access the file,and under Windows NT/2000/XP with NTFS the file ACLs are set so that only theuser who owns it can access or change it.
Obtaining Information About Cryptlibcryptlib provides a number of read-only configuration options that you can use toobtain information about the version of cryptlib that you’re working with.
These options are:

Miscellaneous Topics268
Value Type Description
CRYPT_OPTION_INFO_-MAJORVERSION
CRYPT_OPTION_INFO_-MINORVERSION
CRYPT_OPTION_INFO_-STEPPING
N The cryptlib major and minorversion numbers and releasestepping. For cryptlib 3.1 themajor version number is 3 and theminor version number is 1. Forbeta release 2 the stepping is 2.
CRYPT_OPTION_INFO_-DESCRIPTION
S A text string containing adescription of cryptlib.
CRYPT_OPTION_INFO_-COPYRIGHT
S The cryptlib copyright notice.
Random NumbersSeveral cryptlib functions require access to a source of cryptographically strongrandom numbers. The random-data-gathering operation is controlled with thecryptAddRandom function, which can be used to either inject your own randominformation into the internal randomness pool or to tell cryptlib to poll the system forrandom information. To add your own random data (such as keystroke timings whenthe user enters a password) to the pool, use:
cryptAddRandom( buffer, bufferLength );
In addition to user-supplied and built-in randomness sources, cryptlib will check for a/dev/random, EGD, or PRNGD-style style randomness driver (which continuallyaccumulates random data from the system) and will use this as a source ofrandomness. If running on a system with a hardware random number source(provided by some CPUs and chipsets), cryptlib will also make use of the hardwarerandom number source. cryptlib can also make use of additional entropy seedinginformation on embedded systems without inherent entropy sources, see “Porting toDevices without Randomness/Entropy Sources” on page 281 for more information.
cryptlib includes in its built-in generator an ANSI X9.17 / ANSI X9.31 generator forFIPS 140 certification purposes. Full technical details of the generator are given inthe reference in “Recommended Reading” on page 15.
Gathering Random Informationcryptlib can also gather its own random data by polling the system for randominformation. There are two polling methods you can use, a fast poll that returnsimmediately and retrieves a moderate amount of random information, and a slow pollthat may take some time but that retrieves much larger amounts of randominformation. A fast poll is performed with:
cryptAddRandom( NULL, CRYPT_RANDOM_FASTPOLL );
In general you should sprinkle these throughout your code to build up the amount ofrandomness in the pool.
A slow poll is performed with:
cryptAddRandom( NULL, CRYPT_RANDOM_SLOWPOLL );
The effect of this call varies depending on the operating system. Under DOS the callreturns immediately (see below). Under Windows 3.x the call will get all theinformation it can in about a second, then return (there is usually more informationpresent in the system than can be obtained in a second). Under BeOS, OS/2, and onthe Macintosh, the call will get all the information it can and then return. UnderUnix, Windows 95/98/ME, Windows NT/2000/XP, and Windows CE the call willspawn one or more separate processes or threads to perform the polling and willreturn immediately while the poll continues in the background.
Before the first use of a high-level function such as envelopes, secure sessions, orcalling cryptGenerateKey or cryptExportKey you must perform at least one slow

Working with Newer Versions of cryptlib 269
poll (or, in some cases, several fast polls— see below) in order to accumulate enoughrandom information for use by cryptlib. On most systems cryptlib will perform anon-blocking randomness poll, so you can usually do this by calling the slow pollroutine when your program starts. This ensures that the random information willhave accumulated by the time you need it:
/* Program start-up */
cryptAddRandom( NULL, CRYPT_RANDOM_SLOWPOLL );
/* Other code, slow poll runs in the background */
cryptGenerateKey( cryptContext );
If you forget to perform a slow poll beforehand, the high-level function will blockuntil the slow poll completes. The fact that the call is blocking is usually fairlyobvious, because your program will stop for the duration of the randomness poll. Ifno reliable random data is available then the high-level function that requires it willreturn the error CRYPT_ERROR_RANDOM.
Obtaining Random NumbersYou can obtain random data from cryptlib by using an encryption context with analgorithm that produces byte-oriented output (for example a stream cipher or a blockcipher employed in a stream mode like CFB or OFB). To obtain random data, createa context, generate a key into it, and use the context to generate the required quantityof output by encrypting the contents of a buffer. Since the encryption output israndom, it doesn’t matter what the buffer initially contains. For example you can use the RC4 algorithm (a stream cipher) to generate random data with:
CRYPT_CONTEXT cryptContext;
cryptCreateContext( &cryptContext, cryptUser, CRYPT_ALGO_RC4 );cryptGenerateKey( cryptContext )cryptEncrypt( cryptContext, randomDataBuffer, randomDataLength );cryptDestroyContext( cryptContext );
This will fill the data buffer with the required number of random bytes.
Working with Newer Versions of cryptlibYour software can automatically support new encryption algorithms as they are addedto cryptlib if you check for the range of supported algorithms instead of hard-codingin the values that existed when you wrote the program. In order to support this,cryptlib predefines the values CRYPT_ALGO_FIRST_CONVENTIONAL andCRYPT_ALGO_LAST_CONVENTIONAL for the first and last possibleconventional encryption algorithms, CRYPT_ALGO_FIRST_PKC andCRYPT_ALGO_LAST_PKC for the first and last possible public-key encryptionalgorithms, CRYPT_ALGO_FIRST_HASH and CRYPT_ALGO_LAST_HASH forthe first and last possible hash algorithms, and CRYPT_ALGO_FIRST_MAC andCRYPT_ALGO_LAST_MAC for the first and last possible MAC algorithms. Bychecking each possible algorithm value within this range usingcryptQueryCapability, your software can automatically incorporate any newalgorithms as they are added. For example to scan for all available conventionalencryption algorithms you would use:
CRYPT_ALGO_TYPE cryptAlgo;
for( cryptAlgo = CRYPT_ALGO_FIRST_CONVENTIONAL;cryptAlgo <= CRYPT_ALGO_LAST_CONVENTIONAL;cryptAlgo++ )
if( cryptStatusOK( cryptQueryCapability( cryptAlgo, NULL ) )/* Perform action using algorithm */;
The action you would perform would typically be building a list of availablealgorithms and allowing the user to choose the one they preferred. The same can bedone for the public-key, hash, and MAC algorithms.

Miscellaneous Topics270
If your code follows these guidelines, it will automatically handle any new encryptionalgorithms that are added in newer versions of cryptlib. If you are using the sharedlibrary or DLL form of cryptlib, your software’s encryption capabilities will be automatically upgraded every time cryptlib is upgraded.

Working with Newer Versions of cryptlib 271
Error HandlingEach function in cryptlib performs extensive parameter and error checking (althoughmonitoring of error codes has been omitted in the code samples for readability). Inaddition each of the built-in encryption algorithms can perform a self-test procedurethat checks the implementation using standard test vectors and methods given withthe algorithm specification (typically FIPS publications, ANSI or IETF standards, orstandard reference implementations). This self-test is used to verify that eachencryption algorithm is performing as required.
The macros cryptStatusError() and cryptStatusOK() can be used todetermine whether a return value denotes an error condition, for example:
CRYPT_CONTEXT cryptContext;int status;
status = cryptCreateContext( &cryptContext, cryptUser,CRYPT_ALGO_IDEA );
if( cryptStatusError( status ) )/* Perform error processing */;
The error codes that can be returned are grouped into a number of classes that coverareas such as function parameter errors, resource errors, and data access errors.
The first group contains a single member, the “no error” value:
Error code Description
CRYPT_OK No error.
The next group contains parameter error codes that identify erroneous parameterspassed to cryptlib functions:
Error code Description
CRYPT_ERROR_-PARAM1…
CRYPT_ERROR_-PARAM7
There is a problem with a parameter passed to acryptlib function. The exact code depends on theparameter in error.
The next group contains resource-related errors such as a certain resource not beingavailable or initialised:
Error code Description
CRYPT_ERROR_-FAILED
The operation, for example a public-key encryption ordecryption, failed.
CRYPT_ERROR_-INITED
The object or attribute that you have tried to initialisehas already been initialised previously.
CRYPT_ERROR_-MEMORY
There is not enough memory available to perform thisoperation.
CRYPT_NOSECURE cryptlib cannot perform an operation at the requestedsecurity level (for example allocated pages can’t be locked into memory to prevent them from beingswapped to disk, or an LDAP connection can’t be established using SSL).
CRYPT_ERROR_-NOTINITED
The object or attribute that you have tried to use hasn’t been initialised yet, or a resource which is requiredisn’t available.
CRYPT_ERROR_-RANDOM
Not enough random data is available for cryptlib toperform the requested operation.

Error Handling272
The next group contains cryptlib security violations such as an attempt to use thewrong object for an operation or to use an object for which you don’t have access permission:
Error code Description
CRYPT_ERROR_-COMPLETE
An operation that consists of multiple steps (such as amessage hash) is complete and cannot be continued.
CRYPT_ERROR_-INCOMPLETE
An operation that consists of multiple steps (such as amessage hash) is still in progress and requires furthersteps before it can be regarded as having completed.
CRYPT_ERROR_-INVALID
The public/private key context or certificate object orattribute is invalid for this type of operation.
CRYPT_ERROR_-NOTAVAIL
The requested operation is not available for this object(for example an attempt to load an encryption key intoa hash context, or to decrypt a Diffie-Hellman sharedinteger with an RSA key).
CRYPT_ERROR_-PERMISSION
You don’t have permission to perform this type of operation (for example an encrypt-only key being usedfor a decrypt operation, or an attempt to modify a read-only attribute).
CRYPT_ERROR_-SIGNALLED
An external event such as a signal from a hardwaredevice caused a change in the state of the object. Forexample if a smart card is removed from a card reader,all the objects that had been loaded or derived from thedata on the smart card would return CRYPT_ERROR_-SIGNALLED if you tried to use them.
Once an object has entered this state, the only availableoption is to destroy it, typically usingcryptDestroyObject.
CRYPT_ERROR_-TIMEOUT
The operation timed out, either because of a generaltimeout while accessing an object such as a networkconnection or data file, or because the object was in usefor another operation such as asynchronous keygeneration or a key database lookup operation.
CRYPT_ERROR_-WRONGKEY
The key being used to decrypt or verify the signatureon a piece of data is incorrect.
The next group contains errors related to the higher-level encryption functions suchas enveloping, secure session, and key export/import and signaturegeneration/checking functions:
Error code Description
CRYPT_ERROR_-BADDATA
The data item (typically encrypted or signed data, or akey certificate) was corrupt, or not all of the data waspresent, and it can’t be processed.
CRYPT_ERROR_-OVERFLOW
There is too much data for this function to work with.For an enveloping function, you need to callcryptPopData before you can add any more data to theenvelope.
For a certificate function this means the amount of datayou have supplied is more than what is allowed for thefield you are trying to store it in.
For a public-key encryption or signature function thismeans there is too much data for this public/private keyto encrypt/sign. You should either use a larger

Extended Error Reporting 273
Error code Descriptionpublic/private key (in general a 1024-bit or larger keyshould be sufficient for most purposes) or less data (forexample by reducing the key size in the encryptioncontext passed to cryptExportKey).
CRYPT_ERROR_-SIGNATURE
The signature or integrity check value didn’t match the data.
CRYPT_ERROR_-UNDERFLOW
There is too little data in the envelope or session forcryptlib to process (for example only a portion of a dataitem may be present, which isn’t enough for cryptlib to work with).
The next group contains data/information access errors, usually arising from keyset,certificate, or device container object accesses:
Error code Description
CRYPT_ERROR_-DUPLICATE
The given item is already present in the containerobject.
CRYPT_ERROR_-NOTFOUND
The requested item (for example a key being read froma key database or a certificate component beingextracted from a certificate) isn’t present in the container object.
CRYPT_ERROR_-OPEN
The container object (for example a keyset orconfiguration database) couldn’t be opened, eitherbecause it wasn’t found or because the open operation failed.
CRYPT_ERROR_-READ
The requested item couldn’t be read from the container object.
CRYPT_ERROR_-WRITE
The item couldn’t be written to the container object or the data object couldn’t be updated (for example a key couldn’t be written to a keyset, or couldn’t be deleted from a keyset).
The next group contains errors related to data enveloping:
Error code DescriptionCRYPT_ENVELOPE_
RESOURCEA resource such as an encryption key or passwordneeds to be added to the envelope before cryptlib cancontinue processing the data in it.
Extended Error ReportingSometimes the standard cryptlib error codes aren’t capable of returning full details on the large variety of possible error conditions that can be encountered. This isparticularly true for complex objects such as certificates or ones that are tied to othersoftware or hardware which is outside cryptlib’s control. These objects include database or directory keyset objects, crypto devices, and secure sessions. Forexample if there is a problem checking a certificate object, cryptlib will return ageneric CRYPT_ERROR_INVALID status. If there is a missing object attribute thatmust be set before an object can be used, cryptlib will return a CRYPT_-ERROR_NOTINITED status.
In order to obtain more information on the problem you can read the CRYPT_-ATTRIBUTE_ERRORLOCUS attribute to obtain the locus of the error (the attributethat caused the problem) and the CRYPT_ATTRIBUTE_ERRORTYPE attribute toidentify the type of problem that occurred. These error attributes are present in allobjects and can often provide more extensive information on why an operation withthe object failed, for example if a function returns CRYPT_ERROR_NOTINITED

Error Handling274
then the CRYPT_ATTRIBUTE_ERRORLOCUS attribute will tell you which objectattribute hasn’t been initialised.
The error types are:
Error Type Description
CRYPT_ERRTYPE_-ATTR_ABSENT
The attribute is required but not present in theobject.
CRYPT_ERRTYPE_-ATTR_PRESENT
The attribute is already present in the object, orpresent but not permitted for this type of object.
CRYPT_ERRTYPE_-ATTR_SIZE
The attribute is smaller than the minimumallowable or larger than the maximum allowablesize.
CRYPT_ERRORTYPE_-ATTR_VALUE
The attribute is set to an invalid value.
CRYPT_ERRTYPE_-CONSTRAINT
The attribute violates some constraint for theobject, or represents a constraint which is beingviolated, for example a validity period or keyusage or certificate policy constraint.
CRYPT_ERRTYPE_-ISSUER_CONSTRAINT
The attribute violates a constraint set by anissuer certificate, for example the issuer may seta name constraint which is violated by thecertificate object’s subjectName or subject altName.
For example to obtain more information on why an attempt to sign a certificate failedyou would use:
CRYPT_ATTRIBUTE_TYPE errorLocus;CRYPT_ERRTYPE_TYPE errorType;
status = cryptSignCert( cryptCertificate, cryptCAKey );if( cryptStatusError( status ) )
{cryptGetAttribute( cryptCertificate, CRYPT_ATTRIBUTE_ERRORLOCUS,
&errorLocus );cryptGetAttribute( cryptCertificate, CRYPT_ATTRIBUTE_ERRORTYPE,
&errorType );}
The error type and locus information comes from cryptlib itself, and relates to errorswith object usage identified by cryptlib. In addition to the cryptlib error information,keyset and session objects and objects tied to devices often provide internal errorinformation which is passed to them from the underlying software, hardware, or aremote client or server application. The object-specific error code and message areaccessible as the CRYPT_ATTRIBUTE_INT_ERRORCODE and CRYPT_-ATTRIBUTE_INT_ERRORMESSAGE attributes. For example to obtain moreinformation on why an attempt to read a key from an SQL Server database failed youwould use:
CRYPT_KEYSET cryptKeyset;CRYPT_HANDLE publicKeyint status;
status = cryptGetPublicKey( &cryptKeyset, &publicKey,CRYPT_KEYID_NAME, "John Doe" );
if( cryptStatusError( status ) ){int errorCode, errorStringLength;char *errorString;
errorString = malloc( ... );cryptGetAttribute( cryptKeyset, CRYPT_ATTRIBUTE_INT_ERRORCODE,
&errorCode );

Extended Error Reporting 275
cryptGetAttributeString( cryptKeyset,CRYPT_ATTRIBUTE_INT_ERRORMESSAGE, errorString,&errorStringLength );
}
Note that the error information being returned is passed through by cryptlib from theunderlying software or hardware, and will be specific to the implementation. Forexample if the software that underlies a keyset database is SQL Server then the datareturned will be the SQL Server error code and message. Since the returned data islow-level, internal error information coming from the underlying software and willoften be information provided by a third-party or remote client or server application,the contents of the error code and message can vary somewhat but the error messagewill typically contain some indication of what the problem is.
In some cases the access attempt will be blocked by the cryptlib security kernel, andnever gets to the object itself. This typically occurs when cryptlib returns a CRYPT_-ERROR_PERMISSION error, in which the kernel has prevented a disallowed accesstype. In this case neither the extended error information nor the internal error codeand string will be set, since the object never saw the access attempt.

Embedded Systems276
Embedded Systemscryptlib has been designed to be usable in embedded designs that lack many facilitiesthat are normally found on standard systems, both in terms of resources (memory,network I/O) and in system functionality (a filesystem, dynamic memory allocation).If you’re running in a resource-constrained environment such as an embeddedsystem, you first need to decide what cryptlib services you require and disable anyunnecessary options, as described in “Customised and Cut-down cryptlib Versions” on page 24. This will reduce the cryptlib code footprint to the minimum required foryour particular situation.
As a general rule of thumb if you’re on a resource-constrained system you shouldturn off anything that uses networking, which includes secure sessions (USE_-SESSIONS), and HTTP and LDAP keyset access (USE_HTTP, USE_LDAP). Youprobably also want to turn off crypto devices, (USE_PKCS11 and USE_-FORTEZZA), since the embedded system is unlikely to have PKCS #11 cryptohardware attached to it. You probably won’t be using database keysets (USE_-DBMS), and unless you’re using PGP keyrings you can turn that off as well (USE_-PGPKEYS). PGP keyrings are particularly problematic because their structurerequires that they be processed via a lookahead buffer because it’s not possible to determine how much more data associated with the key is to follow. If you’re running in a memory-constrained environment and are thinking of using PGP keys,you should consider using the PKCS #15 format (the cryptlib native keyset type)instead, since this doesn’t have this problem.
For envelopes, you probably want to turn off compressed enveloping (USE_-COMPRESSION) since zlib needs to allocate a series of fairly sizeable buffers inorder to operate (256KB for compression, 32KB for decompression, compared toonly 8KB used for the envelope buffer itself). If you’re not using PGP, you can turn that off as well (USE_PGP). Finally, there are a considerable range of other optionsthat you can turn off to save memory and space, see cryptini.h for more details.
In addition to the code size tuning and if you’re targeting a new embedded system that isn’t already supported by cryptlib, you need to make any necessary system-specific adaptations to cryptlib to match the characteristics of the embedded devicethat you’re working with. These adaptations are described following the discussion of supported systems below.
Embedded OS TypesMany embedded OSes, and in particular real-time OSes (RTOSes) are highlymodular, and can be heavily customised to suit particular applications. Because ofthis high degree of customisability, it’s not possible for cryptlib to automatically assume that a given OS capability will be available. As a result, the default cryptlibbuild for a particular embedded OS/RTOS uses a fairly minimal set of OS capabilitiesthat should work in most configurations. If you have extended OS facilities available,you can use the cryptlib configuration file cryptini.h to enable any additionalcapabilities that you may need. It’s a good idea to contact the cryptlib developers before you build cryptlib on one of the more modular, configurable embedded OSeslike AMX, eCOS, µITRON, VxWorks, or XMK. Notes for individual OSes aregiven below.
AMXAMX is highly configurable kernel with most functionality set to the minimum levelin the default build in order to conserve space. To run cryptlib you need to enable thetime/date manager (so that cryptlib can check datestamps on the data that it’s processing), and time-slicing if you’re running multiple tasks within cryptlib. For task synchronisation cryptlib uses AMX semaphores, but doesn’t require any further AMX facilities like mailboxes, event groups, or buffer pools.

Embedded OS Types 277
eCOSUnlike most other embedded OSes, eCOS requires that all data structures used by thekernel be statically allocated by the user. This means that cryptlib has to allocatestorage for all semaphores, mutexes, tasks, and other eCOS objects either at compiletime or (at the latest) when it’s loaded/initialised. This entails allocating the storage required by eCOS for each object when cryptlib allocates its kernel object table,rather than allocating the storage on-demand when an object is created. If memory isat a premium, you should shrink the object table (via CONFIG_CONSERVE_-MEMORY and/or CONFIG_NUM_OBJECTS) to the smallest size that you can workwith, since each object entry has to include space for eCOS kernel data.
Typical eCOS configurations include a full TCP/IP stack and file I/O services.cryptlib uses the Posix section 5/6 file I/O layer, the universal low-level I/O layerthat’s supported by all filesystem drivers. The TCP/IP stack is a standard BSD-derived stack and it’s use is enabled by default in the eCOS build.
Embedded LinuxEmbedded Linux is a standard Unix environment. No special operationalconsiderations are required for cryptlib in this environment.
µITRONµITRON has a file interface (ITRON/FILE) derived from the BTRON persistentobject store interface, but the only documentation for this is for BTRON and it’s only available in Japanese. Because of the inability to obtain either documentation or animplementation to code against, cryptlib only contains stubs for file I/O functionality.If your µITRON system provides this file interface, please contact the cryptlibdevelopers.
µITRON also has a TCP/IP interface, but it doesn’t seem to be widely used and the only documentation available is in Japanese. Because of this the use of TCP/IP underµITRON is disabled by default in cryptini.h, if you have a µITRON TCP/IPimplementation you can use it to replace the existing TCP/IP interface in io/tcp.c.
Palm OSWhen you install the PalmOS SDK, the include path for the PalmOS compiler maynot cover the directory containing the standard ANSI/ISO C headers. These headersare found in the posix subdirectory of the standard PalmOS include directory, youcan either configure the include path to include this directory or specify it in themakefile with the–I compiler option.
If you’re building cryptlib using the PalmOS SDK compiler, all compiler warning messages are enabled by default and can’t be reset to a more normal level. Because of this maximum warning level, you’ll get a stream of compiler messages when you build cryptlib, in particular erroneous used-before-initialised messages. This isnormal, and can be ignored.
If you’re building cryptlib using the PRC toolchain, the PalmOS headers contain gcc-specific directives that try to pull in gcc headers that lie outside the PalmOS SDKpath. If the path to these additional headers isn’t configured, you can either configure the include path to include the directories needed by gcc or specify it in the makefilewith the -idirafter compiler option.
QNX NeutrinoQNX Neutrino is a standard Unix environment, and in general no special operationalconsiderations are required for cryptlib in this environment. The one exception is inthe choice of networking environments. QNX Neutrino provides three network stackconfigurations, the standard TCP/IP stack, the enhanced TCP/IP stack, and a low-resource version of the standard stack. cryptlib works with all of these stacks, andwill try and use the most sophisticated features provided by the system. If you’re

Embedded Systems278
using one of the more restricted networking stacks (for example the tiny TCP/IP stackwith no IPv6 support) you may need to change the settings in io/tcp.h to reflect this.
RTEMSRTEMS provides a standard Posix file API and BSD sockets networking API thatmatches the one used by cryptlib’s generic Unix configuration. No special operational considerations are required for cryptlib in this environment.
uClinuxuClinux is an embedded OS intended for use on hardware without memoryprotection, allowing it to be run on systems that couldn’t otherwise run a standard Linux build. To conserve memory, you may want to configure uClinux to use thepage_alloc2/kmalloc2 allocator instead of the somewhat wasteful standardpower-of-two Linux allocator, which is intended for use on systems with virtualmemory support. cryptlib’s memory allocation strategy fits neatly with the page_alloc2 allocator to minimise memory usage.
By default the uClinux toolchains tend to allocate extremely small stacks of only4KB, which is inadequate for all but the most trivial applications. To provide anadequate stack, you need to either set FLTFLAGS=-s stacksize and exportFLTFLAGS to the makefile before building your application, or run flthdrs –sstacksize on your executable after building it.
Windows CEWindows CE is a standard Windows environment. No special operationalconsiderations are required for cryptlib in this environment.
VxWorksVxWorks includes a TCP/IP stack and file I/O services. cryptlib uses the ioLib fileI/O mechanisms, the universal low-level I/O layer that’s supported by all filesystem drivers. The VxWorks TCP/IP stack has changed somewhat over time and issometimes replaced by more functional third-party alternatives or may not be presentat all if VxWorks has been configured without it. Because of this, the use of TCP/IPservices isn’t enabled by default. If you need networking services, you can enable them in cryptini.h, and may need to perform VxWorks-specific network initialisation(for example calling selectInit) if your application doesn’t already do so.
Xilinx XMKXMK is highly configurable kernel with several functions disabled in the defaultbuild. To run cryptlib you need to enable mutexes (config_pthread_mutex)for thread synchronisation, the yield interface (config_yield) for threadmanagement, and timers (config_time) for time handling. In addition if you’re starting threads within cryptlib, you need to either increase the default thread stacksize (pthread_stack_size) or set a larger stack size when you start the internalthread.
Xilinkx XMK provides an emulated Posix filesystem API, however in order to reducecode size cryptlib uses the native XMK memory filesystem (MFS) interface to accessstored data in RAM, ROM, or flash memory. If you need to store data such asconfiguration options or private keys, you need to enable MFS support in your XMKbuild.
XMK includes a minimal network stack (LibXilNet), however this only providesserver functionality (so it’s not possible to implement a network client) and doesn’t support timers, so that each send or receive will block forever until data arrives or issent. Because of these limitations, you need to use a third-party network stack inorder to use cryptlib’s networking capabilities under XMK.

Embedded cryptlib Configuration Options 279
Embedded cryptlib Configuration OptionsYou can use the standard cryptlib makefile to cross-compile the code for any of theembedded targets. If you’re building for a new target type, you first need to add the new target type at the end of the makefile in the “Embedded Systems” section.Thecryptlib naming convention for preprocessor symbols used to identify targets is to use__target_name__, which then enables system-specific behaviour in the code. Forexample if you were adding a new target type to build the code for an Atmel TDMIARM core, you’d use –D__ATMEL__ as the necessary compile option (somecompilers will define the necessary symbols automatically).
The cryptlib makefile and source code auto-detect various system parameters atcompile time, if you’re cross-compiling for a new target type that you’ve defined yourself you’ll need to override this so that you’re building with the parameters for your target rather than for the host system. In addition you can enable various buildoptions for systems with limited resources as described earlier. The values that youmay need to define to handle these system-specific options are:
Option Description
__target_name__ The target type that you’re building for.
CONFIG_LITTLE_ENDIANCONFIG_BIG_ENDIAN
The CPU endianness of the targetsystem.
CONFIG_CONSERVE_-MEMORY
Define if the target has limited memoryavailable to reduce the default sizes ofbuffers and data structures. “Limited” means less than about 256KB of RAM.
CONFIG_DEBUG_MALLOC Define to dump memory usagediagnostics to the console. Yougenerally wouldn’t use this option on the target system, but only on the host duringdevelopment.
CONFIG_NO_DYNALLOC Define to change cryptlib’s handling of on-demand memory allocation asdescribed in “Porting to Devices withoutDynamic Memory Allocation” on page 280.
CONFIG_NO_STDIO Define if the target has nofilesystem/stdio support.
CONFIG_NUM_OBJECTS=n The number of objects that cryptlibreserves room for, defaulting to 1024without CONFIG_CONSERVE_-MEMORY defined or 128 with.
CONFIG_RANDSEED
CONFIG_RANDSEED_-QUALITY
Define to a positive integer value to useexternal random data seed.Define to set the value of the randomseed data, as a percentage figure from 10-100 percent.
Finally, cryptlib includes a considerable amount of other configurability that you cantake advantage of if you need to use it in an environment that imposes particularrestrictions on resource usage. If you’re working with an embedded system, you should contact the cryptlib developers with more details on any specific requirementsthat you may have.
Once you’ve got the necessary options set up, you can build the code. If you’re building for a completely new target, cryptlib will detect this and print messages atthe various locations in the code where you need to add system-specific adaptationssuch as support for reading/writing to flash memory segments in io/file.c.

Embedded Systems280
Alternatively, you can edit io/file.c before you try to build the code, look for all thelocations where CONFIG_NO_STDIO is referenced, and add the necessary supportthere rather than having cryptlib warn you about it during the build process.
Debugging with Embedded cryptlibSince you’ll be using the same code on your host system as you will in the target, byfar the easiest way to develop and debug your application is to do it on the host usingyour preferred development tools. By enabling the same build options as you wouldon the target (except for the CPU endianness override) you can exactly duplicate theconditions on the target embedded system and perform all of your applicationdevelopment on the host rather than having to cross-compile, upload code, and workwith the target’s debugging facilities (if there are any).
Porting to Devices without a FilesystemIf the device you’re working with lacks a filesystem, you’ll need to work with str_file.c to add an adaptation layer to handle the underlying storage abstraction thatyou’re using. In embedded devices this usually consists of blocks of flash memory oroccasionally battery-backed RAM, identified either by name/label or an integer valueor tag. cryptlib supports the use of named/tagged memory segments if you build itwith the CONFIG_NO_STDIO option, and will assemble in-memory (RAM) pseudo-files on which it performs all I/O until the file is committed to backing store,whereupon it’ll perform an atomic transfer of the pseudo-file to flash to minimisewear on the flash memory cells. It’s thus possible to manipulate these (pseudo-)filesarbitrarily without causing excessive wear on the underlying storage medium.
Porting to Devices without Dynamic Memory AllocationIf your system lacks dynamic memory allocation, or has so little memory that it’s necessary to conserve it as much as possible, you first need to build cryptlib with theCONFIG_CONSERVE_MEMORY option. This reduces the default sizes of somebuffers, and sets the initial size of cryptlib’s internal object table to 128 objects instead of the usual 1024. You can further tune the amount of memory used by thesystem object table by setting the CONFIG_NUM_OBJECTS setting to themaximum number of objects that you’ll need. This value must be a power of 2, and can’t be less than 8. For single-purpose use in an embedded device (for examplewhen used specifically for enveloping messages rather than as a general-purpose toolwhere anything is possible), you can usually get by with 32 or even 16 objects.Depending on other options such as whether you use certificate trust settings or notand whether your system has a 16- or 32-bit word size, the cryptlib kernel and built-insystem objects consume between 6 and 12 KB of memory.
As a rough rule of thumb, each non-public-key encryption context consumes around200 bytes (along with any extra memory needed by the algorithm’s expanded encryption key), each public-key encryption context consumes around 1500 bytes(depending again on algorithm-specific parameters such as the algorithm type andkey size), file keysets (which are buffered in memory as mentioned earlier) consume600 bytes plus the size of the keyset file (usually around 1.3 KB for a standard 1024-bit RSA key and accompanying certificate and 3 KB for the key and a 3-certificatechain), envelopes consume 1.2KB plus 16 KB for enveloping and 8KB for de-enveloping (the extra size is due to the built-in envelope buffer), and certificatesconsume an amount of memory that isn’t easily predictable in advance since they consist of an arbitrary number of arbitrarily-sized objects. This makes it verydifficult to estimate their eventual memory usage, but a rule of thumb is about 2 KBused for a typical certificate. Note that the certificate object consumption has verylittle to do with the key size, but is mostly dependent on the number and size of all theother X.509 components that are present in the certificate.
Memory Allocation Strategycryptlib allocates memory in strict FIFO manner, so that creating an object and thendestroying it again rolls back memory to the exact state it was in before the object

Porting to Devices without Randomness/Entropy Sources 281
was created. This ensures that it’s possible to run cryptlib on a system without dynamic memory allocation by using a simple high-water-mark pointer that tracks thelast memory position used, and falls back to its earlier position when the memory is“freed”. Because of this memory usage strategy, cryptlib, although it does acquirememory as required, doesn’t need real dynamic memory allocation and can function perfectly well if given a single fixed block of memory and told to use that.
cryptlib allocates either very little or no memory during its normal operation. That is,memory is allocated once at object creation or activation, after which cryptlib stayswithin the already-allocated bounds unless it encounters some object that it needs tostore for later use. For example if it finds a certificate while processing S/MIME datait’ll need to acquire a block of memory to store the certificate for later access by the caller.
cryptlib Memory UsageAlmost all of the information that cryptlib processes has the potential to includearbitrary-length data, and occasionally arbitrary amounts of arbitrary-length data.Certificates are a particular example of this, as mentioned earlier. cryptlib’s strategy for handling these situations is to use stack memory to handle the data if possible, butif the item being processed exceeds a certain size, to temporarily grab a larger blockof memory from the heap to allow the item to be processed, freeing it againimmediately after use.
In normal use this overflow handling is never invoked, however since cryptlib canalways run into data items of unusual size (constructed either accidentally ordeliberately), you need to decide whether you want to allow this behaviour or not.Allowing it means that you can process unusual data items, but may make youvulnerable to deliberate resource-starvation attacks. Conversely, denying it makesyou immune to excessive memory usage when trying to process data deliberatelyconstructed to require extra memory to process, but will also make it impossible toprocess data with unusual characteristics. In general, cryptlib will be able to processany normal data without requiring dynamically allocated memory, so if you know inadvance which types of data you’ll be processing and are concerned about possibleresource-starvation attacks, you can disable the opportunistic allocation of largerworking areas by using the CONFIG_NO_DYNALLOC build option.
cryptlib includes a number of internal lookup tables used for certificate decoding,algorithm information lookup, error parsing, and so on. These are all declaredstatic const to tell the compiler to place them in the read-only code segment(held in ROM) rather than the initialised data segment (held in RAM). If yourcompiler doesn’t automatically do this for you (almost all do), you’ll need to play with compiler options to ensure that the tables are stored in ROM rather than RAM.
Tracking Memory UsageIn order to track memory usage and determine what’ll be required on your target system, you can use the CONFIG_DEBUG_MALLOC option to dump diagnosticsabout memory usage to the console. This will allow you to see approximately howmuch memory a certain operation will require, and let you play with rearrangingoperations to reduce memory consumption. For example having two objects activesimultaneously rather than using them one after the other will result in a total memoryconsumption equal to the sum of their sizes rather than only the size of the larger ofthe two objects.
The memory usage diagnostics will reveal the FIFO nature of the memory allocationthat cryptlib uses to try to minimise its overall footprint. You can use the sequencenumbers after each allocate and free to track the order in which things are used.
Porting to Devices without Randomness/Entropy Sourcescryptlib requires a source (or more generally multiple sources) of randomness/entropyfor the generation of encryption keys and similar data, as described in “RandomNumbers” on page 268. On some embedded systems there may not be enough

Embedded Systems282
entropy available to safely generate these keys. You can provide this additionalentropy yourself through the use of the CONFIG_RANDSEED option, which enablesthe use of stored random data that contains additional random seed material. This isstored in the same location as the cryptlib configuration data (see “Working withConfiguration Options” on page 263 for more details), and isn’t necessarily a file butcan be a block of data in flash memory, data in battery-backed RAM, or whateverother mechanism your system uses for persistent storage. If you define CONFIG_-RANDSEED to a positive integer value, cryptlib will try and read the random seeddata and use it as additional input to the internal randomness pool. This seed datashould be at least 128 bits (16 bytes) long, something like 128 or 256 bytes is a bettervalue. The source of the data is determined by your system configuration, if there’s a file system available it’ll be stored in a file called randseed.dat, if not it’ll be accessed via whatever persistent storage mechanism is configured for your system inio/file.c. When you build your embedded system, you should install the seed datafrom an external source, for example a hardware random number generator or a copyof cryptlib running on a secure system with a good source of randomness (the use ofcryptlib to generate random data is covered in “Random Numbers” on page 268).
Since a significant portion of the input data for crypto key generation will bedetermined by the seed data if there are no other randomness sources available(cryptlib will always get at least some randomness from the environment, so the valuewill change each time it’s used), you should take as much care as possible to protect the seed data. Obviously you should use different seed data on each system, toprevent a compromise of one system from affecting any others. In addition if yoursystem provides any protection mechanisms you should apply them to the seed datato try and safeguard it as much as possible. Finally, you should use the ability to adduser-supplied randomness described in “Random Numbers” on page 268 toperiodically add any situation-specific data that you may have available. For exampleif your embedded device is being used for voice or video transmission you can addsegments of the compressed audio or video data, and if your device performs asensor/monitoring function you can add the sensor data. Since most embeddeddevices have at least some interaction with the surrounding environment, there’s usually a source of additional randomness available.
Once you have your seed data set up, you need to decide how much overallrandomness it contributes to the system. You can set this value as a percentagebetween 10 and 100 percent via the CONFIG_RANDSEED_QUALITYconfiguration option. If you don’t set a value, cryptlib will assume a figure of 80%,meaning that it needs to obtain an additional 20% of randomness from theenvironment before it’ll generate keys. Note that this setting is merely a safety level, it doesn’t mean that cryptlib will gather randomness until it reaches 100% and thenstop (it never stops gathering randomness), merely that it won’t generate keys when the randomness value is below 100%.

The Database Plugin Interface 283
Database and Networking PluginsIn order to communicate with databases that are used as certificate stores and withdifferent network types, cryptlib uses a plugin interface that allows it to talk to anytype of database back-end and network protocol. The database plugin provides fivefunctions that are used to interface to the back-end, two functions to open and closethe connection to the back-end, two to send data to and read data from it, and one tofetch extended error information if a problem occurs. The plugin typically runs as aUnix daemon which is accessed via an RPC mechanism, however for the ODBC andgeneric database interfaces the code is compiled directly into cryptlib. If you preferto have your plugin as part of cryptlib you can compile it in as a generic databaseinterface. The advantage of using an RPC mechanism instead of compiling theplugin code directly into cryptlib is that cryptlib itself (and the machine that cryptlibis running on) don’t need to contain any database interface code, since everything canbe done on the database server.
The network plugin also provides five functions, two to initialise and shut down theconnection, two to read and write data, and one to check that the networking interfaceprovided by the interface has been correctly initialised. The network plugin allowscryptlib to use any kind of network interface, either a customised form of the built-inBSD sockets interface or a completely different network mechanism such as SNA orX.25.
The Database Plugin InterfaceThe database plugin interface is used when cryptlib receives a user request to access adatabase of type CRYPT_KEYSET_PLUGIN or CRYPT_KEYSET_PLUGIN_-STORE (and by extension for the various CRYPT_KEYSET_ODBC and CRYPT_-KEYSET_DATABASE types as well, although these are preconfigured and don’t require any further setup). The first thing that cryptlib does is call theinitDbxSession() function in keyset/dbms.c, which connects the genericdatabase type to the actual database plugin (for example an Oracle, Sybase, orPostgreSQL interface). There are three standard plugin types defined, one for ODBC,one for generic built-in databases, and a skeleton generic database network pluginthat can communicate with a stub server that talks to the actual database. If you needany other plugin type for a particular database, you can create it as required.
The structure of the plugin is as follows:
#include "keyset/keyset.h"
/* Plugin functions: openDatabase(), closeDatabase(), performUpdate(),performQuery(),performErrorQuery() */
int initDispatchDatabase( DBMS_INFO *dbmsInfo ){dbmsInfo->openDatabaseBackend = openDatabase;dbmsInfo->closeDatabaseBackend = closeDatabase;dbmsInfo->performUpdateBackend = performUpdate;dbmsInfo->performQueryBackend = performQuery;dbmsInfo->performErrorQueryBackend = performErrorQuery;
return( CRYPT_OK );}
keyset.h contains the keyset-related defines that are used in the code, and thedispatcher initialisation function sets up function pointers to the database accessroutines, which are explained in more detail below. State information about a sessionwith the database is contained in the DBMS_STATE_INFO structure which isdefined in keyset.h. This contains both shared information such as the last errorcode and the status of the session, and back-end -specific information such asconnection handles and temporary data areas. When you create a plugin for a newdatabase type, you should add any variables that you need to the database-specificsection of the DBMS_STATE_INFO structure. When cryptlib calls your plugin

Database and Networking Plugins284
functions, it will pass in the DBMS_STATE_INFO that you can use to store stateinformation.
Database Plugin FunctionsThe database plugin functions that you need to provide are as follows:
static int openDatabase( DBMS_STATE_INFO *dbmsInfo, const char *name,const int options, int *featureFlags )
This function is called to open a session with the database. The parameters are thename of the database to open the session to and a set of option flags that apply to thesession. The name parameter is a composite value that depends on the underlyingdatabase being used, usually this is simply the database name, but it can also containa complete user name and password in the format user:pass@server. Othercombinations are user:pass (only a database user name and password) oruser@server (only a user name and server).
The option flags will be set to either CRYPT_KEYOPT_NONE or CRYPT_-KEYOPT_READONLY, many servers can optimise accesses if they know that noupdates will be performed so your code should try and communicate this to the serverif possible. The function should return a set of database feature flags indicating itscapabilities in the featureFlags parameter. These will be either DBMS_HAS_-BINARYBLOBS if the database can store binary data blobs rather than requiring thatdata be base64-encoded, and DBMS_HAS_NONE if it has no special capabilities.The plugin should provide binary blob access if the database supports this (almost alldo) since this increases data handling efficiency and reduces storage requirements.
static void closeDatabase( DBMS_STATE_INFO *dbmsInfo )
This function is called to shut down the session with the database.
static int performUpdate( DBMS_STATE_INFO *dbmsInfo, const char*command, const void *boundData, const int boundDataLength, consttime_t boundDate, const DBMS_UPDATE_TYPE updateType )
This function is called to send data to the database. The parameters are an SQLcommand, optional binary blob data and a date, and an update type indicator thatindicates which type of update is being performed. If the boundData value is non-null then this parameter and the boundDataLength contain a binary blob which isto be added as part of the SQL command. If the boundDate value is nonzero thenthis parameter contains the date and time which is to be added as part of the SQLcommand as an SQL DATETIME value. For example the function can be calledwith:
performUpdate( …, "'INSERT INTO certificates VALUES ( '…', '…', … '…' )", NULL, 0, 0 );
performUpdate( …, "INSERT INTO certificates VALUES ( '…', '…', … ? )",data, length, 0 );
performUpdate( …, "INSERT INTO certificates VALUES ( ?, '…', … ? )",data, length, date );
In the first case all data is contained in the SQL command. In the second case there isa binary data blob associated with the SQL command whose position is indicated bythe ‘?’ placeholder. After sending the SQL command to the database, you also needto send the ( data, length ) value. In the third case there is a binary data blob and adate value associated with the SQL command, with the positions again indicated bythe ‘?’ placeholders. The date value is always first in the sequence of placeholders,and the data blob is always second (even if the data blob parameter appears before thedate parameter in the list of function parameters). After sending the SQL commandto the database, you also need to send the date and then the ( data, length ) values.The date value needs to be converted into whatever format the database expects for aDATETIME value. The exact format depends on the database back-end, which iswhy it’s not present in the SQL command.
The update types are as follows:

The Database Plugin Interface 285
Update Type Description
DBMS_UPDATE_-ABORT
Abort a transaction. This state is communicated to thedatabase through an SQL statement such as ABORTTRANSACTION or ROLLBACK or ABORT, or via afunction call that indicates that the transaction begunearlier should be aborted or rolled back.
DBMS_UPDATE_-BEGIN
Begin a transaction. This state is communicated to thedatabase through an SQL statement such as BEGINTRANSACTION or BEGIN WORK or BEGIN, or viaa function call that indicates that transaction semanticsare in effect for the following SQL statements.
DBMS_UPDATE_-COMMIT
Commit a transaction. This state is communicated tothe database through an SQL statement such as ENDTRANSACTION or COMMIT WORK or COMMIT,or via a function call that indicates that the transactionshould be committed and that transaction semantics areno longer in effect after the statement has beensubmitted.
DBMS_UPDATE_-CONTINUE
Continue an ongoing transaction.
DBMS_UPDATE_-NORMAL
Standard data update.
The DBMS_UPDATE_BEGIN/CONTINUE/COMMIT combination is used toperform an atomic update on the database. The sequence of calls is as follows:
performUpdate( …, "INSERT INTO certificates VALUES ( … )", certificate, certLength, certDate, DBMS_UPDATE_BEGIN );
performUpdate( …, "INSERT INTO certLog VALUES ( … )", certificate,certLength, currentDate, DBMS_UPDATE_CONTINUE );
performUpdate( …, "DELETE FROM certRequests WHERE keyID = keyID",NULL, 0, 0, DBMS_UPDATE_COMMIT );
The first call begins the transaction and submits the initial portion, the ongoing callssubmit successive portions of the transaction, and the final call submits the lastportion and commits the transaction. If there’s a problem, the last call in the transaction will use an update type of DBMS_UPDATE_ABORT. Note that it’s important to ensure that performUpdate itself is atomic, for example if there’s an error inside the function then it needs to back out of the transaction (if one is inprogress) rather than simply returning immediately to the caller. This requires carefultracking of the state of the transaction and handling of error conditions.
static int performQuery( DBMS_STATE_INFO *dbmsInfo, const char*command, char *data, int *dataLength, const char *boundData, constint boundDataLength, time_t boundDate, const DBMS_CACHEDQUERY_TYPEqueryEntry, const DBMS_QUERY_TYPE queryType )
This function is called to fetch data from the database. The parameters are an SQLcommand, an optional buffer to store the result, optional bound query data and dateparameters, a query cacheing indicator (explained further on) and a query typeindicator that indicates which type of query is being performed. The query types areas follows:
Query Type Description
DBMS_QUERY_-CANCEL
Cancel an ongoing query. This terminates an ongoingquery begun by sending a DBMS_QUERY_STARTquery.
DBMS_QUERY_-CHECK
Perform a presence check that simply returns apresent/not present indication without returning anydata. This allows the query to be optimised sincethere’s no need to actually fetch any data from the

Database and Networking Plugins286
Query Type Description
DBMS_QUERY_-CANCEL
Cancel an ongoing query. This terminates an ongoingquery begun by sending a DBMS_QUERY_STARTquery.
back-end. All that’s necessary is that a status indication be returned that indicates whether therequested data is available to be fetched or not.
DBMS_QUERY_-CONTINUE
Continue a previous ongoing query. This returns thenext entry in the result set generated by sending aDBMS_QUERY_START query.
DBMS_QUERY_-NORMAL
Standard data fetch.
DBMS_QUERY_-START
Begin an ongoing query. This submits a query to theback-end without returning any data. The result set isread one entry at a time by sendingDBMS_QUERY_CONTINUE messages.
The DBMS_QUERY_START/CONTINUE/CANCEL combination is used to fetch acollection of entries from the database. The sequence of calls is as follows:
performQuery( …, "SELECT certData FROM certificates WHERE key = ?",NULL, NULL, boundData, boundDataLength, 0, DBMS_CACHEDQUERY_NONE,DBMS_QUERY_START );
dostatus = performQuery( …, NULL, buffer, &length, NULL, 0, 0,
DBMS_CACHEDQUERY_NONE, DBMS_QUERY_CONTINUE );while( cryptStatusOK( status ) );
The first call submits the query and the ongoing calls fetch successive entries in theresult set until an error status is returned (usually this is CRYPT_ERROR_-COMPLETE to indicate that there are no more entries in the result set).
In order to allow for more efficient execution of common queries, cryptlib allowsthem to be cached by the database back-end for re-use in the future. This allows theback-end to perform the task of SQL parsing and validation against the systemcatalog, query optimisation, and access plan generation just once when the first queryis executed rather than having to re-do it for each query. cryptlib provides hints aboutcached queries by specifying a cache entry number when it submits the query.Uncached queries are given an entry number of DBMS_CACHEDQUERY_NONE(these will be little-used query types that it’s not worth cacheing), queries where cacheing are worthwhile are given an entry number from 1 to 5. The submitted SQLfor these queries will never change over subsequent calls, so it’s only necessary to perform the parsing and processing once when the query is submitted for the firsttime. Any subsequent requests can be satisfied using the previously parsed queryheld at the back-end. In the above example, if the query were submitted with acacheing indicator of DBMS_CACHEDQUERY_URI, you could prepare a query for"SELECT certData FROM certificates WHERE uri = ?" the firsttime that the query is submitted and then re-use the prepared query every timeanother query with the cacheing indicator DBMS_CACHEDQUERY_URI is used.
Note that some databases may return a (potentially large) result set in response to aquery for a single result using DBMS_QUERY_NORMAL, for example by returningfurther results after the first one is read or by disallowing further queries until allresults have been processed. In this case it will be necessary to limit the queryresponse size either by setting a size limit before submitting the query or by explicitlycancelling a query if more than one result is returned. In addition since cryptlibexpects all data to be SQL text strings (or binary data for certificates if the databasesupports it) you may need to convert some data types such as integer values to textequivalents when returning them in response to a query.

The Network Plugin Interface 287
static void performErrorQuery( DBMS_STATE_INFO *dbmsInfo, int*errorCode, char *errorMessage )
This function is called to return extended error information when an error occurs.Whenever either performQuery() or performUpdate() return an error status, thisfunction will be called to obtain further information. The information returned isspecific to the database back-end and can include the back-end-specific error codeand a text string describing the error. If this information isn’t available, you should leave it empty.
An example of a plugin interface is keyset/odbc.c, which implements the fullfunctionality required by cryptlib, a somewhat simpler interface for a database thatdoesn’t support binary blobs is keyset/mysql.c. In addition to the standard functionsincluded below, you may also need to include an SQL rewrite function that changesthe contents of SQL queries to match the SQL dialect used by your database. This isa simple function that just substitutes one text string in the query for another. Themost common conversion changes the name of the binary blob type (if the databasesupports it) from the built-in“BLOB”to whatever value is required by the database.Again, see keyset/odbc.c or keyset/mysql.c for an example of the SQL rewriteprocess.
The Network Plugin InterfaceThe network plugin interface is used to provide a transport-layer service to thehigher-level cryptlib protocols that require network access capabilities. Networkmanagement is handled by the cryptlib I/O streams module stream.c. The streamI/O system implements a multi-layer architecture with the transport-layer service inthe lowest layer, optional I/O buffering layered above that, optional application-layerhandling (for example HTTP) above that, and finally the cryptlib protocols such asCMP, RTCS, SCEP, OCSP and TSP above that. Other protocols such as SSH andSSL, which don’t require any of the intermediate layers, talk directly to the transport layer.
By replacing the transport-layer interface, you can run cryptlib communications overany type of transport interface. Currently cryptlib provides two types of built-intransport provider, a generic BSD sockets provider and a provider that uses a cryptlibsession as the transport layer, making it possible to run (for example) RTCS over SSLor CMP over SSH. You can also use the plugin functionality to provide custom I/Ohandling that goes beyond that provided by the standard sockets-based interface. Forexample if you need to use event-based I/O or OS-specific mechanisms such as I/Ocompletion ports, you can provide this capability through the use of custom I/Ohandlers in the network plugin interface.
The network plugin interface is handled through function pointers to the varioustransport-layer functions. By setting these to point to functions in the appropriateplugins, it’s possible to use any type of networking or communications interface for the transport layer. To set these pointers, the cryptlib I/O stream system callssetAccessMethodXXX(), which in the case of BSD sockets issetAccessMethodTCP().
When calling a transport-layer interface function, cryptlib passes in a STREAMstructure which is defined in stream.h. This contains information which is requiredby the transport layer such as socket handles and network communications timeoutinformation.
Network Plugin FunctionsThe network plugin functions that you need to provide are as follows:
static BOOLEAN transportOKFunction( void )
This function is called before using any transport-layer functions to query whether thetransport layer is OK. It should return TRUE if it’s safe to call the other transport-layer functions or FALSE otherwise, for example because the requested networkinterface drivers aren’t loaded.

Database and Networking Plugins288
static int transportConnectFunction( STREAM *stream, const char*server, const int port )
This functions is called to established a connection, either by connecting to a remotesystem or by waiting for a connection from a remote system (the exact type dependson whether the stream is acting as a client or server stream). The server parameteris the name of the local interface or remote server, and the port parameter is the portnumber to listen on or connect to.
static void transportDisconnectFunction( STREAM *stream )
This function is called to shut down a connection with a remote client or server.
static int transportReadFunction( STREAM *stream, BYTE *buffer, constint length, const int flags )
This function is called to read data from a remote client or server. The behaviour ofthis function differs slightly depending on read timeout handling. For blocking reads,it should read as many bytes as are indicated in the length parameter, returning anerror if less bytes are read. For nonblocking reads it should read as many bytes as areavailable (which may be zero) and return. In either case if the read succeeds it returnsa byte count.
Normally the read should wait for data to appear for the number of seconds indicatedby the timeout value stored in the stream I/O structure. However, it’s possible to override this with the flags parameter, which can contain the following flags:
Flag Description
TRANSPORT_FLAG_-NONBLOCKING
Perform a nonblocking read, overriding thetimeout value in the stream I/O structure ifnecessary.
TRANSPORT_FLAG_-BLOCKING
Perform a blocking read, overriding the timeoutvalue in the stream I/O structure if necessary.
These flags are used in cases where it’s known that a certain number of bytes must be read in order to continue, or when the higher-level stream buffering functions want toperform a speculative read-ahead.
static int transportWriteFunction( STREAM *stream, const BYTE *buffer,const int length, const int flags )
This function is used to write data to a remote client or server. The flags parameter iscurrently unused and should be set to TRANSPORT_FLAG_NONE.

AES 289
AlgorithmsThis chapter describes the characteristics of each algorithm used in cryptlib and anyknown restrictions on their use. Since cryptlib originates in a country that doesn’t allow software patents, there are no patent restrictions on the code in its country oforigin. Known restrictions in other countries are listed below and all possible carehas been taken to ensure that no other infringing technology is incorporated into thecode, however since the author is a cryptographer and not an IP lawyer users areurged to consult IP lawyers in the country of intended use if they have any concernsover potential restrictions.
AESAES is a 128-bit block cipher with a 128-bit key and has the cryptlib algorithmidentifier CRYPT_ALGO_AES.
BlowfishBlowfish is a 64-bit block cipher with a 448-bit key and has the cryptlib algorithmidentifier CRYPT_ALGO_BLOWFISH.
CAST-128CAST-128 is a 64-bit block cipher with a 128-bit key and has the cryptlib algorithmidentifier CRYPT_ALGO_CAST.
DESDES is a 64-bit block cipher with a 56-bit key and has the cryptlib algorithmidentifier CRYPT_ALGO_DES. Note that this algorithm is no longer consideredsecure and should not be used. It is present in cryptlib only for compatibility withlegacy applications.
Although cryptlib uses 64-bit DES keys, only 56 bits of the key are actually used.The least significant bit in each byte is used as a parity bit (cryptlib will set thecorrect parity values for you, so you don’t have to worry about this). You can treat the algorithm as having a 64-bit key, but bear in mind that only the high 7 bits of eachbyte are actually used as keying material.
Loading a key will return a CRYPT_ERROR_PARAM3 error if the key is a weakkey. cryptExportKey will export the correct parity-adjusted version of the key.
Triple DESTriple DES is a 64-bit block cipher with a 112/168-bit key and has the cryptlibalgorithm identifier CRYPT_ALGO_3DES.
Although cryptlib uses 128, or 192-bit DES keys (depending on whether two- orthree-key triple DES is being used), only 112 or 168 bits of the key are actually used.The least significant bit in each byte is used as a parity bit (cryptlib will set thecorrect parity values for you, so you don’t have to worry about this). You can treat the algorithm as having a 128 or 192-bit key, but bear in mind that only the high 7bits of each byte are actually used as keying material.
Loading a key will return a CRYPT_ERROR_PARAM3 error if the key is a weakkey. cryptExportKey will export the correct parity-adjusted version of the key.
Diffie-HellmanDiffie-Hellman is a key exchange algorithm with a key size of up to 4096 bits and hasthe cryptlib algorithm identifier CRYPT_ALGO_DH.
Diffie-Hellman was formerly covered by a patent in the US, this has now expired.

Algorithms290
DSADSA is a digital signature algorithm with a key size of up to 1024 bits and has thecryptlib algorithm identifier CRYPT_ALGO_DSA.
DSA is covered by US patent 5,231,668, with the patent held by the US government.This patent has been made available royalty-free to all users world-wide. The USDepartment of Commerce is not aware of any other patents that would be infringedby the DSA. US patent 4,995,082, “Method for identifying subscribers and forgenerating and verifying electronic signatures in a data exchange system” (“the Schnorr patent”) relates to the DSA algorithm but only applies to a very restricted set of smart-card based applications and does not affect the DSA implementation incryptlib.
ElgamalElgamal is a public-key encryption/digital signature algorithm with a key size of up to4096 bits and has the cryptlib algorithm identifier CRYPT_ALGO_ELGAMAL.
Elgamal was formerly covered (indirectly) by a patent in the US, this has nowexpired.
HMAC-MD5HMAC-SHA1HMAC-RIPEMD-160
HMAC-MD5, HMAC-SHA1, and HMAC-RIPEMD-160 are MAC algorithms with akey size of up to 1024 bits and have the cryptlib algorithm identifiersCRYPT_ALGO_HMAC_MD5, CRYPT_ALGO_HMAC_SHA, andCRYPT_ALGO_HMAC_RIPEMD160.
IDEAIDEA is a 64-bit block cipher with a 128-bit key and has the cryptlib algorithmidentifier CRYPT_ALGO_IDEA.
IDEA is covered by patents in Austria, France, Germany, Italy, Japan, theNetherlands, Spain, Sweden, Switzerland, the UK, and the US. A statement from thepatent owners is included below.
IDEA Patent Notice
IDEA is protected by International copyright law and in addition has been patentedin the USA, several countries in Europe (Austria, France, Germany, Italy,Netherlands, Spain, Sweden, Switzerland, United Kingdom), and filed in Japan.
Ascom Systec Ltd., 5506 Mägenwil, Switzerland, holds the patent rights.MediaCrypt AG, 8005 Zurich, Switzerland holds all the relevant rights from Ascomrelated to the worldwide licensing of the IDEA algorithm.
Any use of the algorithm for Commercial Purposes is subject to a license fromMediaCrypt AG and any misuse of the algorithm will be prosecuted.
Commercial Purposes shall mean any revenue generating purpose including but notlimited to
(i) using the algorithm for company internal purposes
(ii) incorporating an application software containing the algorithm into anyhardware and/ or software and distributing such hardware and/or software and/orproviding services related thereto to others
(iii) using a product containing an application software that uses the algorithmnot covered by an IDEA license
Free use for private purposes:

MD2 291
The free use of software and/or hardware containing the algorithm is strictly limitedto non revenue generating data transfer between private individuals, i.e., not servingcommercial purposes. Requests by freeware developers to obtain a royalty-freelicense to spread an application program containing the algorithm not forcommercial purposes must be directed to MediaCrypt.
Special offer for shareware developers:
Selling any software and/or hardware containing the algorithm is subject to aproduct license. However, there is a special waiver for shareware developers. Suchwaiver eliminates the up front fees as well as royalties for the first USD 10,000gross sales of the product containing the algorithm, if and only if:
1) The product is being sold for a minimum of USD 10.00 and a maximum ofUSD 50.00.
2) The source code for the shareware product is available to the public. BeyondUSD 10,000 gross sales from the shareware product the standard terms andconditions for product licenses shall apply.
MD2MD2 is a message digest/hash algorithm with a digest/hash size of 128 bits and hasthe cryptlib algorithm identifier CRYPT_ALGO_MD2. Although no weaknesseshave been found in this algorithm, it should not be used any more except for legacyapplication support.
MD4MD4 is a message digest/hash algorithm with a digest/hash size of 128 bits and hasthe cryptlib algorithm identifier CRYPT_ALGO_MD4. Note that this algorithm is nolonger considered secure and should not be used. It is present in cryptlib only forcompatibility with legacy applications.
MD5MD5 is a message digest/hash algorithm with a digest/hash size of 128 bits and hasthe cryptlib algorithm identifier CRYPT_ALGO_MD5. Note that this algorithm is nolonger considered secure and should not be used. It is present in cryptlib only forcompatibility with legacy applications.
RC2RC2 is a 64-bit block cipher with a 1024-bit key and has the cryptlib algorithmidentifier CRYPT_ALGO_RC2. Although no weaknesses have been found in thisalgorithm, it should not be used any more except for legacy application support.
The term “RC2” is trademarked in the US. It may be necessary to refer to it as “an algorithm compatible with RC2” in products that use RC2 and are distributed in the US.
RC4RC4 is an 8-bit stream cipher with a key of up to 1024 bits and has the cryptlibalgorithm identifier CRYPT_ALGO_RC4.
The term “RC4” is trademarked in the US. It may be necessary to refer to it as “an algorithm compatible with RC4” in products that use RC4 and are distributed in the US. Common practice is to refer to it as ArcFour.
RC5RC5 is a 64-bit block cipher with an 832-bit key and has the cryptlib algorithmidentifier CRYPT_ALGO_RC5.
RC5 is covered by US patent 5,724,428, “Block Encryption Algorithm with Data-Dependent Rotation”, issued 3 March 1998. The patent is held by RSA Data Security

Algorithms292
Inc. 100 Marine Parkway, Redwood City, California 94065, ph.+1 415 595-8782, fax+1 415 595-1873, and the algorithm cannot be used commercially in the US without alicense.
RIPEMD-160RIPEMD-160 is a message digest/hash algorithm with a digest/hash size of 160 bitsand has the cryptlib algorithm identifier CRYPT_ALGO_RIPEMD160.
RSARSA is a public-key encryption/digital signature algorithm with a key size of up to4096 bits and has the cryptlib algorithm identifier CRYPT_ALGO_RSA.
RSA was formerly covered by a patent in the US, this has now expired.
SHASHA is a message digest/hash algorithm with a digest/hash size of 160 bits and hasthe cryptlib algorithm identifier CRYPT_ALGO_SHA.
SkipjackSkipjack is a 64-bit block cipher with an 80-bit key and has the cryptlib algorithmidentifier CRYPT_ALGO_SKIPJACK. Although no weaknesses have been found inthis algorithm, it should not be used any more except for legacy application support.

CRYPT_ALGO_TYPE 293
Data Types and ConstantsThis section describes the data types and constants used by cryptlib.
CRYPT_ALGO_TYPEThe CRYPT_ALGO_TYPE is used to identify a particular encryption algorithm.More information on the individual algorithm types can be found in “Algorithms” on page 271.
Value Description
CRYPT_ALGO_AES AES
CRYPT_ALGO_BLOWFISH Blowfish
CRYPT_ALGO_CAST CAST-128
CRYPT_ALGO_DES DES. This algorithm is no longerconsidered secure and should notbe used except for legacyapplication support.
CRYPT_ALGO_3DES Triple DES
CRYPT_ALGO_IDEA IDEA
CRYPT_ALGO_RC2 RC2. Although no weaknesseshave been found in this algorithm,it should not be used any moreexcept for legacy applicationsupport.
CRYPT_ALGO_RC4 RC4
CRYPT_ALGO_RC5 RC5
CRYPT_ALGO_SKIPJACK Skipjack. Although noweaknesses have been found inthis algorithm, it should not beused any more except for legacyapplication support.
CRYPT_ALGO_DH Diffie-Hellman
CRYPT_ALGO_DSA DSA
CRYPT_ALGO_ELGAMAL Elgamal
CRYPT_ALGO_RSA RSA
CRYPT_ALGO_MD2 MD2. Although no weaknesseshave been found in this algorithm,it should not be used any moreexcept for legacy applicationsupport.
CRYPT_ALGO_MD4 MD4. This algorithm is no longerconsidered secure and should notbe used except for legacyapplication support.
CRYPT_ALGO_MD5 MD5. This algorithm is no longerconsidered secure and should notbe used except for legacyapplication support.

Data Types and Constants294
Value DescriptionCRYPT_ALGO_RIPEMD160 RIPE-MD 160
CRYPT_ALGO_SHA SHA/SHA-1
CRYPT_ALGO_SHA2 SHA2/SHA-256/SHA-384/SHA-512
CRYPT_ALGO_HMAC_MD5 HMAC-MD5
CRYPT_ALGO_HMAC_RIPEMD160 HMAC-RIPEMD-160
CRYPT_ALGO_HMAC_SHA HMAC-SHA
CRYPT_ALGO_VENDOR1CRYPT_ALGO_VENDOR2CRYPT_ALGO_VENDOR3
Optional vendor-definedalgorithms.
CRYPT_ALGO_FIRST_-CONVENTIONAL
CRYPT_ALGO_LAST_-CONVENTIONAL
First and last possibleconventional encryption algorithmtype.
CRYPT_ALGO_FIRST_PKCCRYPT_ALGO_LAST_PKC
First and last possible public-keyalgorithm type.
CRYPT_ALGO_FIRST_HASHCRYPT_ALGO_LAST_HASH
First and last possible hashalgorithm type.
CRYPT_ALGO_FIRST_MACCRYPT_ALGO_LAST_MAC
First and last possible MACalgorithm type.
CRYPT_ATTRIBUTE_TYPEThe CRYPT_ATTRIBUTE_TYPE is used to identify the attribute associated with acryptlib object. Object attributes are introduced in “Working with Object Attributes” on page 33 and are used extensively throughout this manual.
CRYPT_CERTFORMAT_TYPEThe CRYPT_CERTFORMAT_TYPE is used to specify the format for exportedcertificate objects. More information on exporting certificate objects is given in“Importing/Exporting Certificates” onpage 211.
Value Description
CRYPT_CERTFORMAT_-CERTCHAIN
Certificate object encoded as a PKCS#7 certificate chain. This encoding isonly possible for objects that arecertificates or certificate chains.
CRYPT_CERTFORMAT_-CERTIFICATE
Certificate object encoded accordingto the ASN.1 distinguished encodingrules (DER).
CRYPT_CERTFORMAT_TEXT_-CERTCHAIN
CRYPT_CERTFORMAT_TEXT_-CERTIFICATE
Base64-encoded text format. Thecertificate object is encoded as for thebasic CRYPT_CERTFORMAT_typeformat, and an extra layer of base64encoding with BEGIN/ENDCERTIFICATE tags is added. Thisformat is required by some webbrowsers and applications.

CRYPT_CERTTYPE_TYPE 295
CRYPT_CERTTYPE_TYPEThe CRYPT_CERTTYPE_TYPE is used to specify the type of a certificate objectwhen used with cryptCreateCert. More information on certificates and certificateobjects is given in “Certificates and Certificate Management” on page 139.
Value Description
CRYPT_CERTTYPE_-ATTRIBUTE_CERT
Attribute certificate.
CRYPT_CERTTYPE_CERTCHAIN PKCS #7 certificate chain.
CRYPT_CERTTYPE_-CERTIFICATE
Certificate.
CRYPT_CERTTYPE_-CERTREQUEST
PKCS #10 certification request.
CRYPT_CERTTYPE_CMS_-ATTRIBUTES
PKCS #7/CMS attributes.
CRYPT_CERTTYPE_CRL CRL
CRYPT_CERTTYPE_OCSP_-REQUEST
CRYPT_CERTTYPE_OCSP_-RESPONSE
OCSP request and response.
CRYPT_CERTTYPE_RTCS_-REQUEST
CRYPT_CERTTYPE_RTCS_-RESPONSE
RTCS request and response.
CRYPT_CERTTYPE_PKIUSER PKI user information.
CRYPT_CERTTYPE_REQUEST_-CERT
CRYPT_CERTTYPE_REQUEST_-REVOCATION
CRMF certificate request/revocationrequest.
CRYPT_DEVICE_TYPEThe CRYPT_DEVICE_TYPE is used to specify encryption hardware or anencryption device such as a PCMCIA or smart card. More information on encryptiondevices is given in “Encryption Devices and Modules” on page 255.
Value Description
CRYPT_DEVICE_FORTEZZA Fortezza card.
CRYPT_DEVICE_PKCS11 PKCS #11 crypto token.
CRYPT_FORMAT_TYPEThe CRYPT_FORMAT_TYPE is used to identify a data format type for exportedkeys, signatures, and encryption envelopes. Of the formats supported by cryptlib, thecryptlib native format is the most flexible and is the recommended format unless yourequire compatibility with a specific security standard. More information on thedifferent formats is given in “Data Enveloping” on page 51, “Exchanging Keys” on page 183, and “Signing Data” on page 189.
Value Description
CRYPT_FORMAT_CRYPTLIB cryptlib native format.
CRYPT_FORMAT_PGP PGP format.
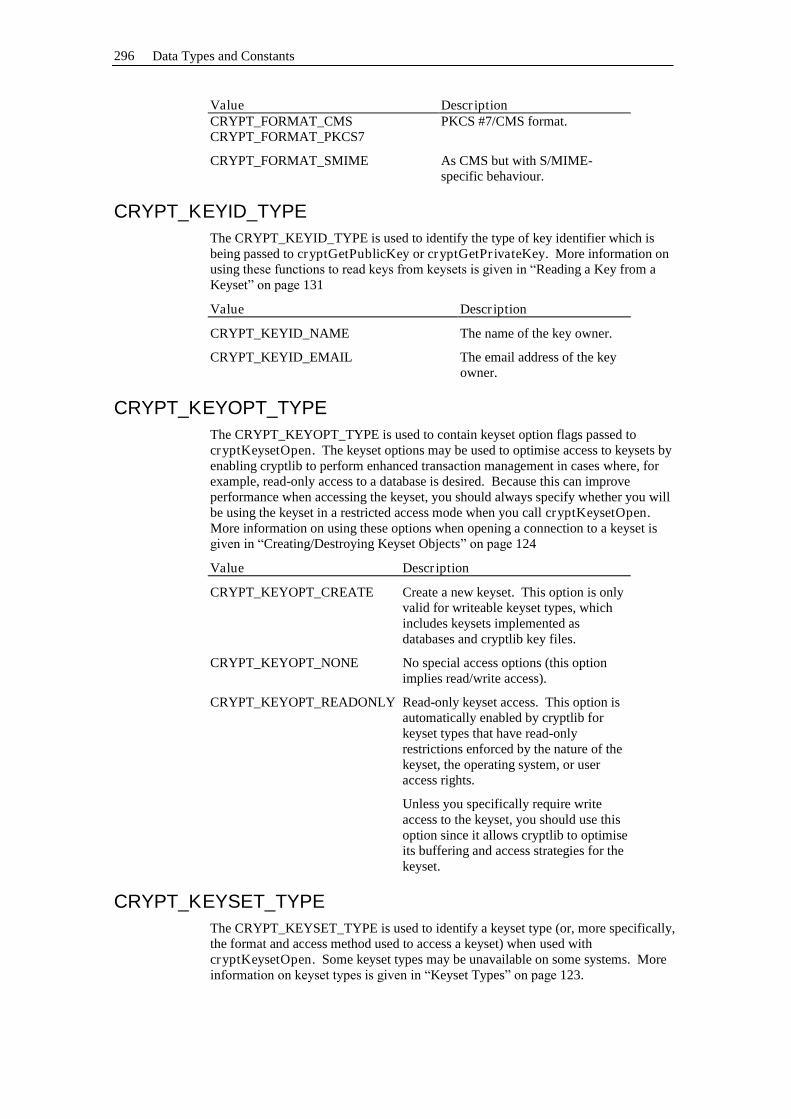
Data Types and Constants296
Value DescriptionCRYPT_FORMAT_CMSCRYPT_FORMAT_PKCS7
PKCS #7/CMS format.
CRYPT_FORMAT_SMIME As CMS but with S/MIME-specific behaviour.
CRYPT_KEYID_TYPEThe CRYPT_KEYID_TYPE is used to identify the type of key identifier which isbeing passed to cryptGetPublicKey or cryptGetPrivateKey. More information onusingthese functions to read keys from keysets is given in “Reading a Key from aKeyset” on page 131
Value Description
CRYPT_KEYID_NAME The name of the key owner.
CRYPT_KEYID_EMAIL The email address of the keyowner.
CRYPT_KEYOPT_TYPEThe CRYPT_KEYOPT_TYPE is used to contain keyset option flags passed tocryptKeysetOpen. The keyset options may be used to optimise access to keysets byenabling cryptlib to perform enhanced transaction management in cases where, forexample, read-only access to a database is desired. Because this can improveperformance when accessing the keyset, you should always specify whether you willbe using the keyset in a restricted access mode when you call cryptKeysetOpen.More information on using these options when opening a connection to a keyset isgiven in “Creating/Destroying Keyset Objects” on page 124
Value Description
CRYPT_KEYOPT_CREATE Create a new keyset. This option is onlyvalid for writeable keyset types, whichincludes keysets implemented asdatabases and cryptlib key files.
CRYPT_KEYOPT_NONE No special access options (this optionimplies read/write access).
CRYPT_KEYOPT_READONLY Read-only keyset access. This option isautomatically enabled by cryptlib forkeyset types that have read-onlyrestrictions enforced by the nature of thekeyset, the operating system, or useraccess rights.
Unless you specifically require writeaccess to the keyset, you should use thisoption since it allows cryptlib to optimiseits buffering and access strategies for thekeyset.
CRYPT_KEYSET_TYPEThe CRYPT_KEYSET_TYPE is used to identify a keyset type (or, more specifically,the format and access method used to access a keyset) when used withcryptKeysetOpen. Some keyset types may be unavailable on some systems. Moreinformation on keyset types is given in “Keyset Types” on page 123.

CRYPT_MODE_TYPE 297
Value Description
CRYPT_KEYSET_FILE A flat-file keyset, either a cryptlibkey file or a PGP/OpenPGP keyring.
CRYPT_KEYSET_HTTP URL specifying the location of acertificate or CRL.
CRYPT_KEYSET_LDAP LDAP directory service.
CRYPT_KEYSET_PLUGIN Generic database network plugin.CRYPT_KEYSET_DATABASE Generic RDBMS interface.CRYPT_KEYSET_ODBC Generic ODBC interface.
CRYPT_KEYSET_DATABASE_-STORE
CRYPT_KEYSET_ODBC_STORECRYPT_KEYSET_PLUGIN_STORE
As for the basic keyset types, butrepresenting a certificate store foruse by a CA rather than a simplekeyset. The user who creates andupdates these keyset types mustbe a CA user.
CRYPT_MODE_TYPEThe CRYPT_MODE_TYPE is used to identify a particular conventional encryptionmode. More information on the individual modes can be found in “Algorithms” on page 271.
Value Description
CRYPT_MODE_ECB ECB
CRYPT_MODE_CBC CBC
CRYPT_MODE_CFB CFB
CRYPT_MODE_OFB OFB
CRYPT_OBJECT_TYPEThe CRYPT_OBJECT_TYPE is used to identify the type of an exported key orsignature object that has been created with cryptExportKey orcryptCreateSignature. More information on working with these objects is given in“Querying an Exported Key Object” on page 186, and “Querying a Signature Object” on page 190.
Value Description
CRYPT_OBJECT_ENCRYPTED_KEY Conventionally exported keyobject.
CRYPT_OBJECT_KEYAGREEMENT Key agreement object.
CRYPT_OBJECT_PKCENCRYPTED_-KEY
Public-key exported key object.
CRYPT_OBJECT_SIGNATURE Signature object.
CRYPT_SESSION_TYPEThe CRYPT_SESSION_TYPE is used to identify a secure session type when usedwith cryptCreateSession. More information on sessions is given in “SecureSessions” on page 96.
Value Description
CRYPT_SESSION_CMPCRYPT_SESSION_CMP_SERVER
CMP client/server session.

Data Types and Constants298
Value Description
CRYPT_SESSION_CMPCRYPT_SESSION_CMP_SERVER
CMP client/server session.
CRYPT_SESSION_OCSPCRYPT_SESSION_OCSP_SERVER
OCSP client/server session.
CRYPT_SESSION_RTCSCRYPT_SESSION_RTCS_SERVER
RTCS client/server session.
CRYPT_SESSION_SCEPCRYPT_SESSION_SCEP_SERVER
SCEP client/server session.
CRYPT_SESSION_SSHCRYPT_SESSION_SSH_SERVER
SSH client/server session.
CRYPT_SESSION_SSLCRYPT_SESSION_SSL_SERVER
SSL client/server session.
CRYPT_SESSION_TSPCRYPT_SESSION_TSP_SERVER
TSP client/server session.
Data Size ConstantsThe following values define various maximum lengths for data objects that are usedin cryptlib. These can be used for allocating memory to contain the objects, or as acheck to ensure that an object isn’t larger than the maximum size allowed by cryptlib.
Constant Description
CRYPT_MAX_HASHSIZE Maximum hash size in bytes.
CRYPT_MAX_IVSIZE Maximum initialisation vector size in bytes.
CRYPT_MAX_KEYSIZE Maximum conventional-encryption key sizein bytes.
CRYPT_MAX_PKCSIZE Maximum public-key component size inbytes. This value specifies the maximumsize of individual components, sincepublic/private keys are usually composed ofa number of components the overall size islarger than this.
CRYPT_MAX_TEXTSIZE Maximum size of a text string (e.g. a publicor private key owner name) in characters.This defines the string size in charactersrather than bytes, so a Unicode string of sizeCRYPT_MAX_TEXTSIZE could be twiceas long as an ASCII string of sizeCRYPT_MAX_TEXTSIZE. This valuedoes not include the terminating nullcharacter in C strings.
Miscellaneous ConstantsThe following values are used for various purposes by cryptlib, for example tospecify that default parameter values are to be used, that the given parameter isunused and can be ignored, or that a special action should be taken in response toseeing this parameter.
Constant Description
CRYPT_KEYTYPE_PRIVATECRYPT_KEYTYPE_PUBLIC
Whether the key being passed tocryptInitComponents()/cryptSetComponent() is a

Miscellaneous Constants 299
Constant Descriptionpublic or private key.
CRYPT_RANDOM_FASTPOLLCRYPT_RANDOM_SLOWPOLL
The type of polling to perform toupdate the internal random data pool.
CRYPT_UNUSED A value indicating that this parameteris unused and can be ignored.
CRYPT_USE_DEFAULT A value indicating that the defaultsetting for this parameter should beused.

Data Structures300
Data StructuresThis section describes the data structures used by cryptlib.
CRYPT_OBJECT_INFO StructureThe CRYPT_OBJECT_INFO structure is used with cryptQueryObject to returninformation about a data object created with cryptExportKey orcryptCreateSignature. Some of the fields are only valid for certain algorithm andmode combinations, or for some types of data objects. If they don’t apply to thegiven algorithm and mode or context, they will be set to CRYPT_ERROR, null, orfilled with zeroes as appropriate.
Field Description
CRYPT_OBJECT_TYPE objectType Data object type.CRYPT_ALGO_TYPE cryptAlgo Encryption/signature algorithm.CRYPT_MODE_TYPE cryptMode Encryption/signature mode.
CRYPT_ALGO_TYPE hashAlgo The hash algorithm used to hash thedata if the data object is a signatureobject.
unsigned char salt[ CRYPT_MAX_-HASHSIZE ]
int saltLength
The salt used to derive theexport/import key if the object is aconventionally encrypted key object
CRYPT_PKCINFO_xxx StructuresThe CRYPT_PKCINFO_xxx structures are used to load public and private keys(which contain multiple key components) into encryption contexts by setting them asthe CRYPT_CTXINFO_KEY_COMPONENTS attribute. All fields are multi-precision integer values that are set using the cryptSetComponent() macro.
The CRYPT_PKCINFO_DLP structure is used to load keys for algorithms based onthe discrete logarithm problem, which includes keys for Diffie-Hellman, DSA, andElgamal. The structure contains the following fields:
Field Description
p Prime modulus.
q Prime divisor. Some DH and Elgamal keys don’t use this parameter, in which case you should set it to an all-zero value of the appropriate size. Note that omittingthe q parameter means that cryptlib can’t perform certain key validity checks that it otherwise performswhen q is present.
g Element of order q mod p.
x Private random integer.
y Public random integer, gx mod p.
The CRYPT_PKCINFO_RSA structure is used to load RSA public-key encryptionkeys and contains the following fields:
Field Description
n Modulus.
e Public exponent.
d Private exponent. Some keys don’t include this parameter, in which case you should set it to an all-zerovalue of the appropriate size. Note that if the d

CRYPT_QUERY_INFO Structure 301
Field Descriptionparameter is absent then the e1 and e2 values must bepresent.
p Prime factor 1.
q Prime factor 2.
u CRT coefficient q-1 mod p.
e1 Private exponent 1 (PKCS #1), d mod (p-1).
e2 Private exponent 2 (PKCS #1), d mod (q-1).
The e1 and e2 components of CRYPT_PKCINFO_RSA may not be present in somekeys. cryptlib will make use of them if they are present, but can also work withoutthem. The loading of private keys is slightly slower if these values aren’t present since cryptlib needs to generate them itself.
CRYPT_QUERY_INFO StructureThe CRYPT_QUERY_INFO structure is used with cryptQueryCapability to returninformation about an encryption algorithm or an encryption context or key-relatedcertificate object (for example a public-key certificate or certification request). Someof the fields are only valid for certain algorithm types, or for some types ofencryption contexts. If they don’t apply to the given algorithm or context, they will be set to CRYPT_ERROR, null, or filled with zeroes as appropriate.
Field Description
char algoName[ CRYPT_MAX_-TEXTSIZE ]
Algorithm name.
int blockSize Algorithm block size in bytes.
int minKeySizeint keySizeint maxKeySize
The minimum, recommended, andmaximum key size in bytes (if thealgorithm uses a key).

Function Reference302
Function Reference
cryptAddCertExtensionThe cryptAddCertExtension function is used to add a generic blob-type certificateextension to a certificate object.
int cryptAddCertExtension( const CRYPT_CERTIFICATE certificate, const char *oid, const intcriticalFlag, const void *extension, const int extensionLength );
Parameters certificateThe certificate object to which to add the extension.
oidThe object identifier value for the extension being added, specified as a sequence ofintegers.
criticalFlagThe critical flag for the extension being added.
extensionThe address of the extension data.
extensionLengthThe length in bytes of the extension data.
Remarks cryptlib directly supports extensions from X.509, PKIX, SET, SigG, and variousvendors itself, so you shouldn’t use this function for anything other than unknown, proprietary extensions.
See also cryptGetCertExtension, cryptDeleteCertExtension.
cryptAddPrivateKeyThe cryptAddPrivateKey function is used to add a user’s private key to a keyset.
int cryptAddPrivateKey( const CRYPT_KEYSET keyset, const CRYPT_HANDLE cryptKey,const char *password );
Parameters keysetThe keyset object to which to write the key.
cryptKeyThe private key to write to the keyset.
passwordThe password used to encrypt the private key.
Remarks The use of a password to encrypt the private key is required when storing a privatekey to a keyset, but not to a crypto device such as a smart card or Fortezza card, sincethese provide their own protection for the key data.
See also cryptAddPublicKey, cryptDeleteKey, cryptGetPrivateKey, cryptGetPublicKey.
cryptAddPublicKeyThe cryptAddPublicKey function is used to add a user’s public key or certificate to a keyset.
int cryptAddPublicKey( const CRYPT_KEYSET keyset, const CRYPT_CERTIFICATEcertificate );
Parameters keysetThe keyset object to which to write the key.

cryptAddRandom 303
certificateThe certificate to add to the keyset.
Remarks This function requires a key certificate object rather than an encryption context, sincethe certificate contains additional identification information which is used when thecertificate is written to the keyset.
See also cryptAddPrivateKey, cryptDeleteKey, cryptGetPrivateKey, cryptGetPublicKey.
cryptAddRandomThe cryptAddRandom function is used to add random data to the internal randomdata pool maintained by cryptlib, or to tell cryptlib to poll the system for randominformation. The random data pool is used to generate session keys andpublic/private keys, and by several of the high-level cryptlib functions.
int cryptAddRandom( const void *randomData, const int randomDataLength );
Parameters randomDataThe address of the random data to be added, or null if cryptlib should poll thesystem for random information.
randomDataLengthThe length of the random data being added, or CRYPT_RANDOM_SLOWPOLLto perform an in-depth, slow poll or CRYPT_RANDOM_FASTPOLL to perform aless thorough but faster poll for random information.
cryptAsyncCancelThe cryptAsyncCancel function is used to cancel an asynchronous operation on anobject.
int cryptAsyncCancel( const CRYPT_HANDLE cryptObject );
Parameters cryptObjectThe object on which an asynchronous operation is to be cancelled.
Remarks Because of the asynchronous nature of the operation being performed the cancel maynot take effect immediately. In the worst case it may take a second or two for thecancel command to be processed by the object.
See also cryptAsyncQuery, cryptGenerateKeyAsync.
cryptAsyncQueryThe cryptAsyncQuery function is used to obtain the status of an asynchronousoperation on an object.
int cryptAsyncQuery( const CRYPT_HANDLE cryptObject );
Parameters cryptObjectThe object to be queried.
Remarks cryptAsyncQuery will return CRYPT_ERROR_TIMEOUT if an asynchronousoperation is in progress and the object is unavailable for use until the operationcompletes.
See also cryptAsyncCancel, cryptGenerateKeyAsync.
cryptCAAddItemThe cryptCAAddItem function is used to add a certificate object to a certificatestore. Usually this would be a standard certificate, however this function can be usedby CAs to add special items such as certificate requests and PKI user information.

Function Reference304
int cryptCAAddItem( const CRYPT_KEYSET keyset, const CRYPT_CERTIFICATE certificate);
Parameters keysetThe certificate store to which the item will be added.
certificateThe item to add to the certificate store.
See also cryptCACertManagement, cryptCAGetItem.
cryptCACertManagementThe cryptCACertManagement function is used to perform a CA certificatemanagement operation such as a certificate issue, revocation, CRL issue, certificateexpiry, or other operation with a certificate store.
int cryptCACertManagement( CRYPT_CERTIFICATE *cryptCert, constCRYPT_CERTACTION_TYPE action, const CRYPT_KEYSET keyset, constCRYPT_CONTEXT caKey, const CRYPT_CERTIFICATE certRequest );
Parameters cryptCertThe address of the certificate object to be created.
actionThe certificate management operation to perform.
keysetThe certificate store to use to perform the action.
caKeyThe CA key to use when performing the action, or CRYPT_UNUSED if no key isnecessary for this action.
certRequestThe certificate request to use when performing the action, or CRYPT_UNUSED ifno request is necessary for this action.
See also cryptCAAddItem, cryptCAGetItem.
cryptCAGetItemThe cryptCAGetItem function is used to read a certificate object from a certificatestore. Usually this would be a standard certificate, however this function can be usedby CAs to obtain special items such as certificate requests and PKI user information.The item to be fetched is identified either through the key owner’s name or their email address.
int cryptCAGetItem( const CRYPT_KEYSET keyset, CRYPT_CERTIFICATE *certificate, constCRYPT_CERTTYPE_TYPE certType, const CRYPT_KEYID_TYPEkeyIDtype, const void *keyID );
Parameters keysetThe certificate store from which to obtain the item.
certificateThe address of the certificate object to be fetched.
certTypeThe item type.
keyIDtypeThe type of the key ID, either CRYPT_KEYID_NAME for the name or key label,or CRYPT_KEYID_EMAIL for the email address.
keyIDThe key ID of the item to read.

cryptCheckCert 305
See also cryptCACertManagement, cryptCAAddItem.
cryptCheckCertThe cryptCheckCert function is used to check the signature on a certificate object,or to verify a certificate object against a CRL or a keyset containing a CRL.
int cryptCheckCert( const CRYPT_CERTIFICATE certificate, const CRYPT_HANDLEsigCheckKey );
Parameters certificateThe certificate container object that contains the certificate item to check.
sigCheckKeyA public-key context or key certificate object containing the public key used toverify the signature, or alternatively CRYPT_UNUSED if the certificate item isself-signed. If the certificate is to be verified against a CRL, this should be acertificate object or keyset containing the CRL. If the certificate is to be verifiedonline, this should be a session object for the server used to verify the certificate.
See also cryptSignCert.
cryptCheckSignatureThe cryptCheckSignature function is used to check the digital signature on a pieceof data.
int cryptCheckSignature( const void *signature, const int signatureLength, constCRYPT_HANDLE sigCheckKey, const CRYPT_CONTEXT hashContext );
Parameters signatureThe address of a buffer that contains the signature.
signatureLengthThe length in bytes of the signature data.
sigCheckKeyA public-key context or key certificate object containing the public key used toverify the signature.
hashContextA hash context containing the hash of the data.
See also cryptCheckSignatureEx, cryptCreateSignature, cryptCreateSignatureEx,cryptQueryObject.
cryptCheckSignatureExThe cryptCheckSignatureEx function is used to check the digital signature on apiece of data with extended control over the signature information.
int cryptCheckSignatureEx( const void *signature, const int signatureLength, constCRYPT_HANDLE sigCheckKey, const CRYPT_CONTEXT hashContext,CRYPT_HANDLE *extraData );
Parameters signatureThe address of a buffer that contains the signature.
signatureLengthThe length in bytes of the signature data.
sigCheckKeyA public-key context or key certificate object containing the public key used toverify the signature.
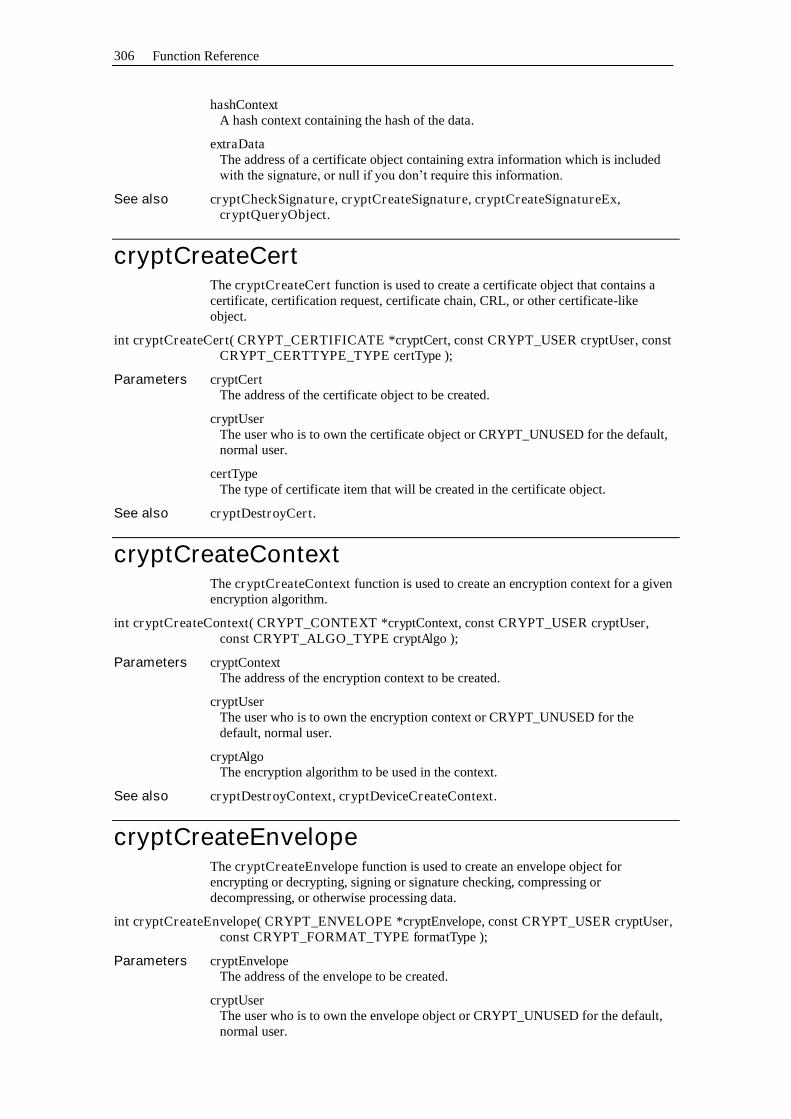
Function Reference306
hashContextA hash context containing the hash of the data.
extraDataThe address of a certificate object containing extra information which is includedwith the signature, or null if you don’t require this information.
See also cryptCheckSignature, cryptCreateSignature, cryptCreateSignatureEx,cryptQueryObject.
cryptCreateCertThe cryptCreateCert function is used to create a certificate object that contains acertificate, certification request, certificate chain, CRL, or other certificate-likeobject.
int cryptCreateCert( CRYPT_CERTIFICATE *cryptCert, const CRYPT_USER cryptUser, constCRYPT_CERTTYPE_TYPE certType );
Parameters cryptCertThe address of the certificate object to be created.
cryptUserThe user who is to own the certificate object or CRYPT_UNUSED for the default,normal user.
certTypeThe type of certificate item that will be created in the certificate object.
See also cryptDestroyCert.
cryptCreateContextThe cryptCreateContext function is used to create an encryption context for a givenencryption algorithm.
int cryptCreateContext( CRYPT_CONTEXT *cryptContext, const CRYPT_USER cryptUser,const CRYPT_ALGO_TYPE cryptAlgo );
Parameters cryptContextThe address of the encryption context to be created.
cryptUserThe user who is to own the encryption context or CRYPT_UNUSED for thedefault, normal user.
cryptAlgoThe encryption algorithm to be used in the context.
See also cryptDestroyContext, cryptDeviceCreateContext.
cryptCreateEnvelopeThe cryptCreateEnvelope function is used to create an envelope object forencrypting or decrypting, signing or signature checking, compressing ordecompressing, or otherwise processing data.
int cryptCreateEnvelope( CRYPT_ENVELOPE *cryptEnvelope, const CRYPT_USER cryptUser,const CRYPT_FORMAT_TYPE formatType );
Parameters cryptEnvelopeThe address of the envelope to be created.
cryptUserThe user who is to own the envelope object or CRYPT_UNUSED for the default,normal user.

cryptCreateSession 307
formatTypeThe data format for the enveloped data.
See also cryptDestroyEnvelope.
cryptCreateSessionThe cryptCreateSession function is used to create a secure session object for use insecuring a communications link or otherwise communicating with a remote server orclient.
int cryptCreateSession( CRYPT_SESSION *cryptSession, const CRYPT_USER cryptUser, constCRYPT_SESSION_TYPE sessionType );
Parameters cryptSessionThe address of the session to be created.
cryptUserThe user who is to own the session object or CRYPT_UNUSED for the default,normal user.
sessionTypeThe type of the secure session.
See also cryptDestroySession.
cryptCreateSignatureThe cryptCreateSignature function digitally signs a piece of data. The signature isplaced in a buffer in a portable format that allows it to be checked usingcryptCheckSignature.
int cryptCreateSignature( void *signature, const int signatureMaxLength, int *signatureLength,const CRYPT_CONTEXT signContext, const CRYPT_CONTEXT hashContext);
Parameters signatureThe address of a buffer to contain the signature. If you set this parameter to null,cryptCreateSignature will return the length of the signature in signatureLengthwithout actually generating the signature.
signatureMaxLengthThe maximum size in bytes of the buffer to contain the signature data.
signatureLengthThe address of the signature length.
signContextA public-key encryption or signature context containing the private key used to signthe data.
hashContextA hash context containing the hash of the data to sign.
See also cryptCheckSignature, cryptCheckSignatureEx, cryptCreateSignatureEx,cryptQueryObject.
cryptCreateSignatureExThe cryptCreateSignatureEx function digitally signs a piece of data with extendedcontrol over the signature format. The signature is placed in a buffer in a portableformat that allows it to be checked using cryptCheckSignatureEx.
int cryptCreateSignatureEx( void *signature, const int signatureMaxLength, int *signatureLength,const CRYPT_FORMAT_TYPE formatType, const CRYPT_CONTEXT

Function Reference308
signContext, const CRYPT_CONTEXT hashContext, constCRYPT_CERTIFICATE extraData );
Parameters signatureThe address of a buffer to contain the signature. If you set this parameter to null,cryptCreateSignature will return the length of the signature in signatureLengthwithout actually generating the signature.
signatureMaxLengthThe maximum size in bytes of the buffer to contain the signature data.
signatureLengthThe address of the signature length.
formatTypeThe format of the signature to create.
signContextA public-key encryption or signature context containing the private key used to signthe data.
hashContextA hash context containing the hash of the data to sign.
extraDataExtra information to include with the signature or CRYPT_UNUSED if the formatis the default signature format (which doesn’t use the extra data) or CRYPT_USE_DEFAULT if the signature isn’t the default format and you want touse the default extra information.
See also cryptCheckSignature, cryptCheckSignatureEx, cryptCreateSignature,cryptQueryObject.
cryptDecryptThe cryptDecrypt function is used to decrypt or hash data.
int cryptDecrypt( const CRYPT_CONTEXT cryptContext, void *buffer, const int length );
Parameters cryptContextThe encryption context to use to decrypt or hash the data.
bufferThe address of the data to be decrypted or hashed.
lengthThe length in bytes of the data to be decrypted or hashed.
Remarks Public-key encryption and signature algorithms have special data formattingrequirements that need to be taken into account when this function is called. Youshouldn’t use this function with these algorithm types, but instead should use the higher-level functions cryptCreateSignature, cryptCheckSignature,cryptExportKey, and cryptImportKey.
See also cryptEncrypt.
cryptDeleteAttributeThe cryptDeleteAttribute function is used to delete an attribute from an object.
int cryptDeleteAttribute( const CRYPT_HANDLE cryptObject, constCRYPT_ATTRIBUTE_TYPE attributeType );
Parameters certificateThe object from which to delete the attribute.

cryptDeleteCertExtension 309
attributeTypeThe attribute to delete.
Remarks Most attributes are always present and can’t be deleted, in general onlycertificateattributes are deletable.
See also cryptGetAttribute, cryptGetAttributeString, cryptSetAttribute,cryptSetAttributeString.
cryptDeleteCertExtensionThe cryptDeleteCertExtension function is used to delete a generic blob-typecertificate extension from a certificate object.
int cryptDeleteCertExtension( const CRYPT_CERTIFICATE certificate, const char *oid );
Parameters certificateThe certificate object from which to delete the extension.
oidThe object identifier value for the extension being deleted, specified as a sequenceof integers.
Remarks cryptlib directly supports extensions from X.509, PKIX, SET, SigG, and variousvendors itself, so you shouldn’t use this function for anything other than unknown, proprietary extensions.
See also cryptAddCertExtension, cryptGetCertExtension.
cryptDeleteKeyThe cryptDeleteKey function is used to delete a key or certificate from a keyset ordevice. The key to delete is identified either through the key owner’s name or their email address.
int cryptDeleteKey( const CRYPT_HANDLE cryptObject, const CRYPT_KEYID_TYPEkeyIDtype, const void *keyID );
Parameters cryptObjectThe keyset or device object from which to delete the key.
keyIDtypeThe type of the key ID, either CRYPT_KEYID_NAME for the name or key label,or CRYPT_KEYID_EMAIL for the email address.
keyIDThe key ID of the key to delete.
See also cryptAddPrivateKey, cryptAddPublicKey, cryptGetPrivateKey,cryptGetPublicKey.
cryptDestroyCertThe cryptDestroyCert function is used to destroy a certificate object after use. Thiserases all keying and security information used by the object and frees up anymemory it uses.
int cryptDestroyCert( const CRYPT_CERTIFICATE cryptCert );
Parameters cryptCertThe certificate object to be destroyed.
See also cryptCreateCert.

Function Reference310
cryptDestroyContextThe cryptDestroyContext function is used to destroy an encryption context after use.This erases all keying and security information used by the context and frees up anymemory it uses.
int cryptDestroyContext( const CRYPT_CONTEXT cryptContext );
Parameters cryptContextThe encryption context to be destroyed.
See also cryptCreateContext, cryptDeviceCreateContext.
cryptDestroyEnvelopeThe cryptDestroyEnvelope function is used to destroy an envelope after use. Thiserases all keying and security information used by the envelope and frees up anymemory it uses.
int cryptDestroyEnvelope( const CRYPT_ENVELOPE cryptEnvelope );
Parameters cryptEnvelopeThe envelope to be destroyed.
See also cryptCreateEnvelope.
cryptDestroyObjectThe cryptDestroyObject function is used to destroy a cryptlib object after use. Thiserases all security information used by the object, closes any open data sources, andfrees up any memory it uses.
int cryptDestroyObject( const CRYPT_HANDLE cryptObject );
Parameters cryptObjectThe object to be destroyed.
Remarks This function is a generic form of the specialised functions that destroy/close specificcryptlib object types such as encryption contexts and certificate and keyset objects.In some cases it may not be possible to determine the exact type of an object (forexample the keyset access functions may return a key certificate object or only anencryption context depending on the keyset type), cryptDestroyObject can be usedto destroy an object of an unknown type.
See also cryptDestroyContext, cryptDestroyCert, cryptDestroyEnvelope,cryptDestroySession, cryptKeysetClose.
cryptDestroySessionThe cryptDestroySession function is used to destroy a session object after use. Thisclose the link to the client or server, erases all keying and security information usedby the session, and frees up any memory it uses.
int cryptDestroySession( const CRYPT_SESSION cryptSession );
Parameters cryptSessionThe session to be destroyed.
See also cryptCreateSession.
cryptDeviceCloseThe cryptDeviceClose function is used to destroy a device object after use. Thiscloses the connection to the device and frees up any memory it uses.

cryptDeviceCreateContext 311
int cryptDeviceClose( const CRYPT_DEVICE device );
Parameters deviceThe device object to be destroyed.
See also cryptDeviceOpen.
cryptDeviceCreateContextThe cryptDeviceCreateContext function is used to create an encryption context for agiven encryption algorithm via an encryption device.
int cryptDeviceCreateContext( const CRYPT_DEVICE cryptDevice, CRYPT_CONTEXT*cryptContext, const CRYPT_ALGO cryptAlgo );
Parameters cryptDeviceThe device object used to create the encryption context.
cryptContextThe address of the encryption context to be created.
cryptAlgoThe encryption algorithm to be used in the context.
See also cryptCreateContext, cryptDestroyContext.
cryptDeviceOpenThe cryptDeviceOpen function is used to establish a connection to a crypto devicesuch as a crypto hardware accelerator or a PCMCIA card or smart card.
int cryptDeviceOpen( CRYPT_DEVICE *device, const CRYPT_USER cryptUser, constCRYPT_DEVICE_TYPE deviceType, const char *name );
Parameters deviceThe address of the device object to be created.
cryptUserThe user who is to own the device object or CRYPT_UNUSED for the default,normal user.
deviceTypeThe device type to be used.
nameThe name of the device, or null if a name isn’t required.
See also cryptDeviceClose.
cryptDeviceQueryCapabilityThe cryptDeviceQueryCapability function is used to obtain information about thecharacteristics of a particular encryption algorithm provided by an encryption device.The information returned covers the algorithm’s key size, data block size, and other algorithm-specific information.
int cryptDeviceQueryCapability( const CRYPT_DEVICE cryptDevice, const CRYPT_ALGOcryptAlgo, CRYPT_QUERY_INFO *cryptQueryInfo );
Parameters cryptDeviceThe encryption device to be queried.
cryptAlgoThe encryption algorithm to be queried.
cryptQueryInfoThe address of a CRYPT_QUERY_INFO structure which is filled with the

Function Reference312
information on the requested algorithm and mode, or null if this information isn’t required.
Remarks Any fields in the CRYPT_QUERY_INFO structure that don’t apply to the algorithm being queried are set to CRYPT_ERROR, null or zero as appropriate. To determinewhether an algorithm is available (without returning information on them), set thequery information pointer to null.
See also cryptQueryCapability.
cryptEncryptThe cryptEncrypt function is used to encrypt or hash data.
int cryptEncrypt( const CRYPT_CONTEXT cryptContext, void *buffer, const int length );
Parameters cryptContextThe encryption context to use to encrypt or hash the data.
bufferThe address of the data to be encrypted or hashed.
lengthThe length in bytes of the data to be encrypted or hashed.
Remarks Public-key encryption and signature algorithms have special data formattingrequirements that need to be taken into account when this function is called. Youshouldn’t use this function with these algorithm types, but instead should use thehigher-level functions cryptCreateSignature, cryptCheckSignature,cryptExportKey, and cryptImportKey.
See also cryptDecrypt.
cryptEndThe cryptEnd function is used to shut down cryptlib after use. This function shouldbe called after you have finished using cryptlib.
int cryptEnd( void );
Parameters None
See also cryptInit.
cryptExportCertThe cryptExportCert function is used to export an encoded signed public keycertificate, certification request, CRL, or other certificate-related item from acertificate container object.
int cryptExportCert( void *certObject, const int certObjectMaxLength, int *certObjectLength, constCRYPT_CERTFORMAT_TYPE certFormatType, constCRYPT_CERTIFICATE certificate );
Parameters certObjectThe address of a buffer to contain the encoded certificate.
certObjectMaxLengthThe maximum size in bytes of the buffer to contain the exported certificate.
certObjectLengthThe address of the exported certificate length.
certFormatTypeThe encoding format for the exported certificate object.

cryptExportKey 313
certificateThe address of the certificate object to be exported.
Remarks The certificate object needs to have all the required fields filled in and must then besigned using cryptSignCert before it can be exported.
See also cryptImportCert.
cryptExportKeyThe cryptExportKey function is used to share a session key between two parties byeither exporting a session key from a context in a secure manner or by establishing anew shared key. The exported/shared key is placed in a buffer in a portable formatthat allows it to be imported back into a context using cryptImportKey.
If an existing session key is to be shared, it can be exported using either a public keyor key certificate or a conventional encryption key. If a new session key is to beestablished, it can be done using a Diffie-Hellman encryption context.
int cryptExportKey( void *encryptedKey, const int encryptedKeyMaxLength, int*encryptedKeyLength, const CRYPT_HANDLE exportKey, constCRYPT_CONTEXT sessionKeyContext );
Parameters encryptedKeyThe address of a buffer to contain the exported key. If you set this parameter tonull, cryptExportKey will return the length of the exported key inencryptedKeyLength without actually exporting the key.
encryptedKeyMaxLengthThe maximum size in bytes of the buffer to contain the exported key.
encryptedKeyLengthThe address of the exported key length.
exportKeyA public-key or conventional encryption context or key certificate object containingthe public or conventional key used to export the session key.
sessionKeyContextAn encryption context containing the session key to export (if the key is to beshared) or an empty context with no key loaded (if the key is to be established).
Remarks A session key can be shared in one of two ways, either by one party exporting anexisting key and the other party importing it, or by both parties agreeing on a key touse. The export/import process requires an existing session key and a public/privateor conventional encryption context or key certificate object to export/import it with.The key agreement process requires a Diffie-Hellman context and an empty sessionkey context (with no key loaded) that the new shared session key is generated into.
See also cryptExportKeyEx, cryptImportKey, cryptQueryObject.
cryptExportKeyExThe cryptExportKeyEx function is used to share a session key between two partiesby either exporting a session key from a context in a secure manner or by establishinga new shared key, with extended control over the exported key format. Theexported/shared key is placed in a buffer in a portable format that allows it to beimported back into a context using cryptImportKey.
If an existing session key is to be shared, it can be exported using either a public keyor key certificate or a conventional encryption key. If a new session key is to beestablished, it can be done using a Diffie-Hellman encryption context.

Function Reference314
int cryptExportKeyEx( void *encryptedKey, const int encryptedKeyMaxLength, int*encryptedKeyLength, const CRYPT_FORMAT_TYPE formatType, constCRYPT_HANDLE exportKey, const CRYPT_CONTEXT sessionKeyContext );
Parameters encryptedKeyThe address of a buffer to contain the exported key. If you set this parameter tonull, cryptExportKeyEx will return the length of the exported key inencryptedKeyLength without actually exporting the key.
encryptedKeyMaxLengthThe maximum size in bytes of the buffer to contain the exported key.
encryptedKeyLengthThe address of the exported key length.
formatTypeThe format for the exported key.
exportKeyA public-key or conventional encryption context or key certificate object containingthe public or conventional key used to export the session key.
sessionKeyContextAn encryption context containing the session key to export (if the key is to beshared) or an empty context with no key loaded (if the key is to be established).
Remarks A session key can be shared in one of two ways, either by one party exporting anexisting key and the other party importing it, or by both parties agreeing on a key touse. The export/import process requires an existing session key and a public/privateor conventional encryption context or key certificate object to export/import it with.The key agreement process requires a Diffie-Hellman context and an empty sessionkey context (with no key loaded) that the new shared session key is generated into.
See also cryptExportKey, cryptImportKey, cryptQueryObject.
cryptFlushDataThe cryptFlushData function is used to flush data through an envelope or sessionobject, completing processing and (for session objects) sending the data to the remoteclient or server.
int cryptFlushData( const CRYPT_HANDLE cryptHandle );
Parameters cryptHandleThe envelope or session object to flush the data through.
See also cryptPopData, cryptPushData.
cryptGenerateKeyThe cryptGenerateKey function is used to generate a new key into an encryptioncontext.
int cryptGenerateKey( const CRYPT_CONTEXT cryptContext );
Parameters cryptContextThe encryption context into which the key is to be generated.
Remarks Hash contexts don’t require keys, so an attempt to generate a key into a hash context will return CRYPT_ERROR_NOTAVAIL.
cryptGenerateKey will generate a key of a length appropriate for the algorithmbeing used into an encryption context. If you want to specify the generation of a keyof a particular length, you should set the CRYPT_CTXINFO_KEYSIZE attributebefore calling this function.
cryptGenerateKeyAsync 315
The generation of large public-key encryption or digital signature keys can take quitesome time. If the environment you are working in supports background processing,you should use cryptGenerateKeyAsync to generate the key instead.
See also cryptGenerateKeyAsync.
cryptGenerateKeyAsyncThe cryptGenerateKeyAsync function is used to asynchronously generate a new keyinto an encryption context.
int cryptGenerateKeyAsync( const CRYPT_CONTEXT cryptContext );
Parameters cryptContextThe encryption context into which the key is to be generated.
Remarks Hash contexts don’t require keys, so an attempt to generate a key into a hash contextwill return CRYPT_ERROR_NOTAVAIL.
cryptGenerateKeyAsync will generate a key of a length appropriate for thealgorithm being used into an encryption context. If you want to specify thegeneration of a key of a particular length, you should set the CRYPT_CTXINFO_-KEYSIZE attribute before calling this function.
See also cryptAsyncCancel, cryptAsyncQuery.
cryptGetAttributeThe cryptGetAttribute function is used to obtain a boolean or numeric value, statusinformation, or object from a cryptlib object.
int cryptGetAttribute( const CRYPT_HANDLE cryptObject, const CRYPT_ATTRIBUTE_TYPEattributeType, int *value );
Parameters cryptObjectThe object from which to read the boolean or numeric value, status information, orobject.
attributeTypeThe attribute which is being read.
valueThe boolean or numeric value, status information, or object.
See also cryptDeleteAttribute, cryptGetAttributeString, cryptSetAttribute,cryptSetAttributeString.
cryptGetAttributeStringThe cryptGetAttributeString function is used to obtain text or binary strings or timevalues from a cryptlib object.
int cryptGetAttributeString( const CRYPT_HANDLE cryptObject, constCRYPT_ATTRIBUTE_TYPE attributeType, void *value, int *valueLength );
Parameters cryptObjectThe object from which to read the text or binary string or time value.
attributeTypeThe attribute which is being read.
valueThe address of a buffer to contain the data. If you set this parameter to null,cryptGetAttributeString will return the length of the data in attributeLengthwithout returning the data itself.

Function Reference316
valueLengthThe length of the data in bytes.
See also cryptDeleteAttribute, cryptGetAttribute, cryptSetAttribute,cryptSetAttributeString.
cryptGetCertExtensionThe cryptGetCertExtension function is used to obtain a generic blob-type certificateextension from a certificate object or public or private key with an attachedcertificate.
int cryptGetCertExtension( const CRYPT_CERTIFICATE certificate, const char *oid, int*criticalFlag, void *extension, const int extensionMaxLength, int*extensionLength );
Parameters cryptObjectThe certificate or public/private key object from which to read the extension.
oidThe object identifier value for the extension being queried, specified as a sequenceof integers.
criticalFlagThe critical flag for the extension being read.
extensionThe address of a buffer to contain the data. If you set this parameter to null,cryptGetCertExtension will return the length of the data in extensionLengthwithout returning the data itself.
extensionMaxLengthThe maximum size in bytes of the buffer to contain the extension data.
extensionLengthThe length in bytes of the extension data.
Remarks cryptlib directly supports extensions from X.509, PKIX, SET, SigG, and variousvendors itself, so you shouldn’t use this function for anything other than unknown, proprietary extensions.
See also cryptAddCertExtension, cryptDeleteCertExtension.
cryptGetPrivateKeyThe cryptGetPrivateKey function is used to create an encryption context from aprivate key in a keyset or crypto device. The private key is identified either throughthe key owner’s name or their email address.
int cryptGetPrivateKey( const CRYPT_HANDLE cryptHandle, CRYPT_CONTEXT*cryptContext, const CRYPT_KEYID_TYPE keyIDtype, const void *keyID,const char *password );
Parameters cryptHandleThe keyset or device from which to obtain the key.
cryptContextThe address of the context to be fetched.
keyIDtypeThe type of the key ID, either CRYPT_KEYID_NAME for the name or key label,or CRYPT_KEYID_EMAIL for the email address.
keyIDThe key ID of the key to read.

cryptGetPublicKey 317
passwordThe password required to decrypt the private key, or null if no password is required.
Remarks cryptGetPrivateKey will return CRYPT_ERROR_WRONGKEY if an incorrectpassword is supplied. This can be used to determine whether a password is necessaryby first calling the function with a null password and then retrying the read with auser-supplied password if the first call returns with CRYPT_ERROR_WRONGKEY.
See also cryptAddPrivateKey, cryptAddPublicKey, cryptDeleteKey, cryptGetPublicKey.
cryptGetPublicKeyThe cryptGetPublicKey function is used to create an encryption context from apublic key in a keyset or crypto device. The public key is identified either throughthe key owner’s name or their email address.
int cryptGetPublicKey( const CRYPT_HANDLE cryptObject, CRYPT_HANDLE *publicKey,const CRYPT_KEYID_TYPE keyIDtype, const void *keyID );
Parameters cryptObjectThe keyset or device from which to obtain the key.
publicKeyThe address of the context or certificate to be fetched.
keyIDtypeThe type of the key ID, either CRYPT_KEYID_NAME for the name or key label,or CRYPT_KEYID_EMAIL for the email address.
keyIDThe key ID of the key to read.
Remarks The type of object in which the key is returned depends on the keyset or device fromwhich it is being read. Most sources will provide a key certificate object, but somewill return only an encryption context containing the key. Both types of object can beused with cryptlib functions.
See also cryptAddPrivateKey, cryptAddPublicKey, cryptDeleteKey,cryptGetPrivateKey.
cryptImportCertThe cryptImportCert function is used to import an encoded certificate, certificationrequest, CRL, or other certificate-related item into a certificate container object.
int cryptImportCert( const void *certObject, const int certObjectLength, const CRYPT_USERcryptUser, CRYPT_CERTIFICATE *certificate );
Parameters certObjectThe address of a buffer that contains the encoded certificate.
certObjectLengthThe encoded certificate length.
cryptUserThe user who is to own the imported object or CRYPT_UNUSED for the default,normal user.
certificateThe certificate object to be created using the imported certificate data.
See also cryptExportCert.

Function Reference318
cryptImportKeyThe cryptImportKey function is used to share a session key between two parties byimporting an encrypted session key that was previously exported withcryptExportKey into an encryption context.
If an existing session key being shared, it can be imported using either a private keyor a conventional encryption key. If a new session key is being established, it can bedone using a Diffie-Hellman encryption context.
int cryptImportKey( const void *encryptedKey, const int encryptedKeyLength, constCRYPT_CONTEXT importContext, const CRYPT_CONTEXTsessionKeyContext );
Parameters encryptedKeyThe address of a buffer that contains the exported key created by cryptExportKey.
encryptedKeyLengthThe length in bytes of the encrypted key data.
importContextA public-key or conventional encryption context containing the private orconventional key required to import the session key.
sessionKeyContextThe context used to contain the imported session key.
Remarks A session key can be shared in one of two ways, either by one party exporting anexisting key and the other party importing it, or by both parties agreeing on a key touse. The export/import process requires an existing session key and a public/privateor conventional encryption context or key certificate object to export/import it with.The key agreement process requires a Diffie-Hellman context and an empty sessionkey context (with no key loaded) that the new shared session key is generated into.
See also cryptExportKey, cryptExportKeyEx, cryptImportKey, cryptQueryObject.
cryptInitThe cryptInit function is used to initialise cryptlib before use. This function shouldbe called before any other cryptlib function is called.
int cryptInit( void );
Parameters None
See also cryptEnd.
cryptKeysetCloseThe cryptKeysetClose function is used to destroy a keyset object after use. Thiscloses the connection to the key collection or keyset and frees up any memory it uses.
int cryptKeysetClose( const CRYPT_KEYSET keyset );
Parameters keysetThe keyset object to be destroyed.
See also cryptKeysetOpen.
cryptKeysetOpenThe cryptKeysetOpen function is used to establish a connection to a key collectionor keyset.

cryptPopData 319
int cryptKeysetOpen( CRYPT_KEYSET *keyset, const CRYPT_USER cryptUser, constCRYPT_KEYSET_TYPE keysetType, const char *name, constCRYPT_KEYOPT_TYPE options );
Parameters keysetThe address of the keyset object to be created.
cryptUserThe user who is to own the keyset object or CRYPT_UNUSED for the default,normal user.
keysetTypeThe keyset type to be used.
nameThe name of the keyset.
optionsOption flags to apply when opening or accessing the keyset.
See also cryptKeysetClose.
cryptPopDataThe cryptPopData function is used to remove data from an envelope or sessionobject.
int cryptPopData( const CRYPT_HANDLE envelope, void *buffer, const int length, int*bytesCopied );
Parameters envelopeThe envelope or session object from which to remove the data.
bufferThe address of the data to remove.
lengthThe length of the data to remove.
bytesCopiedThe address of the number of bytes copied from the envelope.
See also cryptPushData.
cryptPushDataThe cryptPushData function is used to add data to an envelope or session object.
int cryptPushData( const CRYPT_HANDLE envelope, const void *buffer, const int length, int*bytesCopied );
Parameters envelopeThe envelope or session object to which to add the data.
bufferThe address of the data to add.
lengthThe length of the data to add.
bytesCopiedThe address of the number of bytes copied into the envelope.
See also cryptPopData.

Function Reference320
cryptQueryCapabilityThe cryptQueryCapability function is used to obtain information about thecharacteristics of a particular encryption algorithm. The information returned coversthe algorithm’s key size, data block size, and other algorithm-specific information.
int cryptQueryCapability( const CRYPT_ALGO_TYPE cryptAlgo, CRYPT_QUERY_INFO*cryptQueryInfo );
Parameters cryptAlgoThe encryption algorithm to be queried.
cryptQueryInfoThe address of a CRYPT_QUERY_INFO structure which is filled with theinformation on the requested algorithm and mode, or null if this information isn’t required.
Remarks Any fields in the CRYPT_QUERY_INFO structure that don’t apply to the algorithm being queried are set to CRYPT_ERROR, null or zero as appropriate. To determinewhether an algorithm is available (without returning information on it), set the queryinformation pointer to null.
See also cryptDeviceQueryCapability.
cryptQueryObjectThe cryptQueryObject function is used to obtain information about an exported keyobject created with cryptExportKey or a signature object created withcryptCreateSignature. It returns information such as the type and algorithms usedby the object.
int cryptQueryObject( const void *objectData, const int objectDataLength,CRYPT_OBJECT_INFO *cryptObjectInfo );
Parameters objectDataThe address of a buffer that contains the object created by cryptExportKey orcryptCreateSignature.
objectDataLengthThe length in bytes of the object data.
cryptObjectInfoThe address of a CRYPT_OBJECT_INFO structure that contains information onthe exported key or signature.
Remarks Any fields in the CRYPT_OBJECT_INFO structure that don’t apply to the object being queried are set to CRYPT_ERROR, null or zero as appropriate.
See also cryptCheckSignature, cryptCreateSignature, cryptExportKey, cryptImportKey.
cryptSetAttributeThe cryptSetAttribute function is used to add boolean or numeric information,command codes, and objects to a cryptlib object.
int cryptSetAttribute( const CRYPT_HANDLE cryptObject, const CRYPT_ATTRIBUTE_TYPEattributeType, const int value );
Parameters cryptObjectThe object to which to add the value.
attributeTypeThe attribute which is being added.
valueThe boolean or numeric value, command code, or object which is being added.

cryptSetAttributeString 321
See also cryptDeleteAttribute, cryptGetAttribute, cryptGetAttributeString,cryptSetAttributeString.
cryptSetAttributeStringThe cryptSetAttributeString function is used to add text or binary strings or timevalues to an object.
int cryptSetAttributeString( const CRYPT_HANDLE cryptObject, constCRYPT_ATTRIBUTE_TYPE attributeType, const void *value, const intvalueLength );
Parameters cryptObjectThe object to which to add the text or binary string or time value.
attributeTypeThe attribute which is being added.
valueThe address of the data being added.
valueLengthThe length in bytes of the data being added.
See also cryptDeleteAttribute, cryptGetAttribute, cryptGetAttributeString,cryptSetAttribute.
cryptSignCertThe cryptSignCert function is used to digitally sign a public key certificate, CAcertificate, certification request, CRL, or other certificate-related item held in acertificate container object.
int cryptSignCert( const CRYPT_CERTIFICATE certificate, const CRYPT_CONTEXTsignContext );
Parameters certificateThe certificate container object that contains the certificate item to sign.
signContextA public-key encryption or signature context containing the private key used to signthe certificate.
Remarks Once a certificate item has been signed, it can no longer be modified or updated usingthe usual certificate manipulation functions. If you want to add further data to thecertificate item, you have to start again with a new certificate object.
See also cryptCheckCert.
cryptUIDisplayCertThe cryptUIDisplayCert function displays a certificate object such as a certificate orcertificate chain to the user.
int cryptUIDisplayCert( const CRYPT_CERTIFICATE certificate, const HWND hWnd );
Parameters certificateThe certificate object to display.
hWndThe handle of the owner window, or NULL if the certificate viewer dialog has noowner.
See also cryptUIGenerateKey.

Function Reference322
cryptUIGenerateKeyThe cryptUIGenerateKey function is used to generate a new key into an encryptioncontext and obtain from the user the information required to create or obtain acertificate from a CA. This function presents the user with a key generation wizardthat takes them through the key generation process and obtains the informationneeded for certificate creation.
int cryptUIGenerateKey( const CRYPT_DEVICE device, CRYPT_CONTEXT *cryptContext,const CRYPT_CERTIFICATE certificate, char *password, const HWND hWnd);
Parameters deviceThe crypto device in which the key is to be generated, or CRYPT_UNUSED if nocrypto device is being used.
cryptContextThe address of the encryption context into which the key is to be generated.
certificateThe certificate object that will be filled in with the user's details.
passwordThe password selected by the user.
hWndThe handle of the owner window, or NULL if the certificate viewer dialog has noowner.
See also cryptUIDisplayCert.

cryptUIGenerateKey 323
Standards ConformanceAll algorithms, security methods, and data encoding systems used in cryptlib eithercomply with one or more national and international banking and security standards,or are implemented and tested to conform to a reference implementation of aparticular algorithm or security system. Compliance with national and internationalsecurity standards is automatically provided when cryptlib is integrated into anapplication. The algorithm standards that cryptlib follows are listed below. A furtherlist of non-algorithm-related standards that cryptlib complies with are given at thestart of this document.
AESAES has been implemented as per:
FIPS PUB 197,“Advanced Encryption Standard”, 2001.
The AES code has been validated against the test vectors given in:
FIPS PUB 197, “Advanced Encryption Standard”, 2001.
BlowfishBlowfish has been implemented as per:
“Description of a New Variable-Length Key, 64-bit Block Cipher (Blowfish)”, Bruce Schneier, “Fast Software Encryption”, Lecture Notes in Computer ScienceNo. 809, Springer-Verlag 1994.
The Blowfish modes of operation are given in:
ISO/IEC 8372:1987, “Information Technology —Modes of Operation for a 64-bitBlock Cipher Algorithm”.
ISO/IEC 10116:1997, “Information technology — Security techniques—Modesof operation for an n-bit block cipher algorithm”.
The Blowfish code has been validated against the Blowfish reference implementationtest vectors.
CAST-128CAST-128 has been implemented as per:
RFC 2144, “The CAST-128 Encryption Algorithm”, Carlisle Adams, May 1997.
The CAST-128 modes of operation are given in:
ISO/IEC 8372:1987, “Information Technology —Modes of Operation for a 64-bit Block Cipher Algorithm”.
ISO/IEC 10116:1997, “Information technology — Security techniques—Modesof operation for an n-bit block cipher algorithm”.
The CAST-128 code has been validated against the RFC 2144 referenceimplementation test vectors.
DESDES has been implemented as per:
ANSI X3.92, “American National Standard, Data Encryption Algorithm”, 1981.
FIPS PUB 46-2, “Data Encryption Standard”, 1994.
FIPS PUB 74, “Guidelines for Implementing and Using the NBS Data Encryption Standard”, 1981.
ISO/IEC 8731:1987, “Banking — Approved Algorithms for MessageAuthentication— Part 1: Data Encryption Algorithm (DEA)”.

Standards Conformance324
The DES modes of operation are given in:
ANSI X3.106, “American National Standard, Information Systems — DataEncryption Algorithm— Modes of Operation”, 1983.
FIPS PUB 81, “DES Modes of Operation”, 1980.
ISO/IEC 8372:1987, “Information Technology —Modes of Operation for a 64-bit Block Cipher Algorithm”.
ISO/IEC 10116:1997, “Information technology — Security techniques—Modesof operation for an n-bit block cipher algorithm”.
The DES MAC mode is given in:
ANSI X9.9, “Financial Institution Message Authentication (Wholesale)”, 1986.
FIPS PUB 113, “Computer Data Authentication”, 1984.
ISO/IEC 9797:1994, “Information technology — Security techniques— Dataintegrity mechanism using a cryptographic check function employing a blockcipher algorithm”.
The DES code has been validated against the test vectors given in:
NIST Special Publication 500-20, “Validating the Correctness of Hardware Implementations of the NBS Data Encryption Standard”.
Triple DESTriple DES has been implemented as per:
ANSI X9.17, “American National Standard, Financial Institution Key Management (Wholesale)”, 1985.
ANSI X9.52, “Triple Data Encryption Algorithm Modes of Operation”, 1999.
FIPS 46-3, “Data Encryption Standard (DES)”, 1999.
ISO/IEC 8732:1987, “Banking — Key Management (Wholesale)”.
The triple DES modes of operation are given in:
ISO/IEC 8372:1987, “Information Technology —Modes of Operation for a 64-bit Block Cipher Algorithm”.
ISO/IEC 10116:1997, “Information technology — Security techniques—Modesof operation for an n-bit block cipher algorithm”.
The DES code has been validated against the test vectors given in:
NIST Special Publication 800-20, “Modes of Operation Validation System for the Triple Data Encryption Algorithm”.
Diffie-HellmanDH has been implemented as per:
PKCS #3, “Diffie-Hellman Key Agreement Standard”, 1991.
ANSI X9.42, “Public Key Cryptography for the Financial Services Industry —Agreement of Symmetric Keys Using Diffie-Hellman and MQV Algorithms”, 2000.
DSADSA has been implemented as per:
ANSI X9.30-1, “American National Standard, Public-Key Cryptography UsingIrreversible Algorithms for the Financial Services Industry”, 1993.
FIPS PUB 186, “Digital Signature Standard”, 1994.

cryptUIGenerateKey 325
ElgamalElgamal has been implemented as per
“A public-key cryptosystem based on discrete logarithms”, Taher Elgamal, IEEETransactions on Information Theory, Vol.31, No.4 (1985), p.469.
HMAC-MD5HMAC-MD5 has been implemented as per:
RFC 2104, “HMAC: Keyed-Hashing for Message Authentication”, Hugo Krawczyk, Mihir Bellare, and Ran Canetti, February 1997.
The HMAC-MD5 code has been validated against the test vectors given in:
“Test Cases for HMAC-MD5 and HMAC-SHA-1”, Pau-Chen Cheng and RobertGlenn, March 1997.
HMAC-SHA1HMAC-SHA1 has been implemented as per:
FIPS PUB 198, “The Keyed-Hash Message Authentication Code (HMAC)”, 2002.
RFC 2104, “HMAC: Keyed-Hashing for Message Authentication”, Hugo Krawczyk, Mihir Bellare, and Ran Canetti, February 1997.
The HMAC-SHA1 code has been validated against the test vectors given in:
“Test Cases for HMAC-MD5 and HMAC-SHA-1”, Pau-Chen Cheng and RobertGlenn, March 1997.
IDEAIDEA has been implemented as per:
“Device for the Conversion of a Digital Block and the Use Thereof”, James Massey and Xuejia Lai, International Patent PCT/CH91/00117, 1991.
“Device for the Conversion of a Digital Block and Use of Same”, James Massey and Xuejia Lai, US Patent #5,214,703, 1993.
“On the Design and Security of Block Ciphers”, Xuejia Lai, ETH Series inInformation Processing, Vol.1, Hartung-Gorre Verlag, 1992.
ISO/IEC 9979, “Data Cryptographic Techniques — Procedures for theRegistration of Cryptographic Algorithms”.
The IDEA modes of operation are given in:
ISO/IEC 8372:1987, “Information Technology—Modes of Operation for a 64-bit Block Cipher Algorithm”.
ISO/IEC 10116:1997, “Information technology — Security techniques—Modesof operation for an n-bit block cipher algorithm”.
The IDEA code has been validated against the ETH reference implementation testvectors.
MD2MD2 has been implemented as per:
RFC 1319, “The MD2 Message Digest Algorithm”, Burt Kaliski, 1992.
The MD2 code has been validated against the RFC 1319 reference implementationtest vectors.
MD4MD4 has been implemented as per:

Standards Conformance326
RFC 1320, “The MD4 Message Digest Algorithm”, Ronald Rivest, 1992.
The MD4 code has been validated against the RFC 1320 reference implementationtest vectors.
MD5MD5 has been implemented as per:
RFC 1321, “The MD5 Message Digest Algorithm”, Ronald Rivest, 1992.
The MD5 code has been validated against the RFC 1321 reference implementationtest vectors.
RC2The RC2 code is implemented as per:
“The RC2 Encryption Algorithm”, Ronald Rivest, RSA Data Security Inc, 1992.
RFC 2268, “A Description of the RC2 Encryption Algorithm”, Ronald Rivest, 1998.
The RC2 modes of operation are given in:
ISO/IEC 8372:1987, “Information Technology —Modes of Operation for a 64-bit Block Cipher Algorithm”.
ISO/IEC 10116:1997, “Information technology — Security techniques—Modesof operation for an n-bit block cipher algorithm”.
The RC2 code has been validated against RSADSI BSAFE test vectors.
RC4The RC4 code is implemented as per:
“The RC4 Encryption Algorithm”, Ronald Rivest, RSA Data Security Inc, 1992.
The RC4 code has been validated against RSADSI BSAFE and US Department ofCommerce test vectors.
RC5The RC5 code is implemented as per:
“The RC5 Encryption Algorithm”, Ronald Rivest, “Fast Software Encryption II”, Lecture Notes in Computer Science No.1008, Springer-Verlag 1995.
RFC 2040, “The RC5, RC5-CBC, RC5-CBC-Pad, and RC5-CTS Algorithms”, Robert Baldwin and Ronald Rivest, October 1996.
The RC5 modes of operation are given in:
ISO/IEC 8372:1987, “Information Technology —Modes of Operation for a 64-bit Block Cipher Algorithm”.
ISO/IEC 10116:1997, “Information technology — Security techniques—Modesof operation for an n-bit block cipher algorithm”.
The RC5 code has been validated against the RC5 reference implementation testvectors.
RIPEMD-160The RIPEMD-160 code has been implemented as per:
“RIPEMD-160: A strengthened version of RIPEMD”, Hans Dobbertin, Antoon Bosselaers, and Bart Preneel, “Fast Software Encryption III”, Lecture Notes inComputer Science No.1008, Springer-Verlag 1995.
ISO/IEC 10118-3:1997, “Information Technology— Security Techniques—Hash functions— Part 3: Dedicated hash functions”.

cryptUIGenerateKey 327
The RIPEMD-160 code has been validated against the RIPEMD-160 referenceimplementation test vectors.
RSAThe RSA code is implemented as per:
ANSI X9.31-1, “American National Standard, Public-Key Cryptography UsingReversible Algorithms for the Financial Services Industry”, 1993.
ISO IEC 9594-8/ITU-T X.509, “Information Technology — Open SystemsInterconnection— The Directory: Authentication Framework”.
PKCS #1, “RSA Encryption Standard”, 1991.
SHA/SHA1The SHA code has been implemented as per:
ANSI X9.30-2, “American National Standard, Public-Key Cryptography UsingIrreversible Algorithms for the Financial Services Industry”, 1993.
FIPS PUB 180, “Secure Hash Standard”, 1993.
FIPS PUB 180-1, “Secure Hash Standard”, 1994.
ISO/IEC 10118-3:1997, “Information Technology — Security Techniques—Hash functions— Part 3: Dedicated hash functions”.
RFC 3174, “US Secure Hash Algorithm 1 (SHA1)”, 2001
The SHA code has been validated against the test vectors given in:
FIPS PUB 180, “Secure Hash Standard”, 1993.
The SHA1 code has been validated against the test vectors given in:
FIPS PUB 180-1, “Secure Hash Standard”, 1994.
SHA2/SHA-256/SHA-384/SHA-512The SHA2 code has been implemented as per:
FIPS PUB 180-2, “Secure Hash Standard”, 2002.
The SHA2 code has been validated against the test vectors given in:
FIPS PUB 180-2, “Secure Hash Standard”, 2002.
SkipjackThe Skipjack code has been implemented as per:
“Skipjack and KEA Algorithm Specifications, Version 2.0”, National Security Agency, 28 May 1998.
“Capstone (MYK-80) Specifications”, R21 Informal Technical Report, R21-TECH-30-95, National Security Agency, 14 August 1995.

Acknowledgements328
AcknowledgementsAlexey Kirichenko provided information on NtQuerySystemInfo for randomness-gathering under WinNT/Win2K to avoid the need to access the buggy Windowsregistry performance counters.
Brian Gladman wrote the AES code.
Chris Wedgwood and Paul Kendall helped write the Unix random data gatheringroutines.
endergone Zwiebeltüte helped debug the SSL/TLS implementation.
Eric Young and the OpenSSL team wrote the conventional encryption and hashingcode and bignum library.
Jean-Loup Gailly and Mark Adler wrote the zlib compression code.
Joerg Plate did the Amiga port.
Markus F.X.J. Oberhumer did the 32-bit DOS port.
Matt Thomlinson and Blake Coverett helped fix up and debug the Win32 randomdata gathering routines.
Matthijs van Duin, Sascha Kratky, and Jeff Lamarche did the Macintosh port.
Nathan Hammond did the MVS port.
Osma Ahvenlampi did the PPC BeOS port.
Sriram Ramachandran did the Cygwin port.
Steve Landers provided the Tcl bindings, with financial support from EolasTechnologies.
Stuart Woolford and Mario Korva did the OS/2 port.
Wolfgang Gothier tracked down a number of really obscureprobl^H^H^H^H^Hundocumented features.