securesource administrator’s guide nexiant™ nexiant book template 6 overriding restrictions at...
TRANSCRIPT

Nexiant SecureAdministrator’s Guide
Copyright 2008 Nexiant™ All rights reserved.Doc. No. 24-405-0023 Rev. 2.0 (2/2008)
www.nexiant.com | phone: 1+ 888.440.7687
Contents5
Contents
PrefaceWho should read? .............................................................. 9How this book is organized .................................................. 9Conventions ................................................................... 10Other resources .............................................................. 11
Contacting Technical Support ....................................... 11
Chapter 1: Overview
Features ........................................................................ 12Cabinet activities ............................................................. 12Integration with SIM ........................................................ 13Flexibility of configuration ................................................. 13System components ......................................................... 14
The frame ................................................................ 14Nexiant Smart Inventory® Manager (SIM) ...................... 16
How to use this guide ....................................................... 17
Chapter 2: Verifying the cabinet configuration
Verifying the configuration ................................................ 18Accessing the configuration menu ................................. 18Checking cabinet type and serial number ........................ 19
Configuring zones ............................................................ 21Activating modules .......................................................... 22
Activating the zone ..................................................... 23Inspecting the carousel module .................................... 24Verifying calibration .................................................... 25Activating lockers ....................................................... 26Activating the next zone and module .............................. 27Verifying locker doors open using diagnostics .................. 27Flash LEDs to verify zone(s) ......................................... 27Back up the configuration ............................................ 28
Chapter 3: Configuring access options
Accessing configuration options .......................................... 29Requiring a badge scan .................................................... 30Enabling and disabling passwords ....................................... 30
Configuring the length of the password .......................... 30Password expiration .................................................... 31
Enabling and disabling jobs (references) .............................. 31Enabling jobs ............................................................ 31Defining the name and length of jobs ............................. 31Tracking other information ........................................... 32
Restricting access to particular items ................................... 32Adding and modifying department item restrictions ........... 32Overriding restrictions in the SIM .................................. 34
Nexiant™ Nexiant Book Template
Contents6
Overriding restrictions at the cabinet .............................. 35Restricting user access FAQ ......................................... 35
Restricting access to particular modules ............................... 36
Chapter 4: Configuring bin assignments
Planning ........................................................................ 38Why planning is important ........................................... 38Configuring for speed ................................................. 38Planning for auto carousel restock ................................. 38Issuing multiple items ................................................. 39
Adding the item to SIM ..................................................... 39Verify communications with SIM .................................... 39Verify that the item exists in SIM ................................... 40Adding the item to SIM ............................................... 41
Assigning items to bins ..................................................... 42Decide which bin to use .............................................. 42Select the bin ............................................................ 44Assign the item .......................................................... 47Item already assigned ................................................. 48Complete the assignment ............................................ 48
Changing item bin assignments .......................................... 49Locate the item to replace ........................................... 49Select the new item for this bin ..................................... 51
Deleting bin assignments .................................................. 52Printing bin labels ............................................................ 53
Chapter 5: Restocking a cabinet
Restock features ............................................................. 57Scheduling restocks .................................................... 57Supplier features ........................................................ 58Auto carousel restock .................................................. 58
Synchronized restock ....................................................... 58Generate the restock reports ........................................ 58Select the restock ID .................................................. 65Choose auto-restock or restock by item .......................... 66
Restocking FAQ ............................................................... 68
Chapter 6: Managing cabinet inventory
Taking inventory ............................................................. 71Accessing cycle count ................................................. 71Cycle counting ........................................................... 71
Destocking ..................................................................... 73Supplemental restock ....................................................... 75
Chapter 7: Maintaining the cabinet
Cleaning a cabinet ........................................................... 78Moving a cabinet ............................................................. 78
Precautions ............................................................... 78Procedure ................................................................. 79
Nexiant™ Nexiant Book Template
Contents 7
Chapter 8: Training end users
Logging on to the Controller .............................................. 80Searching ....................................................................... 81Dispensing items ............................................................. 81Returning items ............................................................... 83Creating a new password .................................................. 83
Chapter 9: Troubleshooting the cabinet
Carousel jams, preventing rotation ...................................... 85Carousel door fails to open ................................................ 87Carousel door shakes when open ........................................ 87Carousel door opens to more than one bin ............................ 88Carousel drum squeaks while rotating .................................. 89Locker door fails to open ................................................... 89Module LEDs fail to flash ................................................... 91Shutting down the Controller ............................................. 91New auxiliary cabinet(s) not working ................................... 92
Appendix A: Glossary
Appendix B: Specifications
Cabinet specifications ....................................................... 96Carousel dimensions ......................................................... 97Locker dimensions ........................................................... 98
Single-high dimensions ................................................ 98Double-high dimensions .............................................. 98
Weights ......................................................................... 99Customizing cabinets ........................................................ 99
Appendix C: Controller reference
Accessing configuration options ........................................ 100Aging options ................................................................ 100Badge reader options ..................................................... 102Communications options ................................................. 103Display options .............................................................. 104Miscellaneous options ..................................................... 105Logging option .............................................................. 105Omnicell® hardware options ............................................ 106Reference 1 options ....................................................... 107Reference 2 options ....................................................... 108RS232 peripheral options ................................................ 109RS-485 options ............................................................. 110System options ............................................................. 111TCP/IP options .............................................................. 112Time out options ........................................................... 113Tone options ................................................................ 114Transactions options ...................................................... 115
Nexiant Book Template Nexiant™

Contents8
Appendix D: Locker reference
Standard locker modules ................................................. 117Locker door options ....................................................... 118
Index
Nexiant™ Nexiant Book Template

Preface9
Preface
Nexiant Secure is a modular, point-of-use inventory dispensing system. It provides high-security, single item dispensing for high-volume items with on-site configurability. Carousel and locker modules can be interchanged and reconfigured to accommodate ever changing production needs.
Who should read?
Customers who are Nexiant Smart Inventory® Manager (SIM) Administrators, Restock Technicians, or certified technicians that maintain this cabinet. It is assumed that you have been taught how to log on to the Controller, that you have an Administrator’s user ID and password, and that you are comfortable with using Internet Explorer.
How this book is organized
This guide is organized as follows:
• Preface. Describes the purpose of this guide and who should read it. Document conventions, other related books and resources and contacting Technical Support are also referenced.
• Chapter 1: Overview. Describes Nexiant™’s technology system overview. Includes cabinet components and an introduction to the web-based application, Nexiant Smart Inventory® Manager (SIM). Administrator tasks at the cabinet and at the SIM are listed.
• Chapter 2: Verifying the cabinet configuration. Reviews the pre-install process of gathering item and user information in order to build the customer database and pre-configure this cabinet. Provides procedures for accessing and using the configuration menu, if you, or one of our representatives, needs to re-configure zones and modules after install.
• Chapter 3: Configuring access options. Provides procedures for enabling and disabling passwords, user-defined references (jobs, accounts, work orders, etc.) and restricting access to items and modules.
• Chapter 4: Configuring bin assignments. Reviews planning where to locate items based on a variety of factors, changing a par quantity, adding items, deleting items, and moving an item to a new location.
• Chapter 5: Restocking the cabinet. Reviews item packaging and planning for quality dispensing, scheduling restock routes at the SIM, generating restock lists and performing scheduled restocks. Provides synchronized restock procedures for the cabinet and auto-
Nexiant Secure Administrator’s Guide Nexiant™
Preface10
carousel restock procedures (which pre-rotates two or more carousels to speed issues/returns and restocking).
• Chapter 6: Managing cabinet inventory. Reviews procedures for cycle counts (conducting physical inventory at the cabinet), for moving items from one cabinet (point-of-use or POU) to another cabinet (called restock/destock), and for conducting a supplemental restock.
• Chapter 7: Maintaining the cabinet. Provides information about cleaning and moving the cabinet.
• Chapter 8: Training end users. Provides the procedures for logging on to the Controller, searching for items, dispensing and returning items, and creating a new password.
• Chapter 9: Troubleshooting the cabinet. Provides basic procedures for fixing problems at the cabinet before you call Technical Support.
• Appendix A: Glossary.
• Appendix B: Cabinet specifications. Use this reference to verify cabinet specifications.
• Appendix C: Controller reference. Use this reference for Controller configuration settings.
• Appendix D: Locker reference. Use this reference to re-configure lockers and order replacement parts.
• Appendix E: Configuring a brand new cabinet. Provides the step procedures for getting started with a new cabinet.
• Appendix F: Configuring a brand new cabinet. Provides the step procedures for getting started with a new cabinet.
• Index.
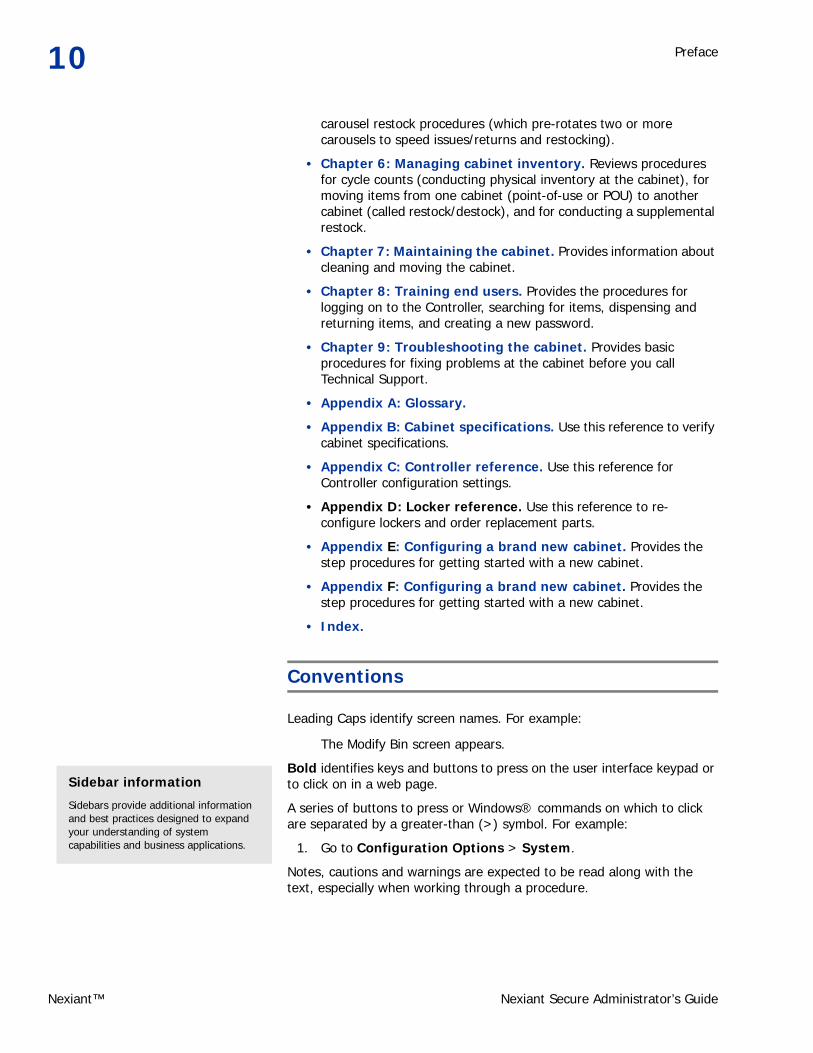
Conventions
Leading Caps identify screen names. For example:
The Modify Bin screen appears.
Bold identifies keys and buttons to press on the user interface keypad or to click on in a web page.
A series of buttons to press or Windows® commands on which to click are separated by a greater-than (>) symbol. For example:
1. Go to Configuration Options > System.
Notes, cautions and warnings are expected to be read along with the text, especially when working through a procedure.
Sidebar information
Sidebars provide additional information and best practices designed to expand your understanding of system capabilities and business applications.
Nexiant™ Nexiant Secure Administrator’s Guide

Preface 11
When explaining our web-based application (SIM) functions, the term “page” refers to the information displayed on your PC screen. When explaining cabinet Controller functions, the term “screen” refers to all information displayed on the Controller screen.
Other resources
Help systems: Each product includes a built-in help system. The Nexiant Smart Inventory® Manager (SIM) provides extensive web help.
Quick Reference: The laminated card attached to the side of each point-of-use (POU) cabinet provides quick steps for end users.
Contacting Technical Support
Nexiant™ Technical Support provides telephone and on-site assistance.
Telephone: 866.850.0500
Web URL: http://www.nexiant.com
Notes draw your attention to important information.
Cautions provide information that if ignored may cause problems using the system.
Warnings provide information that if ignored may damage the system or endanger employees using the system.
Nexiant Secure Administrator’s Guide Nexiant™

Chapter 2: Verifying the cabinet configuration 18
Chapter 2: Verifying the cabinet configuration
Prior to the cabinet installation, Nexiant™ compiled item and user information in order to build your company’s database. This information was also used to pre-configure cabinet zones and assign items to bins.
While pre-configured cabinets have been shipped to you with zones and modules activated, this chapter provides an overview of the configuration menus and the procedures for:
• verifying cabinet configuration
• activating modules
• configuring and activating zones, and
• using diagnostics for verifying zone activation
If you’re adding a new auxiliary cabinet, contact Technical Support for information.
Verifying the configuration
Each cabinet comes pre-configured for your database of items. The database is stored on the remote Nexiant™ server, accessed by the SIM, and downloaded to the Controller.
You must be authorized as an administrator to access and change the configuration.
Accessing the configuration menu
1. Log on to the Controller using your Admin ID and password.
2. Press More Options > More Options > Configuration Options.
The following screen appears.
Do not change the configuration unless you are comfortable and understand the implications of the change. Call Technical Support for help.
Nexiant Secure Administrator’s Guide Nexiant™

Chapter 2: Verifying the cabinet configuration 19
ConfigurationMenu.png
3. Press Setup Cabinets.
The following screen appears.
ConfigureCabinetNewZone.png
Checking cabinet type and serial number
1. Verify that the cabinet is set up as a Nexiant Secure cabinet.
If the screen looks similar to the figure below you know the Controller is configured as a Nexiant Secure cabinet.
Source of pre-configured information
If you have any question about the information in the database, refer to the item import file (Microsoft® Excel file) you should have received by email attachment. This file contains one row for each record stored in the database. This file was imported into SIM to create the database.
Nexiant Secure Administrator’s Guide Nexiant™

Chapter 2: Verifying the cabinet configuration20
ConfigureCabinetNewZone.png
1. To change the serial number, press Set serial number.
The following screen appears.
ConfigureCabinetSerialNumber.png
2. Locate the serial number.
This number appears on the back of each cabinet.
3. Type the serial number and press Enter.
4. Press Previous Screen.
The “Configure cabinet” screen appears again.
5. Press Previous Screen.
The configuration menu appears.
Pre-configured zone information
Zone numbering
In the main cabinet, zones are numbered beginning with 128. The first zone in the first auxiliary cabinet is zone 138; the first zone in the second auxiliary cabinet is zone 148, etc.
Nexiant™ Nexiant Secure Administrator’s Guide

Chapter 2: Verifying the cabinet configuration 21
Configuring zones
Each cabinet can have a maximum of ten zones represented by ten boxes in the center of the “Configure cabinet” screen. Below is a sample of a cabinet with one zone not yet defined.
ConfigureCabinetNewZone.png
Each box corresponds to a zone (module for Nexiant Secure)in the cabinet. The top most box corresponds to the top most zone and so on.
A zone refers to a module installed on rails in the cabinet frame like a drawer in a filing cabinet. A double-zone represents a single module that occupies the space of two drawers.
When you first access this screen the top most zone is highlighted. When stocking a brand new cabinet, start with this zone and work down. You can skip zones that don’t have a module installed.
The buttons on the right are for configuring the individual zones in the current cabinet.
1. Log on to the Controller.
2. Press More Options > More Options > Setup cabinets.
The following screen appears.
“^V^” identifies the zone that contains the Controller
Current cabinet zones; master cabinet numbers begin with zone 128
Module types:CS = CarouselLC = Locker
Zone (slot) is not yet defined
Access type; if present, indicates that only users with the indicated code in their user profile can access this module; 0 = no access control
Double zone (for large items)
Nexiant Secure Administrator’s Guide Nexiant™

Chapter 2: Verifying the cabinet configuration22
ConfigureCabinetNewZone.png
3. Press either Previous zone or Next zone to highlight the zone that contains the module.
4. Start configuring zones from the first zone at the top of the cabinet.
5. Press Carousel or Locker.
Configuring the zone identifies to the controller the type of module in the zone.
6. To move to the next zone, press Next zone.
7. When you’re finished configuring all zones, return to the modules menu by pressing Previous Screen.
Activating modules
1. If locked, get the key, unlock and open both locks at the top of the frame.
Key1.jpg, Key.jpg
The photo shows one type of key lock in the open position. Your key lock may look different from the above.
2. Make sure all modules are flush with the front of the cabinet (pushed in all the way) except for the module you’re working on.
If more than one drawer is pulled out when you activate a particular zone, problems will occur later.
Frame locks
Nexiant™ Nexiant Secure Administrator’s Guide

Chapter 2: Verifying the cabinet configuration 23
Activating the zone
1. Log on to the Controller.
2. Press More Options > More Options > Setup drawers.
The following screen appears.
ConfigureCabinetModulesMenu.png
3. Press Modules.
The following screen appears.
ModuleSetup.png
This screen lists all zones in this cabinet.
Beginning with the top drawer in the main cabinet, zones are numbered starting with 128. The first auxiliary cabinet starts with zone 138, etc.
Each zone that contains a module displays in white text indicating that it has been configured but not yet activated.
All zones are “secure zones.”
Nexiant Secure Administrator’s Guide Nexiant™
Chapter 2: Verifying the cabinet configuration24
4. Press either Previous zone or Next zone to highlight the zone that contains the module.
If you’re configuring a zone in an auxiliary cabinet, press the scroll arrows to access the next or previous set of 10 zones.
5. Press Activate.
A message to open the module drawer appears.
6. Grasp the sides of the module and gently pull out.
For locker modules continue with “Activating lockers” on page 26.
7. Press Enter.
The Controller displays, “Waiting for confirmation.” Then it advises you to perform “Inspect” next and displays the “Module Setup” screen again.
Inspecting the carousel module
8. Press Inspect.
For carousels, the platter rotates once and the message, “Please align the divider between Bin 1 and 56 with the alignment marker” appears.
9. Manually rotate the carousel platter so that the alignment point is one-third (1/3) of a bin width away from the alignment marker.
If the zone has already been activated, Activate changes to Deactivate.
Make sure you select a deactivated zone in the correct cabinet.
Nexiant™ Nexiant Secure Administrator’s Guide

Chapter 2: Verifying the cabinet configuration 25
CarouselCorrectlyAligned.jpg
Press Enter.
The message Carousel information received appears.
10. Press Enter.
11. Gently push the module back into the cabinet.
12. If you’re finished, lock the cabinet and store the key.
If inspection of a carousel fails or generates an error code, open the module and look for objects that may have jammed the rotation. If you find something, remove it and press the button next to Inspect again.
Working with a carousel module it’s easy to dislodge the bin eye sensor assembly. If you have difficulty calibrating the carousel, contact Technical Support.
Verifying calibration
1. Log on to the Controller.
2. Press More options > More options > Diagnostics.
The following screen appears.
1/3 bin width alignment marker
alignment point
Nexiant Secure Administrator’s Guide Nexiant™

Chapter 2: Verifying the cabinet configuration26
Diagnostics.png
3. Press either Previous zone or Next zone to highlight the zone that contains the module.
4. With the carousel zone highlighted, type a two-digit bin ID number (bin 1 = 01, bin 2 = 02, etc.) and press Rotate.
The platter rotates to the bin.
5. Press Unlock.
6. Verify that the bin is the one you requested.
7. Repeat this procedure as needed.
Activating lockers
1. Unscrew the wing nuts or thumb screws.
2. Lift the locker cover.
3. Press the solenoid plunger to open the right most door.
4. Push the sensor button just inside the door.
The Controller displays, “Waiting for confirmation.”
Keep pressing the solenoid plunger until the Controller advises you to perform “Inspect” next and displays the “Module Setup” screen again.
5. Close the locker door.
For lockers, the Controller opens each door in succession.
6. Screw in the wing nuts (or thumb screws in some cabinets) to secure the locker cover.
7. Gently push the module back into the cabinet.
You need to manually open only one door.
“0x0D” error
If inspection displays an “0x0D” error, press Enter and run the test again (press the button next to Inspect).
Nexiant™ Nexiant Secure Administrator’s Guide
Chapter 2: Verifying the cabinet configuration 27
Activating the next zone and module
1. For a new cabinet, move to the next zone, and so on until you’ve activated all zones.
2. When you’re finished, press Exit.
The system returns to the logon screen.
3. Gently push the module back into the cabinet.
4. If you’re finished, lock the cabinet and store the key.
Verifying locker doors open using diagnostics
1. Log on to the Controller.
2. Press More options > More options > Diagnostics.
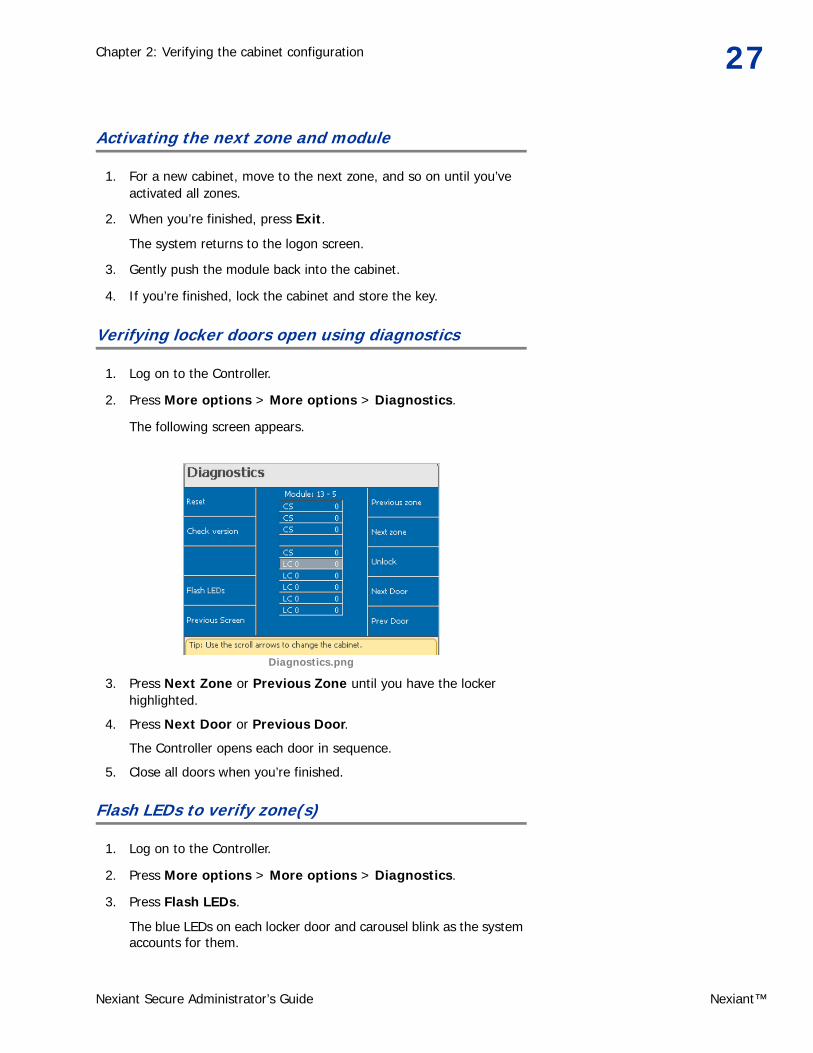
The following screen appears.
Diagnostics.png
3. Press Next Zone or Previous Zone until you have the locker highlighted.
4. Press Next Door or Previous Door.
The Controller opens each door in sequence.
5. Close all doors when you’re finished.
Flash LEDs to verify zone(s)
1. Log on to the Controller.
2. Press More options > More options > Diagnostics.
3. Press Flash LEDs.
The blue LEDs on each locker door and carousel blink as the system accounts for them.
Nexiant Secure Administrator’s Guide Nexiant™
Chapter 2: Verifying the cabinet configuration28
If multiple cabinets are connected, the Controller flashes each cabinet’s LEDs in sequence. This can take several seconds.
Back up the configuration
1. Log off the Controller.
2. Press CTL+ALT+SHIFT+Q.
3. Run dscmd.
4. Type dsutil /shutdown:all /backup /reboot.
Nexiant™ Nexiant Secure Administrator’s Guide

Appendix A: Glossary 93
Appendix A: Glossary
This glossary includes terms for all Nexiant™ products. A term may apply to one or more products.
Alias: 1) Another name for a common item. For example, “Kleenex” may be used as an alias for “tissue.” When searching, you can enter the bin name as it appears under the item (such as B1 or C5) to select the item. So, for example, instead of typing “cellophane tape” in the text entry box, you need only type the bin name B1 or C5.
2) A user-designed convention for coil-based cabinets (Nexiant Safety).
Bin: The smallest storage space in a Nexiant™ Controller-based cabinet or Nexiant Crib. In a Nexiant Secure a bin is a wedge-shaped compartment in a carousel or the space behind a locker door. In a Nexiant Safety, a bin is a coil tray.
Bin Level or Bin Quantity: See quantity on hand.
Bulk order: Minimum order quantity based on vendor’s price break.
Button bar: The horizontal strip attached to a Nexiant Select shelf. This button bar can have up to eight blue buttons, depending on the configuration of the shelf. You press the corresponding blue button when you remove an item from, or return an item to, the shelf.
Calibration: The process of preparing a Nexiant Secure carousel for use.
Carousel: A type of module for Nexiant Secure cabinets that provides a rotating drum and a single door from which to dispense items.
Configuration: The specific combination of cabinets and modules preconfigured for each Nexiant™ customer.
Controller: The user interface located in the main cabinet and used to manage all cabinet functions.
CS: Carousel module, a module with a rotating carousel drum.
Cycle count: The process of counting all items in a bin. The term also refers to the periodic counting of all items in inventory, such as monthly.
De-stock: The process of removing an item from a cabinet without dispensing it. Items may be removed to return them to the vendor or to move them to another cabinet. De-stock is always followed by another process, such as restock.
Nexiant Safety Administrator’s Guide Nexiant™

Appendix A: Glossary94
D-Source: Dispensing source, or POU location, which can be a Nexiant Crib, a cabinet, or a scanner, from which to dispense items. Each d-source has a unique name.
Indirect materials: Supplies that are not required by a direct manufacturing process. Office supplies and building maintenance materials are examples of indirect materials.
Installation Profile: The document that describes the customer configuration. Operations management populates the information in this document during the pre-implementation process.
Item import: The list of items used to create the database during cabinet installation.
LC: Locker module, a module with variable-width rectangular compartments for storing large items.
Module: A carousel or locker mounted in a cabinet frame like a file drawer.
Maintenance and Repair Operations (MRO): This collective term describes the activities that use indirect materials.
Pack requirements: See Bulk order.
PAR or Max Level (or Quantity): The maximum number of items the bin holds.
Pending restock: A restock order that has not been completed. Items on this order have not been received in the cabinet.
Pick List: A report generated by the SIM for each item to be restocked that shows, regardless of bin location, the vendor’s item ID, master name, quantity ordered and unit of stock. In contrast to the restock list, the pick list reflects total quantity to order per item. This report is used by the vendor.
Preventive Maintenance (PM): Regularly scheduled maintenance work to keep a piece of equipment or vehicle running smoothly.
Purchase order (PO): An electronic or printed document that authorizes a supplier to ship materials.
Point-of-use (POU) location: A cabinet, crib or other dispensing equipment for managing materials near to where they are used.
Pre-select mode: Allows users of Nexiant Cribs to select multiple items or quantities of a single item by creating a shopping list from which to access the selected items. This option eliminates the need to select one item, access that item, and repeat the steps for each item, thus reducing the time it takes to dispense multiple items.
Quantity on hand (QOH): The number of items currently stocked in the bin, sometimes referred to as the “bin level.”
Re-calibration: See Calibration.
Nexiant™ Nexiant Safety Administrator’s Guide

Appendix A: Glossary 95
Re-configuration: The process of changing the combination of cabinets and modules for a specific Nexiant™ customer.
Restock: The process of replenishing items in cabinets. (See also Synchronized Restock and Supplemental Restock.)
Smart Inventory Manager (SIM): the web-based database application that supports all Nexiant™ products.
Supplemental Restock: A procedure for restocking one or more cabinets on an as-needed basis. A supplemental restock is an unscheduled replenishment of supplies or the initial supply of materials. You can use this feature to stock items transferred from another POU cabinet or Nexiant Crib (see De-stock).
Synchronized Restock: A normal or synchronized restock is a regularly scheduled procedure, including the route to take, for replenishing items in one or more D-sources. It is always associated with a Restock Number that appears on the (SIM-generated) Restock List report.
Transaction: The record created as a result of any physical activity at a D-source, such as dispensing, returning, counting, and restocking items.
Zone: A module or drawer (Nexiant Secure), door (Nexiant Select) or shelf (Nexiant Safety) in a cabinet frame that can be assigned and activated through the Controller. The height of a module in the zone may be single or double.
Nexiant Safety Administrator’s Guide Nexiant™

Appendix B: Specifications 96
Appendix B: Specifications
Cabinet specifications
Table 1: Electrical
Parameter Value
Input voltage 100-240V AC
Frequency 50/60 Hz
Max. Current 4.5 A
Protection Class Class 1 (connected to protective earth ground)
Table 2: Connections
Parameter Value
Power cord
- for North America 3 x 16 AWG, rated 13 A @ 125 V, 3m (9ft 10in)
- for Europe 3 x 1mm2, rated 10 A @ 250 V, 2.5m (8ft 2in)
Network connections 8-positions Ethernet connector (1 x - main cabinet only)
6-position RS-485 connector (2x)
Table 3: Operating environment
Parameter Value
Temperature 0°C to 35°C (32°F to 95°F)
Humidity 10% to 90% (no condensation)
Table 4: Storage environment
Parameter Value
Temperature -10°C to 45°C (14°F to 113°F)
Humidity 10% to 90% (no condensation)
Nexiant Secure Administrator’s Guide Nexiant™

Appendix B: Specifications 97
Maintenance
No user serviceable parts
Carousel dimensions
Table 5: Dimensions
Parameter Value
Size (W x H x D) 30in x 82in x 33in (0.76m x 2.08m x 0.84m)
Net Weight max. 625 lbs (284 kg)
Shipping Weight max. 675 lbs (307 kg)
Table 6: Storage capacity
Parameter Value
Main cabinet up to 504 different items
Auxiliary Cabinet up to 560 different items
Table 7: Single-high carousel
ProductDivisions
per carousel
AreaIn.2
HeightIn.
VolumeIn.3
Max diagonal
In.
Single division internal widths in inches at
different depths in the bin
From center
Open-ing
Effec-tive
depth
Single division 56 5.3 5.2 27.7 11.05
Double division 28 10.7 5.2 55.5 11.05 11.0 1.13 0.0
Triple division 18 16.0 5.2 83.2 11.05 10.5 1.08 0.5
Quadruple division 14 21.3 5.2 110.9 11.05 10.0 1.02 1.0
5 division 11 26.7 5.2 138.7 11.05 9.5 .97 1.5
6 division 9 32.0 5.2 166.4 11.05 9.0 .91 2.0
7 division 8 37.3 5.2 194.1 11.05 8.5 .85 2.5
8 division 7 42.7 5.2 221.9 11.05 8.0 .80 3.0
1/4 carousel 4 74.7 5.2 388.2 11.05 7.5 .84 3.5
Nexiant Secure Administrator’s Guide Nexiant™

Appendix B: Specifications98
Locker dimensions
Single-high dimensions
LockerDimensions.jpg
Double-high dimensions
Table 8: Single-high locker dimensions
Locker door sizes
External dimensions Internal dimensions
DepthIn.
WidthIn.
HeightIn.
Internal Depth
Top width
(A)
Bottom width
(B)
Usable Height
(C)
Height(D) Bin/tray
1/6 wide 29.25 27 7.5 28.25 2.5 3.2 5.5 2.75 DS Clear Tray 57-3000
2/6 - wide 29.25 27 7.5 28.25 6.4 7.1 5.5 2.75 Akro Mills 30124
3/6 - wide 29.25 27 7.5 28.25 10.3 11 5.5 2.75 Akro Mills 30184
4/6 - wide 29.25 27 7.5 28.25 14.2 14.9 5.5 2.75 USPlastic.com 51074
5/6 - wide 29.25 27 7.5 28.25 18.1 18.8 5.5 2.75 USPlastic.com 51031
Full door 29.25 27 7.5 28.25 22 22.7 5.5 2.75 USPlastic.com 51072
Table 9: Double-high locker dimensions
Locker door sizes
External dimensions Internal dimensions
DepthIn.
WidthIn.
HeightIn.
Internal Depth
Top width
(A)
Bottom width
(B)
Usable Height
(C)
Height(D) Bin/tray
1/6 wide 29.25 27 15.11 28.25 2.5 3.2 12.1 9.35 DS Clear Tray 57-3000
2/6 - wide 29.25 27 15.11 28.25 6.4 7.1 12.1 9.35 Akro Mills 30124
3/6 - wide 29.25 27 15.11 28.25 10.3 11 12.1 9.35 Akro Mills 30184
4/6 - wide 29.25 27 15.11 28.25 14.2 14.9 12.1 9.35 USPlastic.com 51074
5/6 - wide 29.25 27 15.11 28.25 18.1 18.8 12.1 9.35 USPlastic.com 51031
Full door 29.25 27 15.11 28.25 22 22.7 12.1 9.35 USPlastic.com 51072
Nexiant™ Nexiant Secure Administrator’s Guide

Appendix B: Specifications 99
Weights
Customizing cabinets
The unique combination of carousel and locker modules as well as the item database for your company were pre-configured at the factory. You can reconfigure cabinets and modules by removing and adding bin dividers.
These additional accessories are available for purchase. ContactTechnical Support for information.
Table 10: Product weight capacity (per module)
Module Lbs. Kgs.
Carousel 35 15.9
Locker 100 45.3
Table 11: Accessories
Option Description Package Qty
Carousel Tray-Single
Clear, pie-shaped tray that fits in the smallest carousel bin.
60 Pk.
Locker Tray - Single Clear bin for small parts; fits in the smallest locker bin (1/6 wide door).
50 Pk.
Replacement Carousel
Full carousel with 56 dividers. 1
Replacement Tab Guides
Guides that hold the dividers of carousel bins in place.
110 Pk.
Replacement Dividers
Carousel bin dividers for reconfiguring carousels.
55 Pk.
Carousel Plugs Small plastic plugs used when reconfiguring carousel bin sizes greater than single bins.
100 Pk.
Door Kit 1/6, 2/6, 3/6, 4/6, 5/6, or full width door assembly.
1
Door Kit with Latch 1/6, 2/6, 3/6, 4/6, 5/6, or full width door assembly with latch.
1
Nexiant Secure Administrator’s Guide Nexiant™

119 Index
Index
AAccess
restricting to items 32Accessories 99Aging options 100Anti-override bin plugs
replacements 99Area
configuring 111Auxiliary cabinet
no communication with main cabinet 92
BBadge reader 80
options 102Badge scan
requiring 30Bin
assign an item 39, 42assigning an item 47assigning an item already assigned 48carousel 15change item assignment 49, 51locating 50, 52locker 16quantity 48unassigned 50, 52
Bins 45list unassigned 45modify 43selecting 45using a placeholder 44
CCabinet
cleaning 78configuration backup 28configure new 21, 23, 36frame 14no communication with auxiliaries 92serial number, checking 19specifications 96type, checking 19
Calibrationdefined 93
Carousel
Nexiant™
activating 24bin 15components 15defined 93dimensions 97door solenoid and plunger 43door won’t open 87inspect 24location 14manually accessing 43modules 14opening door 26replacement modules 99replacement trays 99verify door open 26weight 99
Carousel Test screen 46Carousels
assigning, see Zones, assigning 21calibrating 24
Communicationproblems with auxiliary cabinet(s) 92
Communications options 103Communications problems 91Component defined 93Components 14Configuration
backing up 28defined 93verifying 19
Configuration options 100for the Controller User Interface 29, 100
Configure Cabinet Modules Menu 23Controller
Unassigned bins screen 46Controller User Interface 14, 15
Carousel Test screen 46configuration options 29, 100defined 93Item selection screen 47logging on 80Modify bin screen 48Password screen 80, 81searching for an item 81Secured items list 72, 76Shutdown 91
Controller, see Distribution board 14Conventions in this guide 10Cycle counting 71
Nexiant Secure Administrator’s Guide

Index120
DDatabasebacking up 92Destock 73, 74
defined 93Diagnostics
verify carousel door open 26Dimensions
carousel 97locker 98
Display options 104Distribution board 14Divider
carousel 15locker 16
Dividersreplacement 99
Doorof carousel won’t open 87of locker won’t open 90on locker 16
Door kits 99Doors
on locker 117opening 26
D-sourcedefined 94
EESM
help system 11
FFrame
locks 22, 85, 89
HHub (carousel) 15
IInstallation profile
defined 94Inventory
removing 73taking 71
Itemassigning to a bin 47assigning when already assigned 48
Nexiant™
change bin assignment 49, 51import, defined 94
Item selection screen 47Items
assigning to bins 39, 42restricting access to 32staging 42storage options 42unassigned 47unassigning 73, 74
JJobs
enabling and tracking 31
KKits for locker doors 99
LLatch
on locker 16LC, locker module defined 94Locker
activating 26bin 16components 16dimensions 98door won’t open 90doors 14, 117inspect 26latch 16location 14modules 14open door manually 44opening doors 26replacement trays 99setting termination jumpers 89verifying 27weight 99
Locker doors 14Lockers
assigning, see Zones, assigning 21customizing, see Technical Support Guide 43
Logging onto the Controller User Interface 80to the SIM 40, 59
Logging options 105
MMiscellaneous options 105
Nexiant Secure Administrator’s Guide

Index 121
Modify bin screen 48Modify route schedule page 62Moduleactivating 24defined 94numbering in cabinet 23, 45unplug from frame 86
Modulesassigning, see Zones, assigning 21configuring 99
NNexiant Secure
product description 9, 14
OOmnicell hardware options 106options 110
PPAR quantity 48PAR value defined 94Password
configure 30disable 30enable 30expiration 31
Pending restock defined 94Placeholder 44Platter
motor 15rotate 43
Powerdisconnect module 86
Power termination jumperson the locker 89
Preconfiguration 18
QQuantity
Bin 48PAR 48setting PAR and quantity on hand 48
Quantity on hand (QOH)definition 94
Quick reference 11
RRe-configuration
Nexiant Secure Administrator’s Guide
defined 95Reference 1 options 107Reference 2 options 108References, enabling 31Resources
ESM help system 11quick reference 11
Restockcomplete, but restock number still listed 69defined 95FAQ 68method 61number missing at cabinet 68preparation procedure 59removing an item without canceling restock order
69restock disappeared 68route list 60route maintenance screen 60route, adding 60supplemental 76synchronized 59synchronized, steps at the cabinet 66type 61unable to generate order 68unscheduled 69
Routeadding for restock 60
RS232 peripheral options 109RS-485 110
SSearching
for information at the Controller User Interface 81
for information in the SIM 41Secured items list 72, 76Secured Zones screen 45Shutdown
Controller User Interface 91SIM
defined 95definition and functions 16logging on 40, 59requirements 16searching for information 41unable to communicate with 91version documented in this guide 57
Siteconfiguring 111
Specifications 96carousel 97locker 98
Nexiant™
Index122
weight 99Supplemental restock 76definition 95
Synchronized restockat the cabinet 66definition 58, 95scheduling 59
Systemcomponent defined 93controller, see Distribution controller 14
System options 111
TTab guide 15Tab guides
replacement 99TCP/IP options 112Time out options 113Tone options 114Transaction
definition 95Transactions options 115
UUnassigned bins screen 46Unit
configuring 111User interface
help system 11
WWD40 85Weight specifications 99
ZZone
defined 95numbering 23, 45
Zonesassigning 21double 21secured 45
Nexiant™
Nexiant Secure Administrator’s Guide