secure boot on i.mx 50, i.mx 53, i.mx 6 and i.mx 7 … trusted and authentic code srk revocation on...
TRANSCRIPT
© 2018 NXP B.V.
Secure Boot on i.MX 50, i.MX 53, i.MX 6 and
i.MX 7 Series using HABv4
1. Introduction
1.1. Purpose
Executing trusted and authentic code on an applications
processor starts with securely booting the device. The
i.MX family of applications processors provides this
capability with the High Availability Boot (HAB)
component of the on-chip ROM. The ROM is
responsible for loading the initial program image from
the boot medium. HAB enables the ROM to
authenticate the program image by using digital
signatures. This initial program image is usually a
bootloader.
HAB provides a mechanism to establish a root of trust
for the remaining software components and establishes a
secure state on the i.MX IC’s secure state machine in
hardware.
The purpose of this application note is to provide a
secure boot reference for i.MX applications processors
that include HABv4. It demonstrates an example for
generating a signed U-Boot image and configuring the
IC to run securely.
NXP Semiconductors Document Number: AN4581
Application Note Rev. 2 , 05/2018
Contents
1. Introduction ........................................................................ 1 2. Overview ............................................................................ 4 3. Code signing example ........................................................ 5 4. Troubleshooting ............................................................... 15 5. Revision history ............................................................... 16 Appendix A. HAB versions and differences ....................... 17 Appendix B. SRK revocation on i.MX 6 & 7 series ........... 19 Appendix C. Fast authentication (≥ HAB 4.1.2 only) ....... 21 Appendix D. HAB4 CSF examples ..................................... 23 Appendix E. Extracting U-boot data for CSF ..................... 27 Appendix F. i.MX manufacturing tool ............................... 29 Appendix G. Extending the root of trust ............................. 33
Introduction
Secure Boot on i.MX 50, i.MX 53, i.MX 6 and i.MX 7 Series using HABv4, Application Note, Rev. 2, 05/2018
2 NXP Semiconductors
1.2. Audience
This document is intended for those who:
• Need an example of the procedure for signing a boot image.
• Need to design signed software images to be used with a HAB-enabled processor.
It is assumed that the reader is familiar with the basics of digital signatures and public key certificates.
1.3. Scope
This document is a practical example to illustrate the construction of a secure boot image, in addition to
configuring the target device to run securely. Extending the secure boot chain past the initial stage is
also possible with HAB. An example is available in Appendix G Extending the root of trust.
This document answers the following questions:
• How is the hardware configured?
• What components are required?
• How is each of these different components generated?
• How are all these components assembled to create a signed image?
NOTE
This document covers secure boot using i.MX6 and i.MX7. HABv4 is
present on the following i.MX processors: i.MX50, i.MX53, i.MX 6 and
i.MX7 Series. i.MX7ULP step by step procedure is not included on this
document but the same concept can be used as an example. For details on
fuse locations please refer to the processors reference manual. This
document applies to all HABv4 processors. Secure boot features for other
processors, such as i.MX25, i.MX35, and i.MX51, which use HABv3, are
documented in Secure Boot on i.MX25, i.MX35, and i.MX51 using HAB3
(AN4547).
NOTE
Secure boot features for i.MX 28 are documented in Secure Boot with
i.MX28 HAB Version 4 (AN4555). i.MX 28 supportsHABv4, but its boot
architecture is significantly different from other processors in the i.MX
family.
NOTE
Secure boot using HAB is no longer supported on i.MX 27 and i.MX 31.
NOTE
Encrypted boot is not included in this document, for further details and
application note please contact your local NXP representative.
Introduction
Secure Boot on i.MX 50, i.MX 53, i.MX 6 and i.MX 7 Series using HABv4, Application Note, Rev. 2, 05/2018
NXP Semiconductors 3
1.4. Definitions, Acronyms, and Abbreviations
Table 1 describes the definitions of terms and acronyms in this document.
Table 1. Definition of terms and acronyms
Terms or acronyms Definitions Remarks
CA Certificate Authority The holder of a private key used to certify public keys
CAAM Cryptographic Acceleration
and Assurance Module
an accelerator for encryption, stream cipher, and hashing algorithms,
with a random number generator and run time integrity checker
CMS Cryptographic Message
Syntax
A general format for data that may have cryptography applied to it,
such as digital signatures and digital envelopes. HAB uses the CMS
as a container holding PKCS#1 signatures.
CSF Command Sequence File A binary data structure interpreted by the HAB to guide authentication
operations.
CST Code Signing Tool An application running on a build host to generate a CSF and
associated digital signatures
DCD Device Configuration Data A binary table used by the ROM code to configure the device at early
boot stage.
HAB High Assurance Boot A software library executed in internal ROM on the NXP processor at
boot time which, among other things, authenticates software in
external memory by verifying digital signatures in accordance with a
CSF. This document is strictly limited to processors running HABv4.
IVT Image Vector Table —
OS Operating System —
OTP One-Time Programmable OTP hardware includes masked ROM, and electrically programmable
fuses (eFuses).
PKCS#1 — Standard specifying the use of the RSA algorithm.
PKI Public Key Infrastructure A hierarchy of public key certificates in which each certificate (except
the root certificate) can be verified using the public key above it.
RSA — Public key cryptography algorithm developed by Rivest, Shamir, and
Adleman.
— — Accelerator (including hash acceleration) found on some processors.
SDP Serial Download Protocol,
also called UART/USB Serial
Download Mode
This allows code provisioning through UART or USB during
production and development phases.
SRK Super Root Key An RSA key pair which forms the start of the boot-time authentication
chain. The hash of the SRK public key is embedded in the processor
using OTP hardware. The SRK private key is held by the CA. Unless
explicitly noted, SRK in this document refers to the public key only.
UID Unique Identifier A unique value (such as a serial number) assigned to each processor
during fabrication.
1.5. References
• i.MX 50 reference manual (IMX50RM), i.MX 53 reference manual (IMX53RM) , i.MX
6Dual/6Quad reference manual (IMX6DQRM), and i.MX7D reference manual (IMX7DRM).
• i.MX 53 security reference manual, i.MX 6Dual/6Quad security reference manual, i.MX
6Solo/6DualLite security reference manual, and i.MX7D reference manual.
HAB CST User Guide available in the Code Signing Tool package downloadable at NXP.com. Search
for IMX_CST_TOOL.
Overview
Secure Boot on i.MX 50, i.MX 53, i.MX 6 and i.MX 7 Series using HABv4, Application Note, Rev. 2, 05/2018
4 NXP Semiconductors
2. Overview
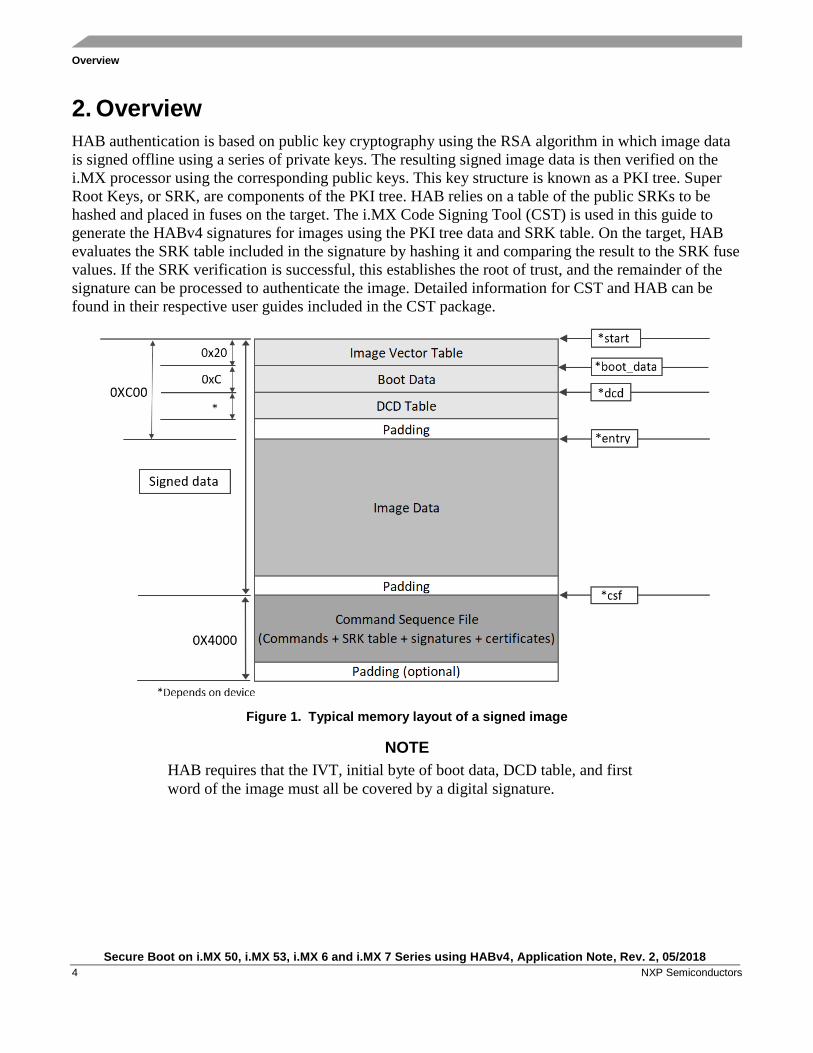
HAB authentication is based on public key cryptography using the RSA algorithm in which image data
is signed offline using a series of private keys. The resulting signed image data is then verified on the
i.MX processor using the corresponding public keys. This key structure is known as a PKI tree. Super
Root Keys, or SRK, are components of the PKI tree. HAB relies on a table of the public SRKs to be
hashed and placed in fuses on the target. The i.MX Code Signing Tool (CST) is used in this guide to
generate the HABv4 signatures for images using the PKI tree data and SRK table. On the target, HAB
evaluates the SRK table included in the signature by hashing it and comparing the result to the SRK fuse
values. If the SRK verification is successful, this establishes the root of trust, and the remainder of the
signature can be processed to authenticate the image. Detailed information for CST and HAB can be
found in their respective user guides included in the CST package.
Figure 1. Typical memory layout of a signed image
NOTE
HAB requires that the IVT, initial byte of boot data, DCD table, and first
word of the image must all be covered by a digital signature.
Code signing example
Secure Boot on i.MX 50, i.MX 53, i.MX 6 and i.MX 7 Series using HABv4, Application Note, Rev. 2, 05/2018
NXP Semiconductors 5
3. Code signing example
The following sections detail the step-by-step process to securely boot an i.MX 6 and 7 Series part with
HABv4. After completing the steps, the image will have a valid HABv4 signature attached and the part
will be closed. Once closed, the part will only execute signed images.
NOTE
OpenSSL is required for generating HAB signing private keys and public
key certificates, please check the HAB CST User Guide available in the
Code Signing Tool package for more details.
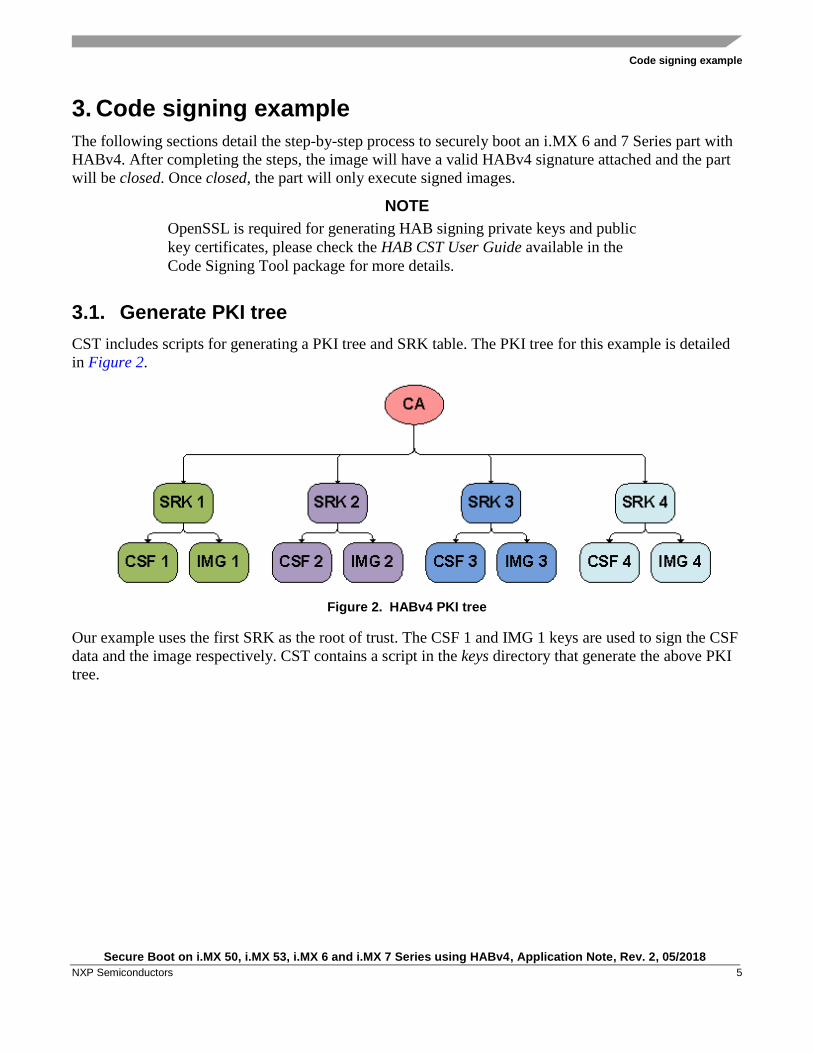
3.1. Generate PKI tree
CST includes scripts for generating a PKI tree and SRK table. The PKI tree for this example is detailed
in Figure 2.
Figure 2. HABv4 PKI tree
Our example uses the first SRK as the root of trust. The CSF 1 and IMG 1 keys are used to sign the CSF
data and the image respectively. CST contains a script in the keys directory that generate the above PKI
tree.
Code signing example
Secure Boot on i.MX 50, i.MX 53, i.MX 6 and i.MX 7 Series using HABv4, Application Note, Rev. 2, 05/2018
6 NXP Semiconductors
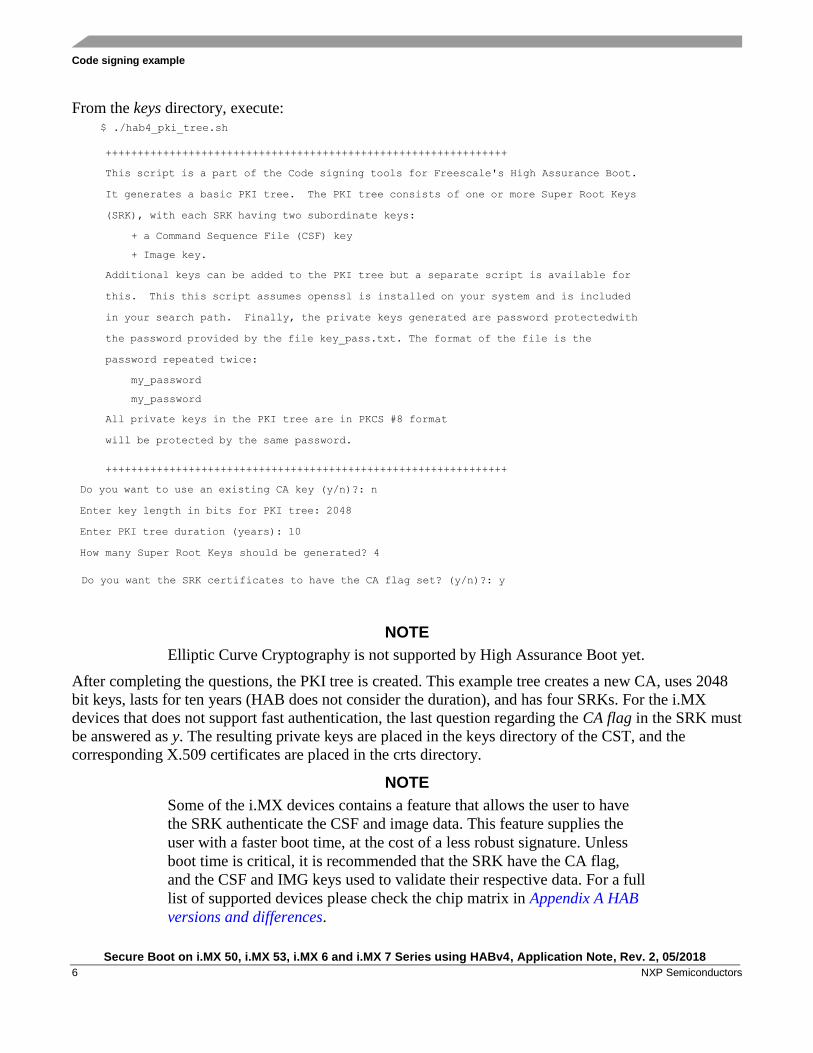
From the keys directory, execute: $ ./hab4_pki_tree.sh
+++++++++++++++++++++++++++++++++++++++++++++++++++++++++++++++
This script is a part of the Code signing tools for Freescale's High Assurance Boot.
It generates a basic PKI tree. The PKI tree consists of one or more Super Root Keys
(SRK), with each SRK having two subordinate keys:
+ a Command Sequence File (CSF) key
+ Image key.
Additional keys can be added to the PKI tree but a separate script is available for
this. This this script assumes openssl is installed on your system and is included
in your search path. Finally, the private keys generated are password protectedwith
the password provided by the file key_pass.txt. The format of the file is the
password repeated twice:
my_password
my_password
All private keys in the PKI tree are in PKCS #8 format
will be protected by the same password.
+++++++++++++++++++++++++++++++++++++++++++++++++++++++++++++++
Do you want to use an existing CA key (y/n)?: n
Enter key length in bits for PKI tree: 2048
Enter PKI tree duration (years): 10
How many Super Root Keys should be generated? 4
Do you want the SRK certificates to have the CA flag set? (y/n)?: y
NOTE
Elliptic Curve Cryptography is not supported by High Assurance Boot yet.
After completing the questions, the PKI tree is created. This example tree creates a new CA, uses 2048
bit keys, lasts for ten years (HAB does not consider the duration), and has four SRKs. For the i.MX
devices that does not support fast authentication, the last question regarding the CA flag in the SRK must
be answered as y. The resulting private keys are placed in the keys directory of the CST, and the
corresponding X.509 certificates are placed in the crts directory.
NOTE
Some of the i.MX devices contains a feature that allows the user to have
the SRK authenticate the CSF and image data. This feature supplies the
user with a faster boot time, at the cost of a less robust signature. Unless
boot time is critical, it is recommended that the SRK have the CA flag,
and the CSF and IMG keys used to validate their respective data. For a full
list of supported devices please check the chip matrix in Appendix A HAB
versions and differences.
Code signing example
Secure Boot on i.MX 50, i.MX 53, i.MX 6 and i.MX 7 Series using HABv4, Application Note, Rev. 2, 05/2018
NXP Semiconductors 7
NOTE
In HAB4 it is possible to include up to four SRKs in a signed image,
although only one SRK can be used per reset cycle. The same SRK must
be used when extending the root of trust beyond the initial boot image.
For more details on key generation for CST, see HAB CST User Guide.
3.2. Generate SRK table
The SRK table is required by CST. It is a table of the Public SRKs. To generate an SRK table, CST
provides the srktool, which requires X.509v3 public key certificates as inputs for the SRKs. This tool
creates the SRK table and an SRK fuse table. The fuse table contains a hash value of the SRK table, and
is programmed to the SRK fuses on the target. The srktool is capable of outputting the fuse table in
different formats to align with different fuse controllers used on various parts. The following shows how
to generate an SRK table with four keys for this example.
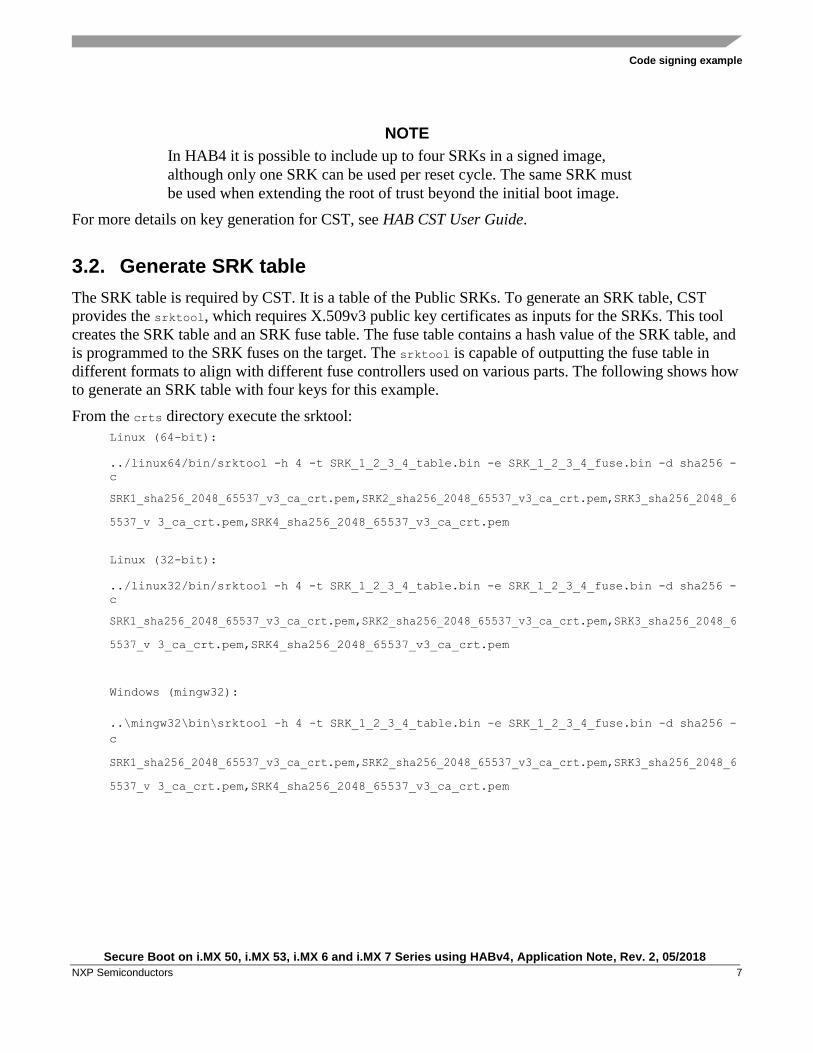
From the crts directory execute the srktool:
Linux (64-bit):
../linux64/bin/srktool -h 4 -t SRK_1_2_3_4_table.bin -e SRK_1_2_3_4_fuse.bin -d sha256 -
c SRK1_sha256_2048_65537_v3_ca_crt.pem,SRK2_sha256_2048_65537_v3_ca_crt.pem,SRK3_sha256_2048_6
5537_v 3_ca_crt.pem,SRK4_sha256_2048_65537_v3_ca_crt.pem
Linux (32-bit):
../linux32/bin/srktool -h 4 -t SRK_1_2_3_4_table.bin -e SRK_1_2_3_4_fuse.bin -d sha256 -
c SRK1_sha256_2048_65537_v3_ca_crt.pem,SRK2_sha256_2048_65537_v3_ca_crt.pem,SRK3_sha256_2048_6
5537_v 3_ca_crt.pem,SRK4_sha256_2048_65537_v3_ca_crt.pem
Windows (mingw32):
..\mingw32\bin\srktool -h 4 -t SRK_1_2_3_4_table.bin -e SRK_1_2_3_4_fuse.bin -d sha256 -
c
SRK1_sha256_2048_65537_v3_ca_crt.pem,SRK2_sha256_2048_65537_v3_ca_crt.pem,SRK3_sha256_2048_6
5537_v 3_ca_crt.pem,SRK4_sha256_2048_65537_v3_ca_crt.pem
Code signing example
Secure Boot on i.MX 50, i.MX 53, i.MX 6 and i.MX 7 Series using HABv4, Application Note, Rev. 2, 05/2018
8 NXP Semiconductors
3.3. Fuse programming
Enabling the secure boot features of the device requires programming fuses on the part. A Fuse Map for
the specific part should always be obtained and referenced to ensure the correct fuse locations are being
programmed.
3.3.1. SRK fuses
The SRK fuse values are generated by srktool when the SRK table was assembled in the previous
section. Be careful when programming these values, as this data is the basis for the root of trust. An
error in SRK results in a part that does not boot.
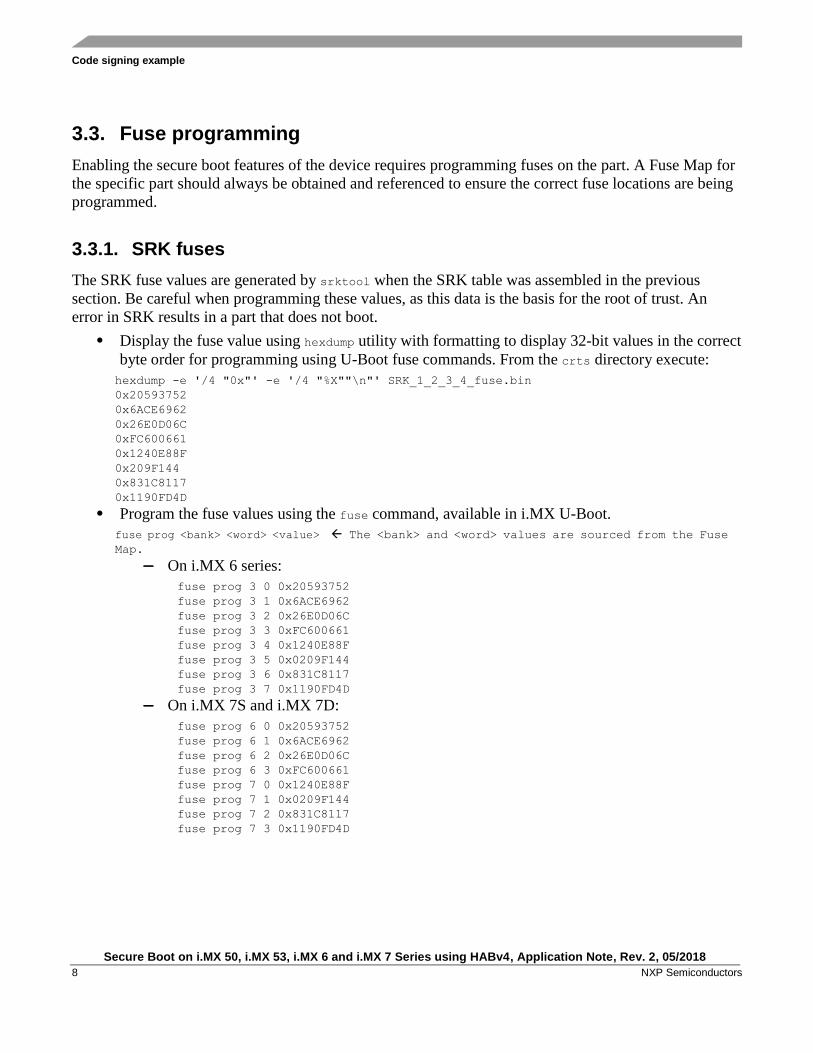
• Display the fuse value using hexdump utility with formatting to display 32-bit values in the correct
byte order for programming using U-Boot fuse commands. From the crts directory execute:
hexdump -e '/4 "0x"' -e '/4 "%X""\n"' SRK_1_2_3_4_fuse.bin
0x20593752
0x6ACE6962
0x26E0D06C
0xFC600661
0x1240E88F
0x209F144
0x831C8117
0x1190FD4D
• Program the fuse values using the fuse command, available in i.MX U-Boot.
fuse prog <bank> <word> <value> The <bank> and <word> values are sourced from the Fuse
Map.
— On i.MX 6 series:
fuse prog 3 0 0x20593752
fuse prog 3 1 0x6ACE6962
fuse prog 3 2 0x26E0D06C
fuse prog 3 3 0xFC600661
fuse prog 3 4 0x1240E88F
fuse prog 3 5 0x0209F144
fuse prog 3 6 0x831C8117
fuse prog 3 7 0x1190FD4D
— On i.MX 7S and i.MX 7D:
fuse prog 6 0 0x20593752
fuse prog 6 1 0x6ACE6962
fuse prog 6 2 0x26E0D06C
fuse prog 6 3 0xFC600661
fuse prog 7 0 0x1240E88F
fuse prog 7 1 0x0209F144
fuse prog 7 2 0x831C8117
fuse prog 7 3 0x1190FD4D
Code signing example
Secure Boot on i.MX 50, i.MX 53, i.MX 6 and i.MX 7 Series using HABv4, Application Note, Rev. 2, 05/2018
NXP Semiconductors 9
3.3.2. RNG trim fuses
HAB provides two options for managing the hardware RNG available in CAAM. HAB can initialize the
RNG, or defer the initialization for the CAAM Operating System driver to manage.
RNG trim fuses provide HAB with a value to program in CAAM. This value setting causes a delay so
that sufficient entropy can be generated on the chip. This ensures that the RNG self-test passes during
RNG initialization. If the self-test fails, HAB does not allow the device to continue booting if it is
Closed. Only HAB sources the RNG Trim Fuse value. The CAAM driver needs to perform a similar
RNG trim configuration, but the values it uses are built into the driver software.
NOTE
On HAB 4.2.0 and later the RNG is not instantiated by default, for older
versions choose one of two methods, or the chip will not boot when the
device is Closed.
3.3.2.1. Option 1 – Defer RNG instantiation for post HAB software (recommended)
Deferring the RNG instantiation is done by adding a command to the CSF signature data. This command
informs HAB to skip the instantiation. As of all CST versions 2.3 and greater, this command is included
in the CSF signature by default if CAAM engine is defined, unless it is overridden by the CSF
description file. When deferring the RNG instantiation any operation that requires the RNG is not
available during ROM boot, if necessary RNG can be instantiated in a later boot stage in U-Boot or
Kernel. Although encryption and blob generation are not available, the HAB-signed or encrypted boot
features are not affected.
The CSF configuration file is discussed later and you can find examples in Appendix D HAB4 CSF
examples. Deferring RNG instantiation is done by adding the following line in CSF Header:
[Header]
Engine = CAAM
In case that Engine must be set to other configuration value, RNG can be deferred by using the Unlock
command:
[Unlock]
Engine = CAAM
Features = RNG
Code signing example
Secure Boot on i.MX 50, i.MX 53, i.MX 6 and i.MX 7 Series using HABv4, Application Note, Rev. 2, 05/2018
10 NXP Semiconductors
3.3.2.2. Option 2 – Set RNG trim in fuse
The Fuse setting is essentially a delay. Increasing the value increases boot time. The recommended safe
value for ensuring the self-test passes is 0x10. Smaller values may work on some parts, but not all. The
delay required to pass the test could also vary based on temperature.
• Program the RNG Trim fuse value using the fuse command available in i.MX U-Boot.
— On i.MX 6 Series 0x480[23:16]:
fuse prog 1 0 0x00100000
— On i.MX 7S and i.MX 7D 0x4C0[15:8]:
fuse prog 3 0 0x00001000
3.4. Configure and build U-boot to support secure boot
The i.MX U-Boot supports secure boot configurations and provides access to HAB APIs exposed by the
ROM vector table. The support is enabled by selecting the CONFIG_SECURE_BOOT option. When
built with this configuration, U-Boot provides extra functions for HAB, one of those being access to
HAB status logs through the hab_status command. It also correctly pads the U-Boot image to an
appropriate size so the CSF signature data generated by CST can be concatenated to image. It also
enables U-Boot to utilize HAB to verify other software, such as the Linux® OS kernel, an example is
available in Appendix G Extending the root of trust.
• Older U-Boot versions (v2016.09 and prior): Uncomment or add CONFIG_SECURE_BOOT to
the board configuration header.
#define CONFIG_SECURE_BOOT
• Newer U-Boot versions (Since v2016.11): For defconfig add CONFIG_SECURE_BOOT=y or
select it in U-Boot menuconfig:
ARM architecture -> Support i.MX HAB features
NOTE
In recent U-Boot versions some of the NXP boards are supporting device
tree to describe the system hardware, on this case the final binary naming
has changed from u-boot.imx to u-boot-dtb.imx.
Code signing example
Secure Boot on i.MX 50, i.MX 53, i.MX 6 and i.MX 7 Series using HABv4, Application Note, Rev. 2, 05/2018
NXP Semiconductors 11
3.5. Create the CSF description file
The CSF contains all the commands that the ROM executes during the secure boot. These commands
instruct HAB on which memory areas of the image to authenticate, which keys to install and use, what
data to write to a register, and so on. In addition, the necessary certificates and signatures involved in the
verification of the image, as well as the SRK table, are attached to the CSF binary signature.
When creating the CSF description file, remember that commands in the binary CSF follow the order in
which they appear in the CSF description file. Ordering of commands within the CSF description file is
significant only to the following extents:
• The Header command must precede any other command.
• The Install SRK command must precede the Install CSFK command.
• The Install CSFK must precede the Authenticate CSF command.
• Install SRK, Install CSFK and Authenticate CSF commands must appear exactly once in a CSF
description file.
• A verification index in an Authenticate Data command must appear as the target index in a
previous Install Key command.
Command Sequence File for the example: #Illustrative Command Sequence File Description
[Header]
Version = 4.2
Hash Algorithm = sha256
Engine = ANY
Engine Configuration = 0
Certificate Format = X509
Signature Format = CMS
[Install SRK]
File = “../crts/SRK_1_2_3_4_table.bin”
# Index of the key location in the SRK table to be installed
Source index = 0
[Install CSFK]
# Key used to authenticate the CSF data
File = “../crts/CSF1_1_sha256_2048_65537_v3_usr_crt.pem”
[Authenticate CSF]
[Install Key]
# Key slot index used to authenticate the key to be installed
Verification index = 0
# Target key slot in HAB key store where key will be installed
Target Index = 2
# Key to install
File= ”../crts/IMG1_1_sha256_2048_65537_v3_usr_crt.pem”
Code signing example
Secure Boot on i.MX 50, i.MX 53, i.MX 6 and i.MX 7 Series using HABv4, Application Note, Rev. 2, 05/2018
12 NXP Semiconductors
[Authenticate Data]
# Key slot index used to authenticate the image data
Verification index = 2
# Address Offset Length Data File Path
Blocks = 0x877fb000 0x000 0x48000 “/<path_to_u-boot_dir>/u-boot-dtb.imx”
The authenticate data command blocks line contains three values and the file containing the data being
signed. The first value is the address on the target where HAB expects the signed image data to begin.
The second and third values are related to the image file that is reference by the data file path. The
second value is the offset into the file where CST will begin signing. The third value is length in bytes of
the data to sign starting from the offset. It is also required that the IVT and DCD regions are signed.
HAB will verify the DCD and IVT fall in an authenticated region. The CSF will not successfully
authenticate unless all commands are successful and all required regions are signed.
For more detailed information about the CSF commands, reference the CST User’s Guide. It may also
be helpful to review the Program Image chapter in the chip’s reference manual to understand the
contents of a boot image.
NOTE
Due to an issue with the i.MX 6ULL processor the header engine
command must be set to SW “Engine = SW”. For more details please
check ERR010449 in Chip Errata for the i.MX 6ULL (IMX6ULLCE).
3.6. Generate the CSF binary signature
The CSF binary signature is generated from the CSF input file by the Code Signing Tool.
• From the linux32, linux64 or mingw32 bin directory, call CST with the CSF input file:
./cst -–o csf-uboot.bin --i csf-uboot
3.7. Attach CSF signature to U-Boot image
The CSF binary data needs to be concatenated to the image.
• Use the cat command to attach the CSF binary to the end of the image:
cat u-boot.dtb.imx csf-uboot.bin > u-boot-signed.imx
3.8. Verify HAB successfully authenticates the signed image
The next step is to verify that the signature attached to U-Boot is successfully processed without issues.
HAB generates events when processing the commands if it encounters issues. One of the utilities
enabled with the CONFIG_SECURE_BOOT switch in U-Boot is the hab_status command. This
command displays any events that were generated. This command is executed by typing hab_status at
the u-boot prompt.
=> hab_status
Code signing example
Secure Boot on i.MX 50, i.MX 53, i.MX 6 and i.MX 7 Series using HABv4, Application Note, Rev. 2, 05/2018
NXP Semiconductors 13
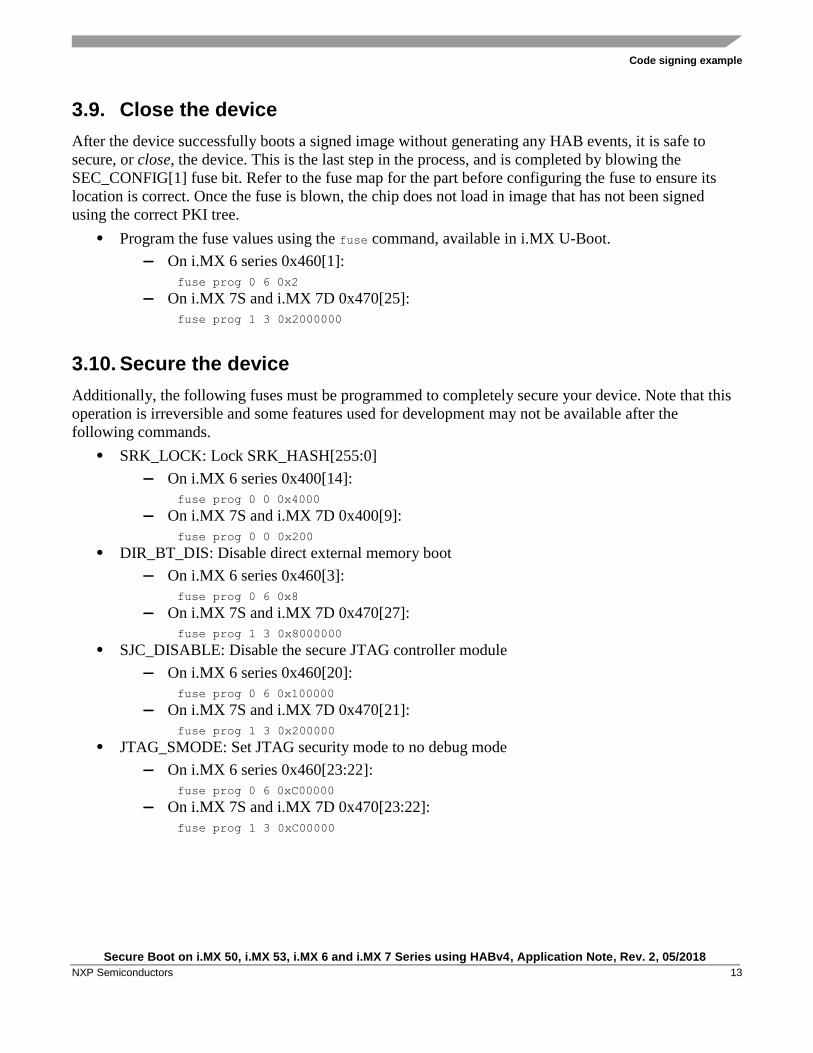
3.9. Close the device
After the device successfully boots a signed image without generating any HAB events, it is safe to
secure, or close, the device. This is the last step in the process, and is completed by blowing the
SEC_CONFIG[1] fuse bit. Refer to the fuse map for the part before configuring the fuse to ensure its
location is correct. Once the fuse is blown, the chip does not load in image that has not been signed
using the correct PKI tree.
• Program the fuse values using the fuse command, available in i.MX U-Boot.
— On i.MX 6 series 0x460[1]:
fuse prog 0 6 0x2
— On i.MX 7S and i.MX 7D 0x470[25]:
fuse prog 1 3 0x2000000
3.10. Secure the device
Additionally, the following fuses must be programmed to completely secure your device. Note that this
operation is irreversible and some features used for development may not be available after the
following commands.
• SRK_LOCK: Lock SRK_HASH[255:0]
— On i.MX 6 series 0x400[14]:
fuse prog 0 0 0x4000
— On i.MX 7S and i.MX 7D 0x400[9]:
fuse prog 0 0 0x200
• DIR_BT_DIS: Disable direct external memory boot
— On i.MX 6 series 0x460[3]:
fuse prog 0 6 0x8
— On i.MX 7S and i.MX 7D 0x470[27]:
fuse prog 1 3 0x8000000
• SJC_DISABLE: Disable the secure JTAG controller module
— On i.MX 6 series 0x460[20]:
fuse prog 0 6 0x100000
— On i.MX 7S and i.MX 7D 0x470[21]:
fuse prog 1 3 0x200000
• JTAG_SMODE: Set JTAG security mode to no debug mode
— On i.MX 6 series 0x460[23:22]:
fuse prog 0 6 0xC00000
— On i.MX 7S and i.MX 7D 0x470[23:22]:
fuse prog 1 3 0xC00000
Code signing example
Secure Boot on i.MX 50, i.MX 53, i.MX 6 and i.MX 7 Series using HABv4, Application Note, Rev. 2, 05/2018
14 NXP Semiconductors
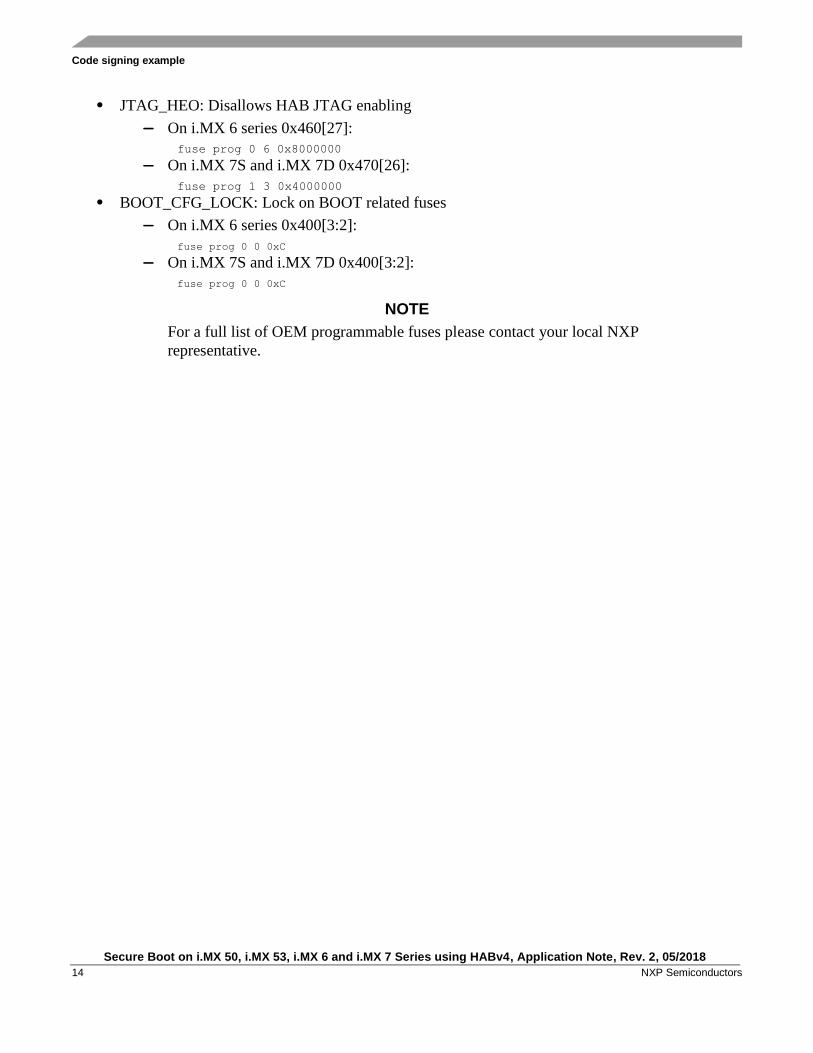
• JTAG_HEO: Disallows HAB JTAG enabling
— On i.MX 6 series 0x460[27]:
fuse prog 0 6 0x8000000
— On i.MX 7S and i.MX 7D 0x470[26]:
fuse prog 1 3 0x4000000
• BOOT_CFG_LOCK: Lock on BOOT related fuses
— On i.MX 6 series 0x400[3:2]:
fuse prog 0 0 0xC
— On i.MX 7S and i.MX 7D 0x400[3:2]:
fuse prog 0 0 0xC
NOTE
For a full list of OEM programmable fuses please contact your local NXP
representative.
Troubleshooting
Secure Boot on i.MX 50, i.MX 53, i.MX 6 and i.MX 7 Series using HABv4, Application Note, Rev. 2, 05/2018
NXP Semiconductors 15
4. Troubleshooting
4.1. HAB events
HAB generates events when it encounters issues. These events are written to a region in OCRAM to
provide users feedback to assist in debugging. The location in OCRAM varies based on the i.MX series
part.
As previously mentioned, U-Boot supplies the hab_status command to read these events and feed them
to the console.
During development, users should check the events before the device is closed. Once an image is signed
with a signature that does not generate events during loading, the signed image should be able to boot on
a closed device without issues. This should be the goal for development, since trying to debug on a
closed platform requires the use of JTAG or the USB serial download protocol to acquire the event
debug information.
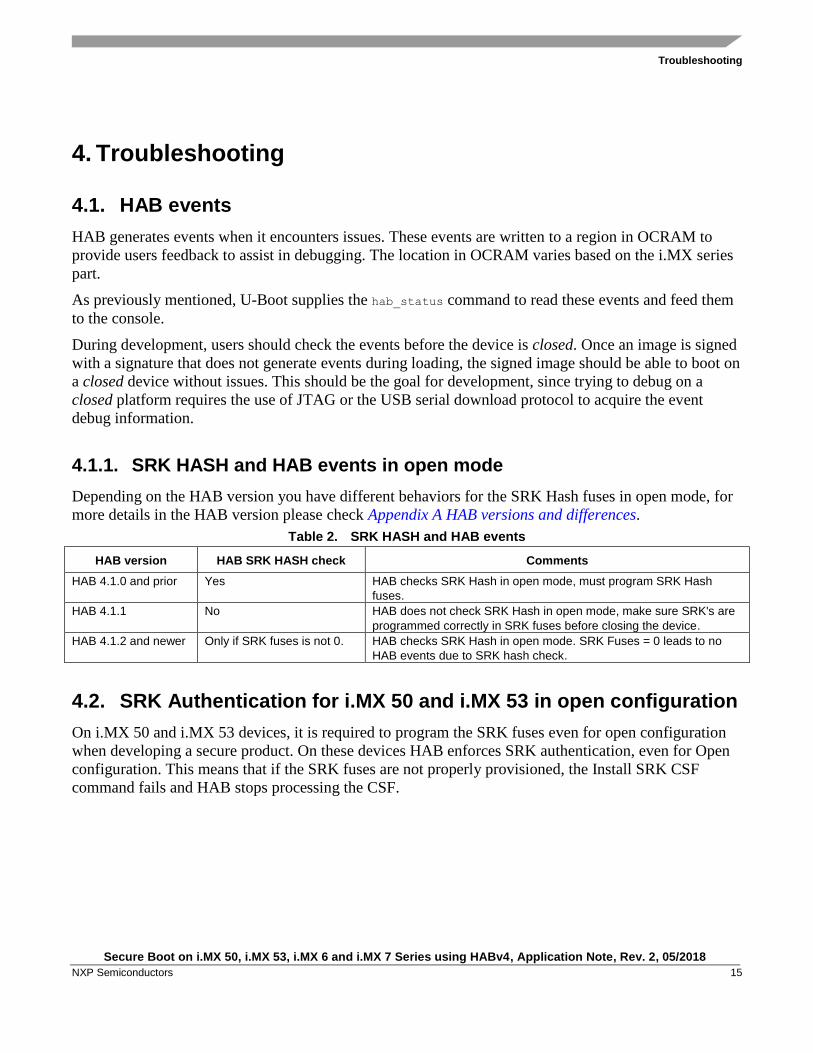
4.1.1. SRK HASH and HAB events in open mode
Depending on the HAB version you have different behaviors for the SRK Hash fuses in open mode, for
more details in the HAB version please check Appendix A HAB versions and differences.
Table 2. SRK HASH and HAB events
HAB version HAB SRK HASH check Comments
HAB 4.1.0 and prior Yes HAB checks SRK Hash in open mode, must program SRK Hash
fuses.
HAB 4.1.1 No HAB does not check SRK Hash in open mode, make sure SRK's are
programmed correctly in SRK fuses before closing the device.
HAB 4.1.2 and newer Only if SRK fuses is not 0. HAB checks SRK Hash in open mode. SRK Fuses = 0 leads to no
HAB events due to SRK hash check.
4.2. SRK Authentication for i.MX 50 and i.MX 53 in open configuration
On i.MX 50 and i.MX 53 devices, it is required to program the SRK fuses even for open configuration
when developing a secure product. On these devices HAB enforces SRK authentication, even for Open
configuration. This means that if the SRK fuses are not properly provisioned, the Install SRK CSF
command fails and HAB stops processing the CSF.
Revision history
Secure Boot on i.MX 50, i.MX 53, i.MX 6 and i.MX 7 Series using HABv4, Application Note, Rev. 2, 05/2018
16 NXP Semiconductors
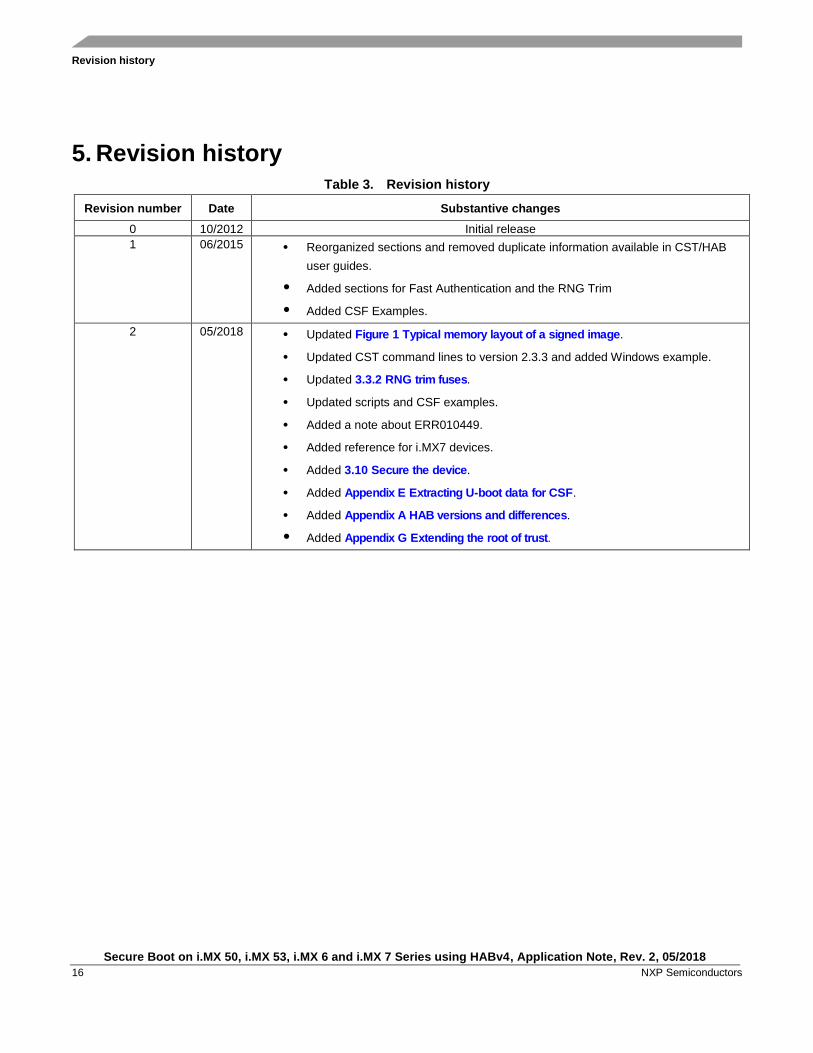
5. Revision historyTable 3. Revision history
Revision number Date Substantive changes
0 10/2012 Initial release
1 06/2015 • Reorganized sections and removed duplicate information available in CST/HAB
user guides.
• Added sections for Fast Authentication and the RNG Trim
• Added CSF Examples.
2 05/2018 • Updated Figure 1 Typical memory layout of a signed image.
• Updated CST command lines to version 2.3.3 and added Windows example.
• Updated 3.3.2 RNG trim fuses.
• Updated scripts and CSF examples.
• Added a note about ERR010449.
• Added reference for i.MX7 devices.
• Added 3.10 Secure the device.
• Added Appendix E Extracting U-boot data for CSF.
• Added Appendix A HAB versions and differences.
• Added Appendix G Extending the root of trust.
HAB versions and differences
Secure Boot on i.MX 50, i.MX 53, i.MX 6 and i.MX 7 Series using HABv4, Application Note, Rev. 2, 05/2018
NXP Semiconductors 17
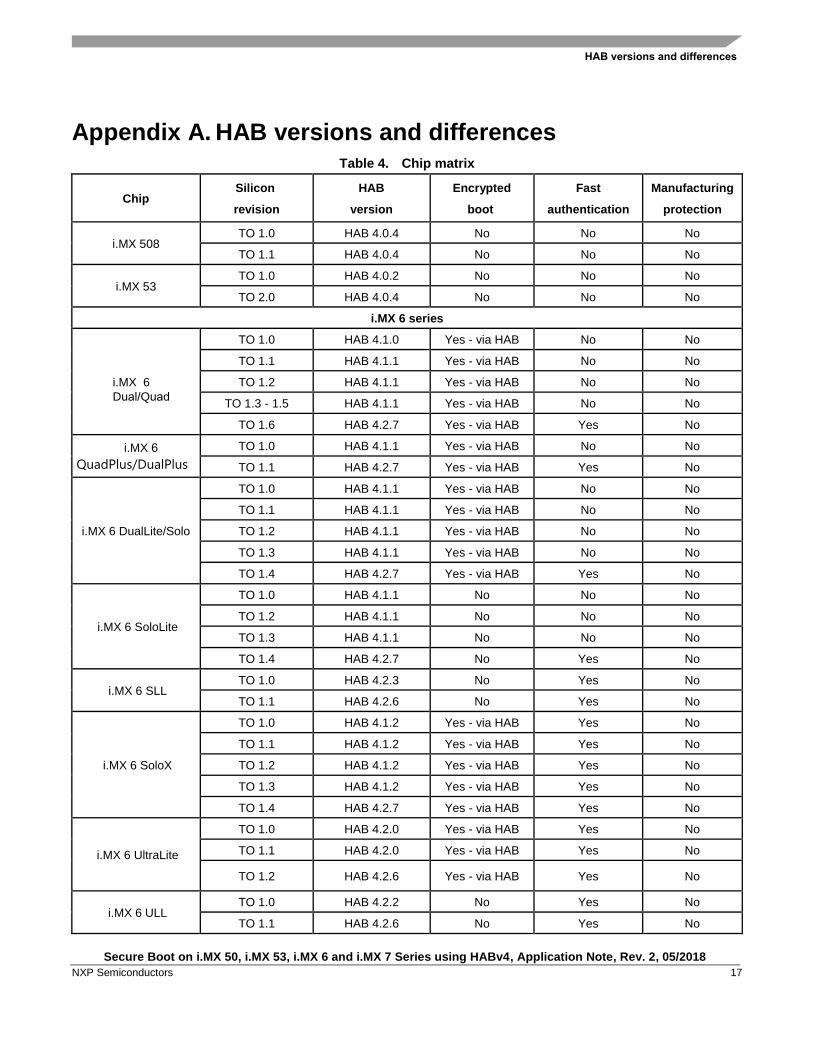
Appendix A. HAB versions and differences Table 4. Chip matrix
Chip Silicon
revision
HAB
version
Encrypted
boot
Fast
authentication
Manufacturing
protection
i.MX 508TO 1.0 HAB 4.0.4 No No No
TO 1.1 HAB 4.0.4 No No No
i.MX 53TO 1.0 HAB 4.0.2 No No No
TO 2.0 HAB 4.0.4 No No No
i.MX 6 series
i.MX 6 Dual/Quad
TO 1.0 HAB 4.1.0 Yes - via HAB No No
TO 1.1 HAB 4.1.1 Yes - via HAB No No
TO 1.2 HAB 4.1.1 Yes - via HAB No No
TO 1.3 - 1.5 HAB 4.1.1 Yes - via HAB No No
TO 1.6 HAB 4.2.7 Yes - via HAB Yes No
i.MX 6QuadPlus/DualPlus
TO 1.0 HAB 4.1.1 Yes - via HAB No No
TO 1.1 HAB 4.2.7 Yes - via HAB Yes No
i.MX 6 DualLite/Solo
TO 1.0 HAB 4.1.1 Yes - via HAB No No
TO 1.1 HAB 4.1.1 Yes - via HAB No No
TO 1.2 HAB 4.1.1 Yes - via HAB No No
TO 1.3 HAB 4.1.1 Yes - via HAB No No
TO 1.4 HAB 4.2.7 Yes - via HAB Yes No
i.MX 6 SoloLite
TO 1.0 HAB 4.1.1 No No No
TO 1.2 HAB 4.1.1 No No No
TO 1.3 HAB 4.1.1 No No No
TO 1.4 HAB 4.2.7 No Yes No
i.MX 6 SLLTO 1.0 HAB 4.2.3 No Yes No
TO 1.1 HAB 4.2.6 No Yes No
i.MX 6 SoloX
TO 1.0 HAB 4.1.2 Yes - via HAB Yes No
TO 1.1 HAB 4.1.2 Yes - via HAB Yes No
TO 1.2 HAB 4.1.2 Yes - via HAB Yes No
TO 1.3 HAB 4.1.2 Yes - via HAB Yes No
TO 1.4 HAB 4.2.7 Yes - via HAB Yes No
i.MX 6 UltraLite
TO 1.0 HAB 4.2.0 Yes - via HAB Yes No
TO 1.1 HAB 4.2.0 Yes - via HAB Yes No
TO 1.2 HAB 4.2.6 Yes - via HAB Yes No
i.MX 6 ULLTO 1.0 HAB 4.2.2 No Yes No
TO 1.1 HAB 4.2.6 No Yes No

HAB versions and differences
Secure Boot on i.MX 50, i.MX 53, i.MX 6 and i.MX 7 Series using HABv4, Application Note, Rev. 2, 05/2018
18 NXP Semiconductors
Chip Silicon
revision
HAB
version
Encrypted
boot
Fast
authentication
Manufacturing
protection
i.MX 7 series
i.MX 7 Solo/Dual
TO 1.0 HAB 4.2.0 Yes - via HAB Yes Yes
TO 1.1 HAB 4.2.2 Yes - via HAB Yes Yes
TO 1.2 HAB 4.2.2 Yes - via HAB Yes Yes
TO 1.3 HAB 4.2.5 Yes - via HAB Yes Yes
i.MX 7 ULP TO 2.0 HAB 4.3.6 Yes - via HAB Yes No
NOTE
The authenticate_image_no_dcd() API function was introduced in HAB
4.2.0. This function is identical to authenticate_image() API function
except it does not run the DCD. HAB 4.2.7 does not include this feature.
NOTE
HAB 4.2.5 and newer versions includes the Security Fixes for ERR010872
and ERR010873. For further details on this topic please contact your local
NXP representative.
SRK revocation on i.MX 6 & 7 series
Secure Boot on i.MX 50, i.MX 53, i.MX 6 and i.MX 7 Series using HABv4, Application Note, Rev. 2, 05/2018
NXP Semiconductors 19
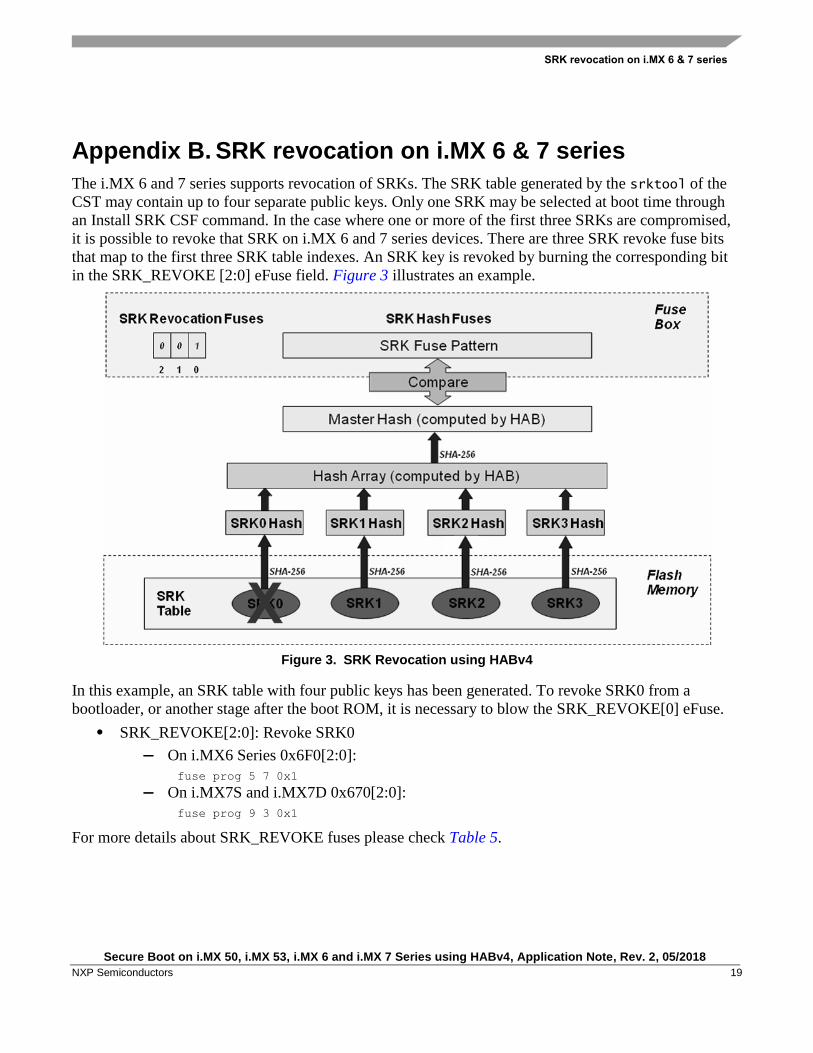
Appendix B. SRK revocation on i.MX 6 & 7 series
The i.MX 6 and 7 series supports revocation of SRKs. The SRK table generated by the srktool of the
CST may contain up to four separate public keys. Only one SRK may be selected at boot time through
an Install SRK CSF command. In the case where one or more of the first three SRKs are compromised,
it is possible to revoke that SRK on i.MX 6 and 7 series devices. There are three SRK revoke fuse bits
that map to the first three SRK table indexes. An SRK key is revoked by burning the corresponding bit
in the SRK_REVOKE [2:0] eFuse field. Figure 3 illustrates an example.
Figure 3. SRK Revocation using HABv4
In this example, an SRK table with four public keys has been generated. To revoke SRK0 from a
bootloader, or another stage after the boot ROM, it is necessary to blow the SRK_REVOKE[0] eFuse.
• SRK_REVOKE[2:0]: Revoke SRK0
— On i.MX6 Series 0x6F0[2:0]:
fuse prog 5 7 0x1
— On i.MX7S and i.MX7D 0x670[2:0]:
fuse prog 9 3 0x1
For more details about SRK_REVOKE fuses please check Table 5.
SRK revocation on i.MX 6 & 7 series
Secure Boot on i.MX 50, i.MX 53, i.MX 6 and i.MX 7 Series using HABv4, Application Note, Rev. 2, 05/2018
20 NXP Semiconductors
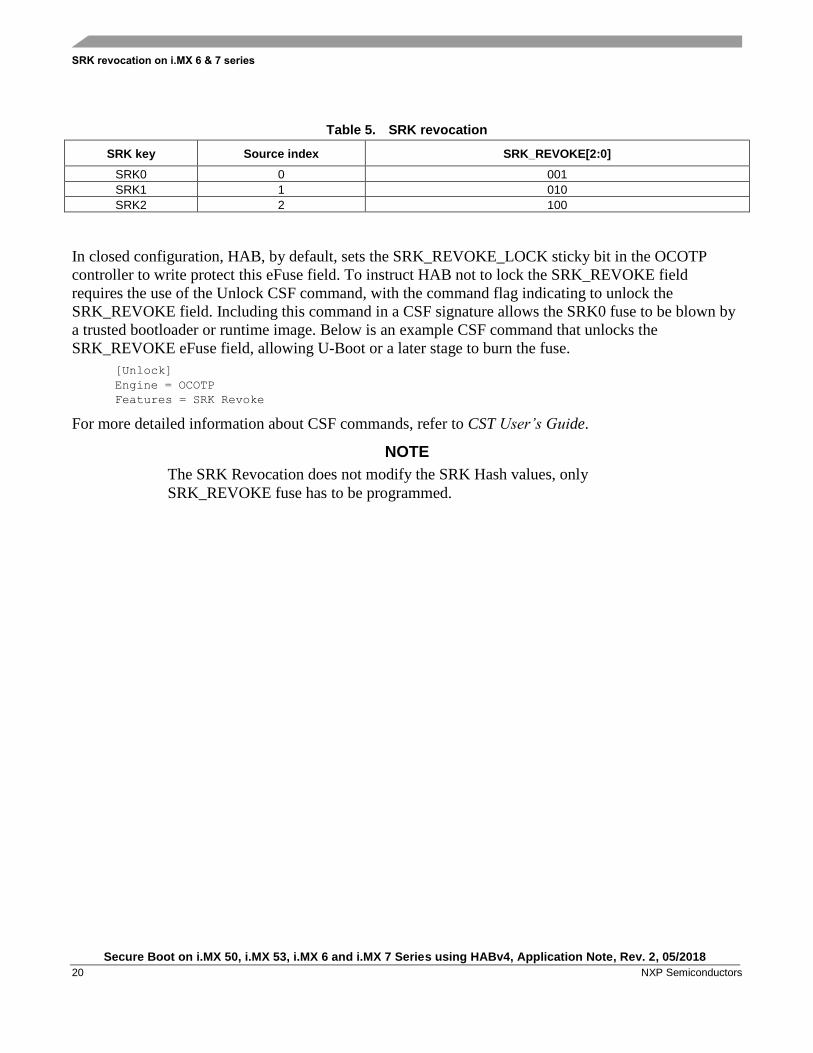
Table 5. SRK revocation
SRK key Source index SRK_REVOKE[2:0]
SRK0 0 001
SRK1 1 010
SRK2 2 100
In closed configuration, HAB, by default, sets the SRK_REVOKE_LOCK sticky bit in the OCOTP
controller to write protect this eFuse field. To instruct HAB not to lock the SRK_REVOKE field
requires the use of the Unlock CSF command, with the command flag indicating to unlock the
SRK_REVOKE field. Including this command in a CSF signature allows the SRK0 fuse to be blown by
a trusted bootloader or runtime image. Below is an example CSF command that unlocks the
SRK_REVOKE eFuse field, allowing U-Boot or a later stage to burn the fuse.
[Unlock]
Engine = OCOTP
Features = SRK Revoke
For more detailed information about CSF commands, refer to CST User’s Guide.
NOTE
The SRK Revocation does not modify the SRK Hash values, only
SRK_REVOKE fuse has to be programmed.
ast authentication (≥ HAB 4.1.2 only)
Secure Boot on i.MX 50, i.MX 53, i.MX 6 and i.MX 7 Series using HABv4, Application Note, Rev. 2, 05/2018
NXP Semiconductors 21
Appendix C. Fast authentication (≥ HAB 4.1.2 only)
HAB 4.1.2 introduces the Fast Authentication feature. It provides the option to use the SRK to verify the
CSF data and Image data directly, instead of using the CSF and IMG keys. This reduces the number of
key pair authentications that must occur during the ROM/HAB boot stage. The typical boot time for an
image smaller than 1MB can be reduced from 25 ms to 12 ms.
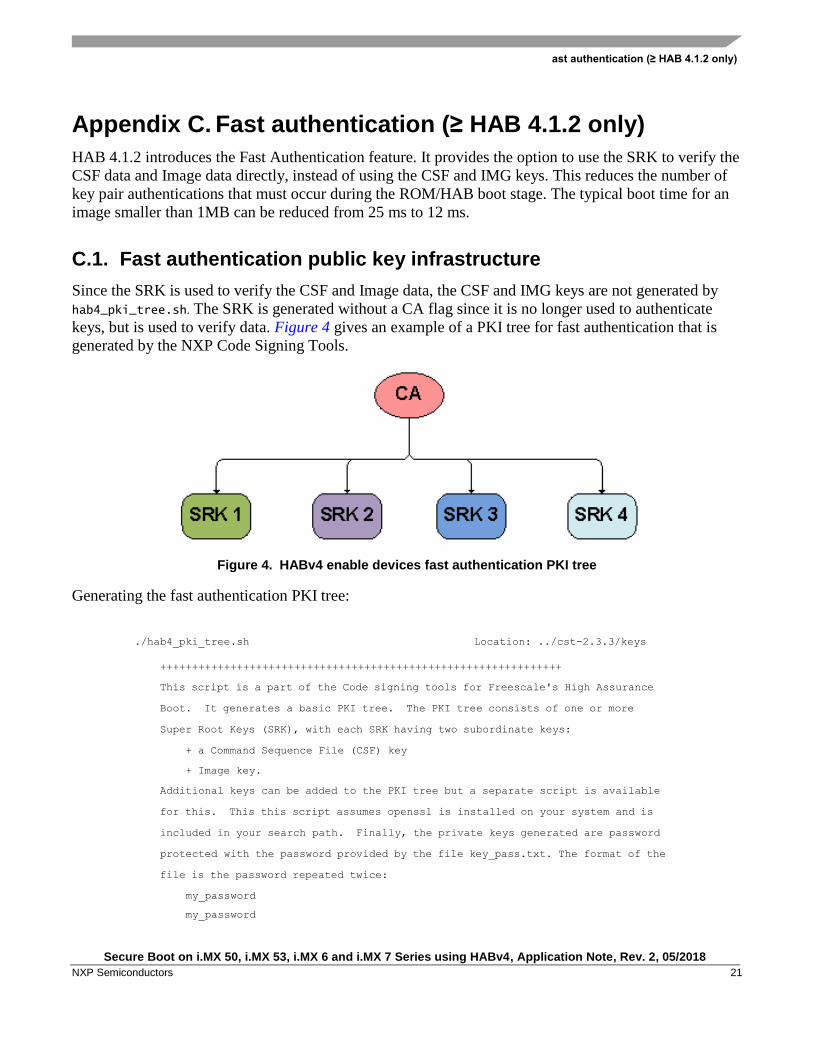
C.1. Fast authentication public key infrastructure
Since the SRK is used to verify the CSF and Image data, the CSF and IMG keys are not generated by
hab4_pki_tree.sh. The SRK is generated without a CA flag since it is no longer used to authenticate
keys, but is used to verify data. Figure 4 gives an example of a PKI tree for fast authentication that is
generated by the NXP Code Signing Tools.
Figure 4. HABv4 enable devices fast authentication PKI tree
Generating the fast authentication PKI tree:
./hab4_pki_tree.sh Location: ../cst-2.3.3/keys
+++++++++++++++++++++++++++++++++++++++++++++++++++++++++++++++
This script is a part of the Code signing tools for Freescale's High Assurance
Boot. It generates a basic PKI tree. The PKI tree consists of one or more
Super Root Keys (SRK), with each SRK having two subordinate keys:
+ a Command Sequence File (CSF) key
+ Image key.
Additional keys can be added to the PKI tree but a separate script is available
for this. This this script assumes openssl is installed on your system and is
included in your search path. Finally, the private keys generated are password
protected with the password provided by the file key_pass.txt. The format of the
file is the password repeated twice:
my_password
my_password
ast authentication (≥ HAB 4.1.2 only)
Secure Boot on i.MX 50, i.MX 53, i.MX 6 and i.MX 7 Series using HABv4, Application Note, Rev. 2, 05/2018
22 NXP Semiconductors
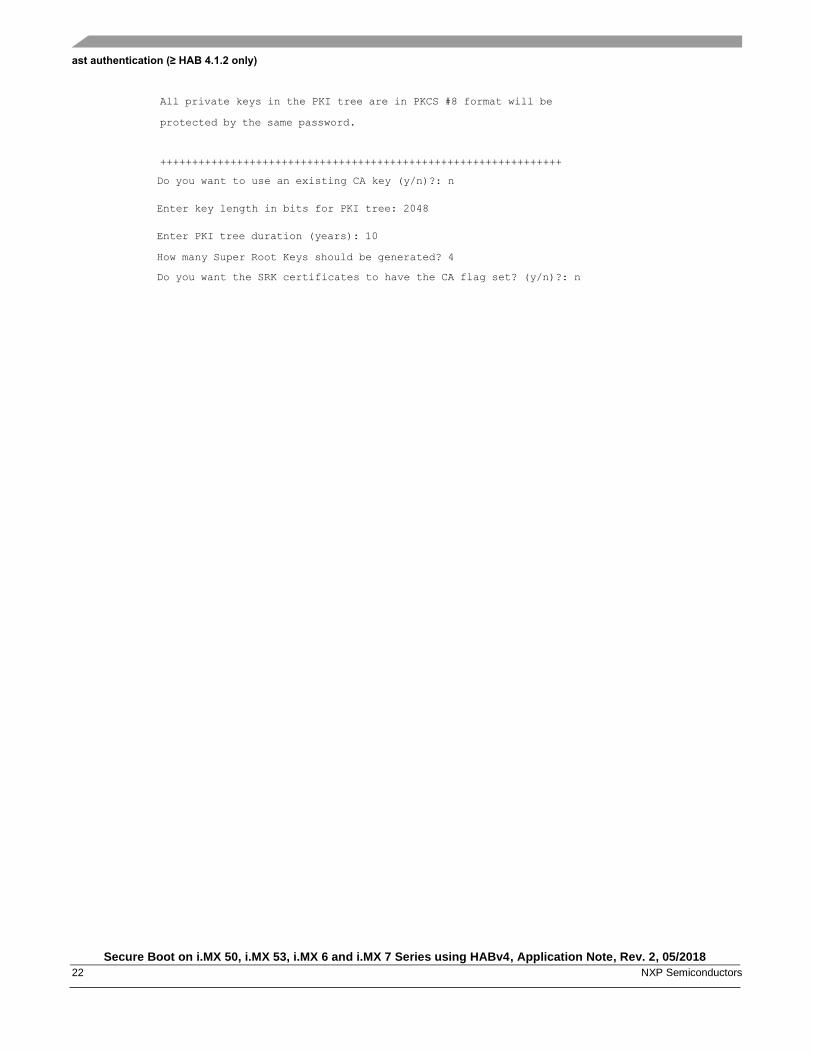
All private keys in the PKI tree are in PKCS #8 format will be
protected by the same password.
+++++++++++++++++++++++++++++++++++++++++++++++++++++++++++++++
Do you want to use an existing CA key (y/n)?: n
Enter key length in bits for PKI tree: 2048
Enter PKI tree duration (years): 10
How many Super Root Keys should be generated? 4
Do you want the SRK certificates to have the CA flag set? (y/n)?: n
HAB4 CSF examples
Secure Boot on i.MX 50, i.MX 53, i.MX 6 and i.MX 7 Series using HABv4, Application Note, Rev. 2, 05/2018
NXP Semiconductors 23
Appendix D. HAB4 CSF examples
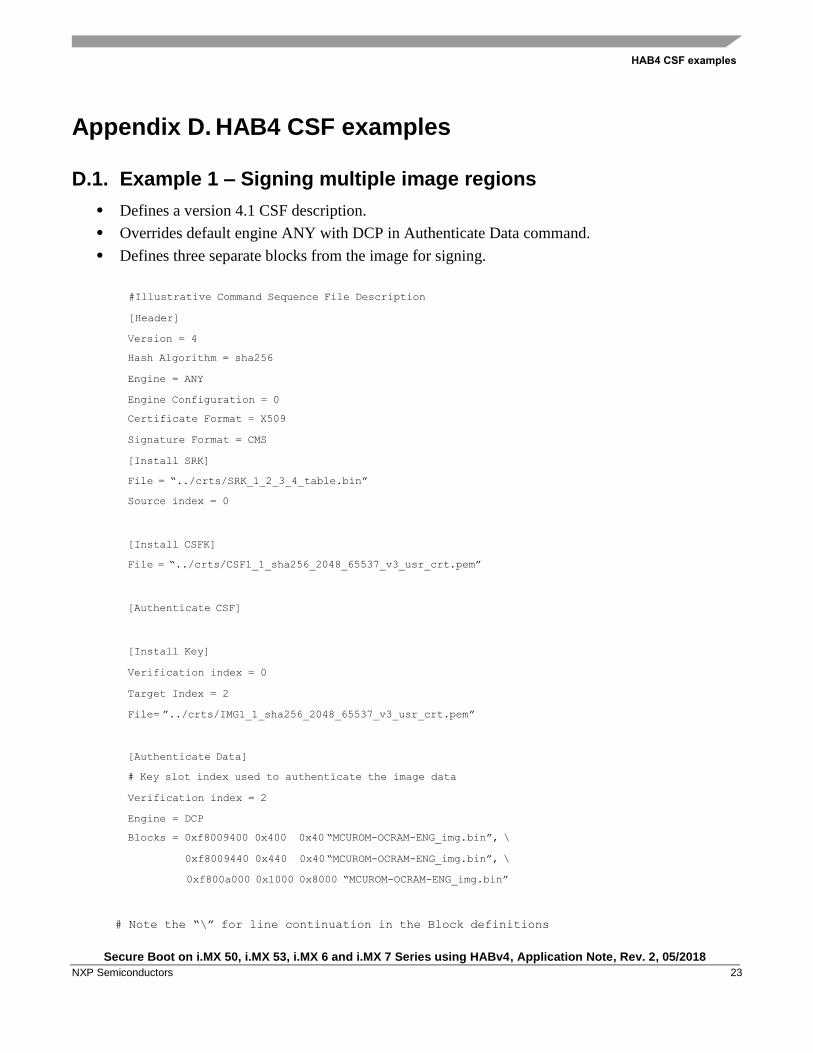
D.1. Example 1 – Signing multiple image regions
• Defines a version 4.1 CSF description.
• Overrides default engine ANY with DCP in Authenticate Data command.
• Defines three separate blocks from the image for signing.
#Illustrative Command Sequence File Description
[Header]
Version = 4
Hash Algorithm = sha256
Engine = ANY
Engine Configuration = 0
Certificate Format = X509
Signature Format = CMS
[Install SRK]
File = “../crts/SRK_1_2_3_4_table.bin”
Source index = 0
[Install CSFK]
File = “../crts/CSF1_1_sha256_2048_65537_v3_usr_crt.pem”
[Authenticate CSF]
[Install Key]
Verification index = 0
Target Index = 2
File= ”../crts/IMG1_1_sha256_2048_65537_v3_usr_crt.pem”
[Authenticate Data]
# Key slot index used to authenticate the image data
Verification index = 2
Engine = DCP
Blocks = 0xf8009400 0x400 0x40 “MCUROM-OCRAM-ENG_img.bin”, \
0xf8009440 0x440 0x40 “MCUROM-OCRAM-ENG_img.bin”, \
0xf800a000 0x1000 0x8000 “MCUROM-OCRAM-ENG_img.bin”
# Note the “\” for line continuation in the Block definitions
HAB4 CSF examples
Secure Boot on i.MX 50, i.MX 53, i.MX 6 and i.MX 7 Series using HABv4, Application Note, Rev. 2, 05/2018
24 NXP Semiconductors
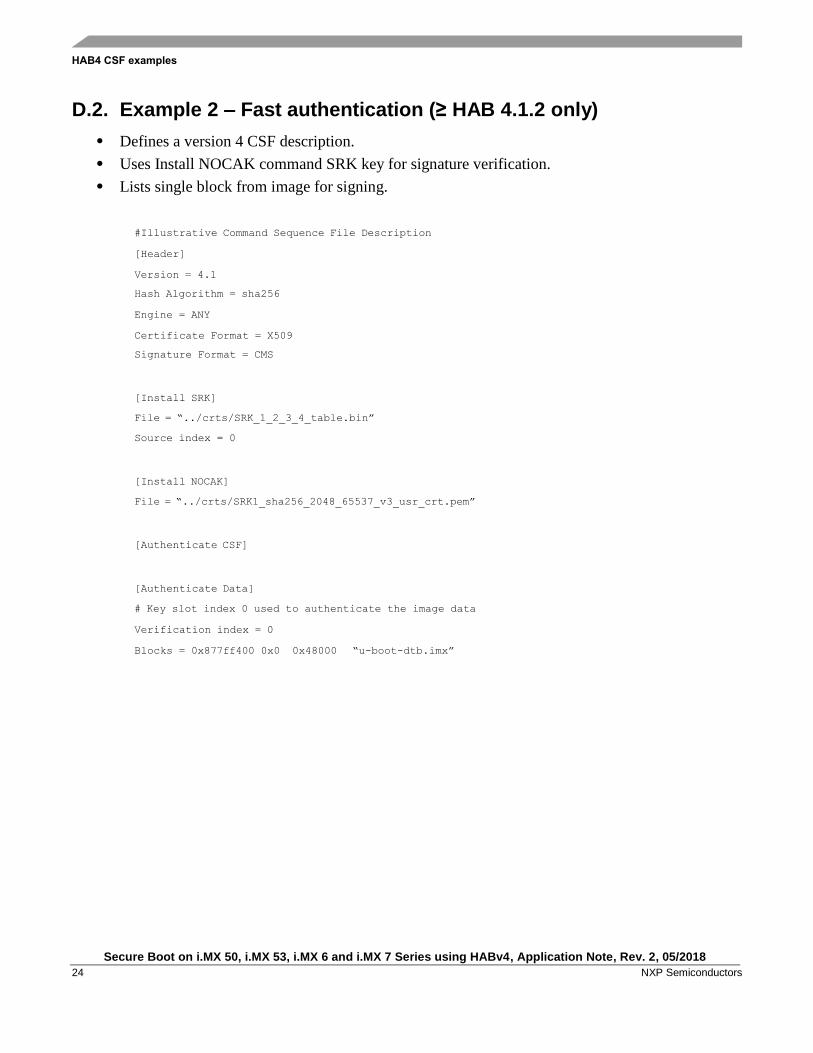
D.2. Example 2 – Fast authentication (≥ HAB 4.1.2 only)
• Defines a version 4 CSF description.
• Uses Install NOCAK command SRK key for signature verification.
• Lists single block from image for signing.
#Illustrative Command Sequence File Description
[Header]
Version = 4.1
Hash Algorithm = sha256
Engine = ANY
Certificate Format = X509
Signature Format = CMS
[Install SRK]
File = “../crts/SRK_1_2_3_4_table.bin”
Source index = 0
[Install NOCAK]
File = “../crts/SRK1_sha256_2048_65537_v3_usr_crt.pem”
[Authenticate CSF]
[Authenticate Data]
# Key slot index 0 used to authenticate the image data
Verification index = 0
Blocks = 0x877ff400 0x0 0x48000 “u-boot-dtb.imx”
HAB4 CSF examples
Secure Boot on i.MX 50, i.MX 53, i.MX 6 and i.MX 7 Series using HABv4, Application Note, Rev. 2, 05/2018
NXP Semiconductors 25
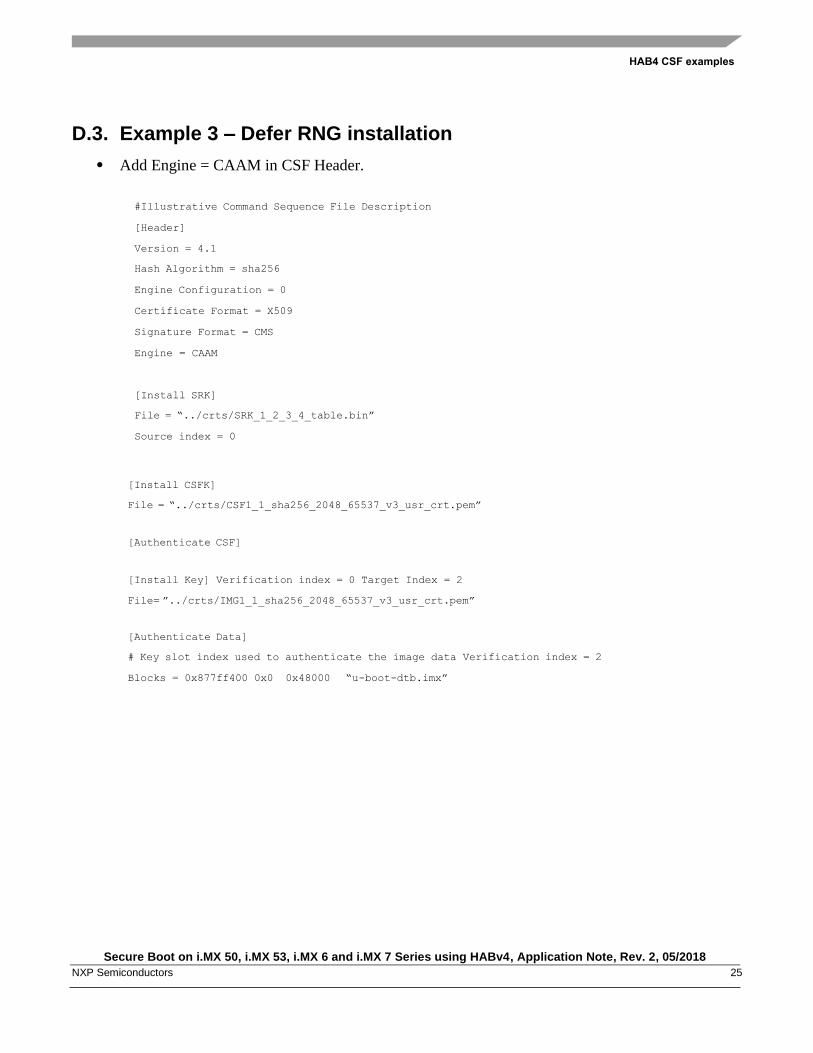
D.3. Example 3 – Defer RNG installation
• Add Engine = CAAM in CSF Header.
#Illustrative Command Sequence File Description
[Header]
Version = 4.1
Hash Algorithm = sha256
Engine Configuration = 0
Certificate Format = X509
Signature Format = CMS
Engine = CAAM
[Install SRK]
File = “../crts/SRK_1_2_3_4_table.bin”
Source index = 0
[Install CSFK]
File = “../crts/CSF1_1_sha256_2048_65537_v3_usr_crt.pem”
[Authenticate CSF]
[Install Key] Verification index = 0 Target Index = 2
File= ”../crts/IMG1_1_sha256_2048_65537_v3_usr_crt.pem”
[Authenticate Data]
# Key slot index used to authenticate the image data Verification index = 2
Blocks = 0x877ff400 0x0 0x48000 “u-boot-dtb.imx”
HAB4 CSF examples
Secure Boot on i.MX 50, i.MX 53, i.MX 6 and i.MX 7 Series using HABv4, Application Note, Rev. 2, 05/2018
26 NXP Semiconductors
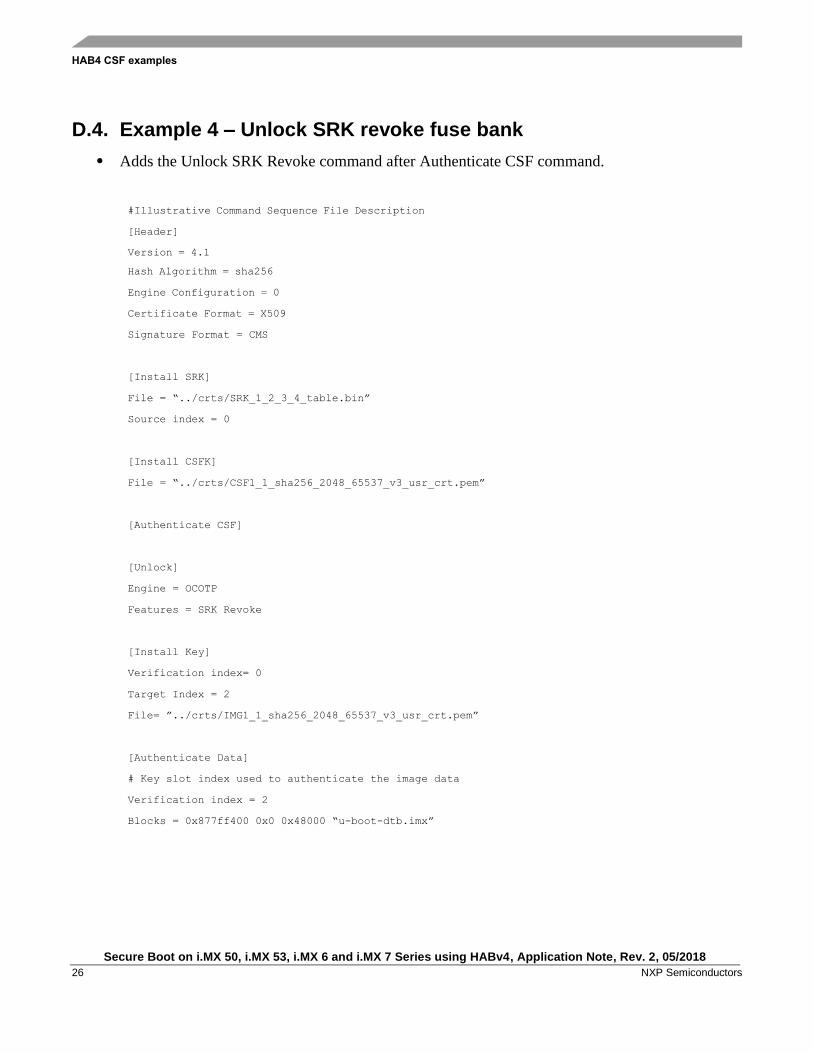
D.4. Example 4 – Unlock SRK revoke fuse bank
• Adds the Unlock SRK Revoke command after Authenticate CSF command.
#Illustrative Command Sequence File Description
[Header]
Version = 4.1
Hash Algorithm = sha256
Engine Configuration = 0
Certificate Format = X509
Signature Format = CMS
[Install SRK]
File = “../crts/SRK_1_2_3_4_table.bin”
Source index = 0
[Install CSFK]
File = “../crts/CSF1_1_sha256_2048_65537_v3_usr_crt.pem”
[Authenticate CSF]
[Unlock]
Engine = OCOTP
Features = SRK Revoke
[Install Key]
Verification index= 0
Target Index = 2
File= ”../crts/IMG1_1_sha256_2048_65537_v3_usr_crt.pem”
[Authenticate Data]
# Key slot index used to authenticate the image data
Verification index = 2
Blocks = 0x877ff400 0x0 0x48000 “u-boot-dtb.imx”
Extracting U-boot data for CSF
Secure Boot on i.MX 50, i.MX 53, i.MX 6 and i.MX 7 Series using HABv4, Application Note, Rev. 2, 05/2018
NXP Semiconductors 27
Appendix E. Extracting U-boot data for CSF
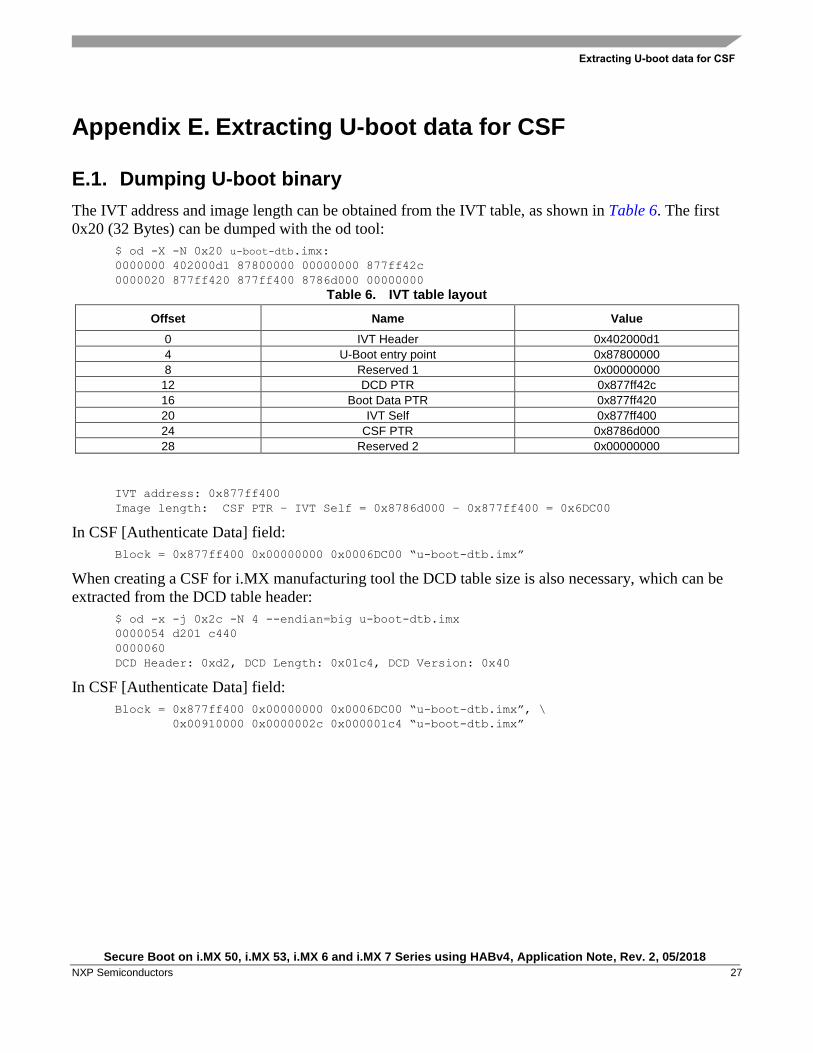
E.1. Dumping U-boot binary
The IVT address and image length can be obtained from the IVT table, as shown in Table 6. The first
0x20 (32 Bytes) can be dumped with the od tool:
$ od -X -N 0x20 u-boot-dtb.imx:
0000000 402000d1 87800000 00000000 877ff42c
0000020 877ff420 877ff400 8786d000 00000000
Table 6. IVT table layout
Offset Name Value
0 IVT Header 0x402000d1
4 U-Boot entry point 0x87800000
8 Reserved 1 0x00000000
12 DCD PTR 0x877ff42c
16 Boot Data PTR 0x877ff420
20 IVT Self 0x877ff400
24 CSF PTR 0x8786d000
28 Reserved 2 0x00000000
IVT address: 0x877ff400
Image length: CSF PTR – IVT Self = 0x8786d000 – 0x877ff400 = 0x6DC00
In CSF [Authenticate Data] field:
Block = 0x877ff400 0x00000000 0x0006DC00 “u-boot-dtb.imx”
When creating a CSF for i.MX manufacturing tool the DCD table size is also necessary, which can be
extracted from the DCD table header:
$ od -x -j 0x2c -N 4 --endian=big u-boot-dtb.imx
0000054 d201 c440
0000060
DCD Header: 0xd2, DCD Length: 0x01c4, DCD Version: 0x40
In CSF [Authenticate Data] field:
Block = 0x877ff400 0x00000000 0x0006DC00 “u-boot-dtb.imx”, \
0x00910000 0x0000002c 0x000001c4 “u-boot-dtb.imx”
Extracting U-boot data for CSF
Secure Boot on i.MX 50, i.MX 53, i.MX 6 and i.MX 7 Series using HABv4, Application Note, Rev. 2, 05/2018
28 NXP Semiconductors
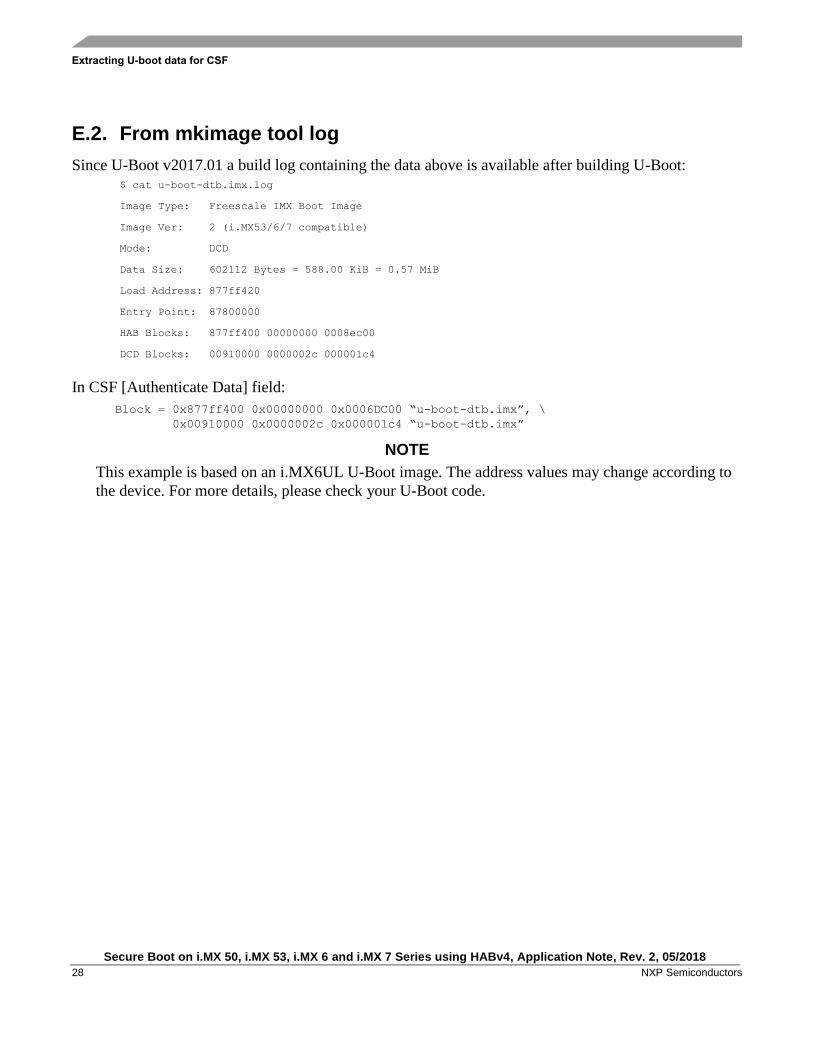
E.2. From mkimage tool log
Since U-Boot v2017.01 a build log containing the data above is available after building U-Boot: $ cat u-boot-dtb.imx.log
Image Type: Freescale IMX Boot Image
Image Ver: 2 (i.MX53/6/7 compatible)
Mode: DCD
Data Size: 602112 Bytes = 588.00 KiB = 0.57 MiB
Load Address: 877ff420
Entry Point: 87800000
HAB Blocks: 877ff400 00000000 0008ec00
DCD Blocks: 00910000 0000002c 000001c4
In CSF [Authenticate Data] field:
Block = 0x877ff400 0x00000000 0x0006DC00 “u-boot-dtb.imx”, \
0x00910000 0x0000002c 0x000001c4 “u-boot-dtb.imx”
NOTE
This example is based on an i.MX6UL U-Boot image. The address values may change according to
the device. For more details, please check your U-Boot code.
i.MX manufacturing tool
Secure Boot on i.MX 50, i.MX 53, i.MX 6 and i.MX 7 Series using HABv4, Application Note, Rev. 2, 05/2018
NXP Semiconductors 29
Appendix F. i.MX manufacturing tool
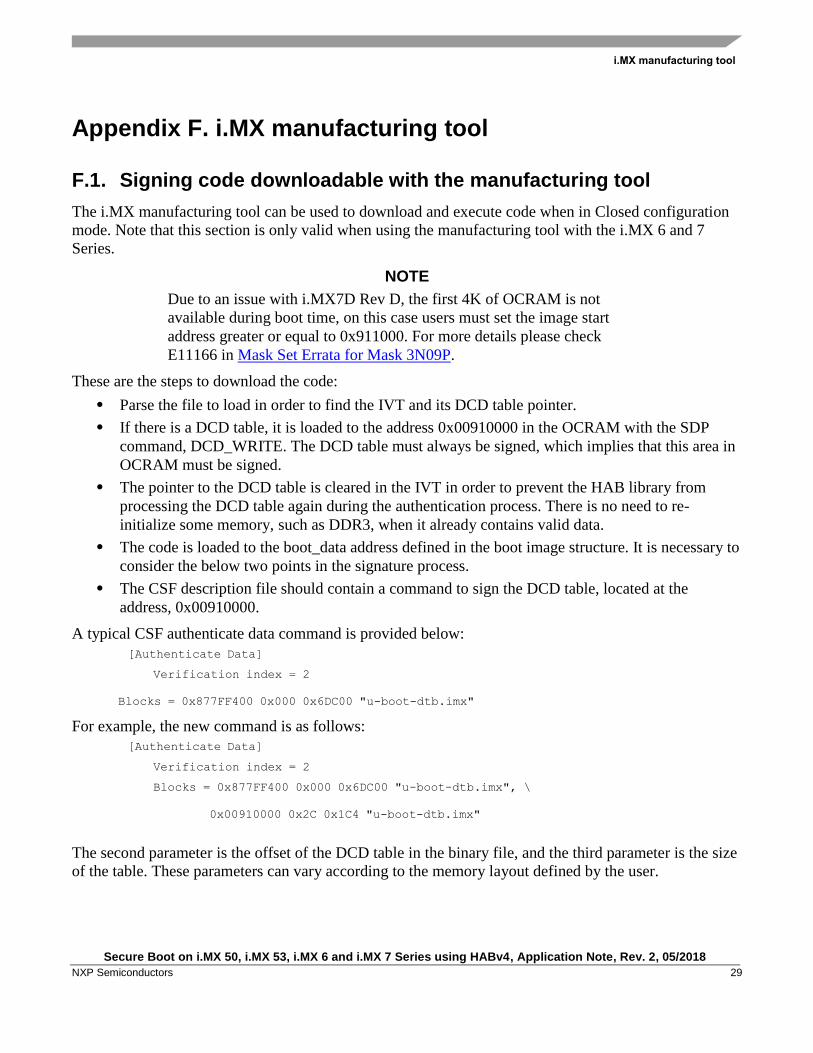
F.1. Signing code downloadable with the manufacturing tool
The i.MX manufacturing tool can be used to download and execute code when in Closed configuration
mode. Note that this section is only valid when using the manufacturing tool with the i.MX 6 and 7
Series.
NOTE
Due to an issue with i.MX7D Rev D, the first 4K of OCRAM is not
available during boot time, on this case users must set the image start
address greater or equal to 0x911000. For more details please check
E11166 in Mask Set Errata for Mask 3N09P.
These are the steps to download the code:
• Parse the file to load in order to find the IVT and its DCD table pointer.
• If there is a DCD table, it is loaded to the address 0x00910000 in the OCRAM with the SDP
command, DCD_WRITE. The DCD table must always be signed, which implies that this area in
OCRAM must be signed.
• The pointer to the DCD table is cleared in the IVT in order to prevent the HAB library from
processing the DCD table again during the authentication process. There is no need to re-
initialize some memory, such as DDR3, when it already contains valid data.
• The code is loaded to the boot_data address defined in the boot image structure. It is necessary to
consider the below two points in the signature process.
• The CSF description file should contain a command to sign the DCD table, located at the
address, 0x00910000.
A typical CSF authenticate data command is provided below:
[Authenticate Data]
Verification index = 2
Blocks = 0x877FF400 0x000 0x6DC00 "u-boot-dtb.imx"
For example, the new command is as follows:
[Authenticate Data]
Verification index = 2
Blocks = 0x877FF400 0x000 0x6DC00 "u-boot-dtb.imx", \
0x00910000 0x2C 0x1C4 "u-boot-dtb.imx"
The second parameter is the offset of the DCD table in the binary file, and the third parameter is the size
of the table. These parameters can vary according to the memory layout defined by the user.
i.MX manufacturing tool
Secure Boot on i.MX 50, i.MX 53, i.MX 6 and i.MX 7 Series using HABv4, Application Note, Rev. 2, 05/2018
30 NXP Semiconductors
Since the IVT is modified when downloading to the target, so the code must be signed with a cleared
DCD pointer. However, the code must be provided with a valid pointer to allow the manufacturing tool
to locate the DCD table.
For example, a script can be used to store the DCD address, which needs to be erased before creating the
CSF binary file in Section 5.4 Generating the Command Sequence File (CSF) Binary File. After that, the
DCD address can be restored to continue the steps that generate the final signed binary.
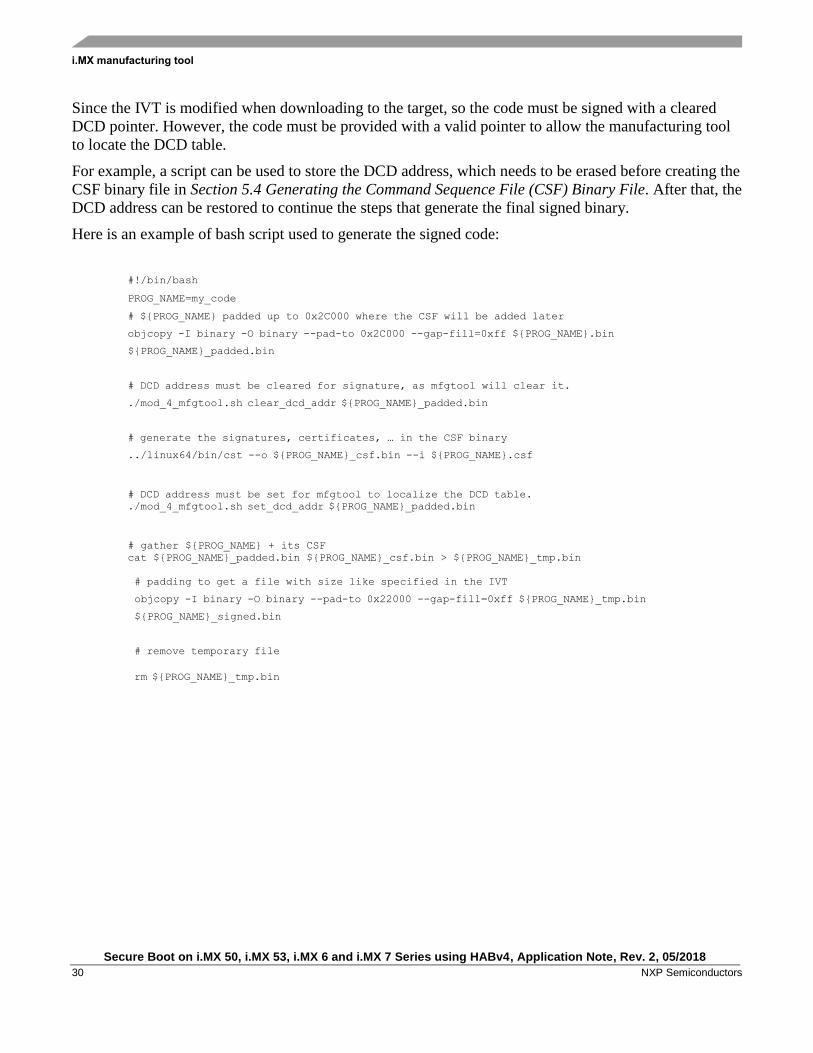
Here is an example of bash script used to generate the signed code:
#!/bin/bash
PROG_NAME=my_code
# ${PROG_NAME} padded up to 0x2C000 where the CSF will be added later
objcopy -I binary -O binary --pad-to 0x2C000 --gap-fill=0xff ${PROG_NAME}.bin
${PROG_NAME}_padded.bin
# DCD address must be cleared for signature, as mfgtool will clear it.
./mod_4_mfgtool.sh clear_dcd_addr ${PROG_NAME}_padded.bin
# generate the signatures, certificates, … in the CSF binary
../linux64/bin/cst --o ${PROG_NAME}_csf.bin --i ${PROG_NAME}.csf
# DCD address must be set for mfgtool to localize the DCD table.
./mod_4_mfgtool.sh set_dcd_addr ${PROG_NAME}_padded.bin
# gather ${PROG_NAME} + its CSF
cat ${PROG_NAME}_padded.bin ${PROG_NAME}_csf.bin > ${PROG_NAME}_tmp.bin
# padding to get a file with size like specified in the IVT
objcopy -I binary -O binary --pad-to 0x22000 --gap-fill=0xff ${PROG_NAME}_tmp.bin
${PROG_NAME}_signed.bin
# remove temporary file
rm ${PROG_NAME}_tmp.bin
i.MX manufacturing tool
Secure Boot on i.MX 50, i.MX 53, i.MX 6 and i.MX 7 Series using HABv4, Application Note, Rev. 2, 05/2018
NXP Semiconductors 31
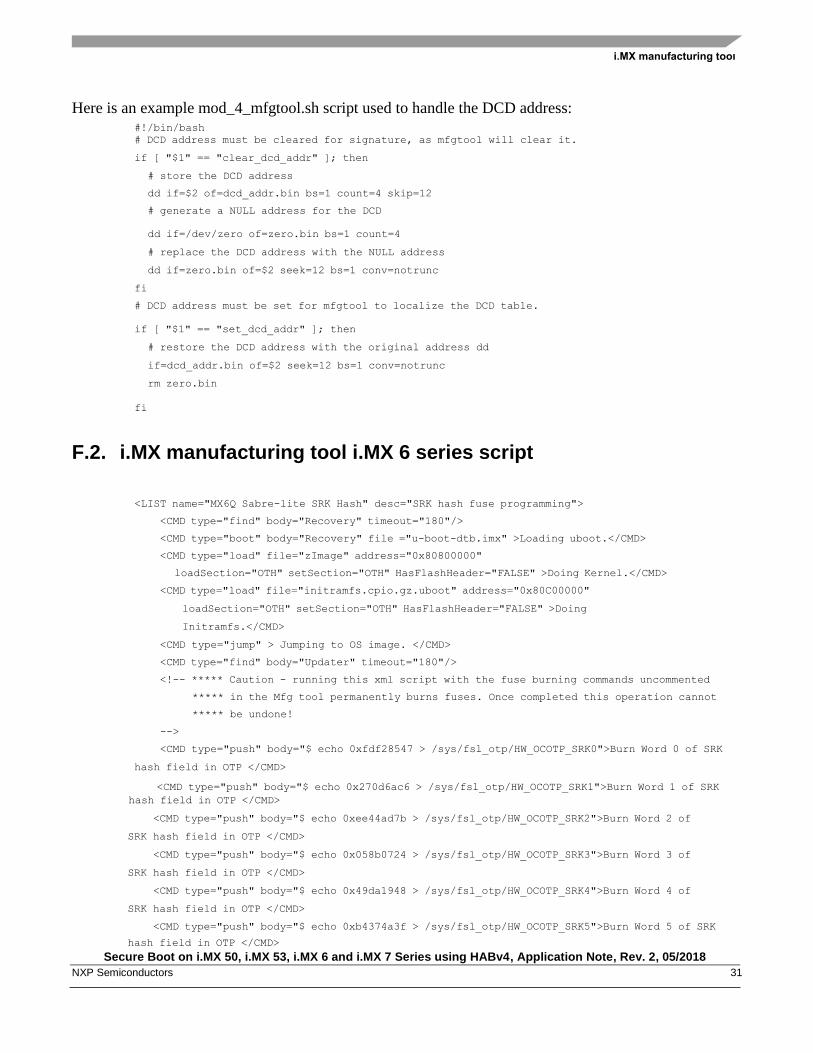
Here is an example mod_4_mfgtool.sh script used to handle the DCD address: #!/bin/bash # DCD address must be cleared for signature, as mfgtool will clear it.
if [ "$1" == "clear_dcd_addr" ]; then
# store the DCD address
dd if=$2 of=dcd_addr.bin bs=1 count=4 skip=12
# generate a NULL address for the DCD
dd if=/dev/zero of=zero.bin bs=1 count=4
# replace the DCD address with the NULL address
dd if=zero.bin of=$2 seek=12 bs=1 conv=notrunc
fi
# DCD address must be set for mfgtool to localize the DCD table.
if [ "$1" == "set_dcd_addr" ]; then
# restore the DCD address with the original address dd
if=dcd_addr.bin of=$2 seek=12 bs=1 conv=notrunc
rm zero.bin
fi
F.2. i.MX manufacturing tool i.MX 6 series script
<LIST name="MX6Q Sabre-lite SRK Hash" desc="SRK hash fuse programming">
<CMD type="find" body="Recovery" timeout="180"/>
<CMD type="boot" body="Recovery" file ="u-boot-dtb.imx" >Loading uboot.</CMD>
<CMD type="load" file="zImage" address="0x80800000"
loadSection="OTH" setSection="OTH" HasFlashHeader="FALSE" >Doing Kernel.</CMD>
<CMD type="load" file="initramfs.cpio.gz.uboot" address="0x80C00000"
loadSection="OTH" setSection="OTH" HasFlashHeader="FALSE" >Doing
Initramfs.</CMD>
<CMD type="jump" > Jumping to OS image. </CMD>
<CMD type="find" body="Updater" timeout="180"/>
<!-- ***** Caution - running this xml script with the fuse burning commands uncommented
***** in the Mfg tool permanently burns fuses. Once completed this operation cannot
***** be undone!
-->
<CMD type="push" body="$ echo 0xfdf28547 > /sys/fsl_otp/HW_OCOTP_SRK0">Burn Word 0 of SRK
hash field in OTP </CMD>
<CMD type="push" body="$ echo 0x270d6ac6 > /sys/fsl_otp/HW_OCOTP_SRK1">Burn Word 1 of SRK
hash field in OTP </CMD>
<CMD type="push" body="$ echo 0xee44ad7b > /sys/fsl_otp/HW_OCOTP_SRK2">Burn Word 2 of
SRK hash field in OTP </CMD>
<CMD type="push" body="$ echo 0x058b0724 > /sys/fsl_otp/HW_OCOTP_SRK3">Burn Word 3 of
SRK hash field in OTP </CMD>
<CMD type="push" body="$ echo 0x49da1948 > /sys/fsl_otp/HW_OCOTP_SRK4">Burn Word 4 of
SRK hash field in OTP </CMD>
<CMD type="push" body="$ echo 0xb4374a3f > /sys/fsl_otp/HW_OCOTP_SRK5">Burn Word 5 of SRK
hash field in OTP </CMD>
i.MX manufacturing tool
Secure Boot on i.MX 50, i.MX 53, i.MX 6 and i.MX 7 Series using HABv4, Application Note, Rev. 2, 05/2018
32 NXP Semiconductors
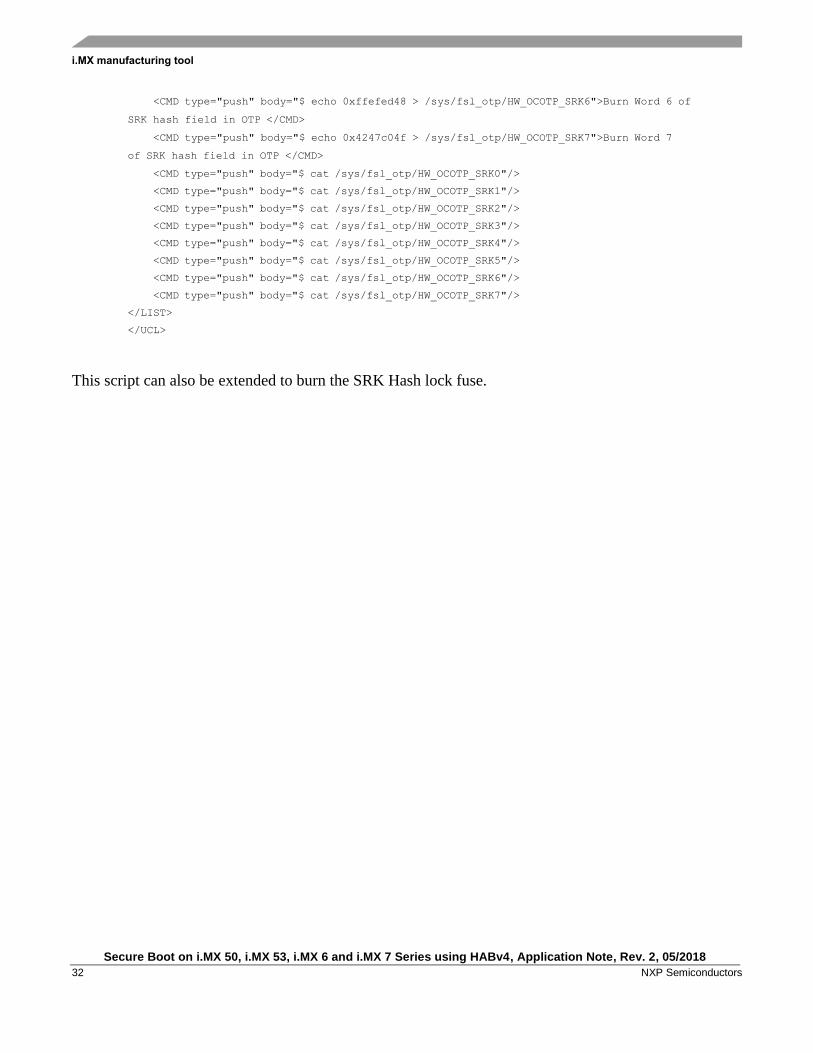
<CMD type="push" body="$ echo 0xffefed48 > /sys/fsl_otp/HW_OCOTP_SRK6">Burn Word 6 of
SRK hash field in OTP </CMD>
<CMD type="push" body="$ echo 0x4247c04f > /sys/fsl_otp/HW_OCOTP_SRK7">Burn Word 7
of SRK hash field in OTP </CMD>
<CMD type="push" body="$ cat /sys/fsl_otp/HW_OCOTP_SRK0"/>
<CMD type="push" body="$ cat /sys/fsl_otp/HW_OCOTP_SRK1"/>
<CMD type="push" body="$ cat /sys/fsl_otp/HW_OCOTP_SRK2"/>
<CMD type="push" body="$ cat /sys/fsl_otp/HW_OCOTP_SRK3"/>
<CMD type="push" body="$ cat /sys/fsl_otp/HW_OCOTP_SRK4"/>
<CMD type="push" body="$ cat /sys/fsl_otp/HW_OCOTP_SRK5"/>
<CMD type="push" body="$ cat /sys/fsl_otp/HW_OCOTP_SRK6"/>
<CMD type="push" body="$ cat /sys/fsl_otp/HW_OCOTP_SRK7"/>
</LIST>
</UCL>
This script can also be extended to burn the SRK Hash lock fuse.
Extending the root of trust
Secure Boot on i.MX 50, i.MX 53, i.MX 6 and i.MX 7 Series using HABv4, Application Note, Rev. 2, 05/2018
NXP Semiconductors 33
Appendix G. Extending the root of trust
The High Assurance Boot (HAB) code located in the on-chip ROM provides an Application
Programming Interface (API) making it possible to call back into the HAB code for authenticating
additional images. U-Boot supports this feature to authenticate the Linux Kernel Image.
The HAB API functions are accessible through the ROM Vector Table (RVT), for further details please
check High Assurance Boot Version 4 Application Programming Interface Reference Manual
(HAB4_API.pdf) in the CST Package.
NOTE
The authenticate_image() API function is intended to authenticate
additional boot images in a post-ROM stage, initial boot images are
supposed to be authenticate only once by the initial ROM code. It’s highly
recommended to ensure the IVT DCD pointer is Null prior to calling HAB
authenticate function.
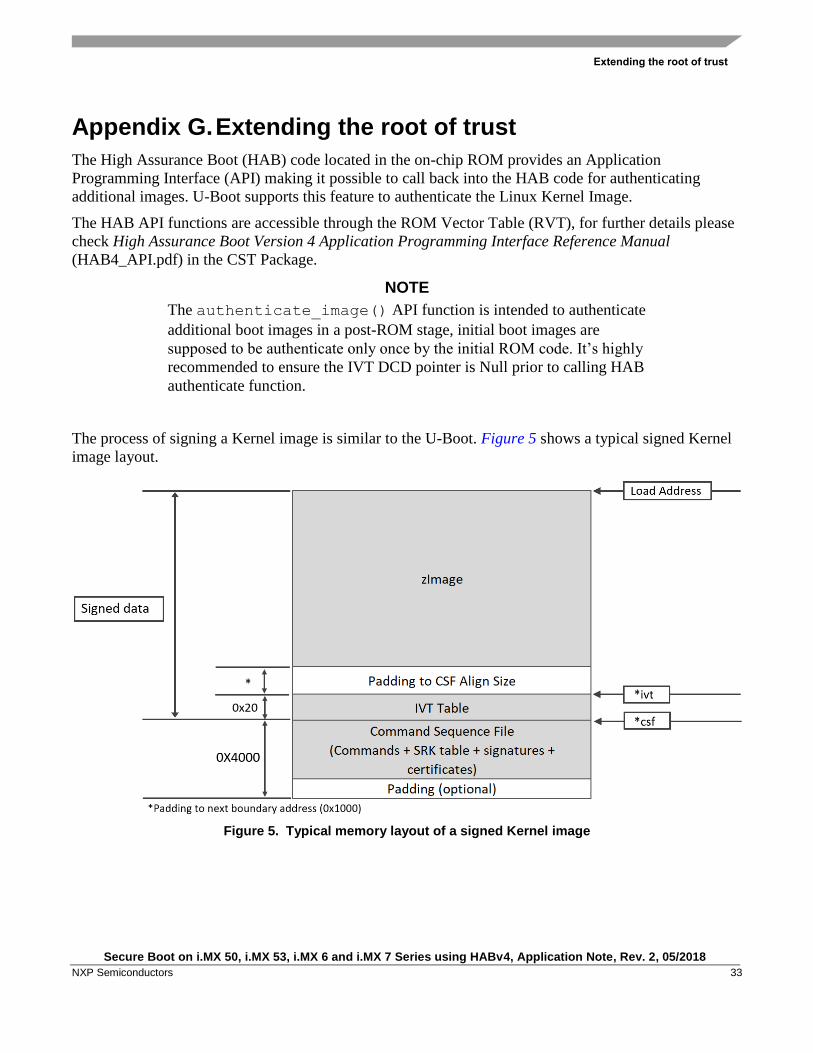
The process of signing a Kernel image is similar to the U-Boot. Figure 5 shows a typical signed Kernel
image layout.
Figure 5. Typical memory layout of a signed Kernel image
Extending the root of trust
Secure Boot on i.MX 50, i.MX 53, i.MX 6 and i.MX 7 Series using HABv4, Application Note, Rev. 2, 05/2018
34 NXP Semiconductors
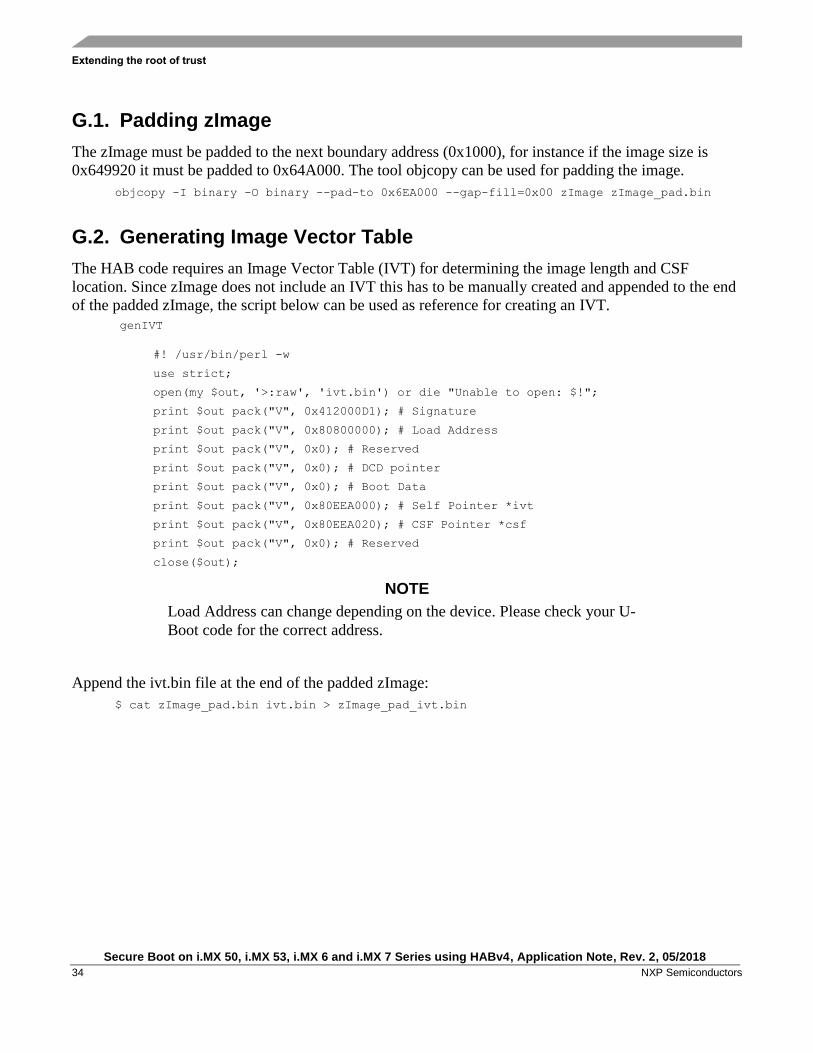
G.1. Padding zImage
The zImage must be padded to the next boundary address (0x1000), for instance if the image size is
0x649920 it must be padded to 0x64A000. The tool objcopy can be used for padding the image.
objcopy -I binary -O binary --pad-to 0x6EA000 --gap-fill=0x00 zImage zImage_pad.bin
G.2. Generating Image Vector Table
The HAB code requires an Image Vector Table (IVT) for determining the image length and CSF
location. Since zImage does not include an IVT this has to be manually created and appended to the end
of the padded zImage, the script below can be used as reference for creating an IVT.
genIVT
#! /usr/bin/perl -w
use strict;
open(my $out, '>:raw', 'ivt.bin') or die "Unable to open: $!";
print $out pack("V", 0x412000D1); # Signature
print $out pack("V", 0x80800000); # Load Address
print $out pack("V", 0x0); # Reserved
print $out pack("V", 0x0); # DCD pointer
print $out pack("V", 0x0); # Boot Data
print $out pack("V", 0x80EEA000); # Self Pointer *ivt
print $out pack("V", 0x80EEA020); # CSF Pointer *csf
print $out pack("V", 0x0); # Reserved
close($out);
NOTE
Load Address can change depending on the device. Please check your U-
Boot code for the correct address.
Append the ivt.bin file at the end of the padded zImage:
$ cat zImage_pad.bin ivt.bin > zImage_pad_ivt.bin
Extending the root of trust
Secure Boot on i.MX 50, i.MX 53, i.MX 6 and i.MX 7 Series using HABv4, Application Note, Rev. 2, 05/2018
NXP Semiconductors 35
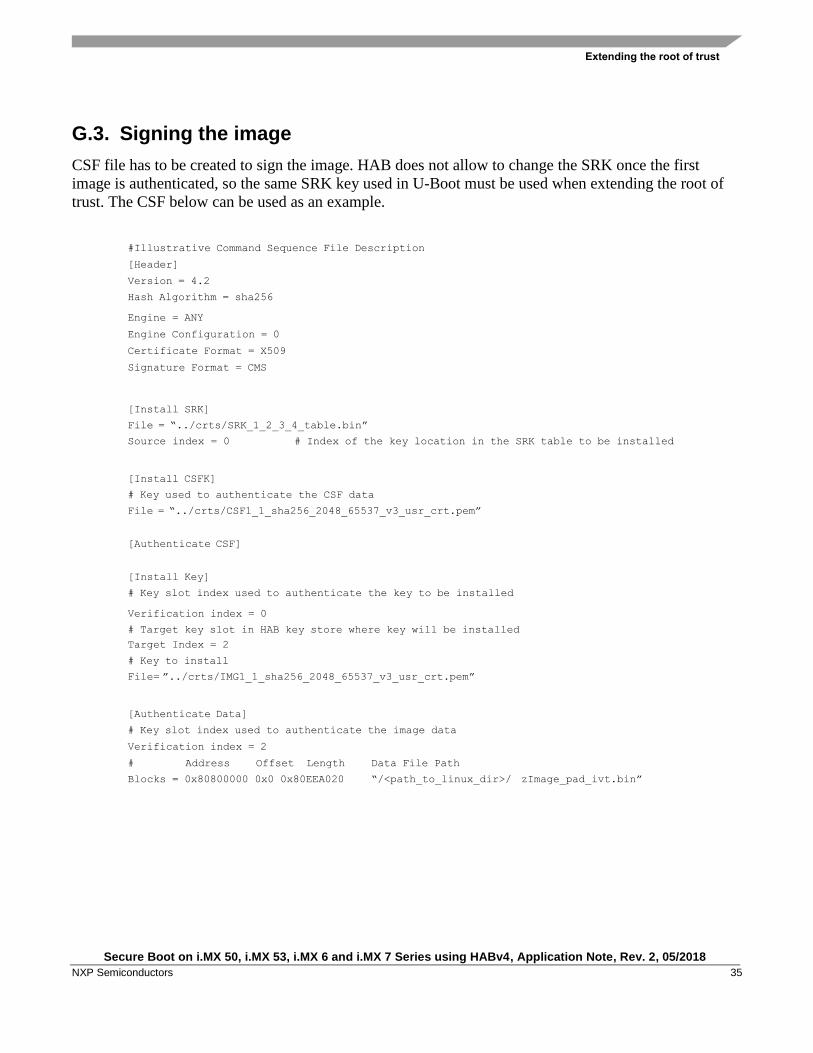
G.3. Signing the image
CSF file has to be created to sign the image. HAB does not allow to change the SRK once the first
image is authenticated, so the same SRK key used in U-Boot must be used when extending the root of
trust. The CSF below can be used as an example.
#Illustrative Command Sequence File Description
[Header]
Version = 4.2
Hash Algorithm = sha256
Engine = ANY
Engine Configuration = 0
Certificate Format = X509
Signature Format = CMS
[Install SRK]
File = “../crts/SRK_1_2_3_4_table.bin”
Source index = 0 # Index of the key location in the SRK table to be installed
[Install CSFK]
# Key used to authenticate the CSF data
File = “../crts/CSF1_1_sha256_2048_65537_v3_usr_crt.pem”
[Authenticate CSF]
[Install Key]
# Key slot index used to authenticate the key to be installed
Verification index = 0
# Target key slot in HAB key store where key will be installed
Target Index = 2
# Key to install
File= ”../crts/IMG1_1_sha256_2048_65537_v3_usr_crt.pem”
[Authenticate Data]
# Key slot index used to authenticate the image data
Verification index = 2
# Address Offset Length Data File Path
Blocks = 0x80800000 0x0 0x80EEA020 “/<path_to_linux_dir>/ zImage_pad_ivt.bin”
Extending the root of trust
Secure Boot on i.MX 50, i.MX 53, i.MX 6 and i.MX 7 Series using HABv4, Application Note, Rev. 2, 05/2018
36 NXP Semiconductors
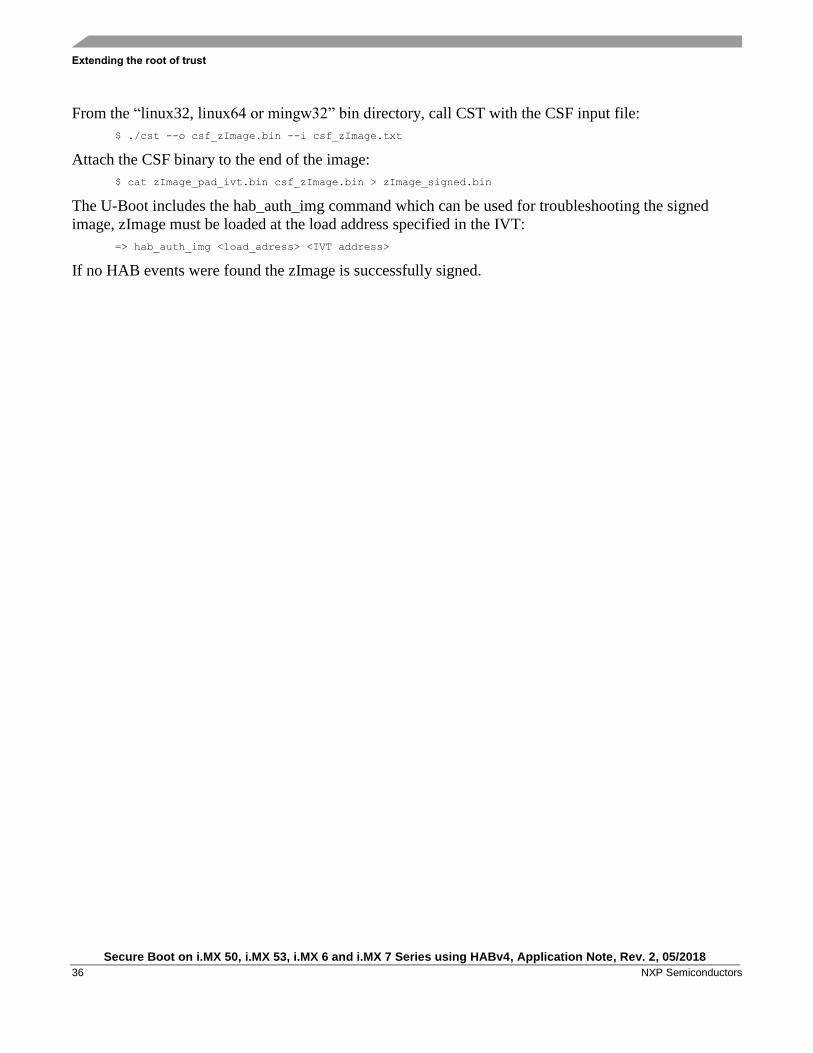
From the “linux32, linux64 or mingw32” bin directory, call CST with the CSF input file:
$ ./cst --o csf_zImage.bin --i csf_zImage.txt
Attach the CSF binary to the end of the image:
$ cat zImage_pad_ivt.bin csf_zImage.bin > zImage_signed.bin
The U-Boot includes the hab_auth_img command which can be used for troubleshooting the signed
image, zImage must be loaded at the load address specified in the IVT:
=> hab_auth_img <load_adress> <IVT address>
If no HAB events were found the zImage is successfully signed.
Document Number: AN4581 Rev. 2
05/2018
How to Reach Us:
Home Page:
nxp.com
Web Support:
nxp.com/support
Information in this document is provided solely to enable system and software
implementers to use NXP products. There are no express or implied copyright licenses
granted hereunder to design or fabricate any integrated circuits based on the
information in this document. NXP reserves the right to make changes without further
notice to any products herein.
NXP makes no warranty, representation, or guarantee regarding the suitability of its
products for any particular purpose, nor does NXP assume any liability arising out of
the application or use of any product or circuit, and specifically disclaims any and all
liability, including without limitation consequential or incidental damages. “Typical”
parameters that may be provided in NXP data sheets and/or specifications can and do
vary in different applications, and actual performance may vary over time. All operating
parameters, including “typicals,” must be validated for each customer application by
customer’s technical experts. NXP does not convey any license under its patent rights
nor the rights of others. NXP sells products pursuant to standard terms and conditions
of sale, which can be found at the following address: nxp.com/SalesTermsandConditions.
NXP, the NXP logo, Freescale, and the Freescale logo are trademarks of NXP B.V. All
other product or service names are the property of their respective owners.
Arm, the Arm logo, and Cortex are registered trademarks of Arm Limited (or its
subsidiaries) in the EU and/or elsewhere. All rights reserved.
© 2018 NXP B.V.