sacramento city college engineering design...
TRANSCRIPT

User Profiles and Workspaces 1
User Profiles and Workspaces
Sacramento City CollegeEngineering Design Technology
User Profiles and Workspaces 2
Introduction After completing this chapter you will be able
to:Describe user profiles. Create user profiles. Restore a user profile. Describe workspaces. Explain the Quick Access toolbar. Create workspaces. Customize a workspace. Restore a workspace. Customize the Quick Access toolbar

User Profiles and Workspaces 3
Introduction In a school or company, there is often more
than one person who will use the same AutoCAD workstation.
Each drafter has a unique style for creating a drawing.
While there are often general rules to follow, many times the method used to arrive at the end result is not important.
Introduction As you learned in previous chapters, there are
many ways to customize AutoCAD. You can
Set screen colors Set other features of the AutoCAD environmentCreate custom menusCustomize the ribbon
User Profiles and Workspaces 4

Introduction Many of these settings can be saved in a user
profile or workspace.
User profiles and workspaces allow you to quickly and easily restore a group of custom settings.
User Profiles and Workspaces 5

User Profiles
User Profiles and Workspaces 6

User ProfilesA user profile is a group of settings for
devices and AutoCAD functions.
User Profiles and Workspaces 7

User ProfilesSome of the settings and values a profile can
contain are: Temporary drawing file location. Template drawing file location. Text display format. Startup dialog box display. Minutes between automatic saves. File extension for temporary files. Color and font settings for AutoCAD's text and graphics
screens Type of pointer and length of crosshairs. Default locations of printers, plotters (PC3 files), and plot
styles (CTB/STB files).
User Profiles and Workspaces 8

User ProfilesMultiple profiles
can be saved by a single user for different applications OR
Several users can create individual profiles for their own use.
User Profiles and Workspaces 9

User ProfileA user profile is not the same as settings
found in a drawing. Drawing template files are used to save
settings relating to a drawing session.UnitsLimitsObject snap settingsDrafting settingsGrip settingsArc and circle smoothnessDimension styles, and text styles.
User Profiles and Workspaces 10

User ProfilesA user profile, by contrastsaves settings related to the performance and
appearance of the software and hardware.
User Profiles and Workspaces 11

Creating A User Profile
User Profiles and Workspaces 12
Creating A User ProfileA user profile is A collection of all of the AutoCAD
environmental settings you have customized in AutoCAD.
Does NOT include Ribbon tabs and panelsApplication and pull-down menusTool palettesToolbars
User Profiles and Workspaces 13
Creating A User ProfileThese customizations are done to make
AutoCAD easier for you to use. Example: as you gain experience in
AutoCAD you realize that you may:Prefer the crosshairs extending to the edges of the
drawing window.Need to have the plotters and plot styles shared on
a network.Prefer the drawing window background color to be
gray.Need to establish specific directories for projects.
User Profiles and Workspaces 14

Creating A User ProfileAfter you have customized AutoCAD to
reflect these preferences. Create a profile so you do not lose your
preferred settings.
User Profiles and Workspaces 15

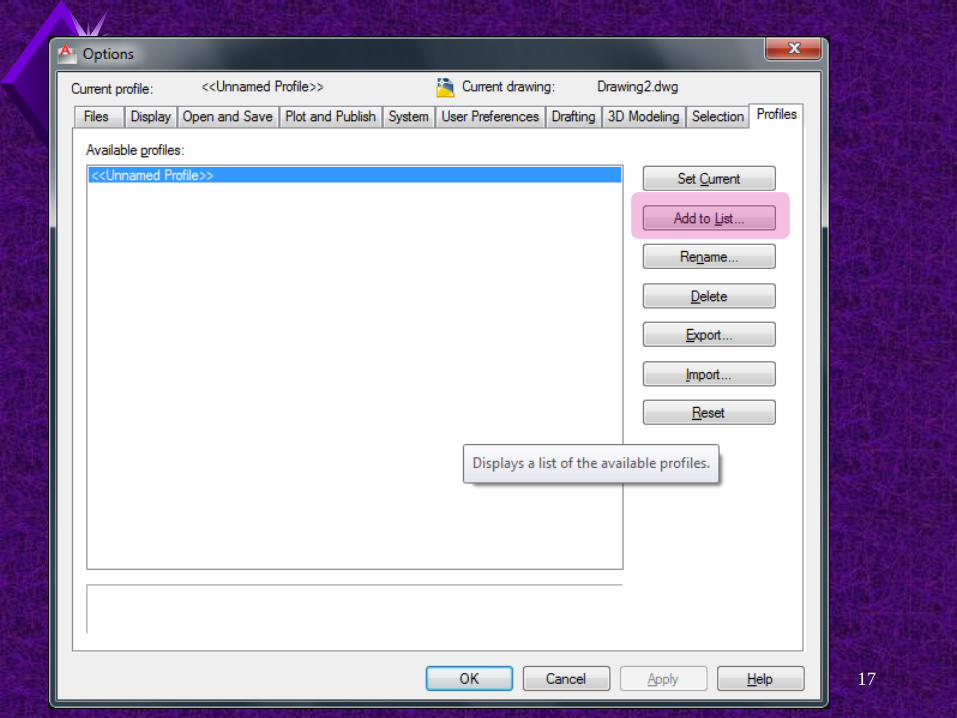
Creating A User ProfileTo create a user profileOptions dialog box > Profiles tab
Pick the Add to List... button on the right side of the tab.
Enter a name and description. Pick the Apply & Close button to close the Add
Profile dialog box. The current settings are saved to the user
profile and the new user profile is now listed in the Profiles tab of the Options dialog box.
User Profiles and Workspaces 16
User Profiles and Workspaces 17

User Profiles and Workspaces 18

User Profiles and Workspaces 19

Creating A User ProfileThe user profile is saved and will be available
in the current drawing session and future AutoCAD drawing sessions.
User Profiles and Workspaces 20

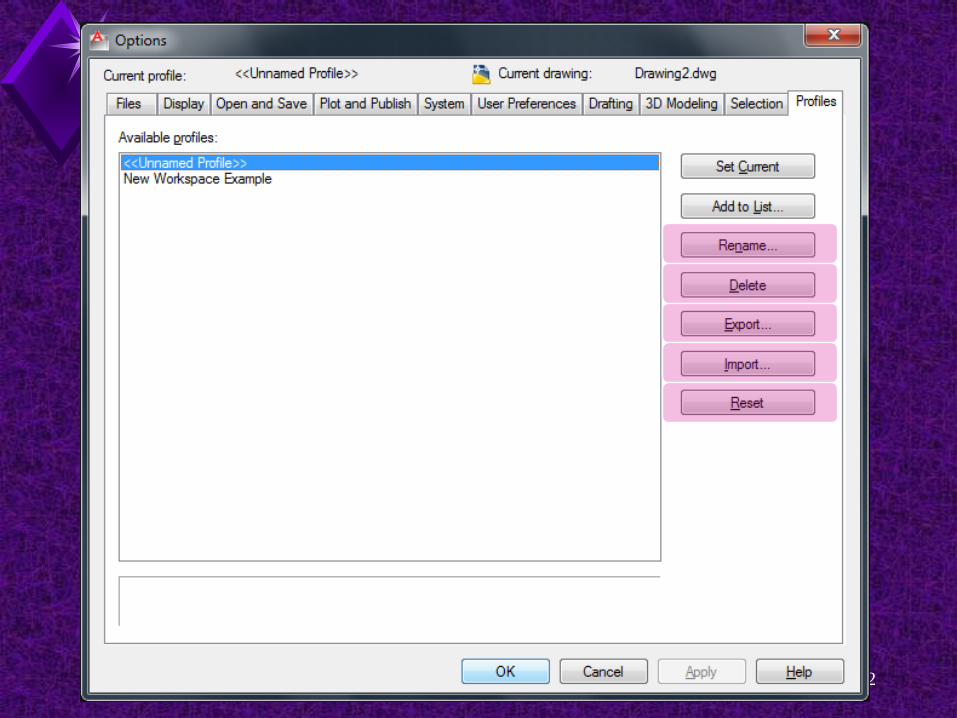
Creating A User ProfileUser ProfilesCan be renamedDeletedExportedImported
Reset buttonResets all settings of a profile to AutoCAD
defaults.
User Profiles and Workspaces 21
User Profiles and Workspaces 22

Restoring a User Profile
User Profiles and Workspaces 23

Restoring a User ProfileOnce a user profile is saved, it is Available in the current drawing session andAvailable in future drawing sessions.
To set any saved user profile as the current user profile,Select Options > Profiles tab. Highlight the name of the profile to restore Pick the Set Current button ORDouble-click on the name in the Available
profiles: list to restore a profile. User Profiles and Workspaces 24

User Profiles and Workspaces 25

Importing /Exporting User Profiles
User Profiles and Workspaces 26

Importing /Exporting User ProfilesA user profile can be exported and imported. This allows you to take your user profile to a
different AutoCAD workstation. A user profile is saved as an ARG file.
User Profiles and Workspaces 27

Importing /Exporting User ProfilesTo export a user profileOptions dialog > Profiles tab.Highlight the profile to export Pick the Export... button. Select a folder and name the file. The user profile is saved with the .arg file
extension.
User Profiles and Workspaces 28

User Profiles and Workspaces 29

Importing /Exporting User ProfilesTo import a user profile,lmport... button > Profiles tab. The lmport Profile dialog box is displayed
This is a standard "open” dialog box.Navigate to the appropriate folderSelect the proper ARG file and Pick the Open button. A icon dialog box named lmport Profile is
displayed.
User Profiles and Workspaces 30

Importing /Exporting User ProfilesYou can rename the user profileChange the description and Choose to include the file path. Pick the Apply & Close button to complete the
process. The user profile is then available in the
profiles tab.
User Profiles and Workspaces 31

Workspaces
User Profiles and Workspaces 32
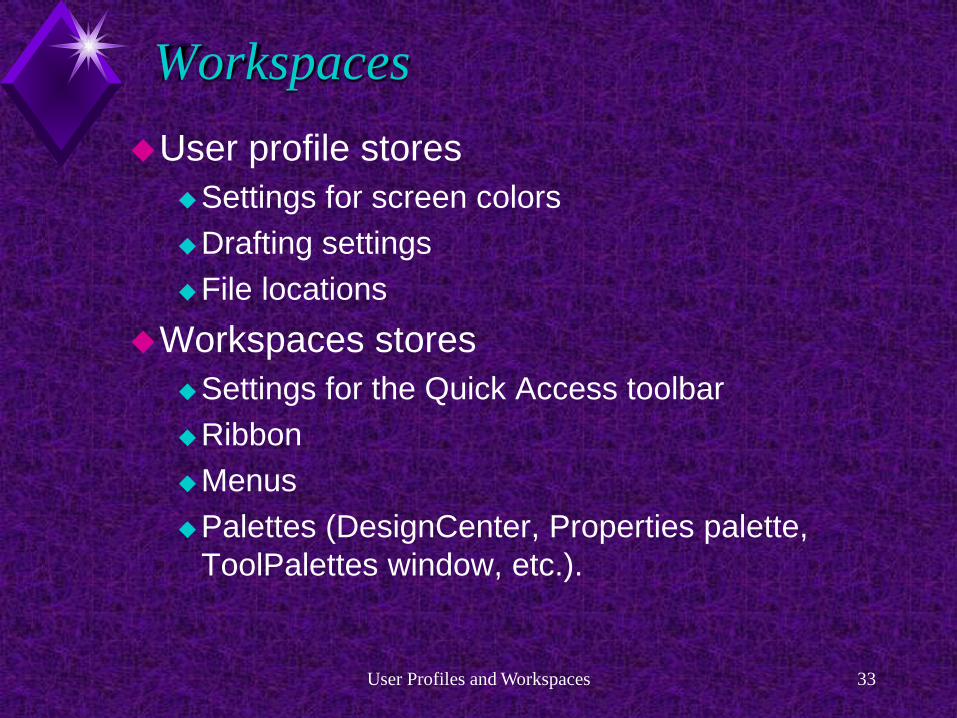
WorkspacesUser profile stores
Settings for screen colorsDrafting settingsFile locations
Workspaces storesSettings for the Quick Access toolbarRibbonMenusPalettes (DesignCenter, Properties palette,
ToolPalettes window, etc.).
User Profiles and Workspaces 33

WorkspacesA workspaces is a collection of
Displayed toolbarsPalettesRibbon tabs and panelsMenus and their configurations.
User Profiles and Workspaces 34
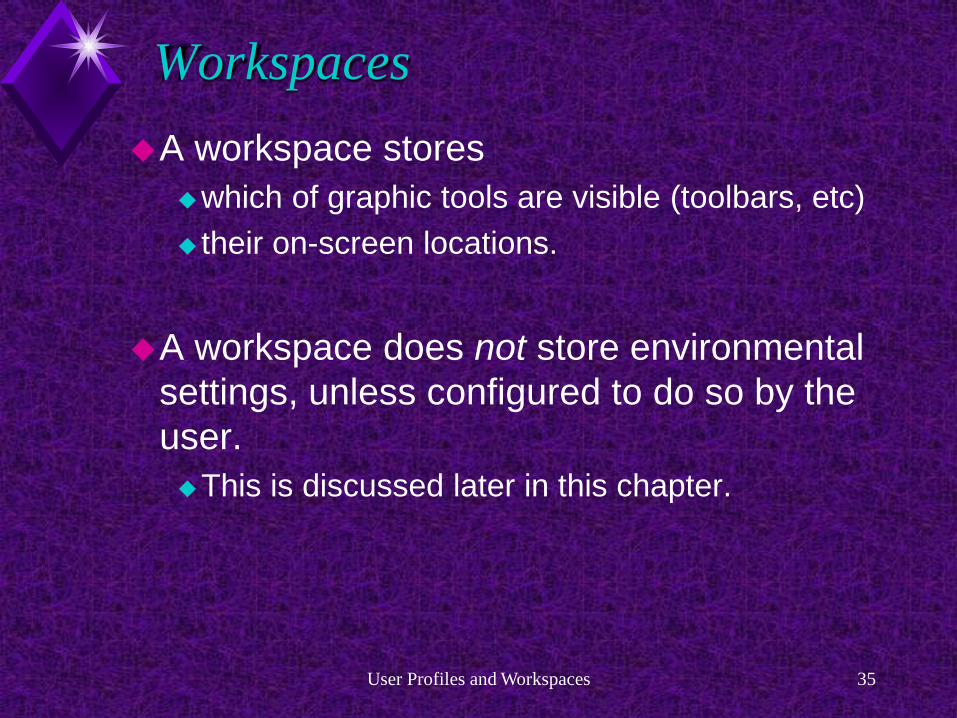
WorkspacesA workspace stores
which of graphic tools are visible (toolbars, etc) their on-screen locations.
A workspace does not store environmental settings, unless configured to do so by the user. This is discussed later in this chapter.
User Profiles and Workspaces 35

WorkspacesA user profile also stores which toolbars
are displayed and their location.A user profile update when you change
environmental settings or when you set a different workspace current.
User Profiles and Workspaces 36

WorkspacesIf a workspace is restored, the user profile updates to reflect the settings
of the workspace for toolbar display and location.
The user profile only stores which workspace is current, not what resides in the workspace or its settings.
User Profiles and Workspaces 37

Creating a Workspace
User Profiles and Workspaces 38

Creating a Workspace AutoCAD has four default workspaces-Drafting and Annotation3D Basics3D ModelingAutoCAD Classic.
User Profiles and Workspaces 39

Creating a WorkspaceA workspace can be set current by
using the Workspace Switching button on the right-hand side of the status bar or
the drop-down list on the Quick Access toolbar. This button displays a shortcut menu
containing the names of all available workspaces.
It also contains buttons for working with workspaces.
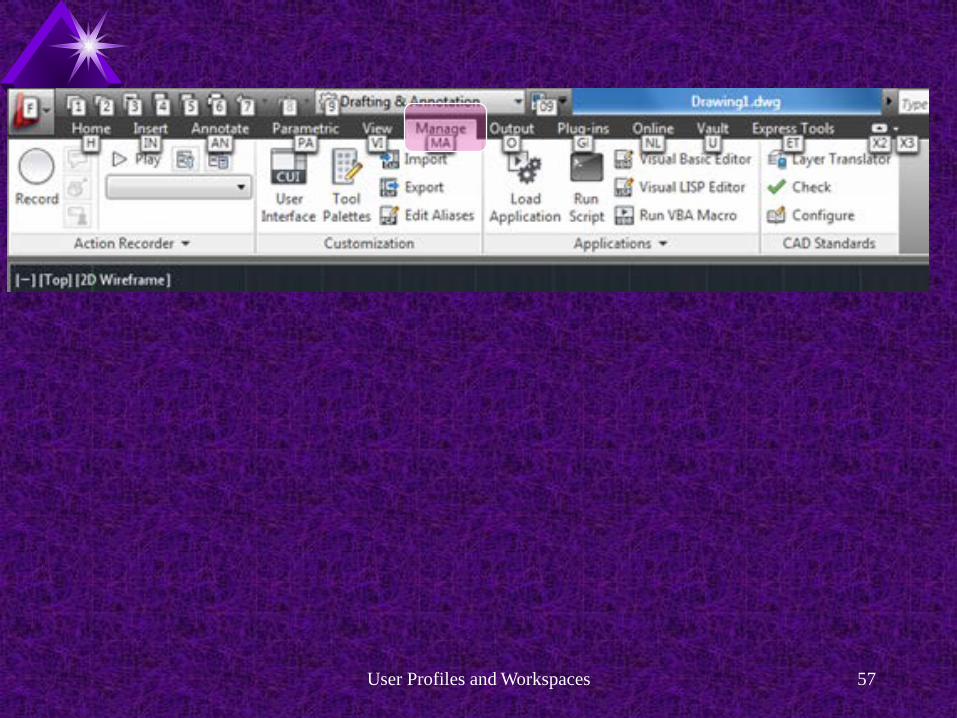
User Profiles and Workspaces 40

User Profiles and Workspaces 41
Workspace Switching button
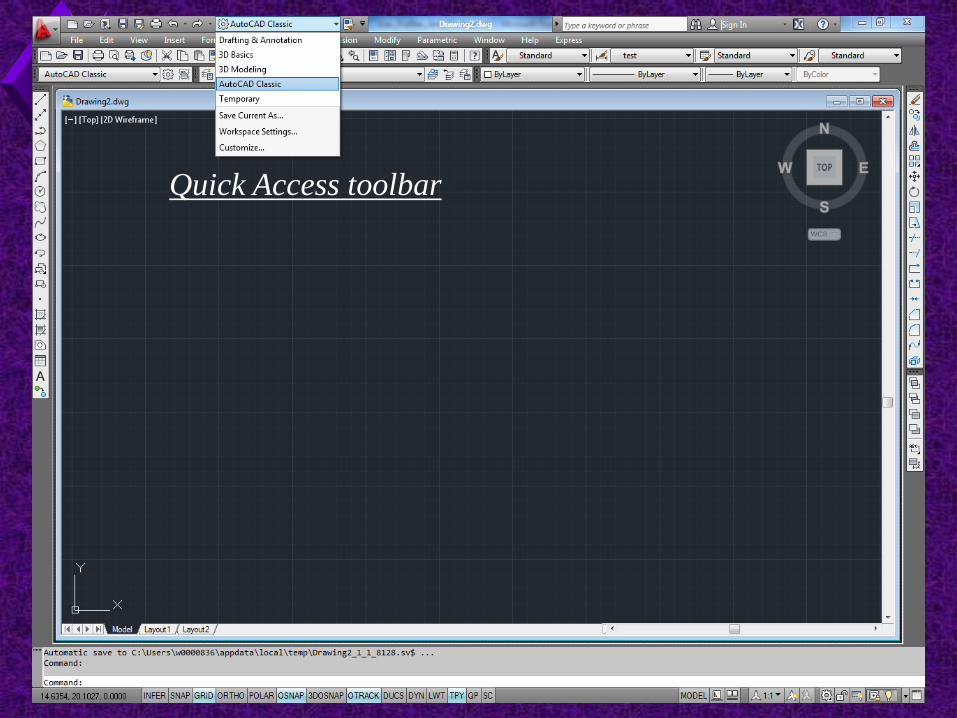
User Profiles and Workspaces 42
Quick Access toolbar

Creating a WorkspaceThe last active workspace is restored
when AutoCAD is launched.AutoCAD can be set up so that any
changes made to the ribbon or toolbars, menus, and palettes are saved to this workspace. However, it is best to create your own
workspaces.
User Profiles and Workspaces 43

Creating a WorkspaceThe first-step in setting up and storing
your own workspace is to arrangeThe ribbonToolbarsTool paletteMenus
To your liking
User Profiles and Workspaces 44
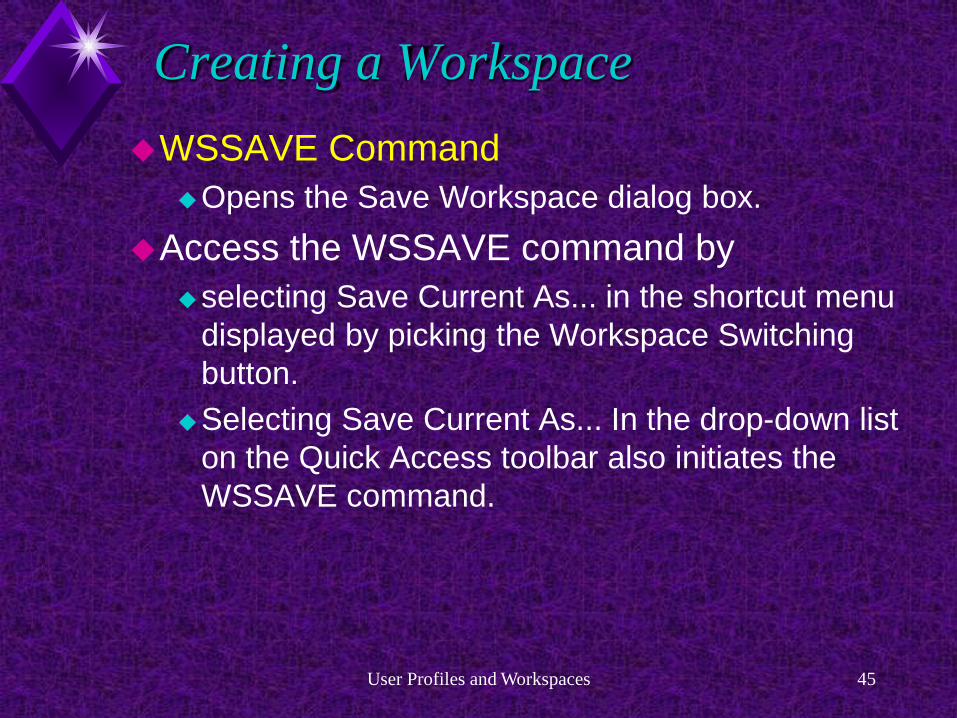
Creating a WorkspaceWSSAVE Command
Opens the Save Workspace dialog box.Access the WSSAVE command by
selecting Save Current As... in the shortcut menu displayed by picking the Workspace Switching button.
Selecting Save Current As... In the drop-down list on the Quick Access toolbar also initiates the WSSAVE command.
User Profiles and Workspaces 45
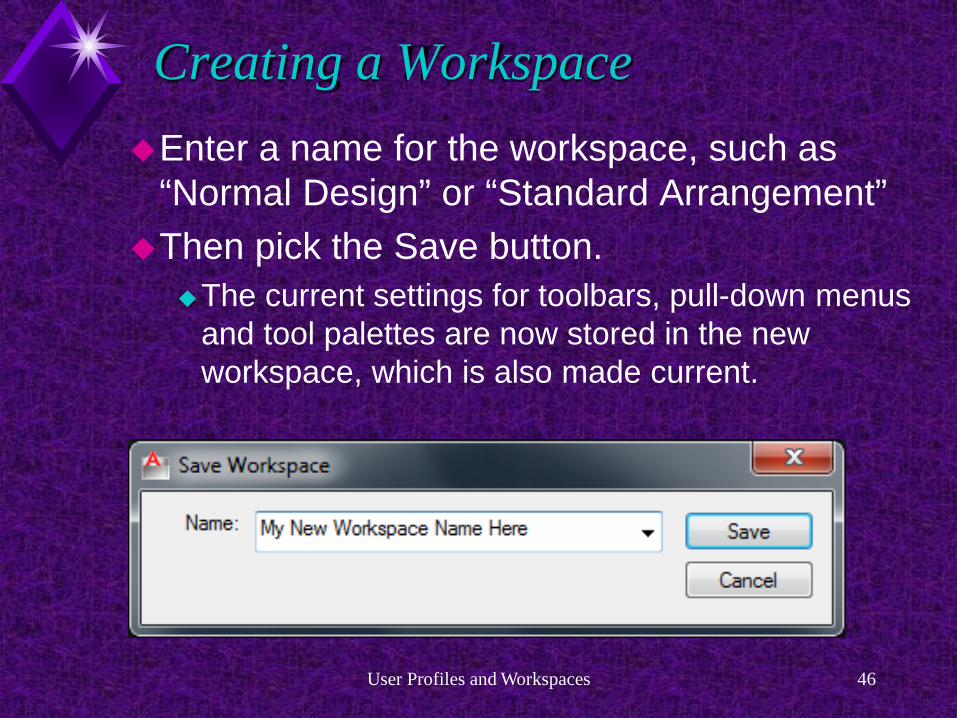
Creating a Workspace Enter a name for the workspace, such as
“Normal Design” or “Standard Arrangement”Then pick the Save button.
The current settings for toolbars, pull-down menus and tool palettes are now stored in the new workspace, which is also made current.
User Profiles and Workspaces 46

Creating a WorkspaceThe workspace name appears in the shortcut menu displayed by picking the
Workspace Switching button and in the drop-down list on the Quick Access
toolbar. The current workspace is indicated in the shortcut menu by a check
mark and appears at the top of the drop-down list on the
Quick Access toolbar.
User Profiles and Workspaces 47

User Profiles and Workspaces 48
Quick Access toolbar

User Profiles and Workspaces 49

Restoring a Workspace
User Profiles and Workspaces 50
Restoring a Workspace Once a workspace has been saved, it can
easily be restored. A list of available workspaces appears in the shortcut menu displayed by picking the
Workspace Switching button and in the drop-down list on the Quick Access
toolbar.
User Profiles and Workspaces 51

User Profiles and Workspaces 52
Quick Access toolbar

User Profiles and Workspaces 53

Restoring a Workspace To select a different workspacepick the name of the workspace in the pop-up
list. A workspace can also be restored using the
Command line:
User Profiles and Workspaces 54
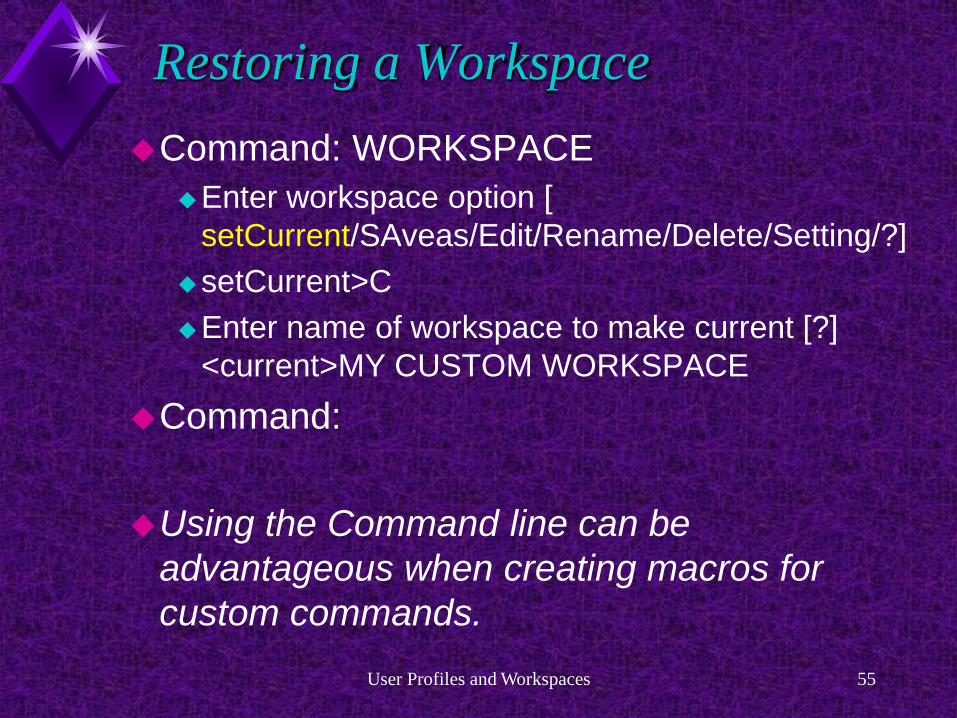
Restoring a WorkspaceCommand: WORKSPACE
Enter workspace option [ setCurrent/SAveas/Edit/Rename/Delete/Setting/?]
setCurrent>CEnter name of workspace to make current [?]
<current>MY CUSTOM WORKSPACECommand:
Using the Command line can be advantageous when creating macros for custom commands.
User Profiles and Workspaces 55

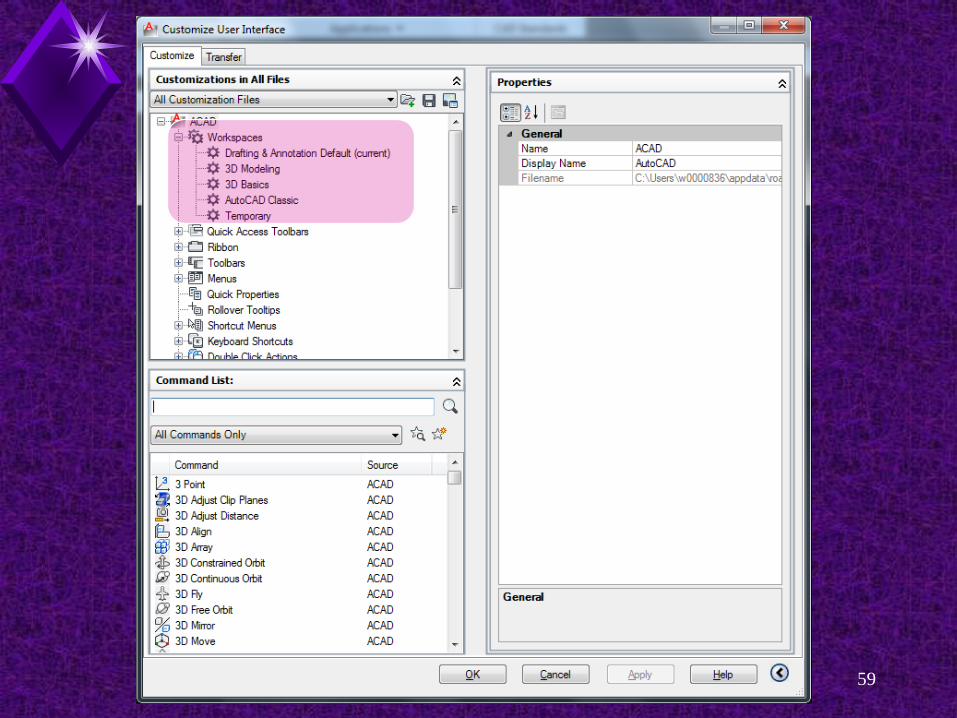
Restoring a WorkspaceYou can also set the Customize User
Interface dialog box to restore a workspace.Open the CUI dialog box. With CUIExpand the Workspaces branch in the
Customizations in All Files pane. All of the workspaces defined in the default CUIx
file and any open CUIx files are displayed in this branch.
User Profiles and Workspaces 56
User Profiles and Workspaces 57

User Profiles and Workspaces 58
User Profiles and Workspaces 59

Restoring a WorkspaceThe label (current) follows the name of the
current workspace.To restore a workspaceRight-click on its name in the Workspaces
branch of the CUI and Select Set Current from the shortcut menu.
Its name is now followed by (current)Pick the OK button to close the Customize
User Interface dialog box and make the workspace current.
User Profiles and Workspaces 60

User Profiles and Workspaces 61

Professional TipThe WSCURRENT system variable
indicates the current workspace. You can use this system variable to
restore a workspace. Simply set the system variable to the
name of the workspace you want to restore.
User Profiles and Workspaces 62
Quick Access Toolbar
User Profiles and Workspaces 63

Quick Access ToolbarThe Quick Access toolbar is located in the
top-left corner of the screen to the right of the application menu icon.
It contains "By default”New, Open, Save, Save As, Undo Redo, and Plot
tools along with the Workspace drop-down list.
User Profiles and Workspaces 64

User Profiles and Workspaces 65

Quick Access ToolbarYou can display other tools on the toolbar
by picking the down arrow button on the right-hand end of the Quick Access toolbarto display a shortcut menu.
User Profiles and Workspaces 66
User Profiles and Workspaces 67

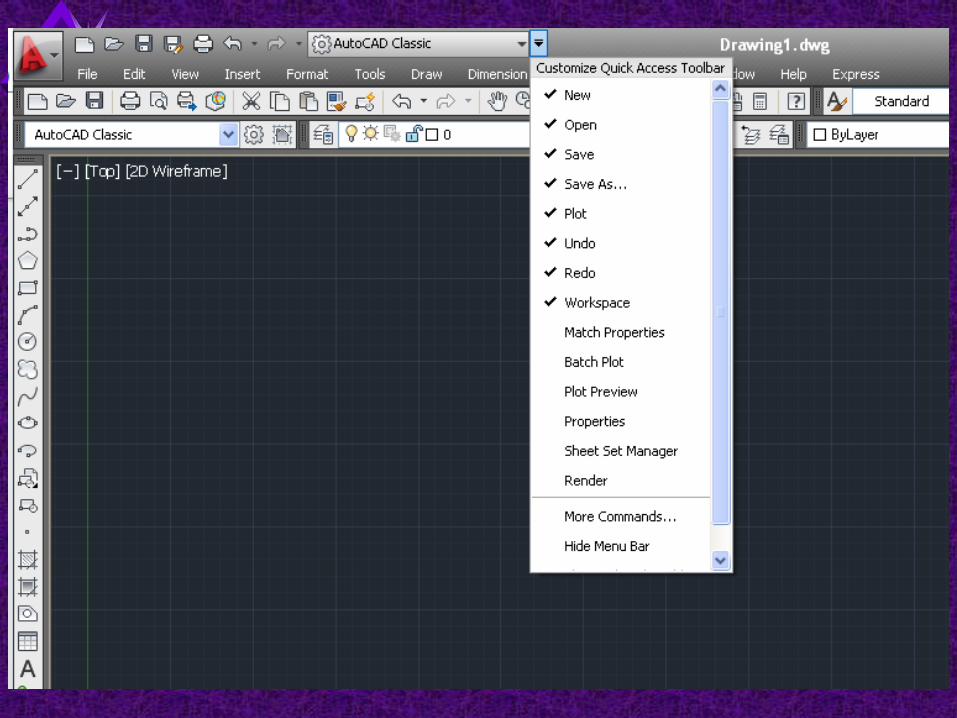
Quick Access ToolbarIn this menu, select the tools to show and
hide. The additional available tools are:
Match Properties, Batch Plot, Plot preview, Properties, Sheet Set Manager, and Render.
Any other defined command can be added to the toolbar by selecting More Commands...in the drop-down list.
This displays the Customize User lnterface dialog box.
User Profiles and Workspaces 68

User Profiles and Workspaces 69
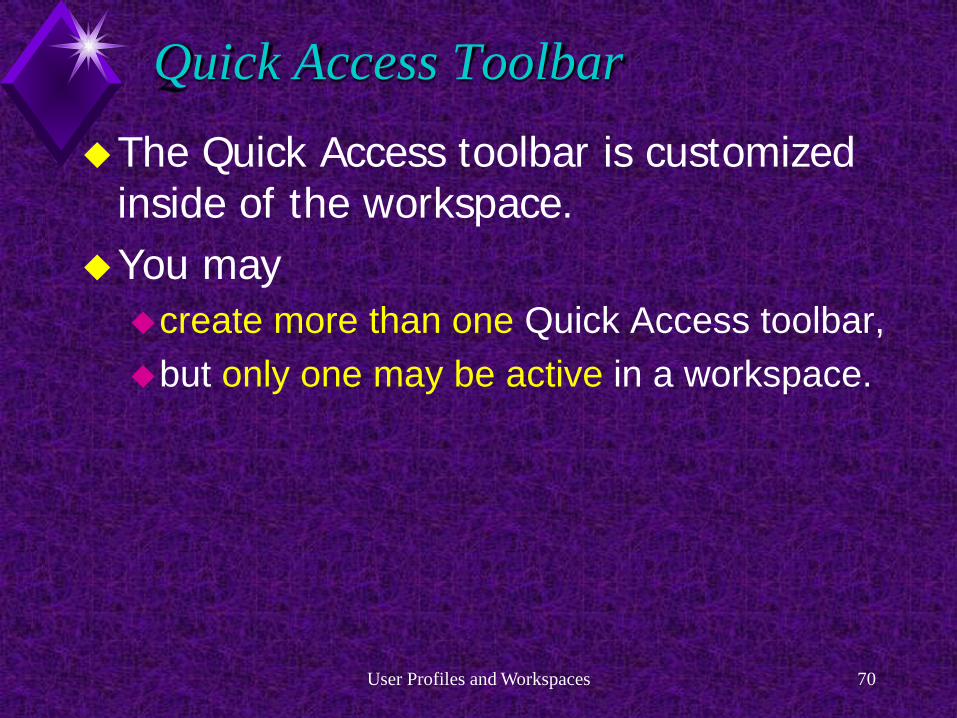
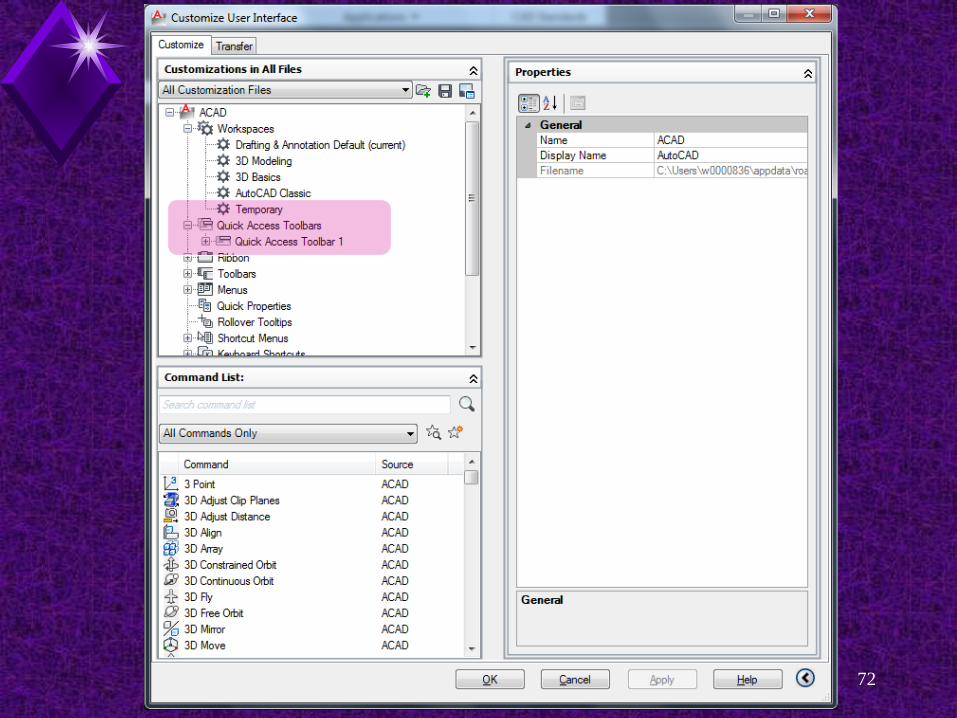
Quick Access ToolbarThe Quick Access toolbar is customized
inside of the workspace. You may create more than one Quick Access toolbar, but only one may be active in a workspace.
User Profiles and Workspaces 70
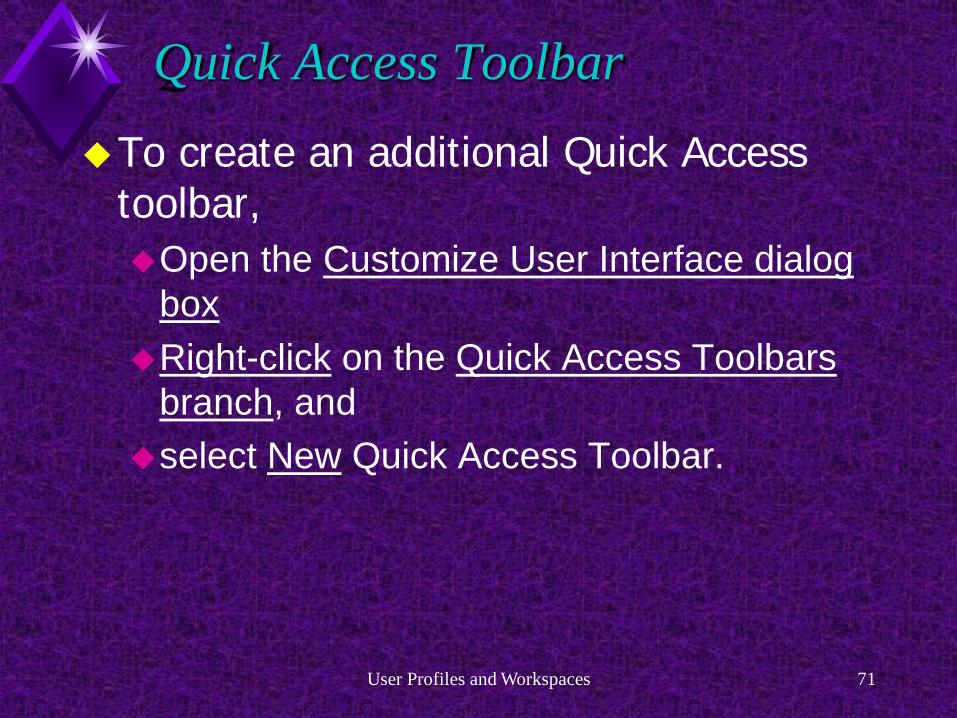
Quick Access ToolbarTo create an additional Quick Access
toolbar,Open the Customize User Interface dialog
boxRight-click on the Quick Access Toolbars
branch, and select New Quick Access Toolbar.
User Profiles and Workspaces 71
User Profiles and Workspaces 72

User Profiles and Workspaces 73

Quick Access ToolbarWhen creating a new Quick Access toolbar, it
is automatically populated with NewOpenSaveSave AsUndo RedoPlot tools Workspace drop-down list.
User Profiles and Workspaces 74

Professional TipAny tool on a ribbon panel can be quickly
added to the Quick Access toolbar. Right-click on the tool icon and Select Add to Quick Access Toolbar from the
shortcut menu.
User Profiles and Workspaces 75

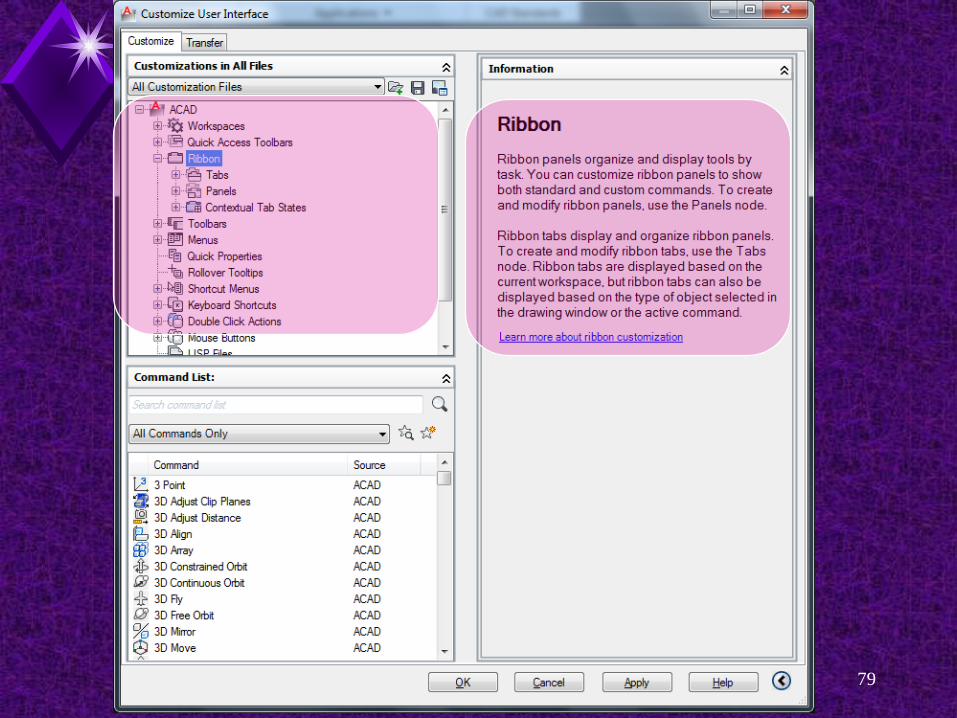
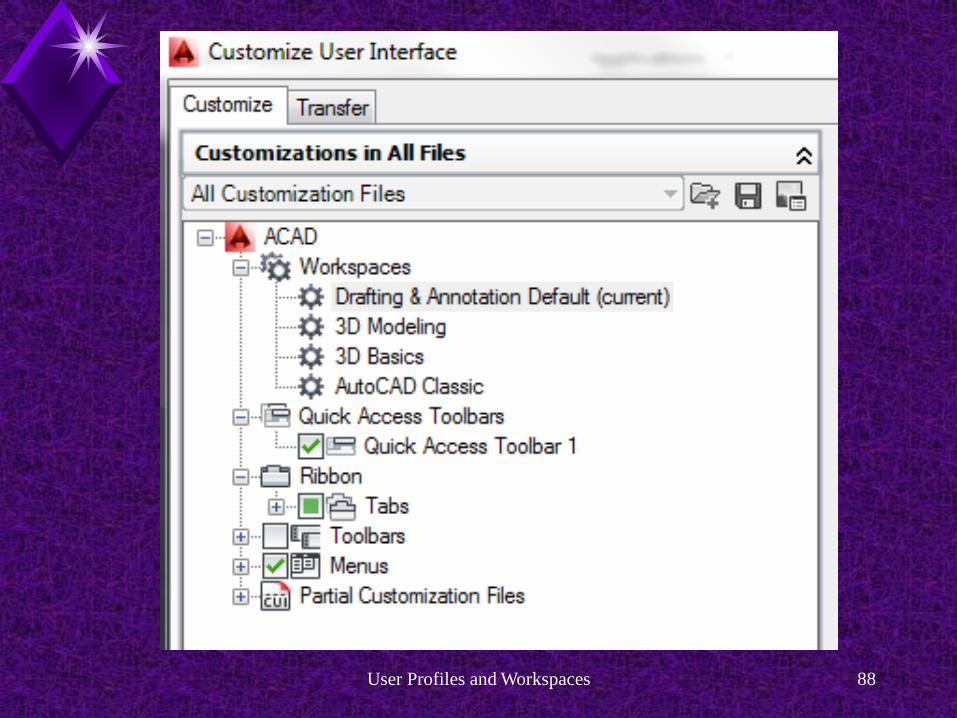
Customizing a Workspace An existing workspace can be customizedUse the Customize User Interface dialog box.Select the workspace to be customized in the
Workspaces branch of the Customizations-in All Files pane.
The name of this pane will change based on the selection in the drop-down list.
User Profiles and Workspaces 76

User Profiles and Workspaces 77

Customizing a WorkspaceThe Workspace Contents pane at the upper-
right corner of the dialog box displays the contents of the selected workspace.
There are Quick Access ToolbarToolbarsMenusPalettes and Ribbon Tabs branches.
Expand a branch to see which components the workspace contains.
User Profiles and Workspaces 78
User Profiles and Workspaces 79

User Profiles and Workspaces 80

User Profiles and Workspaces 81
Customizing a WorkspaceTo customize the workspace, pick the Customize Workspace button at the
top of the Workspace Contents pane. The tree in the pane turns blue to indicate you
are in customization mode and the button changes to the Done button.
User Profiles and Workspaces 82

User Profiles and Workspaces 83
Customizing a WorkspaceThe tree changes.
Several branches disappearThe Menus branch has a green check mark next to
it. If you expand the branches in the
Customizations in All Files pane, you will see that a green check mark also appears next to the components that currently are in the workspace.
User Profiles and Workspaces 84

User Profiles and Workspaces 85
Customizing a WorkspaceTo add a component to the workspace, Pick the blank box in front of its name to place
a check mark in the box. The component also appears in the
Workspace Contents pane.To remove a component from the
workspace, Pick the check mark in front of its name to
clear the check box. The component is also removed from the Workspace Contents pane.
User Profiles and Workspaces 86
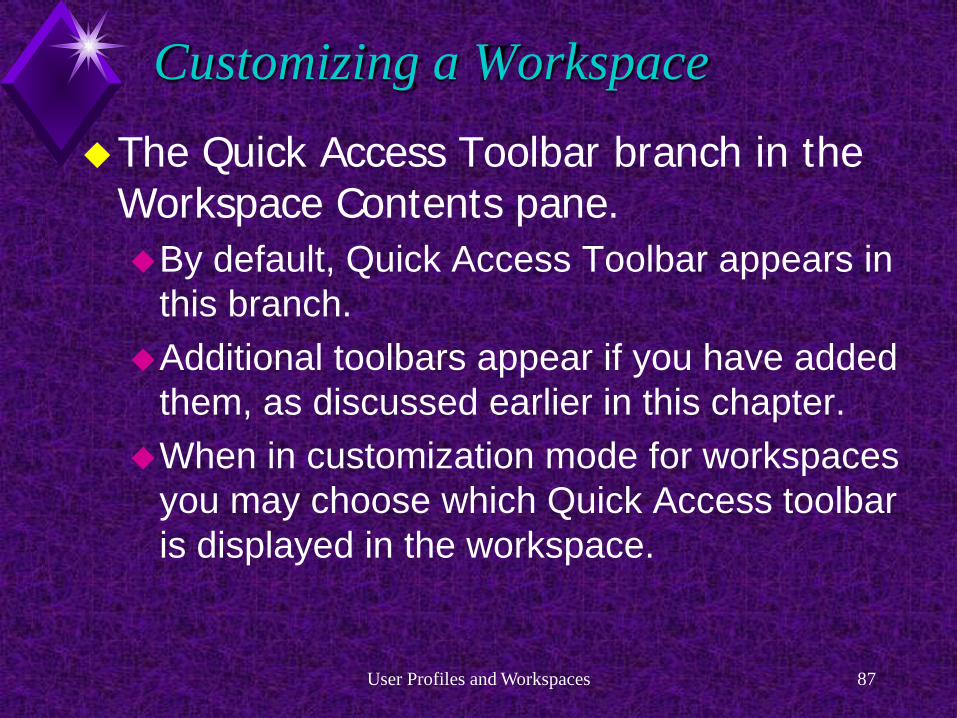
Customizing a WorkspaceThe Quick Access Toolbar branch in the
Workspace Contents pane.By default, Quick Access Toolbar appears in
this branch.Additional toolbars appear if you have added
them, as discussed earlier in this chapter. When in customization mode for workspaces
you may choose which Quick Access toolbar is displayed in the workspace.
User Profiles and Workspaces 87
User Profiles and Workspaces 88
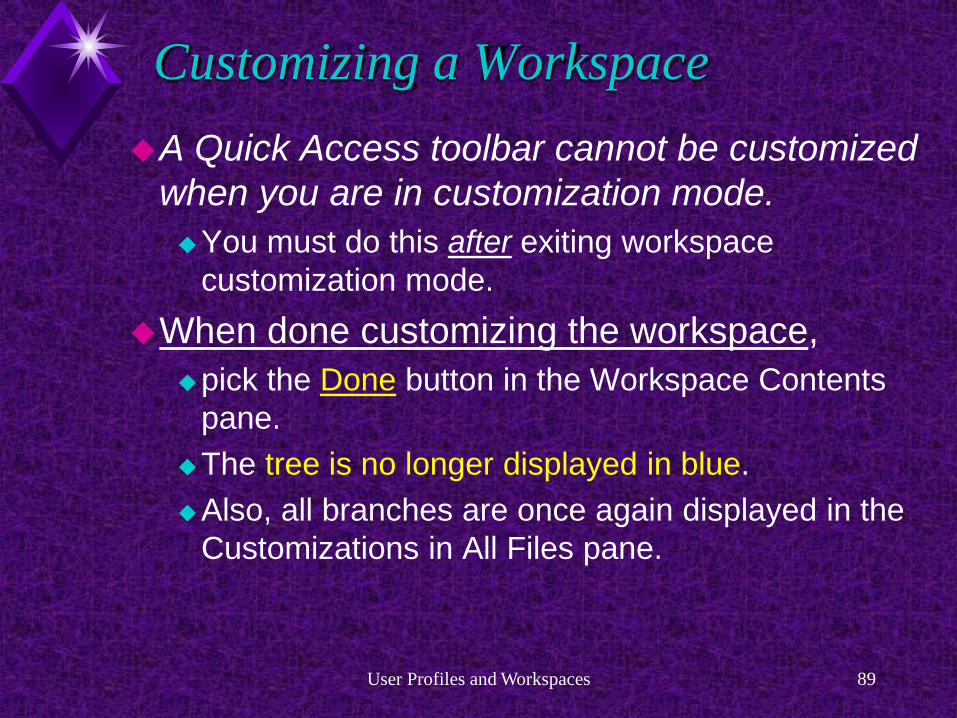
Customizing a WorkspaceA Quick Access toolbar cannot be customized
when you are in customization mode.You must do this after exiting workspace
customization mode.When done customizing the workspace,
pick the Done button in the Workspace Contents pane.
The tree is no longer displayed in blue. Also, all branches are once again displayed in the
Customizations in All Files pane.
User Profiles and Workspaces 89

Customizing a WorkspaceYou can now
expand a branch in the Workspace Contents pane, select a component name, and use the Properties pane to adjust the component's
properties
User Profiles and Workspaces 90

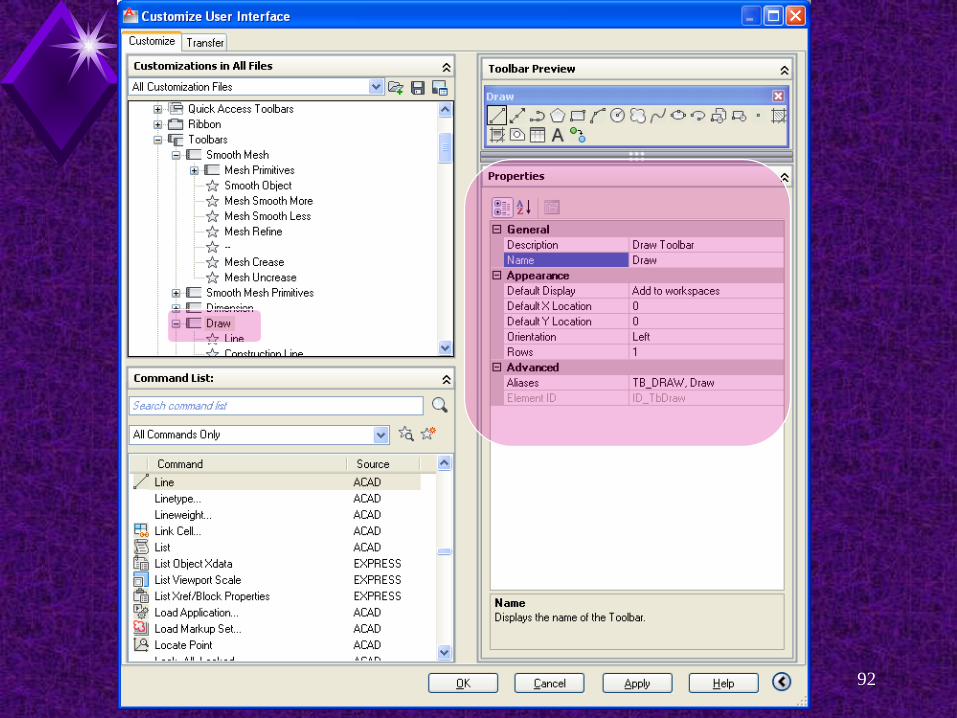
Customizing a WorkspaceFor example, suppose you have added the
Layers toolbar to a workspace. In the Properties panel, You can set the orientation to floating, Specify the location of its anchor point, and Set the number of rows for the toolbar.
User Profiles and Workspaces 91
User Profiles and Workspaces 92

Customizing a WorkspaceYou can also change the order in which
menus appear on the menu bar by dragging them to a new location in the tree in the Workspace Contents pane. The top of the tree is the left-hand side of the
menu bar.In the Customizations in All Files pane, you
can customize the Quick Access toolbar.
User Profiles and Workspaces 93
Customizing a WorkspaceThe components in the Quick Access
Toolbars branch are commands. To add a command to the Quick Access
Toolbars branch:Locate it in the Command List: pane. Then drag and drop it into the branch in the
Customizations in All Files pane.
User Profiles and Workspaces 94
Customizing a WorkspaceTo remove a command from the Quick
Access Toolbars branch, Select it andPress the [Delete] key.
User Profiles and Workspaces 95
Tool Palettes
User Profiles and Workspaces 96

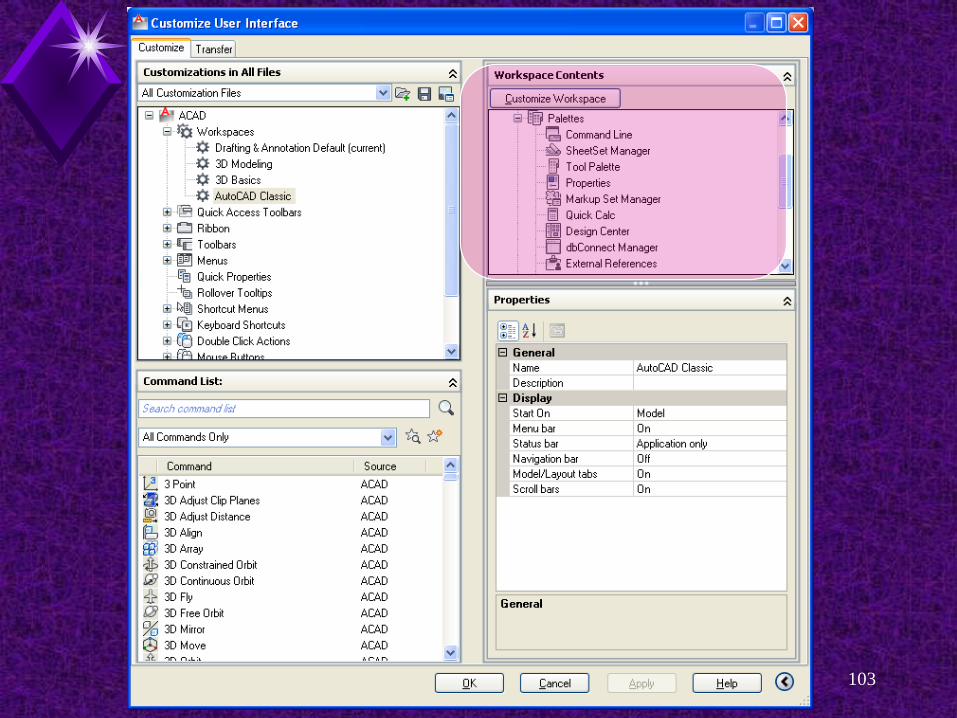
Tool PalettesThere is not a Palettes branch in the
Customizations in All Files pane. All palettes are automatically available in all
workspaces. You can, however, specify whether a palette
is displayed or hidden in a workspace.
User Profiles and Workspaces 97
Tool PalettesYou can also change other properties of a
palette, such as floating/docked status, its size, and whether the autohide feature is enabled.
User Profiles and Workspaces 98
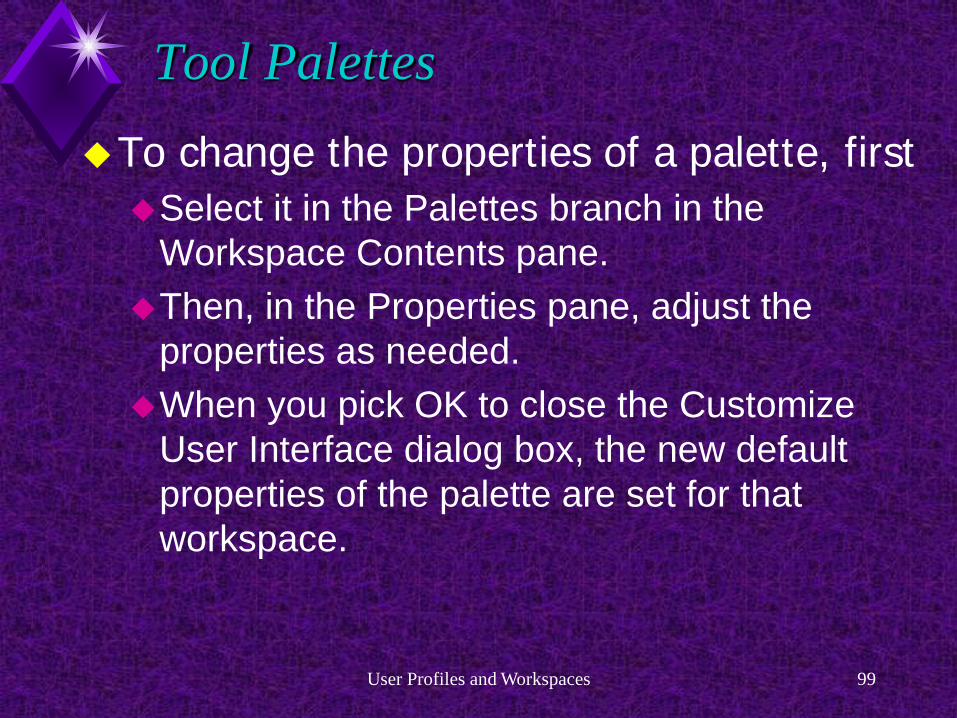
Tool PalettesTo change the properties of a palette, first Select it in the Palettes branch in the
Workspace Contents pane.Then, in the Properties pane, adjust the
properties as needed. When you pick OK to close the Customize
User Interface dialog box, the new default properties of the palette are set for that workspace.
User Profiles and Workspaces 99

Tool PalettesExampleThe Tool Palettes window in the AutoCAD
Classic workspace is by default, displayed floating.
You can hide the Tool Palettes window when in the drawing area by picking the Close button (X).
You can also drag the palette into the drawing area to a new position or dock it.
User Profiles and Workspaces 100

Tool PalettesHowever, these actions do not change the
default setting for the workspace.If you restore the workspace in the future, the
Tool Palettes window will again be floating. You must alter the default settings for the Tool
Palettes window in the workspace.
User Profiles and Workspaces 101

Tool PalettesOpen the Customize User Interface dialog box and Select the AutoCAD Classic workspace.Expand the Palettes branch in the Workspace
Contents pane and Select Tool Palette. In the Properties pane, change the Show property
to No. Now when you set the AutoCAD Classic
workspace current, the Tool Palettes window will not be displayed.
It can, of course, be manually displayed as needed.
User Profiles and Workspaces 102
User Profiles and Workspaces 103

User Profiles and Workspaces 104

Tool PalettesYou can set up a workspace so that it
displays model space or paper space when restored. By default, a workspace displays model space
when it is set current. Three optionsDo not changeModel spaceLayout space
User Profiles and Workspaces 105

Tool PalettesTo change this, Highlight the workspace name in either the
Customizations in All Files pane or the Workspace Contents pane.
In the Properties pane, change the Start On property to Layout or Do not change.
User Profiles and Workspaces 106

User Profiles and Workspaces 107
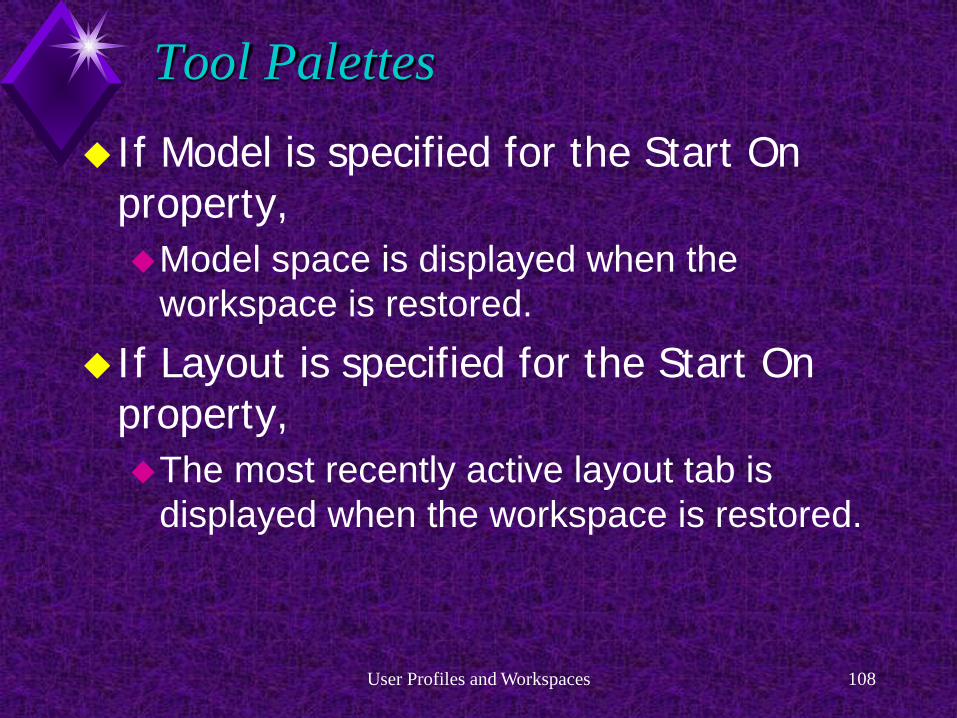
Tool PalettesIf Model is specified for the Start On
property, Model space is displayed when the
workspace is restored. If Layout is specified for the Start On
property, The most recently active layout tab is
displayed when the workspace is restored.
User Profiles and Workspaces 108
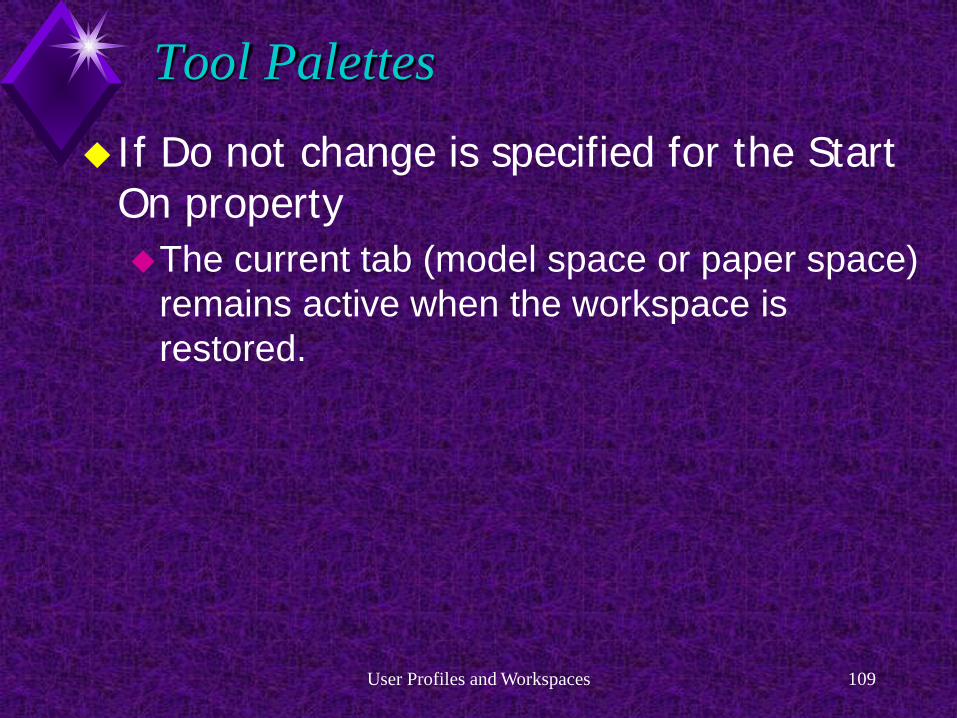
Tool PalettesIf Do not change is specified for the Start
On propertyThe current tab (model space or paper space)
remains active when the workspace is restored.
User Profiles and Workspaces 109