ricon technologies co., ltd. mobile data...
TRANSCRIPT
RICON TECHNOLOGIES CO., LTD.
Mobile Data Communications
User Manual
S9910 GPRS/CDMA DTU

MOBILE DATA COMMUNICATIONS
S9910 GPRS/CDMA DTU
User Manual Ricon Technologies Co., Ltd.
Ahi Evran Cad. No.1 Polaris Plaza Kat.6 No.32 Maslak/ İstanbul Turkey
Tel.: (+90) 212 275 95 95 Fax: (+90) 212 346 26 70
Email: [email protected]
Copyright 2004 M80-771001-01
Release 2.8.1

Notice:
Copyright
The contents of the manual are protected by Chinese law, any organization and/or person cannot copy this manual or part of contents without Ricon Technologies Co., Ltd. authorization in written.
Trademark
Ricon, GPRS DTU, CDMA DTU, MDTU, Wireless DDN, Ricon Technologies and Ricon are the logos and trademarks of Ricon Technologies Co., Ltd. The other company trademarks and logos in this manual are owned by the owner, Ricon does not have the right for those trademarks and logos.
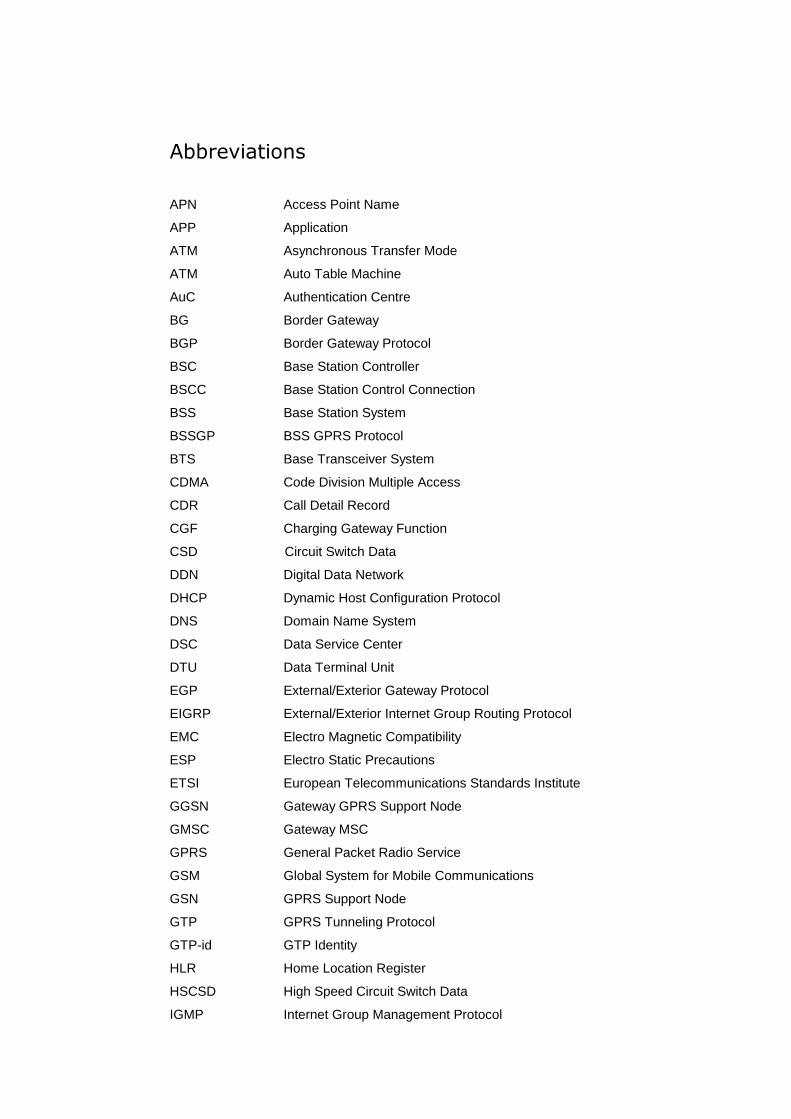
Abbreviations APN Access Point Name
APP Application
ATM Asynchronous Transfer Mode
ATM Auto Table Machine
AuC Authentication Centre
BG Border Gateway
BGP Border Gateway Protocol
BSC Base Station Controller
BSCC Base Station Control Connection
BSS Base Station System
BSSGP BSS GPRS Protocol
BTS Base Transceiver System
CDMA Code Division Multiple Access
CDR Call Detail Record
CGF Charging Gateway Function
CSD Circuit Switch Data
DDN Digital Data Network
DHCP Dynamic Host Configuration Protocol
DNS Domain Name System
DSC Data Service Center
DTU Data Terminal Unit
EGP External/Exterior Gateway Protocol
EIGRP External/Exterior Internet Group Routing Protocol
EMC Electro Magnetic Compatibility
ESP Electro Static Precautions
ETSI European Telecommunications Standards Institute
GGSN Gateway GPRS Support Node
GMSC Gateway MSC
GPRS General Packet Radio Service
GSM Global System for Mobile Communications
GSN GPRS Support Node
GTP GPRS Tunneling Protocol
GTP-id GTP Identity
HLR Home Location Register
HSCSD High Speed Circuit Switch Data
IGMP Internet Group Management Protocol
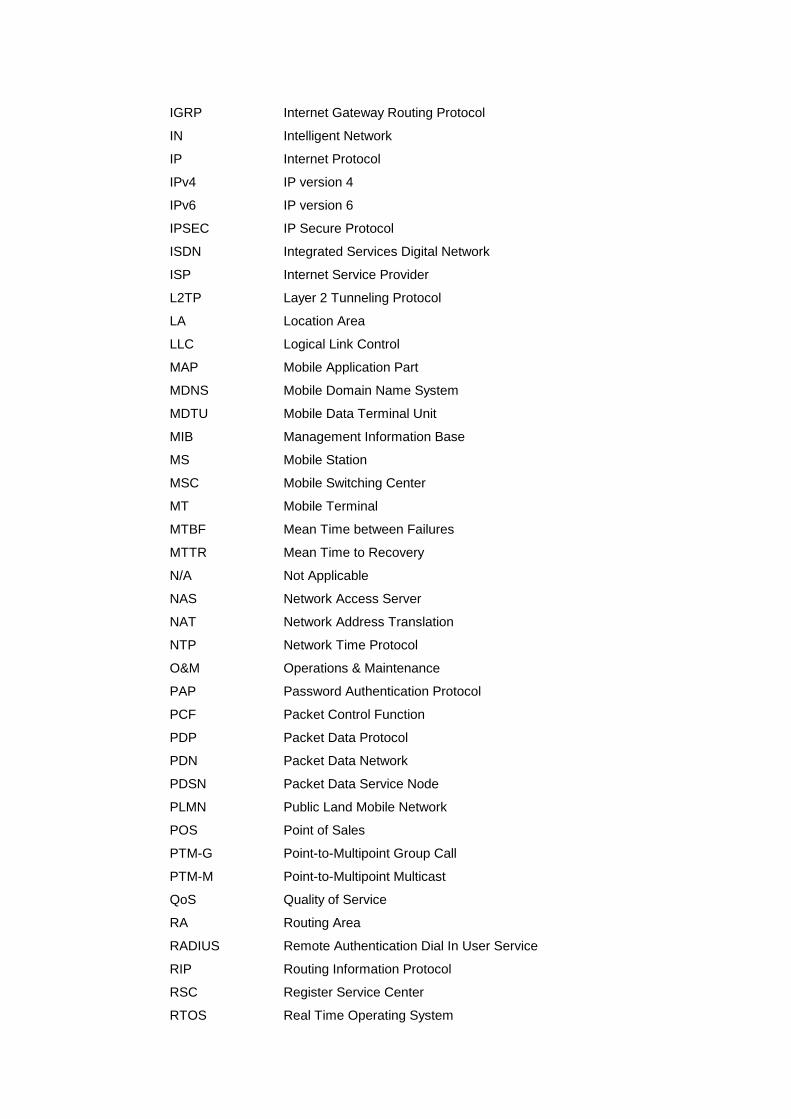
IGRP Internet Gateway Routing Protocol
IN Intelligent Network
IP Internet Protocol
IPv4 IP version 4
IPv6 IP version 6
IPSEC IP Secure Protocol
ISDN Integrated Services Digital Network
ISP Internet Service Provider
L2TP Layer 2 Tunneling Protocol
LA Location Area
LLC Logical Link Control
MAP Mobile Application Part
MDNS Mobile Domain Name System
MDTU Mobile Data Terminal Unit
MIB Management Information Base
MS Mobile Station
MSC Mobile Switching Center
MT Mobile Terminal
MTBF Mean Time between Failures
MTTR Mean Time to Recovery
N/A Not Applicable
NAS Network Access Server
NAT Network Address Translation
NTP Network Time Protocol
O&M Operations & Maintenance
PAP Password Authentication Protocol
PCF Packet Control Function
PDP Packet Data Protocol
PDN Packet Data Network
PDSN Packet Data Service Node
PLMN Public Land Mobile Network
POS Point of Sales
PTM-G Point-to-Multipoint Group Call
PTM-M Point-to-Multipoint Multicast
QoS Quality of Service
RA Routing Area
RADIUS Remote Authentication Dial In User Service
RIP Routing Information Protocol
RSC Register Service Center
RTOS Real Time Operating System
RTP Real-time Transport Protocol
RTU Remote Terminal Unit
RSVP Resource reSerVation Protocol
SCADA Supervisory Control and Data Acquisition
SGSN Serving GPRS Support Node
SIM Subscriber Identify Module
SMS Short Message Service
SMSC Short Message Service Center
SNMP Simple Network Management Protocol
STK SIM Tool Kits
TCP Transmission Control Protocol
TDMA Time Division Multiple Access
TMN Telecommunication Managed Network
TTL Time to Live
UDP User Datagram Protocol
UIM User Identify Module
UMTS Universal Mobile Telecommunication System
USSD Unstructured Supplementary Service Data
UTK UIM Tool Kits
VLR Visitor Location Register
WAN Wide Area Network
WAP Wireless Application Protocol
WDDN Wireless Digital Data Network

Contents
CHAPTER 1 INTRODUCTION ................................................................................... 1
1.1 GENERAL ..................................................................................................................... 1
1.2 SYSTEM FEATURES .................................................................................................. 3
1.3 SYSTEM COMPONENTS ........................................................................................... 4
1.4 PHILOSOPHY .............................................................................................................. 4
1.5 SPECIFICATIONS ....................................................................................................... 5
1.6 TYPE DESCRIPTION .................................................................................................. 6
CHAPTER 2 INSTALLATION ..................................................................................... 7
2.1 GENERAL ..................................................................................................................... 7
2.2 OPEN BOX .................................................................................................................... 7
2.3 INSTALLATION AND CABLE CONNECTION ...................................................... 8
2.4 GROUNDING .............................................................................................................. 12
2.5 POWER SUPPLY ....................................................................................................... 12
2.6 CHECK THE MOBILE NETWORK........................................................................ 12
CHAPTER 3 DTU SETUP ........................................................................................... 13
3.1 SETUP CONNECTION .............................................................................................. 13
3.2 PARAMETERS CONFIGURATION ........................................................................ 13
3.2.1 DTU CONFIGURATION (C) ................................................................................. 14
3.2.2 MODULE TEST (T) ................................................................................................. 31
3.2.3 ADVANCED FUNCTION (F) ................................................................................. 32
3.2.4 DISPLAY SETTING (D) ......................................................................................... 33
3.2.5 VERSION INFO (V) ................................................................................................ 34
3.2.6 RESET (R) ................................................................................................................ 35
CHAPTER 4 OPERATION ......................................................................................... 36
4.1 PANEL INDICATIONS .............................................................................................. 36
4.2 DTU OPERATION GUIDANCE ............................................................................... 36
4.3 TROUBLE SHOOTING ............................................................................................. 37
APPENDIX: HYPERTERMINAL SETTING ................................................................ 39
RICON S9910 GPRS/CDMA DTU User Manual Chapter 1: Introduction
M80-771001-01 1
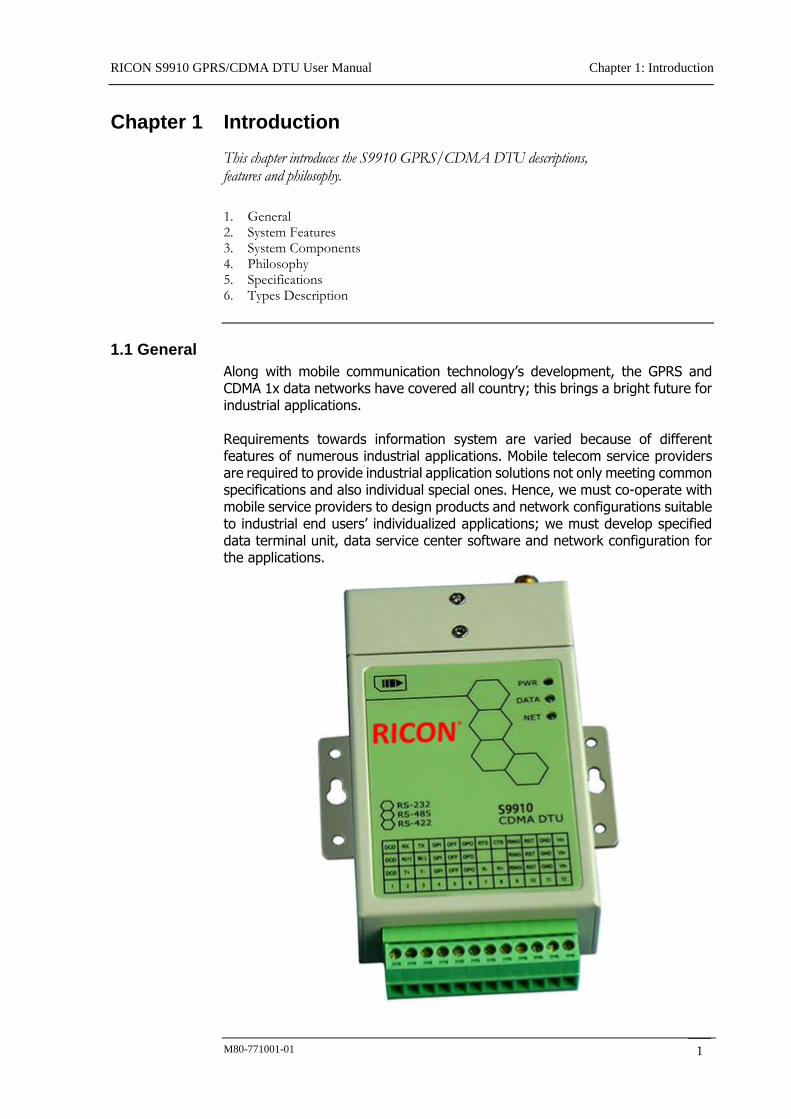
Chapter 1 Introduction
This chapter introduces the S9910 GPRS/CDMA DTU descriptions, features and philosophy.
1. General 2. System Features 3. System Components 4. Philosophy 5. Specifications 6. Types Description
1.1 General
Along with mobile communication technology’s development, the GPRS and CDMA 1x data networks have covered all country; this brings a bright future for industrial applications. Requirements towards information system are varied because of different features of numerous industrial applications. Mobile telecom service providers are required to provide industrial application solutions not only meeting common specifications and also individual special ones. Hence, we must co-operate with mobile service providers to design products and network configurations suitable to industrial end users’ individualized applications; we must develop specified data terminal unit, data service center software and network configuration for the applications.
RICON S9910 GPRS/CDMA DTU User Manual Chapter 1: Introduction
M80-771001-01 2
Based on years of experience of providing mobile data’s industrial application solutions and service operator’s network configurations, Ricon Technologies has designed S9910 DTU which works at an advanced platform with individualized feature options to meet different requirements.
GPRS network theoretically can provide a maximum bandwidth 171.2Kbps, actually, it works at 40~100Kbps bandwidth (it depends on service provider’s operation policy). As we know, GPRS is packet based network which provides TCP/IP communication channel. Same as GPRS network, CDMA 1x network can provide a maximum bandwidth up to 300Kb/s and actual transmitting and receiving bandwidth reaches 100Kb/s. Ricon Technologies has developed H7000 wireless DDN system which provides industrial end-user a virtual private data network of high speed, always - online, and transparent data transmission. It can be widely used at area power SCADA system, industrial supervision, automatic traffic control, weather station, environment protection, pipe supervision, finance and securities, etc. H7000 wireless DDN system consists of: DTU
H7111 GPRS DTU: TTL data interface, built-in design; H7112 GPRS DTU: RS-232/422/485 data interface; H7118 GPRS DTU: RS-232/422/485 data interface, high performance; H7161 GPRS DTU: Ethernet interface; H7611 CDMA DTU: TTL data interface; H7612 CDMA DTU: RS-232/422/485 data interface; H7661 CDMA DTU: Ethernet interface; S9910 GPRS/CDMA 1x DTU: RS-232/422/485 data interface, platform
designed with customer specified options. Data Service Center
H7030 wireless DDN data service center development pack: it provides classes, functions packages and ActiveX controls. Meanwhile, Virtual Serial Port Divers can be provided for existing system’s selections;
H7036 wireless DDN data service center router: it transfers the user data and converts the transmission protocol; it can be connected with the broadband network access and the GPRS/CDMA 1x network to transmit and convert the data from/to GPRS/CDMA DTU, and then transmit the data to user application data service center.
Typical center to multipoint system configuration plan is as below:

RICON S9910 GPRS/CDMA DTU User Manual Chapter 1: Introduction
M80-771001-01 3
Since H7000 wireless DDN system has been operated for many years in China, it proves that the system is widely applied and works stably. The system is a dedicated ideal data transmission channel for industrial applications. The manual explains setup procedure of S9910 DTU and provides the system operation guide.
1.2 System Features
Basic Features
GPRS Part Support dual band GSM/GPRS Complies with ETSI GSM Phase 2+ Standard Real time clock
CDMA Part Support 800/1900MHz band Complies with FCC/SAR and CDG 1/2&3 Real time clock
Enhanced Features
Transparent data transmission and protocol conversion Always online and operation mode selection Support the virtual private data network Support data service center dynamic IP address and domain name STK or UTK card function configuration Support TTL/RS-232/422/485 or Ethernet data interface Support voice interface System maintenance and configuration interface Support UGI based remote configuration and maintenance (integrated
with data service center) Support multiple data service center IP address and domain name 1+0/1+1/1:1 system cascading (Option) SMS backup channel (Option) Support system upgrade from radio (Option) Xmodem interface software upgrade Diagnostic and alarm output
RICON S9910 GPRS/CDMA DTU User Manual Chapter 1: Introduction
M80-771001-01 4
EMC/EMI design Power management for wide range power input Industrial class pluggable terminal for signal connections
1.3 System Components
H7000 wireless DDN system consists of DTU (there are following types can be selected in accordance with specified applications):
H7111 GPRS DTU: TTL data interface, built-in design; H7112 GPRS DTU: RS-232/422/485 data interface; H7118 GPRS DTU: RS-232/422/485 data interface, high performance; H7161 GPRS DTU: Ethernet interface; H7611 CDMA DTU: TTL data interface; H7612 CDMA DTU: RS-232/422/485 data interface; H7661 CDMA DTU: Ethernet interface; S9910 CDMA 1x DTU: RS-232/422/485 data interface, platform
designed with customer specified options. Data service center (There are two options for customer applications):
H7030 wireless DDN data service center development pack: provides classes, functions packages and the ActiveX controls. Meanwhile, Virtual Serial Port Divers can be provided for existing system selections;
H7036 wireless DDN data service center router: it transfers the user data and converts the transmission protocol; it can be connected with the broadband network access and the GPRS/CDMA 1x network to transmit and convert the data from/to GPRS/CDMA DTU, and then transmit the data to user application data service center.
1.4 Philosophy
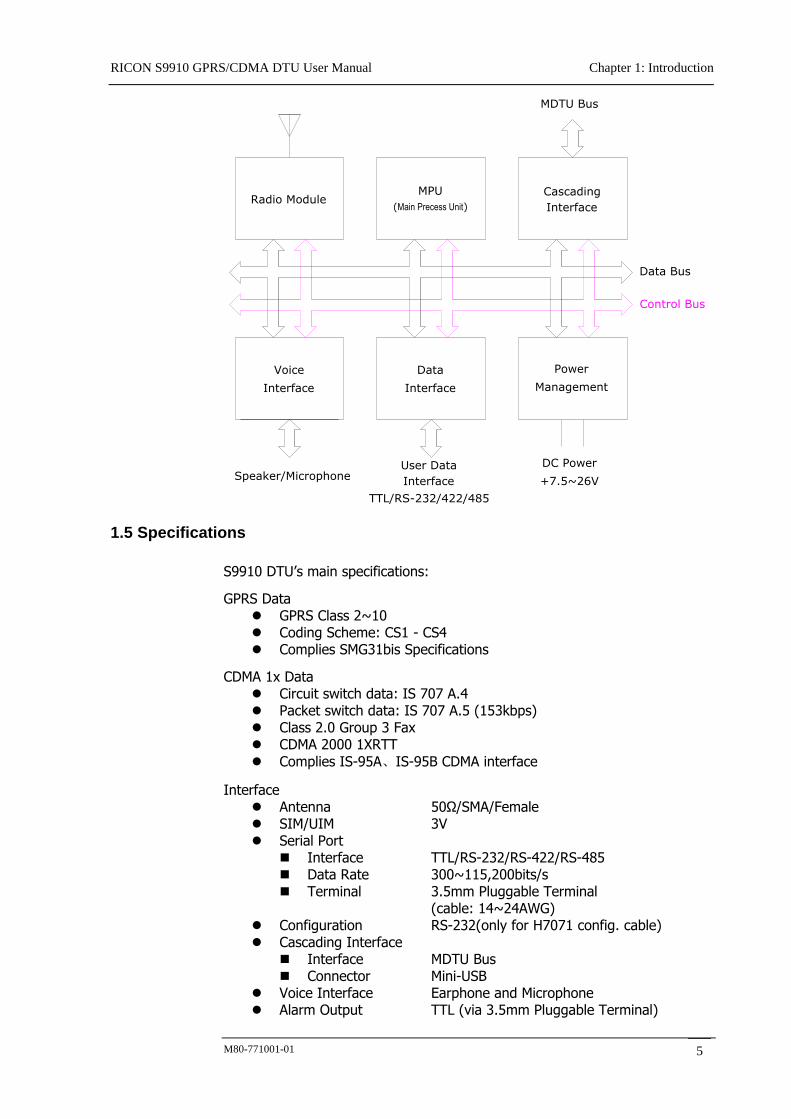
S9910 DTU is a product working at cellular data network to provide data service for industrial applications, such as SCADA system, automatic traffic control and finance, etc. Co-working with data service center, it provides a transparent data channel for customer specified applications. S9910 DTU schematic block diagram is as blow:
RICON S9910 GPRS/CDMA DTU User Manual Chapter 1: Introduction
M80-771001-01 5
Speaker/Microphone
MDTU Bus
User Data
Interface
TTL/RS-232/422/485
DC Power
+7.5~26V
Control Bus
Data Bus
Data
Interface
Voice
Interface
Power
Management
Cascading
Interface
MPU
(Main Precess Unit)Radio Module
1.5 Specifications
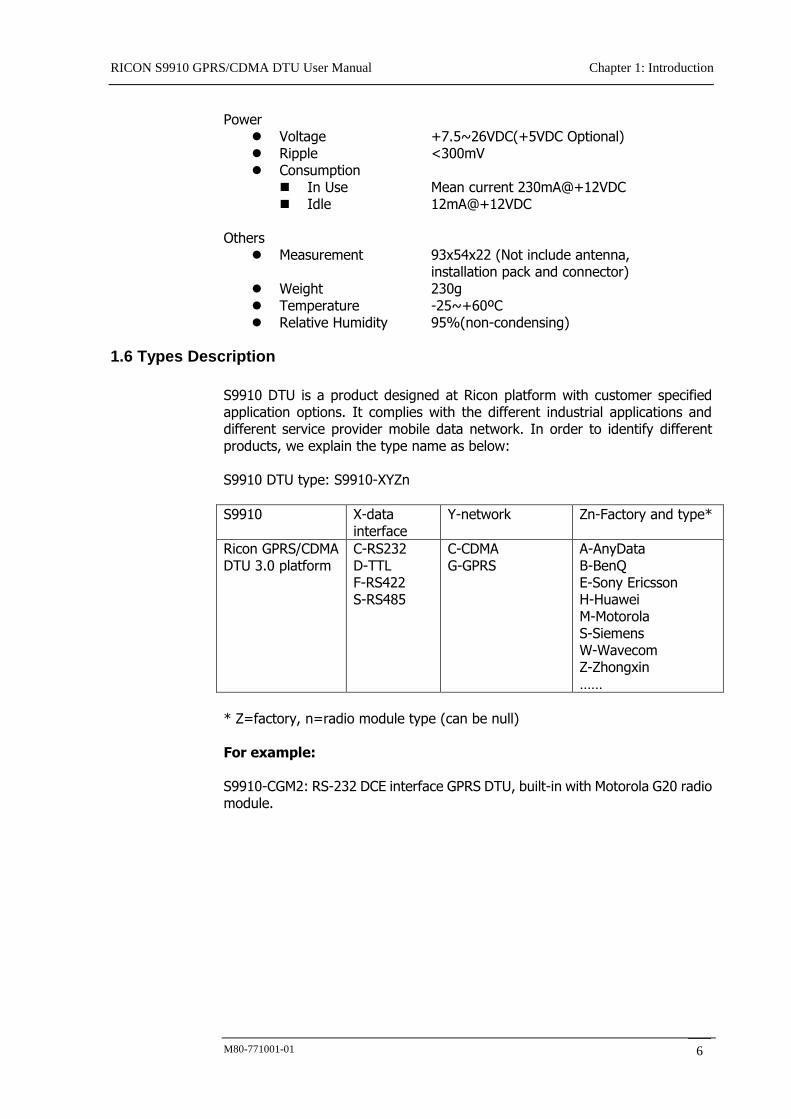
S9910 DTU’s main specifications:
GPRS Data GPRS Class 2~10 Coding Scheme: CS1 - CS4 Complies SMG31bis Specifications
CDMA 1x Data Circuit switch data: IS 707 A.4 Packet switch data: IS 707 A.5 (153kbps) Class 2.0 Group 3 Fax CDMA 2000 1XRTT
Complies IS-95A、IS-95B CDMA interface
Interface Antenna 50Ω/SMA/Female SIM/UIM 3V Serial Port
Interface TTL/RS-232/RS-422/RS-485 Data Rate 300~115,200bits/s Terminal 3.5mm Pluggable Terminal (cable: 14~24AWG)
Configuration RS-232(only for H7071 config. cable) Cascading Interface
Interface MDTU Bus Connector Mini-USB
Voice Interface Earphone and Microphone Alarm Output TTL (via 3.5mm Pluggable Terminal)
RICON S9910 GPRS/CDMA DTU User Manual Chapter 1: Introduction
M80-771001-01 6
Power
Voltage +7.5~26VDC(+5VDC Optional) Ripple <300mV Consumption
In Use Mean current 230mA@+12VDC Idle 12mA@+12VDC
Others Measurement 93x54x22 (Not include antenna, installation pack and connector) Weight 230g Temperature -25~+60ºC Relative Humidity 95%(non-condensing)
1.6 Types Description
S9910 DTU is a product designed at Ricon platform with customer specified application options. It complies with the different industrial applications and different service provider mobile data network. In order to identify different products, we explain the type name as below: S9910 DTU type: S9910-XYZn
S9910 X-data interface
Y-network Zn-Factory and type*
Ricon GPRS/CDMA DTU 3.0 platform
C-RS232 D-TTL F-RS422 S-RS485
C-CDMA G-GPRS
A-AnyData B-BenQ E-Sony Ericsson H-Huawei M-Motorola S-Siemens W-Wavecom Z-Zhongxin ……
* Z=factory, n=radio module type (can be null) For example: S9910-CGM2: RS-232 DCE interface GPRS DTU, built-in with Motorola G20 radio module.
S9910 GPRS/CDMA DTU User Manual Chapter 2: Installation
M80-771001-01 7
Chapter 2 Installation
This chapter describes the S9910 GPRS/CDMA DTU installation procedures, power on and initial setup.
1. General 2. Open Box 3. Installation and Cable Connection 4. Grounding 5. Power Supply 6. Check the Mobile Network
2.1 General
S9910 GPRS/CDMA DTU should be installed and configured properly before putting it in service. The installation and configuration should be done or supervised by Ricon qualified engineer.
Attention: Do not install S9910 GPRS/CDMA DTU or connect/disconnect its cable when it is power on.
2.2 Open Box
In order to protect products during shipment, S9910 GPRS/CDMA DTU has been packed properly. You may need to keep the packing materials for reshipping after you open the pack box. S9910 GPRS/CDMA DTU package includes.
S9910 DTU 1 piece (Packed according to P/O) User Manual 1 copy (CD-ROM) Qualified & Repair Card 1 piece
Optional Accessories:
Standard Antenna Vehicle Antenna Directional Antenna 220VAC Adapter Cascading Cable (Mini-USB/Length 80cm) H7071 Configuration Cable
After you open the box, you should count it carefully with your purchase order.

S9910 GPRS/CDMA DTU User Manual Chapter 2: Installation
M80-771001-01 8
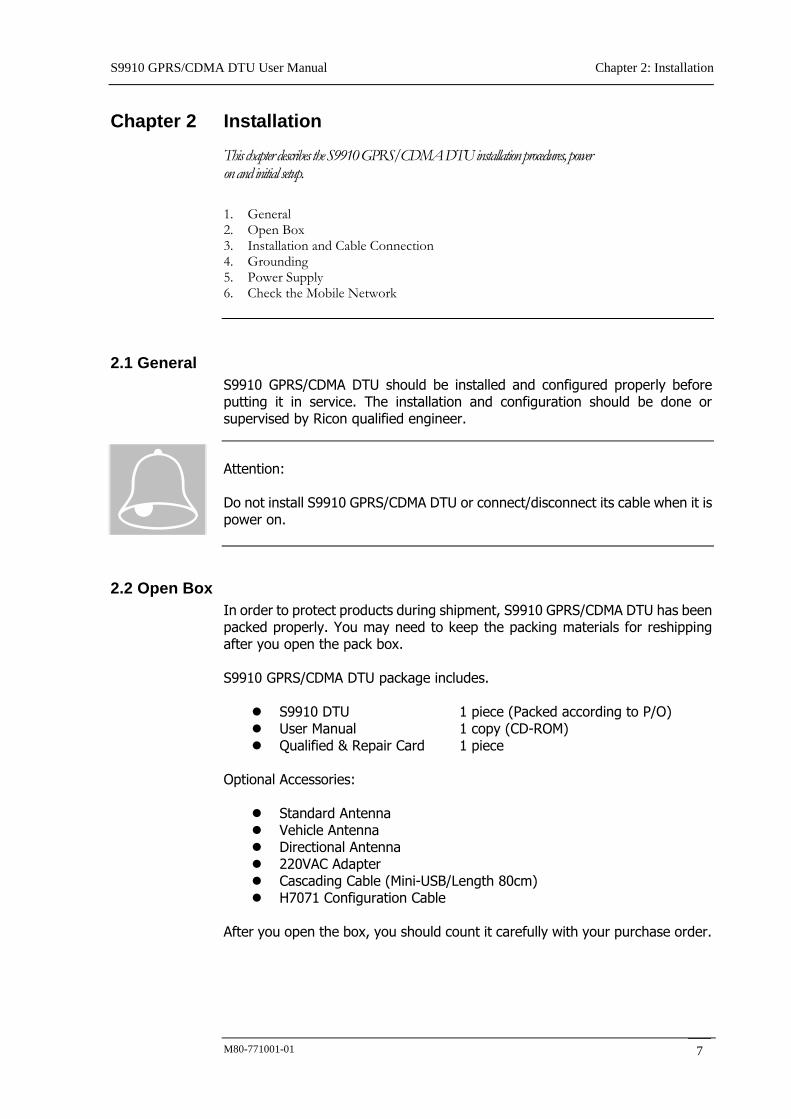
2.3 Installation and Cable Connection
Measurement S9910 DTU outside measurement and installation position:
SIM/UIM
Open top SIM/UIM protection cover, and then insert SIM or UIM from left-top side. SIM/UIM card conductors should face downside and the gap face to outside. The SIM/UIM card also need to be inserted properly and then cove back the SIM/UIM protection cover in order to prevent the SIM/UIM card from dropping out during shipping. Slide the SIM/UIM card by your finger to take out the SIM/UIM card.
S9910 GPRS/CDMA DTU User Manual Chapter 2: Installation
M80-771001-01 9
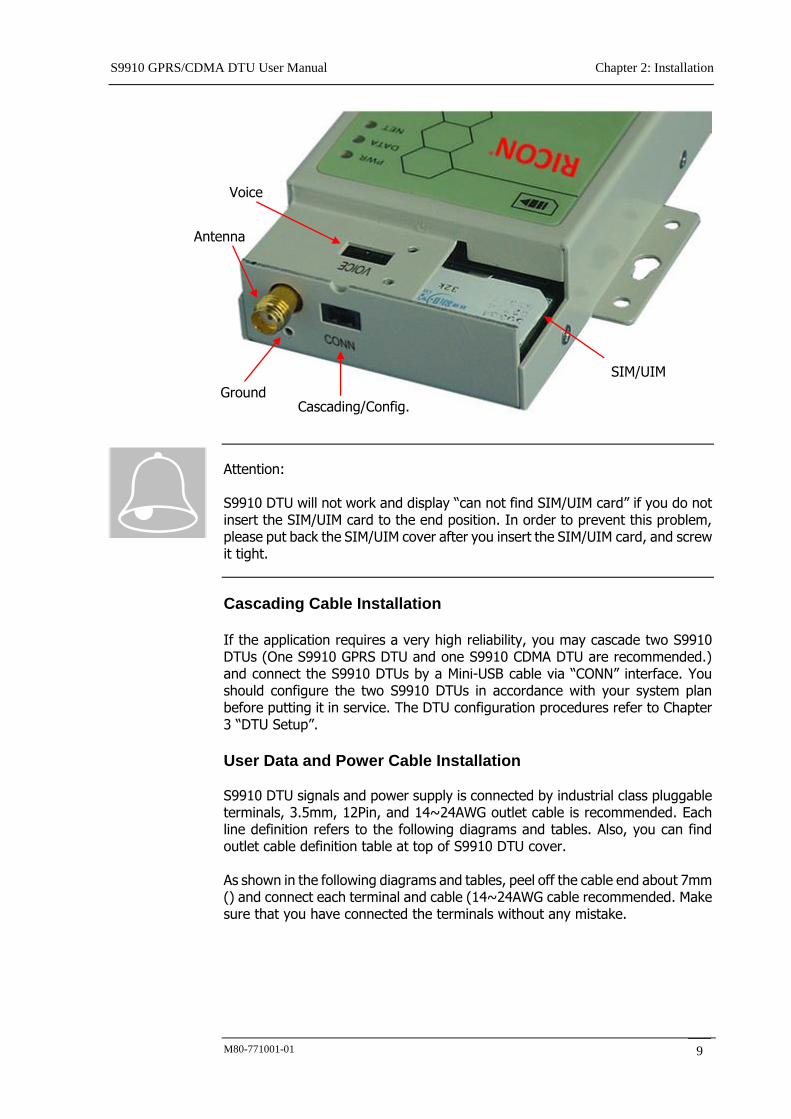
Attention: S9910 DTU will not work and display “can not find SIM/UIM card” if you do not insert the SIM/UIM card to the end position. In order to prevent this problem, please put back the SIM/UIM cover after you insert the SIM/UIM card, and screw it tight.
Cascading Cable Installation If the application requires a very high reliability, you may cascade two S9910 DTUs (One S9910 GPRS DTU and one S9910 CDMA DTU are recommended.) and connect the S9910 DTUs by a Mini-USB cable via “CONN” interface. You should configure the two S9910 DTUs in accordance with your system plan before putting it in service. The DTU configuration procedures refer to Chapter 3 “DTU Setup”.
User Data and Power Cable Installation S9910 DTU signals and power supply is connected by industrial class pluggable terminals, 3.5mm, 12Pin, and 14~24AWG outlet cable is recommended. Each line definition refers to the following diagrams and tables. Also, you can find outlet cable definition table at top of S9910 DTU cover. As shown in the following diagrams and tables, peel off the cable end about 7mm () and connect each terminal and cable (14~24AWG cable recommended. Make sure that you have connected the terminals without any mistake.
Cascading/Config.
Voice
SIM/UIM
Ground
Antenna
S9910 GPRS/CDMA DTU User Manual Chapter 2: Installation
M80-771001-01 10
7mm
14~24AWG
7mm7mm
14~24AWG
Attention: The power cable should be connected correctly. We suggest double check before switch it on. Wrong connections may destroy the equipment. Power terminals: Pin 11 and Pin 12; Here: Pin 11 is “GND”, Pin 12 is power input “Vin” (+7.5~+26VDC).
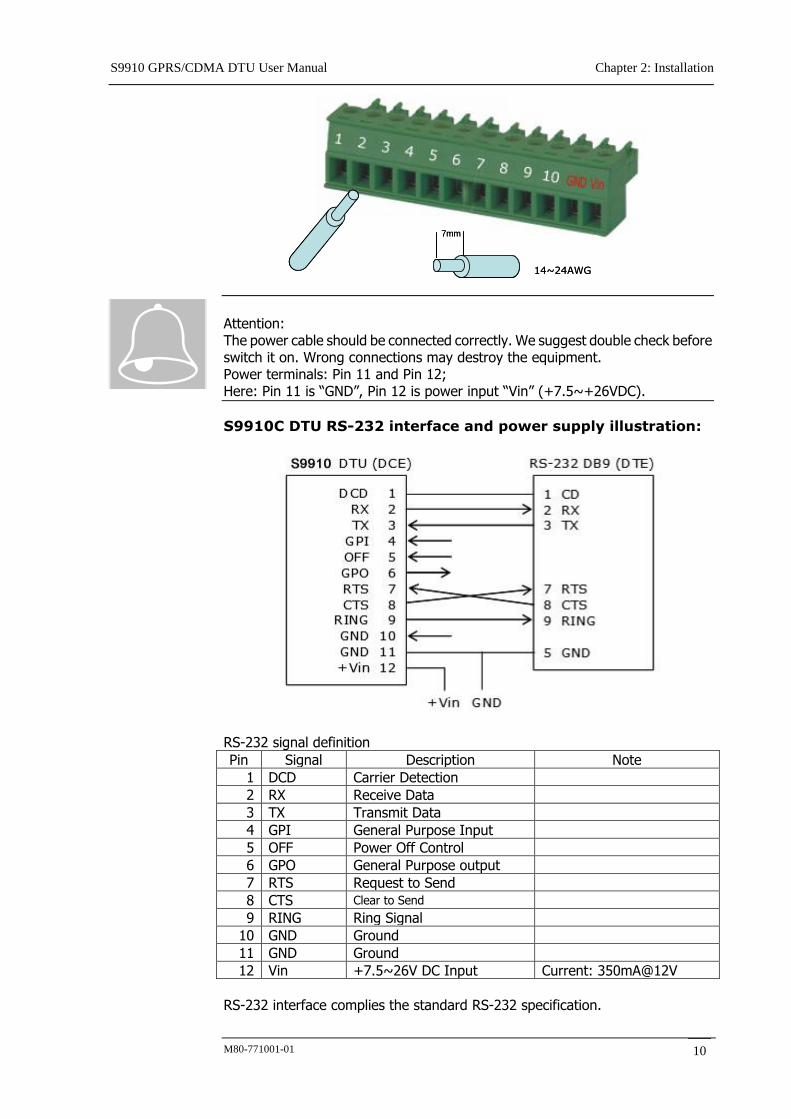
S9910C DTU RS-232 interface and power supply illustration:
RS-232 signal definition
Pin Signal Description Note
1 DCD Carrier Detection
2 RX Receive Data
3 TX Transmit Data
4 GPI General Purpose Input
5 OFF Power Off Control
6 GPO General Purpose output
7 RTS Request to Send
8 CTS Clear to Send
9 RING Ring Signal
10 GND Ground
11 GND Ground
12 Vin +7.5~26V DC Input Current: 350mA@12V
RS-232 interface complies the standard RS-232 specification.
S9910 GPRS/CDMA DTU User Manual Chapter 2: Installation
M80-771001-01 11
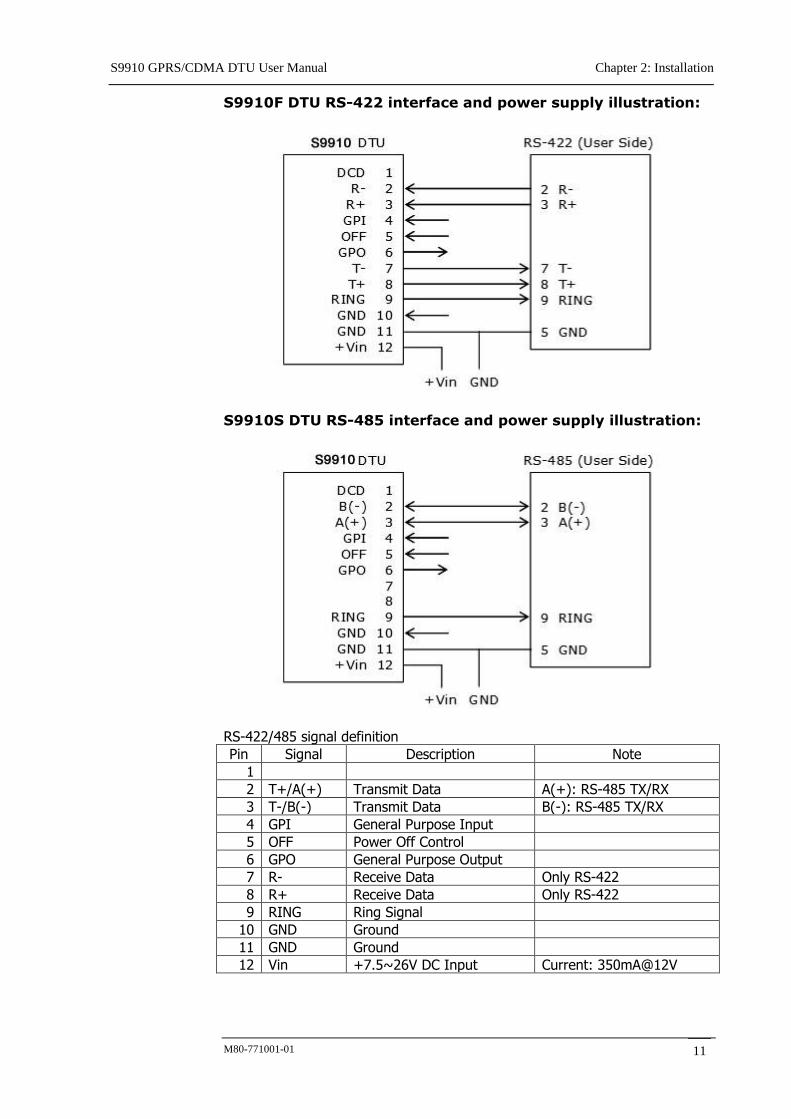
S9910F DTU RS-422 interface and power supply illustration:
S9910S DTU RS-485 interface and power supply illustration:
RS-422/485 signal definition
Pin Signal Description Note
1
2 T+/A(+) Transmit Data A(+): RS-485 TX/RX
3 T-/B(-) Transmit Data B(-): RS-485 TX/RX
4 GPI General Purpose Input
5 OFF Power Off Control
6 GPO General Purpose Output
7 R- Receive Data Only RS-422
8 R+ Receive Data Only RS-422
9 RING Ring Signal
10 GND Ground
11 GND Ground
12 Vin +7.5~26V DC Input Current: 350mA@12V
S9910 GPRS/CDMA DTU User Manual Chapter 2: Installation
M80-771001-01 12
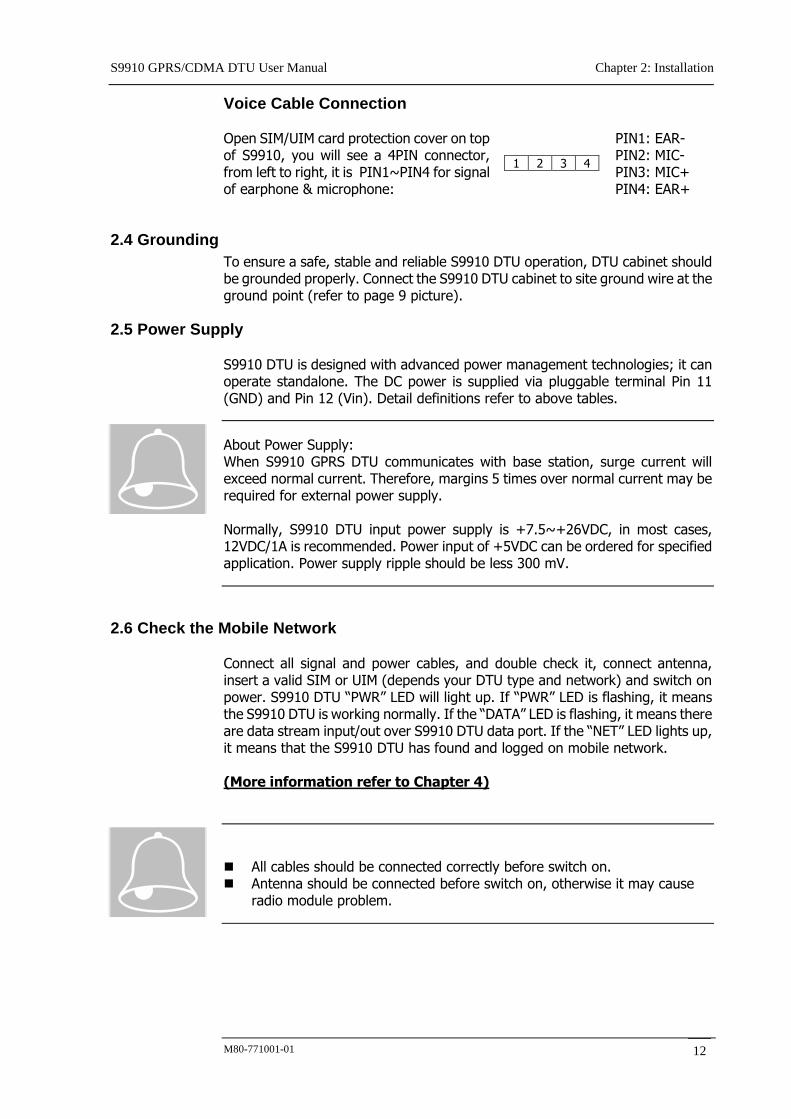
Voice Cable Connection Open SIM/UIM card protection cover on top of S9910, you will see a 4PIN connector, from left to right, it is PIN1~PIN4 for signal of earphone & microphone:
1 2 3 4
PIN1: EAR- PIN2: MIC- PIN3: MIC+ PIN4: EAR+
2.4 Grounding
To ensure a safe, stable and reliable S9910 DTU operation, DTU cabinet should be grounded properly. Connect the S9910 DTU cabinet to site ground wire at the ground point (refer to page 9 picture).
2.5 Power Supply
S9910 DTU is designed with advanced power management technologies; it can operate standalone. The DC power is supplied via pluggable terminal Pin 11 (GND) and Pin 12 (Vin). Detail definitions refer to above tables.
About Power Supply: When S9910 GPRS DTU communicates with base station, surge current will exceed normal current. Therefore, margins 5 times over normal current may be required for external power supply. Normally, S9910 DTU input power supply is +7.5~+26VDC, in most cases, 12VDC/1A is recommended. Power input of +5VDC can be ordered for specified application. Power supply ripple should be less 300 mV.
2.6 Check the Mobile Network
Connect all signal and power cables, and double check it, connect antenna, insert a valid SIM or UIM (depends your DTU type and network) and switch on power. S9910 DTU “PWR” LED will light up. If “PWR” LED is flashing, it means the S9910 DTU is working normally. If the “DATA” LED is flashing, it means there are data stream input/out over S9910 DTU data port. If the “NET” LED lights up, it means that the S9910 DTU has found and logged on mobile network. (More information refer to Chapter 4)
All cables should be connected correctly before switch on. Antenna should be connected before switch on, otherwise it may cause
radio module problem.
S9910 GPRS/CDMA DTU User Manual Chapter 3: DTU Setup
M80-771001-01 13
Chapter 3 DTU Setup
This chapter introduces the S9910 GPRS/CDMA DTU parameters configuration before putting it in service.
1. Setup Connection 2. Parameters configuration
S9910 GPRS/CDMA DTU is built-in with a set of DTU Management Tools for DTU configuration, management and commissioning. Use the tools to configure DTU parameters before putting it in service and change the configurations during system commissioning. The tools can also be used to upgrade the DTU software. After entering the DTU Management Tools, you can configure and manage your system setting in accordance with your system plan. Type H or ? to display the DTU operation menu. Press ESC key to discharge the parameters you have typed. Press Enter key to confirm your setting. Refer to the following descriptions for more details.
3.1 Setup Connection
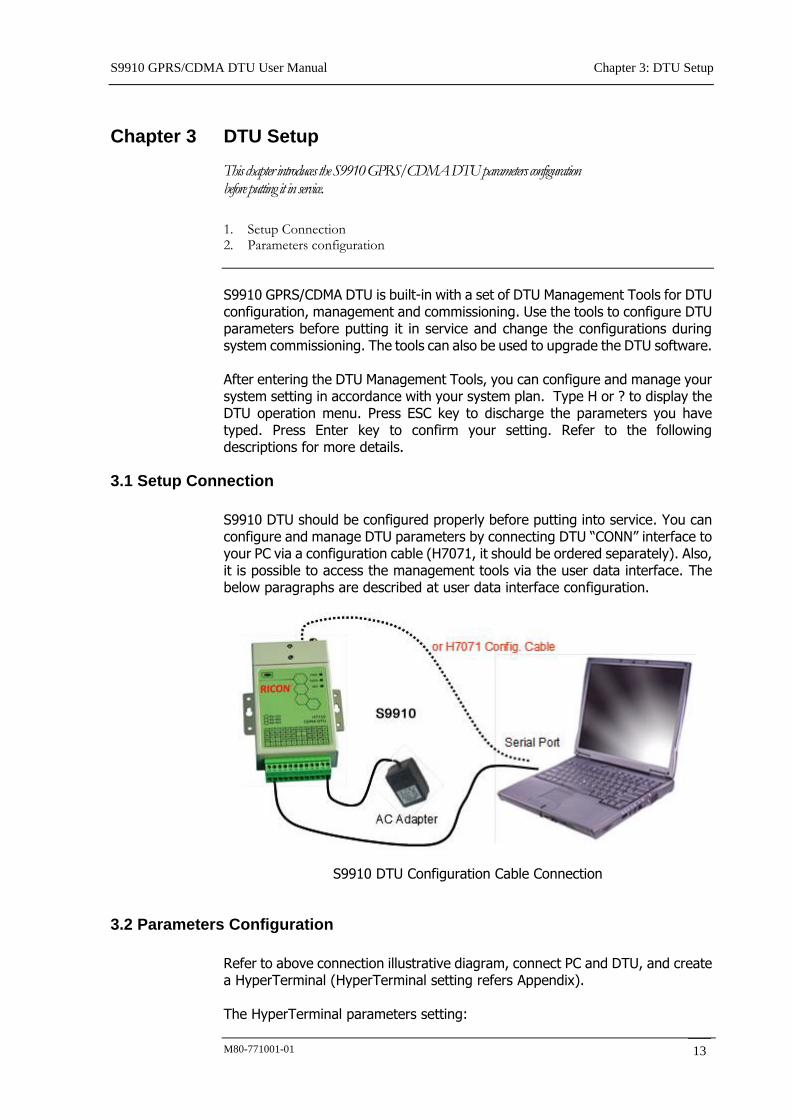
S9910 DTU should be configured properly before putting into service. You can configure and manage DTU parameters by connecting DTU “CONN” interface to your PC via a configuration cable (H7071, it should be ordered separately). Also, it is possible to access the management tools via the user data interface. The below paragraphs are described at user data interface configuration.
S9910 DTU Configuration Cable Connection
3.2 Parameters Configuration
Refer to above connection illustrative diagram, connect PC and DTU, and create a HyperTerminal (HyperTerminal setting refers Appendix). The HyperTerminal parameters setting:
S9910 GPRS/CDMA DTU User Manual Chapter 3: DTU Setup
M80-771001-01 14
Rate: 57600baud Bits: 8bit Parity: None Stop Bits 1bit Flow Control: None
Start a HyperTerminal you have created on you PC, and hold your PC SPACE key, then power on S9910 DTU. The below diagram will appear on your PC screen, and then release the SPACE key. (The HyperTerminal parameters setting refers to described Appendix or Windows operation system manual.)
Notice: 1. To enter the S9910 DTU configuration menu, you have to press and hold
your PC Space key, and then power on the DTU unit the below information is displaying on the screen.
2. The HyperTerminal communication port rate should be set at 57600baud, though it has been configured at other rate for communicating with DTU. However, it must be set at 57600baud to enter the DTU configuration menu.
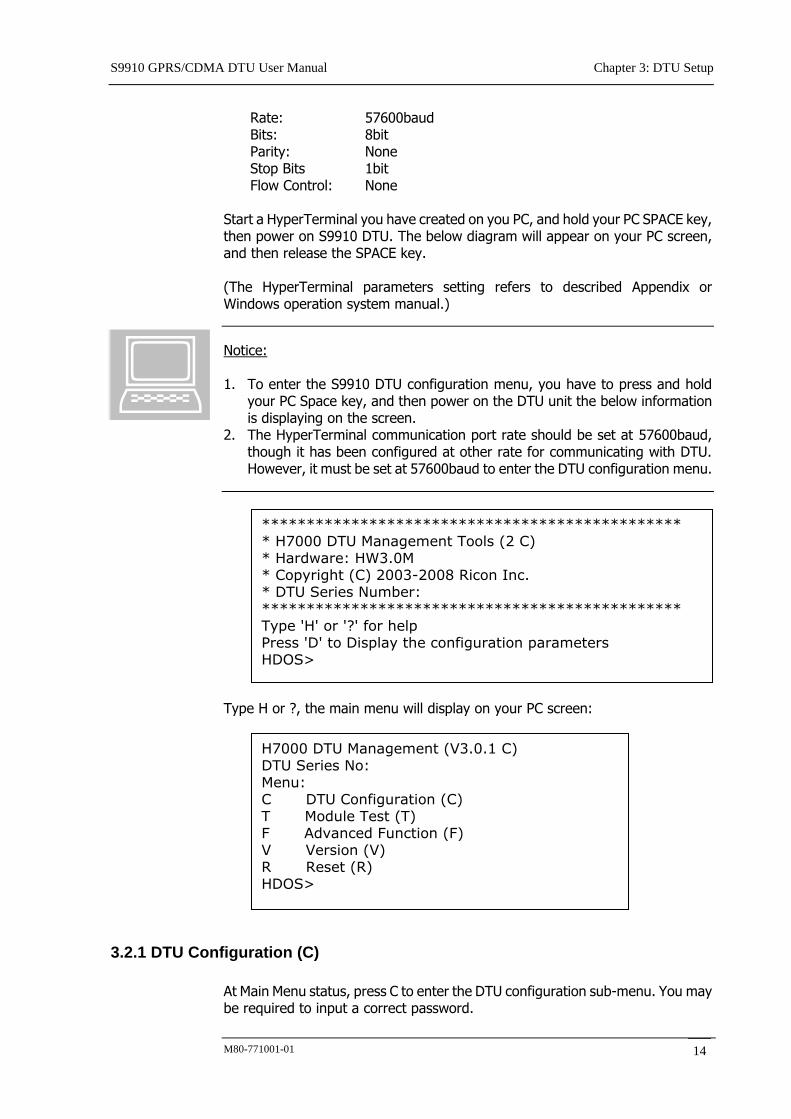
Type H or ?, the main menu will display on your PC screen:
3.2.1 DTU Configuration (C)
At Main Menu status, press C to enter the DTU configuration sub-menu. You may be required to input a correct password.
H7000 DTU Management (V3.0.1 C) DTU Series No: Menu: C DTU Configuration (C) T Module Test (T) F Advanced Function (F) V Version (V) R Reset (R) HDOS>
*********************************************** * H7000 DTU Management Tools (2 C) * Hardware: HW3.0M * Copyright (C) 2003-2008 Ricon Inc. * DTU Series Number: *********************************************** Type 'H' or '?' for help Press 'D' to Display the configuration parameters HDOS>
S9910 GPRS/CDMA DTU User Manual Chapter 3: DTU Setup
M80-771001-01 15
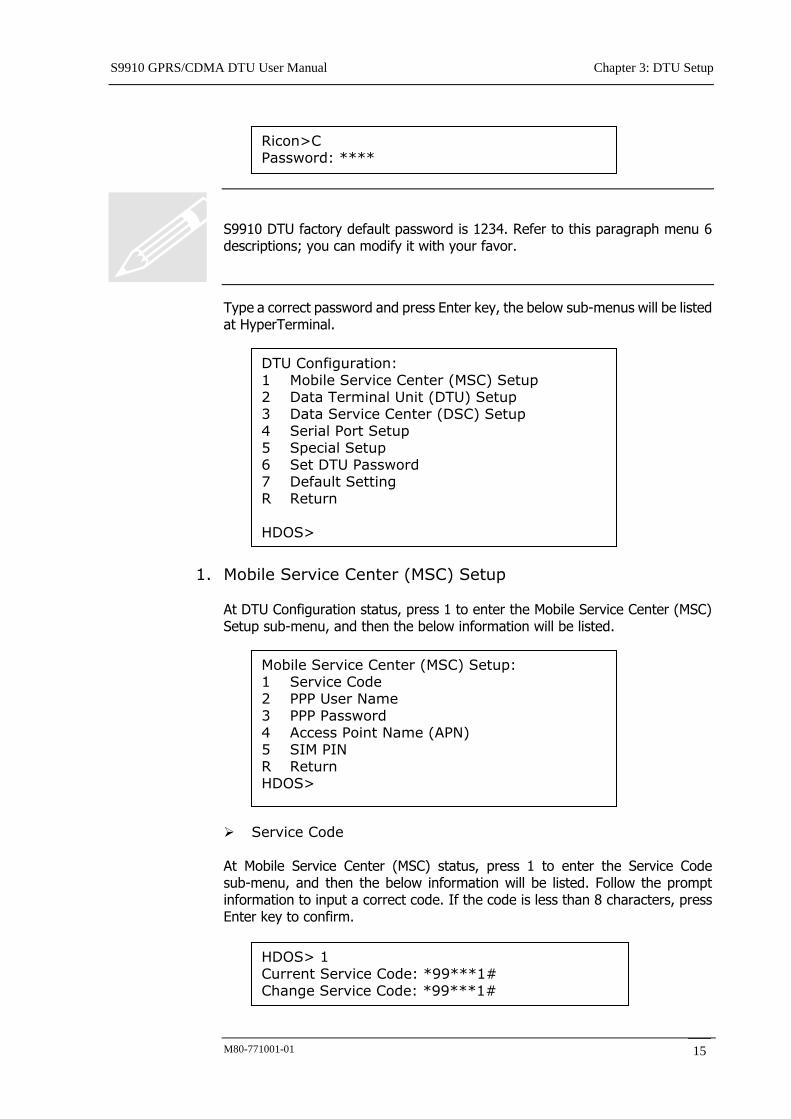
S9910 DTU factory default password is 1234. Refer to this paragraph menu 6 descriptions; you can modify it with your favor.
Type a correct password and press Enter key, the below sub-menus will be listed at HyperTerminal.
1. Mobile Service Center (MSC) Setup At DTU Configuration status, press 1 to enter the Mobile Service Center (MSC) Setup sub-menu, and then the below information will be listed.
Service Code At Mobile Service Center (MSC) status, press 1 to enter the Service Code sub-menu, and then the below information will be listed. Follow the prompt information to input a correct code. If the code is less than 8 characters, press Enter key to confirm.
DTU Configuration: 1 Mobile Service Center (MSC) Setup 2 Data Terminal Unit (DTU) Setup 3 Data Service Center (DSC) Setup 4 Serial Port Setup 5 Special Setup 6 Set DTU Password 7 Default Setting R Return HDOS>
HDOS> 1 Current Service Code: *99***1# Change Service Code: *99***1#
Ricon>C Password: ****
Mobile Service Center (MSC) Setup: 1 Service Code 2 PPP User Name 3 PPP Password 4 Access Point Name (APN) 5 SIM PIN R Return HDOS>
S9910 GPRS/CDMA DTU User Manual Chapter 3: DTU Setup
M80-771001-01 16
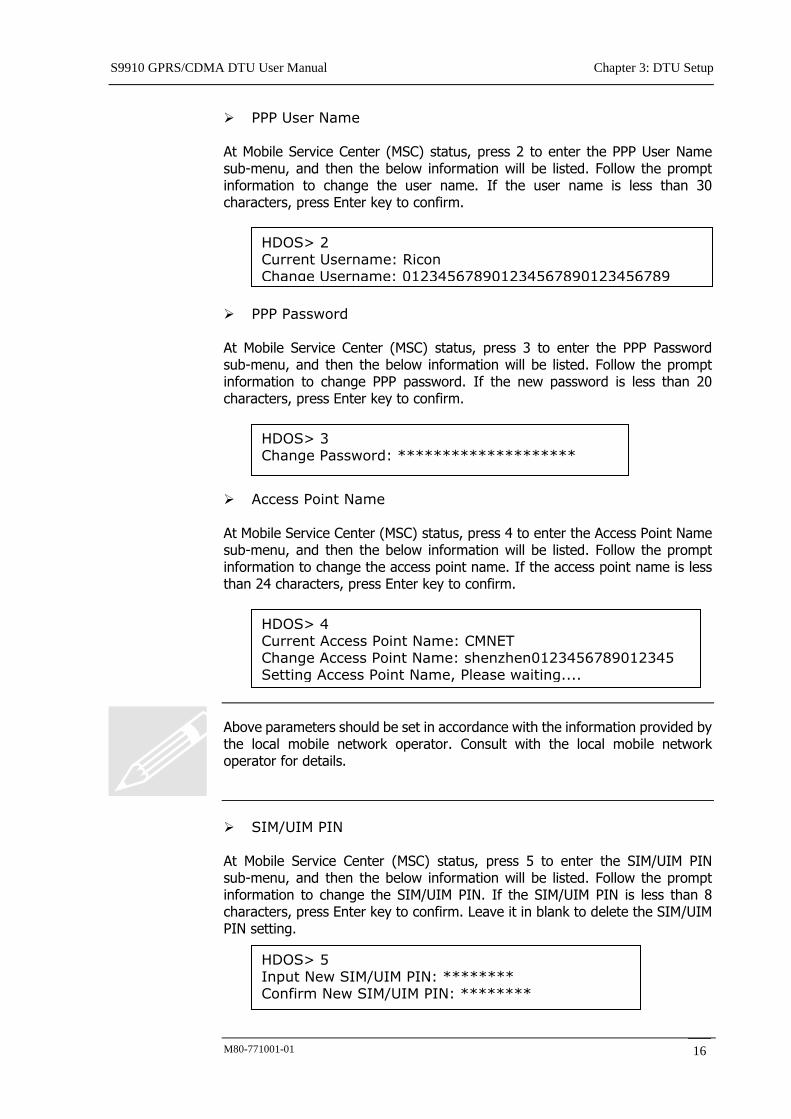
PPP User Name At Mobile Service Center (MSC) status, press 2 to enter the PPP User Name sub-menu, and then the below information will be listed. Follow the prompt information to change the user name. If the user name is less than 30 characters, press Enter key to confirm.
PPP Password At Mobile Service Center (MSC) status, press 3 to enter the PPP Password sub-menu, and then the below information will be listed. Follow the prompt information to change PPP password. If the new password is less than 20 characters, press Enter key to confirm.
Access Point Name At Mobile Service Center (MSC) status, press 4 to enter the Access Point Name sub-menu, and then the below information will be listed. Follow the prompt information to change the access point name. If the access point name is less than 24 characters, press Enter key to confirm.
Above parameters should be set in accordance with the information provided by the local mobile network operator. Consult with the local mobile network operator for details.
SIM/UIM PIN At Mobile Service Center (MSC) status, press 5 to enter the SIM/UIM PIN sub-menu, and then the below information will be listed. Follow the prompt information to change the SIM/UIM PIN. If the SIM/UIM PIN is less than 8 characters, press Enter key to confirm. Leave it in blank to delete the SIM/UIM PIN setting.
HDOS> 2 Current Username: Ricon Change Username: 012345678901234567890123456789
HDOS> 3 Change Password: ********************
HDOS> 5 Input New SIM/UIM PIN: ******** Confirm New SIM/UIM PIN: ********
HDOS> 4 Current Access Point Name: CMNET Change Access Point Name: shenzhen0123456789012345 Setting Access Point Name, Please waiting....
S9910 GPRS/CDMA DTU User Manual Chapter 3: DTU Setup
M80-771001-01 17
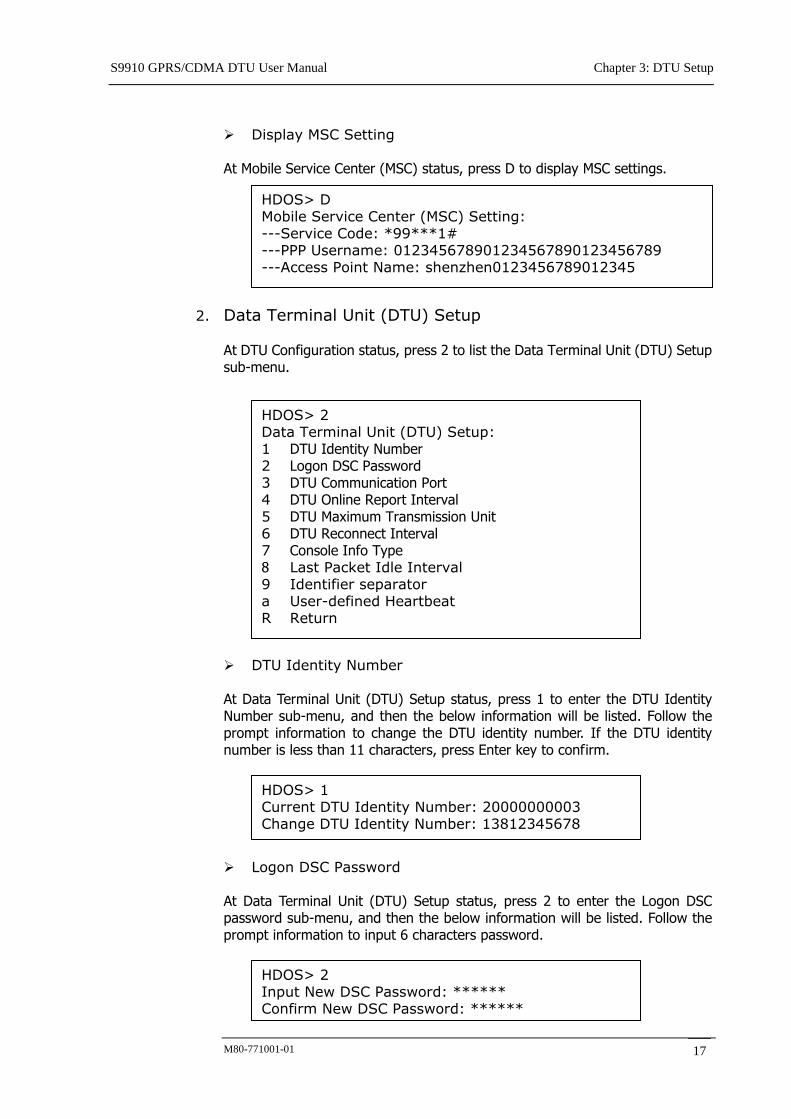
Display MSC Setting At Mobile Service Center (MSC) status, press D to display MSC settings.
2. Data Terminal Unit (DTU) Setup At DTU Configuration status, press 2 to list the Data Terminal Unit (DTU) Setup sub-menu.
DTU Identity Number At Data Terminal Unit (DTU) Setup status, press 1 to enter the DTU Identity Number sub-menu, and then the below information will be listed. Follow the prompt information to change the DTU identity number. If the DTU identity number is less than 11 characters, press Enter key to confirm.
Logon DSC Password At Data Terminal Unit (DTU) Setup status, press 2 to enter the Logon DSC password sub-menu, and then the below information will be listed. Follow the prompt information to input 6 characters password.
HDOS> 1 Current DTU Identity Number: 20000000003 Change DTU Identity Number: 13812345678
HDOS> 2 Input New DSC Password: ****** Confirm New DSC Password: ******
HDOS> D Mobile Service Center (MSC) Setting: ---Service Code: *99***1# ---PPP Username: 012345678901234567890123456789 ---Access Point Name: shenzhen0123456789012345
HDOS> 2 Data Terminal Unit (DTU) Setup: 1 DTU Identity Number 2 Logon DSC Password 3 DTU Communication Port 4 DTU Online Report Interval 5 DTU Maximum Transmission Unit 6 DTU Reconnect Interval 7 Console Info Type 8 Last Packet Idle Interval 9 Identifier separator a User-defined Heartbeat R Return R Return
S9910 GPRS/CDMA DTU User Manual Chapter 3: DTU Setup
M80-771001-01 18
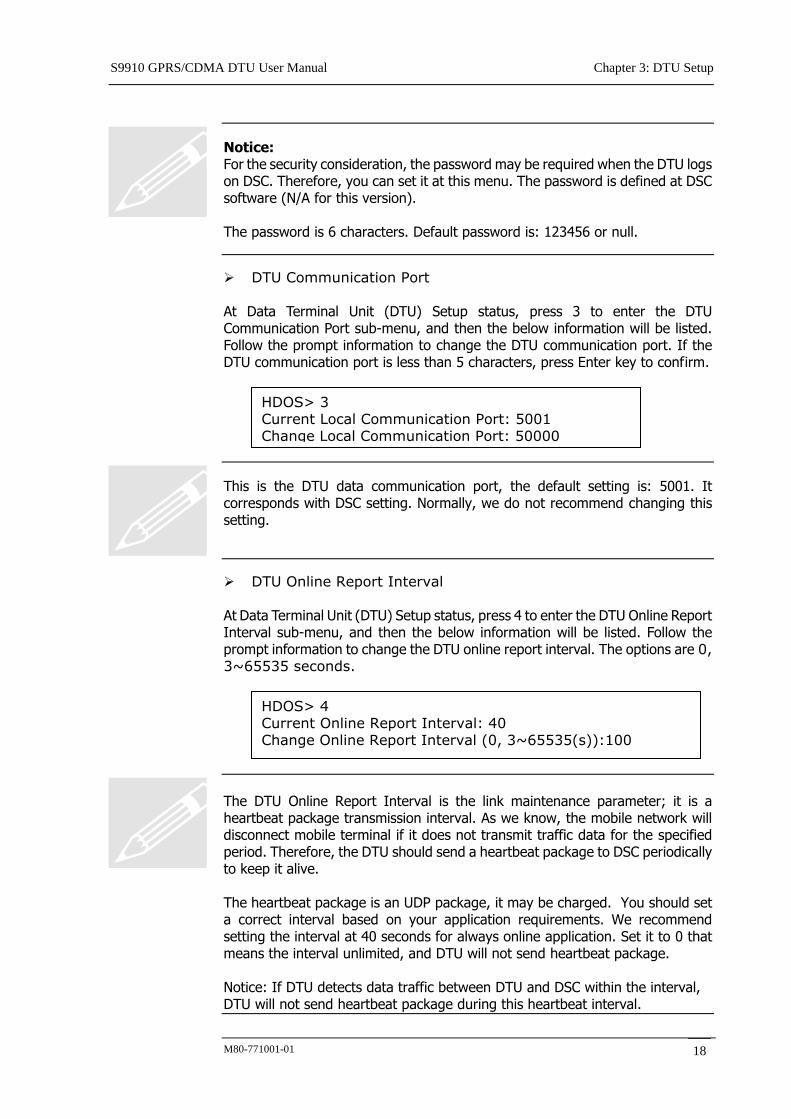
Notice: For the security consideration, the password may be required when the DTU logs on DSC. Therefore, you can set it at this menu. The password is defined at DSC software (N/A for this version). The password is 6 characters. Default password is: 123456 or null.
DTU Communication Port At Data Terminal Unit (DTU) Setup status, press 3 to enter the DTU Communication Port sub-menu, and then the below information will be listed. Follow the prompt information to change the DTU communication port. If the DTU communication port is less than 5 characters, press Enter key to confirm.
This is the DTU data communication port, the default setting is: 5001. It corresponds with DSC setting. Normally, we do not recommend changing this setting.
DTU Online Report Interval At Data Terminal Unit (DTU) Setup status, press 4 to enter the DTU Online Report Interval sub-menu, and then the below information will be listed. Follow the prompt information to change the DTU online report interval. The options are 0, 3~65535 seconds.
The DTU Online Report Interval is the link maintenance parameter; it is a heartbeat package transmission interval. As we know, the mobile network will disconnect mobile terminal if it does not transmit traffic data for the specified period. Therefore, the DTU should send a heartbeat package to DSC periodically to keep it alive. The heartbeat package is an UDP package, it may be charged. You should set a correct interval based on your application requirements. We recommend setting the interval at 40 seconds for always online application. Set it to 0 that means the interval unlimited, and DTU will not send heartbeat package. Notice: If DTU detects data traffic between DTU and DSC within the interval, DTU will not send heartbeat package during this heartbeat interval.
HDOS> 3 Current Local Communication Port: 5001 Change Local Communication Port: 50000
HDOS> 4 Current Online Report Interval: 40 Change Online Report Interval (0, 3~65535(s)):100
S9910 GPRS/CDMA DTU User Manual Chapter 3: DTU Setup
M80-771001-01 19
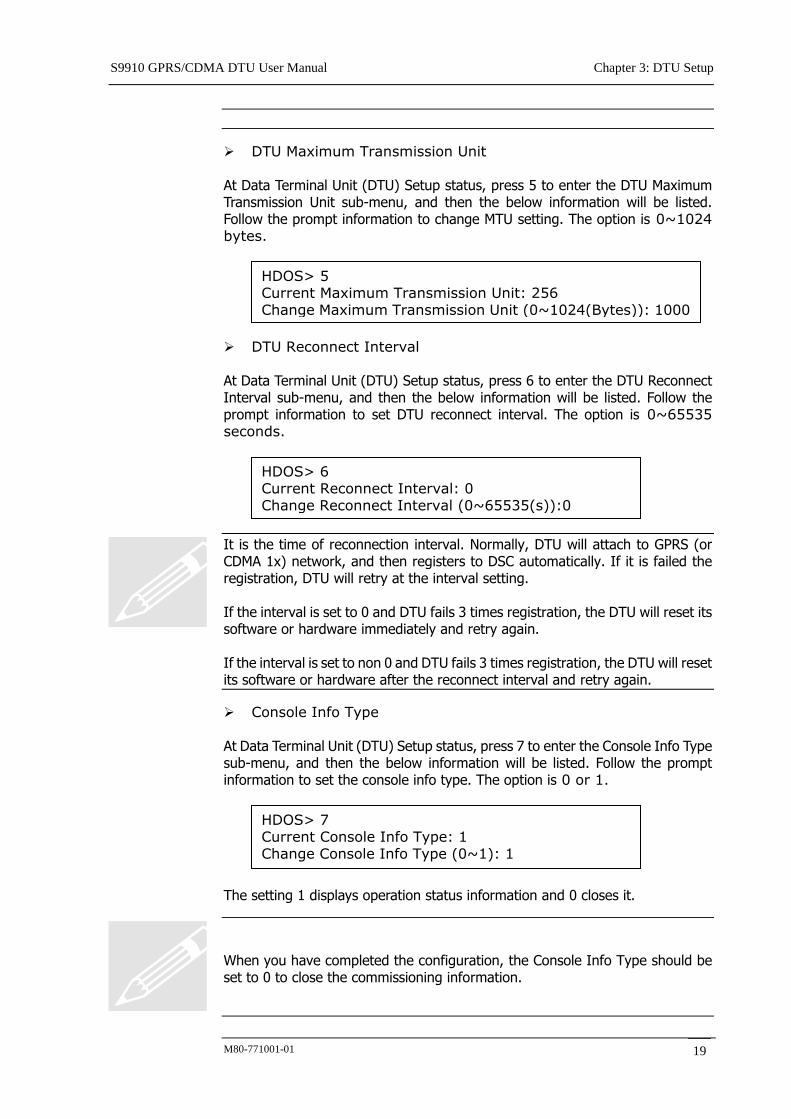
DTU Maximum Transmission Unit At Data Terminal Unit (DTU) Setup status, press 5 to enter the DTU Maximum Transmission Unit sub-menu, and then the below information will be listed. Follow the prompt information to change MTU setting. The option is 0~1024 bytes.
DTU Reconnect Interval At Data Terminal Unit (DTU) Setup status, press 6 to enter the DTU Reconnect Interval sub-menu, and then the below information will be listed. Follow the prompt information to set DTU reconnect interval. The option is 0~65535 seconds.
It is the time of reconnection interval. Normally, DTU will attach to GPRS (or CDMA 1x) network, and then registers to DSC automatically. If it is failed the registration, DTU will retry at the interval setting. If the interval is set to 0 and DTU fails 3 times registration, the DTU will reset its software or hardware immediately and retry again. If the interval is set to non 0 and DTU fails 3 times registration, the DTU will reset its software or hardware after the reconnect interval and retry again.
Console Info Type At Data Terminal Unit (DTU) Setup status, press 7 to enter the Console Info Type sub-menu, and then the below information will be listed. Follow the prompt information to set the console info type. The option is 0 or 1.
The setting 1 displays operation status information and 0 closes it.
When you have completed the configuration, the Console Info Type should be set to 0 to close the commissioning information.
HDOS> 6 Current Reconnect Interval: 0 Change Reconnect Interval (0~65535(s)):0
HDOS> 5 Current Maximum Transmission Unit: 256 Change Maximum Transmission Unit (0~1024(Bytes)): 1000
HDOS> 7 Current Console Info Type: 1 Change Console Info Type (0~1): 1
S9910 GPRS/CDMA DTU User Manual Chapter 3: DTU Setup
M80-771001-01 20
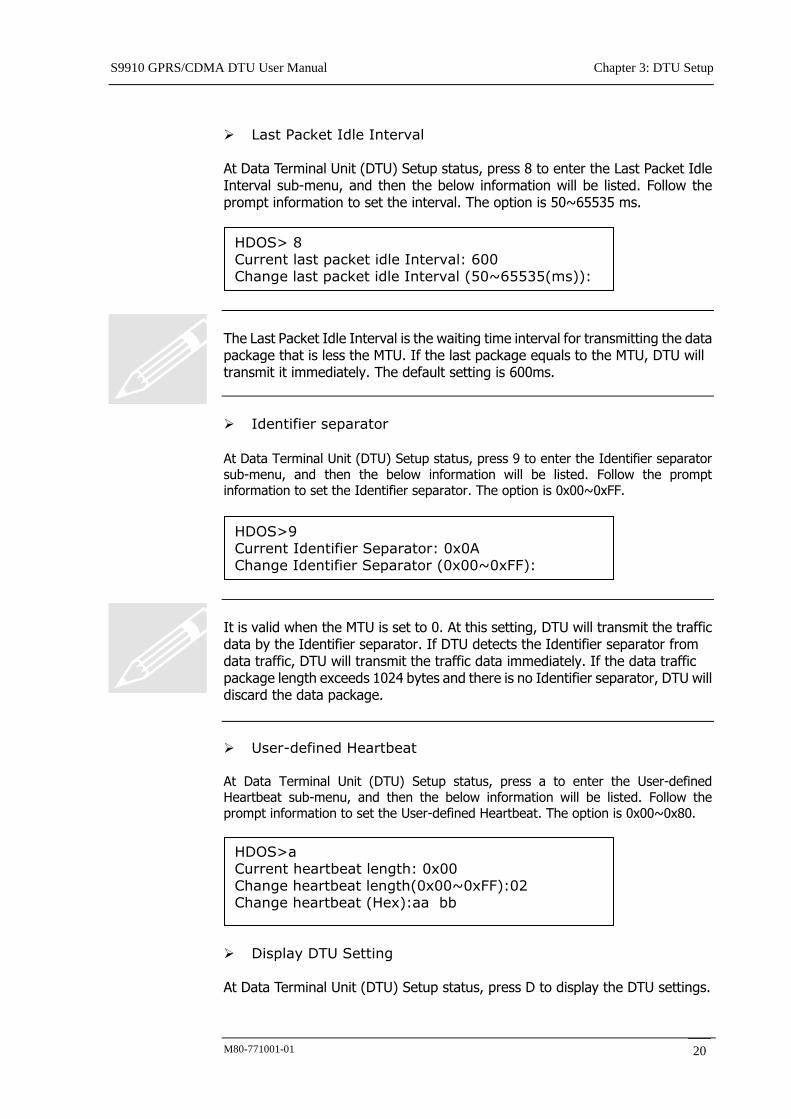
Last Packet Idle Interval At Data Terminal Unit (DTU) Setup status, press 8 to enter the Last Packet Idle Interval sub-menu, and then the below information will be listed. Follow the prompt information to set the interval. The option is 50~65535 ms.
The Last Packet Idle Interval is the waiting time interval for transmitting the data package that is less the MTU. If the last package equals to the MTU, DTU will transmit it immediately. The default setting is 600ms.
Identifier separator
At Data Terminal Unit (DTU) Setup status, press 9 to enter the Identifier separator sub-menu, and then the below information will be listed. Follow the prompt information to set the Identifier separator. The option is 0x00~0xFF.
It is valid when the MTU is set to 0. At this setting, DTU will transmit the traffic data by the Identifier separator. If DTU detects the Identifier separator from data traffic, DTU will transmit the traffic data immediately. If the data traffic package length exceeds 1024 bytes and there is no Identifier separator, DTU will discard the data package.
User-defined Heartbeat At Data Terminal Unit (DTU) Setup status, press a to enter the User-defined Heartbeat sub-menu, and then the below information will be listed. Follow the prompt information to set the User-defined Heartbeat. The option is 0x00~0x80.
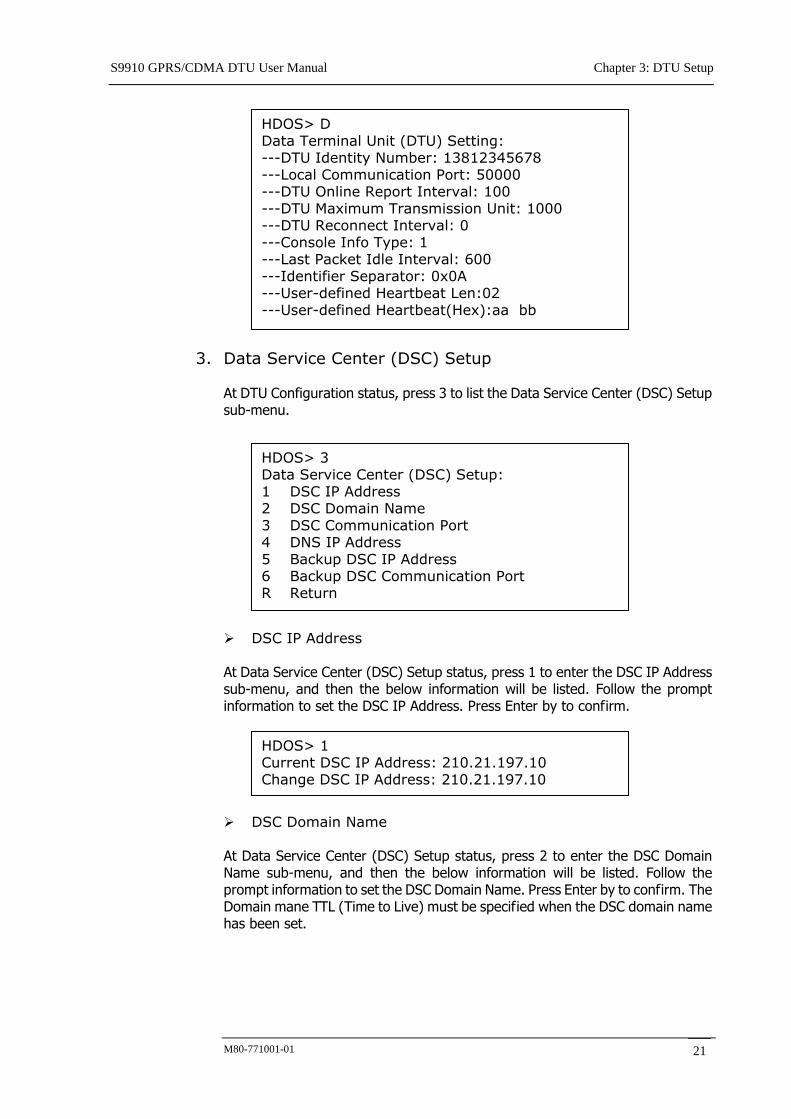
Display DTU Setting At Data Terminal Unit (DTU) Setup status, press D to display the DTU settings.
HDOS> 8 Current last packet idle Interval: 600 Change last packet idle Interval (50~65535(ms)):
HDOS>9 Current Identifier Separator: 0x0A Change Identifier Separator (0x00~0xFF):
HDOS>a Current heartbeat length: 0x00 Change heartbeat length(0x00~0xFF):02 Change heartbeat (Hex):aa bb
S9910 GPRS/CDMA DTU User Manual Chapter 3: DTU Setup
M80-771001-01 21
3. Data Service Center (DSC) Setup
At DTU Configuration status, press 3 to list the Data Service Center (DSC) Setup sub-menu.
DSC IP Address At Data Service Center (DSC) Setup status, press 1 to enter the DSC IP Address sub-menu, and then the below information will be listed. Follow the prompt information to set the DSC IP Address. Press Enter by to confirm.
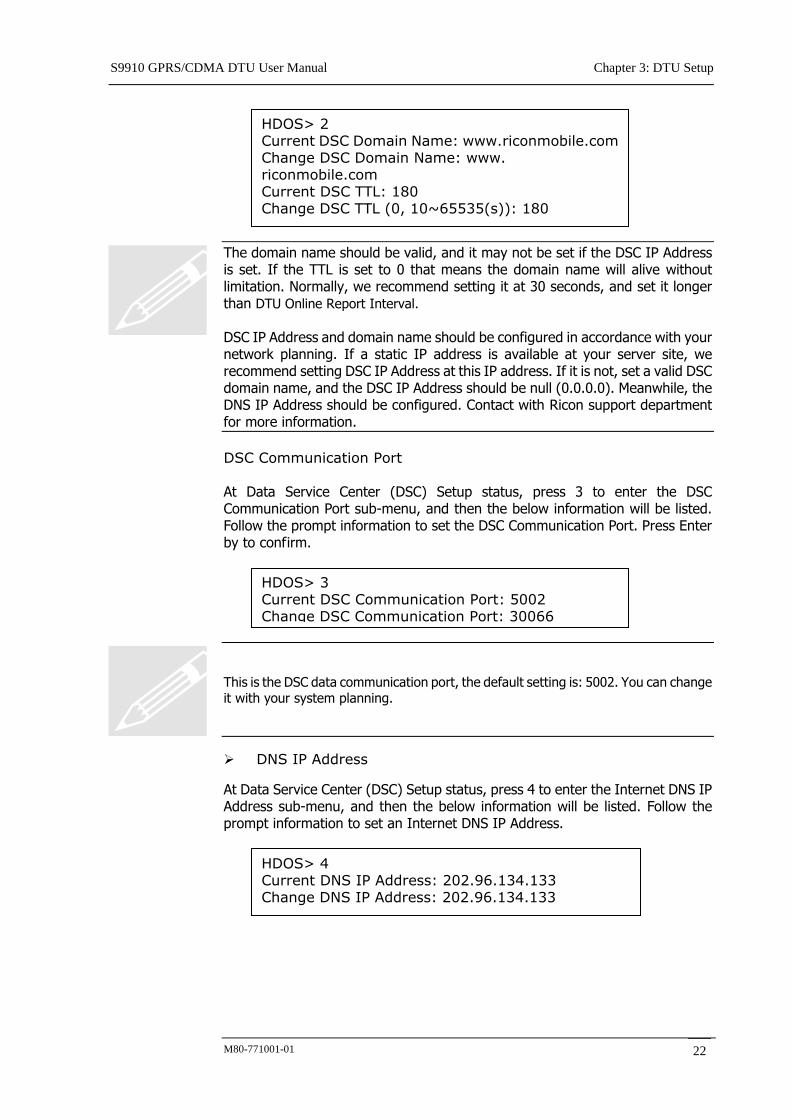
DSC Domain Name At Data Service Center (DSC) Setup status, press 2 to enter the DSC Domain Name sub-menu, and then the below information will be listed. Follow the prompt information to set the DSC Domain Name. Press Enter by to confirm. The Domain mane TTL (Time to Live) must be specified when the DSC domain name has been set.
HDOS> 3 Data Service Center (DSC) Setup: 1 DSC IP Address 2 DSC Domain Name 3 DSC Communication Port 4 DNS IP Address 5 Backup DSC IP Address 6 Backup DSC Communication Port R Return
HDOS> 1 Current DSC IP Address: 210.21.197.10 Change DSC IP Address: 210.21.197.10
HDOS> D Data Terminal Unit (DTU) Setting: ---DTU Identity Number: 13812345678 ---Local Communication Port: 50000 ---DTU Online Report Interval: 100 ---DTU Maximum Transmission Unit: 1000 ---DTU Reconnect Interval: 0 ---Console Info Type: 1 ---Last Packet Idle Interval: 600 ---Identifier Separator: 0x0A ---User-defined Heartbeat Len:02 ---User-defined Heartbeat(Hex):aa bb
S9910 GPRS/CDMA DTU User Manual Chapter 3: DTU Setup
M80-771001-01 22
The domain name should be valid, and it may not be set if the DSC IP Address is set. If the TTL is set to 0 that means the domain name will alive without limitation. Normally, we recommend setting it at 30 seconds, and set it longer than DTU Online Report Interval. DSC IP Address and domain name should be configured in accordance with your network planning. If a static IP address is available at your server site, we recommend setting DSC IP Address at this IP address. If it is not, set a valid DSC domain name, and the DSC IP Address should be null (0.0.0.0). Meanwhile, the DNS IP Address should be configured. Contact with Ricon support department for more information.
DSC Communication Port At Data Service Center (DSC) Setup status, press 3 to enter the DSC Communication Port sub-menu, and then the below information will be listed. Follow the prompt information to set the DSC Communication Port. Press Enter by to confirm.
This is the DSC data communication port, the default setting is: 5002. You can change it with your system planning.
DNS IP Address
At Data Service Center (DSC) Setup status, press 4 to enter the Internet DNS IP Address sub-menu, and then the below information will be listed. Follow the prompt information to set an Internet DNS IP Address.
HDOS> 2 Current DSC Domain Name: www.riconmobile.com Change DSC Domain Name: www. riconmobile.com Current DSC TTL: 180 Change DSC TTL (0, 10~65535(s)): 180
HDOS> 3 Current DSC Communication Port: 5002 Change DSC Communication Port: 30066
HDOS> 4 Current DNS IP Address: 202.96.134.133 Change DNS IP Address: 202.96.134.133
S9910 GPRS/CDMA DTU User Manual Chapter 3: DTU Setup
M80-771001-01 23
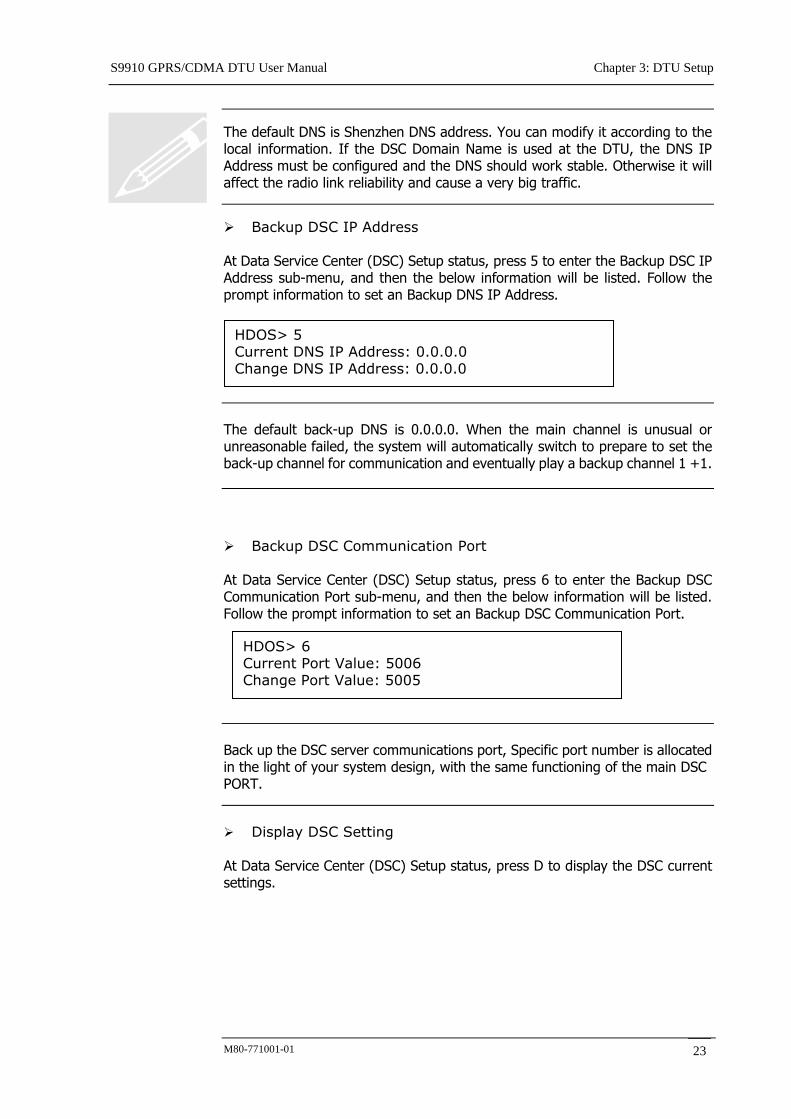
The default DNS is Shenzhen DNS address. You can modify it according to the local information. If the DSC Domain Name is used at the DTU, the DNS IP Address must be configured and the DNS should work stable. Otherwise it will affect the radio link reliability and cause a very big traffic.
Backup DSC IP Address At Data Service Center (DSC) Setup status, press 5 to enter the Backup DSC IP Address sub-menu, and then the below information will be listed. Follow the prompt information to set an Backup DNS IP Address.
The default back-up DNS is 0.0.0.0. When the main channel is unusual or unreasonable failed, the system will automatically switch to prepare to set the back-up channel for communication and eventually play a backup channel 1 +1. Backup DSC Communication Port At Data Service Center (DSC) Setup status, press 6 to enter the Backup DSC Communication Port sub-menu, and then the below information will be listed. Follow the prompt information to set an Backup DSC Communication Port.
Back up the DSC server communications port, Specific port number is allocated in the light of your system design, with the same functioning of the main DSC PORT.
Display DSC Setting At Data Service Center (DSC) Setup status, press D to display the DSC current settings.
HDOS> 5 Current DNS IP Address: 0.0.0.0 Change DNS IP Address: 0.0.0.0
HDOS> 6 Current Port Value: 5006 Change Port Value: 5005

S9910 GPRS/CDMA DTU User Manual Chapter 3: DTU Setup
M80-771001-01 24
4. Serial Port Setup
At DTU Configuration status, press 4 to list the Serial Port Setup sub-menu.
Baud Rate At Serial Port Setup status, press 1 to enter the Baud Rate sub-menu, and then the below information will be listed. Press 1 to 8 to select the required rate. If the rate is not listed at the menu, press 9 to enter the Custom setting, and then type your specified data rate. Press R to return.
Data Bits At Serial Port Setup status, press 2 to enter the Data Bits sub-menu, and then the below information will be listed. Follow the prompt information to set the data bits.
HDOS> 4 Serial Port Setup: 1 Baud Rate 2 Data Bits 3 Parity Bit 4 Stop Bit 5 Flow Control R Return
HDOS> D Data Service Center (DSC) Setting: ---DSC IP Address: 210.21.197.10 ---DSC Domain Name: www.mdtu.com ---DSC Domain TTL: 180 ---DSC Communication Port: 30066 ---DNS IP Address: 202.96.134.133 ---Secondary DSC IP Address:0.0.0.0 ---Secondary DSC Communication Port:5005
HDOS> 1 1 300 bps 2 1200 bps 3 4800 bps 4 9600 bps 5 19200 bps 6 38400 bps 7 57600 bps 8 115200 bps 9 Custom R Return

S9910 GPRS/CDMA DTU User Manual Chapter 3: DTU Setup
M80-771001-01 25
Parity Bit At Serial Port Setup status, press 3 to enter the Parity Bits sub-menu, and then the below information will be listed. Follow the prompt information to set the parity bits.
Stop Bit At Serial Port Setup status, press 4 to enter the Stop Bits sub-menu, and then the below information will be listed. Follow the prompt information to set the stop bits.
Flow Control At Serial Port Setup status, press 5 to enter the Flow Control sub-menu, and then the below information will be listed. Follow the prompt information and select a correct option to set the type of Flow Control.
Notice: The options 1, 2 and 3 are suitable for S9910C or S9910D; the options 4 and 5 are suitable for S9910S or S9910F.
Display Serial Port Setting
HDOS> 2 Current Data Bits: 8 Change Data Bits (6~8): 8
HDOS> 3 1 None 2 Odd 3 Even R Return
HDOS> 4 Current Stop Bit: 1 Change Stop Bit (1~2): 1
HDOS> 5 1 Xon/Xoff 2 Hardware 3 None 4 Half Duplex (RS485) 5 Full Duplex (RS422) R Return
S9910 GPRS/CDMA DTU User Manual Chapter 3: DTU Setup
M80-771001-01 26
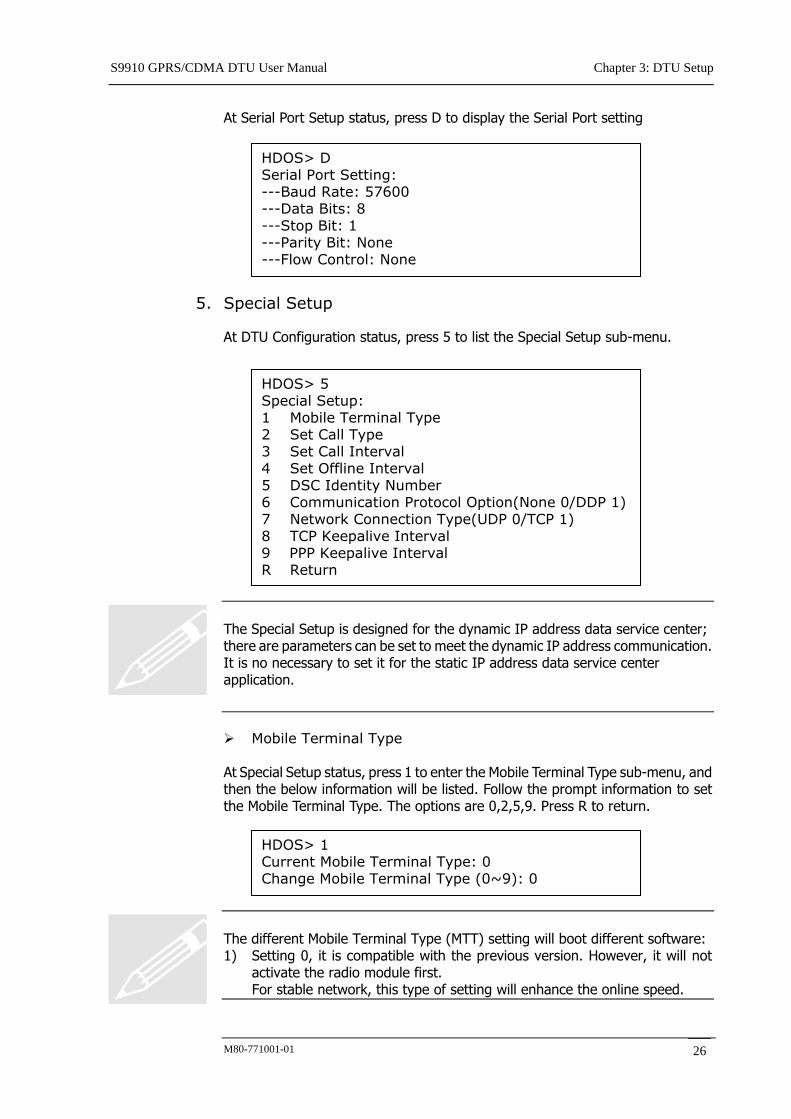
At Serial Port Setup status, press D to display the Serial Port setting
5. Special Setup
At DTU Configuration status, press 5 to list the Special Setup sub-menu.
The Special Setup is designed for the dynamic IP address data service center; there are parameters can be set to meet the dynamic IP address communication. It is no necessary to set it for the static IP address data service center application.
Mobile Terminal Type At Special Setup status, press 1 to enter the Mobile Terminal Type sub-menu, and then the below information will be listed. Follow the prompt information to set the Mobile Terminal Type. The options are 0,2,5,9. Press R to return.
The different Mobile Terminal Type (MTT) setting will boot different software: 1) Setting 0, it is compatible with the previous version. However, it will not
activate the radio module first. For stable network, this type of setting will enhance the online speed.
HDOS> D Serial Port Setting: ---Baud Rate: 57600 ---Data Bits: 8 ---Stop Bit: 1 ---Parity Bit: None ---Flow Control: None
HDOS> 5 Special Setup: 1 Mobile Terminal Type 2 Set Call Type 3 Set Call Interval 4 Set Offline Interval 5 DSC Identity Number 6 Communication Protocol Option(None 0/DDP 1) 7 Network Connection Type(UDP 0/TCP 1) 8 TCP Keepalive Interval 9 PPP Keepalive Interval R Return
HDOS> 1 Current Mobile Terminal Type: 0 Change Mobile Terminal Type (0~9): 0
S9910 GPRS/CDMA DTU User Manual Chapter 3: DTU Setup
M80-771001-01 27
2) Setting 2, DTU is working at user data trigger mode or DSC retrieve mode. For this type of setting, DTU is offline at normal time, and it only log on the mobile network when it detects user data or DSC calling. This configuration is suitable for the less data transmission, such as transmitting data per hour, day or month. It will save power and transmission cost.
3) Setting 5, it is compatible with the previous version and suitable for unstable network.
4) Setting 9, DTU will return the data send from DSC. This setting is used for network testing (co-works with the DTU test tool).
5) Others reserved.
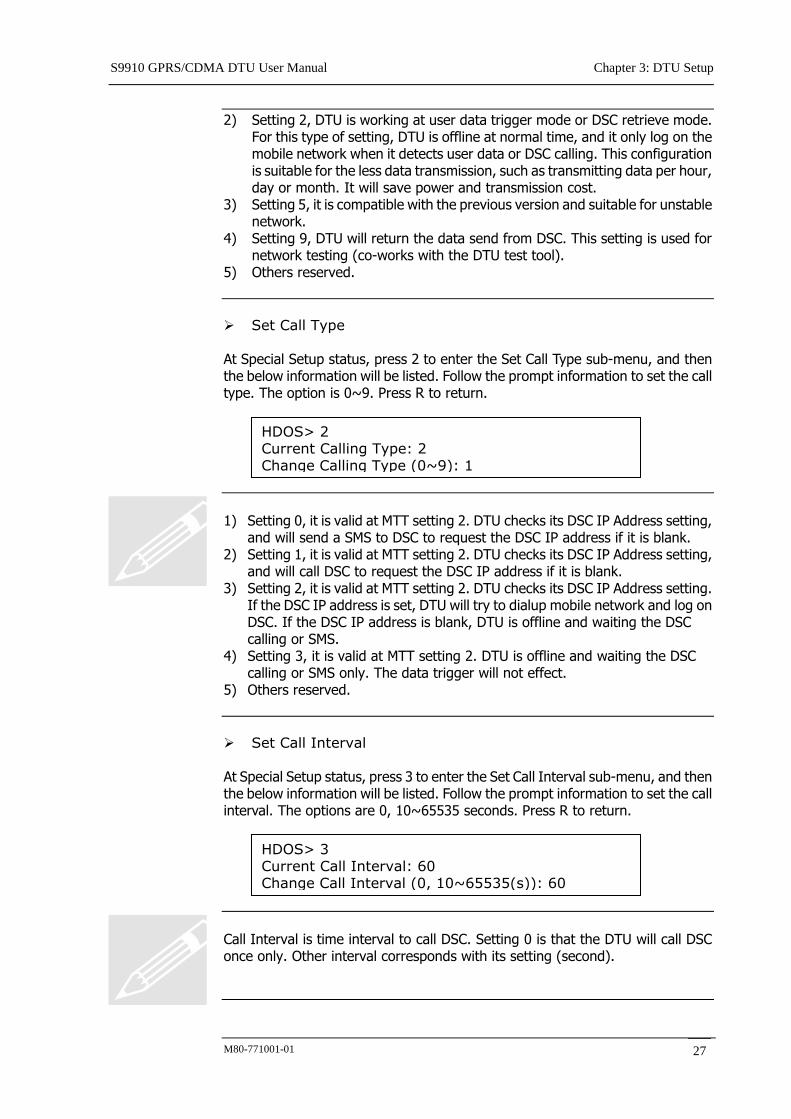
Set Call Type At Special Setup status, press 2 to enter the Set Call Type sub-menu, and then the below information will be listed. Follow the prompt information to set the call type. The option is 0~9. Press R to return.
1) Setting 0, it is valid at MTT setting 2. DTU checks its DSC IP Address setting,
and will send a SMS to DSC to request the DSC IP address if it is blank. 2) Setting 1, it is valid at MTT setting 2. DTU checks its DSC IP Address setting,
and will call DSC to request the DSC IP address if it is blank. 3) Setting 2, it is valid at MTT setting 2. DTU checks its DSC IP Address setting.
If the DSC IP address is set, DTU will try to dialup mobile network and log on DSC. If the DSC IP address is blank, DTU is offline and waiting the DSC calling or SMS.
4) Setting 3, it is valid at MTT setting 2. DTU is offline and waiting the DSC calling or SMS only. The data trigger will not effect.
5) Others reserved.
Set Call Interval At Special Setup status, press 3 to enter the Set Call Interval sub-menu, and then the below information will be listed. Follow the prompt information to set the call interval. The options are 0, 10~65535 seconds. Press R to return.
Call Interval is time interval to call DSC. Setting 0 is that the DTU will call DSC once only. Other interval corresponds with its setting (second).
HDOS> 2 Current Calling Type: 2 Change Calling Type (0~9): 1
HDOS> 3 Current Call Interval: 60 Change Call Interval (0, 10~65535(s)): 60
S9910 GPRS/CDMA DTU User Manual Chapter 3: DTU Setup
M80-771001-01 28
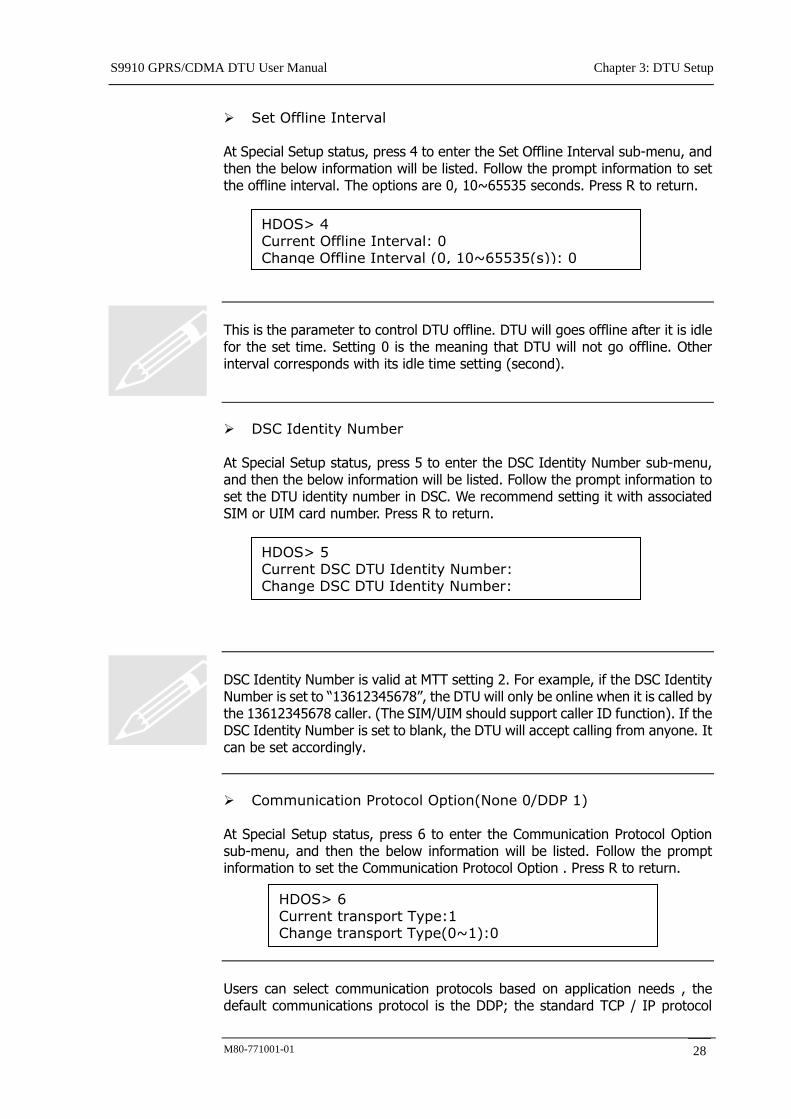
Set Offline Interval At Special Setup status, press 4 to enter the Set Offline Interval sub-menu, and then the below information will be listed. Follow the prompt information to set the offline interval. The options are 0, 10~65535 seconds. Press R to return.
This is the parameter to control DTU offline. DTU will goes offline after it is idle for the set time. Setting 0 is the meaning that DTU will not go offline. Other interval corresponds with its idle time setting (second).
DSC Identity Number At Special Setup status, press 5 to enter the DSC Identity Number sub-menu, and then the below information will be listed. Follow the prompt information to set the DTU identity number in DSC. We recommend setting it with associated SIM or UIM card number. Press R to return.
DSC Identity Number is valid at MTT setting 2. For example, if the DSC Identity Number is set to “13612345678”, the DTU will only be online when it is called by the 13612345678 caller. (The SIM/UIM should support caller ID function). If the DSC Identity Number is set to blank, the DTU will accept calling from anyone. It can be set accordingly.
Communication Protocol Option(None 0/DDP 1) At Special Setup status, press 6 to enter the Communication Protocol Option sub-menu, and then the below information will be listed. Follow the prompt information to set the Communication Protocol Option . Press R to return.
Users can select communication protocols based on application needs , the default communications protocol is the DDP; the standard TCP / IP protocol
HDOS> 4 Current Offline Interval: 0 Change Offline Interval (0, 10~65535(s)): 0
HDOS> 5 Current DSC DTU Identity Number: Change DSC DTU Identity Number:
HDOS> 6 Current transport Type:1 Change transport Type(0~1):0
S9910 GPRS/CDMA DTU User Manual Chapter 3: DTU Setup
M80-771001-01 29
Packing way is in a transparent manner. DDP (DTU DSC protocol) refers that we increase the Ricon company protocol into the standard TCP / IP protocol between the DTU and DSC.
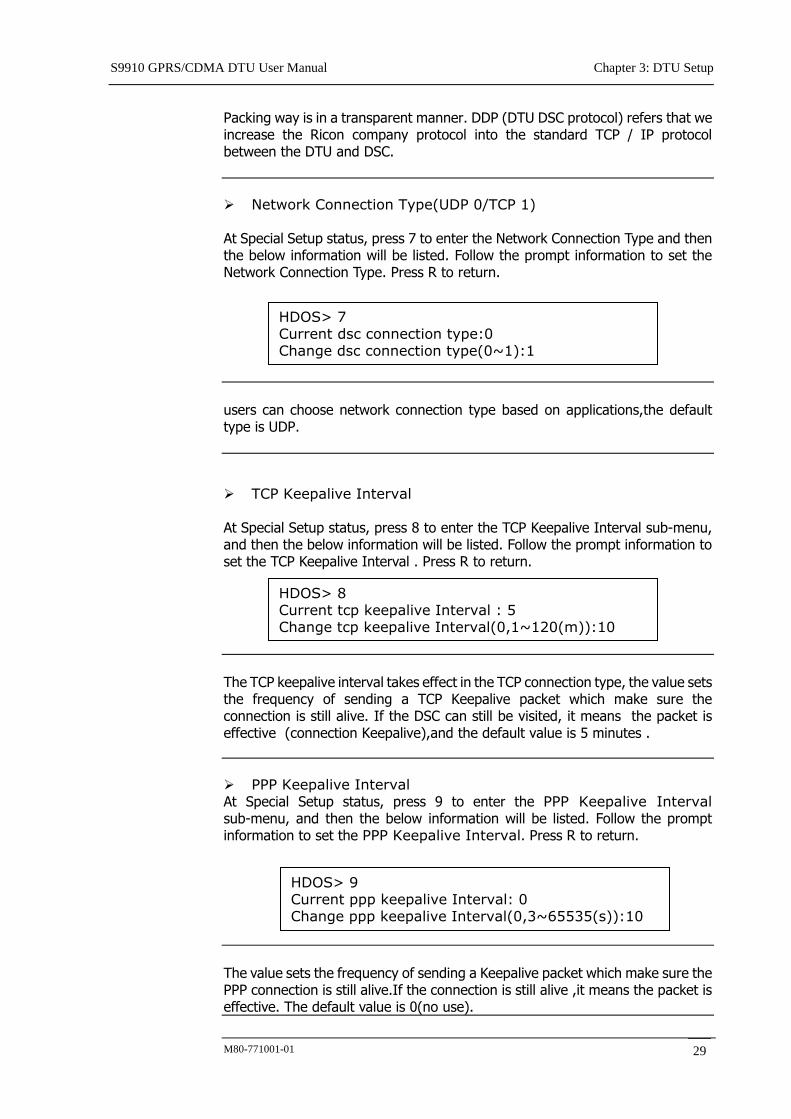
Network Connection Type(UDP 0/TCP 1) At Special Setup status, press 7 to enter the Network Connection Type and then the below information will be listed. Follow the prompt information to set the Network Connection Type. Press R to return.
users can choose network connection type based on applications,the default type is UDP.
TCP Keepalive Interval At Special Setup status, press 8 to enter the TCP Keepalive Interval sub-menu, and then the below information will be listed. Follow the prompt information to set the TCP Keepalive Interval . Press R to return.
The TCP keepalive interval takes effect in the TCP connection type, the value sets the frequency of sending a TCP Keepalive packet which make sure the connection is still alive. If the DSC can still be visited, it means the packet is effective (connection Keepalive),and the default value is 5 minutes .
PPP Keepalive Interval At Special Setup status, press 9 to enter the PPP Keepalive Interval sub-menu, and then the below information will be listed. Follow the prompt information to set the PPP Keepalive Interval. Press R to return.
The value sets the frequency of sending a Keepalive packet which make sure the PPP connection is still alive.If the connection is still alive ,it means the packet is effective. The default value is 0(no use).
HDOS> 8 Current tcp keepalive Interval : 5 Change tcp keepalive Interval(0,1~120(m)):10
HDOS> 7 Current dsc connection type:0 Change dsc connection type(0~1):1
HDOS> 9 Current ppp keepalive Interval: 0 Change ppp keepalive Interval(0,3~65535(s)):10
S9910 GPRS/CDMA DTU User Manual Chapter 3: DTU Setup
M80-771001-01 30
This fuction is effective only for CDMA Products.
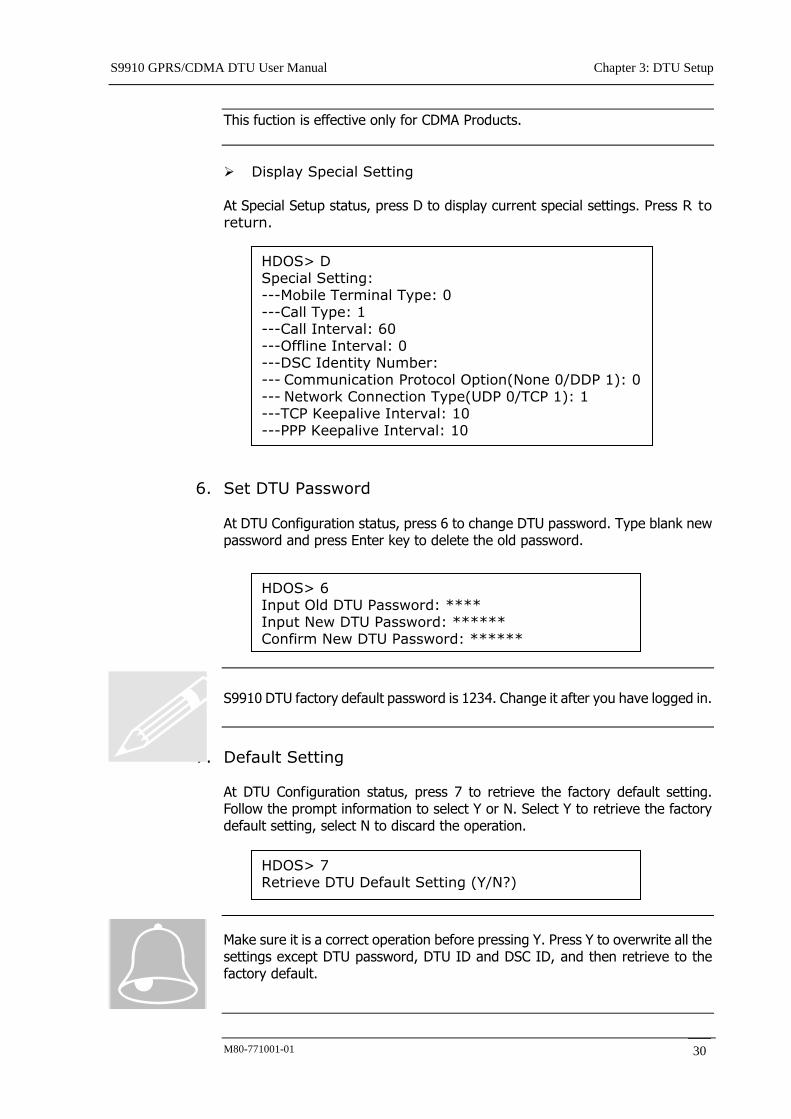
Display Special Setting At Special Setup status, press D to display current special settings. Press R to return.
6. Set DTU Password At DTU Configuration status, press 6 to change DTU password. Type blank new password and press Enter key to delete the old password.
S9910 DTU factory default password is 1234. Change it after you have logged in.
7. Default Setting
At DTU Configuration status, press 7 to retrieve the factory default setting. Follow the prompt information to select Y or N. Select Y to retrieve the factory default setting, select N to discard the operation.
Make sure it is a correct operation before pressing Y. Press Y to overwrite all the settings except DTU password, DTU ID and DSC ID, and then retrieve to the factory default.
HDOS> 7 Retrieve DTU Default Setting (Y/N?)
HDOS> 6 Input Old DTU Password: **** Input New DTU Password: ****** Confirm New DTU Password: ******
HDOS> D Special Setting: ---Mobile Terminal Type: 0 ---Call Type: 1 ---Call Interval: 60 ---Offline Interval: 0 ---DSC Identity Number: --- Communication Protocol Option(None 0/DDP 1): 0 --- Network Connection Type(UDP 0/TCP 1): 1 ---TCP Keepalive Interval: 10 ---PPP Keepalive Interval: 10
S9910 GPRS/CDMA DTU User Manual Chapter 3: DTU Setup
M80-771001-01 31
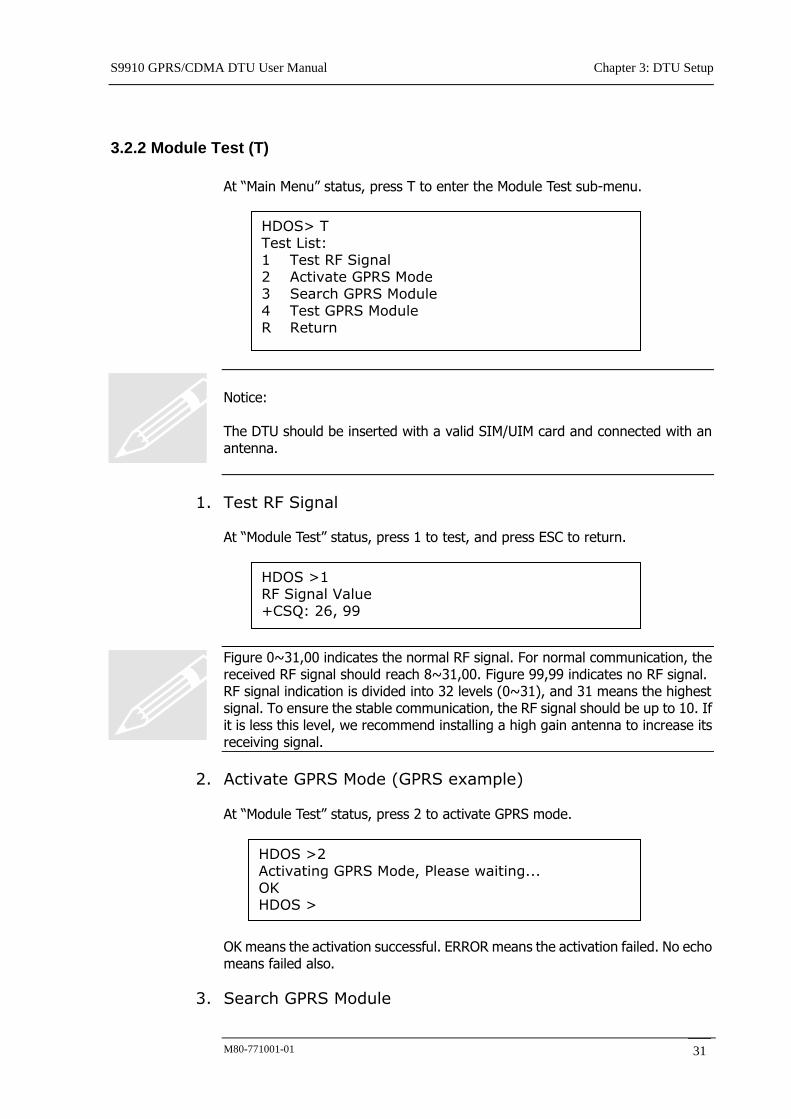
3.2.2 Module Test (T)
At “Main Menu” status, press T to enter the Module Test sub-menu.
Notice: The DTU should be inserted with a valid SIM/UIM card and connected with an antenna.
1. Test RF Signal
At “Module Test” status, press 1 to test, and press ESC to return.
Figure 0~31,00 indicates the normal RF signal. For normal communication, the received RF signal should reach 8~31,00. Figure 99,99 indicates no RF signal. RF signal indication is divided into 32 levels (0~31), and 31 means the highest signal. To ensure the stable communication, the RF signal should be up to 10. If it is less this level, we recommend installing a high gain antenna to increase its receiving signal.
2. Activate GPRS Mode (GPRS example) At “Module Test” status, press 2 to activate GPRS mode.
OK means the activation successful. ERROR means the activation failed. No echo means failed also.
3. Search GPRS Module
HDOS >1 RF Signal Value +CSQ: 26, 99
HDOS >2 Activating GPRS Mode, Please waiting... OK HDOS >
HDOS> T Test List: 1 Test RF Signal 2 Activate GPRS Mode 3 Search GPRS Module 4 Test GPRS Module R Return
S9910 GPRS/CDMA DTU User Manual Chapter 3: DTU Setup
M80-771001-01 32
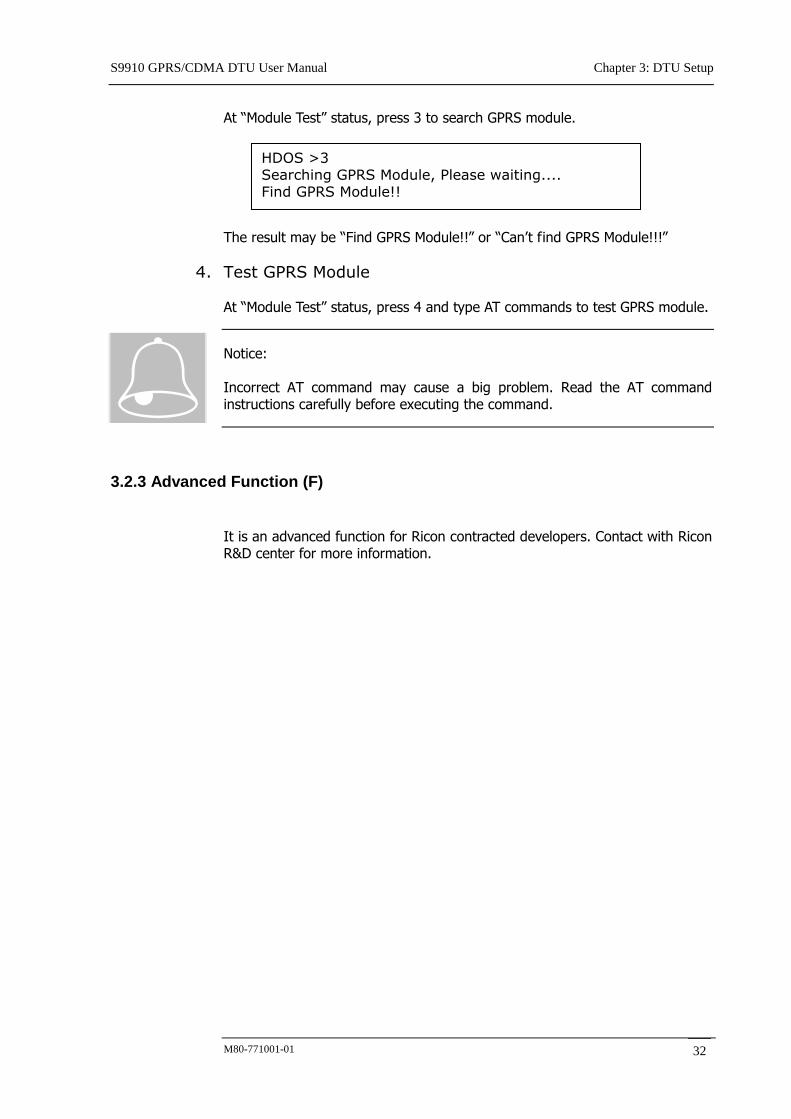
At “Module Test” status, press 3 to search GPRS module.
The result may be “Find GPRS Module!!” or “Can’t find GPRS Module!!!”
4. Test GPRS Module At “Module Test” status, press 4 and type AT commands to test GPRS module.
Notice: Incorrect AT command may cause a big problem. Read the AT command instructions carefully before executing the command.
3.2.3 Advanced Function (F)
It is an advanced function for Ricon contracted developers. Contact with Ricon R&D center for more information.
HDOS >3 Searching GPRS Module, Please waiting.... Find GPRS Module!!
S9910 GPRS/CDMA DTU User Manual Chapter 3: DTU Setup
M80-771001-01 33
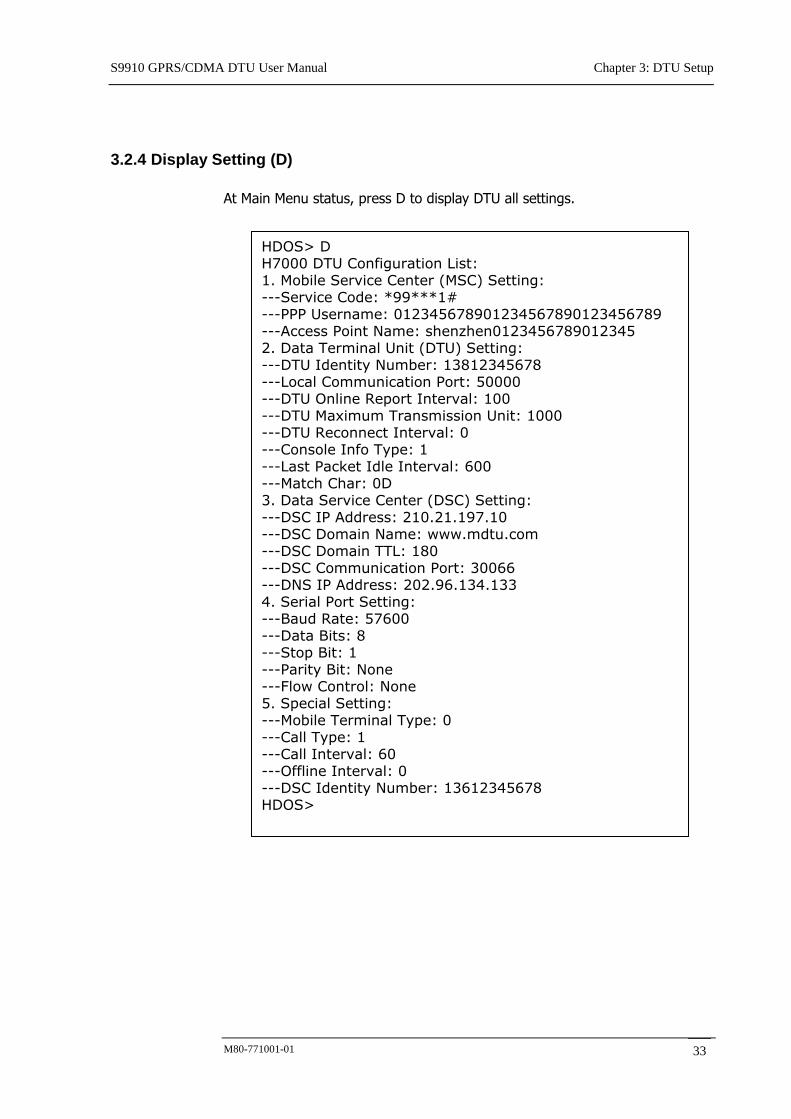
3.2.4 Display Setting (D)
At Main Menu status, press D to display DTU all settings.
HDOS> D H7000 DTU Configuration List: 1. Mobile Service Center (MSC) Setting: ---Service Code: *99***1# ---PPP Username: 012345678901234567890123456789 ---Access Point Name: shenzhen0123456789012345 2. Data Terminal Unit (DTU) Setting: ---DTU Identity Number: 13812345678 ---Local Communication Port: 50000 ---DTU Online Report Interval: 100 ---DTU Maximum Transmission Unit: 1000 ---DTU Reconnect Interval: 0 ---Console Info Type: 1 ---Last Packet Idle Interval: 600 ---Match Char: 0D 3. Data Service Center (DSC) Setting: ---DSC IP Address: 210.21.197.10 ---DSC Domain Name: www.mdtu.com ---DSC Domain TTL: 180 ---DSC Communication Port: 30066 ---DNS IP Address: 202.96.134.133 4. Serial Port Setting: ---Baud Rate: 57600 ---Data Bits: 8 ---Stop Bit: 1 ---Parity Bit: None ---Flow Control: None 5. Special Setting: ---Mobile Terminal Type: 0 ---Call Type: 1 ---Call Interval: 60 ---Offline Interval: 0 ---DSC Identity Number: 13612345678 HDOS>
S9910 GPRS/CDMA DTU User Manual Chapter 3: DTU Setup
M80-771001-01 34
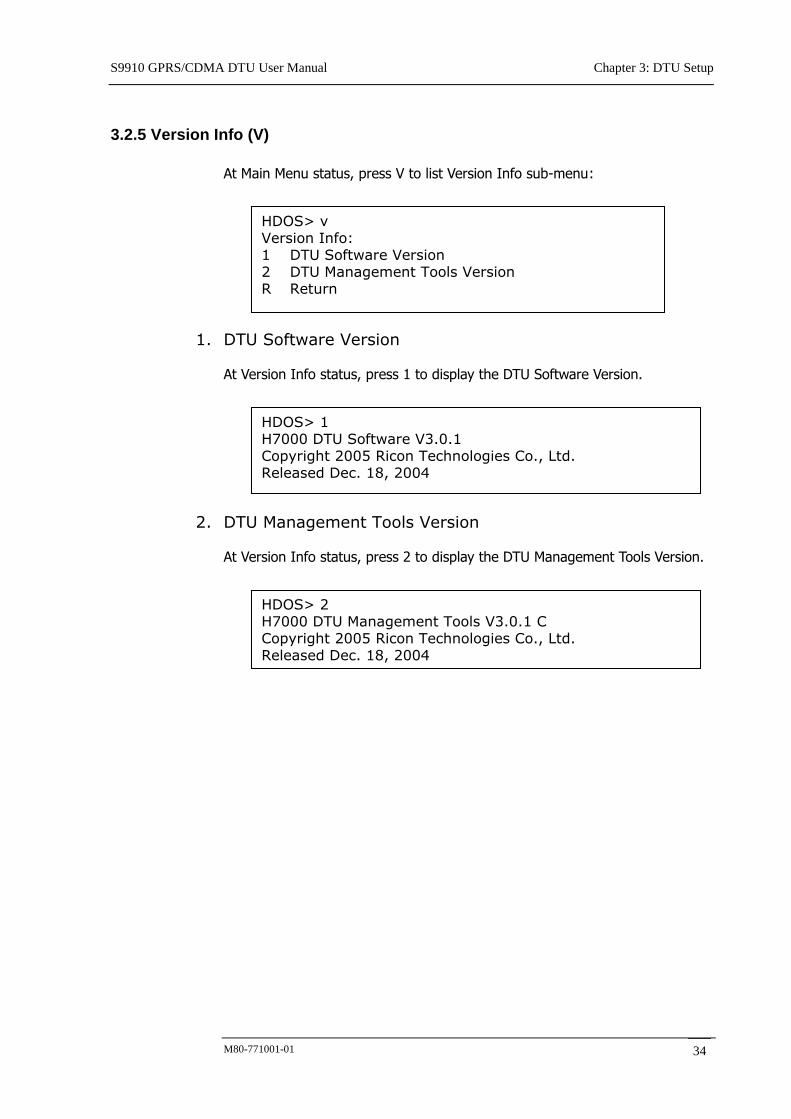
3.2.5 Version Info (V)
At Main Menu status, press V to list Version Info sub-menu:
1. DTU Software Version
At Version Info status, press 1 to display the DTU Software Version.
2. DTU Management Tools Version
At Version Info status, press 2 to display the DTU Management Tools Version.
HDOS> v Version Info: 1 DTU Software Version 2 DTU Management Tools Version R Return
HDOS> 1 H7000 DTU Software V3.0.1 Copyright 2005 Ricon Technologies Co., Ltd. Released Dec. 18, 2004
HDOS> 2 H7000 DTU Management Tools V3.0.1 C Copyright 2005 Ricon Technologies Co., Ltd. Released Dec. 18, 2004
S9910 GPRS/CDMA DTU User Manual Chapter 3: DTU Setup
M80-771001-01 35
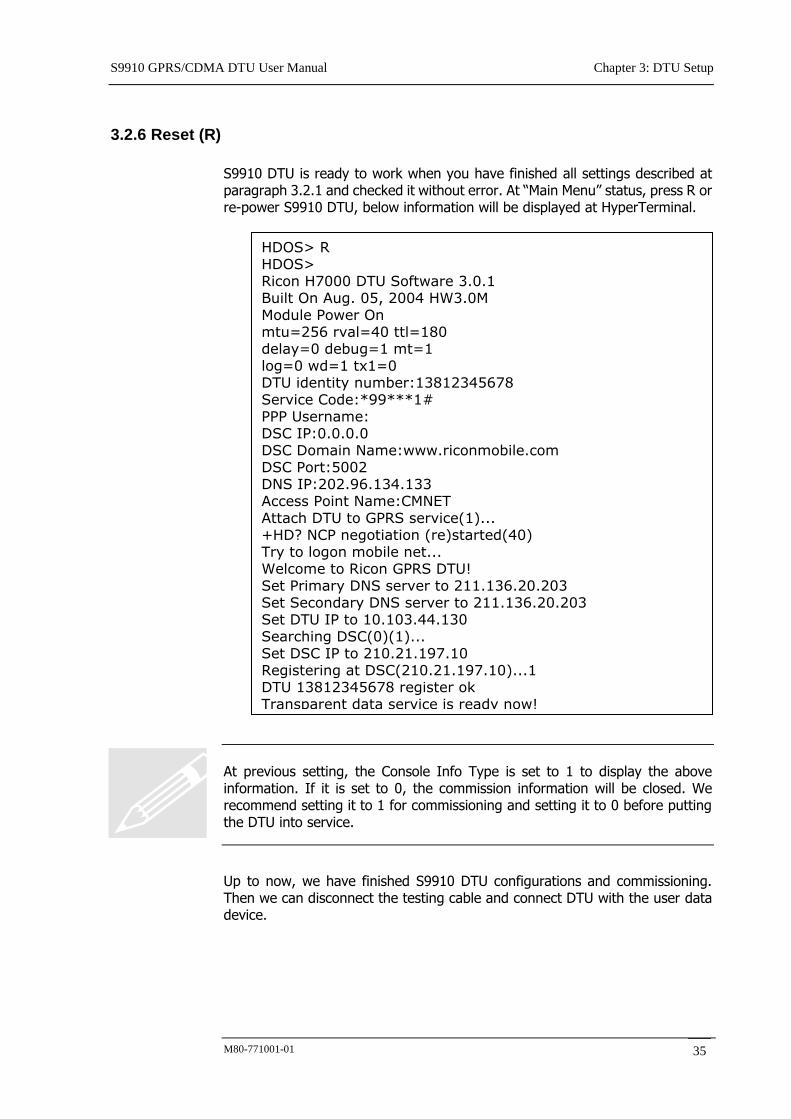
3.2.6 Reset (R)
S9910 DTU is ready to work when you have finished all settings described at paragraph 3.2.1 and checked it without error. At “Main Menu” status, press R or re-power S9910 DTU, below information will be displayed at HyperTerminal.
At previous setting, the Console Info Type is set to 1 to display the above information. If it is set to 0, the commission information will be closed. We recommend setting it to 1 for commissioning and setting it to 0 before putting the DTU into service.
Up to now, we have finished S9910 DTU configurations and commissioning. Then we can disconnect the testing cable and connect DTU with the user data device.
HDOS> R HDOS> Ricon H7000 DTU Software 3.0.1 Built On Aug. 05, 2004 HW3.0M Module Power On mtu=256 rval=40 ttl=180 delay=0 debug=1 mt=1 log=0 wd=1 tx1=0 DTU identity number:13812345678 Service Code:*99***1# PPP Username: DSC IP:0.0.0.0 DSC Domain Name:www.riconmobile.com DSC Port:5002 DNS IP:202.96.134.133 Access Point Name:CMNET Attach DTU to GPRS service(1)... +HD? NCP negotiation (re)started(40) Try to logon mobile net... Welcome to Ricon GPRS DTU! Set Primary DNS server to 211.136.20.203 Set Secondary DNS server to 211.136.20.203 Set DTU IP to 10.103.44.130 Searching DSC(0)(1)... Set DSC IP to 210.21.197.10 Registering at DSC(210.21.197.10)...1 DTU 13812345678 register ok Transparent data service is ready now!
S9910 GPRS/CDMA DTU User Manual Chapter 4: Operation
M80-771001-01 36
Chapter 4 Operation
This chapter describes the S9910 GPRS/CDMA DTU operation guidance and relative information.
1. Panel Indications 2. DTU Operation Guidance 3. Trouble Shooting
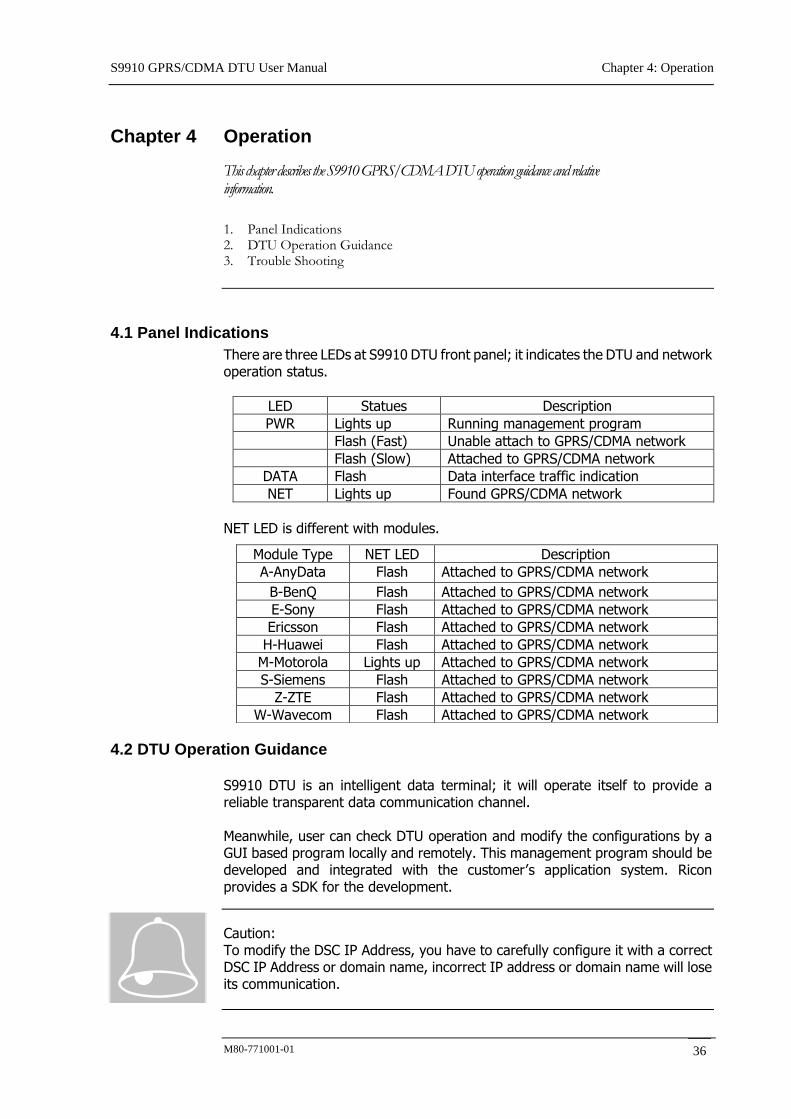
4.1 Panel Indications
There are three LEDs at S9910 DTU front panel; it indicates the DTU and network operation status.
LED Statues Description
PWR Lights up Running management program
Flash (Fast) Unable attach to GPRS/CDMA network
Flash (Slow) Attached to GPRS/CDMA network
DATA Flash Data interface traffic indication
NET Lights up Found GPRS/CDMA network
NET LED is different with modules.
4.2 DTU Operation Guidance S9910 DTU is an intelligent data terminal; it will operate itself to provide a reliable transparent data communication channel. Meanwhile, user can check DTU operation and modify the configurations by a GUI based program locally and remotely. This management program should be developed and integrated with the customer’s application system. Ricon provides a SDK for the development.
Caution: To modify the DSC IP Address, you have to carefully configure it with a correct DSC IP Address or domain name, incorrect IP address or domain name will lose its communication.
Module Type NET LED Description
A-AnyData Flash Attached to GPRS/CDMA network
B-BenQ Flash Attached to GPRS/CDMA network
E-Sony Flash Attached to GPRS/CDMA network
Ericsson Flash Attached to GPRS/CDMA network
H-Huawei Flash Attached to GPRS/CDMA network
M-Motorola Lights up Attached to GPRS/CDMA network
S-Siemens Flash Attached to GPRS/CDMA network
Z-ZTE Flash Attached to GPRS/CDMA network
W-Wavecom Flash Attached to GPRS/CDMA network

S9910 GPRS/CDMA DTU User Manual Chapter 4: Operation
M80-771001-01 37
S9910 DTU should be installed at place with good radio signal receiving. For the cabinet and basement environment, we recommend to extend the antenna.
For outdoor use, lightning should be considered. We propose to install an arrester between antenna and the ANT interface. Contact Ricon technical support department for details.
The configuration parameters can be saved at S9910 DTU flash memory or SIM/UIM card, and the S9910 DTU flash saved settings will be retrieved in higher priority. No routine maintenance is required for S9910 DTU operation. At embedded application environment, the data service center will check DTU operation information.
4.3 Trouble Shooting
Problem 1: All LEDs do not light up.
Check all cables that are connected to the DTU. Check the power supply adapter output voltage. DTU works normally if the PWR LED flash at 1Hz frequency and it is in configuration status if the PWR LED lights up constantly. If the power is correctly connected and there is no LED that light up, the DTU may be failed. Contact to Ricon or reseller for repairing.
Problem 2: NET LED does not light up.
NET LED will flash when the S9910 DTU logged in mobile network. If the NET LED does not light up, you should check the area receiving RF signal and check the SIM or UIM inserted correctly.
Problem 3: DATA LED does not light up
DATA LED will flash when there is data transmitting over the interface.
Problem 4: All LED indications are normal, but it can not transmit traffic data.
Consult with the local mobile operator, to confirm it is covered with GPRS or CDMA 1x service. Meanwhile, check the DSC IP Address and Communication Port setting.
Problem 5: It is no problem to enter the management tools.
To enter the S9910 DTU management tools, you have to create a HyperTerminal and set it properly. Press and hold the PC Space key, and then power on the DTU. If it is still problem, check the HyperTerminal setting
S9910 GPRS/CDMA DTU User Manual Chapter 4: Operation
M80-771001-01 38
(refer to the Appendix for more details). Restart the created HyperTerminal, hold PC Space key, and re-power S9910 DTU. Caution: The laptop PC serial port is very weak. You may need to pay attention for this port and check it. Furthermore, the PC and DTU should be connected at same ground wire.
Problem 6: I have configured the DTU serial port works at 9600baud, and set my PC HyperTerminal COM port rate at same rate (9600baud) also. But I can not enter S9910 DTU management tools.
Although the DTU traffic data and management data are transmitted through the same physical port, but it is transferred via the different logical channel inside of DTU. The serial port setting described at paragraph 3.2.1 is only for the traffic data port. It does not affect the management port. Therefore, your HyperTerminal serial port rate should be set to 57600baud, and then press and hold PC Space key to enter the DTU Management Tools.
S9910 GPRS/CDMA DTU User Manual Appendix: HyperTerminal Setting
M80-771001-01 39
Appendix: HyperTerminal Setting
This annex introduce the Microsoft Windows operating system HyperTerminal setting for the S9910 DTU configuration.
1. COM Port Setting 2. Properties 3. Host System Encoding Method 4. ASCII Setting
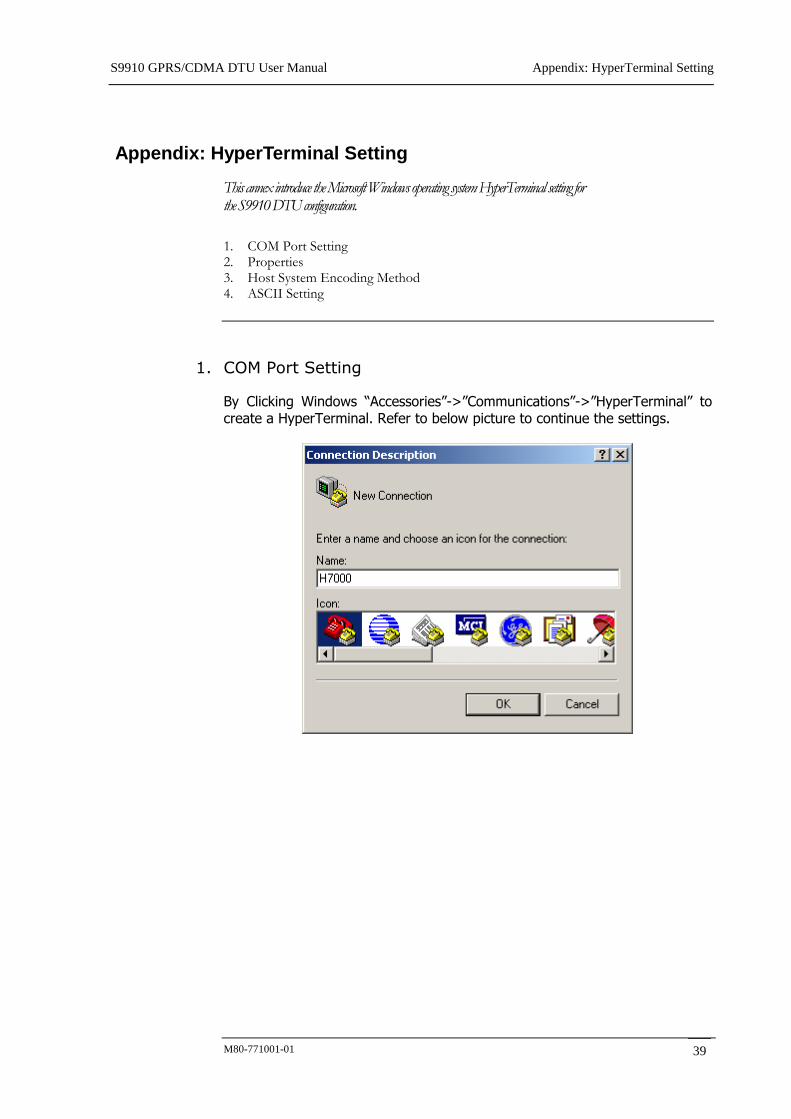
1. COM Port Setting
By Clicking Windows “Accessories”->”Communications”->”HyperTerminal” to create a HyperTerminal. Refer to below picture to continue the settings.
S9910 GPRS/CDMA DTU User Manual Appendix: HyperTerminal Setting
M80-771001-01 40
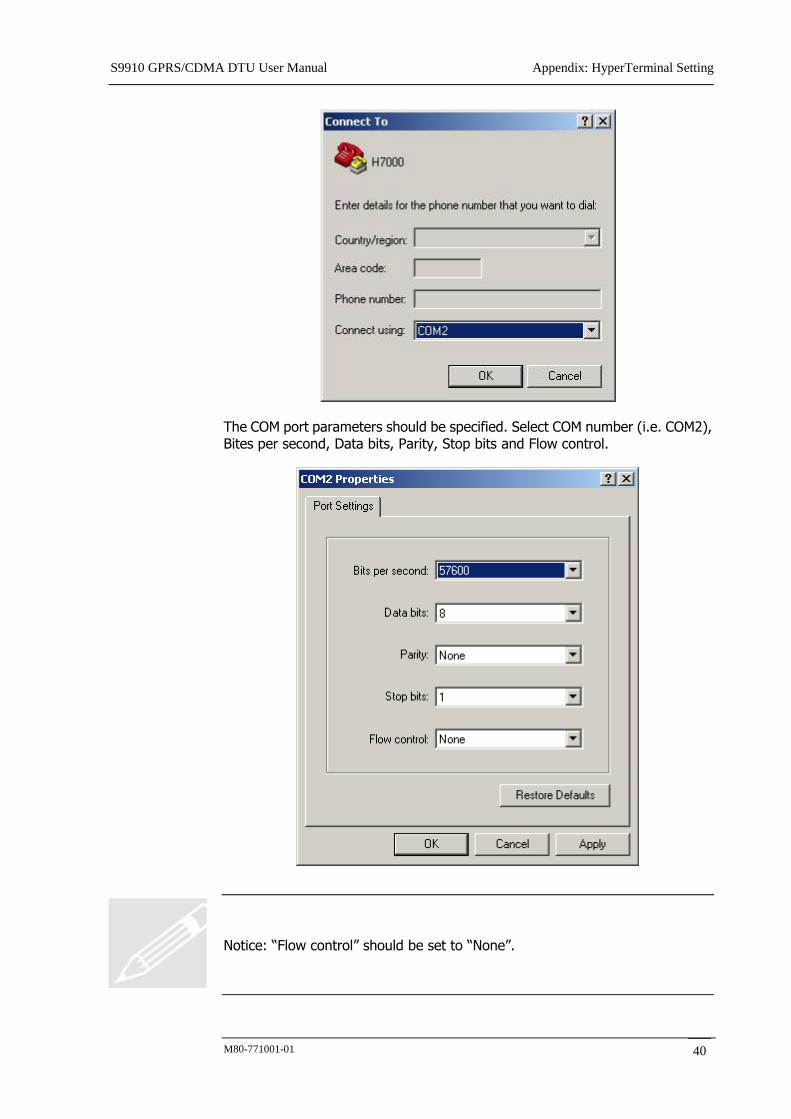
The COM port parameters should be specified. Select COM number (i.e. COM2), Bites per second, Data bits, Parity, Stop bits and Flow control.
Notice: “Flow control” should be set to “None”.
S9910 GPRS/CDMA DTU User Manual Appendix: HyperTerminal Setting
M80-771001-01 41
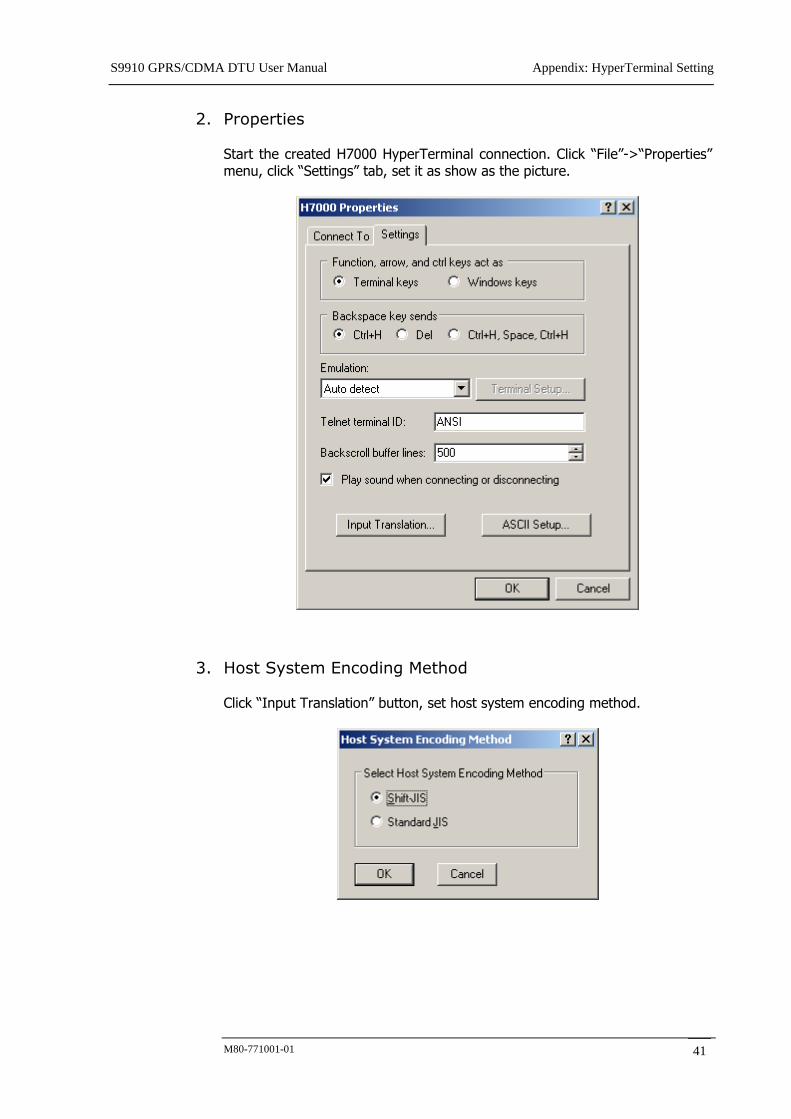
2. Properties Start the created H7000 HyperTerminal connection. Click “File”->“Properties” menu, click “Settings” tab, set it as show as the picture.
3. Host System Encoding Method Click “Input Translation” button, set host system encoding method.
S9910 GPRS/CDMA DTU User Manual Appendix: HyperTerminal Setting
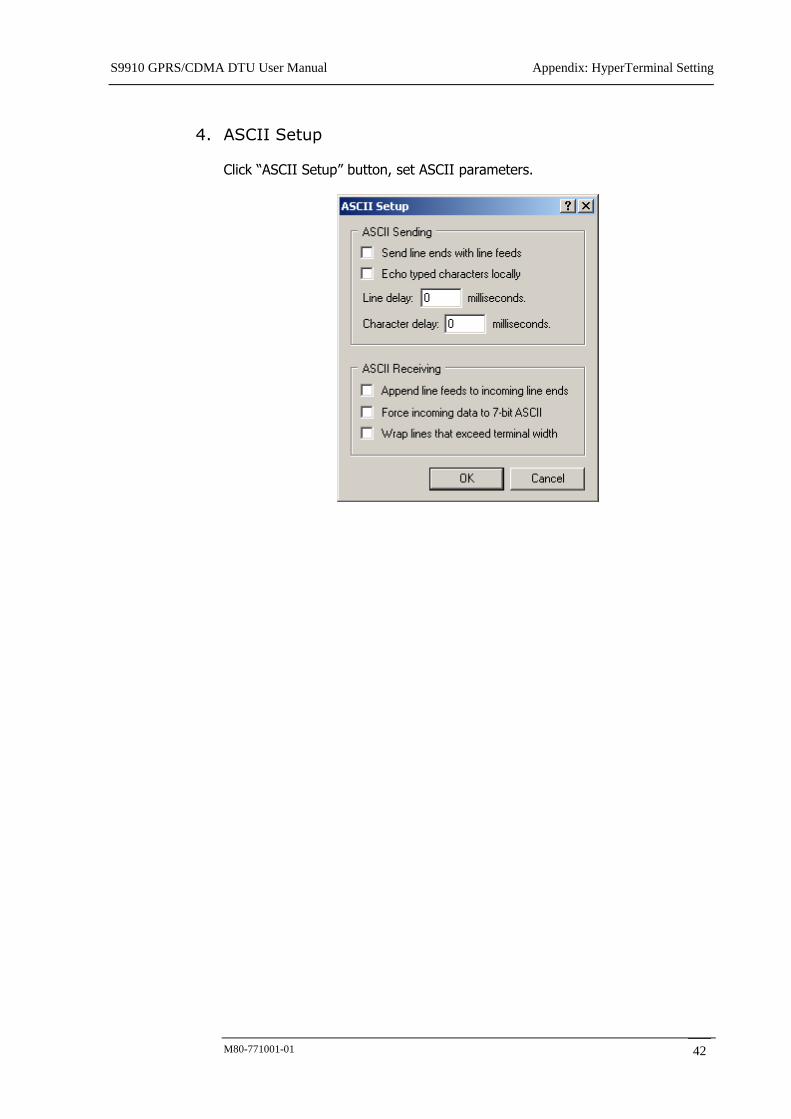
M80-771001-01 42
4. ASCII Setup Click “ASCII Setup” button, set ASCII parameters.