rha.cpe.umanitoba.carha.cpe.umanitoba.ca/.../poster_making_101_word_2007.docx · web viewusing...
TRANSCRIPT

1
Poster Making 101 for Word 2007
1. Open PowerPoint and choose a blank slide from the ‘new slide’ drop-down on the ‘home’ tab.
2. Go to the ‘design’ tab and click on ‘page setup’.
2
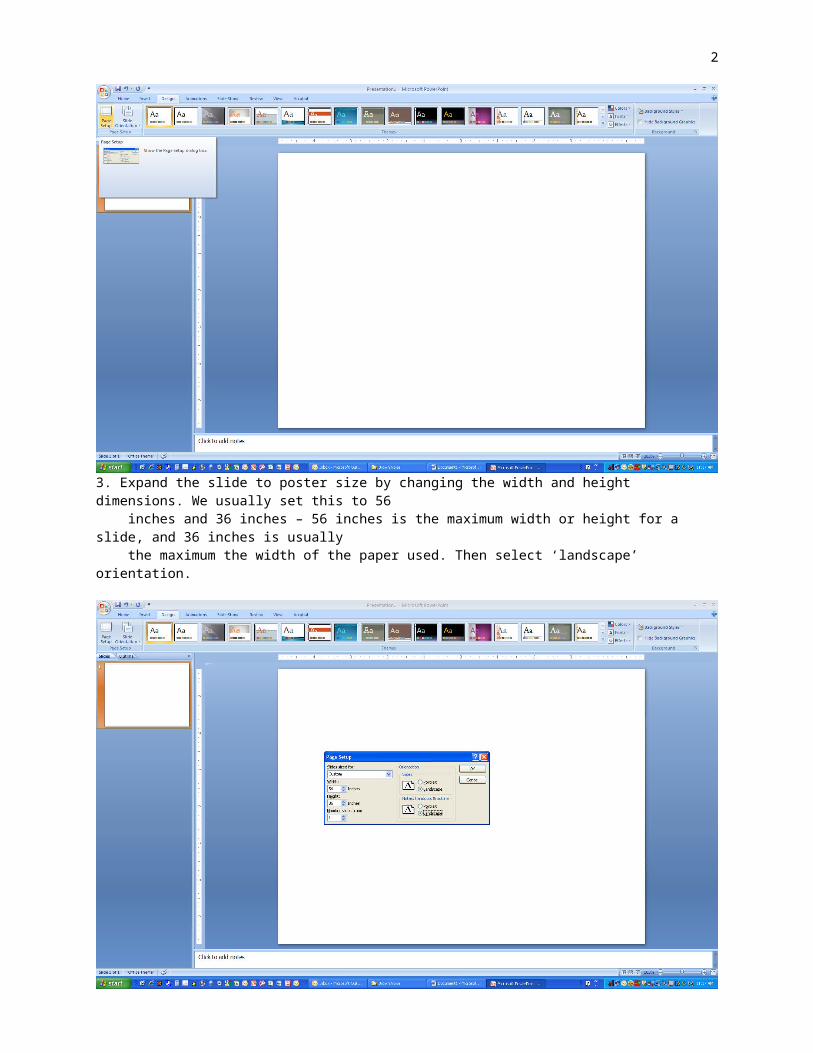
3. Expand the slide to poster size by changing the width and height dimensions. We usually set this to 56 inches and 36 inches – 56 inches is the maximum width or height for a slide, and 36 inches is usually the maximum the width of the paper used. Then select ‘landscape’ orientation.
4. If you would like to have a background colour for you poster, click on the ‘background styles’ drop- down menu on the ‘design’ tab.

3
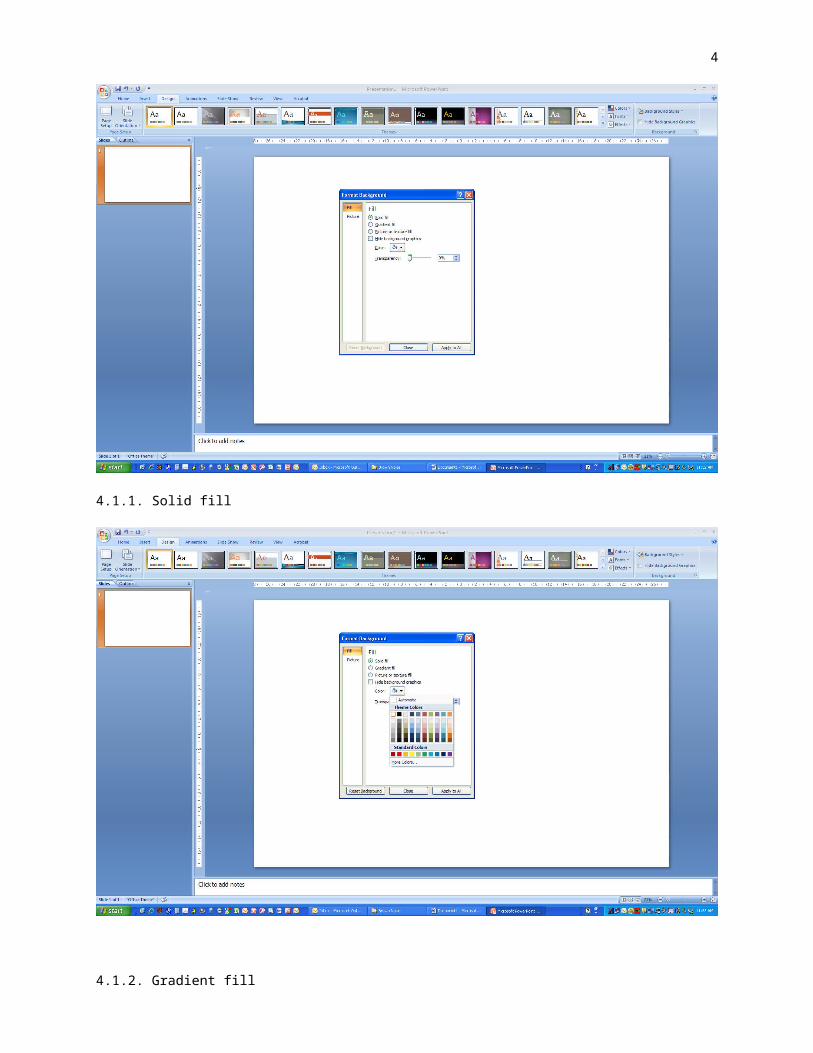
4.1. You can choose from a solid, gradient or picture/texture colour fill - each one brings up a dialogue box that will allow you to choose different options.
4.1.1. Solid fill
4
4.1.2. Gradient fill
4.1.3. Picture or texture fill

5
5. You can also set your background in the slide master view. Slide master is like a layer below the surface that cannot be accessed in the normal slide view. Go to the ‘view’ tab and select ‘slide master’.
Using slide master is useful when you have objects that you want to stay in a certain place and don’t want to accidentally move while you are working on the rest of your poster in the normal view. For example, you may have a logo that you want in a certain place or you want a white border around the edge of your slide. This is done by inserting an autoshape.
5.1. Open the slide master view
5.2. Select a layout (a blank one is usually recommended)

6
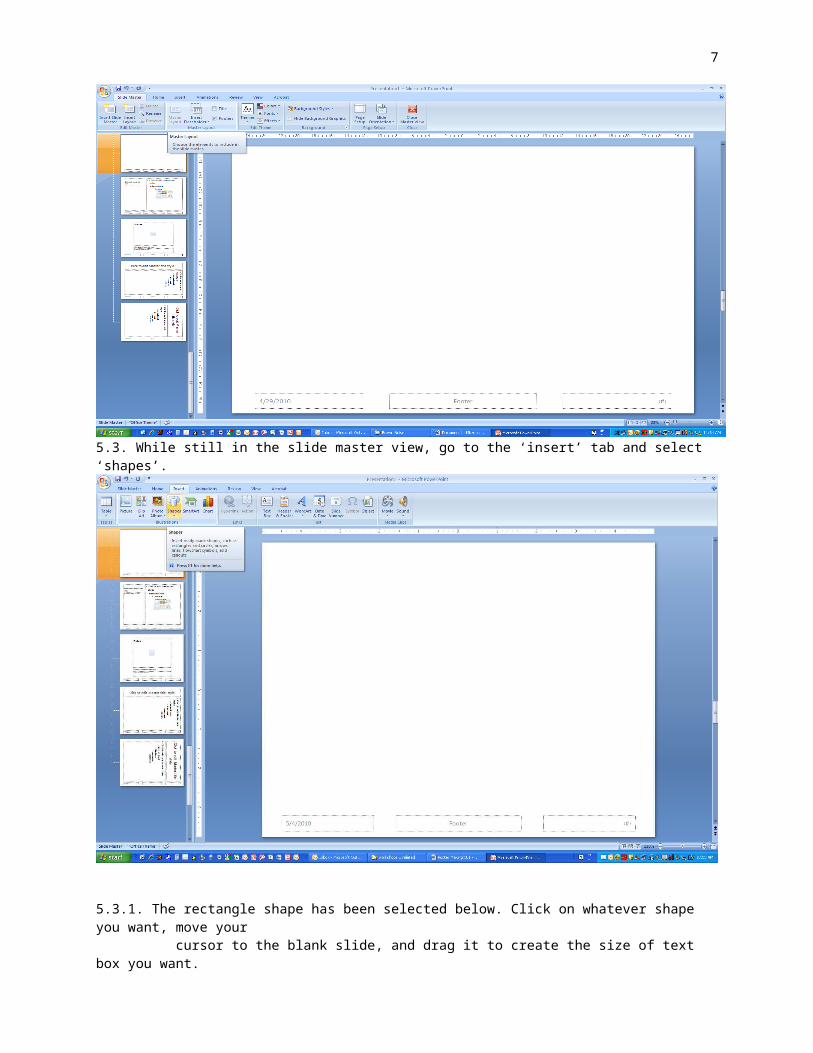
5.3. While still in the slide master view, go to the ‘insert’ tab and select ‘shapes’.
5.3.1. The rectangle shape has been selected below. Click on whatever shape you want, move your cursor to the blank slide, and drag it to create the size of text box you want.
7
5.4. Right click on your new autoshape and select ‘format shape’ to change the colour and other shape characteristics.

8
5.4.1. You can also change the level of transparency of the background colour by sliding the pointer or using the up and down arrows in the dialogue box.
5.4.2. You can also choose to use the ‘gradient fill’. Below, the ‘path’ gradient type has been chosen, but there are countless options for you to choose.

9
5.4.3. You can also choose the ‘texture fill’. Just always keep in mind that you will want your poster to be easily readable, so ensure your background is not too busy and distracting from the text and graphics on your poster.
5.4.4. Once you have chosen your background, close the slide master view. If you decide you want to change your background, you can go back into the slide master view at any time and make edits.

10
6. Now you can start adding text boxes and graphics to your poster in the normal view without accidentally moving your background around.
If you are going to be adding text to your poster, I recommend using text boxes rather than authoshapes as textboxes are easier to work with. However, if you want a shape other than a rectangle, use authoshapes and add text. All of these options are available on the ‘home’ tab – click on the desired text box or autoshape in the ‘drawing’ section of the ribbon, then drag to create the desired shape and size.
6.1. Text box
6.2. Autoshape

11
6.2.1. To add text to the autoshape, right click on it and select ‘edit text’.
6.2.2. A cursor will appear which allows you to enter the desired text, which can be formatted like other text (e.g. change font colour, centered, etc.).

12
6.2.3. When you are adding text to your poster, it is recommended that you choose a size of font that can be easily read while standing 3 to 4 feet away from your poster once it is printed. Experiment by typing some of the body of your text, changing the font size and then viewing it at 100%, standing 3 to 4 feet back from your computer screen .
6.2.4. Make sure your text box is selected, then change the view percent at the bottom right corner of the screen, or going to the ‘view’ tab and choosing ‘zoom’.

13
6.2.4.1. Choosing ‘zoom’ from the ‘view’ tab…..
6.2.4.2. Choose 100%......

14
6.2.4.3. By selecting your text box before zooming in on it, the zoom will take you to the text box, otherwise you will zoom to the middle of the poster and have to navigate around to find your text box.
While you are working on your poster, you will likely find it helpful to continually zoom in and out depending on what you are doing. For example, while working on the content, zoom in (as above) and then zoom out to view the entire poster, to get an idea of how things look, location of text boxes and graphics, etc.
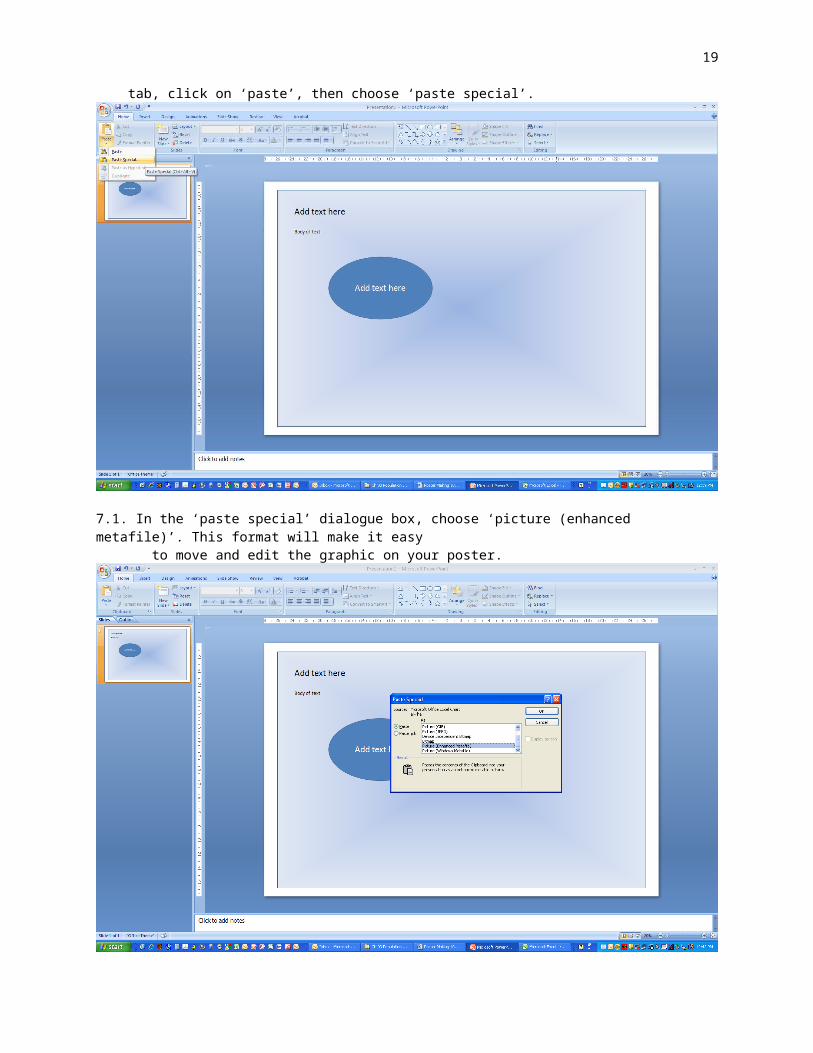
7. You can also add tables and or graphs from other Word documents and Excel documents. The best way I have found to do this is to copy your image and then paste it using ‘paste special’ – on the ‘home’ tab, click on ‘paste’, then choose ‘paste special’.

15
7.1. In the ‘paste special’ dialogue box, choose ‘picture (enhanced metafile)’. This format will make it easy to move and edit the graphic on your poster.
7.2. While the pull handles are visible on the graph, you can move it around by placing your cursor over it, holding down the left click button and dragging it to the desired place.

16
7.3. You can also move your cursor to one of the corner pull handles, left click, and drag to the desired size. Note: make sure to do this using a corner pull handle as this enlarges or shrinks your image proportionally. If you use a side pull handle, your image will stretch out of proportion.

17
8. To align your text boxes and graphics, you can select the ones you want to align (hold down the ‘ctrl’ button, then left click all the text boxes to be aligned), then click on the ‘drawing tools’ menu that will appear automatically once you have selected text boxes.
8.1. Click on ‘align’ and choose from the list of alignment options.

18
8.2. You can also use gridlines to align the components of your poster – check the ‘gridlines’ box on the ‘view’ tab
19
9. If you have several text boxes that you want to connect together (e.g. a text box with a graph title and the graph), select them all by holding the control button and left clicking on each one, then right click and choose ‘group’ from the menu.
10. If you want to layer objects or put an autoshape around another object, right click on the object and choose either ‘send to back’ or ‘bring to front’.

20
10.1. Below, the autoshape was sent to the back, making the graph underneath it visible.