replace gas valve - nexgrill industries, inc. | bbq gas grills
TRANSCRIPT
Replace Gas Valve
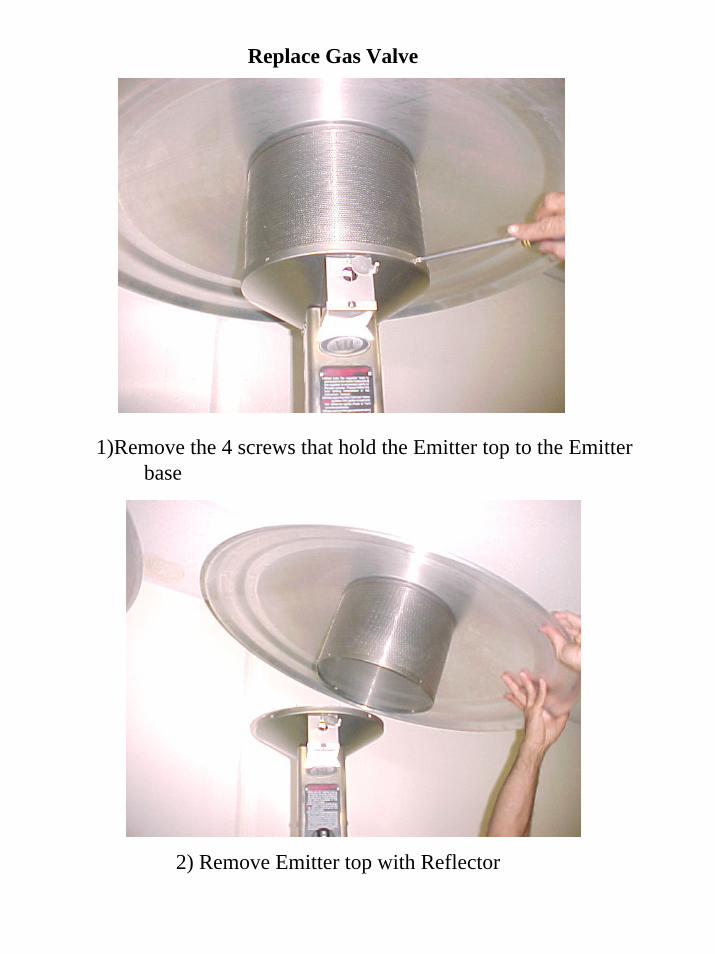
1)Remove the 4 screws that hold the Emitter top to the Emitter base
2) Remove Emitter top with Reflector

Replace Gas Valve
3) Remove the screw of the gas collector box
4) Remove the bottom plate of the gas collector box

Replace Gas Valve
5) Pull outward to remove the control knob
6) Remove all screws from the control panel (3 on each side)

Replace Gas Valve
7)Take out the front control panel
8) Remove burner by turning it counter clockwise until loose

Replace Gas Valve
9) Take out the burner from the unit
10) Remove all screws that connect the controlhousing base to post

Replace Gas Valve
11) Remove the whole burner head assembly from the post
12) Remove the screw from the control front housing base

Replace Gas Valve
13) Remove all the screws from control housing base
14) Remove the 4 screws from the bottom of the control housing base

Replace Gas Valve
15) Remove pilot assembly from emitter base- remove the screw located on outside of emitter base.
16) By pilot nut located on inside fire pit of emitter base

Replace Gas Valve
17) Remove head housing from gas valve
18) Separate the gas valve from the head housing

Replace Gas Valve
19) Remove the pilot gas line by using an 12mm open wrench
20) Pilot gas line has been removed from the gas valve
Replace Gas Valve
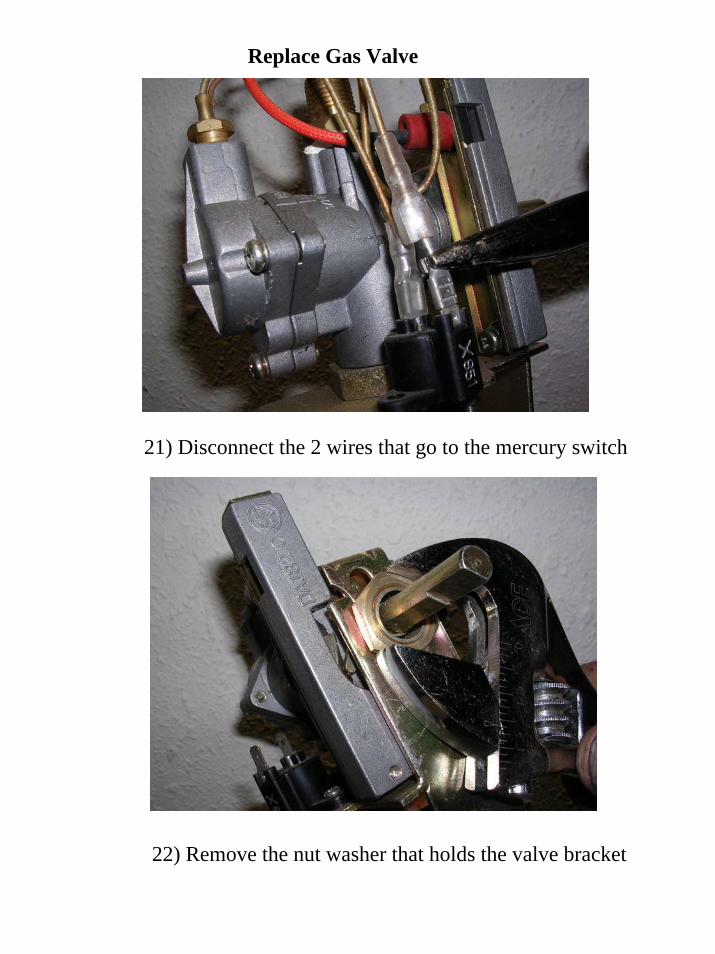
21) Disconnect the 2 wires that go to the mercury switch
22) Remove the nut washer that holds the valve bracket

Replace Gas Valve
23) Remove gas line (hose) from gas valve by using¾” wrench
24) Remove gas valve from support bracket:- support bracket securely upside down- with an adjustable wrench counter clockwise to
remove the nut from valve feed intake

Replace Gas Valve
25) Separate the bracket from valve
To install it: reverse the procedure
*Warning: make sure all connections are secured& tight when install