rename elements user manual - vantec solutions... page 2 1. installation to install the rename...
TRANSCRIPT

www.vantecsolutions.com
Rename Elements – User Manual
Version 1.0 May 2017
www.vantecsolutions.com Page 1
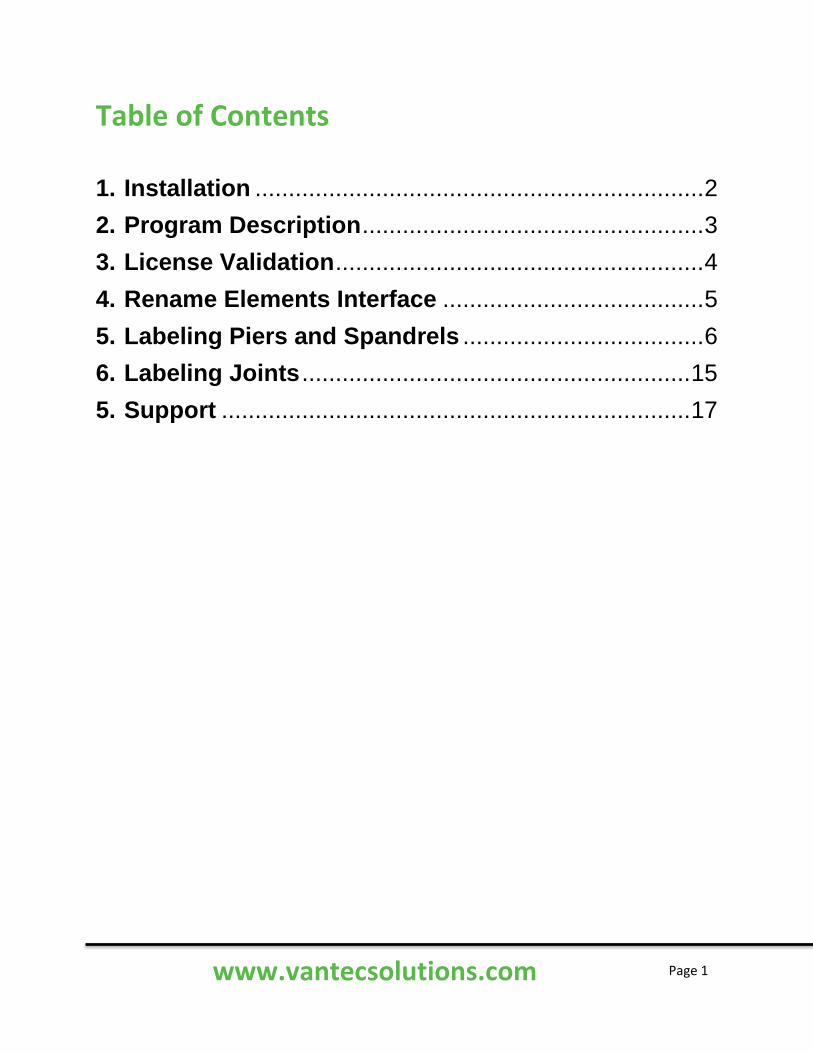
Table of Contents
1. Installation ................................................................... 2
2. Program Description ................................................... 3
3. License Validation ....................................................... 4
4. Rename Elements Interface ....................................... 5
5. Labeling Piers and Spandrels .................................... 6
6. Labeling Joints .......................................................... 15
5. Support ...................................................................... 17

www.vantecsolutions.com Page 2
1. Installation
To install the Rename Elements plugin, extract the zip file
that you received in your email inbox and run the msi file
corresponding to your ETABS® version (2015 or 2016).
Follow the instructions of the installation wizard and in
the second screen confirm the installation directory. The
default installation directory is:
C:\Users\CurrentUserName\AppData\Local\Computers
and Structures\ETABS 201X.
To install the program in a different user account,
replace the CurrentUserName for the target user.
If you want to install the program for several users in
the same computer, perform an initial install on any
account (user1) and then activate the plugin following
the steps in the License Validation section. After the
license activation is complete, copy the “Sections
Xplorer” folder and “ETABS 201X.ini” file from the folder
“C:\Users\user1\AppData\Local\Computers and
Structures\ETABS 201X”
Onto the folder
“C:\Users\user2\AppData\Local\Computers and
Structures\ETABS 201X” and so on.

www.vantecsolutions.com Page 3
2. Program Description
The Rename Elements is a handy plugin that facilitates the edition of pier, spandrel and joint labels in ETABS
®.1
The plugin can be executed by clicking the Tools menu, as shown in Figure 1, and then clicking on Rename_Elements. In each session, ETABS will display a warning asking the user to authorize the plugin execution. This warning is shown in Figure 2.
Figure 1
Figure 2
1 ETABS is a registered trademark of Computers and Structures, Inc.in the USA and other countries.
www.vantecsolutions.com Page 4
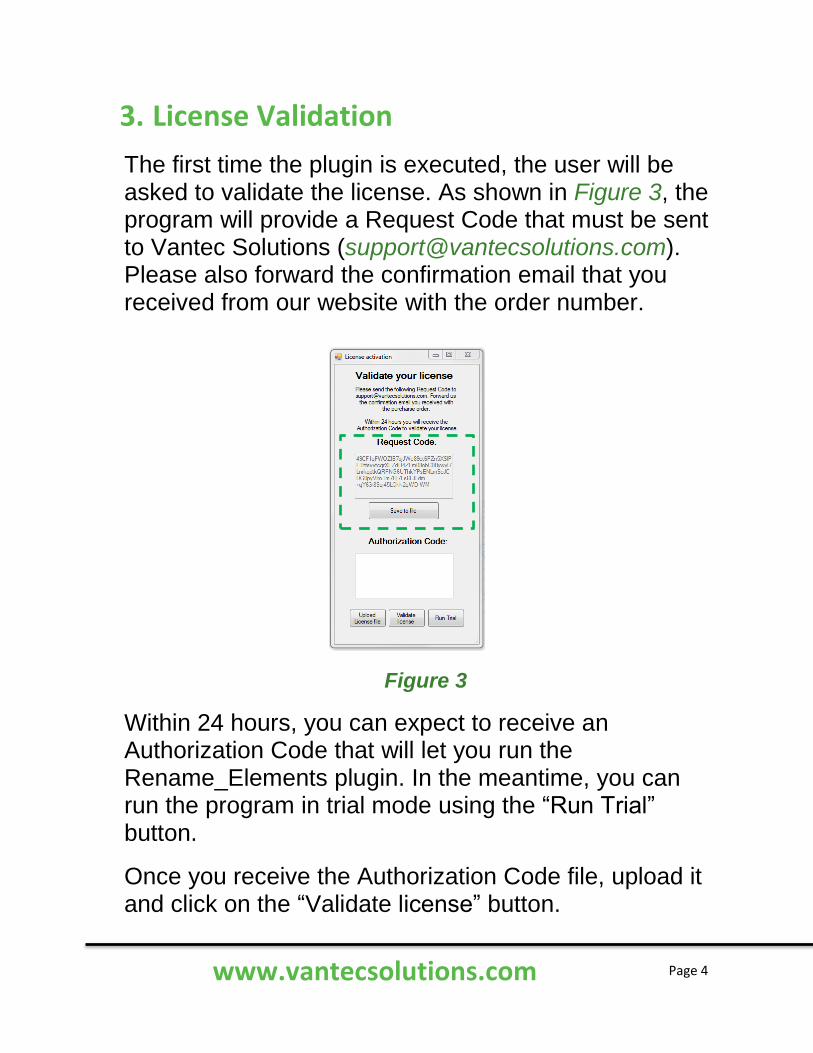
3. License Validation
The first time the plugin is executed, the user will be asked to validate the license. As shown in Figure 3, the program will provide a Request Code that must be sent to Vantec Solutions ([email protected]). Please also forward the confirmation email that you received from our website with the order number.
Figure 3
Within 24 hours, you can expect to receive an Authorization Code that will let you run the Rename_Elements plugin. In the meantime, you can run the program in trial mode using the “Run Trial” button.
Once you receive the Authorization Code file, upload it and click on the “Validate license” button.
www.vantecsolutions.com Page 5
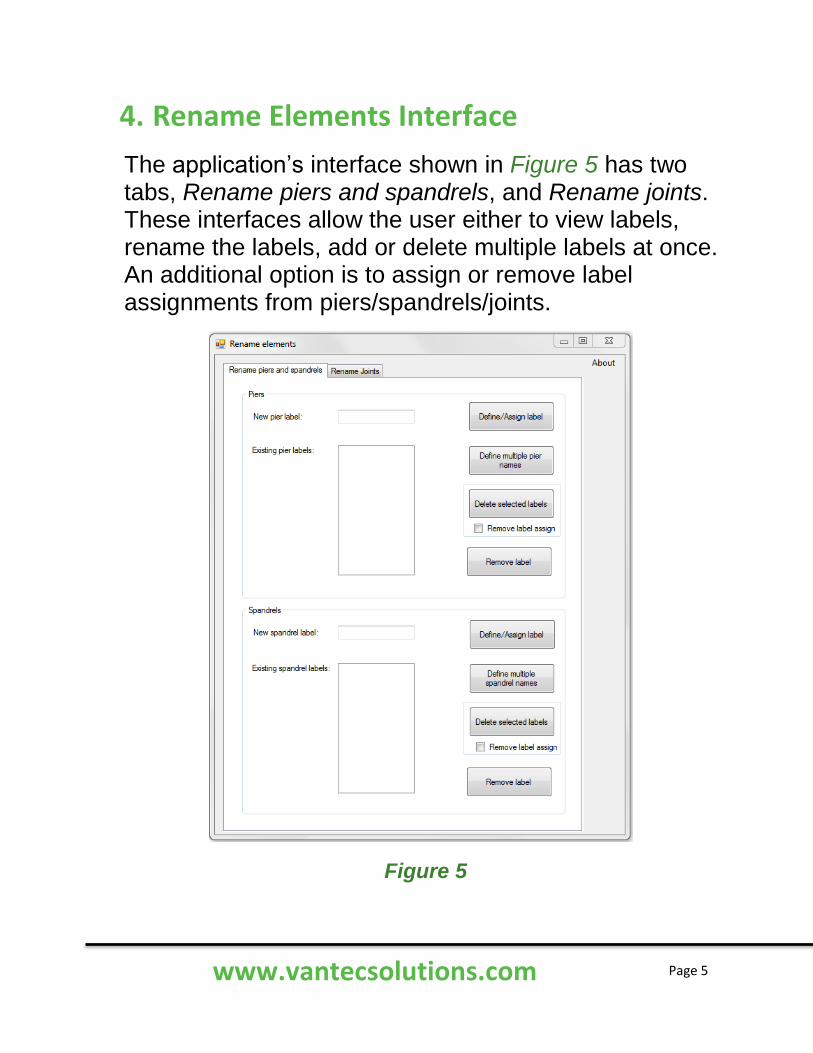
4. Rename Elements Interface
The application’s interface shown in Figure 5 has two tabs, Rename piers and spandrels, and Rename joints. These interfaces allow the user either to view labels, rename the labels, add or delete multiple labels at once. An additional option is to assign or remove label assignments from piers/spandrels/joints.
Figure 5
www.vantecsolutions.com Page 6
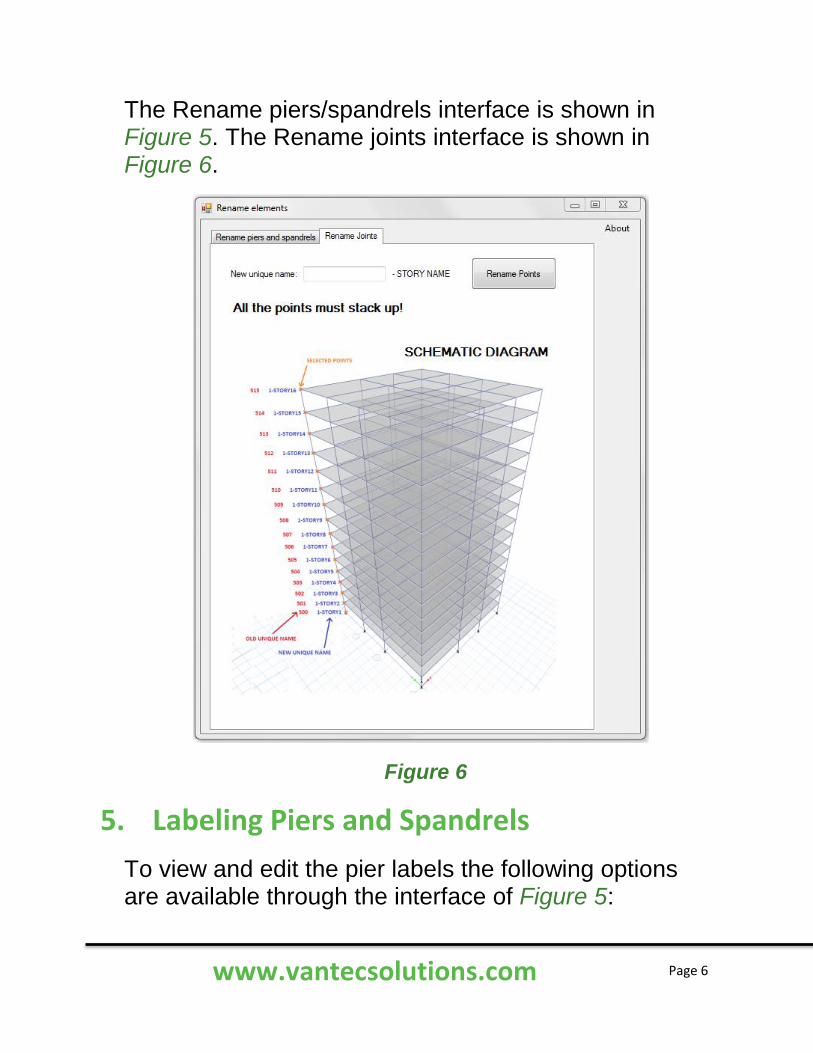
The Rename piers/spandrels interface is shown in Figure 5. The Rename joints interface is shown in Figure 6.
Figure 6
5. Labeling Piers and Spandrels
To view and edit the pier labels the following options are available through the interface of Figure 5:
www.vantecsolutions.com Page 7
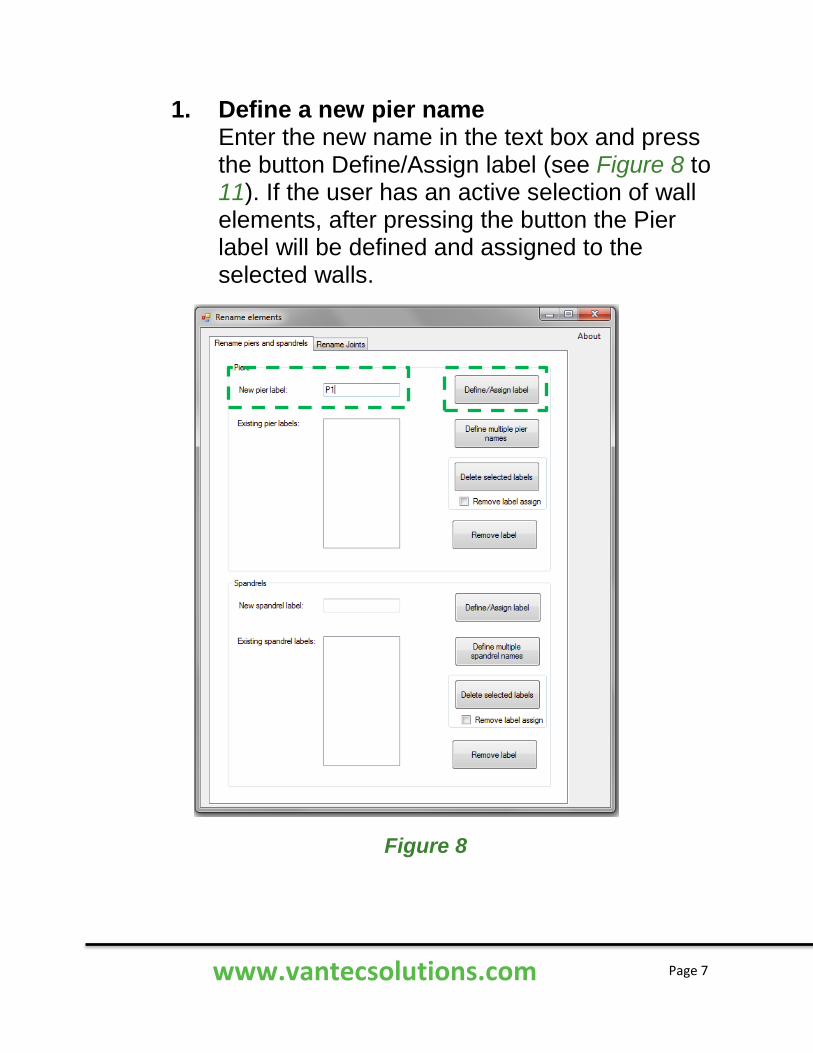
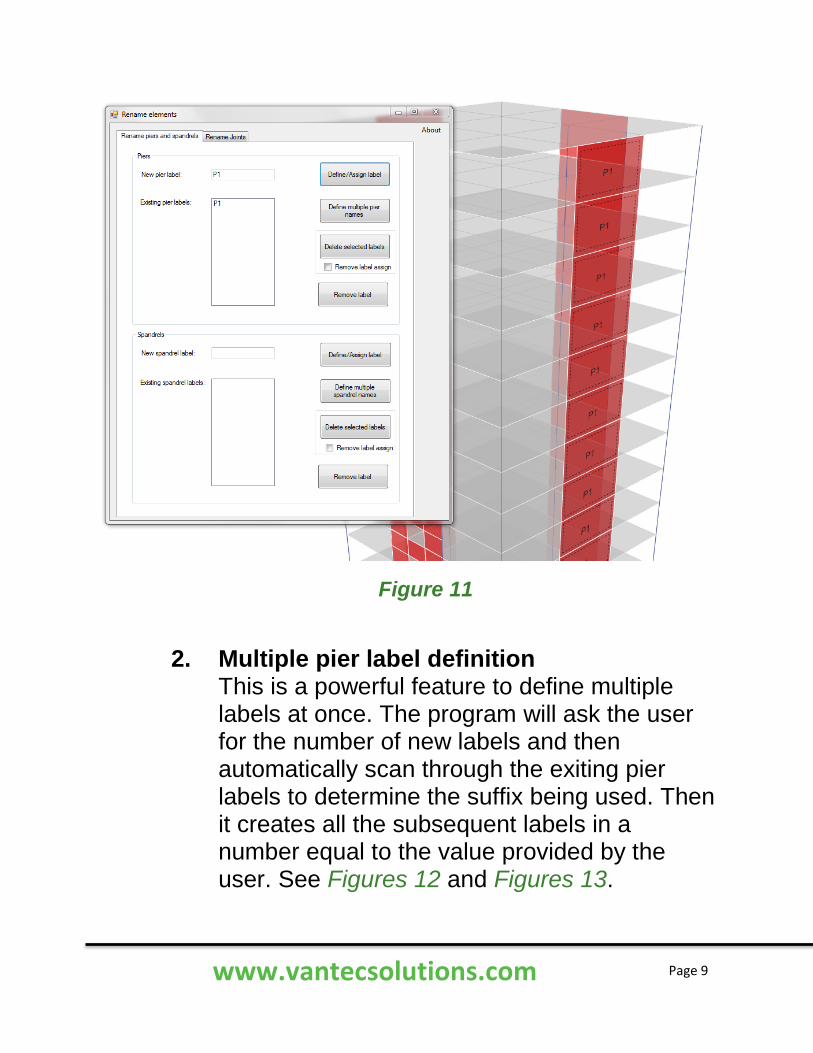
1. Define a new pier name Enter the new name in the text box and press the button Define/Assign label (see Figure 8 to 11). If the user has an active selection of wall elements, after pressing the button the Pier label will be defined and assigned to the selected walls.
Figure 8

www.vantecsolutions.com Page 8
Figure 9
Figure 10
Selected
Piers
www.vantecsolutions.com Page 9
Figure 11
2. Multiple pier label definition
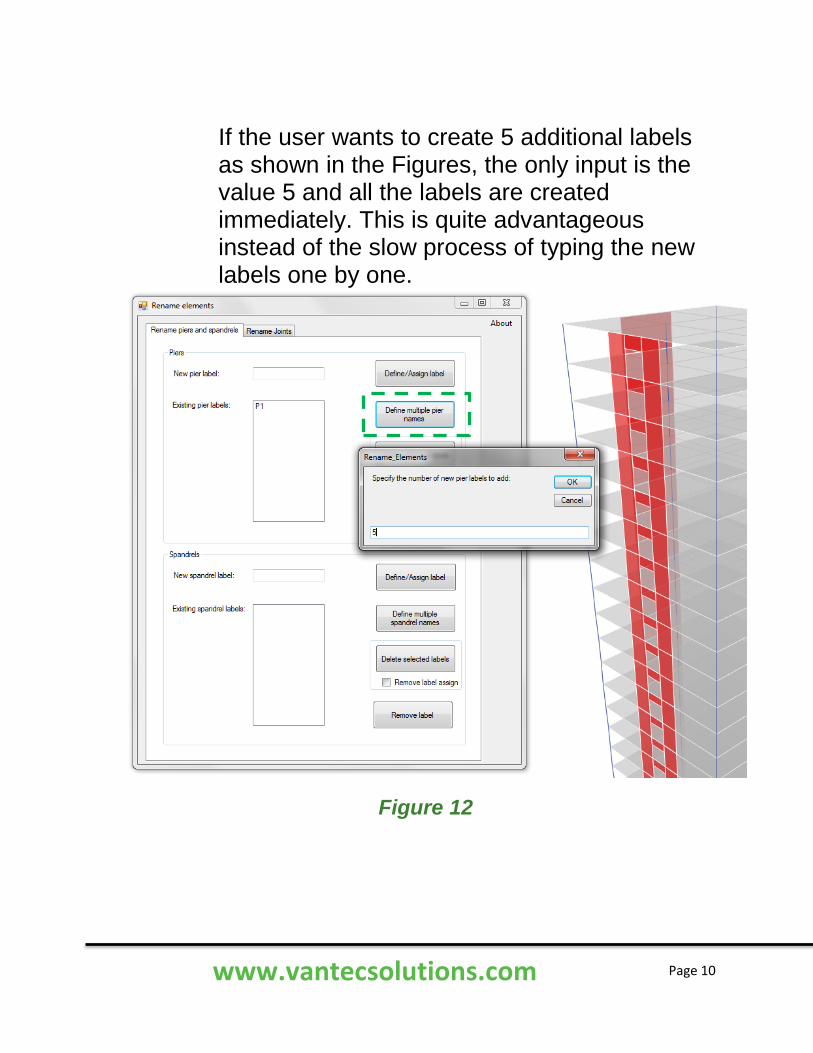
This is a powerful feature to define multiple labels at once. The program will ask the user for the number of new labels and then automatically scan through the exiting pier labels to determine the suffix being used. Then it creates all the subsequent labels in a number equal to the value provided by the user. See Figures 12 and Figures 13.
www.vantecsolutions.com Page 10
If the user wants to create 5 additional labels as shown in the Figures, the only input is the value 5 and all the labels are created immediately. This is quite advantageous instead of the slow process of typing the new labels one by one.
Figure 12

www.vantecsolutions.com Page 11
Figure 13

www.vantecsolutions.com Page 12
3. Rename an existing pier definition To do this, simply double-click on the pier name from the list of existing pier names shown in Figure 14. Then enter the new name.
Figure 14
www.vantecsolutions.com Page 13
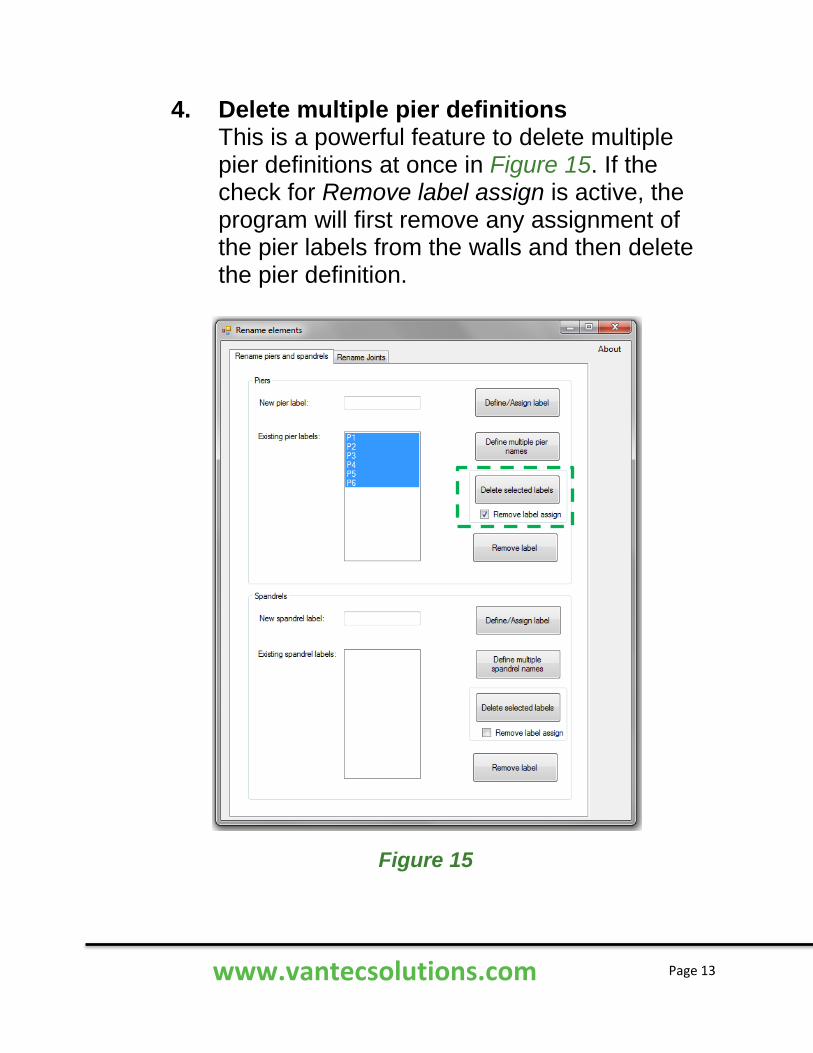
4. Delete multiple pier definitions This is a powerful feature to delete multiple pier definitions at once in Figure 15. If the check for Remove label assign is active, the program will first remove any assignment of the pier labels from the walls and then delete the pier definition.
Figure 15

www.vantecsolutions.com Page 14
5. Remove pier assignments To simply remove any assignment of the pier labels from the walls, select first the walls whose pier label will be removed and then click on the Remove label button of Figure 16.
Figure 16

www.vantecsolutions.com Page 15
The options describe above are also available for spandrels, as shown in Figure 5.
6. Labeling Joints
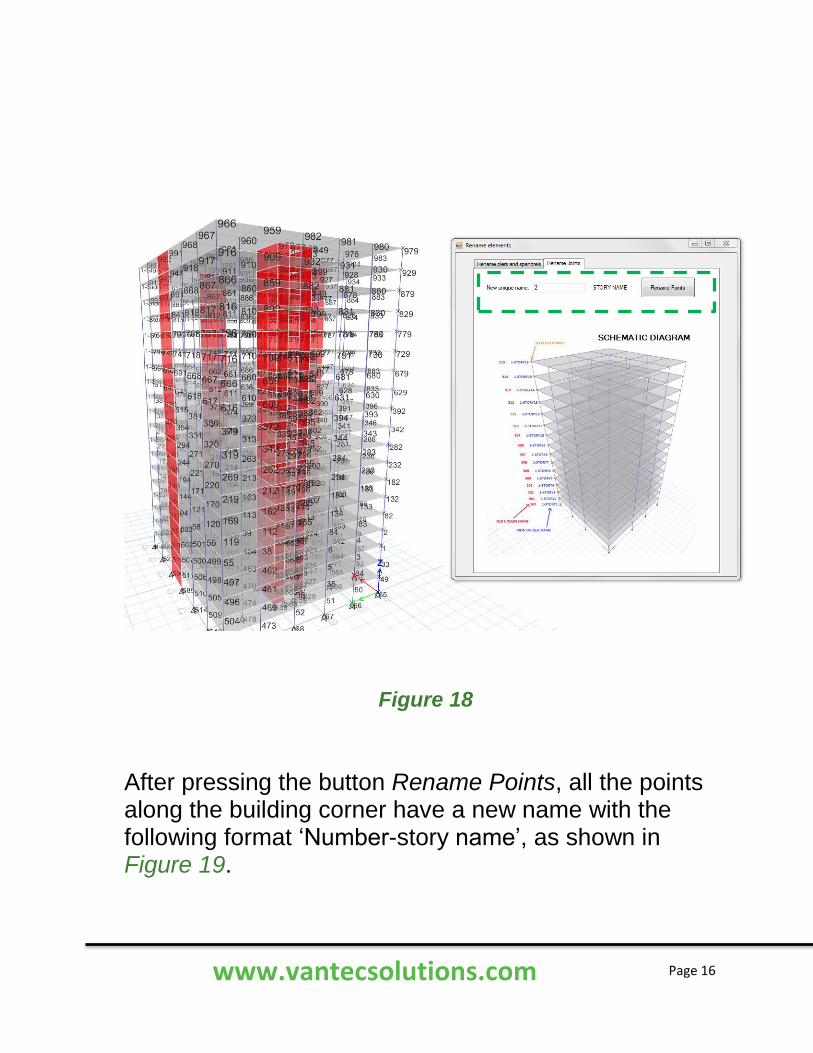
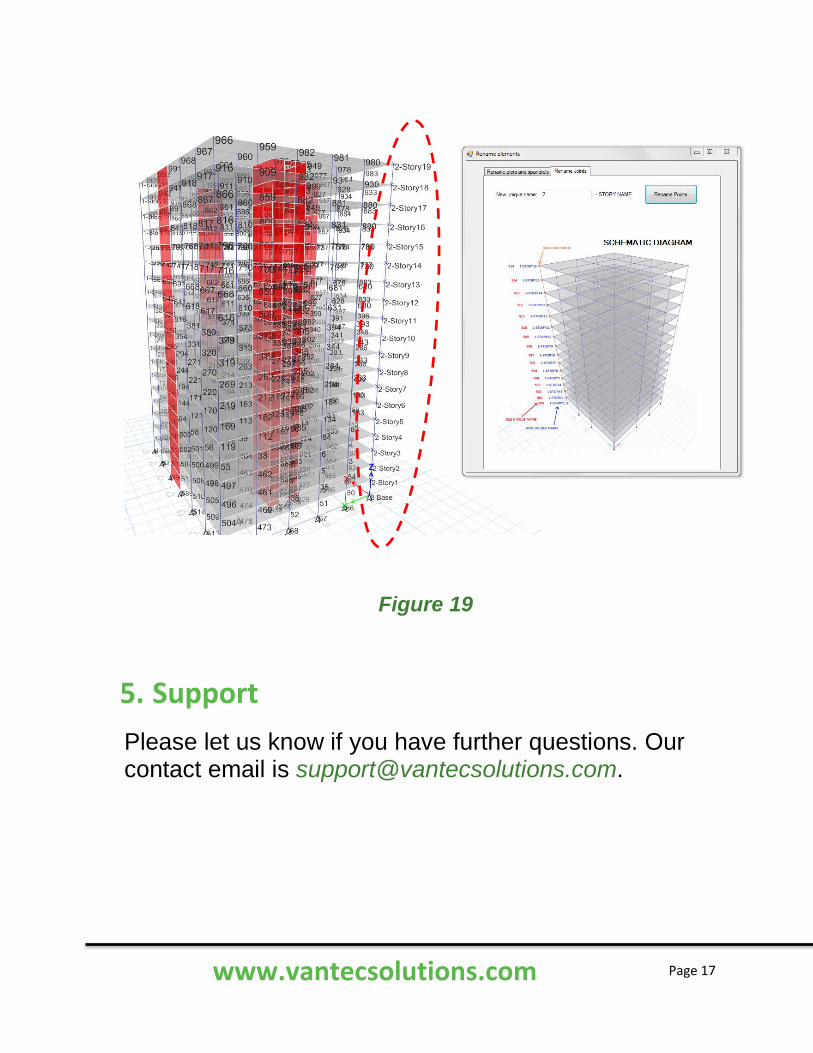
This option allows the user to change the unique name of many points that stack up over the building height. For instance, if you want to change the unique name for all the points circled in Figure 17. Make a multiple selection and type a New Unique Name as shown in Figure 18.
Figure 17
www.vantecsolutions.com Page 16
Figure 18
After pressing the button Rename Points, all the points along the building corner have a new name with the following format ‘Number-story name’, as shown in Figure 19.
www.vantecsolutions.com Page 17
Figure 19
5. Support
Please let us know if you have further questions. Our contact email is [email protected].