reminder how to suture class - · pdf file7khxvh ri vxwxuhv dqg oljdwxuhv lv dq lqwhjudo sduw...
TRANSCRIPT

1

The use of sutures and ligatures is an integral part of surgical procedures. Being proficient in suturing and ligating will not only make your treatments more effective but also shorten the time of the procedure. All that you do that can cut down surgical and anesthesia time will help reduce post-operative complications
2

3

4

Adson forceps are used for a variety of things and are minimally traumatic to tissues. You should get used to using them and using them correctly.
Simple things such as holding an instruments correctly make a difference in the effectiveness of the instrument and you ability to perform the procedure.
5

By holding the needle drivers correctly, you have more control and enable you to perform the task more efficiently and timely. Hemostats are not needle drivers and should not be used as such. Needle drivers’ jaws are finished so they will not damage suture needles. Hemostat jaws are serrated and will damage the needle especially the edges on a cutting needle.
6

These are the three parts of the suture needle. As we can see in this picture that the point is different than the body. We will discuss more the different types of needles and there uses. Never grasp the eye or swaged end of the needle with the needle drivers. This is the weakest part of the needle as well as the pinch point that hold the suture to the needles. If you do, you will most likely bend the needle or damage the connection that hold the suture on the needle. Besides, in a needle with ½ circle, it would almost be impossible to make the point enter at 90 degrees. To suture correctly, the needle point should enter at 90 degrees.
7

Eyed needles are still in your TAC set. These are more traumatic since you must pull 2 lines of thread through the tissue and the eye is larger that the rest of the needle’s diameter. Only pass the suture through this eye once and with enough length that it will pass through the amount of tissue that you are suturing through. You may encounter other ways to thread suture to a needle in which it will not become undone. These ways are not preferred since they will cause even more trauma to the tissues. By having these eyed needles in your TAC set, as long as you have some thread, these needles and a way to sterilize, you have the ability to suture.
Almost all sutures that you will see will be swaged, meaning that the suture is already connected to the needle. We’ve already talked about the pitfalls of holding this incorrectly with the needle drivers.
8

This chart is self-explanatory. One note is the difference between conventional and reverse cutting needles. The reason for the reverse cutting is that they discovered that with a conventional cutting needle, there is a cutting edge where the suture will be applying tension to which makes the tissue weaker and more probable to tearing. A reverse cutting needle is usually considered a better choice. Also note that on the left side of the chart are symbols of the type of point that is on the needle. Most packaging will give you symbols for both the point and the body like they do in the taper-cutting needle in the chart.
9
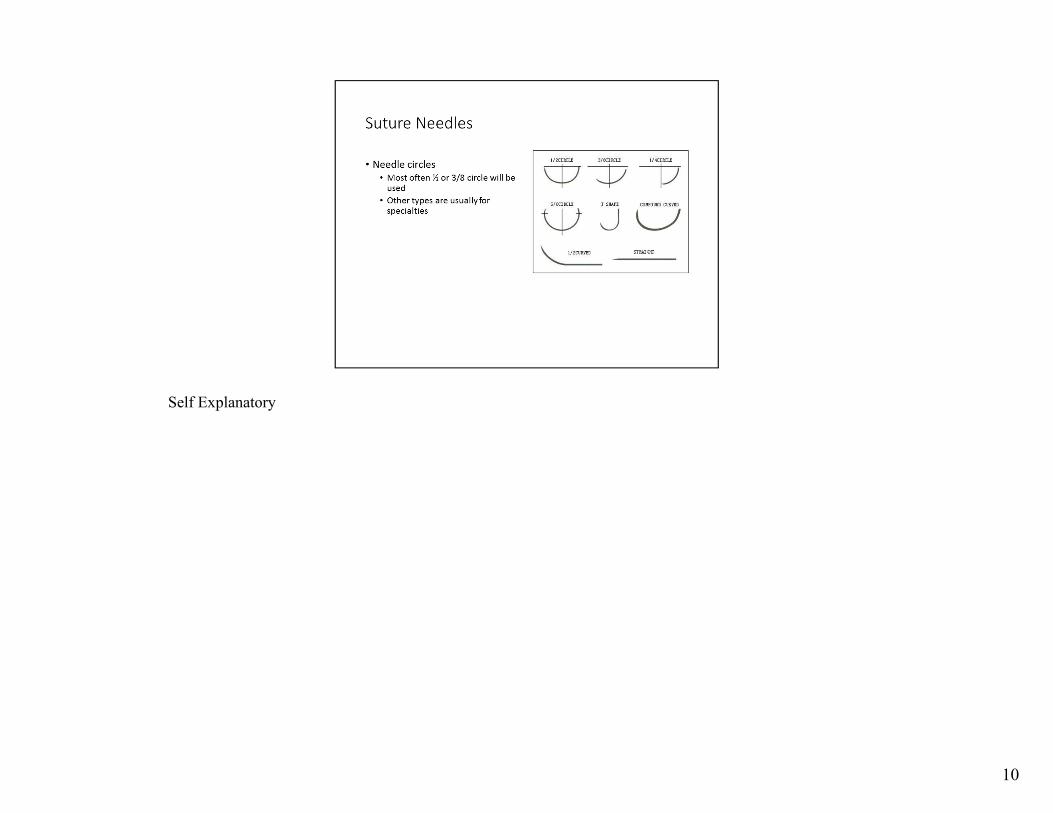
Self Explanatory
10

For the most part, absorbable will be used inside the body and non-absorbable outside. There may be occasions that this may not be, but this is the case most often. Silk, for example, can be used to ligate blood vessels and an absorbable could be used in a skin closure in someone that there is a question about being able to remove the sutures.
11

Both absorbable and non-absorbable suture materials come in both monofilament and multi-strand (braided). Anyone who is a fisherman can identify with the difference between monofilament and braided lines.
12

Self explanatory.
13

You would want the suture to break much more than causing more trauma to the tissues by allowing them to break. If something is going to give, it should be the suture.
14

The individual packages will tell you if it’s absorbable or non-absorbable. You might get generic suture or a type that you have not seen before. The individual package will tell you all the information that you need to know. Note the needle picture. It is the exact size of the needle within the package and what the body is as well as the point.
15

Vicryl is a common absorbable suture. It basically has no tensile strength at 5 weeks. You will become very familiar with its characteristics while you are training in the ORs.
16

This is another common absorbable suture material. Note that this one is monofilament. It retains its strength longer than Vicryl.
17

Chromic gut will cause more tissue inflammation than other absorbable suture.
18

Probably the most common non-absorbable suture material that you will see. It does have considerable memory and since it is somewhat smooth, knots do tighten down easily but have a tendency to loosen. Nylon’s advantage is that it is less expensive and more abundant than other non-absorbable sutures.
19

Polyester is much nicer to work with than nylon. Since it is braided and coated, it is easy to tie and holds knots better than nylon.
20

Polypropylene is also easier to work with than nylon.
21

Silk is very nice to work with. Since it is braided and not coated, it does have a greater chance of harboring organisms.
22

We’ve already discussed the importance of not grasping the swaged eye with the needle drivers.
23
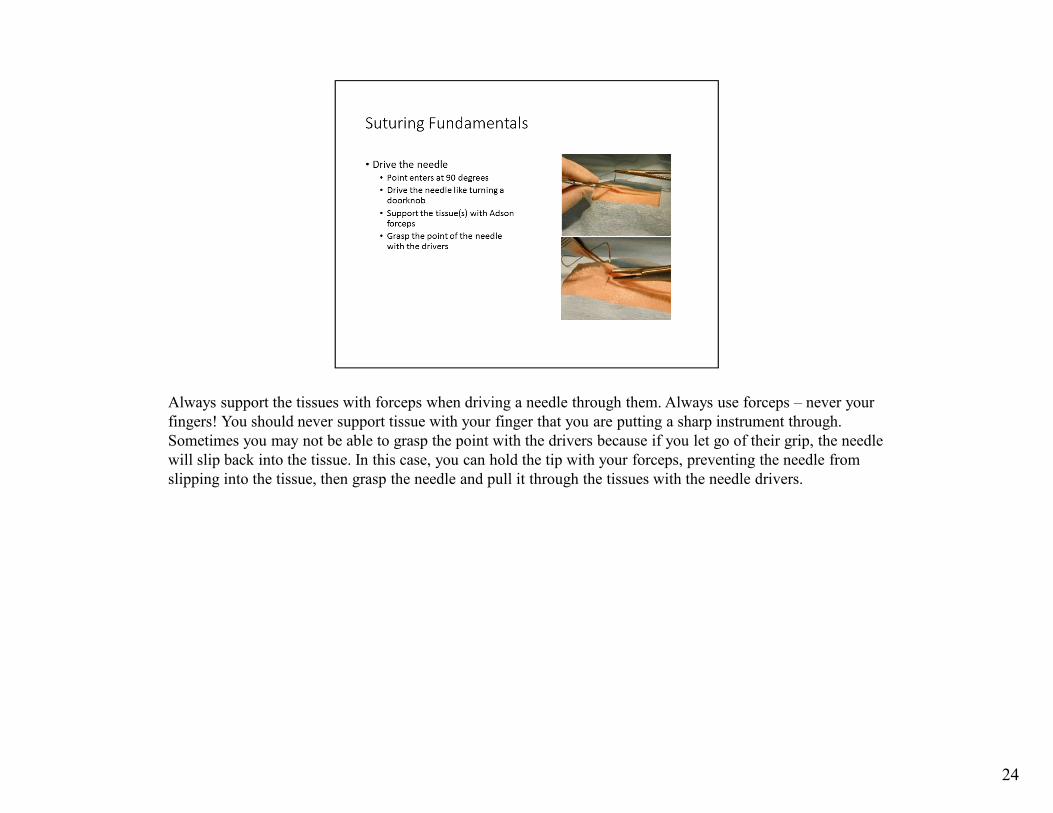
Always support the tissues with forceps when driving a needle through them. Always use forceps – never your fingers! You should never support tissue with your finger that you are putting a sharp instrument through. Sometimes you may not be able to grasp the point with the drivers because if you let go of their grip, the needle will slip back into the tissue. In this case, you can hold the tip with your forceps, preventing the needle from slipping into the tissue, then grasp the needle and pull it through the tissues with the needle drivers.
24

It is not 3-2-1, 5-4-7 or any other combination of throws! It is 2+1+1! Always make sure that you are tying square knots. Square knots don’t slip. Granny knots will slip and become undone.
25

Once again!
26

The video that Clinical Medicine uses on LMS tell you how to do this. You must practice! YouTube also has many videos showing step by step instruction. When tying a knot, always grab the end of the tail and not halfway on the tail. When you grab more of the tail than just the end, you will be wasting suture material and also struggle with trying to pull a loop of suture material through the knot. Be efficient!
27

Apposition is lining the depth of the wound up with each other. Approximation is lining the width of the wound up with each other. Failure to correctly appose and approximate a wound could end up leaving dead space, more scar tissue and prolong healing time.
28

Inversion of the wound edges will always have poor, delayed healing and scarring. This is because the epidermal edges (dying layer) is in contact with each other and does not generate proper healing. Over eversion will often provide the same results. The base layer of the dermis (growing layer) is not really in contact with each other and as a result, poor healing. Optimally we should strive to have all layers of the dermis line up with each other with slight eversion of the wound edges. This ensures that the base layer of the dermis is in contact with each other as well as the other layers. This results in optimal healing.
29

Intrinsic tension is the tension with the suture loop. This is due to putting too much tension on the tissue with your suture. Too much tension within the loop will cause ischemia, necrosis and dehiscence. Extrinsic tension is the force in which the wound edges want to pull apart. A wound extrinsic tension will cause someone to also place intrinsic tension by trying to pull it closed. If there is a question about the amount of tension there is, the stay safe and don’t close it.
30

The amount of tension is inversely affected by the number of sutures put in the wound. Each suture takes up that much more of the load (load sharing). Mattress sutures provide load sharing.
31

We know that we need to be cautious about how tight we make sutures. We also know that we must consider any extrinsic tension as well.
32
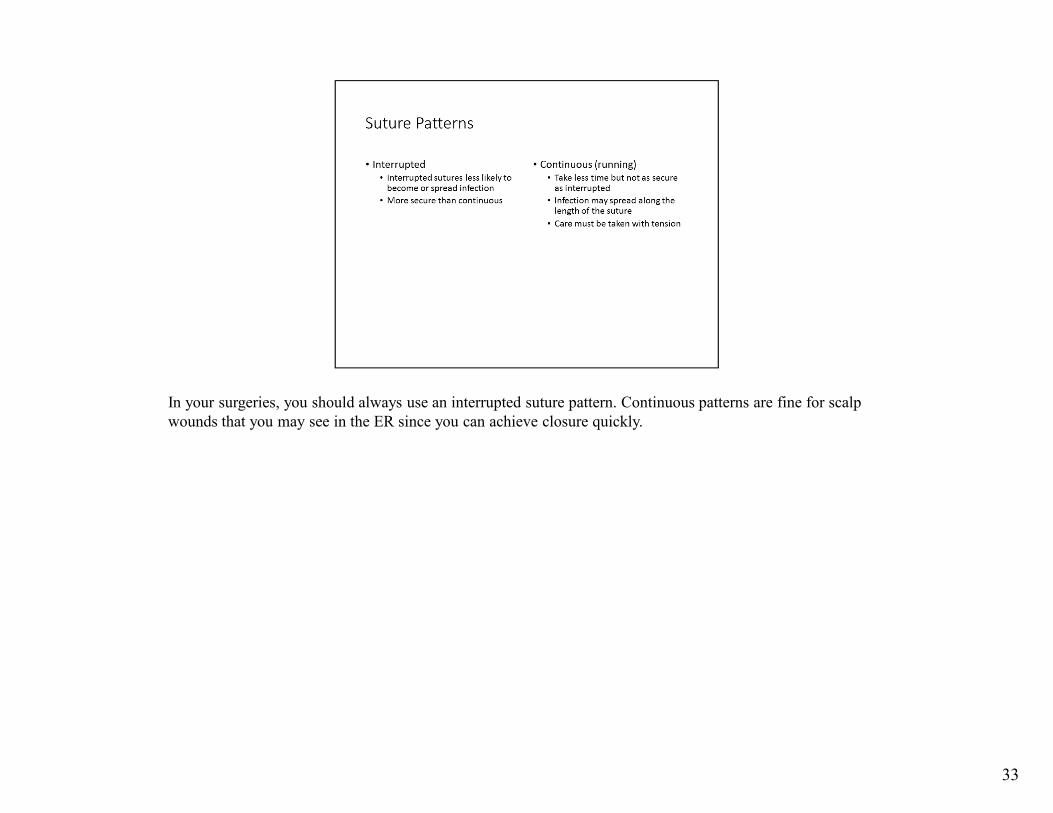
In your surgeries, you should always use an interrupted suture pattern. Continuous patterns are fine for scalp wounds that you may see in the ER since you can achieve closure quickly.
33

You should be a master at this pattern.
34

Very useful pattern. You should also master this one.
35

Another pattern you should master.
36

A good technique.
37

Never cut the suture far from the skin. By doing this you will be pulling all the contaminated suture material through the tissues. Also do not pull the suture out by pulling it away from the suture line. Some sutures will have a tendency to stick a bit and by pulling away, you may pull apart the wound.
38

Areas of better perfusion heal faster. Areas farther away from your heart heal slower.
39

You must provide the patient with written instructions on wound care and extra dressing material when discharged and a time to return to clinic for suture removal. You must include the signs and symptoms of infections with order to RTC if infection is suspected.
40

Usually come with 35 staples to a stapler. Comes in regular and wide variety (35R or 35W). You should evertthe wound edges with forceps when using this. Staples are probably a little better than sutures because they do not pass through the tissues like suture and less likely to carry organisms into the wound.
41

By placing the 2 prongs under and the one on top, this bends the staple in a “V” shape and it is removed. It will not work the other way. Place a finger on the staple or cover with your hand when using hemostats as the removal tool. This will keep the staple from flying through the air and hitting someone in the eye.
42

This is not CTM or SOCOM when you can get away with grabbing a bunch of tissue with hemostats because there is a bleeding vessel in it. Clamping tissue causes damage which you do not want to leave in a wound. No one will be shooting at you if you are in a position to perform surgery. Take your time and do things correctly. A good way to isolate a bleeding vessel is to blot the area with gauze, identify the vessel and grab the end with Adson forceps. Adson’s are fine pointed and will pinpoint the vessel better than the jaws of hemostats. Once you have the vessel with the Adson’s, lift a little so you can place the hemostats on the vessel. You can always do a little blunt dissection to isolate the vessel too. When using curved hemostats, always place the tips up. This allows for you to easily get your ligature under the instrument. This is also why you should place the tips past the vessel. If the very tips are holding the vessel, it is easy to entrap them in your suture loop. Once the first throw of the surgeons know is placed, relax the jaws to check for bleeding. If there is, tighten the knot. This is better to know before you finish a knot and then find out it is ineffective. Once you perform a “flash”, you can either remove the hemostat or retighten it depending on the situation.
43

You must find a technique that you like and practice, practice and practice. This is a muscle memory exercise. You shouldn’t go on rotation and be in an OR looking like a preschooler trying to tie his shoes!
44

If you use a transfixing suture that goes through the vessel, you should also put a regular ligation proximal to it. A vessel under pressure will expand as well as the holes in its walls that the suture is passing through and result in extravasation. Any vessel that is important enough to transfix should have two ligations on it, either two transfixing sutures or a transfixing suture and a ligation.
45