red hat enterprise linux 6 virtualization tuning and optimization
TRANSCRIPT
Red Hat Enterprise Linux 6
Virtualization Tuning and Optimization Guide
Optimizing your virtual environment
Last Updated: 2017-10-20


Red Hat Enterprise Linux 6 Virtualization Tuning and Optimization Guide
Optimizing your virtual environment
Jiri HerrmannRed Hat Customer Content [email protected]
Yehuda ZimmermanRed Hat Customer Content [email protected]
Dayle ParkerRed Hat Customer Content Services
Scott RadvanRed Hat Customer Content Services
Red Hat Subject Matter Experts

Legal Notice
Copyright © 2017 Red Hat, Inc.
This document is licensed by Red Hat under the Creative Commons Attribution-ShareAlike 3.0Unported License. If you distribute this document, or a modified version of it, you must provideattribution to Red Hat, Inc. and provide a link to the original. If the document is modified, all Red Hattrademarks must be removed.
Red Hat, as the licensor of this document, waives the right to enforce, and agrees not to assert,Section 4d of CC-BY-SA to the fullest extent permitted by applicable law.
Red Hat, Red Hat Enterprise Linux, the Shadowman logo, JBoss, OpenShift, Fedora, the Infinitylogo, and RHCE are trademarks of Red Hat, Inc., registered in the United States and othercountries.
Linux ® is the registered trademark of Linus Torvalds in the United States and other countries.
Java ® is a registered trademark of Oracle and/or its affiliates.
XFS ® is a trademark of Silicon Graphics International Corp. or its subsidiaries in the United Statesand/or other countries.
MySQL ® is a registered trademark of MySQL AB in the United States, the European Union andother countries.
Node.js ® is an official trademark of Joyent. Red Hat Software Collections is not formally related toor endorsed by the official Joyent Node.js open source or commercial project.
The OpenStack ® Word Mark and OpenStack logo are either registered trademarks/service marksor trademarks/service marks of the OpenStack Foundation, in the United States and other countriesand are used with the OpenStack Foundation's permission. We are not affiliated with, endorsed orsponsored by the OpenStack Foundation, or the OpenStack community.
All other trademarks are the property of their respective owners.
Abstract
The Red Hat Enterprise Linux Virtualization Tuning and Optimization Guide covers KVM andvirtualization performance. Within this guide you can find tips and suggestions for making full use ofKVM performance features and options for your host systems and guest virtual machines.
. . . . . . . . . . . . . . . . . . . . . . . . . . . . . . . . . . . . . . . . . . . . . . . . . . . . . . . . . . . . . . . . . . . . . . . . . . . . . . . . . . . . . . . . . . . . . . . . . . . . . . . . . . . . . . . . . . . . . . . . . . . . . . . . . . . . . . . . . . . . . . . . . . . . . . . . . . . . . . . . . . . . . . . . . . . . . . . . . . . . . . . . . . . . . . . . . . . . . . . . . . . . . . . . . . . . . . . . . . . . . . . . . . . . . . . . . . . . . . . . . . . . . . . . . . . . . . . . . . . . . . . . . . . . . . . . . . . . . . . .
. . . . . . . . . . . . . . . . . . . . . . . . . . . . . . . . . . . . . . . . . . . . . . . . . . . . . . . . . . . . . . . . . . . . . . . . . . . . . . . . . . . . . . . . . . . . . . . . . . . . . . . . . . . . . . . . . . . . . . . . . . . . . . . . . . . . . . . . . . . . . . . . . . . . . . . . . . . . . . . . . . . . . . . . . . . . . . . . . . . . . . . . . . . . . . . . . . . . . . . . . . . . . . . . . . . . . . . . . . . . . . . . . . . . . . . . . . . . . . . . . . . . . . . . . . . . . . . . . . . . . . . . . . . . . . . . . . . . . . . .
. . . . . . . . . . . . . . . . . . . . . . . . . . . . . . . . . . . . . . . . . . . . . . . . . . . . . . . . . . . . . . . . . . . . . . . . . . . . . . . . . . . . . . . . . . . . . . . . . . . . . . . . . . . . . . . . . . . . . . . . . . . . . . . . . . . . . . . . . . . . . . . . . . . . . . . . . . . . . . . . . . . . . . . . . . . . . . . . . . . . . . . . . . . . . . . . . . . . . . . . . . . . . . . . . . . . . . . . . . . . . . . . . . . . . . . . . . . . . . . . . . . . . . . . . . . . . . . . . . . . . . . . . . . . . . . . . . . . . . . .
. . . . . . . . . . . . . . . . . . . . . . . . . . . . . . . . . . . . . . . . . . . . . . . . . . . . . . . . . . . . . . . . . . . . . . . . . . . . . . . . . . . . . . . . . . . . . . . . . . . . . . . . . . . . . . . . . . . . . . . . . . . . . . . . . . . . . . . . . . . . . . . . . . . . . . . . . . . . . . . . . . . . . . . . . . . . . . . . . . . . . . . . . . . . . . . . . . . . . . . . . . . . . . . . . . . . . . . . . . . . . . . . . . . . . . . . . . . . . . . . . . . . . . . . . . . . . . . . . . . . . . . . . . . . . . . . . . . . . . . .
. . . . . . . . . . . . . . . . . . . . . . . . . . . . . . . . . . . . . . . . . . . . . . . . . . . . . . . . . . . . . . . . . . . . . . . . . . . . . . . . . . . . . . . . . . . . . . . . . . . . . . . . . . . . . . . . . . . . . . . . . . . . . . . . . . . . . . . . . . . . . . . . . . . . . . . . . . . . . . . . . . . . . . . . . . . . . . . . . . . . . . . . . . . . . . . . . . . . . . . . . . . . . . . . . . . . . . . . . . . . . . . . . . . . . . . . . . . . . . . . . . . . . . . . . . . . . . . . . . . . . . . . . . . . . . . . . . . . . . . .
. . . . . . . . . . . . . . . . . . . . . . . . . . . . . . . . . . . . . . . . . . . . . . . . . . . . . . . . . . . . . . . . . . . . . . . . . . . . . . . . . . . . . . . . . . . . . . . . . . . . . . . . . . . . . . . . . . . . . . . . . . . . . . . . . . . . . . . . . . . . . . . . . . . . . . . . . . . . . . . . . . . . . . . . . . . . . . . . . . . . . . . . . . . . . . . . . . . . . . . . . . . . . . . . . . . . . . . . . . . . . . . . . . . . . . . . . . . . . . . . . . . . . . . . . . . . . . . . . . . . . . . . . . . . . . . . . . . . . . . .
. . . . . . . . . . . . . . . . . . . . . . . . . . . . . . . . . . . . . . . . . . . . . . . . . . . . . . . . . . . . . . . . . . . . . . . . . . . . . . . . . . . . . . . . . . . . . . . . . . . . . . . . . . . . . . . . . . . . . . . . . . . . . . . . . . . . . . . . . . . . . . . . . . . . . . . . . . . . . . . . . . . . . . . . . . . . . . . . . . . . . . . . . . . . . . . . . . . . . . . . . . . . . . . . . . . . . . . . . . . . . . . . . . . . . . . . . . . . . . . . . . . . . . . . . . . . . . . . . . . . . . . . . . . . . . . . . . . . . . . .
. . . . . . . . . . . . . . . . . . . . . . . . . . . . . . . . . . . . . . . . . . . . . . . . . . . . . . . . . . . . . . . . . . . . . . . . . . . . . . . . . . . . . . . . . . . . . . . . . . . . . . . . . . . . . . . . . . . . . . . . . . . . . . . . . . . . . . . . . . . . . . . . . . . . . . . . . . . . . . . . . . . . . . . . . . . . . . . . . . . . . . . . . . . . . . . . . . . . . . . . . . . . . . . . . . . . . . . . . . . . . . . . . . . . . . . . . . . . . . . . . . . . . . . . . . . . . . . . . . . . . . . . . . . . . . . . . . . . . . . .
Table of Contents
CHAPTER 1. INTRODUCTION1.1. ABOUT THIS GUIDE1.2. KVM PERFORMANCE ARCHITECTURE OVERVIEW1.3. PERFORMANCE FEATURES AND IMPROVEMENTS
CHAPTER 2. PERFORMANCE MONITORING TOOLS2.1. INTRODUCTION2.2. PERF KVM
CHAPTER 3. OPTIMIZING VIRTUALIZATION PERFORMANCE WITH VIRT-MANAGER3.1. INTRODUCTION3.2. OPERATING SYSTEM DETAILS AND DEVICES
3.2.1. Specifying Guest Virtual Machine Details3.2.2. Remove Unused Devices
3.3. CPU PERFORMANCE OPTIONS3.3.1. Option: Available CPUs3.3.2. Option: CPU Configuration3.3.3. Option: CPU Topology3.3.4. Option: CPU Pinning
3.4. VIRTUAL DISK PERFORMANCE OPTIONS
CHAPTER 4. TUNED4.1. INTRODUCTION4.2. TUNED AND TUNED-ADM
CHAPTER 5. NETWORKING5.1. INTRODUCTION5.2. NETWORK TUNING TIPS5.3. VIRTIO AND VHOST_NET5.4. DEVICE ASSIGNMENT AND SR-IOV
CHAPTER 6. I/O SCHEDULING6.1. I/O SCHEDULING6.2. I/O SCHEDULING WITH RED HAT ENTERPRISE LINUX AS A VIRTUALIZATION HOST6.3. I/O SCHEDULING WITH RED HAT ENTERPRISE LINUX AS A VIRTUALIZATION GUEST6.4. CONFIGURING THE I/O SCHEDULER
6.4.1. Configuring the I/O Scheduler for Red Hat Enterprise Linux 5 and 66.4.2. Configuring the I/O Scheduler for Red Hat Enterprise Linux 7
CHAPTER 7. BLOCK I/O7.1. INTRODUCTION7.2. BLOCK I/O TUNING7.3. CACHING7.4. I/O MODE
CHAPTER 8. MEMORY8.1. INTRODUCTION8.2. MEMORY TUNING TIPS8.3. MEMORY TUNING ON VIRTUAL MACHINES
8.3.1. Memory Monitoring Tools8.3.2. Memory Tuning with virsh
8.3.2.1. memtune8.3.2.2. Memory Backing
4444
666
99999
101112131314
151515
1717171718
19191919202020
2121212222
2424242424252526
Table of Contents
1

. . . . . . . . . . . . . . . . . . . . . . . . . . . . . . . . . . . . . . . . . . . . . . . . . . . . . . . . . . . . . . . . . . . . . . . . . . . . . . . . . . . . . . . . . . . . . . . . . . . . . . . . . . . . . . . . . . . . . . . . . . . . . . . . . . . . . . . . . . . . . . . . . . . . . . . . . . . . . . . . . . . . . . . . . . . . . . . . . . . . . . . . . . . . . . . . . . . . . . . . . . . . . . . . . . . . . . . . . . . . . . . . . . . . . . . . . . . . . . . . . . . . . . . . . . . . . . . . . . . . . . . . . . . . . . . . . . . . . . . .
. . . . . . . . . . . . . . . . . . . . . . . . . . . . . . . . . . . . . . . . . . . . . . . . . . . . . . . . . . . . . . . . . . . . . . . . . . . . . . . . . . . . . . . . . . . . . . . . . . . . . . . . . . . . . . . . . . . . . . . . . . . . . . . . . . . . . . . . . . . . . . . . . . . . . . . . . . . . . . . . . . . . . . . . . . . . . . . . . . . . . . . . . . . . . . . . . . . . . . . . . . . . . . . . . . . . . . . . . . . . . . . . . . . . . . . . . . . . . . . . . . . . . . . . . . . . . . . . . . . . . . . . . . . . . . . . . . . . . . . .
8.3.3. Huge Pages and Transparent Huge Pages (THP)8.3.3.1. Configuring Transparent Huge Pages8.3.3.2. Configuring Static Huge Pages8.3.3.3. Enabling 1 GB huge pages for guests at boot or runtime
8.4. KERNEL SAME-PAGE MERGING (KSM)8.4.1. The KSM Service8.4.2. The KSM Tuning Service8.4.3. KSM Variables and Monitoring8.4.4. Deactivating KSM
CHAPTER 9. NUMA9.1. INTRODUCTION9.2. NUMA MEMORY ALLOCATION POLICIES9.3. LIBVIRT NUMA TUNING
9.3.1. NUMA vCPU Pinning9.3.2. Domain Processes9.3.3. Domain vCPU Threads9.3.4. Using emulatorpin9.3.5. Tuning vCPU Pinning with virsh9.3.6. Tuning Domain Process CPU Pinning with virsh9.3.7. Tuning Domain Process Memory Policy with virsh
9.4. NUMA-AWARE KERNEL SAMEPAGE MERGING (KSM)
APPENDIX A. REVISION HISTORY
262627283031313233
353535353738393940404040
42
Virtualization Tuning and Optimization Guide
2

Table of Contents
3

CHAPTER 1. INTRODUCTION
1.1. ABOUT THIS GUIDE
The Red Hat Enterprise Linux Virtualization Tuning and Optimization Guide contains details ofconfigurable options and settings, and other suggestions that will help you achieve optimal performanceof your Red Hat Enterprise Linux hosts and guest virtual machines.
Following this introduction, the guide consists of the following sections:
Virt-manager
tuned
Networking
Memory
Block I/O
NUMA
Performance Monitoring Tools
1.2. KVM PERFORMANCE ARCHITECTURE OVERVIEW
The following points provide a brief overview of KVM as it pertains to system performance andprocess/thread management:
When using KVM, guests run as a Linux process on the host.
Virtual CPUs (vCPUs) are implemented as normal threads, handled by the Linux scheduler.
Guests inherit features such as NUMA and Huge Pages from the kernel.
Disk and network I/O settings in the host have a significant performance impact.
Network traffic typically travels through a software-based bridge.
1.3. PERFORMANCE FEATURES AND IMPROVEMENTS
CPU/Kernel
NUMA - Non-Uniform Memory Access. See Chapter 9, NUMA for details on NUMA.
CFS - Completely Fair Scheduler. A modern class-focused scheduler.
RCU - Read Copy Update. Better handling of shared thread data.
Up to 160 virtual CPUs (vCPUs).
Memory
Huge Pages and other optimizations for memory-intensive environments. See Chapter 8,Memory for details.
Virtualization Tuning and Optimization Guide
4

Networking
vhost-net - a fast, kernel-based VirtIO solution.
SR-IOV - for near-native networking performance levels.
Block I/O
AIO - Support for a thread to overlap other I/O operations.
MSI - PCI bus device interrupt generation.
Scatter Gather - An improved I/O mode for data buffer handling.
NOTE
For more details on virtualization support, limits, and features, refer to the Red HatEnterprise Linux 6 Virtualization Getting Started Guide and the following URLs:
https://access.redhat.com/certified-hypervisors
https://access.redhat.com/articles/rhel-kvm-limits
CHAPTER 1. INTRODUCTION
5

CHAPTER 2. PERFORMANCE MONITORING TOOLS
2.1. INTRODUCTION
This chapter describes tools used to monitor guest virtual machine environments.
2.2. PERF KVM
You can use the perf command with the kvm option to collect guest operating system statistics from thehost.
In Red Hat Enterprise Linux, the perf package provides the perf command. Run rpm -q perf to see ifthe perf package is installed. If it is not installed, and you want to install it to collect and analyze guestoperating system statistics, run the following command as the root user:
yum install perf
In order to use perf kvm in the host, you must have access to the /proc/modules and /proc/kallsyms files from the guest. There are two methods to achieve this. Refer to the followingprocedure, Procedure 2.1, “Copying /proc files from guest to host” to transfer the files into the host andrun reports on the files. Alternatively, refer to Procedure 2.2, “Alternative: using sshfs to directly accessfiles” to directly mount the guest and access the files.
Procedure 2.1. Copying /proc files from guest to host
IMPORTANT
If you directly copy the required files (for instance, via scp) you will only copy files of zerolength. This procedure describes how to first save the files in the guest to a temporarylocation (with the cat command), and then copy them to the host for use by perf kvm.
1. Log in to the guest and save filesLog in to the guest and save /proc/modules and /proc/kallsyms to a temporary location, /tmp:
# cat /proc/modules > /tmp/modules# cat /proc/kallsyms > /tmp/kallsyms
2. Copy the temporary files to the hostOnce you have logged off from the guest, run the following example scp commands to copy thesaved files to the host. You should substitute your host name and TCP port if they are different:
# scp root@GuestMachine:/tmp/kallsyms guest-kallsyms# scp root@GuestMachine:/tmp/modules guest-modules
You now have two files from the guest (guest-kallsyms and guest-modules) on the host,ready for use by perf kvm.
3. Recording and reporting events with perf kvmUsing the files obtained in the previous steps, recording and reporting of events in the guest, thehost, or both is now possible.
Virtualization Tuning and Optimization Guide
6
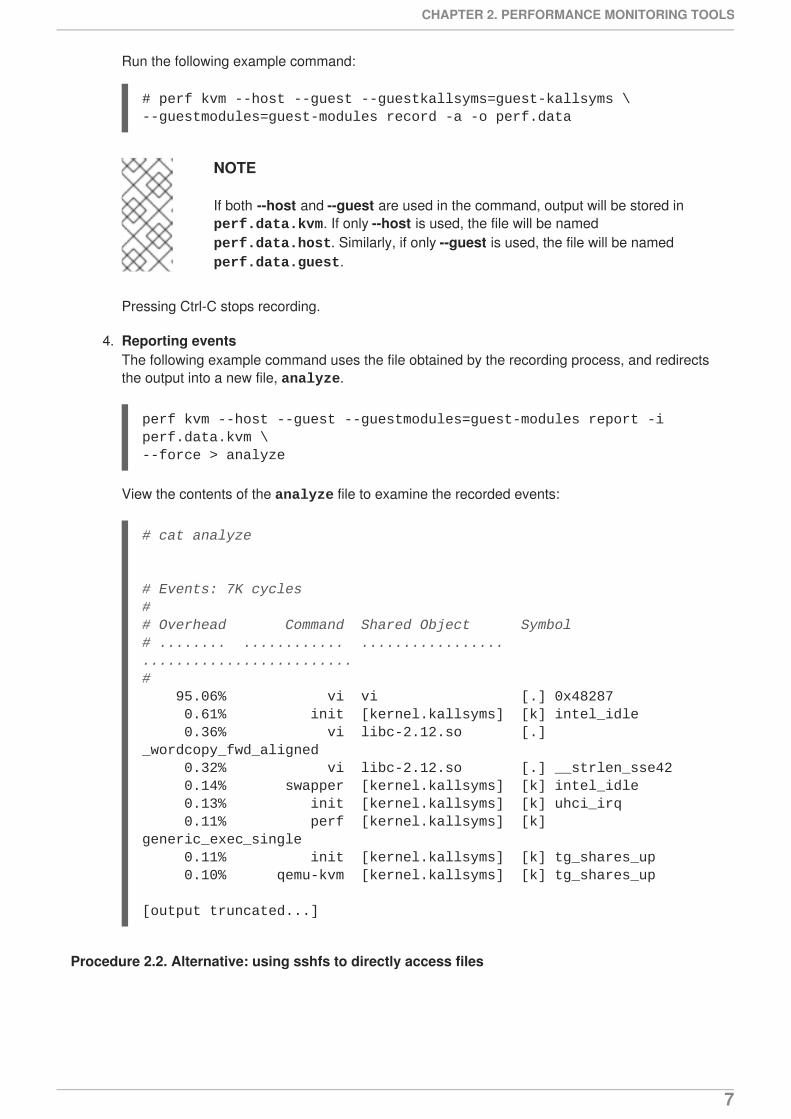
Run the following example command:
# perf kvm --host --guest --guestkallsyms=guest-kallsyms \--guestmodules=guest-modules record -a -o perf.data
NOTE
If both --host and --guest are used in the command, output will be stored in perf.data.kvm. If only --host is used, the file will be named perf.data.host. Similarly, if only --guest is used, the file will be named perf.data.guest.
Pressing Ctrl-C stops recording.
4. Reporting eventsThe following example command uses the file obtained by the recording process, and redirectsthe output into a new file, analyze.
perf kvm --host --guest --guestmodules=guest-modules report -i perf.data.kvm \--force > analyze
View the contents of the analyze file to examine the recorded events:
Procedure 2.2. Alternative: using sshfs to directly access files
# cat analyze
# Events: 7K cycles## Overhead Command Shared Object Symbol# ........ ............ ................. .........................# 95.06% vi vi [.] 0x48287 0.61% init [kernel.kallsyms] [k] intel_idle 0.36% vi libc-2.12.so [.] _wordcopy_fwd_aligned 0.32% vi libc-2.12.so [.] __strlen_sse42 0.14% swapper [kernel.kallsyms] [k] intel_idle 0.13% init [kernel.kallsyms] [k] uhci_irq 0.11% perf [kernel.kallsyms] [k] generic_exec_single 0.11% init [kernel.kallsyms] [k] tg_shares_up 0.10% qemu-kvm [kernel.kallsyms] [k] tg_shares_up
[output truncated...]
CHAPTER 2. PERFORMANCE MONITORING TOOLS
7

IMPORTANT
This is provided as an example only. You will need to substitute values accordingto your environment.
# Get the PID of the qemu process for the guest:PID=`ps -eo pid,cmd | grep "qemu.*-name GuestMachine" \| grep -v grep | awk '{print $1}'`
# Create mount point and mount guestmkdir -p /tmp/guestmount/$PIDsshfs -o allow_other,direct_io GuestMachine:/ /tmp/guestmount/$PID
# Begin recordingperf kvm --host --guest --guestmount=/tmp/guestmount \record -a -o perf.data
# Ctrl-C interrupts recording. Run report:perf kvm --host --guest --guestmount=/tmp/guestmount report \-i perf.data
# Unmount sshfs to the guest once finished:fusermount -u /tmp/guestmount
Virtualization Tuning and Optimization Guide
8

CHAPTER 3. OPTIMIZING VIRTUALIZATION PERFORMANCEWITH VIRT-MANAGER
3.1. INTRODUCTION
This chapter covers performance tuning options for virt-manager, a desktop tool for managing guestvirtual machines.
3.2. OPERATING SYSTEM DETAILS AND DEVICES
3.2.1. Specifying Guest Virtual Machine Details
The virt-manager tool provides different profiles depending on what operating system type and versionare selected for a new guest virtual machine. When creating a guest, you should provide as many detailsas possible; this can improve performance by enabling features available for your specific type of guest.
Refer to the following example screen capture of the virt-manager tool. When creating a new guestvirtual machine, always specify your intended OS type and Version:
Figure 3.1. Provide the OS type and Version
3.2.2. Remove Unused Devices
Removing unused or unnecessary devices can improve performance. For instance, a guest tasked as aweb server is unlikely to require audio features or an attached tablet.
CHAPTER 3. OPTIMIZING VIRTUALIZATION PERFORMANCE WITH VIRT-MANAGER
9

Refer to the following example screen capture of the virt-manager tool. Click the Remove button toremove unnecessary devices:
Figure 3.2. Remove unused devices
3.3. CPU PERFORMANCE OPTIONS
Several CPU related options are available to your guest virtual machines. Configured correctly, theseoptions can have a large impact on performance. The following image shows the CPU options availableto your guests. The remainder of this section shows and explains the impact of these options.
Virtualization Tuning and Optimization Guide
10

Figure 3.3. CPU Performance Options
3.3.1. Option: Available CPUs
Use this option to adjust the amount of virtual CPUs (vCPUs) available to the guest. It is also possible tochange the number of vCPUs while the guest is running, which is referred to as hot plugging and hotunplugging.
IMPORTANT
The hot unplugging feature is only available as a Technology Preview. Therefore, it is notsupported and not recommended for use in high-value deployments.
If you allocate more than is available on the host (known as overcommitting), a warning is displayed, asshown in the following image:
CHAPTER 3. OPTIMIZING VIRTUALIZATION PERFORMANCE WITH VIRT-MANAGER
11

Figure 3.4. CPU overcommit
CPUs are overcommitted when the sum of vCPUs for all guests on the system is greater than thenumber of host CPUs on the system. You can overcommit CPUs with one or multiple guests if the totalnumber of vCPUs is greater than the number of host CPUs.
IMPORTANT
As with memory overcommitting, CPU overcommitting can have a negative impact onperformance, for example in situations with a heavy or unpredictable guest workload.Refer to the Red Hat Enterprise Linux 6 Virtualization Administration Guide for moredetails on overcommitting.
3.3.2. Option: CPU Configuration
Use this option to select the CPU configuration type, based on the desired CPU model. Expand the list tosee available options, or click the Copy host CPU configuration button to detect and apply the physicalhost's CPU model and configuration. Once you select a CPU configuration, its available CPUfeatures/instructions are displayed and can be individually enabled/disabled in the CPU Features list.Refer to the following diagram which shows these options:
Figure 3.5. CPU Configuration Options
NOTE
Copying the host CPU configuration is recommended over manual configuration.
Virtualization Tuning and Optimization Guide
12

NOTE
Alternately, run the virsh capabilities command on your host machine to view thevirtualization capabilities of your system, including CPU types and NUMA capabilities.
3.3.3. Option: CPU Topology
Use this option to apply a particular CPU topology (Sockets, Cores, Threads) to the virtual CPUs for yourguest virtual machine. Refer to the following diagram which shows an example of this option:
Figure 3.6. CPU Topology Options
NOTE
Although your environment may dictate other requirements, selecting any desired numberof sockets, but with only a single core and a single thread usually gives the bestperformance results.
3.3.4. Option: CPU Pinning
Large performance improvements can be obtained by adhering to the system's specific NUMA topology.Use this option to automatically generate a pinning configuration that is valid for the host.
Figure 3.7. CPU Pinning
CHAPTER 3. OPTIMIZING VIRTUALIZATION PERFORMANCE WITH VIRT-MANAGER
13

WARNING
Do not use this option if the guest has more vCPUs than a single NUMA node.
Using the Pinning option will constrain the guest's vCPU threads to a single NUMA node; however,threads will be able to move around within that NUMA node. For tighter binding capabilities, use theoutput from the lscpu command to establish a 1:1 physical CPU to vCPU binding using virsh cpupin. Refer to Chapter 9, NUMA for more information on NUMA and CPU pinning.
3.4. VIRTUAL DISK PERFORMANCE OPTIONS
Several virtual disk related options are available to your guest virtual machines during installation thatcan impact performance. The following image shows the virtual disk options available to your guests.
The cache mode, IO mode, and IO tuning can be selected in the Virtual Disk section in virt-manager. Set these parameters in the fields under Performance options, as shown in the followingimage:
Figure 3.8. Virtual Disk Performance Options
IMPORTANT
When setting the virtual disk performance options in virt-manager, the virtual machinemust be restarted for the settings to take effect.
See Section 7.3, “Caching” and Section 7.4, “I/O Mode” for descriptions of these settings andinstructions for editing these settings in the guest XML configuration.
Virtualization Tuning and Optimization Guide
14

CHAPTER 4. TUNED
4.1. INTRODUCTION
This chapter covers using tuned daemon for dynamically tuning system settings in virtualizedenvironments.
4.2. TUNED AND TUNED-ADM
tuned is a tuning profile delivery mechanism that adapts Red Hat Enterprise Linux for certain workloadcharacteristics, such as requirements for CPU-intensive tasks, or storage/network throughputresponsiveness. It can react to changes in CPU and network use and adjust settings to improveperformance in active devices, or reduce power consumption in inactive devices.
The accompanying ktune partners with the tuned-adm tool to provide a number of tuning profiles thatare pre-configured to enhance performance and reduce power consumption in a number of specific usecases. Edit these profiles or create new profiles to create performance solutions tailored to yourenvironment.
The virtualization-related profiles provided as part of tuned-adm include:
virtual-guest
Based on the enterprise-storage profile, virtual-guest also decreases the swappiness ofvirtual memory. This profile is available in Red Hat Enterprise Linux 6.3 and later, and is therecommended profile for guest machines.
virtual-host
Based on the enterprise-storage profile, virtual-host also decreases the swappiness ofvirtual memory and enables more aggressive writeback of dirty pages. This profile is available in RedHat Enterprise Linux 6.3 and later, and is the recommended profile for virtualization hosts, includingboth KVM and Red Hat Enterprise Virtualization hosts.
Install the tuned package and its associated systemtap scripts with the command:
yum install tuned
Installing the tuned package also sets up a sample configuration file at /etc/tuned.conf and activatesthe default profile.
Start tuned by running:
service tuned start
To start tuned every time the machine boots, run:
chkconfig tuned on
To list all available profiles and identify the current active profile, run:
# tuned-adm listAvailable profiles:
CHAPTER 4. TUNED
15

- latency-performance- sap- virtual-guest- laptop-battery-powersave- virtual-host- enterprise-storage- desktop-powersave- spindown-disk- default- throughput-performance- laptop-ac-powersave- server-powersaveCurrent active profile: default
To only display the currently active profile, run:
tuned-adm active
To switch to one of the available profiles, run:
tuned-adm profile profile_name
For example, to switch to the virtual-host profile, run:
tuned-adm profile virtual-host
NOTE
It is possible to create custom tuned profiles to encapsulate a set of tuning parameters.For instructions on creating custom tuned profiles, refer to the tuned.conf man page.
In some cases, it is preferable to disable tuned to use parameters set manually. To disable all tuning,run:
tuned-adm off
NOTE
Refer to the Red Hat Enterprise Linux 6 Power Management Guide for further informationabout tuned, tuned-adm and ktune.
Virtualization Tuning and Optimization Guide
16

CHAPTER 5. NETWORKING
5.1. INTRODUCTION
This chapter covers network optimization topics for virtualized environments.
5.2. NETWORK TUNING TIPS
Use multiple networks to avoid congestion on a single network. For example, have dedicatednetworks for management, backups and/or live migration.
Usually, matching the default MTU (1500 bytes) in all components is sufficient. If you requirelarger messages, increasing the MTU value can reduce fragmentation. If you change the MTU,all devices in the path should have a matching MTU value.
Use arp_filter to prevent ARP Flux, an undesirable condition that can occur in both hostsand guests and is caused by the machine responding to ARP requests from more than onenetwork interface: echo 1 > /proc/sys/net/ipv4/conf/all/arp_filter or edit /etc/sysctl.conf to make this setting persistent.
NOTE
Refer to the following URL for more information on ARP Flux: http://linux-ip.net/html/ether-arp.html#ether-arp-flux
5.3. VIRTIO AND VHOST_NET
The following diagram demonstrates the involvement of the kernel in the Virtio and vhost_netarchitectures.
Figure 5.1. Virtio and vhost_net architectures
CHAPTER 5. NETWORKING
17

vhost_net moves part of the Virtio driver from the user space into the kernel. This reduces copyoperations, lowers latency and CPU usage.
5.4. DEVICE ASSIGNMENT AND SR-IOV
The following diagram demonstrates the involvement of the kernel in the Device Assignment and SR-IOV architectures.
Figure 5.2. Device assignment and SR-IOV
Device assignment presents the entire device to the guest. SR-IOV needs support in drivers andhardware, including the NIC and the system board and allows multiple virtual devices to be created andpassed into different guests. A vendor-specific driver is required in the guest, however, SR-IOV offersthe lowest latency of any network option.
Virtualization Tuning and Optimization Guide
18

CHAPTER 6. I/O SCHEDULINGThis chapter covers disk performance optimization topics for virtualized environments.
6.1. I/O SCHEDULING
You can use an I/O scheduler to improve disk performance both when Red Hat Enterprise Linux is thevirtualization host and when it is the virtualization guest.
6.2. I/O SCHEDULING WITH RED HAT ENTERPRISE LINUX AS AVIRTUALIZATION HOST
When using Red Hat Enterprise Linux as a host for virtualized guests, the default cfq scheduler isusually ideal. This scheduler performs well on nearly all workloads.
However, if minimizing I/O latency is more important than maximizing I/O throughput on the guestworkloads, it may be beneficial to use the deadline scheduler. The deadline scheduler is also thescheduler used by the tuned profile virtual-host.
6.3. I/O SCHEDULING WITH RED HAT ENTERPRISE LINUX AS AVIRTUALIZATION GUEST
You can use I/O scheduling on a Red Hat Enterprise Linux guest virtual machine, regardless of thehypervisor on which the guest is running. The following is a list of benefits and issues that should beconsidered:
Red Hat Enterprise Linux guests often benefit greatly from the noop scheduler. This noopscheduler allows the host machine or hypervisor to optimize the input/output requests. The noopscheduler can combine small requests from the guest operating system into larger requests,before handing the I/O to the hypervisor. However, noop tries to use the fewest number of CPUcycles in the guest for I/O scheduling. The host/hypervisor has an overview of the requests of allguests and uses a separate strategy for handling I/O.
NOTE
For Red Hat Enterprise Linux 7.2 and newer, virtio-blk always uses noopimplicitly. This is because it uses blk-mq.
Depending on the workload I/O and how storage devices are attached, schedulers like deadline can be more advantageous. Performance testing is required to verify whichscheduler is the best one to use in each situation.
All scheduler tuning should be tested under normal operating conditions, as syntheticbenchmarks typically do not accurately compare performance of systems using sharedresources in virtual environments.
Guests using storage accessed by iSCSI, SR-IOV, or physical device passthrough should notuse the noop scheduler. These methods do not allow the host to optimize I/O requests to theunderlying physical device.
In virtualized environments, sometimes it is not beneficial to schedule I/O on both the host and guestlayers. If multiple guests use storage on a filesystem or block device managed by the host operating
CHAPTER 6. I/O SCHEDULING
19

system, the host may be able to schedule I/O more efficiently because it is aware of requests from allguests and knows the physical layout of storage, which may not map linearly to the guests' virtualstorage. On the other hand, depending on the workload, it may be beneficial to use a scheduler like deadline in the guest virtual machine.
6.4. CONFIGURING THE I/O SCHEDULER
The I/O scheduler is configured one way for Red Hat Enterprise Linux 5 and 6 and a different way forRed Hat Enterprise Linux 7.
6.4.1. Configuring the I/O Scheduler for Red Hat Enterprise Linux 5 and 6
The I/O scheduler can be selected at boot time using the elevator kernel parameter.
In the following example grub.conf stanza, the system is configured to use the noop scheduler. Theexample shown is for VMware ESX.
title Red Hat Enterprise Linux Server (2.6.18-8.el5)root (hd0,0)kernel /vmlinuz-2.6.18-8.el5 ro root=/dev/vg0/lv0 elevator=noopinitrd /initrd-2.6.18-8.el5.img
6.4.2. Configuring the I/O Scheduler for Red Hat Enterprise Linux 7
For a Red Hat Enterprise Linux 7 guest, changes to the I/O scheduler can be made persistent throughboot by adding the following elevator to /etc/grub2.cfg, as in the following example:
# vi /etc/grub2.cfg
linux16 /vmlinuz-kernel-version root=/dev/mapper/vg0-lv0 ro rd.lvm.lv=vg0/lv0 vconsole.keymap=us vconsole.font=latarcyrheb-sun16 rhgb quiet elevator=deadlineinitrd16 /initramfs-kernel-version.img
Virtualization Tuning and Optimization Guide
20

CHAPTER 7. BLOCK I/O
7.1. INTRODUCTION
This chapter covers optimizing I/O settings in virtualized environments.
7.2. BLOCK I/O TUNING
The virsh blkiotune command allows administrators to set or display a guest virtual machine'sblock I/O parameters manually in the <blkio> element in the guest XML configuration.
To display current <blkio> parameters for a virtual machine:
# virsh blkiotune virtual_machine
To set a virtual machine's <blkio> parameters, refer to the following command and replace valuesaccording to your environment:
# virsh blkiotune virtual_machine [--weight number] [--device-weights string] [--config] [--live] [--current]
Parameters include:
weight
The I/O weight, within the range 100 to 1000.
device-weights
A single string listing one or more device/weight pairs, in the format of /path/to/device,weight,/path/to/device,weight. Each weight must be within the range100-1000, or the value 0 to remove that device from per-device listings. Only the devices listed in thestring are modified; any existing per-device weights for other devices remain unchanged.
config
Add the --config option for changes to take effect at next boot.
live
Add the --live option to apply the changes to the running virtual machine.
NOTE
The --live option requires the hypervisor to support this action. Not all hypervisorsallow live changes of the maximum memory limit.
current
Add the --current option to apply the changes to the current virtual machine.
CHAPTER 7. BLOCK I/O
21
NOTE
See # virsh help blkiotune for more information on using the virsh blkiotunecommand.
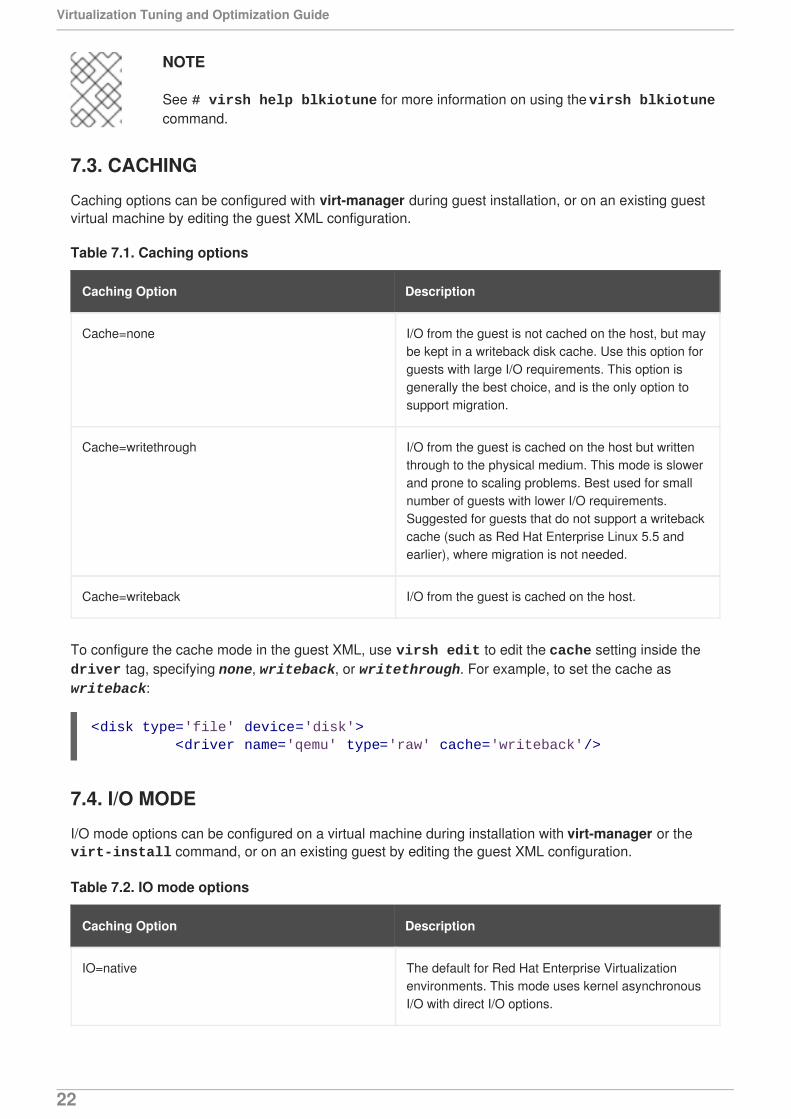
7.3. CACHING
Caching options can be configured with virt-manager during guest installation, or on an existing guestvirtual machine by editing the guest XML configuration.
Table 7.1. Caching options
Caching Option Description
Cache=none I/O from the guest is not cached on the host, but maybe kept in a writeback disk cache. Use this option forguests with large I/O requirements. This option isgenerally the best choice, and is the only option tosupport migration.
Cache=writethrough I/O from the guest is cached on the host but writtenthrough to the physical medium. This mode is slowerand prone to scaling problems. Best used for smallnumber of guests with lower I/O requirements.Suggested for guests that do not support a writebackcache (such as Red Hat Enterprise Linux 5.5 andearlier), where migration is not needed.
Cache=writeback I/O from the guest is cached on the host.
To configure the cache mode in the guest XML, use virsh edit to edit the cache setting inside the driver tag, specifying none, writeback, or writethrough. For example, to set the cache as writeback:
7.4. I/O MODE
I/O mode options can be configured on a virtual machine during installation with virt-manager or the virt-install command, or on an existing guest by editing the guest XML configuration.
Table 7.2. IO mode options
Caching Option Description
IO=native The default for Red Hat Enterprise Virtualizationenvironments. This mode uses kernel asynchronousI/O with direct I/O options.
<disk type='file' device='disk'> <driver name='qemu' type='raw' cache='writeback'/>
Virtualization Tuning and Optimization Guide
22

IO=threads Sets the I/O mode to host user-mode based threads.
IO=default Sets the I/O mode to the kernel default. In Red HatEnterprise Linux 6, the default is IO=threads.
Caching Option Description
In virt-manager, the I/O mode can be specified under Virtual Disk. For information on using virt-manager to change the I/O mode, see Section 3.4, “Virtual Disk Performance Options”
To configure the I/O mode in the guest XML, use virsh edit to edit the io setting inside the drivertag, specifying native, threads, or default. For example, to set the I/O mode to threads:
To configure the I/O mode when installing a guest using virt-install, add the io option to the --disk path parameter. For example, to configure io=threads during guest installation:
virt-install \--disk path=/storage/images/$NAME.img,io=threads,opt2=val2.......
<disk type='file' device='disk'> <driver name='qemu' type='raw' io='threads'/>
CHAPTER 7. BLOCK I/O
23

CHAPTER 8. MEMORY
8.1. INTRODUCTION
This chapter covers memory optimization options for virtualized environments.
8.2. MEMORY TUNING TIPS
To optimize memory performance in a virtualized environment, consider the following:
Do not allocate more resources to guest than it will use.
If possible, assign a guest to a single NUMA node, providing that resources are sufficient on thatNUMA node. For more information on using NUMA, see Chapter 9, NUMA.
When increasing the amount of memory a guest virtual machine can use while the guest isrunning, also referred to as hot plugging, the memory needs to be manually brought online onthe guest by one of the following methods:
Create a custom udev rule
1. Create a file with a name that ends in the .rulessuffix in the /etc/udev/rules.d/directory:
# touch /etc/udev/rules.d/rulename.rules
2. Add the memory onlining to the created file:
# echo 'SUBSYSTEM=="memory", ACTION=="add", ATTR{state}=="offline", ATTR{state}="online"' > /etc/udev/rules.d/rulename.rules
3. Reload udev rules:
# udevadm control --reload
Bring inactive memory online manually after each hot plug
# for mblock in /sys/devices/system/memory/memory*; do echo online > $mblock/state; done
8.3. MEMORY TUNING ON VIRTUAL MACHINES
8.3.1. Memory Monitoring Tools
Memory usage can be monitored in virtual machines using tools used in bare metal environments. Toolsuseful for monitoring memory usage and diagnosing memory-related problems include:
top
vmstat
Virtualization Tuning and Optimization Guide
24

numastat
/proc/
NOTE
For details on using these performance tools, refer to the Red Hat Enterprise Linux 6Performance Tuning Guide and the man pages for these commands.
8.3.2. Memory Tuning with virsh
8.3.2.1. memtune
The optional <memtune> element in the guest XML configuration allows administrators to configureguest virtual machine memory settings manually. If <memtune> is omitted, default memory settingsapply.
Display or set memory parameters in the <memtune> element in a virtual machine with the virsh memtune command, replacing values according to your environment:
virsh # memtune virtual_machine --parameter size
Available parameters include:
hard-limit
The maximum memory the virtual machine can use, in kibibytes (blocks of 1024 bytes).
WARNING
Setting this limit too low can result in the virtual machine being killed by thekernel.
soft-limit
The memory limit to enforce during memory contention, in kibibytes (blocks of 1024 bytes).
swap-hard-limit
The maximum memory plus swap the virtual machine can use, in kibibytes (blocks of 1024 bytes).The swap-hard-limit value must be more than the hard-limit value.
min-guarantee
The guaranteed minimum memory allocation for the virtual machine, in kibibytes (blocks of 1024bytes).
CHAPTER 8. MEMORY
25

NOTE
See # virsh help memtune for more information on using the virsh # memtunecommand.
8.3.2.2. Memory Backing
The optional <memoryBacking> element may contain several elements that influence how virtualmemory pages are backed by host pages.
Red Hat Enterprise Linux 6.6 and later includes support for locking a virtual machine's memory pages inthe host memory with the locked parameter.
Setting locked prevents the host from swapping out memory pages belonging to the guest, which cancause latency. Add the following to the guest XML using the virsh edit command to lock the virtualmemory pages in the host's memory:
<memoryBacking> <locked/></memoryBacking>
IMPORTANT
When setting locked, a hard_limit must be set in the <memtune> element to themaximum memory configured for the guest, plus any memory consumed by the processitself.
Setting nosharepages prevents the host from merging the same memory used among guests. Toinstruct the hypervisor to disable share pages for a guest, add the following to the guest's XML using the virsh edit command:
<memoryBacking> <nosharepages/></memoryBacking>
8.3.3. Huge Pages and Transparent Huge Pages (THP)
x86 CPUs usually address memory in 4kB pages, but they are capable of using larger 2 MB or 1 GBpages known as huge pages. KVM guests can be deployed with huge page memory support in order toimprove performance by increasing CPU cache hits against the Transaction Lookaside Buffer (TLB).
A kernel feature enabled by default in Red Hat Enterprise Linux 6, huge pages can significantly increaseperformance, particularly for large memory and memory-intensive workloads. Red Hat Enterprise Linux 6is able to more effectively manage large amounts of memory by increasing the page size through the useof huge pages.
Red Hat Enterprise Linux 6.7 systems support both 2 MB and 1 GB huge pages, which can be allocatedat boot or at runtime. See Section 8.3.3.3, “Enabling 1 GB huge pages for guests at boot or runtime” forinstructions on enabling multiple huge page sizes.
8.3.3.1. Configuring Transparent Huge Pages
Transparent huge pages (THP) automatically optimize system settings for performance. By allowing all
Virtualization Tuning and Optimization Guide
26
free memory to be used as cache, performance is increased. As KSM can reduce the occurence oftransparent huge pages, you may want to disable it before enabling THP. If you want to disable KSM,refer to Section 8.4.4, “Deactivating KSM”.
Transparent huge pages are enabled by default. To check the current status, run:
# cat /sys/kernel/mm/transparent_hugepage/enabled
To enable transparent huge pages to be used by default, run:
# echo always > /sys/kernel/mm/transparent_hugepage/enabled
This will set /sys/kernel/mm/transparent_hugepage/enabled to always.
To disable transparent huge pages:
# echo never > /sys/kernel/mm/transparent_hugepage/enabled
Transparent Huge Page support does not prevent the use of static huge pages. However, when statichuge pages are not used, KVM will use transparent huge pages instead of the regular 4kB page size.
8.3.3.2. Configuring Static Huge Pages
In some cases, greater control of huge pages is preferable. To use static huge pages on guests, add thefollowing to the guest XML configuration:
<memoryBacking> <hugepages/></memoryBacking>
This instructs the host to allocate memory to the guest using huge pages, instead of using the defaultpage size.
To view the current huge pages value, run the following command:
cat /proc/sys/vm/nr_hugepages
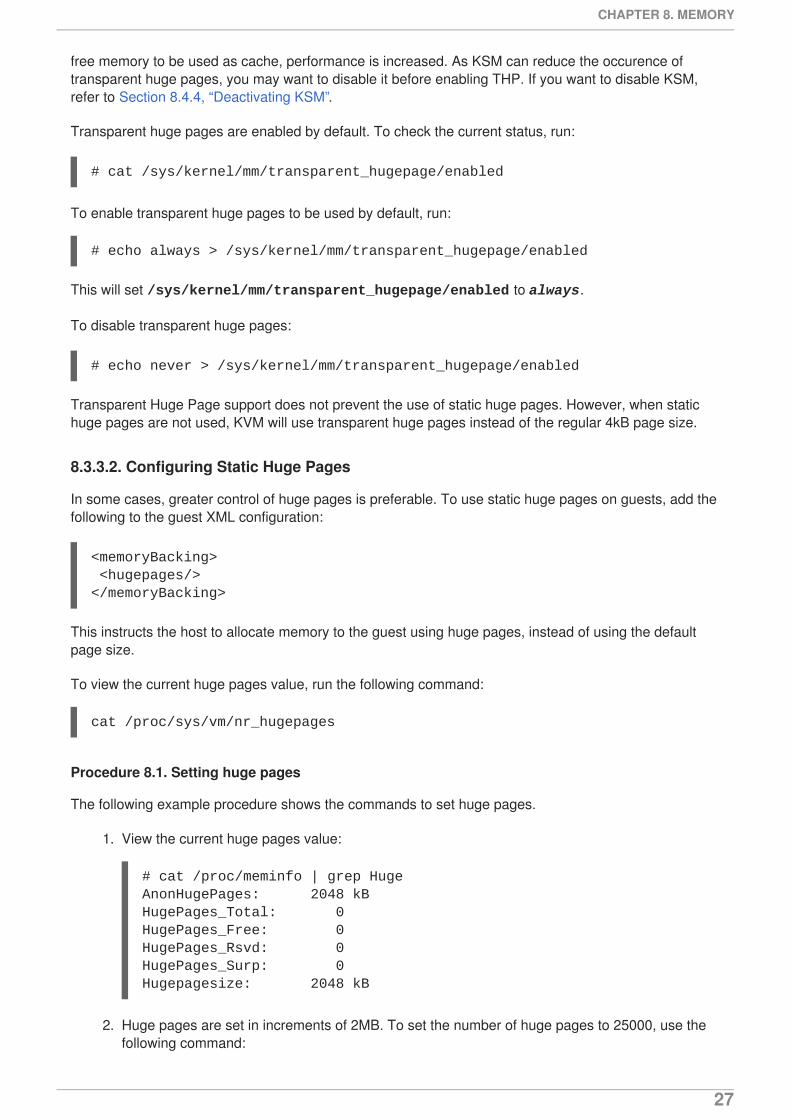
Procedure 8.1. Setting huge pages
The following example procedure shows the commands to set huge pages.
1. View the current huge pages value:
# cat /proc/meminfo | grep HugeAnonHugePages: 2048 kBHugePages_Total: 0HugePages_Free: 0HugePages_Rsvd: 0HugePages_Surp: 0Hugepagesize: 2048 kB
2. Huge pages are set in increments of 2MB. To set the number of huge pages to 25000, use thefollowing command:
CHAPTER 8. MEMORY
27

echo 25000 > /proc/sys/vm/nr_hugepages
NOTE
To make the setting persistent, add the following lines to the /etc/sysctl.conf file on the guest machine, with X being the intendednumber of huge pages:
# echo 'vm.nr_hugepages = X' >> /etc/sysctl.conf# sysctl -p
Afterwards, add transparent_hugepage=never to the kernel boot parametersby appending it to the end of the /kernel line in the /etc/grub2.cfg file onthe guest.
3. Mount the huge pages:
# mount -t hugetlbfs hugetlbfs /dev/hugepages
4. Restart libvirtd, then restart the virtual machine:
# service libvirtd restartStopping libvirtd daemon: [ OK ]Starting libvirtd daemon: [ OK ]
# virsh start virtual_machine
5. Verify the changes in /proc/meminfo:
# cat /proc/meminfo | grep HugeAnonHugePages: 0 kBHugePages_Total: 25000HugePages_Free: 23425HugePages_Rsvd: 0HugePages_Surp: 0Hugepagesize: 2048 kB
Huge pages can benefit not only the host but also guests, however, their total huge pages value must beless than what is available in the host.
8.3.3.3. Enabling 1 GB huge pages for guests at boot or runtime
Red Hat Enterprise Linux 6.7 systems support 2 MB and 1 GB huge pages, which can be allocated atboot or at runtime.
Procedure 8.2. Allocating 1 GB huge pages at boot time
1. To allocate different sizes of huge pages at boot, use the following command, specifying thenumber of huge pages. This example allocates 4 1 GB huge pages and 1024 2 MB huge pages:
Virtualization Tuning and Optimization Guide
28

'default_hugepagesz=1G hugepagesz=1G hugepages=4 hugepagesz=2M hugepages=1024'
Change this command line to specify a different number of huge pages to be allocated at boot.
NOTE
The next two steps must also be completed the first time you allocate 1 GB hugepages at boot time.
2. Mount the 2 MB and 1 GB huge pages on the host:
# mkdir /dev/hugepages1G# mount -t hugetlbfs -o pagesize=1G none /dev/hugepages1G# mkdir /dev/hugepages2M# mount -t hugetlbfs -o pagesize=2M none /dev/hugepages2M
3. Restart libvirtd to enable the use of 1 GB huge pages on guests:
# service restart libvirtd
1 GB huge pages are now available for guests.
Procedure 8.3. Allocating 1 GB huge pages at runtime
1 GB huge pages can also be allocated at runtime. Runtime allocation allows the system administrator tochoose which NUMA node to allocate those pages from. However, runtime page allocation can be moreprone to allocation failure than boot time allocation due to memory fragmentation.
1. To allocate different sizes of huge pages at runtime, use the following command, replacingvalues for the number of huge pages, the NUMA node to allocate them from, and the huge pagesize:
# echo 4 > /sys/devices/system/node/node1/hugepages/hugepages-1048576kB/nr_hugepages# echo 1024 > /sys/devices/system/node/node3/hugepages/hugepages-2048kB/nr_hugepages
This example command allocates 4 1 GB huge pages from node1 and 1024 2MB huge pagesfrom node3.
These huge page settings can be changed at any time with the above command, depending onthe amount of free memory on the host system.
NOTE
The next two steps must also be completed the first time you allocate 1 GB hugepages at runtime.
2. Mount the 2 MB and 1 GB huge pages on the host:
# mkdir /dev/hugepages1G
CHAPTER 8. MEMORY
29

# mount -t hugetlbfs -o pagesize=1G none /dev/hugepages1G# mkdir /dev/hugepages2M# mount -t hugetlbfs -o pagesize=2M none /dev/hugepages2M
3. Restart libvirtd to enable the use of 1 GB huge pages on guests:
# systemctl restart libvirtd
8.4. KERNEL SAME-PAGE MERGING (KSM)
Kernel same-page Merging (KSM), used by the KVM hypervisor, allows KVM guests to share identicalmemory pages. These shared pages are usually common libraries or other identical, high-use data. KSMallows for greater guest density of identical or similar guest operating systems by avoiding memoryduplication.
The concept of shared memory is common in modern operating systems. For example, when a programis first started, it shares all of its memory with the parent program. When either the child or parentprogram tries to modify this memory, the kernel allocates a new memory region, copies the originalcontents and allows the program to modify this new region. This is known as copy on write.
KSM is a Linux feature which uses this concept in reverse. KSM enables the kernel to examine two ormore already running programs and compare their memory. If any memory regions or pages areidentical, KSM reduces multiple identical memory pages to a single page. This page is then marked copyon write. If the contents of the page is modified by a guest virtual machine, a new page is created for thatguest.
This is useful for virtualization with KVM. When a guest virtual machine is started, it only inherits thememory from the host qemu-kvm process. Once the guest is running, the contents of the guestoperating system image can be shared when guests are running the same operating system orapplications. KSM allows KVM to request that these identical guest memory regions be shared.
KSM provides enhanced memory speed and utilization. With KSM, common process data is stored incache or in main memory. This reduces cache misses for the KVM guests, which can improveperformance for some applications and operating systems. Secondly, sharing memory reduces theoverall memory usage of guests, which allows for higher densities and greater utilization of resources.
NOTE
In Red Hat Enterprise Linux 6.7 and later, KSM is NUMA aware. This allows it to takeNUMA locality into account while coalescing pages, thus preventing performance dropsrelated to pages being moved to a remote node. Red Hat recommends avoiding cross-node memory merging when KSM is in use. If KSM is in use, change the /sys/kernel/mm/ksm/merge_across_nodes tunable to 0 to avoid merging pagesacross NUMA nodes. This can be done with the virsh node-memory-tune --shm-merge-across-nodes 0 command. Kernel memory accounting statistics caneventually contradict each other after large amounts of cross-node merging. As such,numad can become confused after the KSM daemon merges large amounts of memory. Ifyour system has a large amount of free memory, you may achieve higher performance byturning off and disabling the KSM daemon. Refer to Chapter 9, NUMA" for moreinformation on NUMA.
Virtualization Tuning and Optimization Guide
30

IMPORTANT
Ensure the swap size is sufficient for the committed RAM even without taking KSM intoaccount. KSM reduces the RAM usage of identical or similar guests. Overcommittingguests with KSM without sufficient swap space may be possible, but is not recommendedbecause guest virtual machine memory use can result in pages becoming unshared.
Red Hat Enterprise Linux uses two separate methods for controlling KSM:
The ksm service starts and stops the KSM kernel thread.
The ksmtuned service controls and tunes the ksm service, dynamically managing same-pagemerging. ksmtuned starts the ksm service and stops the ksm service if memory sharing is notnecessary. When new guests are created or destroyed, ksmtuned must be instructed with the retune parameter to run.
Both of these services are controlled with the standard service management tools.
NOTE
KSM is off by default on Red Hat Enterprise Linux 6.7.
8.4.1. The KSM Service
The ksm service is included in the qemu-kvm package.
When the ksm service is not started, Kernel same-page merging (KSM) shares only 2000 pages.This default value provides limited memory-saving benefits.
When the ksm service is started, KSM will share up to half of the host system's main memory.Start the ksm service to enable KSM to share more memory.
# systemctl start ksmStarting ksm: [ OK ]
The ksm service can be added to the default startup sequence. Make the ksm service persistent with thesystemctl command.
# systemctl enable ksm
8.4.2. The KSM Tuning Service
The ksmtuned service fine-tunes the kernel same-page merging (KSM) configuration by looping andadjusting ksm. In addition, the ksmtuned service is notified by libvirt when a guest virtual machine iscreated or destroyed. The ksmtuned service has no options.
# systemctl start ksmtunedStarting ksmtuned: [ OK ]
The ksmtuned service can be tuned with the retune parameter, which instructs ksmtuned to runtuning functions manually.
CHAPTER 8. MEMORY
31

The /etc/ksmtuned.conf file is the configuration file for the ksmtuned service. The file output belowis the default ksmtuned.conf file:
# Configuration file for ksmtuned.# How long ksmtuned should sleep between tuning adjustments# KSM_MONITOR_INTERVAL=60
# Millisecond sleep between ksm scans for 16Gb server.# Smaller servers sleep more, bigger sleep less.# KSM_SLEEP_MSEC=10
# KSM_NPAGES_BOOST - is added to the `npages` value, when `free memory` is less than `thres`.# KSM_NPAGES_BOOST=300
# KSM_NPAGES_DECAY - is the value given is subtracted to the `npages` value, when `free memory` is greater than `thres`.# KSM_NPAGES_DECAY=-50
# KSM_NPAGES_MIN - is the lower limit for the `npages` value.# KSM_NPAGES_MIN=64
# KSM_NPAGES_MAX - is the upper limit for the `npages` value.# KSM_NPAGES_MAX=1250
# KSM_THRES_COEF - is the RAM percentage to be calculated in parameter `thres`.# KSM_THRES_COEF=20
# KSM_THRES_CONST - If this is a low memory system, and the `thres` value is less than `KSM_THRES_CONST`, then reset `thres` value to `KSM_THRES_CONST` value.# KSM_THRES_CONST=2048
# uncomment the following to enable ksmtuned debug information# LOGFILE=/var/log/ksmtuned# DEBUG=1
Within the /etc/ksmtuned.conf file, npages sets how many pages ksm will scan before the ksmddaemon becomes inactive. This value will also be set in the /sys/kernel/mm/ksm/pages_to_scanfile.
The KSM_THRES_CONST value represents the amount of available memory used as a threshold toactivate ksm. ksmd is activated if either of the following occurs:
The amount of free memory drops below the threshold, set in KSM_THRES_CONST.
The amount of committed memory plus the threshold, KSM_THRES_CONST, exceeds the totalamount of memory.
8.4.3. KSM Variables and Monitoring
Kernel same-page merging (KSM) stores monitoring data in the /sys/kernel/mm/ksm/ directory.Files in this directory are updated by the kernel and are an accurate record of KSM usage and statistics.
Virtualization Tuning and Optimization Guide
32

The variables in the list below are also configurable variables in the /etc/ksmtuned.conf file, asnoted above.
Files in /sys/kernel/mm/ksm/:
full_scans
Full scans run.
merge_across_nodes
Whether pages from different NUMA nodes can be merged.
pages_shared
Total pages shared.
pages_sharing
Pages currently shared.
pages_to_scan
Pages not scanned.
pages_unshared
Pages no longer shared.
pages_volatile
Number of volatile pages.
run
Whether the KSM process is running.
sleep_millisecs
Sleep milliseconds.
These variables can be manually tuned using the virsh node-memory-tune command. For example,the following specifies the number of pages to scan before the shared memory service goes to sleep:
# virsh node-memory-tune --shm-pages-to-scan number
KSM tuning activity is stored in the /var/log/ksmtuned log file if the DEBUG=1 line is added to the /etc/ksmtuned.conf file. The log file location can be changed with the LOGFILE parameter.Changing the log file location is not advised and may require special configuration of SELinux settings.
8.4.4. Deactivating KSM
Kernel same-page merging (KSM) has a performance overhead which may be too large for certainenvironments or host systems. KSM may also introduce side channels that could be potentially used toleak information across guests. If this is a concern, KSM can be disabled on per-guest basis.
CHAPTER 8. MEMORY
33

KSM can be deactivated by stopping the ksmtuned and the ksm services. However, this action does notpersist after restarting. To deactivate KSM, run the following in a terminal as root:
# systemctl stop ksmtunedStopping ksmtuned: [ OK ]# systemctl stop ksmStopping ksm: [ OK ]
Stopping the ksmtuned and the ksm deactivates KSM, but this action does not persist after restarting.Persistently deactivate KSM with the systemctl commands:
# systemctl disable ksm# systemctl disable ksmtuned
When KSM is disabled, any memory pages that were shared prior to deactivating KSM are still shared.To delete all of the PageKSM in the system, use the following command:
# echo 2 >/sys/kernel/mm/ksm/run
After this is performed, the khugepaged daemon can rebuild transparent hugepages on the KVM guestphysical memory. Using # echo 0 >/sys/kernel/mm/ksm/run stops KSM, but does not unshare allthe previously created KSM pages (this is the same as the # systemctl stop ksmtuned command).
Virtualization Tuning and Optimization Guide
34

CHAPTER 9. NUMA
9.1. INTRODUCTION
Historically, all memory on x86 systems is equally accessible by all CPUs. Known as Uniform MemoryAccess (UMA), access times are the same no matter which CPU performs the operation.
This behavior is no longer the case with recent x86 processors. In Non-Uniform Memory Access(NUMA), system memory is divided into zones (called nodes), which are allocated to particular CPUs orsockets. Access to memory that is local to a CPU is faster than memory connected to remote CPUs onthat system.
This chapter describes memory allocation and NUMA tuning configurations in virtualized environments.
9.2. NUMA MEMORY ALLOCATION POLICIES
The following policies define how memory is allocated from the nodes in a system:
Strict
Strict policy means that the allocation will fail if the memory cannot be allocated on the target node.
Specifying a NUMA nodeset list without defining a memory mode attribute defaults to strict mode.
Interleave
Memory pages are allocated across nodes specified by a nodeset, but are allocated in a round-robinfashion.
Preferred
Memory is allocated from a single preferred memory node. If sufficient memory is not available,memory can be allocated from other nodes.
To enable the desired policy, set it as the value of the <memory mode> element of the domain XML file:
IMPORTANT
If memory is overcommitted in strict mode and the guest does not have sufficient swapspace, the kernel will kill some guest processes to retrieve additional memory. Red Hatrecommends using preferred allocation and specifying a single nodeset (for example,nodeset='0') to prevent this situation.
9.3. LIBVIRT NUMA TUNING
Generally, optimal performance on NUMA systems is achieved by limiting guest size to the amount ofresources on a single NUMA node. Avoid unnecessarily splitting resources across NUMA nodes.
<numatune> <memory mode='preferred' nodeset='0'></numatune>
CHAPTER 9. NUMA
35
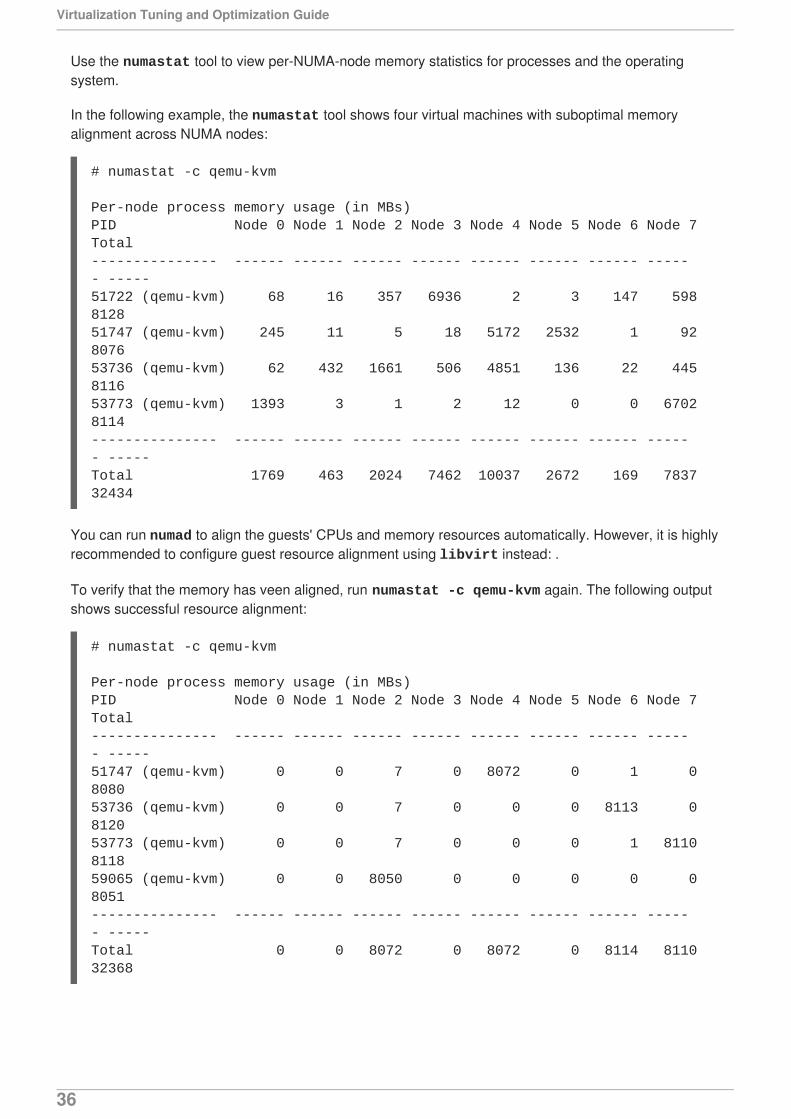
Use the numastat tool to view per-NUMA-node memory statistics for processes and the operatingsystem.
In the following example, the numastat tool shows four virtual machines with suboptimal memoryalignment across NUMA nodes:
# numastat -c qemu-kvm
Per-node process memory usage (in MBs)PID Node 0 Node 1 Node 2 Node 3 Node 4 Node 5 Node 6 Node 7 Total--------------- ------ ------ ------ ------ ------ ------ ------ ------ -----51722 (qemu-kvm) 68 16 357 6936 2 3 147 598 812851747 (qemu-kvm) 245 11 5 18 5172 2532 1 92 807653736 (qemu-kvm) 62 432 1661 506 4851 136 22 445 811653773 (qemu-kvm) 1393 3 1 2 12 0 0 6702 8114--------------- ------ ------ ------ ------ ------ ------ ------ ------ -----Total 1769 463 2024 7462 10037 2672 169 7837 32434
You can run numad to align the guests' CPUs and memory resources automatically. However, it is highlyrecommended to configure guest resource alignment using libvirt instead: .
To verify that the memory has veen aligned, run numastat -c qemu-kvm again. The following outputshows successful resource alignment:
# numastat -c qemu-kvm
Per-node process memory usage (in MBs)PID Node 0 Node 1 Node 2 Node 3 Node 4 Node 5 Node 6 Node 7 Total--------------- ------ ------ ------ ------ ------ ------ ------ ------ -----51747 (qemu-kvm) 0 0 7 0 8072 0 1 0 808053736 (qemu-kvm) 0 0 7 0 0 0 8113 0 812053773 (qemu-kvm) 0 0 7 0 0 0 1 8110 811859065 (qemu-kvm) 0 0 8050 0 0 0 0 0 8051--------------- ------ ------ ------ ------ ------ ------ ------ ------ -----Total 0 0 8072 0 8072 0 8114 8110 32368
Virtualization Tuning and Optimization Guide
36
NOTE
Running numastat with -c provides compact output; adding the -m option adds system-wide memory information on a per-node basis to the output. Refer to the numastat manpage for more information.
For optimal performance results, memory pinning should be used in combination withpinning of vCPU threads as well as other hypervisor threads.
9.3.1. NUMA vCPU Pinning
vCPU pinning provides similar advantages to task pinning on bare metal systems. Since vCPUs run asuser-space tasks on the host operating system, pinning increases cache efficiency. One example of thisis an environment where all vCPU threads are running on the same physical socket, therefore sharing aL3 cache domain.
Combining vCPU pinning with numatune can avoid NUMA misses. The performance impacts of NUMAmisses are significant, generally starting at a 10% performance hit or higher. vCPU pinning and numatune should be configured together.
If the virtual machine is performing storage or network I/O tasks, it can be beneficial to pin all vCPUs andmemory to the same physical socket that is physically connected to the I/O adapter.
NOTE
The lstopo tool can be used to visualize NUMA topology. It can also help verify thatvCPUs are binding to cores on the same physical socket. Refer to the followingKnowledgebase article for more information on lstopo:https://access.redhat.com/site/solutions/62879.
IMPORTANT
Pinning causes increased complexity when there are many more vCPUs than physicalcores.
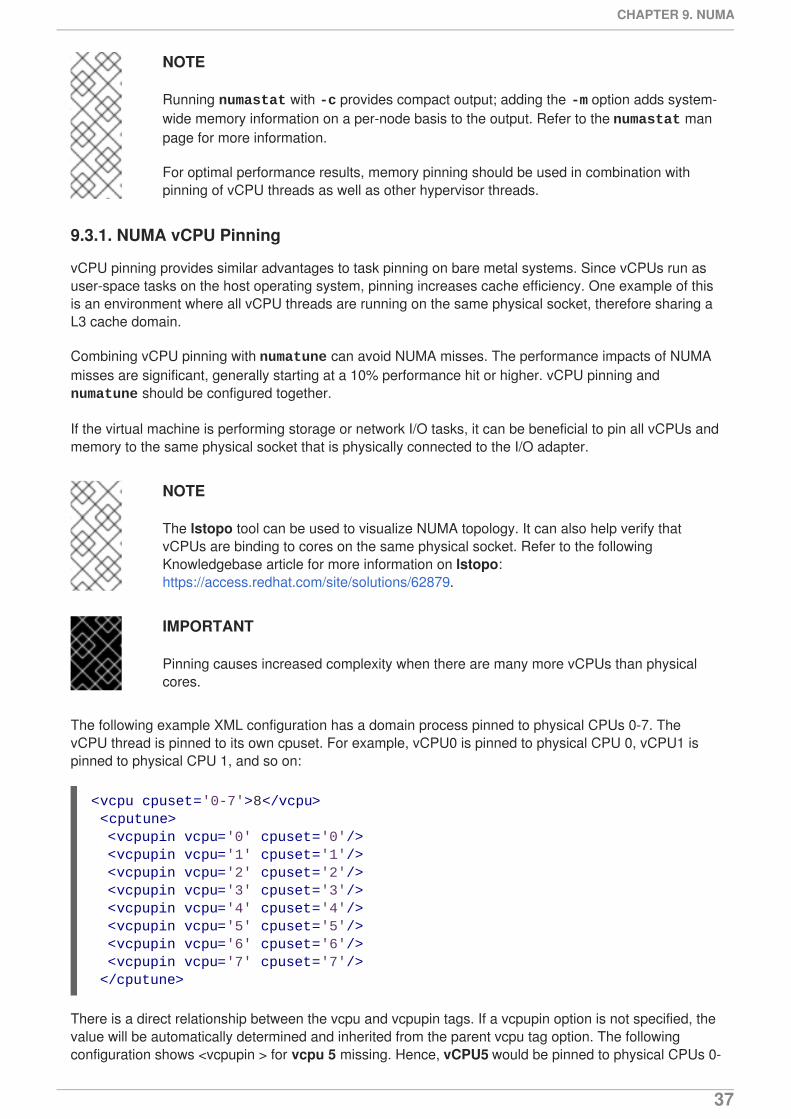
The following example XML configuration has a domain process pinned to physical CPUs 0-7. ThevCPU thread is pinned to its own cpuset. For example, vCPU0 is pinned to physical CPU 0, vCPU1 ispinned to physical CPU 1, and so on:
There is a direct relationship between the vcpu and vcpupin tags. If a vcpupin option is not specified, thevalue will be automatically determined and inherited from the parent vcpu tag option. The followingconfiguration shows <vcpupin > for vcpu 5 missing. Hence, vCPU5 would be pinned to physical CPUs 0-
<vcpu cpuset='0-7'>8</vcpu> <cputune> <vcpupin vcpu='0' cpuset='0'/> <vcpupin vcpu='1' cpuset='1'/> <vcpupin vcpu='2' cpuset='2'/> <vcpupin vcpu='3' cpuset='3'/> <vcpupin vcpu='4' cpuset='4'/> <vcpupin vcpu='5' cpuset='5'/> <vcpupin vcpu='6' cpuset='6'/> <vcpupin vcpu='7' cpuset='7'/> </cputune>
CHAPTER 9. NUMA
37

7, as specified in the parent tag <vcpu>:
9.3.2. Domain Processes
As provided in Red Hat Enterprise Linux, libvirt uses libnuma to set memory binding policies for domainprocesses. The nodeset for these policies can be configured either as static (specified in the domainXML) or auto (configured by querying numad). Refer to the following XML configuration for examples onhow to configure these inside the <numatune> tag:
libvirt uses sched_setaffinity(2) to set CPU binding policies for domain processes. The cpuset optioncan either be static (specified in the domain XML) or auto (configured by querying numad). Refer to thefollowing XML configuration for examples on how to configure these inside the <vcpu> tag:
There are implicit inheritance rules between the placement mode you use for <vcpu> and <numatune>:
The placement mode for <numatune> defaults to the same placement mode of <vcpu>, or tostatic if a <nodeset> is specified.
Similarly, the placement mode for <vcpu> defaults to the same placement mode of<numatune>, or to static if <cpuset> is specified.
This means that CPU tuning and memory tuning for domain processes can be specified and definedseparately, but they can also be configured to be dependent on the other's placement mode.
NOTE
Refer to the following URLs for more information on vcpu and numatune:http://libvirt.org/formatdomain.html#elementsCPUAllocation andhttp://libvirt.org/formatdomain.html#elementsNUMATuning
<vcpu cpuset='0-7'>8</vcpu> <cputune> <vcpupin vcpu='0' cpuset='0'/> <vcpupin vcpu='1' cpuset='1'/> <vcpupin vcpu='2' cpuset='2'/> <vcpupin vcpu='3' cpuset='3'/> <vcpupin vcpu='4' cpuset='4'/> <vcpupin vcpu='6' cpuset='6'/> <vcpupin vcpu='7' cpuset='7'/> </cputune>
<numatune> <memory mode='strict' placement='auto'/></numatune>
<numatune> <memory mode='strict' nodeset='0,2-3'/></numatune>
<vcpu placement='auto' current='8'>32</vcpu>
<vcpu placement='static' cpuset='0-10,ˆ5'>8</vcpu>
Virtualization Tuning and Optimization Guide
38

9.3.3. Domain vCPU Threads
In addition to tuning domain processes, libvirt also permits the setting of the pinning policy for each vcputhread in XML configuration. This is done inside the <cputune> tags:
In this tag, libvirt uses either cgroup or sched_setaffinity(2) to pin the vcpu thread to the specifiedcpuset.
NOTE
For more details on cputune, refer to the following URL:http://libvirt.org/formatdomain.html#elementsCPUTuning
In addition, if you need to set up a virtual machines with more vCPU than a single NUMA node, configurethe host so that the guest detects a NUMA topology on the host. This allows for 1:1 mapping of CPUs,memory, and NUMA nodes. For example, this can be applied with a guest with 4 vCPUs and 6 GBmemory, and a host with the following NUMA settings:
4 available nodes (0-3)Node 0: CPUs 0 4, size 4000 MiBNode 1: CPUs 1 5, size 3999 MiBNode 2: CPUs 2 6, size 4001 MiBNode 3: CPUs 0 4, size 4005 MiB
In this scenario, use the following Domain XML setting:
9.3.4. Using emulatorpin
Another way of tuning the domain process pinning policy is to use the <emulatorpin> tag inside of<cputune>. For example:
<cputune> <vcpupin vcpu="0" cpuset="1-4,ˆ2"/> <vcpupin vcpu="1" cpuset="0,1"/> <vcpupin vcpu="2" cpuset="2,3"/> <vcpupin vcpu="3" cpuset="0,4"/></cputune>
<cputune> <vcpupin vcpu="0" cpuset="1"/> <vcpupin vcpu="1" cpuset="5"/> <vcpupin vcpu="2" cpuset="2"/> <vcpupin vcpu="3" cpuset="6"/></cputune><numatune> <memory mode="strict" nodeset="1-2"/></numatune><cpu> <numa> <cell id="0" cpus="0-1" memory="3" unit="GiB"/> <cell id="1" cpus="2-3" memory="3" unit="GiB"/> </numa></cpu>
CHAPTER 9. NUMA
39
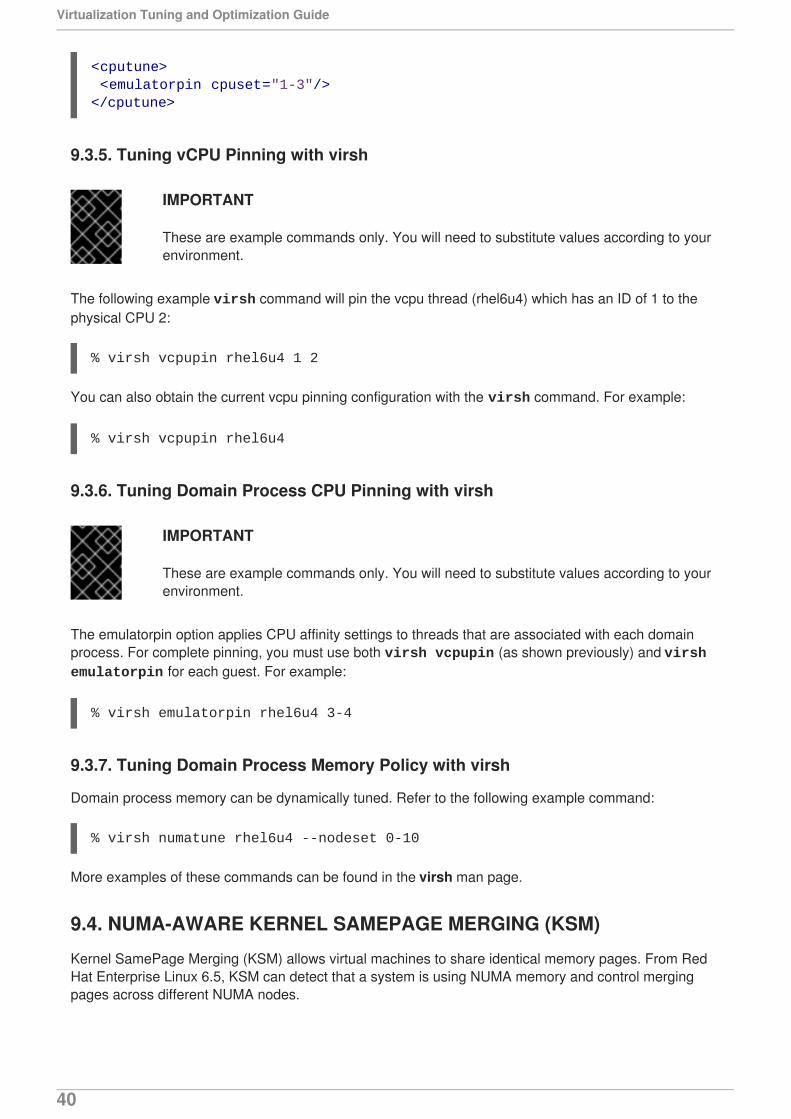
9.3.5. Tuning vCPU Pinning with virsh
IMPORTANT
These are example commands only. You will need to substitute values according to yourenvironment.
The following example virsh command will pin the vcpu thread (rhel6u4) which has an ID of 1 to thephysical CPU 2:
% virsh vcpupin rhel6u4 1 2
You can also obtain the current vcpu pinning configuration with the virsh command. For example:
% virsh vcpupin rhel6u4
9.3.6. Tuning Domain Process CPU Pinning with virsh
IMPORTANT
These are example commands only. You will need to substitute values according to yourenvironment.
The emulatorpin option applies CPU affinity settings to threads that are associated with each domainprocess. For complete pinning, you must use both virsh vcpupin (as shown previously) and virsh emulatorpin for each guest. For example:
% virsh emulatorpin rhel6u4 3-4
9.3.7. Tuning Domain Process Memory Policy with virsh
Domain process memory can be dynamically tuned. Refer to the following example command:
% virsh numatune rhel6u4 --nodeset 0-10
More examples of these commands can be found in the virsh man page.
9.4. NUMA-AWARE KERNEL SAMEPAGE MERGING (KSM)
Kernel SamePage Merging (KSM) allows virtual machines to share identical memory pages. From RedHat Enterprise Linux 6.5, KSM can detect that a system is using NUMA memory and control mergingpages across different NUMA nodes.
<cputune> <emulatorpin cpuset="1-3"/></cputune>
Virtualization Tuning and Optimization Guide
40

Use the sysfs /sys/kernel/mm/ksm/merge_across_nodes parameter to control merging ofpages across different NUMA nodes. By default, pages from all nodes can be merged together. Whenthis parameter is set to zero, only pages from the same node are merged.
Generally, unless you are oversubscribing the system memory, you will get better runtime performanceby disabling KSM sharing.
IMPORTANT
When KSM merges across nodes on a NUMA host with multiple guest virtual machines,guests and CPUs from more distant nodes can suffer a significant increase of accesslatency to the merged KSM page.
To instruct the hypervisor to disable share pages for a guest, add the following to the guest's XML:
<memoryBacking> <nosharepages/></memoryBacking>
For more information about tuning memory settings with the <memoryBacking> element, seeSection 8.3.2, “Memory Tuning with virsh”.
CHAPTER 9. NUMA
41

APPENDIX A. REVISION HISTORY
Revision 1.0-23 Mon March 10 2017 Jiri HerrmannUpdates for the 6.9 GA release
Revision 1.0-19 Mon May 02 2016 Jiri HerrmannUpdates for the 6.8 GA release
Revision 1.0-18 Tue Mar 01 2016 Jiri HerrmannMultiple updates for the 6.8 beta publication
Revision 1.0-17 Thu Oct 08 2015 Jiri HerrmannCleaned up the Revision History
Revision 1.0-16 Wed July 15 2015 Dayle ParkerVersion for 6.7 GA release.
Virtualization Tuning and Optimization Guide
42