rechargeable fan with radio user manualpdf.lowes.com/useandcareguides/854433001093_use.pdfb. radio...
TRANSCRIPT
1
Model No. GS-26R
Rechargeable Cooling Fan with Radio
Instruction Manual
Introduction
Thank you for buying a GAMA SONIC® product. For your information
GAMA SONIC® offers unique multi-purpose rechargeable products that
range from party lights to solar lighting products.
GAMA SONIC® has been recognized as a worldwide leader in the lighting
industry for over 20 years.
For more information visit our website at: www.gamasonic.com.
IMPORTANT: THE BATTERY SECURITY TAB MUST BE REMOVED
BEFORE OPERATING THE FAN (Fig. 1 page 3),
Please read the instruction manual carefully to obtain the best results from your
purchase.
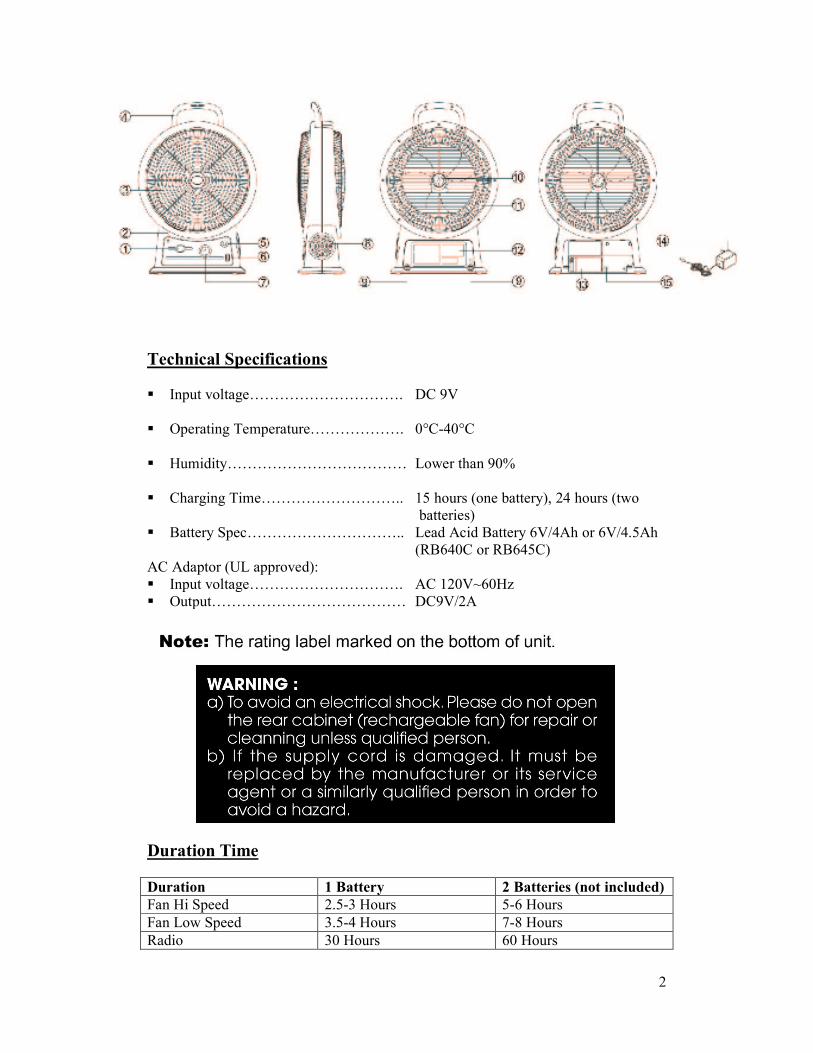
Part Listing and Features
1. Fan HIGH/OFF/LOW Selector 9. Battery cover release lock
2. Charging Indicator 10. Fan oscillating control switch
3. Front Cover 11. Fan cover release lock
4. Handle 12. Battery Door
5. Volume Control
6. AM/FM Selector
13. 1 Sealed Lead-Acid rechargeable battery
6V/4.0Ah or 6V/4.5Ah
7. Tuning 14. AC Adaptor
8. Speaker 15. DC Jack
2
Technical Specifications
� Input voltage………………………….
DC 9V
� Operating Temperature……………….
0°C-40°C
� Humidity………………………………
Lower than 90%
� Charging Time……………………….. 15 hours (one battery), 24 hours (two
batteries)
� Battery Spec………………………….. Lead Acid Battery 6V/4Ah or 6V/4.5Ah
(RB640C or RB645C)
AC Adaptor (UL approved):
� Input voltage…………………………. AC 120V~60Hz
� Output………………………………… DC9V/2A
Duration Time
Duration 1 Battery 2 Batteries (not included)
Fan Hi Speed 2.5-3 Hours 5-6 Hours
Fan Low Speed 3.5-4 Hours 7-8 Hours
Radio 30 Hours 60 Hours
3
Operation
A. Rechargeable Fan with High-Low Speed
1. Place the fan high-low speed selector (feature No. 1) in “HIGH” or
“LOW” speed position.
2. Turn the fan oscillating control switch (feature No. 10) to right position
for start oscillating.
3. Turn the fan oscillating control switch (feature No. 10) to left position
for stop oscillating.
B. Radio Section
- AM Radio
Frequently range: 540 KHz-1600 KHz
- FM Radio
Frequently range: 88MHz-108MHz
1. Place the AM/FM selector (Feature No. 6)in AM or FM position for
modulation select.
2. Adjust the volume control (Feature No. 5) to give the desired level of
sound.
3. Select desired radio station by adjusts the tuning (Feature No. 7).
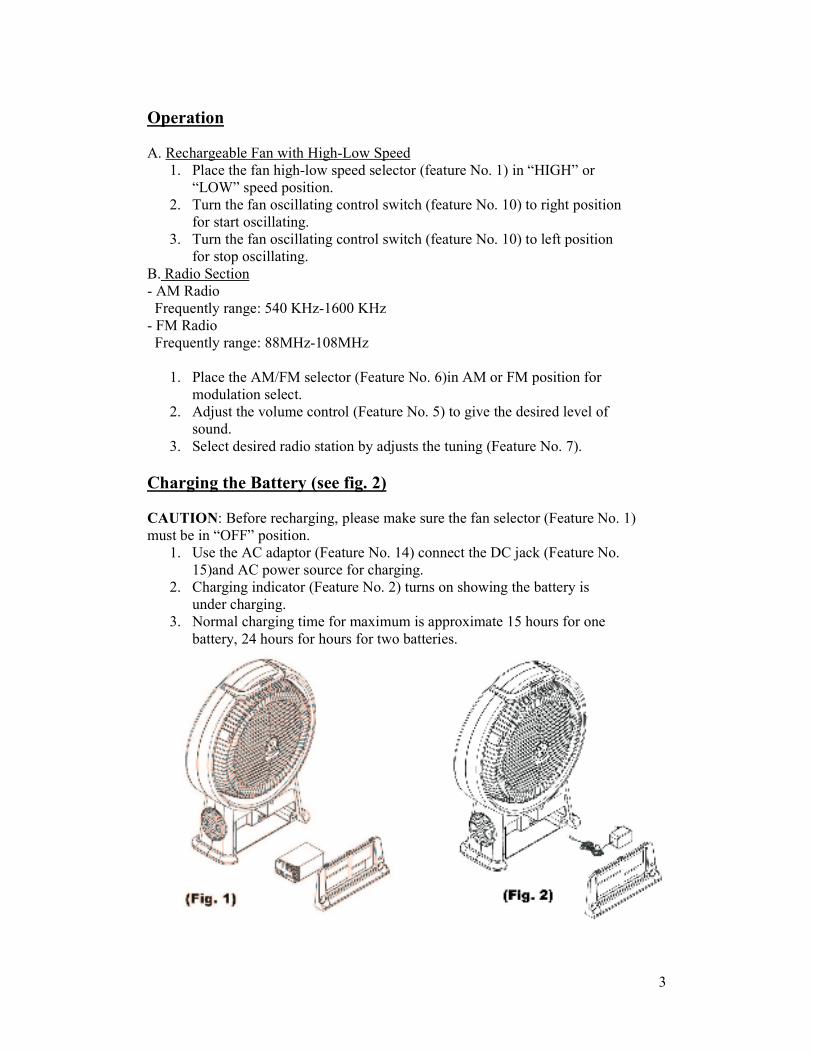
Charging the Battery (see fig. 2)
CAUTION: Before recharging, please make sure the fan selector (Feature No. 1)
must be in “OFF” position.
1. Use the AC adaptor (Feature No. 14) connect the DC jack (Feature No.
15)and AC power source for charging.
2. Charging indicator (Feature No. 2) turns on showing the battery is
under charging.
3. Normal charging time for maximum is approximate 15 hours for one
battery, 24 hours for hours for two batteries.
4
NOTE: The fan with a special built-in circuit protects the battery from being
overcharged and discharged.
a. Overcharge protection
The rechargeable fan will automatically stop charging when the battery power
in high level.
b. Discharge protection
The rechargeable fan will automatically switched off when the battery power
in low level
Replacing the Battery (see fig. 1)
1. Release the battery cover release lock (Feature No. 9) at the back of
rechargeable fan.
2. Open the battery door (Feature No. 12) then replace with new battery
and reassemble in reverse procedures.
Maintenance
1. Use a small cotton swab with cleaning alcohol to clean the plastics.
2. Release the front cover (Feature No. 3) to clean up the fan blade.
3. Never use strong or voltaic chemicals to clean the unit as it may
damage the plastic parts.