quick beginnings - istituto nazionale di fisica...
TRANSCRIPT

AFS
Quick BeginningsVersion 3.6
SC09-4560-00
���

AFS
Quick BeginningsVersion 3.6
SC09-4560-00
���

NoteBefore using this information and the product it supports, be sure to read the general information under“Notices” on page 181.
First Edition (April 2000)
This edition applies to:
IBM AFS for AIX, Version 3.6IBM AFS for Digital Unix, Version 3.6IBM AFS for HP-UX, Version 3.6IBM AFS for Linux, Version 3.6IBM AFS for SGI IRIX, Version 3.6IBM AFS for Solaris, Version 3.6
and to all subsequent releases and modifications until otherwise indicated in new editions.
Order publications through your IBM representative or through the IBM branch office serving your locality.
© Copyright International Business Machines Corporation 1989, 2000. All rights reserved.US Government Users Restricted Rights – Use, duplication or disclosure restricted by GSA ADP Schedule Contractwith IBM Corp.

Contents
About This Guide . . . . . . . . . vAudience and Purpose . . . . . . . . vOrganization of the Document . . . . . vHow to Use This Document . . . . . . vRelated Documents . . . . . . . . . vTypographical Conventions . . . . . . vi
Chapter 1. Installation Overview . . . . 1The Procedures Described in this Guide 1
Required Initial Procedures . . . . . 1As-needed Procedures . . . . . . . 2
Recommended Reading List . . . . . . 2Requirements . . . . . . . . . . . 3
Login Identity. . . . . . . . . . 4General Requirements . . . . . . . 4File Server Machine Requirements . . . 4Client Machine Requirements . . . . 5
Supported System Types . . . . . . . 5About Upgrading the Operating System 6The AFS Binary Distribution . . . . . . 6How to Continue . . . . . . . . . 6
Chapter 2. Installing the First AFSMachine . . . . . . . . . . . . 7Requirements and Configuration Decisions 7Overview: Installing Server Functionality 8Choosing the First AFS Machine . . . . 9Creating AFS Directories . . . . . . . 9Performing Platform-Specific Procedures 9Getting Started on AIX Systems . . . . . 11
Loading AFS into the AIX Kernel . . . 11Configuring Server Partitions on AIXSystems . . . . . . . . . . . . 12Replacing the fsck Program Helper onAIX Systems . . . . . . . . . . 13Enabling AFS Login on AIX Systems 13
Getting Started on Digital UNIX Systems 15Building AFS into the Digital UNIXKernel . . . . . . . . . . . . 15Configuring Server Partitions on DigitalUNIX Systems . . . . . . . . . 18Replacing the fsck Program on DigitalUNIX Systems . . . . . . . . . 18Enabling AFS Login on Digital UNIXSystems . . . . . . . . . . . . 19
Getting Started on HP-UX Systems. . . . 20Building AFS into the HP-UX Kernel 20Configuring Server Partitions on HP-UXSystems . . . . . . . . . . . . 22Configuring the AFS-modified fsckProgram on HP-UX Systems . . . . . 23Enabling AFS Login on HP-UX Systems 24
Getting Started on IRIX Systems . . . . 27Loading AFS into the IRIX Kernel . . . 28Building AFS into the IRIX Kernel . . . 29Configuring Server Partitions on IRIXSystems . . . . . . . . . . . . 30Enabling AFS Login on IRIX Systems 32
Getting Started on Linux Systems . . . . 32Loading AFS into the Linux Kernel . . 32Configuring Server Partitions on LinuxSystems . . . . . . . . . . . . 33Enabling AFS Login on Linux Systems 34
Getting Started on Solaris Systems . . . . 36Loading AFS into the Solaris Kernel 37Configuring the AFS-modified fsckProgram on Solaris Systems . . . . . 38Configuring Server Partitions on SolarisSystems . . . . . . . . . . . . 40Enabling AFS Login and Editing the FileSystems Clean-up Script on SolarisSystems . . . . . . . . . . . . 41
Starting the BOS Server . . . . . . . 44Defining Cell Name and Membership forServer Processes . . . . . . . . . . 46Starting the Database Server Processes . . 47Initializing Cell Security . . . . . . . 48Starting the File Server, Volume Server, andSalvager. . . . . . . . . . . . . 51Starting the Server Portion of the UpdateServer . . . . . . . . . . . . . 53Starting the Controller for NTPD . . . . 54Overview: Installing Client Functionality 55Copying Client Files to the Local Disk . . 56Defining Cell Membership for ClientProcesses . . . . . . . . . . . . 56Creating the Client CellServDB File . . . 57Configuring the Cache . . . . . . . . 59
Configuring a Disk Cache . . . . . . 60Configuring a Memory Cache . . . . 61
© Copyright IBM Corp. 1989, 2000 iii

Configuring the Cache Manager. . . . . 61Overview: Completing the Installation ofthe First AFS Machine . . . . . . . . 64Verifying the AFS Initialization Script . . . 64Activating the AFS Initialization Script . . 67
Activating the Script on AIX Systems 68Activating the Script on Digital UNIXSystems . . . . . . . . . . . . 68Activating the Script on HP-UX Systems 69Activating the Script on IRIX Systems 69Activating the Script on Linux Systems 70Activating the Script on Solaris Systems 70
Configuring the Top Levels of the AFSFilespace . . . . . . . . . . . . 71Storing AFS Binaries in AFS . . . . . . 74Storing AFS Documents in AFS . . . . . 76Storing System Binaries in AFS . . . . . 78Enabling Access to Foreign Cells . . . . 79Improving Cell Security . . . . . . . 81
Controlling root Access. . . . . . . 81Controlling System Administrator Access 82Protecting Sensitive AFS Directories . . 82
Removing Client Functionality . . . . . 83
Chapter 3. Installing Additional ServerMachines . . . . . . . . . . . . 85Installing an Additional File Server Machine 85
Creating AFS Directories and PerformingPlatform-Specific Procedures . . . . . 86Starting Server Programs . . . . . . 105Installing Client Functionality . . . . 107Completing the Installation . . . . . 111
Installing Database Server Functionality 116Summary of Procedures . . . . . . 117Instructions . . . . . . . . . . 118
Removing Database Server Functionality 121Summary of Procedures . . . . . . 121Instructions . . . . . . . . . . 121
Chapter 4. Installing Additional ClientMachines . . . . . . . . . . . . 125Summary of Procedures . . . . . . . 125Creating AFS Directories on the Local Disk 125Performing Platform-Specific Procedures 126Getting Started on AIX Systems . . . . . 126
Loading AFS into the AIX Kernel . . . 126Enabling AFS Login on AIX Systems 127
Getting Started on Digital UNIX Systems 129Building AFS into the Digital UNIXKernel . . . . . . . . . . . . 129
Enabling AFS Login on Digital UNIXSystems . . . . . . . . . . . . 132
Getting Started on HP-UX Systems. . . . 132Building AFS into the HP-UX Kernel 133Enabling AFS Login on HP-UX Systems 135
Getting Started on IRIX Systems . . . . 137Loading AFS into the IRIX Kernel . . . 138Building AFS into the IRIX Kernel . . . 139Enabling AFS Login on IRIX Systems 141
Getting Started on Linux Systems . . . . 141Loading AFS into the Linux Kernel . . 141Enabling AFS Login on Linux Systems 142
Getting Started on Solaris Systems . . . . 144Loading AFS into the Solaris Kernel 145Enabling AFS Login on Solaris Systems 146
Loading and Creating Client Files . . . . 149Configuring the Cache . . . . . . . . 151
Configuring a Disk Cache . . . . . . 153Configuring a Memory Cache . . . . 153
Configuring the Cache Manager. . . . . 153Starting the Cache Manager and Installingthe AFS Initialization Script . . . . . . 156
Running the Script on AIX Systems . . 156Running the Script on Digital UNIXSystems . . . . . . . . . . . . 157Running the Script on HP-UX Systems 158Running the Script on IRIX Systems 158Running the Script on Linux Systems 159Running the Script on Solaris Systems 160
Setting Up Volumes and Loading Binariesinto AFS . . . . . . . . . . . . 161
Linking /usr/afsws on an ExistingSystem Type . . . . . . . . . . 162Creating Binary Volumes for a NewSystem Type . . . . . . . . . . 162
Appendix. Building AFS from SourceCode. . . . . . . . . . . . . . 167Loading the Source Files . . . . . . . 167Compiling AFS Binaries Using the washtoolProgram. . . . . . . . . . . . . 168
Index . . . . . . . . . . . . . 171
Notices . . . . . . . . . . . . . 181Trademarks . . . . . . . . . . . 183
Readers’ Comments — We’d Like to Hearfrom You . . . . . . . . . . . . 185
iv AFS: Quick Beginnings

About This Guide
This section describes the purpose, organization, and conventions of thisdocument.
Audience and Purpose
This guide explains how to install and configure AFS®
server and clientmachines. It assumes that the reader is familiar with UNIX
®
systemadministration, but not AFS.
The instructions explain how to issue AFS commands in the context of specifictasks, but do not describe a command’s function or arguments in detail. Referto the IBM AFS Administration Reference as necessary.
Organization of the Document
See “The Procedures Described in this Guide” on page 1.
How to Use This Document
See “The Procedures Described in this Guide” on page 1 and “How toContinue” on page 6.
Related Documents
The AFS documentation set also includes the following documents.
IBM AFS Administration Guide
This guide describes the concepts and procedures that a system administratormust know to manage an AFS cell. It assumes familiarity with UNIX, butrequires no previous knowledge of AFS.
The first chapters of the IBM AFS Administration Guide present basic conceptsand guidelines. Understanding them is crucial to successful administration ofan AFS cell. The remaining chapters in the guide provide step-by-stepinstructions for specific administrative tasks, along with discussions of theconcepts important to that particular task.
© Copyright IBM Corp. 1989, 2000 v

IBM AFS Administration Reference
This reference manual details the syntax and effect of each AFS command. Itis intended for the experienced AFS administrator, programmer, or user.
The IBM AFS Administration Reference lists AFS files and commands inalphabetical order. The reference page for each command specifies its syntax,including the acceptable aliases and abbreviations. It then describes thecommand’s function, arguments, and output if any. Examples and a list ofrelated commands are provided, as are warnings where appropriate.
This manual complements the IBM AFS Administration Guide: it does notinclude procedural information, but describes commands in more detail thanthe IBM AFS Administration Guide.
IBM AFS User Guide
This guide presents the basic concepts and procedures necessary for usingAFS effectively. It assumes that the reader has some experience with UNIX,but does not require familiarity with networking or AFS.
The guide explains how to perform basic functions, including authenticating,changing a password, protecting AFS data, creating groups, andtroubleshooting. It provides illustrative examples for each function anddescribes some of the differences between the UNIX file system and AFS.
IBM AFS Release Notes
This document provides information specific to each release of AFS, such as alist of new features and commands, a list of requirements and limitations, andinstructions for upgrading server and client machines.
Typographical Conventions
This document uses the following typographical conventions:v Command and option names appear in bold type in syntax definitions,
examples, and running text. Names of directories, files, machines, partitions,volumes, and users also appear in bold type.
v Variable information appears in italic type. This includes user-suppliedinformation on command lines and the parts of prompts that differdepending on who issues the command. New terms also appear in italictype.
v Examples of screen output and file contents appear in monospace type.
vi AFS: Quick Beginnings

In addition, the following symbols appear in command syntax definitions,both in the documentation and in AFS online help statements. When issuing acommand, do not type these symbols.v Square brackets [ ] surround optional items.v Angle brackets < > surround user-supplied values in AFS commands.v A superscripted plus sign + follows an argument that accepts more than
one value.v The percent sign % represents the regular command shell prompt. Some
operating systems possibly use a different character for this prompt.v The number sign # represents the command shell prompt for the local
superuser root. Some operating systems possibly use a different characterfor this prompt.
v The pipe symbol | in a command syntax statement separates mutuallyexclusive values for an argument.
For additional information on AFS commands, including a description ofcommand string components, acceptable abbreviations and aliases, and howto get online help for commands, see the appendix to the IBM AFSAdministration Guide.
About This Guide vii

viii AFS: Quick Beginnings

Chapter 1. Installation Overview
This chapter describes the type of instructions provided in this guide and thehardware and software requirements for installing AFS
®
.
Before beginning the installation of your cell’s first machine, read this chapterand the material from the IBM AFS Administration Guide listed in“Recommended Reading List” on page 2. It is also best to read through“Chapter 2. Installing the First AFS Machine” on page 7 before beginning theinstallation, so that you understand the overall scope of the installationprocedure. Similarly, before installing additional server or client machines it isbest to read through “Chapter 3. Installing Additional Server Machines” onpage 85 and “Chapter 4. Installing Additional Client Machines” on page 125.
If you are already running a version of AFS, consult the upgrade instructionsin the IBM AFS Release Notes or contact the AFS Product Support group beforeproceeding with the installation.
The Procedures Described in this Guide
This guide describes two types of installation procedures: initial procedures(such as installing the first AFS machine or incorporating AFS into the kernel)and as-needed procedures (such as installing additional server machines orclient machines).
Required Initial Procedures
You must perform the following basic procedures to start using AFS.
Incorporating AFS Into the Kernel
You must incorporate AFS modifications into the kernel of every AFS fileserver and client machine. Depending on the operating system, you either usea program for dynamic kernel loading, build a new static kernel, or canchoose between the two. For your convenience, the instructions forincorporating AFS into the kernel appear in full in every chapter where youneed to use them.
Installing the First AFS Machine
You install the first AFS machine in your cell to function as both an AFSserver and client machine. You can disable the client functionality aftercompleting the installation, if you wish.
© Copyright IBM Corp. 1989, 2000 1

The first server machine in a cell performs several functions:v It acts as the system control machine (if your AFS distribution includes the
required encryption files), distributing certain configuration files to theother server machines in the cell
v It acts as the binary distribution machine for its system type, distributing AFSbinaries to other server machines of its system type
v It acts as the first database server machine, running the server processes thatmaintain the AFS administrative databases
After you install server and client functionality, you complete otherprocedures specific to the first machine, including setting up the top levels ofyour cell’s AFS filespace.
As-needed Procedures
Upgrading the Operating System
Upgrading the operating system requires you to take several steps to protectdata and AFS-modified binaries from being lost or overwritten. For guidelines,see “About Upgrading the Operating System” on page 6.
Installing Additional File Server Machines
See “Installing an Additional File Server Machine” on page 85.
Configuring or Decommissioning Database Server Machines
See “Installing Database Server Functionality” on page 116 and “RemovingDatabase Server Functionality” on page 121.
Installing Additional AFS Client Machines
See “Chapter 4. Installing Additional Client Machines” on page 125.
Building AFS from Source Code
See “Appendix. Building AFS from Source Code” on page 167.
Recommended Reading List
To develop the best understanding of the overall scope of an installationprocedure, read through the entire chapter or section that describes it beforeperforming any actions.
2 AFS: Quick Beginnings

In addition, familiarity with some basic AFS concepts can make theinstallation more efficient, because you understand better the purpose of thesteps. The following is a prioritized list of material to read before installingthe first AFS machine. At minimum, read the first chapter of the IBM AFSAdministration Guide. Then continue your reading in the indicated order, asextensively as you can. It is more important at this point to read theconceptual material in each section than the instructions.
Selected Topics in the IBM AFS Administration Guide
v The chapter titled An Overview of AFS Administration
v Selected sections in the Administering Server Machines chapter: Local DiskFiles on a Server Machine, The Four Roles for a Server Machine, Maintaining theServer CellServDB File
v Selected sections in the Monitoring and Controlling Server Processes chapter:Controlling and Checking Process Status
v Selected sections in the Managing Server Encryption Keys chapter: AboutServer Encryption Keys
v Selected sections in the Managing Volumes chapter: About Volumes, CreatingRead/write Volumes, Clones and Cloning, Mounting Volumes
v Selected sections in the Administering Client Machines and the Cache Managerchapter: Overview of Cache Manager Customization, Configuration andCache-related Files on the Local Disk, Determining the Cache Type, Size, andLocation
v Selected sections in the Managing Access Control Lists chapter: Protecting Datain AFS
More Selected Topics in the IBM AFS Administration Guide
v Selected sections in the Managing Volumes chapter: Creating and ReleasingRead-only Volumes (Replication), Creating Backup Volumes
v Selected sections in the Administering the Protection Database chapter: Aboutthe Protection Database
v Selected sections in the Administering User Accounts chapter: The Componentsof an AFS User Account
v Selected sections in the Managing Administrative Privilege chapter: AnOverview of Administrative Privilege
Requirements
You must comply with the following requirements to install AFS successfully.
Chapter 1. Installation Overview 3

Login Identity
Log into the machine you are installing as the local superuser root. Wheninstructed, also authenticate with AFS as the administrative user admin.
General Requirementsv You must have the AFS Binary Distribution for each system type you are
installing. Unless otherwise noted, the Binary Distribution includes softwarefor both client and server machines. If you are using the CD-ROM versionof the distribution, the machine you are installing must be able to access theCD-ROMs, either through a local CD drive or via an NFS
®
mount of a CDdrive attached to a machine that is accessible by network.
v All AFS machines that belong to a cell must be able to access each other viathe network.
v The machine must be running the standard, vendor-supplied version of theoperating system supported by the current version of AFS. The operatingsystem must already be installed on the machine’s root partition.
v You must be familiar with the current operating system and diskconfiguration of the machine you are installing.
v All hardware and non-AFS software on the machine must be functioningnormally.
v No critical processes can be running on the machine you are installing,because you must reboot it during the installation.
File Server Machine Requirementsv Cell configuration is simplest if the first machine you install has the lowest
IP address of any database server machine you currently plan to install. Ifyou later configure a machine with a lower IP address as a database servermachine, you must update the /usr/vice/etc/CellServDB file on all of yourcell’s client machines before the installation. For further discussion, see“Installing Database Server Functionality” on page 116.
v The partition mounted on the /usr directory must have at least 18 MB ofdisk space available for storing the AFS server binaries (stored byconvention in the /usr/afs/bin directory). If the machine is also a client,there must be additional local disk space available, as specified in “ClientMachine Requirements” on page 5. The complete set of AFS binariesrequires yet more space, but they are normally stored in an AFS volumerather than on a machine’s local disk.More significant amounts of space on the partition are required by theadministrative databases stored in the /usr/afs/db directory and the serverprocess log files stored in the /usr/afs/logs directory. The exact requirementdepends on many factors, such as the size of your cell and how often youtruncate the log files.
4 AFS: Quick Beginnings

v There must be at least one partition (or logical volume, if the operatingsystem and AFS support them) dedicated exclusively to storing AFSvolumes. The total number and size of server partitions on all file servermachines in the cell determines how much space is available for AFS files.
Client Machine Requirementsv The partition mounted on the /usr directory must have at least 4 MB of
disk space available for storing the AFS client binaries and kernel libraryfiles (stored by convention in the /usr/vice/etc directory). The complete setof AFS binaries requires more space, but they are normally stored in an AFSvolume rather than on a machine’s local disk. For most system types, theinstructions have you copy only the one kernel library file appropriate forthe machine you are installing. If you choose to store all of the library fileson the local disk, the space requirement can be significantly greater.
v On a client machine that uses a disk cache, there must be enough free spaceon the cache partition (by convention, mounted on the /usr/vice/cachedirectory) to accommodate the cache. The minimum recommended cachesize is 10 MB, but larger caches generally perform better.
v On a client machine that uses a memory cache, there must be at least 5 MBof machine memory to devote to caching, but again more memory generallyleads to better performance. For further discussion, see the sections in“Chapter 4. Installing Additional Client Machines” on page 125 aboutconfiguring the cache.
Supported System Types
The IBM AFS Release Notes for each AFS release list the supported systemtypes. Support for subsequent revisions of an operating system often becomesavailable between AFS releases. The AFS Product Support group can providedetails.
It is the goal of the AFS Development and Product Support groups to supportAFS on a wide range of popular system types. Furthermore, each time anoperating system vendor releases a new general availability version of asupported operating system, it is a goal to certify and support AFS on itwithin a short time. Support can be delayed a bit longer if it is necessary togenerate completely new binaries.
It is not always possible to support AFS on every intermediate version of anoperating system or for certain processor types. In some cases, platformlimitations make certain AFS functionality (such as file server or NFS/AFStranslator functionality) unavailable on one or more platforms. For a list oflimitations, see the IBM AFS Release Notes or ask the AFS Product Supportgroup.
Chapter 1. Installation Overview 5

About Upgrading the Operating System
Whenever you upgrade an AFS machine to a different operating system, youmust take several actions to maintain proper AFS functionality. These actionsinclude, but are not necessarily limited to, the following.v Unmount the AFS server partitions (mounted at /vicepxx directories) on all
file server machines, to prevent the vendor-supplied fsck program fromrunning on them when you reboot the machine during installation of thenew operating system. Before upgrading the operating system, it is prudentto comment out commands in the machine’s initialization file that remountthe server partitions, to prevent them from being remounted until you canreplace the standard fsck program with the AFS-modified version. Theinstructions in this guide for installing AFS server machines explain how toreplace the fsck program.
v Protect the AFS-modified versions of commands and configuration filesfrom being overwritten by vendor-supplied versions. These include vfsck(the AFS version of fsck), binaries for the UNIX remote services such asinetd, and configuration files such as the one for the PluggableAuthentication Module (PAM). After you have successfully installed theoperating system, remember to move the AFS-modified commands and filesback to the locations where they are accessed during normal functioning.
v Reformat the server partitions to accommodate AFS-specific information, incertain cases. The upgrade instructions that accompany the new AFSbinaries for an affected platform always detail the required procedure.
The AFS Binary Distribution
The AFS Binary Distribution includes a separate CD-ROM for each supportedsystem type, containing all AFS binaries and files for both server and clientmachines. The instructions in this guide specify when to mount the CD-ROMand which files or directories to copy to the local disk or into an AFS volume.
How to Continue
If you are installing the first AFS machine in your cell, proceed to “Chapter 2.Installing the First AFS Machine” on page 7.
If you are installing an additional file server machine, or configuring ordecommissioning a database server machine, proceed to “Chapter 3. InstallingAdditional Server Machines” on page 85.
If you are installing an additional client machine, proceed to “Chapter 4.Installing Additional Client Machines” on page 125.
6 AFS: Quick Beginnings

Chapter 2. Installing the First AFS Machine
This chapter describes how to install the first AFS machine in your cell,configuring it as both a file server machine and a client machine. Aftercompleting all procedures in this chapter, you can remove the clientfunctionality if you wish, as described in “Removing Client Functionality” onpage 83.
To install additional file server machines after completing this chapter, see“Chapter 3. Installing Additional Server Machines” on page 85.
To install additional client machines after completing this chapter, see“Chapter 4. Installing Additional Client Machines” on page 125.
Requirements and Configuration Decisions
The instructions in this chapter assume that you meet the followingrequirements.v You are logged onto the machine’s console as the local superuser root
v A standard version of one of the operating systems supported by thecurrent version of AFS is running on the machine
v You can access the data on the AFS CD-ROMs, either through a local CDdrive or via an NFS mount of a CD drive attached to a machine that isaccessible by network
You must make the following configuration decisions while installing the firstAFS machine. To speed the installation itself, it is best to make the decisionsbefore beginning. See the chapter in the IBM AFS Administration Guide aboutissues in cell administration and configuration for detailed guidelines.v Select the first AFS machinev Select the cell namev Decide which partitions or logical volumes to configure as AFS server
partitions, and choose the directory names on which to mount themv Decide whether to use the standard AFS authentication and authorization
software or Kerberos as obtained from another source. On several systemtypes, the decision determines how you incorporate AFS into the machine’sauthentication system. If you wish to use Kerberos, contact the AFS ProductSupport group now to learn about how you must modify the installationprocedure.
v Decide how big to make the client cache
© Copyright IBM Corp. 1989, 2000 7

v Decide how to configure the top levels of your cell’s AFS filespace
This chapter is divided into three large sections corresponding to the threeparts of installing the first AFS machine. Perform all of the steps in the orderthey appear. Each functional section begins with a summary of the proceduresto perform. The sections are as follows:v Installing server functionality (begins in “Overview: Installing Server
Functionality”)v Installing client functionality (begins in “Overview: Installing Client
Functionality” on page 55)v Configuring your cell’s filespace, establishing further security mechanisms,
and enabling access to foreign cells (begins in “Overview: Completing theInstallation of the First AFS Machine” on page 64)
Overview: Installing Server Functionality
In the first phase of installing your cell’s first AFS machine, you install fileserver and database server functionality by performing the followingprocedures:1. Choose which machine to install as the first AFS machine2. Create AFS-related directories on the local disk3. Incorporate AFS modifications into the machine’s kernel4. Configure partitions or logical volumes for storing AFS volumes5. On some system types, install and configure an AFS-modified version of
the fsck program6. If the machine is to remain a client machine, incorporate AFS into its
authentication system7. Start the Basic OverSeer (BOS) Server8. Define the cell name and the machine’s cell membership9. Start the database server processes: Authentication Server, Backup Server,
Protection Server, and Volume Location (VL) Server10. Configure initial security mechanisms11. Start the fs process, which incorporates three component processes: the
File Server, Volume Server, and Salvager12. Start the server portion of the Update Server13. Start the controller process (called runntp) for the Network Time Protocol
Daemon, which synchronizes machine clocks
8 AFS: Quick Beginnings

Choosing the First AFS Machine
The first AFS machine you install must have sufficient disk space to store AFSvolumes. To take best advantage of AFS’s capabilities, store client-side binariesas well as user files in volumes. When you later install additional file servermachines in your cell, you can distribute these volumes among the differentmachines as you see fit.
These instructions configure the first AFS machine as a database server machine,the binary distribution machine for its system type, and the cell’s system controlmachine. For a description of these roles, see the IBM AFS Administration Guide.
Installation of additional machines is simplest if the first machine has thelowest IP address of any database server machine you currently plan toinstall. If you later install database server functionality on a machine with alower IP address, you must first update the /usr/vice/etc/CellServDB file onall of your cell’s client machines. For more details, see “Installing DatabaseServer Functionality” on page 116.
Creating AFS Directories
Create the /usr/afs and /usr/vice/etc directories on the local disk, to houseserver and client files respectively. Subsequent instructions copy files from theAFS CD-ROM into them. Create the /cdrom directory as a mount point forCD-ROMs, if it does not already exist.
# mkdir /usr/afs
# mkdir /usr/vice
# mkdir /usr/vice/etc
# mkdir /cdrom
Performing Platform-Specific Procedures
Several of the initial procedures for installing a file server machine differ foreach system type. For convenience, the following sections group themtogether for each system type:v Incorporate AFS modifications into the kernel.
Chapter 2. Installing the First AFS Machine 9

The kernel on every AFS file server and client machine must incorporateAFS extensions. On machines that use a dynamic kernel module loader, it isconventional to alter the machine’s initialization script to load the AFSextensions at each reboot.
v Configure server partitions or logical volumes to house AFS volumes.Every AFS file server machine must have at least one partition or logicalvolume dedicated to storing AFS volumes (for convenience, thedocumentation hereafter refers to partitions only). Each server partition ismounted at a directory named /vicepxx, where xx is one or two lowercaseletters. By convention, the first 26 partitions are mounted on the directoriescalled /vicepa through /vicepz, the 27th one is mounted on the /vicepaadirectory, and so on through /vicepaz and /vicepba, continuing up to theindex corresponding to the maximum number of server partitionssupported in the current version of AFS (which is specified in the IBM AFSRelease Notes).The /vicepxx directories must reside in the file server machine’s rootdirectory, not in one of its subdirectories (for example, /usr/vicepa is not anacceptable directory location).You can also add or remove server partitions on an existing file servermachine. For instructions, see the chapter in the IBM AFS AdministrationGuide about maintaining server machines.
Note: Not all file system types supported by an operating system arenecessarily supported as AFS server partitions. For possiblerestrictions, see the IBM AFS Release Notes.
v On some system types, install and configure a modified fsck programwhich recognizes the structures that the File Server uses to organize volumedata on AFS server partitions. The fsck program provided with theoperating system does not understand the AFS data structures, and soremoves them to the lost+found directory.
v If the machine is to remain an AFS client machine, modify the machine’sauthentication system so that users obtain an AFS token as they log into thelocal file system. Using AFS is simpler and more convenient for your usersif you make the modifications on all client machines. Otherwise, users mustperform a two-step login procedure (login to the local file system and thenissue the klog command). For further discussion of AFS authentication, seethe chapter in the IBM AFS Administration Guide about cell configurationand administration issues.
To continue, proceed to the appropriate section:v “Getting Started on AIX Systems” on page 11v “Getting Started on Digital UNIX Systems” on page 15v “Getting Started on HP-UX Systems” on page 20
10 AFS: Quick Beginnings

v “Getting Started on IRIX Systems” on page 27v “Getting Started on Linux Systems” on page 32v “Getting Started on Solaris Systems” on page 36
Getting Started on AIX Systems
Begin by running the AFS initialization script to call the AIX kernel extensionfacility, which dynamically loads AFS modifications into the kernel. Then usethe SMIT program to configure partitions for storing AFS volumes, andreplace the AIX fsck program helper with a version that correctly handles AFSvolumes. If the machine is to remain an AFS client machine, incorporate AFSinto the AIX secondary authentication system.
Loading AFS into the AIX Kernel
The AIX kernel extension facility is the dynamic kernel loader provided byIBM Corporation. AIX does not support incorporation of AFS modificationsduring a kernel build.
For AFS to function correctly, the kernel extension facility must run each timethe machine reboots, so the AFS initialization script (included in the AFSdistribution) invokes it automatically. In this section you copy the script to theconventional location and edit it to select the appropriate options dependingon whether NFS is also to run.
After editing the script, you run it to incorporate AFS into the kernel. In latersections you verify that the script correctly initializes all AFS components,then configure the AIX inittab file so that the script runs automatically atreboot.1. Mount the AFS CD-ROM for AIX on the local /cdrom directory. For
instructions on mounting CD-ROMs (either locally or remotely via NFS),see your AIX documentation. Then change directory as indicated.
# cd /cdrom/rs_aix42/root.client/usr/vice/etc
2. Copy the AFS kernel library files to the local /usr/vice/etc/dkload directory,and the AFS initialization script to the /etc directory.
# cp -rp dkload /usr/vice/etc
# cp -p rc.afs /etc/rc.afs
3. Edit the /etc/rc.afs script, setting the NFS variable as indicated.
Chapter 2. Installing the First AFS Machine 11

If the machine is not to function as an NFS/AFS Translator, set the NFSvariable as follows.
NFS=$NFS_NONE
If the machine is to function as an NFS/AFS Translator and is runningAIX 4.2.1 or higher, set the NFS variable as follows. Note that NFS mustalready be loaded into the kernel, which happens automatically onsystems running AIX 4.1.1 and later, as long as the file /etc/exports exists.
NFS=$NFS_IAUTH
4. Invoke the /etc/rc.afs script to load AFS modifications into the kernel. Youcan ignore any error messages about the inability to start the BOS Serveror the Cache Manager or AFS client.
# /etc/rc.afs
Configuring Server Partitions on AIX Systems
Every AFS file server machine must have at least one partition or logicalvolume dedicated to storing AFS volumes. Each server partition is mounted ata directory named /vicepxx, where xx is one or two lowercase letters. The/vicepxx directories must reside in the file server machine’s root directory, notin one of its subdirectories (for example, /usr/vicepa is not an acceptabledirectory location). For additional information, see “PerformingPlatform-Specific Procedures” on page 9.
To configure server partitions on an AIX system, perform the followingprocedures:1. Create a directory called /vicepxx for each AFS server partition you are
configuring (there must be at least one). Repeat the command for eachpartition.
# mkdir /vicepxx
2. Use the SMIT program to create a journaling file system on each partitionto be configured as an AFS server partition.
3. Mount each partition at one of the /vicepxx directories. Choose one of thefollowing three methods:v Use the SMIT programv Use the mount -a command to mount all partitions at oncev Use the mount command on each partition in turn
12 AFS: Quick Beginnings

Also configure the partitions so that they are mounted automatically ateach reboot. For more information, refer to the AIX documentation.
Replacing the fsck Program Helper on AIX Systems
In this section, you make modifications to guarantee that the appropriate fsckprogram runs on AFS server partitions. The fsck program provided with theoperating system must never run on AFS server partitions. Because it does notrecognize the structures that the File Server uses to organize volume data, itremoves all of the data. To repeat:
Never run the standard fsck program on AFS server partitions. It discardsAFS volumes.
On AIX systems, you do not replace the fsck binary itself, but rather theprogram helper file included in the AIX distribution as/sbin/helpers/v3fshelper.1. Move the AIX fsck program helper to a safe location and install the
version from the AFS distribution in its place. The AFS CD-ROM must stillbe mounted at the /cdrom directory.
# cd /sbin/helpers
# mv v3fshelper v3fshelper.noafs
# cp -p /cdrom/rs_aix42/root.server/etc/v3fshelper v3fshelper
2. If you plan to retain client functionality on this machine after completingthe installation, proceed to “Enabling AFS Login on AIX Systems”.Otherwise, proceed to “Starting the BOS Server” on page 44.
Enabling AFS Login on AIX Systems
Note: If you plan to remove client functionality from this machine aftercompleting the installation, skip this section and proceed to “Startingthe BOS Server” on page 44.
Follow the instructions in this section to incorporate AFS modifications intothe AIX secondary authentication system.1. Issue the ls command to verify that the afs_dynamic_auth and
afs_dynamic_kerbauth programs are installed in the local /usr/vice/etcdirectory.
# ls /usr/vice/etc
Chapter 2. Installing the First AFS Machine 13

If the files do not exist, mount the AFS CD-ROM for AIX (if it is notalready), change directory as indicated, and copy them.
# cd /cdrom/rs_aix42/root.client/usr/vice/etc
# cp -p afs_dynamic* /usr/vice/etc
2. Edit the local /etc/security/user file, making changes to the indicatedstanzas:v In the default stanza, set the registry attribute to DCE (not to AFS), as
follows:
registry = DCE
v In the default stanza, set the SYSTEM attribute as indicated.If the machine is an AFS client only, set the following value:
SYSTEM = "AFS OR (AFS[UNAVAIL] AND compat[SUCCESS])"
If the machine is both an AFS and a DCE client, set the following value(it must appear on a single line in the file):
SYSTEM = "DCE OR DCE[UNAVAIL] OR AFS OR (AFS[UNAVAIL] \AND compat[SUCCESS])"
v In the root stanza, set the registry attribute as follows. It enables thelocal superuser root to log into the local file system only, based on thepassword listed in the local password file.
root:registry = files
3. Edit the local /etc/security/login.cfg file, creating or editing the indicatedstanzas:v In the DCE stanza, set the program attribute as follows.
If you use the AFS Authentication Server (kaserver process):
DCE:program = /usr/vice/etc/afs_dynamic_auth
If you use a Kerberos implementation of AFS authentication:
DCE:program = /usr/vice/etc/afs_dynamic_kerbauth
v In the AFS stanza, set the program attribute as follows.
14 AFS: Quick Beginnings

If you use the AFS Authentication Server (kaserver process):
AFS:program = /usr/vice/etc/afs_dynamic_auth
If you use a Kerberos implementation of AFS authentication:
AFS:program = /usr/vice/etc/afs_dynamic_kerbauth
4. Proceed to “Starting the BOS Server” on page 44 (or if referring to theseinstructions while installing an additional file server machine, return to“Starting Server Programs” on page 105).
Getting Started on Digital UNIX Systems
Begin by building AFS modifications into a new static kernel; Digital UNIXdoes not support dynamic loading. Then create partitions for storing AFSvolumes, and replace the Digital UNIX fsck program with a version thatcorrectly handles AFS volumes. If the machine is to remain an AFS clientmachine, incorporate AFS into the machine’s Security Integration Architecture(SIA) matrix.
Building AFS into the Digital UNIX Kernel
Use the following instructions to build AFS modifications into the kernel on aDigital UNIX system.1. Create a copy called AFS of the basic kernel configuration file included
in the Digital UNIX distribution as /usr/sys/conf/machine_name, wheremachine_name is the machine’s hostname in all uppercase letters.
# cd /usr/sys/conf
# cp machine_name AFS
2. Add AFS to the list of options in the configuration file you created in theprevious step, so that the result looks like the following:
. .
. .options UFSoptions NFSoptions AFS
. .
. .
3. Add an entry for AFS to two places in the file /usr/sys/conf/files.
Chapter 2. Installing the First AFS Machine 15

v Add a line for AFS to the list of OPTIONS, so that the result looks likethe following:
. . .
. . .OPTIONS/nfs optional nfsOPTIONS/afs optional afsOPTIONS/nfs_server optional nfs_server
. . .
. . .
v Add an entry for AFS to the list of MODULES, so that the result looks likethe following:
. . . .
. . . .#MODULE/nfs_server optional nfs_server Binarynfs/nfs_server.c module nfs_server optimize -g3nfs/nfs3_server.c module nfs_server optimize -g3#MODULE/afs optional afs Binaryafs/libafs.c module afs#
4. Add an entry for AFS to two places in the file /usr/sys/vfs/vfs_conf.c.v Add AFS to the list of defined file systems, so that the result looks like
the following:. .. .
#include <afs.h>#if defined(AFS) && AFS
extern struct vfsops afs_vfsops;#endif
. .
. .
v Put a declaration for AFS in the vfssw[] table’s MOUNT_ADDON slot,so that the result looks like the following:
. . .
. . .&fdfs_vfsops, "fdfs", /* 12 = MOUNT_FDFS */
#if defined(AFS)&afs_vfsops, "afs",
#else(struct vfsops *)0, "", /* 13 = MOUNT_ADDON */
#endif#if NFS && INFS_DYNAMIC
&nfs3_vfsops, "nfsv3", /* 14 = MOUNT_NFS3 */
16 AFS: Quick Beginnings

5. Mount the AFS CD-ROM for Digital UNIX on the local /cdrom directory.For instructions on mounting CD-ROMs (either locally or remotely viaNFS), see your Digital UNIX documentation. Then change directory asindicated.
# cd /cdrom/alpha_dux40/root.client
6. Copy the AFS initialization script to the local directory for initializationfiles (by convention, /sbin/init.d on Digital UNIX machines). Note theremoval of the .rc extension as you copy the script.
# cp usr/vice/etc/afs.rc /sbin/init.d/afs
7. Copy the AFS kernel module to the local /usr/sys/BINARY directory.If the machine’s kernel supports NFS server functionality:
# cp bin/libafs.o /usr/sys/BINARY/afs.mod
If the machine’s kernel does not support NFS server functionality:
# cp bin/libafs.nonfs.o /usr/sys/BINARY/afs.mod
8. Configure and build the kernel. Respond to any prompts by pressing<Return>. The resulting kernel resides in the file /sys/AFS/vmunix.
# doconfig -c AFS
9. Rename the existing kernel file and copy the new, AFS-modified file tothe standard location.
# mv /vmunix /vmunix_noafs
# cp /sys/AFS/vmunix /vmunix
10. Reboot the machine to start using the new kernel, and login again as thesuperuser root.
# cd /
# shutdown -r now
login: rootPassword: root_password
Chapter 2. Installing the First AFS Machine 17

Configuring Server Partitions on Digital UNIX Systems
Every AFS file server machine must have at least one partition or logicalvolume dedicated to storing AFS volumes. Each server partition is mounted ata directory named /vicepxx, where xx is one or two lowercase letters. The/vicepxx directories must reside in the file server machine’s root directory, notin one of its subdirectories (for example, /usr/vicepa is not an acceptabledirectory location). For additional information, see “PerformingPlatform-Specific Procedures” on page 9.1. Create a directory called /vicepxx for each AFS server partition you are
configuring (there must be at least one). Repeat the command for eachpartition.
# mkdir /vicepxx
2. Add a line with the following format to the file systems registry file,/etc/fstab, for each directory just created. The entry maps the directoryname to the disk partition to be mounted on it.
/dev/disk /vicepxx ufs rw 0 2
The following is an example for the first partition being configured.
/dev/rz3a /vicepa ufs rw 0 2
3. Create a file system on each partition that is to be mounted at a /vicepxxdirectory. The following command is probably appropriate, but consult theDigital UNIX documentation for more information.
# newfs -v /dev/disk
4. Mount each partition by issuing either the mount -a command to mountall partitions at once or the mount command to mount each partition inturn.
Replacing the fsck Program on Digital UNIX Systems
In this section, you make modifications to guarantee that the appropriate fsckprogram runs on AFS server partitions. The fsck program provided with theoperating system must never run on AFS server partitions. Because it does notrecognize the structures that the File Server uses to organize volume data, itremoves all of the data. To repeat:
Never run the standard fsck program on AFS server partitions. It discardsAFS volumes.
18 AFS: Quick Beginnings

On Digital UNIX systems, the files /sbin/fsck and /usr/sbin/fsck are driverprograms. Rather than replacing either of them, you replace the actual binaryincluded in the Digital UNIX distribution as /sbin/ufs_fsck and/usr/sbin/ufs_fsck.1. Install the vfsck binary to the /sbin and /usr/sbin directories. The AFS
CD-ROM must still be mounted at the /cdrom directory.
# cd /cdrom/alpha_dux40/root.server/etc
# cp vfsck /sbin/vfsck
# cp vfsck /usr/sbin/vfsck
2. Rename the Digital UNIX fsck binaries and create symbolic links to thevfsck program.
# cd /sbin
# mv ufs_fsck ufs_fsck.noafs
# ln -s vfsck ufs_fsck
# cd /usr/sbin
# mv ufs_fsck ufs_fsck.noafs
# ln -s vfsck ufs_fsck
3. If you plan to retain client functionality on this machine after completingthe installation, proceed to “Enabling AFS Login on Digital UNIXSystems”. Otherwise, proceed to “Starting the BOS Server” on page 44.
Enabling AFS Login on Digital UNIX Systems
Note: If you plan to remove client functionality from this machine aftercompleting the installation, skip this section and proceed to “Startingthe BOS Server” on page 44.
On Digital UNIX systems, the AFS initialization script automaticallyincorporates the AFS authentication library file into the Security IntegrationArchitecture (SIA) matrix on the machine, so that users with AFS accountsobtain a token at login. In this section you copy the library file to theappropriate location.
For more information on SIA, see the Digital UNIX reference page formatrix.conf, or consult the section on security in your Digital UNIXdocumentation.
Chapter 2. Installing the First AFS Machine 19

Note: If the machine runs both the DCE and AFS client software, AFS muststart after DCE. Consult the AFS initialization script for suggestedsymbolic links to create for correct ordering. Also, the system startupscript order must initialize SIA before any long-running process thatuses authentication.
Perform the following steps to enable AFS login.1. Mount the AFS CD-ROM for Digital UNIX on the local /cdrom directory, if
it is not already. Change directory as indicated.
# cd /cdrom/alpha_dux40/lib/afs
2. Copy the appropriate AFS authentication library file to the local /usr/shlibdirectory.If you use the AFS Authentication Server (kaserver process) in the cell:
# cp libafssiad.so /usr/shlib
If you use a Kerberos implementation of AFS authentication, rename thelibrary file as you copy it:
# cp libafssiad.krb.so /usr/shlib/libafssiad.so
3. Proceed to “Starting the BOS Server” on page 44 (or if referring to theseinstructions while installing an additional file server machine, return to“Starting Server Programs” on page 105).
Getting Started on HP-UX Systems
Begin by building AFS modifications into a new kernel; HP-UX does notsupport dynamic loading. Then create partitions for storing AFS volumes, andinstall and configure the AFS-modified fsck program to run on AFS serverpartitions. If the machine is to remain an AFS client machine, incorporate AFSinto the machine’s Pluggable Authentication Module (PAM) scheme.
Building AFS into the HP-UX Kernel
Use the following instructions to build AFS modifications into the kernel onan HP-UX system.1. Move the existing kernel-related files to a safe location.
# cp /stand/vmunix /stand/vmunix.noafs
# cp /stand/system /stand/system.noafs
20 AFS: Quick Beginnings

2. Mount the AFS CD-ROM for HP-UX on the local /cdrom directory. Forinstructions on mounting CD-ROMs (either locally or remotely via NFS),see your HP-UX documentation. Then change directory as indicated.
# cd /cdrom/hp_ux110/root.client
3. Copy the AFS initialization file to the local directory for initialization files(by convention, /sbin/init.d on HP-UX machines). Note the removal of the.rc extension as you copy the file.
# cp usr/vice/etc/afs.rc /sbin/init.d/afs
4. Copy the file afs.driver to the local /usr/conf/master.d directory, changingits name to afs as you do.
# cp usr/vice/etc/afs.driver /usr/conf/master.d/afs
5. Copy the AFS kernel module to the local /usr/conf/lib directory.If the machine’s kernel supports NFS server functionality:
# cp bin/libafs.a /usr/conf/lib
If the machine’s kernel does not support NFS server functionality, changethe file’s name as you copy it:
# cp bin/libafs.nonfs.a /usr/conf/lib/libafs.a
6. Incorporate the AFS driver into the kernel, either using the SAM programor a series of individual commands.v To use the SAM program:
a. Invoke the SAM program, specifying the hostname of the localmachine as local_hostname. The SAM graphical user interface popsup.
# sam -display local_hostname:0
b. Choose the Kernel Configuration icon, then the Drivers icon. Fromthe list of drivers, select afs.
c. Open the pull-down Actions menu and choose the Add Driver toKernel option.
d. Open the Actions menu again and choose the Create a New Kerneloption.
Chapter 2. Installing the First AFS Machine 21

e. Confirm your choices by choosing Yes and OK when prompted bysubsequent pop-up windows. The SAM program builds the kerneland reboots the system.
f. Login again as the superuser root.
login: rootPassword: root_password
v To use individual commands:a. Edit the file /stand/system, adding an entry for afs to the Subsystems
section.b. Change to the /stand/build directory and issue the mk_kernel
command to build the kernel.
# cd /stand/build
# mk_kernel
c. Move the new kernel to the standard location (/stand/vmunix),reboot the machine to start using it, and login again as the superuserroot.
# mv /stand/build/vmunix_test /stand/vmunix
# cd /
# shutdown -r now
login: rootPassword: root_password
Configuring Server Partitions on HP-UX Systems
Every AFS file server machine must have at least one partition or logicalvolume dedicated to storing AFS volumes. Each server partition is mounted ata directory named /vicepxx, where xx is one or two lowercase letters. The/vicepxx directories must reside in the file server machine’s root directory, notin one of its subdirectories (for example, /usr/vicepa is not an acceptabledirectory location). For additional information, see “PerformingPlatform-Specific Procedures” on page 9.1. Create a directory called /vicepxx for each AFS server partition you are
configuring (there must be at least one). Repeat the command for eachpartition.
# mkdir /vicepxx
22 AFS: Quick Beginnings

2. Use the SAM program to create a file system on each partition. Forinstructions, consult the HP-UX documentation.
3. On some HP-UX systems that use logical volumes, the SAM programautomatically mounts the partitions. If it has not, mount each partition byissuing either the mount -a command to mount all partitions at once orthe mount command to mount each partition in turn.
Configuring the AFS-modified fsck Program on HP-UX Systems
In this section, you make modifications to guarantee that the appropriate fsckprogram runs on AFS server partitions. The fsck program provided with theoperating system must never run on AFS server partitions. Because it does notrecognize the structures that the File Server uses to organize volume data, itremoves all of the data. To repeat:
Never run the standard fsck program on AFS server partitions. It discardsAFS volumes.
On HP-UX systems, there are several configuration files to install in additionto the AFS-modified fsck program (the vfsck binary).1. Create the command configuration file /sbin/lib/mfsconfig.d/afs. Use a text
editor to place the indicated two lines in it:
format_revision 1fsck 0 m,P,p,d,f,b:c:y,n,Y,N,q,
2. Create and change directory to an AFS-specific command directory called/sbin/fs/afs.
# mkdir /sbin/fs/afs
# cd /sbin/fs/afs
3. Copy the AFS-modified version of the fsck program (the vfsck binary) andrelated files from the distribution directory to the new AFS-specificcommand directory.
# cp -p /cdrom/hp_ux110/root.server/etc/* .
4. Change the vfsck binary’s name to fsck and set the mode bitsappropriately on all of the files in the /sbin/fs/afs directory.
# mv vfsck fsck
# chmod 755 *
Chapter 2. Installing the First AFS Machine 23

5. Edit the /etc/fstab file, changing the file system type for each AFS serverpartition from hfs to afs. This ensures that the AFS-modified fsckprogram runs on the appropriate partitions.The sixth line in the following example of an edited file shows an AFSserver partition, /vicepa.
/dev/vg00/lvol1 / hfs defaults 0 1/dev/vg00/lvol4 /opt hfs defaults 0 2/dev/vg00/lvol5 /tmp hfs defaults 0 2/dev/vg00/lvol6 /usr hfs defaults 0 2/dev/vg00/lvol8 /var hfs defaults 0 2/dev/vg00/lvol9 /vicepa afs defaults 0 2/dev/vg00/lvol7 /usr/vice/cache hfs defaults 0 2
6. If you plan to retain client functionality on this machine after completingthe installation, proceed to “Enabling AFS Login on HP-UX Systems”.Otherwise, proceed to “Starting the BOS Server” on page 44.
Enabling AFS Login on HP-UX Systems
Note: If you plan to remove client functionality from this machine aftercompleting the installation, skip this section and proceed to “Startingthe BOS Server” on page 44.
At this point you incorporate AFS into the operating system’s PluggableAuthentication Module (PAM) scheme. PAM integrates all authenticationmechanisms on the machine, including login, to provide the securityinfrastructure for authenticated access to and from the machine.
Explaining PAM is beyond the scope of this document. It is assumed that youunderstand the syntax and meanings of settings in the PAM configuration file(for example, how the other entry works, the effect of marking an entry asrequired, optional, or sufficient, and so on).
The following instructions explain how to alter the entries in the PAMconfiguration file for each service for which you wish to use AFSauthentication. Other configurations possibly also work, but the instructionsspecify the recommended and tested configuration.
Note: The instructions specify that you mark each entry as optional.However, marking some modules as optional can mean that they grantaccess to the corresponding service even when the user does not meetall of the module’s requirements. In some operating system revisions,for example, if you mark as optional the module that controls login viaa dial-up connection, it allows users to login without providing a
24 AFS: Quick Beginnings
password. See the IBM AFS Release Notes for a discussion of anylimitations that apply to this operating system.
Also, with some operating system versions you must install patches forPAM to interact correctly with certain authentication programs. Fordetails, see the IBM AFS Release Notes.
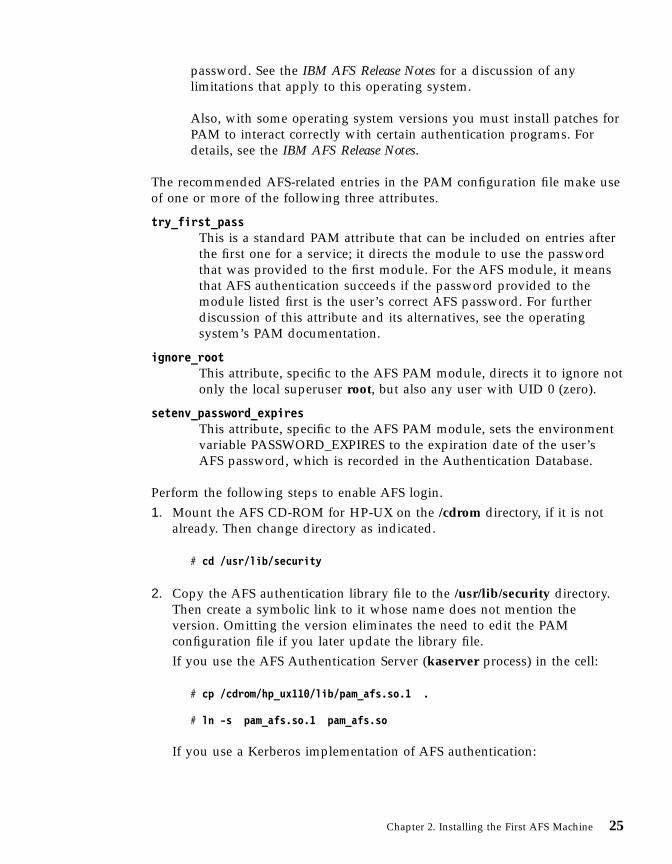
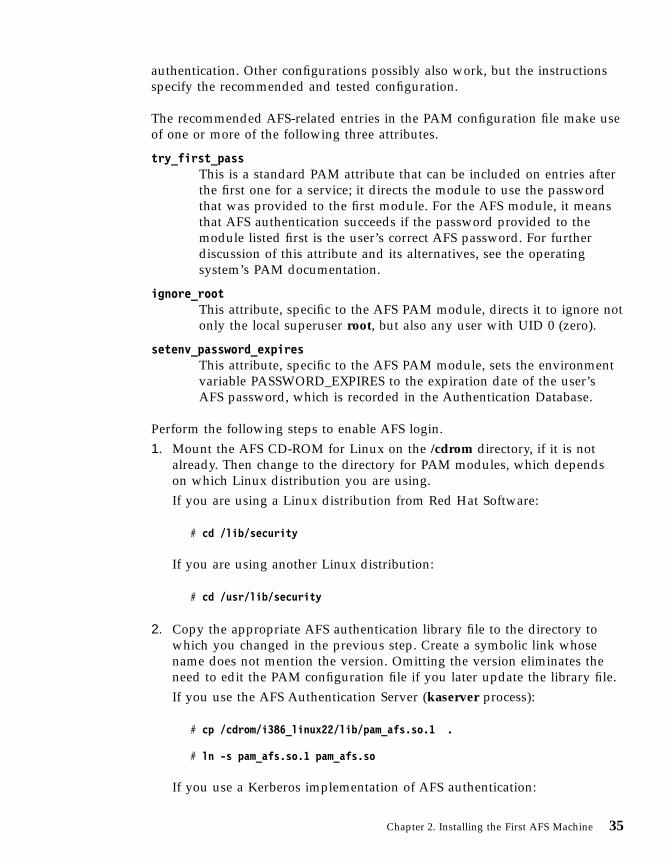
The recommended AFS-related entries in the PAM configuration file make useof one or more of the following three attributes.
try_first_passThis is a standard PAM attribute that can be included on entries afterthe first one for a service; it directs the module to use the passwordthat was provided to the first module. For the AFS module, it meansthat AFS authentication succeeds if the password provided to themodule listed first is the user’s correct AFS password. For furtherdiscussion of this attribute and its alternatives, see the operatingsystem’s PAM documentation.
ignore_rootThis attribute, specific to the AFS PAM module, directs it to ignore notonly the local superuser root, but also any user with UID 0 (zero).
setenv_password_expiresThis attribute, specific to the AFS PAM module, sets the environmentvariable PASSWORD_EXPIRES to the expiration date of the user’sAFS password, which is recorded in the Authentication Database.
Perform the following steps to enable AFS login.1. Mount the AFS CD-ROM for HP-UX on the /cdrom directory, if it is not
already. Then change directory as indicated.
# cd /usr/lib/security
2. Copy the AFS authentication library file to the /usr/lib/security directory.Then create a symbolic link to it whose name does not mention theversion. Omitting the version eliminates the need to edit the PAMconfiguration file if you later update the library file.If you use the AFS Authentication Server (kaserver process) in the cell:
# cp /cdrom/hp_ux110/lib/pam_afs.so.1 .
# ln -s pam_afs.so.1 pam_afs.so
If you use a Kerberos implementation of AFS authentication:
Chapter 2. Installing the First AFS Machine 25

# cp /cdrom/hp_ux110/lib/pam_afs.krb.so.1 .
# ln -s pam_afs.krb.so.1 pam_afs.so
3. Edit the Authentication management section of the HP-UX PAMconfiguration file, /etc/pam.conf by convention. The entries in this sectionhave the value auth in their second field.First edit the standard entries, which refer to the HP-UX PAM module(usually, the file /usr/lib/security/libpam_unix.1) in their fourth field. Foreach service for which you want to use AFS authentication, edit the thirdfield of its entry to read optional. The pam.conf file in the HP-UXdistribution usually includes standard entries for the login and ftpservices, for instance.If there are services for which you want to use AFS authentication, but forwhich the pam.conf file does not already include a standard entry, youmust create that entry and place the value optional in its third field. Forinstance, the HP-UX pam.conf file does not usually include standardentries for the remsh or telnet services.Then create an AFS-related entry for each service, placing it immediatelybelow the standard entry. The following example shows what theAuthentication Management section looks like after you have you edited orcreated entries for the services mentioned previously. Note that theexample AFS entries appear on two lines only for legibility.
login auth optional /usr/lib/security/libpam_unix.1login auth optional /usr/lib/security/pam_afs.so \
try_first_pass ignore_root setenv_password_expiresftp auth optional /usr/lib/security/libpam_unix.1ftp auth optional /usr/lib/security/pam_afs.so \
try_first_pass ignore_rootremsh auth optional /usr/lib/security/libpam_unix.1remsh auth optional /usr/lib/security/pam_afs.so \
try_first_pass ignore_roottelnet auth optional /usr/lib/security/libpam_unix.1telnet auth optional /usr/lib/security/pam_afs.so \
try_first_pass ignore_root setenv_password_expires
4. If you use the Common Desktop Environment (CDE) on the machine andwant users to obtain an AFS token as they log in, also add or edit thefollowing four entries in the Authentication management section. Note thatthe AFS-related entries appear on two lines here only for legibility.
dtlogin auth optional /usr/lib/security/libpam_unix.1dtlogin auth optional /usr/lib/security/pam_afs.so \
try_first_pass ignore_root
26 AFS: Quick Beginnings

dtaction auth optional /usr/lib/security/libpam_unix.1dtaction auth optional /usr/lib/security/pam_afs.so \
try_first_pass ignore_root
5. Proceed to “Starting the BOS Server” on page 44 (or if referring to theseinstructions while installing an additional file server machine, return to“Starting Server Programs” on page 105).
Getting Started on IRIX Systems
To incorporate AFS into the kernel on IRIX systems, choose one of twomethods:v Run the AFS initialization script to invoke the ml program distributed by
Silicon Graphics, Incorporated (SGI), which dynamically loads AFSmodifications into the kernel
v Build a new static kernel
Then create partitions for storing AFS volumes. You do not need to replacethe IRIX fsck program because SGI has already modified it to handle AFSvolumes properly. If the machine is to remain an AFS client machine, verifythat the IRIX login utility installed on the machine grants an AFS token.
In preparation for either dynamic loading or kernel building, perform thefollowing procedures:1. Mount the AFS CD-ROM for IRIX on the /cdrom directory. For instructions
on mounting CD-ROMs (either locally or remotely via NFS), see your IRIXdocumentation. Then change directory as indicated.
# cd /cdrom/sgi_65/root.client
2. Copy the AFS initialization script to the local directory for initializationfiles (by convention, /etc/init.d on IRIX machines). Note the removal of the.rc extension as you copy the script.
# cp -p usr/vice/etc/afs.rc /etc/init.d/afs
3. Issue the uname -m command to determine the machine’s CPU boardtype. The IPxx value in the output must match one of the supported CPUboard types listed in the IBM AFS Release Notes for the current version ofAFS.
# uname -m
Chapter 2. Installing the First AFS Machine 27
4. Proceed to either “Loading AFS into the IRIX Kernel” or “Building AFSinto the IRIX Kernel” on page 29.
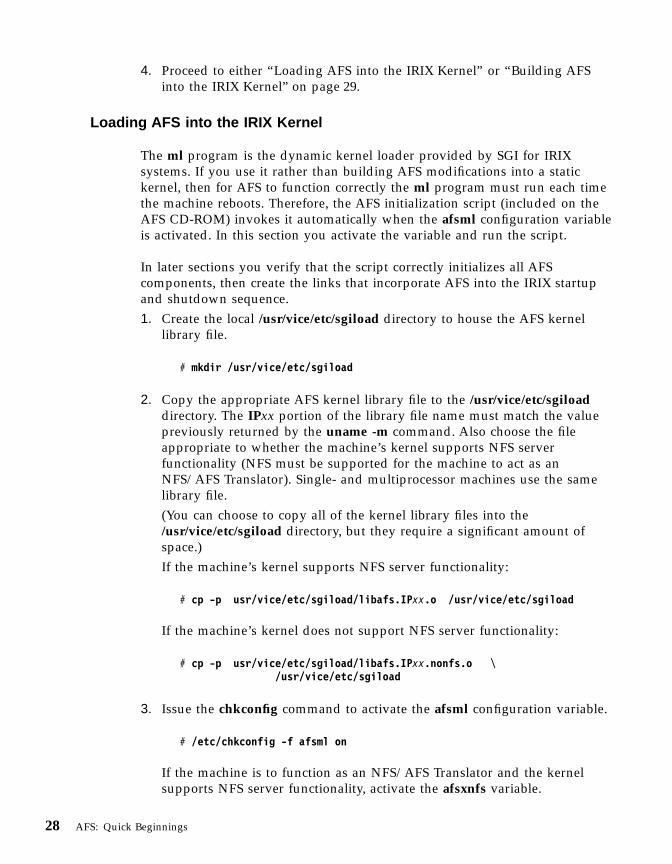
Loading AFS into the IRIX Kernel
The ml program is the dynamic kernel loader provided by SGI for IRIXsystems. If you use it rather than building AFS modifications into a statickernel, then for AFS to function correctly the ml program must run each timethe machine reboots. Therefore, the AFS initialization script (included on theAFS CD-ROM) invokes it automatically when the afsml configuration variableis activated. In this section you activate the variable and run the script.
In later sections you verify that the script correctly initializes all AFScomponents, then create the links that incorporate AFS into the IRIX startupand shutdown sequence.1. Create the local /usr/vice/etc/sgiload directory to house the AFS kernel
library file.
# mkdir /usr/vice/etc/sgiload
2. Copy the appropriate AFS kernel library file to the /usr/vice/etc/sgiloaddirectory. The IPxx portion of the library file name must match the valuepreviously returned by the uname -m command. Also choose the fileappropriate to whether the machine’s kernel supports NFS serverfunctionality (NFS must be supported for the machine to act as anNFS/AFS Translator). Single- and multiprocessor machines use the samelibrary file.(You can choose to copy all of the kernel library files into the/usr/vice/etc/sgiload directory, but they require a significant amount ofspace.)If the machine’s kernel supports NFS server functionality:
# cp -p usr/vice/etc/sgiload/libafs.IPxx.o /usr/vice/etc/sgiload
If the machine’s kernel does not support NFS server functionality:
# cp -p usr/vice/etc/sgiload/libafs.IPxx.nonfs.o \/usr/vice/etc/sgiload
3. Issue the chkconfig command to activate the afsml configuration variable.
# /etc/chkconfig -f afsml on
If the machine is to function as an NFS/AFS Translator and the kernelsupports NFS server functionality, activate the afsxnfs variable.
28 AFS: Quick Beginnings

# /etc/chkconfig -f afsxnfs on
4. Run the /etc/init.d/afs script to load AFS extensions into the kernel. Thescript invokes the ml command, automatically determining which kernellibrary file to use based on this machine’s CPU type and the activationstate of the afsxnfs variable.You can ignore any error messages about the inability to start the BOSServer or the Cache Manager or AFS client.
# /etc/init.d/afs start
5. Proceed to “Configuring Server Partitions on IRIX Systems” on page 30.
Building AFS into the IRIX Kernel
Use the following instructions to build AFS modifications into the kernel onan IRIX system.1. Copy the kernel initialization file afs.sm to the local /var/sysgen/system
directory, and the kernel master file afs to the local /var/sysgen/master.ddirectory.
# cp -p bin/afs.sm /var/sysgen/system
# cp -p bin/afs /var/sysgen/master.d
2. Copy the appropriate AFS kernel library file to the local file/var/sysgen/boot/afs.a; the IPxx portion of the library file name mustmatch the value previously returned by the uname -m command. Alsochoose the file appropriate to whether the machine’s kernel supports NFSserver functionality (NFS must be supported for the machine to act as anNFS/AFS Translator). Single- and multiprocessor machines use the samelibrary file.If the machine’s kernel supports NFS server functionality:
# cp -p bin/libafs.IPxx.a /var/sysgen/boot/afs.a
If the machine’s kernel does not support NFS server functionality:
# cp -p bin/libafs.IPxx.nonfs.a /var/sysgen/boot/afs.a
3. Issue the chkconfig command to deactivate the afsml configurationvariable.
# /etc/chkconfig -f afsml off
Chapter 2. Installing the First AFS Machine 29

If the machine is to function as an NFS/AFS Translator and the kernelsupports NFS server functionality, activate the afsxnfs variable.
# /etc/chkconfig -f afsxnfs on
4. Copy the existing kernel file, /unix, to a safe location. Compile the newkernel, which is created in the file /unix.install. It overwrites the existing/unix file when the machine reboots in the next step.
# cp /unix /unix_noafs
# autoconfig
5. Reboot the machine to start using the new kernel, and login again as thesuperuser root.
# cd /
# shutdown -i6 -g0 -y
login: rootPassword: root_password
Configuring Server Partitions on IRIX Systems
Every AFS file server machine must have at least one partition or logicalvolume dedicated to storing AFS volumes. Each server partition is mounted ata directory named /vicepxx, where xx is one or two lowercase letters. The/vicepxx directories must reside in the file server machine’s root directory, notin one of its subdirectories (for example, /usr/vicepa is not an acceptabledirectory location). For additional information, see “PerformingPlatform-Specific Procedures” on page 9.
AFS supports use of both EFS and XFS partitions for housing AFS volumes.SGI encourages use of XFS partitions.1. Create a directory called /vicepxx for each AFS server partition you are
configuring (there must be at least one). Repeat the command for eachpartition.
# mkdir /vicepxx
2. Add a line with the following format to the file systems registry file,/etc/fstab, for each partition (or logical volume created with the XLVvolume manager) to be mounted on one of the directories created in theprevious step.For an XFS partition or logical volume:
30 AFS: Quick Beginnings

/dev/dsk/disk /vicepxx xfs rw,raw=/dev/rdsk/disk 0 0
For an EFS partition:
/dev/dsk/disk /vicepxx efs rw,raw=/dev/rdsk/disk 0 0
The following are examples of an entry for each file system type:
/dev/dsk/dks0d2s6 /vicepa xfs rw,raw=/dev/rdsk/dks0d2s6 0 0/dev/dsk/dks0d3s1 /vicepb efs rw,raw=/dev/rdsk/dks0d3s1 0 0
3. Create a file system on each partition that is to be mounted on a /vicepxxdirectory. The following commands are probably appropriate, but consultthe IRIX documentation for more information. In both cases, raw_device isa raw device name like /dev/rdsk/dks0d0s0 for a single disk partition or/dev/rxlv/xlv0 for a logical volume.For XFS file systems, include the indicated options to configure thepartition or logical volume with inodes large enough to accommodateAFS-specific information:
# mkfs -t xfs -i size=512 -l size=4000b raw_device
For EFS file systems:
# mkfs -t efs raw_device
4. Mount each partition by issuing either the mount -a command to mountall partitions at once or the mount command to mount each partition inturn.
5. (Optional) If you have configured partitions or logical volumes to useXFS, issue the following command to verify that the inodes are configuredproperly (are large enough to accommodate AFS-specific information). Ifthe configuration is correct, the command returns no output. Otherwise, itspecifies the command to run in order to configure each partition orlogical volume properly.
# /usr/afs/bin/xfs_size_check
6. If you plan to retain client functionality on this machine after completingthe installation, proceed to “Enabling AFS Login on IRIX Systems” onpage 32. Otherwise, proceed to “Starting the BOS Server” on page 44.
Chapter 2. Installing the First AFS Machine 31

Enabling AFS Login on IRIX Systems
Note: If you plan to remove client functionality from this machine aftercompleting the installation, skip this section and proceed to “Startingthe BOS Server” on page 44.
The standard IRIX command-line login program and the graphical xdm loginprogram both automatically grant an AFS token when AFS is incorporatedinto the machine’s kernel. However, some IRIX distributions use another loginutility by default, and it does not necessarily incorporate the required AFSmodifications. If that is the case, you must disable the default utility if youwant AFS users to obtain AFS tokens at login. For further discussion, see theIBM AFS Release Notes.
If you configure the machine to use an AFS-modified login utility, then theafsauthlib.so and afskauthlib.so files (included in the AFS distribution) mustreside in the /usr/vice/etc directory. Issue the ls command to verify.
# ls /usr/vice/etc
If the files do not exist, mount the AFS CD-ROM for IRIX (if it is not already),change directory as indicated, and copy them.
# cd /cdrom/sgi_65/root.client/usr/vice/etc
# cp -p *authlib* /usr/vice/etc
After taking any necessary action, proceed to “Starting the BOS Server” onpage 44.
Getting Started on Linux Systems
Begin by running the AFS initialization script to call the insmod program,which dynamically loads AFS modifications into the kernel. Then createpartitions for storing AFS volumes. You do not need to replace the Linux fsckprogram. If the machine is to remain an AFS client machine, incorporate AFSinto the machine’s Pluggable Authentication Module (PAM) scheme.
Loading AFS into the Linux Kernel
The insmod program is the dynamic kernel loader for Linux. Linux does notsupport incorporation of AFS modifications during a kernel build.
For AFS to function correctly, the insmod program must run each time themachine reboots, so the AFS initialization script (included on the AFS
32 AFS: Quick Beginnings

CD-ROM) invokes it automatically. The script also includes commands thatselect the appropriate AFS library file automatically. In this section you runthe script.
In later sections you verify that the script correctly initializes all AFScomponents, then activate a configuration variable, which results in the scriptbeing incorporated into the Linux startup and shutdown sequence.1. Mount the AFS CD-ROM for Linux on the local /cdrom directory. For
instructions on mounting CD-ROMs (either locally or remotely via NFS),see your Linux documentation. Then change directory as indicated.
# cd /cdrom/i386_linux22/root.client/usr/vice/etc
2. Copy the AFS kernel library files to the local /usr/vice/etc/modloaddirectory. The filenames for the libraries have the format libafs-version.o,where version indicates the kernel build level. The string .mp in the versionindicates that the file is appropriate for machines running a multiprocessorkernel.
# cp -rp modload /usr/vice/etc
3. Copy the AFS initialization script to the local directory for initializationfiles (by convention, /etc/rc.d/init.d on Linux machines). Note the removalof the .rc extension as you copy the script.
# cp -p afs.rc /etc/rc.d/init.d/afs
4. Run the AFS initialization script to load AFS extensions into the kernel.You can ignore any error messages about the inability to start the BOSServer or the Cache Manager or AFS client.
# /etc/rc.d/init.d/afs start
Configuring Server Partitions on Linux Systems
Every AFS file server machine must have at least one partition or logicalvolume dedicated to storing AFS volumes. Each server partition is mounted ata directory named /vicepxx, where xx is one or two lowercase letters. The/vicepxx directories must reside in the file server machine’s root directory, notin one of its subdirectories (for example, /usr/vicepa is not an acceptabledirectory location). For additional information, see “PerformingPlatform-Specific Procedures” on page 9.1. Create a directory called /vicepxx for each AFS server partition you are
configuring (there must be at least one). Repeat the command for eachpartition.
Chapter 2. Installing the First AFS Machine 33

# mkdir /vicepxx
2. Add a line with the following format to the file systems registry file,/etc/fstab, for each directory just created. The entry maps the directoryname to the disk partition to be mounted on it.
/dev/disk /vicepxx ext2 defaults 0 2
The following is an example for the first partition being configured.
/dev/sda8 /vicepa ext2 defaults 0 2
3. Create a file system on each partition that is to be mounted at a /vicepxxdirectory. The following command is probably appropriate, but consult theLinux documentation for more information.
# mkfs -v /dev/disk
4. Mount each partition by issuing either the mount -a command to mountall partitions at once or the mount command to mount each partition inturn.
5. If you plan to retain client functionality on this machine after completingthe installation, proceed to “Enabling AFS Login on Linux Systems”.Otherwise, proceed to “Starting the BOS Server” on page 44.
Enabling AFS Login on Linux Systems
Note: If you plan to remove client functionality from this machine aftercompleting the installation, skip this section and proceed to “Startingthe BOS Server” on page 44.
At this point you incorporate AFS into the operating system’s PluggableAuthentication Module (PAM) scheme. PAM integrates all authenticationmechanisms on the machine, including login, to provide the securityinfrastructure for authenticated access to and from the machine.
Explaining PAM is beyond the scope of this document. It is assumed that youunderstand the syntax and meanings of settings in the PAM configuration file(for example, how the other entry works, the effect of marking an entry asrequired, optional, or sufficient, and so on).
The following instructions explain how to alter the entries in the PAMconfiguration file for each service for which you wish to use AFS
34 AFS: Quick Beginnings
authentication. Other configurations possibly also work, but the instructionsspecify the recommended and tested configuration.
The recommended AFS-related entries in the PAM configuration file make useof one or more of the following three attributes.
try_first_passThis is a standard PAM attribute that can be included on entries afterthe first one for a service; it directs the module to use the passwordthat was provided to the first module. For the AFS module, it meansthat AFS authentication succeeds if the password provided to themodule listed first is the user’s correct AFS password. For furtherdiscussion of this attribute and its alternatives, see the operatingsystem’s PAM documentation.
ignore_rootThis attribute, specific to the AFS PAM module, directs it to ignore notonly the local superuser root, but also any user with UID 0 (zero).
setenv_password_expiresThis attribute, specific to the AFS PAM module, sets the environmentvariable PASSWORD_EXPIRES to the expiration date of the user’sAFS password, which is recorded in the Authentication Database.
Perform the following steps to enable AFS login.1. Mount the AFS CD-ROM for Linux on the /cdrom directory, if it is not
already. Then change to the directory for PAM modules, which dependson which Linux distribution you are using.If you are using a Linux distribution from Red Hat Software:
# cd /lib/security
If you are using another Linux distribution:
# cd /usr/lib/security
2. Copy the appropriate AFS authentication library file to the directory towhich you changed in the previous step. Create a symbolic link whosename does not mention the version. Omitting the version eliminates theneed to edit the PAM configuration file if you later update the library file.If you use the AFS Authentication Server (kaserver process):
# cp /cdrom/i386_linux22/lib/pam_afs.so.1 .
# ln -s pam_afs.so.1 pam_afs.so
If you use a Kerberos implementation of AFS authentication:
Chapter 2. Installing the First AFS Machine 35

# cp /cdrom/i386_linux22/lib/pam_afs.krb.so.1 .
# ln -s pam_afs.krb.so.1 pam_afs.so
3. For each service with which you want to use AFS authentication, insert anentry for the AFS PAM module into the auth section of the service’s PAMconfiguration file. (Linux uses a separate configuration file for each service,unlike some other operating systems which list all services in a single file.)Mark the entry as sufficient in the second field.Place the AFS entry below any entries that impose conditions under whichyou want the service to fail for a user who does not meet the entry’srequirements. Mark these entries required. Place the AFS entry above anyentries that need to execute only if AFS authentication fails.Insert the following AFS entry if using the Red Hat distribution:
auth sufficient /lib/security/pam_afs.so try_first_pass ignore_root
Insert the following AFS entry if using another distribution:
auth sufficient /usr/lib/security/pam_afs.so try_first_pass ignore_root
The following example illustrates the recommended configuration of theconfiguration file for the login service (/etc/pam.d/login) on a machineusing the Red Hat distribution.
#%PAM-1.0auth required /lib/security/pam_securetty.soauth required /lib/security/pam_nologin.soauth sufficient /lib/security/pam_afs.so try_first_pass ignore_rootauth required /lib/security/pam_pwdb.so shadow nullokaccount required /lib/security/pam_pwdb.sopassword required /lib/security/pam_cracklib.sopassword required /lib/security/pam_pwdb.so shadow nullok use_authtoksession required /lib/security/pam_pwdb.so
4. Proceed to “Starting the BOS Server” on page 44 (or if referring to theseinstructions while installing an additional file server machine, return to“Starting Server Programs” on page 105).
Getting Started on Solaris Systems
Begin by running the AFS initialization script to call the modload programdistributed by Sun Microsystems, which dynamically loads AFS modificationsinto the kernel. Then create partitions for storing AFS volumes, and installand configure the AFS-modified fsck program to run on AFS server partitions.
36 AFS: Quick Beginnings

If the machine is to remain an AFS client machine, incorporate AFS into themachine’s Pluggable Authentication Module (PAM) scheme.
Loading AFS into the Solaris Kernel
The modload program is the dynamic kernel loader provided by SunMicrosystems for Solaris systems. Solaris does not support incorporation ofAFS modifications during a kernel build.
For AFS to function correctly, the modload program must run each time themachine reboots, so the AFS initialization script (included on the AFSCD-ROM) invokes it automatically. In this section you copy the appropriateAFS library file to the location where the modload program accesses it andthen run the script.
In later sections you verify that the script correctly initializes all AFScomponents, then create the links that incorporate AFS into the Solaris startupand shutdown sequence.1. Mount the AFS CD-ROM for Solaris on the /cdrom directory. For
instructions on mounting CD-ROMs (either locally or remotely via NFS),see your Solaris documentation. Then change directory as indicated.
# cd /cdrom/sun4x_56/root.client/usr/vice/etc
2. Copy the AFS initialization script to the local directory for initializationfiles (by convention, /etc/init.d on Solaris machines). Note the removal ofthe .rc extension as you copy the script.
# cp -p afs.rc /etc/init.d/afs
3. Copy the appropriate AFS kernel library file to the local file /kernel/fs/afs.If the machine is running Solaris 2.6 or the 32–bit version of Solaris 7, itskernel supports NFS server functionality, and the nfsd process is running:
# cp -p modload/libafs.o /kernel/fs/afs
If the machine is running Solaris 2.6 or the 32–bit version of Solaris 7, andits kernel does not support NFS server functionality or the nfsd process isnot running:
# cp -p modload/libafs.nonfs.o /kernel/fs/afs
If the machine is running the 64–bit version of Solaris 7, its kernelsupports NFS server functionality, and the nfsd process is running:
# cp -p modload/libafs64.o /kernel/fs/sparcv9/afs
Chapter 2. Installing the First AFS Machine 37

If the machine is running the 64–bit version of Solaris 7, and its kerneldoes not support NFS server functionality or the nfsd process is notrunning:
# cp -p modload/libafs64.nonfs.o /kernel/fs/sparcv9/afs
4. Run the AFS initialization script to load AFS modifications into the kernel.You can ignore any error messages about the inability to start the BOSServer or the Cache Manager or AFS client.
# /etc/init.d/afs start
When an entry called afs does not already exist in the local/etc/name_to_sysnum file, the script automatically creates it and rebootsthe machine to start using the new version of the file. If this happens, login again as the superuser root after the reboot and run the initializationscript again. This time the required entry exists in the/etc/name_to_sysnum file, and the modload program runs.
login: rootPassword: root_password
# /etc/init.d/afs start
Configuring the AFS-modified fsck Program on Solaris Systems
In this section, you make modifications to guarantee that the appropriate fsckprogram runs on AFS server partitions. The fsck program provided with theoperating system must never run on AFS server partitions. Because it does notrecognize the structures that the File Server uses to organize volume data, itremoves all of the data. To repeat:
Never run the standard fsck program on AFS server partitions. It discardsAFS volumes.
1. Create the /usr/lib/fs/afs directory to house the AFS-modified fsckprogram and related files.
# mkdir /usr/lib/fs/afs
# cd /usr/lib/fs/afs
2. Copy the vfsck binary to the newly created directory, changing the nameas you do so.
# cp /cdrom/sun4x_56/root.server/etc/vfsck fsck
38 AFS: Quick Beginnings

3. Working in the /usr/lib/fs/afs directory, create the following links to Solarislibraries:
# ln -s /usr/lib/fs/ufs/clri# ln -s /usr/lib/fs/ufs/df# ln -s /usr/lib/fs/ufs/edquota# ln -s /usr/lib/fs/ufs/ff# ln -s /usr/lib/fs/ufs/fsdb# ln -s /usr/lib/fs/ufs/fsirand# ln -s /usr/lib/fs/ufs/fstyp# ln -s /usr/lib/fs/ufs/labelit# ln -s /usr/lib/fs/ufs/lockfs# ln -s /usr/lib/fs/ufs/mkfs# ln -s /usr/lib/fs/ufs/mount# ln -s /usr/lib/fs/ufs/ncheck# ln -s /usr/lib/fs/ufs/newfs# ln -s /usr/lib/fs/ufs/quot# ln -s /usr/lib/fs/ufs/quota# ln -s /usr/lib/fs/ufs/quotaoff# ln -s /usr/lib/fs/ufs/quotaon# ln -s /usr/lib/fs/ufs/repquota# ln -s /usr/lib/fs/ufs/tunefs# ln -s /usr/lib/fs/ufs/ufsdump# ln -s /usr/lib/fs/ufs/ufsrestore# ln -s /usr/lib/fs/ufs/volcopy
4. Append the following line to the end of the file /etc/dfs/fstypes.
afs AFS Utilities
5. Edit the /sbin/mountall file, making two changes.v Add an entry for AFS to the case statement for option 2, so that it reads
as follows:
case "$2" inufs) foptions="-o p"
;;afs) foptions="-o p"
;;s5) foptions="-y -t /var/tmp/tmp$$ -D"
;;*) foptions="-y"
;;
v Edit the file so that all AFS and UFS partitions are checked in parallel.Replace the following section of code:
# For fsck purposes, we make a distinction between ufs and# other file systems#if [ "$fstype" = "ufs" ]; then
Chapter 2. Installing the First AFS Machine 39

ufs_fscklist="$ufs_fscklist $fsckdev"saveentry $fstype "$OPTIONS" $special $mountpcontinue
fi
with the following section of code:
# For fsck purposes, we make a distinction between ufs/afs# and other file systems.#if [ "$fstype" = "ufs" -o "$fstype" = "afs" ]; then
ufs_fscklist="$ufs_fscklist $fsckdev"saveentry $fstype "$OPTIONS" $special $mountpcontinue
fi
Configuring Server Partitions on Solaris Systems
Every AFS file server machine must have at least one partition or logicalvolume dedicated to storing AFS volumes. Each server partition is mounted ata directory named /vicepxx, where xx is one or two lowercase letters. The/vicepxx directories must reside in the file server machine’s root directory, notin one of its subdirectories (for example, /usr/vicepa is not an acceptabledirectory location). For additional information, see “PerformingPlatform-Specific Procedures” on page 9.1. Create a directory called /vicepxx for each AFS server partition you are
configuring (there must be at least one). Repeat the command for eachpartition.
# mkdir /vicepxx
2. Add a line with the following format to the file systems registry file,/etc/vfstab, for each partition to be mounted on a directory created in theprevious step. Note the value afs in the fourth field, which tells Solaris touse the AFS-modified fsck program on this partition.
/dev/dsk/disk /dev/rdsk/disk /vicepxx afs boot_order yes
The following is an example for the first partition being configured.
/dev/dsk/c0t6d0s1 /dev/rdsk/c0t6d0s1 /vicepa afs 3 yes
3. Create a file system on each partition that is to be mounted at a /vicepxxdirectory. The following command is probably appropriate, but consult theSolaris documentation for more information.
40 AFS: Quick Beginnings

# newfs -v /dev/rdsk/disk
4. Issue the mountall command to mount all partitions at once.5. If you plan to retain client functionality on this machine after completing
the installation, proceed to “Enabling AFS Login and Editing the FileSystems Clean-up Script on Solaris Systems”. Otherwise, proceed to“Starting the BOS Server” on page 44.
Enabling AFS Login and Editing the File Systems Clean-up Script onSolaris Systems
Note: If you plan to remove client functionality from this machine aftercompleting the installation, skip this section and proceed to “Startingthe BOS Server” on page 44.
At this point you incorporate AFS into the operating system’s PluggableAuthentication Module (PAM) scheme. PAM integrates all authenticationmechanisms on the machine, including login, to provide the securityinfrastructure for authenticated access to and from the machine.
Explaining PAM is beyond the scope of this document. It is assumed that youunderstand the syntax and meanings of settings in the PAM configuration file(for example, how the other entry works, the effect of marking an entry asrequired, optional, or sufficient, and so on).
The following instructions explain how to alter the entries in the PAMconfiguration file for each service for which you wish to use AFSauthentication. Other configurations possibly also work, but the instructionsspecify the recommended and tested configuration.
Note: The instructions specify that you mark each entry as optional.However, marking some modules as optional can mean that they grantaccess to the corresponding service even when the user does not meetall of the module’s requirements. In some operating system revisions,for example, if you mark as optional the module that controls login viaa dial-up connection, it allows users to login without providing apassword. See the IBM AFS Release Notes for a discussion of anylimitations that apply to this operating system.
Also, with some operating system versions you must install patches forPAM to interact correctly with certain authentication programs. Fordetails, see the IBM AFS Release Notes.
Chapter 2. Installing the First AFS Machine 41

The recommended AFS-related entries in the PAM configuration file make useof one or more of the following three attributes.
try_first_passThis is a standard PAM attribute that can be included on entries afterthe first one for a service; it directs the module to use the passwordthat was provided to the first module. For the AFS module, it meansthat AFS authentication succeeds if the password provided to themodule listed first is the user’s correct AFS password. For furtherdiscussion of this attribute and its alternatives, see the operatingsystem’s PAM documentation.
ignore_rootThis attribute, specific to the AFS PAM module, directs it to ignore notonly the local superuser root, but also any user with UID 0 (zero).
setenv_password_expiresThis attribute, specific to the AFS PAM module, sets the environmentvariable PASSWORD_EXPIRES to the expiration date of the user’sAFS password, which is recorded in the Authentication Database.
Perform the following steps to enable AFS login.1. Mount the AFS CD-ROM for Solaris on the /cdrom directory, if it is not
already. Then change directory as indicated.
# cd /usr/lib/security
2. Copy the AFS authentication library file to the /usr/lib/security directory.Then create a symbolic link to it whose name does not mention theversion. Omitting the version eliminates the need to edit the PAMconfiguration file if you later update the library file.If you use the AFS Authentication Server (kaserver process):
# cp /cdrom/sun4x_56/lib/pam_afs.so.1 .
# ln -s pam_afs.so.1 pam_afs.so
If you use a Kerberos implementation of AFS authentication:
# cp /cdrom/sun4x_56/lib/pam_afs.krb.so.1 .
# ln -s pam_afs.krb.so.1 pam_afs.so
3. Edit the Authentication management section of the Solaris PAMconfiguration file, /etc/pam.conf by convention. The entries in this sectionhave the value auth in their second field.
42 AFS: Quick Beginnings

First edit the standard entries, which refer to the Solaris PAM module(usually, the file /usr/lib/security/pam_unix.so.1) in their fourth field. Foreach service for which you want to use AFS authentication, edit the thirdfield of its entry to read optional. The pam.conf file in the Solarisdistribution usually includes standard entries for the login, rlogin, and rshservices, for instance.If there are services for which you want to use AFS authentication, but forwhich the pam.conf file does not already include a standard entry, youmust create that entry and place the value optional in its third field. Forinstance, the Solaris pam.conf file does not usually include standardentries for the ftp or telnet services.Then create an AFS-related entry for each service, placing it immediatelybelow the standard entry. The following example shows what theAuthentication Management section looks like after you have you edited orcreated entries for the services mentioned previously. Note that theexample AFS entries appear on two lines only for legibility.
login auth optional /usr/lib/security/pam_unix.so.1login auth optional /usr/lib/security/pam_afs.so \
try_first_pass ignore_root setenv_password_expiresrlogin auth optional /usr/lib/security/pam_unix.so.1rlogin auth optional /usr/lib/security/pam_afs.so \
try_first_pass ignore_root setenv_password_expiresrsh auth optional /usr/lib/security/pam_unix.so.1rsh auth optional /usr/lib/security/pam_afs.so \
try_first_pass ignore_rootftp auth optional /usr/lib/security/pam_unix.so.1ftp auth optional /usr/lib/security/pam_afs.so \
try_first_pass ignore_roottelnet auth optional /usr/lib/security/pam_unix.so.1telnet auth optional /usr/lib/security/pam_afs.so \
try_first_pass ignore_root setenv_password_expires
4. If you use the Common Desktop Environment (CDE) on the machine andwant users to obtain an AFS token as they log in, also add or edit thefollowing four entries in the Authentication management section. Note thatthe AFS-related entries appear on two lines here only for legibility.
dtlogin auth optional /usr/lib/security/pam_unix.so.1dtlogin auth optional /usr/lib/security/pam_afs.so \
try_first_pass ignore_rootdtsession auth optional /usr/lib/security/pam_unix.so.1dtsession auth optional /usr/lib/security/pam_afs.so \
try_first_pass ignore_root
5. Some Solaris distributions include a script that locates and removesunneeded files from various file systems. Its conventional location is/usr/lib/fs/nfs/nfsfind. The script generally uses an argument to the find
Chapter 2. Installing the First AFS Machine 43

command to define which file systems to search. In this step you modifythe command to exclude the /afs directory. Otherwise, the commandtraverses the AFS filespace of every cell that is accessible from themachine, which can take many hours. The following alterations arepossibilities, but you must verify that they are appropriate for your cell.The first possible alteration is to add the -local flag to the existingcommand, so that it looks like the following:
find $dir -local -name .nfs\* -mtime +7 -mount -exec rm -f {} \;
Another alternative is to exclude any directories whose names begin withthe lowercase letter a or a non-alphabetic character.
find /[A-Zb-z]* remainder of existing command
Do not use the following command, which still searches under the /afsdirectory, looking for a subdirectory of type 4.2.
find / -fstype 4.2 /* do not use */
6. Proceed to “Starting the BOS Server” (or if referring to these instructionswhile installing an additional file server machine, return to “StartingServer Programs” on page 105).
Starting the BOS Server
You are now ready to start the AFS server processes on this machine. Begin bycopying the AFS server binaries from the CD-ROM to the conventional localdisk location, the /usr/afs/bin directory. The following instructions also createfiles in other subdirectories of the /usr/afs directory.
Then issue the bosserver command to initialize the Basic OverSeer (BOS)Server, which monitors and controls other AFS server processes on its servermachine. Include the -noauth flag to disable authorization checking. Becauseyou have not yet configured your cell’s AFS authentication and authorizationmechanisms, the BOS Server cannot perform authorization checking as it doesduring normal operation. In no-authorization mode, it does not verify theidentity or privilege of the issuer of a bos command, and so performs anyoperation for anyone.
Disabling authorization checking gravely compromises cell security. You mustcomplete all subsequent steps in one uninterrupted pass and must not leavethe machine unattended until you restart the BOS Server with authorizationchecking enabled, in “Verifying the AFS Initialization Script” on page 64.
44 AFS: Quick Beginnings

As it initializes for the first time, the BOS Server creates the followingdirectories and files, setting the owner to the local superuser root and themode bits to limit the ability to write (and in some cases, read) them. For adescription of the contents and function of these directories and files, see thechapter in the IBM AFS Administration Guide about administering servermachines. For further discussion of the mode bit settings, see “ProtectingSensitive AFS Directories” on page 82.v /usr/afs/db
v /usr/afs/etc/CellServDB
v /usr/afs/etc/ThisCell
v /usr/afs/local
v /usr/afs/logs
The BOS Server also creates symbolic links called /usr/vice/etc/ThisCell and/usr/vice/etc/CellServDB to the corresponding files in the /usr/afs/etcdirectory. The AFS command interpreters consult the CellServDB andThisCell files in the /usr/vice/etc directory because they generally run onclient machines. On machines that are AFS servers only (as this machinecurrently is), the files reside only in the /usr/afs/etc directory; the links enablethe command interpreters to retrieve the information they need. Laterinstructions for installing the client functionality replace the links with actualfiles.1. On the local /cdrom directory, mount the AFS CD-ROM for this machine’s
system type, if it is not already. For instructions on mounting CD-ROMs(either locally or remotely via NFS), consult the operating systemdocumentation.
2. Copy files from the CD-ROM to the local /usr/afs directory.
# cd /cdrom/sysname/root.server/usr/afs
# cp -rp * /usr/afs
3. Issue the bosserver command. Include the -noauth flag to disableauthorization checking.
# /usr/afs/bin/bosserver -noauth &
4. Verify that the BOS Server created /usr/vice/etc/ThisCell and/usr/vice/etc/CellServDB as symbolic links to the corresponding files in the/usr/afs/etc directory.
# ls -l /usr/vice/etc
Chapter 2. Installing the First AFS Machine 45

If either or both of /usr/vice/etc/ThisCell and /usr/vice/etc/CellServDB donot exist, or are not links, issue the following commands.
# cd /usr/vice/etc
# ln -s /usr/afs/etc/ThisCell
# ln -s /usr/afs/etc/CellServDB
Defining Cell Name and Membership for Server Processes
Now assign your cell’s name. The chapter in the IBM AFS AdministrationGuide about cell configuration and administration issues discusses theimportant considerations, explains why changing the name is difficult, andoutlines the restrictions on name format. Two of the most importantrestrictions are that the name cannot include uppercase letters or more than 64characters.
Use the bos setcellname command to assign the cell name. It creates two files:v /usr/afs/etc/ThisCell, which defines this machine’s cell membershipv /usr/afs/etc/CellServDB, which lists the cell’s database server machines; the
machine named on the command line is placed on the list automatically
Note: In the following and every instruction in this guide, for themachine name argument substitute the fully-qualified hostname (such asfs1.abc.com) of the machine you are installing. For the cell nameargument substitute your cell’s complete name (such as abc.com).
1. Issue the bos setcellname command to set the cell name.
# cd /usr/afs/bin
# ./bos setcellname <machine name> <cell name> -noauth
Because you are not authenticated and authorization checking is disabled,the bos command interpreter possibly produces error messages aboutbeing unable to obtain tickets and running unauthenticated. You can safelyignore the messages.
2. Issue the bos listhosts command to verify that the machine you areinstalling is now registered as the cell’s first database server machine.
# ./bos listhosts <machine name> -noauthCell name is cell_name
Host 1 is machine_name
46 AFS: Quick Beginnings

Starting the Database Server Processes
Next use the bos create command to create entries for the four databaseserver processes in the /usr/afs/local/BosConfig file and start them running.The four processes run on database server machines only:v The Authentication Server (the kaserver process) maintains the
Authentication Databasev The Backup Server (the buserver process) maintains the Backup Databasev The Protection Server (the ptserver process) maintains the Protection
Databasev The Volume Location (VL) Server (the vlserver process) maintains the
Volume Location Database (VLDB)
Note: AFS’s authentication and authorization software is based on algorithmsand other procedures known as Kerberos, as originally developed byProject Athena at the Massachusetts Institute of Technology. Some cellschoose to replace the AFS Authentication Server and othersecurity-related protocols with Kerberos as obtained directly fromProject Athena or other sources. If you wish to do this, contact the AFSProduct Support group now to learn about necessary modifications tothe installation.
The remaining instructions in this chapter include the -cell argument on allapplicable commands. Provide the cell name you assigned in “Defining CellName and Membership for Server Processes” on page 46. If a commandappears on multiple lines, it is only for legibility.1. Issue the bos create command to start the Authentication Server. The
current working directory is still /usr/afs/bin.
# ./bos create <machine name> kaserver simple /usr/afs/bin/kaserver \-cell <cell name> -noauth
You can safely ignore the messages that tell you to add Kerberos to the/etc/services file; AFS uses a default value that makes the additionunnecessary. You can also ignore messages about the failure ofauthentication.
2. Issue the bos create command to start the Backup Server.
# ./bos create <machine name> buserver simple /usr/afs/bin/buserver \-cell <cell name> -noauth
3. Issue the bos create command to start the Protection Server.
Chapter 2. Installing the First AFS Machine 47
# ./bos create <machine name> ptserver simple /usr/afs/bin/ptserver \-cell <cell name> -noauth
4. Issue the bos create command to start the VL Server.
# ./bos create <machine name> vlserver simple /usr/afs/bin/vlserver \-cell <cell name> -noauth
Initializing Cell Security
Now initialize the cell’s security mechanisms. Begin by creating the followingtwo initial entries in the Authentication Database:v A generic administrative account, called admin by convention. If you
choose to assign a different name, substitute it throughout the remainder ofthis document.After you complete the installation of the first machine, you can continue tohave all administrators use the admin account, or you can create a separateadministrative account for each of them. The latter scheme impliessomewhat more overhead, but provides a more informative audit trail foradministrative operations.
v The entry for AFS server processes, called afs. No user logs in under thisidentity, but the Authentication Server’s Ticket Granting Service (TGS)module uses the associated key to encrypt the server tickets that it grants toAFS clients for presentation to server processes during mutualauthentication. (The chapter in the IBM AFS Administration Guide about cellconfiguration and administration describes the role of server encryptionkeys in mutual authentication.)In Step 7 on page 50, you also place the initial AFS server encryption keyinto the /usr/afs/etc/KeyFile file. The AFS server processes refer to this fileto learn the server encryption key when they need to decrypt server tickets.
You also issue several commands that enable the new admin user to issueprivileged commands in all of the AFS suites.
The following instructions do not configure all of the security mechanismsrelated to the AFS Backup System. See the chapter in the IBM AFSAdministration Guide about configuring the Backup System.1. Enter kas interactive mode. Because the machine is in no-authorization
checking mode, include the -noauth flag to suppress the AuthenticationServer’s usual prompt for a password.
48 AFS: Quick Beginnings

# kas -cell <cell name> -noauthka>
2. Issue the kas create command to create Authentication Database entriescalled admin and afs.Do not provide passwords on the command line. Instead provide them asafs_passwd and admin_passwd in response to the kas commandinterpreter’s prompts as shown, so that they do not appear on thestandard output stream.You need to enter the afs_passwd string only in this step and in Step 7 onpage 50, so provide a value that is as long and complex as possible,preferably including numerals, punctuation characters, and bothuppercase and lowercase letters. Also make the admin_passwd as long andcomplex as possible, but keep in mind that administrators need to enterit often. Both passwords must be at least six characters long.
ka> create afsinitial_password: afs_passwdVerifying, please re-enter initial_password: afs_passwd
ka> create admininitial_password: admin_passwdVerifying, please re-enter initial_password: admin_passwd
3. Issue the kas examine command to display the afs entry. The outputincludes a checksum generated by encrypting a constant with the serverencryption key derived from the afs_passwd string. In Step 8 on page 50you issue the bos listkeys command to verify that the checksum in itsoutput matches the checksum in this output.
ka> examine afsUser data for afskey (0) cksum is checksum . . .
4. Issue the kas setfields command to turn on the ADMIN flag in the adminentry. This enables the admin user to issue privileged kas commands.Then issue the kas examine command to verify that the ADMIN flagappears in parentheses on the first line of the output, as shown in theexample.
ka> setfields admin -flags admin
ka> examine adminUser data for admin (ADMIN) . . .
5. Issue the kas quit command to leave kas interactive mode.
Chapter 2. Installing the First AFS Machine 49

ka> quit
6. Issue the bos adduser command to add the admin user to the/usr/afs/etc/UserList file. This enables the admin user to issue privilegedbos and vos commands.
# ./bos adduser <machine name> admin -cell <cell name> -noauth
7. Issue the bos addkey command to define the AFS server encryption keyin the /usr/afs/etc/KeyFile file.Do not provide the password on the command line. Instead provide it asafs_passwd in response to the bos command interpreter’s prompts, asshown. Provide the same string as in Step 2 on page 49.
# ./bos addkey <machine name> -kvno 0 -cell <cell name> -noauthInput key: afs_passwdRetype input key: afs_passwd
8. Issue the bos listkeys command to verify that the checksum for the newkey in the KeyFile file is the same as the checksum for the key in theAuthentication Database’s afs entry, which you displayed in Step 3 onpage 49.
# ./bos listkeys <machine name> -cell <cell name> -noauthkey 0 has cksum checksum
You can safely ignore any error messages indicating that bos failed to gettickets or that authentication failed.
If the keys are different, issue the following commands, making sure thatthe afs_passwd string is the same in each case. The checksum stringsreported by the kas examine and bos listkeys commands must match; ifthey do not, repeat these instructions until they do, using the -kvnoargument to increment the key version number each time.
# ./kas -cell <cell name> -noauth
ka> setpassword afs -kvno 1new_password: afs_passwdVerifying, please re-enter initial_password: afs_passwd
ka> examine afsUser data for afskey (1) cksum is checksum . . .
ka> quit
50 AFS: Quick Beginnings

# ./bos addkey <machine name> -kvno 1 -cell <cell name> -noauthInput key: afs_passwdRetype input key: afs_passwd
# ./bos listkeys <machine name> -cell <cell name> -noauthkey 1 has cksum checksum
9. Issue the pts createuser command to create a Protection Database entryfor the admin user.By default, the Protection Server assigns AFS UID 1 (one) to the adminuser, because it is the first user entry you are creating. If the localpassword file (/etc/passwd or equivalent) already has an entry for adminthat assigns it a UNIX UID other than 1, it is best to use the -id argumentto the pts createuser command to make the new AFS UID match theexisting UNIX UID. Otherwise, it is best to accept the default.
# ./pts createuser -name admin -cell <cell name> [-id <AFS UID>] -noauthUser admin has id AFS UID
10. Issue the pts adduser command to make the admin user a member of thesystem:administrators group, and the pts membership command toverify the new membership. Membership in the group enables the adminuser to issue privileged pts commands and some privileged fscommands.
# ./pts adduser admin system:administrators -cell <cell name> -noauth
# ./pts membership admin -cell <cell name> -noauthGroups admin (id: 1) is a member of:
system:administrators
11. Issue the bos restart command with the -all flag to restart the databaseserver processes, so that they start using the new server encryption key.
# ./bos restart <machine name> -all -cell <cell name> -noauth
Starting the File Server, Volume Server, and Salvager
Start the fs process, which consists of the File Server, Volume Server, andSalvager (fileserver, volserver and salvager processes).1. Issue the bos create command to start the fs process. The command
appears here on multiple lines only for legibility.
# ./bos create <machine name> fs fs /usr/afs/bin/fileserver \/usr/afs/bin/volserver /usr/afs/bin/salvager \-cell <cell name> -noauth
Chapter 2. Installing the First AFS Machine 51

Sometimes a message about Volume Location Database (VLDB)initialization appears, along with one or more instances of an errormessage similar to the following:
FSYNC_clientInit temporary failure (will retry)
This message appears when the volserver process tries to start before thefileserver process has completed its initialization. Wait a few minutes afterthe last such message before continuing, to guarantee that both processeshave started successfully.
You can verify that the fs process has started successfully by issuing thebos status command. Its output mentions two proc starts.
# ./bos status <machine name> fs -long -noauth
2. Your next action depends on whether you have ever run AFS file servermachines in the cell:v If you are installing the first AFS server machine ever in the cell (that is,
you are not upgrading the AFS software from a previous version), createthe first AFS volume, root.afs.For the partition name argument, substitute the name of one of themachine’s AFS server partitions (such as /vicepa).
# ./vos create <machine name> <partition name> root.afs \-cell <cell name> -noauth
The Volume Server produces a message confirming that it created thevolume on the specified partition. You can ignore error messagesindicating that tokens are missing, or that authentication failed.
v If there are existing AFS file server machines and volumes in the cell,issue the vos syncvldb and vos syncserv commands to synchronize theVLDB with the actual state of volumes on the local machine. To followthe progress of the synchronization operation, which can take severalminutes, use the -verbose flag.
# ./vos syncvldb <machine name> -cell <cell name> -verbose -noauth
# ./vos syncserv <machine name> -cell <cell name> -verbose -noauth
You can ignore error messages indicating that tokens are missing, orthat authentication failed.
52 AFS: Quick Beginnings

Starting the Server Portion of the Update Server
Start the server portion of the Update Server (the upserver process), todistribute the contents of directories on this machine to other server machinesin the cell. It becomes active when you configure the client portion of theUpdate Server on additional server machines.
Distributing the contents of its /usr/afs/etc directory makes this machine thecell’s system control machine. The other server machines in the cell run theupclientetc process (an instance of the client portion of the Update Server) toretrieve the configuration files. Use the -crypt argument to the upserverinitialization command to specify that the Update Server distributes thecontents of the /usr/afs/etc directory only in encrypted form, as shown in thefollowing instruction. Several of the files in the directory, particularly theKeyFile file, are crucial to cell security and so must never cross the networkunencrypted.
(You can choose not to configure a system control machine, in which case youmust update the configuration files in each server machine’s /usr/afs/etcdirectory individually. The bos commands used for this purpose also encryptdata before sending it across the network.)
Distributing the contents of its /usr/afs/bin directory to other server machinesof its system type makes this machine a binary distribution machine. The otherserver machines of its system type run the upclientbin process (an instance ofthe client portion of the Update Server) to retrieve the binaries.
The binaries in the /usr/afs/bin directory are not sensitive, so it is notnecessary to encrypt them before transfer across the network. Include the-clear argument to the upserver initialization command to specify that theUpdate Server distributes the contents of the /usr/afs/bin directory inunencrypted form unless an upclientbin process requests encrypted transfer.
Note that the server and client portions of the Update Server always mutuallyauthenticate with one another, regardless of whether you use the -clear or-crypt arguments. This protects their communications from eavesdropping tosome degree.
For more information on the upclient and upserver processes, see theirreference pages in the IBM AFS Administration Reference. The commandsappear on multiple lines here only for legibility.1. Issue the bos create command to start the upserver process.
Chapter 2. Installing the First AFS Machine 53

# ./bos create <machine name> upserver simple \"/usr/afs/bin/upserver -crypt /usr/afs/etc \-clear /usr/afs/bin" -cell <cell name> -noauth
Starting the Controller for NTPD
Keeping the clocks on all server and client machines in your cell synchronizedis crucial to several functions, and in particular to the correct operation ofAFS’s distributed database technology, Ubik. The chapter in the IBM AFSAdministration Guide about administering server machines explains how timeskew can disturb Ubik’s performance and cause service outages in your cell.
The AFS distribution includes a version of the Network Time ProtocolDaemon (NTPD) for synchronizing the clocks on server machines. If a timesynchronization program is not already running on the machine, then in thissection you start the runntp process to configure NTPD for use with AFS.
Note: Do not run the runntp process if NTPD or another timesynchronization protocol is already running on the machine. Someversions of some operating systems run a time synchronizationprogram by default, as detailed in the IBM AFS Release Notes.
Attempting to run multiple instances of the NTPD causes an error.Running NTPD together with another time synchronization protocol isunnecessary and can cause instability in the clock setting.
If you run the runntp process and your cell has reliable network connectivityto machines outside your cell, then it is conventional to configure the first AFSmachine to refer to a time source outside the cell. When you later install therunntp program on other server machines in the cell, it configures NTPD tochoose a time source at random from among the database server machineslisted in the /usr/afs/etc/CellServDB file. Time synchronization thereforeworks in a chained manner: this database server machine refers to a timesource outside the cell, the database server machines refer to the machineamong them that has access to the most accurate time (NTPD itself includescode for determining this), and each non-database server machine refers to alocal database server machine chosen at random from the/usr/afs/etc/CellServDB file. If you ever decide to remove database serverfunctionality from this machine, it is best to transfer responsibility forconsulting an external time source to a remaining database server machine.
If your cell does not have network connectivity to external machines, or if theconnectivity is not reliable, include the -localclock flag to the runntpcommand as indicated in the following instructions. The flag tells NTPD to
54 AFS: Quick Beginnings

rely on the machine’s internal clock when all external time sources areinaccessible. The runntp command has other arguments that are possiblyuseful given your cell configuration; see the IBM AFS Administration Reference.
Choosing an appropriate external time source is important, but involves moreconsiderations than can be discussed here. If you need help in selecting asource, contact the AFS Product Support group.
As the runntp process initializes NTPD, trace messages sometimes appear onthe standard output stream. You can ignore them, but they can be informativeif you understand how NTPD works.1. Issue the bos create command to start the runntp process. For the host
argument, substitute the fully-qualified hostname or IP address of one ormore machines outside the cell that are to serve as time sources. Separateeach name with a space.v If your cell usually has reliable network connectivity to an external time
source, use the following command:
# ./bos create <machine name> runntp simple \"/usr/afs/bin/runntp <host>+" -cell <cell name> -noauth
v If your cell does not have network connectivity to an external timesource, use the following command:
# ./bos create <machine name> runntp simple \"/usr/afs/bin/runntp -localclock" -cell <cell name> -noauth
v If your cell has network connectivity to an external time source, but thenetwork connection is frequently interrupted, use the followingcommand:
# ./bos create <machine name> runntp simple \"/usr/afs/bin/runntp -localclock <host>+" \-cell <cell name> -noauth
Overview: Installing Client Functionality
The machine you are installing is now an AFS file server machine, databaseserver machine, system control machine, and binary distribution machine.Now make it a client machine by completing the following tasks:1. Define the machine’s cell membership for client processes2. Create the client version of the CellServDB file3. Define cache location and size
Chapter 2. Installing the First AFS Machine 55

4. Create the /afs directory and start the Cache Manager
Copying Client Files to the Local Disk
Before installing and configuring the AFS client, copy the necessary files fromthe AFS CD-ROM to the local /usr/vice/etc directory.1. On the local /cdrom directory, mount the AFS CD-ROM for this machine’s
system type, if it is not already. For instructions on mounting CD-ROMs(either locally or remotely via NFS), consult the operating systemdocumentation.
2. Copy files to the local /usr/vice/etc directory.This step places a copy of the AFS initialization script (and related files, ifapplicable) into the /usr/vice/etc directory. In the preceding instructions forincorporating AFS into the kernel, you copied the script directly to theoperating system’s conventional location for initialization files. When youincorporate AFS into the machine’s startup sequence in a later step, youcan choose to link the two files.On some system types that use a dynamic kernel loader program, youpreviously copied AFS library files into a subdirectory of the /usr/vice/etcdirectory. On other system types, you copied the appropriate AFS libraryfile directly to the directory where the operating system accesses it. Thefollowing commands do not copy or recopy the AFS library files into the/usr/vice/etc directory, because on some system types the library filesconsume a large amount of space. If you want to copy them, add the -rflag to the first cp command and skip the second cp command.
# cd /cdrom/sysname/root.client/usr/vice/etc
# cp -p * /usr/vice/etc
# cp -rp C /usr/vice/etc
Defining Cell Membership for Client Processes
Every AFS client machine has a copy of the /usr/vice/etc/ThisCell file on itslocal disk to define the machine’s cell membership for the AFS clientprograms that run on it. The ThisCell file you created in the /usr/afs/etcdirectory (in “Defining Cell Name and Membership for Server Processes” onpage 46) is used only by server processes.
Among other functions, the ThisCell file on a client machine determines thefollowing:
56 AFS: Quick Beginnings
v The cell in which users authenticate when they log onto the machine,assuming it is using an AFS-modified login utility
v The cell in which users authenticate by default when they issue the klogcommand
v The cell membership of the AFS server processes that the AFS commandinterpreters on this machine contact by default
1. Change to the /usr/vice/etc directory and remove the symbolic link createdin “Starting the BOS Server” on page 44.
# cd /usr/vice/etc
# rm ThisCell
2. Create the ThisCell file as a copy of the /usr/afs/etc/ThisCell file. Definingthe same local cell for both server and client processes leads to the mostconsistent AFS performance.
# cp /usr/afs/etc/ThisCell ThisCell
Creating the Client CellServDB File
The /usr/vice/etc/CellServDB file on a client machine’s local disk lists thedatabase server machines for each cell that the local Cache Manager cancontact. If there is no entry in the file for a cell, or if the list of database servermachines is wrong, then users working on this machine cannot access the cell.The chapter in the IBM AFS Administration Guide about administering clientmachines explains how to maintain the file after creating it.
As the afsd program initializes the Cache Manager, it copies the contents ofthe CellServDB file into kernel memory. The Cache Manager always consultsthe list in kernel memory rather than the CellServDB file itself. Betweenreboots of the machine, you can use the fs newcell command to update thelist in kernel memory directly; see the chapter in the IBM AFS AdministrationGuide about administering client machines.
The AFS distribution includes the file CellServDB.sample, and you havealready copied it to the /usr/vice/etc directory. It includes an entry for all AFScells that agreed to share their database server machine information at thetime your AFS CD-ROM was created. The AFS Product Support group alsomaintains a copy of the file, updating it as necessary. If you are interested inparticipating in the global AFS namespace, it is a good policy to consult thefile occasionally for updates. Ask the AFS Product Support group for a pointerto its location.
Chapter 2. Installing the First AFS Machine 57

The CellServDB.sample file can be a good basis for the client CellServDBfile, because all of the entries in it use the correct format. You can add orremove cell entries as you see fit. Later (in “Enabling Access to Foreign Cells”on page 79) you perform additional steps that enable the Cache Manageractually to reach the cells.
In this section, you add an entry for the local cell to the local CellServDB file.The current working directory is still /usr/vice/etc.1. Remove the symbolic link created in “Starting the BOS Server” on page 44
and rename the CellServDB.sample file to CellServDB.
# rm CellServDB
# mv CellServDB.sample CellServDB
2. Add an entry for the local cell to the CellServDB file. One easy method isto use the cat command to append the contents of the server/usr/afs/etc/CellServDB file to the client version.
# cat /usr/afs/etc/CellServDB >> CellServDB
Then open the file in a text editor to verify that there are no blank lines,and that all entries have the required format, which is described justfollowing. The ordering of cells is not significant, but it can be convenientto have the client machine’s home cell at the top; move it there now if youwish.v The first line of a cell’s entry has the following format:
>cell_name #organization
where cell_name is the cell’s complete Internet domain name (forexample, abc.com) and organization is an optional field that follows anynumber of spaces and the number sign (#). By convention it names theorganization to which the cell corresponds (for example, the ABCCorporation).
v After the first line comes a separate line for each database servermachine. Each line has the following format:
IP_address #machine_name
where IP_address is the machine’s IP address in dotted decimal format(for example, 192.12.105.3). Following any number of spaces and thenumber sign (#) is machine_name, the machine’s fully-qualified hostname(for example, db1.abc.com). In this case, the number sign does notindicate a comment; machine_name is a required field.
58 AFS: Quick Beginnings

3. If the file includes cells that you do not wish users of this machine toaccess, remove their entries.
The following example shows entries for two cells, each of which has threedatabase server machines:
>abc.com #ABC Corporation (home cell)192.12.105.3 #db1.abc.com192.12.105.4 #db2.abc.com192.12.105.55 #db3.abc.com>stateu.edu #State University cell138.255.68.93 #serverA.stateu.edu138.255.68.72 #serverB.stateu.edu138.255.33.154 #serverC.stateu.edu
Configuring the Cache
The Cache Manager uses a cache on the local disk or in machine memory tostore local copies of files fetched from file server machines. As the afsdprogram initializes the Cache Manager, it sets basic cache configurationparameters according to definitions in the local /usr/vice/etc/cacheinfo file.The file has three fields:1. The first field names the local directory on which to mount the AFS
filespace. The conventional location is the /afs directory.2. The second field defines the local disk directory to use for the disk cache.
The conventional location is the /usr/vice/cache directory, but you canspecify an alternate directory if another partition has more space available.There must always be a value in this field, but the Cache Manager ignoresit if the machine uses a memory cache.
3. The third field specifies the number of kilobyte (1024 byte) blocks toallocate for the cache.
The values you define must meet the following requirements.v On a machine using a disk cache, the Cache Manager expects always to be
able to use the amount of space specified in the third field. Failure to meetthis requirement can cause serious problems, some of which can be repairedonly by rebooting. You must prevent non-AFS processes from filling up thecache partition. The simplest way is to devote a partition to the cacheexclusively.
v The amount of space available in memory or on the partition housing thedisk cache directory imposes an absolute limit on cache size.
v The maximum supported cache size can vary in each AFS release; see theIBM AFS Release Notes for the current version.
Chapter 2. Installing the First AFS Machine 59

v For a disk cache, you cannot specify a value in the third field that exceeds95% of the space available on the partition mounted at the directory namedin the second field. If you violate this restriction, the afsd program exitswithout starting the Cache Manager and prints an appropriate message onthe standard output stream. A value of 90% is more appropriate on mostmachines. Some operating systems (such as AIX) do not automaticallyreserve some space to prevent the partition from filling completely; forthem, a smaller value (say, 80% to 85% of the space available) is moreappropriate.
v For a memory cache, you must leave enough memory for other processesand applications to run. If you try to allocate more memory than is actuallyavailable, the afsd program exits without initializing the Cache Managerand produces the following message on the standard output stream.
afsd: memCache allocation failure at number KB
The number value is how many kilobytes were allocated just before thefailure, and so indicates the approximate amount of memory available.
Within these hard limits, the factors that determine appropriate cache sizeinclude the number of users working on the machine, the size of the files withwhich they work, and (for a memory cache) the number of processes that runon the machine. The higher the demand from these factors, the larger thecache needs to be to maintain good performance.
Disk caches smaller than 10 MB do not generally perform well. Machinesserving multiple users usually perform better with a cache of at least 60 to 70MB. The point at which enlarging the cache further does not really improveperformance depends on the factors mentioned previously and is difficult topredict.
Memory caches smaller than 1 MB are nonfunctional, and the performance ofcaches smaller than 5 MB is usually unsatisfactory. Suitable upper limits aresimilar to those for disk caches but are probably determined more by thedemands on memory from other sources on the machine (number of usersand processes). Machines running only a few processes possibly can use asmaller memory cache.
Configuring a Disk Cache
Note: Not all file system types that an operating system supports arenecessarily supported for use as the cache partition. For possiblerestrictions, see the IBM AFS Release Notes.
To configure the disk cache, perform the following procedures:
60 AFS: Quick Beginnings

1. Create the local directory to use for caching. The following instructionshows the conventional location, /usr/vice/cache. If you are devoting apartition exclusively to caching, as recommended, you must also configureit, make a file system on it, and mount it at the directory created in thisstep.
# mkdir /usr/vice/cache
2. Create the cacheinfo file to define the configuration parameters discussedpreviously. The following instruction shows the standard mount location,/afs, and the standard cache location, /usr/vice/cache.
# echo "/afs:/usr/vice/cache:#blocks" > /usr/vice/etc/cacheinfo
The following example defines the disk cache size as 50,000 KB:
# echo "/afs:/usr/vice/cache:50000" > /usr/vice/etc/cacheinfo
Configuring a Memory Cache
To configure a memory cache, create the cacheinfo file to define theconfiguration parameters discussed previously. The following instructionshows the standard mount location, /afs, and the standard cache location,/usr/vice/cache (though the exact value of the latter is irrelevant for a memorycache).
# echo "/afs:/usr/vice/cache:#blocks" > /usr/vice/etc/cacheinfo
The following example allocates 25,000 KB of memory for the cache.
# echo "/afs:/usr/vice/cache:25000" > /usr/vice/etc/cacheinfo
Configuring the Cache Manager
By convention, the Cache Manager mounts the AFS filespace on the local /afsdirectory. In this section you create that directory.
The afsd program sets several cache configuration parameters as it initializesthe Cache Manager, and starts daemons that improve performance. You canuse the afsd command’s arguments to override the parameters’ default valuesand to change the number of some of the daemons. Depending on themachine’s cache size, its amount of RAM, and how many people work on it,you can sometimes improve Cache Manager performance by overriding thedefault values. For a discussion of all of the afsd command’s arguments, seeits reference page in the IBM AFS Administration Reference.
Chapter 2. Installing the First AFS Machine 61

The afsd command line in the AFS initialization script on each system typeincludes an OPTIONS variable. You can use it to set nondefault values for thecommand’s arguments, in one of the following ways:v You can create an afsd options file that sets values for arguments to the afsd
command. If the file exists, its contents are automatically substituted for theOPTIONS variable in the AFS initialization script. The AFS distribution forsome system types includes an options file; on other system types, youmust create it.You use two variables in the AFS initialization script to specify the path tothe options file: CONFIG and AFSDOPT. On system types that define aconventional directory for configuration files, the CONFIG variable indicatesit by default; otherwise, the variable indicates an appropriate location.List the desired afsd options on a single line in the options file, separatingeach option with one or more spaces. The following example sets the -statargument to 2500, the -daemons argument to 4, and the -volumes argumentto 100.
-stat 2500 -daemons 4 -volumes 100
v On a machine that uses a disk cache, you can set the OPTIONS variable inthe AFS initialization script to one of $SMALL, $MEDIUM, or $LARGE. The AFSinitialization script uses one of these settings if the afsd options file namedby the AFSDOPT variable does not exist. In the script as distributed, theOPTIONS variable is set to the value $MEDIUM.
Note: Do not set the OPTIONS variable to $SMALL, $MEDIUM, or $LARGE on amachine that uses a memory cache. The arguments it sets areappropriate only on a machine that uses a disk cache.
The script (or on some system types the afsd options file named by theAFSDOPT variable) defines a value for each of SMALL, MEDIUM, and LARGE thatsets afsd command arguments appropriately for client machines of differentsizes:– SMALL is suitable for a small machine that serves one or two users and
has approximately 8 MB of RAM and a 20-MB cache– MEDIUM is suitable for a medium-sized machine that serves two to six
users and has 16 MB of RAM and a 40-MB cache– LARGE is suitable for a large machine that serves five to ten users and has
32 MB of RAM and a 100-MB cachev You can choose not to create an afsd options file and to set the OPTIONS
variable in the initialization script to a null value rather than to the default$MEDIUM value. You can then either set arguments directly on the afsdcommand line in the script, or set no arguments (and so accept defaultvalues for all Cache Manager parameters).
62 AFS: Quick Beginnings

1. Create the local directory on which to mount the AFS filespace, byconvention /afs. If the directory already exists, verify that it is empty.
# mkdir /afs
2. On AIX systems, add the following line to the /etc/vfs file. It enables AIXto unmount AFS correctly during shutdown.
afs 4 none none
3. On Linux systems, copy the afsd options file from the /usr/vice/etcdirectory to the /etc/sysconfig directory, removing the .conf extension asyou do so.
# cp /usr/vice/etc/afs.conf /etc/sysconfig/afs
4. Edit the machine’s AFS initialization script or afsd options file to setappropriate values for afsd command parameters. The script resides in theindicated location on each system type:v On AIX systems, /etc/rc.afs
v On Digital UNIX systems, /sbin/init.d/afs
v On HP-UX systems, /sbin/init.d/afs
v On IRIX systems, /etc/init.d/afs
v On Linux systems, /etc/sysconfig/afs (the afsd options file)v On Solaris systems, /etc/init.d/afs
Use one of the methods described in the introduction to this section to addthe following flags to the afsd command line. If you intend for themachine to remain an AFS client, also set any performance-relatedarguments you wish.v Add the -nosettime flag, because this is a file server machine that is also
a client. The flag prevents the machine from picking a file servermachine in the cell as its source for the correct time, which clientmachines normally do. File server machines instead use NTPD (ascontrolled by the runntp process) or another protocol to synchronizetheir clocks.
v Add the -memcache flag if the machine is to use a memory cache.v Add the -verbose flag to display a trace of the Cache Manager’s
initialization on the standard output stream.
Chapter 2. Installing the First AFS Machine 63

Overview: Completing the Installation of the First AFS Machine
The machine is now configured as an AFS file server and client machine. Inthis final phase of the installation, you initialize the Cache Manager and thencreate the upper levels of your AFS filespace, among other procedures. Theprocedures are:1. Verify that the initialization script works correctly, and incorporate it into
the operating system’s startup and shutdown sequence2. Create and mount top-level volumes3. Create and mount volumes to store system binaries in AFS4. Enable access to foreign cells5. Institute additional security measures6. Remove client functionality if desired
Verifying the AFS Initialization Script
At this point you run the AFS initialization script to verify that it correctlyinvokes all of the necessary programs and AFS processes, and that they startcorrectly. The following are the relevant commands:v The command that dynamically loads AFS modifications into the kernel, on
some system types (not applicable if the kernel has AFS modifications builtin)
v The bosserver command, which starts the BOS Server; it in turn starts theserver processes for which you created entries in the/usr/afs/local/BosConfig file
v The afsd command, which initializes the Cache Manager
On system types that use a dynamic loader program, you must reboot themachine before running the initialization script, so that it can freshly load AFSmodifications into the kernel.
If there are problems during the initialization, attempt to resolve them. TheAFS Product Support group can provide assistance if necessary.1. Issue the bos shutdown command to shut down the AFS server processes
other than the BOS Server. Include the -wait flag to delay return of thecommand shell prompt until all processes shut down completely.
# /usr/afs/bin/bos shutdown <machine name> -wait
2. Issue the ps command to learn the bosserver process’s process ID number(PID), and then the kill command to stop it.
64 AFS: Quick Beginnings

# ps appropriate_ps_options | grep bosserver
# kill bosserver_PID
3. Issue the appropriate commands to run the AFS initialization script forthis system type.On AIX systems:
a. Reboot the machine and log in again as the local superuser root.
# cd /
# shutdown -r now
login: rootPassword: root_password
b. Run the AFS initialization script.
# /etc/rc.afs
On Digital UNIX systems:
a. Run the AFS initialization script.
# /sbin/init.d/afs start
On HP-UX systems:
a. Run the AFS initialization script.
# /sbin/init.d/afs start
On IRIX systems:
a. If you have configured the machine to use the ml dynamic loaderprogram, reboot the machine and log in again as the local superuserroot.
# cd /
# shutdown -i6 -g0 -y
login: rootPassword: root_password
Chapter 2. Installing the First AFS Machine 65

b. Issue the chkconfig command to activate the afsserver and afsclientconfiguration variables.
# /etc/chkconfig -f afsserver on
# /etc/chkconfig -f afsclient on
c. Run the AFS initialization script.
# /etc/init.d/afs start
On Linux systems:
a. Reboot the machine and log in again as the local superuser root.
# cd /
# shutdown -r now
login: rootPassword: root_password
b. Run the AFS initialization script.
# /etc/rc.d/init.d/afs start
On Solaris systems:
a. Reboot the machine and log in again as the local superuser root.
# cd /
# shutdown -i6 -g0 -y
login: rootPassword: root_password
b. Run the AFS initialization script.
# /etc/init.d/afs start
4. Wait for the message that confirms that Cache Manager initialization iscomplete.On machines that use a disk cache, it can take a while to initialize theCache Manager for the first time, because the afsd program must create all
66 AFS: Quick Beginnings

of the Vn files in the cache directory. Subsequent Cache Managerinitializations do not take nearly as long, because the Vn files alreadyexist.As a basic test of correct AFS functioning, issue the klog command toauthenticate as the admin user. Provide the password (admin_passwd) youdefined in “Initializing Cell Security” on page 48.
# /usr/afs/bin/klog adminPassword: admin_passwd
5. Issue the tokens command to verify that the klog command workedcorrectly. If it did, the output looks similar to the following example forthe abc.com cell, where admin’s AFS UID is 1. If the output does not seemcorrect, resolve the problem. Changes to the AFS initialization script arepossibly necessary. The AFS Product Support group can provide assistanceas necessary.
# /usr/afs/bin/tokensTokens held by the Cache Manager:
User's (AFS ID 1) tokens for [email protected] [Expires May 22 11:52]--End of list--
6. Issue the bos status command to verify that the output for each processreads Currently running normally.
# /usr/afs/bin/bos status <machine name>
7. Change directory to the local file system root (/) and issue the fscheckvolumes command.
# cd /
# /usr/afs/bin/fs checkvolumes
Activating the AFS Initialization Script
Now that you have confirmed that the AFS initialization script workscorrectly, take the action necessary to have it run automatically at each reboot.Proceed to the instructions for your system type:v “Activating the Script on AIX Systems” on page 68v “Activating the Script on Digital UNIX Systems” on page 68v “Activating the Script on HP-UX Systems” on page 69v “Activating the Script on IRIX Systems” on page 69
Chapter 2. Installing the First AFS Machine 67

v “Activating the Script on Linux Systems” on page 70v “Activating the Script on Solaris Systems” on page 70
Activating the Script on AIX Systems1. Edit the AIX initialization file, /etc/inittab, adding the following line to
invoke the AFS initialization script. Place it just after the line that startsNFS daemons.
rcafs:2:wait:/etc/rc.afs > /dev/console 2>&1 # Start AFS services
2. (Optional) There are now copies of the AFS initialization file in both the/usr/vice/etc and /etc directories. If you want to avoid potential confusionby guaranteeing that they are always the same, create a link betweenthem. You can always retrieve the original script from the AFS CD-ROM ifnecessary.
# cd /usr/vice/etc
# rm rc.afs
# ln -s /etc/rc.afs
3. Proceed to “Configuring the Top Levels of the AFS Filespace” on page 71.
Activating the Script on Digital UNIX Systems1. Change to the /sbin/init.d directory and issue the ln -s command to create
symbolic links that incorporate the AFS initialization script into the DigitalUNIX startup and shutdown sequence.
# cd /sbin/init.d
# ln -s ../init.d/afs /sbin/rc3.d/S67afs
# ln -s ../init.d/afs /sbin/rc0.d/K66afs
2. (Optional) There are now copies of the AFS initialization file in both the/usr/vice/etc and /sbin/init.d directories. If you want to avoid potentialconfusion by guaranteeing that they are always the same, create a linkbetween them. You can always retrieve the original script from the AFSCD-ROM if necessary.
# cd /usr/vice/etc
68 AFS: Quick Beginnings

# rm afs.rc
# ln -s /sbin/init.d/afs afs.rc
3. Proceed to “Configuring the Top Levels of the AFS Filespace” on page 71.
Activating the Script on HP-UX Systems1. Change to the /sbin/init.d directory and issue the ln -s command to create
symbolic links that incorporate the AFS initialization script into the HP-UXstartup and shutdown sequence.
# cd /sbin/init.d
# ln -s ../init.d/afs /sbin/rc2.d/S460afs
# ln -s ../init.d/afs /sbin/rc2.d/K800afs
2. (Optional) There are now copies of the AFS initialization file in both the/usr/vice/etc and /sbin/init.d directories. If you want to avoid potentialconfusion by guaranteeing that they are always the same, create a linkbetween them. You can always retrieve the original script from the AFSCD-ROM if necessary.
# cd /usr/vice/etc
# rm afs.rc
# ln -s /sbin/init.d/afs afs.rc
3. Proceed to “Configuring the Top Levels of the AFS Filespace” on page 71.
Activating the Script on IRIX Systems1. Change to the /etc/init.d directory and issue the ln -s command to create
symbolic links that incorporate the AFS initialization script into the IRIXstartup and shutdown sequence.
# cd /etc/init.d
# ln -s ../init.d/afs /etc/rc2.d/S35afs
# ln -s ../init.d/afs /etc/rc0.d/K35afs
2. (Optional) There are now copies of the AFS initialization file in both the/usr/vice/etc and /etc/init.d directories. If you want to avoid potentialconfusion by guaranteeing that they are always the same, create a linkbetween them. You can always retrieve the original script from the AFSCD-ROM if necessary.
Chapter 2. Installing the First AFS Machine 69

# cd /usr/vice/etc
# rm afs.rc
# ln -s /etc/init.d/afs afs.rc
3. Proceed to “Configuring the Top Levels of the AFS Filespace” on page 71.
Activating the Script on Linux Systems1. Issue the chkconfig command to activate the afs configuration variable.
Based on the instruction in the AFS initialization file that begins with thestring #chkconfig, the command automatically creates the symbolic linksthat incorporate the script into the Linux startup and shutdown sequence.
# /sbin/chkconfig --add afs
2. (Optional) There are now copies of the AFS initialization file in both the/usr/vice/etc and /etc/rc.d/init.d directories, and copies of the afsd optionsfile in both the /usr/vice/etc and /etc/sysconfig directories. If you want toavoid potential confusion by guaranteeing that the two copies of each fileare always the same, create a link between them. You can always retrievethe original script or options file from the AFS CD-ROM if necessary.
# cd /usr/vice/etc
# rm afs.rc afs.conf
# ln -s /etc/rc.d/init.d/afs afs.rc
# ln -s /etc/sysconfig/afs afs.conf
3. Proceed to “Configuring the Top Levels of the AFS Filespace” on page 71.
Activating the Script on Solaris Systems1. Change to the /etc/init.d directory and issue the ln -s command to create
symbolic links that incorporate the AFS initialization script into the Solarisstartup and shutdown sequence.
# cd /etc/init.d
# ln -s ../init.d/afs /etc/rc3.d/S99afs
# ln -s ../init.d/afs /etc/rc0.d/K66afs
2. (Optional) There are now copies of the AFS initialization file in both the/usr/vice/etc and /etc/init.d directories. If you want to avoid potential
70 AFS: Quick Beginnings

confusion by guaranteeing that they are always the same, create a linkbetween them. You can always retrieve the original script from the AFSCD-ROM if necessary.
# cd /usr/vice/etc
# rm afs.rc
# ln -s /etc/init.d/afs afs.rc
Configuring the Top Levels of the AFS Filespace
If you have not previously run AFS in your cell, you now configure the toplevels of your cell’s AFS filespace. If you have run a previous version of AFS,the filespace is already configured. Proceed to “Storing AFS Binaries in AFS”on page 74.
You created the root.afs volume in “Starting the File Server, Volume Server,and Salvager” on page 51, and the Cache Manager mounted it automaticallyon the local /afs directory when you ran the AFS initialization script in“Verifying the AFS Initialization Script” on page 64. You now set the accesscontrol list (ACL) on the /afs directory; creating, mounting, and setting theACL are the three steps required when creating any volume.
After setting the ACL on the root.afs volume, you create your cell’s root.cellvolume, mount it as a subdirectory of the /afs directory, and set the ACL.Create both a read/write and a regular mount point for the root.cell volume.The read/write mount point enables you to access the read/write version ofreplicated volumes when necessary. Creating both mount points essentiallycreates separate read-only and read-write copies of your filespace, and enablesthe Cache Manager to traverse the filespace on a read-only path or read/writepath as appropriate. For further discussion of these concepts, see the chapterin the IBM AFS Administration Guide about administering volumes.
Then replicate both the root.afs and root.cell volumes. This is required if youwant to replicate any other volumes in your cell, because all volumesmounted above a replicated volume must themselves be replicated in orderfor the Cache Manager to access the replica.
When the root.afs volume is replicated, the Cache Manager is programmed toaccess its read-only version (root.afs.readonly) whenever possible. To makechanges to the contents of the root.afs volume (when, for example, you mountanother cell’s root.cell volume at the second level in your filespace), you must
Chapter 2. Installing the First AFS Machine 71

mount the root.afs volume temporarily, make the changes, release the volumeand remove the temporary mount point. For instructions, see “EnablingAccess to Foreign Cells” on page 79.1. Issue the fs setacl command to edit the ACL on the /afs directory. Add an
entry that grants the l (lookup) and r (read) permissions to thesystem:anyuser group, to enable all AFS users who can reach your cell totraverse through the directory. If you prefer to enable access only to locallyauthenticated users, substitute the system:authuser group.Note that there is already an ACL entry that grants all seven access rightsto the system:administrators group. It is a default entry that AFS placeson every new volume’s root directory.
# /usr/afs/bin/fs setacl /afs system:anyuser rl
2. Issue the vos create command to create the root.cell volume. Then issuethe fs mkmount command to mount it as a subdirectory of the /afsdirectory, where it serves as the root of your cell’s local AFS filespace.Finally, issue the fs setacl command to create an ACL entry for thesystem:anyuser group (or system:authuser group).For the partition name argument, substitute the name of one of themachine’s AFS server partitions (such as /vicepa). For the cellnameargument, substitute your cell’s fully-qualified Internet domain name (suchas abc.com).
# /usr/afs/bin/vos create <machine name> <partition name> root.cell
# /usr/afs/bin/fs mkmount /afs/cellname root.cell
# /usr/afs/bin/fs setacl /afs/cellname system:anyuser rl
3. (Optional) Create a symbolic link to a shortened cell name, to reduce thelength of pathnames for users in the local cell. For example, in theabc.com cell, /afs/abc is a link to /afs/abc.com.
# cd /afs
# ln -s full_cellname short_cellname
4. Issue the fs mkmount command to create a read/write mount point forthe root.cell volume (you created a regular mount point in Step 2).By convention, the name of a read/write mount point begins with aperiod, both to distinguish it from the regular mount point and to make itvisible only when the -a flag is used on the ls command.Change directory to /usr/afs/bin to make it easier to access the commandbinaries.
72 AFS: Quick Beginnings

# cd /usr/afs/bin
# ./fs mkmount /afs/.cellname root.cell -rw
5. Issue the vos addsite command to define a replication site for both theroot.afs and root.cell volumes. In each case, substitute for the partitionname argument the partition where the volume’s read/write versionresides. When you install additional file server machines, it is a good ideato create replication sites on them as well.
# ./vos addsite <machine name> <partition name> root.afs
# ./vos addsite <machine name> <partition name> root.cell
6. Issue the fs examine command to verify that the Cache Manager canaccess both the root.afs and root.cell volumes, before you attempt toreplicate them. The output lists each volume’s name, volumeID number,quota, size, and the size of the partition that houses them. If you get anerror message instead, do not continue before taking corrective action.
# ./fs examine /afs
# ./fs examine /afs/cellname
7. Issue the vos release command to release a replica of the root.afs androot.cell volumes to the sites you defined in Step 5.
# ./vos release root.afs
# ./vos release root.cell
8. Issue the fs checkvolumes to force the Cache Manager to notice that youhave released read-only versions of the volumes, then issue the fs examinecommand again. This time its output mentions the read-only version ofthe volumes (root.afs.readonly and root.cell.readonly) instead of theread/write versions, because of the Cache Manager’s bias to access theread-only version of the root.afs volume if it exists.
# ./fs checkvolumes
# ./fs examine /afs
# ./fs examine /afs/cellname
Chapter 2. Installing the First AFS Machine 73

Storing AFS Binaries in AFS
In the conventional configuration, you make AFS client binaries andconfiguration files available in the subdirectories of the /usr/afsws directoryon client machines (afsws is an acronym for AFS workstation). You canconserve local disk space by creating /usr/afsws as a link to an AFS volumethat houses the AFS client binaries and configuration files for this system type.
In this section you create the necessary volumes. The conventional location towhich to link /usr/afsws is /afs/cellname/sysname/usr/afsws, where sysname isthe appropriate system type name as specified in the IBM AFS Release Notes.The instructions in “Chapter 4. Installing Additional Client Machines” onpage 125 assume that you have followed the instructions in this section.
If you have previously run AFS in the cell, the volumes possibly already exist.If so, you need to perform Step 8 on page 76 only.
The current working directory is still /usr/afs/bin, which houses the fs andvos command suite binaries. In the following commands, it is possible youstill need to specify the pathname to the commands, depending on how yourPATH environment variable is set.1. Issue the vos create command to create volumes for storing the AFS client
binaries for this system type. The following example instruction createsvolumes called sysname, sysname.usr, and sysname.usr.afsws. Refer to theIBM AFS Release Notes to learn the proper value of sysname for this systemtype.
# vos create <machine name> <partition name> sysname
# vos create <machine name> <partition name> sysname.usr
# vos create <machine name> <partition name> sysname.usr.afsws
2. Issue the fs mkmount command to mount the newly created volumes.Because the root.cell volume is replicated, you must precede the cellnamepart of the pathname with a period to specify the read/write mount point,as shown. Then issue the vos release command to release a new replica ofthe root.cell volume, and the fs checkvolumes command to force the localCache Manager to access them.
# fs mkmount -dir /afs/.cellname/sysname -vol sysname
# fs mkmount -dir /afs/.cellname/sysname/usr -vol sysname.usr
# fs mkmount -dir /afs/.cellname/sysname/usr/afsws -vol sysname.usr.afsws
74 AFS: Quick Beginnings

# vos release root.cell
# fs checkvolumes
3. Issue the fs setacl command to grant the l (lookup) and r (read)permissions to the system:anyuser group on each new directory’s ACL.
# cd /afs/.cellname/sysname
# fs setacl -dir . usr usr/afsws -acl system:anyuser rl
4. Issue the fs setquota command to set an unlimited quota on the volumemounted at the /afs/cellname/sysname/usr/afsws directory. This enables youto copy all of the appropriate files from the CD-ROM into the volumewithout exceeding the volume’s quota.If you wish, you can set the volume’s quota to a finite value after youcomplete the copying operation. At that point, use the vos examinecommand to determine how much space the volume is occupying. Thenissue the fs setquota command to set a quota that is slightly larger.
# fs setquota /afs/.cellname/sysname/usr/afsws 0
5. Mount the AFS CD-ROM for this machine’s system type on the local/cdrom directory, if it is not already. For instructions on mountingCD-ROMs (either locally or remotely via NFS), consult the operatingsystem documentation.
6. Copy the contents of the indicated directories from the CD-ROM into the/afs/cellname/sysname/usr/afsws directory.
# cd /afs/.cellname/sysname/usr/afsws
# cp -rp /cdrom/sysname/bin .
# cp -rp /cdrom/sysname/etc .
# cp -rp /cdrom/sysname/include .
# cp -rp /cdrom/sysname/lib .
7. Issue the fs setacl command to set the ACL on each directoryappropriately. To comply with the terms of your AFS License agreement,you must prevent unauthorized users from accessing AFS software. Toenable access for locally authenticated users only, set the ACL on the etc,include, and lib subdirectories to grant the l and r permissions to thesystem:authuser group rather than the system:anyuser group. Thesystem:anyuser group must retain the l and r permissions on the binsubdirectory to enable unauthenticated users to access the klog binary. To
Chapter 2. Installing the First AFS Machine 75

ensure that unauthorized users are not accessing AFS software, checkperiodically that the ACLs on these directories are set properly.
# cd /afs/.cellname/sysname/usr/afsws
# fs setacl -dir etc include lib -acl system:authuser rl \system:anyuser none
8. Create /usr/afsws on the local disk as a symbolic link to the directory/afs/cellname/@sys/usr/afsws. You can specify the actual system nameinstead of @sys if you wish, but the advantage of using @sys is that itremains valid if you upgrade this machine to a different system type.
# ln -s /afs/cellname/@sys/usr/afsws /usr/afsws
9. (Optional) To enable users to issue commands from the AFS suites (suchas fs) without having to specify a pathname to their binaries, include the/usr/afsws/bin and /usr/afsws/etc directories in the PATH environmentvariable you define in each user’s shell initialization file (such as .cshrc).
Storing AFS Documents in AFS
The AFS distribution includes the following documents:v IBM AFS Release Notes
v IBM AFS Quick Beginnings
v IBM AFS User Guide
v IBM AFS Administration Reference
v IBM AFS Administration Guide
The AFS CD-ROM for each system type has a top-level Documentationdirectory, with a subdirectory for each document format provided. Thedifferent formats are suitable for online viewing, printing, or both.
This section explains how to create and mount a volume to house thedocuments, making them available to your users. The recommended mountpoint for the volume is /afs/cellname/afsdoc. If you wish, you can create a linkto the mount point on each client machine’s local disk, called /usr/afsdoc.Alternatively, you can create a link to the mount point in each user’s homedirectory. You can also choose to permit users to access only certaindocuments (most probably, the IBM AFS User Guide) by creating differentmount points or setting different ACLs on different document directories.
The current working directory is still /usr/afs/bin, which houses the fs andvos command suite binaries you use to create and mount volumes. In the
76 AFS: Quick Beginnings

following commands, it is possible you still need to specify the pathname tothe commands, depending on how your PATH environment variable is set.1. Issue the vos create command to create a volume for storing the AFS
documentation. Include the -maxquota argument to set an unlimited quotaon the volume. This enables you to copy all of the appropriate files fromthe CD-ROM into the volume without exceeding the volume’s quota.If you wish, you can set the volume’s quota to a finite value after youcomplete the copying operations. At that point, use the vos examinecommand to determine how much space the volume is occupying. Thenissue the fs setquota command to set a quota that is slightly larger.
# vos create <machine name> <partition name> afsdoc -maxquota 0
2. Issue the fs mkmount command to mount the new volume. Because theroot.cell volume is replicated, you must precede the cellname with a periodto specify the read/write mount point, as shown. Then issue the vosrelease command to release a new replica of the root.cell volume, and thefs checkvolumes command to force the local Cache Manager to accessthem.
# fs mkmount -dir /afs/.cellname/afsdoc -vol afsdoc
# vos release root.cell
# fs checkvolumes
3. Issue the fs setacl command to grant the rl permissions to thesystem:anyuser group on the new directory’s ACL.
# cd /afs/.cellname/afsdoc
# fs setacl . system:anyuser rl
4. Mount the AFS CD-ROM for any system type on the local /cdromdirectory, if one is not already. For instructions on mounting CD-ROMs(either locally or remotely via NFS), consult the operating systemdocumentation.
5. Copy the AFS documents in one or more formats from the CD-ROM intosubdirectories of the /afs/cellname/afsdoc directory. Repeat the commandsfor each format.
# mkdir format_name
# cd format_name
# cp -rp /cdrom/Documentation/format .
Chapter 2. Installing the First AFS Machine 77

If you choose to store the HTML version of the documents in AFS, notethat in addition to a subdirectory for each document there are several fileswith a .gif extension, which enable readers to move easily betweensections of a document. The file called index.htm is an introductory HTMLpage that contains a hyperlink to each of the documents. For onlineviewing to work properly, these files must remain in the top-level HTMLdirectory (the one named, for example, /afs/cellname/afsdoc/html).
6. (Optional) If you believe it is helpful to your users to access the AFSdocuments in a certain format via a local disk directory, create /usr/afsdocon the local disk as a symbolic link to the documentation directory in AFS(/afs/cellname/afsdoc/format_name).
# ln -s /afs/cellname/afsdoc/format_name /usr/afsdoc
An alternative is to create a link in each user’s home directory to the/afs/cellname/afsdoc/format_name directory.
Storing System Binaries in AFS
You can also choose to store other system binaries in AFS volumes, such asthe standard UNIX programs conventionally located in local disk directoriessuch as /etc, /bin, and /lib. Storing such binaries in an AFS volume not onlyfrees local disk space, but makes it easier to update binaries on all clientmachines.
The following is a suggested scheme for storing system binaries in AFS. Itdoes not include instructions, but you can use the instructions in “Storing AFSBinaries in AFS” on page 74 (which are for AFS-specific binaries) as atemplate.
Some files must remain on the local disk for use when AFS is inaccessible(during bootup and file server or network outages). The required binariesinclude the following:v A text editor, network commands, and so onv Files used during the boot sequence before the afsd program runs, such as
initialization and configuration files, and binaries for commands that mountfile systems
v Files used by dynamic kernel loader programs
In most cases, it is more secure to enable only locally authenticated users toaccess system binaries, by granting the l (lookup) and r (read) permissions tothe system:authuser group on the ACLs of directories that contain the
78 AFS: Quick Beginnings

binaries. If users need to access a binary while unauthenticated, however, theACL on its directory must grant those permissions to the system:anyusergroup.
The following chart summarizes the suggested volume and mount pointnames for storing system binaries. It uses a separate volume for eachdirectory. You already created a volume called sysname for this machine’ssystem type when you followed the instructions in “Storing AFS Binaries inAFS” on page 74.
You can name volumes in any way you wish, and mount them at otherlocations than those suggested here. However, this scheme has severaladvantages:v Volume names clearly identify volume contentsv Using the sysname prefix on every volume makes it is easy to back up all of
the volumes together, because the AFS Backup System enables you todefine sets of volumes based on a string included in all of their names
v It makes it easy to track related volumes, keeping them together on thesame file server machine if desired
v There is a clear relationship between volume name and mount point name
Volume Name Mount Pointsysname /afs/cellname/sysnamesysname.bin /afs/cellname/sysname/binsysname.etc /afs/cellname/sysname/etcsysname.usr /afs/cellname/sysname/usrsysname.usr.afsws /afs/cellname/sysname/usr/afswssysname.usr.bin /afs/cellname/sysname/usr/binsysname.usr.etc /afs/cellname/sysname/usr/etcsysname.usr.inc /afs/cellname/sysname/usr/includesysname.usr.lib /afs/cellname/sysname/usr/libsysname.usr.loc /afs/cellname/sysname/usr/localsysname.usr.man /afs/cellname/sysname/usr/mansysname.usr.sys /afs/cellname/sysname/usr/sys
Enabling Access to Foreign Cells
In this section you create a mount point in your AFS filespace for the root.cellvolume of each foreign cell that you want to enable your users to access. Forusers working on a client machine to access the cell, there must in addition bean entry for it in the client machine’s local /usr/vice/etc/CellServDB file. (Theinstructions in “Creating the Client CellServDB File” on page 57 suggest thatyou use the CellServDB.sample file included in the AFS distribution as thebasis for your cell’s client CellServDB file. The sample file lists all of the cellsthat had agreed to participate in the AFS global namespace at the time your
Chapter 2. Installing the First AFS Machine 79

AFS CD-ROM was created. As mentioned in that section, the AFS ProductSupport group also maintains a copy of the file, updating it as necessary.)
The chapter in the IBM AFS Administration Guide about cell administrationand configuration issues discusses the implications of participating in theglobal AFS namespace. The chapter about administering client machinesexplains how to maintain knowledge of foreign cells on client machines, andincludes suggestions for maintaining a central version of the file in AFS.1. Issue the fs mkmount command to mount each foreign cell’s root.cell
volume on a directory called /afs/foreign_cell. Because the root.afs volumeis replicated, you must create a temporary mount point for its read/writeversion in a directory to which you have write access (such as your cell’s/afs/.cellname directory). Create the mount points, issue the vos releasecommand to release new replicas to the read-only sites for the root.afsvolume, and issue the fs checkvolumes command to force the local CacheManager to access the new replica.
Note: You need to issue the fs mkmount command only once for eachforeign cell’s root.cell volume. You do not need to repeat thecommand on each client machine.
Substitute your cell’s name for cellname.
# cd /afs/.cellname
# /usr/afs/bin/fs mkmount temp root.afs
Repeat the fs mkmount command for each foreign cell you wish to mountat this time.
# /usr/afs/bin/fs mkmount temp/foreign_cell root.cell -c foreign_cell
Issue the following commands only once.
# /usr/afs/bin/fs rmmount temp
# /usr/afs/bin/vos release root.afs
# /usr/afs/bin/fs checkvolumes
2. If this machine is going to remain an AFS client after you complete theinstallation, verify that the local /usr/vice/etc/CellServDB file includes anentry for each foreign cell.For each cell that does not already have an entry, complete the followinginstructions:
80 AFS: Quick Beginnings

a. Create an entry in the CellServDB file. Be sure to comply with theformatting instructions in “Creating the Client CellServDB File” onpage 57.
b. Issue the fs newcell command to add an entry for the cell directly tothe list that the Cache Manager maintains in kernel memory. Provideeach database server machine’s fully qualified hostname.
# /usr/afs/bin/fs newcell <foreign_cell> <dbserver1> \[<dbserver2>] [<dbserver3>]
c. If you plan to maintain a central version of the CellServDB file (theconventional location is /afs/cellname/common/etc/CellServDB), create itnow as a copy of the local /usr/vice/etc/CellServDB file. Verify that itincludes an entry for each foreign cell you want your users to be ableto access.
# mkdir common
# mkdir common/etc
# cp /usr/vice/etc/CellServDB common/etc
# /usr/afs/bin/vos release root.cell
3. Issue the ls command to verify that the new cell’s mount point is visible inyour filespace. The output lists the directories at the top level of the newcell’s AFS filespace.
# ls /afs/foreign_cell
4. Please register your cell with the AFS Product Support group at this time.If you do not want to participate in the global AFS namespace, they listyour cell in a private CellServDB file that is not available to other AFScells.
Improving Cell Security
This section discusses ways to improve the security of AFS data in your cell.Also see the chapter in the IBM AFS Administration Guide about configurationand administration issues.
Controlling root Access
As on any machine, it is important to prevent unauthorized users fromlogging onto an AFS server or client machine as the local superuser root. Takecare to keep the root password secret.
Chapter 2. Installing the First AFS Machine 81

The local root superuser does not have special access to AFS data through theCache Manager (as members of the system:administrators group do), but itdoes have the following privileges:v On client machines, the ability to issue commands from the fs suite that
affect AFS performancev On server machines, the ability to disable authorization checking, or to
install rogue process binaries
Controlling System Administrator Access
Following are suggestions for managing AFS administrative privilege:v Create an administrative account for each administrator named something
like username.admin. Administrators authenticate under these identities onlywhen performing administrative tasks, and destroy the administrativetokens immediately after finishing the task (either by issuing the unlogcommand, or the klog command to adopt their regular identity).
v Set a short ticket lifetime for administrator accounts (for example, 20minutes) by using the -lifetime argument to the kas setfields command,which is described in the IBM AFS Administration Reference. Do nothowever, use a short lifetime for users who issue long-running backupcommands.
v Limit the number of system administrators in your cell, especially thosewho belong to the system:administrators group. By default they have allACL rights on all directories in the local AFS filespace, and therefore mustbe trusted not to examine private files.
v Limit the use of system administrator accounts on machines in public areas.It is especially important not to leave such machines unattended withoutfirst destroying the administrative tokens.
v Limit the use by administrators of standard UNIX commands that makeconnections to remote machines (such as the telnet utility). Many of theseprograms send passwords across the network without encrypting them.
Protecting Sensitive AFS Directories
Some subdirectories of the /usr/afs directory contain files crucial to cellsecurity. Unauthorized users must not read or write to these files because ofthe potential for misuse of the information they contain.
As the BOS Server initializes for the first time on a server machine, it createsseveral files and directories (as mentioned in “Starting the BOS Server” onpage 44). It sets their owner to the local superuser root and sets their modebits to enable writing by the owner only; in some cases, it also restrictsreading.
82 AFS: Quick Beginnings

At each subsequent restart, the BOS Server checks that the owner and modebits on these files are still set appropriately. If they are not, it write thefollowing message to the /usr/afs/logs/BosLog file:
Bosserver reports inappropriate access on server directories
The BOS Server does not reset the mode bits, which enables you to setalternate values if you wish.
The following charts lists the expected mode bit settings. A question markindicates that the BOS Server does not check that mode bit.
/usr/afs drwxr?xr-x/usr/afs/backup drwx???---/usr/afs/bin drwxr?xr-x/usr/afs/db drwx???---/usr/afs/etc drwxr?xr-x/usr/afs/etc/KeyFile -rw????---/usr/afs/etc/UserList -rw?????--/usr/afs/local drwx???---/usr/afs/logs drwxr?xr-x
Removing Client Functionality
Follow the instructions in this section only if you do not wish this machine toremain an AFS client. Removing client functionality means that you cannotuse this machine to access AFS files.1. Remove the files from the /usr/vice/etc directory. The command does not
remove the directory for files used by the dynamic kernel loader program,if it exists on this system type. Those files are still needed on a server-onlymachine.
# cd /usr/vice/etc
# rm *
# rm -rf C
2. Create symbolic links to the ThisCell and CellServDB files in the/usr/afs/etc directory. This makes it possible to issue commands from theAFS command suites (such as bos and fs) on this machine.
# ln -s /usr/afs/etc/ThisCell ThisCell
# ln -s /usr/afs/etc/CellServDB CellServDB
Chapter 2. Installing the First AFS Machine 83

3. On IRIX systems, issue the chkconfig command to deactivate the afsclientconfiguration variable.
# /etc/chkconfig -f afsclient off
4. Reboot the machine. Most system types use the shutdown command, butthe appropriate options vary.
# cd /
# shutdown appropriate_options
84 AFS: Quick Beginnings

Chapter 3. Installing Additional Server Machines
Instructions for the following procedures appear in the indicated section ofthis chapter.v “Installing an Additional File Server Machine”v “Installing Database Server Functionality” on page 116v “Removing Database Server Functionality” on page 121
The instructions make the following assumptions.v You have already installed your cell’s first file server machine by following
the instructions in “Chapter 2. Installing the First AFS Machine” on page 7v You are logged in as the local superuser root
v You are working at the consolev A standard version of one of the operating systems supported by the
current version of AFS is running on the machinev You can access the data on the AFS CD-ROMs, either through a local
CD-ROM drive or via an NFS mount of a CD-ROM drive attached to amachine that is accessible by network
Installing an Additional File Server Machine
The procedure for installing a new file server machine is similar to installingthe first file server machine in your cell. There are a few parts of theinstallation that differ depending on whether the machine is the same AFSsystem type as an existing file server machine or is the first file servermachine of its system type in your cell. The differences mostly concern thesource for the needed binaries and files, and what portions of the UpdateServer you install:v On a new system type, you must load files and binaries from the AFS
CD-ROM. You install the server portion of the Update Server to make thismachine the binary distribution machine for its system type.
v On an existing system type, you can copy files and binaries from apreviously installed file server machine, rather than from the CD-ROM. Youinstall the client portion of the Update Server to accept updates of binaries,because a previously installed machine of this type was installed as thebinary distribution machine.
These instructions are brief; for more detailed information, refer to thecorresponding steps in “Chapter 2. Installing the First AFS Machine” onpage 7.
© Copyright IBM Corp. 1989, 2000 85

To install a new file server machine, perform the following procedures:1. Copy needed binaries and files onto this machine’s local disk2. Incorporate AFS modifications into the kernel3. Configure partitions for storing volumes4. Replace the standard fsck utility with the AFS-modified version on some
system types5. Start the Basic OverSeer (BOS) Server6. Start the appropriate portion of the Update Server7. Start the fs process, which incorporates three component processes: the
File Server, Volume Server, and Salvager8. Start the controller process (called runntp) for the Network Time Protocol
Daemon, which synchronizes clocks
After completing the instructions in this section, you can install databaseserver functionality on the machine according to the instructions in “InstallingDatabase Server Functionality” on page 116.
Creating AFS Directories and Performing Platform-Specific Procedures
Create the /usr/afs and /usr/vice/etc directories on the local disk. Subsequentinstructions copy files from the AFS distribution CD-ROM into them, at theappropriate point for each system type.
# mkdir /usr/afs
# mkdir /usr/afs/bin
# mkdir /usr/vice
# mkdir /usr/vice/etc
# mkdir /cdrom
As on the first file server machine, the initial procedures in installing anadditional file server machine vary a good deal from platform to platform. Forconvenience, the following sections group together all of the procedures for asystem type. Most of the remaining procedures are the same on every systemtype, but differences are noted as appropriate. The initial procedures are thefollowing.v Incorporate AFS modifications into the kernel, either by using a dynamic
kernel loader program or by building a new static kernelv Configure server partitions to house AFS volumesv Replace the operating system vendor’s fsck program with a version that
recognizes AFS data
86 AFS: Quick Beginnings

v If the machine is to remain an AFS client machine, modify the machine’sauthentication system so that users obtain an AFS token as they log into thelocal file system. (For this procedure only, the instructions direct you to theplatform-specific section in “Chapter 2. Installing the First AFS Machine” onpage 7.)
To continue, proceed to the section for this system type:v “Getting Started on AIX Systems”v “Getting Started on Digital UNIX Systems” on page 88v “Getting Started on HP-UX Systems” on page 92v “Getting Started on IRIX Systems” on page 95v “Getting Started on Linux Systems” on page 100v “Getting Started on Solaris Systems” on page 101
Getting Started on AIX Systems
Begin by running the AFS initialization script to call the AIX kernel extensionfacility, which dynamically loads AFS modifications into the kernel. Thenconfigure partitions and replace the AIX fsck program with a version thatcorrectly handles AFS volumes.1. Mount the AFS CD-ROM for AIX on the local /cdrom directory. For
instructions on mounting CD-ROMs (either locally or remotely via NFS),see your AIX documentation. Then change directory as indicated.
# cd /cdrom/rs_aix42/root.client/usr/vice/etc
2. Copy the AFS kernel library files to the local /usr/vice/etc/dkloaddirectory, and the AFS initialization script to the /etc directory.
# cp -rp dkload /usr/vice/etc
# cp -p rc.afs /etc/rc.afs
3. Edit the /etc/rc.afs script, setting the NFS variable as indicated.If the machine is not to function as an NFS/AFS Translator, set the NFSvariable as follows.
NFS=$NFS_NONE
If the machine is to function as an NFS/AFS Translator and is runningAIX 4.2.1 or higher, set the NFS variable as follows. Note that NFS mustalready be loaded into the kernel, which happens automatically onsystems running AIX 4.1.1 and later, as long as the file /etc/exports exists.
Chapter 3. Installing Additional Server Machines 87

NFS=$NFS_IAUTH
4. Invoke the /etc/rc.afs script to load AFS modifications into the kernel. Youcan ignore any error messages about the inability to start the BOS Serveror the Cache Manager or AFS client.
# /etc/rc.afs
5. Create a directory called /vicepxx for each AFS server partition you areconfiguring (there must be at least one). Repeat the command for eachpartition.
# mkdir /vicepxx
6. Use the SMIT program to create a journaling file system on eachpartition to be configured as an AFS server partition.
7. Mount each partition at one of the /vicepxx directories. Choose one of thefollowing three methods:v Use the SMIT programv Use the mount -a command to mount all partitions at oncev Use the mount command on each partition in turn
Also configure the partitions so that they are mounted automatically ateach reboot. For more information, refer to the AIX documentation.
8. Move the AIX fsck program helper to a safe location and install theversion from the AFS distribution in its place. The AFS CD-ROM muststill be mounted at the /cdrom directory.
# cd /sbin/helpers
# mv v3fshelper v3fshelper.noafs
# cp -p /cdrom/rs_aix42/root.server/etc/v3fshelper v3fshelper
9. If the machine is to remain an AFS client, incorporate AFS into itsauthentication system, following the instructions in “Enabling AFS Loginon AIX Systems” on page 13.
10. Proceed to “Starting Server Programs” on page 105.
Getting Started on Digital UNIX Systems
Begin by building AFS modifications into the kernel, then configure serverpartitions and replace the Digital UNIX fsck program with a version thatcorrectly handles AFS volumes.
88 AFS: Quick Beginnings

If the machine’s hardware and software configuration exactly matches anotherDigital UNIX machine on which AFS is already built into the kernel, you cancopy the kernel from that machine to this one. In general, however, it is betterto build AFS modifications into the kernel on each machine according to thefollowing instructions.1. Create a copy called AFS of the basic kernel configuration file included
in the Digital UNIX distribution as /usr/sys/conf/machine_name, wheremachine_name is the machine’s hostname in all uppercase letters.
# cd /usr/sys/conf
# cp machine_name AFS
2. Add AFS to the list of options in the configuration file you created in theprevious step, so that the result looks like the following:
. .
. .options UFSoptions NFSoptions AFS
. .
. .
3. Add an entry for AFS to two places in the file /usr/sys/conf/files.v Add a line for AFS to the list of OPTIONS, so that the result looks like
the following:. . .. . .
OPTIONS/nfs optional nfsOPTIONS/afs optional afsOPTIONS/nfs_server optional nfs_server
. . .
. . .
v Add an entry for AFS to the list of MODULES, so that the result looks likethe following:
. . . .
. . . .#MODULE/nfs_server optional nfs_server Binarynfs/nfs_server.c module nfs_server optimize -g3nfs/nfs3_server.c module nfs_server optimize -g3#MODULE/afs optional afs Binaryafs/libafs.c module afs#
4. Add an entry for AFS to two places in the file /usr/sys/vfs/vfs_conf.c.
Chapter 3. Installing Additional Server Machines 89

v Add AFS to the list of defined file systems, so that the result looks likethe following:
. .
. .#include <afs.h>#if defined(AFS) && AFS
extern struct vfsops afs_vfsops;#endif
. .
. .
v Put a declaration for AFS in the vfssw[] table’s MOUNT_ADDON slot,so that the result looks like the following:
. . .
. . .&fdfs_vfsops, "fdfs", /* 12 = MOUNT_FDFS */
#if defined(AFS)&afs_vfsops, "afs",
#else(struct vfsops *)0, "", /* 13 = MOUNT_ADDON */
#endif#if NFS && INFS_DYNAMIC
&nfs3_vfsops, "nfsv3", /* 14 = MOUNT_NFS3 */
5. Mount the AFS CD-ROM for Digital UNIX on the local /cdrom directory.For instructions on mounting CD-ROMs (either locally or remotely viaNFS), see your Digital UNIX documentation. Then change directory asindicated.
# cd /cdrom/alpha_dux40/root.client
6. Copy the AFS initialization script to the local directory for initializationfiles (by convention, /sbin/init.d on Digital UNIX machines). Note theremoval of the .rc extension as you copy the script.
# cp usr/vice/etc/afs.rc /sbin/init.d/afs
7. Copy the AFS kernel module to the local /usr/sys/BINARY directory.If the machine’s kernel supports NFS server functionality:
# cp bin/libafs.o /usr/sys/BINARY/afs.mod
If the machine’s kernel does not support NFS server functionality:
# cp bin/libafs.nonfs.o /usr/sys/BINARY/afs.mod
8. Configure and build the kernel. Respond to any prompts by pressing<Return>. The resulting kernel resides in the file /sys/AFS/vmunix.
90 AFS: Quick Beginnings

# doconfig -c AFS
9. Rename the existing kernel file and copy the new, AFS-modified file tothe standard location.
# mv /vmunix /vmunix_noafs
# cp /sys/AFS/vmunix /vmunix
10. Reboot the machine to start using the new kernel, and login again as thesuperuser root.
# cd /
# shutdown -r now
login: rootPassword: root_password
11. Create a directory called /vicepxx for each AFS server partition you areconfiguring (there must be at least one). Repeat the command for eachpartition.
# mkdir /vicepxx
12. Add a line with the following format to the file systems registry file,/etc/fstab, for each directory just created. The entry maps the directoryname to the disk partition to be mounted on it.
/dev/disk /vicepxx ufs rw 0 2
The following is an example for the first partition being configured.
/dev/rz3a /vicepa ufs rw 0 2
13. Create a file system on each partition that is to be mounted at a /vicepxxdirectory. The following command is probably appropriate, but consultthe Digital UNIX documentation for more information.
# newfs -v /dev/disk
14. Mount each partition by issuing either the mount -a command to mountall partitions at once or the mount command to mount each partition inturn.
15. Install the vfsck binary to the /sbin and /usr/sbin directories. The AFSCD-ROM must still be mounted at the /cdrom directory.
Chapter 3. Installing Additional Server Machines 91

# cd /cdrom/alpha_dux40/root.server/etc
# cp vfsck /sbin/vfsck
# cp vfsck /usr/sbin/vfsck
16. Rename the Digital UNIX fsck binaries and create symbolic links to thevfsck program.
# cd /sbin
# mv ufs_fsck ufs_fsck.noafs
# ln -s vfsck ufs_fsck
# cd /usr/sbin
# mv ufs_fsck ufs_fsck.noafs
# ln -s vfsck ufs_fsck
17. If the machine is to remain an AFS client, incorporate AFS into itsauthentication system, following the instructions in “Enabling AFS Loginon Digital UNIX Systems” on page 19.
18. Proceed to “Starting Server Programs” on page 105.
Getting Started on HP-UX Systems
Begin by building AFS modifications into the kernel, then configure serverpartitions and replace the HP-UX fsck program with a version that correctlyhandles AFS volumes.
If the machine’s hardware and software configuration exactly matches anotherHP-UX machine on which AFS is already built into the kernel, you can copythe kernel from that machine to this one. In general, however, it is better tobuild AFS modifications into the kernel on each machine according to thefollowing instructions.1. Move the existing kernel-related files to a safe location.
# cp /stand/vmunix /stand/vmunix.noafs
# cp /stand/system /stand/system.noafs
2. Mount the AFS CD-ROM for HP-UX on the local /cdrom directory. Forinstructions on mounting CD-ROMs (either locally or remotely via NFS),see your HP-UX documentation. Then change directory as indicated.
92 AFS: Quick Beginnings

# cd /cdrom/hp_ux110/root.client
3. Copy the AFS initialization file to the local directory for initialization files(by convention, /sbin/init.d on HP-UX machines). Note the removal ofthe .rc extension as you copy the file.
# cp usr/vice/etc/afs.rc /sbin/init.d/afs
4. Copy the file afs.driver to the local /usr/conf/master.d directory, changingits name to afs as you do.
# cp usr/vice/etc/afs.driver /usr/conf/master.d/afs
5. Copy the AFS kernel module to the local /usr/conf/lib directory.If the machine’s kernel supports NFS server functionality:
# cp bin/libafs.a /usr/conf/lib
If the machine’s kernel does not support NFS server functionality, changethe file’s name as you copy it:
# cp bin/libafs.nonfs.a /usr/conf/lib/libafs.a
6. Incorporate the AFS driver into the kernel, either using the SAMprogram or a series of individual commands.v To use the SAM program:
a. Invoke the SAM program, specifying the hostname of the localmachine as local_hostname. The SAM graphical user interface popsup.
# sam -display local_hostname:0
b. Choose the Kernel Configuration icon, then the Drivers icon. Fromthe list of drivers, select afs.
c. Open the pull-down Actions menu and choose the Add Driver toKernel option.
d. Open the Actions menu again and choose the Create a New Kerneloption.
e. Confirm your choices by choosing Yes and OK when prompted bysubsequent pop-up windows. The SAM program builds the kerneland reboots the system.
f. Login again as the superuser root.
Chapter 3. Installing Additional Server Machines 93

login: rootPassword: root_password
v To use individual commands:a. Edit the file /stand/system, adding an entry for afs to the
Subsystems section.b. Change to the /stand/build directory and issue the mk_kernel
command to build the kernel.
# cd /stand/build
# mk_kernel
c. Move the new kernel to the standard location (/stand/vmunix),reboot the machine to start using it, and login again as thesuperuser root.
# mv /stand/build/vmunix_test /stand/vmunix
# cd /
# shutdown -r now
login: rootPassword: root_password
7. Create a directory called /vicepxx for each AFS server partition you areconfiguring (there must be at least one). Repeat the command for eachpartition.
# mkdir /vicepxx
8. Use the SAM program to create a file system on each partition. Forinstructions, consult the HP-UX documentation.
9. On some HP-UX systems that use logical volumes, the SAM programautomatically mounts the partitions. If it has not, mount each partition byissuing either the mount -a command to mount all partitions at once orthe mount command to mount each partition in turn.
10. Create the command configuration file /sbin/lib/mfsconfig.d/afs. Use atext editor to place the indicated two lines in it:
format_revision 1fsck 0 m,P,p,d,f,b:c:y,n,Y,N,q,
11. Create and change directory to an AFS-specific command directory called/sbin/fs/afs.
94 AFS: Quick Beginnings

# mkdir /sbin/fs/afs
# cd /sbin/fs/afs
12. Copy the AFS-modified version of the fsck program (the vfsck binary)and related files from the distribution directory to the new AFS-specificcommand directory.
# cp -p /cdrom/hp_ux110/root.server/etc/* .
13. Change the vfsck binary’s name to fsck and set the mode bitsappropriately on all of the files in the /sbin/fs/afs directory.
# mv vfsck fsck
# chmod 755 *
14. Edit the /etc/fstab file, changing the file system type for each AFS serverpartition from hfs to afs. This ensures that the AFS-modified fsckprogram runs on the appropriate partitions.The sixth line in the following example of an edited file shows an AFSserver partition, /vicepa.
/dev/vg00/lvol1 / hfs defaults 0 1/dev/vg00/lvol4 /opt hfs defaults 0 2/dev/vg00/lvol5 /tmp hfs defaults 0 2/dev/vg00/lvol6 /usr hfs defaults 0 2/dev/vg00/lvol8 /var hfs defaults 0 2/dev/vg00/lvol9 /vicepa afs defaults 0 2/dev/vg00/lvol7 /usr/vice/cache hfs defaults 0 2
15. If the machine is to remain an AFS client, incorporate AFS into itsauthentication system, following the instructions in “Enabling AFS Loginon HP-UX Systems” on page 24.
16. Proceed to “Starting Server Programs” on page 105.
Getting Started on IRIX Systems
Begin by incorporating AFS modifications into the kernel. Either use the mldynamic loader program, or build a static kernel. Then configure partitions tohouse AFS volumes. AFS supports use of both EFS and XFS partitions forhousing AFS volumes. SGI encourages use of XFS partitions.
You do not need to replace IRIX fsck program, because the version that SGIdistributes handles AFS volumes properly.
Chapter 3. Installing Additional Server Machines 95

1. Prepare for incorporating AFS into the kernel by performing the followingprocedures.a. Mount the AFS CD-ROM for IRIX on the /cdrom directory. For
instructions on mounting CD-ROMs (either locally or remotely viaNFS), see your IRIX documentation. Then change directory asindicated.
# cd /cdrom/sgi_65/root.client
b. Copy the AFS initialization script to the local directory for initializationfiles (by convention, /etc/init.d on IRIX machines). Note the removal ofthe .rc extension as you copy the script.
# cp -p usr/vice/etc/afs.rc /etc/init.d/afs
c. Issue the uname -m command to determine the machine’s CPU boardtype. The IPxx value in the output must match one of the supportedCPU board types listed in the IBM AFS Release Notes for the currentversion of AFS.
# uname -m
2. Incorporate AFS into the kernel, either using the ml program or bybuilding AFS modifications into a static kernel.v To use the ml program:
a. Create the local /usr/vice/etc/sgiload directory to house the AFSkernel library file.
# mkdir /usr/vice/etc/sgiload
b. Copy the appropriate AFS kernel library file to the/usr/vice/etc/sgiload directory. The IPxx portion of the library filename must match the value previously returned by the uname -mcommand. Also choose the file appropriate to whether the machine’skernel supports NFS server functionality (NFS must be supportedfor the machine to act as an NFS/AFS Translator). Single- andmultiprocessor machines use the same library file.(You can choose to copy all of the kernel library files into the/usr/vice/etc/sgiload directory, but they require a significant amountof space.)If the machine’s kernel supports NFS server functionality:
# cp -p usr/vice/etc/sgiload/libafs.IPxx.o /usr/vice/etc/sgiload
96 AFS: Quick Beginnings

If the machine’s kernel does not support NFS server functionality:
# cp -p usr/vice/etc/sgiload/libafs.IPxx.nonfs.o \/usr/vice/etc/sgiload
c. Issue the chkconfig command to activate the afsml configurationvariable.
# /etc/chkconfig -f afsml on
If the machine is to function as an NFS/AFS Translator and thekernel supports NFS server functionality, activate the afsxnfsvariable.
# /etc/chkconfig -f afsxnfs on
d. Run the /etc/init.d/afs script to load AFS extensions into the kernel.The script invokes the ml command, automatically determiningwhich kernel library file to use based on this machine’s CPU typeand the activation state of the afsxnfs variable.You can ignore any error messages about the inability to start theBOS Server or the Cache Manager or AFS client.
# /etc/init.d/afs start
e. Proceed to Step 3 on page 98.v If you prefer to build a kernel, and the machine’s hardware and
software configuration exactly matches another IRIX machine on whichAFS is already built into the kernel, you can copy the kernel from thatmachine to this one. In general, however, it is better to build AFSmodifications into the kernel on each machine according to thefollowing instructions.a. Copy the kernel initialization file afs.sm to the local
/var/sysgen/system directory, and the kernel master file afs to thelocal /var/sysgen/master.d directory.
# cp -p bin/afs.sm /var/sysgen/system
# cp -p bin/afs /var/sysgen/master.d
b. Copy the appropriate AFS kernel library file to the local file/var/sysgen/boot/afs.a; the IPxx portion of the library file name mustmatch the value previously returned by the uname -m command.Also choose the file appropriate to whether the machine’s kernelsupports NFS server functionality (NFS must be supported for the
Chapter 3. Installing Additional Server Machines 97

machine to act as an NFS/AFS Translator). Single- andmultiprocessor machines use the same library file.If the machine’s kernel supports NFS server functionality:
# cp -p bin/libafs.IPxx.a /var/sysgen/boot/afs.a
If the machine’s kernel does not support NFS server functionality:
# cp -p bin/libafs.IPxx.nonfs.a /var/sysgen/boot/afs.a
c. Issue the chkconfig command to deactivate the afsml configurationvariable.
# /etc/chkconfig -f afsml off
If the machine is to function as an NFS/AFS Translator and thekernel supports NFS server functionality, activate the afsxnfsvariable.
# /etc/chkconfig -f afsxnfs on
d. Copy the existing kernel file, /unix, to a safe location. Compile thenew kernel, which is created in the file /unix.install. It overwritesthe existing /unix file when the machine reboots in the next step.
# cp /unix /unix_noafs
# autoconfig
e. Reboot the machine to start using the new kernel, and login again asthe superuser root.
# cd /
# shutdown -i6 -g0 -y
login: rootPassword: root_password
3. Create a directory called /vicepxx for each AFS server partition you areconfiguring (there must be at least one). Repeat the command for eachpartition.
# mkdir /vicepxx
98 AFS: Quick Beginnings

4. Add a line with the following format to the file systems registry file,/etc/fstab, for each partition (or logical volume created with the XLVvolume manager) to be mounted on one of the directories created in theprevious step.For an XFS partition or logical volume:
/dev/dsk/disk /vicepxx xfs rw,raw=/dev/rdsk/disk 0 0
For an EFS partition:
/dev/dsk/disk /vicepxx efs rw,raw=/dev/rdsk/disk 0 0
The following are examples of an entry for each file system type:
/dev/dsk/dks0d2s6 /vicepa xfs rw,raw=/dev/rdsk/dks0d2s6 0 0/dev/dsk/dks0d3s1 /vicepb efs rw,raw=/dev/rdsk/dks0d3s1 0 0
5. Create a file system on each partition that is to be mounted on a /vicepxxdirectory. The following commands are probably appropriate, but consultthe IRIX documentation for more information. In both cases, raw_device isa raw device name like /dev/rdsk/dks0d0s0 for a single disk partition or/dev/rxlv/xlv0 for a logical volume.For XFS file systems, include the indicated options to configure thepartition or logical volume with inodes large enough to accommodateAFS-specific information:
# mkfs -t xfs -i size=512 -l size=4000b raw_device
For EFS file systems:
# mkfs -t efs raw_device
6. Mount each partition by issuing either the mount -a command to mountall partitions at once or the mount command to mount each partition inturn.
7. (Optional) If you have configured partitions or logical volumes to useXFS, issue the following command to verify that the inodes are configuredproperly (are large enough to accommodate AFS-specific information). Ifthe configuration is correct, the command returns no output. Otherwise, itspecifies the command to run in order to configure each partition orlogical volume properly.
# /usr/afs/bin/xfs_size_check
Chapter 3. Installing Additional Server Machines 99

8. If the machine is to remain an AFS client, incorporate AFS into itsauthentication system, following the instructions in “Enabling AFS Loginon IRIX Systems” on page 32.
9. Proceed to “Starting Server Programs” on page 105.
Getting Started on Linux Systems
Begin by running the AFS initialization script to call the insmod program,which dynamically loads AFS modifications into the kernel. Then createpartitions for storing AFS volumes. You do not need to replace the Linux fsckprogram.1. Mount the AFS CD-ROM for Linux on the local /cdrom directory. For
instructions on mounting CD-ROMs (either locally or remotely via NFS),see your Linux documentation. Then change directory as indicated.
# cd /cdrom/i386_linux22/root.client/usr/vice/etc
2. Copy the AFS kernel library files to the local /usr/vice/etc/modloaddirectory. The filenames for the libraries have the format libafs-version.o,where version indicates the kernel build level. The string .mp in theversion indicates that the file is appropriate for machines running amultiprocessor kernel.
# cp -rp modload /usr/vice/etc
3. Copy the AFS initialization script to the local directory for initializationfiles (by convention, /etc/rc.d/init.d on Linux machines). Note theremoval of the .rc extension as you copy the script.
# cp -p afs.rc /etc/rc.d/init.d/afs
4. Run the AFS initialization script to load AFS extensions into the kernel.You can ignore any error messages about the inability to start the BOSServer or the Cache Manager or AFS client.
# /etc/rc.d/init.d/afs start
5. Create a directory called /vicepxx for each AFS server partition you areconfiguring (there must be at least one). Repeat the command for eachpartition.
# mkdir /vicepxx
100 AFS: Quick Beginnings

6. Add a line with the following format to the file systems registry file,/etc/fstab, for each directory just created. The entry maps the directoryname to the disk partition to be mounted on it.
/dev/disk /vicepxx ext2 defaults 0 2
The following is an example for the first partition being configured.
/dev/sda8 /vicepa ext2 defaults 0 2
7. Create a file system on each partition that is to be mounted at a /vicepxxdirectory. The following command is probably appropriate, but consultthe Linux documentation for more information.
# mkfs -v /dev/disk
8. Mount each partition by issuing either the mount -a command to mountall partitions at once or the mount command to mount each partition inturn.
9. If the machine is to remain an AFS client, incorporate AFS into itsauthentication system, following the instructions in “Enabling AFS Loginon Linux Systems” on page 34.
10. Proceed to “Starting Server Programs” on page 105.
Getting Started on Solaris Systems
Begin by running the AFS initialization script to call the modload program,which dynamically loads AFS modifications into the kernel. Then configurepartitions and replace the Solaris fsck program with a version that correctlyhandles AFS volumes.1. Mount the AFS CD-ROM for Solaris on the /cdrom directory. For
instructions on mounting CD-ROMs (either locally or remotely via NFS),see your Solaris documentation. Then change directory as indicated.
# cd /cdrom/sun4x_56/root.client/usr/vice/etc
2. Copy the AFS initialization script to the local directory for initializationfiles (by convention, /etc/init.d on Solaris machines). Note the removal ofthe .rc extension as you copy the script.
# cp -p afs.rc /etc/init.d/afs
3. Copy the appropriate AFS kernel library file to the local file/kernel/fs/afs.
Chapter 3. Installing Additional Server Machines 101

If the machine is running Solaris 2.6 or the 32–bit version of Solaris 7, itskernel supports NFS server functionality, and the nfsd process isrunning:
# cp -p modload/libafs.o /kernel/fs/afs
If the machine is running Solaris 2.6 or the 32–bit version of Solaris 7,and its kernel does not support NFS server functionality or the nfsdprocess is not running:
# cp -p modload/libafs.nonfs.o /kernel/fs/afs
If the machine is running the 64–bit version of Solaris 7, its kernelsupports NFS server functionality, and the nfsd process is running:
# cp -p modload/libafs64.o /kernel/fs/sparcv9/afs
If the machine is running the 64–bit version of Solaris 7, and its kerneldoes not support NFS server functionality or the nfsd process is notrunning:
# cp -p modload/libafs64.nonfs.o /kernel/fs/sparcv9/afs
4. Run the AFS initialization script to load AFS modifications into thekernel. You can ignore any error messages about the inability to start theBOS Server or the Cache Manager or AFS client.
# /etc/init.d/afs start
When an entry called afs does not already exist in the local/etc/name_to_sysnum file, the script automatically creates it and rebootsthe machine to start using the new version of the file. If this happens, login again as the superuser root after the reboot and run the initializationscript again. This time the required entry exists in the/etc/name_to_sysnum file, and the modload program runs.
login: rootPassword: root_password
# /etc/init.d/afs start
5. Create the /usr/lib/fs/afs directory to house the AFS-modified fsckprogram and related files.
102 AFS: Quick Beginnings

# mkdir /usr/lib/fs/afs
# cd /usr/lib/fs/afs
6. Copy the vfsck binary to the newly created directory, changing the nameas you do so.
# cp /cdrom/sun4x_56/root.server/etc/vfsck fsck
7. Working in the /usr/lib/fs/afs directory, create the following links toSolaris libraries:
# ln -s /usr/lib/fs/ufs/clri# ln -s /usr/lib/fs/ufs/df# ln -s /usr/lib/fs/ufs/edquota# ln -s /usr/lib/fs/ufs/ff# ln -s /usr/lib/fs/ufs/fsdb# ln -s /usr/lib/fs/ufs/fsirand# ln -s /usr/lib/fs/ufs/fstyp# ln -s /usr/lib/fs/ufs/labelit# ln -s /usr/lib/fs/ufs/lockfs# ln -s /usr/lib/fs/ufs/mkfs# ln -s /usr/lib/fs/ufs/mount# ln -s /usr/lib/fs/ufs/ncheck# ln -s /usr/lib/fs/ufs/newfs# ln -s /usr/lib/fs/ufs/quot# ln -s /usr/lib/fs/ufs/quota# ln -s /usr/lib/fs/ufs/quotaoff# ln -s /usr/lib/fs/ufs/quotaon# ln -s /usr/lib/fs/ufs/repquota# ln -s /usr/lib/fs/ufs/tunefs# ln -s /usr/lib/fs/ufs/ufsdump# ln -s /usr/lib/fs/ufs/ufsrestore# ln -s /usr/lib/fs/ufs/volcopy
8. Append the following line to the end of the file /etc/dfs/fstypes.
afs AFS Utilities
9. Edit the /sbin/mountall file, making two changes.v Add an entry for AFS to the case statement for option 2, so that it
reads as follows:
case "$2" inufs) foptions="-o p"
;;afs) foptions="-o p"
;;s5) foptions="-y -t /var/tmp/tmp$$ -D"
Chapter 3. Installing Additional Server Machines 103

;;*) foptions="-y"
;;
v Edit the file so that all AFS and UFS partitions are checked in parallel.Replace the following section of code:
# For fsck purposes, we make a distinction between ufs and# other file systems#if [ "$fstype" = "ufs" ]; then
ufs_fscklist="$ufs_fscklist $fsckdev"saveentry $fstype "$OPTIONS" $special $mountpcontinue
fi
with the following section of code:
# For fsck purposes, we make a distinction between ufs/afs# and other file systems.#if [ "$fstype" = "ufs" -o "$fstype" = "afs" ]; then
ufs_fscklist="$ufs_fscklist $fsckdev"saveentry $fstype "$OPTIONS" $special $mountpcontinue
fi
10. Create a directory called /vicepxx for each AFS server partition you areconfiguring (there must be at least one). Repeat the command for eachpartition.
# mkdir /vicepxx
11. Add a line with the following format to the file systems registry file,/etc/vfstab, for each partition to be mounted on a directory created in theprevious step. Note the value afs in the fourth field, which tells Solaris touse the AFS-modified fsck program on this partition.
/dev/dsk/disk /dev/rdsk/disk /vicepxx afs boot_order yes
The following is an example for the first partition being configured.
/dev/dsk/c0t6d0s1 /dev/rdsk/c0t6d0s1 /vicepa afs 3 yes
12. Create a file system on each partition that is to be mounted at a /vicepxxdirectory. The following command is probably appropriate, but consultthe Solaris documentation for more information.
104 AFS: Quick Beginnings

# newfs -v /dev/rdsk/disk
13. Issue the mountall command to mount all partitions at once.14. If the machine is to remain an AFS client, incorporate AFS into its
authentication system, following the instructions in “Enabling AFS Loginand Editing the File Systems Clean-up Script on Solaris Systems” onpage 41.
15. Proceed to “Starting Server Programs”.
Starting Server Programs
In this section you initialize the BOS Server, the Update Server, the controllerprocess for NTPD, and the fs process. You begin by copying the necessaryserver files to the local disk.1. Copy file server binaries to the local /usr/afs/bin directory.
v On a machine of an existing system type, you can either load files fromthe AFS CD-ROM or use a remote file transfer protocol to copy filesfrom an existing server machine of the same system type. To load fromthe CD-ROM, see the instructions just following for a machine of a newsystem type. If using a remote file transfer protocol, copy the completecontents of the existing server machine’s /usr/afs/bin directory.
v On a machine of a new system type, you must use the followinginstructions to copy files from the AFS CD-ROM.a. On the local /cdrom directory, mount the AFS CD-ROM for this
machine’s system type, if it is not already. For instructions onmounting CD-ROMs (either locally or remotely via NFS), consult theoperating system documentation.
b. Copy files from the CD-ROM to the local /usr/afs directory.
# cd /cdrom/sysname/root.server/usr/afs
# cp -rp * /usr/afs
2. Copy the contents of the /usr/afs/etc directory from an existing file servermachine, using a remote file transfer protocol such as ftp or NFS. If youuse a system control machine, it is best to copy the contents of its/usr/afs/etc directory. If you choose not to run a system control machine,copy the directory’s contents from any existing file server machine.
3. Change to the /usr/afs/bin directory and start the BOS Server (bosserverprocess). Include the -noauth flag to prevent the AFS processes fromperforming authorization checking. This is a grave compromise of security;finish the remaining instructions in this section in an uninterrupted pass.
Chapter 3. Installing Additional Server Machines 105

# cd /usr/afs/bin
# ./bosserver -noauth &
4. If you run a system control machine, create the upclientetc process as aninstance of the client portion of the Update Server. It accepts updates ofthe common configuration files stored in the system control machine’s/usr/afs/etc directory from the upserver process (server portion of theUpdate Server) running on that machine. The cell’s first file servermachine was installed as the system control machine in “Starting theServer Portion of the Update Server” on page 53. (If you do not run asystem control machine, you must update the contents of the /usr/afs/etcdirectory on each file server machine, using the appropriate boscommands.)By default, the Update Server performs updates every 300 seconds (fiveminutes). Use the -t argument to specify a different number of seconds.For the machine name argument, substitute the name of the machine youare installing. The command appears on multiple lines here only forlegibility reasons.
# ./bos create <machine name> upclientetc simple \"/usr/afs/bin/upclient <system control machine> \[-t <time>] /usr/afs/etc" -cell <cell name> -noauth
5. Create an instance of the Update Server to handle distribution of the fileserver binaries stored in the /usr/afs/bin directory.v If this is the first file server machine of its AFS system type, create the
upserver process as an instance of the server portion of the UpdateServer. It distributes its copy of the file server process binaries to theother file server machines of this system type that you install in future.Creating this process makes this machine the binary distributionmachine for its type.
# ./bos create <machine name> upserver simple \"/usr/afs/bin/upserver -clear /usr/afs/bin" \-cell <cell name> -noauth
v If this machine is an existing system type, create the upclientbin processas an instance of the client portion of the Update Server. It acceptsupdates of the AFS binaries from the upserver process running on thebinary distribution machine for its system type. For distribution to workproperly, the upserver process must already by running on thatmachine.
106 AFS: Quick Beginnings

Use the -clear argument to specify that the upclientbin process requestsunencrypted transfer of the binaries in the /usr/afs/bin directory.Binaries are not sensitive and encrypting them is time-consuming.By default, the Update Server performs updates every 300 seconds (fiveminutes). Use the -t argument to specify an different number of seconds.
# ./bos create <machine name> upclientbin simple \"/usr/afs/bin/upclient <binary distribution machine> \[-t <time>] -clear /usr/afs/bin" -cell <cell name> -noauth
6. Start the runntp process, which configures the Network Time ProtocolDaemon (NTPD) to choose a database server machine chosen randomlyfrom the local /usr/afs/etc/CellServDB file as its time source. In thestandard configuration, the first database server machine installed in yourcell refers to a time source outside the cell, and serves as the basis forclock synchronization on all server machines.
# ./bos create <machine name> runntp simple \/usr/afs/bin/runntp -cell <cell name> -noauth
Note: Do not run the runntp process if NTPD or another timesynchronization protocol is already running on the machine. Someversions of some operating systems run a time synchronizationprogram by default, as detailed in the IBM AFS Release Notes.
Attempting to run multiple instances of the NTPD causes an error.Running NTPD together with another time synchronization protocolis unnecessary and can cause instability in the clock setting.
7. Start the fs process, which binds together the File Server, Volume Server,and Salvager.
# ./bos create <machine name> fs fs \/usr/afs/bin/fileserver /usr/afs/bin/volserver \/usr/afs/bin/salvager -cell <cell name> -noauth
Installing Client Functionality
If you want this machine to be a client as well as a server, follow theinstructions in this section. Otherwise, skip to “Completing the Installation”on page 111.
Begin by loading the necessary client files to the local disk. Then create thenecessary configuration files and start the Cache Manager. For more detailedexplanation of the procedures involved, see the corresponding instructions in“Chapter 2. Installing the First AFS Machine” on page 7 (in the sectionsfollowing “Overview: Installing Client Functionality” on page 55).
Chapter 3. Installing Additional Server Machines 107
If another AFS machine of this machine’s system type exists, the AFS binariesare probably already accessible in your AFS filespace (the conventionallocation is /afs/cellname/sysname/usr/afsws). If not, or if this is the first AFSmachine of its type, copy the AFS binaries for this system type into an AFSvolume by following the instructions in “Storing AFS Binaries in AFS” onpage 74. Because this machine is not yet an AFS client, you must perform theprocedure on an existing AFS machine. However, remember to perform thefinal step (linking the local directory /usr/afsws to the appropriate location inthe AFS file tree) on this machine itself. If you also want to create AFSvolumes to house UNIX system binaries for the new system type, see “StoringSystem Binaries in AFS” on page 78.1. Copy client binaries and files to the local disk.
v On a machine of an existing system type, you can either load files fromthe AFS CD-ROM or use a remote file transfer protocol to copy filesfrom an existing server machine of the same system type. To load fromthe CD-ROM, see the instructions just following for a machine of anew system type. If using a remote file transfer protocol, copy thecomplete contents of the existing client machine’s /usr/vice/etcdirectory.
v On a machine of a new system type, you must use the followinginstructions to copy files from the AFS CD-ROM.a. On the local /cdrom directory, mount the AFS CD-ROM for this
machine’s system type, if it is not already. For instructions onmounting CD-ROMs (either locally or remotely via NFS), consultthe operating system documentation.
b. Copy files to the local /usr/vice/etc directory.This step places a copy of the AFS initialization script (and relatedfiles, if applicable) into the /usr/vice/etc directory. In the precedinginstructions for incorporating AFS into the kernel, you copied thescript directly to the operating system’s conventional location forinitialization files. When you incorporate AFS into the machine’sstartup sequence in a later step, you can choose to link the twofiles.On some system types that use a dynamic kernel loader program,you previously copied AFS library files into a subdirectory of the/usr/vice/etc directory. On other system types, you copied theappropriate AFS library file directly to the directory where theoperating system accesses it. The following commands do not copyor recopy the AFS library files into the /usr/vice/etc directory,because on some system types the library files consume a largeamount of space. If you want to copy them, add the -r flag to thefirst cp command and skip the second cp command.
108 AFS: Quick Beginnings

# cd /cdrom/sysname/root.client/usr/vice/etc
# cp -p * /usr/vice/etc
# cp -rp C /usr/vice/etc
2. Change to the /usr/vice/etc directory and create the ThisCell file as a copyof the /usr/afs/etc/ThisCell file. You must first remove the symbolic link tothe /usr/afs/etc/ThisCell file that the BOS Server created automatically in“Starting Server Programs” on page 105.
# cd /usr/vice/etc
# rm ThisCell
# cp /usr/afs/etc/ThisCell ThisCell
3. Remove the symbolic link to the /usr/afs/etc/CellServDB file.
# rm CellServDB
4. Create the /usr/vice/etc/CellServDB file. Use a network file transferprogram such as ftp or NFS to copy it from one of the following sources,which are listed in decreasing order of preference:v Your cell’s central CellServDB source file (the conventional location is
/afs/cellname/common/etc/CellServDB)v The global CellServDB file maintained by the AFS Product Support
groupv An existing client machine in your cellv The CellServDB.sample file included in the
sysname/root.client/usr/vice/etc directory of each AFS CD-ROM; add anentry for the local cell by following the instructions in “Creating theClient CellServDB File” on page 57
5. Create the cacheinfo file for either a disk cache or a memory cache. For adiscussion of the appropriate values to record in the file, see “Configuringthe Cache” on page 59.To configure a disk cache, issue the following commands. If you aredevoting a partition exclusively to caching, as recommended, you mustalso configure it, make a file system on it, and mount it at the directorycreated in this step.
# mkdir /usr/vice/cache
# echo "/afs:/usr/vice/cache:#blocks" > cacheinfo
Chapter 3. Installing Additional Server Machines 109

To configure a memory cache:
# echo "/afs:/usr/vice/cache:#blocks" > cacheinfo
6. Create the local directory on which to mount the AFS filespace, byconvention /afs. If the directory already exists, verify that it is empty.
# mkdir /afs
7. On AIX systems, add the following line to the /etc/vfs file. It enables AIXto unmount AFS correctly during shutdown.
afs 4 none none
8. On Linux systems, copy the afsd options file from the /usr/vice/etcdirectory to the /etc/sysconfig directory, removing the .conf extension asyou do so.
# cp /usr/vice/etc/afs.conf /etc/sysconfig/afs
9. Edit the machine’s AFS initialization script or afsd options file to setappropriate values for afsd command parameters. The script resides in theindicated location on each system type:v On AIX systems, /etc/rc.afs
v On Digital UNIX systems, /sbin/init.d/afs
v On HP-UX systems, /sbin/init.d/afs
v On IRIX systems, /etc/init.d/afs
v On Linux systems, /etc/sysconfig/afs (the afsd options file)v On Solaris systems, /etc/init.d/afs
Use one of the methods described in “Configuring the Cache Manager” onpage 61 to add the following flags to the afsd command line. If you intendfor the machine to remain an AFS client, also set any performance-relatedarguments you wish.v Add the -nosettime flag, because this is a file server machine that is
also a client.v Add the -memcache flag if the machine is to use a memory cache.v Add the -verbose flag to display a trace of the Cache Manager’s
initialization on the standard output stream.10. If appropriate, follow the instructions in “Storing AFS Binaries in AFS”
on page 74 to copy the AFS binaries for this system type into an AFSvolume. See the introduction to this section for further discussion.
110 AFS: Quick Beginnings

Completing the Installation
At this point you run the machine’s AFS initialization script to verify that itcorrectly loads AFS modifications into the kernel and starts the BOS Server,which starts the other server processes. If you have installed client files, thescript also starts the Cache Manager. If the script works correctly, perform thesteps that incorporate it into the machine’s startup and shutdown sequence. Ifthere are problems during the initialization, attempt to resolve them. The AFSProduct Support group can provide assistance if necessary.
If the machine is configured as a client using a disk cache, it can take a whilefor the afsd program to create all of the Vn files in the cache directory.Messages on the console trace the initialization process.1. Issue the bos shutdown command to shut down the AFS server processes
other than the BOS Server. Include the -wait flag to delay return of thecommand shell prompt until all processes shut down completely.
# /usr/afs/bin/bos shutdown <machine name> -wait
2. Issue the ps command to learn the BOS Server’s process ID number (PID),and then the kill command to stop the bosserver process.
# ps appropriate_ps_options | grep bosserver
# kill bosserver_PID
3. Run the AFS initialization script by issuing the appropriate commands forthis system type.On AIX systems:
a. Reboot the machine and log in again as the local superuser root.
# cd /
# shutdown -r now
login: rootPassword: root_password
b. Run the AFS initialization script.
# /etc/rc.afs
c. Edit the AIX initialization file, /etc/inittab, adding the following line toinvoke the AFS initialization script. Place it just after the line that startsNFS daemons.
Chapter 3. Installing Additional Server Machines 111

rcafs:2:wait:/etc/rc.afs > /dev/console 2>&1 # Start AFS services
d. (Optional) There are now copies of the AFS initialization file in boththe /usr/vice/etc and /etc directories. If you want to avoid potentialconfusion by guaranteeing that they are always the same, create a linkbetween them. You can always retrieve the original script from the AFSCD-ROM if necessary.
# cd /usr/vice/etc
# rm rc.afs
# ln -s /etc/rc.afs
e. Proceed to Step 4 on page 116.
On Digital UNIX systems:
a. Run the AFS initialization script.
# /sbin/init.d/afs start
b. Change to the /sbin/init.d directory and issue the ln -s command tocreate symbolic links that incorporate the AFS initialization script intothe Digital UNIX startup and shutdown sequence.
# cd /sbin/init.d
# ln -s ../init.d/afs /sbin/rc3.d/S67afs
# ln -s ../init.d/afs /sbin/rc0.d/K66afs
c. (Optional) There are now copies of the AFS initialization file in boththe /usr/vice/etc and /sbin/init.d directories. If you want to avoidpotential confusion by guaranteeing that they are always the same,create a link between them. You can always retrieve the original scriptfrom the AFS CD-ROM if necessary.
# cd /usr/vice/etc
# rm afs.rc
# ln -s /sbin/init.d/afs afs.rc
d. Proceed to Step 4 on page 116.
On HP-UX systems:
112 AFS: Quick Beginnings

a. Run the AFS initialization script.
# /sbin/init.d/afs start
b. Change to the /sbin/init.d directory and issue the ln -s command tocreate symbolic links that incorporate the AFS initialization script intothe HP-UX startup and shutdown sequence.
# cd /sbin/init.d
# ln -s ../init.d/afs /sbin/rc2.d/S460afs
# ln -s ../init.d/afs /sbin/rc2.d/K800afs
c. (Optional) There are now copies of the AFS initialization file in boththe /usr/vice/etc and /sbin/init.d directories. If you want to avoidpotential confusion by guaranteeing that they are always the same,create a link between them. You can always retrieve the original scriptfrom the AFS CD-ROM if necessary.
# cd /usr/vice/etc
# rm afs.rc
# ln -s /sbin/init.d/afs afs.rc
d. Proceed to Step 4 on page 116.
On IRIX systems:
a. If you have configured the machine to use the ml dynamic loaderprogram, reboot the machine and log in again as the local superuserroot.
# cd /
# shutdown -i6 -g0 -y
login: rootPassword: root_password
b. Issue the chkconfig command to activate the afsserver configurationvariable.
# /etc/chkconfig -f afsserver on
If you have configured this machine as an AFS client and want to itremain one, also issue the chkconfig command to activate the afsclientconfiguration variable.
Chapter 3. Installing Additional Server Machines 113
# /etc/chkconfig -f afsclient on
c. Run the AFS initialization script.
# /etc/init.d/afs start
d. Change to the /etc/init.d directory and issue the ln -s command tocreate symbolic links that incorporate the AFS initialization script intothe IRIX startup and shutdown sequence.
# cd /etc/init.d
# ln -s ../init.d/afs /etc/rc2.d/S35afs
# ln -s ../init.d/afs /etc/rc0.d/K35afs
e. (Optional) There are now copies of the AFS initialization file in boththe /usr/vice/etc and /etc/init.d directories. If you want to avoidpotential confusion by guaranteeing that they are always the same,create a link between them. You can always retrieve the original scriptfrom the AFS CD-ROM if necessary.
# cd /usr/vice/etc
# rm afs.rc
# ln -s /etc/init.d/afs afs.rc
f. Proceed to Step 4 on page 116.
On Linux systems:
a. Reboot the machine and log in again as the local superuser root.
# cd /
# shutdown -r now
login: rootPassword: root_password
b. Run the AFS initialization script.
# /etc/rc.d/init.d/afs start
c. Issue the chkconfig command to activate the afs configuration variable.Based on the instruction in the AFS initialization file that begins with
114 AFS: Quick Beginnings

the string #chkconfig, the command automatically creates the symboliclinks that incorporate the script into the Linux startup and shutdownsequence.
# /sbin/chkconfig --add afs
d. (Optional) There are now copies of the AFS initialization file in boththe /usr/vice/etc and /etc/rc.d/init.d directories, and copies of the afsdoptions file in both the /usr/vice/etc and /etc/sysconfig directories. Ifyou want to avoid potential confusion by guaranteeing that the twocopies of each file are always the same, create a link between them.You can always retrieve the original script or options file from the AFSCD-ROM if necessary.
# cd /usr/vice/etc
# rm afs.rc afs.conf
# ln -s /etc/rc.d/init.d/afs afs.rc
# ln -s /etc/sysconfig/afs afs.conf
e. Proceed to Step 4 on page 116.
On Solaris systems:
a. Reboot the machine and log in again as the local superuser root.
# cd /
# shutdown -i6 -g0 -y
login: rootPassword: root_password
b. Run the AFS initialization script.
# /etc/init.d/afs start
c. Change to the /etc/init.d directory and issue the ln -s command tocreate symbolic links that incorporate the AFS initialization script intothe Solaris startup and shutdown sequence.
# cd /etc/init.d
# ln -s ../init.d/afs /etc/rc3.d/S99afs
# ln -s ../init.d/afs /etc/rc0.d/K66afs
Chapter 3. Installing Additional Server Machines 115

d. (Optional) There are now copies of the AFS initialization file in boththe /usr/vice/etc and /etc/init.d directories. If you want to avoidpotential confusion by guaranteeing that they are always the same,create a link between them. You can always retrieve the original scriptfrom the AFS CD-ROM if necessary.
# cd /usr/vice/etc
# rm afs.rc
# ln -s /etc/init.d/afs afs.rc
4. Verify that /usr/afs and its subdirectories on the new file server machinemeet the ownership and mode bit requirements outlined in “ProtectingSensitive AFS Directories” on page 82. If necessary, use the chmodcommand to correct the mode bits.
5. To configure this machine as a database server machine, proceed to“Installing Database Server Functionality”.
Installing Database Server Functionality
This section explains how to install database server functionality. Databaseserver machines have two defining characteristics. First, they run theAuthentication Server, Protection Server, and Volume Location (VL) Serverprocesses. They also run the Backup Server if the cell uses the AFS BackupSystem, as is assumed in these instructions. Second, they appear in theCellServDB file of every machine in the cell (and of client machines in foreigncells, if they are to access files in this cell).
Note the following requirements for database server machines.v In the conventional configuration, database server machines also serve as
file server machines (run the File Server, Volume Server and Salvagerprocesses). If you choose not to run file server functionality on a databaseserver machine, then the kernel does not have to incorporate AFSmodifications, but the local /usr/afs directory must house most of thestandard files and subdirectories. In particular, the /usr/afs/etc/KeyFile filemust contain the same keys as all other server machines in the cell. If yourun a system control machine, run the upclientetc process on everydatabase server machine other than the system control machine; if you donot run a system control machine, use the bos addkey command asinstructed in the chapter in the IBM AFS Administration Guide aboutmaintaining server encryption keys.The instructions in this section assume that the machine on which you areinstalling database server functionality is already a file server machine.
116 AFS: Quick Beginnings

Contact the AFS Product Support group to learn how to install databaseserver functionality on a non-file server machine.
v During the installation of database server functionality, you must restart allof the database server machines to force the election of a new Ubikcoordinator (synchronization site) for each database server process. This cancause a system outage, which usually lasts less than 5 minutes.
v Updating the kernel memory list of database server machines on each clientmachine is generally the most time-consuming part of installing a newdatabase server machine. It is, however, crucial for correct functioning inyour cell. Incorrect knowledge of your cell’s database server machines canprevent your users from authenticating, accessing files, and issuing AFScommands.You update a client’s kernel memory list by changing the/usr/vice/etc/CellServDB file and then either rebooting or issuing the fsnewcell command. For instructions, see the chapter in the IBM AFSAdministration Guide about administering client machines.The point at which you update your clients’ knowledge of database servermachines depends on which of the database server machines has the lowestIP address. The following instructions indicate the appropriate place toupdate your client machines in either case.– If the new database server machine has a lower IP address than any
existing database server machine, update the CellServDB file on everyclient machine before restarting the database server processes. If you donot, users can become unable to update (write to) any of the AFSdatabases. This is because the machine with the lowest IP address isusually elected as the Ubik coordinator, and only the Coordinator acceptsdatabase writes. On client machines that do not have the new list ofdatabase server machines, the Cache Manager cannot locate the newcoordinator. (Be aware that if clients contact the new coordinator beforeit is actually in service, they experience a timeout before contactinganother database server machine. This is a minor, and temporary,problem compared to being unable to write to the database.)
– If the new database server machine does not have the lowest IP addressof any database server machine, then it is better to update clients afterrestarting the database server processes. Client machines do not startusing the new database server machine until you update their kernelmemory list, but that does not usually cause timeouts or updateproblems (because the new machine is not likely to become thecoordinator).
Summary of Procedures
To install a database server machine, perform the following procedures.1. Install the bos suite of commands locally, as a precaution
Chapter 3. Installing Additional Server Machines 117
2. Add the new machine to the /usr/afs/etc/CellServDB file on existing fileserver machines
3. Update your cell’s central CellServDB source file and the file you makeavailable to foreign cells
4. Update every client machine’s /usr/vice/etc/CellServDB file and kernelmemory list of database server machines
5. Start the database server processes (Authentication Server, Backup Server,Protection Server, and Volume Location Server)
6. Restart the database server processes on every database server machine7. Notify the AFS Product Support group that you have installed a new
database server machine
Instructions
Note: It is assumed that your PATH environment variable includes thedirectory that houses the AFS command binaries. If not, you possiblyneed to precede the command names with the appropriate pathname.
1. You can perform the following instructions on either a server or clientmachine. Login as an AFS administrator who is listed in the/usr/afs/etc/UserList file on all server machines.
% klog admin_userPassword: admin_password
2. If you are working on a client machine configured in the conventionalmanner, the bos command suite resides in the /usr/afsws/bin directory, asymbolic link to an AFS directory. An error during installation canpotentially block access to AFS, in which case it is helpful to have a copyof the bos binary on the local disk. This step is not necessary if you areworking on a server machine, where the binary resides in the local/usr/afs/bin directory.
% cp /usr/afsws/bin/bos /tmp
3. Issue the bos addhost command to add the new database server machineto the /usr/afs/etc/CellServDB file on existing server machines (as well asthe new database server machine itself).Substitute the new database server machine’s fully-qualified hostname forthe host name argument. If you run a system control machine, substituteits fully-qualified hostname for the machine name argument. If you do notrun a system control machine, repeat the bos addhost command once foreach server machine in your cell (including the new database servermachine itself), by substituting each one’s fully-qualified hostname forthe machine name argument in turn.
118 AFS: Quick Beginnings

% bos addhost <machine name> <host name>
If you run a system control machine, wait for the Update Server todistribute the new CellServDB file, which takes up to five minutes bydefault. If you are issuing individual bos addhost commands, attempt toissue all of them within five minutes.
Note: It is best to maintain a one-to-one mapping between hostnamesand IP addresses on a multihomed database server machine (theconventional configuration for any AFS machine). The BOS Serveruses the gethostbyname( ) routine to obtain the IP addressassociated with the host name argument. If there is more than oneaddress, the BOS Server records in the CellServDB entry the onethat appears first in the list of addresses returned by the routine.The routine possibly returns addresses in a different order ondifferent machines, which can create inconsistency.
4. (Optional) Issue the bos listhosts command on each server machine toverify that the new database server machine appears in its CellServDBfile.
% bos listhosts <machine name>
5. Add the new database server machine to your cell’s central CellServDBsource file, if you use one. The standard location is/afs/cellname/common/etc/CellServDB.If you are willing to make your cell accessible to users in foreign cells,add the new database server machine to the file that lists your cell’sdatabase server machines. The conventional location is/afs/cellname/service/etc/CellServDB.local.
6. If this machine’s IP address is lower than any existing database servermachine’s, update every client machine’s /usr/vice/etc/CellServDB fileand kernel memory list to include this machine. (If this machine’s IPaddress is not the lowest, it is acceptable to wait until Step 12 onpage 120.)There are several ways to update the CellServDB file on client machines,as detailed in the chapter of the IBM AFS Administration Guide aboutadministering client machines. One option is to copy over the centralupdate source (which you updated in Step 5), with or without using thepackage program. To update the machine’s kernel memory list, you caneither reboot after changing the CellServDB file or issue the fs newcellcommand.
7. Start the Authentication Server (the kaserver process).
Chapter 3. Installing Additional Server Machines 119
% bos create <machine name> kaserver simple /usr/afs/bin/kaserver
8. Start the Backup Server (the buserver process). You must perform otherconfiguration procedures before actually using the AFS Backup System,as detailed in the IBM AFS Administration Guide.
% bos create <machine name> buserver simple /usr/afs/bin/buserver
9. Start the Protection Server (the ptserver process).
% bos create <machine name> ptserver simple /usr/afs/bin/ptserver
10. Start the Volume Location (VL) Server (the vlserver process).
% bos create <machine name> vlserver simple /usr/afs/bin/vlserver
11. Issue the bos restart command on every database server machine in thecell, including the new machine. The command restarts theAuthentication, Backup, Protection, and VL Servers, which forces anelection of a new Ubik coordinator for each process. The new machinevotes in the election and is considered as a potential new coordinator.A cell-wide service outage is possible during the election of a newcoordinator for the VL Server, but it normally lasts less than five minutes.Such an outage is particularly likely if you are installing your cell’ssecond database server machine. Messages tracing the progress of theelection appear on the console.Repeat this command on each of your cell’s database server machines inquick succession. Begin with the machine with the lowest IP address.
% bos restart <machine name> kaserver buserver ptserver vlserver
If an error occurs, restart all server processes on the database servermachines again by using one of the following methods:v Issue the bos restart command with the -bosserver flag for each
database server machinev Reboot each database server machine, either using the bos exec
command or at its console12. If you did not update the CellServDB file on client machines in Step 6
on page 119, do so now.13. Send the new database server machine’s name and IP address to the
AFS Product Support group.If you wish to participate in the AFS global name space, your cell’s entryappear in a CellServDB file that the AFS Product Support group makes
120 AFS: Quick Beginnings

available to all AFS sites. Otherwise, they list your cell in a private filethat they do not share with other AFS sites.
Removing Database Server Functionality
Removing database server machine functionality is nearly the reverse ofinstalling it.
Summary of Procedures
To decommission a database server machine, perform the followingprocedures.1. Install the bos suite of commands locally, as a precaution2. Notify the AFS Product Support group that you are decommissioning a
database server machine3. Update your cell’s central CellServDB source file and the file you make
available to foreign cells4. Update every client machine’s /usr/vice/etc/CellServDB file and kernel
memory list of database server machines5. Remove the machine from the /usr/afs/etc/CellServDB file on file server
machines6. Stop the database server processes and remove them from the
/usr/afs/local/BosConfig file if desired7. Restart the database server processes on the remaining database server
machines
Instructions
Note: It is assumed that your PATH environment variable includes thedirectory that houses the AFS command binaries. If not, you possiblyneed to precede the command names with the appropriate pathname.
1. You can perform the following instructions on either a server or clientmachine. Login as an AFS administrator who is listed in the/usr/afs/etc/UserList file on all server machines.
% klog admin_userPassword: admin_password
2. If you are working on a client machine configured in the conventionalmanner, the bos command suite resides in the /usr/afsws/bin directory, asymbolic link to an AFS directory. An error during installation canpotentially block access to AFS, in which case it is helpful to have a copy
Chapter 3. Installing Additional Server Machines 121

of the bos binary on the local disk. This step is not necessary if you areworking on a server machine, where the binary resides in the local/usr/afs/bin directory.
% cp /usr/afsws/bin/bos /tmp
3. Send the revised list of your cell’s database server machines to the AFSProduct Support group.This step is particularly important if your cell is included in the globalCellServDB file. If the administrators in foreign cells do not learn aboutthe change in your cell, they cannot update the CellServDB file on theirclient machines. Users in foreign cells continue to send database requeststo the decommissioned machine, which creates needless network trafficand activity on the machine. Also, the users experience time-out delayswhile their request is forwarded to a valid database server machine.
4. Remove the decommissioned machine from your cell’s centralCellServDB source file, if you use one. The conventional location is/afs/cellname/common/etc/CellServDB.If you maintain a file that users in foreign cells can access to learn aboutyour cell’s database server machines, update it also. The conventionallocation is /afs/cellname/service/etc/CellServDB.local.
5. Update every client machine’s /usr/vice/etc/CellServDB file and kernelmemory list to exclude this machine. Altering the CellServDB file andkernel memory list before stopping the actual database server processesavoids possible time-out delays that result when users send requests to adecommissioned database server machine that is still listed in the file.There are several ways to update the CellServDB file on client machines,as detailed in the chapter of the IBM AFS Administration Guide aboutadministering client machines. One option is to copy over the centralupdate source (which you updated in Step 5 on page 119), with orwithout using the package program. To update the machine’s kernelmemory list, you can either reboot after changing the CellServDB file orissue the fs newcell command.
6. Issue the bos removehost command to remove the decommissioneddatabase server machine from the /usr/afs/etc/CellServDB file on servermachines.Substitute the decommissioned database server machine’s fully-qualifiedhostname for the host name argument. If you run a system controlmachine, substitute its fully-qualified hostname for the machine nameargument. If you do not run a system control machine, repeat the bosremovehost command once for each server machine in your cell(including the decommissioned database server machine itself), bysubstituting each one’s fully-qualified hostname for the machine nameargument in turn.
122 AFS: Quick Beginnings

% bos removehost <machine name> <host name>
If you run a system control machine, wait for the Update Server todistribute the new CellServDB file, which takes up to five minutes bydefault. If issuing individual bos removehost commands, attempt toissue all of them within five minutes.
7. (Optional) Issue the bos listhosts command on each server machine toverify that the decommissioned database server machine no longerappears in its CellServDB file.
% bos listhosts <machine name>
8. Issue the bos stop command to stop the database server processes on themachine, by substituting its fully-qualified hostname for themachine name argument. The command changes each process’s status inthe /usr/afs/local/BosConfig file to NotRun, but does not remove its entryfrom the file.
% bos stop <machine name> kaserver buserver ptserver vlserver
9. (Optional) Issue the bos delete command to remove the entries fordatabase server processes from the BosConfig file. This step isunnecessary if you plan to restart the database server functionality onthis machine in future.
% bos delete <machine name> kaserver buserver ptserver vlserver
10. Issue the bos restart command on every database server machine in thecell, to restart the Authentication, Backup, Protection, and VL Servers.This forces the election of a Ubik coordinator for each process, ensuringthat the remaining database server processes recognize that the machineis no longer a database server.A cell-wide service outage is possible during the election of a newcoordinator for the VL Server, but it normally lasts less than five minutes.Messages tracing the progress of the election appear on the console.Repeat this command on each of your cell’s database server machines inquick succession. Begin with the machine with the lowest IP address.
% bos restart <machine name> kaserver buserver ptserver vlserver
If an error occurs, restart all server processes on the database servermachines again by using one of the following methods:v Issue the bos restart command with the -bosserver flag for each
database server machine
Chapter 3. Installing Additional Server Machines 123

v Reboot each database server machine, either using the bos execcommand or at its console
124 AFS: Quick Beginnings

Chapter 4. Installing Additional Client Machines
This chapter describes how to install AFS client machines after you haveinstalled the first AFS machine. Some parts of the installation differ dependingon whether or not the new client is of the same AFS system type (uses thesame AFS binaries) as a previously installed client machine.
Summary of Procedures
1. Incorporate AFS into the machine’s kernel2. Define the machine’s cell membership3. Define cache location and size4. Create the /usr/vice/etc/CellServDB file, which determines which foreign
cells the client can access in addition to the local cell5. Create the /afs directory and start the Cache Manager6. Create and mount volumes for housing AFS client binaries (necessary only
for clients of a new system type)7. Create a link from the local /usr/afsws directory to the AFS directory
housing the AFS client binaries8. Modify the machine’s authentication system to enable AFS users to obtain
tokens at login
Creating AFS Directories on the Local Disk
Create the /usr/vice/etc directory on the local disk, to house client binaries andconfiguration files. Subsequent instructions copy files from the AFS CD-ROMinto them. Create the /cdrom directory as a mount point for the CD-ROM, if itdoes not already exist.
# mkdir /usr/vice
# mkdir /usr/vice/etc
# mkdir /cdrom
© Copyright IBM Corp. 1989, 2000 125

Performing Platform-Specific Procedures
Every AFS client machine’s kernel must incorporate AFS modifications. Somesystem types use a dynamic kernel loader program, whereas on other systemtypes you build AFS modifications into a static kernel. Some system typessupport both methods.
Also modify the machine’s authentication system so that users obtain an AFStoken as they log into the local file system. Using AFS is simpler and moreconvenient for your users if you make the modifications on all clientmachines. Otherwise, users must perform a two-step login procedure (login tothe local file system and then issue the klog command). For further discussionof AFS authentication, see the chapter in the IBM AFS Administration Guideabout cell configuration and administration issues.
For convenience, the following sections group the two procedures by systemtype. Proceed to the appropriate section.v “Getting Started on AIX Systems”v “Getting Started on Digital UNIX Systems” on page 129v “Getting Started on HP-UX Systems” on page 132v “Getting Started on IRIX Systems” on page 137v “Getting Started on Linux Systems” on page 141v “Getting Started on Solaris Systems” on page 144
Getting Started on AIX Systems
In this section you load AFS into the AIX kernel. Then incorporate AFSmodifications into the machine’s secondary authentication system, if you wishto enable AFS login.
Loading AFS into the AIX Kernel
The AIX kernel extension facility is the dynamic kernel loader provided byIBM Corporation. AIX does not support incorporation of AFS modificationsduring a kernel build.
For AFS to function correctly, the kernel extension facility must run each timethe machine reboots, so the AFS initialization script (included in the AFSdistribution) invokes it automatically. In this section you copy the script to theconventional location and edit it to select the appropriate options dependingon whether NFS is also to run.
126 AFS: Quick Beginnings

After editing the script, you run it to incorporate AFS into the kernel. In alater section you verify that the script correctly initializes the Cache Manager,then configure the AIX inittab file so that the script runs automatically atreboot.1. Mount the AFS CD-ROM for AIX on the local /cdrom directory. For
instructions on mounting CD-ROMs (either locally or remotely via NFS),see your AIX documentation. Then change directory as indicated.
# cd /cdrom/rs_aix42/root.client/usr/vice/etc
2. Copy the AFS kernel library files to the local /usr/vice/etc/dkload directory,and the AFS initialization script to the /etc directory.
# cp -rp dkload /usr/vice/etc
# cp -p rc.afs /etc/rc.afs
3. Edit the /etc/rc.afs script, setting the NFS variable as indicated.If the machine is not to function as an NFS/AFS Translator, set the NFSvariable as follows.
NFS=$NFS_NONE
If the machine is to function as an NFS/AFS Translator and is runningAIX 4.2.1 or higher, set the NFS variable as follows. Note that NFS mustalready be loaded into the kernel, which happens automatically onsystems running AIX 4.1.1 and later, as long as the file /etc/exports exists.
NFS=$NFS_IAUTH
4. Invoke the /etc/rc.afs script to load AFS modifications into the kernel. Youcan ignore any error messages about the inability to start the BOS Serveror the Cache Manager or AFS client.
# /etc/rc.afs
Enabling AFS Login on AIX Systems
Now incorporate AFS into the AIX secondary authentication system.1. Issue the ls command to verify that the afs_dynamic_auth and
afs_dynamic_kerbauth programs are installed in the local /usr/vice/etcdirectory.
# ls /usr/vice/etc
Chapter 4. Installing Additional Client Machines 127

If the files do not exist, mount the AFS CD-ROM for AIX (if it is notalready), change directory as indicated, and copy them.
# cd /cdrom/rs_aix42/root.client/usr/vice/etc
# cp -p afs_dynamic* /usr/vice/etc
2. Edit the local /etc/security/user file, making changes to the indicatedstanzas:v In the default stanza, set the registry attribute to DCE (not to AFS), as
follows:
registry = DCE
v In the default stanza, set the SYSTEM attribute as indicated.If the machine is an AFS client only, set the following value:
SYSTEM = "AFS OR (AFS[UNAVAIL] AND compat[SUCCESS])"
If the machine is both an AFS and a DCE client, set the following value(it must appear on a single line in the file):
SYSTEM = "DCE OR DCE[UNAVAIL] OR AFS OR (AFS[UNAVAIL] \AND compat[SUCCESS])"
v In the root stanza, set the registry attribute as follows. It enables thelocal superuser root to log into the local file system only, based on thepassword listed in the local password file.
root:registry = files
3. Edit the local /etc/security/login.cfg file, creating or editing the indicatedstanzas:v In the DCE stanza, set the program attribute as follows.
If you use the AFS Authentication Server (kaserver process):
DCE:program = /usr/vice/etc/afs_dynamic_auth
If you use a Kerberos implementation of AFS authentication:
DCE:program = /usr/vice/etc/afs_dynamic_kerbauth
v In the AFS stanza, set the program attribute as follows.
128 AFS: Quick Beginnings

If you use the AFS Authentication Server (kaserver process):
AFS:program = /usr/vice/etc/afs_dynamic_auth
If you use a Kerberos implementation of AFS authentication:
AFS:program = /usr/vice/etc/afs_dynamic_kerbauth
4. Proceed to “Loading and Creating Client Files” on page 149.
Getting Started on Digital UNIX Systems
In this section you build AFS into the Digital UNIX kernel. Then incorporateAFS modifications into the machine’s Security Integration Architecture (SIA)matrix, if you wish to enable AFS login.
Building AFS into the Digital UNIX Kernel
On Digital UNIX systems, you must build AFS modifications into a new statickernel; Digital UNIX does not support dynamic loading. If the machine’shardware and software configuration exactly matches another Digital UNIXmachine on which AFS is already built into the kernel, you can choose tocopy the kernel from that machine to this one. In general, however, it is betterto build AFS modifications into the kernel on each machine according to thefollowing instructions.1. Create a copy called AFS of the basic kernel configuration file included
in the Digital UNIX distribution as /usr/sys/conf/machine_name, wheremachine_name is the machine’s hostname in all uppercase letters.
# cd /usr/sys/conf
# cp machine_name AFS
2. Add AFS to the list of options in the configuration file you created in theprevious step, so that the result looks like the following:
. .
. .options UFSoptions NFSoptions AFS
. .
. .
3. Add an entry for AFS to two places in the file /usr/sys/conf/files.
Chapter 4. Installing Additional Client Machines 129

v Add a line for AFS to the list of OPTIONS, so that the result looks likethe following:
. . .
. . .OPTIONS/nfs optional nfsOPTIONS/afs optional afsOPTIONS/nfs_server optional nfs_server
. . .
. . .
v Add an entry for AFS to the list of MODULES, so that the result looks likethe following:
. . . .
. . . .#MODULE/nfs_server optional nfs_server Binarynfs/nfs_server.c module nfs_server optimize -g3nfs/nfs3_server.c module nfs_server optimize -g3#MODULE/afs optional afs Binaryafs/libafs.c module afs#
4. Add an entry for AFS to two places in the file /usr/sys/vfs/vfs_conf.c.v Add AFS to the list of defined file systems, so that the result looks like
the following:. .. .
#include <afs.h>#if defined(AFS) && AFS
extern struct vfsops afs_vfsops;#endif
. .
. .
v Put a declaration for AFS in the vfssw[] table’s MOUNT_ADDON slot,so that the result looks like the following:
. . .
. . .&fdfs_vfsops, "fdfs", /* 12 = MOUNT_FDFS */
#if defined(AFS)&afs_vfsops, "afs",
#else(struct vfsops *)0, "", /* 13 = MOUNT_ADDON */
#endif#if NFS && INFS_DYNAMIC
&nfs3_vfsops, "nfsv3", /* 14 = MOUNT_NFS3 */
130 AFS: Quick Beginnings

5. Mount the AFS CD-ROM for Digital UNIX on the local /cdrom directory.For instructions on mounting CD-ROMs (either locally or remotely viaNFS), see your Digital UNIX documentation. Then change directory asindicated.
# cd /cdrom/alpha_dux40/root.client
6. Copy the AFS initialization script to the local directory for initializationfiles (by convention, /sbin/init.d on Digital UNIX machines). Note theremoval of the .rc extension as you copy the script.
# cp usr/vice/etc/afs.rc /sbin/init.d/afs
7. Copy the AFS kernel module to the local /usr/sys/BINARY directory.If the machine’s kernel supports NFS server functionality:
# cp bin/libafs.o /usr/sys/BINARY/afs.mod
If the machine’s kernel does not support NFS server functionality:
# cp bin/libafs.nonfs.o /usr/sys/BINARY/afs.mod
8. Configure and build the kernel. Respond to any prompts by pressing<Return>. The resulting kernel resides in the file /sys/AFS/vmunix.
# doconfig -c AFS
9. Rename the existing kernel file and copy the new, AFS-modified file tothe standard location.
# mv /vmunix /vmunix_noafs
# cp /sys/AFS/vmunix /vmunix
10. Reboot the machine to start using the new kernel, and login again as thesuperuser root.
# cd /
# shutdown -r now
login: rootPassword: root_password
Chapter 4. Installing Additional Client Machines 131

Enabling AFS Login on Digital UNIX Systems
On Digital UNIX systems, the AFS initialization script automaticallyincorporates the AFS authentication library file into the Security IntegrationArchitecture (SIA) matrix on the machine, so that users with AFS accountsobtain a token at login. In this section you copy the library file to theappropriate location.
For more information on SIA, see the Digital UNIX reference page formatrix.conf, or consult the section on security in your Digital UNIXdocumentation.
Note: If the machine runs both the DCE and AFS client software, AFS muststart after DCE. Consult the AFS initialization script for suggestedsymbolic links to create for correct ordering. Also, the system startupscript order must initialize SIA before any long-running process thatuses authentication.
Perform the following steps to enable AFS login.1. Mount the AFS CD-ROM for Digital UNIX on the local /cdrom directory, if
it is not already. Change directory as indicated.
# cd /cdrom/alpha_dux40/lib/afs
2. Copy the appropriate AFS authentication library file to the local /usr/shlibdirectory.If you use the AFS Authentication Server (kaserver process) in the cell:
# cp libafssiad.so /usr/shlib
If you use a Kerberos implementation of AFS authentication, rename thelibrary file as you copy it:
# cp libafssiad.krb.so /usr/shlib/libafssiad.so
3. Proceed to “Loading and Creating Client Files” on page 149.
Getting Started on HP-UX Systems
In this section you build AFS into the HP-UX kernel. Then incorporate AFSmodifications into the machine’s Pluggable Authentication Module (PAM)system, if you wish to enable AFS login.
132 AFS: Quick Beginnings

Building AFS into the HP-UX Kernel
On HP-UX systems, you must build AFS modifications into a new statickernel; HP-UX does not support dynamic loading. If the machine’s hardwareand software configuration exactly matches another HP-UX machine on whichAFS is already built into the kernel, you can choose to copy the kernel fromthat machine to this one. In general, however, it is better to build AFSmodifications into the kernel on each machine according to the followinginstructions.1. Move the existing kernel-related files to a safe location.
# cp /stand/vmunix /stand/vmunix.noafs
# cp /stand/system /stand/system.noafs
2. Mount the AFS CD-ROM for HP-UX on the local /cdrom directory. Forinstructions on mounting CD-ROMs (either locally or remotely via NFS),see your HP-UX documentation. Then change directory as indicated.
# cd /cdrom/hp_ux110/root.client
3. Copy the AFS initialization file to the local directory for initialization files(by convention, /sbin/init.d on HP-UX machines). Note the removal of the.rc extension as you copy the file.
# cp usr/vice/etc/afs.rc /sbin/init.d/afs
4. Copy the file afs.driver to the local /usr/conf/master.d directory, changingits name to afs as you do.
# cp usr/vice/etc/afs.driver /usr/conf/master.d/afs
5. Copy the AFS kernel module to the local /usr/conf/lib directory.If the machine’s kernel supports NFS server functionality:
# cp bin/libafs.a /usr/conf/lib
If the machine’s kernel does not support NFS server functionality, changethe file’s name as you copy it:
# cp bin/libafs.nonfs.a /usr/conf/lib/libafs.a
6. Incorporate the AFS driver into the kernel, either using the SAM programor a series of individual commands.v To use the SAM program:
Chapter 4. Installing Additional Client Machines 133

a. Invoke the SAM program, specifying the hostname of the localmachine as local_hostname. The SAM graphical user interface popsup.
# sam -display local_hostname:0
b. Choose the Kernel Configuration icon, then the Drivers icon. Fromthe list of drivers, select afs.
c. Open the pull-down Actions menu and choose the Add Driver toKernel option.
d. Open the Actions menu again and choose the Create a New Kerneloption.
e. Confirm your choices by choosing Yes and OK when prompted bysubsequent pop-up windows. The SAM program builds the kerneland reboots the system.
f. Login again as the superuser root.
login: rootPassword: root_password
v To use individual commands:a. Edit the file /stand/system, adding an entry for afs to the Subsystems
section.b. Change to the /stand/build directory and issue the mk_kernel
command to build the kernel.
# cd /stand/build
# mk_kernel
c. Move the new kernel to the standard location (/stand/vmunix),reboot the machine to start using it, and login again as the superuserroot.
# mv /stand/build/vmunix_test /stand/vmunix
# cd /
# shutdown -r now
login: rootPassword: root_password
134 AFS: Quick Beginnings

Enabling AFS Login on HP-UX Systems
At this point you incorporate AFS into the operating system’s PluggableAuthentication Module (PAM) scheme. PAM integrates all authenticationmechanisms on the machine, including login, to provide the securityinfrastructure for authenticated access to and from the machine.
Explaining PAM is beyond the scope of this document. It is assumed that youunderstand the syntax and meanings of settings in the PAM configuration file(for example, how the other entry works, the effect of marking an entry asrequired, optional, or sufficient, and so on).
The following instructions explain how to alter the entries in the PAMconfiguration file for each service for which you wish to use AFSauthentication. Other configurations possibly also work, but the instructionsspecify the recommended and tested configuration.
Note: The instructions specify that you mark each entry as optional.However, marking some modules as optional can mean that they grantaccess to the corresponding service even when the user does not meetall of the module’s requirements. In some operating system revisions,for example, if you mark as optional the module that controls login viaa dial-up connection, it allows users to login without providing apassword. See the IBM AFS Release Notes for a discussion of anylimitations that apply to this operating system.
Also, with some operating system versions you must install patches forPAM to interact correctly with certain authentication programs. Fordetails, see the IBM AFS Release Notes.
The recommended AFS-related entries in the PAM configuration file make useof one or more of the following three attributes.
try_first_passThis is a standard PAM attribute that can be included on entries afterthe first one for a service; it directs the module to use the passwordthat was provided to the first module. For the AFS module, it meansthat AFS authentication succeeds if the password provided to themodule listed first is the user’s correct AFS password. For furtherdiscussion of this attribute and its alternatives, see the operatingsystem’s PAM documentation.
ignore_rootThis attribute, specific to the AFS PAM module, directs it to ignore notonly the local superuser root, but also any user with UID 0 (zero).
Chapter 4. Installing Additional Client Machines 135

setenv_password_expiresThis attribute, specific to the AFS PAM module, sets the environmentvariable PASSWORD_EXPIRES to the expiration date of the user’sAFS password, which is recorded in the Authentication Database.
Perform the following steps to enable AFS login.1. Mount the AFS CD-ROM for HP-UX on the /cdrom directory, if it is not
already. Then change directory as indicated.
# cd /usr/lib/security
2. Copy the AFS authentication library file to the /usr/lib/security directory.Then create a symbolic link to it whose name does not mention theversion. Omitting the version eliminates the need to edit the PAMconfiguration file if you later update the library file.If you use the AFS Authentication Server (kaserver process) in the cell:
# cp /cdrom/hp_ux110/lib/pam_afs.so.1 .
# ln -s pam_afs.so.1 pam_afs.so
If you use a Kerberos implementation of AFS authentication:
# cp /cdrom/hp_ux110/lib/pam_afs.krb.so.1 .
# ln -s pam_afs.krb.so.1 pam_afs.so
3. Edit the Authentication management section of the HP-UX PAMconfiguration file, /etc/pam.conf by convention. The entries in this sectionhave the value auth in their second field.First edit the standard entries, which refer to the HP-UX PAM module(usually, the file /usr/lib/security/libpam_unix.1) in their fourth field. Foreach service for which you want to use AFS authentication, edit the thirdfield of its entry to read optional. The pam.conf file in the HP-UXdistribution usually includes standard entries for the login and ftpservices, for instance.If there are services for which you want to use AFS authentication, but forwhich the pam.conf file does not already include a standard entry, youmust create that entry and place the value optional in its third field. Forinstance, the HP-UX pam.conf file does not usually include standardentries for the remsh or telnet services.Then create an AFS-related entry for each service, placing it immediatelybelow the standard entry. The following example shows what theAuthentication Management section looks like after you have you edited or
136 AFS: Quick Beginnings

created entries for the services mentioned previously. Note that theexample AFS entries appear on two lines only for legibility.
login auth optional /usr/lib/security/libpam_unix.1login auth optional /usr/lib/security/pam_afs.so \
try_first_pass ignore_root setenv_password_expiresftp auth optional /usr/lib/security/libpam_unix.1ftp auth optional /usr/lib/security/pam_afs.so \
try_first_pass ignore_rootremsh auth optional /usr/lib/security/libpam_unix.1remsh auth optional /usr/lib/security/pam_afs.so \
try_first_pass ignore_roottelnet auth optional /usr/lib/security/libpam_unix.1telnet auth optional /usr/lib/security/pam_afs.so \
try_first_pass ignore_root setenv_password_expires
4. If you use the Common Desktop Environment (CDE) on the machine andwant users to obtain an AFS token as they log in, also add or edit thefollowing four entries in the Authentication management section. Note thatthe AFS-related entries appear on two lines here only for legibility.
dtlogin auth optional /usr/lib/security/libpam_unix.1dtlogin auth optional /usr/lib/security/pam_afs.so \
try_first_pass ignore_rootdtaction auth optional /usr/lib/security/libpam_unix.1dtaction auth optional /usr/lib/security/pam_afs.so \
try_first_pass ignore_root
5. Proceed to “Loading and Creating Client Files” on page 149.
Getting Started on IRIX Systems
In this section you incorporate AFS into the IRIX kernel, choosing one of twomethods:v Dynamic loading using the ml program distributed by Silicon Graphics,
Incorporated (SGI).v Building a new static kernel.
Then see “Enabling AFS Login on IRIX Systems” on page 141 to read aboutintegrated AFS login on IRIX systems.
In preparation for either dynamic loading or kernel building, perform thefollowing procedures:1. Mount the AFS CD-ROM for IRIX on the /cdrom directory. For instructions
on mounting CD-ROMs (either locally or remotely via NFS), see your IRIXdocumentation. Then change directory as indicated.
Chapter 4. Installing Additional Client Machines 137

# cd /cdrom/sgi_65/root.client
2. Copy the AFS initialization script to the local directory for initializationfiles (by convention, /etc/init.d on IRIX machines). Note the removal of the.rc extension as you copy the script.
# cp -p usr/vice/etc/afs.rc /etc/init.d/afs
3. Issue the uname -m command to determine the machine’s CPU boardtype. The IPxx value in the output must match one of the supported CPUboard types listed in the IBM AFS Release Notes for the current version ofAFS.
# uname -m
4. Proceed to either “Loading AFS into the IRIX Kernel” or “Building AFSinto the IRIX Kernel” on page 139.
Loading AFS into the IRIX Kernel
The ml program is the dynamic kernel loader provided by SGI for IRIXsystems. If you use it rather than building AFS modifications into a statickernel, then for AFS to function correctly the ml program must run each timethe machine reboots. Therefore, the AFS initialization script (included on theAFS CD-ROM) invokes it automatically when the afsml configuration variableis activated. In this section you activate the variable and run the script.
In a later section you verify that the script correctly initializes the CacheManager, then create the links that incorporate AFS into the IRIX startup andshutdown sequence.1. Create the local /usr/vice/etc/sgiload directory to house the AFS kernel
library file.
# mkdir /usr/vice/etc/sgiload
2. Copy the appropriate AFS kernel library file to the /usr/vice/etc/sgiloaddirectory. The IPxx portion of the library file name must match the valuepreviously returned by the uname -m command. Also choose the fileappropriate to whether the machine’s kernel supports NFS serverfunctionality (NFS must be supported for the machine to act as anNFS/AFS Translator). Single- and multiprocessor machines use the samelibrary file.
138 AFS: Quick Beginnings

(You can choose to copy all of the kernel library files into the/usr/vice/etc/sgiload directory, but they require a significant amount ofspace.)If the machine’s kernel supports NFS server functionality:
# cp -p usr/vice/etc/sgiload/libafs.IPxx.o /usr/vice/etc/sgiload
If the machine’s kernel does not support NFS server functionality:
# cp -p usr/vice/etc/sgiload/libafs.IPxx.nonfs.o \/usr/vice/etc/sgiload
3. Issue the chkconfig command to activate the afsml configuration variable.
# /etc/chkconfig -f afsml on
If the machine is to function as an NFS/AFS Translator and the kernelsupports NFS server functionality, activate the afsxnfs variable.
# /etc/chkconfig -f afsxnfs on
4. Run the /etc/init.d/afs script to load AFS extensions into the kernel. Thescript invokes the ml command, automatically determining which kernellibrary file to use based on this machine’s CPU type and the activationstate of the afsxnfs variable.You can ignore any error messages about the inability to start the BOSServer or the Cache Manager or AFS client.
# /etc/init.d/afs start
5. Proceed to “Enabling AFS Login on IRIX Systems” on page 141.
Building AFS into the IRIX Kernel
If you prefer to build a kernel, and the machine’s hardware and softwareconfiguration exactly matches another IRIX machine on which AFS is alreadybuilt into the kernel, you can choose to copy the kernel from that machine tothis one. In general, however, it is better to build AFS modifications into thekernel on each machine according to the following instructions.1. Copy the kernel initialization file afs.sm to the local /var/sysgen/system
directory, and the kernel master file afs to the local /var/sysgen/master.ddirectory.
Chapter 4. Installing Additional Client Machines 139

# cp -p bin/afs.sm /var/sysgen/system
# cp -p bin/afs /var/sysgen/master.d
2. Copy the appropriate AFS kernel library file to the local file/var/sysgen/boot/afs.a; the IPxx portion of the library file name mustmatch the value previously returned by the uname -m command. Alsochoose the file appropriate to whether the machine’s kernel supports NFSserver functionality (NFS must be supported for the machine to act as anNFS/AFS Translator). Single- and multiprocessor machines use the samelibrary file.If the machine’s kernel supports NFS server functionality:
# cp -p bin/libafs.IPxx.a /var/sysgen/boot/afs.a
If the machine’s kernel does not support NFS server functionality:
# cp -p bin/libafs.IPxx.nonfs.a /var/sysgen/boot/afs.a
3. Issue the chkconfig command to deactivate the afsml configurationvariable.
# /etc/chkconfig -f afsml off
If the machine is to function as an NFS/AFS Translator and the kernelsupports NFS server functionality, activate the afsxnfs variable.
# /etc/chkconfig -f afsxnfs on
4. Copy the existing kernel file, /unix, to a safe location. Compile the newkernel, which is created in the file /unix.install. It overwrites the existing/unix file when the machine reboots in the next step.
# cp /unix /unix_noafs
# autoconfig
5. Reboot the machine to start using the new kernel, and login again as thesuperuser root.
# cd /
# shutdown -i6 -g0 -y
140 AFS: Quick Beginnings

login: rootPassword: root_password
6. Proceed to “Enabling AFS Login on IRIX Systems”.
Enabling AFS Login on IRIX Systems
The standard IRIX command-line login program and the graphical xdm loginprogram both automatically grant an AFS token when AFS is incorporatedinto the machine’s kernel. However, some IRIX distributions use another loginutility by default, and it does not necessarily incorporate the required AFSmodifications. If that is the case, you must disable the default utility if youwant AFS users to obtain AFS tokens at login. For further discussion, see theIBM AFS Release Notes.
If you configure the machine to use an AFS-modified login utility, then theafsauthlib.so and afskauthlib.so files (included in the AFS distribution) mustreside in the /usr/vice/etc directory. Issue the ls command to verify.
# ls /usr/vice/etc
If the files do not exist, mount the AFS CD-ROM for IRIX (if it is not already),change directory as indicated, and copy them.
# cd /cdrom/sgi_65/root.client/usr/vice/etc
# cp -p *authlib* /usr/vice/etc
After taking any necessary action, proceed to “Loading and Creating ClientFiles” on page 149.
Getting Started on Linux Systems
In this section you load AFS into the Linux kernel. Then incorporate AFSmodifications into the machine’s Pluggable Authentication Module (PAM)system, if you wish to enable AFS login.
Loading AFS into the Linux Kernel
The insmod program is the dynamic kernel loader for Linux. Linux does notsupport incorporation of AFS modifications during a kernel build.
For AFS to function correctly, the insmod program must run each time themachine reboots, so the AFS initialization script (included on the AFS
Chapter 4. Installing Additional Client Machines 141

CD-ROM) invokes it automatically. The script also includes commands thatselect the appropriate AFS library file automatically. In this section you runthe script.
In a later section you also verify that the script correctly initializes the CacheManager, then activate a configuration variable, which results in the scriptbeing incorporated into the Linux startup and shutdown sequence.1. Mount the AFS CD-ROM for Linux on the local /cdrom directory. For
instructions on mounting CD-ROMs (either locally or remotely via NFS),see your Linux documentation. Then change directory as indicated.
# cd /cdrom/i386_linux22/root.client/usr/vice/etc
2. Copy the AFS kernel library files to the local /usr/vice/etc/modloaddirectory. The filenames for the libraries have the format libafs-version.o,where version indicates the kernel build level. The string .mp in the versionindicates that the file is appropriate for machines running a multiprocessorkernel.
# cp -rp modload /usr/vice/etc
3. Copy the AFS initialization script to the local directory for initializationfiles (by convention, /etc/rc.d/init.d on Linux machines). Note the removalof the .rc extension as you copy the script.
# cp -p afs.rc /etc/rc.d/init.d/afs
4. Run the AFS initialization script to load AFS extensions into the kernel.You can ignore any error messages about the inability to start the BOSServer or the Cache Manager or AFS client.
# /etc/rc.d/init.d/afs start
Enabling AFS Login on Linux Systems
At this point you incorporate AFS into the operating system’s PluggableAuthentication Module (PAM) scheme. PAM integrates all authenticationmechanisms on the machine, including login, to provide the securityinfrastructure for authenticated access to and from the machine.
Explaining PAM is beyond the scope of this document. It is assumed that youunderstand the syntax and meanings of settings in the PAM configuration file(for example, how the other entry works, the effect of marking an entry asrequired, optional, or sufficient, and so on).
142 AFS: Quick Beginnings

The following instructions explain how to alter the entries in the PAMconfiguration file for each service for which you wish to use AFSauthentication. Other configurations possibly also work, but the instructionsspecify the recommended and tested configuration.
The recommended AFS-related entries in the PAM configuration file make useof one or more of the following three attributes.
try_first_passThis is a standard PAM attribute that can be included on entries afterthe first one for a service; it directs the module to use the passwordthat was provided to the first module. For the AFS module, it meansthat AFS authentication succeeds if the password provided to themodule listed first is the user’s correct AFS password. For furtherdiscussion of this attribute and its alternatives, see the operatingsystem’s PAM documentation.
ignore_rootThis attribute, specific to the AFS PAM module, directs it to ignore notonly the local superuser root, but also any user with UID 0 (zero).
setenv_password_expiresThis attribute, specific to the AFS PAM module, sets the environmentvariable PASSWORD_EXPIRES to the expiration date of the user’sAFS password, which is recorded in the Authentication Database.
Perform the following steps to enable AFS login.1. Mount the AFS CD-ROM for Linux on the /cdrom directory, if it is not
already. Then change to the directory for PAM modules, which dependson which Linux distribution you are using.If you are using a Linux distribution from Red Hat Software:
# cd /lib/security
If you are using another Linux distribution:
# cd /usr/lib/security
2. Copy the appropriate AFS authentication library file to the directory towhich you changed in the previous step. Create a symbolic link whosename does not mention the version. Omitting the version eliminates theneed to edit the PAM configuration file if you later update the library file.If you use the AFS Authentication Server (kaserver process):
# cp /cdrom/i386_linux22/lib/pam_afs.so.1 .
# ln -s pam_afs.so.1 pam_afs.so
Chapter 4. Installing Additional Client Machines 143

If you use a Kerberos implementation of AFS authentication:
# cp /cdrom/i386_linux22/lib/pam_afs.krb.so.1 .
# ln -s pam_afs.krb.so.1 pam_afs.so
3. For each service with which you want to use AFS authentication, insert anentry for the AFS PAM module into the auth section of the service’s PAMconfiguration file. (Linux uses a separate configuration file for each service,unlike some other operating systems which list all services in a single file.)Mark the entry as sufficient in the second field.Place the AFS entry below any entries that impose conditions under whichyou want the service to fail for a user who does not meet the entry’srequirements. Mark these entries required. Place the AFS entry above anyentries that need to execute only if AFS authentication fails.Insert the following AFS entry if using the Red Hat distribution:
auth sufficient /lib/security/pam_afs.so try_first_pass ignore_root
Insert the following AFS entry if using another distribution:
auth sufficient /usr/lib/security/pam_afs.so try_first_pass ignore_root
The following example illustrates the recommended configuration of theconfiguration file for the login service (/etc/pam.d/login) on a machineusing the Red Hat distribution.
#%PAM-1.0auth required /lib/security/pam_securetty.soauth required /lib/security/pam_nologin.soauth sufficient /lib/security/pam_afs.so try_first_pass ignore_rootauth required /lib/security/pam_pwdb.so shadow nullokaccount required /lib/security/pam_pwdb.sopassword required /lib/security/pam_cracklib.sopassword required /lib/security/pam_pwdb.so shadow nullok use_authtoksession required /lib/security/pam_pwdb.so
4. Proceed to “Loading and Creating Client Files” on page 149.
Getting Started on Solaris Systems
In this section you load AFS into the Solaris kernel. Then incorporate AFSmodifications into the machine’s Pluggable Authentication Module (PAM)system, if you wish to enable AFS login.
144 AFS: Quick Beginnings

Loading AFS into the Solaris Kernel
The modload program is the dynamic kernel loader provided by SunMicrosystems for Solaris systems. Solaris does not support incorporation ofAFS modifications during a kernel build.
For AFS to function correctly, the modload program must run each time themachine reboots, so the AFS initialization script (included on the AFSCD-ROM) invokes it automatically. In this section you copy the appropriateAFS library file to the location where the modload program accesses it andthen run the script.
In a later section you verify that the script correctly initializes the CacheManager, then create the links that incorporate AFS into the Solaris startupand shutdown sequence.1. Mount the AFS CD-ROM for Solaris on the /cdrom directory. For
instructions on mounting CD-ROMs (either locally or remotely via NFS),see your Solaris documentation. Then change directory as indicated.
# cd /cdrom/sun4x_56/root.client/usr/vice/etc
2. Copy the AFS initialization script to the local directory for initializationfiles (by convention, /etc/init.d on Solaris machines). Note the removal ofthe .rc extension as you copy the script.
# cp -p afs.rc /etc/init.d/afs
3. Copy the appropriate AFS kernel library file to the local file /kernel/fs/afs.If the machine is running Solaris 2.6 or the 32–bit version of Solaris 7, itskernel supports NFS server functionality, and the nfsd process is running:
# cp -p modload/libafs.o /kernel/fs/afs
If the machine is running Solaris 2.6 or the 32–bit version of Solaris 7, andits kernel does not support NFS server functionality or the nfsd process isnot running:
# cp -p modload/libafs.nonfs.o /kernel/fs/afs
If the machine is running the 64–bit version of Solaris 7, its kernelsupports NFS server functionality, and the nfsd process is running:
# cp -p modload/libafs64.o /kernel/fs/sparcv9/afs
Chapter 4. Installing Additional Client Machines 145

If the machine is running the 64–bit version of Solaris 7, and its kerneldoes not support NFS server functionality or the nfsd process is notrunning:
# cp -p modload/libafs64.nonfs.o /kernel/fs/sparcv9/afs
4. Run the AFS initialization script to load AFS modifications into the kernel.You can ignore any error messages about the inability to start the BOSServer or the Cache Manager or AFS client.
# /etc/init.d/afs start
When an entry called afs does not already exist in the local/etc/name_to_sysnum file, the script automatically creates it and rebootsthe machine to start using the new version of the file. If this happens, login again as the superuser root after the reboot and run the initializationscript again. This time the required entry exists in the/etc/name_to_sysnum file, and the modload program runs.
login: rootPassword: root_password
# /etc/init.d/afs start
Enabling AFS Login on Solaris Systems
At this point you incorporate AFS into the operating system’s PluggableAuthentication Module (PAM) scheme. PAM integrates all authenticationmechanisms on the machine, including login, to provide the securityinfrastructure for authenticated access to and from the machine.
Explaining PAM is beyond the scope of this document. It is assumed that youunderstand the syntax and meanings of settings in the PAM configuration file(for example, how the other entry works, the effect of marking an entry asrequired, optional, or sufficient, and so on).
The following instructions explain how to alter the entries in the PAMconfiguration file for each service for which you wish to use AFSauthentication. Other configurations possibly also work, but the instructionsspecify the recommended and tested configuration.
Note: The instructions specify that you mark each entry as optional.However, marking some modules as optional can mean that they grantaccess to the corresponding service even when the user does not meetall of the module’s requirements. In some operating system revisions,for example, if you mark as optional the module that controls login via
146 AFS: Quick Beginnings

a dial-up connection, it allows users to login without providing apassword. See the IBM AFS Release Notes for a discussion of anylimitations that apply to this operating system.
Also, with some operating system versions you must install patches forPAM to interact correctly with certain authentication programs. Fordetails, see the IBM AFS Release Notes.
The recommended AFS-related entries in the PAM configuration file make useof one or more of the following three attributes.
try_first_passThis is a standard PAM attribute that can be included on entries afterthe first one for a service; it directs the module to use the passwordthat was provided to the first module. For the AFS module, it meansthat AFS authentication succeeds if the password provided to themodule listed first is the user’s correct AFS password. For furtherdiscussion of this attribute and its alternatives, see the operatingsystem’s PAM documentation.
ignore_rootThis attribute, specific to the AFS PAM module, directs it to ignore notonly the local superuser root, but also any user with UID 0 (zero).
setenv_password_expiresThis attribute, specific to the AFS PAM module, sets the environmentvariable PASSWORD_EXPIRES to the expiration date of the user’sAFS password, which is recorded in the Authentication Database.
Perform the following steps to enable AFS login.1. Mount the AFS CD-ROM for Solaris on the /cdrom directory, if it is not
already. Then change directory as indicated.
# cd /usr/lib/security
2. Copy the AFS authentication library file to the /usr/lib/security directory.Then create a symbolic link to it whose name does not mention theversion. Omitting the version eliminates the need to edit the PAMconfiguration file if you later update the library file.If you use the AFS Authentication Server (kaserver process):
# cp /cdrom/sun4x_56/lib/pam_afs.so.1 .
# ln -s pam_afs.so.1 pam_afs.so
If you use a Kerberos implementation of AFS authentication:
Chapter 4. Installing Additional Client Machines 147

# cp /cdrom/sun4x_56/lib/pam_afs.krb.so.1 .
# ln -s pam_afs.krb.so.1 pam_afs.so
3. Edit the Authentication management section of the Solaris PAMconfiguration file, /etc/pam.conf by convention. The entries in this sectionhave the value auth in their second field.First edit the standard entries, which refer to the Solaris PAM module(usually, the file /usr/lib/security/pam_unix.so.1) in their fourth field. Foreach service for which you want to use AFS authentication, edit the thirdfield of its entry to read optional. The pam.conf file in the Solarisdistribution usually includes standard entries for the login, rlogin, and rshservices, for instance.If there are services for which you want to use AFS authentication, but forwhich the pam.conf file does not already include a standard entry, youmust create that entry and place the value optional in its third field. Forinstance, the Solaris pam.conf file does not usually include standardentries for the ftp or telnet services.Then create an AFS-related entry for each service, placing it immediatelybelow the standard entry. The following example shows what theAuthentication Management section looks like after you have you edited orcreated entries for the services mentioned previously. Note that theexample AFS entries appear on two lines only for legibility.
login auth optional /usr/lib/security/pam_unix.so.1login auth optional /usr/lib/security/pam_afs.so \
try_first_pass ignore_root setenv_password_expiresrlogin auth optional /usr/lib/security/pam_unix.so.1rlogin auth optional /usr/lib/security/pam_afs.so \
try_first_pass ignore_root setenv_password_expiresrsh auth optional /usr/lib/security/pam_unix.so.1rsh auth optional /usr/lib/security/pam_afs.so \
try_first_pass ignore_rootftp auth optional /usr/lib/security/pam_unix.so.1ftp auth optional /usr/lib/security/pam_afs.so \
try_first_pass ignore_roottelnet auth optional /usr/lib/security/pam_unix.so.1telnet auth optional /usr/lib/security/pam_afs.so \
try_first_pass ignore_root setenv_password_expires
4. If you use the Common Desktop Environment (CDE) on the machine andwant users to obtain an AFS token as they log in, also add or edit thefollowing four entries in the Authentication management section. Note thatthe AFS-related entries appear on two lines here only for legibility.
dtlogin auth optional /usr/lib/security/pam_unix.so.1dtlogin auth optional /usr/lib/security/pam_afs.so \
148 AFS: Quick Beginnings

try_first_pass ignore_rootdtsession auth optional /usr/lib/security/pam_unix.so.1dtsession auth optional /usr/lib/security/pam_afs.so \
try_first_pass ignore_root
5. Some Solaris distributions include a script that locates and removesunneeded files from various file systems. Its conventional location is/usr/lib/fs/nfs/nfsfind. The script generally uses an argument to the findcommand to define which file systems to search. In this step you modifythe command to exclude the /afs directory. Otherwise, the commandtraverses the AFS filespace of every cell that is accessible from themachine, which can take many hours. The following alterations arepossibilities, but you must verify that they are appropriate for your cell.The first possible alteration is to add the -local flag to the existingcommand, so that it looks like the following:
find $dir -local -name .nfs\* -mtime +7 -mount -exec rm -f {} \;
Another alternative is to exclude any directories whose names begin withthe lowercase letter a or a non-alphabetic character.
find /[A-Zb-z]* remainder of existing command
Do not use the following command, which still searches under the /afsdirectory, looking for a subdirectory of type 4.2.
find / -fstype 4.2 /* do not use */
6. Proceed to “Loading and Creating Client Files”.
Loading and Creating Client Files
Now copy files from the AFS CD-ROM to the /usr/vice/etc directory. On someplatforms that use a dynamic loader program to incorporate AFSmodifications into the kernel, you have already copied over some the files.Copying them again does no harm.
Every AFS client machine has a copy of the /usr/vice/etc/ThisCell file on itslocal disk to define the machine’s cell membership for the AFS clientprograms that run on it. Among other functions, this file determines thefollowing:v The cell in which users authenticate when they log onto the machine,
assuming it is using an AFS-modified login utility
Chapter 4. Installing Additional Client Machines 149

v The cell in which users authenticate by default when they issue the klogcommand
v The cell membership of the AFS server processes that the AFS commandinterpreters on this machine contact by default
Similarly, the /usr/vice/etc/CellServDB file on a client machine’s local disklists the database server machines in each cell that the local Cache Managercan contact. If there is no entry in the file for a cell, or the list of databaseserver machines is wrong, then users working on this machine cannot accessthe cell. The chapter in the IBM AFS Administration Guide about administeringclient machines explains how to maintain the file after creating it. A version ofthe client CellServDB file was created during the installation of your cell’sfirst machine (in “Creating the Client CellServDB File” on page 57). It isprobably also appropriate for use on this machine.
Remember that the Cache Manager consults the /usr/vice/etc/CellServDB fileonly at reboot, when it copies the information into the kernel. For the CacheManager to perform properly, the CellServDB file must be accurate at alltimes. Refer to the chapter in the IBM AFS Administration Guide aboutadministering client machines for instructions on updating this file, with orwithout rebooting.1. On the local /cdrom directory, mount the AFS CD-ROM for this machine’s
system type, if it is not already. For instructions on mounting CD-ROMs(either locally or remotely via NFS), consult the operating systemdocumentation.
2. Copy files to the local /usr/vice/etc directory.This step places a copy of the AFS initialization script (and related files, ifapplicable) into the /usr/vice/etc directory. In the preceding instructions forincorporating AFS into the kernel, you copied the script directly to theoperating system’s conventional location for initialization files. When youincorporate AFS into the machine’s startup sequence in a later step, youcan choose to link the two files.On some system types that use a dynamic kernel loader program, youpreviously copied AFS library files into a subdirectory of the /usr/vice/etcdirectory. On other system types, you copied the appropriate AFS libraryfile directly to the directory where the operating system accesses it. Thefollowing commands do not copy or recopy the AFS library files into the/usr/vice/etc directory, because on some system types the library filesconsume a large amount of space. If you want to copy them, add the -rflag to the first cp command and skip the second cp command.
# cd /cdrom/sysname/root.client/usr/vice/etc
150 AFS: Quick Beginnings

# cp -p * /usr/vice/etc
# cp -rp C /usr/vice/etc
3. Create the /usr/vice/etc/ThisCell file.
# echo "cellname" > /usr/vice/etc/ThisCell
4. Create the /usr/vice/etc/CellServDB file. Use a network file transferprogram such as ftp or NFS to copy it from one of the following sources,which are listed in decreasing order of preference:v Your cell’s central CellServDB source file (the conventional location is
/afs/cellname/common/etc/CellServDB)v The global CellServDB file maintained by the AFS Product Support
groupv An existing client machine in your cellv The CellServDB.sample file included in the
sysname/root.client/usr/vice/etc directory of each AFS CD-ROM; add anentry for the local cell by following the instructions in “Creating theClient CellServDB File” on page 57
Configuring the Cache
The Cache Manager uses a cache on the local disk or in machine memory tostore local copies of files fetched from file server machines. As the afsdprogram initializes the Cache Manager, it sets basic cache configurationparameters according to definitions in the local /usr/vice/etc/cacheinfo file.The file has three fields:1. The first field names the local directory on which to mount the AFS
filespace. The conventional location is the /afs directory.2. The second field defines the local disk directory to use for the disk cache.
The conventional location is the /usr/vice/cache directory, but you canspecify an alternate directory if another partition has more space available.There must always be a value in this field, but the Cache Manager ignoresit if the machine uses a memory cache.
3. The third field specifies the number of kilobyte (1024 byte) blocks toallocate for the cache.
The values you define must meet the following requirements.v On a machine using a disk cache, the Cache Manager expects always to be
able to use the amount of space specified in the third field. Failure to meetthis requirement can cause serious problems, some of which can be repaired
Chapter 4. Installing Additional Client Machines 151

only by rebooting. You must prevent non-AFS processes from filling up thecache partition. The simplest way is to devote a partition to the cacheexclusively.
v The amount of space available in memory or on the partition housing thedisk cache directory imposes an absolute limit on cache size.
v The maximum supported cache size can vary in each AFS release; see theIBM AFS Release Notes for the current version.
v For a disk cache, you cannot specify a value in the third field that exceeds95% of the space available on the partition mounted at the directory namedin the second field. If you violate this restriction, the afsd program exitswithout starting the Cache Manager and prints an appropriate message onthe standard output stream. A value of 90% is more appropriate on mostmachines. Some operating systems (such as AIX) do not automaticallyreserve some space to prevent the partition from filling completely; forthem, a smaller value (say, 80% to 85% of the space available) is moreappropriate.
v For a memory cache, you must leave enough memory for other processesand applications to run. If you try to allocate more memory than is actuallyavailable, the afsd program exits without initializing the Cache Managerand produces the following message on the standard output stream.
afsd: memCache allocation failure at number KB
The number value is how many kilobytes were allocated just before thefailure, and so indicates the approximate amount of memory available.
Within these hard limits, the factors that determine appropriate cache sizeinclude the number of users working on the machine, the size of the files withwhich they work, and (for a memory cache) the number of processes that runon the machine. The higher the demand from these factors, the larger thecache needs to be to maintain good performance.
Disk caches smaller than 10 MB do not generally perform well. Machinesserving multiple users usually perform better with a cache of at least 60 to 70MB. The point at which enlarging the cache further does not really improveperformance depends on the factors mentioned previously and is difficult topredict.
Memory caches smaller than 1 MB are nonfunctional, and the performance ofcaches smaller than 5 MB is usually unsatisfactory. Suitable upper limits aresimilar to those for disk caches but are probably determined more by thedemands on memory from other sources on the machine (number of usersand processes). Machines running only a few processes possibly can use asmaller memory cache.
152 AFS: Quick Beginnings
Configuring a Disk Cache
Note: Not all file system types that an operating system supports arenecessarily supported for use as the cache partition. For possiblerestrictions, see the IBM AFS Release Notes.
To configure the disk cache, perform the following procedures:1. Create the local directory to use for caching. The following instruction
shows the conventional location, /usr/vice/cache. If you are devoting apartition exclusively to caching, as recommended, you must also configureit, make a file system on it, and mount it at the directory created in thisstep.
# mkdir /usr/vice/cache
2. Create the cacheinfo file to define the configuration parameters discussedpreviously. The following instruction shows the standard mount location,/afs, and the standard cache location, /usr/vice/cache.
# echo "/afs:/usr/vice/cache:#blocks" > /usr/vice/etc/cacheinfo
The following example defines the disk cache size as 50,000 KB:
# echo "/afs:/usr/vice/cache:50000" > /usr/vice/etc/cacheinfo
Configuring a Memory Cache
To configure a memory cache, create the cacheinfo file to define theconfiguration parameters discussed previously. The following instructionshows the standard mount location, /afs, and the standard cache location,/usr/vice/cache (though the exact value of the latter is irrelevant for a memorycache).
# echo "/afs:/usr/vice/cache:#blocks" > /usr/vice/etc/cacheinfo
The following example allocates 25,000 KB of memory for the cache.
# echo "/afs:/usr/vice/cache:25000" > /usr/vice/etc/cacheinfo
Configuring the Cache Manager
By convention, the Cache Manager mounts the AFS filespace on the local /afsdirectory. In this section you create that directory.
Chapter 4. Installing Additional Client Machines 153

The afsd program sets several cache configuration parameters as it initializesthe Cache Manager, and starts daemons that improve performance. You canuse the afsd command’s arguments to override the parameters’ default valuesand to change the number of some of the daemons. Depending on themachine’s cache size, its amount of RAM, and how many people work on it,you can sometimes improve Cache Manager performance by overriding thedefault values. For a discussion of all of the afsd command’s arguments, seeits reference page in the IBM AFS Administration Reference.
The afsd command line in the AFS initialization script on each system typeincludes an OPTIONS variable. You can use it to set nondefault values for thecommand’s arguments, in one of the following ways:v You can create an afsd options file that sets values for arguments to the afsd
command. If the file exists, its contents are automatically substituted for theOPTIONS variable in the AFS initialization script. The AFS distribution forsome system types includes an options file; on other system types, youmust create it.You use two variables in the AFS initialization script to specify the path tothe options file: CONFIG and AFSDOPT. On system types that define aconventional directory for configuration files, the CONFIG variable indicatesit by default; otherwise, the variable indicates an appropriate location.List the desired afsd options on a single line in the options file, separatingeach option with one or more spaces. The following example sets the -statargument to 2500, the -daemons argument to 4, and the -volumes argumentto 100.
-stat 2500 -daemons 4 -volumes 100
v On a machine that uses a disk cache, you can set the OPTIONS variable inthe AFS initialization script to one of $SMALL, $MEDIUM, or $LARGE. The AFSinitialization script uses one of these settings if the afsd options file namedby the AFSDOPT variable does not exist. In the script as distributed, theOPTIONS variable is set to the value $MEDIUM.
Note: Do not set the OPTIONS variable to $SMALL, $MEDIUM, or $LARGE on amachine that uses a memory cache. The arguments it sets areappropriate only on a machine that uses a disk cache.
The script (or on some system types the afsd options file named by theAFSDOPT variable) defines a value for each of SMALL, MEDIUM, and LARGE thatsets afsd command arguments appropriately for client machines of differentsizes:– SMALL is suitable for a small machine that serves one or two users and
has approximately 8 MB of RAM and a 20-MB cache
154 AFS: Quick Beginnings

– MEDIUM is suitable for a medium-sized machine that serves two to sixusers and has 16 MB of RAM and a 40-MB cache
– LARGE is suitable for a large machine that serves five to ten users and has32 MB of RAM and a 100-MB cache
v You can choose not to create an afsd options file and to set the OPTIONSvariable in the initialization script to a null value rather than to the default$MEDIUM value. You can then either set arguments directly on the afsdcommand line in the script, or set no arguments (and so accept defaultvalues for all Cache Manager parameters).
1. Create the local directory on which to mount the AFS filespace, byconvention /afs. If the directory already exists, verify that it is empty.
# mkdir /afs
2. On AIX systems, add the following line to the /etc/vfs file. It enables AIXto unmount AFS correctly during shutdown.
afs 4 none none
3. On Linux systems, copy the afsd options file from the /usr/vice/etcdirectory to the /etc/sysconfig directory, removing the .conf extension asyou do so.
# cp /usr/vice/etc/afs.conf /etc/sysconfig/afs
4. Edit the machine’s AFS initialization script or afsd options file to setappropriate values for afsd command parameters. The appropriate file foreach system type is as follows:v On AIX systems, /etc/rc.afs
v On Digital UNIX systems, /sbin/init.d/afs
v On HP-UX systems, /sbin/init.d/afs
v On IRIX systems, /etc/init.d/afs
v On Linux systems, /etc/sysconfig/afs (the afsd options file)v On Solaris systems, /etc/init.d/afs
Use one of the methods described in the introduction to this section to addthe following flags to the afsd command line. Also set anyperformance-related arguments you wish.v Add the -memcache flag if the machine is to use a memory cache.v Add the -verbose flag to display a trace of the Cache Manager’s
initialization on the standard output stream.
Chapter 4. Installing Additional Client Machines 155

Starting the Cache Manager and Installing the AFS Initialization Script
In this section you run the AFS initialization script to start the CacheManager. If the script works correctly, perform the steps that incorporate itinto the machine’s startup and shutdown sequence. If there are problemsduring the initialization, attempt to resolve them. The AFS Product Supportgroup can provide assistance if necessary.
On machines that use a disk cache, it can take a while for the afsd program torun the first time on a machine, because it must create all of the Vn files inthe cache directory. Subsequent Cache Manager initializations do not takenearly as long, because the Vn files already exist.
On system types that use a dynamic loader program, you must reboot themachine before running the initialization script, so that it can freshly load AFSmodifications into the kernel.
Proceed to the instructions for your system type:v “Running the Script on AIX Systems”v “Running the Script on Digital UNIX Systems” on page 157v “Running the Script on HP-UX Systems” on page 158v “Running the Script on IRIX Systems” on page 158v “Running the Script on Linux Systems” on page 159v “Running the Script on Solaris Systems” on page 160
Running the Script on AIX Systems1. Reboot the machine and log in again as the local superuser root.
# cd /
# shutdown -r now
login: rootPassword: root_password
2. Run the AFS initialization script.
# /etc/rc.afs
3. Edit the AIX initialization file, /etc/inittab, adding the following line toinvoke the AFS initialization script. Place it just after the line that startsNFS daemons.
156 AFS: Quick Beginnings

rcafs:2:wait:/etc/rc.afs > /dev/console 2>&1 # Start AFS services
4. (Optional) There are now copies of the AFS initialization file in both the/usr/vice/etc and /etc directories. If you want to avoid potential confusionby guaranteeing that they are always the same, create a link betweenthem. You can always retrieve the original script from the AFS CD-ROM ifnecessary.
# cd /usr/vice/etc
# rm rc.afs
# ln -s /etc/rc.afs
5. If a volume for housing AFS binaries for this machine’s system type doesnot already exist, proceed to “Setting Up Volumes and Loading Binariesinto AFS” on page 161. Otherwise, the installation is complete.
Running the Script on Digital UNIX Systems1. Run the AFS initialization script.
# /sbin/init.d/afs start
2. Change to the /sbin/init.d directory and issue the ln -s command to createsymbolic links that incorporate the AFS initialization script into the DigitalUNIX startup and shutdown sequence.
# cd /sbin/init.d
# ln -s ../init.d/afs /sbin/rc3.d/S67afs
# ln -s ../init.d/afs /sbin/rc0.d/K66afs
3. (Optional) There are now copies of the AFS initialization file in both the/usr/vice/etc and /sbin/init.d directories. If you want to avoid potentialconfusion by guaranteeing that they are always the same, create a linkbetween them. You can always retrieve the original script from the AFSCD-ROM if necessary.
# cd /usr/vice/etc
# rm afs.rc
# ln -s /sbin/init.d/afs afs.rc
Chapter 4. Installing Additional Client Machines 157

4. If a volume for housing AFS binaries for this machine’s system type doesnot already exist, proceed to “Setting Up Volumes and Loading Binariesinto AFS” on page 161. Otherwise, the installation is complete.
Running the Script on HP-UX Systems1. Run the AFS initialization script.
# /sbin/init.d/afs start
2. Change to the /sbin/init.d directory and issue the ln -s command to createsymbolic links that incorporate the AFS initialization script into the HP-UXstartup and shutdown sequence.
# cd /sbin/init.d
# ln -s ../init.d/afs /sbin/rc2.d/S460afs
# ln -s ../init.d/afs /sbin/rc2.d/K800afs
3. (Optional) There are now copies of the AFS initialization file in both the/usr/vice/etc and /sbin/init.d directories. If you want to avoid potentialconfusion by guaranteeing that they are always the same, create a linkbetween them. You can always retrieve the original script from the AFSCD-ROM if necessary.
# cd /usr/vice/etc
# rm afs.rc
# ln -s /sbin/init.d/afs afs.rc
4. If a volume for housing AFS binaries for this machine’s system type doesnot already exist, proceed to “Setting Up Volumes and Loading Binariesinto AFS” on page 161. Otherwise, the installation is complete.
Running the Script on IRIX Systems1. If you have configured the machine to use the ml dynamic loader
program, reboot the machine and log in again as the local superuser root.
# cd /
# shutdown -i6 -g0 -y
login: rootPassword: root_password
158 AFS: Quick Beginnings

2. Issue the chkconfig command to activate the afsclient configurationvariable.
# /etc/chkconfig -f afsclient on
3. Run the AFS initialization script.
# /etc/init.d/afs start
4. Change to the /etc/init.d directory and issue the ln -s command to createsymbolic links that incorporate the AFS initialization script into the IRIXstartup and shutdown sequence.
# cd /etc/init.d
# ln -s ../init.d/afs /etc/rc2.d/S35afs
# ln -s ../init.d/afs /etc/rc0.d/K35afs
5. (Optional) There are now copies of the AFS initialization file in both the/usr/vice/etc and /etc/init.d directories. If you want to avoid potentialconfusion by guaranteeing that they are always the same, create a linkbetween them. You can always retrieve the original script from the AFSCD-ROM if necessary.
# cd /usr/vice/etc
# rm afs.rc
# ln -s /etc/init.d/afs afs.rc
6. If a volume for housing AFS binaries for this machine’s system type doesnot already exist, proceed to “Setting Up Volumes and Loading Binariesinto AFS” on page 161. Otherwise, the installation is complete.
Running the Script on Linux Systems1. Reboot the machine and log in again as the local superuser root.
# cd /
# shutdown -r now
login: rootPassword: root_password
2. Run the AFS initialization script.
Chapter 4. Installing Additional Client Machines 159

# /etc/rc.d/init.d/afs start
3. Issue the chkconfig command to activate the afs configuration variable.Based on the instruction in the AFS initialization file that begins with thestring #chkconfig, the command automatically creates the symbolic linksthat incorporate the script into the Linux startup and shutdown sequence.
# /sbin/chkconfig --add afs
4. (Optional) There are now copies of the AFS initialization file in both the/usr/vice/etc and /etc/rc.d/init.d directories, and copies of the afsd optionsfile in both the /usr/vice/etc and /etc/sysconfig directories. If you want toavoid potential confusion by guaranteeing that the two copies of each fileare always the same, create a link between them. You can always retrievethe original script or options file from the AFS CD-ROM if necessary.
# cd /usr/vice/etc
# rm afs.rc afs.conf
# ln -s /etc/rc.d/init.d/afs afs.rc
# ln -s /etc/sysconfig/afs afs.conf
5. If a volume for housing AFS binaries for this machine’s system type doesnot already exist, proceed to “Setting Up Volumes and Loading Binariesinto AFS” on page 161. Otherwise, the installation is complete.
Running the Script on Solaris Systems1. Reboot the machine and log in again as the local superuser root.
# cd /
# shutdown -i6 -g0 -y
login: rootPassword: root_password
2. Run the AFS initialization script.
# /etc/init.d/afs start
3. Change to the /etc/init.d directory and issue the ln -s command to createsymbolic links that incorporate the AFS initialization script into the Solarisstartup and shutdown sequence.
160 AFS: Quick Beginnings

# cd /etc/init.d
# ln -s ../init.d/afs /etc/rc3.d/S99afs
# ln -s ../init.d/afs /etc/rc0.d/K66afs
4. (Optional) There are now copies of the AFS initialization file in both the/usr/vice/etc and /etc/init.d directories. If you want to avoid potentialconfusion by guaranteeing that they are always the same, create a linkbetween them. You can always retrieve the original script from the AFSCD-ROM if necessary.
# cd /usr/vice/etc
# rm afs.rc
# ln -s /etc/init.d/afs afs.rc
5. If a volume for housing AFS binaries for this machine’s system type doesnot already exist, proceed to “Setting Up Volumes and Loading Binariesinto AFS”. Otherwise, the installation is complete.
Setting Up Volumes and Loading Binaries into AFS
In this section, you link /usr/afsws on the local disk to the directory in AFSthat houses AFS binaries for this system type. The conventional name for theAFS directory is /afs/cellname/sysname/usr/afsws.
If this machine is an existing system type, the AFS directory presumablyalready exists. You can simply create a link from the local /usr/afsws directoryto it. Follow the instructions in “Linking /usr/afsws on an Existing SystemType” on page 162.
If this machine is a new system type (there are no AFS machines of this typein your cell), you must first create and mount volumes to store its AFSbinaries, and then create the link from /usr/afsws to the new directory. See“Creating Binary Volumes for a New System Type” on page 162.
You can also store UNIX system binaries (the files normally stored in localdisk directories such as /bin, /etc, and /lib) in volumes mounted under/afs/cellname/sysname. See “Storing System Binaries in AFS” on page 78.
Chapter 4. Installing Additional Client Machines 161

Linking /usr/afsws on an Existing System Type
If this client machine is an existing system type, there is already a volumemounted in the AFS filespace that houses AFS client binaries for it.1. Create /usr/afsws on the local disk as a symbolic link to the directory
/afs/cellname/@sys/usr/afsws. You can specify the actual system nameinstead of @sys if you wish, but the advantage of using @sys is that itremains valid if you upgrade this machine to a different system type.
# ln -s /afs/cellname/@sys/usr/afsws /usr/afsws
2. (Optional) If you believe it is helpful to your users to access the AFSdocuments in a certain format via a local disk directory, create /usr/afsdocon the local disk as a symbolic link to the documentation directory in AFS(/afs/cellname/afsdoc/format_name).
# ln -s /afs/cellname/afsdoc/format_name /usr/afsdoc
An alternative is to create a link in each user’s home directory to the/afs/cellname/afsdoc/format_name directory.
Creating Binary Volumes for a New System Type
If this client machine is a new system type, you must create and mountvolumes for its binaries before you can link the local /usr/afsws directory toan AFS directory.
To create and mount the volumes, you use the klog command to authenticateas an administrator and then issue commands from the vos and fs commandsuites. However, the command binaries are not yet available on this machine(by convention, they are accessible via the /usr/afsws link that you are aboutto create). You have two choices:v Perform all steps except the last one (Step 10 on page 165) on an existing
AFS machine. On a file server machine, the klog, fs and vos binaries residein the /usr/afs/bin directory. On client machines, the klog and fs binariesreside in the /usr/afsws/bin directory and the vos binary in the/usr/afsws/etc directory. Depending on how your PATH environmentvariable is set, you possibly need to precede the command names with apathname.If you work on another AFS machine, be sure to substitute the new systemtype name for the sysname argument in the following commands, not thesystem type of the machine on which you are issuing the commands.
v Copy the necessary command binaries to a temporary location on the localdisk, which enables you to perform the steps on the local machine. Thefollowing procedure installs them in the /tmp directory and removes them
162 AFS: Quick Beginnings

at the end. Depending on how your PATH environment variable is set, youpossibly need to precede the command names with a pathname.
Perform the following steps to create a volume for housing AFS binaries.1. Working either on the local machine or another AFS machine, mount the
AFS CD-ROM for the new system type on the /cdrom directory, if it isnot already. For instructions on mounting CD-ROMs (either locally orremotely via NFS), consult the operating system documentation.
2. If working on the local machine, copy the necessary binaries to atemporary location on the local disk. Substitute a different directory namefor /tmp if you wish.
# cd /cdrom/new_sysname/root.server/usr/afs/bin
# cp -p klog /tmp
# cp -p fs /tmp
# cp -p vos /tmp
3. Authenticate as the user admin.
# klog adminPassword: admin_password
4. Issue the vos create command to create volumes for storing the AFSclient binaries for this system type. The following example instructioncreates volumes called sysname, sysname.usr, and sysname.usr.afsws. Referto the IBM AFS Release Notes to learn the proper value of sysname for thissystem type.
# vos create <machine name> <partition name> sysname
# vos create <machine name> <partition name> sysname.usr
# vos create <machine name> <partition name> sysname.usr.afsws
5. Issue the fs mkmount command to mount the newly created volumes.Because the root.cell volume is replicated, you must precede the cellnamepart of the pathname with a period to specify the read/write mountpoint, as shown. Then issue the vos release command to release a newreplica of the root.cell volume, and the fs checkvolumes command toforce the local Cache Manager to access them.
# fs mkmount -dir /afs/.cellname/sysname -vol sysname
# fs mkmount -dir /afs/.cellname/sysname/usr -vol sysname.usr
Chapter 4. Installing Additional Client Machines 163

# fs mkmount -dir /afs/.cellname/sysname/usr/afsws -vol sysname.usr.afsws
# vos release root.cell
# fs checkvolumes
6. Issue the fs setacl command to grant the l (lookup) and r (read)permissions to the system:anyuser group on each new directory’s ACL.
# cd /afs/.cellname/sysname
# fs setacl -dir . usr usr/afsws -acl system:anyuser rl
7. Issue the fs setquota command to set an unlimited quota on the volumemounted at the /afs/cellname/sysname/usr/afsws directory. This enablesyou to copy all of the appropriate files from the CD-ROM into thevolume without exceeding the volume’s quota.If you wish, you can set the volume’s quota to a finite value after youcomplete the copying operation. At that point, use the vos examinecommand to determine how much space the volume is occupying. Thenissue the fs setquota command to set a quota that is slightly larger.
# fs setquota /afs/.cellname/sysname/usr/afsws 0
8. Copy the contents of the indicated directories from the CD-ROM into the/afs/cellname/sysname/usr/afsws directory.
# cd /afs/.cellname/sysname/usr/afsws
# cp -rp /cdrom/sysname/bin .
# cp -rp /cdrom/sysname/etc .
# cp -rp /cdrom/sysname/include .
# cp -rp /cdrom/sysname/lib .
9. Issue the fs setacl command to set the ACL on each directoryappropriately. To comply with the terms of your AFS License agreement,you must prevent unauthorized users from accessing AFS software. Toenable access for locally authenticated users only, set the ACL on the etc,include, and lib subdirectories to grant the l and r permissions to thesystem:authuser group rather than the system:anyuser group. Thesystem:anyuser group must retain the l and r permissions on the binsubdirectory to enable unauthenticated users to access the klog binary. Toensure that unauthorized users are not accessing AFS software, checkperiodically that the ACLs on these directories are set properly.
164 AFS: Quick Beginnings

# cd /afs/.cellname/sysname/usr/afsws
# fs setacl -dir etc include lib -acl system:authuser rl \system:anyuser none
10. Perform this step on the new client machine even if you have performedthe previous steps on another machine. Create /usr/afsws on the localdisk as a symbolic link to the directory /afs/cellname/@sys/usr/afsws. Youcan specify the actual system name instead of @sys if you wish, but theadvantage of using @sys is that it remains valid if you upgrade thismachine to a different system type.
# ln -s /afs/cellname/@sys/usr/afsws /usr/afsws
11. (Optional) To enable users to issue commands from the AFS suites (suchas fs) without having to specify a pathname to their binaries, include the/usr/afsws/bin and /usr/afsws/etc directories in the PATH environmentvariable you define in each user’s shell initialization file (such as .cshrc).
12. (Optional) If you believe it is helpful to your users to access the AFSdocuments in a certain format via a local disk directory, create/usr/afsdoc on the local disk as a symbolic link to the documentationdirectory in AFS (/afs/cellname/afsdoc/format_name).
# ln -s /afs/cellname/afsdoc/format_name /usr/afsdoc
An alternative is to create a link in each user’s home directory to the/afs/cellname/afsdoc/format_name directory.
13. (Optional) If working on the local machine, remove the AFS binariesfrom the temporary location. They are now accessible in the /usr/afswsdirectory.
# cd /tmp
# rm klog fs vos
Chapter 4. Installing Additional Client Machines 165

166 AFS: Quick Beginnings

Appendix. Building AFS from Source Code
This chapter describes how to build AFS from source code.
Loading the Source Files
Working on an AFS client machine, perform these steps to load the AFSsource tree from the AFS Source Distribution.1. Create and mount a volume for housing the AFS source tree. These
instructions name the volume src.afs and mount it at the/afs/cellname/afs/src directory.Setting the -maxquota argument to 0 (zero) sets an unlimited quota on thevolume, which enables you to copy all of the files into the volume withoutexceeding its quota. If you wish, you can set the volume’s quota to a finitevalue after you complete the copying operation. At that point, use the vosexamine command to determine how much space the volume isoccupying. Then issue the fs setquota command to set a quota that isslightly larger.
# vos create <machine name> <partition name> src.afs -maxquota 0
# cd /afs/.cellname
# mkdir afs
# fs mkmount afs/src src.afs
# vos release root.cell
# fs checkvolumes
2. On the local /cdrom directory, mount the CD-ROM that contains the AFSsource files. For instructions on mounting CD-ROMs (either locally orremotely via NFS), consult the operating system documentation.
3. Copy the source files from the CD-ROM into the newly created volume.
# cd /cdrom/src
# cp -rp * /afs/.cellname/afs/src
© Copyright IBM Corp. 1989, 2000 167

Compiling AFS Binaries Using the washtool Program
The AFS distribution includes the washtool program for managing ahierarchy of software development projects. The program builds project treesfor program editing, compilation, and installation.1. Create a subdirectory under the /afs/.cellname/afs directory for each system
type for which you will build AFS binaries. Creating and mounting avolume for each system type is recommended, but you can also simplyuse the mkdir command. If you create a new volume, grant it anunlimited quota to avoid running out of space during the build process.
# cd /afs/.cellname/afs
If creating a new volume:
# vos create <machine name> <partition name> sysname -maxquota 0
# fs mkmount sysname sysname
If not creating a new volume:
# mkdir sysname
2. In the directory for each system type, create subdirectories called dest,dest/bin, and obj. If you plan to use the @sys variable in pathnames thatrefer to these directories, then you must use the conventional systemnames listed in the IBM AFS Release Notes.
# cd sysname
# mkdir dest
# mkdir dest/bin
# mkdir obj
3. Create the indicated directories and symbolic links in the /afs/.cellname/afsdirectory.
# cd /afs/.cellname/afs
# ln -s @sys/dest dest
# ln -s @sys/obj obj
# ln -s . PARENT
# ln -s src/Makefile Makefile
168 AFS: Quick Beginnings

The following is an example directory listing for the /afs/.cellname/afsdirectory after completing the preceding steps. It includes two examplesystem types.
lrwxr-xr-x admin 12 Jun 18 11:26 Makefile->src/Makefilelrwxr-xr-x admin 1 Jun 18 11:26 PARENT -> .lrwxr-xr-x admin 9 Jun 18 11:25 dest -> @sys/destlrwxr-xr-x admin 8 Jun 18 11:25 obj -> @sys/objdrwxrwxrwx admin 4096 Jun 18 11:24 rcsdrwxrwxrwx admin 2048 Jun 18 11:27 rs_aix42drwxrwxrwx admin 2048 Jun 18 11:10 srcdrwxrwxrwx admin 2048 Jun 18 11:27 sun4x_56
4. (Optional) By default, the build procedure writes its results into adestination directory for each system type called/afs/.cellname/afs/sysname/dest. To write the results to a different destinationdirectory, create a link from the dest directory to it.
# cd /afs/.cellname/afs/sysname
# ln -s full_path_of_alternate_directory dest
5. For each system type you plan to build, copy the binary for the washtoolprogram to the directory specified in the AFS Makefile, which is/afs/cellname/afs/sysname/dest/bin. If you prefer to store the program in adifferent directory, you can use the WASHTOOL variable on the makecommand line as described in Step 6.If there is a volume that houses the AFS binaries for each system type (asrecommended), the conventional location for the washtool binary is the/afs/cellname/sysname/usr/afsws/bin directory. Use the following instructionto copy it.
# cd /afs/cellname/sysname/usr/afsws/bin
# cp washtool /afs/.cellname/afs/sysname/dest/bin
Otherwise, mount the (binary) AFS CD-ROM for this system type on thelocal /cdrom directory, and copy the washtool binary directly from it.
# cd /cdrom/sysname/bin
# cp washtool /afs/.cellname/afs/sysname/dest/bin
6. Working in the /afs/.cellname/afs directory on a machine of the system typefor which you are building AFS, issue the make install command. Set theSYS_NAME variable to the appropriate system type name.
Appendix. Building AFS from Source Code 169

If the washtool binary is not in the conventional directory(/afs/cellname/afs/sysname/dest/bin), set the WASHTOOL variable to thealternate full pathname of the binary.
# cd /afs/.cellname/afs
# make SYS_NAME=sysname [WASHTOOL=alternate_washtool_directory] install
170 AFS: Quick Beginnings

Index
Special Characters/ as start to file and directory names
see alphabetized entries withoutinitial slash 9
Aaccess
to local and foreign cells 79to root and admin accounts 81
access control list (ACL), setting 72activating AFS init. script (see entry
installing) 67adding
entries to BosConfig filedatabase server machine 119first AFS machine 47server machine after first 106
new db-server machine toCellServDB files 118
admin accountadding
to system:administratorsgroup 51
to UserList file 50controlling access to 81creating 48setting ADMIN flag on Auth. DB
entry 49afs (/afs) directory
as root of AFS filespace 153creating
client machine 153first AFS machine 61server machine after first 110
AFS Binary Distribution 6AFS cache (see entry: cache) 151afs entry in Authentication
Database 48afs file
AFS initialization file 157, 158,159, 160
afsd options file (Linux) 153AFS filespace
configuring top levels 71controlling access by root
superuser 81deciding how to configure 7enabling access to foreign
cells 79
AFS filespace (continued)root at /afs directory 153
AFS initialization script
adding to machine startupsequence
client machine 156first AFS machine 67server machine after first 111
runningclient machine 156first AFS machine 64server machine after first 111
setting afsd parametersclient machine 153first AFS machine 61server machine after first 110
verifying on first AFSmachine 64
AFS kernel extensions
on client machineAIX 126Digital UNIX 129HP-UX 132IRIX 137Linux 141Solaris 144
on first AFS machineAIX 11Digital UNIX 15HP-UX 20IRIX 27Linux 32Solaris 37
on server machine after firstAIX 87Digital UNIX 89HP-UX 92IRIX 95Linux 100Solaris 101
AFS login
on client machineAIX 126Digital UNIX 129HP-UX 132IRIX 141Linux 141Solaris 144
AFS login (continued)on file server machine
AIX 13Digital UNIX 19HP-UX 24IRIX 32Linux 34Solaris 41
AFS server partitionconfiguring on first AFS machine
AIX 12Digital UNIX 18HP-UX 22IRIX 30Linux 33Solaris 40
configuring on server machineafter first
AIX 88Digital UNIX 91HP-UX 94IRIX 98Linux 100Solaris 104
mounted on /vicep directory 10protecting during operating
system upgrade 5afsclient variable (IRIX)
client machine 158first AFS machine 65server machine after first 113
afsdcommand in AFS init. script 153options file (Linux) 153
afsml variable (IRIX)client machine 138first AFS machine 28server machine after first 96
afsserver variable (IRIX)first AFS machine 65server machine after first 113
afsxnfs variable (IRIX)client machine 138first AFS machine 28server machine after first 96
AIXAFS initialization script
on add’l server machine 111on client machine 156
© Copyright IBM Corp. 1989, 2000 171

AIX (continued)on first AFS machine 65, 68
AFS kernel extensionson add’l server machine 87on client machine 126on first AFS machine 11
AFS loginon client machine 126on file server machine 13
AFS server partitionon add’l server machine 88on first AFS machine 12
editing /etc/vfs file 153fsck program
on add’l server machine 88on first AFS machine 13
Authentication Database 48Authentication Server
startingfirst AFS machine 47new db-server machine 119
authorization checking (disabling)first AFS machine 44server machine after first 105
Bbackground reading list 2Backup Server
startingfirst AFS machine 47new db-server machine 120
stopping 123Basic OverSeer Server (see entry
BOS Server) 44binaries
storing AFS in volume 74, 161storing system in volumes 78
Binary Distribution (AFS) 6binary distribution machine 53bos commands
addhost 118addkey 50adduser 50create 47delete 123listhosts 46listkeys 50removehost 122restart
on first AFS machine 51on new db-server
machine 120on removed db-server
machine 123setcellname 46
bos commands (continued)shutdown 64status 52stop 123
BOS Serverchecking mode bits on AFS
directories 82starting
first AFS machine 44server machine after first 105
BosConfig fileadding entries
database server machine 119first AFS machine 47server machine after first 106
removing entries 123bosserver command 45building
AFS extensions into kernel (seeentry incorporating AFS kernelextensions) 9
AFS from source 168buserver process (see entry Backup
Server) 47
Ccache
choosing size 151configuring
client machine 151first AFS machine 59server machine after first 109
requirements 151Cache Manager
client machine 153first AFS machine 61server machine after first 110
cacheinfo file 151CD-ROM
copying AFS binaries intovolume 75
copying AFS documentationfrom 77
copying client files fromclient machine 149first AFS machine 56server machine after first 108
copying server files fromfirst AFS machine 45server machine after first 105
copying source files from 167creating /cdrom directory
client machine 125first AFS machine 9server machine after first 86
CD-ROM (continued)packaging of AFS Binary
Distribution 6cdrom directory
client machine 125first AFS machine 9server machine after first 86
cellenabling access to foreign 79improving security 81initializing security
mechanisms 48cell name
choosing 7defining during installation of
first machine 46setting in client ThisCell file
client machine 149first AFS machine 56server machine after first 109
setting in server ThisCell filefirst AFS machine 46server machine after first 109
symbolic link for abbreviated 72CellServDB file (client)
adding entryfor foreign cell 79for new db-server
machine 119creating
on client machine 149on first AFS machine 57on server machine after
first 109removing entry 122required format 57
CellServDB file (server)adding entry for new db-server
machine 118creating
on first AFS machine 46on server machine after
first 105displaying entries 46removing entry 122
client cache (see entry: cache) 151client machine
/cdrom directory 125/usr/vice/etc directory 125AFS initialization script 156AFS kernel extensions
on AIX 126on Digital UNIX 129on HP-UX 132on IRIX 137
172 AFS: Quick Beginnings

client machine (continued)on Linux 141on Solaris 144
AFS loginon AIX 126on Digital UNIX 129on HP-UX 132on IRIX 141on Linux 141on Solaris 144
afsd command parameters 153afsd options file (Linux) 153Cache Manager 153cache size and location 151cell membership 149CellServDB file
adding entry 119creating during initial
installation 149removing entry 122
copying client files to localdisk 149
requirements for installation 5ThisCell file 149vfs file (AIX) 153
clock synchronization 54commands
afsd 153bos addhost 118bos addkey 50bos adduser 50bos create 47bos delete 123bos listhosts 46bos listkeys 50bos removehost 122bos restart
on first AFS machine 51on new db-server
machine 120on removed db-server
machine 123bos setcellname 46bos shutdown 64bos status 52bos stop 123bosserver 45fs checkvolumes 67, 73fs examine 73fs mkmount 72fs newcell 80fs setacl 72fs setquota 75kas (interactive) 48kas create 49
commands (continued)kas examine 49kas quit 49kas setfields 49klog 66make 169pts adduser 51pts createuser 51tokens 67vos addsite 73vos create
root.afs volume 52root.cell volume 72src.afs volume 167volume for AFS binaries 74volume for AFS
documentation 77vos release 73vos syncserv 52vos syncvldb 52washtool 169
compiling AFS from source 168configuring
AFS filespace (top levels) 71AFS server partition on first AFS
machineAIX 12Digital UNIX 18HP-UX 22IRIX 30Linux 33Solaris 40
AFS server partition on servermachine after first
AIX 88Digital UNIX 91HP-UX 94IRIX 98Linux 100Solaris 104
cacheclient machine 151first AFS machine 59server machine after first 109
Cache Managerclient machine 153first AFS machine 61server machine after first 110
copyingAFS binaries into volume 75AFS documentation from
CD-ROM 77client files to local disk
client machine 149first AFS machine 56
copying (continued)client files to local disk
(continued)server machine after first 108
server files to local diskfirst AFS machine 45server machine after first 105
source files from CD-ROM 167
creating
/cdrom directoryclient machine 125first AFS machine 9server machine after first 86
/usr/afs/bin directoryfirst AFS machine 45server machine after first 86
/usr/afs directoryfirst AFS machine 9server machine after first 86
/usr/afs/etc directoryfirst AFS machine 45server machine after first 105
/usr/vice/etc directoryclient machine 125first AFS machine 9server machine after first 86
admin account in AuthenticationDatabase 48
afs entry in AuthenticationDatabase 48
CellServDB file (client)client machine 149first AFS machine 57server machine after first 109
CellServDB file (server)first AFS machine 46server machine after first 105
mount point 72read/write mount point 72root.afs volume 52root.cell volume 71server encryption key
Authentication Database 49KeyFile file 50
src.afs volume 167symbolic link
for abbreviated cell name 72to AFS binaries 76
UserList file entry 50volume
for AFS binaries 74, 161for AFS documentation 76for AFS source 167for system binaries 78
Index 173

Ddatabase server machine
entry in client CellServDB filefor foreign cell 79for new db-server
machine 119on client machine 149on first AFS machine 57on server machine after
first 109removing 122
entry in server CellServDB filefor new db-server
machine 118on first AFS machine 46on server machine after
first 105removing 122
installingadditional 118first 47
removing db-server processesfrom BosConfig file 123
removing from service 121requirements for installation 116starting database server
processes 119stopping database server
processes 123defining
cell name during installation offirst machine 46
first AFS machine as databaseserver 46
replication site for volume 73Digital UNIX
AFS initialization scripton add’l server machine 112on client machine 157on first AFS machine 65, 68
AFS loginon client machine 129on file server machine 19
AFS-modified kernelon add’l server machine 89on client machine 129on first AFS machine 15
AFS server partitionon add’l server machine 91on first AFS machine 18
fsck programon add’l server machine 91on first AFS machine 18
directories/afs 153
directories (continued)/usr/afsdoc 76/usr/afsws 74, 161/usr/vice/cache 151/vicepxx (see entry AFS server
partition) 10disabling authorization checking
first AFS machine 44server machine after first 105
disk cache (see entry: cache) 151displaying
CellServDB file (server)entries 46
server encryption keyAuthentication Database 49KeyFile file 50
documentation, creating volume forAFS 76
Eenabling AFS login
client machineAIX 126Digital UNIX 129HP-UX 132IRIX 141Linux 141Solaris 144
file server machineAIX 13Digital UNIX 19HP-UX 24IRIX 32Linux 34Solaris 41
encryption filesin AFS Binary Distribution 6
encryption key (see entry serverencryption key) 48
environment variables (see entry:variables) 153
etc/init.d/afs (see entry: afsfile) 158
etc/rc.afs (see entry: rc.afs file) 156etc/rc.d/init.d/afs (see entry: afs
file) 159etc/sysconfig/afs (see entry: afs
file) 153etc/vfs file 153
FFile Server
first AFS machine 51server machine after first 107
file server machinerequirements for installation 4
file server machine (continued)see entries first AFS machine; file
server machine, additional 6
file server machine, additional
/cdrom directory 86/usr/afs/bin directory 86/usr/afs directory 86/usr/afs/etc directory 105/usr/vice/etc directory 86AFS initialization script 111AFS kernel extensions
on AIX 87on Digital UNIX 89on HP-UX 92on IRIX 95on Linux 100Solaris 101
AFS login (see entry for first AFSmachine) 86
AFS server partitionon AIX 88on Digital UNIX 91on HP-UX 94on IRIX 98on Linux 100on Solaris 104
afsd command parameters 110authorization checking
(disabling) 105BOS Server 105Cache Manager 110cache size and location 109cell membership, defining
for client processes 109for server processes 105
client functionality 107copying
client files to local disk 108server files to local disk 105
File Server 107fs process 107fsck program
on AIX 88on Digital UNIX 91on HP-UX 94on IRIX 95on Linux 100on Solaris 102
runntp process 107server functionality 105ThisCell file (client) 109ThisCell file (server) 105Update Server client portion 106Update Server server
portion 106
174 AFS: Quick Beginnings

file server machine, additional(continued)
Volume Server 107file systems clean-up script (Solaris)
client machine 144file server machine 41
filesafs
AFS initialization file 157,158, 159, 160
afsd options file (Linux) 153AFS initialization (see entry: AFS
initialization script) 153AFS source 167afsd options file (Linux) 153BosConfig 47cacheinfo 151CellServDB (client) 57CellServDB (server) 46index.htm 77KeyFile 48protecting during operating
system upgrade 5rc.afs 156ThisCell (client) 56ThisCell (server) 46UserList 50vfs (AIX) 153
fileserver process (see entry FileServer) 51
filespace (see entry AFS filespace) 7first AFS machine
/cdrom directory 9/usr/afs directory 9/usr/vice/etc directory 9AFS initialization script
activating 67running/verifying 64
AFS kernel extensionson AIX 11on Digital UNIX 15on HP-UX 20on IRIX 27on Linux 32on Solaris 37
AFS loginon AIX 13on Digital UNIX 19on HP-UX 24on IRIX 32on Linux 34on Solaris 41
AFS server partitionon AIX 12on Digital UNIX 18
first AFS machine (continued)AFS server partition (continued)
on HP-UX 22on IRIX 30on Linux 33on Solaris 40
afsd command parameters 61Authentication Server 47authorization checking
(disabling) 44Backup Server 47BOS Server 44Cache Manager 61cache size and location 59cell membership, defining
for client processes 56for server processes 46
CellServDB file (client) 57CellServDB file (server) 46client functionality
installing 55removing 83
completion of installation 64copying
AFS binaries into volume 75AFS documentation from
CD-ROM 77client files to local disk 56server files to local disk 45
definingas binary distribution
machine 53as database server 46as system control
machine 53File Server, fs process 51fsck program
on AIX 13on Digital UNIX 18on HP-UX 23on IRIX 27on Linux 32on Solaris 38
Protection Server 47roles 1runntp process 54Salvager 51server functionality 8subdirectories of /usr/afs 45ThisCell file (client) 56ThisCell file (server) 46Update Server server portion 53VL Server 47Volume Server 51
foreign cell, enabling access 79
fs commandscheckvolumes 67, 73examine 73mkmount 72newcell 80setacl 72setquota 75
fs processfirst AFS machine 51server machine after first 107
fsck programon first AFS machine
AIX 13Digital UNIX 18HP-UX 23IRIX 27Linux 32Solaris 38
on server machine after firstAIX 88Digital UNIX 91HP-UX 94IRIX 95Linux 100Solaris 102
HHP-UX
AFS initialization scripton add’l server machine 112on client machine 158on first AFS machine 65, 69
AFS loginon client machine 132on file server machine 24
AFS-modified kernelon add’l server machine 92on client machine 132on first AFS machine 20
AFS server partitionon add’l server machine 94on first AFS machine 22
fsck programon add’l server machine 94on first AFS machine 23
Iincorporating AFS kernel extensions
client machineAIX 126Digital UNIX 129HP-UX 132IRIX 137Linux 141Solaris 144
Index 175

incorporating AFS kernel extensions(continued)
first AFS machineAIX 11Digital UNIX 15HP-UX 20IRIX 27Linux 32Solaris 37
server machine after firstAIX 87Digital UNIX 89HP-UX 92IRIX 95Linux 100Solaris 101
index.htm file 77
initializing
cell security mechanisms 48server process (see entry starting
or server’s name) 47
installing
AFS initialization scriptclient machine 156first AFS machine 67server machine after first 111
client functionalityclient machine 125first AFS machine 55server machine after first 107
database server machineadditional 118first 47
file server machine after first 85first AFS machine 6server functionality
first AFS machine 8server machine after first 105
instructions
client machine 125database server machine,
installing additional 118database server machine,
installing first 47database server machine,
removing 121file server machine after first 85first AFS machine 6
interactive mode for kas
entering 48quitting 49
invoking AFS init. script (see entryrunning) 64
IRIXAFS initialization script
on add’l server machine 113on client machine 158on first AFS machine 65, 69
AFS kernel extensionson client machine 138on first AFS machine 28on server machine after
first 96AFS login 32AFS-modified kernel
on add’l server machine 97on client machine 139on first AFS machine 29
AFS server partitionon add’l server machine 98on first AFS machine 30
afsclient variableclient machine 158first AFS machine 65server machine after first 113
afsml variableclient machine 138first AFS machine 28server machine after first 96
afsserver variablefirst AFS machine 65server machine after first 113
afsxnfs variableclient machine 138first AFS machine 28server machine after first 96
fsck program replacement notnecessary 27
Kkas commands
create 49examine 49interactive mode, entering 48quit 49setfields 49
kaserver process (see entryAuthentication Server) 47
Kerberos 47kernel extensions (see entry AFS
kernel extensions) 9key (see entry server encryption
key) 48KeyFile file
first AFS machine 48server machine after first 105
klog command 66
Llicensing requirements 75Linux
AFS initialization scripton add’l server machine 114on client machine 159on first AFS machine 66, 70
AFS kernel extensionson add’l server machine 100on client machine 141on first AFS machine 32
AFS loginon client machine 141on file server machine 34
AFS server partitionon add’l server machine 100on first AFS machine 33
afsd options file 153fsck program replacement not
necessary 32loading AFS kernel extensions (see
entry incorporating) 9logical volume (see entry AFS server
partition) 10
Mmake command 169memory cache (see entry: cache) 151mode bits on local AFS
directories 82mount point 72
Nnaming conventions for AFS server
partition 10NTPD
first AFS machine 54server machine after first 107
Ooperating system upgrades 5OPTIONS variable in AFS
initialization file 153overview
completing installation of firstmachine 64
general installationrequirements 4
installing additional databaseserver machine 117
installing client functionality onfirst machine 55
installing client machine 125installing server functionality on
first AFS machine 8
176 AFS: Quick Beginnings

overview (continued)installing server machine after
first 85removing database server
machine 121
PPAM
on HP-UXclient machine 132file server machine 24
on Linuxclient machine 141file server machine 34
on Solarisclient machine 144file server machine 41
partition (see entry AFS serverpartition) 10
PATH environment variable forusers 76
Pluggable Authentication Module(see entry PAM) 24
Protection Database 51Protection Server
startingfirst AFS machine 47new db-server machine 120
stopping 123pts commands
adduser 51createuser 51
ptserver process (see entry ProtectionServer) 47
Qquota for volume 75
Rrc.afs file (AFS init. file for
AIX) 156read/write mount point for root.afs
volume 72reading list for background
information 2releasing replicated volume 73removing
client functionality from first AFSmachine 83
database server machine fromservice 121
entries from BosConfig File 123entry from CellServDB file 122
replacing fsck programfirst AFS machine
AIX 13
replacing fsck program (continued)first AFS machine (continued)
Digital UNIX 18HP-UX 23Solaris 38
not necessary on IRIX 27not necessary on Linux 32server machine after first
AIX 88Digital UNIX 91HP-UX 94Solaris 102
replicating volumes 71requirements
AFS server partition name andlocation 10
cache 151CellServDB file format (client
version) 57client machine 5database server machine 116file server machine
(additional) 85file server machine (general) 4first AFS machine 7general 4protecting binaries per AFS
license 75restarting server process
on first AFS machine 51on new db-server machine 120on removed db-server
machine 123roles for first AFS machine 1root.afs volume
creating 52read/write mount point 72replicating 71
root.cell volume
creating and replicating 71mounting for foreign cells in
local filespace 79
root superuser
as installer’s login identity 3controlling access 81
running AFS init. script
client machine 156first AFS machine 64server machine after first 111
runntp process
first AFS machine 54server machine after first 107
SSalvager (salvager process)
first AFS machine 51server machine after first 107
sbin/init.d/afs (see entry: afsfile) 157
scriptsAFS initialization (see entry: AFS
initialization script) 153file systems clean-up (Solaris)
client machine 144file server machine 41
secondary authentication system(AIX)
client machine 126server machine 13
securityimproving 81initializing cell-wide 48
Security Integration Architecture (seeentry SIA) 19
server encryption keyin Authentication Database 49in KeyFile file 50
server machine after first (see entry:file server machine, additional) 85
server processrestarting
on first AFS machine 51on new db-server
machine 120on removed db-server
machine 123see also entry for each server’s
name 47setting
ACL 72cache size and location
client machine 151first AFS machine 59server machine after first 109
cell name in client ThisCell fileclient machine 149first AFS machine 56server machine after first 109
cell name in server ThisCell filefirst AFS machine 46server machine after first 105
volume quota 75SIA (Digital UNIX)
client machine 129file server machine 19
SolarisAFS initialization script
on add’l server machine 115
Index 177

Solaris (continued)on client machine 160on first AFS machine 66, 70
AFS kernel extensionson add’l server machine 101on client machine 144on first AFS machine 37
AFS loginon client machine 144on file server machine 41
AFS server partitionon add’l server machine 104on first AFS machine 40
file systems clean-up scripton client machine 144on file server machine 41
fsck programon add’l server machine 102on first AFS machine 38
source (AFS)compiling 168storing in AFS volume 167
src.afs volume 167starting
Authentication Serverfirst AFS machine 47new db-server machine 119
Backup Serverfirst AFS machine 47new db-server machine 120
BOS Serverfirst AFS machine 44server machine after first 105
File Serverfirst AFS machine 51server machine after first 107
fs processfirst AFS machine 51server machine after first 107
Protection Serverfirst AFS machine 47new db-server machine 120
runntp processfirst AFS machine 54server machine after first 107
Update Server client portion 106Update Server server portion
first AFS machine 53server machine after first 106
VL Serverfirst AFS machine 47new db-server machine 120
Volume Serverfirst AFS machine 51server machine after first 107
stoppingdatabase server processes 123
storingAFS binaries in volumes 74, 161AFS documentation in
volumes 76AFS source in volume 167system binaries in volumes 78
supported system types 5symbolic link
for abbreviated cell name 72to AFS binaries from local
disk 76SYS_NAME variable for washtool
command 169system:administrators group 51system control machine 53system types supported 5
TThisCell file (client)
client machine 149first AFS machine 56server machine after first 109
ThisCell file (server)first AFS machine 46server machine after first 105
time synchronization 54tokens command 67
UUNIX mode bits on local AFS
directories 82upclient process 106Update Server
starting client portion 106starting server portion
first AFS machine 53server machine after first 106
upgrading the operating system 5upserver process (see entry Update
Server) 53UserList file
first AFS machine 50server machine after first 105
usr/afs/bin directoryfirst AFS machine 45server machine after first 86
usr/afs/db directory 45usr/afs directory
first AFS machine 9server machine after first 86
usr/afs/etc/CellServDB file (seeentry CellServDB file (server)) 46
usr/afs/etc directoryfirst AFS machine 45
usr/afs/etc directory (continued)server machine after first 105
usr/afs/etc/KeyFile (see entryKeyFile file) 48
usr/afs/etc/ThisCell (see entryThisCell file (server)) 46
usr/afs/etc/UserList (see entryUserList file) 50
usr/afs/local/BosConfig (see entryBosConfig file) 47
usr/afs/local directory 45usr/afs/logs directory 45usr/afsdoc directory 76usr/afsws directory 74, 161usr/vice/cache directory 151usr/vice/etc/cacheinfo (see entry:
cacheinfo file) 151usr/vice/etc/CellServDB (see entry
CellServDB file (client)) 57usr/vice/etc directory
client machine 125first AFS machine 9server machine after first 86
usr/vice/etc/ThisCell (see entryThisCell file (client)) 56
Vvariables
afsclient (IRIX)client machine 158first AFS machine 65server machine after first 113
afsml (IRIX)client machine 138first AFS machine 28server machine after first 96
afsserver (IRIX)first AFS machine 65server machine after first 113
afsxnfs (IRIX)client machine 138first AFS machine 28server machine after first 96
OPTIONS (in AFS initializationfile) 153
PATH, setting for users 76SYS_NAME for washtool
command 169WASHTOOL 169
vfs file 153vicepxx directory (see entry AFS
server partition) 10VL Server (vlserver process)
startingfirst AFS machine 47new db-server machine 120
178 AFS: Quick Beginnings

VL Server (vlserver process)(continued)
stopping 123
volserver process (see entry VolumeServer) 51
volume
creatingroot.afs 52root.cell 71src.afs 167
defining replication site 73for AFS binaries 74, 161for AFS documentation 76for AFS source 167for system binaries 78mounting 72releasing replicated 73replicating root.afs and
root.cell 71setting quota 75
Volume Location Server (see entryVL Server) 47
Volume Server
first AFS machine 51server machine after first 107
vos commands
addsite 73create
root.afs volume 52root.cell volume 72src.afs volume 167volume for AFS binaries 74volume for AFS
documentation 77release 73syncserv 52syncvldb 52
Wwashtool command 169
WASHTOOL variable 169
Index 179

180 AFS: Quick Beginnings

Notices
First Edition (April 2000)
This information was developed for products and services offered in theU.S.A.
IBM may not offer the products, services, or features discussed in thisdocument in other countries. Consult your local IBM representative forinformation on the products and services currently available in your area. Anyreference to an IBM product, program, or service is not intended to state orimply that only that IBM product, program, or service may be used. Anyfunctionally equivalent product, program, or service that does not infringeany IBM intellectual property right may be used instead. However, it is theuser’s responsibility to evaluate and verify the operation of any non-IBMproduct, program, or service.
IBM may have patents or pending patent applications covering subject matterdescribed in this document. The furnishing of this document does not giveyou any license to these patents. You can send license inquiries, in writing, to:
IBM Director of LicensingIBM CorporationNorth Castle DriveArmonk, NY 10504-1785U.S.A.
For license inquiries regarding double-byte (DBCS) information, contact theIBM Intellectual Property Department in your country or send inquiries, inwriting, to:
IBM World Trade Asia Corporation Licensing2-31 Roppongi 3-chome, Minato-kuTokyo 106, Japan
The following paragraph does not apply to the United Kingdom or anycountry where such provisions are inconsistent with local law:
INTERNATIONAL BUSINESS MACHINES CORPORATION PROVIDES THISDOCUMENT “AS IS” WITHOUT WARRANTY OF ANY KIND, EITHEREXPRESS OR IMPLIED, INCLUDING, BUT NOT LIMITED TO, THEIMPLIED WARRANTIES OR CONDITIONS OF NON-INFRINGEMENT,MERCHANTABILITY OR FITNESS FOR A PARTICULAR PURPOSE. Somestates do not allow disclaimer of express or implied warranties in certaintransactions, therefore, this statement may not apply to you.
© Copyright IBM Corp. 1989, 2000 181
This information could include technical inaccuracies or typographical errors.Changes are periodically made to the information herein; these changes willbe incorporated in new editions of the document. IBM may makeimprovements and/or changes in the product(s) and/or the program(s)described in this publication at any time without notice.
Any references in this information to non-IBM Web sites are provided forconvenience only and do not in any manner serve as an endorsement of thoseWeb sites. The materials at those Web sites are not part of the materials forthis IBM product and use of those Web sites is at your own risk.
IBM may use or distribute any of the information you supply in any way itbelieves appropriate without incurring any obligation to you.
Licensees of this program who wish to have information about it for thepurpose of enabling: (i) the exchange of information between independentlycreated programs and other programs (including this one) and (ii) the mutualuse of the information which has been exchanged, should contact:
IBM CorporationATTN: Software Licensing11 Stanwix StreetPittsburgh, PA 15222-1312U.S.A.
Such information may be available, subject to appropriate terms andconditions, including in some cases, payment of a fee.
The licensed program described in this document and all licensed materialavailable for it are provided by IBM under terms of the IBM InternationalProgram License Agreement or any equivalent agreement between us.
Any performance data contained herein was determined in a controlledenvironment. Therefore, the results obtained in other operating environmentsmay vary significantly. Some measurements may have been made ondevelopment-level systems and there is no guarantee that these measurementswill be the same on generally available systems. Furthermore, somemeasurements may have been estimated through extrapolation. Actual resultsmay vary. Users of this document should verify the applicable data for theirspecific environment.
Information concerning non-IBM products was obtained from the suppliers ofthose products, their published announcements or other publicly availablesources. IBM has not tested those products and cannot confirm the accuracyof performance, compatibility or any other claims related to non-IBMproducts. Questions on the capabilities of non-IBM products should beaddressed to the suppliers of those products.
182 AFS: Quick Beginnings

All statements regarding IBM’s future direction or intent are subject to changeor withdrawal without notice, and represent goals and objectives only.
All IBM prices show are IBM’s suggested retail prices, are current and aresubject to change without notice. Dealer prices may vary.
This information is for planning purposes only. The information herein issubject to change before the products described become available.
This information contains examples of data and reports used in daily businessoperations. To illustrate them as completely as possible, the examples mayinclude the names of individuals, companies, brands, and products. All ofthese names are fictitious and any similarity to the names and addresses usedby an actual business enterprise is entirely coincidental.
If you are viewing this information softcopy, the photographs and colorillustrations may not appear.
Trademarks
The following terms are trademarks of International Business MachineCorporation in the United States, other countries, or both:
AFSAIXAS/400CICSCICS OS/2CICS/400CICS/6000CICS/ESACICS/MVSCICS/VSECICSPlexDB2DCE Encina Lightweight ClientDFSEncinaIBM
IMSMQSeriesMVS/ESAOS/2OS/390OS/400PowerPCRISC System/6000RS/6000S/390TransarcTXSeriesVSE/ESAVTAMVisualAgeWebSphere
Microsoft, Windows, Windows NT, and the Windows logo are trademarks ofMicrosoft Corporation in the United States, other countries or both.
Java and all Java-based trademarks and logos are trademarks or registeredtrademarks of Sun Microsystems, Inc. in the United States, other countries, orboth.
Notices 183

UNIX is a registered trademark in the United States, other countries or bothand is licensed exclusively through X/Open Company Limited.
Other company, product, and service names may be trademarks or servicemarks of others.
184 AFS: Quick Beginnings

Readers’ Comments — We’d Like to Hear from You
AFSQuick BeginningsVersion 3.6
Publication No. SC09-4560-00
Overall, how satisfied are you with the information in this book?
Very Satisfied Satisfied Neutral Dissatisfied VeryDissatisfied
Overall satisfaction h h h h h
How satisfied are you that the information in this book is:
Very Satisfied Satisfied Neutral Dissatisfied VeryDissatisfied
Accurate h h h h h
Complete h h h h h
Easy to find h h h h h
Easy to understand h h h h h
Well organized h h h h h
Applicable to your tasks h h h h h
Please tell us how we can improve this book:
Thank you for your responses. May we contact you? h Yes h No
When you send comments to IBM, you grant IBM a nonexclusive right to use or distribute your comments in anyway it believes appropriate without incurring any obligation to you.
Name Address
Company or Organization
Phone No.

Readers’ Comments — We’d Like to Hear from YouSC09-4560-00
SC09-4560-00
����Cut or FoldAlong Line
Cut or FoldAlong Line
Fold and Tape Please do not staple Fold and Tape
Fold and Tape Please do not staple Fold and Tape
NO POSTAGENECESSARYIF MAILED IN THEUNITED STATES
BUSINESS REPLY MAILFIRST-CLASS MAIL PERMIT NO. 40 ARMONK, NEW YORK
POSTAGE WILL BE PAID BY ADDRESSEE
IBM CorporationATTN: File Systems Documentation Group11 Stanwix StreetPittsburgh, PA15222-1312
_ _ _ _ _ _ _ _ _ _ _ _ _ _ _ _ _ _ _ _ _ _ _ _ _ _ _ _ _ _ _ _ _ _ _ _ _ _ _ _ _ _ _ _ _ _ _ _ _ _ _ _ _ _ _ _ _ _ _ _ _ _ _ _ _ _ _ _ _ _ _ _ _ _
_ _ _ _ _ _ _ _ _ _ _ _ _ _ _ _ _ _ _ _ _ _ _ _ _ _ _ _ _ _ _ _ _ _ _ _ _ _ _ _ _ _ _ _ _ _ _ _ _ _ _ _ _ _ _ _ _ _ _ _ _ _ _ _ _ _ _ _ _ _ _ _ _ _
__
__
__
__
__
__
__
__
__
__
__
__
__
__
__
__
__
__
__
__
__
__
__
__
__
__
__
__
__
__
__
__
__
__
__
__
__
__
__
__
_


����
Part Number: CT6Q7NAProgram Number:
Printed in the United States of Americaon recycled paper containing 10%recovered post-consumer fiber.
SC09-4560-00
CT6Q
7NA

Spine information:
��� AFS Quick Beginnings Version 3.6 SC09-4560-00