pyportal email display with zapier and adafruit io...pyportal's display to use it as a smart...
TRANSCRIPT

PyPortal Email Display with Zapier and Adafruit IOCreated by Brent Rubell
Last updated on 2020-04-14 06:58:20 PM EDT

Overview
Want to write a message to your PyPortal's display? Perhaps you'd like to easily add and change text on yourPyPortal's display to use it as a smart sticky-note, or have people email it directly!
Using Zapier (https://adafru.it/Eij), you will set up a Zap to receive email via a custom Zapier email address atzapiermail.com and forward it to an Adafruit IO Feed.
With some CircuitPython Code, your PyPortal will be obtaining the current value of an Adafruit IO Feed and updatingthe display with the email sender address and the subject line.
Adafruit IO and ZapierAdafruit IO is the easiest way to stream, log, and
interact with your data (https://adafru.it/eIC). It's built
from the ground up to be easy to use - we do the hard
stuff so you can focus on the fun stuff.
Want to automate your work by connecting Adafruit IO
to the online apps you already
use? Zapier (https://adafru.it/Eij) is an Adafruit IO
Connected Service (https://adafru.it/Eik) which can
receive email alerts, interact with smart devices, or
publish your Adafruit IO feeds directly to Google Docs.
© Adafruit Industries https://learn.adafruit.com/pyportal-email-display Page 3 of 37

CircuitPython CodeCircuitPython is perfect for building Internet-of-Things
projects. This project uses the PyPortal CircuitPython
module, which can send web requests and display the
response on the PyPortal!
You can rapidly update your code without having to
compile and store WiFi and API secret keys on the
device. This means that there's no editing code and re-
uploading whenever you move the PyPortal to another
network - just update a file and you're set.
Want to do more with IoT and your PyPortal? With
the Adafruit IO CircuitPython
module (https://adafru.it/Ean), you can easily send data
to Adafruit IO, receive data from Adafruit IO, and easily
manipulate data with the powerful Adafruit IO
API (https://adafru.it/uff).
Prerequisite Guides
If you're new to Adafruit IO or CircuitPython, take a moment to walk through the following guides to get you startedand up-to-speed:
Welcome to Adafruit IO (https://adafru.it/DZd)Welcome to CircuitPython (https://adafru.it/cpy-welcome)
Parts
You only need a PyPortal for this guide - no other sensors or breakouts are required!
Adafruit PyPortal - CircuitPython Powered Internet Display
$54.95IN STOCK
Add To Cart
© Adafruit Industries https://learn.adafruit.com/pyportal-email-display Page 4 of 37

USB cable - USB A to Micro-B
$2.95IN STOCK
Add To Cart
© Adafruit Industries https://learn.adafruit.com/pyportal-email-display Page 5 of 37

Install CircuitPython
CircuitPython (https://adafru.it/tB7) is a derivative of MicroPython (https://adafru.it/BeZ) designed to simplifyexperimentation and education on low-cost microcontrollers. It makes it easier than ever to get prototyping byrequiring no upfront desktop software downloads. Simply copy and edit files on the CIRCUITPY "flash" drive to iterate.
The following instructions will show you how to install CircuitPython. If you've already installed CircuitPython but arelooking to update it or reinstall it, the same steps work for that as well!
Set up CircuitPython Quick Start!
Follow this quick step-by-step for super-fast Python power :)
https://adafru.it/Egk
https://adafru.it/Egk
https://adafru.it/HFd
https://adafru.it/HFd
Click the link above to download the latest version of
CircuitPython for the PyPortal.
Download and save it to your desktop (or wherever is
handy).
© Adafruit Industries https://learn.adafruit.com/pyportal-email-display Page 6 of 37

Plug your PyPortal into your computer using a known-
good USB cable.
A lot of people end up using charge-only USB cables
and it is very frustrating! So make sure you have a USB
cable you know is good for data sync.
Double-click the Reset button on the top in the middle
(magenta arrow) on your board, and you will see the
NeoPixel RGB LED (green arrow) turn green. If it turns
red, check the USB cable, try another USB port,
etc. Note: The little red LED next to the USB connector
will pulse red. That's ok!
If double-clicking doesn't work the first time, try again.
Sometimes it can take a few tries to get the rhythm right!
© Adafruit Industries https://learn.adafruit.com/pyportal-email-display Page 7 of 37

You will see a new disk drive appear called
PORTALBOOT.
Drag the adafruit-circuitpython-pyportal-
<whatever>.uf2 file to PORTALBOOT.
© Adafruit Industries https://learn.adafruit.com/pyportal-email-display Page 8 of 37

The LED will flash. Then, the PORTALBOOT drive will
disappear and a new disk drive called CIRCUITPY will
appear.
If you haven't added any code to your board, the only
file that will be present is boot_out.txt. This is absolutely
normal! It's time for you to add your code.py and get
started!
That's it, you're done! :)
PyPortal Default Files
Click below to download a zip of the files that shipped on the PyPortal or PyPortal Pynt.
https://adafru.it/Env
https://adafru.it/Env
https://adafru.it/HFf
https://adafru.it/HFf
© Adafruit Industries https://learn.adafruit.com/pyportal-email-display Page 9 of 37

Adafruit IO Setup
If you do not already have an Adafruit IO account set up, head over to io.adafruit.com (https://adafru.it/fH9) to link yourAdafruit.com account to Adafruit IO.
The first step is to create a new Adafruit IO feed to hold the data from the Zap you'll create. Navigate to the feedspage (https://adafru.it/mxC) on Adafruit IO. Then click Actions -> Create New Feed, and name this feed zapemail.
If you do not already know how to create a feed, head over to Adafruit IO Basics: Feeds (https://adafru.it/ioA).
Obtain Secret Adafruit IO Keys
You are also going to need your Adafruit IO username and secret API key.
Navigate to your profile and click the View AIO Key button to retrieve them. Write them down in a safe place, you'llneed them for later steps.
© Adafruit Industries https://learn.adafruit.com/pyportal-email-display Page 10 of 37

Zapier Setup
Using Zapier (https://adafru.it/Bwr) with Adafruit IO allows you to automate web tasks on the Internet. For this guide,you'll be creating a Zap using Zapier's Inbound Email integration to send data from a custom email address to anAdafruit IO feed.
Linking Zapier with Adafruit IO
You'll want to first link Zapier with your Adafruit IO Account.
Zapier for Adafruit IO is currently not listed on the Zapier Integrations page (we need 10 active users to make itpublic), you can sign up for it using this invite link (https://adafru.it/Dw6).
Once you have a Zapier Account, you're going create a Zap. A Zap is a combination of a trigger (an incoming email)and an action (sending new data to an Adafruit IO feed).
To do this, navigate to the Zapier Dashboard (https://adafru.it/DCk) and click Make a Zap!
Add a Zapier Trigger
You'll be prompted to choose a trigger app. From the
dropdown, select Email by Zapier.
© Adafruit Industries https://learn.adafruit.com/pyportal-email-display Page 11 of 37

Next, you'll want to select a trigger. Click New Inbound
Email. This trigger will fire when an email is forwarded to
your custom zapiermail.com email address
Customize the name of the email address associated
with this zap. Be sure to use lowercase letters and
numbers only.
Then, click Copy to Clipboard. Save the email address
somewhere safe (like a text file on your desktop), you'll
need it later.
© Adafruit Industries https://learn.adafruit.com/pyportal-email-display Page 12 of 37

Zapier needs an email sent to the address you created
to act as a sample.
Send an email to the zapier email address you created
with some text in the subject line - a simple Hello
Zapier works.
© Adafruit Industries https://learn.adafruit.com/pyportal-email-display Page 13 of 37

Zapier will check for a new email in the inbox. Once an
email shows up, you can check out the raw data Zapier
received as part of the sample.
You're going to be sending some of this data, such as
the email address ( from ) and the subject , to an
Adafruit IO feed.
Add a Zapier Action
Now that you have a trigger, it's time to add an Action.
Once Zapier receives a new inbound email, it needs
something to do with it. This is an action, in Zapier
terms.
Click Add a Step
© Adafruit Industries https://learn.adafruit.com/pyportal-email-display Page 14 of 37

Zapier integrates with hundreds of apps, but you'll want
to add Adafruit IO as an Action App
Using the search bar - search for Adafruit IO.
Select Create Feed Data as an Adafruit IO Action.
Next, select your Adafruit IO Account (or connect your
account if you have not done so already).
© Adafruit Industries https://learn.adafruit.com/pyportal-email-display Page 15 of 37

Select zapemail as the feed key.
The Value field is be the data sent from Zapier to the
Adafruit IO feed you created earlier.
First, Select From as the first value.
To add separation between the email address and the
text, press the space bar once in the value field.
Next, Select Subject as the second value.
The Value field should look like the following
© Adafruit Industries https://learn.adafruit.com/pyportal-email-display Page 16 of 37

Zapier will allow you to test out the Zap by sending a
test Zap to Adafruit IO. To do this, click Send Test to
Adafruit IO.
If Zapier and Adafruit IO are integrated correctly, Zapier
will display that the test was successful.
But - how do you know if Adafruit IO received the
message from Zapier?
Navigate to your Adafruit IO zapemail feed. You should
see the sender and subject from the email you sent
earlier appear on the feed.
Lastly, you'll want to turn on the Zap so it runs continuously.
© Adafruit Industries https://learn.adafruit.com/pyportal-email-display Page 17 of 37

© Adafruit Industries https://learn.adafruit.com/pyportal-email-display Page 18 of 37

PyPortal CircuitPython Setup
To use all the amazing features of your PyPortal with CircuitPython, you must first install a number of libraries. Thispage covers that process.
Adafruit CircuitPython Bundle
Download the Adafruit CircuitPython Library Bundle. You can find the latest release here:
https://adafru.it/ENC
https://adafru.it/ENC
Download the adafruit-circuitpython-bundle-*.x-mpy-*.zip bundle zip file where *.x MATCHES THE VERSION OFCIRCUITPYTHON YOU INSTALLED, and unzip a folder of the same name. Inside you'll find a lib folder. You have twooptions:
You can add the lib folder to your CIRCUITPY drive. This will ensure you have all the drivers. But it will take abunch of space on the 8 MB diskAdd each library as you need it, this will reduce the space usage but you'll need to put in a little more effort.
At a minimum we recommend the following libraries, in fact we more than recommend. They're basically required. Sograb them and install them into CIRCUITPY/lib now!
adafruit_esp32spi - This is the library that gives you internet access via the ESP32 using (you guessed it!) SPItransport. You need this for anything Internetadafruit_requests - This library allows us to perform HTTP requests and get responses back from servers.GET/POST/PUT/PATCH - they're all in here!adafruit_pyportal - This is our friendly wrapper library that does a lot of our projects, displays graphics and text,fetches data from the internet. Nearly all of our projects depend on it!adafruit_touchscreen - a library for reading touches from the resistive touchscreen. Handles all the analognoodling, rotation and calibration for you.adafruit_cursorcontrol - a library for reading PyGamer and PyBadge joystick and buttons. Handles all thegraphics, button press reading and joystick movement for you.adafruit_io - this library helps connect the PyPortal to our free datalogging and viewing serviceadafruit_imageload - an image display helper, required for any graphics!adafruit_display_text - not surprisingly, it displays text on the screenadafruit_bitmap_font - we have fancy font support, and its easy to make new fonts. This library reads and parsesfont files.adafruit_slideshow - for making image slideshows - handy for quick display of graphics and soundneopixel - for controlling the onboard neopixeladafruit_adt7410 - library to read the temperature from the on-board Analog Devices ADT7410 precisiontemperature sensoradafruit_sdcard - support for reading/writing data from the onboard SD card slot.adafruit_bus_device - low level support for I2C/SPI
© Adafruit Industries https://learn.adafruit.com/pyportal-email-display Page 19 of 37

Internet Connect!
Once you have CircuitPython setup and libraries installed we can get your board connected to the Internet. Note thataccess to enterprise level secured WiFi networks is not currently supported, only WiFi networks that require SSID andpassword.
To get connected, you will need to start by creating a secrets file.
What's a secrets file?
We expect people to share tons of projects as they build CircuitPython WiFi widgets. What we want to avoid is peopleaccidentally sharing their passwords or secret tokens and API keys. So, we designed all our examples to use asecrets.py file, that is in your CIRCUITPY drive, to hold secret/private/custom data. That way you can share your main
project without worrying about accidentally sharing private stuff.
Your secrets.py file should look like this:
# This file is where you keep secret settings, passwords, and tokens!# If you put them in the code you risk committing that info or sharing it
secrets = { 'ssid' : 'home ssid', 'password' : 'my password', 'timezone' : "America/New_York", # http://worldtimeapi.org/timezones 'github_token' : 'fawfj23rakjnfawiefa', 'hackaday_token' : 'h4xx0rs3kret', }
Inside is a python dictionary named secrets with a line for each entry. Each entry has an entry name (say 'ssid' ) and
then a colon to separate it from the entry key 'home ssid' and finally a comma ,
At a minimum you'll need the ssid and password for your local WiFi setup. As you make projects you may need more
tokens and keys, just add them one line at a time. See for example other tokens such as one for accessing github orthe hackaday API. Other non-secret data like your timezone can also go here, just cause its called secrets doesn'tmean you can't have general customization data in there!
For the correct time zone string, look at http://worldtimeapi.org/timezones (https://adafru.it/EcP) and remember that ifyour city is not listed, look for a city in the same time zone, for example Boston, New York, Philadelphia, WashingtonDC, and Miami are all on the same time as New York.
Of course, don't share your secrets.py - keep that out of GitHub, Discord or other project-sharing sites.
Connect to WiFi
OK now you have your secrets setup - you can connect to the Internet. Lets use the ESP32SPI and the Requestslibraries - you'll need to visit the CircuitPython bundle and install (https://adafru.it/ENC):
adafruit_bus_deviceadafruit_esp32spiadafruit_requestsneopixel
© Adafruit Industries https://learn.adafruit.com/pyportal-email-display Page 20 of 37

Into your lib folder. Once that's done, load up the following example using Mu or your favorite editor:
import boardimport busiofrom digitalio import DigitalInOutimport adafruit_esp32spi.adafruit_esp32spi_socket as socketfrom adafruit_esp32spi import adafruit_esp32spiimport adafruit_requests as requests
print("ESP32 SPI webclient test")
TEXT_URL = "http://wifitest.adafruit.com/testwifi/index.html"JSON_URL = "http://api.coindesk.com/v1/bpi/currentprice/USD.json"
# If you are using a board with pre-defined ESP32 Pins:esp32_cs = DigitalInOut(board.ESP_CS)esp32_ready = DigitalInOut(board.ESP_BUSY)esp32_reset = DigitalInOut(board.ESP_RESET)
# If you have an ItsyBitsy Airlift:# esp32_cs = DigitalInOut(board.D13)# esp32_ready = DigitalInOut(board.D11)# esp32_reset = DigitalInOut(board.D12)
# If you have an externally connected ESP32:# esp32_cs = DigitalInOut(board.D9)# esp32_ready = DigitalInOut(board.D10)# esp32_reset = DigitalInOut(board.D5)
spi = busio.SPI(board.SCK, board.MOSI, board.MISO)esp = adafruit_esp32spi.ESP_SPIcontrol(spi, esp32_cs, esp32_ready, esp32_reset)
requests.set_socket(socket, esp)
if esp.status == adafruit_esp32spi.WL_IDLE_STATUS: print("ESP32 found and in idle mode")print("Firmware vers.", esp.firmware_version)print("MAC addr:", [hex(i) for i in esp.MAC_address])
for ap in esp.scan_networks(): print("\t%s\t\tRSSI: %d" % (str(ap["ssid"], "utf-8"), ap["rssi"]))
print("Connecting to AP...")while not esp.is_connected: try: esp.connect_AP(b"MY_SSID_NAME", b"MY_SSID_PASSWORD") except RuntimeError as e: print("could not connect to AP, retrying: ", e) continueprint("Connected to", str(esp.ssid, "utf-8"), "\tRSSI:", esp.rssi)print("My IP address is", esp.pretty_ip(esp.ip_address))print( "IP lookup adafruit.com: %s" % esp.pretty_ip(esp.get_host_by_name("adafruit.com"))
This first connection example doesn't use a secrets file - you'll hand-enter your SSID/password to verify connectivity first! See the detailed instructions after the code below.�
© Adafruit Industries https://learn.adafruit.com/pyportal-email-display Page 21 of 37

"IP lookup adafruit.com: %s" % esp.pretty_ip(esp.get_host_by_name("adafruit.com")))print("Ping google.com: %d ms" % esp.ping("google.com"))
# esp._debug = Trueprint("Fetching text from", TEXT_URL)r = requests.get(TEXT_URL)print("-" * 40)print(r.text)print("-" * 40)r.close()
print()print("Fetching json from", JSON_URL)r = requests.get(JSON_URL)print("-" * 40)print(r.json())print("-" * 40)r.close()
print("Done!")
And save it to your board, with the name code.py .
Then go down to this line
esp.connect_AP(b'MY_SSID_NAME', b'MY_SSID_PASSWORD')
and change MY_SSID_NAME and MY_SSID_PASSWORD to your access point name and password, keeping them
within the '' quotes. (This example doesn't use the secrets' file, but it's also very stand-alone so if other things seem tonot work you can always re-load this to verify basic connectivity.) You should get something like the following:
As mentioned, this first connection example doesn't use a secrets file - you'll hand-enter your SSID/password to verify connectivity first!�
© Adafruit Industries https://learn.adafruit.com/pyportal-email-display Page 22 of 37

In order, the example code...
Initializes the ESP32 over SPI using the SPI port and 3 control pins:
esp32_cs = DigitalInOut(board.ESP_CS)esp32_ready = DigitalInOut(board.ESP_BUSY)esp32_reset = DigitalInOut(board.ESP_RESET)
spi = busio.SPI(board.SCK, board.MOSI, board.MISO)esp = adafruit_esp32spi.ESP_SPIcontrol(spi, esp32_cs, esp32_ready, esp32_reset)
Tells our requests library the type of socket we're using (socket type varies by connectivity type - we'll be using
the adafruit_esp32spi_socket for this example). We'll also set the interface to an esp object. This is a little bit of a
hack, but it lets us use requests like CPython does.
requests.set_socket(socket, esp)
Verifies an ESP32 is found, checks the firmware and MAC address
if esp.status == adafruit_esp32spi.WL_IDLE_STATUS: print("ESP32 found and in idle mode")print("Firmware vers.", esp.firmware_version)print("MAC addr:", [hex(i) for i in esp.MAC_address])
© Adafruit Industries https://learn.adafruit.com/pyportal-email-display Page 23 of 37

Performs a scan of all access points it can see and prints out the name and signal strength:
for ap in esp.scan_networks(): print("\t%s\t\tRSSI: %d" % (str(ap['ssid'], 'utf-8'), ap['rssi']))
Connects to the AP we've defined here, then prints out the local IP address, attempts to do a domain name lookup andping google.com to check network connectivity (note sometimes the ping fails or takes a while, this isn't a big deal)
print("Connecting to AP...")esp.connect_AP(b'MY_SSID_NAME', b'MY_SSID_PASSWORD')print("Connected to", str(esp.ssid, 'utf-8'), "\tRSSI:", esp.rssi)print("My IP address is", esp.pretty_ip(esp.ip_address))print("IP lookup adafruit.com: %s" % esp.pretty_ip(esp.get_host_by_name("adafruit.com")))print("Ping google.com: %d ms" % esp.ping("google.com"))
OK now we're getting to the really interesting part. With a SAMD51 or other large-RAM (well, over 32 KB) device, wecan do a lot of neat tricks. Like for example we can implement an interface a lot like requests (https://adafru.it/E9o) -which makes getting data really really easy
To read in all the text from a web URL call requests.get - you can pass in https URLs for SSL connectivity
TEXT_URL = "http://wifitest.adafruit.com/testwifi/index.html"print("Fetching text from", TEXT_URL)r = requests.get(TEXT_URL)print('-'*40)print(r.text)print('-'*40)r.close()
Or, if the data is in structured JSON, you can get the json pre-parsed into a Python dictionary that can be easily queriedor traversed. (Again, only for nRF52840, M4 and other high-RAM boards)
JSON_URL = "http://api.coindesk.com/v1/bpi/currentprice/USD.json"print("Fetching json from", JSON_URL)r = requests.get(JSON_URL)print('-'*40)print(r.json())print('-'*40)r.close()
Requests
We've written a requests-like (https://adafru.it/Kpa) library for web interfacingnamed Adafruit_CircuitPython_Requests (https://adafru.it/FpW). This library allows you to send HTTP/1.1 requestswithout "crafting" them and provides helpful methods for parsing the response from the server.
# adafruit_requests usage with an esp32spi_socketimport boardimport busiofrom digitalio import DigitalInOutimport adafruit_esp32spi.adafruit_esp32spi_socket as socket
© Adafruit Industries https://learn.adafruit.com/pyportal-email-display Page 24 of 37

import adafruit_esp32spi.adafruit_esp32spi_socket as socketfrom adafruit_esp32spi import adafruit_esp32spiimport adafruit_requests as requests
# If you are using a board with pre-defined ESP32 Pins:esp32_cs = DigitalInOut(board.ESP_CS)esp32_ready = DigitalInOut(board.ESP_BUSY)esp32_reset = DigitalInOut(board.ESP_RESET)
# If you have an externally connected ESP32:# esp32_cs = DigitalInOut(board.D9)# esp32_ready = DigitalInOut(board.D10)# esp32_reset = DigitalInOut(board.D5)
spi = busio.SPI(board.SCK, board.MOSI, board.MISO)esp = adafruit_esp32spi.ESP_SPIcontrol(spi, esp32_cs, esp32_ready, esp32_reset)
print("Connecting to AP...")while not esp.is_connected: try: esp.connect_AP(b"MY_SSID_NAME", b"MY_SSID_PASSWORD") except RuntimeError as e: print("could not connect to AP, retrying: ", e) continueprint("Connected to", str(esp.ssid, "utf-8"), "\tRSSI:", esp.rssi)
# Initialize a requests object with a socket and esp32spi interfacerequests.set_socket(socket, esp)
TEXT_URL = "http://wifitest.adafruit.com/testwifi/index.html"JSON_GET_URL = "http://httpbin.org/get"JSON_POST_URL = "http://httpbin.org/post"
print("Fetching text from %s" % TEXT_URL)response = requests.get(TEXT_URL)print("-" * 40)
print("Text Response: ", response.text)print("-" * 40)response.close()
print("Fetching JSON data from %s" % JSON_GET_URL)response = requests.get(JSON_GET_URL)print("-" * 40)
print("JSON Response: ", response.json())print("-" * 40)response.close()
data = "31F"print("POSTing data to {0}: {1}".format(JSON_POST_URL, data))response = requests.post(JSON_POST_URL, data=data)print("-" * 40)
json_resp = response.json()# Parse out the 'data' key from json_resp dict.print("Data received from server:", json_resp["data"])print("-" * 40)response.close()
© Adafruit Industries https://learn.adafruit.com/pyportal-email-display Page 25 of 37

json_data = {"Date": "July 25, 2019"}print("POSTing data to {0}: {1}".format(JSON_POST_URL, json_data))response = requests.post(JSON_POST_URL, json=json_data)print("-" * 40)
json_resp = response.json()# Parse out the 'json' key from json_resp dict.print("JSON Data received from server:", json_resp["json"])print("-" * 40)response.close()
The code first sets up the ESP32SPI interface. Then, it initializes a request object using an ESP32 socket and the
esp object.
import boardimport busiofrom digitalio import DigitalInOutimport adafruit_esp32spi.adafruit_esp32spi_socket as socketfrom adafruit_esp32spi import adafruit_esp32spiimport adafruit_requests as requests
# If you are using a board with pre-defined ESP32 Pins:esp32_cs = DigitalInOut(board.ESP_CS)esp32_ready = DigitalInOut(board.ESP_BUSY)esp32_reset = DigitalInOut(board.ESP_RESET)
# If you have an externally connected ESP32:# esp32_cs = DigitalInOut(board.D9)# esp32_ready = DigitalInOut(board.D10)# esp32_reset = DigitalInOut(board.D5)
spi = busio.SPI(board.SCK, board.MOSI, board.MISO)esp = adafruit_esp32spi.ESP_SPIcontrol(spi, esp32_cs, esp32_ready, esp32_reset)
print("Connecting to AP...")while not esp.is_connected: try: esp.connect_AP(b'MY_SSID_NAME', b'MY_SSID_PASSWORD') except RuntimeError as e: print("could not connect to AP, retrying: ",e) continueprint("Connected to", str(esp.ssid, 'utf-8'), "\tRSSI:", esp.rssi)
# Initialize a requests object with a socket and esp32spi interfacerequests.set_socket(socket, esp)
HTTP GET with Requests
The code makes a HTTP GET request to Adafruit's WiFi testing website- http://wifitest.adafruit.com/testwifi/index.html (https://adafru.it/FpZ).
To do this, we'll pass the URL into requests.get() . We're also going to save the response from the server into a
variable named response .
While we requested data from the server, we'd what the server responded with. Since we already saved the
© Adafruit Industries https://learn.adafruit.com/pyportal-email-display Page 26 of 37

server's response , we can read it back. Luckily for us, requests automatically decodes the server's response into
human-readable text, you can read it back by calling response.text .
Lastly, we'll perform a bit of cleanup by calling response.close() . This closes, deletes, and collect's the response's
data.
print("Fetching text from %s"%TEXT_URL)response = requests.get(TEXT_URL)print('-'*40)
print("Text Response: ", response.text)print('-'*40)response.close()
While some servers respond with text, some respond with json-formatted data consisting of attribute–value pairs.
CircuitPython_Requests can convert a JSON-formatted response from a server into a CPython dict. object.
We can also fetch and parse json data. We'll send a HTTP get to a url we know returns a json-formatted response(instead of text data).
Then, the code calls response.json() to convert the response to a CPython dict .
print("Fetching JSON data from %s"%JSON_GET_URL)response = requests.get(JSON_GET_URL)print('-'*40)
print("JSON Response: ", response.json())print('-'*40)response.close()
HTTP POST with Requests
Requests can also POST data to a server by calling the requests.post method, passing it a data value.
data = '31F'print("POSTing data to {0}: {1}".format(JSON_POST_URL, data))response = requests.post(JSON_POST_URL, data=data)print('-'*40)
json_resp = response.json()# Parse out the 'data' key from json_resp dict.print("Data received from server:", json_resp['data'])print('-'*40)response.close()
You can also post json-formatted data to a server by passing json_data into the requests.post method.
© Adafruit Industries https://learn.adafruit.com/pyportal-email-display Page 27 of 37

json_data = {"Date" : "July 25, 2019"}print("POSTing data to {0}: {1}".format(JSON_POST_URL, json_data))response = requests.post(JSON_POST_URL, json=json_data)print('-'*40)
json_resp = response.json()# Parse out the 'json' key from json_resp dict.print("JSON Data received from server:", json_resp['json'])print('-'*40)response.close()
Advanced Requests Usage
Want to send custom HTTP headers, parse the response as raw bytes, or handle a response's http status code in yourCircuitPython code?
We've written an example to show advanced usage of the requests module below.
© Adafruit Industries https://learn.adafruit.com/pyportal-email-display Page 28 of 37

import boardimport busiofrom digitalio import DigitalInOutimport adafruit_esp32spi.adafruit_esp32spi_socket as socketfrom adafruit_esp32spi import adafruit_esp32spiimport adafruit_requests as requests
# If you are using a board with pre-defined ESP32 Pins:esp32_cs = DigitalInOut(board.ESP_CS)esp32_ready = DigitalInOut(board.ESP_BUSY)esp32_reset = DigitalInOut(board.ESP_RESET)
# If you have an externally connected ESP32:# esp32_cs = DigitalInOut(board.D9)# esp32_ready = DigitalInOut(board.D10)# esp32_reset = DigitalInOut(board.D5)
spi = busio.SPI(board.SCK, board.MOSI, board.MISO)esp = adafruit_esp32spi.ESP_SPIcontrol(spi, esp32_cs, esp32_ready, esp32_reset)
print("Connecting to AP...")while not esp.is_connected: try: esp.connect_AP(b"MY_SSID_NAME", b"MY_SSID_PASSWORD") except RuntimeError as e: print("could not connect to AP, retrying: ", e) continueprint("Connected to", str(esp.ssid, "utf-8"), "\tRSSI:", esp.rssi)
# Initialize a requests object with a socket and esp32spi interfacerequests.set_socket(socket, esp)
JSON_GET_URL = "http://httpbin.org/get"
# Define a custom header as a dict.headers = {"user-agent": "blinka/1.0.0"}
print("Fetching JSON data from %s..." % JSON_GET_URL)response = requests.get(JSON_GET_URL, headers=headers)print("-" * 60)
json_data = response.json()headers = json_data["headers"]print("Response's Custom User-Agent Header: {0}".format(headers["User-Agent"]))print("-" * 60)
# Read Response's HTTP status codeprint("Response HTTP Status Code: ", response.status_code)print("-" * 60)
# Read Response, as raw bytes instead of pretty textprint("Raw Response: ", response.content)
# Close, delete and collect the response dataresponse.close()
WiFi Manager
© Adafruit Industries https://learn.adafruit.com/pyportal-email-display Page 29 of 37

That simpletest example works but its a little finicky - you need to constantly check WiFi status and have many loops tomanage connections and disconnections. For more advanced uses, we recommend using the WiFiManager object. Itwill wrap the connection/status/requests loop for you - reconnecting if WiFi drops, resetting the ESP32 if it gets into abad state, etc.
Here's a more advanced example that shows the WiFi manager and also how to POST data with some extra headers:
import timeimport boardimport busiofrom digitalio import DigitalInOutimport neopixelfrom adafruit_esp32spi import adafruit_esp32spifrom adafruit_esp32spi import adafruit_esp32spi_wifimanager
print("ESP32 SPI webclient test")
# Get wifi details and more from a secrets.py filetry: from secrets import secretsexcept ImportError: print("WiFi secrets are kept in secrets.py, please add them there!") raise
# If you are using a board with pre-defined ESP32 Pins:esp32_cs = DigitalInOut(board.ESP_CS)esp32_ready = DigitalInOut(board.ESP_BUSY)esp32_reset = DigitalInOut(board.ESP_RESET)
# If you have an externally connected ESP32:# esp32_cs = DigitalInOut(board.D9)# esp32_ready = DigitalInOut(board.D10)# esp32_reset = DigitalInOut(board.D5)
spi = busio.SPI(board.SCK, board.MOSI, board.MISO)esp = adafruit_esp32spi.ESP_SPIcontrol(spi, esp32_cs, esp32_ready, esp32_reset)"""Use below for Most Boards"""status_light = neopixel.NeoPixel( board.NEOPIXEL, 1, brightness=0.2) # Uncomment for Most Boards"""Uncomment below for ItsyBitsy M4"""# status_light = dotstar.DotStar(board.APA102_SCK, board.APA102_MOSI, 1, brightness=0.2)# Uncomment below for an externally defined RGB LED# import adafruit_rgbled# from adafruit_esp32spi import PWMOut# RED_LED = PWMOut.PWMOut(esp, 26)# GREEN_LED = PWMOut.PWMOut(esp, 27)# BLUE_LED = PWMOut.PWMOut(esp, 25)# status_light = adafruit_rgbled.RGBLED(RED_LED, BLUE_LED, GREEN_LED)wifi = adafruit_esp32spi_wifimanager.ESPSPI_WiFiManager(esp, secrets, status_light)
counter = 0
while True: try: print("Posting data...", end="") data = counter feed = "test"
© Adafruit Industries https://learn.adafruit.com/pyportal-email-display Page 30 of 37
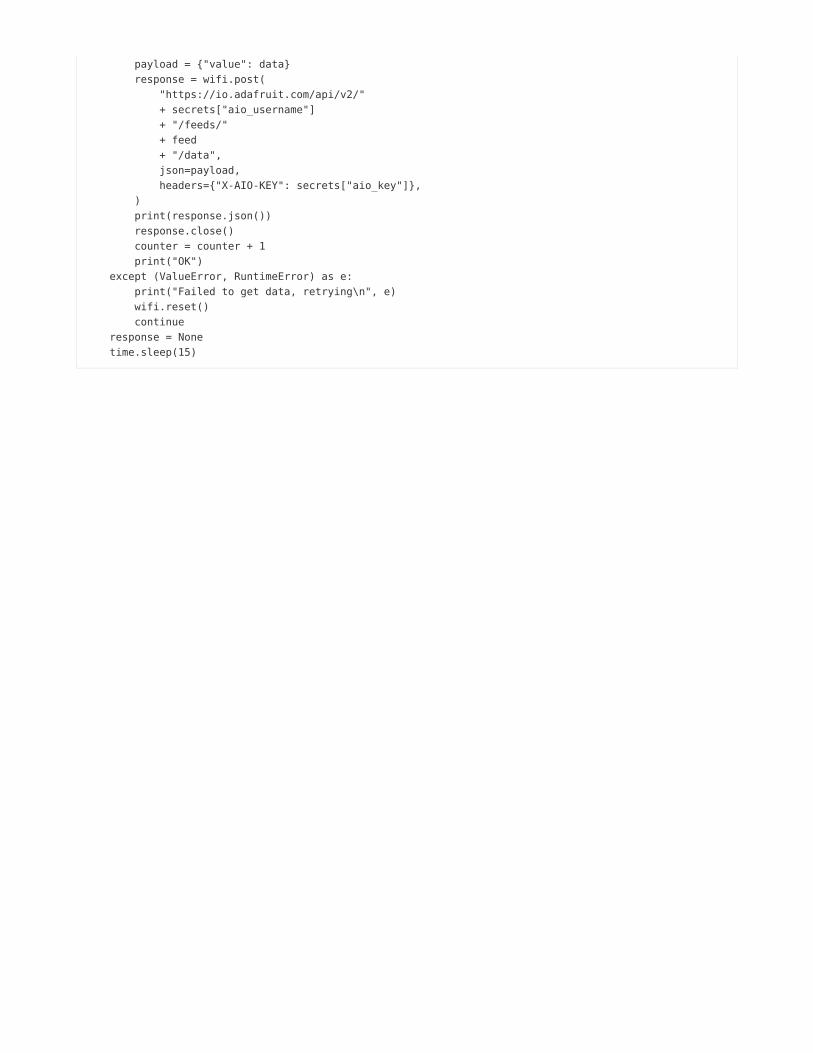
payload = {"value": data} response = wifi.post( "https://io.adafruit.com/api/v2/" + secrets["aio_username"] + "/feeds/" + feed + "/data", json=payload, headers={"X-AIO-KEY": secrets["aio_key"]}, ) print(response.json()) response.close() counter = counter + 1 print("OK") except (ValueError, RuntimeError) as e: print("Failed to get data, retrying\n", e) wifi.reset() continue response = None time.sleep(15)
You'll note here we use a secrets.py file to manage our SSID info. The wifimanager is given the ESP32 object, secretsand a neopixel for status indication.
Note, you'll need to add a some additional information to your secrets file so that the code can query the Adafruit IOAPI:
aio_usernameaio_key
You can go to your adafruit.io View AIO Key link to get those two values and add them to the secrets file, which willnow look something like this:
# This file is where you keep secret settings, passwords, and tokens!# If you put them in the code you risk committing that info or sharing it
secrets = { 'ssid' : '_your_ssid_', 'password' : '_your_wifi_password_', 'timezone' : "America/Los_Angeles", # http://worldtimeapi.org/timezones 'aio_username' : '_your_aio_username_', 'aio_key' : '_your_aio_key_', }
Next, set up an Adafruit IO feed named test
If you do not know how to set up a feed, follow this page and come back when you've set up a feed namedtest . (https://adafru.it/f5k)
We can then have a simple loop for posting data to Adafruit IO without having to deal with connecting or initializing thehardware!
Take a look at your test feed on Adafruit.io and you'll see the value increase each time the CircuitPython board postsdata to it!
© Adafruit Industries https://learn.adafruit.com/pyportal-email-display Page 31 of 37

© Adafruit Industries https://learn.adafruit.com/pyportal-email-display Page 32 of 37

Code PyPortal with CircuitPython
Secrets File Setup
If you have not yet set up a secrets.py file in your CIRCUITPY drive and connected to the internet using it, follow this
guide and come back when you've successfully connected to the internet (https://adafru.it/Eao).
Adafruit IO username, and Adafruit IO key. Head to io.adafruit.com (https://adafru.it/fsU) and simply click the View AIOKey link on the left hand side of the Adafruit IO page to get this information.
Then, add them to the secrets.py file:
secrets = { 'ssid' : '_your_wifi_ssid', 'password : '_your_wifi_password', 'aio_username' : '_your_adafruit_io_username', 'aio_key' : '_your_big_huge_super_long_aio_key_' }
Add CircuitPython Code and Project Assets
In the embedded code element below, click on the Download: Project Zip link, and save the .zip archive file to yourcomputer.
Then, uncompress the .zip file, it will unpack to a folder named PyPortal_Email_Display.
Copy the contents of the PyPortal_Email_Display directory to your PyPortal's CIRCUITPY drive. Make sure to save thefont (Helvetica-Oblique-17.bdf) into the fonts folder on the CIRCUITPY drive.
Rename the email_display.py file to code.py so it will automatically run when the PyPortal restarts.
This is what the final contents of the CIRCUITPY drive will look like:
© Adafruit Industries https://learn.adafruit.com/pyportal-email-display Page 33 of 37

"""PyPortal Adafruit IO Feed Display
Displays an Adafruit IO Feed on a PyPortal."""import timeimport boardfrom adafruit_pyportal import PyPortal
# Get Adafruit IO details and more from a secrets.py filetry: from secrets import secretsexcept ImportError: print("Adafruit IO secrets are kept in secrets.py, please add them there!") raise
# Adafruit IO AccountIO_USER = secrets['aio_username']IO_KEY = secrets['aio_key']# Adafruit IO FeedIO_FEED = 'zapemail'
DATA_SOURCE = "https://io.adafruit.com/api/v2/{0}/feeds/{1}?X-AIO-Key={2}".format(IO_USER, IO_FEED, IO_KEY)FEED_VALUE_LOCATION = ['last_value']
cwd = ("/"+__file__).rsplit('/', 1)[0]pyportal = PyPortal(url=DATA_SOURCE, json_path=FEED_VALUE_LOCATION, status_neopixel=board.NEOPIXEL, default_bg=cwd+"/pyportal_email.bmp", text_font=cwd+"/fonts/Helvetica-Oblique-17.bdf", text_position=(30, 65), text_color=0xFFFFFF, text_wrap=35, # wrap feed after 35 chars text_maxlen=160)
# speed up projects with lots of text by preloading the font!pyportal.preload_font()
while True: try: print('Fetching Adafruit IO Feed Value..') value = pyportal.fetch() print("Response is", value) except RuntimeError as e: print("Some error occured, retrying! -", e) time.sleep(10)
Code Usage
If you run into any errors, such as "ImportError: no module named `adafruit_display_text.label`" be sure to update your libraries to the latest release bundle!�
© Adafruit Industries https://learn.adafruit.com/pyportal-email-display Page 34 of 37

After the PyPortal loads up (it will display a startup
image and sound), it will display an
image called email_background.bmp as the screen's
background. This is a 320 x 240 pixel RGB 16-bit raster
graphic in .bmp format.
Then, it requests the value of the Adafruit IO feed
( IO_FEED in the code) and displays the value with
bitmapped fonts on top of the background.
Want to use your own fonts? Learn more
about PyPortal fonts in this
guide (https://adafru.it/E7E).
When the custom inbox is emailed, Zapier will immediately send the data to an Adafruit IO feed.
Customization
© Adafruit Industries https://learn.adafruit.com/pyportal-email-display Page 35 of 37

Now that you have your PyPortal displaying incoming emails, you add some customization to the PyPortal to give yourpersonal flair!
Change the background
You can customize the background to add (or remove) information, by making a 320x240 16-bit RGB color .bmp file.
Display more text
Want to show more text on the display? While our code limits the maximum length of the feed value being displayed to160 characters, you can change it in the code by increasing the length of the variable text_maxlen to any amount of
characters which can fit reasonably on the display.
If you want to display more text, switch to a smaller font size.
Change the text color
You can also change the color of the display by changing the line text_color=0xFFFFFF in the code to your color of
choice.
Visit https://www.color-hex.com (https://adafru.it/Eil) to pick your color, and then adjust the text_color value.
For example, if you'd like to change the text from white to black, you'd adjust the text_colorfrom text_color=0xFFFFFF to text_color=#000000
© Adafruit Industries https://learn.adafruit.com/pyportal-email-display Page 36 of 37

© Adafruit Industries Last Updated: 2020-04-14 06:58:19 PM EDT Page 37 of 37