pynapse manual for v95 synapse
TRANSCRIPT
Pynapse Manual for v95 SynapsePython Programming in Synapse
Updated 2021-03-24

© 2016-2021 Tucker-Davis Technologies, Inc. (TDT). All rights reserved.
Tucker-Davis Technologies11930 Research CircleAlachua, FL 32615 USAPhone: +1.386.462.9622Fax: +1.386.462.5365
Notices
The information contained in this document is provided "as is," and is subject to being changed,without notice. TDT shall not be liable for errors or damages in connection with the furnishing, use, orperformance of this document or of any information contained herein.
The latest versions of TDT documents are always online at https://www.tdt.com/docs/
Pynapse Manual | 2

Table of Contents
Overview
5Benefits of Pynapse
6Pynapse Gizmo
6Event Loop
7Python State Machine
7Main Assets of Pynapse Gizmo
8Common Applications
Requirements
9Installing Python
Quick Start Example
15Using the Always State
16Using Multiple States
Inputs
25Slot Methods for Responding to Input States
26Duration Testing
28Epoc Storage
28Buffering
29Methods
Outputs
41Buffering
41Parameter Outputs
41Output Methods
46Parameter Methods
States
48Slot Methods for Responding to State Changes
49State Timeouts
50Methods
Controls
56Slot Methods for Responding to Control Changes
57Methods
Timers
60Slot Methods for Responding to Timer Ticks
61Methods
Globals
65Methods
Table of Contents | 3
Synapse Control
68Slot Methods for Responding to Synapse Mode Changes
69SynapseAPI
Code Editor and Parser
72Code Tree
75Organizing Your Code
76Testing
Run-Time and Debugging
77Debug View
81Debugging
Tips and Tricks
83Synchronizing Events
84Delays
85Runtime Plots
Installing Standard Python
88Environments
Table of Contents | 4

Overview
Pynapse is a gizmo for tightly integrating Python coding into
your Synapse experiment.
Many users write external code in Python (or Matlab) that runs
alongside their Synapse experiments. These programs are
used for overall experiment control, stimulus delivery,
behavioral control, and online analysis - things that are either
novel paradigms that don't exist in the current gizmo set or
can't easily be programmed to run directly on the real-time
hardware.
There are several challenges faced by these users and Pynapse is designed to address these
issues with an intuitive and powerful interface.
Benefits of Pynapse
Pynapse is more than a great embedded Python editor within Synapse. You get:
Great Python editor with all the bells and whistles (highlighting, code completion, and
more)
Easy-to-learn, structured programming framework
Fully automatic Synapse synchronization. Your Python code is saved and versioned with
your experiment
Powerful hardware and software seamlessly integrated
Runtime live code editing and monitoring
Automatic code flowcharting
•
•
•
•
•
•
Overview | 5

Pynapse Gizmo
Pynapse Gizmo Block Diagram
All of this is built into the Pynapse gizmo. Just install Python and drop the Pynapse gizmo into
your Synapse experiment.
The circuit that runs on the real-time hardware has all the features that anyone writing custom
Python code to interact with the hardware. Pynapse runs an optimized polling loop that
synchronizes Python to Synapse, faster than existing methods. The State Machine architecture
in Pynapse yields tight programs that are easy to read and easy to debug.
Event Loop
A tight polling loop is continuously running and monitoring hardware events defined in the
experiment.
Hardware event is detected by the Pynapse event loop.
Call is made into Python to execute a method written by the user
Call is logged and timestamped
Events are sent back to the hardware
All of this happens in milliseconds.
1.
2.
3.
4.
Overview | 6

Python State Machine
The Python code can be organized into 'States'. Pynapse keeps track of which state it is in, and
hardware events will only trigger Python calls defined within that state. State changes are also
controlled by the Python code, and automatically timestamped and stored with the rest of your
data for easy analysis.
Main Assets of Pynapse Gizmo
Pynapse has six fundamental assets built into it that are accessible in the Python code.
Asset Description
Inputs Connect to external hardware and trigger events while accessing signals in Python
Outputs Drive logic and waveform outputs under Python control
Timers Drive timing of Python program or an experimental event
Controls Provide user control with standard User Interface elements
Globals Share global variables across your Python code and sync to edit runtime user controls
States Switch states, set timeouts, or capture state change events
Overview | 7

Common Applications
Program Control
Start/stop Synapse or other programs based on conditional triggers
Run Synapse for a set duration
Behavioral Control
Implement complex behavioral paradigms over trials that control:
Cues
Waiting periods
Input decisions
Reward output
and more
Signal Analysis and Display
Collect signals in a triggered buffer or through the API
Perform calculations, such as:
Presentation averaging, spike counting, or FFT
Plot results using Python plotting libraries (such as Matplotlib)
Stimulus Presentation
Generate simple or complex stimuli to present during triggered conditions using Pynapse
output control or built-in buffers
•
•
•
◦
◦
◦
◦
◦
•
•
◦
•
•
Overview | 8

Requirements
Installing Python
After installing TDT drivers and Synapse, you'll need to install Python on the computer that is
running Synapse. Pynapse works with Python 3.x.
There are two recommended paths for installing Python:
Anaconda Python: Anaconda includes many scientific packages pre-installed for you and
is the recommended installation. It is easier to create and manage environments in
Anaconda as well.
Standard Python: If you just want to run Python inside Synapse for behavioral control,
install standard Python.
This document covers the Anaconda installation method. For the standard Python installation
method click here.
Anaconda Python Installation
Anaconda installs from https://docs.anaconda.com/anaconda/install/windows/
During installation:
Select 'Install for All Users'
Change the installation directory to C:\Anaconda3
•
•
We recommend installing 64-bit Python on 64-bit Windows 10. This is the Python 3.x86 "64-Bit Graphical Installer"
option.
On 32-bit machines, install the Python 3.x "32-Bit Graphical Installer".
Note
1.
a.
b.
Requirements | 9

In Synapse, add a Python Coding Gizmo from the Specialized gizmo list.
Example Installer 1
Example Installer 2
2.
Requirements | 10

In Pynapse General Tab, set the Python Install Directory to your installed Python, which in
this case is:
C:\Anaconda3\python.exe
In Synapse, go to Menu → Preferences. The Python Directory will have updated to the path
you just used. Select 'Lock' so this path is the default path whenever you use a Pynapse
gizmo.
3.
4.
Requirements | 11

Environments
Pynapse also works in Python virtual environments. A virtual environment is a self-contained
directory tree that contains a Python installation for a particular version of Python, plus a
number of additional packages. The default environment is called 'base'.
Environments are simply directories on disk, so it is easy to delete/recreate environments if
they get in a bad state. It is more difficult to do this with the 'base' environment. It is therefore
recommended that you create a specific environment for Pynapse to use.
Environments are created in Anaconda using an Anaconda Prompt. Note that you can specify
the Python version for each environment as well.
Here's how to create an environment to use in Pynapse:
In Windows, go to Start → "Anaconda Prompt (Anaconda3)"
Type this to create a Python 3.7 environment called 'pynapse':
conda create --name pynapse python=3.7
The fresh environment is mostly empty, so you'll want to add common packages. From the
Anaconda Prompt, first type this to activate the new environment:
conda activate pynapse
Then install some of the libraries we'll want to use. For example, install the tdt package for
data analysis:
pip install tdt
To make sure auto-completion on the Pynapse editor works, you must downgrade one of the
installed packages:
1.
2.
If you want to add runtime plotting to Pynapse, create the environment with this:
conda create --name pynapse python=3.7 matplotlib ipykernel=4.10.0
Tip
3.
4.
Anytime you want to add packages to an environment, do it through the Anaconda Prompt and activate your
environment first.
Important
5.
Requirements | 12

pip install jedi==0.17.0
Back in Synapse, the Pynapse General Tab has a drop down that shows the environments
created in Anaconda, so you can choose the environment directly in the GUI.
6.
Requirements | 13
Quick Start Example
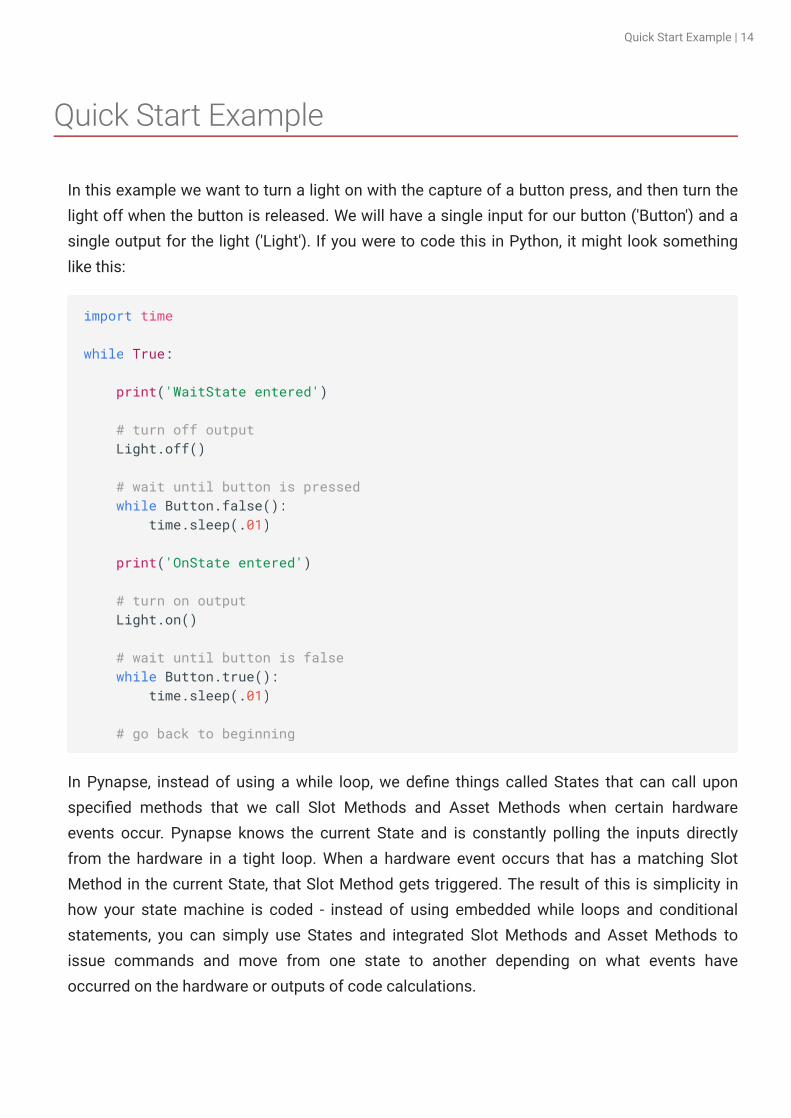
In this example we want to turn a light on with the capture of a button press, and then turn the
light off when the button is released. We will have a single input for our button ('Button') and a
single output for the light ('Light'). If you were to code this in Python, it might look something
like this:
In Pynapse, instead of using a while loop, we define things called States that can call upon
specified methods that we call Slot Methods and Asset Methods when certain hardware
events occur. Pynapse knows the current State and is constantly polling the inputs directly
from the hardware in a tight loop. When a hardware event occurs that has a matching Slot
Method in the current State, that Slot Method gets triggered. The result of this is simplicity in
how your state machine is coded - instead of using embedded while loops and conditional
statements, you can simply use States and integrated Slot Methods and Asset Methods to
issue commands and move from one state to another depending on what events have
occurred on the hardware or outputs of code calculations.
import time
while True:
print('WaitState entered')
# turn off output Light.off()
# wait until button is pressed while Button.false(): time.sleep(.01)
print('OnState entered')
# turn on output Light.on()
# wait until button is false while Button.true(): time.sleep(.01)
# go back to beginning
Quick Start Example | 14

Here is a table of important definitions of terms you will see throughout this example and in
the Pynapse manual:
For the quick start example, we are going to demonstrate how to perform our Light on/off task
in two ways: the first is going to use the initial 'Always' State in Pynapse; the second is going to
show you how to use multiple States to switch between active pieces of code and perform
certain tasks based on captured hardware events.
Using the Always State
The special State called 'Always' runs on every polling loop regardless of what the Pynapse
active State is. In our example, we can take advantage of this special State by just focusing on
writing code that triggers based on hardware events and not worrying about the Pynapse State
machine. Since the 'Always' State is present in the Pynapse Source by default, all we write are
Sloth Methods and Asset Methods:
A high-level translation of this code would read as follows:
Term Definition
state Specially defined Python class that has #StateId = ? at the end of the class definition
method Any function defined inside a class using the def keyword
slot method Special method that Pynapse calls in response to events. Slot method names always begin with a
s_ prefix
asset Special Pynapse classes that interact with inputs, outputs, states, controls, globals, and timers.
Assets always begins with a p_ prefix. For reference, the list of all slot methods that these assets
can trigger, and methods you can use to interact with the assets in Python, can be found in the
Assets Reference section of this manual.
function General name used for any function defined outside of a class with the def keyword
# Pynapse Source #
class Always: #StateID = 0
def s_Button_rise(): p_Output.Light.turnOn() print('Light is on!')
def s_Button_fall(): p_Output.Light.turnOff() print('Light is off!')
Quick Start Example | 15

In the Always State, if the 'Button' input true (button is pressed), then turn the 'Light' output on
and print "Light is on!"; if the 'Button' input is false (button is released), then turn the 'Light'
output off and print "Light is off!".
Here is the same translation using Pynapse terminology:
As mentioned, Pynapse is constantly polling the hardware for events that trigger methods
inside of the current active State (Always). In this case, we've defined two Slot Methods
's_Button_rise' and 's_Button_fall' which are part of the Input Assets. The 's_Button_rise' Slot
Method triggers when the button is pressed (Button input changes to true) and the
's_Button_fall' triggers when the button is released (Button input changes from true to false).
When the button press is detected, Pynapse internally executes the Output Pynapse Asset
Method (Light.turnOn), which toggles the output logic signal from low to high. When the button
is released, the Light.turnOff Asset Method is executed.
After we test this code (right-click 'Main' → 'Test') and go to run-time, you will see the Light
output toggle on and off with the pressing or release of the Button input.
Using Multiple States
This example was entirely coded in the Always State. Now, we'll take advantage of Pynapse's
built-in State Machine. Using multiple Pynapse States has major advantages at runtime,
especially as your paradigm increases in complexity. You get a visual indicator of what State
you are in for behavior monitoring and the State changes are timestamped and recorded in the
data tank synchronized with the rest of your data. There are some other debugging features
you get at run-time as well, discussed in more detail in Run-Time and Debugging.
If the button was released first (e.g you were pressing down the button as you went to run-time then let go) the
's_Button_fall' Slot Method would trigger first. These Slot Methods are independent functions that are beholden
only to detected hardware events - they do not influence each other.
Note
All Pynapse Slot Methods start with s_ and all Pynapse Assets start with p_ . Remembering these two prefixes
makes it easy to use code completion inside the Pynapse Code Editor to see all the available Slots and Assets
right inside the editor and quickly find what you are looking for.
Important
Quick Start Example | 16
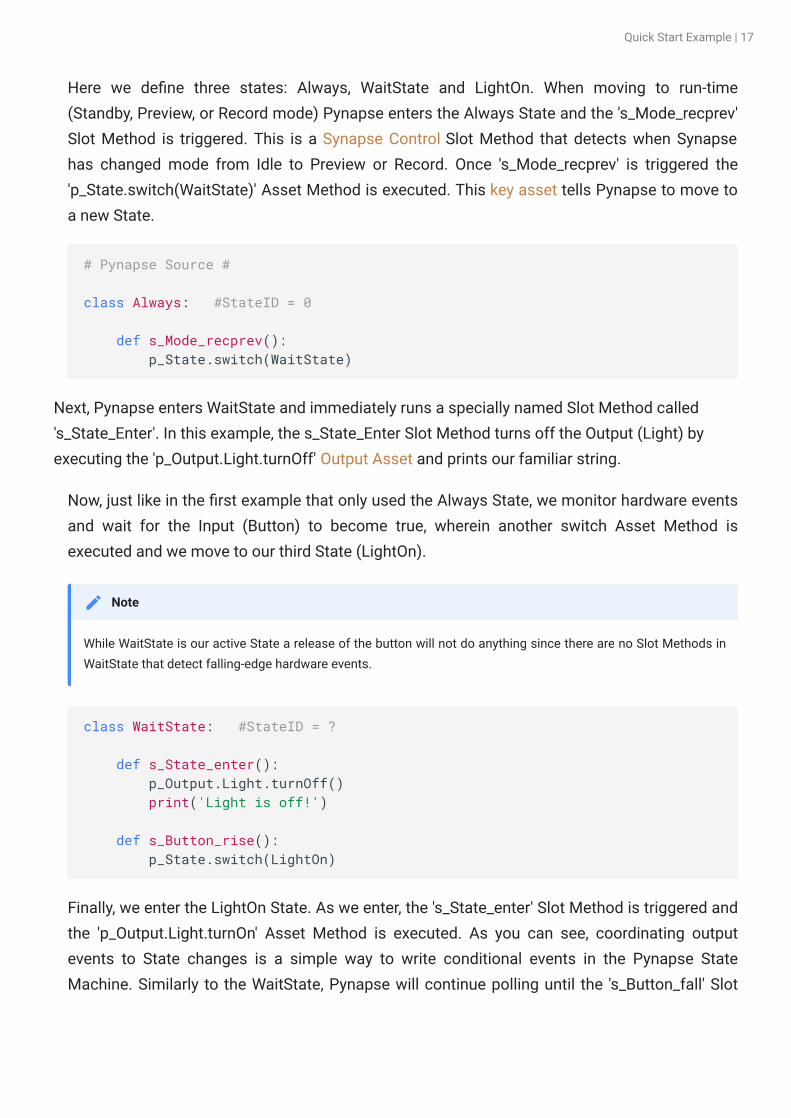
Here we define three states: Always, WaitState and LightOn. When moving to run-time
(Standby, Preview, or Record mode) Pynapse enters the Always State and the 's_Mode_recprev'
Slot Method is triggered. This is a Synapse Control Slot Method that detects when Synapse
has changed mode from Idle to Preview or Record. Once 's_Mode_recprev' is triggered the
'p_State.switch(WaitState)' Asset Method is executed. This key asset tells Pynapse to move to
a new State.
Next, Pynapse enters WaitState and immediately runs a specially named Slot Method called
's_State_Enter'. In this example, the s_State_Enter Slot Method turns off the Output (Light) by
executing the 'p_Output.Light.turnOff' Output Asset and prints our familiar string.
Now, just like in the first example that only used the Always State, we monitor hardware events
and wait for the Input (Button) to become true, wherein another switch Asset Method is
executed and we move to our third State (LightOn).
Finally, we enter the LightOn State. As we enter, the 's_State_enter' Slot Method is triggered and
the 'p_Output.Light.turnOn' Asset Method is executed. As you can see, coordinating output
events to State changes is a simple way to write conditional events in the Pynapse State
Machine. Similarly to the WaitState, Pynapse will continue polling until the 's_Button_fall' Slot
# Pynapse Source #
class Always: #StateID = 0
def s_Mode_recprev(): p_State.switch(WaitState)
While WaitState is our active State a release of the button will not do anything since there are no Slot Methods in
WaitState that detect falling-edge hardware events.
Note
class WaitState: #StateID = ?
def s_State_enter(): p_Output.Light.turnOff() print('Light is off!')
def s_Button_rise(): p_State.switch(LightOn)
Quick Start Example | 17

Method is triggered by a button release, wherein we switch back to WaitState and the Output
(Light) is turned off.
class LightOn: #StateID = ?
def s_State_enter(): p_Output.Light.turnOn() print('Light is on!')
def s_Button_fall(): p_State.switch(WaitState)
Notice there were no while loops used in these examples. In Pynapse you should almost never write while
loops. Its polling loop handles this for you. All of your methods should return immediately so the polling loop can
continue executing.
Important
Quick Start Example | 18

Inputs
You can have up to 8 inputs into the Pynapse gizmo. These inputs can be digital signals (logic
TTL) or analog signals (float or integer) that go through a Logic Conversion, such as
thresholding.
Input Processor
Set the Name of the input to something that makes sense for your experiment, e.g. 'NosePoke'.
This will be used throughout the Python code.
Inputs | 19

You can optionally save epoch timestamp events for each input. An integer code for the event
type is stored with the timestamp. See Epoc Storage below for more information.
Inputs | 20
Number input signals pass through a logic conversion so they can trigger on/off events in Pynapse.
Smoothing is a low pass filter that removes jitter on the analog signal before logic conversion. This helps avoid a
situation where the signal is quickly bouncing around the test threshold.
By default, the Test is Above, which is a simple threshold detection method to convert the number signal input
into a logic signal when it goes beyond the Thresh-A value.
Epoc events are triggered on the 'rise' event of all of these tests. If the test can be true for more than 2 samples
('Strobe') then a timestamp for the 'fall' event is also stored. See Epoc Storage below for full epoc code
information.
Logic Conversion for Number Signals
Inputs | 21
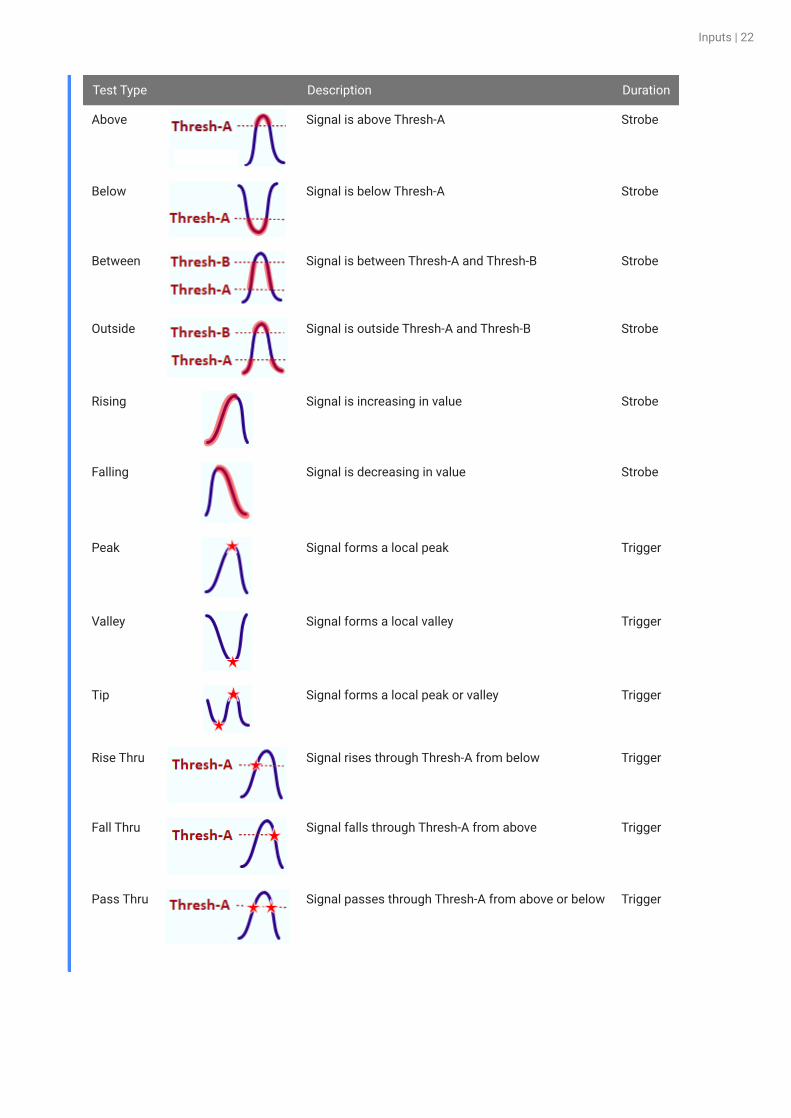
Test Type Description Duration
Above Signal is above Thresh-A Strobe
Below Signal is below Thresh-A Strobe
Between Signal is between Thresh-A and Thresh-B Strobe
Outside Signal is outside Thresh-A and Thresh-B Strobe
Rising Signal is increasing in value Strobe
Falling Signal is decreasing in value Strobe
Peak Signal forms a local peak Trigger
Valley Signal forms a local valley Trigger
Tip Signal forms a local peak or valley Trigger
Rise Thru Signal rises through Thresh-A from below Trigger
Fall Thru Signal falls through Thresh-A from above Trigger
Pass Thru Signal passes through Thresh-A from above or below Trigger
Inputs | 22

Inputs Tab - Logic Options
Inputs | 23

Invert and Debounce are typically used if the input is coming directly from a digital input on the
RZ processor. Debounce is the amount of time the input has to settle before its new state is
used. This is useful for lever presses or hardware button presses which can 'bounce' on
contact and trigger several rapid artificial events before making solid contact.
Inputs Tab - Number Options
Inputs | 24

Slot Methods for Responding to Input States
These input slots capture status information about the inputs. They are available as method
definitions inside Pynapse states for each input. Write a method with this name to react to the
corresponding event.
Move through behavioral states based on status of MyInput
Slot name Operation Event
s_Input1_true() Status input is true
s_Input1_rise() Status input changed to true
s_Input1_fall() Status input changed to false
s_Input1_active() Duration input passed the 'Time to Active' duration test (see Duration Testing)
s_Input1_pass() Duration input passed the 'Time to Pass' duration test (see Duration Testing)
s_Input1_fail() Duration input failed the 'Time to Pass' duration test, after passing 'Time to Active' (see
Duration Testing)
s_Input1_done() Buffer input buffer is full and ready to be read (see Buffering)
'Input1' is default name of the first input. The name of each slot method gets replaced with the name of your
actual input, so if you name the input 'NosePoke' then s_NosePoke_rise() is an available slot
Note
Example
class PreTrial: def s_MyInput_rise(): p_State.switch(StartTrial)
class StartTrial: # StateID = ? def s_MyInput_active(): p_State.switch(ActiveState)
def s_MyInput_fall(): p_State.switch(PreTrial)
class ActiveState: # StateID = ? def s_MyInput_pass(): p_State.switch(PassState)
def s_MyInput_fail(): p_State.switch(FailState)
Inputs | 25

Duration Testing
The inputs can use built-in duration testing. In this example, the button has to be pressed for
600ms to get to the 'Active' state, and another 400ms for it to 'Pass'. This timing happens on
the hardware and the active , pass and fail slots are triggered in Pynapse.
No Trial
Time to Active not reached by Input.
No trial is initiated.
Inputs | 26

Fail
Time to Active reached by Input, so 'Active' trigger fires.
Time to Pass was not reached by Input, so the 'Fail' trigger fires when Input is released.
Pass
Time to Active reached by Input, so 'Active' trigger fires.
Time to Pass also reached by Input, so 'Pass' trigger fires.
Inputs | 27

Epoc Storage
Epoc events are triggered on the 'rise' event of the input and a timestamp and value of 3 is
stored in the data tank. If the input is true for more than 2 samples then the 'fall' event is also
timestamped and stored, with a value of 4.
The full state of the input, including duration test results, is captured in the integer code:
Example values of the epoc event:
Buffering
Buffering lets you save a small snippet of data in hardware memory and read it into Pynapse.
When the input switches to true ('rise' trigger) the buffer is captured. When buffering is
finished it fires the done trigger.
You can connect the buffer signal source can be any single channel signal in your experiment,
including the input signal. Even though the inputs are all converted to digital signals for logic
tests, you can still trigger Pynapse to buffer up the original analog signal and then read that
into Python for online analysis. For example, you can do a threshold detection on a signal and
save the snippet around the threshold crossing, and do something with this in Pynapse.
b6 b5 b4 b3 b2 b1 b0
Done Fail Pass Active Fall Rise True
Event Value Binary Representation
Rise 3 0x0000011
Fall 4 0x0000100
Active 9 0x0001001
Pass 17 0x0010001
Fail 36 0x0100100
Done 64 0x1000000
Inputs | 28

Display a 1000 sample buffer when triggered.
Methods
All input methods have the form p_Input.{INPUT_NAME}.{METHOD} . Type p_ in the Pynapse
Code Editor and let the code completion do the work for you.
Buffer operations
Read a triggered snippet of memory from the hardware.
setBufferSize
Change the number of samples to store in the buffer.
Example
%matplotlib
import matplotlib.pyplot as plt
class Always: #StateID = 0
def s_Mode_standby(): # set up the buffer and plot p_Input.MyInput2.setBufferSize(1000) p_Input.MyInput2.armBuffer() plt.plot()
def s_MyInput_done(): # get buffer arr = p_Input.MyInput2.getBuffer()
# plot buffer contents plt.plot(arr)
p_Input.MyInput.setBufferSize(npts)
Inputs Type Description
npts integer Number of samples to buffer
This call must always be made if using a buffer.
Important
Inputs | 29

Initialize the buffer size before the recording starts.
armBuffer
Let the buffer accept a trigger and fill with new data.
Arm the buffer when the experiment first runs.
disarmBuffer
Stop the buffer from loading again. Use this to avoid overwriting buffer data before you've had
a chance to read it with getBuffer .
Example
class Always: #StateID = 0
def s_Mode_standby(): # set up the buffer p_Input.MyInput.setBufferSize(1000) p_Input.MyInput.armBuffer()
p_Input.MyInput.armBuffer()
This call must always be made if using a buffer.
Important
Example
class Always: #StateID = 0
def s_Mode_standby(): # set up the buffer p_Input.MyInput.setBufferSize(1000) p_Input.MyInput.armBuffer()
p_Input.MyInput.disarmBuffer()
Inputs | 30

Prevent the hardware buffer from triggering/ loading new data while you read it.
getBuffer
Capture the MyInput buffer when the 'done' trigger fires.
Example
p_Input.MyInput.disarmBuffer()arr = p_Input.MyInput.getBuffer()p_Input.MyInput.armBuffer()
arr = p_Input.MyInput.getBuffer(npts=0, offset=0)
Inputs Type Description
npts integer Number of samples to read (0=all)
offset integer Starting index in buffer to read from (0-based)
Returns
array number Buffer contents as python list
Example
class Always: #StateID = 0
def s_Mode_standby(): # set up the buffer p_Input.MyInput.setBufferSize(1000) p_Input.MyInput.armBuffer()
def s_MyInput_done(): # get buffer arr = p_Input.MyInput.getBuffer() print(arr)
Inputs | 31

Duration Settings
setTimingTest
Override the duration test settings applied to the input at runtime.
Modify the timing tests based on performance.
Manual Control
Manual turn inputs on, off, or pulse during runtime. Useful for debugging.
manualOn
Manually turn on the input.
Turn on the input when entering a state.
p_Input.MyInput.setTimingTest(acttime_sec, passtime_sec)
Inputs Type Description
acttime_sec float Time to Active, in seconds
passtime_sec float Time to Pass, in seconds
Example
def s_State_enter(): # if more than 5 successful trials, increase the time to pass by 50 ms. if p_Global.success.read() > 5: p_Global.pass_time.inc(delta=0.05) p_Input.MyInput.setTimingTest(p_Global.act_time.read(), p_Global.pass_time.read())
p_Input.MyInput.manualPulse()
Example
def s_State_enter(): p_Input.MyInput.manualOn()
Inputs | 32

manualOff
Manually turn off the input.
Turn off the input when exiting a state.
manualPulse
Manually pulse the input.
Pulse the input when entering a state.
Number Conversion Settings
Override the feature settings applied to the input signal for logic conversion at runtime.
setFeatureThresholds
Modify the threshold settings for the logic conversion.
p_Input.MyInput.manualPulse()
Example
def s_State_exit(): p_Input.MyInput.manualOff()
p_Input.MyInput.manualPulse()
Example
def s_State_enter(): p_Input.MyInput.manualPulse()
p_Input.MyInput.setFeatureThresholds(thresh_A, thresh_B)
Inputs Type Description
thresh_A float Threshold (in V) for the Thresh-A parameter
thresh_B float Threshold (in V) for the Thresh-B parameter
Inputs | 33

Modify the lever force requirement based on performance.
setScale
Change the scale factor applied to the signal before it goes through the logic conversion.
Modify the scale factor based on a run-time Control.
setSmoothing
Change the smoothing filter applied to the input signal before it goes through the logic
conversion.
Example
def s_State_enter(): # if more than 5 successful trials, increase the force required by 0.05 if p_Global.success.read() > 5: p_Global.thresh_A.inc(delta=0.05) p_Input.MyInput.setFeatureThresholds(p_Global.thresh_A.read(), p_Global.thresh_B.read())
p_Input.MyInput.setScale(scalefactor)
Inputs Type Description
scalefactor float Scale factor applied to signal before logic conversion
Example
class Always: #StateID = 0
# set input scale factor to value of the SmoothCtrl slider at runtime def s_SmoothCtrl_change(value): p_Input.MyInput.setScale(value)
p_Input.MyInput.setSmoothing(acttime_sec, passtime_sec)
Inputs Type Description
tau_sec float Time constant of the low-pass smoothing filter, in seconds (0=off)
Inputs | 34

Modify the smoothing filter based on a run-time Control.
Status
Get information on the current state of the input.
isOn
Returns true if the input is currently true.
When entering a state, check if an input is already true.
isOff
Returns true if the input is currently false.
Example
class Always: #StateID = 0
# set smoothing 'tau' to value of the TauCtrl slider at runtime def s_TauCtrl_change(value): p_Input.MyInput.setSmoothing(value)
p_Input.MyInput.isOn()
Example
def s_state_enter(): if p_Input.MyInput.isOn(): print('MyInput is on') else: print('MyInput is off')
p_Input.MyInput.isOff()
Inputs | 35

When entering a state, check the status of the input.
getRawInput
Read the current value of an input. If it is a number, the raw input into the Pynapse gizmo
before any feature detection.
When a threshold is crossed, check the current value of the signal.
getStatusBits
Read the current state of an input as a bitwise integer value. Bit order is:
Done | Fail | Pass | Active | Fall | Rise | True
Used by the Pynapse polling loop.
Example
def s_state_enter(): if p_Input.MyInput.isOff(): print('MyInput is off') else: print('MyInput is on')
p_Input.MyInput.getRawInput()
Example
def s_MyInput_rise(): print(p_Input.MyInput.getRawInput())
p_Input.MyInput.getStatusBits()
Inputs | 36
Outputs
You can have up to 8 outputs from the Pynapse gizmo. The outputs can be logic signals that
are turned on/off, or triggered for a single sample, or strobed high for a fixed duration. You can
also load a custom analog waveform into a buffer and trigger Pynapse to play it out.
Set the Name of the output to something that makes sense for your experiment, e.g. 'Reward'.
This will be used throughout the Python code and to link to other gizmos.
You can optionally save epoch timestamp events for each output. A timestamp is saved when
the output turns on. If the output is high for more than 2 samples then the offset is stored as
well.
Triggered - output stays high for a fixed amount of time (controlled by hardware). If Duration is
0, this is a single sample.
Strobed - output turns on when the turnOn() method is called and turns off when the turnOff()
is called.
See Synchronizing Events for information on the Sync to State Change option.
Outputs | 37

Outputs Tab - Logic Options
Outputs | 38

Outputs Tab - Float Options
Outputs | 39

Outputs Tab - Buffer Options
In the Buffer Options, there is an optional low pass filter (Image Filter) to remove aliased
signals. If unsure, set this to ~⅓ of the output Sample Freq.
Outputs | 40

Buffering
Buffering lets you write a small waveform to hardware memory and trigger it for presentation.
This allows you to create fully custom stimuli on the fly, either pre-loaded or adaptive in
response to behavioral events.
Parameter Outputs
Pynapse has a set of Parameter outputs which can control all parameters that define a
stimulation gizmo. For example, control the waveform parameters of an Audio Stimulation
gizmo or an Electrical Stim Driver gizmo directly from Pynapse, just like you would use a
Parameter Sequencer gizmo for. Create the parameters on the fly based on subject feedback,
or play from a python-generated list. See Parameter Methods below.
See Synchronizing Events for information on the Sync to State Change option.
See Using Parameters for more general information on parameters.
Output Methods
All output methods have the form p_Output.{OUTPUT_NAME}.{METHOD} . Type p_ in the
Pynapse Code Editor and let the code completion do the work for you. 'Output1' is the default
name of the first output. The name of each method gets replaced with the name of your actual
output, so if you name the output 'Reward' then p_Output.Reward.fire() is an available
method.
Manual Control
Manual turn outputs on, off, or fires a pulse waveform during runtime. Useful for stimulus/
reward presentation.
Outputs | 41
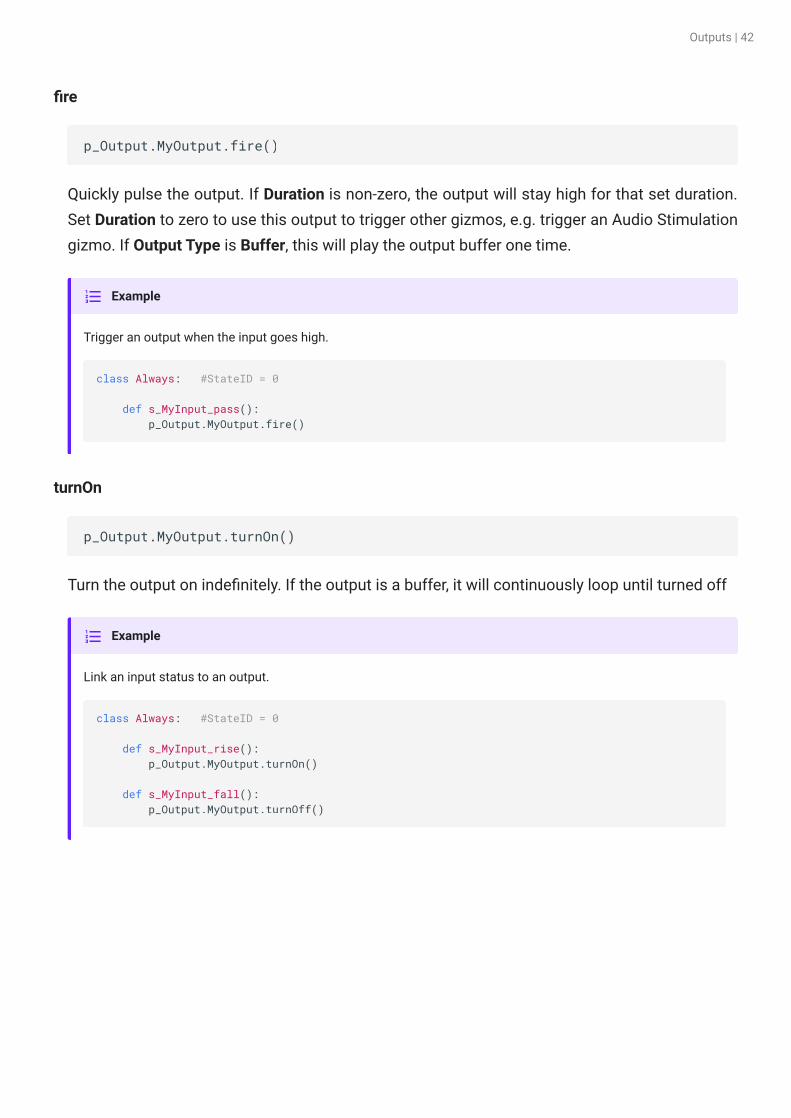
fire
Quickly pulse the output. If Duration is non-zero, the output will stay high for that set duration.
Set Duration to zero to use this output to trigger other gizmos, e.g. trigger an Audio Stimulation
gizmo. If Output Type is Buffer, this will play the output buffer one time.
Trigger an output when the input goes high.
turnOn
Turn the output on indefinitely. If the output is a buffer, it will continuously loop until turned off
Link an input status to an output.
p_Output.MyOutput.fire()
Example
class Always: #StateID = 0
def s_MyInput_pass(): p_Output.MyOutput.fire()
p_Output.MyOutput.turnOn()
Example
class Always: #StateID = 0
def s_MyInput_rise(): p_Output.MyOutput.turnOn()
def s_MyInput_fall(): p_Output.MyOutput.turnOff()
Outputs | 42

turnOff
Turn the output off.
Link an input status to an output.
Duration Settings
setPulseShape
Override the output Duration (if Control Mode is set to Triggered) and the Output Value
settings (if Output Type is set to Float or Integer) at runtime.
Modify the pulse shape and output value based on performance.
p_Output.MyOutput.turnOff()
Example
class Always: #StateID = 0
def s_MyInput_rise(): p_Output.MyOutput.turnOn()
def s_MyInput_fall(): p_Output.MyOutput.turnOff()
p_Output.MyOutput.setPulseShape(dur_sec, outval=None)
Inputs Type Description
dur_sec float Duration of the output pulse when triggered with fire , in seconds
outval float or integer Output value when true
Example
def s_State_enter(): # if more than 5 successful trials, decrease the output pulse time by 50 ms and output value by 1. if p_Global.success.read() > 5: p_Global.pulse_dur.dec(delta=0.05) p_Global.output_val.dec(delta=1) p_Output.MyOutput.setPulseShape(p_Global.pulse_dur.read(), p_Global.output_val.read())
Outputs | 43
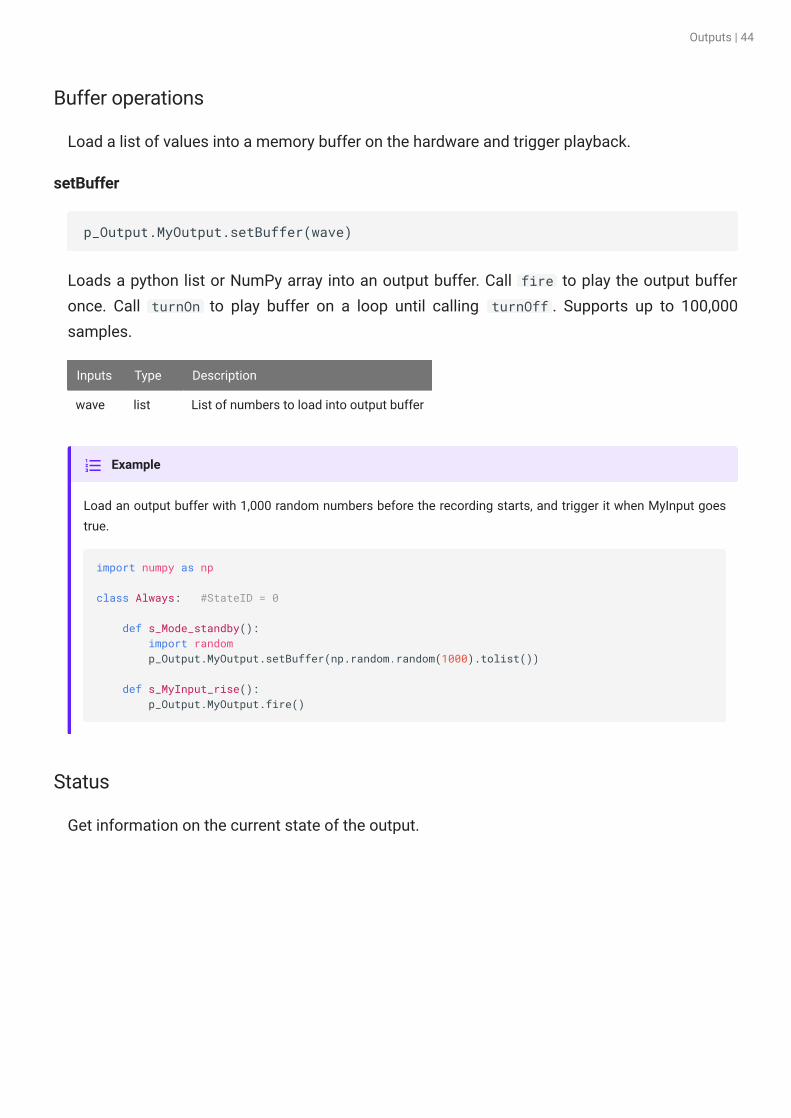
Buffer operations
Load a list of values into a memory buffer on the hardware and trigger playback.
setBuffer
Loads a python list or NumPy array into an output buffer. Call fire to play the output buffer
once. Call turnOn to play buffer on a loop until calling turnOff . Supports up to 100,000
samples.
Load an output buffer with 1,000 random numbers before the recording starts, and trigger it when MyInput goes
true.
Status
Get information on the current state of the output.
p_Output.MyOutput.setBuffer(wave)
Inputs Type Description
wave list List of numbers to load into output buffer
Example
import numpy as np
class Always: #StateID = 0
def s_Mode_standby(): import random p_Output.MyOutput.setBuffer(np.random.random(1000).tolist())
def s_MyInput_rise(): p_Output.MyOutput.fire()
Outputs | 44

isOn
Returns true if the output is currently true.
When entering a state, check if an output is already true.
isOff
Returns true if the output is currently false.
When entering a state, check the status of the output.
p_Output.MyOutput.isOn()
Example
def s_state_enter(): if p_Output.MyOutput.isOn(): print('MyOutput is on') else: print('MyOutput is off')
p_Output.MyOutput.isOff()
Example
def s_state_enter(): if p_Output.MyOutput.isOff(): print('MyOutput is off') else: print('MyOutput is on')
Outputs | 45

Parameter Methods
All parameter methods have the form p_Param.{PARAMETER_NAME}_write . Type p_ in the
Pynapse Code Editor and let the code completion do the work for you. 'Par1' is the default
name of the first parameter. The name of each write method gets replaced with the name of
your actual parameter, so if the parameter is called 'Freq' then p_Param.Freq_write(val) is an
available method.
Par1_write
Write a new value for this parameter.
Modify the wave frequency for an Audio Stimulation gizmo when a state changes.
List_write
Write all the parameters at once using a list.
p_Param.Par1_write(val)
Inputs Type Description
val float Floating point value to send to this parameter output
Example
class PrepStim: #StateID = 0 def s_State_enter(): # get next stim ready wave_freq = 1000 p_Param.p_Param.WaveFreq_write(wave_freq)
p_Param.List_write(vlist)
Inputs Type Description
vlist list List of floating point numbers to send to all parameter outputs
Outputs | 46

Prepare a list of stimulation parameters for an Audio Stimulation gizmo when a state changes.
Example
class PrepStim: #StateID = 0 def s_State_enter(): # get next stim ready pulse_count = 3 pulse_period = 100 wave_freq = 1000 p_Param.List_write([pulse_count, pulse_period, wave_freq)
Outputs | 47

States
Pynapse has an internal state machine that logs all events and keeps track of the current state.
New triggers coming in are filtered through this state machine, so that only the slot methods
associated with the current state can run.
There is a special 'Always' state - slot methods in the Always state can trigger on any polling
loop. This is a useful state to add user mode controls (start/pause/stop).
States are 'classes' in the Python code that have the special comment #StateID = ? at the
end of the class definition. The number defined here is the id number associated with this
state. This value will be timestamped and stored with the data in the data tank. If the parser
finds a ? , it will automatically assign a number for you. Otherwise enter an integer to lock the
StateID in place, for example #StateID = 555 .
See Working with StateIDs for more information.
Slot Methods for Responding to State Changes
These state slots capture state machine changes. They are available as method definitions
inside Pynapse states, including the Always state. Write a method with this name to react to
the corresponding event.
Slot name Event
s_State_change Triggers on any state change
s_State_enter Triggers once when the state begins
s_State_exit Triggers once when the state ends
s_State_timeout Triggers when the state timeout is reached
States | 48

Turn on an output only while in a particular state.
In this example, use s_State_change() to track order of state execution. Suppose there are many states that exit
to TargetState. If the state that exited to TargetState is TargetOldState, we want to do something.
State Timeouts
The Pynapse state machine has a built-in Timer that is used as a timeout within the current
state that moves to another state if it fires. Timeouts are usually set in the s_State_enter() slot
method but can be set anywhere in the State. Timeouts can also be canceled.
Example
class StartTrial: # StateID = ? # turn on MyOutput when entering state def s_State_enter(): p_Output.MyOutput.turnOn()
# when MyInput passes 'Time to Active', switch to ActiveState def s_MyInput_active(): p_State.switch(ActiveState)
# turn off MyOutput when exiting state def s_State_exit(): p_Output.MyOutput.turnOff()
class ActiveState: # StateID = ? # when MyInput passes 'Time to Pass', switch to PassState def s_MyInput_pass(): p_State.switch('PassState')
def s_MyInput1_fail(): p_State.switch(FailState)
class Always: # StateID = 0 def s_State_change(newstateidx, oldstateidx): print('new state', newstateidx, 'old state', oldstateidx) if newstateidx == TargetState and oldstateidx == TargetOldState: print('do something')
States | 49

If the user fails to press a button (MyInput) within five seconds, we want to move to a NoTrial state and wait there
for ten seconds before starting a new trial.
Methods
All state methods have the form p_State.{METHOD} . Type p_ in the Pynapse Code Editor and
let the code completion do the work for you.
State Control
switch
Tell Pynapse to move to a new state. All states are python 'classes'. The input to switch can
be either the class or the string class name you want to switch to. See the example below
Example
class StartTrial: # StateID = ?
# if no input is received after 5 seconds, switch to NoTrial statedef s_State_enter():
p_State.setTimeout(5, NoTrial)
def s_MyInput_rise(): p_State.switch(TrialState)
class NoTrial: # StateID = ? # wait 10 seconds, return to StartTrial def s_State_enter(): p_State.setTimeout(10, StartTrial)
class TrialState: # StateID = ? # turn on an output def s_State_enter(): p_Output.MyOutput.turnOn()
p_State.switch(newstate)
Inputs Type Description
newstate class or string Name of new class to switch to
States | 50
Switch between states when MyInput goes high.
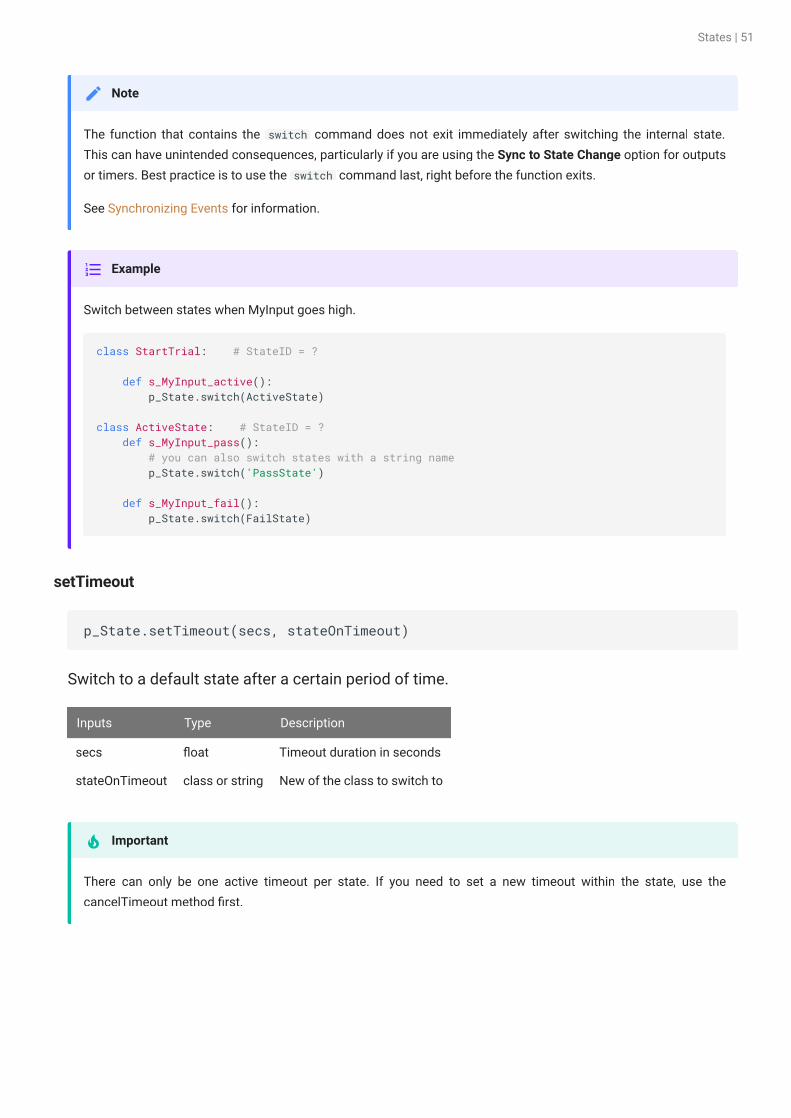
setTimeout
Switch to a default state after a certain period of time.
The function that contains the switch command does not exit immediately after switching the internal state.
This can have unintended consequences, particularly if you are using the Sync to State Change option for outputs
or timers. Best practice is to use the switch command last, right before the function exits.
See Synchronizing Events for information.
Note
Example
class StartTrial: # StateID = ?
def s_MyInput_active(): p_State.switch(ActiveState)
class ActiveState: # StateID = ? def s_MyInput_pass(): # you can also switch states with a string name p_State.switch('PassState')
def s_MyInput_fail(): p_State.switch(FailState)
p_State.setTimeout(secs, stateOnTimeout)
Inputs Type Description
secs float Timeout duration in seconds
stateOnTimeout class or string New of the class to switch to
There can only be one active timeout per state. If you need to set a new timeout within the state, use the
cancelTimeout method first.
Important
States | 51
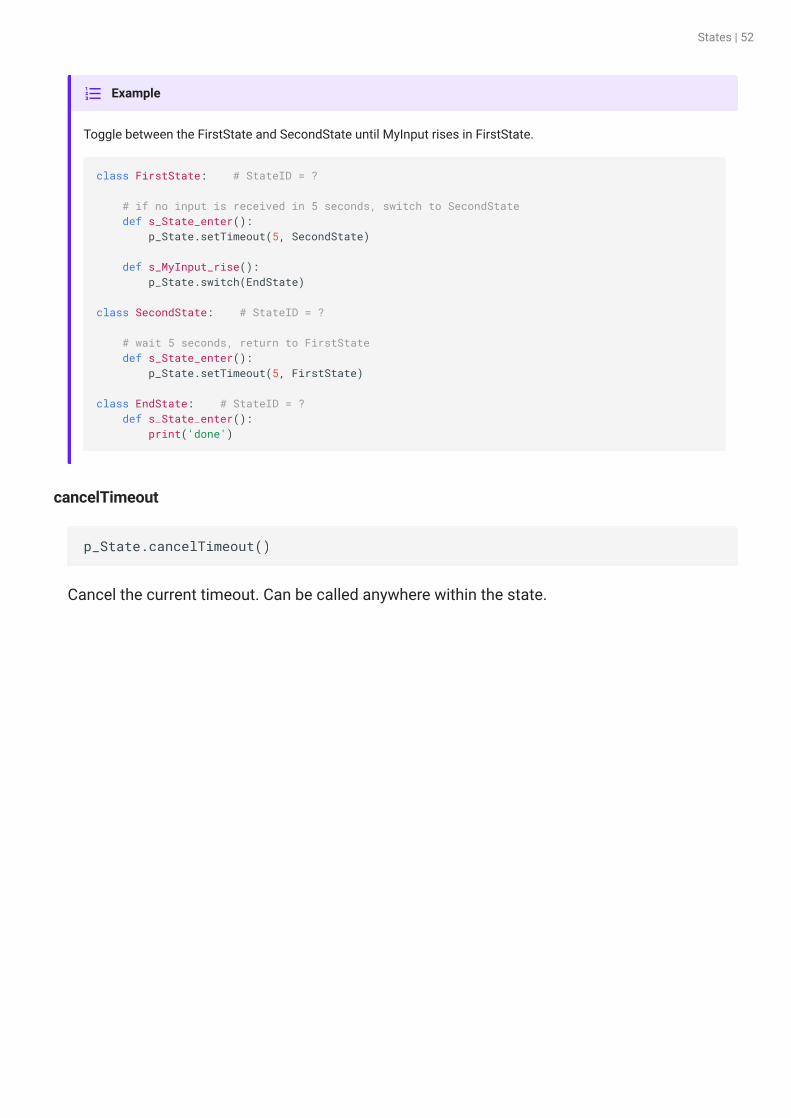
Toggle between the FirstState and SecondState until MyInput rises in FirstState.
cancelTimeout
Cancel the current timeout. Can be called anywhere within the state.
Example
class FirstState: # StateID = ?
# if no input is received in 5 seconds, switch to SecondState def s_State_enter(): p_State.setTimeout(5, SecondState)
def s_MyInput_rise(): p_State.switch(EndState)
class SecondState: # StateID = ?
# wait 5 seconds, return to FirstState def s_State_enter(): p_State.setTimeout(5, FirstState)
class EndState: # StateID = ? def s_State_enter(): print('done')
p_State.cancelTimeout()
States | 52

Give the subject 15 seconds to press MyInput 10 times. If successful, cancel the state timeout and give the
subject unlimited time to reach 20 presses before moving to the success state.
Status
isCurrent
Check if the current state is the given name. This is useful if you have a lot of States defined
but want to do similar actions in multiple states for a given slot method. You can move the
logic into the Always state and avoid repeating yourself. See the example below.
Or if you want to
Example
class TrialState: # StateID = ? def s_State_enter(): # reset counter
p_Global.count.write(0)
# if target isn't reached in 15 seconds switch to DefaultState p_State.setTimeout(15, DefaultState)
def s_MyInput_rise(): # increment counter p_Global.count.inc()
# if we reached our first target, cancel timeout if p_Global.count.read() == 10: p_State.cancelTimeout() elif p_Global.count.read() == 20: p_State.switch(SuccessState)
class DefaultState: # StateID = ? def s_State_enter(): print('default')
class SuccessState: # StateID = ? def s_State_enter(): print('success')
p_State.isCurrent(stname)
Inputs Type Description
stname class or string Name of state to check
States | 53
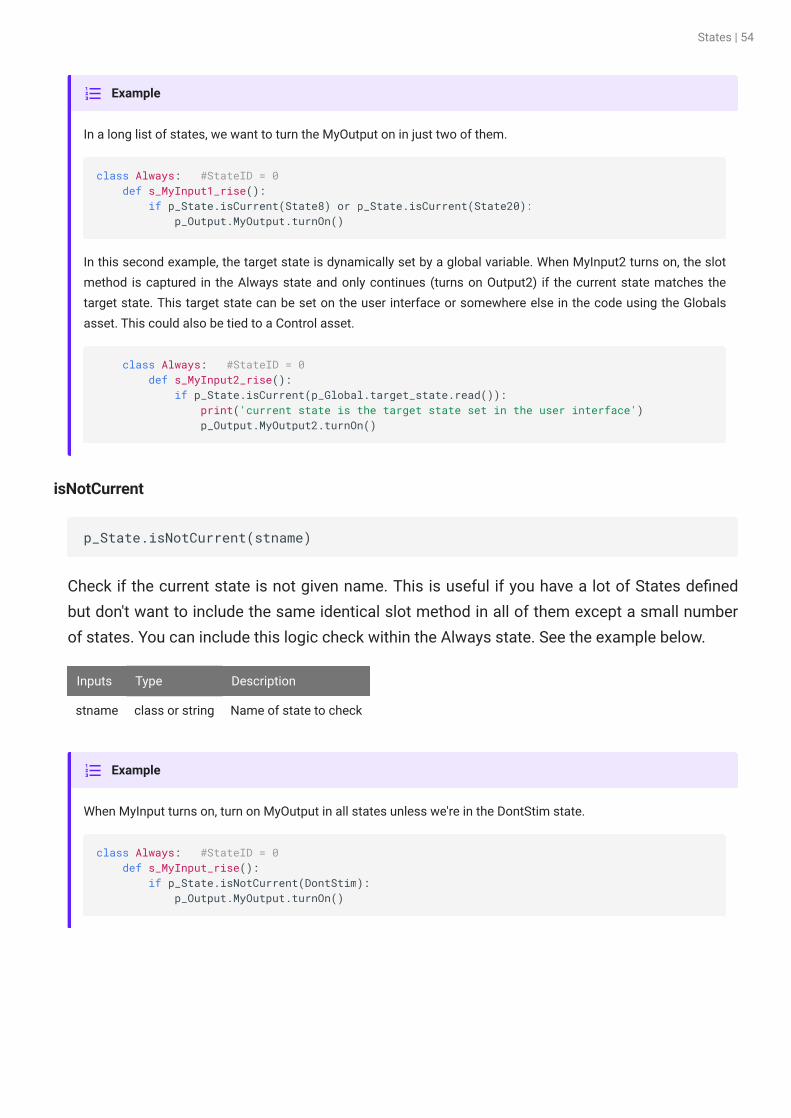
In a long list of states, we want to turn the MyOutput on in just two of them.
In this second example, the target state is dynamically set by a global variable. When MyInput2 turns on, the slot
method is captured in the Always state and only continues (turns on Output2) if the current state matches the
target state. This target state can be set on the user interface or somewhere else in the code using the Globals
asset. This could also be tied to a Control asset.
isNotCurrent
Check if the current state is not given name. This is useful if you have a lot of States defined
but don't want to include the same identical slot method in all of them except a small number
of states. You can include this logic check within the Always state. See the example below.
When MyInput turns on, turn on MyOutput in all states unless we're in the DontStim state.
Example
class Always: #StateID = 0 def s_MyInput1_rise(): if p_State.isCurrent(State8) or p_State.isCurrent(State20): p_Output.MyOutput.turnOn()
class Always: #StateID = 0 def s_MyInput2_rise(): if p_State.isCurrent(p_Global.target_state.read()): print('current state is the target state set in the user interface') p_Output.MyOutput2.turnOn()
p_State.isNotCurrent(stname)
Inputs Type Description
stname class or string Name of state to check
Example
class Always: #StateID = 0 def s_MyInput_rise(): if p_State.isNotCurrent(DontStim): p_Output.MyOutput.turnOn()
States | 54

Controls
You can create run-time widgets of all different kinds and read/ write the values of the widget.
Controls will issue a trigger when their value is changed, which can be captured and reacted to
in the Pynapse event loop. You can also read the value of the controls inside any method.
You can add up to 12 custom controls. All available controls and their options are shown in the
images below. Drag and drop the control rows in design-time to change the order they are
displayed at runtime.
User Mode Controls let you start, pause, resume, or stop the state flow in Pynapse during
runtime. User mode controls are enabled by the check box in the Controls tab. See Slot
Methods for Responding to Control Changes for an example of how these might be used.
Controls Tab
Controls | 55

Runtime Tab
Slot Methods for Responding to Control Changes
These control slot methods capture status information about the controls. They are available
as method definitions inside Pynapse states for each input. Write a method with this name to
react to the corresponding event.
All custom control slot methods s_{CONTROL_NAME}_change . Type def s_ in the Pynapse
Code Editor and let the code completion do the work for you.
Slot name Event
s_Umode_start Start button pressed
s_Umode_pause Pause button pressed
s_Umode_resume Resume button pressed
s_Umode_stop Stop button pressed
s_MyControl_change MyControl value changed
Controls | 56
Methods
All control methods have the form p_Control.{CONTROL_NAME}.{METHOD} . Type p_ in the
Pynapse Code Editor and let the code completion do the work for you.
Status
read
Read the current value of the control. For combo box controls, the value is the index into the
list of items in the combo box.
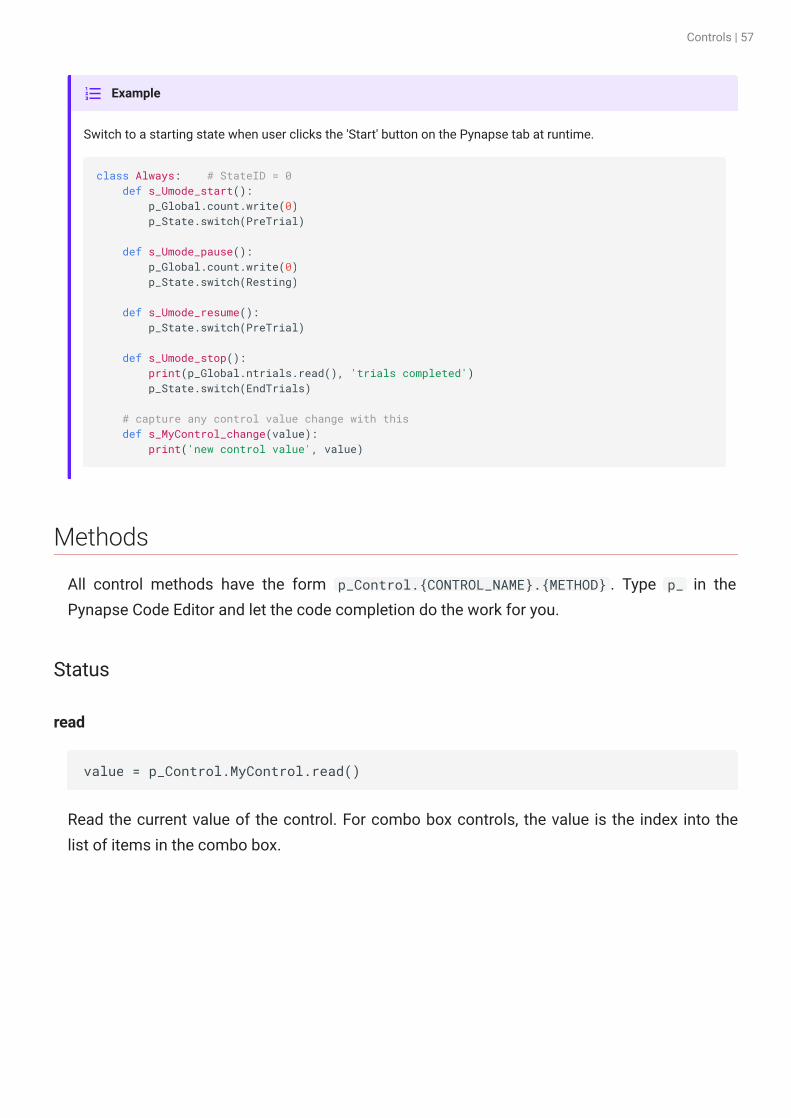
Switch to a starting state when user clicks the 'Start' button on the Pynapse tab at runtime.
Example
class Always: # StateID = 0 def s_Umode_start(): p_Global.count.write(0) p_State.switch(PreTrial)
def s_Umode_pause(): p_Global.count.write(0) p_State.switch(Resting)
def s_Umode_resume(): p_State.switch(PreTrial)
def s_Umode_stop(): print(p_Global.ntrials.read(), 'trials completed') p_State.switch(EndTrials)
# capture any control value change with this def s_MyControl_change(value):
print('new control value', value)
value = p_Control.MyControl.read()
Controls | 57

Set the next stimulation based on a slider value controlled by the user at runtime.
Control
write
Write a new value to the control. For combo box controls, the value is the index into the list of
items in the combo box.
Increment a progress bar.
Example
class PrepStim: #StateID = 0 def s_State_enter(): # get next stim ready wave_freq = p_Control.MyControl.read() p_Param.p_Param.WaveFreq_write(wave_freq)
p_Control.MyControl.write(val)
Inputs Type Description
val number New value of the control
Example
class EndTrial: #StateID = 0 def s_State_enter():
# increment completed trials counter p_Global.completed_trials.inc()
# update progress bar progress = 100 * p_Global.completed_trials.read() / p_Global.desired_trials.read() p_Control.MyProgressBar.write(progress)
Controls | 58

setRange
Set the value range of the control between minv and maxv.
p_Control.MyControl.setRange(minv, maxv)
Inputs Type Description
minv number New minimum value for this control
maxv number New maximum value for this control
Controls | 59

Timers
Timers can be used independent of states to control program flow or stimulus presentation.
The period and number of repeats can be modified at runtime within the Python code.
If Control type is 'Trigger', then you initiate the timer with the start method and it runs until it
has reached the number of repeats. In 'Enable' mode, you turn on the timer and can optionally
turn it off prematurely with the turnOn / turnOff method pairs.
Timers Tab
See Synchronizing Events for information on the Sync to State Change option.
Slot Methods for Responding to Timer Ticks
These slot methods capture status information about the timers. They are available as method
definitions inside Pynapse states for each timer. Write a method with this name to react to the
corresponding event.
Slot name Event
s_MyTimer1_tick Fires on each tick of MyTimer1 .
Note: this event does not fire when the timer is first turned on (count = 0)
Timers | 60

The timer slot method has the form s_{TIMER_NAME}_tick . Type def s_ in the Pynapse Code
Editor and let the code completion do the work for you.
Methods
All control methods have the form p_Timer.{TIMER_NAME}.{METHOD} . Type p_ in the Pynapse
Code Editor and let the code completion do the work for you.
Set a timer once a second for 10 seconds, and print the current timer count when it fires
In this example, Synapse stops the recording after 10 seconds and switches to Idle.
Example
class Always: # StateID = 0 def s_Mode_standby(): p_Timer.MyTimer.setPeriod(1) p_Timer.MyTimer.setRepeats(10)
def s_Mode_recprev(): p_Timer.MyTimer.turnOn()
def s_Timer1_tick(count): print(count)
class Always: # StateID = 0 def s_Mode_standby(): p_Timer.MyTimer.setPeriod(10) p_Timer.MyTimer.setRepeats(1)
def s_Mode_recprev(): p_Timer.MyTimer.turnOn()
def s_Timer1_tick(count): print('done') syn.setModeStr('Idle')
Timers | 61

Setup
setPeriod
Set the period between timer ticks.
setRepeats
Set the number of ticks before the timer finishes.
Control
turnOn
Start a timer that has Control mode set to 'Enable'. This call is required to start any timer in
'Enable' mode.
turnOff
Stop a timer prematurely. This only works with timers that have Control mode set to 'Enable'.
p_Timer.MyTimer.setPeriod(period_sec)
Inputs Type Description
period_sec number New period, in seconds
p_Timer.MyTimer.setRepeats(reps)
Inputs Type Description
reps number Number of times to repeat the timer tick
p_Timer.MyTimer.turnOn()
p_Timer.MyTimer.turnOff()
Timers | 62

start
Start a timer that has Control mode set to 'Trigger'. This call is required to start any timer in
'Trigger' mode.
p_Timer.MyTimer.start()
Timers | 63

Globals
Globals are global variables you can read/write in your Python logic code. They can also be
added to the runtime interface for visual display, and can also be editing at runtime.
The variable can be any python object. It's string representation will be displayed in the runtime
UI.
This is equivalent to using the global keyword in Python, except by storing it as a Pynapse
asset instead you don't have to remember the global keyword everywhere you want to modify
it, and you also get a runtime interface to see/ edit the current value.
Give each variable a name and a default value in the Globals Tab.
Globals Tab
When Runtime Display is enabled, the same global variables interface is shown in the Pynapse
tab at runtime.
When Allow Edits is enabled, at runtime you can double-click on a variable and change its
value in the dialog.
Editing the variable using the runtime display may changes its data type. After editing, the variable will be an int,
float, str, or list.
Note
Globals | 64

Methods
All globals methods have the form p_Global.{GLOBAL_NAME}.{METHOD} . Type p_ in the
Pynapse Code Editor and let the code completion do the work for you.
Status
read
Read the current value of a global variable. For combo box controls, the value is the index into
the list of items in the combo box (zero-based).
Control
write
Write a new value to the global variable. This can be any python object.
inc
Increment the global variable value.
value = p_Global.varname.read()
p_Global.varname.write(v)
Inputs Type Description
v python object New value assigned to global variable
p_Global.varname.inc(delta=1)
Inputs Type Description
delta number Amount to increase variable value (default=1)
Globals | 65

dec
Decrement the global variable value.
Data Conversion
toFloat
Convert the variable value to a floating point number for math operations
toInt
Convert the variable value to an integer number for math operations
toString
Convert the variable value to a string.
toPretty
Convert the variable to a string containing its name and value. Useful for logging
p_Global.varname.dec(delta=1)
Inputs Type Description
delta number Amount to decrease variable value (default=1)
p_Global.varname.toFloat()
p_Global.varname.toInt()
p_Global.varname.toFloat()
p_Global.varname.toFloat()
Globals | 66

Example
p_Global.varname.write(1)
# prints 'varname=1'print(p_Global.varname.toPretty())
Globals | 67

Synapse Control
Pynapse has built in slots for Synapse mode change events. These are useful in the 'Always'
state to initialize variables or buffers for stimulation before the recording begins.
Slot Methods for Responding to Synapse Mode Changes
These slots capture Synapse system mode change events. They are available as method
definitions inside Pynapse states. Write a method with this name to react to the corresponding
mode change event.
Slot name Event
s_Mode_change(newmode) Triggers on any mode change
s_Mode_idle Mode changed to idle
s_Mode_standby Mode changed to standby
s_Mode_preview Mode changed to preview
s_Mode_record Mode changed to record
s_Mode_recprev Mode changed to preview or record
If you use p_State.switch() inside s_Mode_standby() , this overrides the 'Initial State' setting on the General
Tab.
Important
Synapse Control | 68

SynapseAPI
Pynapse also exposes an instance of the SynapseAPI class as the variable syn in the source
code editor. Type syn. in the Code Editor and code completion shows you all of the available
method calls. For the complete list of SynapseAPI methods and how to use them, see
SynapseAPI Manual.
Preload a stimulus output buffer before the experiment runs
When experiment starts, switch to PreTrial state as the default starting state.
Example
import numpy as np
class Always: #StateID = 0 def s_Mode_standby(): import random p_Output.MyOutput.setBuffer(np.random.random(1000).tolist())
class Always: #StateID = 0 def s_Mode_standby(): p_State.switch(PreTrial)
SynapseAPI calls goes through sockets, and that adds some extra delay. The SynapseAPI calls are also affected
by what is happening in the Synapse window. For example, if you do something that is graphically intensive such
as resizing the windows during a recording, you can see a big (>100ms) lag before the call gets through. It
shouldn't be relied on for time critical events.
Important
User puts system into Standby mode, then when trigger is received Pynapse switches system to Record mode.
Example
class Always: #StateID = 0 def s_MyInput_rise(): syn.setModeStr('Record')
Synapse Control | 69

Code Editor and Parser
The built-in Python editor is where all your states and events are defined, telling the Pynapse
event loop what do when events happen. Click the 'Edit' button, or double-click on the Source
code, to enable editing.
The built-in Python editor does code completion for you. Every time you press 'Commit' the
parser dynamically generates a list of methods and event triggers you have access to based on
the named inputs, outputs, controls, globals, and timers. All Pynapse assets start with p_ and
all slot methods start with def s_ , so start there and the code completion will show you the
available assets or slots.
Code Editor and Parser | 70

You can also right-click → "Help" on anything in the editor to show more complete
documentation on the object under the cursor.
Asset names are linked to their method calls in the Python
code. Assets that appear in the Python code will have a
lock icon next to their names in their asset tab. If you
decide to change the name of an asset after writing Python code that interacts with it, click the
lock icon to change the name of the asset and update all of the instances of this name in the
Python code.
Assets Code Completion
Slots Code Completion
Code Editor and Parser | 71

Code Tree
The parser identifies all of the states and all of the methods that are written within the states
that respond to events, and builds the Code Tree.
You can click on any item in the Code Tree and the Editor shows you just the selected state or
methods so you are just editing that part of the code. If you want to look at the entire file, click
'Main' in the Code Tree.
Code Editor and Parser | 72

To Add a State
The easiest way to add a state is by right-clicking on an existing state in the Code Tree (or
'Main') and adding a state from the menu. This brings up a state creation wizard that shows
you all the available hardware events you can capture with the state. You choose which
methods to include in the code and a state timeout if desired. This saves you from having to
remember the exact syntax for creating a state every time.
You can also edit the Python code directly with the required state structure:
By default the Code Tree shows only Pynapse states and slot methods. Sometimes you'll write methods
inside states that aren't Pynapse slots. The 'Show All' button will include these methods in the Code
Tree.
Note
class MyNewState: #StateID = ? pass
Code Editor and Parser | 73

Working with StateIDs
Classes defined with the #StateID = ? comment are parsed as Pynapse states. If the StateID
is ? then Pynapse will automatically assign a number to the state for you. The StateIDs are
shown next to the state name in the Code Tree.
The StateID number is saved into the data tank when state changes occur during runtime. It is
important that the StateIDs are consistent across recordings. If you make changes to your
Pynapse source code and all of the StateIDs are ? then these numbers will change if you add
or remove states from your source code. This will make it harder to organize your data during
post-processing if you are trying to compare data made with your newer experiment to
recordings made with earlier versions of your experiment.
The solution is to lock the StateIDs to a value right in the comment, like #StateID = 555 . If
you already have code written with automatically generated StateIDs, you can lock the current
StateIDs in place by right-clicking on 'Main' and select 'Commit State IDs'. This will overwrite all
of the #StateID = ? comments with their assigned StateID, like #StateID = 1010 .
After you create a state, you can get back to the creation wizard by right-clicking the state name in the Code Tree
→ Reconfigure.
Note
You can include regular classes in the code that aren't Pynapse states by excluding the #StateID comment from
the class definition.
Note
Code Editor and Parser | 74

Flow Chart
As experiments get more complicated, it is helpful to see an overview of how the
states, inputs, and outputs are connected. Click the Flow Chart button to see a
graphical representation of all these links. Double-click on a state in the Flow Chart to show it
in the code editor.
Organizing Your Code
There are two kinds of files: Pynapse files and Python files.
'Main' is the default block of Pynapse code in the Code Tree. You can have up to three other
'Local' Pynapse code blocks that are also saved in the experiment. These are not files on disk
but rather saved with the experiment in the Synapse database. Right-click on 'Main' in the Code
Tree → Add Local Pynapse Block. You can import/export them if desired.
If you want to have your own classes/modules outside of Synapse you can also link to them
from the experiment. This way you can share common files across experiments. You can link
to as many existing files on disk as you want and they get imported automatically. In the Code
Tree, right-click on 'Main' → Add Python Import File, and choose the Python file.
StateIDs have to be defined in order (top to bottom) in the Python source code. For example, this code is invalid
because the state class defined with #StateID = 2 is before #StateID = 1 .
Important
class Always: #StateID = 0 def s_Mode_standby(): p_State.switch(MyState1)
class MyState1: #StateID = 2 def s_State_enter(): print('MyState1') p_State.setTimeout(1, MyState2)
class MyState2: #StateID = 1 def s_State_enter(): print('MyState2') p_State.setTimeout(1, MyState1)
Code Editor and Parser | 75
Testing
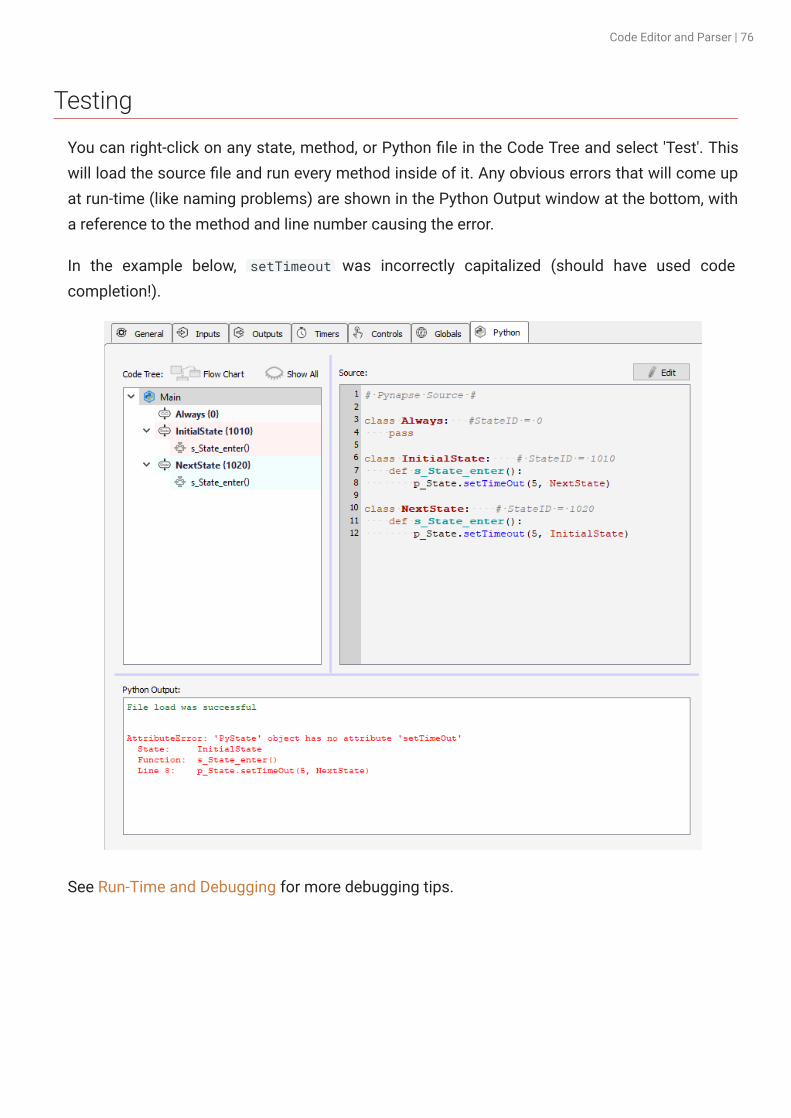
You can right-click on any state, method, or Python file in the Code Tree and select 'Test'. This
will load the source file and run every method inside of it. Any obvious errors that will come up
at run-time (like naming problems) are shown in the Python Output window at the bottom, with
a reference to the method and line number causing the error.
In the example below, setTimeout was incorrectly capitalized (should have used code
completion!).
See Run-Time and Debugging for more debugging tips.
Code Editor and Parser | 76

Run-Time and Debugging
The Pynapse run-time interface has two modes. The default view shows the current State in
red text, any Controls and Globals assets defined at design-time, and the Console Output
shows any print outputs or error messages from the Python code.
Debug View
Click the Debugger icon to open the expanded run-time view. This gives you a more in-
depth look at the events in Pynapse and allows you to manipulate the Pynapse state
and manually trigger events during the experiment.
Run-Time and Debugging | 77

Call Tree
The Call Tree shows all the states and slot methods that Pynapse knows about. An icon next to
the state/slot name gives you more status information:
Expand Mode determines what methods to show within the states.
Icon Description
Currently active state*
A green lightning bolt is briefly shown next to successful calls.
A red warning sign is briefly shown next to calls that had errors.
* The Always state is always also active and slot methods within it can always be triggered by Pynapse events
Note
Run-Time and Debugging | 78

Time Line
The Time Line shows when a state is active and when slot methods fired. If there was an error
during the slot method, it will show a red bar. You can click on events in the time line to see
more information about it in the Call Log.
The controls at the top can stop/resume the time line, or move backward/ forward in time for
review.
Span is how much time to show in the time line. When it gets to the end it clears the time line
and starts drawing from the left. Overlap is what percentage of the end of the previous time
line to include when the time line refreshes.
Sync To can be used to reset the time line when a particular state change happens, so you can
easily follow the events in a particular state. This is helpful for debugging rapid events using a
short time Span.
Call Log
All Pynapse events are captured in the Call Log with a timestamp and the amount of time
spent in that method.
Icon Description
Show only the states and no slot methods
Show all slot methods within current state
Show all slot methods within all states
The information shown here is also optionally saved to a text file with the rest of your data. Enable the Call
Logging setting in the General Tab at design-time.
Tip
Run-Time and Debugging | 79

If you click on an event in the call log, that event will be highlighted in the Call Tree, and vice
versa. If it was an error, it will be outlined in red.
The window underneath the call log shows the console output for the selected call, including
any error messages generated by that call, so you can track it down in the source code.
Icon Description
You can optionally exclude the 'Always' state calls by turning off the Always button.
The Show All button will show every Pynapse event, including state timeouts, internal state changes, and
global variable changes.
A green lightning bolt is shown next to successful calls.
A red warning sign is shown next to calls that had errors.
Pause the time line so the Call Log doesn't refresh while you are trying to look at the error messages
Note
Run-Time and Debugging | 80
Debugging
Manual Control
You can manually control the state flow in the Call Tree. Double-click on any state to switch
Pynapse into that state. The event will be capture in the Call Log.
You can also double-click on a slot method to trigger it manually. This will not be captured in
the call log.
Live Code Editing
The bottom of the Debugging window is a view of the source code. Click on a state or a slot
method in the Call Tree to see its source. Click the Edit button to make live changes to the
code. Changes made here will be immediately applied the next time the slot fires.
The Allow Run-Time Call Control check box on the General Tab at design-time must be enabled for manual
control to work.
Important
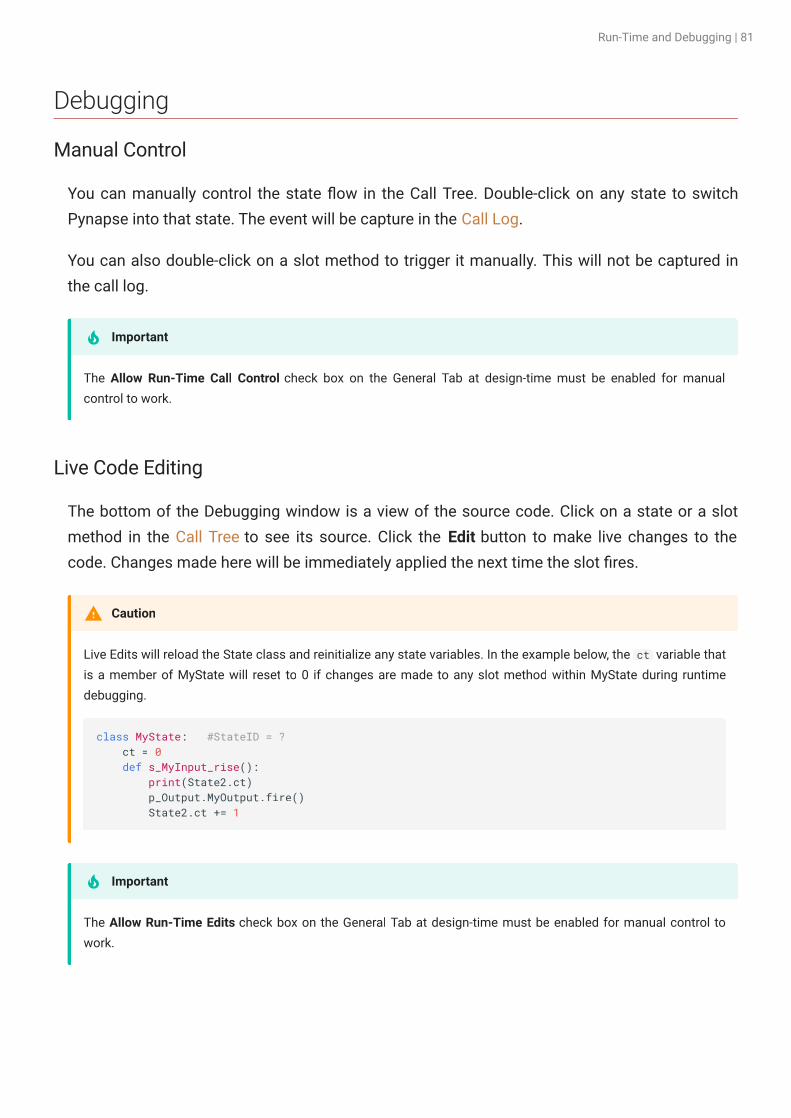
Live Edits will reload the State class and reinitialize any state variables. In the example below, the ct variable that
is a member of MyState will reset to 0 if changes are made to any slot method within MyState during runtime
debugging.
Caution
class MyState: #StateID = ? ct = 0 def s_MyInput_rise(): print(State2.ct) p_Output.MyOutput.fire() State2.ct += 1
The Allow Run-Time Edits check box on the General Tab at design-time must be enabled for manual control to
work.
Important
Run-Time and Debugging | 81

If Run-time Persistence for this gizmo is enabled, those changes will apply to your experiment source code when
you go back to run-time, otherwise those changes are lost.
Important
Run-Time and Debugging | 82

Tips and Tricks
Synchronizing Events
By default, all outputs in the Python code are executed sequentially as they are written, In the
example below, outputs and timers are turned on in a slot method. The sleep statements are
used to exaggerate the effect by adding additional latency between each call.
The two outputs and the timer have 'Epoc Save' turned on. The runtime output looks like this:
class MyState1: #StateID = 1 def s_MyInput_rise():
p_Output.MyOutput1.fire() time.sleep(0.1)
p_Timer.MyTimer1.setPeriod(.1) p_Timer.MyTimer1.setRepeats(3) p_Timer.MyTimer1.start() time.sleep(0.1)
p_Output.MyOutput2.fire() time.sleep(0.1)
p_State.switch(MyState2)
Event Description
P1S/ State change event timestamp
Out1 Output1 fired
Tim1 Timer1 ticked
Out2 Output2 fired
Tips and Tricks | 83

You can see the noticeable 100 ms gaps in between the output events, and all of these events
occur before the state change ('P1S/' = 2 in this example).
For coordinating stimulus events or anything else that has to happen on the hardware
simultaneously, the Outputs, Parameters, and Timers have a Sync to State Change option. If all
of the outputs and timers in the last example had this option enabled, then the result looks like
this:
The sleep delays are still there but now all outputs fire precisely when the state changed to 2.
Delays
The polling loop delay depends on the 'Polling Rate' setting in the Pynapse General Tab. The
typical round-trip delays (read Pynapse input → set Pynapse output) are shown below.
For tighter behavioral state control, always enable Maximum Polling Rate.
The p_State.switch statement must come after any calls to set the timers or outputs for this to work properly.
Important
Polling Rate Maximum Delay
enabled 4-5 ms
disabled ~40 ms
Maximum polling rate is not available when using Corpus hardware emulation
Note
If using the SynapseAPI class in Pynapse, there is a variable delay that ranges from 5 to 30 ms. If the computer is
under heavy processing, there can be delay spikes up to ~100 ms.
Note
Tips and Tricks | 84
Runtime Plots
If you would like to do online plotting or make your own custom GUIs then matplotlib and
ipykernel==4.10.1 must also be installed in your Python environment.
If you want to plot something on screen using matplotlib you must include this line of code at
the top of your Python code:
%matplotlib
If for some reason you need to set the matplotlib backend is set, once it is set it cannot be changed for the entire
interpreter session. For example, if in between recordings you change %matplotlib qt to %matplotlib tk , the
second statement is ignored and qt backend will be used. If Pynapse code gets modified such that a different
backend is used, a complete restart of Synapse is required.
Global and Control asset 'writes' go through the SynapseAPI and have a longer delay.
Any calls that 'read' an asset value (except for Globals which are python variables) also go through the
SynapseAPI.
Important
Note about using a different matplotlib backend
Tips and Tricks | 85
Installing Standard Python
Standard python.exe installs from https://www.python.org/downloads/windows/
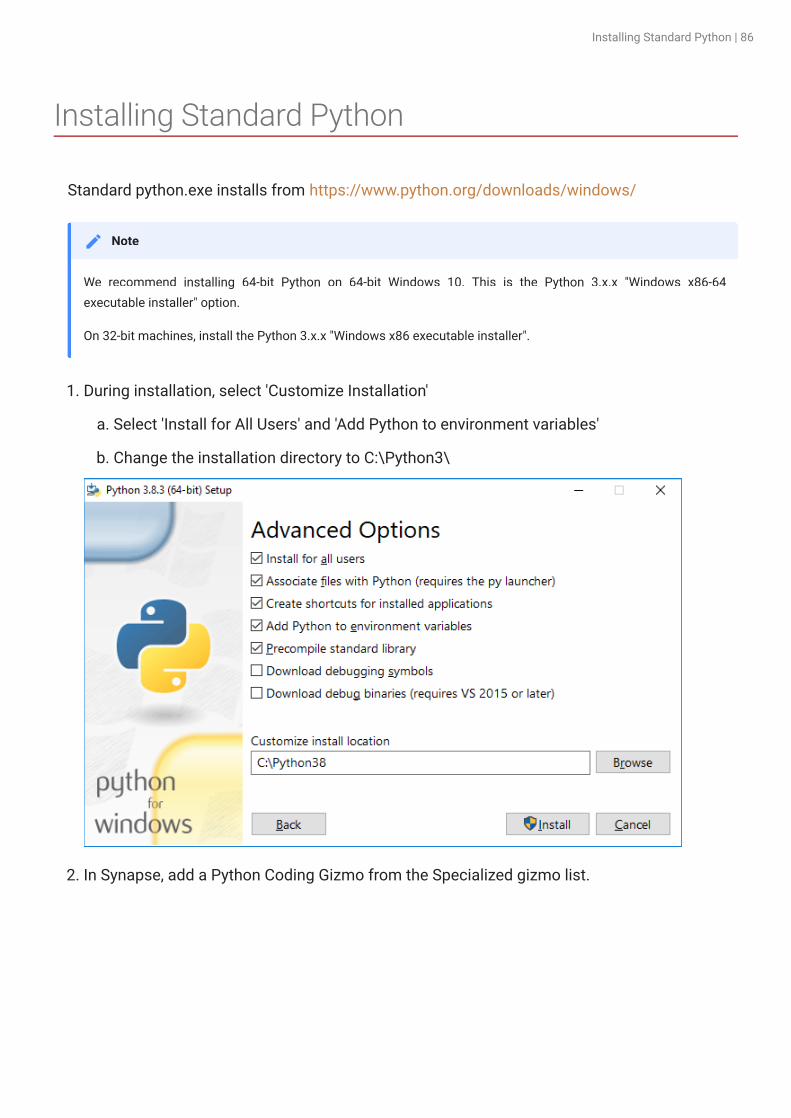
During installation, select 'Customize Installation'
Select 'Install for All Users' and 'Add Python to environment variables'
Change the installation directory to C:\Python3\
In Synapse, add a Python Coding Gizmo from the Specialized gizmo list.
We recommend installing 64-bit Python on 64-bit Windows 10. This is the Python 3.x.x "Windows x86-64
executable installer" option.
On 32-bit machines, install the Python 3.x.x "Windows x86 executable installer".
Note
1.
a.
b.
2.
Installing Standard Python | 86
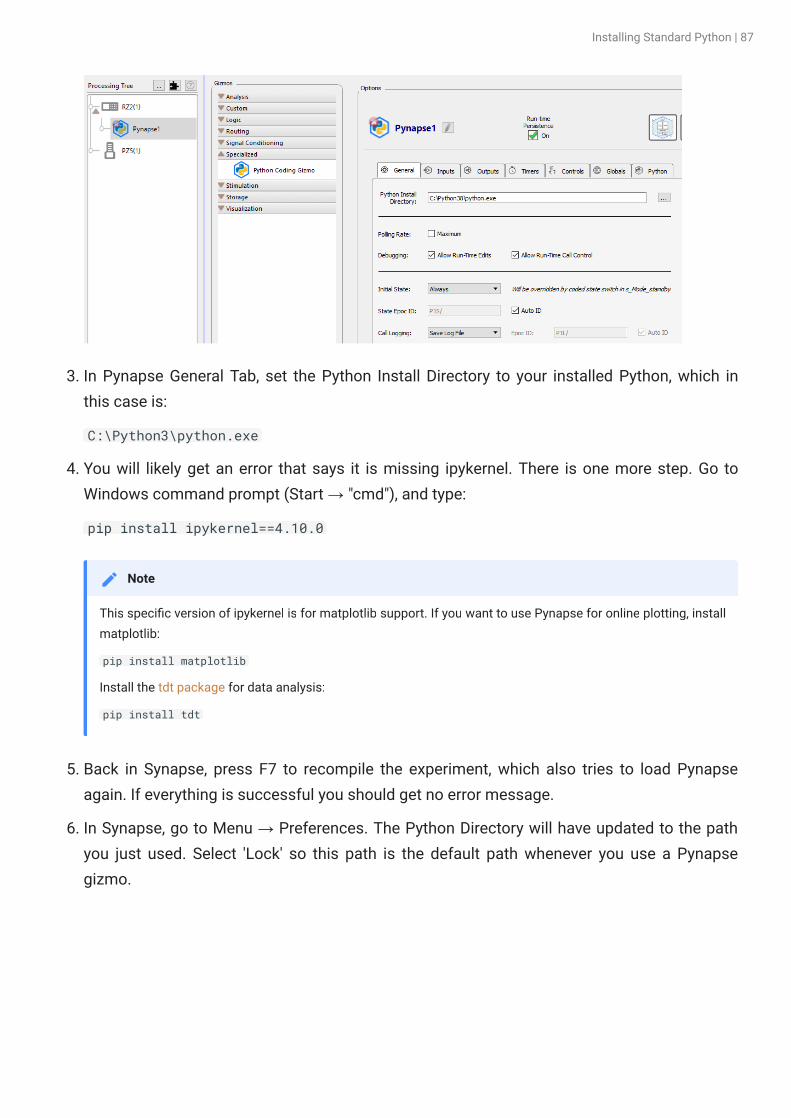
In Pynapse General Tab, set the Python Install Directory to your installed Python, which in
this case is:
C:\Python3\python.exe
You will likely get an error that says it is missing ipykernel. There is one more step. Go to
Windows command prompt (Start → "cmd"), and type:
pip install ipykernel==4.10.0
Back in Synapse, press F7 to recompile the experiment, which also tries to load Pynapse
again. If everything is successful you should get no error message.
In Synapse, go to Menu → Preferences. The Python Directory will have updated to the path
you just used. Select 'Lock' so this path is the default path whenever you use a Pynapse
gizmo.
3.
4.
This specific version of ipykernel is for matplotlib support. If you want to use Pynapse for online plotting, install
matplotlib:
pip install matplotlib
Install the tdt package for data analysis:
pip install tdt
Note
5.
6.
Installing Standard Python | 87

Environments
Pynapse also works in Python virtual environments. A virtual environment is a self-contained
directory tree that contains a Python installation for a particular version of Python, plus a
number of additional packages.
Environments are simply directories on disk, so it is easy to delete/recreate environments if
they get in a bad state. It is more difficult to do this with the 'base' environment that installs
with your Python installer. It is recommended that you create a specific environment for
Pynapse to use.
Environments are created in standard python.exe installation with the venv module.
From the command line:
python -m venv C:\Python38\envs\pynapse
Then in Pynapse in the General Tab, your Python Install Directory would be:
C:\Python38\envs\pynapse\Scripts\python.exe
Installing Standard Python | 88

To install pip packages from the command line (Start → cmd), you first activate the
environment:
Tkinter doesn't have up-to-date Windows support. If you wish to use tkinter for a custom GUI or the tkinter
backend for matplotlib then ipykernel <= 4.10.1 is a requirement.
pip install ipykernel==4.10.0
See https://github.com/ipython/ipykernel/issues/358 and https://github.com/ipython/ipykernel/issues/518.
C:\Python38\envs\pynapse\Scripts\activate.batpip install ipykernel matplotlib pyqt5
Note for tkinter users
Installing Standard Python | 89