property surveillance with thecus nas device · ... efficient surveillance system at home and...
TRANSCRIPT

Thecus TME
PROPERTY SURVEILLANCE
WITH THECUS NAS DEVICE

Low-Cost and Effective Property Monitoring Function On Thecus NAS
Low-Cost and Effective Property Monitoring Function On Thecus NAS
� Many property owners are victims of break-ins.
Home owners would spend a fortune on home
surveillance systems to protect their properties,
complicated operations and expensive.
� Thecus NAS device, which support network camera, is able to
provide efficient monitoring at home or office. The advantages are:
�Setup is easy
�Configuration is simple
�Low cost and efficient
�Stable and low power
consumption
EquipmentEquipment
� Thecus NAS device (N199, N299, N5200, or N5200PRO)
� Computer
� Vivotek PT-7137 Network Camera
or below compatible network cameras
� Afreey ANC-818G
� SparkLan CAS-370W
� Panasonic BL-C10
� Axis 207.
� Internet connection

ProceduresProcedures
Procedure I
Procedure II
Procedure III
Procedure IV
•Setup network camera (refer to manufacturer manual)
•Configure network camera on Thecus NAS
•Schedule & start image capture task
•view images recorded by the network camera

StepsSteps
1. Refer to Axis user manual to set up network camera.
2. Go to System > Module Mgmt to install IP cam module
※ Module can be downloaded from thecus website www.thecus.com

� Module download link: www.thecus.com/download.php
Select N5200 or N5200 PRO and Firmware
Select N5200 or N5200 PRO
Select Firmware

3. Click on IP Cam to start.

4. Click Add

5. Complete the IP Cam Configure section
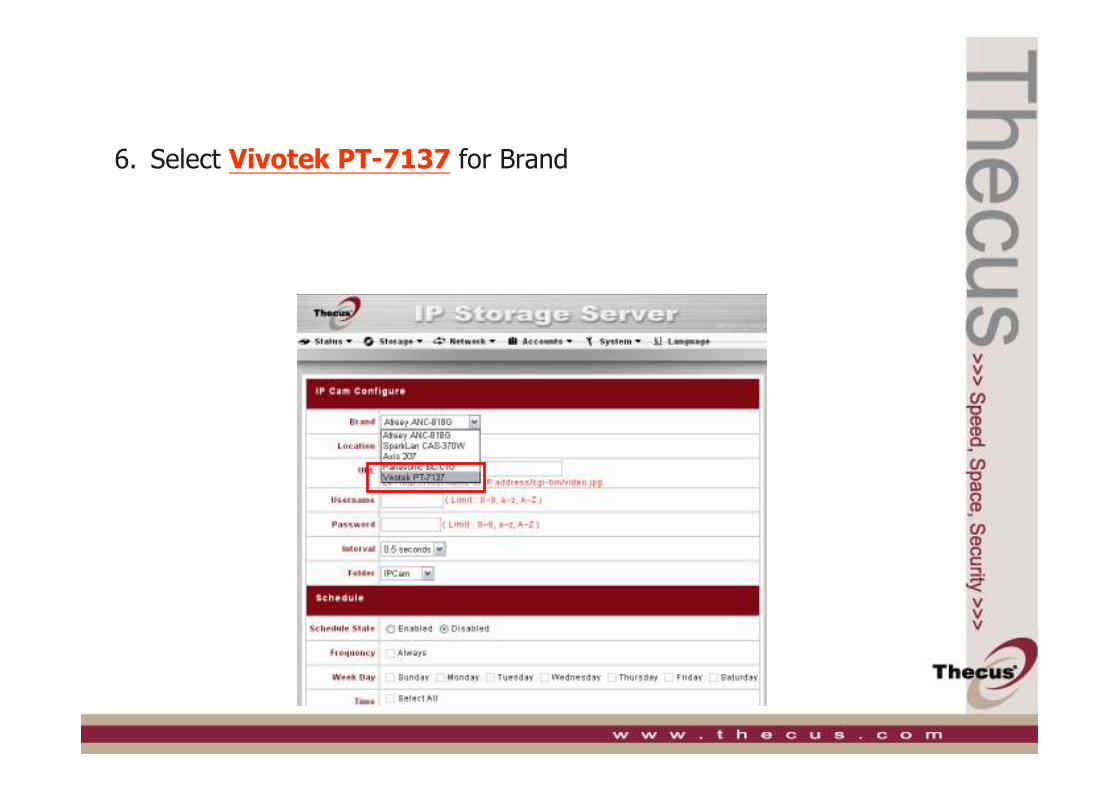
6. Select Vivotek PT-7137 for Brand

7. Enter where the images are recorded from for Location
For this demo, enter Office

8. Enter URL where snapshots of IP cam are available.
For this demo, Vivotek IP cam’s snapshots are available at http://172.16.65.191/cgi-bin/video.jpg

9. Enter IP cam’s username and password
Select interval (interval between each captured image)
Select Folder to store images

10. Complete the Schedule section

11. Click OK

12. Summary of the task scheduled

13. Images are stored at N5200 (under IP Cam folder)
IP Cam folder on NAS

14. Images are compressed into MPEG file every hour.
MPEG

ConclusionConclusion
Having some kind of monitoring system at home or office is
always handy for owners. When property owners are able to
monitor homes or offices with surveillance equipment, it's like
they have a television network devoted to the safety of their
properties. Thecus NAS device with network camera can just do
the job. It not only let owners know the condition of their
property from remote locations, but also keep records. It is
definitely a low-cost and efficient surveillance system at home
and office to protect properties.