proficy historian 9
TRANSCRIPT
Proficy Historian 9.1
Quick Installation Guide

Proprietary Notice
The information contained in this publication is believed to be accurate and reliable. However, General
Electric Company assumes no responsibilities for any errors, omissions or inaccuracies. Information
contained in the publication is subject to change without notice.
No part of this publication may be reproduced in any form, or stored in a database or retrieval system, or
transmitted or distributed in any form by any means, electronic, mechanical photocopying, recording or
otherwise, without the prior written permission of General Electric Company. Information contained herein is
subject to change without notice.
© 2021, General Electric Company. All rights reserved.
Trademark Notices
GE, the GE Monogram, and Predix are either registered trademarks or trademarks of General Electric
Company.
Microsoft® is a registered trademark of Microsoft Corporation, in the United
States and/or other countries. All other trademarks are the property of their
respective owners.
We want to hear from you. If you have any comments, questions, or suggestions about our documentation,
send them to the following email address:
This document provides information to install the Historian components that are required
to add, configure, and remotely manage collector instances using Configuration Hub.
Note: The information in this document is applicable to all Web-based Clients.
Components Required to Use Configuration Hub
To use Configuration Hub, install the following components, and then perform post-
installation tasks.
Component Description
The Historian
server
Installing the Historian server is mandatory to work with Historian. If you
want to use Web-based Clients, you must provide the User Account and
Authentication (UAA) server details while installing the Historian server.
When you install the Historian server, the following components are installed
as well:
• The RemoteCollectorConfigurator utility: A command-line tool, which allows you to manage collectors remotely.
• The UAA Configuration tool: A utility that allows you to specify the UAA server details to match with the UAA server used by Web-based Clients.
Web-based
Clients
Install Web-based Clients if you want to manage Historian administrative
tasks and analyze the data using components such as Configuration Hub, the
Web Admin console, Trend Client, and REST APIs.
To use Web-based Clients, you need a UAA server to handle user authentication. UAA provides identity-based security for applications and APIs. It supports open standards for authentication and authorization, including Oauth2.
During the Web-based Clients installation, you can choose to install a UAA
instance and Configuration Hub, or you can use existing ones.
Collectors Installing collectors is mandatory to collect and store data in Historian.
When you install collectors, all the collectors and the Remote Management Agents are installed. You must then create instances of each collector and manage them using Configuration Hub.
When you install collectors, if iFIX/CIMPLICITY are installed on the same
machine, instances of the following collectors are created automatically:

Component Description
• The iFIX collector • The iFIX Alarms & Events collector • The OPC Classic Data Access collector for CIMPLICITY • The OPC Classic Alarms and Events collector for CIMPLICITY
Install the Historian Server
1. Log in as an administrator to the machine on which you want to install Historian.
2. Run the InstallLauncher.exe file.
3. Select Install Historian.
The welcome page appears.
4. Select Next.
The license agreement appears.
5. Select the Accept check box, and then select Next.
The Where do you want to install Historian? page appears.
6. If needed, change the default installation drive of the Historian server, and then select Next.
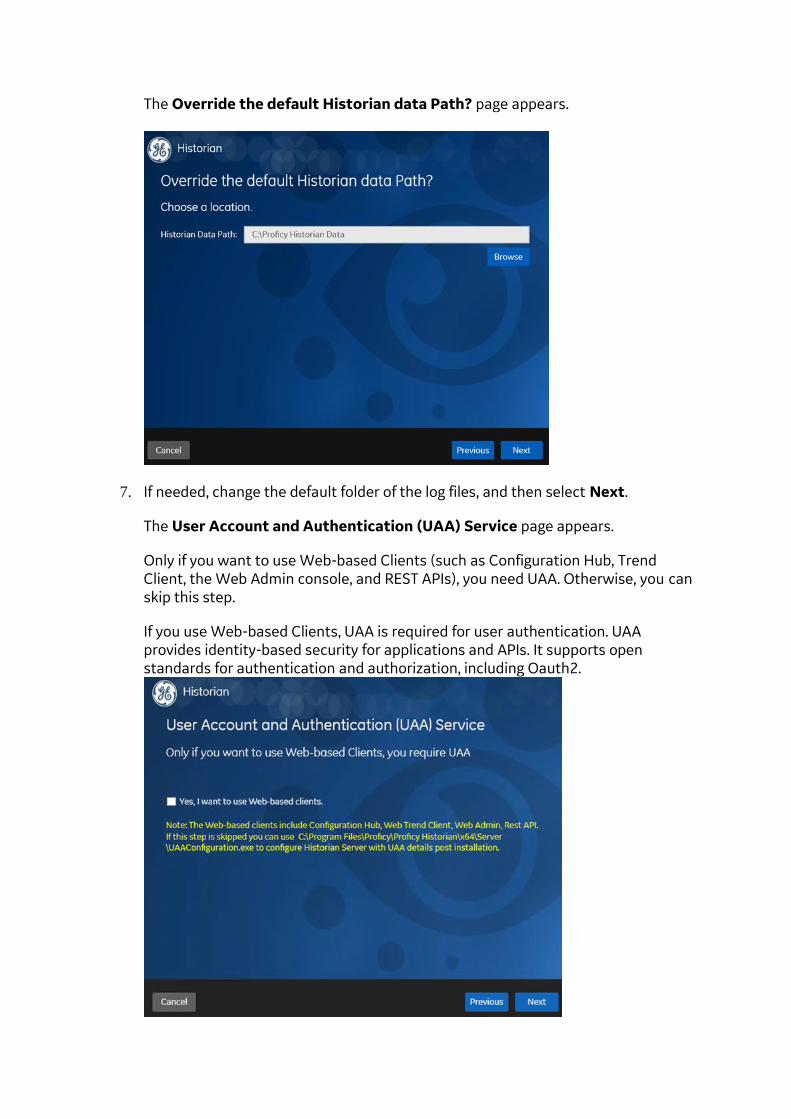
The Override the default Historian data Path? page appears.
7. If needed, change the default folder of the log files, and then select Next.
The User Account and Authentication (UAA) Service page appears.
Only if you want to use Web-based Clients (such as Configuration Hub, Trend Client, the Web Admin console, and REST APIs), you need UAA. Otherwise, you can skip this step.
If you use Web-based Clients, UAA is required for user authentication. UAA provides identity-based security for applications and APIs. It supports open standards for authentication and authorization, including Oauth2.

8. If you want to use Web-based Clients, select the Yes, I want to use Web-based Clients check box, and provide values as described in the following table.
Field Description
UAA Server Name Enter the name of the machine on which the UAA server is installed. If the machine uses a fully qualified domain name (FQDN), provide the FQDN. By default, the local hostname is considered.
Public https port Enter the port number used by the UAA service. The default value is 443. Ensure that this port number matches the one on the TCP Port Assignments page during Web-based Clients installation.
Important: If you are installing a distributed/mirror node, provide the same UAA details that you entered while installing the primary server. Note:
• You can install a UAA service using Operations Hub or Historian Web-based Clients. You can provide the URL of an existing UAA instance. Or, if a UAA service is not available, you can install it during Web-based Clients installation.
• If you change the UAA server for Web-based Clients later, you must change the UAA server details for the Historian server as well. You can do so using the UAA Configuration tool without the need to install the Historian server again.
9. Select Next.
The Historian Security Groups page appears.
Using Historian security groups provides an added layer of control over access to your Historian system. By default, the option to create Historian security groups is not selected.
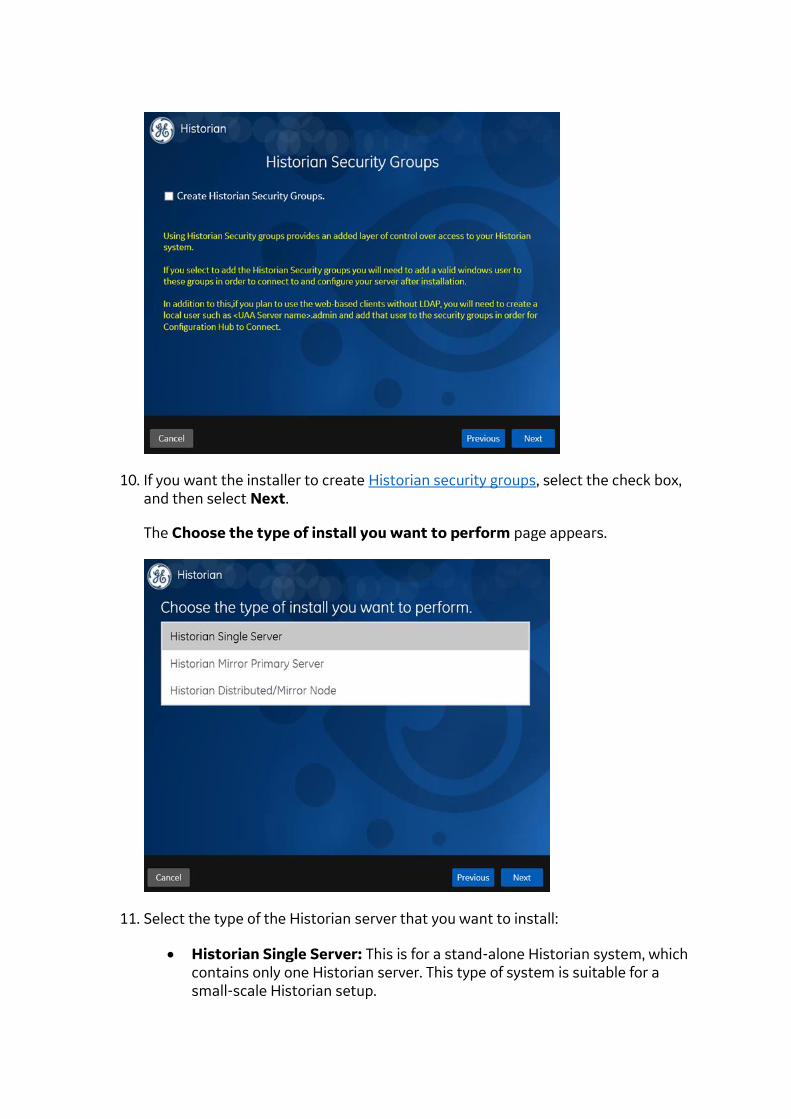
10. If you want the installer to create Historian security groups, select the check box, and then select Next.
The Choose the type of install you want to perform page appears.
11. Select the type of the Historian server that you want to install:
• Historian Single Server: This is for a stand-alone Historian system, which contains only one Historian server. This type of system is suitable for a small-scale Historian setup.
• Historian Mirror Primary Server: This is for a horizontally scalable Historian system, which contains multiple Historian servers, all of which are connected to one another. Installing this server will allow you to add machines and distributed/mirror nodes to this system.
• Historian Distributed/Mirror Node: This is for a horizontally scalable Historian system, which contains multiple Historian servers, all of which are connected to one another. Installing this server will allow you to add this node to a primary server.
The Ready to Install page appears.
12. Select Install.
The installation begins.
13. When you are asked to reboot your system, select Yes.
The Historian server is installed on your machine. In addition, the following components are installed:
• The RemoteCollectorConfigurator utility: A command-line tool, which allows you to manage collectors remotely. By default, it is located in the C:\Program Files\GE Digital\NonWebCollectorInstantiationTool folder. For instructions on using this utility, refer to About Installing and Managing Collectors Remotely.
• The UAA Configuration tool: A utility that allows you to specify the UAA server details to match with the UAA server used by Web-based Clients. By default, it is located in the C:\Program Files\Proficy\Proficy Historian\x64\Server folder. For instructions on using this tool, refer to Change the UAA Server Details.
What to do next
If you do not want strict authentication, disable the Enforce Strict Client
Authentication and Enforce Strict Collector Authentication options under Historian
Administrator > Data Stores > Security. For more information, refer to Strict
Authentication.
Install/Upgrade Web-based Clients
Upgrade Web-based Clients
If you want to upgrade Web-based Clients, run the installer for Web-based Clients.
However, before you upgrade:
• When you upgrade, Web-based Clients and associated data will be lost. Therefore,
back up the Web-based Clients and associated data using the uaa_config_tool
utility provided in the Utilities folder of the ISO package. For information, refer to
Migrate User Authentication Data from Historian to Common UAA Service.

Note: After installation, uaa_config_tool is available in the following folder as well:
\Program Files\GE Digital\Historian Config
• If the machine name has changed, you must uninstall and reinstall Web-based
Clients.
• If you want to use a different UAA server from the previous one, you must
manually migrate the UAA data to new UAA server using the uaa_config_tool
utility.
• If you want to switch from using a local UAA to using an external UAA (or vice
versa), you must manually change the UAA details.
• You cannot upgrade Web-based Clients from a version earlier than 8.0. This is because, starting 8.0, Web-based Clients are installed separately (not as part of the Historian server installation). Therefore, if you want to upgrade Web-based Clients, you must do either of the following:
o Install Web-based Clients on a new machine. o Uninstall the Historian server (remember to back up the UAA using the
UAA_config_tool), and then install Web-based Clients.
• If you install Web-based Clients before uninstalling the previous version, you cannot modify the Configuration Hub credentials.
• If an earlier version of Configuration Hub is available on the same machine, you will be allowed to use the same; you cannot install Configuration Hub again.
Install Web-based Clients
1. Run the InstallLauncher.exe file.
2. Select Install Web-based Clients.
The welcome page appears.
3. Select Next.
The license agreement appears.
4. Select the Accept check box, and then select Next.

The TCP port assignments page appears.
5. As needed, change the values for TCP port assignments as described in the following table, and then select Next.
Field Description
Public https port Port for https protocol communication used by Web-based Clients. The
default value is 443. Ensure that this port number matches the one you
specify while installing the Historian server. In addition:
• If you will install Operations Hub later on the same machine, the value that you provide in this field is populated while installing Operations Hub.
• If you have already installed Operations Hub on the same machine, this field is disabled and populated with the value you have provided while installing Operations Hub.
UAA http port Port for http protocol communication used by the UAA service. The
default value is 9480.
UAA database port Port for the UAA database. The default value is 9432.
Historian http port Port for the http protocol communication used by Web-based Clients.
The default value is 8070.
Field Description
Historian database
port
Port for the PostgreSQL Historian database. The default value is 8432.
UAA Idp config
service port
Port for the Configuration Hub identity provider service. The default
value is 7010.
UAA security app
port
Port for the UAA Configuration tool. The default value is 7011.
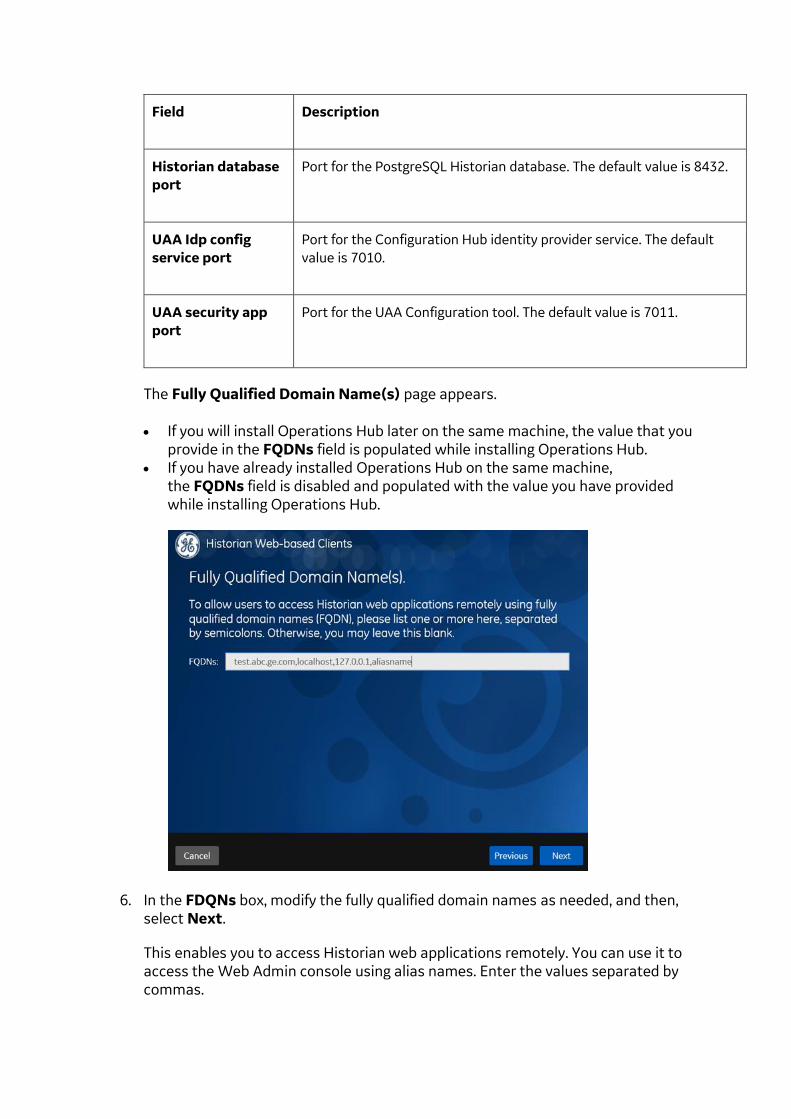
The Fully Qualified Domain Name(s) page appears.
• If you will install Operations Hub later on the same machine, the value that you provide in the FQDNs field is populated while installing Operations Hub.
• If you have already installed Operations Hub on the same machine, the FQDNs field is disabled and populated with the value you have provided while installing Operations Hub.
6. In the FDQNs box, modify the fully qualified domain names as needed, and then, select Next.
This enables you to access Historian web applications remotely. You can use it to access the Web Admin console using alias names. Enter the values separated by commas.

To access Web-based Clients using any of the following URLs, enter Testmachine.abc.ge.com,localhost,127.0.0.1,aliasName
o https:// Testmachine.abc.ge.com /historian-visualization/hwa o https:// 127.0.0.1 /historian-visualization/hwa o https:// aliasName /historian-visualization/hwa o https:// localhost /historian-visualization/hwa
Important:
o Do not enter a space between the values. o FQDN is not supported for Configuration Hub. o You must add the FQDN and the IP address in the hosts file located at
C:\Windows\System32\drivers\etc. The IP address that you add must be a static or fixed IP address. Format: <IP address> <alias name> Example: 1.2.3.4 myservername
The User Account and Authentication Service page appears, allowing you to choose whether you want to install UAA along with Web-based Clients installation or use an existing UAA.
• If you want to install UAA, clear the Use External UAA check box.
• If you want to use an existing UAA, select the Use External UAA check box.
7. If you want to install UAA, enter the Admin client secret, re-enter the secret, and then select Next.
The admin client secret must satisfy the following conditions:
o Must not contain only numbers. o Must not begin or end with a special character.

o Must not contain curly braces next to each other.
Note: The format of the username is <host name>.admin, where <host name> is the machine on which Web-based Clients are installed. And, the client ID is admin. Both the host name and client ID are case-sensitive. If, however, the UAA server hostname is long, resulting in a username longer than 20 characters, Windows does not allow you to create the user. In that case, you can create a UAA user, and then create the corresponding Windows user, using the uaa_config_tool utility:
1. Access the uaa_config_tool utility. By default, it is located at C:\Program Files\GE Digital\Historian Config.
2. Run the following command: uaa_config_tool add_user -u <username> -p <password> -s <the client secret you provided while installing the Historian server> -c Example: uaa_config_tool add_user -u adminuser -p Password123 -s pwd@123 -c For more information, refer to Using the UAA Config Tool.
8. Alternatively, if you want to use an existing UAA service (that is, a UAA instance already installed by an external application such as Operations Hub):
a. Select the Use External UAA check box.
The fields for the existing UAA service appear.
b. Enter values as described in the following table.
c. Select Test Connection.
The results of connection test appear. You cannot proceed until the connection is successful.
d. Select Next.
The Configuration Hub Installation page appears, allowing you to choose whether you want to install Configuration Hub along with Web-based Clients or use an existing Configuration Hub, which is installed with iFIX. Configuration Hub allows you to add and manage a collector instance remotely. For more information, refer to About Configuration Hub.
Field Description
UAA Base
URL
Enter the URL of the existing UAA server in the following format:
https://<UAA server name>:<port number>, where <UAA server name> is the
FQDN or host name of the machine on which UAA is installed. By default, the
port number is 443.
Note: Do not enter a trailing slash character.
Admin Client
ID
Enter the client name that you provided while installing the external UAA.
The default value is admin.
Admin client
secret
Enter the client secret that you provided while installing the external UAA.
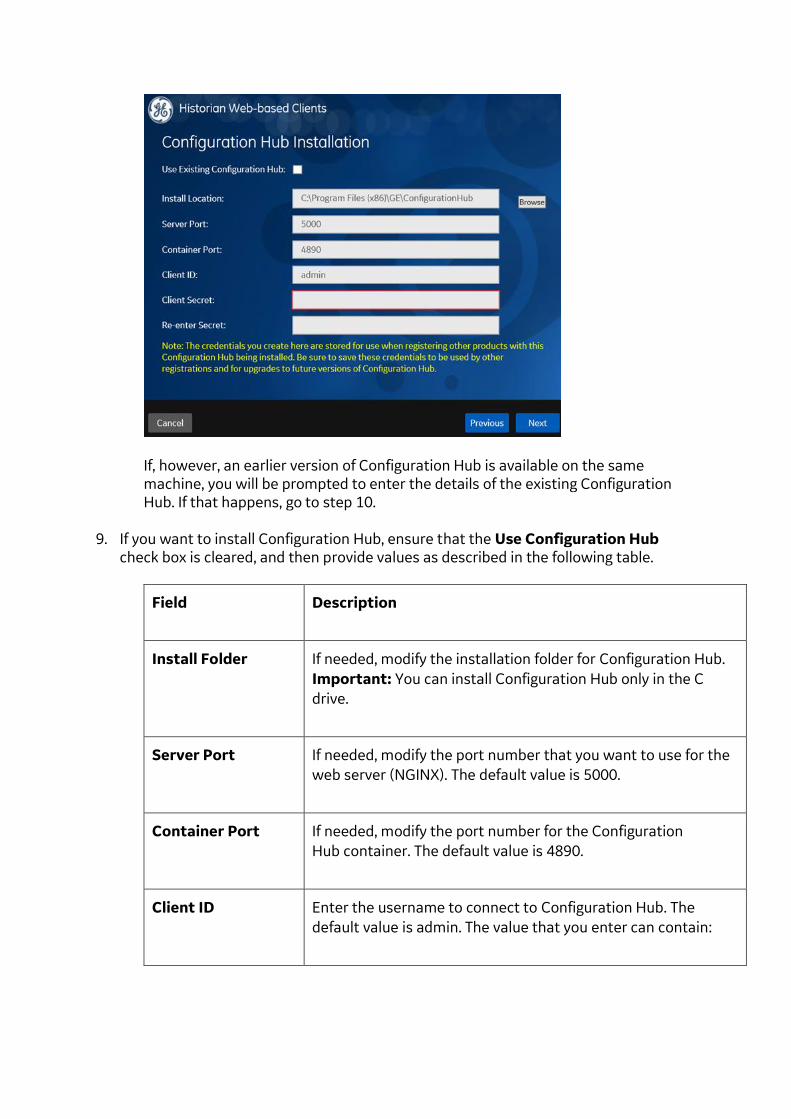
If, however, an earlier version of Configuration Hub is available on the same machine, you will be prompted to enter the details of the existing Configuration Hub. If that happens, go to step 10.
9. If you want to install Configuration Hub, ensure that the Use Configuration Hub check box is cleared, and then provide values as described in the following table.
Field Description
Install Folder If needed, modify the installation folder for Configuration Hub.
Important: You can install Configuration Hub only in the C
drive.
Server Port If needed, modify the port number that you want to use for the
web server (NGINX). The default value is 5000.
Container Port If needed, modify the port number for the Configuration
Hub container. The default value is 4890.
Client ID Enter the username to connect to Configuration Hub. The
default value is admin. The value that you enter can contain:

Field Description
• All English alphanumeric characters
(ABCDEFGHIJKLMNOPQRSTUVXYZ
abcdefghijklmnopqrstuvwxyz_0123456789)
• The following special characters: -><:~!@#$%^&*?|
Client Secret Enter the password to connect to Configuration Hub. The value
that you enter:
• Must contain at least eight characters.
• Can contain all English alphanumeric characters
(ABCDEFGHIJKLMNOPQRSTUVXYZ
abcdefghijklmnopqrstuvwxyz_0123456789)
• Can contain the following special characters:
-><:~!@#$%^&*?|
Re-enter secret Re-enter the password to connect to Configuration Hub.
10. Alternatively, if you want to use an existing Configuration Hub:
a. Select the Use Existing Configuration Hub check box.
Note: This check box is disabled if an existing Configuration Hub is detected.
The fields for using existing Configuration Hub appear.

b. Provide values as described in the following table.
Field Description
Server Name Enter the server name or the FQDN of the existing
Configuration Hub server, as displayed in the address bar of the
browser when you access Configuration Hub from the machine
where Configuration Hub is installed.
Server Port If needed, modify the port number that you want to use for the
web server (NGINX). The default value is 5000.
Client ID If needed, modify the username to connect to Configuration
Hub. The default value is admin.
Client Secret Enter the password to connect to Configuration Hub.
c. Select Test Connection.
The results of connection test appear. You cannot proceed until the connection is successful.
d. Select Next.
The default installation drive appears.
11. If needed, change the installation drive for Web-based Clients, and then select Next.
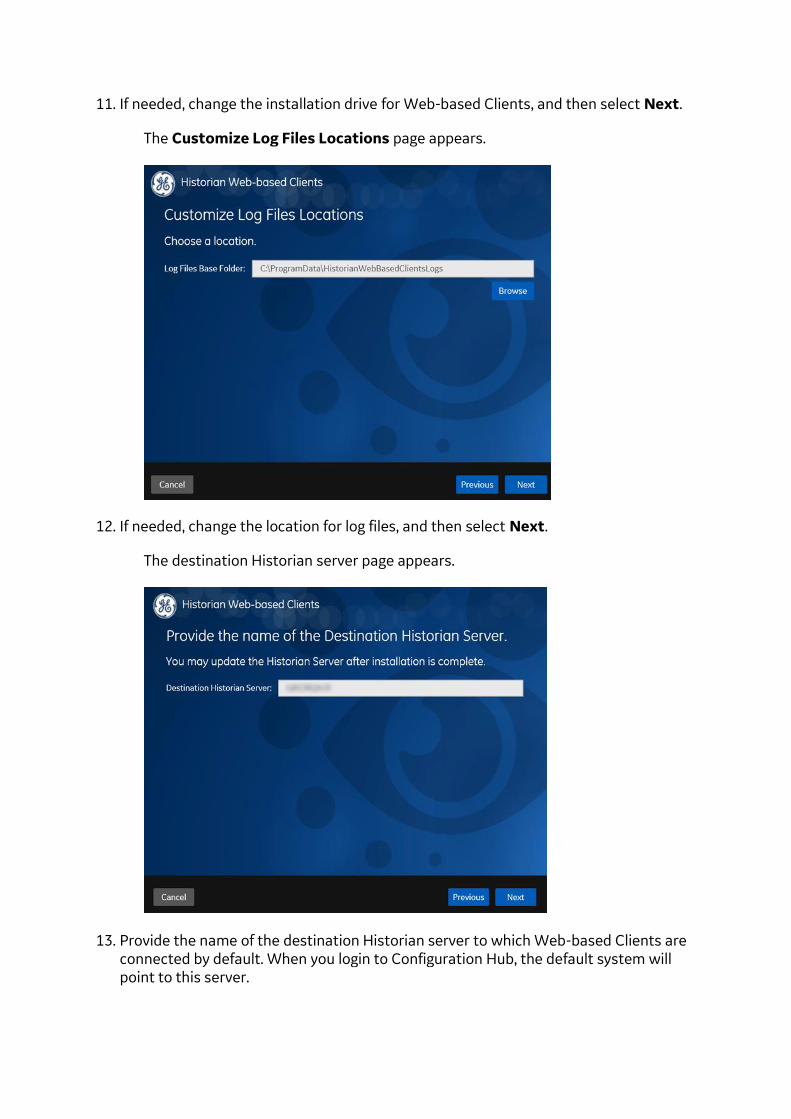
The Customize Log Files Locations page appears.
12. If needed, change the location for log files, and then select Next.
The destination Historian server page appears.
13. Provide the name of the destination Historian server to which Web-based Clients are connected by default. When you login to Configuration Hub, the default system will point to this server.
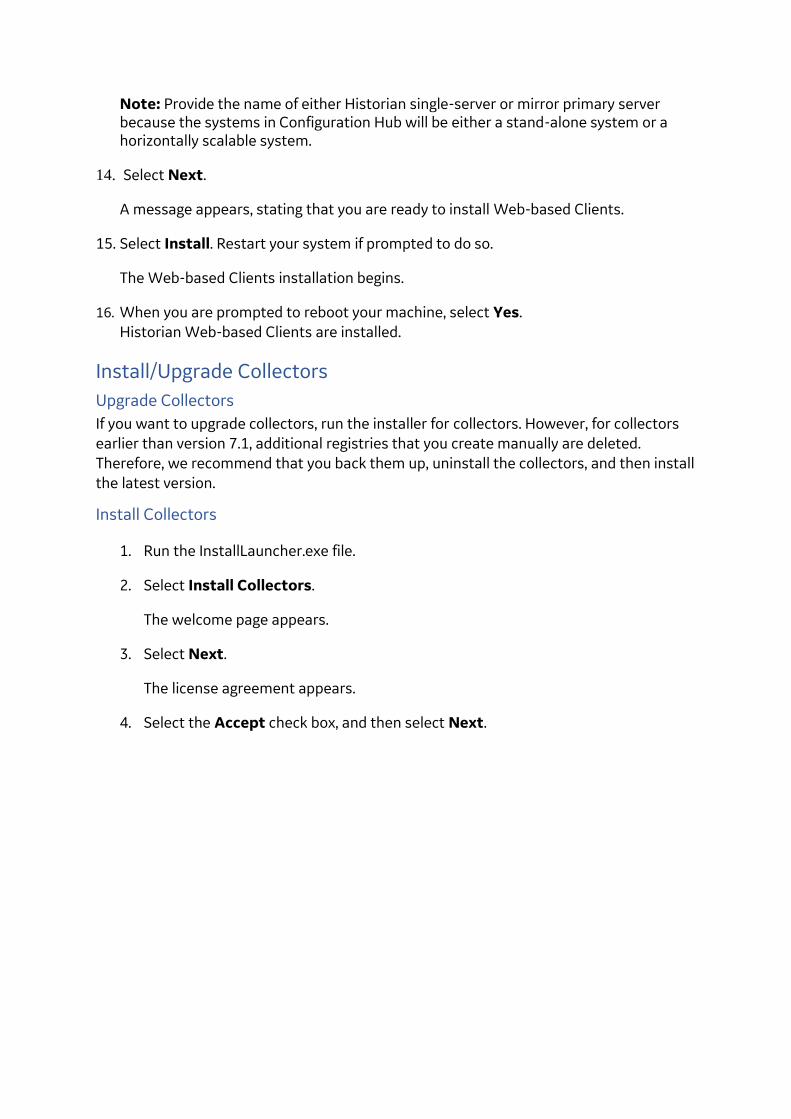
Note: Provide the name of either Historian single-server or mirror primary server because the systems in Configuration Hub will be either a stand-alone system or a horizontally scalable system.
14. Select Next.
A message appears, stating that you are ready to install Web-based Clients.
15. Select Install. Restart your system if prompted to do so.
The Web-based Clients installation begins.
16. When you are prompted to reboot your machine, select Yes.
Historian Web-based Clients are installed.
Install/Upgrade Collectors
Upgrade Collectors
If you want to upgrade collectors, run the installer for collectors. However, for collectors
earlier than version 7.1, additional registries that you create manually are deleted.
Therefore, we recommend that you back them up, uninstall the collectors, and then install
the latest version.
Install Collectors
1. Run the InstallLauncher.exe file.
2. Select Install Collectors.
The welcome page appears.
3. Select Next.
The license agreement appears.
4. Select the Accept check box, and then select Next.

The default installation drive appears.
5. If needed, change the installation drive, and then select Next.
The data directory page appears.
6. If needed, change the folder for storing the collector log files, and then select Next.

The destination Historian server page appears.
7. Provide the credentials of the Windows user account of the destination Historian server to which you want Remote Management Agent to connect, and then select Next. These details are required for Remote Collector Manager to connect to Historian to manage the collectors remotely. If the Historian server and collectors are installed on the same machine, and if strict collector authentication is disabled, you need not provide these details; by default, the machine name of the local Historian server is considered. If, however, they are installed on different machines, or if strict collector authentication is enabled, you must provide the credentials of the Historian server user.
8. Select Yes.
A message appears, stating that you are ready to install collectors.
9. Select Install.
The installation begins.
10. When you are prompted to reboot your system, select Yes.
The collector executable files are installed. In addition, if iFIX and/or CIMPLICITY are installed on the same machine as the collectors, instances of the following collectors are created automatically:
• The iFIX collector • The iFIX Alarms & Events collector • The OPC Classic Data Access collector for CIMPLICITY
• The OPC Classic Alarms and Events collector for CIMPLICITY
You can begin using these collectors, or create more instances as needed using Configuration Hub or the RemoteCollectorConfigurator utility. For instructions specific to setting up the iFIX collector and the iFIX Alarms and Events collector, refer to Working with iFIX Collectors.
Before you use Configuration Hub, perform the post-installation tasks.
Perform Post-Installation Tasks
After you install the Historian server, collectors, and Web-based Clients, perform the
following steps to begin using Configuration Hub (along with other Web-based Clients).
Create User and Grant Access
1. While installing the Historian server, if you have allowed the installer to create Historian security groups, create a local Windows user with the format <Web-based Clients server name>.admin, and add the user to the ihSecurityAdmins group. This user will log in to Web-based Clients. Alternatively, you can create UAA users in an external UAA, and map their security groups. For information, refer to About UAA Groups. Depending on whether the user will use local or domain security groups, select the appropriate option in Historian Administrator.
2. Ensure that the Windows user that you have specified will use local or domain security groups, select the appropriate option in Historian Administrator.
Enable Trust for a Client Certificate for Configuration Hub
If you want to use an existing Configuration Hub securely, you must copy the
Configuration Hub certificate to the remote machine and add it to the trusted root folder.
Client-side certificates validate the client’s identity to the Configuration Hub web server.
For instructions, refer to the first set of steps in Client Certificates for Configuration Hub.
Enable Trust for a Self-signed Certificate on Chrome
During Historian installation, a self-signed certificate is generated that you use with
Historian web applications. A self-signed certificate is a certificate that is signed by itself
rather than signed by a trusted authority. Therefore, a warning appears in the browser
when connecting to a server that uses a self-signed certificate until it is permanently
stored in your certificate store. This topic describes how to ensure that Google Chrome
trusts the self-signed certificate.
1. Using Google Chrome, access the site to which you want to connect.
A message appears to inform you that the certificate is not trusted by the computer or browser.
2. Select Not Secure in the URL, and then select Certificate.
The Certificate window appears.
3. Select Certification Path, select the root certificate, and then select View Certificate.
The Certificate window appears, displaying the General, Details, and Certification Path sections.
4. Select Details, and then select Copy to Files.
5. Follow the on-screen instructions to save the certificate to a local file. Use the default format: DER encoded binary X.509 (.CER).
6. Right-click the .CER file that you have exported, and select Install Certificate.
The Certificate Import Wizard window appears.
7. Select Trusted Root Certificate Authorities, and then select OK.
Note: Do not let the wizard select the store for you.
A Security Warning window may appear. If it does, ignore the message by selecting Yes. The certificate is installed.
8. Restart the browser, and connect to the server.
9. Open the URL authenticated by the certificate.
If error messages do not appear, the certificate is successfully imported.
Import an Issuer Certificate
If you want to use an external UAA, you must import an issuer certificate.
1. Copy the issuer certificate from the machine on which UAA is installed.
2. Access the Certificate Management tool.
The GE Operations Hub Certificate Management Tool page appears, displaying
the Server Certificate section.
3. In the External Trust subsection, next to the Certificate File box, select Select.
4. Navigate to and select the certificate file, and then select Open.
5. Select Import.
A message appears, asking you to confirm that you want to import a certificate.
6. Select Yes.
You are now ready to use Configuration Hub. If you encounter any issues, refer to Troubleshooting Configuration Hub Issues.
Tip: If there are issues with login, or if you want to point to a different Configuration Hub or UAA, use the Web Based Clients Configuration tool.