problem solving with robots - university of northamptonscott/csy1020/pack2.pdf · robot should...
TRANSCRIPT

Problem Solving with
Robots
Scott Turner
Oliver Hawkes
©School of Applied Sciences, University of Northampton: Scott Turner and Oliver Hawkes

Problem Solving with Robots
©School of Applied Sciences, University of Northampton: Scott Turner and Oliver Hawkes
Acknowledgements and Introduction
This project has been supported by the ICS Teaching Development Fund and also with
help from Nuffield Science Bursary and SETPOINT Northamptonshire.
As well as the Division of Computing and Teaching Enhancement Award, University of
Northampton.
Introduction
This pack is aimed at supplementing taught materials on problem solving with some exer-
cises to work through based around the Mindstorms RCX.

Problem Solving with Robots
©School of Applied Sciences, University of Northampton: Scott Turner and Oliver Hawkes
Sequence, Branching and Loops
Let’s start with three basic types of routines and these are sequences, loops and
branches. Each of these makes the program behave differently when an event
happens, and most programs are a combination of all of these.
Sequential
A sequential routine is, as its name suggests,
is a sequence of commands to be completed.
Put simply, it is a list of instructions that are
carried out one after the other. The list be-
low is a set of directions, and these are a se-
quential routine.
Once the sequence is completed the program
stops. Go forward
Turn left
Go forward
Turn right
Etc.
Instruction 1
Instruction 2
Instruction 3
Stop
Conditional Branching
Conditional branching allows dif-
ferent commands to be carried
out depending on the result of
tests. It is called conditional
branching because depending on
different conditions, different
branches of commands are fol-
lowed.
A condition could be birds fly or
x>4, when the statement is true
the condition is true.
Instruction 1-test
Instruction 3 or sequence
2
Instruction 2 or sequence
1
If test is true If test is false
Instruction 4 or sequence
Imagine you were giving directions to somewhere, but you weren’t sure if one of
the roads is closed. If it were open your directions would go straight on, but if it
were closed you would have to re-direct them. This is a condition and the results
are the branches.

Problem Solving with Robots
©School of Applied Sciences, University of Northampton: Scott Turner and Oliver Hawkes
Sequence, Branching and Loops
Loops
This is a set of commands that are followed
and then repeated.
The loop can be continuously looping the
same instructions (for example the diagram
to the right)
Conditions can be added to the loop and the
diagram below. The loop will only be repeated
if a test has a true condition, otherwise a dif-
ferent set of instructions are carried out.
Instruction 1
Instruction 2
Instruction 3
If test is true
Instruction 1—test
Instruction 3
If test is false
Instruction 2
Routines often involve a combination of all sequential, branches and loops in or-
der to make them work.

Problem Solving with Robots
©School of Applied Sciences, University of Northampton: Scott Turner and Oliver Hawkes
Example
Let’s start with an example
This routines moves a robot forwards for 1 second, backward for 1 second, and then
turns 90 degrees to the right.
public class week2_1{
public static void main(String[] args)
{
robot2 buggy=new robot2();
buggy.forward(1000);
buggy.backward(1000);
buggy.spinRight(1000);
}
}
We are only interested in the bits in bold underlined italics. We can ignore the rest for
the moment.
The line buggy.forward(1000); moves the robot called ‘buggy’ forward for 1000milli-
seconds.
The line buggy.backward(1000); the buggy backwards for 1000 milliseconds
The line buggy.spinRight(1250); turns buggy to the right for 1000 milliseconds which
for this robot ends up being a right-angle turn.
Notice the order of the lines and the actions carried out:
buggy.forward(1000);
buggy.backward(1000);
buggy.spinRight(1250);
1. Do the first line first
2. Do the second line next
3. Do the third line after that

Problem Solving with Robots
©School of Applied Sciences, University of Northampton: Scott Turner and Oliver Hawkes
Example
Here is the main part of the robot the RCX
brick.
The motors are drive from ports A, B, and
C.
The sensors are connected on ports 1,2,
3.
Image taken from : http://en.wikipedia.org/
wiki/Image:LegoMindstormsRCX.jpg
In the problems unless otherwise stated the sensors will be connected on ports 1 and 2 and
the motors on ports A and C.
An example robot below has a left ‘bumper’ sensor connected on port 1 and a right bumper
sensor on port 3. The left and right motors are on ports A and C respectively.

Problem Solving with Robots
©School of Applied Sciences, University of Northampton: Scott Turner and Oliver Hawkes
Initial Problems
Problem 1
Create a sequential routine, using the instructions provided, to make a robot trace out a
square of the desk. Each side of the square will be the same length as the distance cov-
ered by the robot when it moves forward a second.
Problem 2
Write routines to get the robot to trace out the following letters (approximately). It might be easier to draw these shapes out first and move the robot by hand to get
a sense of how the robot would move.
• C— Can you think of at least two ways this can be done?
• Z
Introduction
Use the routine from the previous example. Replace the instructions in bold italics with in-
structions to do the following. You might have to experiment with times. That is good thing.

Problem Solving with Robots
©School of Applied Sciences, University of Northampton: Scott Turner and Oliver Hawkes
Dancing Robot 1
Introduction
Using the Framework below get the robot to do a little dance. The moves are up to you .
The robot must ‘dance’ in a 1m square area (as shown below). If you want some further in-
structions these are available in the Appendix.
But be creative.
Framework
public class week2_1{
public static void main(String[] args)
{
robot2 buggy=new robot2();
//Put your dancing robot instructions here
//You can have more than one instructions
}
}
Dance Floor

Problem Solving with Robots
©School of Applied Sciences, University of Northampton: Scott Turner and Oliver Hawkes
Wall challenge 1
Framework
Create a sequential routine, using the following:
public class week2_4{
public static void main(String[] args)
{
robot2 harry=new robot2();
for(;;)
{
//part of the routine inside the loop can go here
if (harry.checkBumpers()==true)
{
//what to do on wall detection wall goes here
}
//further code could go here
}
//code outside of the loop could go here
}
}
This routine will keep repeating (it loops) actions. Your task to replace the lines mark in
bold and starting with //, with the instructions you think should go there. This time the
robot is called Harry. The line if (harry.checkBumpers()==true) checks if either both
bumpers is touching if it do something. That something is the instructions in place of //
what to do on wall detection wall goes here. You can have more than one instruc-
tion in place of that line.
Introduction
Now for something a little more chal-
lenging. Design a routine to make a
robot move towards a wall, detect that
the wall is there, reverse backwards
and turn 90 degrees to the right. (Tip:
use drawings to express your ideas)

Problem Solving with Robots
©School of Applied Sciences, University of Northampton: Scott Turner and Oliver Hawkes
Wall challenge 2
Framework
Create a sequential routine, using the following:
public class wall_f{
public static void main(String[] args){
robot2 tom=new robot2();
for(;;)
{
//instructions can go here as well
if ((tom.bumper(1)==true)&&(tom.bumper(2)==true))
{
//put instructions in here for actions
//to be carried out if both bumpers
//detects a collision
}
if ((tom.bumper(1)==false)&&(tom.bumper(2)==false))
{
//put instructions in here for actions
//to be carried out if both bumpers
//do not detect a collision
}
if ((tom.bumper(1)==false)&&(tom.bumper(2)==true))
{
//put instructions in here for actions
//to be carried out if right bumper only
//detects a collision
}
}
}
}
Introduction
Now for something a little more
challenging. Design a routine that
makes a robot keep the wall to its
right, whilst following the contour
of the room. It can touch the wall.
This might take some experiment-
ing with, that is normal. Again re-
place the lines marked with // with
your instructions.

Problem Solving with Robots
©School of Applied Sciences, University of Northampton: Scott Turner and Oliver Hawkes
Line follower
Framework
Create a sequential routine, using the following:
public class line_follower {
public static void main (String[] args) {
robot2 dick=new robot2();
for(;;)
{
if ((dick.checkLight(1)==true)&&(dick.checkLight(2)==true))
{
//if both sensor are on the line what
//action do you want to do?
}
if ((dick.checkLight(1)==false)&&(dick.checkLight(2)==false))
{
//if both sensor are off the line
//what action do you want to do?
}
if ((dick.checkLight(1)==true)&&(dick.checkLight(2)==false))
{
//if left sensor is one the line and right sensor is off
//what action do you want to do?
}
if ((dick.checkLight(1)==false)&&(dick.checkLight(2)==true))
{
//if right sensor is on the line and left sensor is off
//what action do you want to do?
}
}
}
}
Introduction
Produce a line following robot routine. The robot should follow a black line.
The robot is configured with two light de-tectors facing the floor. If a light sensor is above a black line it returns a ‘true’ other-wise ‘false’.

Problem Solving with Robots
©School of Applied Sciences, University of Northampton: Scott Turner and Oliver Hawkes
Wall challenge 3
Level 1
Can you use or modify one of the routine you have developed previous to solve this prob-
lem? Is so which one and why?
Level 2
Can you think of an alternative approach which could also be used to solve the problem? You
can add one new feature to the room to solve this?
Level 3
Can you modify the Level 1 approach developed and with the addition of a single piece of
7cm of black tape, find a way to stop it at the right place. Additional instructions are avail-
able see Appendix for more details. You can add or remove sensors as appropriate.
Introduction
Produce a routine to move a robot from one
corner of room to the opposite diagonal corner.
The user (not necessary the designer) can be
used to stop the robot to say it has reached the
corner (i.e. Just turn the power off). It must be
able to around objects.
A real world example of this type of activity is in
automatic (or autonomous) guided vehicles found
in factories and warehouse. Used for delivering
goods or parts.
Many different technologies can be used by these
robots to navigate including following magnetic
tracks in the floor or laser ranging finding.
Image taken from: http://
www.jervisbwebb.com/Categories/AGVs.aspx?
cid=3

Problem Solving with Robots
©School of Applied Sciences, University of Northampton: Scott Turner and Oliver Hawkes
Maze
Physical Arrangement: Robot
The robot has two light sensors at the front. If you wish, you can add an extra bumper that
connects two bumpers together (put it on port 2) instructions to use this can be found in the
Appendix.
Physical Arrangement: Maze
As well as the black lines on a white background, you can make one physical change to the
maze.
The lines are thick enough to have to the two light sensors above it at the same time. Black
insulation tape can be used to make suitable lines.
To be considered
How does the robot know it has reached the end of the maze?
What happens at T-junctions? Does the robot go left, right or straight on?
What would happen if the black lines were only thick enough only one light sensor at a time
to be above the line? Can a solution still be found?
Introduction
Produce a routine to move a robot in a maze. The maze is made from black lines on a white
background. The robot should follow these lines, either on the line or following the edge of the line.
Robot following the middle of the line (a) coming up to a T junction (b) carrying on at the junc-
tion
(a) (b)

Problem Solving with Robots
©School of Applied Sciences, University of Northampton: Scott Turner and Oliver Hawkes
Dancing Robot 2
Introduction
Using the Framework from dancing robot below get the two robots to dance. The moves are
up to you . But this time if the two robots touch they must react to each other. For example
if the touch they might reverse away a short distance.
The robot must ‘dance’ in a 1m square area (as shown below). If you want some further in-
structions these are available in the Appendix.
But be creative.
Dance Floor

Problem Solving with Robots
©School of Applied Sciences, University of Northampton: Scott Turner and Oliver Hawkes
Follow the leader
Hints and warnings
• You have solved a similar problem earlier.
• You might need to change the light levels in the room (or if you feeling more confi-
dent about programming within the robot2 class).
• It might be worth adding a bit of white card on the back of the robots to help improve
the reflectance.
• You are going to need to write at least two routine one for the front robot (Leader ro-
bot) and another for the followers.
Introduction
Now for something a little more challenging.
Some robots are programmed to follow the actions of
a “Leader” robot, in order to make them copy each
other. The picture on the right shows a long train of
small robots, which are all following the same com-
mands as the robot at the front of the line.
The movements that the robots need to do varies
from level to level, with the ultimate goal being to
get a robot that can go forwards, backwards, left and
right (not tight turns) and stop.
You can use light sensors (as below), bumper sen-
sors, or a combination of sensors. These can be
move as you see appropriate.
This task has three levels, with increasing difficulty.
It is possible to write a routine that will work for all
three.
A long chain of robots following
one another (www.csail.mit.edu/events)
Problem Solving with Robots
©School of Applied Sciences, University of Northampton: Scott Turner and Oliver Hawkes
Follow the leader
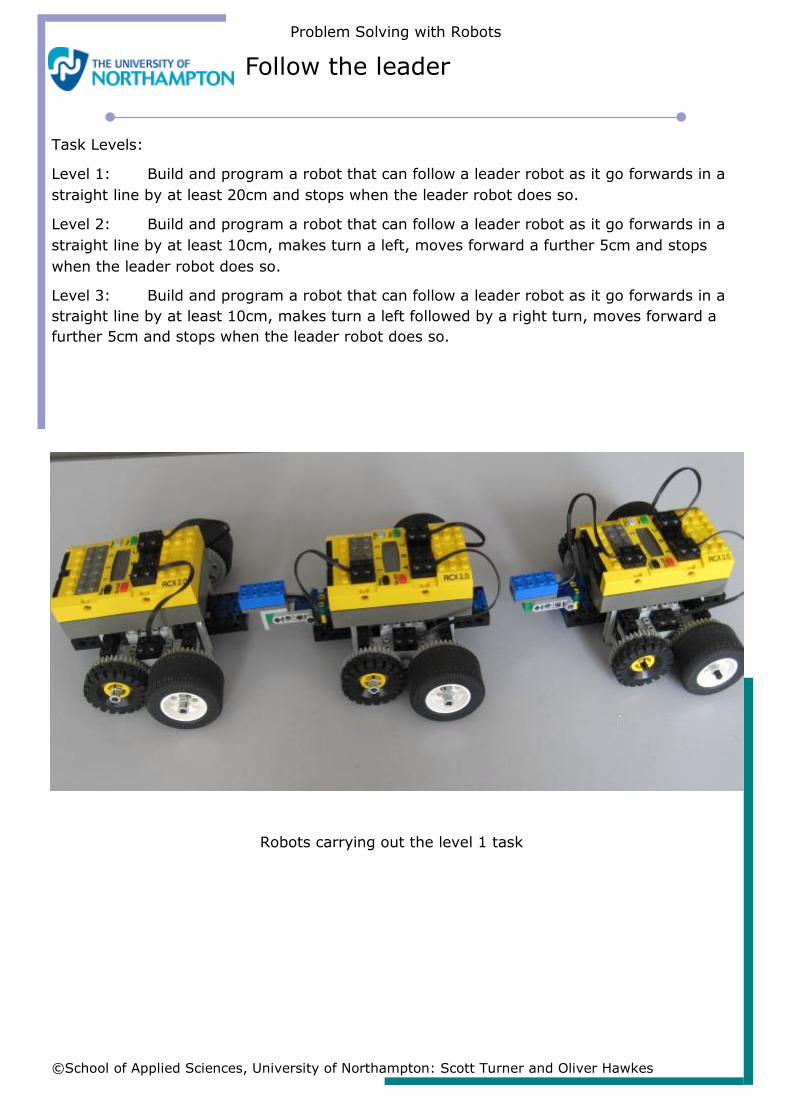
Task Levels:
Level 1: Build and program a robot that can follow a leader robot as it go forwards in a
straight line by at least 20cm and stops when the leader robot does so.
Level 2: Build and program a robot that can follow a leader robot as it go forwards in a
straight line by at least 10cm, makes turn a left, moves forward a further 5cm and stops
when the leader robot does so.
Level 3: Build and program a robot that can follow a leader robot as it go forwards in a
straight line by at least 10cm, makes turn a left followed by a right turn, moves forward a
further 5cm and stops when the leader robot does so.
Robots carrying out the level 1 task

Problem Solving with Robots
©School of Applied Sciences, University of Northampton: Scott Turner and Oliver Hawkes
Bomb disposal
Many robots are used to defuse bombs when it is too hazard-
ous for humans to be sent in. Using the Mindstorm Robots
move the bomb into a containment area (without making any
sudden movements that would set the bomb off) and get the
robot back behind the safety line. If the detonator is triggered
then the task is failed.
In these challenging tasks it is expect that you may rearrange
the sensors. In this case the ‘bomb’ can be a drinks can.
Levels 3,4 and 5 require a wall to be built around the area. This
can be done by using very thick books or boxes.
Bomb Disposal Robot (www.army-technology.com)
Level 1: Build and program a robot that can take a bomb that starts just in front of the robot
into a containment area, which is marked with a black line, and move the robot back behind the
safety line.
Level 2: Build and program a robot that can detect whether there is a bomb in the area or
not, and if detected move it into the containment area. If not, stay behind the safety line. If the
bomb is present then it will still be in front of the robot.
Level 3: Build and program a robot that can take a bomb that is in a know location
(measurements shown in diagram) and move it to the containment area, which is marked with a
black line. When this is done, move the robot back behind the safety line.
Level 4: Build and program a robot that can take a bomb that is in a known location
(measurements shown in diagram) and move it to the containment area that the robot must find.
When it has found the containment area, it must move to a safe distance (touching at least one
wall).
Level 5: Build and program a robot that can find a bomb regardless of where it is located
and move it into the containment area, which is marked with a black line, and move the robot
back to a safe distance, which is when the robot is touching one of the walls.
Task Extension: In addition to Level 5 program to robot to look for additional items before it re-
turns behind the safety line.

Problem Solving with Robots
©School of Applied Sciences, University of Northampton: Scott Turner and Oliver Hawkes
Bomb disposal: Level 1
Level 1
Build and program a robot that can take a bomb that starts just in front of the robot into a con-
tainment area, which is marked with a black line, and move the robot back behind the safety
line.
CONTAINMENT CONTAINMENT CONTAINMENT CONTAINMENT
AREAAREAAREAAREA Bomb
Move the bomb in a straight line
and use the sensors to stop the
robot when the bomb is in the
containment area. Move the ro-
bot back to the beginning.
Framework public class bomb_1 { public static void main(String[] args) { robot2 robot=new robot2(); for(;;) { if (robot.checkLight(1)==false) { //put instructions here for actions //to be carried out if no line is //detected } if (robot.checkLight(1)==true) { //put instructions here for actions //to be carried out when a line is //detected for the first time while(robot.checkLight(1)==false) { //put instructions here for actions //to be carried out when a line is //not detected after the first line //has been } if (robot.checkLight(1)==true) //put instructions here for actions //to be carried out when a line is //detected for a second time } } } }

Problem Solving with Robots
©School of Applied Sciences, University of Northampton: Scott Turner and Oliver Hawkes
Bomb disposal: Level 2
Level 2
Build and program a robot that can detect whether there is a bomb in the area or not, and if de-
tected move it into the containment area. If not, stay behind the safety line. If the bomb is pre-
sent then it will still be in front of the robot.
Detect whether there is an
object in front of the robot
and if so move the bomb in a
straight line. Use the sensors
to stop the robot when the
bomb is in the containment
area. Move the robot back to
the beginning.
Framework
public class bomb_2 { public static void main(String[] args) { robot2 robot=new robot2(); for(;;) { if (robot.checkLight(1)==false) { //put instructions here for actions //to be carried out if no line is //detected } if (robot.checkLight(1)==true) { //put instructions here for actions //to be carried out when a line is //detected for the first time while(robot.checkLight(1)==false) { //put instructions here for actions //to be carried out when a line is //not detected after the first line //has been } if (robot.checkLight(1)==true) //put instructions here for actions //to be carried out when a line is //detected for a second time }
if ((robot.checkLight(2)==true)) { //put instructions here for actions //to be carried out when no bomb
//is detected } } } }
CONTAINMENT CONTAINMENT CONTAINMENT CONTAINMENT
AREAAREAAREAAREA Bomb

Problem Solving with Robots
©School of Applied Sciences, University of Northampton: Scott Turner and Oliver Hawkes
Bomb disposal: Level 3
Level 3
Build and program a robot that can take a bomb that is in a known location (measurements
shown in diagram) and move it to the containment area, which is marked with a black line.
When this is done, move the robot back behind the safety line.
Move the robot over to the
bomb and collect it. Move the
bomb into the containment
area and move the robot
back to behind the safety
line.
Framework public class bomb_3{ public static void main(String[] args){ robot2 robot=new robot2(); { //put instructions here for actions //that are going outside the main //loop for(;;) { if ((robot.checkLight(1)==false)) { //put instructions here for actions //to be carried out if no line is //detected } if ((robot.checkLight(1)==true)) { //put instructions here for actions //to be carried when a line is //detected while((robot.checkLight(1)==false)) { //put instructions here for actions //to be carried out when a line is //not detected after the first line //has been } if ((robot.checkLight(1)==true)) //put instructions here for actions //to be carried out when a line is //detected for a second time } } } } }
Bomb
CONTAINMENT CONTAINMENT CONTAINMENT CONTAINMENT
AREAAREAAREAAREA
20cm
30cm

Problem Solving with Robots
©School of Applied Sciences, University of Northampton: Scott Turner and Oliver Hawkes
Bomb disposal: Levels 4 and 5
Level 4
Build and program a robot that can take a bomb that is in a known location (measurements
shown in diagram) and move it to the containment area that the robot must find. When it has
found the containment area, it must move to a safe distance (at least 40cm away from the
bomb).
Move the robot over to the
bomb and collect it. Use the
sensors to find the contain-
ment area and move the ro-
bot back to a safe distance.
Level 5
Build and program a robot that can find a bomb regardless of where it is located and move it into
the containment area, which is marked with a black line, and move the robot back to a safe dis-
tance, which is when the robot is touching one of the walls.
Bomb location: Unknown
Use the robot to locate the
bomb and move it into the
containment area. Move the
robot back behind the safety
line.
CONTAINMENT CONTAINMENT CONTAINMENT CONTAINMENT
AREAAREAAREAAREA
Bomb located in
this area
Bomb
Containment
area located in 20cm
30cm
Framework for this is given on the next page.

Problem Solving with Robots
©School of Applied Sciences, University of Northampton: Scott Turner and Oliver Hawkes
Bomb disposal: Level 4
public class bomb_4{ public static void main(String[] args) { robot2 robot=new robot2(); { //put instructions here for actions //that are going outside the main //loop for(;;) { if (robot.checkLight(2)==false) { //put instructions here for actions //to be carried out if no line is //detected } if (robot.bumper(1)==true) { //put instructions here for actions //to be carried out if a wall is //detected. } if (robot.checkLight(2)==true) { //put instructions here for actions //to be carried out when a line has //been detected } }
} }

Problem Solving with Robots
©School of Applied Sciences, University of Northampton: Scott Turner and Oliver Hawkes
Appendix A—Instructions
Please note that time1 in these instruction is a whole number, so for example 300.5 is not
allowed but 301 is.
stop();
This stops both motors, but then moves onto the next instruction if you want it stop
and wait use halt().
forward(time1);
This moves the robot forward for time1 milliseconds (1/1000th of second)
spinRight(time1);
This moves the robot in a tight circle to the right using both motors time1 milliseconds
(1/1000th of second)
turnRight(time1);
This moves the robot in a looser circle than spinRight() to the right using both motors
time1 milliseconds (1/1000th of second)
spinLeft(time1);
This moves the robot in a tight circle to the left using one motor for time1 millisec-
onds (1/1000th of second)
turnLeft(time1);
This moves the robot in a looser circle than spinLeft() to the left using one motor for
time1 milliseconds (1/1000th of second)
backward(time1);
This moves the robot backward time1 milliseconds (1/1000th of second)
bumpIt(int time1)
Using both touch sensors on ports 1 and 3 : If either touch sensor is true then move
the robot backwards.
bumper(x)
Using a touch sensor on port x: Returns true if contact is made.
Problem Solving with Robots
©School of Applied Sciences, University of Northampton: Scott Turner and Oliver Hawkes
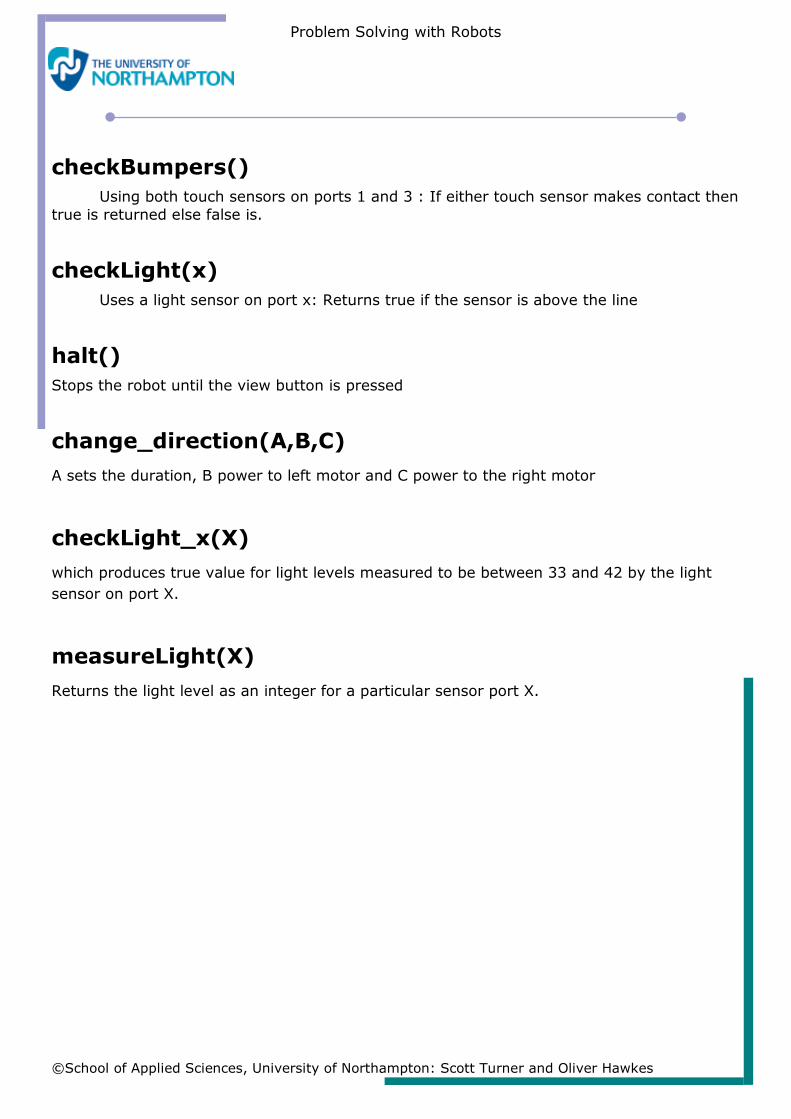
checkBumpers()
Using both touch sensors on ports 1 and 3 : If either touch sensor makes contact then
true is returned else false is.
checkLight(x)
Uses a light sensor on port x: Returns true if the sensor is above the line
halt()
Stops the robot until the view button is pressed
change_direction(A,B,C)
A sets the duration, B power to left motor and C power to the right motor
checkLight_x(X)
which produces true value for light levels measured to be between 33 and 42 by the light
sensor on port X.
measureLight(X)
Returns the light level as an integer for a particular sensor port X.