pro mixc1-preview.prosites.com/106982/wy/docs/dentsply promix... · 2015-07-23 · model 400 model...
TRANSCRIPT

MODEL 400MODEL 402
ProMix®
Operations ManualDirections for Use
A M A L G A M AT O R

ON-OFF Switch
Figure 1
Arm Body Tab
Arm Button
Figure 2

TABLE OF CONTENTS
Figures . . . . . . . . . . . . . . . . . . . . . . . Inside Front Cover
Technical Details. . . . . . . . . . . . . . . . . . . . . . . . . . . . . . 2
Glossary of Symbols . . . . . . . . . . . . . . . . . . . . . . . . . . 3
Definition of Terms . . . . . . . . . . . . . . . . . . . . . . . . . . . . 3
Operations Guide . . . . . . . . . . . . . . . . . . . . . . . . . . . . 4
Indications for Use . . . . . . . . . . . . . . . . . . . . . . . . . . . . 5
Contraindications and Warnings . . . . . . . . . . . . . . . . . 5
Precautions . . . . . . . . . . . . . . . . . . . . . . . . . . . . . . . . . 5
Installation . . . . . . . . . . . . . . . . . . . . . . . . . . . . . . . . . . 6
Operation . . . . . . . . . . . . . . . . . . . . . . . . . . . . . . . . . . . 6
Setting Memory Locations . . . . . . . . . . . . . . . . . . . 8
Setting Mixing Time . . . . . . . . . . . . . . . . . . . . . . . . 8
Installing Capsules . . . . . . . . . . . . . . . . . . . . . . . . . 9
Starting the Mixing Cycle . . . . . . . . . . . . . . . . . . . . 9
Stopping/Interrupting the Mixing Cycle . . . . . . . . . 9
Removing Capsules . . . . . . . . . . . . . . . . . . . . . . . 10
Cleaning and Disinfection . . . . . . . . . . . . . . . . . . . . . 10
Warranty . . . . . . . . . . . . . . . . . . . . . . . . . . . . . . . . . . 10
1

TECHNICAL DETAILS:
AC INPUT RATING: Model 400 120V, 50/60Hz, 2.0AModel 402 230V, 50/60Hz, 1.0A
FUSE RATING: Model 400 F2.0A/250VModel 402 T1.6A/250V
MOTOR RATING: 115VAC, 60Hz
PRESET MOTOR SPEEDS: Low (Turtle) 3700 ± 200 rpmHigh (Rabbit) 4200 ± 200 rpm
IEC EQUIPMENT CLASS: I
INSTALLATION CATEGORY(OVER VOLTAGE CATEGORY): II
POLLUTION DEGREE: 2
OPERATION MODE: Intermittent Operation (30 sec ON/120 sec OFF)
OPERATING ENVIRONMENT
NOTE: Equipment not suitable for use in the presence of flammable anes-thetic mixture with air or with nitrous oxide.
Operating Temperature: 10 to 40 degrees C (50˚F to 104˚F)Relative Humidity: 30 to 75% (non-condensing)Atmospheric Pressure: 525 to 795 mmHg
TRANSPORT: STORAGE CONDITIONSTemperature: -10 to +60 degrees C (22˚F to 140˚F)Relative humidity: 10% to 100% (non-condensing)Atmospheric Pressure: 375 to 795 mmHg
DIMENSIONS:Height: 5 inches (12.7 cm)Width: 9 inches (22.86 cm)Length: 9.5 inches (24.13 cm)Weight: 7 pounds (3.18 Kg)Power Cord Length: 117.6 inches (300cm)
2

GLOSSARY OF SYMBOLS
Caution, Consult Instructions for Use
Alternating Current
Protective Earth
OFF (Power: Disconnection from the Main Power Supply)
ON (Power: Connection to the Main Power Supply)
START /STOP: Initiates and deactivates the amalgamation cycle
HIGH: rabbitLOW: turtle
DEFINITION OF TERMS:Initialization: The function performed by the software of the unit
after power up or master reset
Stand-By: The condition when the unit is not performing the amalgamation cycle but has completed the “initialization” period
Run: The condition when the unit is performing the amalgamation cycle
3

OPERATIONS GUIDE
ProMix® AmalgamatorINTRODUCTION:The microprocessor controlled ProMix® Amalgamator is one of the most advancedamalgam and encapsulated material mixer systems presently available in the dental marketplace.
The ProMix® Amalgamation Unit provides:
a) A Constant Mixing Speed which is automatically maintained during thecomplete run/mix cycle.
b) Two Preset Speeds with an LED indication of the selected Low speed(3700 rpm) or High speed (4200 rpm).
c) Two Memory Locations (M1 and M2) which can be programmed fortime and mixing speed for your two most commonly used encapsulatedmaterials (to the manufacturer’s specifications).
d) A Timer to set the run cycle to a maximum of 30 seconds in 1 secondincrements for either selected speed.
e) A Digital LCD Display for convenient viewing of timing functions.
f) A Unique Capsule Holder (arm assembly) which will accommodate alarge variety of today’s commonly used capsules (including those with nozzles).
g) A Safety Switch which automatically turns OFF the run cycle should theProMix® Amalgamator cover accidentally be opened.
h) Quiet and smooth running operation.
i) A Thermally Protected Motor to prevent any possible damage causedby overheating.
j) Manual Cycle Interrupt Capability to reduce material waste should thetimer inadvertently be set longer than required.
4
INDICATIONS:For the trituration of dental alloys, capsule delivered temporary filling materialsand cements.
CONTRAINDICATIONS:None known
WARNINGS:1. We recommend that the ProMix® Amalgamator not be used in cases where a
patient or user of the ProMix® Amalgamator has been fitted with an implantedheart pacemaker and has been cautioned against the use of small electricalappliances (such as electric shavers, hair dryers, etc.)
2. The ProMix® Amalgamator is not suitable for use in the presence of a flammable anesthetic mixture with air or nitrous oxide.
PRECAUTIONS:1. This product is intended to be used as specifically outlined in the Directions for
Use. Any use of this product inconsistent with the Directions for Use is at thediscretion and sole responsibility of the practitioner.
2. Operate the ProMix® Amalgamator only on a hard, flat surface away from countertop edges. Unsafe to operate in any other manner than specified byDENTSPLY.
3. As with all dental procedures, use standard personal protective equipment (i.e., wear face mask, eyewear or face shield, gloves and protective gown).
4. Do not place the unit on or next to a radiator or other heat source. Excessiveheat may damage the unit’s electronics.
5. Do not operate the unit in a tightly confined space or corner. Place the unitwhere air is free to circulate on all sides and beneath it.
6. The translucent acrylic arm cover/door of the ProMix® Amalgamator has a safety interlock switch. Do not attempt to override the switch and/or operatethe ProMix® with this door open.
7. Should the ProMix® Amalgamator get damaged in any way, do not attempt tooperate the unit unless thoroughly inspected and serviced by qualifiedDENTSPLY Service personnel.
5

8. Always use the unit in conjunction with a properly grounded power source. Useonly the supplied power cord. Connect only to a power source for which thisunit is rated.
9. DO NOT IMMERSE UNIT, POWER CORD OR PLUG IN WATER OR DISINFECTANT SOLUTIONS.See cleaning and disinfection instructions on page (10).
10. DECLARATION OF CONFORMITY - EU402 Models conform with the Laboratory Equipment European Directive,73/23/EEC including amendments.
ADVERSE REACTIONS:Electrical appliances can interfere with some pacemakers. If the user or patienthas been fitted with an implanted heart pacemaker, see Warnings.
STEP-BY-STEP INSTRUCTIONS:INSTALLATION:
NOTE: Upon receiving the ProMix® Amalgamator system check the pack-aging and parts for any damage that may have occurred in transit.If damage is apparent, please contact your dealer immediately.
UNIT POWER-UP (INITIALIZATION):Plug the supplied detachable power cord into the back of the unit and then intothe main power supply.
NOTE: Always use the unit in conjunction with a properly groundedpower source.
Activate the Power Switch on the back of the unit.
Upon AC power up, the unit will always be initialized as follows:• the LCD display will read “00”,• the motor will be OFF,• the “LOW” motor speed will be selected and the “LOW” LED indicator
will be ON.
If these three conditions are not apparent, do not use the unit. Contact qualifiedDENTSPLY Service personnel.
NOTE: AC power interrupts and degradation causing improper operatingvoltages to the microprocessor will always result in a microprocessor master reset and re-initialization of the unit.
6

OPERATION:The operation of the ProMix® Amalgamator can be controlled by the LCD displayand the seven (7) push buttons/pads located on the front panel (see Figure 1,inside Front Cover).
“LCD” display Indicates the set (desired) amalgamation cycle/run time and counts down to “00” during operation.
“Up” arrow Increases the programmed run time by seconds (to amaximum of 30 seconds).
“Down” arrow Decreases the programmed run time by seconds.
“High” (rabbit) Selects the high amalgamation speed (4200 rpm) and the associated LED indicator.
“Low” (turtle) Selects the low amalgamation speed (3700 rpm) and the associated LED indicator.
“Start/Stop” (I/O) Starts and stops the amalgamation cycle.
NOTE: The two (2) “memory” locations are set at the factory to commonly usedsettings. To change the settings to suit individual needs see “SettingMemory Locations” (page 8).
“M1” (Memory #1) Stores and recalls #1 preprogrammed amalgamationspeed and time, even in the “power OFF” condition.
NOTE: The Memory #1 location is factory set to 15 seconds at Low speed.
“M2” (Memory #2) Stores and recalls #2 preprogrammed amalgamationspeed and time, even in the “power OFF” condition.
NOTE: The Memory #2 location is factory set to 20 seconds at High speed.
7

SETTING MEMORY LOCATIONS:The ProMix® Amalgamator memory locations (M1 & M2) can be programmed tosuit the two most commonly used amalgamation cycle times and speed settingsof the individual user (corresponding to the manufacturer’s specification of thematerial/amalgam being mixed).
a) Select the desired speed by pressing the appropriate key pad (verify theassociated LED illuminates).
b) Select the desired run time by depressing and holding the up or downarrow button/pad (to scroll through time) until the desired time is displayedon the LCD.
c) Store the setting by depressing and holding the desired memory location(M1 or M2) button/pad for longer than 3 seconds (the LCD will display “00”for 0.5 second before the desired memory setting will reappear indicatingthe end of the storage cycle).
SETTING THE MIXING TIME:
NOTE: Refer to the encapsulated material manufacturer’s specification todetermine the proper mixing time and speed.
If the material/amalgam required mixing time and speed is the same as one of thetwo (2) stored memory locations (M1 or M2) simply depress that desired Memorykey pad and proceed to “Installing Capsules”.
If not, proceed as follows:a) Select the recommended speed by pressing the appropriate speed
button/pad:i) High speed (rabbit)ii) Low speed (turtle)
b) Select the recommended mixing time (to a maximum 30 seconds) by:i) pressing the appropriate Up or Down arrow button/pad until the
recommended mixing time is displayed on the LCD; or holding downthe Up or Down arrow button/pad automatically scrolls through themixing time in one (1) second intervals.
8

INSTALLING CAPSULES:The ProMix® Amalgamator capsule holder is designed for easy use and to automatically retain the capsule when installed properly (refer to Figure 2, insidefront cover).
a) Lift the ProMix® Amalgamator cover to gain access to capsule holder.
b) Open the capsule holder by pressing the Arm Button with your thumb whileholding the Arm Body Tab with your fingers to keep the assembly stable.
c) Activate the capsule (if necessary, per material manufacturer’s instructions).
d) Place the capsule into the opened jaws of the Arm assembly.
NOTE: Capsules with nozzles should be placed to the left (such that thenozzle fits in the groove of the capsule holder).
To assure consistent mixes, capsules of the same brand should be oriented in thesame position (e.g. top to left) each time.
e) Release the Arm Button, which automatically retains the capsule.
f) Close the ProMix® Amalgamator cover.
STARTING THE MIXING CYCLE/UNIT OPERATION:a) To start the mixing cycle, simply press the Start/Stop button.
b) The LCD display will count down to “00” from the selected run time in one(1) second increments.
c) The ProMix® Amalgamator will automatically Stop at the end of the runcycle.
d) The LCD display will return to the previously selected run time.
STOPPING/INTERRUPTING THE CYCLE:
NOTE: Interrupting/halting the mixing cycle in any of the following manners may make the material being processed unusable (referto the material/ amalgam manufacturers specification).
9

To stop the mixing cycle (during processing) before the selected run time is complete:
a) Press any key pad.
b) OPEN or lift the ProMix® Amalgamator cover which activates the unitssafety device.
The reading on the LCD will return to the previously selected value.The ProMix® Amalgamator unit will enter/return to the Stand-By mode.
REMOVING CAPSULES:a) Lift the ProMix® Amalgamator cover to gain access to capsule holder.
b) Open the capsule holder by pressing the Arm Button with your thumbwhile holding the Arm Body Tab with your fingers to keep the assemblystable.
c) Remove the processed capsule.
DISINFECTION:
NOTE: Disconnect the power cord from the ProMix® Amalgamator unitand power source prior to cleaning.
Prior to disinfection, thoroughly wipe all surfaces and power cord clean with adamp towel (with mild detergent if needed). Properly discard used towel. EPA registered surface disinfectants are acceptable. Water-based disinfectant solutionsare preferred. Some disinfectants may cause damage to plastic. The disinfectantmanufacturer’s directions should be followed for optimum results. Do not allowwater, cleaning or disinfectant solutions to get inside the unit.
WARRANTY:The ProMix® Amalgamator is designed for use in a dental office only. The warrantydoes not cover other uses. The ProMix® Amalgamator is warranted against defective material and workmanship for a period of twelve (12) months from thedate of purchase by a dentist. In the event of such a defect, DENTSPLY will repairor replace the ProMix® Amalgamator or necessary parts therein, at its discretion,and such repair or replacement shall be the sole remedy of this warranty. Thiswarranty extends only to the original purchase and is subject to these conditions.
1. Any servicing of the ProMix® Amalgamator must be performed by qualifiedDENTSPLY service personnel.
10

2. The ProMix® Amalgamator must not be subjected to abuse or improperinstallation or application, nor installation or repair service by other thantrained DENTSPLY service personnel.
THERE ARE NO WARRANTIES, EXPRESS OR LIMITED, WHICH EXTENDBEYOND THIS DESCRIPTION. DENTSPLY neither assumes, nor authorizes anyperson to assume for it, any other liability in connection with the sale and use ofthe ProMix® Amalgamator.
DAMAGES ARE LIMITED STRICTLY TO REPLACEMENT OF THE ProMix®
Amalgamator. DENTSPLY EXPRESSLY DISCLAIMS LIABILITY FOR INCIDENTALAND CONSEQUENTIAL DAMAGES RESULTING FROM THE USE OF THE ProMix®
Amalgamator.
Claims covered by this warranty will be honored when this warranty is presentedthrough your DENTSPLY Service Center (see list on page 12) within one (1) monthfrom discovery of defect.
Caution: U.S. federal law restricts this device to sale by or on the order of a dentist.
11

Worldwide Service Centers
12
Dentsply ProfessionalAttn: Product Service1301 Smile WayPO Box 7807York, PA 17404-0607 USATel. 800-989-8826
DENTSPLY LimitedAviator ParkStation RoadAddleston, WeybridgeSurry KT15 2PGTel. 44 01932 853422
DENTSPLY Australia Pty. Ltd.11-21 Gilby RoadMount Waverley Victoria 3149AustraliaTel. 61-03-9538-8280
DENTSPLY SankinAzabu Kaisei Building1-8-10, Azabudai, Minato-kuToykyo, 106-0041JapanTel. 81-03-514-1001
Hong Kong Division of DENTSPLY International25/F, Pacific Link TowerSouthmark Tower11 Yip Hing StreetWong Chuk HangHong KongTel. (852)-2870-0336
DENTSPLY Industria e Comercio ltda.Praiade Botafogo228/Bloco A/Grupo 1501-BBotafogo22359-900 Rio de Janeiro, RJ BrazilTel. (55-21)-3237-9800
DENTSPLY Mexico, S.A. de C.V.Calzada Vallejo No. 846Col. Industrial Vallejo02300 Mexico, D.F.Tel. 52-55-5587-6488
DENTSPLY Canada161 Vinyl CourtWoodbridge, OntarioL4L 4A3 CanadaTel. 800-263-1437

13
ITEM AMALGAM MIXING TIME MIXING SPEED
Amalgam Mixing Record

MODELO 400MODELO 402
ProMix®
Guía de funcionamientoInstrucciones de uso
A M A L G A M A D O R

Interruptor de encendido (ON-OFF)
Ilustración 1
Lengüeta del brazo
Botón del brazo
Ilustración 2

ÍNDICE
Ilustraciones . . . . . . . . (al reverso de la primera página)
Información técnica . . . . . . . . . . . . . . . . . . . . . . . . . . . 2
Glosario de símbolos . . . . . . . . . . . . . . . . . . . . . . . . . . 3
Definición de términos . . . . . . . . . . . . . . . . . . . . . . . . . 3
Guía de funcionamiento . . . . . . . . . . . . . . . . . . . . . . . 4
Indicaciones de uso . . . . . . . . . . . . . . . . . . . . . . . . . . . 5
Contraindicaciones y advertencias . . . . . . . . . . . . . . . 5
Precauciones . . . . . . . . . . . . . . . . . . . . . . . . . . . . . . . . 5
Instalación . . . . . . . . . . . . . . . . . . . . . . . . . . . . . . . . . . 6
Manejo . . . . . . . . . . . . . . . . . . . . . . . . . . . . . . . . . . . . . 6
Configuración de localizaciones de la memoria. . . 8
Configuración del tiempo de mezcla . . . . . . . . . . . 8
Instalación de las cápsulas . . . . . . . . . . . . . . . . . . 9
Comienzo del ciclo de mezcla . . . . . . . . . . . . . . . . 9
Detención/interrupción del ciclo de mezcla . . . . . . 9
Cómo quitar las cápsulas. . . . . . . . . . . . . . . . . . . 10
Limpieza y desinfección. . . . . . . . . . . . . . . . . . . . . . . 10
Garantía . . . . . . . . . . . . . . . . . . . . . . . . . . . . . . . . . . . 10
1
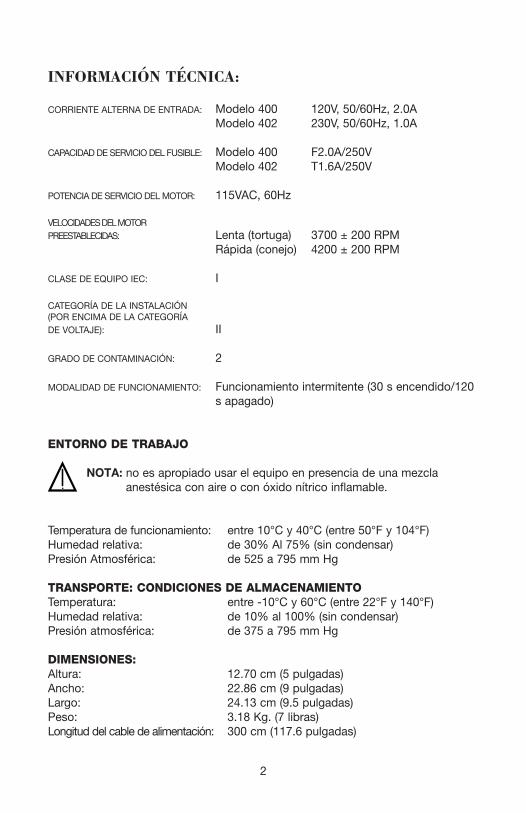
INFORMACIÓN TÉCNICA:
CORRIENTE ALTERNA DE ENTRADA: Modelo 400 120V, 50/60Hz, 2.0AModelo 402 230V, 50/60Hz, 1.0A
CAPACIDAD DE SERVICIO DEL FUSIBLE: Modelo 400 F2.0A/250VModelo 402 T1.6A/250V
POTENCIA DE SERVICIO DEL MOTOR: 115VAC, 60Hz
VELOCIDADES DEL MOTOR PREESTABLECIDAS: Lenta (tortuga) 3700 ± 200 RPM
Rápida (conejo) 4200 ± 200 RPM
CLASE DE EQUIPO IEC: I
CATEGORÍA DE LA INSTALACIÓN (POR ENCIMA DE LA CATEGORÍA DE VOLTAJE): II
GRADO DE CONTAMINACIÓN: 2
MODALIDAD DE FUNCIONAMIENTO: Funcionamiento intermitente (30 s encendido/120 s apagado)
ENTORNO DE TRABAJO
NOTA: no es apropiado usar el equipo en presencia de una mezclaanestésica con aire o con óxido nítrico inflamable.
Temperatura de funcionamiento: entre 10°C y 40°C (entre 50°F y 104°F)Humedad relativa: de 30% Al 75% (sin condensar)Presión Atmosférica: de 525 a 795 mm Hg
TRANSPORTE: CONDICIONES DE ALMACENAMIENTOTemperatura: entre -10°C y 60°C (entre 22°F y 140°F)Humedad relativa: de 10% al 100% (sin condensar)Presión atmosférica: de 375 a 795 mm Hg
DIMENSIONES:Altura: 12.70 cm (5 pulgadas)Ancho: 22.86 cm (9 pulgadas)Largo: 24.13 cm (9.5 pulgadas)Peso: 3.18 Kg. (7 libras)Longitud del cable de alimentación: 300 cm (117.6 pulgadas)
2

GLOSARIO DE SÍMBOLOS
Precaución, consulte Instrucciones de Uso
Corriente alterna
Conexión a tierra para protección
OFF (energía: desconexión de la fuente de alimentación)
ON (energía: conexión a la fuente de alimentación)
START/STOP: inicia y desactiva el ciclo de amalgamación.
RÁPIDO: conejoBAJO: tortuga
DEFINICIÓN DE TÉRMINOS:Inicio: función que lleva a cabo el programa de la unidad
después de encenderse o reestablecerse el registro principal.
En suspensión: cuando la unidad no está realizando ningún ciclode amalgamación pero ha acabado el tiempo deinicio de la unidad.
Marcha: cuando la unidad está llevando a cabo el ciclo de amalgamación
3

Guía de funcionamiento
Amalgamador ProMix®
INTRODUCCIÓN:El microprocesador que controla el amalgamador ProMix® es uno de los sistemasde mezcla de amalgamas y de material encapsulado más avanzados de losdisponibles en el mercado de la industria dental.
La unidad de amalgamación ProMix® ofrece:
a) Una velocidad de mezcla constante que se mantiene de forma automática durante el ciclo completo de amalgamación.
b) Dos velocidades preestablecidas con un indicador luminoso quemuestra la velocidad lenta (3700 RPM) y otro que muestra la velocidadrápida (4200 RPM) seleccionada.
c) Dos localizaciones de memoria (M1 y M2) que pueden ser progra-madas con el tiempo y la velocidad de mezcla de los dos materialesencapsulados que más use (siguiendo los datos técnicos facilitados porel fabricante).
d) Un cronómetro para establecer el ciclo de marcha hasta un mínimo de30 segundos, con incrementos de 1 segundo para cada una de lasvelocidades seleccionadas.
e) Pantalla digital para poder ver adecuadamente las funciones de medidadel tiempo.
f) Una agarradera de la cápsula exclusiva (en la estructura del brazo)que puede acomodar una gran variedad de cápsulas utilizadas en laactualidad comúnmente (incluyendo las que tienen boquillas).
g) Un Interruptor de seguridad que corta automáticamente el ciclo demarcha en el caso de que la tapa de la unidad se abra de forma accidental.
h) Funcionamiento silencioso y suave.
i) Motor con protección térmica para evitar todo daño que pudieracausar un sobrecalentamiento.
4

j) Capacidad para interrumpir el ciclo con el objeto de evitar el malgastode amalgama en el caso de que el cronómetro hubiese sido programadopara más tiempo del necesario.
INDICACIONES:Trituración de materiales de relleno y cementos provisionales suministrados enaleaciones y cápsulas dentales.
CONTRAINDICACIONES:No se conocen.
AVISO:1. No recomendamos el uso de la unidad ProMix® en los casos en los que los
pacientes o los usuarios de este aparato tengan implantado un marcapasospara el corazón y hayan sido prevenidos contra el uso de pequeños aparatoseléctricos (máquinas de afeitar eléctricas, secadoras de pelo, etc).
2. El amalgamador ProMix® no es apropiado para el uso del equipo en presenciade una mezcla anestésica con aire o con óxido nítrico inflamable.
PRECAUCIONES:1. Este producto está fabricado para ser usado según lo explicado específica-
mente en las Instrucciones de uso. El uso de este producto de cualquier otramanera a la explicada en las Instrucciones de uso es voluntad y responsabili-dad única del profesional que lo utilice.
2. Utilice el amalgamador ProMix® sólo en una superficie dura y llana, lejos de losbordes de la mesa de trabajo. No es seguro utilizar el aparato de manera distinta a la especificada por DENTSPLY.
3. Como en todo procedimiento dental, utilice un equipo de protección estándar(es decir, máscara de protección para la cara, gafas de protección o escudoprotector de la cara, también guantes y bata de protección).
4. No coloque la unidad sobre o cerca de un radiador u otra fuente de calor. Elexceso de calor podría afectar el sistema electrónico de la unidad.
5. No haga funcionar la unidad en un rincón o lugar sin espacio. Coloque launidad donde circule el aire de forma libre por todas las caras de la unidad ypor debajo de ésta.
5
6. La tapa/puerta del brazo acrílico translúcido del amalgamador ProMix® tiene uninterruptor entrecruzado de seguridad. No intente anular el funcionamiento delinterruptor y hacer funcionar la unidad con esta puerta abierta.
7. En el caso de que el amalgamador ProMix® sufriese daños por cualquier razón,no intente hacerlo para que funcione a menos que sea inspeccionada y repara-da por el personal de servicios calificado del distribuidor de DENTSPLY.
8. Utilice la unidad siempre con una toma de corriente con una conexión a tierraadecuada. Utilice exclusivamente el cable de alimentación suministrado.Conecte la unidad únicamente a una fuente de alimentación de voltaje adecuado.
9. NO SUMERJA LA UNIDAD, EL CABLE DE ALIMENTACIÓN O LA CLAVIJA OEN AGUA SOLUCIONES DESINFECTANTES.Vea las instrucciones de limpieza y desinfección en la página 10.
10. DECLARACIÓN DE CONFORMIDAD - UELos modelos 402 para la Unión Europea cumplen con la Directiva Europea deEquipos de Laboratorio 73/23/EEC y con sus anexos.
REACCIONES ADVERSAS:Los dispositivos eléctricos pueden interferir con algunos marcapasos. Si el usuario oel paciente tienen implantado un marcapasos, véase la sección Advertencias.
INSTRUCCIONES PASO A PASO:INSTALACIÓN:
NOTA: Cuando reciba el sistema de amalgamación ProMix®, revise el paquete y las piezas para ver si hay algún daño que pueda haberseproducido durante el transporte. Si notara algún desperfecto, contacte a su distribuidor inmediatamente.
ENCENDIDO DE LA UNIDAD (INICIO):Conecte el cable de alimentación en la parte trasera de la unidad y luegoenchúfelo a la toma de corriente.
NOTA: Utilice la unidad siempre con una toma de corriente con unaconexión a tierra adecuada.
Active el interruptor de encendido en la parte trasera de la unidad.
6

Cuando esté enchufada la unidad, deberá inicializarse siempre tal y como seespecifica aquí:
• la pantalla líquida deberá mostrar “00”,• el motor deberá estar apagado,• deberá seleccionarse la velocidad LENTA (LOW) del motor y el
indicador luminoso para LENTO (LOW) deberá estar encendido.
Si no se dieran estas tres condiciones, no use la unidad. Contacte al personal calificado de DENTSPLY.
NOTA: Las interrupciones y bajadas de corriente alterna que den lugar avoltajes de funcionamiento inadecuados para el microprocesador producirán siempre el reestablecimiento del registro principal enel microprocesador y la reinicialización de la unidad.
FUNCIONAMIENTO:El funcionamiento del amalgamador ProMix® puede controlarse desde la pantalladigital y los siete (7) botones localizados en el tablero delantero (véase la ilus-tración 1, al reverso de la primera página de esta guía).
La pantalla digital indica el ciclo de amalgamación/tiempo de marcha establecido (deseado) y muestra la cuenta regresiva durante el proceso hasta llegar a “00”.
La flecha hacia arriba aumenta el tiempo de marcha programado en interval-os de un segundo (hasta un mínimo de 30 segundos).
La flecha hacia abajo disminuye el tiempo de marcha programado en intervalos de un segundo.
“Aumentar” (conejo) El botón que muestra el dibujo de un conejo activa la velocidad de amalgamación rápida (4200 RPM) y el indicador luminoso asociado.
“Reducir” (tortuga) El botón que muestra el dibujo de una tortuga activa lavelocidad de amalgamación lenta (3700 RPM) y elindicador luminoso asociado.
Botón de inicio/ Inicia y para el ciclo de amalgamación.detención (I/O)
7

NOTA: Las dos (2) localizaciones de memoria vienen configuradas de fábrica conconfiguraciones de uso común. Para cambiar las configuraciones con elobjeto de satisfacer sus necesidades individuales véase la secciónConfiguración de localizaciones de memoria (página 8).
“M1” (memoria 1) almacena la velocidad y el tiempo de amalgamació pre-programada 1, incluso cuando la unidad está apagada.
NOTA: la localización de memoria 1 viene configurada de fábrica a 15 segundoscon la velocidad lenta.
“M2” (memoria 2) almacena la velocidad y el tiempo de amalgamación pre-programada 2, incluso si la unidad está apagada.
NOTA: La localización de memoria 2 viene configurada de fábrica a 20 segundoscon la velocidad rápida.
CONFIGURACIÓN DE LOCALIZACIONES DE LA MEMORIA:El amalgamador ProMix® tiene dos (2) localizaciones de memoria (M1 y M2) quepueden programarse para ajustarse a las dos configuraciones de tiempos yvelocidad del ciclo de amalgamación más comúnmente usadas por el usuarioindividual (lo que corresponde a las especificaciones dadas por los fabri-cantes para el material o amalgama a mezclar).
a) Seleccione la velocidad deseada presionando el botón correspondiente(compruebe los indicadores luminosos apropiados).
b) Seleccione el tiempo de marcha deseado presionando y sosteniendo losbotones de la flecha hacia arriba o hacia abajo (para aumentar o disminuirel tiempo) hasta que aparezca el tiempo deseado en la pantalla.
c) Salvaguarde la configuración presionando y manteniendo apretado elbotón de la localización de memoria deseada (M1 o M2) durante más de 3segundos (la pantalla digital deberá mostrar “00” durante 0,5 segundosantes de que vuelva a aparecer la configuración de memoria deseada indicando así el final del ciclo).
CONFIGURACIÓN DEL TIEMPO DE MEZCLA:
NOTA: Consulte las especificaciones dadas por el fabricante del materialencapsulado para determinar el tiempo y la velocidad de mezcla adecuados.
8

Si el tiempo y la velocidad de mezcla del material o la amalgama es igual a unode los dos (2) tiempos salvaguardados en las localizaciones de memoria (M1 oM2), presione el botón de la memoria que desee y proceda con la “Instalación decápsulas”.
En caso contrario, haga lo siguiente:a) Seleccione la velocidad recomendada presionando los botones de
velocidad correspondientes:i) Velocidad rápida (conejo)ii) Velocidad lenta (tortuga)
b) Seleccione el tiempo de mezcla recomendado (hasta un máximo de 30segundos) siguiendo estos pasos:
i) Presione el botón con la flecha hacia arriba o hacia abajo hasta que eltiempo de mezcla recomendado aparezca en la pantalla; o mantengaapretado el botón con la flecha mirando hacia arriba o abajo con loque el tiempo de mezcla cambiará a intervalos de un (1) segundo.
INSTALACIÓN DE CÁPSULAS:El sujetador de la cápsula del amalgamador ProMix® está diseñada para un usofácil y para retener automáticamente la cápsula cuando se instala apropiadamente(consulte la ilustración 2, al reverso de la primera página de esta guía).
a) Levante la tapa del amalgamador ProMix® para poder tener acceso al sujetador de la cápsula.
b) Abra el sujetador de la cápsula presionando el botón del brazo con el pulgar mientras sostenga la lengüeta del brazo con los dedos para que launidad no pierda estabilidad.
c) Active la cápsula (en caso de ser necesario, siguiendo las instrucciones delfabricante del material).
d) Coloque la cápsula dentro de los elementos de sujeción abiertos delbrazo.
NOTA: Las cápsulas con boquilla deberán colocarse hacia la izquierda(de tal manera que la boquilla entre en la ranura del sujetador dela cápsula).
Para asegurar mezclas consistentes, se deberían colocar cápsulas de la mismamarca en la misma posición (por ejemplo, de arriba a la izquierda) cada vez.
e) Suelte el botón del brazo. Esto hará que se retenga la cápsula automáticamente.
9

f) Cierre la tapa del amalgamador ProMix®.
COMIENZO DEL CICLO DE MEZCLA/FUNCIONAMIENTO DE LA UNIDAD:a) Para comenzar con el ciclo de mezcla, simplemente presione el botón de
Inicio/Detención.
b) La pantalla líquida hará la cuenta regresiva en incrementos de un (1)segundo hasta llegar a “00” desde el tiempo de marcha seleccionado.
c) El amalgamador ProMix® parará automáticamente al final del ciclo de marcha.
d) La pantalla digital volverá al tiempo de marcha seleccionado previamente.
DETENCIÓN/INTERRUPCIÓN DEL CICLO DE MEZCLA:
NOTA: La interrupción o parada del ciclo de mezcla de cualquiera de lassiguientes maneras podría hacer que el material que se estéprocesando no pueda usarse más (consulte con las especifica-ciones de los fabricantes de materiales y amalgamas).
Para parar el ciclo de mezcla (durante el procesamiento) antes de que haya transcurrido el tiempo de marcha seleccionado:
a) Presione cualquier botón.
b) ABRA o levante la tapa del amalgamador que activa el dispositivo deseguridad de las unidades.
La lectura en pantalla deberá volver al valor seleccionado previamente. El amalgamador ProMix® deberá entrar o volver a la modalidad de suspensión.
CÓMO QUITAR LAS CÁPSULAS:a) Levante la tapa del amalgamador ProMix® para poder tener acceso al
sujetador de la cápsula.
b) Abra el sujetador de la cápsula presionando el botón del brazo con el pulgar mientras sostenga la lengüeta del brazo con los dedos para que launidad no pierda estabilidad.
c) Retire la cápsula procesada.
10
DESINFECCIÓN:
NOTA: Desconecte el cable de alimentación del amalgamador ProMix® yde la fuente de alimentación antes de su limpieza.
Antes de la desinfección, limpie todas las superficies y el cable de alimentacióncon una toallita húmeda (y con un detergente suave en caso necesario). Desechede forma apropiada la toallita usada. Se pueden usar los desinfectantes parasuperficies registrados por la EPA. Las soluciones desinfectantes basadas enagua son preferibles. Algunos desinfectantes pueden causar daños al plástico.Deben seguirse las instrucciones del fabricante del desinfectante para conseguirresultados óptimos. No permita que entre el agua, o que entren solucioneslimpiadoras o desinfectantes en la unidad.
GARANTÍA:El amalgamador ProMix® es diseñado para su uso exclusivo durante la consultade un dentista. La garantía no cubre otros usos. El amalgamador ProMix® estágarantizado ante defectos en materiales y fabricación por un periodo de doce (12)meses a partir de la fecha de compra realizada por el dentista. En el caso de quese produjese tal defecto, DENTSPLY reparará o reemplazará el amalgamadorProMix® o las piezas necesarias del mismo, según vea conveniente, y dichareparación o cambio será la única solución dada por esta garantía. Esta garantíase extiende solamente a la compra original y está sujeta a las siguientes condi-ciones:
1. Todos los servicios prestados sobre el amalgamador ProMix® deberán serrealizados por el personal calificado de DENTSPLY.
2. El amalgamador ProMix® no deberá haber sido objeto de abuso, insta-lación o utilización inapropiada, ni deberá haber sido instalado o reparadopor otro servicio que no consista en el personal de servicio especializadoDENTSPLY.
NO HABRÁ GARANTÍAS, EXPRESAS O LIMITADAS, QUE SE EXTIENDAN PORENCIMA DE ESTA DESCRIPCIÓN. DENTSPLY tampoco asumirá, ni autorizará anadie a asumir ninguna otra responsabilidad en su nombre con relación a la ventao el uso del amalgamador ProMix®.
LOS DAÑOS SE LIMITAN ESTRICTAMENTE AL CAMBIO DEL AMALGAMADORPROMIX®. DENTSPLY RENUNCIA EXPRESAMENTE A TODA RESPONSABILIDADPOR DAÑOS ACCIDENTALES Y DAÑOS CONSIGUIENTES QUE RESULTENDEBIDO AL USO DEL AMALGAMADOR PROMIX®.
11

Se satisfarán las reclamaciones cubiertas por esta garantía cuando se presente lamisma a través del centro de servicios DENTSPLY (véase la lista de la página 12)a más tardar un mes (1) a partir el descubrimiento del defecto.
Precaución: Las leyes federales de los Estados Unidos restringen la venta deeste producto de manera que se haga por medio de un dentista opor orden del mismo.
12
Centros de servicio en todo el mundo
13
Dentsply ProfessionalAttn: Product Service1301 Smile WayPO Box 7807York, PA 17404-0607 USATel. 800-989-8826
DENTSPLY LimitedAviator ParkStation RoadAddleston, WeybridgeSurry KT15 2PGTel. 44 01932 853422
DENTSPLY Australia Pty. Ltd.11-21 Gilby RoadMount Waverley Victoria 3149AustraliaTel. 61-03-9538-8280
DENTSPLY SankinAzabu Kaisei Building1-8-10, Azabudai, Minato-kuToykyo, 106-0041JapanTel. 81-03-514-1001
Hong Kong Division of DENTSPLY International25/F, Pacific Link TowerSouthmark Tower11 Yip Hing StreetWong Chuk HangHong KongTel. (852)-2870-0336
DENTSPLY Industria e Comercio ltda.Praiade Botafogo228/Bloco A/Grupo 1501-BBotafogo22359-900 Rio de Janeiro, RJ BrazilTel. (55-21)-3237-9800
DENTSPLY Mexico, S.A. de C.V.Calzada Vallejo No. 846Col. Industrial Vallejo02300 Mexico, D.F.Tel. 52-55-5587-6488
DENTSPLY Canada161 Vinyl CourtWoodbridge, OntarioL4L 4A3 CanadaTel. 800-263-1437

14
ARTÍCULO AMALGAMA TIEMPO DE MEZCLA VELOCIDAD DE MEZCLA
Registro de mezcla de amalgamas

MODÈLE 400MODÈLE 402
ProMix®
Guide d’utilisationMode d’emploi
V I B R AT E U R P O U R A M A L G A M E

Interrupteur marche/arrêt
Figure 1
Languette de fixation du bras
Touche du bras
Figure 2

TABLE DES MATIÈRES
Figures . . . . . . . . . . . . . . . . . . Deuxième de couverture
Précisions techniques . . . . . . . . . . . . . . . . . . . . . . . . . 2
Glossaire des symboles . . . . . . . . . . . . . . . . . . . . . . . . 3
Définition des termes . . . . . . . . . . . . . . . . . . . . . . . . . . 3
Guide d’utilisation . . . . . . . . . . . . . . . . . . . . . . . . . . . . 4
Indications d’emploi . . . . . . . . . . . . . . . . . . . . . . . . . . . 5
Contre-indications et avertissements . . . . . . . . . . . . . 5
Précautions . . . . . . . . . . . . . . . . . . . . . . . . . . . . . . . . . 5
Installation . . . . . . . . . . . . . . . . . . . . . . . . . . . . . . . . . . 6
Utilisation . . . . . . . . . . . . . . . . . . . . . . . . . . . . . . . . . . . 6
Régler les positions de mémoire . . . . . . . . . . . . . . 8
Régler la durée de mélange . . . . . . . . . . . . . . . . . . 8
Installer les capsules . . . . . . . . . . . . . . . . . . . . . . . 9
Démarrer le cycle de mélange . . . . . . . . . . . . . . . . 9
Arrêter/Interrompre le cycle de mélange . . . . . . . . 9
Retirer les capsules . . . . . . . . . . . . . . . . . . . . . . . 10
Nettoyage et désinfection . . . . . . . . . . . . . . . . . . . . . 10
Garantie. . . . . . . . . . . . . . . . . . . . . . . . . . . . . . . . . . . 10
1

PRÉCISIONS TECHNIQUES :
COURANT D’ENTRÉE NOMINAL, ALIMENTATION SECTEUR : Modèle 400 120V, 50/60Hz, 2,0A
Modèle 402 230V, 50/60Hz, 1,0A
CAPACITÉ NOMINALE DU FUSIBLE : Modèle 400 F2,0A/250VModèle 402 T1,6A/250V
PUISSANCE NOMINALE DU MOTEUR : 115VAC, 60Hz
PRÉRÉGLAGE DES VITESSES DU MOTEUR : Basse (tortue) 3700 ± 200 rpmÉlevée (lapin) 4200 ± 200 rpm
CLASSE ÉQUIPEMENT IEC : I
CATÉGORIE D’INSTALLATION(CATÉGORIE DE SURTENSION) : II
DEGRÉ DE POLLUTION : 2
MODE DE FONCTIONNEMENT : Fonctionnement intermittent (30 secondes de marche/120 secondes d’arrêt)
ENVIRONNEMENT DE FONCTIONNEMENT
REMARQUE : Ne pas utiliser cet équipement en présence d’un mélangeanesthésique inflammable contenant de l’air ou de l’oxydenitreux.
Température de fonctionnement : 10°C à 40°C (50-104°F)Humidité relative : 30% à 75% (sans condensation)Pression atmosphérique : 525 à 795 mmHg
TRANSPORT : CONDITIONS DE STOCKAGETempérature : -10°C à 60°C (22-104°F)Humidité relative : 10% à 100% (sans condensation)Pression atmosphérique : 375 à 795 mmHg
DIMENSIONS :Hauteur : 12,7 cm (5 po)Largeur : 22,86 cm (9 po)Longueur : 24,13 cm (9,5 po)Poids : 3,18 kg (7 lb)Longueur du cordon d’alimentation : 300 cm (117,6 po)
2

GLOSSAIRE DES SYMBOLES
Attention, consulter les instructions d'utilisation
Courant alternatif
Borne de mise à la terre
ARRÊT (Alimentation: Déconnexion de l’alimentation principale)
MARCHE (Alimentation: Connexion à l’alimentation principale)
DÉMARRER/ARRÊTER: Lance et arrête le cycle d’amalgamation
ÉLEVÉE: LapinBASSE: Tortue
DÉFINITION DES TERMES:Initialisation: Fonction exécutée par le logiciel de l’appareil
après la mise sous tension ou une réinitialisation.
Mode veille: État dans lequel l’appareil a terminé la période d’ « initialisation » mais n’exécute pas le cycle d’amalgamation.
Fonctionnement: État dans lequel l’appareil exécute le cycle d’amalgamation.
3

GUIDE D’UTILISATION
Vibrateur pour amalgame ProMix®
INTRODUCTION :Le vibrateur pour amalgame ProMix® commandé par microprocesseur est l’un dessystèmes de mélange d’amalgame et de matériau encapsulé les plus avancés surle marché des produits dentaires.
L’unité d’amalgamation ProMix® offre les caractéristiques suivantes:
a) Une vitesse de mélange constante, laquelle est automatiquementmaintenue durant tout le cycle de fonctionnement/mélange.
b) Deux vitesses préréglées avec indication sur DEL du choix de lavitesse basse (3700 r/min) ou élevée (4200 r/min).
c) Deux positions de mémoire (M1 et M2) pouvant être programméespour la durée et la vitesse d’amalgamation de deux de vos matériauxencapsulés les plus utilisés (selon les instructions du fabricant).
d) Une minuterie pour régler le cycle à un maximum de 30 secondes (paréchelons d’une seconde), s’appliquant à la vitesse choisie.
e) Un affichage numérique à cristaux liquides pour bien voir les fonctionsde durée.
f) Un support unique de capsule (assemblage du bras) qui fonctionneraavec un grand nombre de capsules utilisées actuellement (y compriscelles avec des buses).
g) Un interrupteur de sécurité qui arrête le cycle automatiquement en casd’ouverture accidentelle de la porte de l’appareil ProMix®.
h) Un fonctionnement silencieux et doux.
i) Un moteur protégé thermiquement pour éviter tous dommages liés àla surchauffe.
j) La capacité d’interrompre le cycle pour éliminer le résidu de matérieldans le cas où le fonctionnement programmé de la minuterie serait parinadvertance trop long.
4
INDICATIONS:Trituration des alliages dentaires, des matériaux d'obturation temporaires en capsule et des ciments.
CONTRE-INDICATIONS:Aucune connue
AVERTISSEMENTS:1. Nous recommandons de ne pas utiliser le vibrateur d’amalgame ProMix® si le
patient ou l’utilisateur porte un stimulateur cardiaque et qu’il a été averti contrel’utilisation de petits appareils électriques (rasoir électrique, sèche-cheveux,etc.).
2. Ne pas utiliser le vibrateur d’amalgame ProMix® en présence d’un mélangeanesthésique inflammable contenant de l’air ou de l’oxyde nitreux.
PRÉCAUTIONS:1. Ce produit est conçu pour être utilisé spécifiquement de la façon indiquée dans
le mode d’emploi. Toute utilisation de ce produit non conforme au mode d’em-ploi sera à la discrétion et sous l’entière responsabilité du praticien.
2. Utiliser le vibrateur d’amalgame ProMix® uniquement sur une surface dure etplate, loin des bords du comptoir. Il est dangereux d’utiliser l’appareil de façonautre que celle précisée par DENTSPLY.
3. Comme durant l’exécution de toute procédure dentaire, portez les équipementsde protection personnelle standard (notamment, masque buccal, lunettes desécurité ou écran facial, gants de sécurité et sarau).
4. Ne placez jamais l’appareil sur ou à proximité d’un radiateur ou d’une autresource de chaleur. Une chaleur excessive risquerait d’endommager les com-posants électroniques de l’appareil.
5. Ne faites pas fonctionner cet appareil dans un recoin ou un espace clos.Choisissez un endroit où l’air peut circuler librement sur tous les côtés et endessous de l’appareil.
6. Le couvercle ou la porte en acrylique transparent du vibrateur d’amalgameProMix® possède un verrou de sécurité. N’essayez pas forcer ce verrou et/oud’utiliser le ProMix® avec la porte ouverte.
7. Si le vibrateur d’amalgame ProMix® est endommagé d’une façon quelconque,ne tentez pas de l’utiliser avant qu’il ait été soigneusement examiné et réparépar le personnel qualifié d’un concessionnaire de DENTSPLY.
5

8. Utilisez toujours l’appareil avec une prise correctement mise à la terre. Utilisezuniquement le cordon d’alimentation fourni. Connectez l’appareil uniquement àune source d’alimentation conforme aux spécifications.
9. NE PAS IMMERGER L’APPAREIL, LE CORDON ET LA PRISE D’ALIMENTATIONDANS L’EAU OU UNE SOLUTION DÉSINFECTANTE. Voir les instructions denettoyage et de désinfection en page (10).
10. DÉCLARATION DE CONFORMITÉ - UELes appareils modèle 402 sont conformes à la directive européenene sur leséquipements de laboratoire, 73/23/EEC y compris ses amendements.
RÉACTIONS ADVERSES:Les appareils électriques peuvent affecter le fonctionnement de stimulateurs cardiaques. Si l’utilisateur ou un patient porte un stimulateur cardiaque, voir lesAvertissements.
INSTRUCTIONS DÉTAILLÉES:INSTALLATION:
REMARQUE: Lorsque vous recevez le vibrateur d’amalgame Promix®,vérifiez l’emballage et les composants pour voir si ils ontété endommagés durant le transport ou le stockage. Sivous découvrez des dommages, contactez votre vendeurimmédiatement.
MISE SOUS TENSION DE L'APPAREIL (INITIALISATION):Branchez le cordon d’alimentation détachable dans la partie arrière de l’appareil,puis dans une prise secteur.
REMARQUE : Utilisez toujours l’appareil avec une prise correctementmise à la terre.
Activez l’interrupteur d’alimentation sur la partie arrière de l’appareil.
Après la mise sous tension, l’appareil peut être initialisé de la façon suivante:• L’affichage à cristaux liquides indiquera « 00 »,• le moteur sera ARRÊTÉ,• la vitesse « BASSE » du moteur sera sélectionnée et la DEL « BASSE »
sera allumée.
Si ces trois actions ne se produisent pas, n’utilisez pas l’appareil. Contactez dupersonnel d’entretien qualifié de DENTSPLY.
6

REMARQUE : La coupure du courant alternatif et la dégradation due àdes tensions de fonctionnement non conformes provo-quera une mise à zéro du microprocesseur et la réinitiali-sation de l’appareil.
FONCTIONNEMENT:Le fonctionnement du vibrateur d’amalgame ProMix® peut être commandé parl’afficheur à cristaux liquides (ACL) et les sept (7) touches situées sur le panneauavant (voir la figure 1, deuxième de couverture).
L’afficheur « ACL » indique le réglage désiré du cycle d’amalgamation oude la durée d’exécution, ainsi que le compte à reboursjusqu’à « 00 » lorsque l’appareil fonctionne.
La flèche vers le haut accroît la durée de fonctionnement programmée paréchelons d’une seconde (jusqu’à un maximum de 30secondes).
La flèche vers le bas réduit la durée de fonctionnement programmée paréchelons d’une seconde.
« Élevée » (lapin) Sélectionne la vitesse rapide d’amalgamation (4200 r/min) et le voyant DEL correspondant.
« Basse » (tortue) Sélectionne la vitesse lente d’amalgamation (3700 r/min) et le voyant DEL correspondant.
« Démarrer/Arrêter » Lance et arrête le cycle d’amalgamation.(I/O)
REMARQUE: Les deux (2) positions de mémoire ont été réglées en usine avec lesparamètres les plus communs. Pour changer ces paramètres selonvos besoins, voir « Régler les positions de mémoire » (page 8).
« M1 » (Mémoire 1) stocke et rappelle le programme n° 1 de vitesse et dedurée d’amalgamation, même dans la condition d’ «ARRÊT ».
REMARQUE: La Mémoire 1 est réglée en usine à 15 secondes et basse vitesse.
7

« M2 » (Mémoire 2) stocke et rappelle le programme n° 2 de vitesse et dedurée d’amalgamation, même dans la condition d’ «ARRÊT ».
REMARQUE: La Mémoire 2 est réglée en usine à 20 secondes et vitesse élevée.
RÉGLER LES POSITIONS DE MÉMOIRE:Le vibrateur d’amalgame ProMix® possède deux (2) positions de mémoire (M1 &M2) pouvant être programmées pour correspondre aux durées et vitesses de deuxcycles d’amalgamation les plus fréquemment utilisés par un utilisateur (conformé-ment aux recommandations du fabricant relatives au matériau/amalgame àmélanger).
a) Sélectionnez la vitesse désirée en appuyant sur les touches appropriées duclavier (assurez-vous que le voyant DEL correspondant s’illumine).
b) Sélectionnez la durée de fonctionnement désirée en appuyant sur latouche de la flèche verticale ou descendante (pour faire défiler la durée)jusqu’à ce que l’ACL affiche la durée voulue.
c) Stockez les réglages en appuyant sur la touche de la position de mémoiredésirée (M1 ou M2) pendant plus de 3 secondes (l’ACL affichera « 00 »pendant 0,5 seconde avant la réapparition du réglage de mémoire désiré,ce qui confirme la fin du cycle de stockage).
RÉGLAGE DE LA DURÉE DE MÉLANGE:
REMARQUE : Référez-vous aux précisions fournies par le fabricant de l’amalgame pour déterminer la durée de mélange et lavitesse appropriée.
Si le matériau/amalgame exige une durée de mélange et une vitesse correspon-dant à l’une des deux (2) positions de mémoires programmées (M1 ou M2),appuyez simplement sur la touche Mémoire concernée et passez à « Installationdes capsules ».
Dans le cas contraire, exécutez les opérations suivantes:a) Sélectionnez la vitesse recommandée en appuyant sur la touche de vitesse
appropriée:i) Vitesse élevée (lapin)ii) Vitesse lente (tortue)
b) Sélectionnez la durée de mélange recommandée (maximum 30 secondes)en:
8

i) appuyant sur la touche appropriée de flèche vers le haut/bas jusqu’àce que la durée de mélange recommandée apparaisse sur l’ACL (sivous tenez enfoncée la flèche vers le haut/bas, les durées de mélangedéfilent automatiquement par intervalles d’une seconde).
INSTALLATION DES CAPSULES:Le porte-capsule du vibrateur d’amalgame ProMix® est conçu pour s’utiliser avecfacilité, ainsi que pour automatiquement retenir la capsule, dans la mesure où l’in-stallation est correctement effectuée (voir la figure 2, deuxième de couverture).
a) Soulevez le couvercle du vibrateur d’amalgame ProMix® pour accéder auporte-capsule.
b) Ouvrez le porte-capsule en appuyant sur la touche du bras avec votrepouce tout en tenant la languette entre vos doigts pour assurer la stabilitéde l’assemblage.
c) Activez la capsule (si nécessaire, conformément aux instructions du fabricant).
d) Placez la capsule dans les mâchoires ouvertes de l’assemblage.
REMARQUE : Les capsules avec une buse doivent être placées àgauche (de façon à ce que la buse entre dans la rainure duporte-capsule).
Pour garantir l’uniformité des mélanges, les capsules de même marque doiventchaque fois être orientées dans la même direction (par exemple, vers le haut àgauche).
e) Relâchez le bouton du bras, lequel retient automatiquement la capsule.
f) Fermez le couvercle de l’appareil ProMix®.
DÉMARRAGE DU CYCLE DE MÉLANGE/MISE EN MARCHE DE L’APPAREIL:a) Pour démarrer le cycle de mélange, il suffit d’appuyer sur le bouton
Démarrer/Arrêter.
b) L’ACL effectuera le compte à rebours jusqu’à « 00 » à partir de la durée defonctionnement sélectionnée, par échelons d’une (1) seconde.
c) À la fin du cycle de fonctionnement, l’appareil ProMix® s’arrête automatique-ment.
9

d) L’ACL reviendra à la durée de fonctionnement précédemment choisie.
ARRÊT/INTERRUPTION DU CYCLE:
REMARQUE: l’interruption/arrêt du cycle de mélange de toutes lesmanières suivantes pourraient rendre inutilisable la capsuleen cours de traitement (voir les précisions du fabricantpour le matériau/amalgame).
Pour arrêter le cycle de mélange (pendant le fonctionnement) avant la fin de ladurée prévue:
a) Appuyez sur n’importe quelle touche du clavier.
b) OUVREZ ou levez le couvercle du vibrateur d’amalgame ProMix®, ce quidéclenche le dispositif de sécurité de l’apapreil.
L’ACL reviendra à la valeur précédemment choisie.Le vibrateur d’amalgame ProMix® se place ou retourne en mode veille.
ENLÈVEMENT DES CAPSULES :a) Soulevez le couvercle du vibrateur d’amalgame ProMix® pour accéder au
porte-capsule.
b) Ouvrez le porte-capsule en appuyant sur la touche du bras avec votrepouce tout en tenant la languette entre vos doigts pour assurer la stabilitéde l’assemblage.
c) Enlevez la capsule usée.
DÉSINFECTION:
REMARQUE : Avant le nettoyage, déconnectez le cordon d’alimentationde l’appareil ProMix® et la source d’alimentation électrique.
Avant la désinfection, essuyez soigneusement toutes les surfaces et le cordond’alimentation avec un chiffon humide (et un détergent doux si nécessaire). Jetezles chiffons usés conformément aux règles en vigueur. Les désinfectants de surface homologués par l’EPA sont acceptables. Les solutions désinfectantes àbase d’eau sont préférables. Certains désinfectants peuvent endommager le plastique. Pour des résultats optimaux, suivez les instructions du fabricant dudésinfectant. Ne permettez aucune infiltration d’eau, de produit nettoyant ou desolution désinfectante dans l’appareil.
10

GARANTIE:Le vibrateur d’amalgame ProMix® est conçu uniquement pour les cabinets dedentiste. La garantie ne couvre aucune autre utilisation. Le vibrateur d’amalgameProMix® est garanti contre les défauts de matériau et de main-d’œuvre pendantune période de douze (12) mois à compter de sa date d’achat par un dentiste. Siun tel défaut venait à se manifester, DENTSPLY se chargera de réparer ou rem-placer le vibrateur d’amalgame ProMix® ou les composants nécessaires, à sonentière discrétion, et cette réparation ou ce remplacement constitueront le seulrecours offert par la garantie. Cette garantie ne s’applique qu’à l’achat original etest sujette aux conditions ci-dessous.
1. Toute réparation du vibrateur d’amalgame ProMix® doit être effectuée pardu personnel de réparation DENTSPLY qualifié.
2. Le vibrateur d’amalgame ProMix® ne doit pas avoir fait l’objet d’une instal-lation ou une utilisation abusive ou incorrecte, ni avoir été installé ou réparépar d’autres personnes que des techniciens DENTSPLY spécialement for-més.
IL N’EXISTE AUCUNE AUTRE GARANTIE EXPRESSE OU IMPLICITE S’APPLIQUANT EN SUS DES PRÉSENTES. DENTSPLY n’assume, et n’autorisepersonne à assumer en son nom, toute autre responsabilité en rapport avec lavente et l’utilisation du vibrateur d’amalgame ProMix®.
LES DOMMAGES ADMISSIBLES SE LIMITENT STRICTEMENT AU REMPLACE-MENT DU vibrateur d’amalgame ProMix®. DENTSPLY RÉFUTE EXPRESSÉMENTTOUTE RÉCLAMATION DE RESPONSABILITÉ POUR DES DOMMAGES INDI-RECTS OU FORTUITS RÉSULTANTS DE L’UTILISATION DU vibrateur d’amalgameProMix®.
Les réclamations couvertes par cette garantie seront honorées dans la mesure oùcette garantie est présentée à votre centre de réparation DENTSPLY (voir la listeen page 12) dans un délai d’un mois après la découverte du défaut.
Attention : Les lois fédérales américaines stipulent que cet appareil ne peut êtrevendu que par ou sur ordonnance d'un dentiste.
11

Centres de réparation mondiaux
12
Dentsply ProfessionalAttn: Product Service1301 Smile WayPO Box 7807York, PA 17404-0607 USATel. 800-989-8826
DENTSPLY LimitedAviator ParkStation RoadAddleston, WeybridgeSurry KT15 2PGTel. 44 01932 853422
DENTSPLY Australia Pty. Ltd.11-21 Gilby RoadMount Waverley Victoria 3149AustraliaTel. 61-03-9538-8280
DENTSPLY SankinAzabu Kaisei Building1-8-10, Azabudai, Minato-kuToykyo, 106-0041JapanTel. 81-03-514-1001
Hong Kong Division of DENTSPLY International25/F, Pacific Link TowerSouthmark Tower11 Yip Hing StreetWong Chuk HangHong KongTel. (852)-2870-0336
DENTSPLY Industria e Comercio ltda.Praiade Botafogo228/Bloco A/Grupo 1501-BBotafogo22359-900 Rio de Janeiro, RJ BrazilTel. (55-21)-3237-9800
DENTSPLY Mexico, S.A. de C.V.Calzada Vallejo No. 846Col. Industrial Vallejo02300 Mexico, D.F.Tel. 52-55-5587-6488
DENTSPLY Canada161 Vinyl CourtWoodbridge, OntarioL4L 4A3 CanadaTel. 800-263-1437

13
ÉLÉMENT AMALGAME DURÉE DE MÉLANGE VITESSE DE MÉLANGE
Fiche de mélange de l’amalgame

MODELL 400MODELL 402
ProMix®
BetriebsanleitungGebrauchsanweisung
A M A L G A M AT O R

EIN-/AUS-Schalter
Abbildung 1
Schutzgehäuseklappe
Schutzknopf
Abbildung 2

INHALTSVERZEICHNIS
Abbildungen . . . . . . . . . . . . . . . . . . . . . . Titelblatt innen
Technische Details . . . . . . . . . . . . . . . . . . . . . . . . . . . . 2
Glossar der Symbole . . . . . . . . . . . . . . . . . . . . . . . . . . 3
Begriffsdefinition. . . . . . . . . . . . . . . . . . . . . . . . . . . . . . 3
Betriebsanleitung . . . . . . . . . . . . . . . . . . . . . . . . . . . . 4
Indikationen . . . . . . . . . . . . . . . . . . . . . . . . . . . . . . . . . 5
Kontraindikationen und Warnungen. . . . . . . . . . . . . . . 5
Sicherheitsmaßnahmen . . . . . . . . . . . . . . . . . . . . . . . . 5
Installation . . . . . . . . . . . . . . . . . . . . . . . . . . . . . . . . . . 6
Betrieb . . . . . . . . . . . . . . . . . . . . . . . . . . . . . . . . . . . . . 6
Einstellung der Memory-Stellen . . . . . . . . . . . . . . . 8
Einstellung der Mischzeit . . . . . . . . . . . . . . . . . . . . 8
Einsetzen der Kapseln . . . . . . . . . . . . . . . . . . . . . . 9
Starten des Mischzyklus. . . . . . . . . . . . . . . . . . . . . 9
Beenden/Unterbrechen des Mischzyklus. . . . . . . . 9
Entfernen der Kapseln . . . . . . . . . . . . . . . . . . . . . 10
Reinigung und Desinfektion . . . . . . . . . . . . . . . . . . . . 10
Garantie . . . . . . . . . . . . . . . . . . . . . . . . . . . . . . . . . . 10
1

TECHNISCHE DETAILS:
AC INPUTWERTE: Modell 400 120V, 50/60Hz, 2.0AModell 402 230V, 50/60Hz, 1.0A
SICHERUNGSWERTE: Modell 400 F2.0A/250VModell 402 T1.6A/250V
MOTORWERTE: 115VAC, 60Hz
VOREINGESTELLTE MOTORGESCHWINDIGKEITEN: Niedrig (Schildkröte) 4200 ± 200 rpm
Hoch (Hase) 4200 ± 200 rpm
IEC GERÄTEKATEGORIE: I
INSTALLATIONSKATEGORIE(ÜBERSPANNUNGSKATEGORIE): II
VERSCHMUTZUNGSGRAD: 2
BETRIEBSMODUS: Nicht-kontinuierlicher Betrieb (30 sek. EIN/120 sek. AUS)
BETRIEBSUMGEBUNG
ACHTUNG: Nicht geeignet für Betrieb in Gegenwart von brennbarerBetäubungsmischung mit oder ohne Stickoxid.
Betriebstemperatur: 10°C bis 40°C (50°F bis 104°F)Relative Luftfeuchtigkeit: 30% bis 75% (nicht kondensierend)Luftdruck: 525 bis 795 mmHg
TRANSPORT: LAGERBEDINGUNGENTemperatur: –10 °C bis +60 °C (da 22 °F bis 140 °F) Relative Luftfeuchtigkeit: 10% bis 100% (nicht kondensierend)Luftdruck: 375 bis 795 mmHg
ABMESSUNGEN:Höhe: 12,7 cm (5 Zoll) Breite: 22,86 cm (9 Zoll)Länge: 24,13 cm (9,5 Zoll)Gewicht: 3.18 kg (7 Pounds)Länge des Stromkabels: 300 cm (117,6 Zoll)
2

GLOSSAR DER SYMBOLE
Vorsicht, Consult Bedienungshinweise
Wechselstrom
Schutzerdung
AUS (Strom: Unterbrechung von Hauptstromzufuhr)
EIN (Strom: Verbindung zur Hauptstromzufuhr)
START/STOP; Löst den Amalgamationszyklyus aus oder deaktiviertihn
HOCH; HaseNIEDRIG; Schildkröte
BEGRIFFSDEFINITIONENAktivierung: Funktion, die von der Software des Geräts eingeleitet
wird, wenn der Strom eingeschaltet oder das Gerät neuaktiviert wird.
Stand-By: Zustand, wenn das Gerät keinen Amalgamationszyklusdurchführt, aber die Aktivierungszeit durchlaufen hat.
Lauf: Zustand, wenn das Gerät den Amalgamationszyklus durchführt.
3
BETRIEBSANLEITUNG
ProMix® Amalgamator EINLEITUNGDer mikroprozessor-gesteuerte ProMix® Amalgamator ist eines der fortschrittlich-sten Amalgam- und Kapsel-Mischersysteme, die es heute auf dem Dental-Marktgibt.
Das Amalgamationsgerät ProMix® bietet folgende Funktionen:
a) Eine konstante Mischgeschwindigkeit, die während des gesamtenLauf-/Mischzyklus automatisch gehalten wird.
b) Zwei voreingestellte Geschwindigkeiten mit einer LED-Anzeige fürausgewählte niedrige Geschwindigkeit (3700 rpm) oder hoheGeschwindigkeit (4200 rpm).
c) Zwei Memory-Stellen (M1 und M2), die für Zeit- undMischgeschwindigkeiten von zwei von Ihnen am häufigsten verwendetenAmalgam-Materialien voreingestellt werden können (sieheHerstelleranweisungen).
d) Ein timer zur Einstellung des Laufzyklus für maximal 30 Sekunden inZeitabständen von einer Sekunde für jede gewählte Drehzahl.
e) Eine digitale LCD-Anzeige zum bequemen Ablesen der Timer-Funktionen.
f) Einen einzigartigen Kapselhalter (Armmontage), der eine beträchtlichVielfalt der heute verwendeten Kapseln (auch solche mit Düsen)aufnehmen kann.
g) Einen Sicherheitsschalter, der automatisch den Laufzyklus ausschal-tet,wenn der Deckel des ProMix® Amalgamators versehentlich geöffnetwird.
h) Leiser und reibungsloser Betrieb.
i) Einen thermisch geschützten Motor, der eine mögliche Beschädigungdurch Überhitzung verhindert.
j) Eine Möglichkeit zur manuellen Zyklusunterbrechung, umAmalgamverluste zu vermeiden, wenn der Timer versehentlich für einelänger als benötigte Zeit eingestellt worden ist.
4

INDIKATIONENZur Trituration von Zahnamalgamen, in Kapselform gelieferte Materialien undZemente für vorläufige Füllungen.
KONTRAINDIKAITONENNicht bekannt.
WARNUNGEN1. Wir raten vom Gebrauch von ProMix® Amalgamator in den Fällen ab, wo dem
Patienten oder jeweiligen Betreiber ein Herzschrittmacher implantiert und er vordem Gebrauch kleiner Elektrogeräte wie Rasierapparate und Haartrocknergewarnt wurde.
2. Der ProMix® Amalgamator ist nicht geeignet für Betrieb in Gegenwart vonbrennbarer Betäubungsmischung mit Luft oder Stickoxiden.
VORSICHTSMASSNAHMEN1. Dieses Produkt darf nur wie ausdrücklich in der Gebrauchsanweisung
dargestellt verwendet werden. Jegliche Verwendung ohne Einhaltung derGebrauchsanweisung unterliegt dem Ermessen und der alleinigen Haftung desFachmanns.
2. Betreiben Sie den ProMix® Amalgamator nur auf festen, ebenen Flächen undvon Tischkanten entfernt. Ein Betrieb des Geräts auf eine anders als vonDENTSPLY vorgeschriebene Art und Weise ist gefährlich.
3. Wie bei allen zahnärztlichen Behandlungen ist es nötig,Standardsicherheitsausrüstung zu verwenden (d.h. Gesichtsmaske, Augen-oder Gesichtsschutz, Handschuhe oder Schutzkittel tragen).
4. Stellen Sie das Gerät nicht in die Nähe einer Heizung oder anderer Hitzequelle.Die Überhitzung kann die Gerätelektronik beschädigen.
5. Betreiben Sie das Gerät nicht in einem eng begrenzten Raum oder einer Ecke.Stellen Sie das Gerät dort auf, wo Luftzirkulation rund um das Gerät gesichert ist.
6. Die transparente Acyl-Schutzabdeckung/Tür des ProMix® Amalgamators ist miteinem Sicherheitsschalter ausgestattet. Versuchen Sie nicht, den Schalter zuüberspringen bzw. den ProMix® mit offener Tür zu betreiben.
7. Sollte der ProMix® Amalgamator auf irgendeine Art beschädigt werden, ver-suchen Sie nicht, das Gerät zu betreiben, bevor es von einem qualifiziertenDENTSPLY Servicetechniker untersucht und repariert worden ist.
5

8. Betreiben Sie das Gerät nur mit einer Stromquelle mit ordnungsgemäßerErdung. Verwenden Sie nur das mitgelieferte Stromkabel. Verbinden Sie dasGerät nur mit einer Stromquelle mit geeigneter Spannung.
9. TAUCHEN SIE DAS GERÄT, DAS STROMKABEL ODER DEN STECKER NICHTIN WASSER ODER DESINFEKTIONSLÖSUNGEN EIN. Siehe hierzu dieReinigungsanweisungen auf Seite (10).
10. KONFORMITÄTSERKLÄRUNG - EC Es wird hiermit bestätigt, dass die EC Modelle 402 sowie 402UK deneuropäischen Richtlinien für Laborgeräte 73/23/EC einschließlich derenÄnderungen entsprechen.
NEBENWIRKUNGENElektrogeräte können die Funktion mancher Schrittmacher beeinträchtigen. Wenn beimBetreiber oder Patienten solche Schrittmacher eingesetzt sind, siehe Warnungen.
SCHRITT-FÜR-SCHRITT-ANWEISUNGENINSTALLATION
HINWEIS: Überprüfen Sie beim Erhalt des ProMix® AmalgamatorSystems die Verpackung und alle Teile auf Beschädigungen während desTransports. Bei sichtbaren Schäden setzen Sie sich bitte sofort mit IhremHändler in Verbindung.
GERÄT EINSCHALTEN (INITIALISIEREN)Stecken Sie das abnehmbare Stromkabel in den hinteren Teil des Geräts unddann ans Stromnetz.
HINWEIS: Betreiben Sie das Gerät nur mit einer Stromquelle mit ord-nungsgemäßer Erdung.
Aktivieren des Stromschalters am hinteren Teil des Geräts.
Bei Wechselstrom wird das Gerät folgendermaßen aktiviert:• die LCD-Anzeige zeigt „00” an,• der Motor steht auf OFF,• die Motordrehzahl „LOW” wird ausgewählt und die LED-Anzeige „LOW”.
Non utilizzare l’unità se non si verifica una delle condizioni indicate sopra.Contattare il personale autorizzato di assistenza DENTSPLY.
HINWEIS: Wechselstromunterbrechungen und -abfall bewirkt ungleicheBetriebsspannung auf den Mikroprozessor, das führt immerdazu, dass der Mikroprozessor wieder neu gestartet wird undder Aktivierungsprozess beginnt von vorn beginnt.
6

BETRIEBDer Betrieb des ProMix® Amalgamators kann mit Hilfe der LCD-Anzeige und densieben (7) Druckknöpfen auf der Frontseite (siehe Abbildung 1, TitelblattInnenseite) gesteuert werden.
„LCD”-Anzeige gibt den eingestellten (gewünschten) Amalgamationszyklus/Laufzeit an und zählt während des Betriebs in Abständen von einer Sekunde runter bis auf „00”.
Pfeil „Up” erhöht die programmierte Laufzeit in Abständen von einer Sekunde (bis zu maximal 30 Sekunden).
Pfeil „Down” reduziert die programmierte Zeit in Abständen von einer Sekunde.
„High” (Hase) wählt die hohe Amalgamationsdrehzahl (4200 rpm) und die entsprechende LED-Anzeige aus.
„Low” (Schildkröte) wählt die hohe Amalgamationsdrehzahl (4200 rpm) und die entsprechende LED-Anzeige aus.
„Start/Stop” (I/O) aktiviert und deaktiviert den Amalgamationszyklus.
HINWEIS: Die zwei (2) Memory-Stellen werden werkseitig nach den häufigbenutzten Einstellungen voreingestellt. Für Änderungen derEinstellungen nach individuellem Bedarf siehe „Einstellung derMemory-Stellen” (Seite 8).
„M1” (Memory #1) speichert und ruft die voreingestellte Drehzahl und Zeitfür die Amalgamation unter Position #1 auf, auch wenndas Gerät ausgeschaltet ist („Stromzufuhr OFF”).
HINWEIS: Die Memorystelle #1 wird werkseitig auf 15 Sekunden für die niedrige Drehzahl eingestellt.
„M2” (Memory #2) speichert und ruft die voreingestellte Drehzahl und Zeitfür die Amalgamation unter Position #2 auf, auch wenndas Gerät ausgeschaltet ist ( „Stromzufuhr OFF”).
HINWEIS: Die Memorystelle #2 wird werkseitig auf 20 Sekunden für hoheDrehzahl eingestellt.
7

EINSTELLUNG DER MEMORYSTELLENDie ProMix® Amalgamator Memory-Stellen (M1 & M2) können passend zu den zweiam häufigsten verwendeten Zeiten und Drehzahlen für den Amalgamationszyklusdes einzelnen Anwenders (entsprechend den Angaben des Herstellers des zumischenden Materials/Amalgams) vorprogrammiert werden.
a) Wählen Sie die gewünschte Drehzahl, indem Sie den jeweiligen Knopfdrücken (prüfen Sie, ob die jeweilige LED leuchtet).
b) Wählen Sie die gewünschte Laufzeit, indem Sie die Pfeilknöpfe UP/DOWNgedrückt halten (und die Zeit durchblättern) bis die gewünschte Zeit aufder LCD angezeigt wird.
c) Speichern Sie die Einstellung, indem Sie die jeweilige Memory-Stelle (M1oder M2) für länger als 3 Sekunden gedrückt halten (die LCD zeigt „00” fürdie ersten 0,5 Sekunden und im Zeitraum zwischen 2,5 und 3,0 Sekundenan, um das Ende des Speicherzyklus anzugeben).
EINSTELLUNG DER MISCHZEITEN
HINWEIS: Richten Sie sich nach den Herstellerangaben des jeweiligenAmalgams, um die richtige Mischzeit und -drehzahl festzulegen.
Wenn die für das Material/Amalgam erforderliche Mischzeit und -drehzahl die gle-iche ist wie eine der zwei gespeicherten Memory-Stellen (M1 oder M2), drückenSie einfach den gewünschten Memory-Knopf und gehen Sie weiter zu „Installationder Kapseln”.
Wenn nicht, verfahren Sie wie folgt:a) Wählen Sie die empfohlene Drehzahl, indem Sie den/die jeweilige/n
Drehzahlknopf/-taste drücken):i) hohe Geschwindigkeit (Hase).ii) niedrige Drehzahl (Schildkröte).
b) Wählen Sie die empfohlene Mischzeit (bis zu maximal 30 Sekunden), indemSie:
i) die jeweilige Pfeiltaste Up/Down solange gedrückt halten, bis die emp-fohlene/ erwünschte Drehzahl auf der LCD angezeigt wird; oder dasHalten der Pfeiltaste Up/Down automatisch zur erwünschten Mischzeitin Zeitabständen von einer (1) Sekunde gelangt.
8

INSTALLATION DER KAPSELNDer Kapselhalter des ProMix® Amalgamators hat ein benutzerfreundliches Designund kann die Kapsel automatisch halten, wenn sie richtig eingesetzt ist (sieheAbbildung 2, Titelblatt Innenseite).
a) Heben Sie den Deckel des ProMix® Amalgamators an, um zum Kapselhalterzu gelangen.
b) Öffnen Sie den Kapselhalter, indem Sie den Sicherheitsknopf mit IhremDaumen gedrückt halten und die Schutzgehäuseklappe mit Ihren Fingernhalten, um die ganze Montage zu stabilisieren.
c) Aktivieren Sie die Kapsel (falls erforderlich, gemäß Herstelleranweisungen).
d) Legen Sie die Kapsel in die geöffneten Backen der Gehäusevorrichtung.
HINWEIS: Die Kapseln mit Düsen sind links einzulegen (so dass die Düsein die Rille des Kapselhalters passt).
Um gleichmäßige Mischungen zu gewährleisten, sollten die Kapseln der gleichenMarke immer in die gleiche Position (z.B. Spitze nach links) eingelegt werden.
e) Schalten Sie den Sicherheitsknopf frei, die Kapsel bleibt automatischgehaftet.
f) Schließen Sie den Deckel des ProMix® Amalgamators.
STARTEN DES MISCHZYKLUSSEES/ BETRIEBSa) Um den Mischzyklus zu starten, drücken Sie den Start/Stop-Knopf.
b) Die LCD-Anzeige zählt von der ausgewählten Zeit in Abständen von einer(1) Sekunde runter bis auf „00”.
c) L’amalgamatore ProMix® si ferma automaticamente alla fine del ciclo diamalgamazione.
d) Die LCD-Anzeige kehrt zur vorher gewählten Laufzeit zurück.
BEENDEN/ UNTERBRECHUNG DES MISCHZYKLUSSEES:
HINWEIS: Das Unterbrechen/Anhalten des Mischzyklus auf eine der fol-genden Arten kann zur Folge haben, dass die in derVerarbeitung befindliche Kapsel unbrauchbar wird (sieheHerstellerangaben).
9

Um den Mischzyklus (während der Verarbeitung) vor Ablauf der eingestelltenLaufzeit zu stoppen, verfahren Sie wie folgt:
a) Drücken Sie eine beliebige Taste.
b) Öffnen Sie oder heben Sie den Deckel des ProMix® Amalgamators, der dieSicherheitseinrichtung aktiviert.
Die LCD-Anzeige kehrt zum vorher gewählten Wert zurück.Der ProMix® Amalgamator kehrt nun zum „Stand-By”-Modus zurück.
ENTFERNEN DER KAPSELNa) Heben Sie den Deckel des ProMix® Amalgamators, um zum Kapselhalter
zu gelangen.
b) Öffnen Sie den Kapselhalter, indem Sie den Sicherheitsknopf mit IhremDaumen gedrückt halten und die Schutzgehäuseklappe mit Ihren Fingernhalten, um die ganze Montage zu stabilisieren.
c) Entfernen Sie nun die verarbeitete Kapsel.
DESINFEKTION
HINWEIS: Nehmen Sie den Stecker aus der Steckdose und dem ProMix®
Amalgamator heraus, bevor Sie mit den Reinigungsarbeitenbeginnen.
Vor der Desinfektion reinigen Sie mit einem feuchten, weichen Tuch (mit mildemWasch- oder Spülmittel, falls erforderlich) alle Flächen und das Stromkabel.Entsorgen Sie das Tuch vorschriftsmäßig. EPA-registrierteFlächendesinfektionsmittel sind zulässig. Wasserbasierte Desinfektionslösungensind vorzuziehen. Einige Desinfektionsmittel können den Kunststoff beschädigen.Für optimale Ergebnisse folgen Sie den Anweisungen desDesinfektionsmittelherstellers. Achten Sie darauf, dass weder Wasser nochReinigungs- oder Desinfektionslösung in den Amalgamator eindringt.
GARANTIEDer ProMix® Amalgamator ist nur für den Einsatz in der Zahnarztpraxis bestimmt.Die Garantie umfasst keinen anderweitigen Gebrauch. Die Garantie für den ProMix®
Amalgamator gegen Material- und Verarbeitungsmängel beträgt zwölf (12) Monate,ab dem Kauf durch einen Zahnarzt. Bei Auftreten eines derartigen Fehlers wirdDENTSPLY nach eigenem Ermessen das mangelhafte Gerät reparieren bzw. ganzoder teilweise ersetzen. Eine derartige Reparatur oder der Austausch sind der einzigmögliche Anspruch aus dieser Garantieleistung. Die Garantie gilt nur für den erstenKauf und unterliegt diesen Bedingungen.
10

1. Der ProMix® Amalgamator darf nur von geschulten DENTSPLY Service-Techniker gewartet werden.
2. Der ProMix® Amalgamator darf keinem unbefugten Gebrauch oderMissbrauch ausgesetzt werden, noch darf er von anderen Personen alsdem von DENTSPLY geschulten Personal installiert oder repariert werden.
ES GIBT KEINE SONSTIGEN VERTRAGLICHEN ODER EINGESCHRÄNKTENGARANTIELEISTUNGEN, DIE ÜBER DIE O.G. LEISTUNGEN HINAUSGEHEN.Weder übernimmt DENTSPLY noch beauftragt DENTSPLY Dritte, irgendeineandere Haftung zu übernehmen, die mit dem Kauf und Einsatz des ProMix®
Amalgamators in Zusammenhang steht.
DER SCHADENERSATZ BESCHRÄNKT SICH AUSSCHLIESSLICH AUF DASERSETZEN DES ProMix® Amalgamators. DENTSPLY HAFTET EXPLIZIT NICHTFÜR FOLGESCHÄDEN JEGLICHER ART, DIE AUS DEM EINSATZ DES ProMix®
Amalgamators HERRÜHREN KÖNNTEN.
Zur Wahrnehmung der Garantieansprüche muss diese Garantiekarte IhremDENTSPLY Service Center (siehe Liste auf Seite 12) innerhalb eines (1) Monatsnach der Fehlerentdeckung vorgelegt werden.
Warnung: Die US-Gesetze beschränken dieses Gerät auf den Verkauf durch oderauf Verordnung eines Zahnarztes.
11

Weltweite Servicezentren
12
Dentsply ProfessionalAttn: Product Service1301 Smile WayPO Box 7807York, PA 17404-0607 USATel. 800-989-8826
DENTSPLY LimitedAviator ParkStation RoadAddleston, WeybridgeSurry KT15 2PGTel. 44 01932 853422
DENTSPLY Australia Pty. Ltd.11-21 Gilby RoadMount Waverley Victoria 3149AustraliaTel. 61-03-9538-8280
DENTSPLY SankinAzabu Kaisei Building1-8-10, Azabudai, Minato-kuToykyo, 106-0041JapanTel. 81-03-514-1001
Hong Kong Division of DENTSPLY International25/F, Pacific Link TowerSouthmark Tower11 Yip Hing StreetWong Chuk HangHong KongTel. (852)-2870-0336
DENTSPLY Industria e Comercio ltda.Praiade Botafogo228/Bloco A/Grupo 1501-BBotafogo22359-900 Rio de Janeiro, RJ BrazilTel. (55-21)-3237-9800
DENTSPLY Mexico, S.A. de C.V.Calzada Vallejo No. 846Col. Industrial Vallejo02300 Mexico, D.F.Tel. 52-55-5587-6488
DENTSPLY Canada161 Vinyl CourtWoodbridge, OntarioL4L 4A3 CanadaTel. 800-263-1437

13
ARTIKEL AMALGAM
Amalgam Mischungsprotokoll
MISCHGESCHWINDIGKEITMISCHZEIT

MODELLO 400MODELLO 402
ProMix®
Manuale operativoIstruzioni per l’uso
A M A L G A M AT O R E

Interruttore ON-OFF
Figura 1
Linguetta del corpodel braccio
Pulsante del braccio
Figura 2
INDICE
Figure . . . . . . . . . . . . . . . . . Interno coperchio anteriore
Note tecniche . . . . . . . . . . . . . . . . . . . . . . . . . . . . . . . . 2
Glossario dei Simboli . . . . . . . . . . . . . . . . . . . . . . . . . . 3
Definizione dei termini . . . . . . . . . . . . . . . . . . . . . . . . . 3
Guida all’uso . . . . . . . . . . . . . . . . . . . . . . . . . . . . . . . . 4
Indicazioni . . . . . . . . . . . . . . . . . . . . . . . . . . . . . . . . . . 5
Controindicazioni e avvertenze . . . . . . . . . . . . . . . . . . 5
Precauzioni . . . . . . . . . . . . . . . . . . . . . . . . . . . . . . . . . . 5
Installazione . . . . . . . . . . . . . . . . . . . . . . . . . . . . . . . . . 6
Utilizzo . . . . . . . . . . . . . . . . . . . . . . . . . . . . . . . . . . . . . 6
Impostazione delle posizioni di memoria . . . . . . . . 8
Impostazione del tempo di miscelazione . . . . . . . . 8
Installazione delle capsule . . . . . . . . . . . . . . . . . . . 9
Avvio del ciclo di miscelazione. . . . . . . . . . . . . . . . 9
Arresto/interruzione del ciclo . . . . . . . . . . . . . . . . . 9
Rimozione delle capsule. . . . . . . . . . . . . . . . . . . . 10
Pulizia e disinfezione . . . . . . . . . . . . . . . . . . . . . . . . . 10
Garanzia . . . . . . . . . . . . . . . . . . . . . . . . . . . . . . . . . 10
1

NOTE TECNICHE:
VALORI NOMINALI ALIMENTAZIONE c.a.: Modello 400 120V, 50/60Hz, 2.0A
Modello 402 230V, 50/60Hz, 1.0A
VALORI NOMINALI DEL FUSIBILE: Modello 400 F2.0A/250V
Modello 402 T1.6A/250V
VALORE NOMINALE DEL MOTORE: 115VAC, 60Hz
VELOCITÀ PREIMPOSTATE Bassa (tartaruga) 3700 ± 200 rpmDEL MOTORE: Alta (coniglio) 4200 ± 200 rpm
CLASSE DELL’APPARECCHIATURA SECONDO IEC: I
CATEGORIA D’INSTALLAZIONE (CATEGORIA DI SOVRATENSIONE):II
GRADO D’INQUINAMENTO: 2
MODALITA’ OPERATIVA: Funzionamento intermittente (30 sec ON/120 sec OFF)
AMBIENTE DI FUNZIONAMENTO
NOTA: apparecchiature non adatta all’uso in presenza di misceleanestetiche infiammabili con aria o protossido d’azoto.
Temperatura di funzionamento: da 10 °C a 40 °C (da 50 °F a 104 °F)Umidità relativa: dal 30% a 75% (senza condensazione) Pressione atmosferica: da 525 a 795 mmHg
TRASPORTO: AMBIENTE DI MAGAZZINAGGIOTemperatura: da –10 °C a +60 °C (da 22 °F a 140 °F) Umidità relativa: dal 10% al 100% (senza condensazione) Pressione atmosferica: da 375 a 795 mmHg
DIMENSIONI:Altezza: 12,7 cm (5 pollici) Larghezza: 22,86 cm (9 pollici) Lunghezza: 24,13 cm (9,5 pollici) Peso: 3,18 kg (7 libbre) Lunghezza cavo di alimentazione: 300 cm (117,6 pollici)
2

GLOSSARIO DEI SIMBOLI
Attenzione, consultare le istruzioni per l'uso
Corrente alternata
Collegamento a terra
OFF (Alimentazione elettrica disinserita)
ON (Alimentazione elettrica inserita)
AVVIO/STOP; pulsante di avvio e arresto del ciclo di miscelazionedell’amalgama
ALTA; simbolo del coniglio BASSA; simbolo della tartaruga
DEFINIZIONE DEI TERMINI:Inizializzazione: funzione eseguita dal software dell’unità dopo
l’accensione o il resettaggio del master.
Stand-By: modalità dell’unità dopo il periodo di inizializzazione quando non è in esecuzione il ciclodi miscelazione dell’amalgama.
Fase di funzionamento: modalità dell’unità in cui viene eseguito il ciclo di
miscelazione dell’amalgama.
3

GUIDA ALL’USO
Amalgamatore ProMix®
INTRODUZIONEL’amalgamatore ProMix® con controllo a microprocessore è uno dei più avanzatisistemi di miscelazione di amalgama e di materiali incapsulati disponibili nel set-tore dei prodotti dentali.
L’unità di amalgamazione ProMix® dispone delle seguenti caratteristiche:
a) Velocità di miscelazione costante costante mantenuta automatica-mente durante tutto il ciclo di funzionamento/miscelazione.
b) Due velocità preimpostate con spia LED che indica la velocità selezion-ata Bassa (3700 rpm) o Alta (4200 rpm).
c) Due posizioni di memoria (M1 e M2) che possono essere programmatecon il tempo e la velocità di miscelazione dei due materiali per incapsu-lazione utilizzati più di frequente (secondo le istruzioni del produttore).
d) Un timer per regolare la durata del ciclo alla velocità selezionata adincrementi di 1 s fino ad un massimo di 30 s.
e) Un display LCD digitale per una comoda visualizzazione delle funzioni di temporizzazione.
f) Un’eccezionale portacapsule (gruppo braccio) che alloggia gran partedell’ampia gamma di capsule utilizzate al giorno d’oggi (comprese quellecon ugelli).
g) Un interruttore di sicurezza che interrompe automaticamente il ciclo dimiscelazione dell’amalgamatore ProMix® in caso di apertura accidentaledel coperchio.
h) Funzionamento silenzioso e regolare.
i) Motore con protezione termica per evitare i possibili danni da sur-riscaldamento.
j) Funzione di interruzione manuale del ciclo per ridurre gli sprechi dimateriale in caso di programmazione di un tempo eccessivo sul timer.
4

INDICAZIONIPer la triturazione di leghe dentali, materiali per otturazioni temporanee in capsulee cementi.
CONTROINDICAZIONINessuna nota.
ADVVERTENZE1. Non utilizzare l’amalgamatore ProMix® se il paziente o l’utente è un portatore di
pacemaker e non può utilizzare piccole apparecchiature elettriche (ad esempiorasoi elettrici, asciugacapelli, ecc.).
2. L’amalgamatore ProMix® non è adatto all’uso in presenza di miscele anesteticheinfiammabili con aria o protossido d’azoto.
PRECAUZIONI1. Questo prodotto è adatto all’uso solo come indicato specificamente nelle
Istruzioni per l’uso. L’utilizzo di questo prodotto in modo diverso da quantoindicato nelle Istruzioni per l’uso è a discrezione ed esclusiva responsabilitàdell’operatore.
2. Utilizzare l’amalgamatore ProMix® solo su superfici dure e piane lontano daibordi della superficie di lavoro. È pericoloso l’utilizzo dell’apparecchiatura incondizioni diverse da quelle specificate da DENTSPLY.
3. Utilizzare le normali apparecchiature di protezione personale per proceduredentali (cioè indossare maschera, occhiali o schermo, guanti e camice di pro-tezione).
4. Non collocare l’unità sopra o accanto ad un radiatore o altra fonte di calore. Ilsurriscaldamento può causare danni ai componenti elettronici dell’unità.
5. Non utilizzare l’unità in spazi ristretti o in angoli. Collocare l’unità in spazi checonsentono la libera circolazione dell’aria su tutti i lati dell’apparecchiatura esotto di essa.
6. Il coperchio/sportello con braccio in resina acrilica traslucida dell’amalgamatoreProMix® è dotato di interruttore di sicurezza. Non cercare di escluderel’interruttore e/o utilizzare l’amalgamatore ProMix® con tale sportello aperto.
7. Se l’amalgamatore ProMix® è danneggiato, non cercare di utilizzarlo prima che ilpersonale autorizzato di assistenza DENTSPLY abbia effettuato un’ispezionedettagliata e le necessarie riparazioni.
5

8. Utilizzare l’unità sempre con una presa di alimentazione dotata di adeguatamessa a terra. Utilizzare solo con il cavo di alimentazione a corredo. Collegaresolo ad una presa di alimentazione con valori nominali adeguati all’unità.
9. NON IMMERGERE L’UNITÀ, IL CAVO DI ALIMENTAZIONE O LA SPINA INSOLUZIONI DISINFETTANTI. Per la pulizia e la disinfezione dell’unità seguire leistruzioni riportate a pagina 10.
10. DICHIARAZIONE DI CONFORMITÀ - COMPATIBILITÀ ELETTROMAGNETICA I modelli 402 sono conformi alla Direttiva europea sugli strumenti da laborato-rio 73/23/EEC e ai relativi emendamenti.
EFFETTI INDESIDERATILe apparecchiature elettriche possono interferire con alcuni pacemaker. Se l’u-tente o il paziente sono portatori di pacemaker, consultare la sezione Avvertenze.
ISTRUZIONI DETTAGLIATEINSTALLAZIONE
NOTA: controllare che la confezione e i componenti dell’amalgamatoreProMix® non abbiano subito danni durante il trasporto. In caso di danni,consultare immediatamente il rivenditore.
ACCENSIONE DELL’UNITÀ (INIZIALIZZAZIONE)Collegare il cavo staccabile di alimentazione fornito a corredo dell’unità prima alretro di quest’ultima e poi alla presa di alimentazione.
NOTA: utilizzare l’unità sempre con una presa di alimentazione dotata diadeguata messa a terra.
Accendere l’interruttore di alimentazione sul retro dell’unità.
UDopo l’accensione con alimentazione in c.a., l’unità effettua l’inizializzazione nelseguente modo:
• sullo schermo LCD viene visualizzato “00”,• il motore è spento,• viene selezionata la velocità “BASSA” del motore e la spia LED
“BASSA” si accende.
Non utilizzare l’unità se non si verifica una delle condizioni indicate sopra.Contattare il personale autorizzato di assistenza DENTSPLY.
NOTA: le interruzioni e i problemi dell’alimentazione in c.a. che provo-cano incorrette tensioni di funzionamento del microprocessorecausano anche il resettaggio del master e la reinizializzazione del-
6

l’unità.UTILIZZOIl funzionamento dell’amalgamatore ProMix® può essere controllato mediante loschermo LCD e i sette (7) pulsanti situati sul pannello anteriore (vedere Figura 1,interno coperchio anteriore).
Schermo LCD Indica il ciclo di amalgamazione/tempo di miscelazioneselezionato ed esegue il conteggio alla rovescia fino a “00” durante il funzionamento.
Freccia “Su” Aumenta il tempo di miscelazione programmato in incrementi di 1 s (fino a massimo 30 s).
Freccia “Giù” Diminuisce il tempo di miscelazione programmato in incrementi di 1 s.
“Alta” (coniglio) Seleziona la velocità di amalgamazione alta (4200 rpm)e accende la relativa spia LED.
“Bassa” (tartaruga)Seleziona la velocità di amalgamazione bassa (3700 rpm) e accende la relativa spia LED.
“Avvio/Stop” (I/O) Serve ad avviare e a fermare il ciclo di amalgamazione.
NOTA: le due (2) posizioni di “memoria” hanno come impostazione predefinita val-ori di comune uso. Per cambiare le impostazioni secondo le proprie esi-genze, consultare “Impostazione delle posizioni di memoria” (pagina 8).
“M1” (Memoria #1) Memorizza e richiama la velocità e il tempo di amalga-mazione n. 1 preprogrammati, anche quando l’unità èspenta.
NOTA: la posizione di memoria n. 1 ha come impostazione predefinita 15 s avelocità Bassa.
“M2” (Memoria n. 2) Memorizza e richiama la velocità e il tempo di amalga-mazione n. 2, anche quando l’unità è spenta.
NOTA: la posizione di memoria n. 2 ha come impostazione predefinita 20 s a
7
velocità Alta.IMPOSTAZIONE DELLE POSIZIONI DI MEMORIALe posizioni di memoria (M1 e M2) dell’amalgamatore ProMix® possono essereprogrammate con il tempo e la velocità di amalgamazione preferiti dall’utente(secondo le istruzioni del produttore del materiale/amalgama da miscelare).
a) Selezionare la velocità desiderata premendo il pulsante appropriato (verifi-care che la spia relativa si accenda).
b) Selezionare il tempo di miscelazione desiderato mantenendo premuta lafreccia Su o Giù (per cambiare il tempo di miscelazione) fino a quando iltempo desiderato viene visualizzato sullo schermo LCD.
c) Memorizzare l’impostazione premendo la posizione di memoria corrispon-dente (M1 o M2) per più di 3 s (lo schermo LCD visualizza “00” per 0,5 sprima che l’impostazione di memoria desiderata sia visualizzata nuova-mente per indicare la fine del ciclo di memorizzazione).
IMPOSTAZIONE DEL TEMPO DI MISCELAZIONE
NOTA: per determinare il tempo e la velocità di miscelazione corretti,consultare le istruzioni del produttore.
Se il tempo e la velocità di miscelazione del materiale/amalgama sono uguali aquelli di una delle due (2) posizioni di memoria (M1 o M2) è sufficiente premere iltasto di memoria desiderato e passare alla sezione “Installazione delle capsule”.
In caso contrario, procedere come segue:a) Selezionare la velocità di miscelazione raccomandata premendo l’appropri-
ato pulsante di velocità:i) Velocità Alta (simbolo del coniglio).ii) Velocità Bassa (simbolo della tartaruga).
b) Selezionare il tempo di miscelazione raccomandato (massimo 30 s) nelseguente modo:
i) Premere l’appropriato pulsante freccia Su o Giù fino a visualizzare sulloschermo LCD il tempo di miscelazione raccomandato; oppure man-tenere premuto il pulsante freccia Su o Giù per cambiare automatica-mente il tempo di miscelazione ad incrementi di 1 s.
8

INSTALLAZIONE DELLE CAPSULEIl portacapsule dell’amalgamatore ProMix® è progettato per un facile uso e pertrattenere automaticamente la capsula installata correttamente (consultare laFigura 2, interno coperchio anteriore).
a) Accedere al portacapsule sollevando il coperchio dell’amalgamatoreProMix®.
b) Aprire il portacapsule premendo il pulsante del braccio con il pollice e man-tenendo con le dita la linguetta del corpo del braccio per mantenere stabileil gruppo.
c) Attivare la capsula (secondo le istruzioni del produttore, se necessario).
d) Collocare la capsula nelle ganasce aperte del gruppo Braccio.
NOTA: le capsule con ugelli devono essere collocate a sinistra (in modoche l’ugello alloggi nella scanalatura del portacapsule).
Per garantire miscelazioni ripetibili, le capsule della stessa marca devono essereorientate ogni volta nella stessa direzione (per esempio dall’alto verso sinistra).
e) Rilasciare il pulsante del braccio che trattiene automaticamente la capsula.
f) Chiudere il coperchio dell’amalgamatore ProMix®.
AVVIO DEL CICLO DI MISCELAZIONE/FUNZIONAMENTO DELL’UNITÀa) Per avviare il ciclo di miscelazione è sufficiente premere il pulsante
Avvio/Stop.
b) Lo schermo LCD visualizza il conto alla rovescia dal tempo di miscelazionefino a “00” ad incrementi di 1 s.
c) L’amalgamatore ProMix® si ferma automaticamente alla fine del ciclo diamalgamazione.
c) Lo schermo LCD visualizza nuovamente il tempo di miscelazione presente-mente selezionato.
ARRESTO/INTERRUZIONE DEL CICLO
NOTA: l’arresto/interruzione del ciclo di miscelazione nei seguenti modipuò rendere inutilizzabile il materiale in trattamento (consultare le
9

istruzioni del produttore del materiale/amalgama).Per fermare il ciclo di miscelazione (durante il trattamento) prima che della sca-denza del tempo di miscelazione selezionato effettuare quanto segue:
a) Premere un tasto qualsiasi.
b) APRIRE o sollevare il coperchio dell’amalgamatore ProMix® per attivare l’interruttore di sicurezza dell’unità.
Sullo schermo LCD viene visualizzato nuovamente il valore selezionato preceden-temente. L’amalgamatore ProMix® passa/ritorna alla modalità Stand-By.
RIMOZIONE DELLE CAPSULEa) Sollevare il coperchio dell’amalgamatore ProMix® per accedere al portacapsule.
b) Aprire il portacapsule premendo il pulsante del braccio con il pollice emantenendo con le dita la linguetta del corpo del braccio per mantenerestabile il gruppo.
c) Rimuovere la capsula trattata.
DISINFEZIONE
NOTA: prima di effettuare la pulizia, scollegare il cavo di alimentazionedall’amalgamatore ProMix™ e dalla presa di alimentazione.
Prima di effettuare la disinfezione, pulire con un panno umido tutte le superfici e ilcavo di alimentazione (utilizzare un detergente delicato, se necessario). Gettare viain modo adeguato il panno usato. È accettabile l’uso di disinfettanti per superficiconsentiti dall’ente di protezione ambientale degli Stati Uniti (EPA). È preferibile l’usodi soluzioni disinfettanti a base di acqua. Alcuni disinfettanti possono danneggiare laplastica. Per risultati ottimali seguire le istruzioni del produttore del disinfettante.Non far penetrare acqua o soluzioni detergenti o disinfettanti all’interno dell’unità.
GARANZIAL’amalgamatore ProMix® è adatto all’uso esclusivamente negli studi dentistici. Lapresente garanzia non è valida per altri usi. L’amalgamatore ProMix® è garantitocontro difetti di materiali e di fabbricazione per un periodo di dodici (12) mesi dalladata di acquisto da parte di un dentista. Nel caso di tali difetti, la DENTSPLY ripar-erà o sostituirà l’amalgamatore ProMix® o le parti necessarie a sua discrezione e taleriparazione o sostituzione sarà l'unico rimedio di questa garanzia. Questa garanzia èvalida solo per l’acquisto originale ed è soggetta alle seguenti condizioni.
1. Qualunque intervento di assistenza tecnica all’amalgamatore ProMix® deveessere eseguito da personale qualificato del servizio di assistenza
10

DENTSPLY.2. L’amalgamatore ProMix® non deve essere stato sottoposto ad un uso
illecito o una installazione o applicazione impropria né essere stato installa-to o riparato da personale diverso da quello addestrato del servizio assis-tenza della DENTSPLY.
NON È FORNITA ALCUNA GARANZIA, ESPRESSA O LIMITATA, OLTRE QUELLAQUI DESCRITTA. La DENTSPLY non si assume, né autorizza alcuna persona adassumersi in sua vece, alcuna altra responsabilità in relazione alla vendita e all'usodell’amalgamatore ProMix®.
I DANNI SONO STRETTAMENTE LIMITATI ALLA SOSTITUZIONEDELL’amalgamatore ProMix®. LA DENTSPLY DECLINA ESPRESSAMENTE OGNIRESPONSABILITÀ PER DANNI ACCIDENTALI ED INDIRETTI DERIVANTI DALL’U-SO DELL’amalgamatore ProMix®.
Le richieste coperte da questa garanzia saranno accettate se questa garanziaviene presentata attraverso il proprio centro assistenza DENTSPLY (vedi elenco apagina 12) entro un (1) mese dalla scoperta del difetto.
ATTENZIONE: le leggi federali degli Stati Uniti limitano la vendita di questoapparecchio a dentisti o su prescrizione di un dentista.
11

Centri di assistenza nel mondo
12
Dentsply ProfessionalAttn: Product Service1301 Smile WayPO Box 7807York, PA 17404-0607 USATel. 800-989-8826
DENTSPLY LimitedAviator ParkStation RoadAddleston, WeybridgeSurry KT15 2PGTel. 44 01932 853422
DENTSPLY Australia Pty. Ltd.11-21 Gilby RoadMount Waverley Victoria 3149AustraliaTel. 61-03-9538-8280
DENTSPLY SankinAzabu Kaisei Building1-8-10, Azabudai, Minato-kuToykyo, 106-0041JapanTel. 81-03-514-1001
Hong Kong Division of DENTSPLY International25/F, Pacific Link TowerSouthmark Tower11 Yip Hing StreetWong Chuk HangHong KongTel. (852)-2870-0336
DENTSPLY Industria e Comercio ltda.Praiade Botafogo228/Bloco A/Grupo 1501-BBotafogo22359-900 Rio de Janeiro, RJ BrazilTel. (55-21)-3237-9800
DENTSPLY Mexico, S.A. de C.V.Calzada Vallejo No. 846Col. Industrial Vallejo02300 Mexico, D.F.Tel. 52-55-5587-6488
DENTSPLY Canada161 Vinyl CourtWoodbridge, OntarioL4L 4A3 CanadaTel. 800-263-1437

13
ARTICOLO AMALGAMA
Scheda di miscelazione dell’amalgama
VELOCITÀ DIMISCELAZIONE
TEMPO DI MISCELAZIONE

blankblank

blank

blank

inside back coverblank

DENTSPLY InternationalYork, PA 17404-0807 USA1-800-877-0020
Manufactured for:DENTSPLY Caulk38 West Clarke AvenueMilford, DE 19963 USA1-302-422-4511www.dentsply.com
DENTSPLY DETREY GmbHDe-Trey-Str. 178467 KonstanzGermanyTel. 49-7531-583-0
©2011 DENTPSLY International. All rights reserved.
Form #035-00009 (R 7/6/11)