pro-bot - logo · pro-bot-teacher guide key focus 1 - create a simple program using basic commands...
TRANSCRIPT

1
P
ro-B
ot
- Tea
cher
Guid
e
Teacher Guide
Pro
duct
Cod
e: E
L00
53
5 / IT0
01
43
Pro-Bot

2
P
ro-B
ot
- Tea
cher
Guid
e
Contents Previous Experiences ................................................................................................ 3
Progression .............................................................................................................. 3
National Curriculum ................................................................................................. 3
Key Focus 1 - Create a simple program using basic commands ..................................... 5
Key Focus 2 - Create a program using commands and parameters ............................... 6
Key Focus 3 - Use repetition in programming ............................................................... 7
Key Focus 4 – Using Procedures ................................................................................... 9
Key Focus 5 - Create a simple program one step at a time. ......................................... 10
Getting Started with Pro-Bot ..................................................................................... 11
Pro-Bot Basics – A Program .................................................................................... 11
Editing Your Program ............................................................................................ 11
Repeat Loops ......................................................................................................... 12
Different Step Lengths and Angles ......................................................................... 12
Procedures – What is a Procedure? ........................................................................ 13
Procedures – Defining and Editing ......................................................................... 14
Menu System ......................................................................................................... 15
Using Sensors ........................................................................................................ 16
Examples Using Sensors ......................................................................................... 17
Connecting to a PC ................................................................................................ 18
More Example Programs ........................................................................................ 19
Use the screen on the device to write programs,
draw shapes and respond to inputs.
Pro-Bot
3
P
ro-B
ot
- Tea
cher
Guid
e
Previous Experiences Prior to using Pro-Bot children may have worked with Bee-Bot and Blue-Bot. Bee-Bot
and Blue-Bot provide a good route into learning the basic concepts of programing.
Progression The activities listed below are in a suggested order of progression. There is no specific
amount of time to be spent on each as this will vary from one situation to another. It
may also be necessary to break some of the activities down further to suit children’s
needs.
National Curriculum The National Curriculum for Computing references below are indicative of some aspects
of the curriculum the activities cover. They are not an exhaustive list nor do they
indicate that one activity fully covers that curriculum area. The activities support
children in learning computing skills and applying computational thinking.
National Curriculum for Computing
Key Stage 1
Understand what algorithms are; how they are implemented as programs on
digital devices; and that programs execute by following precise and
unambiguous instructions
Create and debug simple programs
Key Stage 2
Design, write and debug programs that accomplish specific goals, including
controlling or simulating physical systems; solve problems by decomposing them
into smaller parts
Use sequence, selection, and repetition in programs; work with variables and
various forms of input and output
Use logical reasoning to explain how some simple algorithms work and to
detect and correct errors in algorithms and programs
Additional Support
A separate user guide is supplied with Pro-Bot.

4
P
ro-B
ot
- Tea
cher
Guid
e
This page left intentionally blank.

5
P
ro-B
ot
- Tea
cher
Guid
e Key Focus 1 - Create a simple program using basic
commands
Preparation This activity may be done with or without a mat. Check Pro-Bot powers-up when
switched on.
Activity Some of Pro-Bot’s control buttons mirror those of Bee-Bot and Blue-Bot, i.e. Forward,
Backward, Left, Right and Go. Using these buttons allows Pro-Bot to be operated in an
identical manner to Bee-Bot/Blue-Bot and enables progression to be made in small
steps. As with Bee-Bot, mats and grids are available to support children’s
understanding of basic movement. Children should be given time to use these basic
commands to make Pro-Bot move. This activity may effectively be a re-cap of Bee-
Bot/Blue-Bot or a first introduction to Pro-Bot.

6
P
ro-B
ot
- Tea
cher
Guid
e
Key Focus 2 - Create a program using commands and
parameters
Preparation Check Pro-Bot powers-up when switched on. Identify a suitable surface to run Pro-Bot
on. Smooth surfaces will allow Pro-Bot to move more accurately.
Activity Once confident with the basic movements, children should begin adding parameters to
commands, e.g. “Forward 10”. ‘Forward’ is the command and ‘10’ is the parameter.
The parameter tells Pro-Bot how far to move forward. Angles of turn are also
parameters that can be added to Left or Right, e.g. “Right Turn 45”.
Children should spend some time experimenting with parameters and noticing how
these affect Pro-Bot's movement. They might work on creating regular polygons. A
square is a good place to start.

7
P
ro-B
ot
- Tea
cher
Guid
e
Key Focus 3 - Use repetition in programming
Preparation Check Pro-Bot powers-up when switched on. Identify a suitable surface to run Pro-Bot
on. Smooth surfaces will allow Pro-Bot to move more accurately. Ensure large sheets of
paper and felt tips are available.

8
P
ro-B
ot
- Tea
cher
Guid
e
Activity After spending time experimenting with Pro-Bot and drawing
simple regular polygons, pupils can begin to look at ways to
become more efficient in their programming.
Pro-Bot has a ‘Repeat’ command. This can be used to repeat
one or several commands. In the previous activity children
might have used commands (such as the ones shown here) to
draw a square.
Ask the children to look carefully at the commands. Can they
see which instructions repeat and how many times they
repeat?
The commands ‘Fd 10’ and ‘Rt 90’ are repeated four times.
To draw the same square as the example above, enter the
commands as shown.
Use a pen in Pro-Bot’s pen holder to draw shapes. Which
other regular polygons can be created?
Try using Pro-Bot to draw an equilateral triangle. This is quite
challenging and can provoke useful discussions about internal
and external angles.
You might also talk about the relationship between the
number of sides and the angles, e.g.
A square - 4 sides, external angle 90°
A pentagon - 5 sides, external angle 72°
An octagon - 8 sides, external angle 45°
Tip: For each of the above multiply
the number of sides by the angle.
Main
Fd 10
Rt 90
Fd 10
Rt 90
Fd 10
Rt 90
Fd 10
Rt 90
Main
Rpt 4 [
Fd 10
Rt 90
]

9
P
ro-B
ot
- Tea
cher
Guid
e
Key Focus 4 – Using Procedures (A set of instructions to complete a specific task)
Preparation Check Pro-Bot powers up when switched on. Identify a suitable surface to run Pro-Bot
on. Smooth surfaces will allow Pro-Bot to move more accurately. Ensure large sheets of
paper and felt tips are available.
Activity Procedures are a great way for pupils to solve problems by decomposing them into
smaller parts.
In LOGO, the programmer can ‘teach’ a new command, for
example to ‘Square’. Every time the command ‘Square’ is typed,
LOGO will carry out that procedure. Pro-Bot can be 'taught' new
actions using its procedure functionality. For example pupils could
use ‘Proc1’ to store instructions to draw the first initial of their
name and ‘Proc2’ to store instructions for the second initial. By
using ‘Proc1’ and ‘Proc2’ from the main program, Pro-Bot will
then draw the children’s initials.
NB Pro-Bot has a hidden ‘Proc39’ which draws a diamond and a hidden ‘Proc40’ which
draws 8 diamonds as a star.
Main
Proc40
10 P
ro-B
ot
- Tea
cher
Guid
e
Key Focus 5 - Create a simple program one step at a
time.
Preparation Check Pro-Bot powers-up when switched on. Identify a suitable surface to run Pro-Bot
on. Smooth surfaces will allow Pro-Bot to move more accurately. Find suitable objects
to use as obstacles and resources to build a tunnel for Pro-Bot to drive through.
Activity The curriculum for Computing 2014: ‘Work with variables and various forms of input
and output’.
Children’s understanding of inputs and outputs may be supported using Pro-Bot. In
previous activities, pupils have programmed outputs from Pro-Bot, i.e. wheels moving
and lights switching on and off. Pro-Bot will also produce different sounds. These are
all forms of output.
Pro-Bot may also help children understand inputs. It has front and back bumpers, a
light sensor and a sound sensor - these are all input devices. Pro-Bot can be
programmed to switch its lights on if the room goes dark or to back away and turn
from an obstacle should it bump into one.
Try the following challenges:
Get Pro-Bot to switch on its lights as it drives through a tunnel, then switch them off as
it leaves.
(This simulates the automatic headlights function on a real car.)
Get Pro-Bot to navigate around an obstacle using the front bumper.
Get Pro-Bot to work its way past several obstacles using front and back bumpers.
Program Pro-Bot so that it will not move until it ‘hears’ a noise.
All these challenges are fantastic for developing children’s computing and problem
solving skills, as well as their ability to work in a team!

11 P
ro-B
ot
- Tea
cher
Guid
e
Getting Started with Pro-Bot
Pro-Bot Basics – A Program
In a programming language, such as Logo, a program is a sequence of
commands that are executed in the order specified. With the Pro-Bot,
like the multi-award winning Bee-Bot®, a simple program can be
developed using only the four arrow keys. Surprisingly complex and
extended sequences can be created without requiring any other keys.
By default, pressing a or moves the Pro-Bot 25cm and pressing the or
rotates 90º. Pro-Bot’s memory can hold over 200 steps, making it possible to create
longer and more complex program sequences.
Here’s a sample program to get you started. After entering the following commands
four time press and the Pro-Bot will trace out a square with 25cm sides.
When writing programs on the Pro-Bot, the short form of the program commands is
displayed on the LCD screen of the Pro-Bot:
Forward Fd Back Bk
Right turn Rt Left turn Lt
Repeat Rpt Pause Ps
TIP: If you want to stop the Pro-Bot when it is going, press the key again.
Editing Your Program
One of the great strengths of the Pro-Bot is its ability to edit the programs using the
built-in LCD. Use the scroll keys above the display to move the cursor up and down the
list of commands.
To insert a command in between two commands, move the cursor onto the command
you want to insert after, then type the new command.
TIP: To insert in front of the first command of a program, move the cursor to the very
top of the display (above the first command).
To delete a command, press the key.
Pressing will only delete the last key pressed on each line.
TIP: To delete the whole program or individual procedures, hold the key down for
3 seconds and select the required option using the scroll keys and key to confirm.
12 P
ro-B
ot
- Tea
cher
Guid
e
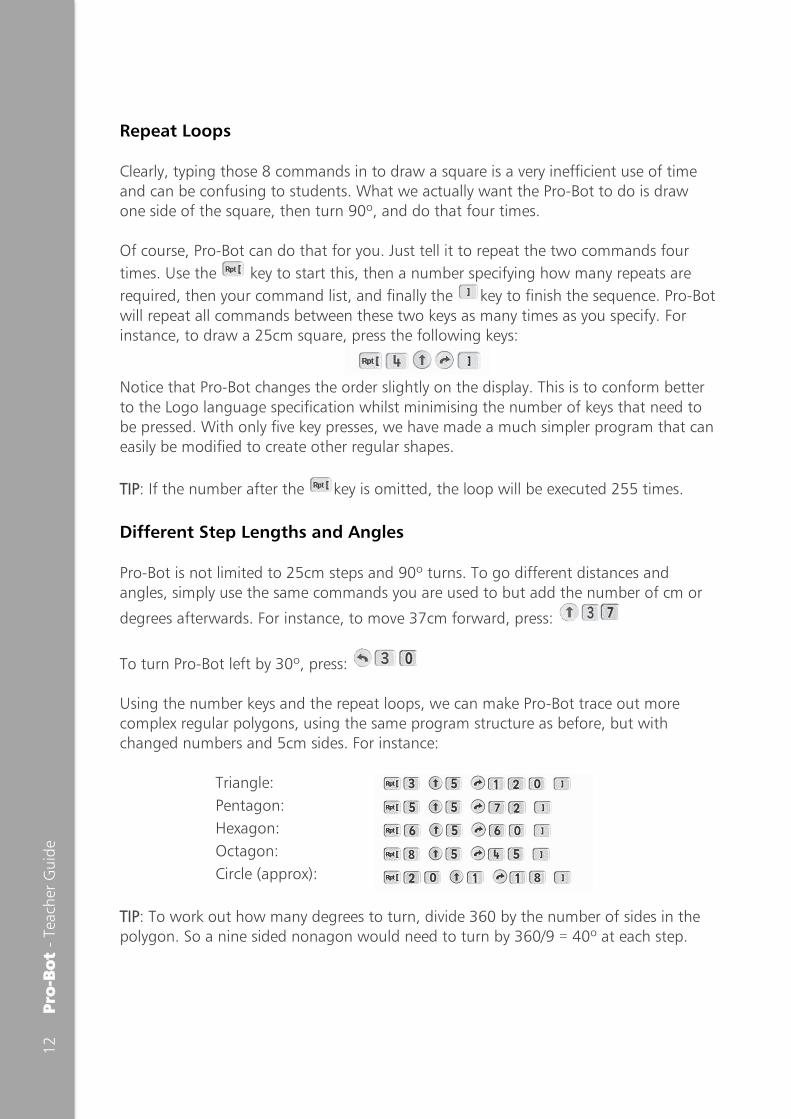
Repeat Loops
Clearly, typing those 8 commands in to draw a square is a very inefficient use of time
and can be confusing to students. What we actually want the Pro-Bot to do is draw
one side of the square, then turn 90º, and do that four times.
Of course, Pro-Bot can do that for you. Just tell it to repeat the two commands four
times. Use the key to start this, then a number specifying how many repeats are
required, then your command list, and finally the key to finish the sequence. Pro-Bot
will repeat all commands between these two keys as many times as you specify. For
instance, to draw a 25cm square, press the following keys:
Notice that Pro-Bot changes the order slightly on the display. This is to conform better
to the Logo language specification whilst minimising the number of keys that need to
be pressed. With only five key presses, we have made a much simpler program that can
easily be modified to create other regular shapes.
TIP: If the number after the key is omitted, the loop will be executed 255 times.
Different Step Lengths and Angles
Pro-Bot is not limited to 25cm steps and 90º turns. To go different distances and
angles, simply use the same commands you are used to but add the number of cm or
degrees afterwards. For instance, to move 37cm forward, press:
To turn Pro-Bot left by 30º, press:
Using the number keys and the repeat loops, we can make Pro-Bot trace out more
complex regular polygons, using the same program structure as before, but with
changed numbers and 5cm sides. For instance:
Triangle:
Pentagon:
Hexagon:
Octagon:
Circle (approx):
TIP: To work out how many degrees to turn, divide 360 by the number of sides in the
polygon. So a nine sided nonagon would need to turn by 360/9 = 40º at each step.

13 P
ro-B
ot
- Tea
cher
Guid
e
Using the Pen Mechanism With the pen mechanism, you can bring these shapes to life. Insert a standard (TTS /
Berol) felt tip into the pen holder, then twist the levers clockwise to place the pen
under slight pressure onto the writing surface. Ensure the surface below is capable of
taking a dry wipe pen without damage.
When you have finished drawing, twist the levers anti-clockwise to lift the pen off the
surface. There is no need to take the pen out every time.
TIP: It is easiest to fit the pen in correctly when the mechanism is in the “Up” position.
Twist the levers anti-clockwise and ensure that the top of the mechanism is proud of
Pro-Bot’s top surface.
TIP: Don’t put the pen in with the lid still attached or the lid will stay in! To remove the
pen lid from the Pro-Bot, put the pen back in so that it fits back into the lid then push
the pen up from the underneath using a ball-pen or similar.
K’Nex Compatibility The Pro-Bot has been designed to be compatible with K’Nex. It has 4 K’Nex shaped
mounting holes one in each corner to allow K’Nex pieces to be inserted.
Procedures – What is a Procedure?
Logo is a “procedural language”. This means that the main program can call other
“secondary programs” (procedures) that each perform a specific function. For instance,
one procedure could trace out a leaf, another could trace out a petal and a third could
draw a stem.
The main program could use all these three procedures to draw a complete flower. Pro-
Bot, of course, can do exactly this. In fact different groups of students could write the
different procedures and the main program, then put them all together and see how
well it works!
Pro-Bot has several different types of procedure. They are numbered from 1 to 39.
Procedure numbers 1 to 32 are fully definable by you, numbers 33 to 37 are for sensors
and 38 to 40 are the built-in, invisible, demo sequences. The other special procedures
are also shown differently in the display and are:
33 FRONT: Run when the front touch sensor is triggered
34 REAR: Run when the rear touch sensor is triggered
35 DARK: Run when the light sensor goes from light to dark
36 LIGHT: Run when the light sensor goes from dark to light
37 SOUND: Run when the sound sensor is triggered
38 HEXGN: Draws a hexagon (not visible)

14
P
ro-B
ot
- Tea
cher
Guid
e
39 DIAMND: Draws a diamond (not visible)
40 FLOWER: Draws eight diamonds using proc39 (not visible)
Procedures – Using Procedures
To use an existing procedure in your program, press the key followed by the
number of the procedure you want to run. For example, to run the built-in hexagon
procedure, you would use:
The following example draws a simple flower, with each petal being drawn using a
Procedure 1 (petal), which itself uses Procedure 2 (half petal).
Main Proc 1 Proc 2
Rpt 6 [ Proc 2 Rpt 10 [
Proc 1 Lt 120 Fd 1
] Proc 2 Lt 6
Lt 60 ]
TIP: On complex programs it is best not to use ‘Pause after command’, so switch it off
in the Config menu.
Procedures – Defining and Editing
To create a new procedure, press the key then scroll down to the <New Proc>
menu entry and press again. You are then presented with a list of procedures from
Proc1 to Proc32 and the sensor procedures. You can use any of the first 32 procedures
for what you want, but the sensor ones are fixed and can only be used for their
allocated sensor. Scroll down to the number you want to use then press again to
select it.
The top line of the display changes to the number of the procedure chosen, for
example ‘Proc 3’. You can then enter commands as you would normally. When you
have finished entering commands for the procedure, press the key again.
To edit a procedure you have already written, press and scroll down to the <Edt Proc>
menu entry and press again. Scroll down to the number of the procedure you
want to edit, then press . Edit the commands in the list as normal and press
once more to complete the procedure editing.
Pro-Bot allows you to run any procedure from within any other procedure, even ones
that haven’t any commands in yet. If you run procedures that call each other, you may

15 P
ro-B
ot
- Tea
cher
Guid
e
get into an endless loop. Don’t worry; just press the key to stop the program
running.
TIP: To completely redefine a procedure that you have already written, simply use
‘New Proc’ instead of ‘Edit proc’ and Pro-Bot will clear the procedure for you.
Menu System
Using the menu key gives you access to a number of other functions within Pro-Bot.
Special commands can be added to your program, different configuration options can
be selected and procedures can be managed.
The Menu system is entered by pressing the key above the display. You are then
given a list of menu selections. The first in the list is always <Back>, which allows you to
go back one level of the menu. Use the up and down scroll keys to move the highlight
to the menu item you want to select, then press again to select that item.
The Menu system is structured as follows:
Back Goes back one level
New Proc
o <Select> Edit procedure with empty program
Edt Proc
o <Select> Edit procedure with existing program
Config
o Units
Cm Units are in Cm
Pro-Bot Units are in Pro-Bot lengths
o End of Cmd
Beep on/off Enable beep after commands
Pause on/off Enable pause after commands
Sensors (NB. in version 1 all sensors are enabled together)
o Touch on/off Enable both touch sensors
o Sound on/off Enable sound sensor
o Light on/off Enable light sensor
Clear
o Clr Main Clears Main procedure only
o Clr Proc Clears specified procedure
o Clr All Clears the whole program

16 P
ro-B
ot
- Tea
cher
Guid
e
Special Commands Menu
Press and hold for 1½ seconds and a list of special commands will appear. Use the
scroll keys to select the desired command, then select it with the key. The special
commands available are:
Light On: Switches the Pro-Bot’s headlights on whilst running
Light Off: Switches Pro-Bot’s headlights off
Sound 1: Plays sound “witch on”
Sound 2: Plays sound “button click”
Sound 3: Plays sound “car horn”
Sound 4: Plays sound “data transfer”
Sound 5: Plays sound “transfer complete”
Sound 6: Plays sound “error”
Sound 7: Plays sound “go to standby”
Pen Up: Has no effect but provides compatibility with Probotix
Pen Down: Has no effect but provides compatibility with Probotix
Using Sensors The most exciting thing about learning to program with the Pro-Bot is the four built-in
sensors that can be used to control your program. Before you can use sensors in your
program, you must enable them by selecting sensors from the Menu system and
checking that they say “On”.
You don’t need to call the procedures for the sensors; they will be run automatically
whenever the relevant sensor is activated. In fact, you would be very unlikely to ever use
the command “Proc 33” in a program, although it is not forbidden.
Touch Sensors
When the front touch sensor hits an obstacle, procedure 33 FRONT will run. Similarly
when you activate the rear touch sensor, procedure 34 REAR will be run. You can get
Pro-Bot to do whatever you like when these are activated.
TIP: Why not beep the horn, reverse and turn slightly to avoid an obstacle? Put the
following commands into procedure 33 FRONT:
Sound 3 (remember to press and hold to access the special commands)
Bd 10
Rt 45
Then watch what happens when your main program causes it to run into an obstacle.
17 P
ro-B
ot
- Tea
cher
Guid
e
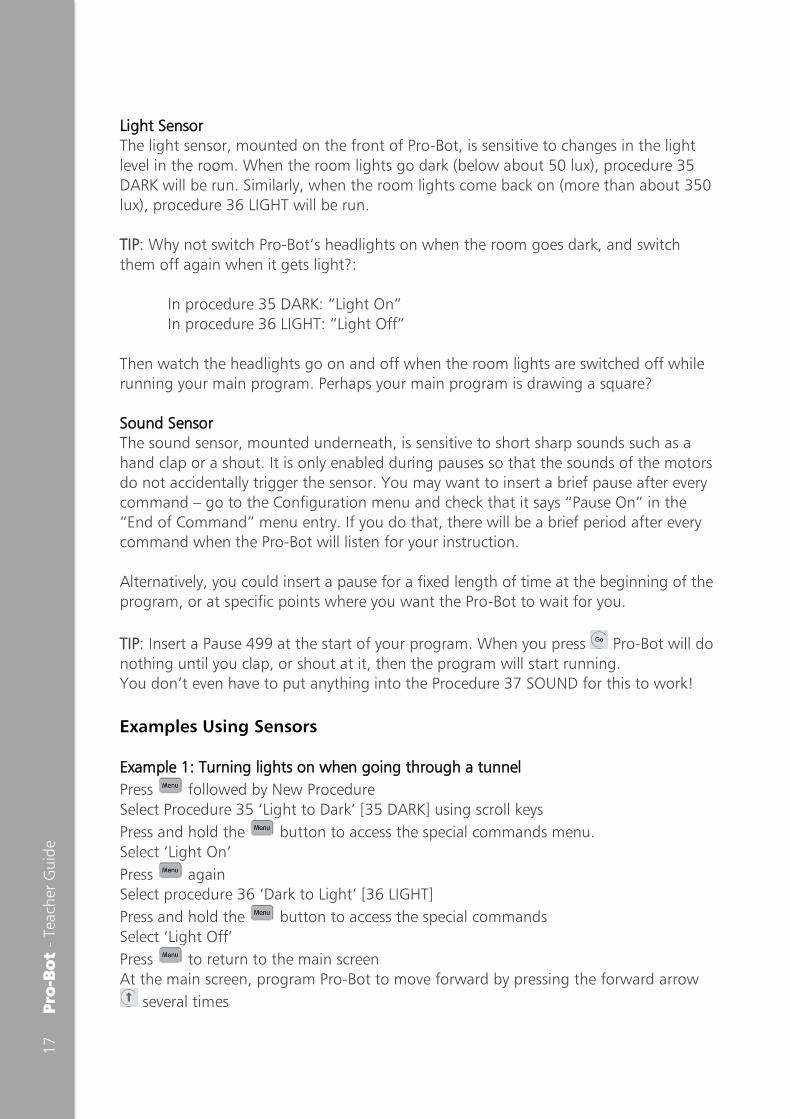
Light Sensor
The light sensor, mounted on the front of Pro-Bot, is sensitive to changes in the light
level in the room. When the room lights go dark (below about 50 lux), procedure 35
DARK will be run. Similarly, when the room lights come back on (more than about 350
lux), procedure 36 LIGHT will be run.
TIP: Why not switch Pro-Bot’s headlights on when the room goes dark, and switch
them off again when it gets light?:
In procedure 35 DARK: “Light On”
In procedure 36 LIGHT: “Light Off”
Then watch the headlights go on and off when the room lights are switched off while
running your main program. Perhaps your main program is drawing a square?
Sound Sensor
The sound sensor, mounted underneath, is sensitive to short sharp sounds such as a
hand clap or a shout. It is only enabled during pauses so that the sounds of the motors
do not accidentally trigger the sensor. You may want to insert a brief pause after every
command – go to the Configuration menu and check that it says “Pause On” in the
“End of Command” menu entry. If you do that, there will be a brief period after every
command when the Pro-Bot will listen for your instruction.
Alternatively, you could insert a pause for a fixed length of time at the beginning of the
program, or at specific points where you want the Pro-Bot to wait for you.
TIP: Insert a Pause 499 at the start of your program. When you press Pro-Bot will do
nothing until you clap, or shout at it, then the program will start running.
You don’t even have to put anything into the Procedure 37 SOUND for this to work!
Examples Using Sensors
Example 1: Turning lights on when going through a tunnel
Press followed by New Procedure
Select Procedure 35 ‘Light to Dark’ [35 DARK] using scroll keys
Press and hold the button to access the special commands menu.
Select ‘Light On’
Press again
Select procedure 36 ‘Dark to Light’ [36 LIGHT]
Press and hold the button to access the special commands
Select ‘Light Off’
Press to return to the main screen
At the main screen, program Pro-Bot to move forward by pressing the forward arrow
several times
18 P
ro-B
ot
- Tea
cher
Guid
e
Press to start Pro-Bot
The program will look as follows in the following three procedures
Main 35 DARK 36 LIGHT
Fd 100 Light On Light Off
Example 2: Reversing when front touch sensor is pressed
Press followed by New Procedure
Select Procedure 33 ‘Front touch sensor’ [33 FRONT]
Press and hold the button to access the special commands menu.
Select ‘Sound 3’ to make Pro-Bot beep its horn
Press the back arrow key to program Pro-Bot to reverse
Press the left arrow key to insert a turn (by doing this Pro-Bot will continue reversing
and turning until there are no obstacles in front of it)
Press to return to the main screen
Press the forward key and enter a large number such as 300 (This will ensure that
Pro-Bot hits an object in the room before the program ends)
Press to start Pro-Bot
The program will look as follows in the two procedures
Main 33 FRONT
Fd 300 Sound 3
Bd
Lt
Connecting to a PC
Only use the special USB cable provided with your copy of Probotix software (TTS Code
– EL00477) (available separately) to connect Pro-Bot to the PC. Follow the instructions
with Probotix to install the PC software.
The upload/download process is managed completely from the PC and all that needs to
be done on the Pro-Bot is to ensure that it is switched on.

19 P
ro-B
ot
- Tea
cher
Guid
e
More Example Programs
6-Pointed Star
Rpt 6
[Fd 10
Rt 120
Fd 10
Lt 60]
5-Pointed Star
Rpt 5
[Fd 10
Rt 132
Fd 10
Lt 60]
Complex Flower
Main Proc 1 Proc 2
Rpt 12 Rpt 30 Rpt 15[
[Proc 1 [Fd 1 [Fd 1
Lt 30] Lt 3]] Lt 6]
Rpt 24[ Lt Lt
Proc 2 Rpt 30[ Rpt 15[
Lt 15] [Fd 1 Fd 1
Lt 3] Lt 6]
Lt Lt
Technical Support
Email [email protected] for technical support.
TTS Group Ltd.
Park Lane Business Park,
Kirkby-in-Ashfield,
Nottinghamshire,
NG17 9GU, UK.
Freephone: 0800 318686
Freefax: 0800 137525 © TTS Group 2017