presents handbells v2 - bolder sounds bells v2.pdf · about the v2 handbells after the initial...
TRANSCRIPT

About The V2 Handbells
After the initial release of the handbells, there were many inquiries asking if we planned on expanding 3 octave range of the handbells. Version 2 is the answer to that question - Yes! The range has been expanded to 6 octaves. The new samples add another 1.1 gigabytes to the previous 1.1 gigabyte V1 library. On the low end we have added C2 and G2 bells as well as the octave above that (C3 - B3). On the high end we have added bells C7 - C8. The addition of Mart and Mart-Lift articulations have also been added for the full 6 octaves. And to round it off, a very flexible user interface with KSP scripting has been created by Bo Clausen.
presents
Handbells V22.2 gigabyte Library for Kontakt 3 & 4
V 2

Handbell V 2 NI Kontakt Features
Handbell Sampled Articulations
Handbell Clapper - samples are created with the traditional technique of holding it against the shoul-der, bell-upwards, and then swinging the bell through an elliptical shape to cause the clapper to strike the casting of the bell.
Suspended Handbell with a soft rubber mallet - samples were recorded with the bells suspended from the ceiling of the room while being struck with a soft rubber mallet.
Suspended Handbell with a hard rubber mallet - samples were recorded with the bells suspended from the ceiling of the room while being struck with a hard rubber mallet.
Suspended Handbell with a plastic chopstick - samples were recorded with the bells suspended from the ceiling of the room while being struck with a plastic chopstick. This creates a great deal of high frequency content for a special effect.
Singing Handbells - The Singing Handbells sound is created by running a wood dowel along the rim of the handbell, similar to the way you can run a wet finger along the edge of a crystal glass and make it sing.
Plucked Handbells - is accomplished by using the thumb and forefinger to force the clapper head into the casting while the bell is on the table, producing a staccato note.
Malleted Handbells on a padded table - samples are created by striking the bell with a rubber mallet while the bell is resting on the foam of a padded table. This produces a tone brighter and more percus-sive than the plucked samples.
Handbell Shakes - is accomplished by quickly ringing the bell back and forth so that the clapper strikes both the front and back of the bell casting in rapid succession. This creates a continuous sus-tained tone.
Martellato (mart) - this articulation is created when the handbell is rung by holding it by the handle and gently striking the full body of the handbell horizontally on the padded table.
Martellato Lift (mart-lift) - is the above Martellato articulation followed by immediately lifting the handbell from the table to allow the bell to continue to ring.

Per Key Round-RobinBo’s KSP Per Key Round-Robin is much more flexible than the Round-Robin feature that comes built into Kontakt. With Kontakt’s Round-Robin if I play a C note and then play the neighboring D note in alternation (like a trill) we will only hear layer 1 for the C note and layer 2 for the D note. With Bo’s Per Key Round-Robin script the above mentioned trill example would eventually give you both layers of the C and D note samples.
To see how it works, go into edit mode of the instrument and look at the groups being highlighted when you play.
Intelligent Pitch Round-RobinWe might also call this Faux (Fake) - Round-Robin because it actually uses a bit of a trick with trans-position and KSP scripting to create the illusion of a true Round-Robin, when in fact there is really only one set of samples are utilized. I will not go into details of how this works here, but only the 2 Martellato articulations use this script since just one set of samples were recorded. This is due to the fact that you will rarely ever hear the same note repeated with Mart articulation. However for those who will use the Marts in a nontraditional context this will be very effective in creating the Round-Robin effect.
Sample LengthDon’t be fooled by the default release time setting of the AMP Envelope. These samples are quite long. Ranging from 6 second up to 30 seconds on the C2 and G2 bells. If you want a longer decay either hold the key down for a longer period of time or use Kontakts front panel knobs of the AMP Envelope menu to set the release time to a higher value.
Hover Over Mouse Help
A built in Help Page is provided on Kontakt’s front panel. Also a very convenient feature has been added where you can simply ‘hover’ your mouse over a particular control and the information on that control will be displayed at the bottom of Kontakt as long as you SHOW INFO PANE is highlighted.
General Help Page .rtfIncluded in the Handbells Kontakt folder is a file called HB V2 General Help Page - v2.rtf. This is a Rich Text Format help document you may want to print and use it as a quick and easy reference for opera-tion and editing of the various parameters implemented into the V2 Handbells.
show info pane

Preset Save/Recall This convenient feature enables the user to make edits to the Church (IR convolution), Reverb (Kontakt’s built in reverb) as well as the EQ section and save or recall those edited parameters without having to save a new .nki instrument for each setting. Illustrated above is the drop down menu for the preset save/recall for the Church (IR convolution). With this example - you can save up to 6 different presets of the various Church parameters: Church IR’s - Church Sizes - Church Amount. Once you create a preset you like - choose Save as Preset 1- 6 and that preset will be placed in the corresponding Preset slot. The Reset All Knobs selection from the drop down menu will reset all the Church parameters to their default value. After editing and saving a preset, be sure to save the edited .nki instrument so when you load your instrument in the future, the presets you’ve created are saved and may be recalled. And remember you can do this on the EQ and Reverb sections as well!
Reset KnobsTo reset the knobs to their default value - CTRL + Click (PC) or Command + Click (Mac).

Kontakt Installation
Before you do anything else - please make a backup copy of the package you have downloaded!
1. The Handbells_V2 .rar file needs to be decompressed, there are many utilities on the internet which will do this on both the Mac and PC platform. Some are freeware and some are not. The one that I use on OS X is called RAR Expander. You can put the Handbells folder wherever you’d like on your hard drive. 2. Please do not change the folder structure, so that the Kontakt Instruments can reference their samples correctly.
Kontakt Scripting Very thoughtful, flexible and musical scripts have been created by Bo Clausen for Bolder Sounds in this sample library. The user may edit many parameters using the graphical user interface that Bo has created, and save them to be later recalled.
4 IR samples are from the M7 Bricasti free collection created by Peter Roos at Samplicity, they are of excellent quality! You can visit them at http://www.samplicity.com
The handbell KSP scripts offer both IR reverb processing as well as Kontakts built in reverb option which is quite a bit more CPU efficient.
More details on the scripts to follow.
Kontakt Compatibility
This library has been tested for compatibility in NI Kontakt versions 3 and 4. This library is NOT com-patible with the Kontakt 4 sample PLAYER, only the full retail Kontakt SAMPLER. It will only run in demo mode for 30 minutes on the Kontakt PLAYER.

Front Panel
You will notice a drop down menu in the lower right hand corner of Kontaks front panel. With this menu the user is able to select from 6 different front panel pages. They are as follows -
Main Page
drop-down menu to select more pages
ButtonsThe 3 buttons above the Bolder logo labeled EQ 3, Church (IR) and Reverb (Kontaks built in reverb) will appear on all pages. These are on-off buttons. If you wish to tweak the EQ of an instrument, the EQ button must first be turned on in order to audition your EQ edits. The same is true for the Church and Reverb buttons. Clicking on a button automatically takes you to its corresponding edit page.
At Curve KnobThe At Curve knob controls the curve of the attack. Attack KnobThe Attack knob controls the attack time. Release/Damp KnobThe Release/Damp Knob has three modes, all depending on the Sustain On/Off button and the Pedal Mode button positions.
1. When the Sustain button = Sustain On, the Knob controls the Release time ( from 100 ms to 25 kms, default value = 200 ms ).
2. When the Sustain button = Sustain Off, the Knob controls the Damp time ( from 100 ms to 500 ms, default value = 300 ms ).
3. When the Pedal Mode = P. Damper Mode, the Knob controls the P. Damper time when the Sus-Pedal is pressed, and when notes are played while the Sus-Pedal is down ( from 100 ms to 500 ms, default value = 300 ms ).

Modulation WheelThe modulation wheel (cc#1) controls the volume of the Shakes and Singing articulations.
Sustain Mode The Sustain button switches between the two Sustain modes -
When Sustain On - everything works the normal way.
When Sustain Off - holding down the keys or pressing the Sus-Pedal has no effect.
You can also use Keyswitch C0 to turn Sustain On/Off. Using the Keyswitch will remember your Re-lease and Damp knob settings.
Pedal ModeThe Pedal Mode button switch between the two Pedal Modes -
When P. Sustain Mode is selected - the pedal behaves like a normal Sustain Pedal.
EQ Page
The EQ page features a 3 band parametric EQ. The first column assigns the center frequency. The second column determines the bandwidth of that frequency. And the third column determines the cut or boost of the previously assigned two parameters. Remember - the EQ button must be turned ON for any of these parameters to have any effect! Also notice the Preset Save/Recall button placed at the upper left explained on page 4 of this manual.

Echo/Gyro Page
Echo Ring The Echo Ring effect is created by sounding the bell as normal and then lightly touching the bell on the foam table in rhythm to the ‘hook’ notation which tells the ringer which beats the pulsing effect is on.
Gyro The Gyro effect is created by rotating the wrist which causes the wave to oscillate in a way similar to the Doppler effect.
The Echo Ring/Gyro button turns the Echo Ring/Gyro On/Off, and opens the Echo Ring/Gyro Page. The ModWheel can be used to turn the Echo Ring/Gyro On/Off.
Technique The Technique drop-down Menu lets you select either the Echo Ring technique or Gyro technique.
1/16 sync The 1/16 sync knob adjusts the Echo Ring/Gyro in speeds of 1/16 steps, synchronized to your host tempo.
Retrigger If Retrigger is On, the Echo Ring/Gyro will be restarted each time a note is received. If Off, the Echo Ring/Gyro will run continuously without reacting to new notes.
Beat The Beat drop-down Menu lets you select either DownBeat or UpBeat Echo Ring/Gyro.
Swing The Swing knob adds a percentage of swing to the Echo Ring/Gyro, either moving it back or for-ward.

Location Page
Public Perspec The Public Perspec button change between Public and Player Perspective. Using the Public Perspec-tive button, the lower bells are panned more to the right and higher bells gradually to the left. Using the Player Perspective this is reversed. WidthThe Width controls the stereo width of the bells. Turning the Width knob fully counter clockwise sums the stereo signal to mono. PanThe Pan knob controls the panning of the bells.
Select-Church A drop-down menu in which you may select from 4 different Church IR Convolutions. Church - Size The Church - Size drop-down Menu lets you select between five different sizes of the selected Church IR Type. Amount The Amount knob controls the Church IR reverb volume.
Preset Save/Recall button This button is explained in detail on page 4 of this manual.
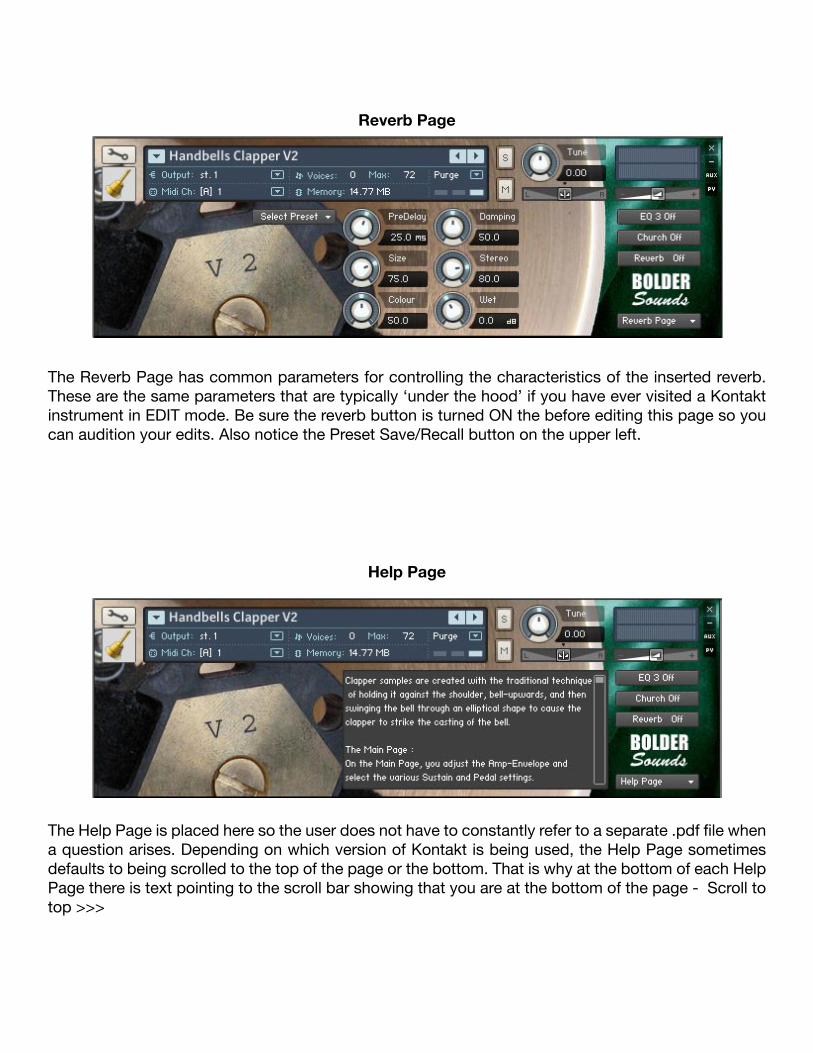
Reverb Page
The Reverb Page has common parameters for controlling the characteristics of the inserted reverb. These are the same parameters that are typically ‘under the hood’ if you have ever visited a Kontakt instrument in EDIT mode. Be sure the reverb button is turned ON the before editing this page so you can audition your edits. Also notice the Preset Save/Recall button on the upper left.
Help Page
The Help Page is placed here so the user does not have to constantly refer to a separate .pdf file when a question arises. Depending on which version of Kontakt is being used, the Help Page sometimes defaults to being scrolled to the top of the page or the bottom. That is why at the bottom of each Help Page there is text pointing to the scroll bar showing that you are at the bottom of the page - Scroll to top >>>

Handbells Multi .nkm
The purpose of the multi is to give the user access to all sampled articulations at one time, each on a separate midi channel (1-10). This will be very useful when working with a sequencer in a DAW as one example.
The headers for each instrument in the above mulit rack are Minimized with the exception of the last instrument (Handbells Singing V2). You can Maximize and Minimize each instrument individually with the +/- button to the right in the instrument. Or you can Max - Minimize all instruments in the rack us-ing Mini or Maxi buttons all the way to the right - beside the AUX button at the top right section of the mulit rack.

The 2 different ways to Show/Hide Performance View (UI), is either click on the bell icon to the left in the instrument, or click on the PV button to the right in the instrument.
Performance View - multiWhen a header is Maximized you have the option of using performance view. The main advantage of this approach is that Performance Views appear below the Instrument Header in the rack; you don’t need to switch to Instrument Edit mode to locate the respective parameters.
In the above performance view is not enabled. In the below picture Perf romance View is enabled
PV buttonBell icon to access performance view
Handbells Multi .nkm (continued)
To conserve CPU usage, the Multi have 4 Insert FX added in the stereo output, to mimic the possibili-ties we have on the different Pages in the single instruments.
The EQ in slot 1.The Inverter and Stereo Ehn. in slot 2 and 3, to mimic the Perspective.The CV in slot 4, to mimic the Church. To further conserve CPU usage the user can load the Reverb instead.
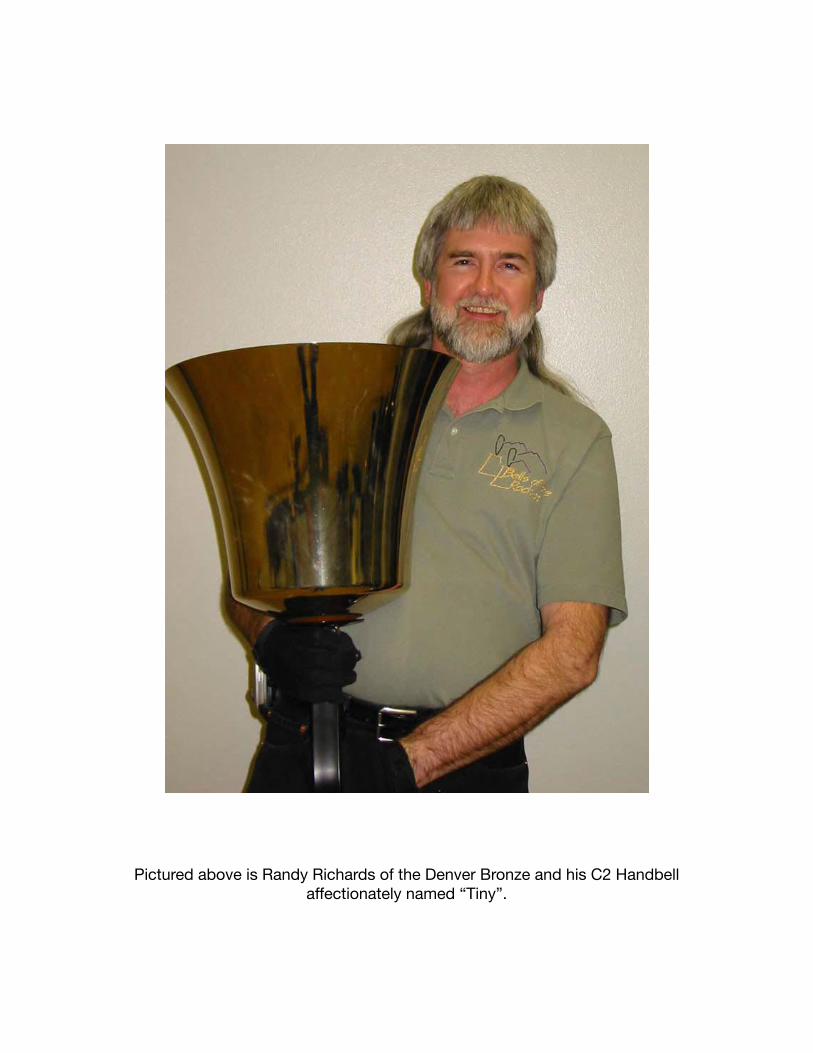
Pictured above is Randy Richards of the Denver Bronze and his C2 Handbell affectionately named “Tiny”.

My sincere thanks to the TARA Performing Arts High School here in Boulder, Colorado as well as Randy Richards and Jane Ryer of the Denver Bronze Handbell Ensemble for allowing me to record these beautiful handbells.
Many thanks to composer Matthew Prins and Denver Bronze member Randy Richards for their invalu-able expertise on the subject of Handbells.
Thank you to Bo Clausen in Aarhus, Denmark for his thoughtful and musical Kontakt scripts and for catching my mistakes.
Customer SupportFor any questions, technical issues inquiries etc .... Please contact Bolder Sounds via email at [email protected].
GENERAL LICENSE CONDITIONS: you have purchased a single-user license use these sam-ples to be used in any type of music production, i.e. making demos, records, remixes, commercials, jingles, post productions, commissioned pieces, sound tracks for film, theatre, musicals, live perfor-mances, computer games or multimedia. Samples may not be utilized or resold in the form of Sample Library Music or Sample-related endeavors (e.g. “Joe’s Sample Collection” which contains our prod-ucts). Written permission from Bolder Sounds is required. You CAN NOT trade, re-sell, lend, rent, copy, duplicate, upload or download to any database, BBS, or Server any of our sounds because Bolder Sounds owns the rights to the samples and programs, Bolder is licensing these to a single user for music production.
Installation of this library constitutes full acceptance of these terms.
* On a personal note ......... Please think twice before making a copy of this library for a friend or any-one else. All the legal mumbo jumbo in the world is not going to stop piracy of libraries such as this. Many hours of work has gone into this library, I have also gone to great lengths to make this disc as affordable as I can so that this disc is NOT pirated. As always.......... please put yourself in our shoes before making a decision whether to copy this data for purposes of piracy or not.
Thank You for your consideration! Dennis Burns - boldersounds.com
Creative Sample Libraries Since 1992
Thanks and Acknowledgements