practical activities - open university...through activities 2-6. we will then look at the second...
TRANSCRIPT

It is by no means necessary to be especially talented in the use of the materials and forms of image-making described in the activities; the important thing is to have tried these various processes in order to be able to appreciate the problems and potential they offer. At all stages in both exploring alone and teaching the class it is very important to retain your buoyancy, confidence, and pleasure in the activity.
Practical activities
You will find the Curriculum Resources video (index nos. 26Ck353) very useful in giving you guidance and ideas for carrying out practical art activities. The video gives examples of:
1 children working from observation
2 cross-curricular studies which will be valuable both for your individual work and for your work with children in the classroom.
Two different age ranges are shown, covering the early and later years of primary school. All the activities described can be used with pupils 4-12 years of age.
The two classes shown have pupils of varying artistic abilities. They were chosen for the enthusiasm they bring to their art-making. The school is St Nicholas's Combined, Kenilworth, Warwickshire. The class teachers are Janet Naujorkas and Jane Bates. The background to the schemes of work you will see is outlined in Appendix 2 of this Module.
The video A C T I V I T Y 1
One of the fundamental concerns of art education is the development of skills and observation. Watch the first part of the art video sequence (index nos 260-3 1 9) where you will see Janet teaching a year 1 class.
1 In a notebook write down your answers to the following questions.
What textures might you hope to find on a visit to a churchyard?
How many rubbing activities are described?
When the children are drawing, what colours are used and what materials are they provided with?
How many different surfaces and objects did the children notice?
How do we make marks - what tools do we use?
How many different sorts of mark do the children make?
What range of materials did the children use?
What response was there when the children were asked how a tree should look?
What are the advantages of strengthening and adding body to the paint?
2 How do you think the children responded to the activities that you watched them doing in the video, and why?

ART
3 The teacher stimulated the children by asking questions. Can you think of others that she might have asked?
4 How would you organise the three activities explored in the video?
You have seen the year 1 class at St Nicholas's experimenting with textures and materials. Now practise for yourself those processes by working through Activities 2-6. We will then look at the second half of the video. The materials you need for each activity are listed in Appendix 3.
A C T I V I T Y 2 h a ~ i ~ ~ ~ g l n d rubbings
1 Select a natural form to draw, for example, a stone, a piece of wood, a leaf. Take some pencils of varying hardness or softness (H, HB, B, 2B) and explore the possibilities offered by the textures, shape and patterns you see on its surface. Taking a rubbing of the obiect, if this is practicable, will make you more aware of these elements. You are already responding to the creative potential of the object rather than being too focused on producing an illusion of reality, and making i t look like the 'real thing'.
As you work, think about the potential of the object. A well-observed pattern of lines and textures drawn, for example, with a variety of marks using hard and soft pencils can lead to an appreciation of expression in a wide variety of media. At this stage an imaginative and open response to the object is preferable to the constant rubbing out and redrawing which so often accompanies unskilled attempts at 'reality'. Drawing does not necessarily have to be done in pencil; crayons, chalks, charcoal and pens can also be used, each bringing a different quality to the drawing.
You should consider to what scale you are going to draw your object. A small stone with exciting patterns does not have to be reproduced at the same size. Equally, a large piece of wood does not have to be drawn in its entirety. Think of the effects of reducing or enlarging the scale of your object. For example, reducing the size of an obiect may mean that interesting patterns are lost; enlarging the object may mean that its overall shape or its relation to the objects that surround it is obscured.
2 Now try using other drawing implements, for example crayons, chalks, charcoal and pens. Consider their different effects and how you might - combine them to create a particular feel.
1
Figures 1 and 2 show two examples of children's drawings from life.
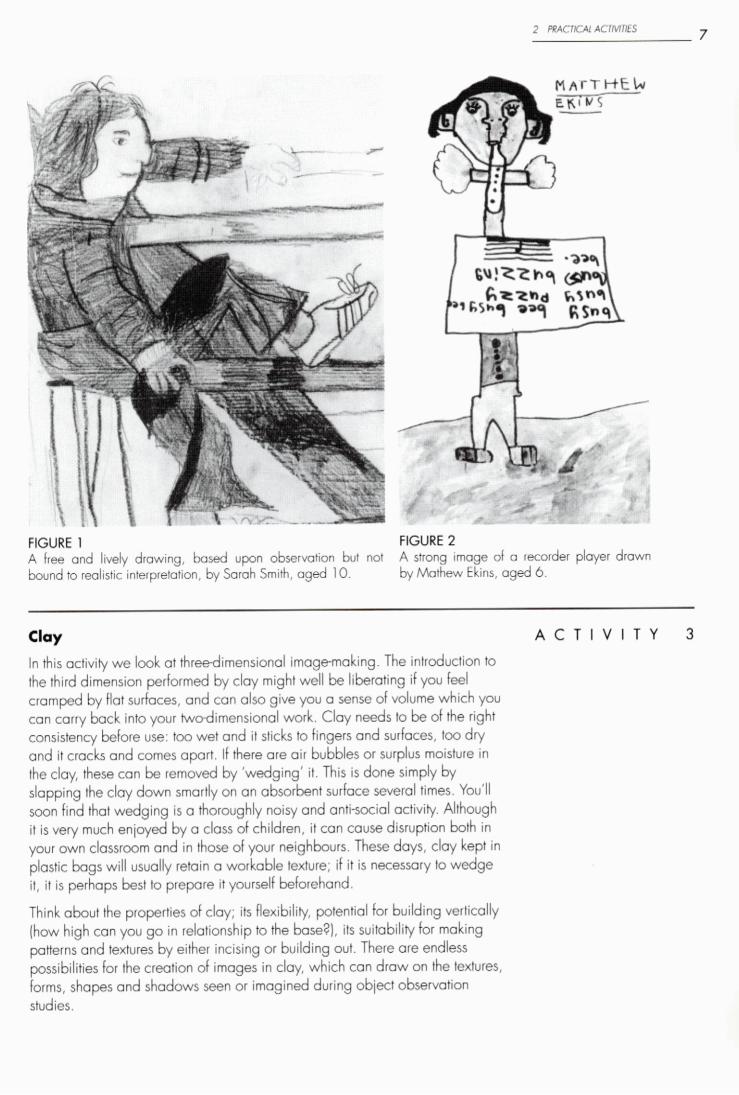
FIGURE 1 FIGURE 2 A free and lively dmwing, based upon obserwtion but not A strong image of o recorder player drown bound to realistic interpretation, by Somh Smith, aged 10. by Mothew Ekins, aged 6.
In this activity we look at threedimensional imagemaking. The introduction to the third dimension performed by cloy might well be liberating if you feel cramped by flat surfaces, and con also give you a sense of volume which you can carry bock into your twcdimensional work. Clay needs to be of the right consistency before use: too wet and it sticks to fingers and surfaces, too dry and it cracks and comes aport. If there are air bubbles or surplus moisture in the cloy, these can be removed by 'wedging' it. This is done simply by slapping the clay down smartly on an absorbent surface several times. You'll soon find that wedging is a thoroughly noisy and antisocial activity. Although i t is very much eniqed by a class d children, it can cause disruption both in your own classroom and in those of your neighbours. These days, cloy kept in plastic bogs will usually retain a workable texiure; if it is necessary to wedge it, it is perhaps best to prepore it yourself beforehand.
A C T I V I T Y 3
Think about the properties of cloy; its flexibility, potential for building vertically (how high can you go in relationship to the bose?), its suitability for making potterns and textures by either incising or building out. There are endless possibilities for the creation of images in clay, which can draw on the textures, forms, shapes and shadows seen or imagined during obiect observation studies.

ART
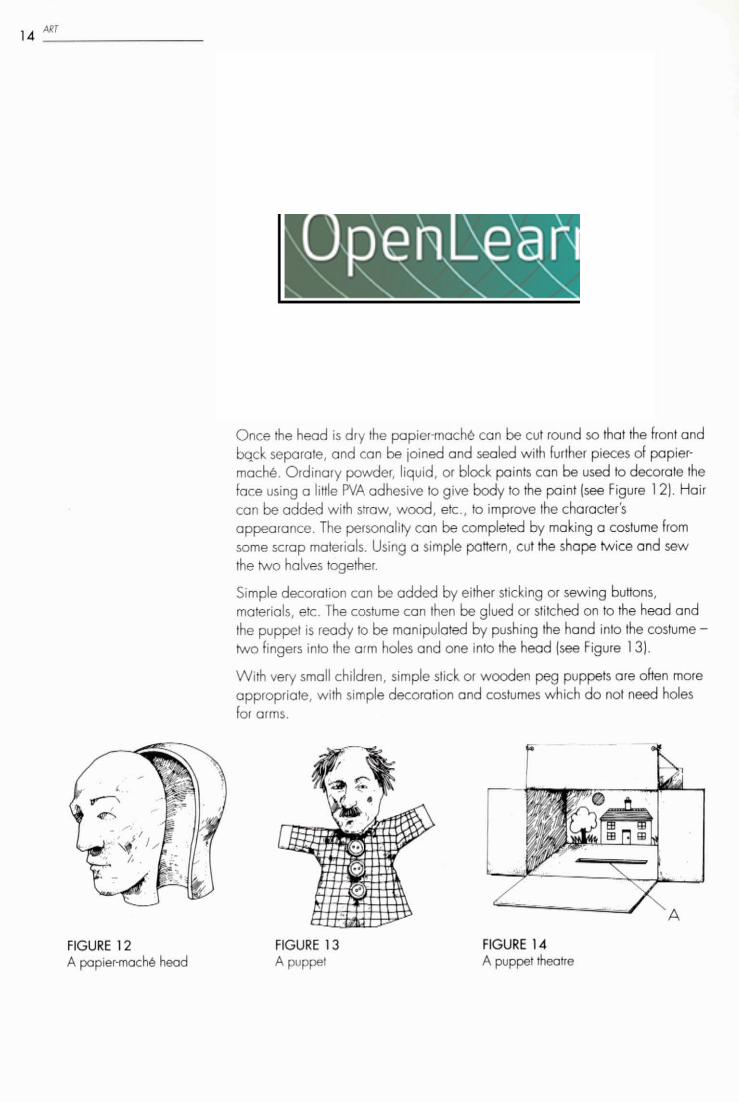
FIGURE 3 A decorated tile
Take a substantial piece of clay, roll it out with a rolling pin and then try one of the following activities.
Make square or oblong decorated tiles by cutting the clay out into squares or oblongs and then incising or building out the clay to form patterns, rhythms and textures derived perhaps from the observation you made in Activity 2 (see Figure 3). Make a box by cutting out four sides, a bottom and a lid, with a knob for a handle (see Figure 4). This can be decorated by incising or building out the clay to form images drawn perhaps from the observations you made in Activity 2. Note: When the box is finished, do not leave the lid on to dry, but put it on a flat surface or it will sag and no longer fit.
Make a coil pot by cutting a circle 3 or 4 inches in diameter, and then rolling thin coils of clay to build round and up the circular base. The coils should form a pot that curves gently outwards to prevent collapse (see Figure 5 ) . Once complete you can leave the coils as they are, or smooth them with a finger or tool, adding water if the clay is becoming dry. You can incise or build out this smooth surface to produce a simple, spare pattern or one of greater complexity, inspired perhaps by the observations you made in Activity 2.
If a kiln is available in school, firing will preserve your clay objects best. But all clay, if allowed lo dry steadily and thoroughly, away from direct heat, should be safe from cracking and can be painted with normal powder paints, squeezy or block paints. Adding a small amount of PVA adhesive prevents the moisture being absorbed into the unfired clay and produces a shiny, varnished appearance when dry.
Plaster or scrap work can arise from a study of clay and lead to the creation of larger pieces of work not feasible in clay.
FIGURE 4 A clay box
FIGURE 5 A coil pot


A C T I V I T Y 5 Print-makin
Print-making is a nc~tural development from painting and involves the selection of shapes, textures and colours to use as the basis either for one-off prints or for more complex repeating patterns.
Water-based paints are ideal for this purpose and again only basic colours - red, blue, yellow, plus white and black - are necessary. Roll some ink on to a plastic or glass plate with a printing roller.
With a stick, pencil, piece of wood, etc., make some marks/lines/circles which effectively remove the paint from the block, leaving the surface clear of the colour you are using (see Figure 6).
Alternatively, a second method is to place string, paper, card on the inked surface, and where these cover the colour, white shapes will result (see Figure 7).
A third method is to squeeze a second and third colour on to the already inked-up block in various shapes and dribbles, and then take a print (see Figure 8).
A fourth method is 1.0 cut a recognisable shape, perhaps a house or an animal, out of thicker card, and place on the rolled-up block. This will give a silhouette effect, where the roller fails to get right up against the raised shape and a white line will define the shape of the house (in the diagram) and also the windows (see Figure 9).
FIGURES 6-9 Examples of block printing
FIGURE 6 FIGURE 7
I I L
FIGURE 8 FIGURE 9

2 PRACJICAl ACTIVITIES 1 1
Place a clean piece of thin printing paper on to the block and rub with either a dry roller or your fingers until a print appears. You can test whether or not it has come through by pulling the corner back as far as you can while pressing down on the opposite corners to prevent the print coming off.
Shapes and textures observed and produced in previous activities can be used as the starting point for these prints; they will take on a fresh meaning in their new context.
2 Vegetable prints
These are a simple and effective way of producing a print through the repetition of a shape. Cut a potato, carrot or turnip in half, cut shapes from it and paint ink on with a paintbrush. Print by pressing the vegetable on to printing paper and repeating (see Figure 10).
FIGURE 10 A vegetable print
A second vegetable can be cut, and further pattern added in another colour, perhaps linking the first shapes together.
Stones or blocks of wood of various shapes and sizes are placed on a square of material (cotton sheeting), and tied there with string. This is then immersed in a bath of dye and allowed to dry, and when the string is removed most of the fabric will be dyed but white shapes with linking lines will be left (see Figure 1 1 ).
FIGURE 1 1 An example of tiedye
The craft of batik involves drawing with wax on fabric, immersing the fabric in See Appendix 3 coloured dye, and removing the wax when the dye is dry. The design can be developed by repeating it using other colours and images. Cold-water dyes avoid the need for gas rings and boiling dyes.

A C T I V I T Y 6 Collage
Gafhar a cdlection d pieces of material of van/ing textures, colours, ond thicknesses: pieces of string, sandpaper, wood shavings and d u s t , tissue paper and cdoured foil or even small dkuts d wood.
Using one or more of the oblects, drawings and paintings from earlier activities as a starting point, you can create striking images by assembling and cornpasing he obiacts and materials on a background sheet of paper.
We h m now cowred the activities done by he year 1 dass fdlowing their visit to a churchyard, so we can move on to observe a year 7 dass working on observational drawing and creuting threedimensional pieces for a space environment [index nos 3 19-53).
1 In a notebook, write down your answen to the fdlowing questions.
(a) Using the 'hold' facility on your video ployer, examine the environment and write down your impressions of how space was achieved, what materials were used on the objects and how they were armnged.
(b) A group of children in Jane's dass are exploring he function of drawing, examining the obiects in front of them in a critical woy and training them& to look. Whot does the teacher exiract from he children by questioning fhem about he drawing activity?
(c) How does the introduction of cdour help the teacher and the pupils to express more fully the forms and textures of the plank8
Id) How are the children in the video responding by helping each other?
This year 7 class is also exploring s e a l concepts arising from their year 6 studies and current considerations of Earh and climate. How much information would you want to provide the children with, for example about planets, stars and scientific discovery, before they made three- dimensional obits about space?
NKP9F9 mate topc depicting solar system as featured on
he video

2 PRACTICAL ACJIVIJIES
When all the planets, comets and space objects were finally completed, the environment was contained within an area 8 ' x 12'. The two existing walls were covered with displays of the children's large painting of space and planets. These were viewed from the two open sides of the display (in front and to the left). Three-dimensional planets, comets, and so on were arranged on cords (string being attached across the space) and lit by stage lighting concealed behind a board low down at the front.
From your close scrutiny of the video, describe how you would plan for a group of children to create a large spatial object from wire, papier-mache and paint, or from other materials.
Consider the approach of this teacher, who divided her class in two, and had a large group making three-dimensional obiects from space, and a smaller group drawing from observation. All the children had an opportunity to do both activities.
In Activity 7 you can explore some of the techniques that the pupils were carrying out on the video.
Three-dimensional constructions A C T I V I T Y 7
Increasingly the use of scrap materials is becoming important in creative work in school. A good supply of cast-off yoghurt pots, TV dinner containers, plastic bottles, etc., can be an exciting starting point for arts activities.
Collect together a variety of scrap materials and make a three-dimensional construction, either starting from a cross-curriculum theme like space, or using ideas and images gained from your earlier observation work as a point of departure.
You might create a threedimensional series of images which explore the See Appendix 3
textures, forms, colours and rhythms inherent in the obiect. The ioining together is important and both at home or in the classroom you should experiment to rearrange the elements until a satisfying effect is produced. The end product can be left in its raw state or painted using PVA medium with powder paints, squeezy or block paints. Further two- and three-dimensional activities which are exciting for children can be explored at this stage and may evolve out of the current activity.
Producing a puppet head
Glove puppet-making can bring together the disciplines of three-dimensional expression, the decorative qualities found in fabric, and the expressiveness of paint in essential elements of story telling and musical expression. Plasticine is the ideal vehicle for making a puppet head. The character needs to have strong, prominent features which will stand out as a face, and so it may help to establish the character's personality and rolejirst. Once the face is moulded, cover it with three layers of papier-mache. This is made from fairly small pieces of paper soaked in wallpaper paste. The pieces should be small enough to allow the features to remain visible; the head should not be concealed like a mummy.
A C T I V I T Y 8
2 PRACJlCAl ACTIVITIES 15
A puppet theatre can be made very simply by putting a supermarket box on its side, cutting a hole (A) in the side to allow the puppets to emerge, and pulling out the top flaps to make a proscenium arch (see Figure 14).
A blackcloth can be painted to represent scenery; the front decorated to add to the story or to represent the front of the stage in a theatre. Lighting can be effected by ordinary household torches. If the room can be darkened or even blackened out, the imagination is vividly aroused. The story is important and a strong link can be made with creative writing and drama. The telling or delivery of the story, and the use of gesture and movement, are of great importance, and musical expression will further extend the telling of the story.
Weaving A C T I V I T Y 9
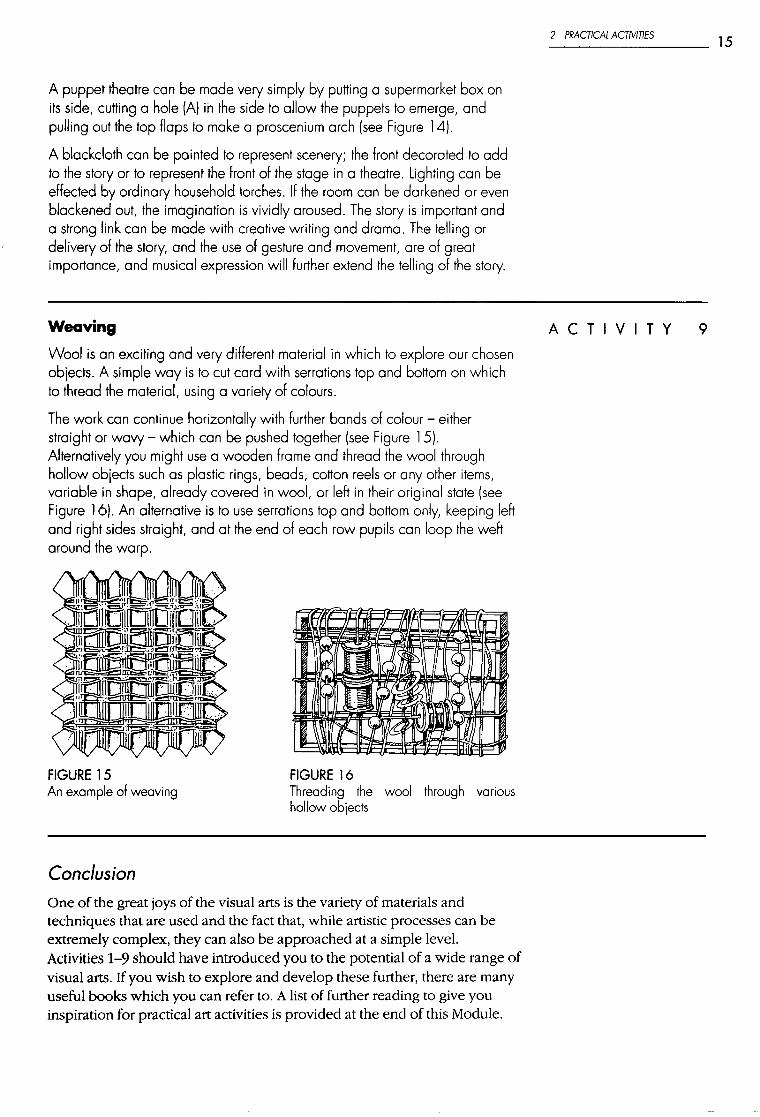
Wool is an exciting and very different material in which to explore our chosen objects. A simple way is to cut card with serrations top and bottom on which to thread the material, using a variety of colours.
The work can continue horizontally with further bands of colour - either straight or wavy - which can be pushed together (see Figure 15). Alternatively you might use a wooden frame and thread the wool through hollow obiects such as plastic rings, beads, cotton reels or any other items, variable in shape, already covered in wool, or left in their original state (see Figure 16). An alternative is to use serrations top and bottom only, keeping left and right sides straight, and at the end of each row pupils can loop the weft around the warp.
FIGURE 15 An example of weaving
FIGURE 16 Threading the wool through various hollow obiects
Conclusion
One o f the great joys o f the visual arts is the variety of materials and techniques that are used and the fact that, while artistic processes can be extremely complex, they can also be approached at a simple level. Activities 1-9 should have introduced you to the potential of a wide range of visual arts. I f you wish to explore and develop these further, there are many useful books which you can refer to. A list of further reading to give you inspiration for practical art activities is provided at the end of this Module.