power tools - bconstructive
TRANSCRIPT

Power tools
Unit Standard 24350 (v3), Level 2
Identify, select, use and maintain portable power tools for BCATS projects 6 CREDITS

All rights reserved.
No part of this work may be reproduced, adapted, modified, copied or transmitted in any form or by any means, including by way of example only, written, graphic, electronic, mechanical, reprographic, photocopying, recording, taping or information retrieval systems, without the written permission of the publisher.
Building and Construction Industry Training Organisation (BCITO)
Level 5, 234 Wakefield Street PO Box 2615 Wellington 6140 0800 422 486 www.bcito.org.nz © 2020 BCITO

Table of contentsPage
Introduction 4
How you will be assessed 5
Glossary of terms 6
Health and safety 8
Classification 13
Power sources 14
Portable electric drills 17
Cordless power tools 19
Drill attachments 21
Power screwdrivers and impact drivers 23
Saws 25
Routers 29
Power planer 32
Finishing sanders 34
Belt sander 35
Disc based sanders/grinders 36
Plate or biscuit jointers 37
Nail gun 38
Painting and decorating 40
Concreting 45
Summary 48

This handbook is an introduction to a wide range of portable power tools used for BCATS projects.
Portable power tools are an essential part of a tradesperson’s toolkit. They can make creating projects and doing repairs easier, quicker, and more cost effective.
There is a wide range of portable power tools available. Some are designed to perform a variety of tasks and others to perform only one. Learning about the different tools will help you to select the best one for the task, use them correctly and safely, and care for them.
To include and describe every power tool you could use for your BCATS projects would make this resource very long. Therefore, the main power tools used across a range of areas have been selected.
Your teacher/tutor will teach you to identify, select, use, and maintain all the power tools needed for your two BCATS projects.
Introduction
24350 Power tools4

You will be assessed through a combination of practical and written work.
To achieve this unit standard, you need to complete two BCATS projects where you can identify, describe, select, and safely use and maintain portable power tools. Your teacher/tutor will tell you which projects to complete.
You need to show your teacher/tutor that you can:
→ describe what eight power tools can and cannot be used for
→ describe how to use eight power tools safely
→ choose the right power tool for the job
→ choose the right Personal Protective Equipment (PPE) for the power tool
→ check that electrical cords and connections of four power tools are set up and used correctly
→ use four power tools correctly and safely
→ keep power tools clean and free of rust, and store and maintain them correctly
→ report any damaged, blunt or faulty tools to your teacher/tutor.
Theory requirements of this unit standard are assessed by you completing a Knowledge Assessment Sheet.
Your teacher/tutor might give you a work diary to help you record how you make your projects.
If you can, take photos of you using and maintaining power tools as your projects progress.
Note: Your teacher/tutor must also formally attest to observing behaviours such as using the tools safely and reporting any damaged or faulty ones.
How you will be assessed
Power tools 24350 5

Term Meaning
Alternating Current (AC)
An electric current that reverses direction in a circuit at regular intervals. This is the form of electrical power delivered to homes and businesses and so is the type of power that power tools with electrical cords use.
Anti-clockwise Rotating in the opposite direction to the path of the hands of a clock.
Bevel Cut a slanting edge on a piece of timber.
Binding To hold, restrain or cause to stick.
Chamfer A flat surface made by removing the edge or corner of a piece of timber.
Chuck A revolving clamp with adjustable jaws that holds a drill bit.
Cladding The external wall covering material on a building or fence.
Clockwise Rotating in the same direction as the path of the hands of a clock.
Collet chuck A holding device that forms a collar around the tool to be held and, when tightened, exerts a strong clamping force on the tool.
Collets or sleeves
A cone-shaped sleeve used for holding circular or rod-like machine pieces.
Depth of cut The distance that a cutting blade extends into material being cut.
Double insulated
Two levels of protection built into power tools. The primary protection is afforded by the first layer. If that fails protection is provided by a second level.
Flutes The helical grooves of a twist drill that provides the rapid removal of waste material from a cutting surface.
Helical grooves Spiral grooves.
Kick back A sharp and often dangerous reaction that can occur when the material being machined closes on a cutting blade. This closing can cause the material to be projected violently back toward the operator by the momentum of the blade.
Masonry Building work block, stone or brick work.
Mode The method of carrying out an operation or task.
Profile A temporary wooden structure used to set out a construction area and establish levels. String lines are attached to the top to define the set out.
Residual current device (RCD)
A safety circuit-breaker that plugs into a power socket and automatically disconnects the current if there is a fault in electrical equipment.
Glossary of terms
24350 Power tools6

Term Meaning
Revolutions per minute (RPM)
The rating which identifies the speed of a machine.
Ripping Cutting timber with the grain.
Side loaded The application of pressure to the side of the disc when using a portable power tool.
The ‘earth’ The wire through which electricity can pass into the ground, which makes the equipment safe if something goes wrong with it.
Torque The measure of a turning force around its axis.
Transformer An electrical safety device which lowers the voltage of an electric current.
Tungsten carbide
An extremely hard composite steel used in tools and accessories that require high-wear resistant qualities.
Power tools 24350 7

Health and safety
The Health and Safety at Work Act 2015 is designed to:
→ prevent harm to employees at work
→ promote good practices in health and safety management.
The Act puts responsibilities on everyone to take all practical steps to ensure their own safety and the safety of others.
A key aspect of safety is an awareness of the equipment that you are using and the environment in which you are using it. Apart from using the correct Personal Protection Equipment (PPE), one way you can help ensure your own safety is to select and use portable power tools correctly. Keep them well maintained and check them before using. Do not use any with damaged or worn parts.
Make sure you understand the operation of tools and equipment and of the working qualities of the materials you’re using.
Check that your work is secure before using any power tool or applying a force, such as using a pneumatic torque wrench to tighten a nut or a plunge router to complete a rebate.
You must receive training in the use and maintenance of power tools and apply it when you select and use them.
You have a responsibility to ask your teacher/tutor for guidance if you are unsure of or have forgotten how to use a power tool safely.
Always stop and think - If it doesn’t look right, don’t do it!
ALWAYS
→ only use tools you have been taught how to use properly and safely
→ know the capabilities and limitations of the tool
→ select the right tool for the job
→ strictly follow safe working practices
→ check the tool and any cords for damage or faults before and after use
→ keep power tools well maintained and report any damage immediately
→ select and use appropriate Personal Protection Equipment (PPE).
Depending on your school’s policy, you might not be able to use some of the portable power tools included in this resource, such as a circular saw. If this is the case, it is a good idea to take the opportunity to learn about it and carefully watch how your teacher/tutor uses it.
24350 Power tools8

Health and safety
Care, maintenance and safety basics → Keep power tools in good condition. Good-
quality work is impossible to achieve with blunt, incorrectly sharpened, or damaged blades.
→ Power tools with blades in poor condition are dangerous because you have to apply extra pressure on the tool. This reduces your control and this increases the likelihood of injury. Keep them sharp and use them safely at all times.
→ When starting a job it is useful to have all the power tools you think you’ll use for each individual stage. Keep them all to one side of the job, as shown to the right. Once finished, clean and store the tools.
→ Take care when handling, packing, or storing power tools. Blades fitted to power tools can lose their edges when they come into contact with hard surfaces such as metal or concrete. Storing the power tool in its case or on a storage rack prevents the blades from coming into contact with each other and dulling (losing their cutting edge). Replace dull or damaged blades.
→ Wind the power cords around the power tool to prevent kinking. If the power tool is battery powered place the battery on charge once the task has been completed.
→ Putting power tools away as soon as you’ve finished using them is also good practice because a cluttered area can be unsafe. It is too easy to trip over or knock over tools left lying around.
→ Always store power tools in a dry place. Periodically rub metal components down with light machine oil to prevent rust.
Note: It is important to clean tools immediately after working with materials that harden, such as concrete or resin. It is very difficult to remove these materials once they have dried.
Power tools 24350 9

Plan and set up a secure working environment.
→ When working with machining equipment, keep all work being machined securely clamped to a stable platform.
→ Keeping both hands on the power tool when using it will provide greater control.
→ Ensure that there is enough light and maintain good housekeeping practices, such as tidying as you go.
Concentrate on the job
→ A brief moment of not paying attention can cause damage to equipment and materials and serious injury to yourself or others.
→ Keep your mind focused on the job.
→ Do not muck around while you’re using power tools or distract anyone else using one.
→ Know what is required of you and do it to the best of your ability.
Avoid accidental starting
→ Check that the trigger or switch is in the off position before plugging the tool in.
→ Always disconnect the tool from the power source before making any adjustments.
→ Remove all adjusting tools (such as chuck keys) before reconnecting to the power source.
Wear the correct safety equipment
→ Wear the correct eye protection and use safety shields. Flying particles, chips of wood, splinters, and chipped or broken cutter heads can all cause major damage to eyes.
→ Always wear the appropriate hearing protection. Power tools often produce a lot of noise.
→ Protect your feet. Wear safety boots or at least shoes with non-slip soles.
→ Wear correct breathing protection to guard against fumes, vapours and dust.
→ Wear overalls to protect your clothing and body from dust and dirt.
24350 Power tools10

Classification
Use the tools correctly
→ When using power tools to cut materials, let the power tool build up to full speed before commencing the cut.
→ Do not force the tool. Let it work at its correct rate to ensure quality and safety.
→ Keep tools clean and cutting edges sharp.
→ Check power cords and plugs for cracks or damage.
→ Keep power leads out of the line of cut.
→ Position yourself so that you have a comfortable, stable and secure stance and can see what you are cutting.
→ Keep out of the line of cut by standing to the side of saw blades, grinding wheels and cutting edges, and behind drills to avoid chips and flying objects.
→ Anticipate binding, kickback or other circumstances that may cause the tool to twist or buck violently in your grip.
→ If the tool starts to smoke, turn it off and disconnect it immediately from the power source.
Caution:
Do not overreach or allow yourself to become unbalanced or in an awkward position.
Power tools 24350 11

Power tool hazards and controlsEvery power tool has its own hazard, and every hazard is able to be controlled. Be aware of the hazard and use the appropriate control. An example of how to do this is below.
Before I use a jigsaw, I think about the hazards and make sure I can control each hazard.
1. I think about what could/might happen.
2. I take action to eliminate or reduce the likelihood of it happening
HAZARD POTENTIAL HARM CONTROL(S)
Blade breaking or bending while using the tool.
Damage to eyes from broken blade. Secure work being cut. Ensure there is sufficient depth beneath the work to enable the blade to fully extend.
Hold the saw firmly in position with the blade slightly away from the face of the work before switching on.
Wait until the blade reaches full speed before starting to cut.
Do not force the saw when completing the cut.
Ease the pressure off the blade towards the end of the cut in order to remain in control when the blade exists the material.
Wear safety glasses.
Not using it as trained to.
Cutting fingers/hands (or other body part) by slipping.
Use a straight edge to guide a cut. The straight edge should be clamped into position.
Material being cut not secured in place.
Cutting hand/fingers (or other body part) as a result of the material moving.
Secure the work in a vice or with cramps.
Using blunt or incorrect blades.
Excessive force required to complete the task, which could lead to slipping and resulting hand/finger injury.
Ensure the correct blade is fitted and in good condition
Off-cuts Injury Wear at least covered footwear, ear muffs, and safety glasses.
24350 Power tools12

Classification
Power tools can be classified according to their purpose. Some power tools will be used across a wide variety of projects. Others are specialist tools used for one or very few tasks, such as a pneumatic hammer for breaking concrete.
DRILLING GRINDING/ SHARPENING
SAWS SANDERS
General purpose drill
Impact driver
Hammer drill
Medium duty drill
Heavy duty drill
Angle drill
Post hole borer (petrol)
Bench grinder
Motorised whetstone
Handheld grinder
Drill bit sharpener
Reciprocating saw (sabre saw)
Portable circular saw (wood, metal, plastics)
Rail saw
Biscuit (plate) jointer
Jigsaw
Belt sander
Disc sander/polisher
Dual action (inline & orbital) finishing sander
Palm finishing sander
OTHER PAINTING & DECORATING
PAVING /CONCRETE TILING
Power planer
Plunge router
Trimmer router
Multifunction tool (Multi tool)
Nail gun
Water blaster
Spray guns
Heat guns
Pneumatic hammer
Concrete cutter
Groove cutter or edger
Plate compactor
Vibrator
Concrete mixer
Wet portable bench saw
Wet circular saw
There are many other trades in the building and construction industry, all of which have their own specialist power tools. Your teacher/tutor will introduce you to these and teach you how to use them if your project relates to one of them instead of those covered in this resource.
BCATS trades are listed below, most of which have specialities within them:
Architectural aluminium joinery Brick and block laying
Carpentry Concrete
Exterior plastering Flooring
Frame and truss fabrication Glass and glazing
Interior systems Joinery
Kitchen and bathroom design Painting and decorating
Stonemasonry Tiling
Power tools 24350 13

Power sources
Most portable power tools that you will use will be powered by:
→ 230/240 Volt, AC power which comes from the mains outlets.
→ Rechargeable batteries, e.g. cordless power tools.
→ Compressed air, which is usually run off air compressors, although some tools (such as nail guns) use CO2 gas cartridges.
Leads and extension leadsAlways use an appropriate electrical safety device, such as a residual current device (RCD) or an isolating transformer, when using tools with power leads outdoors or in damp conditions.
Make sure the RCD device is plugged directly into the power socket and power cords are positioned so they will not be run over or get damp.
Test the RCD device before using electrical equipment.
Double insulation: Almost all modern power tools are double insulated. This means that they have two types of insulation between the power and the operator.
Never stand in water or allow electrical leads to lie in it even when an electrical safety device is being used.
24350 Power tools14
Wall socket RCD Multi-socket RCD
The symbol for double insulation

Power sources
Protect your leads from heat, flame, oils, sharp edges, water and abrasive surfaces. Special care should be taken to prevent damage to an extension lead. Exposed wiring is extremely dangerous.
→ Always uncoil extension leads to prevent heat build-up.
→ It is a good idea to join leads together at their plugs with a simple loose knot. Ensure that the joint is supported off the ground.
→ Never carry tools around by their lead.
Extension leads are available in light or heavy weights.
→ Light-duty leads are useful for small drills and lights. Using a light-duty lead with a larger tool will result in a loss of power and excess heating of the lead which could cause a short circuit or fire.
→ Heavy-duty leads are used for larger tools requiring a greater flow of electricity. Also use a heavy-duty lead when a long extension cord is required.
Note: While double insulation may provide protection from faults in the portable power tool, you must still be careful because extension leads are NOT double insulated:
Cordless toolsCordless power tools are often more convenient to use because they are not limited by the availability and location of a power source. However, they can only be operated for a limited time before the batteries must be recharged.
→ Heavy-duty work requires more frequent recharging than light-duty work.
→ Do not overwork the cordless tool.
→ As the energy is drained from the batteries they are less able to provide the required torque necessary to operate the motor.
→ As soon as you detect a loss in power, remove the battery for recharging. Most trades-people have spare batteries.
Handy tip: If a machine overheats, remove the load, ensure that all air vents are clear of blockages, and run it at full speed for a short time so the fan can force air through to cool it.
Power tools 24350 15

Power sources
Pneumatic toolsPneumatic tools are powered by air that's typically delivered from an air compressor. The air is sent through a pressure regulator that's set to the required pressure for operation of the tool. Pulling the trigger on the tool sends the air into the motor and causes the tool to begin work.
→ Always wear protective goggles when using air tools.
→ Never direct compressed air at any part of the human body. The blast can penetrate the body, particularly if directed at cuts or abrasions. This can cause an air embolism in the blood stream, which is often fatal. Eyes can be damaged or blown out and ear drums ruptured.
→ Disconnect the airline before making any adjustment to the power tool.
→ Always report any damaged hoses, tools or fittings to your teacher/tutor immediately. Do not use them again until they are properly repaired or replaced.
24350 Power tools16
Portable electric drills
Portable electric drills are among the most versatile of all power tools. They are available in a wide range of sizes and power ratings.
They can be used for drilling holes in most materials including wood, plastic, steel, fibreglass, and concrete. Attachments can be added to allow for tasks such as sanding, grinding, and polishing.
They can be powered by 240V mains, batteries, or pneumatically.
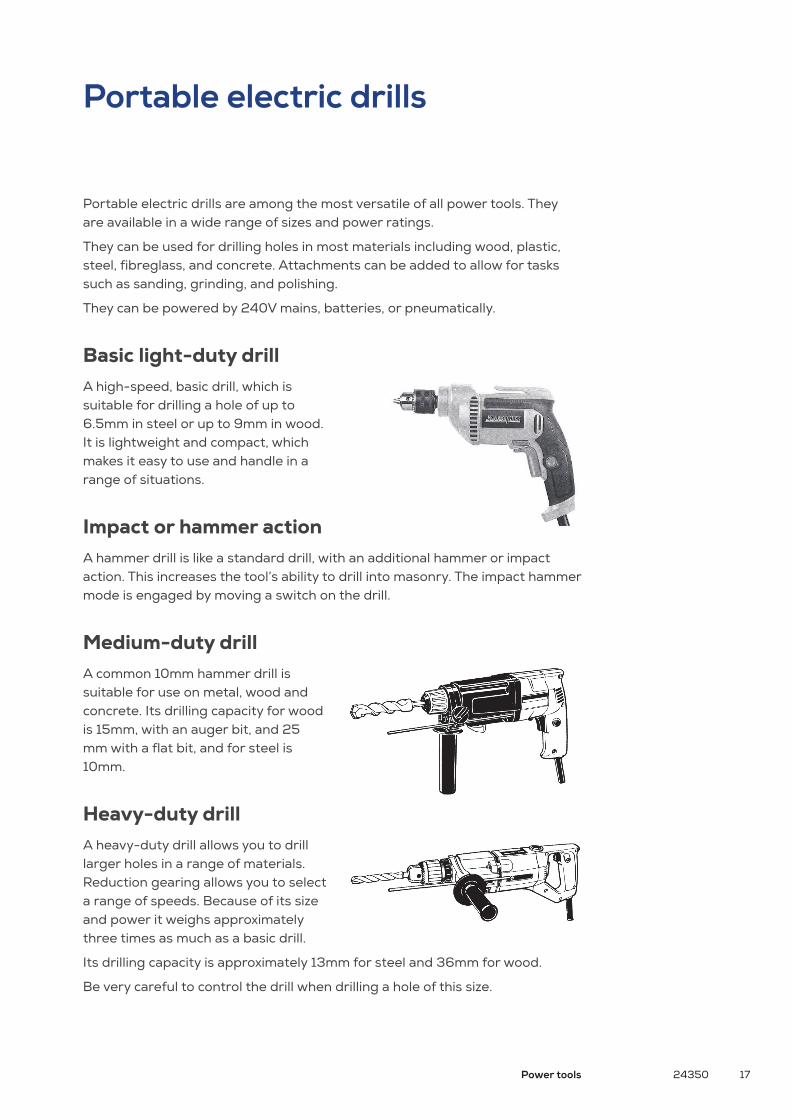
Basic light-duty drill A high-speed, basic drill, which is suitable for drilling a hole of up to 6.5mm in steel or up to 9mm in wood. It is lightweight and compact, which makes it easy to use and handle in a range of situations.
Impact or hammer actionA hammer drill is like a standard drill, with an additional hammer or impact action. This increases the tool’s ability to drill into masonry. The impact hammer mode is engaged by moving a switch on the drill.
Medium-duty drillA common 10mm hammer drill is suitable for use on metal, wood and concrete. Its drilling capacity for wood is 15mm, with an auger bit, and 25 mm with a flat bit, and for steel is 10mm.
Heavy-duty drillA heavy-duty drill allows you to drill larger holes in a range of materials. Reduction gearing allows you to select a range of speeds. Because of its size and power it weighs approximately three times as much as a basic drill.
Its drilling capacity is approximately 13mm for steel and 36mm for wood.
Be very careful to control the drill when drilling a hole of this size.
Power tools 24350 17
Using drills
> Smaller objects and materials should be securely held to a stable platform by a vice or clamp.
> Place a piece of scrap timber under the work when you need to drill right through it.
> Allow the drill to work for you. Do not place too much pressure on the drill.
> When a bit slows up or begins to stall, this is a sign that it may need to be sharpened.
> If debris builds up in the flutes of the drill bit, and can’t get out of the hole, the bit will bind. The resulting heat that is generated will cause overheating and burning of the bit. The torque of the drill could also snap the bit off.
> When you are drilling a deep hole, pull the drill out of the hole every so often to clear the bit of debris.
> A blunt drill bit will make very slow progress and the top may turn blue in colour from overheating.
> Apply less pressure when nearing completion of the hole to assist a smooth clean exit of the drill bit. Be prepared for the drill bit to bite as it exits hard material.
> When using heavier drills, don’t grip your thumb around the handle. This will help you let go if the drill if the bit grips and so help prevent injury to your wrist.
Portable electric drills
24350 Power tools18

Cordless power tools
There is a variety of power tools for both home and industrial use. Most traditional power tools (such as drills, jigsaws, electric planer, orbital sanders, and routers) are available as cordless power tools.
The main benefit of using cordless power tools is that a mains power supply is not required. When working outside this removes the risk of running power cords over wet or damp ground. It also removes the risk of power cords being accidently cut.
The discharge rate varies depending on the battery as well as the use of the power tool. Follow manufacturer’s instructions for correct care and for charging the battery to ensure the longest possible life.
A good rule to follow is to charge the battery after use. This ensures the power tool is ready for anybody to use it without having to wait. Having a fully charged spare battery available is useful where power tools are used frequently.
Cordless drillMost cordless drills will not produce the same extreme torque as a cord type drill and will eventually run out of power when the battery discharges (goes flat).
For light-duty work, the average drill can operate continuously for about a half an hour. Some heavy-duty cordless drills may operate longer on a single charge. Remember to follow manufacturer’s instructions for correct care and charging of the battery to ensure the longest possible life.
Power tools 24350 19
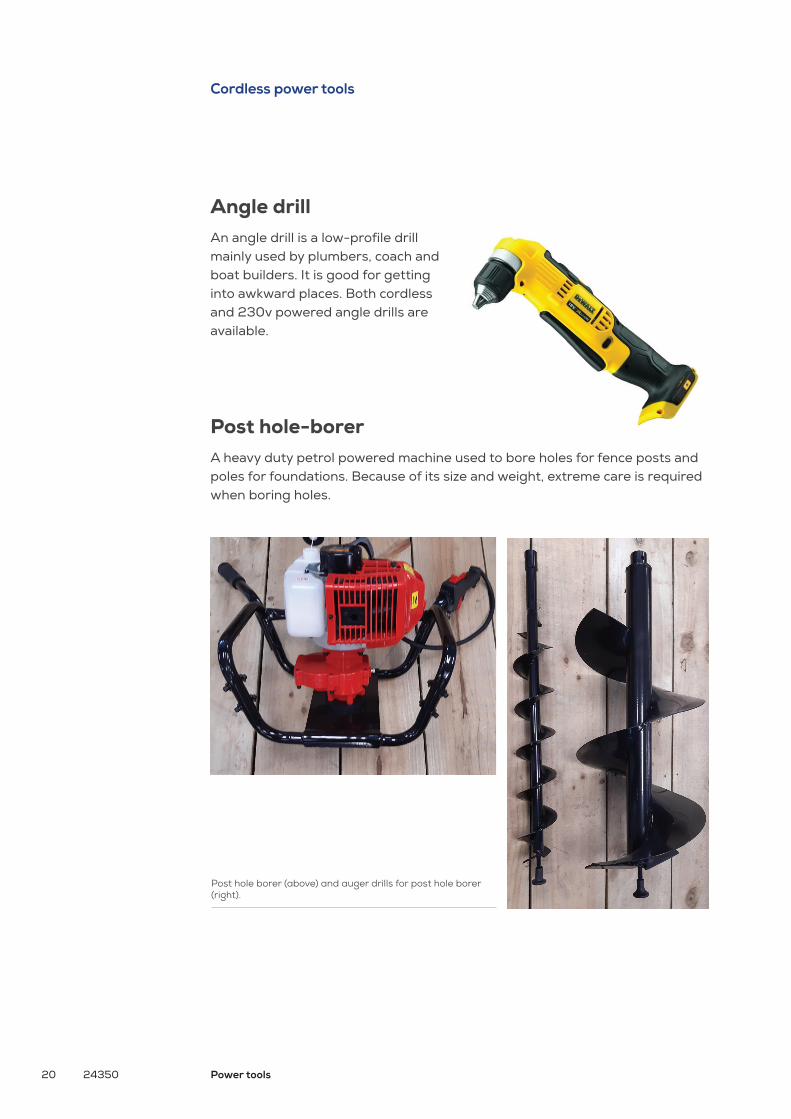
Post hole borer (above) and auger drills for post hole borer (right).
Cordless power tools
Angle drillAn angle drill is a low-profile drill mainly used by plumbers, coach and boat builders. It is good for getting into awkward places. Both cordless and 230v powered angle drills are available.
Post hole-borerA heavy duty petrol powered machine used to bore holes for fence posts and poles for foundations. Because of its size and weight, extreme care is required when boring holes.
24350 Power tools20
Drill attachments
There is a wide range of attachments that can be used to convert a drill into a screwdriver, bench grinder, circular saw, hammer unit, jigsaw, orbital sander or lathe.
Most attachments can only be used for light-duty work and have limited effectiveness. The best and safest option is therefore to select and use the tools specifically designed for these jobs.
Drill bitsThe correct selection of drills is important for a quality job.
Wood – use twist bits, spade bits and power auger bits.
Metal – use high-speed twist drill bits.
Brick, concrete and masonry – use top-quality, high-impact carbide-tipped masonry bits.
The most commonly used drill bit is the high-speed parallel shank twist bit. It is an all-purpose drill bit constructed out of hardened tool steel, which can be used on materials such as cast iron, steel, steel forgings, sheet metals, plastics, aluminium and wood.
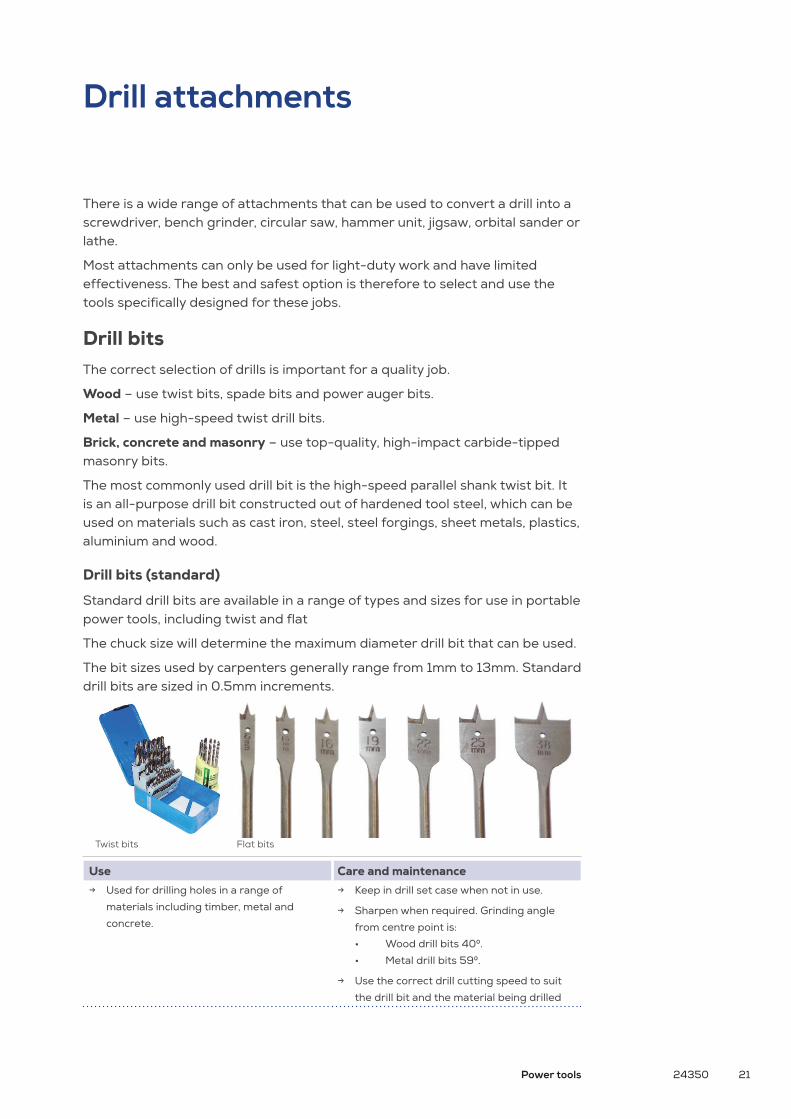
Drill bits (standard)
Standard drill bits are available in a range of types and sizes for use in portable power tools, including twist and flat
The chuck size will determine the maximum diameter drill bit that can be used.
The bit sizes used by carpenters generally range from 1mm to 13mm. Standard drill bits are sized in 0.5mm increments.
Use Care and maintenance → Used for drilling holes in a range of
materials including timber, metal and
concrete.
→ Keep in drill set case when not in use.
→ Sharpen when required. Grinding angle
from centre point is:
• Wood drill bits 400.
• Metal drill bits 590.
→ Use the correct drill cutting speed to suit
the drill bit and the material being drilled
Twist bits Flat bits
Power tools 24350 21

Drill attachments
Masonry bits
Masonry bits have ultra-hard tungsten carbide welded to the drill tips so they will cut through concrete, brick and ceramics.
Standard masonry drills should be used at low speed on soft masonry such as brick.
Higher-quality, high-impact masonry bits have larger tungsten tips suitable for faster speeds with hammer drills.
Note: When drilling masonry, be sure to use steady pressure at low speed. Take your time!
Spade or flat bits
Spade bits operate at high speeds and are excellent for boring large holes in wood.
The length of the spade helps the bit run true without any wobbling or drifting.
Spade bits are available in metric sizes from 6mm to 38mm as well as imperial sizes.
Drilling dowel joints in timber
A centre point (brad point or dowel drill bit) is used for drilling holes in timber, e.g. dowelling. The point will ensure accuracy when starting the hole.
Auger bits
Auger bits are available in a large range of sizes and lengths. The bit will run straight and true providing that the drill is held at 90 degrees to the surface being drilled. A slow-speed drill with reversing features is most suited for this bit.
Hole saws
Hole saws are used as well as spade bits for drilling holes larger than 13mm.
The common sizes range up to 64mm in diameter. Use a slow speed.
24350 Power tools22

Power screwdrivers and impact drivers
Power screwdrivers, impact drivers, and specialised bits are available for a range of tasks, including driving screws into drywall materials, fast self-drilling screws for roofing materials and heavy-duty metal applications. To avoid injury when using a portable power screwdriver it is important that only variable speed is used.
Wear ears muffs and safety glasses when using an impact driver.
Correct use
Select driver bits of the correct type and size for the screw. Take care that the driver bit is correctly fitted into the screw head slot before engaging the trigger.
Worn or incorrect driver bits can damage the head of the screw. The work surface can also be damaged if the bit jumps out of the screw slot.
When driving screws into walls, floors or in the vicinity of “live” electrical wires, avoid touching any metal parts of the power tool. Holding the screwdriver by the insulated surfaces will help prevent an electric shock should the screw hit a live wire. Do this even if you’ve first used a stud finder that can detect electrical currents.
Types of bits
Slotted insert and power bits
Pozidriv insert and power bits
Phillips insert and power bits
Square and Hex Recess power bits
Impact driver
Power tools 24350 23

Saws
JigsawsThe jigsaw is used for cutting internal and external curves in a variety of materials. Most saws come with a tilting base to allow for bevel and compound cuts.
By using the correct blade, you can cut wood, manufactured boards, plastics, fibreglass, aluminium and light steel.
The set of the tooth will have a significant effect on the quality of the cut. The number and type of teeth per 25mm will determine the blade most suited to the type of material. For example, large teeth will cut soft material quickly but leave a rough surface, while fine teeth with less set on the blade will give a smoother but slower cut.
Saw blade profiles
Suitable for aluminium, plastics and laminates
Suitable for timber Suitable for metal
Scroll cutting for wood, fibreboards and plastics
Plywood – hollow ground
OPERATING THE JIGSAW
> Check that the area below the intended cut is free of obstructions and that extension cords are well out of the way.
> Position the saw with the base plate firmly up against the material to be cut and the blade clear of the work.
> Start the saw and wait for the blade to reach full speed before making contact with the material to be cut. Apply gentle pressure.
> Guide the saw along the cutting path, applying gentle pressure while letting the blade do most of the work.
> Ease the pressure off the blade towards the end of the cut so that the saw will remain under control when the blade exits the material.
> Straight and circular guides are available to ensure accuracy for long, straight cuts and circular cuts.
> Ensure all work is secure before using the jigsaw.
CAUTION: Do not force the saw's speed or the blade may break
24350 Power tools24
Pallet secured with F-clamps before cutting

Saws
Reciprocating saw (sabre saw)The portable reciprocating (sabre) saw is a heavy-duty, powerful and versatile hand held saw which can be used to cut a wide range of materials. It is designed especially to cut spaces for doors and windows, scroll or make circle cuts in sheet materials, and cut through plastic, steel and pipes.
The cutting stroke is between 25mm and 30mm with the blade making over 2000 strokes per minute.
Blades come in lengths from 120mm to 375mm.
OPERATING A RECIPRICATING SAW
> Check that the area below the intended cut is free of obstructions and that extension cords are well out of the way.
> Position the saw with the base plate firmly up against the material to be cut and the blade clear of the work.
> Start the saw and wait for the blade to reach full speed before making contact with the material to be cut. Apply gentle pressure.
> Guide the saw along the cutting path, applying gentle pressure while letting the blade do most of the work.
> Ease the pressure off the blade towards the end of the cut so that the saw will remain under control when the blade exits the material.
> Straight and circular guides are available to ensure accuracy for long, straight cuts and circular cuts.
> Ensure all work is secure before using the saw.
Power tools 24350 25

Saws
Portable circular sawPortable electric power saws are used extensively throughout the construction industry. They are very versatile, available in a range of sizes, and can be used to cut a wide variety of materials.
A portable circular saw consists of a circular saw blade geared to a motor with a handle and a non-locking trigger switch. They are either 240 Volts or battery powered.
A circular saw offers the power and precision to make long, straight ripping cuts and crosscutting cuts. It can also be used for bevelling, rebating, grooving and trenching.
They are most commonly used to cut wood and timber-based manufactured board. With specialised blades, however, they can be used to cut a wide range of materials, including metal, plastic, fibreglass, fibre cement sheet, fibre plank, brick, and tile.
Circular saws are measured by the maximum blade diameter they can hold. A circular saw with a blade size of 185mm to 190mm can cut material up to approximately 70mm thick.
To reduce drag and produce a smoother cut on the top side ensure that the blade is cutting the timber at an acute angle. Do this by adjusting and setting the depth of the cut so that only one tooth is exposed on the other side of the material.
One of the biggest hazards when using circular saws is ‘kick-back’. This is caused when the material being cut binds on the back of the blade causing the saw to kick up and backwards. This is why you always keep body parts, leads and other items away from behind the blade.
24350 Power tools26

Saws
Safety requirements
All portable power saws must have these built-in safety features:
→ A spring-loaded self-closing retractable lower guard to cover the lower portion of the blade on both sides and to below the bottom of the teeth. Check that this guard works freely and efficiently, especially before commencing work. Never tie the guard back.
→ A fixed-top hood guard, deep enough to cover both sides of the blade to below the depth of the bottom of the saw teeth.
Using a portable circular saw
To obtain a fine edge cut when cutting, place the finished side of the material face down and mark out and cut from the back. Alternatively, to make a fine-edge cut on the finished side, place masking tape along the line of the proposed cut. This will help prevent splitting caused by the upward cut of the rotating blade.
→ Always ensure that the power cord is well clear of and behind the direction of the cut.
→ Use an edge guide or ripping fence for long straight cuts.
Circular saw blades – types and features
Most circular saws are sold with a tungsten-carbide blade, which is suitable for most work. However, to ensure the best cut, it is necessary to use the blade specifically designed for the task. The more teeth on the blade, the smoother the cut.
Rip saw blades
Chiselling action – very efficient along the grain,
Very rough across the grain.
Crosscut blades (cut off blades)
Slicing cut – smooth cut across the grain.
Very slow if used for ripping.
Power tools 24350 27

Saws
Combination blade
A combination of ripping and crosscut blades, it cuts along and across the grain. It has fewer teeth than the crosscut blade for faster cutting.
Tungsten carbide blades
Very hard tips to the blade; stays sharper longer.
It produces a very smooth cut and is especially suited for manufactured boards.
Plywood cutting blades
These have small, closely spaced teeth to give a finer, smoother cut and help to prevent damage to the surface laminates.
Metal cutting blades
Metal cutting blades are manufactured with large gaps between teeth. The blades have what is known as zero hook angles to produce clean cuts with minimal burrs. Metal cutting blades tend to last longer than abrasive blades.
Abrasive blades
These are made of abrasive particles bonded to a mesh.
The two main types are:
→ metal cutting abrasive blades
→ masonry blades.
When using abrasive blades, always cut in a straight line. Discs can shatter when twisted.
→ Feed the saw slowly. Allow the blade time to cut the material.
→ Discs wear down as they are used. If a disc is cracked or split, change it immediately.
→ The smaller the diameter of the disc, the less efficient it is for cutting.
24350 Power tools28
A Cambridge High School student and BCATS 2019 photo competition winner getting ready to use a circular saw on his Gateway placement.

Routers
The portable electric router consists of a high-speed electric motor that drives a spindle with a chuck (collet) attached to one end. The revolutions per minute (RPM) of the motor vary for different machines, from 9,000 RPM to 30,000 RPM. The motor speed of a portable electric router is very high when compared with most other portable power tools.
The router simplifies the task of making complex timber joints like dovetails, cutting decorative edging and rebates. It is also invaluable when trimming laminates for bench tops and tables.
The versatility of the router is provided by the wide range of bits and accessories.
The diameter of the cutter shaft and power of the motor determine the size of the router. Chuck sizes and cutter shank sizes are most commonly 6.5mm (1/4 inch) or 12.5mm (1/2 inch) for medium to heavy-duty work. Collets or sleeves are fitted to 6.5mm shanks to enable them to fit into the larger router.
Router bitsA router bit has a shank on one end and the cutting blade and flutes on the other. Some cutters have guides or a pilot bearing at the bottom of the cutting blade. This acts as a guide so edge work can be done.
High-speed steel (HSS)
Cheaper bits that are resin bonded so will not hold their cutting edge when used on hardwoods, particle board or MDF.
Tungsten carbide tipped router bits
Generally more expensive and better quality bits that remain sharper longer.
Power tools 24350 29

Routers
Laminate bit
A tungsten carbide bit for use on plastic laminates. The pilot bearing is set flush with the cutting blade to allow you to trim off surplus material.
Keep router bits clean by applying solvent or acetone with a coarse cloth. This removes the gummy build-up that tends to accumulate on the blades.
OPERATING A ROUTER
> Check that the router is in the “off” position and that the cord is removed from the power point.
> Insert a bit all the way into the collet chuck, then withdraw it approximately 2mm to enable the collet to grip the parallel shank of the bit when tightened down.
> Securely tighten the chuck with the correct spanners.
> To remove the bit, simply reverse the installation procedure.
> When using smaller shank bits, first insert the appropriate collet sleeve into the chuck with the groove in the collet lining up with the corresponding grooves in the chuck. Then install the bit.
> Adjust the depth of cut and ensure that the locking levers are firmly in place.
> Turn on the router slightly away from the work, make contact and move the router in an anti-clockwise direction (see diagram below) when routing on the outside edges.
> Wood has a tendency to split at the edges when across the grain. To minimise this, cut all the end grain cuts first, then finish with cuts along the grain to eliminate the loose ends.
> For an internal profile, move the router in a clockwise direction (from right to left).
> Grip the router firmly with both hands. The router has a powerful torque that can twist it out of a careless grip.
> Turn off the router and let it come to a complete stop before moving it away from your work.
Anti-clockwise Clockwise
24350 Power tools30

Routers
Router guides
Adjustable guide
An adjustable guide attached to the router may be used for straight cuts when chamfering or grooving parallel to the edge of the board.
Depending on the location and direction of the groove, clamp a straight piece of timber or metal guide to the job.
Trimmer guide
A collar that slips onto the base plate, over the cutter, to follow the curve of the work.
Template guide
The template guide is a sleeve through which the bit passes. It is fitted to the base of the router. The guides come in several sizes. The bit is always smaller than the ring bushing and allowance for this must be made when making your pattern.
Template guides are used with a template (pattern). This is a smooth-edged pattern of plywood or MDF. The template is fixed or cramped to your work and the template guide follows the pattern.
Power tools 24350 31
Using an adjustable guide Adjustable guide fitted to router

Power planers can do most jobs that a hand plane can do but in a fraction of the time and with a lot less effort.
Planers have one or more full-width blades set into opposite sides of a cutter head that revolves at 12000 to 16000 RPM.
Setting of the bladesTo ensure that the finished surface is smooth and even, the blades must be mounted so that the tips of the blades are absolutely level with and parallel to the surface of the rear base.
Power planer
24350 Power tools32
Shown right: To adjust the depth of cut, turn
the knob on the front of the planer.
Backshoe or rear base plate
In-feed plate
The Correct Setting Ensure that the tips of the blade are level with the rear base plate
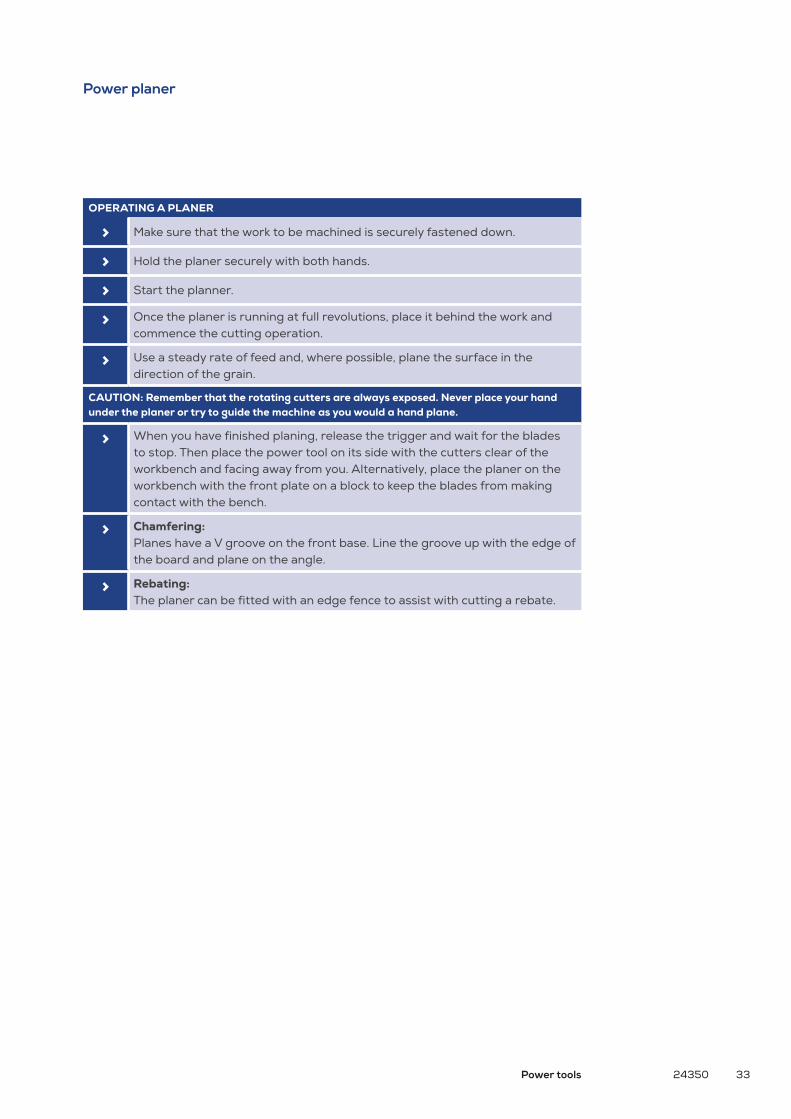
OPERATING A PLANER
> Make sure that the work to be machined is securely fastened down.
> Hold the planer securely with both hands.
> Start the planner.
> Once the planer is running at full revolutions, place it behind the work and commence the cutting operation.
> Use a steady rate of feed and, where possible, plane the surface in the direction of the grain.
CAUTION: Remember that the rotating cutters are always exposed. Never place your hand under the planer or try to guide the machine as you would a hand plane.
> When you have finished planing, release the trigger and wait for the blades to stop. Then place the power tool on its side with the cutters clear of the workbench and facing away from you. Alternatively, place the planer on the workbench with the front plate on a block to keep the blades from making contact with the bench.
> Chamfering: Planes have a V groove on the front base. Line the groove up with the edge of the board and plane on the angle.
> Rebating: The planer can be fitted with an edge fence to assist with cutting a rebate.
Power planer
Power tools 24350 33

Finishing sanders
A finishing, or orbital, sander is a lightweight power tool that quickly produces a smooth surface on materials such as wood, metal, fibreglass or paint. It is not designed for fast removal of material.
It is probably the easiest and safest of all power hand tools to use.
The finishing sander operates by moving the attached abrasive in a circular or in back and forth motions. Often, a single job will require sanding several times with rough, medium, and then fine abrasives. You can achieve a high polish finish on surfaces by then attaching a buffing cloth to the finishing sander’s pads.
SMALL FINISHING SANDER DUAL ACTION FINISHING SANDER
The palm sander is an efficient, lightweight machine that is easy to use and easily fits into hard to get at spots. This sander is often used to achieve a very smooth finish.
A medium-duty sander that features both in-line and orbital sanding strokes. The in-line strokes are used, with the grain, to produce a quality finish.
Dust is a health hazard that should be avoided whenever possible. Some sanders have bags to collect dust but the best method of dust control is to attach the sander to a vacuum dust-extraction system.
MaintenanceClean the sander regularly to ensure that dust has not built up in and around the vents and in between the base and the main body. Blowing the dust out with compressed air is effective.
Unusual noises may indicate that internal mechanical components are worn, damaged or loose. Report any unusual noises to your teacher/tutor.
24350 Power tools34

Belt sander
Belt sanders are capable of removing material at a faster rate than a finishing sander. Belt sanders use continuous sanding belts. These are available in a wide range of grits to suit various applications.
Fitting the beltThe rear roller drives the belt. The spring-loaded forward roller controls the tension and tracking of the belt.
When changing the belt, ensure that the overlap of the join is trailing. Most belts have an arrow printed on the inside of the belt to help with fitting.
Once the new belt has been fitted, check the tracking of the belt on the rollers by carefully holding the sander upside down on a firm surface.
To achieve perfect tracking, the angle of the front roller can be changed with the tracking adjustment knob. The belt will be tracking correctly when it runs evenly and flush with the outside edge of the base plate.
Belt sanders pull forwards when in use. Therefore, smaller items such as a section of timber must be secured before using the belt sander.
Hold the belt sander firmly with both hands and move it evenly across the surface of the work to get the best finish. Ensure that the belt is always sanding in the direction of the grain.
Power tools 24350 35

Disc based sanders/grinders
Disc sander/polisherDisc sanders can be used for rough sanding jobs and are ideal for the fast shaping of wood, fibreglass and for the removal of rust and paint. The speed of removal and quality of finish depend on the coarseness of the abrasive disc.
Disc sanders tend to leave scouring marks on the work. They are therefore not recommended for finishing projects that require a smooth, flat surface.
The sander can be converted into a polisher by attaching a wool buff to the disc.
Polishing and buffing involves only a very thin cutting of the surface material using an abrasive cutting compound. Polishing also includes buffing to produce a high sheen after the application of a material, such as wax.
Always keep the polisher moving. If it stays in one place the surface can be permanently damaged.
Portable disc grindersA portable disc grinder (angle grinder) is fitted with a reinforced vitrified resinoid grinding wheel mounted on a drive shaft.
Disc or angle grinders are used to grind steel and other hard materials. They may be used to remove burrs or for preparing an edge for welding.
These grinders operate at very high speeds so special care must be taken when using them. Always check that all guards are correctly set up to protect the operator and others from sparks and flying particles.
Operate the grinder with a two-handed grip at all times. Hold the angle grinder at a 150 angle to the work surface to perform the correct grinding operation.
Grinding discs are made to grind either metal or masonry. Keep all discs labelled to make identification easier.
With the appropriate cutting disc, the grinder can also be used to cut metal and ceramics. Make several passes along the cut removing a little bit of material with each pass. Do not attempt to cut the entire thickness of the material at once. Allow the disc grinder’s own weight to apply pressure to the job. It should never be necessary to force the tool.
Caution: Check all discs before use for cracks or damage. Discard any damaged discs. Your teacher/tutor can teach you how to break new discs in in a way your work won’t get damaged.
24350 Power tools36
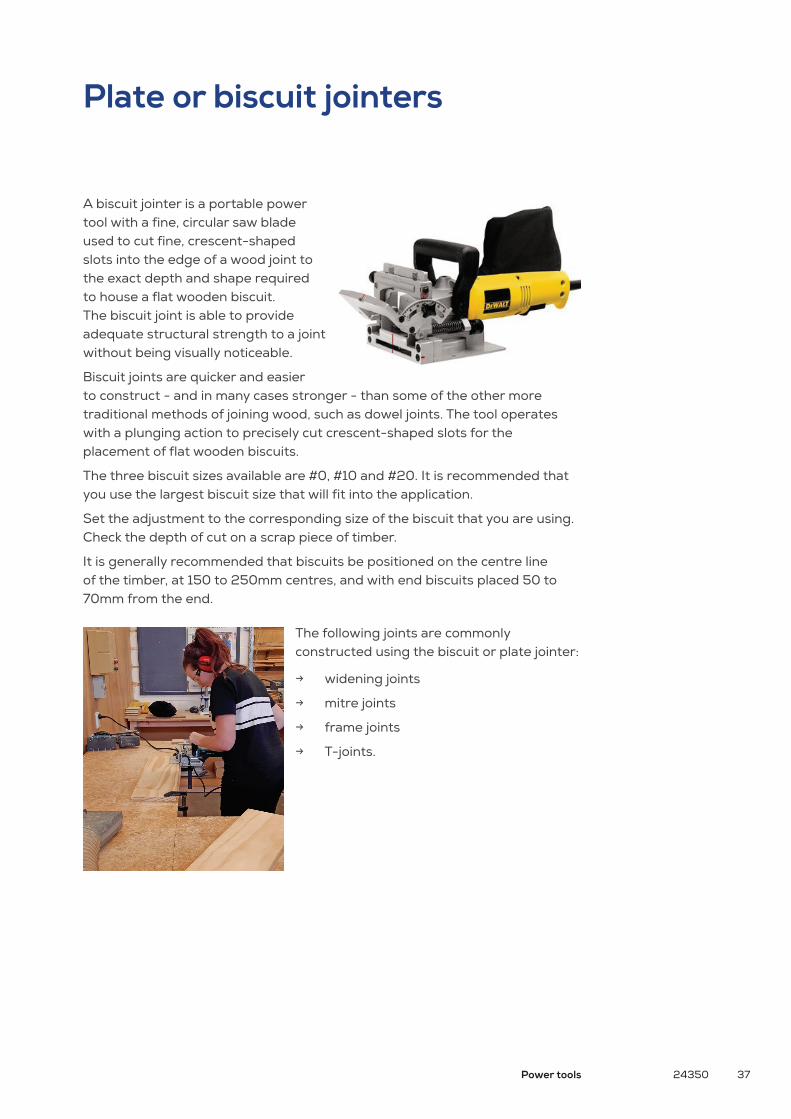
Plate or biscuit jointers
A biscuit jointer is a portable power tool with a fine, circular saw blade used to cut fine, crescent-shaped slots into the edge of a wood joint to the exact depth and shape required to house a flat wooden biscuit. The biscuit joint is able to provide adequate structural strength to a joint without being visually noticeable.
Biscuit joints are quicker and easier to construct - and in many cases stronger - than some of the other more traditional methods of joining wood, such as dowel joints. The tool operates with a plunging action to precisely cut crescent-shaped slots for the placement of flat wooden biscuits.
The three biscuit sizes available are #0, #10 and #20. It is recommended that you use the largest biscuit size that will fit into the application.
Set the adjustment to the corresponding size of the biscuit that you are using. Check the depth of cut on a scrap piece of timber.
It is generally recommended that biscuits be positioned on the centre line of the timber, at 150 to 250mm centres, and with end biscuits placed 50 to 70mm from the end.
The following joints are commonly constructed using the biscuit or plate jointer:
→ widening joints
→ mitre joints
→ frame joints
→ T-joints.
Power tools 24350 37

Nail gun
Nail guns can sink thousands of nails a day with excellent accuracy. They are used when a large number of nails are required, such as when framing a building. In these situations they have replaced hammers as the tool of choice in the construction industry.
Some models are useful in heavy-duty, high-volume applications, while others work well for small jobs.
→ Framing nailers handle large projects, such as building decks, constructing room additions or framing houses.
→ Finish nailer guns are lighter than the typical framing nailer guns and work well for assembling furniture and installing cabinets, trim and molding.
→ Staplers, tackers and brad nailers are compact and suited for precision work. They require specialized nails.
→ Roofing nailers are designed for applying roof shingles.
→ Flooring nailers speed up the installation of hardwood flooring.
→ Palm nailers are small, handheld tools that can drive nails in tight spaces. They don't have onboard nail storage, so you have to reload them after driving each nail.
Nail guns can be driven by compressed air, gas, or battery power.
Compressed air-powered, or pneumatic, nail guns are connected by a hose to an air compressor. A pneumatic nailer can be powerful and capable of handling heavy-duty tasks. A disadvantage is that the compressor’s air hose limits mobility on site. In addition, when too far away to run electrical leads to the air compressor, a generator needs to be used.
Cordless, fuel-driven nailers use gas combustion to drive nails. Fuel is injected from a disposable gas cartridge that combusts in a chamber to create driving force. A battery provides the electric charge to ignite the fuel. No cords or hoses are necessary, giving this type of nailer excellent mobility. A fuel-
24350 Power tools38
Nail gun nails - remove from cartridge when nail gun not in use

Nail gun
driven nailer can be powerful enough for heavy-duty jobs, capable of driving large fasteners into hard materials.
A battery-powered nail gun has a quick startup time, but doesn't have as much driving power as a pneumatic nail gun. They are also usually heavier than other options and so are best for smaller jobs.
Using a nail gunNail guns have the potential to cause serious injury. It is essential that you check what is known as the ‘line of vision’ before firing the gun. This means checking to see that no part of your body or another person is in front of the nail gun.
OPERATING A NAIL GUN
> Inspect the nail gun and repair or replace damaged parts before use.
> Check the line of vision is clear before firing the gun.
> Use clamps when you need to secure work pieces.
> Don't use a nail gun near flammable gases or liquids.
> Keep your hands, feet and other body parts behind the gun at all times when operating.
> Never point the tool at a person or an animal.
> Keep others away when operating a nail gun. Stop using it immediately if anyone approaches your line of vision.
> Disconnect the tool from the air compressor or power supply before performing maintenance, making adjustments or attempting to clear a jam.
> Remove nails from the cartridge when not in use.
Power tools 24350 39
Body behind the nail gun, line of vision checked.

Painting and decorating
Examples in this handbook of power tools used in painting and decorating are the water-blaster, heat gun, and spray gun. Electric sanders and extraction vacuum cleaners are also standard power tools but are not included here because they’re also used by other trades.
Water blastersWater blasters can be very useful as part of the paint preparation process, helping to clean off dirt, grime and salt. Water blasting will not kill moss and mould, however. These need to be treated with a moss and mould killer before water blasting.
Water blasting is generally best for firmer surfaces such as concrete and steel. Ensure you use the appropriate pressure for the surface you are working on.
As with all tools, do not use water blasters unless you have been properly trained in their various uses.
The water pressure of a water blaster can vary dramatically and they can cause significant damage, such as broken windows and lights, if used inappropriately. Timber can be damaged by water blasters and water can be forced up under weatherboards.
OPERATING A WATER BLASTER
> Be alert when blasting and watch for hazards. Water blasting will result in working areas becoming wet and slippery very quickly, making it very easy for someone to slip and injure themselves.
> Do not use a water blaster from a ladder. Use scaffolding instead.
> Before starting the motor, pull the trigger to release any built-up pressure. Always release the water pressure in the line when the motor is switched off. This reduces the risk of being pushed back by the stop/start motion.
> Never point the gun or wand at anyone as this can result in injury or death.
24350 Power tools40

Heat gunsHeat guns can help with stripping old paint and lacquer by softening it enough to be scraped off with a scraper.
They consist of an electric motor and an element that heats the air drawn in to produce a stream of air that is hot enough to soften the paint film.
Both electric and gas heat guns are available. The thermostat allows an adjustment in the hot air temperature in a similar way to a hair dryer except more powerful.
Heat guns operate between 100 and 600 degrees. Therefore, extreme care must be taken when using a heat gun.
Advantages of using a heat gun are that:
→ it does not heat lead paint enough to produce toxic gases
→ there is less danger of charring the timber than if a blowtorch was used.
A disadvantage is that it can be much slower when removing large areas of paint.
Spray gunsSpray painting allows surfaces to be painted quickly and gives a high quality, consistent finish. Care must be taken to not overspray when using a spray gun.
In a workshop situation, spray painting is best done in a properly equipped spray booth. They confine any spray mist to the booth and are ventilated to remove toxins from the air. A totally enclosed booth has the advantage of being able to keep dust out and can be heated to speed up dry times.
There are three main types of spraying systems:
→ Compressed air
→ Airless
→ HVLP (high volume low pressure
Each of these 3 types of spray systems are summarisede in the following pages.
Painting and decorating
Power tools 24350 41

Painting and decorating
COMPRESSED AIR
Compressed air systems project the paint out of the tip using compressed air, creating an even and smooth finish.
When using a compressed air paint sprayer it is essential to wear goggles and a respirator mask. Overalls and boot covers should also be worn.
AIRLESS
Airless spray doesn’t use compressed air to atomise the paint. Instead, paint is drawn from a supply container into a pump, which pressurises the paint. The paint is forced through a hose to a small hole in a spray gun tip, atomizing the fluid as it leaves the gun.
This is similar to a garden hose that atomises water by forcing it through the nozzle under pressure. If there is no nozzle attachment on the hose, water comes out as a solid stream of water. If a nozzle is fitted, the water has a much smaller hole to pass through, causing the stream of water to tear itself apart into fine spray droplets.
There are a variety of tip options to select from for wood stain, varnish, lacquer, and more-viscous liquids such as latex paints.
The advantages of airless spray are:
→ Reduced overspray and bounce-back. More than 75% of the paint gets to, and stays on, the object being painted.
→ A level paint surface and a consistent finish thickness, which gives improved coverage.
→ Paint is pushed into recesses and corners, providing better coverage.
→ Thicker paint can be more readily sprayed without adding thinner.
24350 Power tools42
Compressed air gun
Airless gun and sprayer
Painting and decorating
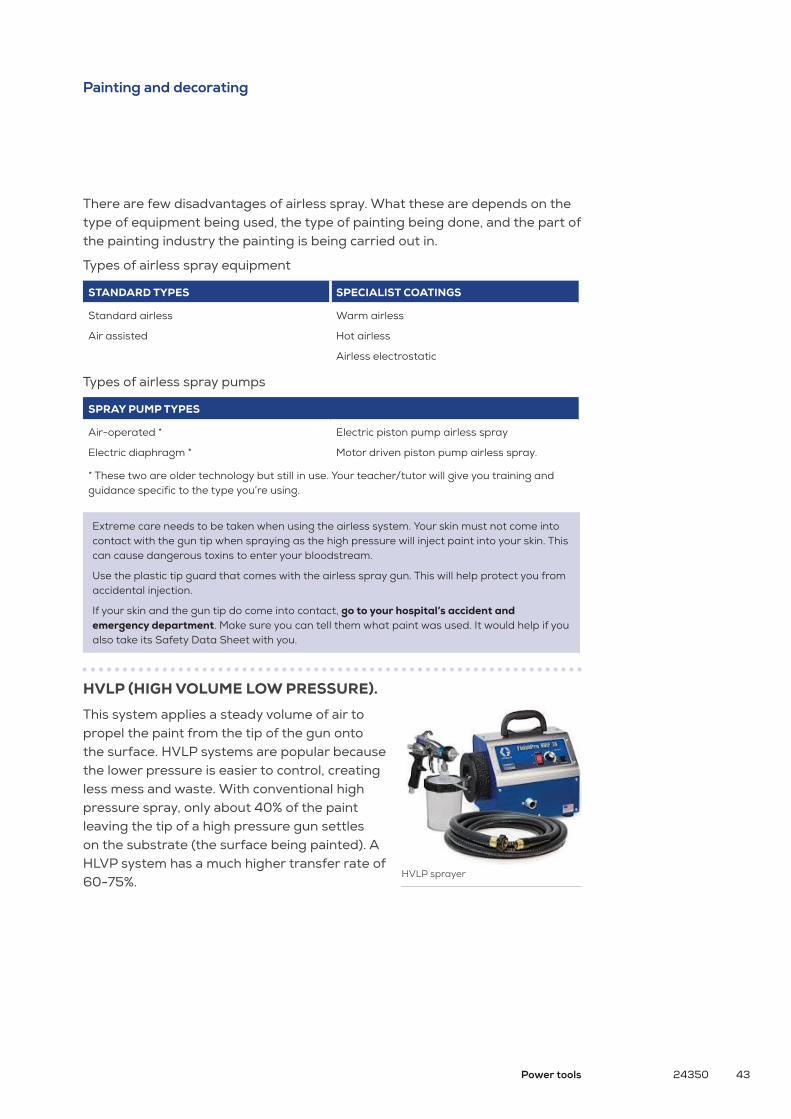
HVLP (HIGH VOLUME LOW PRESSURE).
This system applies a steady volume of air to propel the paint from the tip of the gun onto the surface. HVLP systems are popular because the lower pressure is easier to control, creating less mess and waste. With conventional high pressure spray, only about 40% of the paint leaving the tip of a high pressure gun settles on the substrate (the surface being painted). A HLVP system has a much higher transfer rate of 60-75%.
There are few disadvantages of airless spray. What these are depends on the type of equipment being used, the type of painting being done, and the part of the painting industry the painting is being carried out in.
Types of airless spray equipment
STANDARD TYPES SPECIALIST COATINGS
Standard airless
Air assisted
Warm airless
Hot airless
Airless electrostatic
Types of airless spray pumps
SPRAY PUMP TYPES
Air-operated *
Electric diaphragm *
Electric piston pump airless spray
Motor driven piston pump airless spray.
* These two are older technology but still in use. Your teacher/tutor will give you training and guidance specific to the type you’re using.
Extreme care needs to be taken when using the airless system. Your skin must not come into contact with the gun tip when spraying as the high pressure will inject paint into your skin. This can cause dangerous toxins to enter your bloodstream.
Use the plastic tip guard that comes with the airless spray gun. This will help protect you from accidental injection.
If your skin and the gun tip do come into contact, go to your hospital’s accident and emergency department. Make sure you can tell them what paint was used. It would help if you also take its Safety Data Sheet with you.
Power tools 24350 43
HVLP sprayer
Painting and decorating
Cleaning
All parts of the spray gun must be cleaned thoroughly after use. Any paint not cleaned away will dry and clog up the spray gun. Allow plenty of time for cleaning.
Safety: You must wear gloves and do the cleaning in a well-ventilated area.
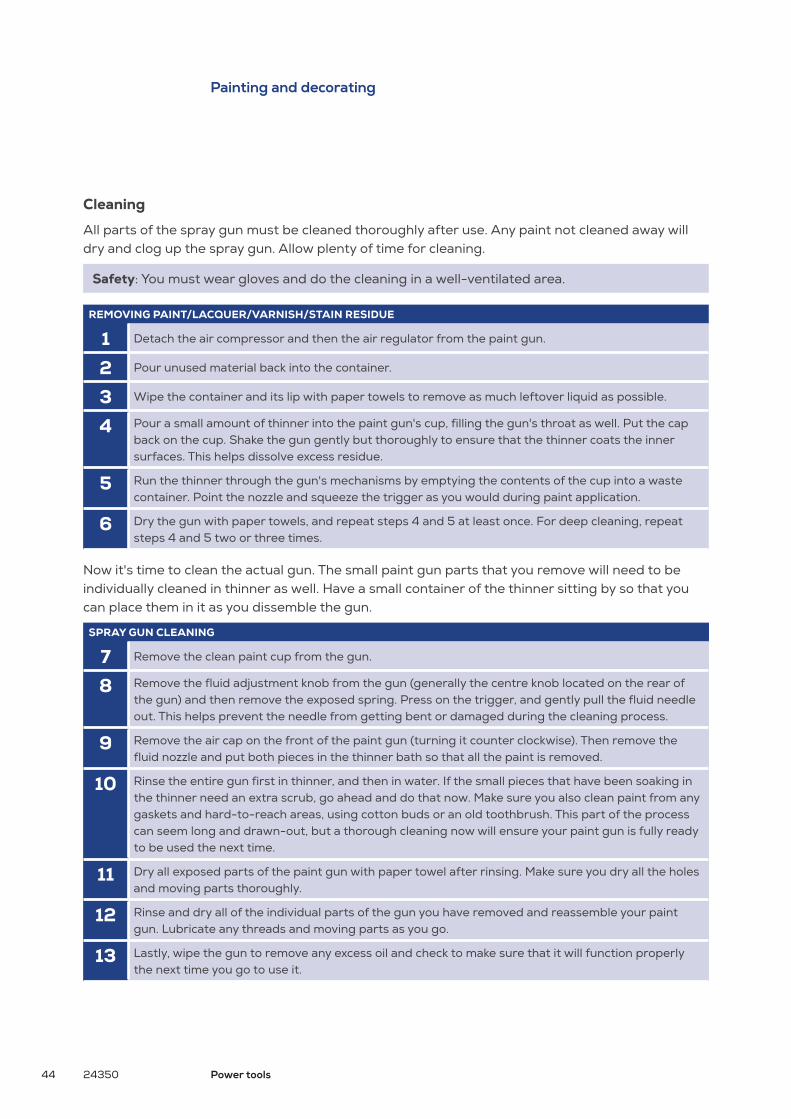
REMOVING PAINT/LACQUER/VARNISH/STAIN RESIDUE
1 Detach the air compressor and then the air regulator from the paint gun.
2 Pour unused material back into the container.
3 Wipe the container and its lip with paper towels to remove as much leftover liquid as possible.
4 Pour a small amount of thinner into the paint gun's cup, filling the gun's throat as well. Put the cap back on the cup. Shake the gun gently but thoroughly to ensure that the thinner coats the inner surfaces. This helps dissolve excess residue.
5 Run the thinner through the gun's mechanisms by emptying the contents of the cup into a waste container. Point the nozzle and squeeze the trigger as you would during paint application.
6 Dry the gun with paper towels, and repeat steps 4 and 5 at least once. For deep cleaning, repeat steps 4 and 5 two or three times.
Now it's time to clean the actual gun. The small paint gun parts that you remove will need to be individually cleaned in thinner as well. Have a small container of the thinner sitting by so that you can place them in it as you dissemble the gun.
SPRAY GUN CLEANING
7 Remove the clean paint cup from the gun.
8 Remove the fluid adjustment knob from the gun (generally the centre knob located on the rear of the gun) and then remove the exposed spring. Press on the trigger, and gently pull the fluid needle out. This helps prevent the needle from getting bent or damaged during the cleaning process.
9 Remove the air cap on the front of the paint gun (turning it counter clockwise). Then remove the fluid nozzle and put both pieces in the thinner bath so that all the paint is removed.
10 Rinse the entire gun first in thinner, and then in water. If the small pieces that have been soaking in the thinner need an extra scrub, go ahead and do that now. Make sure you also clean paint from any gaskets and hard-to-reach areas, using cotton buds or an old toothbrush. This part of the process can seem long and drawn-out, but a thorough cleaning now will ensure your paint gun is fully ready to be used the next time.
11 Dry all exposed parts of the paint gun with paper towel after rinsing. Make sure you dry all the holes and moving parts thoroughly.
12 Rinse and dry all of the individual parts of the gun you have removed and reassemble your paint gun. Lubricate any threads and moving parts as you go.
13 Lastly, wipe the gun to remove any excess oil and check to make sure that it will function properly the next time you go to use it.
24350 Power tools44
Concreting
The main power tools used in concreting are:
→ concrete mixer
→ pneumatic hammer
→ concrete cutter
→ plate compactor
→ concrete vibrator
→ groove cutter or edger.
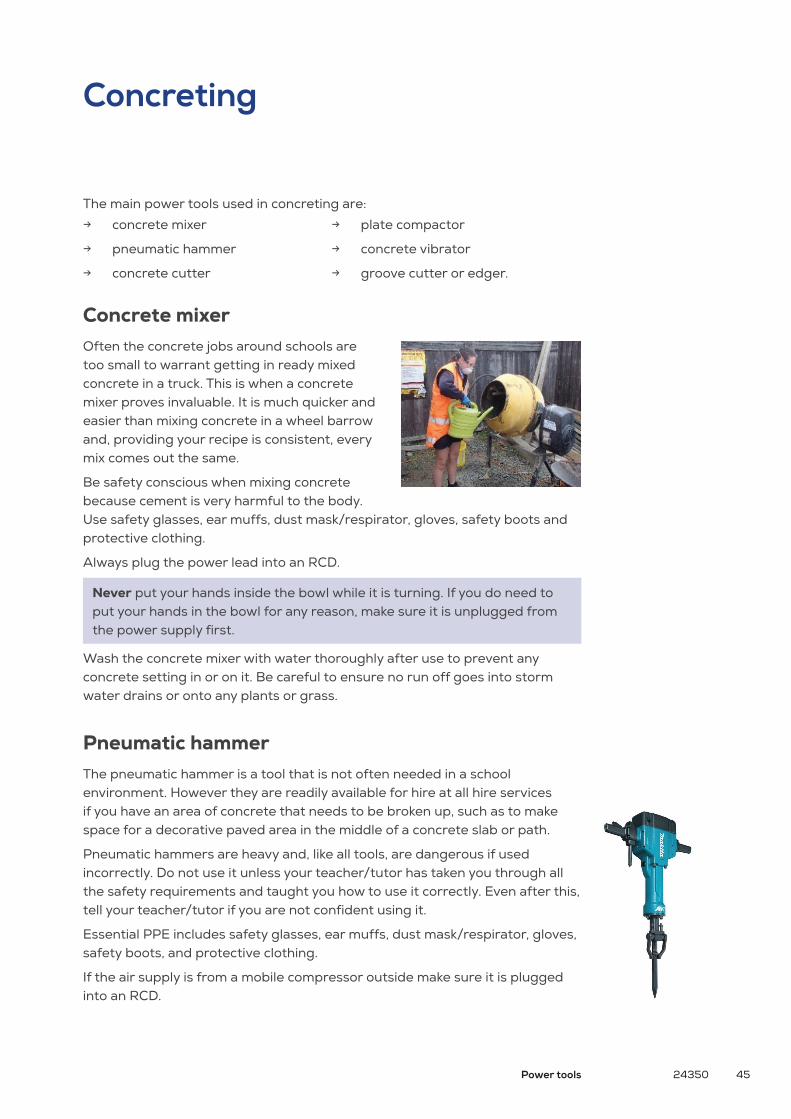
Concrete mixer Often the concrete jobs around schools are too small to warrant getting in ready mixed concrete in a truck. This is when a concrete mixer proves invaluable. It is much quicker and easier than mixing concrete in a wheel barrow and, providing your recipe is consistent, every mix comes out the same.
Be safety conscious when mixing concrete because cement is very harmful to the body. Use safety glasses, ear muffs, dust mask/respirator, gloves, safety boots and protective clothing.
Always plug the power lead into an RCD.
Never put your hands inside the bowl while it is turning. If you do need to put your hands in the bowl for any reason, make sure it is unplugged from the power supply first.
Wash the concrete mixer with water thoroughly after use to prevent any concrete setting in or on it. Be careful to ensure no run off goes into storm water drains or onto any plants or grass.
Pneumatic hammerThe pneumatic hammer is a tool that is not often needed in a school environment. However they are readily available for hire at all hire services if you have an area of concrete that needs to be broken up, such as to make space for a decorative paved area in the middle of a concrete slab or path.
Pneumatic hammers are heavy and, like all tools, are dangerous if used incorrectly. Do not use it unless your teacher/tutor has taken you through all the safety requirements and taught you how to use it correctly. Even after this, tell your teacher/tutor if you are not confident using it.
Essential PPE includes safety glasses, ear muffs, dust mask/respirator, gloves, safety boots, and protective clothing.
If the air supply is from a mobile compressor outside make sure it is plugged into an RCD.
Power tools 24350 45

Concrete cutterOften it is necessary to break up existing concrete before a new path or driveway may be laid. The two main power tools to complete this task are the concrete cutter and jack hammer.
The concrete cutter will be used first in order make a clean cut at the ends of the section to be removed. A hose keeps the blade
wet at all times, with the water supply attaching to the hose in the tool. A jack hammer is required when breaking up concrete over 75mm thick.
Safety: Cutting concrete creates a lot of dust. Ensure a dust or respirator is used. Ear muffs, overalls, safety gloves, and steel cap boots should be worn.
Plate compactorA plate compactor is a large motorised tool that is used to compact granular surfaces, such as hardfill or sand, to create a dense, tightly packed base for concrete to be laid over. They are mostly used to compact smaller areas of hardfill where there is poor access, or it is too costly to use a roller.
Concrete vibrators Vibrators are used to settle and compact concrete during pours or as concrete is being finished. The purpose of the vibrator is to shake the wet concrete, eliminating air pockets so the slab becomes more solid.
The vibrator also levels the concrete quickly, reducing the amount of manual labour required. Because it brings the moisture to the top quickly, it also speeds the drying process.
Concreting
24350 Power tools46
An electric internal concrete vibrator

There are three main types of concrete vibrators used in the construction industry
→ Internal (also called needle or poker) includes a vibrating probe that is immersed in the wet concrete
→ Form, which attaches to the outside of the concrete form to create vibrations that eliminate voids along the edge of the form.
→ Surface, which attaches to a screed to vibrate the concrete surface during screeding (levelling the concrete during the pouring process)
Groove cuttersGroove cutters, also known as groovers, are used to make control joints on sidewalks, driveways, walkways and foundation slabs.
The control joints allow for controlled concrete movement as it hardens, which reduces the risk of unwanted cracking.
Concreting
Power tools 24350 47

Summary
Portable power tools are widely used in the construction industry. Use extreme care and appropriate PPE at all times to avoid injuring yourself or others.
Safe use of portable power toolsAlways:
→ use an appropriate electrical safety device, such as a residual current device (RCD) or an isolating transformer, when using 230v power tools outdoors or in damp conditions
→ use the right power tool for the job
→ ensure the work is secure and won’t move when using cutting equipment
→ use the correct personal protective equipment (PPE)
→ use them correctly – follow your teacher’s/tutor’s instructions and ask if unsure
→ check that cutting tools are sharp before using them
→ check that all power tools are in good condition, free of damage or defects, before using them
→ check the voltage leakage compliance tag is up to date.
Carrying and storing sharp tools → Don't carry too many power tools at once.
→ If you’re carrying a power tool fitted with a sharp cutting blade, such as a sabre saw, point it towards the floor and hold it firmly.
→ Cutting edges lose their sharpness when they are in contact with metal, so take care when handling, packing or transporting power tools.
→ Store power tools in a container or rack.
24350 Power tools48

Tool care and maintenance → Good workmanship is impossible with power tools that are blunt, dirty or
rusty, or have broken fittings and handles.
→ Power tool cutting blades should always be kept sharp and in good condition.
→ If you find any damaged or faulty power tools, tell your teacher/tutor.
→ Keep tools dry and rub metal components with light machine oil to prevent rust.
→ Clean any soil, sand or concrete from timber before using power tools on it.
→ Make a habit of checking that all power tools have been collected, cleaned and put away at the end of your lesson.
→ Place cordless power tool batteries on charge after using the power tool.
Power tools 24350 49
