piv enhancement scheduling · piv enhancement scheduling •applicant training –applicant profile...
TRANSCRIPT

PIV Enhancement Scheduling
Training
Version 1.6

PIV Enhancement Scheduling
• Applicant Training
– Applicant Profile• Registration
• Change Password
• Reset Password
• Update Account
– Scheduling an Appointment• Book an Appointment
• Cancel an Appointment
• Modify an Appointment
APPLICANT TRAINING –APPLICANT PROFILE
Registration
Change Password
Reset Password
Update Account

• When accessing the system, the Terms and Conditions screen appears.
• Click on the Accept Terms and Conditions button to proceed.
Registration

• Click on Create Account in the toolbar or “Click Here to Create a new PIV Card Applicant Account”.
Registration

Registration
• Enter your First Name, Last Name, E-mail Address, Password, and Phone Number.
• Select your Organization and Type of Applicant from the drop down windows.
• When the information is entered, click on the Create Account button.

Registration

• The screen below appears to confirm the account creation.
Registration

• When accessing the system, the Terms and Conditions screen appears.
• Click on the Accept Terms and Conditions button to proceed.
Change Password
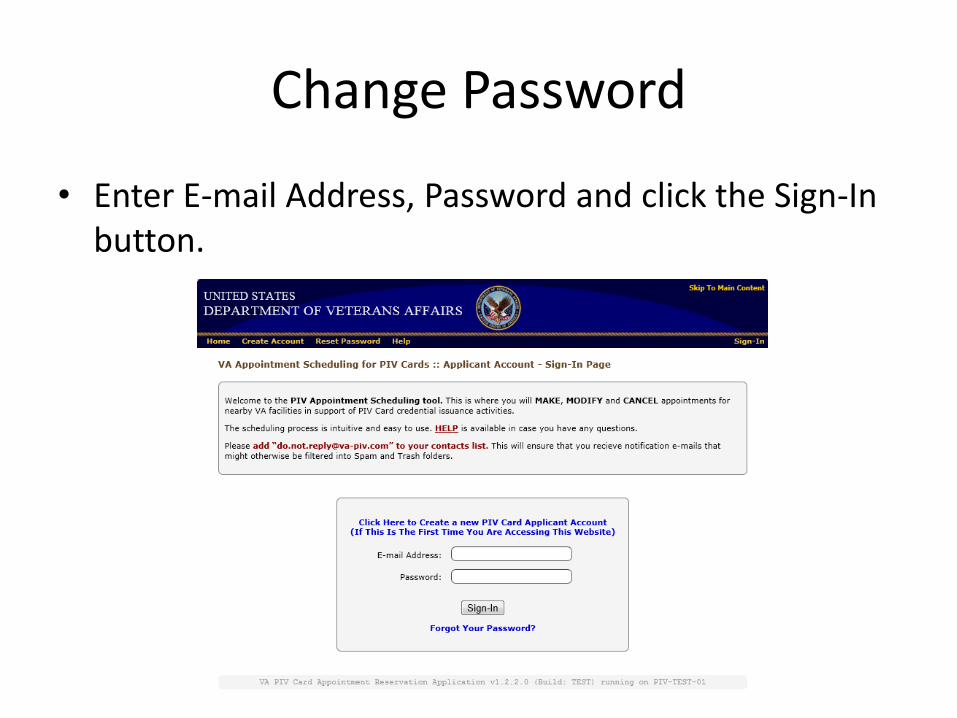
• Enter E-mail Address, Password and click the Sign-In button.
Change Password

• The following screen appears. Click Change Password in the toolbar.
Change Password

Change Password
• Enter your E-mail Address, Old Password, New Password.
• Enter the new password in the New Password Verify field to confirm the value.
• Click the Change Password button to submit the change.

Change Password

• The following screen appears to confirm the password has been changed.
Change Password

• When accessing the system, the Terms and Conditions screen appears.
• Click on the Accept Terms and Conditions button to proceed.
Reset Password

• Click on Reset Password in the toolbar at the top or on the Forgot Your Password link centered below.
Reset Password

• Enter the email address where the new password is to be sent. Then click the Reset Password button.
Reset Password

• When the password has been reset, the following screen appears. Retrieve the email to obtain the new password then click Sign-In.
Reset Password

• When accessing the system, the Terms and Conditions screen appears.
• Click on the Accept Terms and Conditions button to proceed.
Update Account

• Enter E-mail Address, Password and click the Sign-In button.
Update Account

• The screen below is displayed. Click on Update Account in the toolbar.
Update Account

• Enter the information that is to be modified and click the Update Account button.
Update Account

• The screen below is displayed.
Update Account

APPLICANT TRAINING –SCHEDULING AN APPOINTMENT
Making an Appointment
Cancel an Appointment
Modify an Appointment

• When accessing the system, the Terms and Conditions screen appears.
• Click on the Accept Terms and Conditions button to proceed.
Book an Appointment

• Enter E-mail Address, Password and click the Sign-In button.
Book an Appointment

• Click Make Appointment in the toolbar or the button.
Book an Appointment
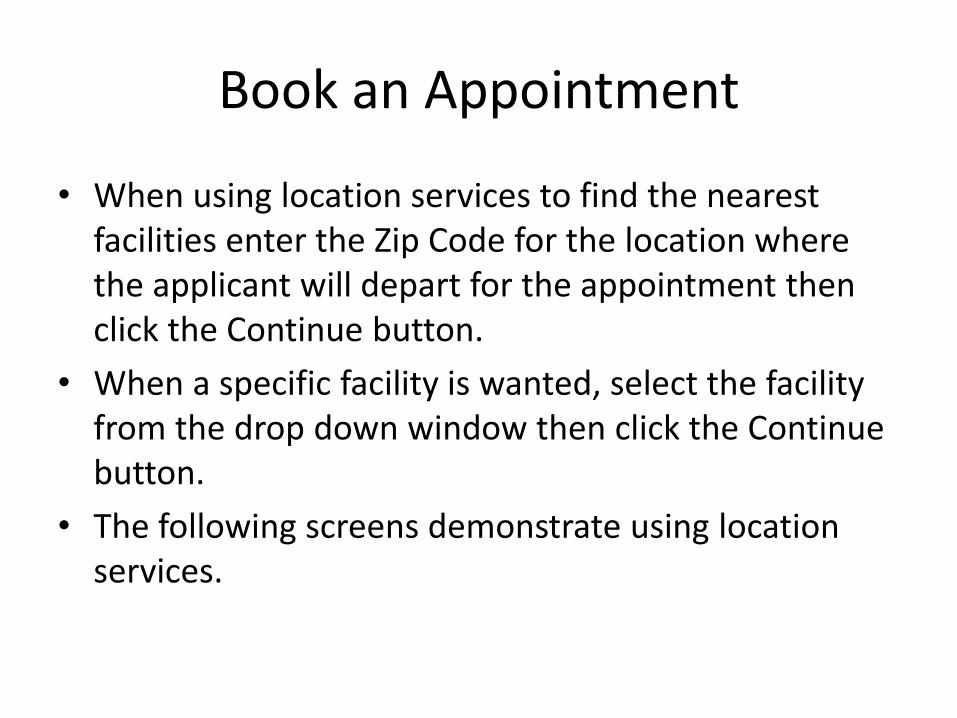
Book an Appointment
• When using location services to find the nearest facilities enter the Zip Code for the location where the applicant will depart for the appointment then click the Continue button.
• When a specific facility is wanted, select the facility from the drop down window then click the Continue button.
• The following screens demonstrate using location services.

Book an Appointment

• Select the facility where the appointment is to be made and click Continue.
Book an Appointment

• Select the Appointment Type from the drop down window then click Continue.
Book an Appointment
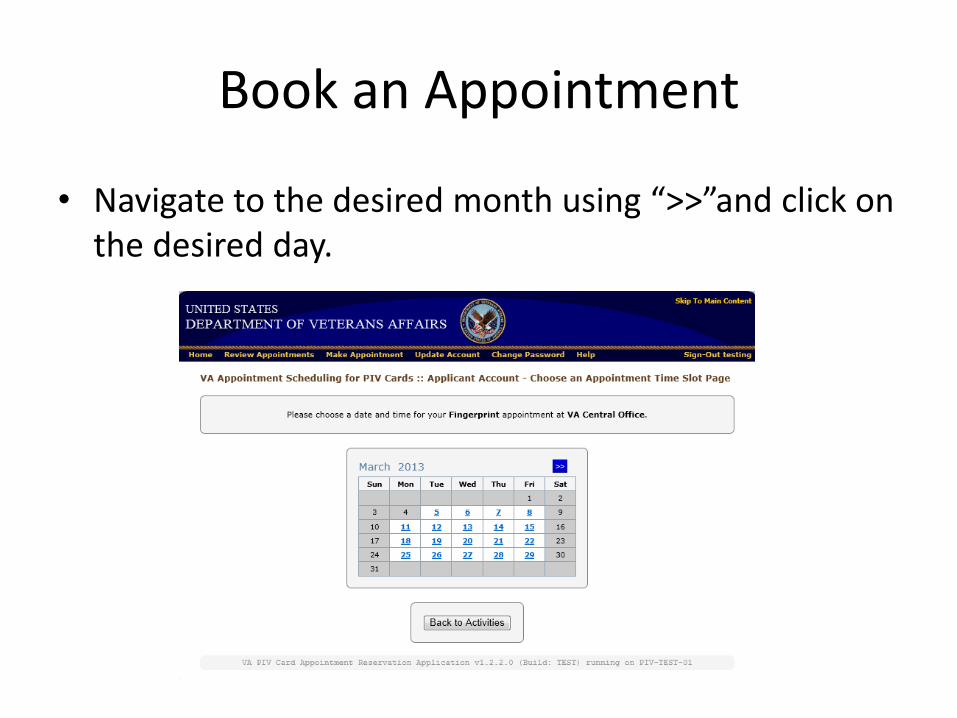
• Navigate to the desired month using “>>”and click on the desired day.
Book an Appointment

• Click on the desired time for the appointment.
Book an Appointment

• Review the Summary of Selections section then click Continue.
Book an Appointment

Book an Appointment
• When the next screen appears, confirm the information entered and the time of the appointment.
• If all is correct, click on the Confirm Appointment button at the bottom.
• Otherwise, select the Cancel Appointment button to cancel the appointment.

Book an Appointment

• When the Confirm Appointment button is clicked, the following appears to confirm the appointment.
Book an Appointment

• When accessing the system, the Terms and Conditions screen appears.
• Click on the Accept Terms and Conditions button to proceed.
Cancel an Appointment

• Enter E-mail Address, Password and click the Sign-In button.
Cancel an Appointment

• The following screen appears. Click the Review Appointments button to proceed.
Cancel an Appointment

• On the next screen, click the Cancel Appointment button.
Cancel an Appointment

• Provide a reason for the cancellation and click the Cancel Appointment button.
Cancel an Appointment

• The next screen confirms the cancellation.
Cancel an Appointment

• When accessing the system, the Terms and Conditions screen appears.
• Click on the Accept Terms and Conditions button to proceed.
Modify an Appointment

• Enter E-mail Address, Password and click the Sign-In button.
Modify an Appointment

• The following screen appears. Click the Review Appointments button to proceed.
Modify an Appointment

• On the next screen, click the Modify Appointment button.
Modify an Appointment
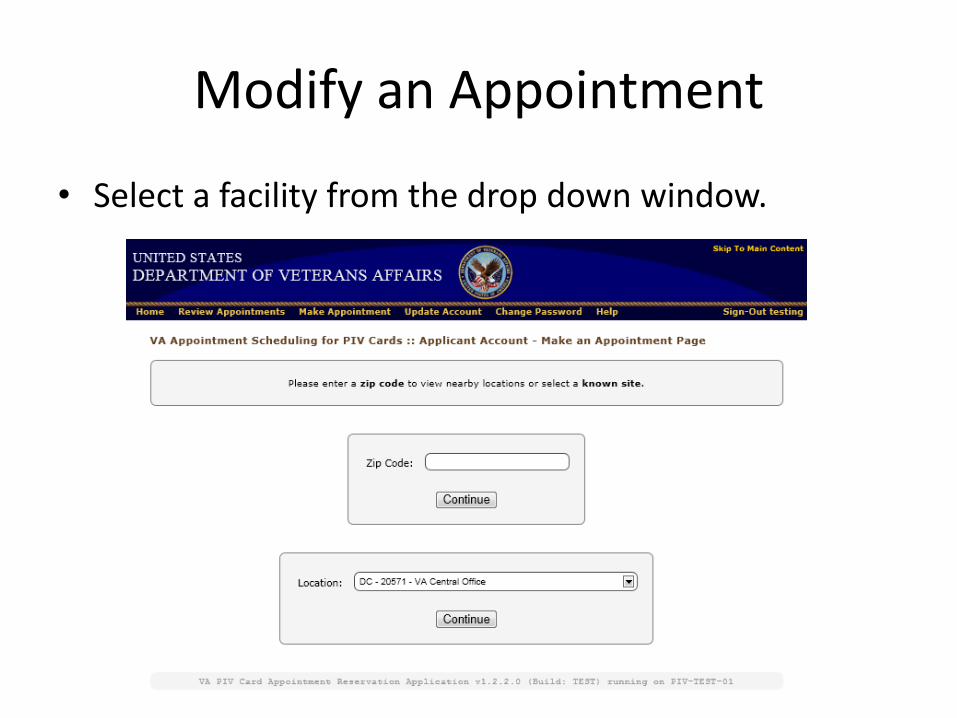
• Select a facility from the drop down window.
Modify an Appointment

• Select the Appointment Type from the drop down window under Explore availability.
Modify an Appointment

• Navigate to the desired month using “>>” and click on the desired day.
Modify an Appointment

• Click on the desired time for the appointment.
Modify an Appointment

• Review the Summary of Selections section then click Continue.
Modify an Appointment

Modify an Appointment
• When the next screen appears, confirm the information entered and the time of the appointment.
• If all is correct, click on the Confirm Appointment button at the bottom.
• Otherwise, select the Cancel button to cancel the appointment.

Modify an Appointment

• When the Confirm Appointment button is clicked, the following appears to confirm the appointment.
Modify an Appointment