physical fitness unit. target heart rate benefits: cardiovascular training: increases strength of...
TRANSCRIPT

Physical Fitness Unit

Target Heart Rate

Benefits:
Cardiovascular Training:• Increases strength of heart/vessels• Decreases stroke volume/cardiac output
• decreases heart rate• Decreases blood pressure
• decreases vessel plaque buildup• Increase calorie burn• Increases maximal oxygen intake to bloodstream
• Flushes wastes from cells • Increases physical fitness

Terminology
• HR: heart rate (beats/minutes)• MHR: maximal heart rate (220-age)• RHR: resting heart rate• HRR: heart rate range (MHR-RHR) or functional capacity• THR: target heart rate; goal heart rate during an activity

Benefits of Knowing Heart Rate: Karvonen’s Formula• Allows for appropriate choice of activity and level of intensity during
bouts of exercise• Simple method that can be used regardless of:
• Age• Gender• Fitness level
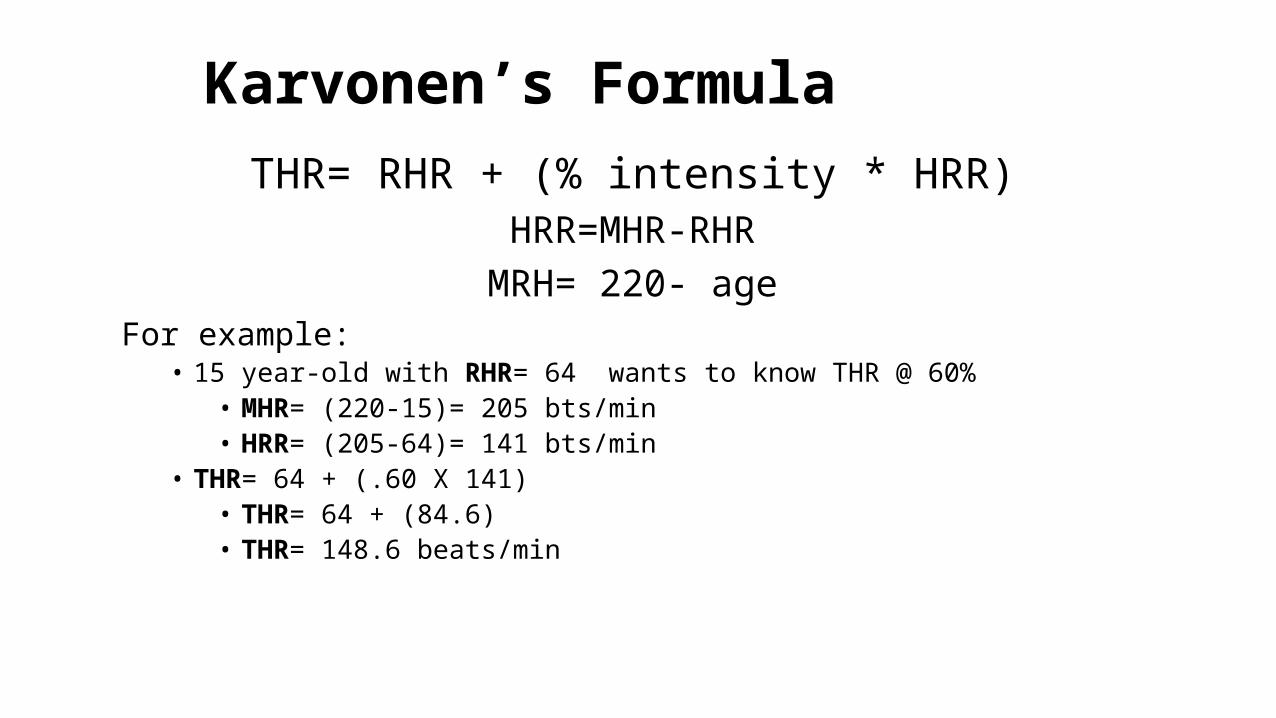
Karvonen’s FormulaTHR= RHR + (% intensity * HRR)
HRR=MHR-RHRMRH= 220- age
For example:• 15 year-old with RHR= 64 wants to know THR @ 60%
• MHR= (220-15)= 205 bts/min• HRR= (205-64)= 141 bts/min
• THR= 64 + (.60 X 141)• THR= 64 + (84.6)• THR= 148.6 beats/min

Training Zones• Warm-up Zone: 50-60% MHR
• Good starting zone beginning exercisers
• Fitness (fat burning) Zone: 60-70% MHR• Higher percentage of fat calories burned
• Aerobic (endurance) Zone: 70-80% MHR• Increase CV strength
• Anaerobic (performance) Zone: 80-90% MHR• Improvement of oxygen uptake and use• Increase lactic acid tolerance
• Maximal Effort Zone: 90-100% MHR• Burns highest number of calories, but can only be done for short bouts• Should be in excellent condition/health

http://en.wikipedia.org/wiki/File:Exercise_zones.png
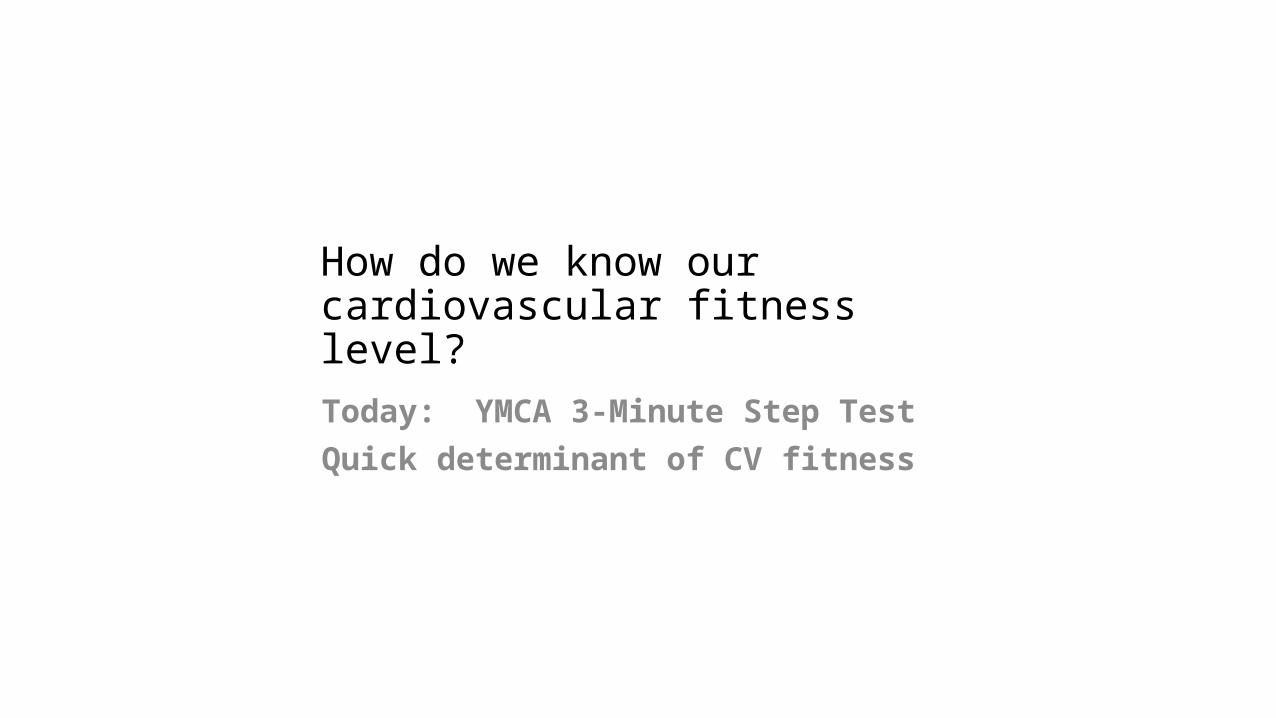
How do we know our cardiovascular fitness level?Today: YMCA 3-Minute Step TestQuick determinant of CV fitness

YMCA 3-Minute Step Test
• Class will form pairs; one taking test while other will prepare to monitor other’s heart rate post-test
• Test taker will do a four step step-up process (up, up, down, down) at a pace of 24 steps/minute (96 beats/min) for 3 minutes
• At end of three minutes, test taker will sit down. Partner will find pulse (radial or carotid) and monitor pulse for one minute
• Record pulse and switch roles
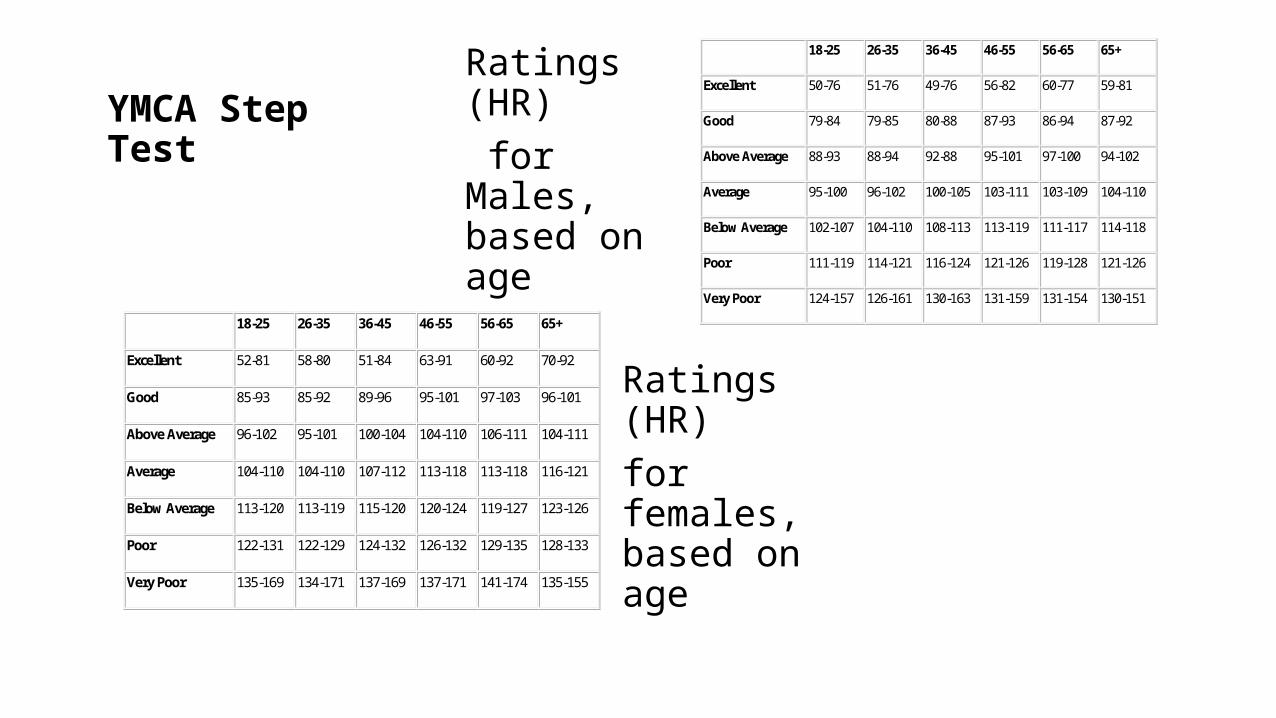
YMCA Step Test
Ratings (HR) for Males, based on age
Ratings (HR)for females, based on age
18-25 26-35 36-45 46-55 56-65 65+
Excellent 50-76 51-76 49-76 56-82 60-77 59-81
Good 79-84 79-85 80-88 87-93 86-94 87-92
Above Average 88-93 88-94 92-88 95-101 97-100 94-102
Average 95-100 96-102 100-105 103-111 103-109 104-110
Below Average 102-107 104-110 108-113 113-119 111-117 114-118
Poor 111-119 114-121 116-124 121-126 119-128 121-126
Very Poor 124-157 126-161 130-163 131-159 131-154 130-151
18-25 26-35 36-45 46-55 56-65 65+
Excellent 52-81 58-80 51-84 63-91 60-92 70-92
Good 85-93 85-92 89-96 95-101 97-103 96-101
Above Average 96-102 95-101 100-104 104-110 106-111 104-111
Average 104-110 104-110 107-112 113-118 113-118 116-121
Below Average 113-120 113-119 115-120 120-124 119-127 123-126
Poor 122-131 122-129 124-132 126-132 129-135 128-133
Very Poor 135-169 134-171 137-169 137-171 141-174 135-155

Introduction to Physical Fitness

•Physical fitness: efficient working of body systems to allow a person to be healthy and perform activities of daily living•Health/wellness: a balanced state of being, which includes intellectual, social, emotional, physical, and spiritual components•Physical activity: movement involving the large muscles of the body•Exercise: physical activity done in order to become fit
Terminology:

• A. Body Composition• B. Flexibility• C. Cardiovascular Endurance• D. Muscular Strength• E. Muscular Endurance
Components of Physical Fitness:

• The percentage of body weight that is made up of fat, compared to other tissues (muscle & bone)
• A healthy range of body fatness helps avoid illness and lead to lower death rates
• Either too little or too much body fat can cause health problems
A. Body Composition

• Ability to move your joints through a full range of motion• Good flexibility leads to fewer sore and injured muscles
B. Flexibility
• The ability to exercise the whole body for extended periods of time
• Requires a strong heart, healthy lungs and clear blood vessels to supply the cells with the necessary oxygen
C. Cardiovascular Endurance
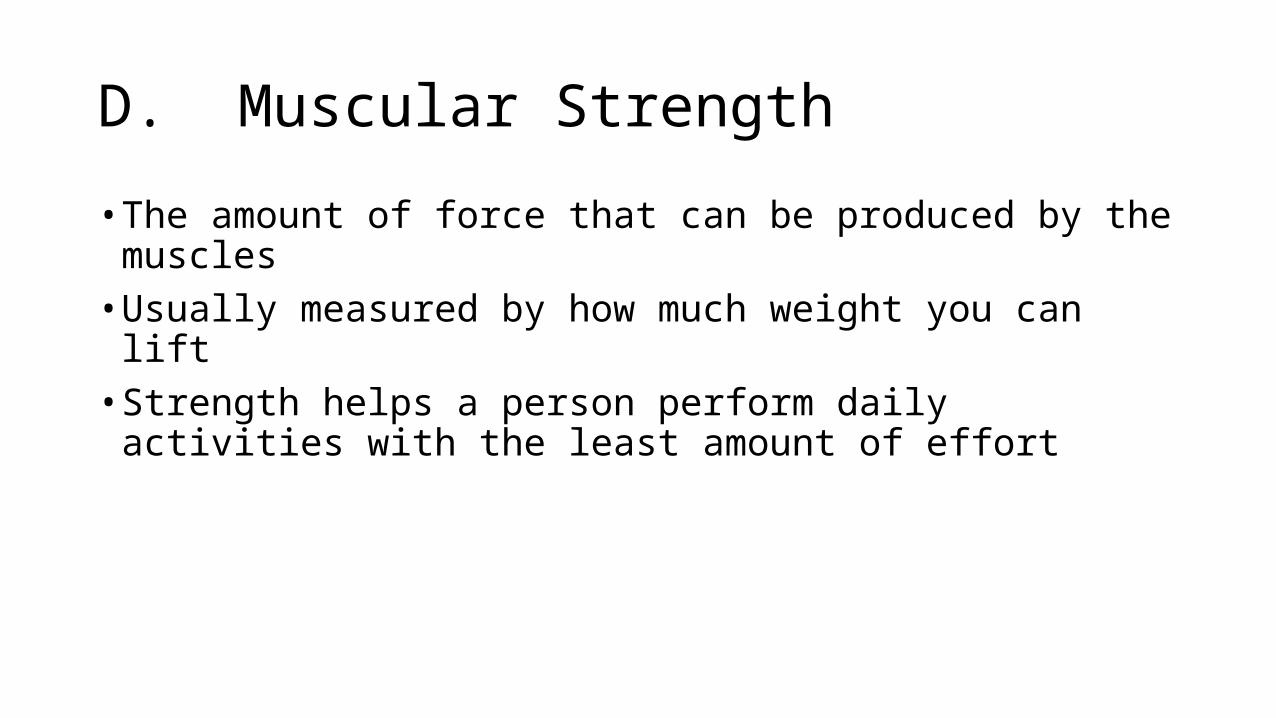
• The amount of force that can be produced by the muscles• Usually measured by how much weight you can lift• Strength helps a person perform daily activities with the least amount
of effort
D. Muscular Strength

• The ability to use your muscles repeatedly without getting tired• May improve posture and lead to fewer low back problems
E. Muscular Endurance

• Improved health and wellness• Prevent disease and illness
• Look good• Maintain body weight
• Feel good• Decrease in injuries• Resist fatigue / work more efficiently
• Enjoy life• Able to do more
• Meet emergencies
Benefits of Physical Fitness

Body Composition

• Body composition: the makeup of the body tissues, including muscle, bone, fat and other tissues
• Skinfold measurement: layers of fat under the skin that are measured to estimate body fat
• Skin caliper: a device used to measure the amount of fat beneath the skin
• Percent body fat: the amount of fat in a person, expressed as a percentage of total weight
Terminology:

• Typical person• Lean body tissue = 75 to 85 %
• Includes muscle, bone, skin, organs (heart, liver, kidneys, lungs, etc.)• Fat = 15 to 25 %
• A low percentage of body fat is desirable; however, some body fat is essential:
• Insulates: helps body adapt to heat or cold• Shock absorption: protects organs/bones from injury• Source of stored energy• Helps body use vitamins effectively
Body Composition
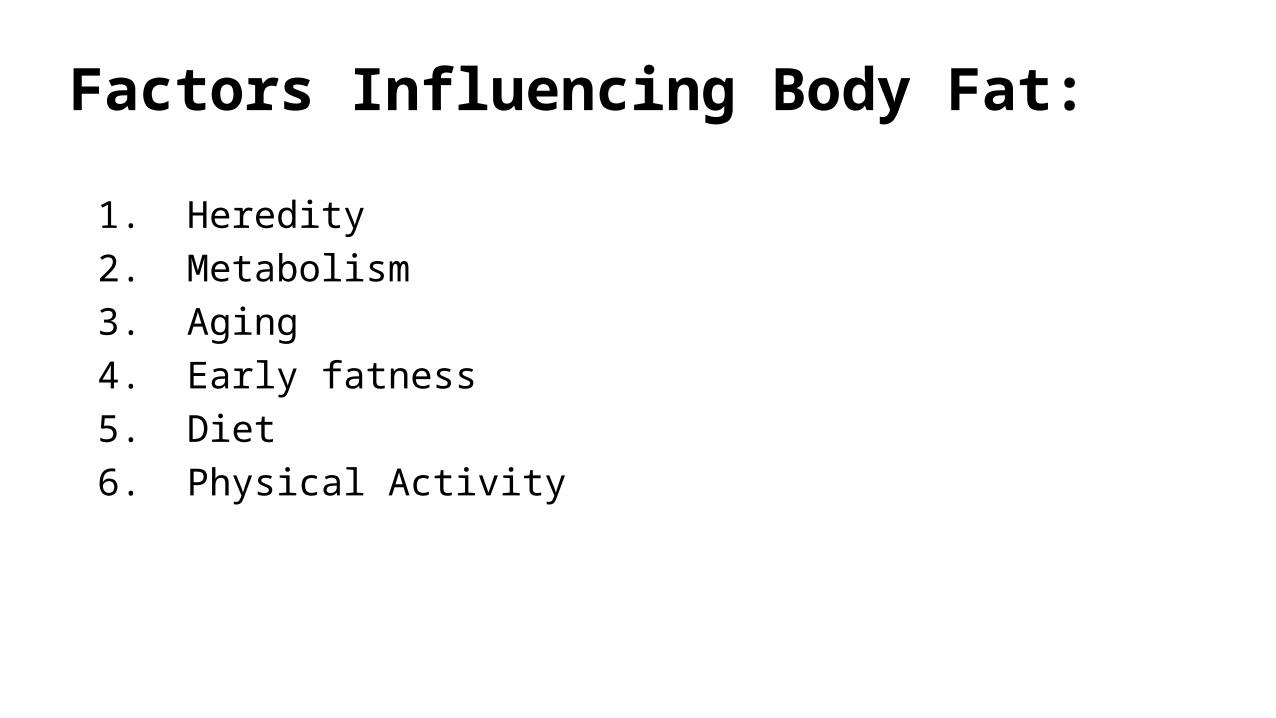
1. Heredity2. Metabolism3. Aging4. Early fatness5. Diet6. Physical Activity
Factors Influencing Body Fat:
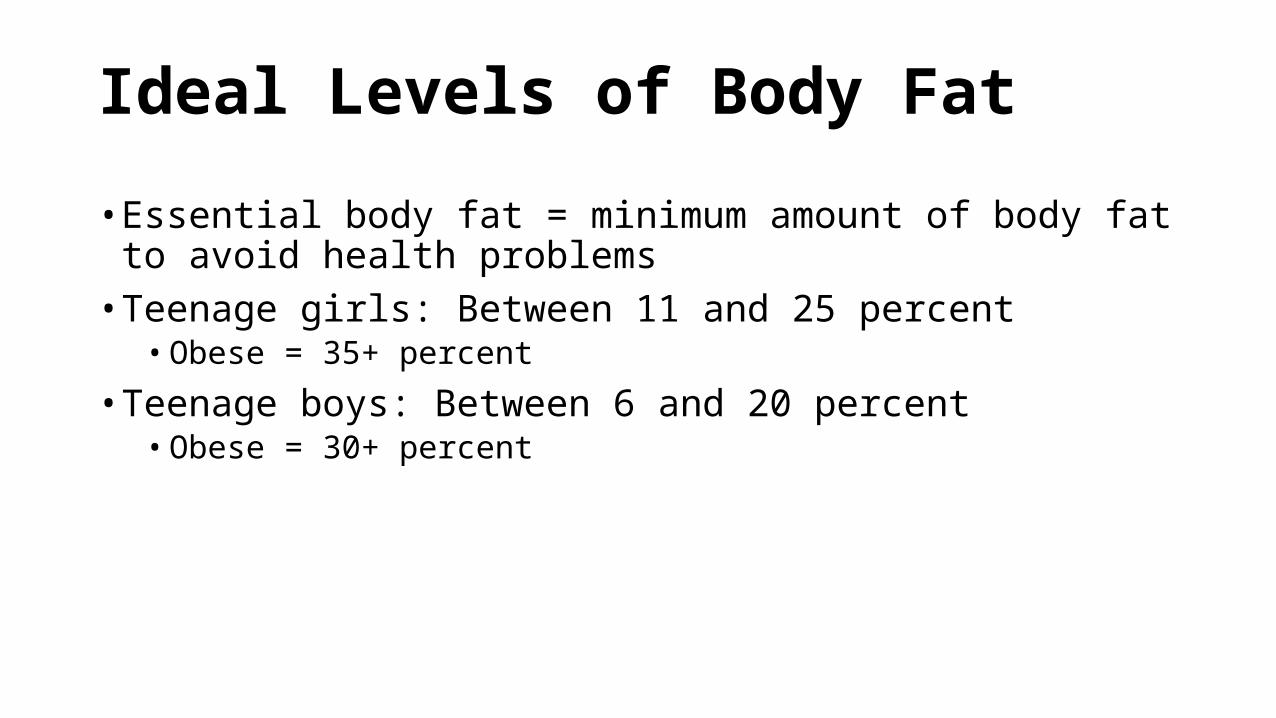
• Essential body fat = minimum amount of body fat to avoid health problems
• Teenage girls: Between 11 and 25 percent• Obese = 35+ percent
• Teenage boys: Between 6 and 20 percent• Obese = 30+ percent
Ideal Levels of Body Fat

• High blood pressure• High blood cholesterol• Coronary heart disease• Stroke• Diabetes• Some types of cancer (endometrial, breast, prostate & colon)• Sleep apnea & breathing problems
Health Risks of Being Overweight:

• Eating disorders• Anoreixa• Bulimia
• Abnormal menstruation in females• Loss of bone density• Higher incidence of injuries
Health Risks of Being Underweight:
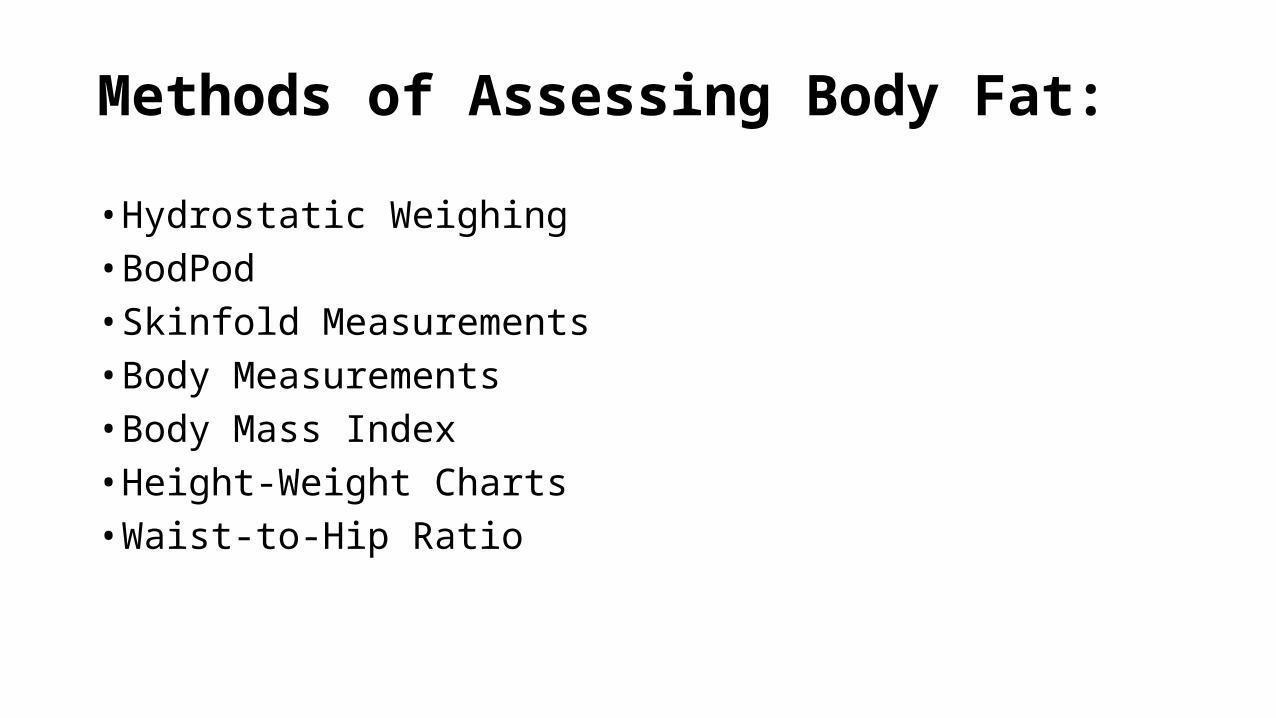
• Hydrostatic Weighing• BodPod• Skinfold Measurements• Body Measurements• Body Mass Index• Height-Weight Charts• Waist-to-Hip Ratio
Methods of Assessing Body Fat:

• Based on the fact that lean mass (bone, muscle, connective tissue) sinks while body fat floats
• Weight is taken on land• Lung capacity is also measured to account for air in the lungs• Person is immersed in a tank of water & then weighed• A formula applied to underwater weight & lung capacity to determine
body fat• + very accurate• - requires time, money and expertise
Hydrostatic Weighing

Bod Pod• A machine that measures weight
(mass)• Uses air to measure volume
(change in pressure)• Calculates density
(mass/volume)• Takes into account the air in the
lungs• + very accurate• - limited availability

Skinfold Measurements• Caliper is used to measure
skinfolds at certain sites• Females: triceps + hips + thigh• Males: chest + abdomen + thigh
• Amount of body fat is determined using age and sum of skinfold measurements
• + easy• - accuracy (estimate)

• Body measurements are used to estimate a person’s percentage of body fat
• Females = height & hip• Males = weight & waist• Using a chart, line up the body measurements in the two side
columns and determine the percent body fat value in the middle column
Body Measurements

• Indicator of body composition• Take the following measurements:
• Height: measured in inches, without shoes• Weight: measure in pounds, without shoes and minimal clothing
• Check chart to find BMI rating
Body Mass Index (BMI)

• Method to estimate percent body fat• Comparison between a person’s height and weight• Obtain the measurements as follows:
• Weigh the person on an accurate scale with shoes removed and minimal clothing
• Measure the person without shoes
• Then compare the two measurements• The ideal ratio is 2:1 or greater
Height / Weight Charts

• Method to estimate percentage of body fat• Comparison between the circumference of a person’s waist and a
person’s hips• Waist circumference: measure the person’s waist at the level of the navel• Hip circumference: measure the person’s hips at the widest point
• Using a chart, line up the body measurements in the two side columns and determine the percent fat value in the middle column
Waist-to-Hip Ratio

Body Composition Lab Info
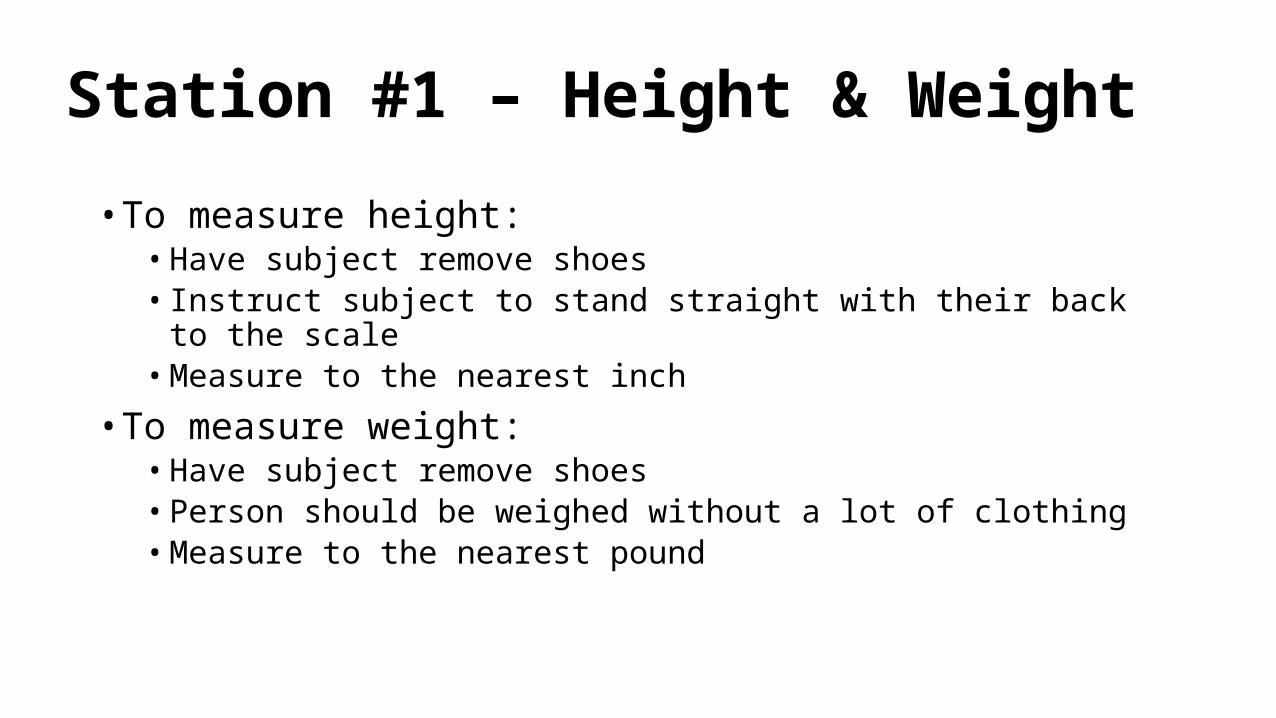
• To measure height:• Have subject remove shoes• Instruct subject to stand straight with their back to the scale• Measure to the nearest inch
• To measure weight:• Have subject remove shoes• Person should be weighed without a lot of clothing• Measure to the nearest pound
Station #1 – Height & Weight

• To measure waist circumference:• Measure at the level of the navel• Measure to the nearest inch
• To measure hip circumference:• Measure hips at the widest point• Measure to the nearest inch
Station #2 – Waist & Hips

• General Guidelines• Always measure on the right side of the body• Hydration status affects measurements• Subject should be relaxed• Examiner should pick up the subject’s skinfold between the thumb and index
finger• Examiner places the calipers next to the fingers holding the skinfold• The examiner records the measurement taken in millimeters• The procedure is repeated 3 times and the measurement for each site is
averaged• Each time the skinfold is released and then re-grasped
Station #3 – Skinfold Measurements
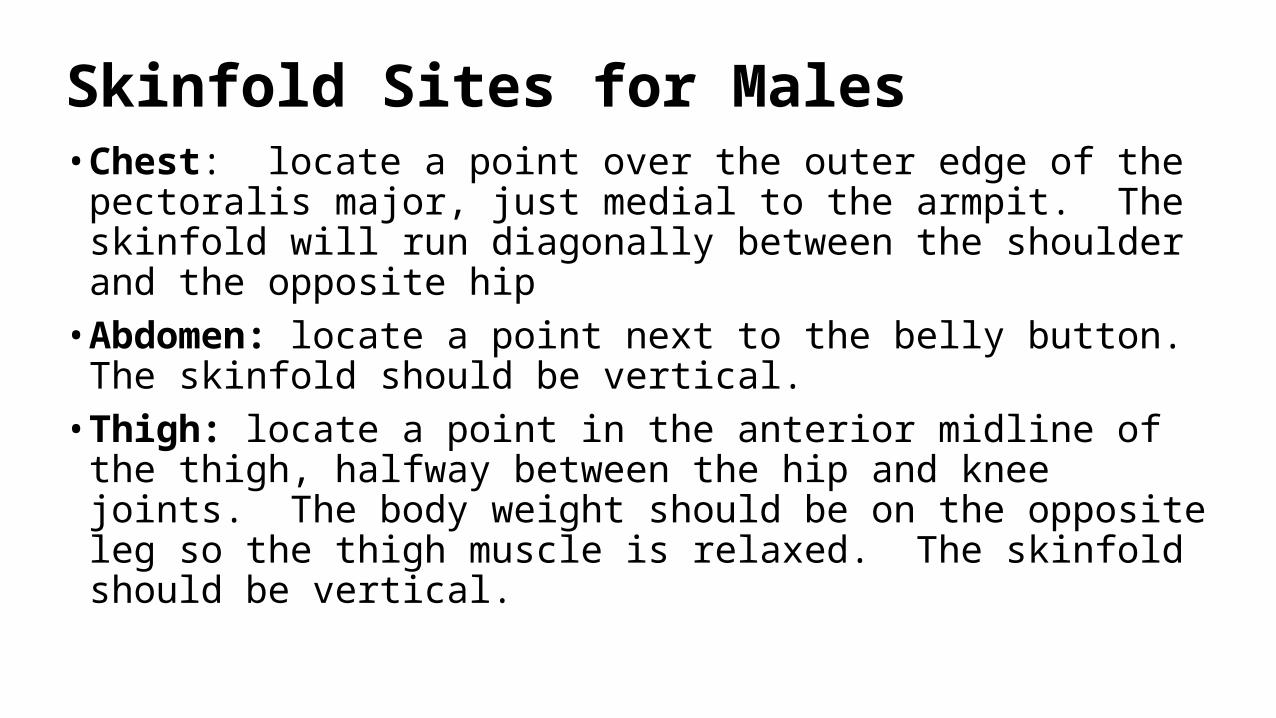
• Chest: locate a point over the outer edge of the pectoralis major, just medial to the armpit. The skinfold will run diagonally between the shoulder and the opposite hip
• Abdomen: locate a point next to the belly button. The skinfold should be vertical.
• Thigh: locate a point in the anterior midline of the thigh, halfway between the hip and knee joints. The body weight should be on the opposite leg so the thigh muscle is relaxed. The skinfold should be vertical.
Skinfold Sites for Males

Skinfold Sites for Males

• Triceps: locate a point halfway between the tip of the shoulder and the tip of the elbow, with the elbow in 90⁰ flexion. Then measure the skinfold with the arm relaxed and extended.
• Iliac crest: locate a point over the top of the hip, in line with the middle of the armpit. Measure the skinfold in a diagonal plane.
• Thigh: locate a point in the anterior midline of the thigh, halfway between the hip and knee joints. The body weight should be on the opposite leg so the thigh muscle is relaxed. The skinfold should be vertical.
Skinfold Sites for Females

Skinfold Sites for Females

Males: Weight & Waist

Females: Height & HipsEstimation of relative fat in women from height and hip circumference.
http://img.dailymail.co.uk/img/pix/womenfatchart241201_387x450.jpg
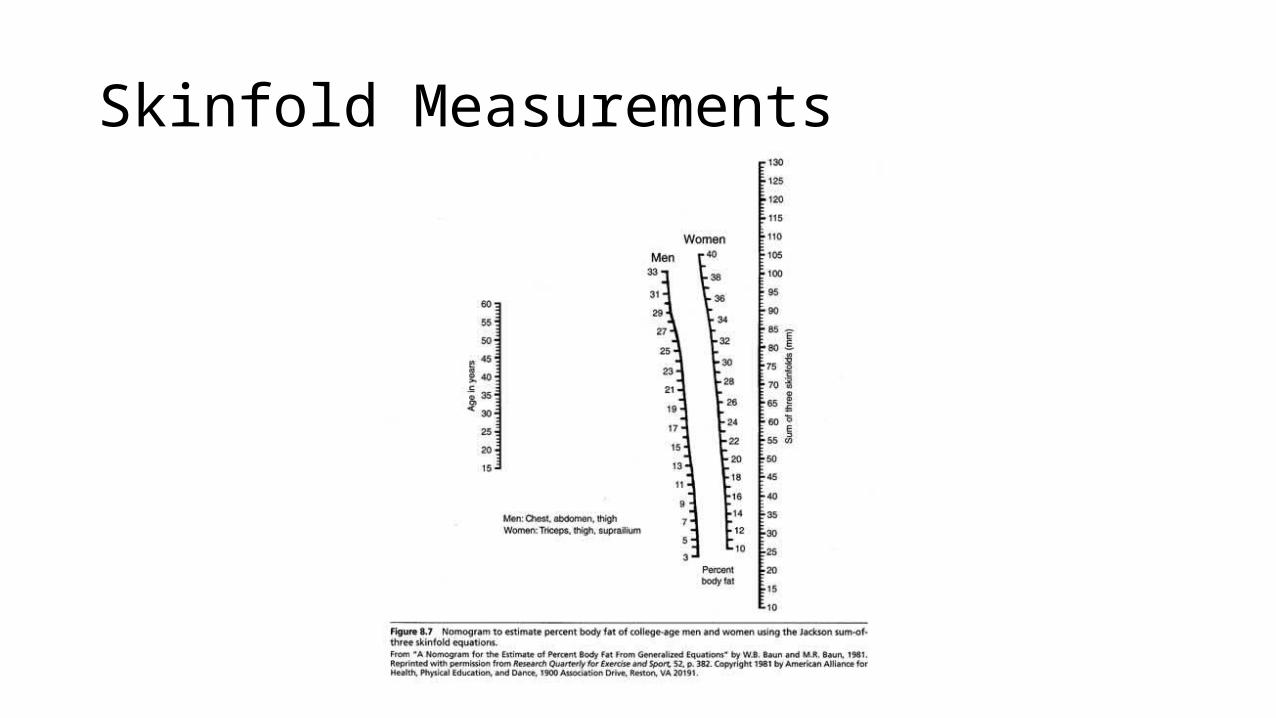
Skinfold Measurements


Waist-Hip Ratio
The FITT Formula

•American College of Sports Medicine (ACSM): an organization which works to improve health through the use of science and medicine•Frequency: how often physical activity is performed•Intensity: how hard physical activity is performed•Specificity: the type of exercise performed determines the benefits received
Terminology:
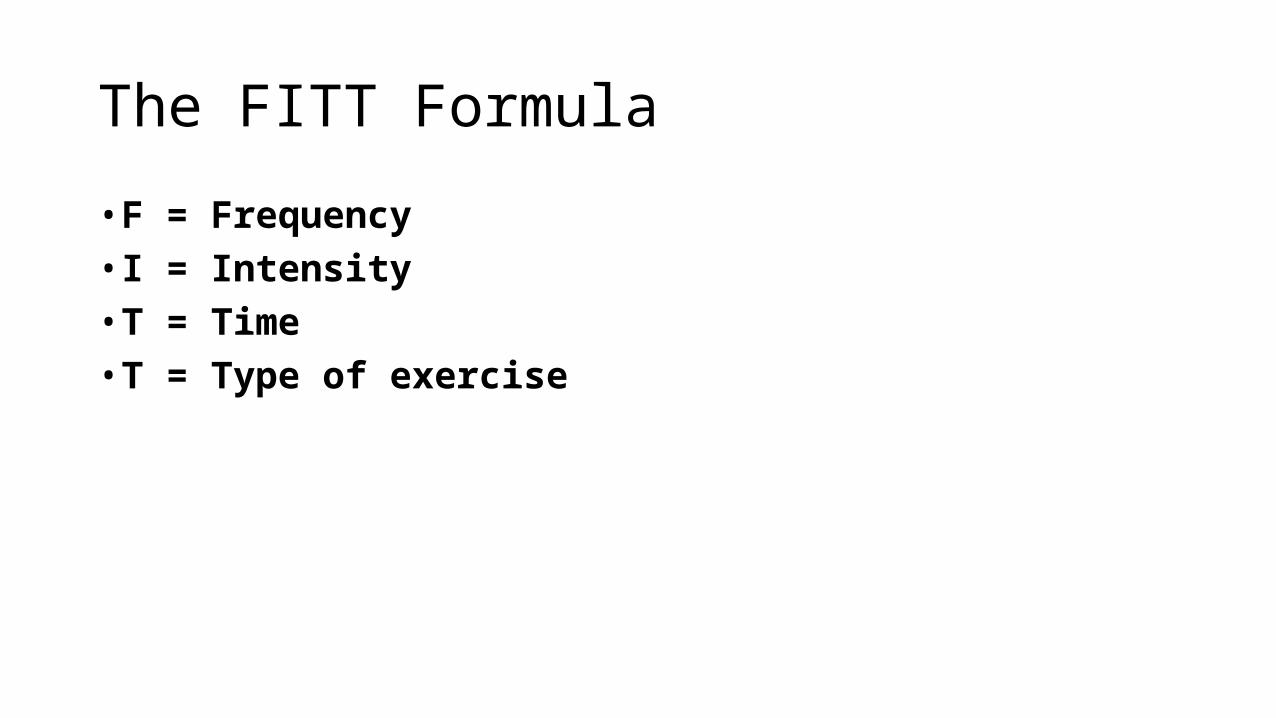
• F = Frequency• I = Intensity• T = Time• T = Type of exercise
The FITT Formula

• How often you perform physical activity (ie, daily, 3X week)• Varies with the type of exercise performed
Frequency

• How hard physical activity is performed• ACSM recommendation: 60 to 90% of maximum heart rate• Determined by calculating your heart rate during the activity
Intensity
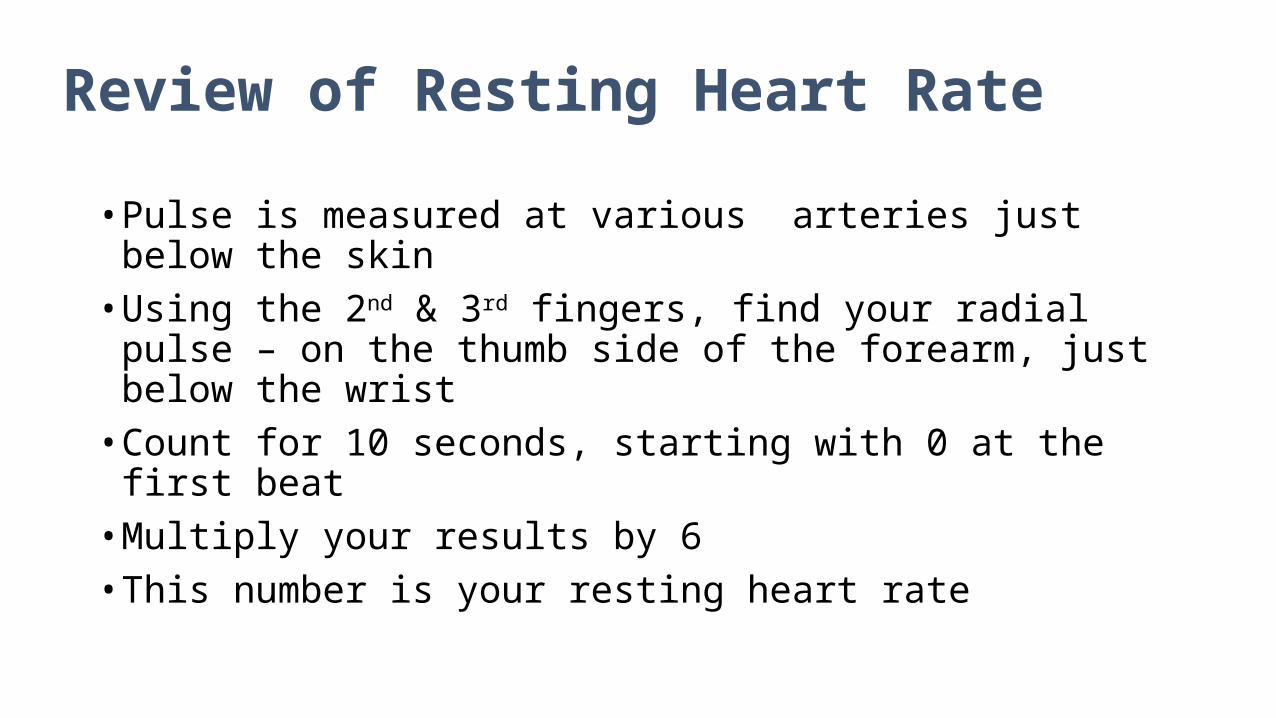
• Pulse is measured at various arteries just below the skin• Using the 2nd & 3rd fingers, find your radial pulse – on the thumb side
of the forearm, just below the wrist• Count for 10 seconds, starting with 0 at the first beat• Multiply your results by 6• This number is your resting heart rate
Review of Resting Heart Rate

• During exercise, or immediately following exercise, find your radial pulse
• Count for 10 seconds, beginning with 0• Multiply that number by 10• This is your exercise heart rate• This number should fall somewhere between 60% and 90% (calculated
on next slide)
Exercise Heart Rate

• Start with 220• Subtract your age• This number is your maximum heart rate• Now multiply that number by 60% and 90% to find your exercise
heart rate training zone
To Measure Exercise Intensity:
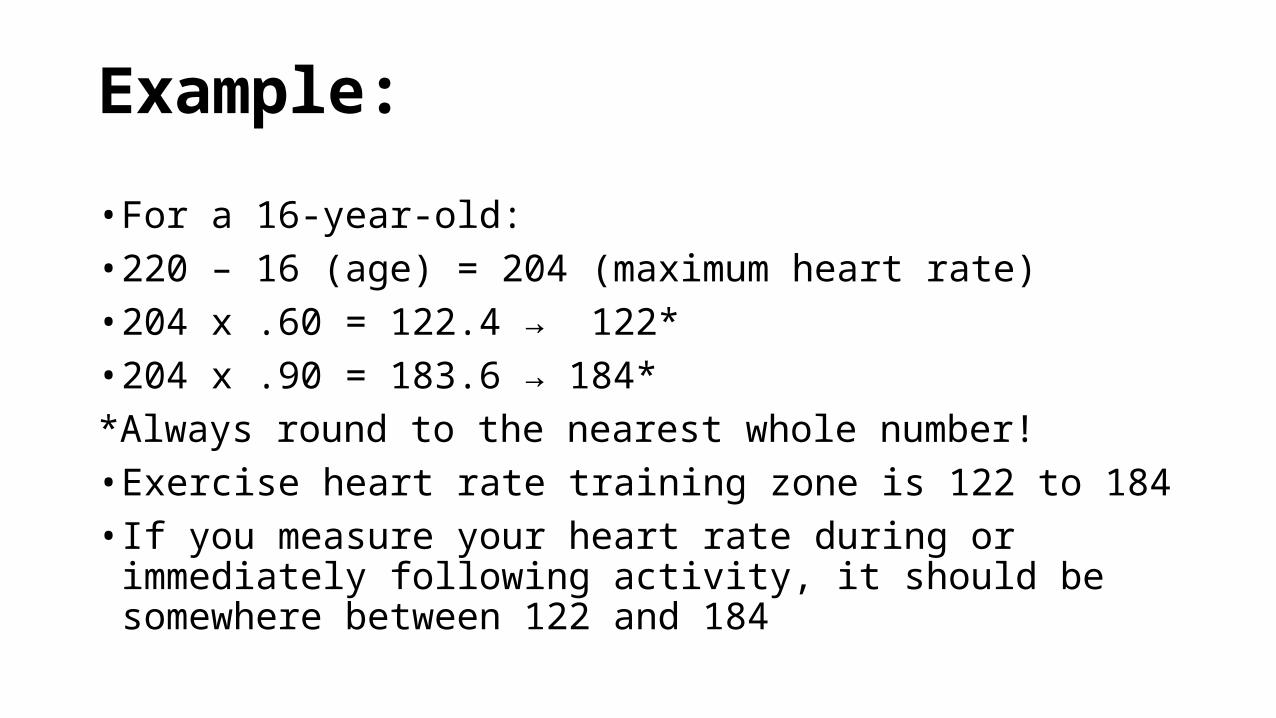
• For a 16-year-old:• 220 – 16 (age) = 204 (maximum heart rate)• 204 x .60 = 122.4 → 122*• 204 x .90 = 183.6 → 184**Always round to the nearest whole number!• Exercise heart rate training zone is 122 to 184• If you measure your heart rate during or immediately following
activity, it should be somewhere between 122 and 184
Example:

• Refers to how long you do the activity• ACSM recommends 15 to 60 minutes of continuous activity• Time depends on the type of activity and the level of intensity• Guidelines will be given for different types of physical activity
Time

• The type of activity is based on specificity• The activity must be specific to the benefits you are trying to gain• For example, bicycling helps develop cardiovascular endurance, but
does not help improve flexibility• ACSM recommends any activity that uses large muscle groups, can be
maintained continuously and is rhythmical and aerobic in nature
Type of Activity

Safe Participation

•Physical Activity Readiness Questionnaire (PAR-Q): a questionnaire used to assess a person’s medical and physical readiness prior to starting a physical fitness program
Terminology:
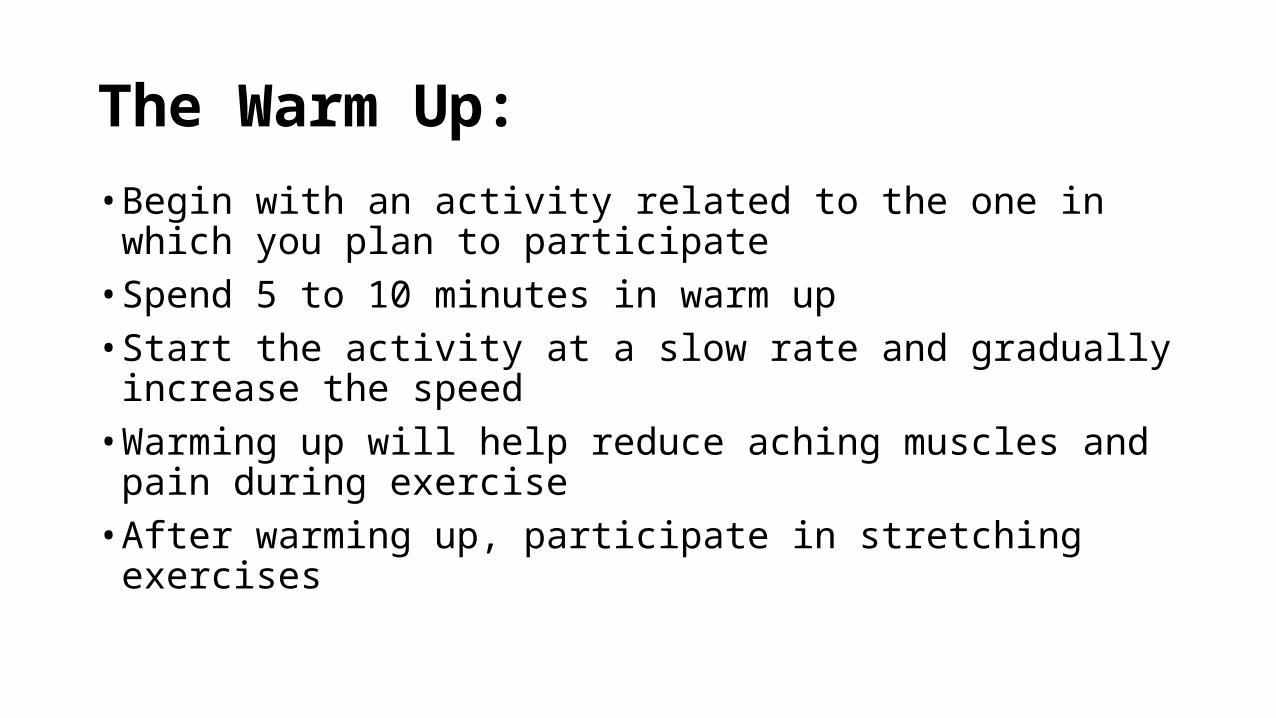
• Begin with an activity related to the one in which you plan to participate
• Spend 5 to 10 minutes in warm up• Start the activity at a slow rate and gradually increase the speed• Warming up will help reduce aching muscles and pain during exercise• After warming up, participate in stretching exercises
The Warm Up:

• Just as important as warming up• Minimum of 5 minutes• Allow the body time to recover from stress of exercise• Keep the blood circulating• Avoid blood pooling in the body, feeling dizzy or passing out• Stay away from saunas, hot tubs or shower immediately after exercise• Allow heart rate to drop below 100 bpm• Wait until profuse sweating stops
The Cool Down:

1. Wear clothing that is comfortable and allows you to move. 2. Make sure you have a pair of good shoes and socks.3. Work out at the same time each day. 4. Use different activities to avoid getting bored.5. Set a goal and chart your progress toward that goal.6. Work out with a group or friend if you don’t like to exercise by yourself.7. Make sure exercise is enjoyable; don’t push yourself if you have severe chest pain, dizziness, breathlessness, lightheadedness or nausea. These symptoms are your body’s way of telling you to stop.
Tips for Making Exercise Enjoyable:

Flexibility Assessment

•Flexibility: the ability to move a joint through a full range of motion•Static: a slow, sustained stretch through a pain-free ROM•Proprioceptive neuromuscular facilitation (PNF) stretch: a technique where a muscle is contracted prior to stretching so it can be stretched further•Ballistic stretch: a series of quick, bouncing movements that are held for a short time
Terminology:

• Spend less energy in physical movement (more efficient)• Lack of flexibility leads to improper body movements (sitting, walking,
running, etc.)• Improper body movements often lead to injuries• Factors leading to decreased flexibility:
• Sedentary living • Inactivity• Increase in body fat
Why is flexibility important?

1. Bone structure of the joint2. Amount of tissue surrounding the joint3. Extensibility of tissues* crossing over the joint
*tissues include muscles/tendons and ligaments
A consistent stretching program will most influence the 3rd factor: tissue extensibility
Factors Influencing Flexibility
• Stretching stimulates sensory receptors located in the muscles and joints• If the muscle is stretched suddenly, these receptors cause the muscle to
shorten rather than lengthen• If the muscle is stretched slowly, the sensory receptors override the
initial response and allow the muscle to relax and lengthen• The more a muscle relaxes, the more it can lengthen (stretch)without
injury
How does stretching increase flexibility?

1 . Ballistic: rapid bouncing movement causes the muscle to contract (to shorten rather than lengthen) and may lead to muscle soreness and injury as well as decreased flexibility2. Static: slowly stretching the muscle until tension is felt (not pain) and holding for 10+ seconds resulting in increased flexibility3. PNF: contracting the opposing muscle (antagonist) causes the muscle being stretched to relax and lengthen, and increase flexibility
Types of Stretching

• Sit-And-Reach Test:• Measures the flexibility of the low back and hips as well as the hamstrings
and calf muscles
• Shoulder Lift Test:• Measures the flexibility of the shoulder muscle and shoulder joint
Tests Used to Assess Flexibility
• The subject sits on the floor with the legs extended and the backs of the legs pressed against the floor
• The person’s heels should touch the edge of a line and be about 5 inches apart• A yardstick is taped to the floor with the 15-inch mark at the same line as the
person’s heels• The subject stretches forward three times and reaches forward, with one hand
on top of the other, as far as possible on the yardstick• The subject must keep the legs extended and the backs of the legs against the
floor; the feet cannot cross the line• The best of the 3 trials is recorded as the test score• The subject’s lower body flexibility rating is determined using chart on the
following slide
Instructions for Sit-And-Reach Test:

Flexibility Score Flexibility Category
11 or less Very Poor
12 to 13 Poor
14 to 16 Fair
17 to 19 Good
20 to 21 Very Good
22 to 23 Excellent
24 or more Superior
Sit-And-Reach Test

• The subject lies prone on the floor with both arms extended beyond the head and a yardstick or ruler held in both hands
• The subject’s chin and forehead must stay in contact with the floor at all times
• The subject raises both arms as high as possible without the rest of the body losing contact with the floor
• The assessor uses a second yardstick or ruler to measure the distance between the floor and the yardstick held by the subject
• The subject performs the test 3 times; the best score is recorded• The subject’s upper body flexibility rating is determined using the chart on
the following slide
Instructions for Shoulder Lift Test:

Flexibility Score Flexibility Category
10 or less Very Poor
11 to 14 Poor
15 to 18 Fair
19 to 21 Good
22 to 24 Very Good
25 to 26 Excellent
27 or more Superior
Shoulder Lift Test

Writing a Flexibility Program

Static or PNF Ballistic
Frequency Stretch each muscle group daily, if possible, but at least 3 days a week .
Stretch each muscle group daily, if possible, but at least 3 days a week
Intensity Stretch the muscle beyond its normal length, until a tension is felt but avoid pain.
Stretch the muscle beyond its normal length using slow, gentle bouncing
Time Hold each stretch for 10 to 30 seconds, then rest for 10 seconds. Perform 1 set of 10 reps.
Bounce against the muscle slowly and gently 10 to 15 times. Rest for 10 seconds between sets. Start with 1 set and progress to 3 sets.
The FITT Formula
1. Start with a brief warm-up prior to stretching. A good rule is to warm up until you perspire. That will ensure that the tissues of the body will be more flexible due to an increase in body temperature.2. Beginners should use static or PNF stretching instead of ballistic stretching.3. Perform stretching exercises daily in order to increase flexibility.4. Move into the stretching position slowly and continue until a stretch on the muscle is felt. Pain is not part of a good stretching program.
Guidelines for Stretching:

5. Sensory receptors are stimulated after 6 seconds of slow, sustained stretching so each stretch should be held for 10+ or more seconds.6. Relax the muscle that is being stretched.7. After the stretch is complete, slowly release the muscle from that position.8. Do not stretch joints that are hypermobile, unstable, or injured.9. Stretch only to the point that is comfortable for you. Stretching exercises are not meant to be competitive.
Guidelines for Stretching (cont.)

• Shoulder muscles• Low back muscles• Trunk rotators• Hip flexors• Hip abductors• Hamstrings• Calves
Muscle Groups to be Stretched:

• Each muscle group from the previous slide has one or more stretching options.
• Each stretch is shown on the left side of the slide and explained on the right side of the slide
• Some stretches need to be performed to each side• Pay close attention to the precautions. They appear below the
explanation and are designated by the ◊ symbol.• To write your flexibility program, choose at least one stretch for each
major muscle group.
Flexibility Program Guidelines:

Shoulder Stretches• A. Doorframe Stretch
• Stand facing the doorway, hands on walls on either side with upper arms straight out and elbows bent at 90⁰
• Walk through doorway until a stretch is felt• Hold 10+ seconds
◊Make sure to maintain good standing posture◊

Shoulder Stretches• B. Chair Stretch• Stand with feet shoulder width apart facing
the back of the chair. Reach forward and place both hands on the back of the chair.
• Move head and chest downward by contracting abdominal muscles for 10+ seconds.
◊Keep feet spread and back from chair. Keep lower back flat – not arched.◊

Low Back Stretches • C. Cross-Legged Curl
• Sit with legs crossed and arms folded or relaxed
• Tuck in chin and lean forward, attempting to touch forehead to knees. Hold for 10+ seconds
◊Do not bounce. Keep glutes on the floor.◊

Low Back Stretches• D. Sitting Curl
• Sit on chair with hips back, feet flat on floor and spread shoulder width apart
• Tuck in chin and bend head forward between knees, with arms reaching toward the back of the chair
• Hold 10+ seconds
◊Keep hips in the chair & feet flat on the floor◊

Low Back Stretches• E. Knees-to-Chest Curl
• Lie on back to start• Bring both knees to chest, then hold
under the knees and pull them towards the chest
• If a stretch is not felt, bring head forward.• Hold for 10+ seconds
◊Avoid placing excess weight on the back of the neck◊

Trunk Rotator Stretches• F. Seated Twist
• Sit with legs crossed• Twist body to the right side. Place
hand on the right side of the thigh and pull.
• Hold 10+ seconds. • Repeat to opposite side
◊Keep back straight and sit tall◊
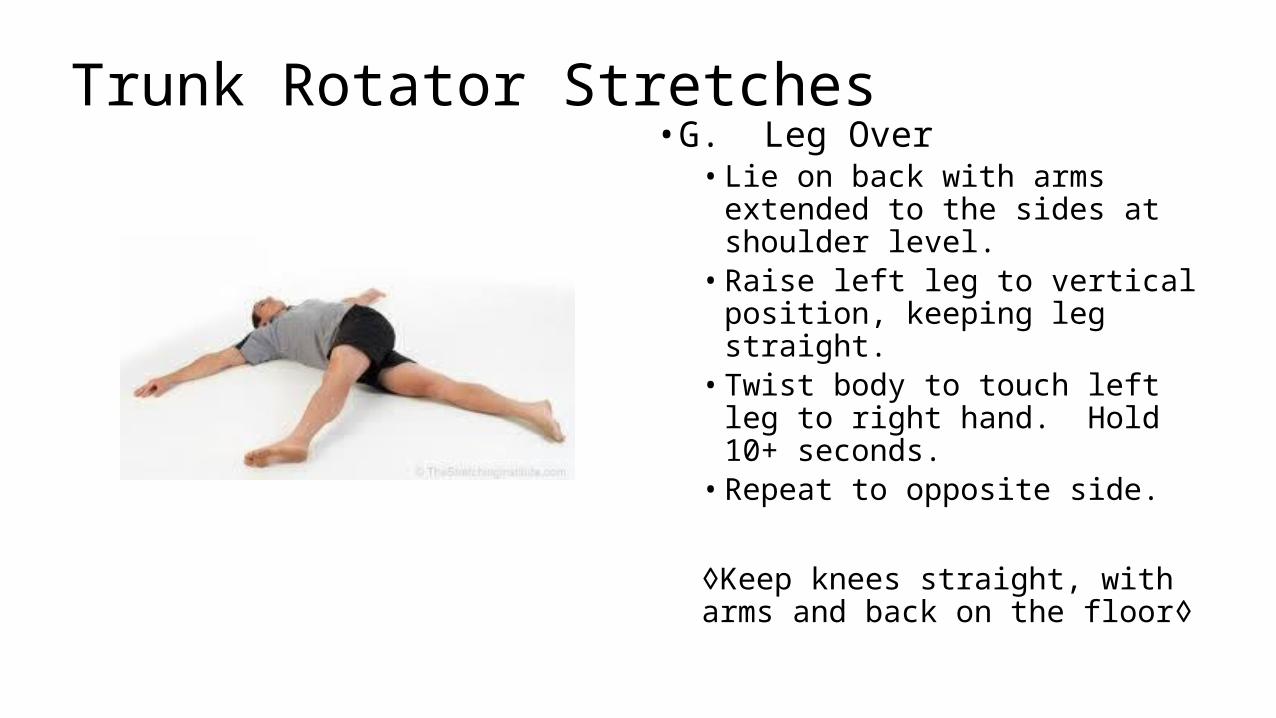
Trunk Rotator Stretches• G. Leg Over
• Lie on back with arms extended to the sides at shoulder level.
• Raise left leg to vertical position, keeping leg straight.
• Twist body to touch left leg to right hand. Hold 10+ seconds.
• Repeat to opposite side.
◊Keep knees straight, with arms and back on the floor◊

Hip Flexor Stretches• H. Lying Knee Pull
• Lie on back with legs extended.• Bring left knee to chest, holding just
under knee with both hands• Pull until stretch is felt; hold 10+
seconds• Repeat on opposite side
◊Make sure extended leg stays on the floor◊

Hip Flexor Stretches• I. Table-Lying Knee Pull
• Lie supine on table with legs over the edge.
• Bring left knee to chest, holding leg just below the knee with both hands. Hold 10+ seconds.
• Repeat to opposite side.
◊Be sure opposite leg is relaxed and hangs over the table◊

Hip Abductor Stretch • J. Billig Stretch
• Stand with feet together and right side to wall, about 18” from wall.
• Place right hand and forearm against the wall at shoulder level, left hand on hips.
• Keep body straight, facing forward, move hips toward the wall.
• Hold for 10+ seconds. Repeat to opposite side
◊Keep knees straight, hips and shoulders facing forward◊

Hamstring Stretches• K. Sitting Toe-Touch
• Sit on the floor with legs together and extended
• Extend arms forward, towards the toes, until a stretch is felt. Hold for 10+ seconds.
◊Do not bounce. Keep legs straight◊

Hamstring Stretches• L. Hamstring Stretch
• Sit with one leg extended, opposite leg bent at knee
• Bend forward at the waist and try to touch the toes.
• Hold 10+ seconds.• Repeat with opposite leg.
◊Do not bounce. Keep extended leg straight◊

Calf Stretches • M. Standing Calf Stretch• Stand facing the wall, with palms against
the wall and body at arm’s length. Spread feet slightly apart.
• Keep feet flat and body in a straight line. Lean forward, bending elbows, until a stretch is felt.
• Hold 10+ seconds.
◊Keep knees and body straight and feet flat◊
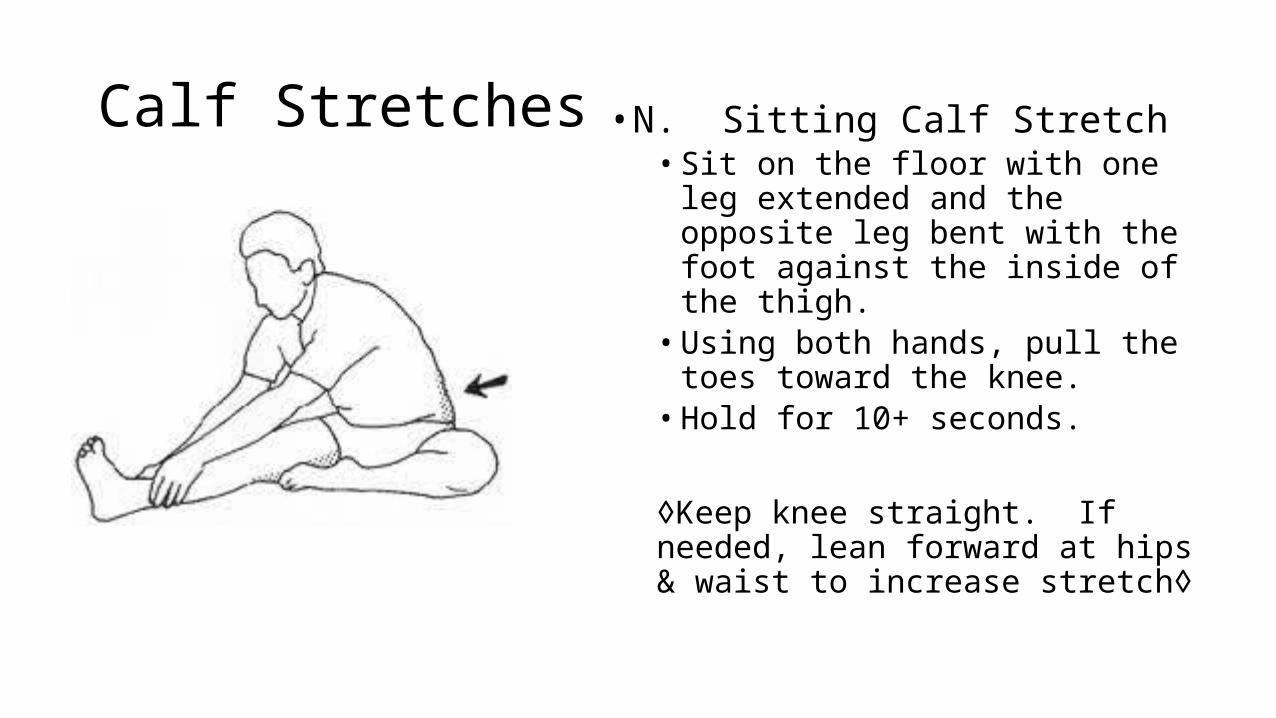
Calf Stretches • N. Sitting Calf Stretch• Sit on the floor with one leg extended and
the opposite leg bent with the foot against the inside of the thigh.
• Using both hands, pull the toes toward the knee.
• Hold for 10+ seconds.
◊Keep knee straight. If needed, lean forward at hips & waist to increase stretch◊
Cardiovascular Fitness

•Aerobic: exercise that uses oxygen to produce energy and can be performed for an extended period of time•Anaerobic: exercise that does not use oxygen to produce energy and can only be performed for short periods
Terminology:

• Purpose: to deliver oxygen and nutrients to the cells of the body and to remove carbon dioxide and other waste products from the cells
• Blood moves through arteries, capillaries and veins to transport these substances
• The heart serves as the pump to circulate the blood through the circulatory system and the lungs
• The gases are exchanged through the alveoli surrounded by capillaries • Training allows the circulatory and respiratory systems to get oxygen and
nutrients to cells more efficiently
The Circulatory System

1. Decreased resting heart rate2. Increased blood volume, red blood cells and hemoglobin (binds with oxygen)3. Decreased recovery time4. Increased number of capillaries→ more efficient exchange of O2, CO2 and nutrients5. Decreased respiratory rate6. Heart muscle becomes stronger → increased stroke volume / more efficient
Benefits of Training:

7. Reduced incidence of heart disease8. Reduced amount of fat in the blood (lower LDL and higher HDL)9. Collateral circulation is developed; more likely to avoid or recover from heart attack10. Lower blood pressure11. Reduced emotional stress12. Control weight13. Build muscle14. Improve posture
Additional Benefits of Training:

• Subject can choose between a 1.5 Mile Run Test or 3.0 Mile Walk Test• Both are easy to administer and interpret
• Before administering the test:1. Determine the length of the testing area (most high school tracks are 400M or ¼ mile)2. Have a stopwatch available to time the subject3. Have the subject warm up and stretch before the test4. Instruct the subject to cover the distance in the shortest time possible5. Have the subject cool down after the test
Cardiovascular Assessments

• Recommended for subjects who have been exercising regularly (3 or more times/week for 4+ weeks)
• Length: 6 laps on a standard track (400 M)• Subject may sprint, jog, or walk, but should complete the assessment in
the shortest time possible
1.5 Mile Run

• Recommended for subjects who have not been exercising regularly • Length: 12 laps on a standard track• Subject must walk the whole time, and should complete the distance
in the shortest time possible
3-Mile Walk

Writing a Cardiovascular Fitness Program

* minimum of 20 minutes
The FITT Formula
Fitness Category
Frequency (days / week)
Intensity (calories/minute)
Time* (calories/ session)
Type of Activity
Beginner 3-5 5 75 Aerobic activity
Very Poor 3-5 5 100 Aerobic activity
Poor 3-5 5-10 150 Aerobic activity
Fair 3-5 10+ 200 Aerobic activity
Good 3-5 10+ 300+ Aerobic activity
Excellent 3-5 10+ 300+ Aerobic activity
Superior 3-5 10+ 300+ Aerobic activity
Muscular Fitness

Muscular fitness: a term used to refer to muscular strength and muscular enduranceStrength: the ability to exert forceEndurance: the ability to contract a muscle repeatedly or hold a contraction for a long period of timeHypertrophy: an increase in the size of muscle cellsAtrophy: a decrease in the size of muscle cellsProgressive resistance: a gradual increase in the amount of weight applied to the musclesOverload: subjecting the body’s systems to loads greater than what they are used toIsometric: a muscle contraction with little or no movement occurring Isotonic: a muscle contraction with movement occurring, usually lengthening and shorteningIsokinetic: a muscle contraction where maximum resistance is applied and speed is kept constant through a full range of motionEccentric: a contraction where muscles shortenConcentric: a contraction where muscles lengthen
Set: a given number of repetitions
Repetition: a complete muscle contraction
Terminology:

1. Skeletal: attached to bones and allow voluntary movements*2. Smooth: line the walls of organs (ie, stomach, blood vessels); involuntary3. Cardiac: make up the walls of the heart; involuntary
*Type involved in muscular strength and endurance
Review of Muscle Types

• Fibers: the long, thin cells that make up muscles• Type of muscle fibers determine strength & endurance
A. Slow-twitch fibers: red in color, contract at a slow rate. These fibers are involved in cardiovascular activities such as running.B. Fast-twitch fibers: white in color; contract quickly. These fibers are important for strength activities.C. Intermediate muscle fibers: have characteristics of both slow- and
fast-twitch fibers. They contract quickly and have good endurance.
• Individual’s muscle fibers are genetically determined, but can be improved through training
• Weight training results in hypertrophy (increase in the size of muscle cells)
• Inactivity results in atrophy (decrease in the size of muscle cells)
Review of Muscle Fibers
• Exercises done to improve muscular strength and endurance• Based on principles of progressive resistance and overload
• Progressive resistance: gradually increasing the amount of weight applied to the muscles
• Overload: subjecting the muscles to loads greater than what they are used to
• Performed with machines or free weights• Uses repetitions and sets
• Repetition: a complete muscle contraction• Set: a given number of repetitions
Weight Training

1. Increase the number of repetitions2. Increase the amount of resistance3. Increase the number of sets4. Decrease the recovery period or rest intervals between sets
Methods for Increasing Strength

• Ability to perform ADL’s (activities of daily living) more efficiently with less fatigue
• Prevent health problems• Strengthen bones – reduced risk of osteoporosis• Prevent muscle injuries and muscle soreness• Helps maintain weight by burning more calories than fat • Help maintain good posture
Benefits of Increased Strength
• Decrease the amount of resistance
• Increase the number of repetitions
• Increase the number of sets
• Increase the recovery period or rest intervals between sets
Methods for Increasing Endurance

• Able to work longer without getting tired
• Able to maintain good posture
• Less likely to have low back problems, muscle soreness and injuries
• Increased lean body mass / decreased fat
• Look and feel better
• Good bone strength
• Reduced risk of cardiovascular disease
Benefits of Increased Muscle Endurance

Muscle Strength Muscle Endurance
Frequency 3 days/week (non-consecutive days) 3 to 6 days/week
Intensity 60 to 90% of 1 RM 20-50% of 1 RM
Time 1 to 3 sets of 3 to 8 reps 1 to 3 sets of 10 to 25 reps
Type of Exercise Weight training Calisthenics (body weight) or Resistance training (weights/machines)
FITT Formula for Muscle Fitness

Isometric Contraction• A muscle contraction with little
or no movement occurring
• +requires little or no equipment
• +builds posture muscles that have to contract for long periods during the day
• - boring/difficult to be motivated

Isotonic Contraction• A muscle contraction with
movement, usually lengthening and shortening
• Eccentric: muscle shortens• Concentric: muscle lengthens
• +same resistance through ROM
• +measurable results
• + high motivation
• - equipment required

Isokinetic Contraction• A muscle contraction where the
speed is kept constant and maximum resistance is applied through a full range of motion
• + constant speed (↑power)
• + constant resistance
• + safety
• - expense of machine
• - don’t allow eccentric contractions

Strength Assessment

•One repetition maximum (1RM): the amount of resistance that can be lifted in one repetition
Terminology:

1. Use slow, smooth and steady movements. Constantly remind yourself to slow each movement down, and stop at both ends of the movement.2. Exercise through a full range of motion.3. Always use a spotter when using with free weights.4. Start with a moderate program and gradually increase the difficulty.5. Do not hold your breath when you lift. Exhale when you lift and inhale when you return.6. Avoid positions that cause arching of the lower back or hyperextension of the wrists.7. Always concentrate on technique.8. Weight lifting should not be competitive. Try to improve your own strength rather than compare yourself to someone else.
Weight Training Guidelines

• Many types of strength assessment are available• A one repetition maximum (1RM) is considered to be the best measure of
strength• This unit will use a modified 1RM test (explained in the following slides)
• Bench press for upper body strength rating• Leg press for lower body strength rating
• These tests are easy to administer and easy to interpret
Strength Assessment
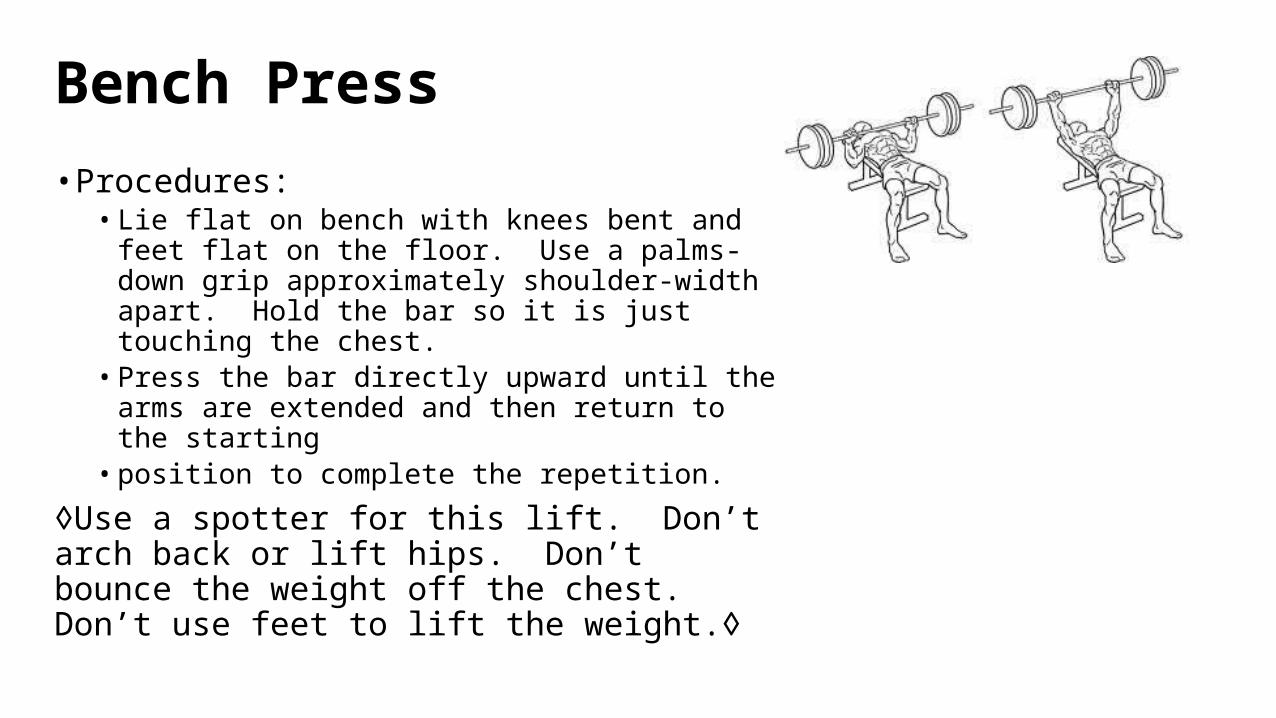
Bench Press
• Procedures:• Lie flat on bench with knees bent and feet flat on
the floor. Use a palms-down grip approximately shoulder-width apart. Hold the bar so it is just touching the chest.
• Press the bar directly upward until the arms are extended and then return to the starting
• position to complete the repetition.
◊Use a spotter for this lift. Don’t arch back or lift hips. Don’t bounce the weight off the chest. Don’t use feet to lift the weight.◊
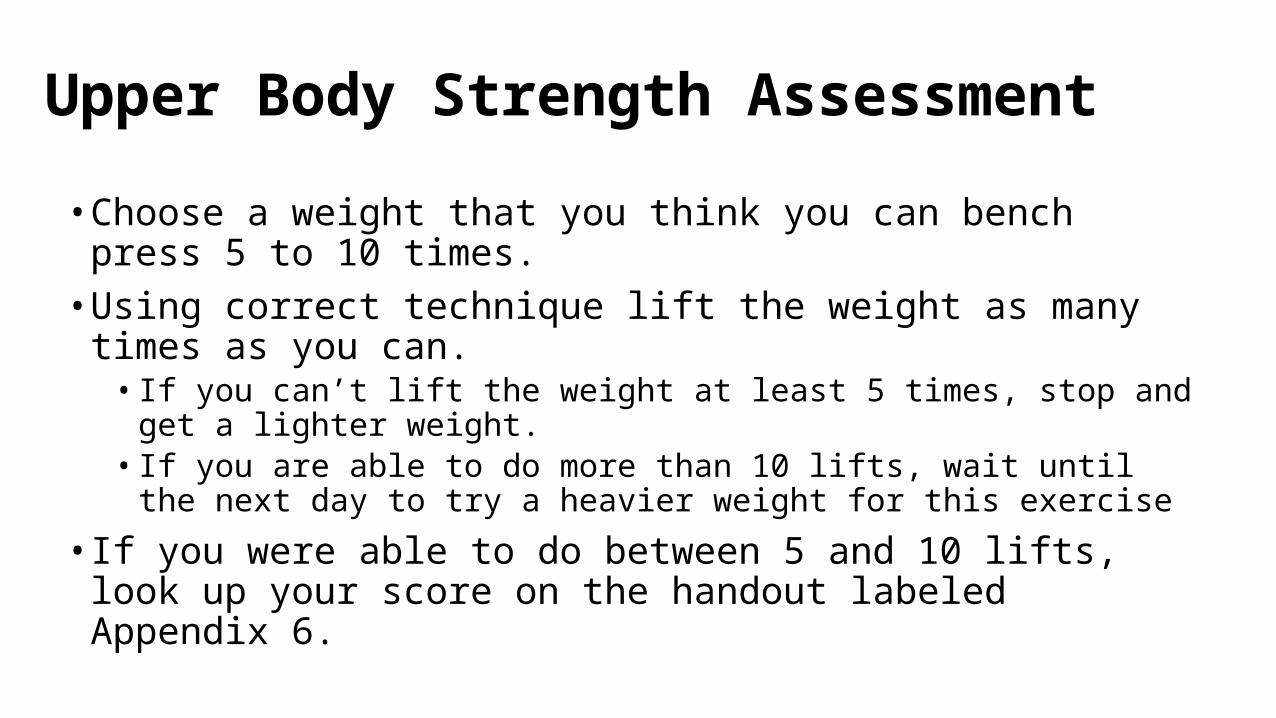
• Choose a weight that you think you can bench press 5 to 10 times.• Using correct technique lift the weight as many times as you can.
• If you can’t lift the weight at least 5 times, stop and get a lighter weight.• If you are able to do more than 10 lifts, wait until the next day to try a heavier
weight for this exercise
• If you were able to do between 5 and 10 lifts, look up your score on the handout labeled Appendix 6.
Upper Body Strength Assessment


• On the handout, find the weight you lifted in the left-hand column and the number of reps in the top row. Then find your score in the box where this row and column intersect. This is your 1RM score.
• Divide your 1RM score by your body weight to get a strength per pound of body weight score.
• For example, a person weighing 150 pounds with a 1RM of 100 pounds on the bench press has a score of .67 pounds per pound of body weight. Now use the tables on the next slide to determine your strength rating.
Upper Body Strength Rating
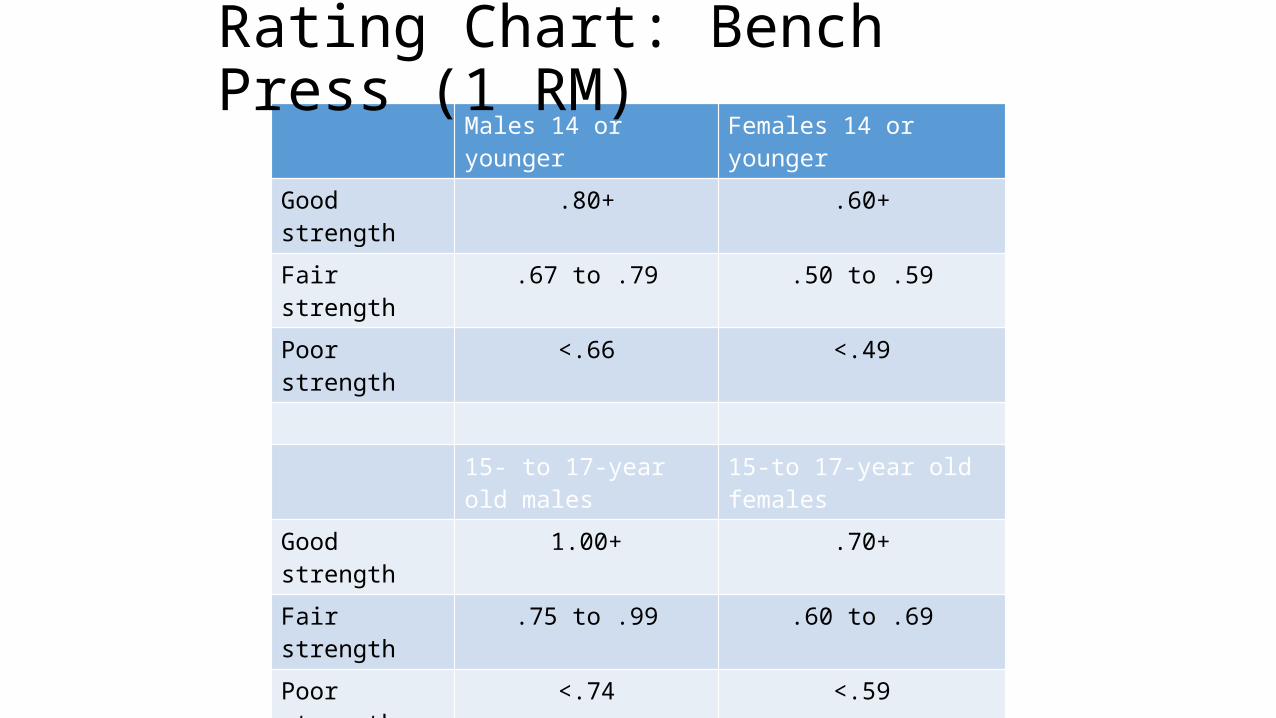
Males 14 or younger Females 14 or younger
Good strength .80+ .60+
Fair strength .67 to .79 .50 to .59
Poor strength <.66 <.49
15- to 17-year old males 15-to 17-year old females
Good strength 1.00+ .70+
Fair strength .75 to .99 .60 to .69
Poor strength <.74 <.59
18-year-old + males 18-year-old + females
Good strength 1.10+ .85+
Fair strength .80 to 1.09 .67 to .84
Poor strength <.79 <.66
Rating Chart: Bench Press (1 RM)

Leg Press• Procedures:
• Adjust the seat distance on the machine for leg length comfort. Sit with your feet resting on the platform.
• Push the platform until your legs are straight, then return to the starting position to complete the repetition.
◊Do not lock knees.◊
• The same procedure will be used for this assessment• Choose a weight for the leg press that you think you can lift 5 to 10 times.• Using correct technique lift the weight as many times as you can.
• If you can’t lift the weight at least 5 times, stop and get a lighter weight.• If you are able to do more than 10 lifts, wait until the next day to try a heavier weight
for this exercise
• If you were able to do between 5 and 10 lifts, look at the score by your weight from handout labeled Appendix 6.
Lower Body Strength Assessment

• On the handout labeled Appendix 6, find the weight you lifted in the left-hand column and the number of reps in the top row. Then find your score in the box where this row and column intersect. This is your 1RM score.
• Divide your 1RM score by your body weight to get a strength per pound of body weight score.
• Use the tables on the following slide to determine your strength rating.
Lower Body Strength Rating

Males 14 or younger Females 14 or younger
Good strength 1.50+ 1.10+
Fair strength 1.35 to 1.49 .95 to 1.09
Poor strength <1.34 <.94
15- to 17-year old males 15-to 17-year old females
Good strength 1.75+ 1.30+
Fair strength 1.50 to 1.74 1.10 to 1.29
Poor strength <1.49 <1.09
18-year-old + males 18-year-old + females
Good strength 1.90+ 1.40+
Fair strength 1.65 to 1.89 1.30 to 1.39
Poor strength <1.64 <1.29
Rating Chart: Leg Press (1 RM)
Writing a Strength Training Program

FITT Guidelines Muscular Strength
Frequency 3 days/week (non-consecutive days
Intensity 60 to 90% 1 RM
Time 1 to 3 sets of 3 to 8 repetitions
Type of Exercise Weight training
FITT Formula for Muscular Strength

• Shoulders• Chest• Back• Biceps• Triceps• Abdomen• Hamstrings• Quadriceps• Calves
Major Muscle Groups
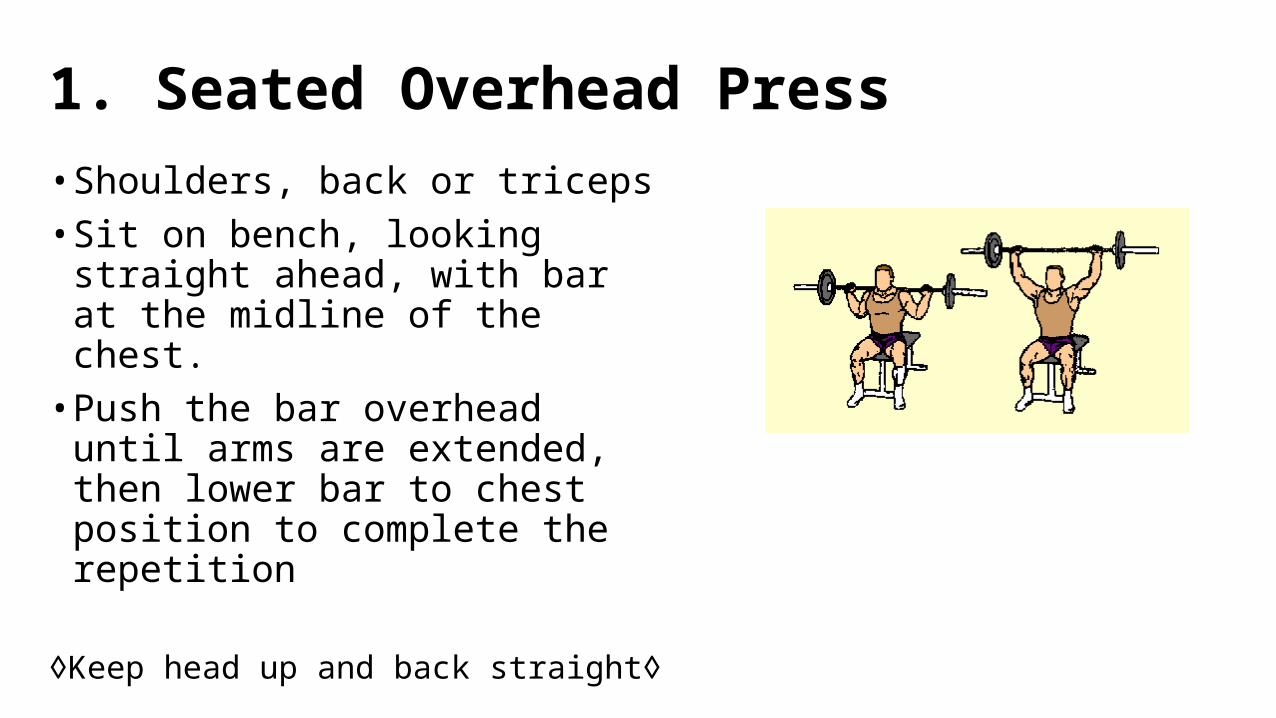
1. Seated Overhead Press• Shoulders, back or triceps• Sit on bench, looking straight ahead,
with bar at the midline of the chest.• Push the bar overhead until arms are
extended, then lower bar to chest position to complete the repetition
◊Keep head up and back straight◊

2. Upright Rowing• Shoulders or biceps• Grasp the bar while standing with hands about
4” apart. Use a palms-down grip and let the bar touch the thighs.
• Keep head straight and raise the bar until it touches the chin.
• Lower bar to starting position to complete the repetition.
◊Keep body straight. Keep bar close to body with elbows high than hands. Don’t jerk to start the exercise.◊

3. Dips• Shoulders or triceps• Body is supported between the parallel
bars.• Dip down as far as possible, then return
to starting position to complete the repetition.
◊Avoid swinging of the body.◊

4. Arm Curl• Biceps• Use a palms-up grip, shoulder-width
apart, with arms extended & bar resting against thighs.
• Curl the bar up to touch the shoulder/neck area, then return to the starting position to complete the repetition.
◊Keep elbows close to the sides of the body. Keep body straight, eyes forward. Do not bounce or use back to lift.◊

5. Chin Up• Back or biceps• Use a palms-down grip, shoulder-width
apart, with arms extended to support body from the bar.
• Pull the body toward the bar until chin is above the bar, then return to the starting position to complete the repetition.
◊Straighten out arms on each repetition. Avoid unnecessary body swing and movement.◊

6. Bench Press• Chest or triceps• Lie flat on bench with knees bent and
feet flat on floor. Use a palms-down grip, shoulder-width apart.
• Press the bar directly up to extend arms, then return to starting position to complete the repetition.
• Use spotter during exercise. Don’t arch back during movement. Don’t bounce weight off chest. Avoid pushing with feet to lift weight.

7. Incline Bench Press
• Chest or triceps• Lie flat on incline bench, with legs straight
and feet flat. Use a palms-down grip, about shoulder-width apart. Hold the bar at the level of the chest.
• Push the bar up until arms are extended and then return to starting position to complete the repetition.
◊Use a spotter. Don’t arch back during movement. Don’t bounce weight off the chest.◊

8. Lat Machine Pulldown• Back• Start in a seated position, grasp the bar in a
wide palms-down grip with arms fully extended.
• Pull the bar down until it touches the base of the neck, and then return to the starting position to complete the repetition.
◊Keep upper body straight. Do not bounce, or lift body to assist in the movement.◊

9. Bent Arm Pullover• Chest• Lie flat on bench with knees bent and feet flat
on floor. Allow head to hang over the end of the bench. Use palms-down grip, with hands about 12” apart. Hold the bar at the chest level.
• Lower the bar back over the head, with the elbows bent as far as possible, then pull the weight back to starting position.
◊Keep elbows close to head and pointing to the ceiling. Avoid arching the back. Keep the bar close to the face during the exercise.◊

10. Sit Up• Abdomen• Lie flat on floor, with legs bent at the knees, and feet flat on the floor.• Curl up to about 30⁰ angle, then return to the starting position to complete the
repetition.◊Stabilize feet if necessary. Do not arch back during exercise. Keep arms flat across chest. Avoid jerking or bouncing movements.◊

11. Leg Curl• Hamstrings• Lie prone, with legs extended and backs of heels
against the bar.• Lift feet upward until legs are fully flexed and then
return to the starting position to complete the repetition.
◊All movement should be from the knee joint. Avoid bouncing or jerking movements.◊

12. Squat• Back, quadriceps, hamstrings, calves• Place bar across shoulders with back straight. Keep head up and feet parallel, about
shoulder-width apart.• Lower body until thighs are parallel with the floor. Rise to the starting position by
extending hips & knees to complete the repetition.
• ◊Use partners as spotters. Keep back straight and chest up through the movement. Do not round the back or bounce at the end of the exercise.◊

13. Leg Extension• Quadriceps• Start in seated position with lower legs at 90°angle and front of ankle against bar.• Extend knees until lower legs are parallel to the floor. Return to starting position to
complete the repetition.
◊Keep back straight. Do not bounce weight during the exercise. Extend legs completely but do not lock knee joint.◊

14. Heel Raise• Calves• Place bar across shoulders. Feet should be
pointed ahead and spread about shoulder-width apart.
• Rise up on toes as far as possible, and then return to the starting position to complete the repetition.
◊Keep body in a straight line and do not bend knees during the exercise. Avoid bouncing during the lift.◊

15. Leg Press• Quadriceps, hamstrings, calves• Adjust the seat distance on the machine
for leg length comfort. Sit with your feet resting on the platform.
• Push the platform until your legs are straight, then return to the starting position to complete the repetition.
◊Do not lock knees.◊

A. Select one exercise for each of the major muscles groups. Do not use the same exercise for more than one muscle group. For example, if you select bench press (#6) to strengthen the chest, you must use a different exercise for the triceps.B. You should rest 90 seconds between sets or use alternating exercises.C. Determine the number of sets (from 1 to 3) and reps (from 3 to 8) for each exercise. Tomorrow you will meet in the weight room and decide on the appropriate resistance using the guesstimate method as explained on the following slide.
Guidelines for Writing a Strength Training Program

• D. The guesstimate method is basically a process of trial and error:• Guess how many pounds you can lift.• Try this weight for the given number of reps for one set.• If the exercise seems too easy and you can do more than the recommended number of
reps, increase the amount of resistance for the following set.• If the exercise is too hard and you cannot do the recommended number of reps, stop
and decrease the amount of resistance for the next set.• Remember to increase the weight whenever you can do more than the recommended
number of reps on the last set.
Guidelines for Writing a Strength Training Program (cont.)
• E. If you have had a recent significant injury or have not been cleared by a doctor following surgery, do not perform any exercises for that muscle group.
• F. After completing four weeks of your strength training program, it is a good idea to reassess your strength. Follow the guidelines for the upper and lower body strength assessment to evaluate your progress.
Guidelines for Writing a Strength Training Program (cont.)

Muscular Endurance Assessment

FITT Guidelines Muscular Endurance
Frequency 3 to 6 days/week
Intensity 20 to 50% of 1 RM
Time 1 to 3 sets of 10 to 25 repetitions
Type of Exercise Calisthenics (body weight) or Resistance training (weights/machines)
FITT Formula for Muscular Endurance
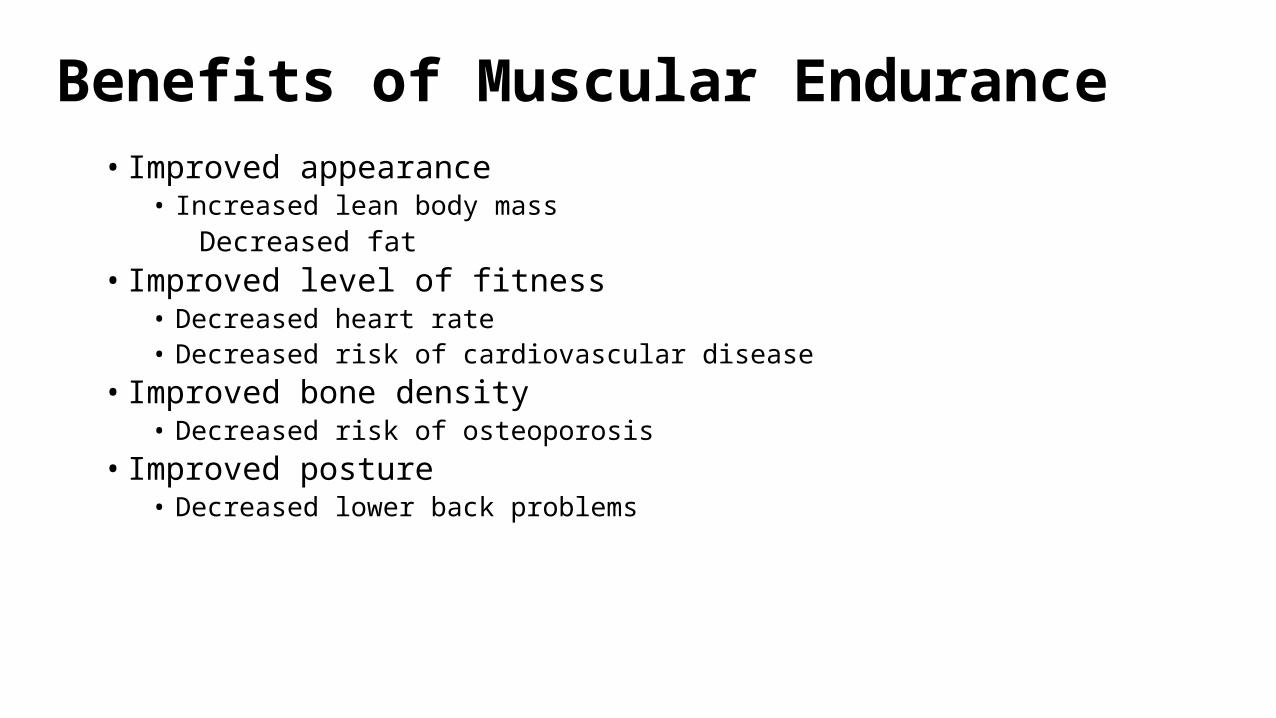
• Improved appearance• Increased lean body mass
Decreased fat• Improved level of fitness
• Decreased heart rate• Decreased risk of cardiovascular disease
• Improved bone density• Decreased risk of osteoporosis
• Improved posture• Decreased lower back problems
Benefits of Muscular Endurance

• This program will assess muscular endurance using 5 tests to assess the body’s large muscle groups
• Combination of isotonic and isometric tests• Use the following rating chart to determine your level of muscular
endurance
Muscular Endurance Assessment
Muscle endurance rating Number of tests passed
Good 5
Fair 3 to 4
Poor <3

• Isometric test for leg/arm muscles & trunk stabilizers• Lie on your left side• Lift your body so that it is supported by your left hand and the outside of
your left foot• Raise your right arm and leg in the air. Hold this position as long as
possible.• Return to starting position and repeat test on right side.• Passing scores:
• Males – hold position for 30 seconds on each side• Females – hold position for 20 seconds on each side
Assessment #1 – Side Stand

• Isotonic test for upper back muscles• Lie facedown on a weight bench about 15 – 20” high. Upper body should hang off the
end of the bench; top of the hips should be even with the end of the bench• Have a partner hold your calves to the bench. Fold your arms and place them below
your chin• Start with your upper body bent at the hip so the chin is near the floor & palm of hand
is resting on the floor• Keep your head and neck in line with your upper body and slowly lift your head and
upper body until it is in line with your lower body • Lower to the starting position so that the palm of the lower hand touches the floor• Perform one lift every 3 seconds• Passing scores:
• Males – 20 repetitions• Females – 15 repetitions
Assessment #2 – Trunk Extension
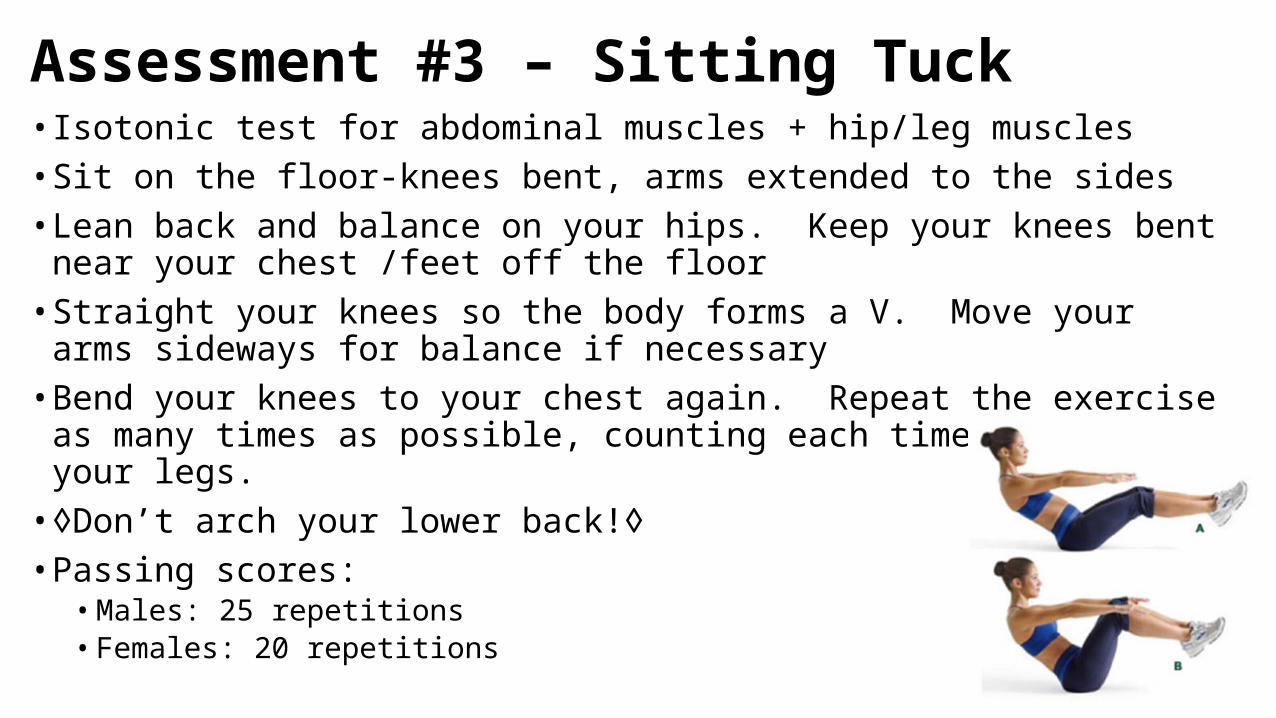
• Isotonic test for abdominal muscles + hip/leg muscles• Sit on the floor-knees bent, arms extended to the sides• Lean back and balance on your hips. Keep your knees bent near your chest
/feet off the floor• Straight your knees so the body forms a V. Move your arms sideways for
balance if necessary• Bend your knees to your chest again. Repeat the exercise as many times as
possible, counting each time you extend your legs.• ◊Don’t arch your lower back!◊• Passing scores:
• Males: 25 repetitions • Females: 20 repetitions
Assessment #3 – Sitting Tuck

• Isotonic test for hip and leg muscles• Assume a push-up position with weight on hands and feet• Pull your right knee under your chest, keeping the left leg straight• Change legs by pulling your left leg forward and pushing your right leg back.
Continue changing legs• Count the number of leg changes in 1 minute• ◊Don’t let your lower back sag!◊• Passing scores: males & females – 25 changes
Assessment #4 – Leg Change
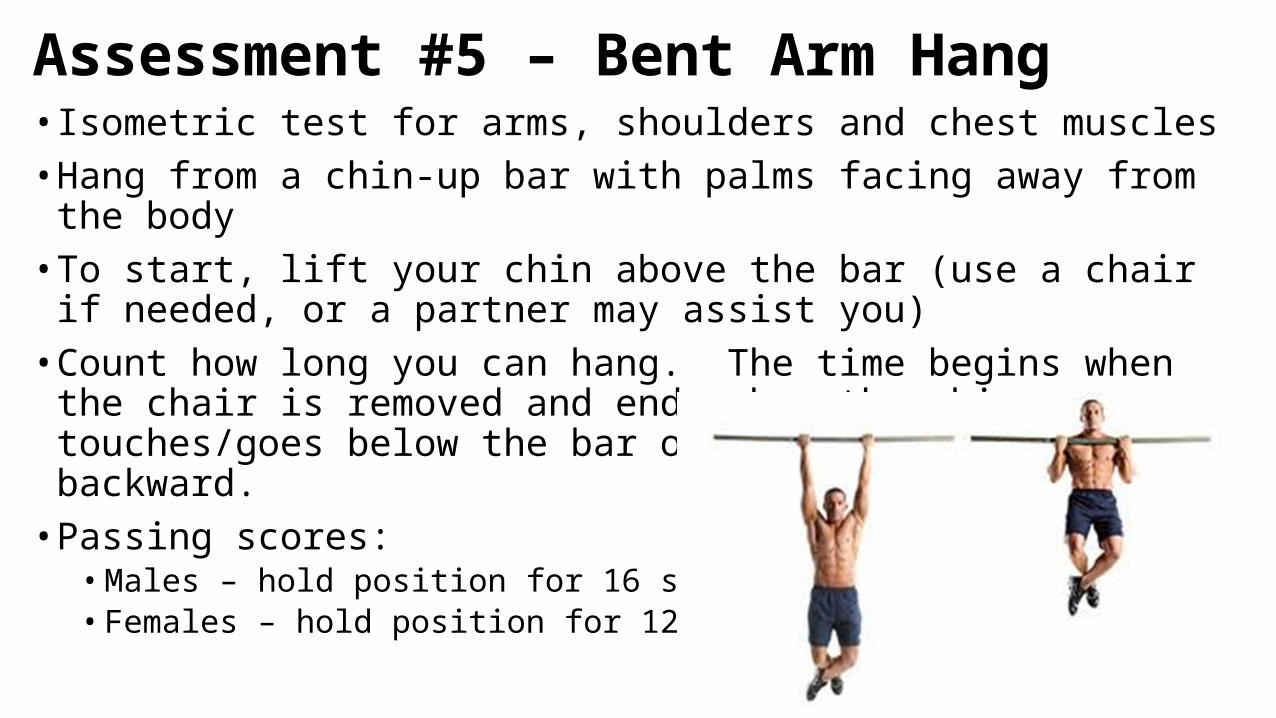
• Isometric test for arms, shoulders and chest muscles• Hang from a chin-up bar with palms facing away from the body• To start, lift your chin above the bar (use a chair if needed, or a partner may
assist you)• Count how long you can hang. The time begins when the chair is removed
and ends when the chin touches/goes below the bar or the head tilts backward.
• Passing scores:• Males – hold position for 16 seconds• Females – hold position for 12 seconds
Assessment #5 – Bent Arm Hang

Muscular Endurance Program

FITT Guidelines Muscular Endurance
Frequency 3 to 6 days/week
Intensity 20 to 50% of 1 RM
Time 1 to 3 sets of 10 to 25 repetitions
Type of Exercise Calisthenics (body weight) or Resistance training (weights/machines)
FITT Formula for Muscular Endurance
1. Warm up and stretch prior to exercise2. Perform each exercise in order3. Breathe normally while exercising4. Start with low-intensity exercises and progress slowly to higher-intensity exercises5. Use proper body mechanics and good techniques to avoid injuries6. Move through a full range of motion7. Avoid working the same muscle groups in consecutive exercises8. Exercise each specific muscle group 9. Vary your exercise routine to avoid boredom10. If the circuit is too difficult, do as many repetitions as possible, then walk or jog until the next exercise11. If the circuit is too easy, complete multiple sets (rather than one set to exhaustion) or repeat the circuit (up to 3 times)12. For each exercise, write on your record sheet the number of reps you completed in 1 minute (up to 20 reps)
Guidelines for Endurance Exercises

Muscle Endurance Circuit Training Program
Exercise Number of repetitions
Start with warm-up and stretching1. Stride jump 20 repetitions
2. Side leg raise (right leg) 20 repetitions
3. Side leg raise (left leg) 20 repetitions
4. Trunk (upper back) lift 20 repetitions
5. Bridging 20 repetitions
6. Push-up or modified push-up 15 repetitions7. Curl-up with twist 20 repetitions
8. High knee jog 20 repetitions
9. Prone arm lift 20 repetitions
End with cool-down and stretch

• This program consists of 9 stations• Each station is performed for 1 minute or until the recommended number
of repetitions are completed – whichever occurs first• Advantages of circuit training:
• Requires little or no equipment• Quick - each station lasts for 1 minute• Multiple options for each station
• Disadvantage of circuit training:• High number of reps often leads to performing exercises incorrectly (due to fatigue)
Circuit Training Program

• Muscle groups: legs and arms + cardiovascular fitness• Stand with left leg forward and right leg back. Hold right arm at shoulder length
in front of body and left arm straight back.• Jump, moving right foot forward and left foot back. Arms switch position when
feet change places• Feet should be 18 to 24” apart.• Continue jumping, alternating feet and arms.
Stride Jump

• Muscle groups: hip and thigh muscles• Lie on left side and use arms for balance.• Lift the right leg 45 degrees, keeping the knee pointing forward. Don’t let the leg
rotate.• Lower your leg, then repeat the movement. Use an ankle weight to increase the
intensity.• Switch and repeat the exercise with the left leg.
Side Leg Raise

• Muscle group: upper back• Lie facedown (prone) with hands intertwined behind your neck.• Pull your shoulder blades together, raise your elbows off the floor, then lift your
head and chest off the floor. Arch the back until the sternum clears the floor.• Lower your trunk and repeat the exercise.• You may need to place your feet under a bar or have someone hold them down.
Trunk (Upper Back) Lift

• Muscle group: glutes and hamstrings• Lie on your back with knees bent and feet close to glutes.• Contract glute muscles. Lift the hips and raise your back off the floor until the hip
joint is straight.• Lower your hips to the floor and repeat the exercise.• ◊Do not overarch your lower back.◊
Bridging

• Muscle groups: pectorals and triceps• Lie prone on a mat or carpet with hands under your shoulders, fingers spread, and legs
straight. Legs should be slightly apart with toes tucked under.• Push up until your arms are straight. Keep your legs and back straight so your body forms a
straight line.• Lower your body by bending your elbows until they are parallel to the floor, then push up
until arms are fully extended.• Repeat, alternating between full extension and 90°flexion positions.• ◊Do not allow the hips to sag or bend at the hips more than 5 degrees.◊• If you cannot complete 20 reps of the standard push-up, try a modified version where the
knees stay on the floor.
Push Up
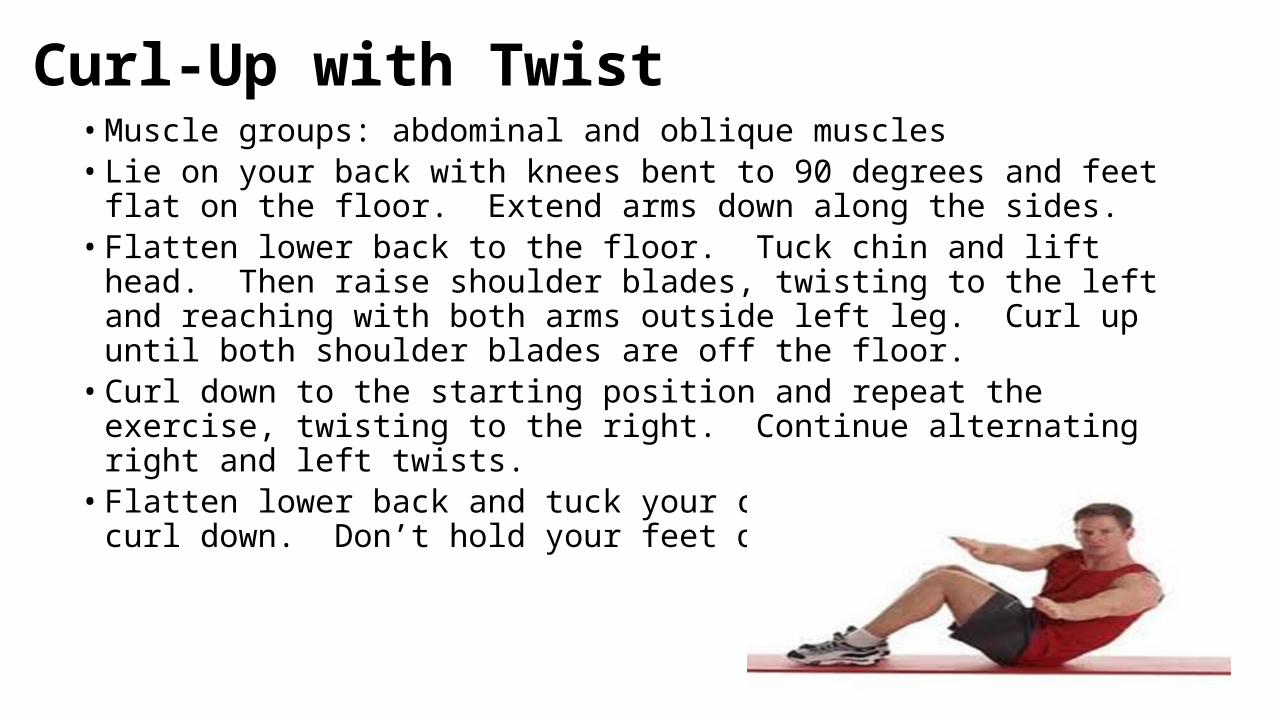
• Muscle groups: abdominal and oblique muscles• Lie on your back with knees bent to 90 degrees and feet flat on the floor. Extend
arms down along the sides.• Flatten lower back to the floor. Tuck chin and lift head. Then raise shoulder
blades, twisting to the left and reaching with both arms outside left leg. Curl up until both shoulder blades are off the floor.
• Curl down to the starting position and repeat the exercise, twisting to the right. Continue alternating right and left twists.
• Flatten lower back and tuck your chin as you curl up and curl down. Don’t hold your feet down.
Curl-Up with Twist

• Muscle group: muscles of arms and legs + cardiovascular fitness
• Jog in place. Try to lift each knee so that the upper leg is parallel with the floor.
• Count 1 each time the right knee touches the floor.• Try to do 1 to 2 steps per second.
High Knee Jog

• Muscle groups: back and shoulder muscles; prevents poor posture• Lie prone on floor with arms extended and held against your ears.• Keep forehead and chest on floor and lift arms so the hands are 6 inches off the
floor.• Lower arms and then repeat the exercise. Keep your arms held against ears and
elbows straight.
Prone Arm Lift

Completing a Fitness Profile

• Fitness profile: a short summary of the results of your fitness assessments
Terminology:

• Content
Fitness Profile
Rating /Score
Body Composition Flexibility Cardiovascular Fitness
Muscular
Upper
Strength
Lower
Muscular Endurance
Superior
Excellent
Very Good
Good
Fair
Poor

A. Determine your current level of physical activityB. Decide which categories you would like to improveC. Select activities that will help you make progress in those categoriesD. Set goals to help you make progress
1. Goals should be specific2. Goals should be realistic3. Goals should be personalized 4. Set goals that focus on activity and/or fitness
E. Write down your goals F. Periodically evaluate your goals to see how you are doing/make necessary changes
Guidelines for Setting Fitness Goals

• Physical activity: activity used to develop one or more components of physical fitness;
• Basketball, soccer, etc• Stretching exercises• Weight lifting
• Physical fitness:• Cardiovascular fitness• Flexibility• Muscular strength• Muscular endurance
Physical Activity vs. Physical Fitness Goals

• Physical Activity Days/Week Weeks • 1. Stretching exercises 5 4• 2. Jogging 3 4
• Physical Fitness Number/Score Date• 1. ↑ Sit & reach score 10 April 15
*set for 4 weeks or less
Examples of Short-Term Goals*

• Physical Activity Days/Week Weeks • 1. Strength exercises 3 8• 2. Play volleyball 5 6
• Physical Fitness Number/Score Date• 1. ↓1.5 mile run score 10:15 June 1st
• 2. ↑bench press Good July 1st
*set for 4 weeks or more
Examples of Long-Term Goals*