phonak baseo q - find the best hearing aid solution€¦ · 1. welcome 5 2. important safety...
TRANSCRIPT
Phonak BaseoTM Q Q15, Q10, Q5
User Guide

1. Welcome 52. Important safety information:
Please read before operating your hearing aid for the first time 62.1 Hazard warnings 6
2.2 Information on product safety 9
3. Hearing aid description 124. Step-by-step instructions for using
the hearing aid 17Step 1. Getting to know your hearing aid 17
Step 2. Battery preparation 19
Step 3. Inserting the battery 20
Step 4. Turning on the hearing aid 21
Step 5. Inserting the hearing aid 22
Step 6. Adjusting the volume control behind the ear 28
Step 7. Selecting the hearing program behind the ear 29
Step 8. Removing the hearing aid 30
Contents
2
Step 9. Turning off the hearing aid 32
Step 10. Changing the battery 32
5. Care and maintenance 336. Troubleshooting 357. Wireless accessories description 378. Service and warranty 399. Compliance information 4110. Information and description of symbols 42
3
4
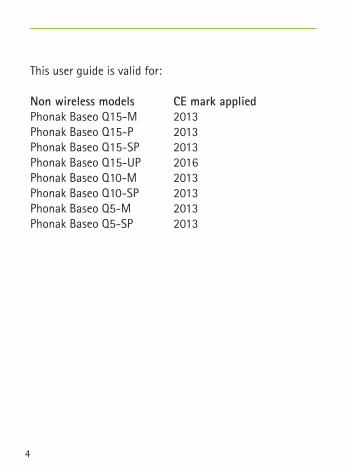
This user guide is valid for:
Non wireless models CE mark applied Phonak Baseo Q15-M 2013 Phonak Baseo Q15-P 2013 Phonak Baseo Q15-SP 2013 Phonak Baseo Q15-UP 2016 Phonak Baseo Q10-M 2013 Phonak Baseo Q10-SP 2013 Phonak Baseo Q5-M 2013 Phonak Baseo Q5-SP 2013

5
Your hearing aids have been developed by Phonak – the world leader in hearing solutions based in Zurich, Switzerland.
These premium products are the result of decades of research and expertise and are designed to keep you connected to the beauty of sound! We thank you for making such a great choice and wish you many years of listening pleasure.
Please read the user guide carefully to make sure that you understand and get the best out of your hearing aids. For more information about features and benefits, simply contact your hearing care professional.
Phonak – life is on www.phonak.com
1. Welcome

6
Please read the information on the following pages before using your hearing aid.
A hearing aid will not restore normal hearing and will not prevent or improve a hearing impairment resulting from organic conditions. Infrequent use of a hearing aid does not permit a user to attain full benefit from it. The use of a hearing aid is only part of hearing habilitation and may need to be supplemented by auditory training and instruction in lipreading.
2.1 Hazard warnings
! The intended use of hearing aids is to amplify and transmit sound to the ears and hereby compensate for impaired hearing. The hearing aids (specially programmed for each hearing loss) must only be used by the intended person. They should not be used by any other person as they could damage hearing.
! Changes or modifications to the hearing aid that were not explicitly approved by Phonak are not permitted. Such changes may damage your ear or the hearing aid.
2. Important safety information

7
! Do not use the hearing aids in explosive areas (mines or industrial areas with danger of explosions, oxygen rich environments or areas where flammable anesthetics are handled).
! Hearing aid batteries are toxic if they are swallowed! Keep out of reach of children, mentally challenged people and pets. If batteries are swallowed, consult your physician immediately!
! If you feel pain in or behind your ear, if it is inflamed, if skin irritation or accelerated accumulations of ear wax occur, please check with your hearing care professional or physician.
! In very rare cases, the dome can remain in your ear canal when removing the hearing tube from the ear. In the unlikely case that the dome does get stuck in your ear canal, it is strongly recommended to see a physician for safe removal.
! Hearing programs in the directional microphone mode reduce background noises. Please be aware that warning signals or noises coming from behind, e. g. cars, are partially or entirely suppressed.

8
2. Important safety information
! This hearing aid is not for children below 36 months. It contains small parts that can cause choking, if swallowed by children. Keep out of reach of children and mentally challenged people or pets. If swallowed, consult a physician or hospital immediately.
! Do not make a wire connection from your hearing aid to any external audio sources like radio etc. That could cause injuries on your body (electric shock).
! The following is only applicable for persons with active implantable medical devices (i.e. pacemakers, defibrillators, etc.):
S Keep magnets (i.e. battery handling tool, EasyPhone magnet, etc.) at least 15 cm (6 inches) away from the active implant.
S You are not permitted to use wireless accessories for your hearing aids. Ask your hearing care professional for details.
S If using a Phonak wireless accessory, consult the “Important safety information” section of your wireless accessory user guide for more information.
9
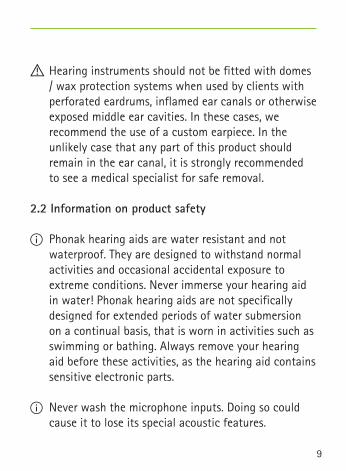
! Hearing instruments should not be fitted with domes / wax protection systems when used by clients with perforated eardrums, inflamed ear canals or otherwise exposed middle ear cavities. In these cases, we recommend the use of a custom earpiece. In the unlikely case that any part of this product should remain in the ear canal, it is strongly recommended to see a medical specialist for safe removal.
2.2 Information on product safety
I Phonak hearing aids are water resistant and not waterproof. They are designed to withstand normal activities and occasional accidental exposure to extreme conditions. Never immerse your hearing aid in water! Phonak hearing aids are not specifically designed for extended periods of water submersion on a continual basis, that is worn in activities such as swimming or bathing. Always remove your hearing aid before these activities, as the hearing aid contains sensitive electronic parts.
I Never wash the microphone inputs. Doing so could cause it to lose its special acoustic features.

10
2. Important safety information
I Protect your hearing aid from heat (never leave it near a window or in the car.) Never use a microwave or other heating devices to dry your hearing aid. Ask your hearing care professional about suitable drying methods.
I The dome should be changed every three months or when it becomes stiff or brittle. This is to prevent the dome from detaching from the tube spout during insertion into or removal from the ear.
I When you are not using your hearing aid, leave the battery compartment open so that any moisture can evaporate. Make sure that you always completely dry your hearing aid after use. Store the hearing aid in a safe, dry and clean place.
I Do not drop your hearing aid! Dropping onto a hard surface can damage your hearing aid.
I Always use new batteries for your hearing aid. In case a battery is leaking, replace it immediately with a new one to avoid any skin irritation. You can return used batteries to your hearing care professional.
11
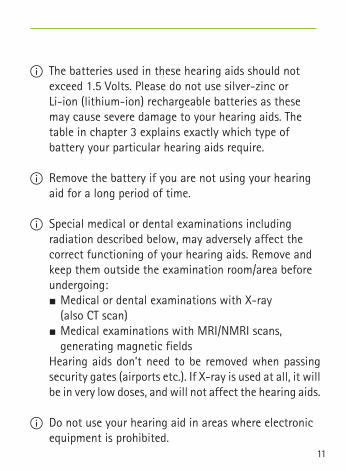
S Medical or dental examinations with X-ray (also CT scan)
S Medical examinations with MRI/NMRI scans, generating magnetic fields
Hearing aids don’t need to be removed when passing security gates (airports etc.). If X-ray is used at all, it will be in very low doses, and will not affect the hearing aids.
I Do not use your hearing aid in areas where electronic equipment is prohibited.
I Special medical or dental examinations including radiation described below, may adversely affect the correct functioning of your hearing aids. Remove and keep them outside the examination room/area before undergoing:
I The batteries used in these hearing aids should not exceed 1.5 Volts. Please do not use silver-zinc or Li-ion (lithium-ion) rechargeable batteries as these may cause severe damage to your hearing aids. The table in chapter 3 explains exactly which type of battery your particular hearing aids require.
I Remove the battery if you are not using your hearing aid for a long period of time.

12
3. Hearing aid descriptionThe following user instructions describe different hearing aid models: The M, P, SP and UP hearing aids.
The different hearing aids can be adapted with a variety of earmolds. On the following pages use the labeled drawings to identify the earmold that you use.
The following table shows what battery you need for your hearing aid model.
Model Zinc air battery size IEC ANSI (marking on package) code codeM 13 (orange) PR48 7000ZD P 13 (orange) PR48 7000ZD SP 13 (orange) PR48 7000ZD UP 675 (blue) PR44 7003ZD
Please ensure you use the correct type of battery in your hearing aids (zinc-air). Please also read chapter 2.2 for further information on product safety.
13
e f
g
a
b
c
d
h
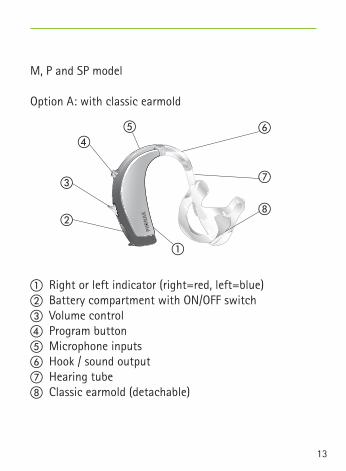
M, P and SP model
Option A: with classic earmold
a Right or left indicator (right=red, left=blue)b Battery compartment with ON/OFF switchc Volume controld Program buttone Microphone inputsf Hook / sound outputg Hearing tubeh Classic earmold (detachable)

e
aa
b
c d
M, P and SP model
Option B: with dome Option C: with SlimTip
a Hearing tubeb Earmold: Dome (detachable)c Retentiond Earmold: SlimTip (detachable)e Removal handle
3. Hearing aid description
14
15
c
d
e f
g
h
b
a
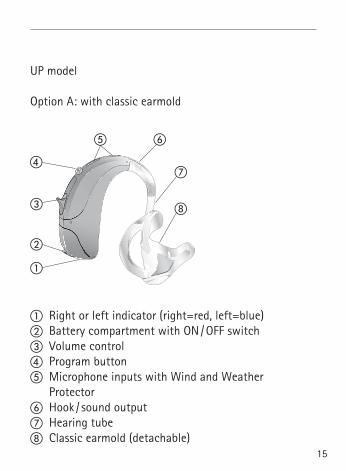
UP model
Option A: with classic earmold
a Right or left indicator (right=red, left=blue)b Battery compartment with ON / OFF switch c Volume controld Program buttone Microphone inputs with Wind and Weather
Protectorf Hook / sound outputg Hearing tubeh Classic earmold (detachable)

UP model
Option B: Power SlimTube with classic earmold
a Right or left indicator (right=red, left=blue)b Battery compartment with ON / OFF switch c Volume controld Program buttone Microphone inputs with Wind and Weather
Protectorf Power SlimTubeg Classic earmold (detachable)
3. Hearing aid description
c
d
e f
g
b
a
16

17
The following chapter provides step-by-step instructions on how to use your hearing aid. Please follow these steps carefully. In the drawings, the parts that are particularly important for each step are shown in green.
Step 1. Getting to know your hearing aid
Take the hearing aid in your hand and try out the hearing aid controls. This will make it easier for you to feel and operate the controls later on when wearing the hearing aid.
4. Step-by-step instructions for using the hearing aid

Fig. 1a
Increase volume
Decrease volume
Fig. 1b
Program button
To increase the volume, press the volume control upwards. To decrease the volume, press the volume control downwards (Fig. 1a).
In order to change a hearing program, press the program button displayed (Fig. 1b).
18
4. Using the hearing aid

Fig. 2
Step 2. Battery preparation
Remove the protective foil from the new battery (Fig. 2). Wait for two minutes before inserting to activate the battery.
19

Fig. 3a Fig. 3b
Step 3. Inserting the battery
Take the hearing aid in your hand and open the battery door (Fig. 3a). Insert the battery so that you see the + symbol on the battery (Fig. 3b).
20
4. Using the hearing aid

Fig. 4
21
Step 4. Turning on the hearing aid
Switch on the hearing aid by closing the battery compartment (Fig. 4).
I Open and close the battery compartment gently and carefully.
I Check if you feel resistance when closing the battery compartment. Check to make sure the battery is correctly inserted and in the correct direction. If the battery is inserted the wrong way, the hearing aid will not work and the battery compartment can be damaged.

22
The hearing aid is now switched on. It can take a few seconds before it starts. (When you wear the hearing aid, you will hear an acoustic signal).
Step 5. Inserting the hearing aid
This step shows you how to correctly insert the hearing aid. The instructions apply for all hearing aid models. The type of earmold determines how the hearing aid is inserted.
I Each hearing aid is individually programmed for your right or left ear. For the first step identify right and left so you will be able to insert your hearing aid in the correct ear.
4. Using the hearing aid
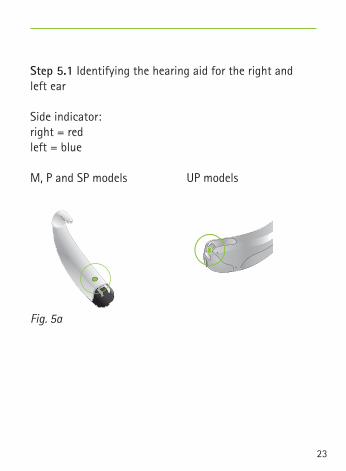
Fig. 5a
Step 5.1 Identifying the hearing aid for the right and left ear
Side indicator: right = red left = blue
M, P and SP models UP models
23

Fig. 5b Fig. 5c Fig. 5d
24
Step 5.2 Inserting the hearing aid with classic earmold
Before inserting the earmold, check that the earmold tube is slided over the hearing aid hook correctly. With your right hand, take your earmold for the right ear (red mark on the hearing aid, see step 5.1) between your thumb and forefinger (Fig. 5b).
Take the earmold up to your ear (Fig. 5b). Place the ear canal part of the earmold into your ear canal (see the part circled in green (Fig. 5b). Next place the hearing aid behind your ear (Fig. 5c). Then insert the upper part of the earmold into the upper part of the bowl of your ear.
4. Using the hearing aid
25
Fig. 5e
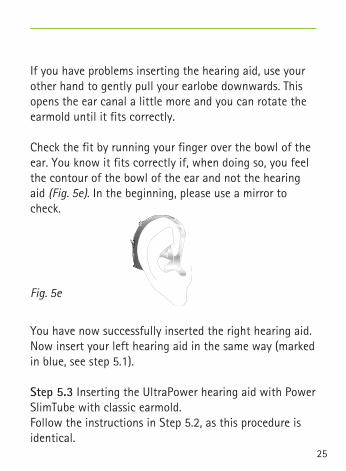
If you have problems inserting the hearing aid, use your other hand to gently pull your earlobe downwards. This opens the ear canal a little more and you can rotate the earmold until it fits correctly.
Check the fit by running your finger over the bowl of the ear. You know it fits correctly if, when doing so, you feel the contour of the bowl of the ear and not the hearing aid (Fig. 5e). In the beginning, please use a mirror to check.
You have now successfully inserted the right hearing aid. Now insert your left hearing aid in the same way (marked in blue, see step 5.1).
Step 5.3 Inserting the UltraPower hearing aid with Power SlimTube with classic earmold. Follow the instructions in Step 5.2, as this procedure is identical.

Fig. 5f Fig. 5g Fig. 5h
26
Step 5.4 Inserting the hearing aid with a dome
Before inserting the dome, check that it is correctly attached to the tube (dome length is completely sliced over the tube). With your right hand, place the right hearing aid (red mark on the hearing aid, see step 5.1) behind your right ear (Fig. 5f). Take the hearing tube between your thumb and forefinger. Insert the dome deep enough into the ear canal so that the hearing tube lies flat on your ear (Fig. 5g). If your hearing aid has a retention cord, then press it into the bowl of the ear in order to retain the dome in the ear canal (Fig. 5h).
4. Using the hearing aid

27
If you have problems inserting the hearing aid, use your other hand to gently pull your earlobe downwards. This opens the ear canal a little more and you can rotate the dome until it fits correctly.
You have now successfully inserted the right hearing aid. Now insert your left hearing aid in the same way (marked in blue, see step 5.1).
28
Fig. 6
Increase volume
Decrease volume
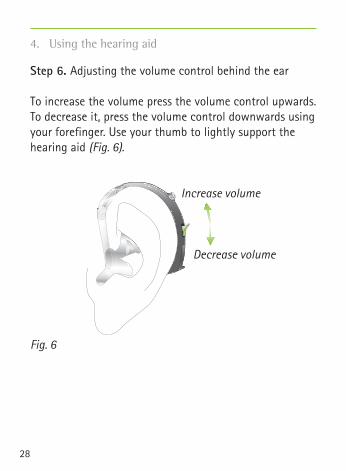
Step 6. Adjusting the volume control behind the ear
To increase the volume press the volume control upwards. To decrease it, press the volume control downwards using your forefinger. Use your thumb to lightly support the hearing aid (Fig. 6).
4. Using the hearing aid

29
Fig. 7
Step 7. Selecting the hearing program behind the ear
In order to select or change a hearing program, press the program button displayed (Fig. 7).
If you press it again, you change to the next program. A signal indicates the change. A signal tone can only be easily heard if you have turned on the hearing aids and you are wearing it correctly behind the ear.

30
Fig. 8a
Fig. 8b
Step 8. Removing the hearing aid
Step 8.1 Removing the hearing aid with classic earmold
Take the hearing aid behind your ear (do not touch the tube!) and lift it above the upper part of your ear and then gently let go (Fig. 8a).
Use your thumb and forefinger to grasp the earmold in your ear (not the tube!) and gently remove it from your ear (Fig. 8b).
4. Using the hearing aid

Fig. 8c
31
Step 8.2 Removing the hearing aid with a dome
Grasp the hearing aid by the hearing tube and carefully remove it from your ear (Fig. 8c).
! In very rare cases, the dome can remain in your ear canal when removing the hearing tube from the ear. In the unlikely case that the dome does get stuck in your ear canal, it is strongly recommended to see a physician for safe removal.

32
Fig. 9
Step 9. Turning off the hearing aid
You can turn off your hearing aid by opening the battery compartment (Fig. 9).
Step 10. Changing the battery
Your hearing aid will indicate with a double beep, that the battery soon needs to be changed. You typically have up to 30 minutes to change the battery, however this can differ and might be considerably shorter. We recommend that you always keep a spare battery on hand.
4. Using the hearing aid

33
5. Care and maintenanceDiligent and routine care of your hearing aid contributes to outstanding performance and a long service life.
Please use the following specifications as a guideline:
General information Before using hair spray or applying cosmetics, you should remove your hearing aid from your ear, because these products may damage it.
When you are not using your hearing aid, leave the battery door open so that any moisture can evaporate. Make sure that you always completely dry your hearing aid after use. Store the hearing aid in a safe, dry and clean place.
34
Daily Inspect the earmold (dome or SlimTip) and tube for earwax and moisture deposits. Clean the surfaces with a lint-free cloth. Never use cleaning agents such as household detergents, soap, etc. for cleaning your hearing aid. It is not recommended to rinse these parts with water, risk for lodging in the tube. If you need to clean your hearing aid intensively, ask your hearing care professional for advice and information on filters or drying capsules.
Weekly Clean the earmold (dome or SlimTip) with a soft, damp cloth or with a special cleaning cloth for hearing aids. For more in depth maintenance instructions or for more than basic cleaning, please see your hearing care professional.
Monthly Inspect your hearing tube for color changes, hardening, or cracks. In the case of such changes, the hearing tube has to be replaced. Please see your hearing care professional.
5. Care and maintenance

35
6. TroubleshootingHearing aids sound softer than usual / no sound First check whether you can adjust and make the sound louder with the volume control. Then check the hearing tube and earmold for earwax residue and clean if necessary. Check whether the battery is correctly inserted and properly fitted, adjust the fit if necessary. If there is no improvement, change the battery. If the problem persists, contact your hearing care professional.
Battery discharges too quickly Insert a new battery and make note of exactly how long it lasts. Contact your hearing care professional with this information, they will be able to help and advise you.
Crackling or buzzing noises Check the hearing tube and earmold for earwax residue.Check the hearing tube for damage (color changes, hardening or cracks) and contact your hearing care professional if necessary for replacement.
Whistling Check whether the earmold is correctly and firmly fitted. If this is the case, but the problem persists, please consult with your hearing care professional.

36
Pain or inflammation in your ear Remove the hearing aid and consult with your hearing care professional. If the problem is serious, please contact your physician.
6. Troubleshooting
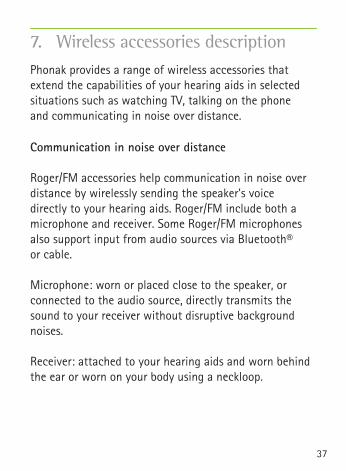
Phonak provides a range of wireless accessories that extend the capabilities of your hearing aids in selected situations such as watching TV, talking on the phone and communicating in noise over distance.
Communication in noise over distance Roger/FM accessories help communication in noise over distance by wirelessly sending the speaker's voice directly to your hearing aids. Roger/FM include both a microphone and receiver. Some Roger/FM microphones also support input from audio sources via Bluetooth® or cable.
Microphone: worn or placed close to the speaker, or connected to the audio source, directly transmits the sound to your receiver without disruptive background noises.
Receiver: attached to your hearing aids and worn behind the ear or worn on your body using a neckloop.
7. Wireless accessories description
37

* Some Roger/FM microphones also support input from audio sources via Bluetooth® or cable.
Behind-the-ear receiver option
Body-worn receiver option
Microphone *
38
7. Wireless accessories description

39
8.1 Local warranty Please ask the hearing care professional, where you purchased your hearing aid, about the terms of the local warranty.
8.2 International warranty Phonak offers a one year limited international warranty, valid starting from the date of purchase. This limited warranty covers manufacturing and material defects in the hearing aid itself, but not accessories such as batteries, tubes, earmolds, external receivers. The warranty only comes into force if a proof of purchase is shown.
The international warranty does not affect any legal rights that you might have under applicable national legislation governing sale of consumer goods.
8. Service and warranty

40
8.3 Warranty limitation This warranty does not cover damage from improper handling or care, exposure to chemicals or undue stress. Damage caused by third parties or non-authorized service centers renders the warranty null and void. This warranty does not include any services performed by a hearing care professional in their office.
Serial number (left side):
Serial number (right side):
Date of purchase:
Authorized hearing care professional (stamp/signature):
8. Service and warranty

41
Europe: Declaration of Conformity Hereby Phonak AG declares that this Phonak product meets the requirements of the Medical Devices Directive 93/42/EEC. The full text of the Declaration of Conformity can be obtained from the manufacturer or the local Phonak representative whose address can be taken from the list on www.phonak.com (Phonak worldwide locations).
9. Compliance information
Australia/New Zealand:Indicates a device’s compliance with applicableRadio Spectrum Management’s (RSM) andAustralian Communications and Media Authority(ACMA) regulatory arrangements for the legal salein New Zealand and Australia.

42
This symbol indicates that the products described in these user instructions adhere to the requirements for an applied part of Type B of EN 60601-1. The surface of the hearing aid is specified as an applied part of Type B.
10. Information and explanation of symbols
With the CE symbol, Phonak AG confirms that this product – including accessories – meets the requirements of the Medical Devices Directive 93/42/EEC. The numbers after the CE symbol correspond to the code of certified institutions that were consulted under the above-mentioned directives.
Indicates the medical device manufacturer, as defined in EU Directive 93/42/EEC.
43
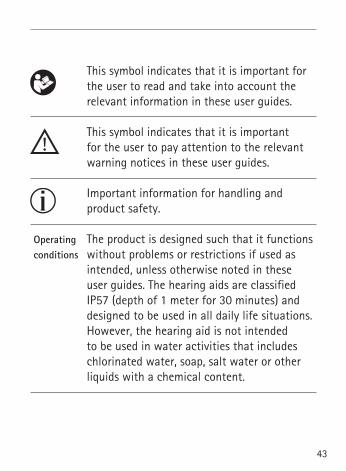
This symbol indicates that it is important for the user to read and take into account the relevant information in these user guides.
This symbol indicates that it is important for the user to pay attention to the relevant warning notices in these user guides.
Important information for handling and product safety.
The product is designed such that it functions without problems or restrictions if used as intended, unless otherwise noted in these user guides. The hearing aids are classified IP57 (depth of 1 meter for 30 minutes) and designed to be used in all daily life situations. However, the hearing aid is not intended to be used in water activities that includes chlorinated water, soap, salt water or other liquids with a chemical content.
Operatingconditions

44
10. Information and explanation of symbols
Indicates the manufacturer’s catalogue number so that the medical device can be identified.
Temperature during transportation and storage: –20° to +60° Celsius (–4° to +140° Fahrenheit).
Humidity during transportation: Up to 90% (non condensing). Humidity during storage: 0% to 70%, if not in use. See instruction in chapter 2.2 regarding drying the hearing aid after use.
Atmospheric pressure: 200 hPA to 1500 hPa
During transportation keep dry.
Indicates the manufacturer’s serial number so that a specific medical device can be identified.

The symbol with the crossed-out garbage bin is to make you aware that this hearing aid may not be thrown away as normal household waste. Please dispose of old or unused hearing aids, at waste disposal sites intended for electronic waste, or give your hearing aid to your hearing care professional for disposal. Proper disposal protects the environment and health.
Notes
46


029-
0298
-02/
V4.0
0/20
17-0
6/FO
© P
hona
k AG
Al
l rig
hts
rese
rved
Manufacturer:Phonak AGLaubisrütistrasse 28CH-8712 StäfaSwitzerland
www.phonak.com
Your hearing care professional: