peoplesoft campus solutions 9.0 to 9.2 upgrade - oracle · peoplesoft campus solutions 9.0 to 9.2...
TRANSCRIPT
PeopleSoft Campus Solutions 9.0 to 9.2 Upgrade
March 2016

PeopleSoft Campus Solutions 9.0 to 9.2 Upgrade Copyright © 2016, Oracle and/or its affiliates . All rights reserved.Trademark NoticeOracle and Java are registered trademarks of Oracle and/or its affiliates. Other names may be trademarks of their respective owners.
Intel and Intel Xeon are trademarks or registered trademarks of Intel Corporation. All SPARC trademarks are used under license and are trademarks or registered trademarks of SPARC International, Inc. AMD, Opteron, the AMD logo, and the AMD Opteron logo are trademarks or registered trademarks of Advanced Micro Devices. UNIX is a registered trademark of The Open Group.License Restrictions Warranty/Consequential Damages DisclaimerThis software and related documentation are provided under a license agreement containing restrictions on use and disclosure and are protected by intellectual property laws. Except as expressly permitted in your license agreement or allowed by law, you may not use, copy, reproduce, translate, broadcast, modify, license, transmit, distribute, exhibit, perform, publish, or display any part, in any form, or by any means. Reverse engineering, disassembly, or decompilation of this software, unless required by law for interoperability, is prohibited. Warranty DisclaimerThe information contained herein is subject to change without notice and is not warranted to be error-free. If you find any errors, please report them to us in writing.Restricted Rights NoticeIf this is software or related documentation that is delivered to the U.S. Government or anyone licensing it on behalf of the U.S. Government, then the following notice is applicable:
U.S. GOVERNMENT END USERS:
Oracle programs, including any operating system, integrated software, any programs installed on the hardware, and/or documentation, delivered to U.S. Government end users are "commercial computer software" pursuant to the applicable Federal Acquisition Regulation and agency-specific supplemental regulations. As such, use, duplication, disclosure, modification, and adaptation of the programs, including any operating system, integrated software, any programs installed on the hardware, and/or documentation, shall be subject to license terms and license restrictions applicable to the programs. No other rights are granted to the U.S. Government.Hazardous Applications NoticeThis software or hardware is developed for general use in a variety of information management applications. It is not developed or intended for use in any inherently dangerous applications, including applications that may createa risk of personal injury. If you use this software or hardware in dangerous applications, then you shall be responsible to take all appropriate fail-safe, backup, redundancy, and other measures to ensure its safe use. Oracle Corporation and its affiliates disclaim any liability for any damages caused by use of this software or hardware in dangerous applications.Third Party Content, Products, and Services DisclaimerThis software or hardware and documentation may provide access to or information about content, products, and services from third parties. Oracle Corporation and its affiliates are not responsible for and expressly disclaim all warranties of any kind with respect to third-party content, products, and services unless otherwise set forth in an applicable agreement between you and Oracle. Oracle Corporation and its affiliates will not be responsible for anyloss, costs, or damages incurred due to your access to or use of third-party content, products, or services, except asset forth in an applicable agreement between you and Oracle.Documentation AccessibilityFor information about Oracle's commitment to accessibility, visit the Oracle Accessibility Program website at http://www.oracle.com/pls/topic/lookup?ctx=acc&id=docacc.

Access to Oracle Support
Oracle customers have access to electronic support through My Oracle Support. For information, visit http://www.oracle.com/pls/topic/lookup?ctx=acc&id=info or visit http://www.oracle.com/pls/topic/lookup?ctx=acc&id=trs if you are hearing impaired.


5
Contents
PrefaceAbout This Documentation ................................................................................................................................. 17Understanding This Documentation ...................................................................................................................... 17Prerequisites ........................................................................................................................................................... 17Audience ................................................................................................................................................................ 17Organization ........................................................................................................................................................... 18Typographical Conventions ................................................................................................................................... 18Products .................................................................................................................................................................. 19Related Information ............................................................................................................................................... 20Comments and Suggestions ................................................................................................................................... 20
Chapter 1Planning Your Application Changes .................................................................................................................. 21Understanding Application Upgrade Planning ...................................................................................................... 21Understanding Your Upgrade ................................................................................................................................ 21
Understanding PeopleSoft Upgrades ................................................................................................................ 22Verifying the Software Installation ................................................................................................................... 22Defining Upgrade Databases ............................................................................................................................ 22Increasing Database Space ................................................................................................................................ 23Reviewing Upgrade Notes and Tips ................................................................................................................. 23Reviewing Fixes Required at Upgrade ............................................................................................................. 24
Preparing Your Upgrade Job .................................................................................................................................. 24Running the Application Filter Query .............................................................................................................. 25Modifying the DB2 Scripts ............................................................................................................................... 25Evaluating Upgrade Steps for Your Upgrade Job ............................................................................................. 26Preserving Files from the Initial Pass for MTP ................................................................................................ 27Modifying Compare Report Options ................................................................................................................ 27Optimizing the Create and Alter Process .......................................................................................................... 29
Verifying the Database User .................................................................................................................................. 29Performing Script Modifications ............................................................................................................................ 31
Understanding Script Modifications ................................................................................................................. 31Editing the DB2 Scripts .................................................................................................................................... 31Editing Move to Production Import Scripts ...................................................................................................... 32Editing the Move to Production Password ........................................................................................................ 33Editing Application Tablespace Step Properties ............................................................................................... 33
Preserving PeopleTools Configuration Data .......................................................................................................... 34
Copyright © 2016, Oracle and/or its affiliates. All Rights Reserved.

Contents
6
Understanding PeopleTools Configuration Data Preservation ......................................................................... 34Saving Transparent Data Encryption Information ............................................................................................ 34Saving Oracle Fine Grained Auditing Information .......................................................................................... 35
Identifying Customizations .................................................................................................................................... 36Backing Up the New Release Demo Database ...................................................................................................... 38Updating Statistics ................................................................................................................................................. 38
Understanding Updating Statistics .................................................................................................................... 38Running Initial Update Statistics for DB2 zOS ................................................................................................ 38Generating the Initial RUNSTATS Report for DB2 LUW .............................................................................. 39Running Initial Update Statistics for DB2 LUW .............................................................................................. 39Generating Initial Update Stats Script for Oracle ............................................................................................. 39Running Initial Update Statistics for Oracle ..................................................................................................... 40Running Initial Update Statistics for Microsoft ................................................................................................ 40
Running Initial Audit Reports ................................................................................................................................ 40Understanding Running Initial Audit Reports .................................................................................................. 40Running the Initial DDDAUDIT Report .......................................................................................................... 41Running the Initial SYSAUDIT Report ............................................................................................................ 41Running the Initial SWPAUDIT Report ........................................................................................................... 41Creating the INITALTAUD Project ................................................................................................................. 42Running the Initial Alter Audit ......................................................................................................................... 42Reviewing the Initial Audits ............................................................................................................................. 43
Chapter 2Performing Pre-Upgrade Application Setup Tasks .......................................................................................... 45Understanding Pre-Upgrade Application Setup Tasks .......................................................................................... 45
Chapter 3Preparing for Application Changes .................................................................................................................... 47Understanding Database Preparation ..................................................................................................................... 47Reviewing Table Row Counts ............................................................................................................................... 47Preparing Your Database ....................................................................................................................................... 47
Understanding Database Preparation ................................................................................................................ 48Verifying Database Integrity ............................................................................................................................. 48Cleaning the PSOBJCHNG Table .................................................................................................................... 48
Renaming Records and Fields ................................................................................................................................ 49Understanding Renaming Records and Fields .................................................................................................. 49Exporting the Rename Utility ........................................................................................................................... 50Importing the Rename Utility ........................................................................................................................... 50Building the Rename Utility Project ................................................................................................................. 50Editing the Rename Project Script .................................................................................................................... 51
Copyright © 2016, Oracle and/or its affiliates. All Rights Reserved.

Contents
7
Running the Rename Project Script .................................................................................................................. 51Exporting Rename Utility Data ........................................................................................................................ 51Importing Rename Utility Data ........................................................................................................................ 52
Organizing Customizations .................................................................................................................................... 52Understanding the UPGCUST Project Creation ............................................................................................... 52Creating the UPGCUST Project ....................................................................................................................... 52Running the UPGCUST Filter Script ............................................................................................................... 52
Preparing for the Application Upgrade .................................................................................................................. 53Creating a Copy of RecField Definitions .......................................................................................................... 54Loading the Alter Analyzer Data ...................................................................................................................... 54Deleting Old Pagelet Wizard Data .................................................................................................................... 54
Backing Up After Preparing Your Database .......................................................................................................... 55
Chapter 4Applying PeopleTools Changes ........................................................................................................................... 57Understanding PeopleTools Changes .................................................................................................................... 57Performing Updates to PeopleTools System Tables .............................................................................................. 57
Understanding Updating PeopleTools System Tables ...................................................................................... 58Exporting Installation Data ............................................................................................................................... 58Updating the Product License Code ................................................................................................................. 58Exporting PeopleTools System Tables ............................................................................................................. 59Importing PeopleTools System Tables ............................................................................................................. 59Rerunning Update Statistics for DB2 zOS ........................................................................................................ 60Rerunning the RUNSTATS Report for DB2 LUW .......................................................................................... 60Rerunning Update Statistics for DB2 LUW ..................................................................................................... 60Regenerating Update Statistics Script for Oracle ............................................................................................. 61Rerunning Update Statistics for Oracle ............................................................................................................ 61
Turning Off Change Control .................................................................................................................................. 61Populating Tablespace Data ................................................................................................................................... 62
Creating Application Tablespaces .................................................................................................................... 62Populating Updated Tablespace Data ............................................................................................................... 62Updating Tablespace Names ............................................................................................................................. 63
Creating Updated PeopleTools Views ................................................................................................................... 64Updating Process Request Tables .......................................................................................................................... 64Setting Object Version Numbers ........................................................................................................................... 65Configuring the Scheduler and Server ................................................................................................................... 65
Chapter 5Running and Reviewing Compare Reports ....................................................................................................... 67Understanding Compare Reports ........................................................................................................................... 67
Copyright © 2016, Oracle and/or its affiliates. All Rights Reserved.

Contents
8
Running Preliminary Application Changes ........................................................................................................... 67Exporting Project Definitions ........................................................................................................................... 67Importing Project Definitions ........................................................................................................................... 68
Running the Alter Analyzer Loader ....................................................................................................................... 68Renaming Tables .................................................................................................................................................... 68
Understanding Renaming Tables ...................................................................................................................... 69Running the SQL Table Rename Utility ........................................................................................................... 69Reviewing the SQL Table Rename Utility Output ........................................................................................... 69Renaming SQL Tables ...................................................................................................................................... 70
Running New Release Compare Reports ............................................................................................................... 70Understanding the New Release Compare ....................................................................................................... 70Preserving the Local Message Node ................................................................................................................. 71Copying the UPGCUST Project to File ............................................................................................................ 71Running the UPGCUST Compare from File .................................................................................................... 71Running the New Release UPGCUST Compare .............................................................................................. 72Populating the UPGIB Project .......................................................................................................................... 72Creating the UPGIB_TGT Project .................................................................................................................... 72Copying the UPGIB_TGT Project to File ........................................................................................................ 73Copying the UPGIB_TGT Project from File .................................................................................................... 73Merging the UPGIB and UPGIB_TGT Projects .............................................................................................. 74Copying the UPGIB Project to File .................................................................................................................. 74Running the UPGIB Compare from File .......................................................................................................... 74Creating the UPGIB Project .............................................................................................................................. 75
Reviewing New Release Compare Reports ........................................................................................................... 75Reviewing New Release Changes .................................................................................................................... 75Reviewing New Release Changes from File .................................................................................................... 76Reviewing Additional Upgrade Projects .......................................................................................................... 77Reviewing Additional Upgrade Projects from File .......................................................................................... 78
Chapter 6Applying Application Changes ........................................................................................................................... 79Understanding Application Changes ...................................................................................................................... 79Running the New Release Upgrade Copy .............................................................................................................. 79
Exporting Selected PeopleTools Tables ........................................................................................................... 80Importing Selected PeopleTools Tables ........................................................................................................... 80Copying the UPGCUST Project from File ....................................................................................................... 81Copying the UPGCUST Project ....................................................................................................................... 81Reviewing Copy Results ................................................................................................................................... 81Updating Target Values .................................................................................................................................... 82Copying the UPGIB Project from File .............................................................................................................. 83Copying the UPGIB Project .............................................................................................................................. 83
Copyright © 2016, Oracle and/or its affiliates. All Rights Reserved.

Contents
9
Exporting the UPGNONCOMP Project ........................................................................................................... 83Importing the UPGNONCOMP Project ........................................................................................................... 84Copying the UPGNONCOMP Project .............................................................................................................. 84Reviewing Project Copy Results ...................................................................................................................... 85Exporting New Release Objects ....................................................................................................................... 85Importing New Release Objects ....................................................................................................................... 85Resetting Object Version Numbers .................................................................................................................. 86
Updating Database Overrides ................................................................................................................................ 86Understanding Database Overrides ................................................................................................................... 86Setting Index Parameters After Copy .............................................................................................................. 86Setting Tablespace Names After Copy ............................................................................................................. 87Creating New Tablespaces ................................................................................................................................ 87
Backing Up After the Upgrade Copy ..................................................................................................................... 90Backing Up Your Database After Upgrade Copy ............................................................................................. 90Backing Up the New Release Demo Again ...................................................................................................... 90
Preparing for Data Conversion Analysis ................................................................................................................ 91Understanding Data Conversion Analysis Preparation ..................................................................................... 91Generating Update Stats Script Again for Oracle ............................................................................................. 91Updating Statistics Again for Oracle ................................................................................................................ 91Populating the Initial Alter Analyzer Repository ............................................................................................. 92Populating the MTP Alter Analyzer Repository ............................................................................................... 92
Modifying the Database Structure ......................................................................................................................... 92Understanding Modifying the Database Structure ............................................................................................ 93Backing Up for DB2 ......................................................................................................................................... 93Creating the DB2 Tablespace Audit Project ..................................................................................................... 94Auditing DB2 Tablespace Assignments Again ................................................................................................ 94Generating DB2 Tablespace Migration Scripts ................................................................................................ 94Editing DB2 Tablespace Migration Scripts ...................................................................................................... 95Altering DB2 Tablespace Migration Tables ..................................................................................................... 95Creating DB2 Tablespace Migration Indexes ................................................................................................... 96Creating DB2 Tablespace Migration Triggers .................................................................................................. 96Updating Tablespace Names Again .................................................................................................................. 97Building the Upgrade Tables Script .................................................................................................................. 97Re-Creating Upgrade Tables ............................................................................................................................. 97Creating the Upgrade Projects .......................................................................................................................... 98Building the Alter Temporary Tables Script .................................................................................................... 98Building the Optional Temporary Tables Script ............................................................................................... 98Creating the ALLTABS Project ........................................................................................................................ 99Building the Create and Alter Scripts ............................................................................................................... 99Recycling Tablespace Version Numbers ........................................................................................................ 100Editing the Create and Alter Scripts ............................................................................................................... 100Re-Creating Required Temporary Tables ....................................................................................................... 101
Copyright © 2016, Oracle and/or its affiliates. All Rights Reserved.

Contents
10
Re-Creating Optional Temporary Tables ........................................................................................................ 101Creating Tables ............................................................................................................................................... 102Altering Tables ................................................................................................................................................ 102Creating Indexes ............................................................................................................................................. 102Re-Creating Triggers ...................................................................................................................................... 103Reviewing Tablespace and Index States ......................................................................................................... 103Reviewing the Create Indexes Log ................................................................................................................. 103Setting Index Parameters ................................................................................................................................ 104Setting Temporary Table Tablespace Names ................................................................................................. 104Setting Tablespace Names .............................................................................................................................. 105Generating the DB2 LUW RUNSTATS Script ............................................................................................. 105Updating Statistics for DB2 LUW .................................................................................................................. 105Updating Statistics for DB2 zOS .................................................................................................................... 106Generating Update Statistics Script for Oracle ............................................................................................... 106Updating Statistics for Oracle ......................................................................................................................... 106
Loading Data for Data Conversion ...................................................................................................................... 107Exporting the System Data Definition Data ................................................................................................... 107Importing the System Data Definition Data ................................................................................................... 108Generating the System Data Scripts ............................................................................................................... 108Modifying the Generated System Data DB2 zOS Script ................................................................................ 108Exporting Application Messages .................................................................................................................... 109Importing Application Messages .................................................................................................................... 109Exporting Record Groups ............................................................................................................................... 109Importing Record Groups ............................................................................................................................... 110Exporting the System Setup Data .................................................................................................................. 111Importing the System Setup Data ................................................................................................................... 111Exporting the PW Pagelet Data ...................................................................................................................... 111Importing the PW Pagelet Data ...................................................................................................................... 112Exporting the Pagelet Wizard Data ................................................................................................................. 112Importing the Pagelet Wizard Data ................................................................................................................. 112Exporting the Feed Data ................................................................................................................................. 113Importing the Feed Data ................................................................................................................................. 113Exporting Delivered Equations ....................................................................................................................... 113Importing Delivered Equations ....................................................................................................................... 114Exporting Data Conversion Driver Data ......................................................................................................... 114Importing Data Conversion Driver Data ......................................................................................................... 114Loading Image Release Information ............................................................................................................... 115
Applying Updates Before Data Conversion ......................................................................................................... 115Running the Data Conversion Analyzer .............................................................................................................. 116Backing Up Before Data Conversion ................................................................................................................... 116Running Data Conversion ................................................................................................................................... 116
Understanding Data Conversion ..................................................................................................................... 117
Copyright © 2016, Oracle and/or its affiliates. All Rights Reserved.

Contents
11
Reviewing Data Conversion Tips ................................................................................................................... 117Turning Trace On ............................................................................................................................................ 119Performing Data Conversion Concurrently .................................................................................................... 120Turning Trace Off ........................................................................................................................................... 120
Backing Up After Data Conversion ..................................................................................................................... 120Finalizing the Database Structure ........................................................................................................................ 121
Understanding the Final Database Structure ................................................................................................... 121Building the Alter with Deletes Scripts .......................................................................................................... 121Altering Tables with Deletes .......................................................................................................................... 122Creating Indexes Again ................................................................................................................................... 122Creating Triggers ............................................................................................................................................ 122Running the AE_SYNCIDGEN Process ........................................................................................................ 123Creating All Views ......................................................................................................................................... 123
Loading Data to Complete System Setup ............................................................................................................ 123Exporting Strings ............................................................................................................................................ 124Importing Strings ............................................................................................................................................ 125Exporting EDI Statements .............................................................................................................................. 125Importing EDI Statements .............................................................................................................................. 125Exporting Mass Change Data ......................................................................................................................... 126Importing Mass Change Data ......................................................................................................................... 126Exporting XML Service Information .............................................................................................................. 126Importing XML Service Information .............................................................................................................. 127Exporting Related-Language System Data ..................................................................................................... 127Importing Related-Language System Data ..................................................................................................... 128Exporting Application System Data ............................................................................................................... 128Importing Application System Data ............................................................................................................... 129Exporting Common Portal System Options .................................................................................................... 129Importing Common Portal System Options .................................................................................................... 129Exporting Setup Data ...................................................................................................................................... 130Importing Setup Data ...................................................................................................................................... 130Exporting Activity Guide Data ....................................................................................................................... 130Importing Activity Guide Data ....................................................................................................................... 131Exporting Authorization Service Data ............................................................................................................ 131Importing Authorization Service Data ............................................................................................................ 131Exporting File Extension Lists ........................................................................................................................ 132Importing File Extension Lists ........................................................................................................................ 132Exporting Interwindow Communication Data ................................................................................................ 132Importing Interwindow Communication Data ................................................................................................ 133Exporting Pivot Grid Data .............................................................................................................................. 133Importing Pivot Grid Data .............................................................................................................................. 133Exporting Related Content Data ..................................................................................................................... 134Importing Related Content Data ..................................................................................................................... 134
Copyright © 2016, Oracle and/or its affiliates. All Rights Reserved.

Contents
12
Exporting WorkCenter Data ........................................................................................................................... 134Importing WorkCenter Data ........................................................................................................................... 134Setting Portal System Options ........................................................................................................................ 135Setting Menu Pagelet Values .......................................................................................................................... 135
Loading Stored Statements .................................................................................................................................. 135Understanding Loading Stored Statements ..................................................................................................... 136Setting PSOPTIONS for COBOL ................................................................................................................... 136Running the STOREAD Script ....................................................................................................................... 136Running the STOREAV Script ....................................................................................................................... 137Running the STORECC Script ....................................................................................................................... 137Running the STOREFA Script ........................................................................................................................ 137Running the STORESF Script ........................................................................................................................ 137Running the STORESR Script ........................................................................................................................ 138
Running Final Update Statistics ........................................................................................................................... 138Generating Final RUNSTATS for DB2 LUW ................................................................................................ 138Running Final Statistics for DB2 LUW .......................................................................................................... 139Running Final Statistics for DB2 zOS ............................................................................................................ 139Generating Final Update Stats Script for Oracle ............................................................................................ 139Running Final Statistics for Oracle ................................................................................................................. 140
Updating Language Data ...................................................................................................................................... 140Understanding Updating Language Data ........................................................................................................ 140Running the TSRECPOP Script ...................................................................................................................... 140
Updating Object Version Numbers ...................................................................................................................... 141Running the Final Audit Reports ......................................................................................................................... 141
Running the Final DDDAUDIT Report .......................................................................................................... 141Running the Final SYSAUDIT Report ........................................................................................................... 141Running the Final SWPAUDIT Report .......................................................................................................... 142Creating the FNLALTAUD Project ................................................................................................................ 142Running the Final Alter Audit ........................................................................................................................ 142Reviewing the Final Audits ............................................................................................................................ 143Running the Final SETINDEX Report ........................................................................................................... 144
Restoring the New Release Demo ........................................................................................................................ 144
Chapter 7Performing Environment Configuration ......................................................................................................... 145Understanding Environment Configuration ......................................................................................................... 145Configuring the Upgrade Environment ................................................................................................................ 145
Configuring the Web Server ........................................................................................................................... 145Configuring Portal .......................................................................................................................................... 146
Reapplying Customizations ................................................................................................................................. 146Understanding the Reapplication .................................................................................................................... 147
Copyright © 2016, Oracle and/or its affiliates. All Rights Reserved.
Contents
13
Performing Customized Object Adjustment ................................................................................................... 147Registering Portal Navigation Objects ............................................................................................................ 147
Setting Up Security .............................................................................................................................................. 148Understanding Security ................................................................................................................................... 148Performing Security Setup .............................................................................................................................. 148Synchronizing CREF Permissions .................................................................................................................. 149Granting Access to Personalize the Homepage .............................................................................................. 149
Completing Portal Data Conversion .................................................................................................................... 150Reviewing the Pagelet and Collection Log ..................................................................................................... 150Enabling Pagelet Publishing ........................................................................................................................... 151
Chapter 8Finalizing Application Setup Tasks .................................................................................................................. 153Understanding Application Setup Tasks .............................................................................................................. 153Truncating Data from Obsolete HCM Tables ...................................................................................................... 153Reviewing Oracle SES-Enabled Transactions ..................................................................................................... 154
Chapter 9Completing Application Changes ..................................................................................................................... 155Understanding Database Changes ........................................................................................................................ 155Enabling Oracle Transparent Data Encryption .................................................................................................... 155Enabling Oracle Fine Grained Auditing .............................................................................................................. 156Preparing the Content Provider Registry ............................................................................................................. 157Updating the Portal Options Data ........................................................................................................................ 157Deleting Rename Data ......................................................................................................................................... 158Stamping the Database ......................................................................................................................................... 158Reviewing Change Control .................................................................................................................................. 159Backing Up Before Testing .................................................................................................................................. 160Testing Your Copy of Production ........................................................................................................................ 160
Chapter 10Applying Changes to the Production Database ............................................................................................... 161Understanding the Move to Production ............................................................................................................... 161Testing the Move to Production ........................................................................................................................... 161
Understanding the Test Move to Production Passes ....................................................................................... 161Understanding the Test Move to Production Steps ......................................................................................... 162Creating a New Change Assistant Job ............................................................................................................ 163
Testing Once More ............................................................................................................................................... 164Performing the Move to Production ..................................................................................................................... 164
Copyright © 2016, Oracle and/or its affiliates. All Rights Reserved.

Contents
14
Chapter 11Appendices .......................................................................................................................................................... 165Understanding Appendices .................................................................................................................................. 165
Appendix APreserving Queries and Tree Objects .............................................................................................................. 167Understanding Preserving Queries and Trees ...................................................................................................... 167Preparing the Database ......................................................................................................................................... 167Creating a New Project ........................................................................................................................................ 168Comparing the New Project ................................................................................................................................. 169Copying the Project .............................................................................................................................................. 169Testing the Project ................................................................................................................................................ 170Re-Exporting the PeopleTools Tables ................................................................................................................. 170
Appendix BUpgrading the Content Provider Registry ....................................................................................................... 171Understanding Content Provider Registry Upgrade ............................................................................................ 171Copying Your Portal Solutions Database ............................................................................................................ 172Upgrading PeopleTools for Portal Solutions ...................................................................................................... 173Updating Registry Permission Lists ..................................................................................................................... 173
Understanding Registry Permission List Updates .......................................................................................... 173Updating the Portal Registry ........................................................................................................................... 173Deleting the Database Cache .......................................................................................................................... 174
Creating the Portal Project ................................................................................................................................... 174Understanding Portal Project Creation ........................................................................................................... 174Creating the Target Portal Solutions Project .................................................................................................. 174Cleaning the Target Portal Solutions Project .................................................................................................. 175Deleting the Target Portal Solutions Database Cache .................................................................................... 176Copying the Target Portal Solutions Project Definition ................................................................................. 176Creating the Copy of Production Portal Project ............................................................................................. 177Cleaning the Copy of Production Portal Project ............................................................................................. 179Deleting the Copy of Production Database Cache .......................................................................................... 179
Comparing the Portal Project ............................................................................................................................... 180Reviewing the Portal Project ................................................................................................................................ 180Copying the Portal Project ................................................................................................................................... 180
Understanding Portal Project Copying ........................................................................................................... 180Copying the Portal Project to the Portal Solutions Database .......................................................................... 181Deleting the Portal Solutions Database Cache ................................................................................................ 181
Copyright © 2016, Oracle and/or its affiliates. All Rights Reserved.

Contents
15
Copying the Portal Project to Production ............................................................................................................. 181Understanding Portal Project to Production Copying ..................................................................................... 182Copying the Portal Project to File ................................................................................................................... 182Copying the Portal Project from File .............................................................................................................. 182Deleting the Portal Solutions Database Cache Again ..................................................................................... 183
Deleting Obsolete Folders .................................................................................................................................... 183Understanding Obsolete Folder Deletion ........................................................................................................ 183Deleting Obsolete Folders on Portal Solutions 8.4 ......................................................................................... 183Deleting Obsolete Folders on Portal Solutions 8.8 ......................................................................................... 184
Updating Registry Folder Permissions ................................................................................................................. 184Understanding Registry Folder Permissions Updates ..................................................................................... 184Updating Portal Solutions Registry Folder Permissions ................................................................................. 184Deleting the Portal Solutions Cache ............................................................................................................... 185
Appendix CUsing the Comparison Process .......................................................................................................................... 187Understanding the Comparison Process ............................................................................................................... 187
Reviewing the Source and Target Columns .................................................................................................... 188Reviewing the Action Column ........................................................................................................................ 189Reviewing the Upgrade Column ..................................................................................................................... 189Putting It All Together .................................................................................................................................... 190
Understanding Upgrade Compare Reports .......................................................................................................... 190Reviewing Report Columns ............................................................................................................................ 191Using Reports .................................................................................................................................................. 191
Copyright © 2016, Oracle and/or its affiliates. All Rights Reserved.

17
About This Documentation
This preface discusses:
• Understanding This Documentation• Prerequisites• Audience• Organization• Typographical Conventions• Products• Related Information• Comments and Suggestions
Understanding This Documentation
This documentation is designed to direct you through the process of upgrading to your new PeopleSoft release.This section describes information that you should know before you begin working with PeopleSoft products and documentation, including PeopleSoft documentation conventions.
Prerequisites
You must complete the tasks in the document Getting Started on Your PeopleSoft Upgrade before beginning this upgrade. If you have not yet completed these tasks, do so now. Go to My Oracle Support and search for Getting Started on Your PeopleSoft Upgrade.
Audience
This documentation is written for the individuals responsible for upgrading to your new PeopleSoft release. This documentation assumes that you have a basic understanding of the PeopleSoft system. One of the most important components of a successful upgrade of your PeopleSoft installation is your on-site expertise.You should be familiar with your operating hardware environment and have the necessary skills to support that environment. You should also have a working knowledge of:
• SQL and SQL command syntax.• PeopleSoft system navigation.• PeopleSoft windows, menus, and pages, and how to modify them.• Microsoft Windows.Oracle recommends that you complete training before performing an upgrade.See Oracle University http://education.oracle.com.
Copyright © 2016, Oracle and/or its affiliates. All Rights Reserved.
Preface
18
Organization
This documentation is divided into chapters that represent major milestones in the upgrade process.This documentation may also contain appendixes. When additional information is required to complete an upgrade task, you will be directed to the appropriate appendix.
Typographical Conventions
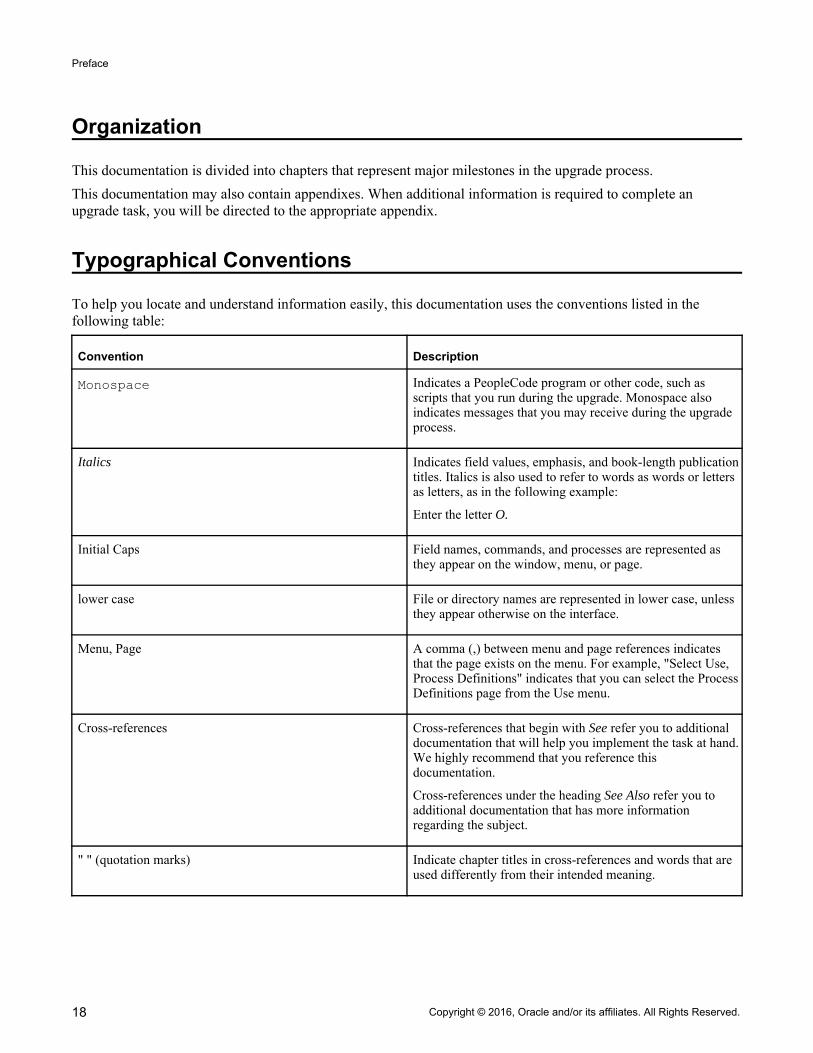
To help you locate and understand information easily, this documentation uses the conventions listed in the following table:
Convention Description
Monospace Indicates a PeopleCode program or other code, such as scripts that you run during the upgrade. Monospace also indicates messages that you may receive during the upgrade process.
Italics Indicates field values, emphasis, and book-length publicationtitles. Italics is also used to refer to words as words or letters as letters, as in the following example:
Enter the letter O.
Initial Caps Field names, commands, and processes are represented as they appear on the window, menu, or page.
lower case File or directory names are represented in lower case, unless they appear otherwise on the interface.
Menu, Page A comma (,) between menu and page references indicates that the page exists on the menu. For example, "Select Use, Process Definitions" indicates that you can select the ProcessDefinitions page from the Use menu.
Cross-references Cross-references that begin with See refer you to additional documentation that will help you implement the task at hand.We highly recommend that you reference this documentation.
Cross-references under the heading See Also refer you to additional documentation that has more information regarding the subject.
" " (quotation marks) Indicate chapter titles in cross-references and words that are used differently from their intended meaning.
Copyright © 2016, Oracle and/or its affiliates. All Rights Reserved.

Preface
19
Convention Description
⇒ (line-continuation arrow) A line-continuation arrow inserted at the end of a line of code indicates that the line of code has been wrapped at the page margin. The code should be viewed or entered as a continuous line of code, without the line-continuation arrow.
Note. Note text. Text that begins with Note indicates information that you should pay particular attention to as you work with your PeopleSoft system.
Important! Important note text. A note that begins with Important! is crucial and includes information about what you need to do for the system to function properly.
Warning! Warning text. A note that begins with Warning! contains crucial configuration information or implementation considerations;for example, if there is a chance of losing or corrupting data. Pay close attention to warning messages.
Products
This documentation may refer to these products and product families:
• Oracle's PeopleSoft Application Designer• Oracle's PeopleSoft Change Assistant• Oracle's PeopleSoft Data Mover• Oracle's PeopleSoft Process Scheduler• Oracle's PeopleSoft Pure Internet Architecture• Oracle's PeopleSoft Campus Solutions• Oracle's PeopleSoft Customer Relationship Management• Oracle's PeopleSoft Financial Management• Oracle's PeopleSoft Human Capital Management• Oracle's PeopleSoft Enterprise Learning Management• Oracle's PeopleSoft PeopleTools• Oracle's PeopleSoft Enterprise Performance Management• Oracle's PeopleSoft Interaction Hub• Oracle's PeopleSoft Supply Chain ManagementSee http://www.oracle.com/us/products/applications/peoplesoft-enterprise/index.html for a list of Oracle's PeopleSoft products.
Copyright © 2016, Oracle and/or its affiliates. All Rights Reserved.

Preface
20
Related Information
Oracle provides additional information that may help with your upgrade. The following information is available on My Oracle Support:
• Release Notes. Before you begin your upgrade, read the release notes to determine what has changed in the system and to familiarize yourself with the new features. The release notes also indicate whether you need to upgrade other portions of your system, such as your relational database management system (RDBMS) software or batch files.Go to My Oracle Support and search for the Release Notes for your product and release level.
• Installation Guides. Before you begin your upgrade, ensure that you have installed PeopleSoft PeopleTools and completed the installation of your PeopleSoft application, if applicable.To find the installation documentation for PeopleSoft PeopleTools or for your PeopleSoft application, go to My Oracle Support and search for the installation guide for your product and release level.
• Upgrade Documentation. The upgrade documentation on My Oracle Support contains information posted after shipment of this release that may not be included in these upgrade instructions. Always check My OracleSupport for the most current documentation and information.
Important! Before upgrading, it is imperative that you check My Oracle Support for updates to the upgrade instructions. We continually post updates as we refine the upgrade process.
To find updates to the upgrade documentation, go to My Oracle Support and search for the upgrade documentation for your product and release level.
• Getting Started on Your PeopleSoft Upgrade. Before beginning a PeopleSoft upgrade, you must complete the tasks in the document Getting Started on Your PeopleSoft Upgrade. This document guides you through planning your upgrade as well as installing the software necessary to upgrade to the new PeopleSoft product release. If you did not complete the tasks in this documentation, do so now.Go to My Oracle Support and search for Getting Started on Your PeopleSoft Upgrade.
Comments and Suggestions
Your comments are important to us. We encourage you to tell us what you like, or what you would like changed about our documentation, PeopleSoft Online Help (PeopleBooks), and other Oracle reference and training materials. Please send your suggestions to:[email protected] we cannot guarantee to answer every email message, we will pay careful attention to your comments and suggestions. We are always improving our product communications for you.
Copyright © 2016, Oracle and/or its affiliates. All Rights Reserved.

21
Chapter 1
Planning Your Application Changes
This chapter discusses:
• Understanding Application Upgrade Planning• Understanding Your Upgrade• Preparing Your Upgrade Job• Verifying the Database User• Performing Script Modifications• Preserving PeopleTools Configuration Data• Identifying Customizations• Backing Up the New Release Demo Database• Updating Statistics• Running Initial Audit Reports
Understanding Application Upgrade Planning
You must make a copy of your production database before you start preparations for the technical portion of the upgrade. Unless otherwise noted, run these tasks on your Copy of Production database (not the New Release Demo database). In this chapter, you will also prepare your upgrade job and identify any customizations that you have made to your database.
Important! You must read the documentation Getting Started on Your PeopleSoft Upgrade before you continue with your upgrade. This getting started guide explains the upgrade process, terminology, and setup tasks that mustbe performed prior to starting your upgrade.
Task 1-1: Understanding Your Upgrade
This section discusses:
• Understanding PeopleSoft Upgrades• Verifying the Software Installation• Defining Upgrade Databases• Increasing Database Space• Reviewing Upgrade Notes and Tips• Reviewing Fixes Required at Upgrade
Copyright © 2016, Oracle and/or its affiliates. All Rights Reserved.

Planning Your Application Changes Chapter 1
22
Understanding PeopleSoft UpgradesThis task reviews information that you need to know before you begin your upgrade. It explains the different types of databases that you will use and provides useful upgrade tips and information that you may need to apply before beginning your upgrade.
Task 1-1-1: Verifying the Software InstallationBefore continuing with the upgrade, you must complete all of the tasks in Getting Started on Your PeopleSoft Upgrade, "Starting Your Upgrade." Verify that the following tasks are complete:
• Installing the new release.• Applying PeopleSoft PeopleTools patches.• Installing PeopleSoft Change Assistant.• Making a Copy of Production database.• Retrieving and applying upgrade files.• Defining upgrade packages.• Creating and configuring an upgrade job.• Reviewing upgrade step properties.
Properties
Database Orientation
Pass Type Products Platforms Languages
Source Initial All All All
Task 1-1-2: Defining Upgrade DatabasesThe following databases will be used during your upgrade:
• The New Release Demo database always refers to the database delivered with your new PeopleSoft release.It contains the new and changed database objects that you want to add. The New Release Demo database is also referred to as the Demo database later in the upgrade.
• The Copy of Production database refers to the copy of your production database, into which you will add the new and changed objects for this release from the New Release Demo database.
Note. You will create more than one Copy of Production database. Your second and subsequent copies are referred to as the New Copy of Production.
Copyright © 2016, Oracle and/or its affiliates. All Rights Reserved.

Chapter 1 Planning Your Application Changes
23
Properties
Database Orientation
Pass Type Products Platforms Languages
Target Initial All All All
Task 1-1-3: Increasing Database SpaceTo prepare for the upgrade, you may need to increase the space allocated to your Copy of Production database. Depending on your relational database management system (RDBMS), this may include allocating space to tablespaces or allocating database primary space and log files. Be aware that your new environment needs to accommodate both the existing data in your Copy of Production database as well as the new data, new data structures, and new database objects. Every site and configuration is different, so Oracle cannot offer a guaranteedestimate of your database sizing needs.As part of the initial upgrade pass, you may need to revisit your initial space allocation settings more than once as you progress through the upgrade. At the end of the initial pass, the final space allocation settings will closely reflect the space you will need to complete any subsequent Move to Production passes. Work with your database administrator to ensure that your environment is set up appropriately for both the initial and Move to Production passes.See the PeopleSoft installation documentation for your product line and release.
Note. If you are an Oracle RDBMS customer, you also need to alter the tablespace for PSIMAGE and increase it to 200 MB, autoextend on the next 10 MB, with maxsize unlimited.
Properties
Database Orientation
Pass Type Products Platforms Languages
Target All All All All
Task 1-1-4: Reviewing Upgrade Notes and TipsThis section contains information that may apply to your upgrade product. Review the information in this section before beginning your upgrade.
• Performance Recommendations Before beginning your upgrade, you should plan for performance issues as outlined in the Getting Started on Your PeopleSoft Upgrade documentation.
• Third-Party Product SetupBe sure to review the release notes for your new application release, as third-party components such as Verity are no longer supported for the new application. The release notes will indicate the replacement component, such as Oracle Secure Enterprise Search (SES), XML Publisher, etc. Upgrading to the new application releasewill require you to set up these new third-party products. Review your application release notes and upgrade documentation for additional instructions.
Copyright © 2016, Oracle and/or its affiliates. All Rights Reserved.

Planning Your Application Changes Chapter 1
24
• Microsoft SQL Server Column StatisticsAs of Microsoft SQL Server 2000, user-defined statistics can be created on columns within a table. This feature is not supported by PeopleSoft PeopleTools. If you added user-defined statistics to any columns in your PeopleSoft application, it may cause errors to occur during the upgrade steps that alter tables. Oracle recommends that you drop all user-defined statistics on columns of PeopleSoft tables before proceeding with your upgrade.
• Working with Decoupled PS_HOME
If you are working with a decoupled PS_HOME, you can put custom upgrade scripts in the PS_CUST_HOME. However, be careful when working with Data Mover scripts that generate or import a .dat file as the .dat file needs to be in the same "HOME" as the custom script.See the product documentation for PeopleTools: System and Server Administration for your new release for more information about working with PS_CUST_HOME.
Properties
Database Orientation
Pass Type Products Platforms Languages
Target All All All All
Task 1-1-5: Reviewing Fixes Required at UpgradeIt is important that you run your upgrade using the latest versions of all upgrade software. It is also important to frequently search for and apply the Required at Upgrade fixes for your particular application. Refer to your application upgrade home page, section "Updates and Fixes Required at Upgrade" for more information about when and how to apply your Required at Upgrade fixes.See My Oracle Support, Your Application Upgrade Home Page for your new release, Updates and Fixes Requiredat Upgrade.
Properties
Database Orientation
Pass Type Products Platforms Languages
Target All All All All
Task 1-2: Preparing Your Upgrade Job
This section discusses:
• Running the Application Filter Query• Modifying the DB2 Scripts• Evaluating Upgrade Steps for Your Upgrade Job• Preserving Files from the Initial Pass for MTP
Copyright © 2016, Oracle and/or its affiliates. All Rights Reserved.

Chapter 1 Planning Your Application Changes
25
• Modifying Compare Report Options• Optimizing the Create and Alter Process
Task 1-2-1: Running the Application Filter QueryThis step runs a filter query and filters out steps in your upgrade job that are not required for your Target databaseenvironment. For example, steps will be filtered based on whether or not your Source database platform matches your Target database platform.
Properties
Database Orientation
Pass Type Products Platforms Languages
Target All All All All
Task 1-2-2: Modifying the DB2 ScriptsPerform this step only if your database platform is DB2 z/OS. DB2 z/OS scripts that create tables need the set_current_sqlid statement so that the tables are created with the correct owner ID. Open each script listed below, then uncomment and modify all of the DB2-specific statements to reflect your environment.
Note. You can find these scripts in the new release PS_APP_HOME directory.
For SQL scripts, if the script does not contain DB2-specific statements, add the following line to the top of the script and edit it for your environment, inserting the appropriate owner ID in uppercase characters: set current sqlid = 'OWNERID (in uppercase)';
For PeopleSoft Data Mover scripts (DMSs), if the script does not contain DB2-specific statements, add the following line to the top of the script and edit it for your environment, inserting the appropriate owner ID in uppercase characters:set execute_sql set current sqlid = 'OWNERID (in uppercase)';
Following is a list of the scripts that you need to edit:DLUPX02I.DMS
DLUPX13I.DMS
DLUPX96I.DMS
PUUPX07.DMS
Note. The DLUPX96I.DMS script runs on your Source database. Remember to edit this script for your Source database. All of the other scripts listed run against the Target database.
In several steps in the upgrade process, project definitions are copied into the database. Any DB2 z/OS scripts thatare built from these projects need to be modified before running them. When the SQL scripts are built after copying the projects, the database/tablespace names are the default values. These values need to be changed to theTarget database-specific values.
Copyright © 2016, Oracle and/or its affiliates. All Rights Reserved.
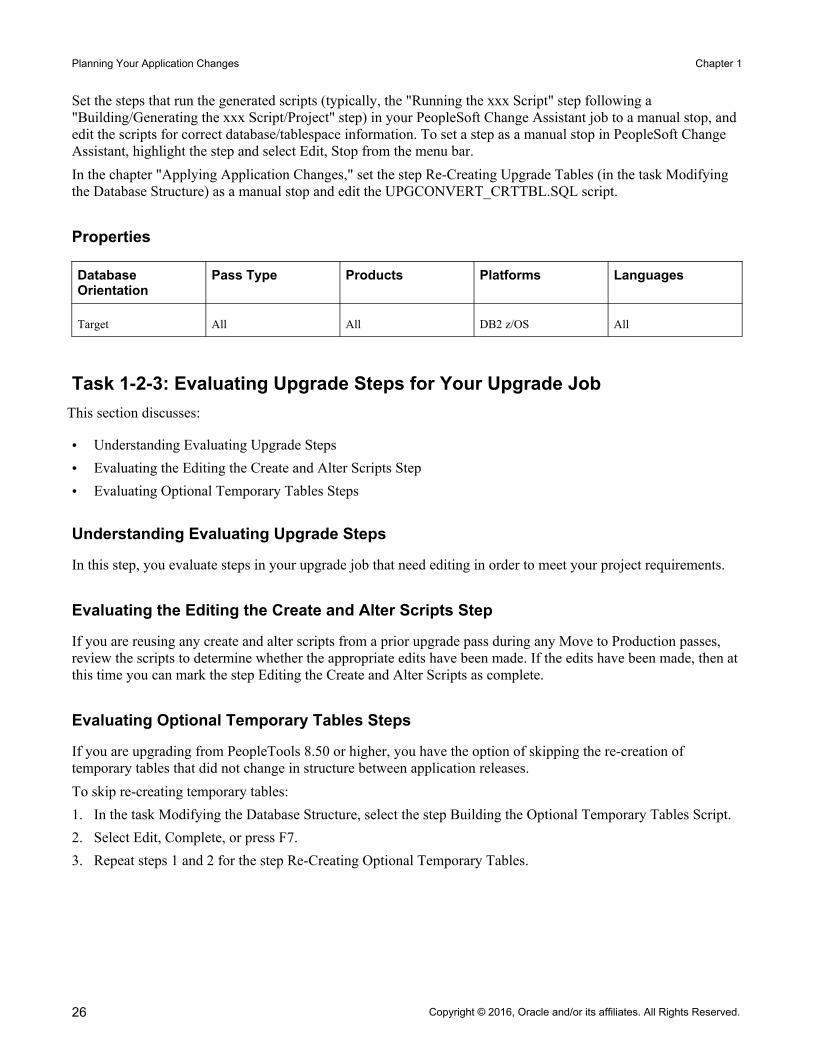
Planning Your Application Changes Chapter 1
26
Set the steps that run the generated scripts (typically, the "Running the xxx Script" step following a "Building/Generating the xxx Script/Project" step) in your PeopleSoft Change Assistant job to a manual stop, and edit the scripts for correct database/tablespace information. To set a step as a manual stop in PeopleSoft Change Assistant, highlight the step and select Edit, Stop from the menu bar.In the chapter "Applying Application Changes," set the step Re-Creating Upgrade Tables (in the task Modifying the Database Structure) as a manual stop and edit the UPGCONVERT_CRTTBL.SQL script.
Properties
Database Orientation
Pass Type Products Platforms Languages
Target All All DB2 z/OS All
Task 1-2-3: Evaluating Upgrade Steps for Your Upgrade JobThis section discusses:
• Understanding Evaluating Upgrade Steps• Evaluating the Editing the Create and Alter Scripts Step• Evaluating Optional Temporary Tables Steps
Understanding Evaluating Upgrade Steps
In this step, you evaluate steps in your upgrade job that need editing in order to meet your project requirements.
Evaluating the Editing the Create and Alter Scripts Step
If you are reusing any create and alter scripts from a prior upgrade pass during any Move to Production passes, review the scripts to determine whether the appropriate edits have been made. If the edits have been made, then at this time you can mark the step Editing the Create and Alter Scripts as complete.
Evaluating Optional Temporary Tables Steps
If you are upgrading from PeopleTools 8.50 or higher, you have the option of skipping the re-creation of temporary tables that did not change in structure between application releases.To skip re-creating temporary tables:1. In the task Modifying the Database Structure, select the step Building the Optional Temporary Tables Script.2. Select Edit, Complete, or press F7.3. Repeat steps 1 and 2 for the step Re-Creating Optional Temporary Tables.
Copyright © 2016, Oracle and/or its affiliates. All Rights Reserved.

Chapter 1 Planning Your Application Changes
27
Properties
Database Orientation
Pass Type Products Platforms Languages
Target All All All All
Task 1-2-4: Preserving Files from the Initial Pass for MTPReview the following steps and make sure to copy the files from your initial pass to the proper location for all your Move to Production passes, if they apply to your upgrade.
• Generating the System Data Scripts• Exporting Related-Language System Data • Exporting Application System Data
Properties
Database Orientation
Pass Type Products Platforms Languages
Target MTP All All All
Task 1-2-5: Modifying Compare Report OptionsFor compare steps, PeopleSoft Change Assistant templates are generated with the default reports filter turned on in the compare options. This limits the size of the reports and keeps them manageable. Before you start the compares, review the PeopleSoft Change Assistant job for each compare step listed below and modify the compare options based on your requirements.If you decide not to modify the compare options, the objects are still compared. However, the results are only available online in PeopleSoft Application Designer and are not written to the compare reports. The compare reports are tools to help you review changed objects. However, based on the report filters you select, you may need to review the action flags for other objects in the compare project in PeopleSoft Application Designer.For example, you can modify the compare options so that the report contains customized objects that are present in your Copy of Production database but absent from the Demo database. Alternatively, you can review these objects online, through PeopleSoft Application Designer, after the compare.To modify upgrade compare options:1. Highlight the "Running the UPGCUST Compare" step and right-click.2. Select Step Properties.
The Step Properties dialog box appears.3. Click Upgrade.
The Compare and Report dialog box appears.4. Click Options.
Copyright © 2016, Oracle and/or its affiliates. All Rights Reserved.

Planning Your Application Changes Chapter 1
28
5. Select the Report Filter tab.The default options include your custom changes on the reports.
6. Change the default options as necessary and click OK.This example shows the Report Filter page of the Upgrade Options dialog box, with several options selected.
Upgrade Options page, Report Filter tab
7. In the Compare and Report dialog box, click OK.8. In the Step Definitions dialog box, click OK.9. Repeat steps 2 through 8 for the "Running the New Release UPGCUST Compare" and "Creating the UPGIB
Project" steps.10. Select File, Save Job.
Properties
Database Orientation
Pass Type Products Platforms Languages
Target Initial All All All
Copyright © 2016, Oracle and/or its affiliates. All Rights Reserved.

Chapter 1 Planning Your Application Changes
29
Task 1-2-6: Optimizing the Create and Alter ProcessDuring the initial pass, you generate and sometimes edit, then execute the SQL scripts to create and alter tables. Inthe Move to Production pass, you may be able to skip the SQL script-generation steps and use the SQL that you previously generated and edited. This practice may save time in your critical go-live window and is the ultimate goal, but it is an incremental process to get to that point.In the first Move to Production pass, everyone must generate the SQL scripts. There are small differences between the initial and Move to Production passes that require the SQL to be regenerated in at least one Move to Production pass. The PeopleSoft Change Assistant templates are generated with the steps set this way.In subsequent Move to Production passes, you may choose to turn off the script-generation steps, if possible. If you have not changed any records at the end of one Move to Production pass, then you can use that SQL in your next pass. If you have done anything to change records, you will need to generate the SQL scripts again. This includes changes such as applying updates from My Oracle Support that involve record changes or making additional customizations to records.If you chose to skip regenerating the scripts, mark each step as complete in your PeopleSoft Change Assistant job.You can also modify the step properties in the template so the step will never show up in any future Move to Production job. To modify the step properties:1. Double-click the step to open the Step Properties dialog box.2. Change the Apply Type to Initial Pass.
In addition, copy the SQL scripts from the previous pass output directory to the new pass output directory. PeopleSoft Change Assistant looks for the SQL scripts in the output directory set on the job's Database Configuration. Therefore, ensure that PeopleSoft Change Assistant will find the SQL scripts when it tries to run them.You may choose to skip the following script-generation steps:
• Creating New Tablespaces• Creating the Upgrade Projects• Editing the Create and Alter Scripts
Properties
Database Orientation
Pass Type Products Platforms Languages
Target MTP All All All
Task 1-3: Verifying the Database User
In this task, you verify that the user performing the upgrade steps has proper permissions to complete the upgrade.Ensure that your upgrade user has PeopleSoft administrator privileges. This allows access to the PeopleSoft portalto make necessary security changes for the upgrade and to run the Portal Application Engine upgrade program. You use this ID to update the security setting for your other users so they can sign in after the upgrade.
Copyright © 2016, Oracle and/or its affiliates. All Rights Reserved.

Planning Your Application Changes Chapter 1
30
Warning! You must perform this step now using your old version of PeopleSoft PeopleTools. If you skip this step, or if your user has insufficient PeopleSoft administrator privileges, you will not be able to complete your upgrade. You cannot complete this step later in the upgrade process. Perform the following steps to grant administrator privileges now.
To grant your upgrade user PeopleSoft administrator privileges:1. From the browser, select PeopleTools, Security, User Profiles, User Profiles.2. Select the user ID for your upgrade user.3. Select the Roles tab.4. Add the role PeopleSoft Administrator if it is not already granted to your upgrade user.5. Save the user profile.The following two conditions must be satisfied for the upgrade user to access tools like PeopleSoft Application Designer and PeopleSoft Data Mover.1. Verify that at least one of the permission lists to which the upgrade user is tied also exists in the New Release
Demo database, as follows:a. Run the following query on your Target database to determine which permission lists are tied to the
upgrade user:
SELECT DISTINCT A.CLASSID FROM PSROLECLASS A, PSROLEUSER B,⇒ PSOPRDEFN C WHERE A.ROLENAME = B.ROLENAME AND B.ROLEUSER = C.OPRID AND C.OPRID = 'Upgrade User'
b. Run the following query on the New Release Demo database to get a list of the permission lists defined in the database:SELECT DISTINCT CLASSID FROM PSCLASSDEFN
c. Verify that at least one of the values returned by the first query is present in the list returned by the second query.
2. Verify that the permission list you identified in step 1c has access to tools like PeopleSoft Application Designer and PeopleSoft Data Mover enabled in the New Release Demo database, as follows:a. Log on to the New Release Demo database's Pure Internet Architecture.b. Select PeopleTools, Security, Permissions & Roles, Permission Lists.c. Enter the permission list name in the search box and click Search.d. Select the PeopleTools tab.e. Select the Application Designer Access and Data Mover Access check boxes if they are not already
selected.f. Click Save.
See the product documentation for PeopleTools: Security Administration for your new release.
Copyright © 2016, Oracle and/or its affiliates. All Rights Reserved.

Chapter 1 Planning Your Application Changes
31
Properties
Database Orientation
Pass Type Products Platforms Languages
Target All All All All
Task 1-4: Performing Script Modifications
This section discusses:
• Understanding Script Modifications• Editing the DB2 Scripts• Editing Move to Production Import Scripts• Editing the Move to Production Password• Editing Application Tablespace Step Properties
Understanding Script ModificationsIn this task, you perform preparation steps and make manual modifications to scripts delivered with your new PeopleSoft release. You must make the following modifications before proceeding with the remainder of your upgrade.
Note. Move to Production: These steps will be repeated in the Move to Production (MTP) pass. The script that you previously edited may be acceptable, or you may need to change it again if your New Copy of Production hasa different security or data definition language (DDL) configuration.
Task 1-4-1: Editing the DB2 ScriptsPerform this step only if your database platform is DB2 z/OS. DB2 z/OS scripts that create tables need the set current sqlid statement so that the tables are created with the correct owner ID. Open each script listed below, then uncomment and modify all of the DB2-specific statements to reflect your environment.For SQL scripts, if the script does not contain DB2-specific statements, add the following line to the top of the script and edit it for your environment:set current sqlid = 'OWNERID (in uppercase)';
For PeopleSoft Data Mover scripts (DMSs), if the script does not contain DB2-specific statements, add the following line to the top of the script and edit it for your environment:set execute_sql set current sqlid = 'OWNERID (in uppercase)';
Following is a list of the scripts that you need to edit:PT_LICENSECODE.DMS
PT_RELEASE_IMPORT.DMS
Copyright © 2016, Oracle and/or its affiliates. All Rights Reserved.

Planning Your Application Changes Chapter 1
32
In several steps in the upgrade process, project definitions are copied into the database. Any DB2 z/OS scripts thatare built from these project definitions will need to be modified before you run them. Set the following steps in your PeopleSoft Change Assistant job to a manual stop and edit the scripts for correct database/tablespace information. When you build the SQL scripts after copying the project, the database/tablespace names are the default values. You need to change these to the Target database specific values. To set a step to a manual stop in PeopleSoft Change Assistant, highlight the step and select Edit, Stop from the menu bar.In chapter 6, "Applying Application Changes," set the step Re-Creating Upgrade Tables (in the task Modifying the Database Structure) as a manual stop and edit the UPGCONVERT_CRTTBL.SQL script.
Properties
Database Orientation
Pass Type Products Platforms Languages
Target All All DB2 z/OS All
Task 1-4-2: Editing Move to Production Import ScriptsPerform this step only if your database platform is DB2 z/OS.During the Move to Production, there are several scripts that export data from the previous Copy of Production to the New Copy of Production. These scripts export the tables to a DAT file. When the tables are exported, all the table attributes, including the database-specific information (table owner, database name, and tablespace name), are stored in the DAT file. When you run the import script, it tries to create the tables and indexes using the database-specific information from the DAT file. So even though you ran the import script against your Copy of Production, you would still create tables in the upgraded database (which is the Source database for the Move to Production step). To create the tables in the Target database, open each script listed below, then uncomment and modify all of the DB2-specific statements to reflect your environment.You will also need to add the following command into MVPRDIMP.DMS, near the end of the script, just after the REPLACE_DATA PSSTATUS command, but before the REPLACE_VIEW PSTEMPTBLCNTVW command, to change ownerid to the owner ID of your database. Update PSSTATUS set OWNERID='OWNERID (in uppercase)';
Following is a list of the scripts that you need to edit:MVAPPIMP.DMS
MVPRDIMP.DMS
If you prefer, you can copy these overrides from the xxDMODBO.DMS script that was generated from DBSetup while installing your database. Make sure you remove the SET NO RECORD if you copy from the DBSetup generated file.See the documentation for PeopleTools: Data Management for your new release.See "Applying Changes to the Production Database," Performing the Move to Production.
Copyright © 2016, Oracle and/or its affiliates. All Rights Reserved.

Chapter 1 Planning Your Application Changes
33
Properties
Database Orientation
Pass Type Products Platforms Languages
Target MTP All DB2 z/OS All
Task 1-4-3: Editing the Move to Production PasswordIf your access ID and access password are different in the Copy of Production database than in the New Copy of Production database, you need to reset the access password in the MVPRDIMP.DMS script.To modify passwords in your New Copy of Production database, append the following to your MVPRDIMP.DMS script and replace ownerID, accessID, accesspswd, symbolicID, PT_WEBSERVERpassword, opridpassword, and oprid with your values in the New Copy of Production database:UPDATE PSSTATUS set OWNERID = 'ownerID';UPDATE PSACCESSPRFL SET ACCESSID = 'accessID', ACCESSPSWD = 'accesspswd', ENCRYPTED = 0;UPDATE PSACCESSPROFILE SET STM_ACCESS_ID = 'accessid', STM_ACCESS_PSWD = 'accesspswd', ENCRYPTED = 0;UPDATE PSOPRDEFN SET SYMBOLICID = 'symbolicid'; UPDATE PSOPRDEFN SET PTOPERPSWDV2 = 'PT_WEBSERVERpassword', ENCRYPTED = 0,⇒ ACCTLOCK = 0 WHERE OPRID = 'PTWEBSERVER'; UPDATE PSOPRDEFN SET PTOPERPSWDV2 = 'opridpassword', ENCRYPTED = 0,⇒ ACCTLOCK = 0 WHERE OPRID = 'oprid'; ENCRYPT_PASSWORD *;
GRANT SELECT ON PSSTATUS TO people; GRANT SELECT ON PSOPRDEFN TO people; GRANT SELECT ON PSACCESSPRFL TO people; GRANT SELECT ON PSACCESSPROFILE TO people;
Properties
Database Orientation
Pass Type Products Platforms Languages
Target MTP All All All
Task 1-4-4: Editing Application Tablespace Step PropertiesDuring each Move to Production pass, you must create any new tablespaces. You can reuse the same script created during the initial pass when you created new tablespaces, or you can build a new one if you plan to use different tablespaces on your production system.See "Applying Application Changes," Updating Database Overrides, Creating New Tablespaces.
Copyright © 2016, Oracle and/or its affiliates. All Rights Reserved.

Planning Your Application Changes Chapter 1
34
The script supplied by Oracle to create tablespaces for your upgrade is:
• CSDDL.SQL for Oracle• CSDDLDMS.SQL for DB2 UNIX/NT ANSI• CSDDLDMSU.SQL for DB2 z/OS UnicodeOnce you have determined which script to run during Move to Production, modify your upgrade job with the correct script name.To update the step Creating Application Tablespaces with the correct script name:1. In PeopleSoft Change Assistant, open your upgrade job. 2. In the task Populating Tablespace Data, right-click the step Creating Application Tablespaces and then select
Step Properties.3. In the Script/Procedure field, change xxDDL to the name of the script that you want to run and click OK.4. Select File, Save.
Properties
Database Orientation
Pass Type Products Platforms Languages
Target MTP All Oracle
DB2 LUW
DB2 z/OS
All
Task 1-5: Preserving PeopleTools Configuration Data
This section discusses:
• Understanding PeopleTools Configuration Data Preservation• Saving Transparent Data Encryption Information• Saving Oracle Fine Grained Auditing Information
Understanding PeopleTools Configuration Data PreservationIn this task you run scripts to preserve your PeopleTools configuration data. You will disable certain functionalityand save configuration data for use at the end of the upgrade.
Task 1-5-1: Saving Transparent Data Encryption InformationPeopleSoft Change Assistant will display and run this step only if you are upgrading from PeopleSoft PeopleTools 8.50 or higher.
Copyright © 2016, Oracle and/or its affiliates. All Rights Reserved.

Chapter 1 Planning Your Application Changes
35
If you have defined encrypted fields within PeopleSoft PeopleTools for Oracle's Transparent Data Encryption (TDE) feature, note that all metadata field definitions are delivered from PeopleSoft applications without any encryption attributes enabled. PeopleSoft applications will not deliver any metadata indicating that encryption is enabled for any field for an initial installation database file, project, or a PeopleSoft PeopleTools or PeopleSoft application patch. If you customize any fields by adding TDE encryption, you will need to keep track of the fieldsand their associated record definitions and ensure that you maintain the desired encryption status throughout any upgrades that you perform.If you have TDE enabled, run PS_HOME\SCRIPTS\PREUPGTDEPROCESS.SQL. This script clears the TDE encryption algorithm currently defined in the PeopleSoft metadata. The script also creates two projects, ENCRYPTEDFLDSB and ENCRYPTEDTBLSB. The project ENCRYPTEDFLDSB contains fields that currently have distinct encrypted columns and the project ENCRYPTEDTBLSB contains recfields that currently have distinct encrypted columns, as indicated in the Oracle database catalog.You will need the information in the projects and the log file that results from running this script in order to reimplement TDE after the upgrade.See "Completing Application Changes," Enabling Oracle Transparent Data Encryption.
Properties
Database Orientation
Pass Type Products Platforms Languages
Target All All Oracle All
Task 1-5-2: Saving Oracle Fine Grained Auditing InformationIf you have implemented Oracle's Fine Grained Auditing (FGA) feature on PeopleSoft tables, disable it for the duration of the upgrade to improve upgrade performance.To disable Fine Grained Auditing:1. Run PS_HOME\SCRIPTS\PREUPGFGAREPORT.SQL. This script reports on the current (pre-upgrade) FGA
policies stored in USER_AUDIT_POLICIES, detailing all columns by table for all tables with FGA policies. Keep this report to use at the end of the final pass of the upgrade.
2. Run PS_HOME\SCRIPTS\PREUPGFGAPROCESS.SQL. This script generates the scripts PSCREATEFGA.SQL and PSDISABLEFGA.SQL.
3. Run the generated PSDISABLEFGA.SQL to disable FGA polices.You will run the generated PSCREATEFGA.SQL script at the end of the final pass of the upgrade. Do not run it at this time.See the product documentation for PeopleTools: Data Management for your new release for more information about administering PeopleSoft databases on Oracle.See "Completing Application Changes," Enabling Oracle Fine Grained Auditing.
Copyright © 2016, Oracle and/or its affiliates. All Rights Reserved.

Planning Your Application Changes Chapter 1
36
Properties
Database Orientation
Pass Type Products Platforms Languages
Target All All Oracle All
Task 1-6: Identifying Customizations
In this task, identify your modifications to Mass Change, EDI, Message Catalog, SQR Strings, XML Service Information, Setup Manager and Optimization Models data, Pagelet Wizard objects, and related-language system data, so that you can reload them later in the upgrade process.
Important! If you use any of the features listed above, you must analyze your data because the upgrade replaces the data in the Target database with the delivered data in the New Release Demo database.
The upgrade tasks will replace all Mass Change processes and Setup Manager data. Only modifications to delivered Pagelet Wizard objects will be overwritten because any non-delivered custom Pagelet Wizard objects will be preserved during the upgrade. You cannot print Mass Change code. Be sure that you have extracted your modifications to reapply them later. You must extract your modifications, using cut and paste, to a file for manualreapplication later. EDI tables must be handled in the same way. Reload additional data and review customizations in Oracle-delivered data.Message sets 0–19,999 will be overlaid during the upgrade, so any customizations that you made in this range will be lost. In addition, all SQR strings will be replaced. To save your customizations, cut and paste your changesto a file and manually reapply them.Be aware that the data loaded by the PeopleSoft software must not be overwritten.If you have multiple languages loaded, you should save any custom data that you have in related-language tables for system data. For these tables, data will be exported from the New Release Demo database when you export related-language system data, and imported to your Copy of Production when you import related-language systemdata. The import may delete your custom data, depending on the import option.The tables that need to be reviewed are listed in the following scripts. These scripts can be found in your new release PS_APP_HOME\SCRIPTS directory.
Important! These scripts are delivered with and run from your new PeopleSoft release. These scripts are not run in this task. You will run these scripts later in the upgrade process.
Review the tables that will be overwritten in the scripts listed in this table:
Tables Script
Message Catalog DLUPX01E.DMS
SQR Strings DLUPX04E.DMS
XML Service Information DLUPX13E.DMS
Setup Manager and Optimization Models DLUPX16E.DMS
Copyright © 2016, Oracle and/or its affiliates. All Rights Reserved.

Chapter 1 Planning Your Application Changes
37
Tables Script
Pagelet Wizard DLUPX14E.DMS
If your database contains translations, set the Exporting Related-Language System Data step in your PeopleSoft Change Assistant job to a manual stop in order to review the list of related-language system data tables that will be exported and imported. The following scripts are generated later in the upgrade process and do not currently exist:DLUPLASYSE.DMS
DLUPLASYSI.DMS
Note. Move to Production: Once you have reapplied these customizations at the end of your initial upgrade pass, you will not need to apply them again. The affected tables are moved from the old Copy of Production to the NewCopy of Production by the scripts listed in the following table:
Tables Scripts
Mass Change MVAPPEXP.DMS
MVAPPIMP.DMS
EDI MVPRDEXP.DMS
MVPRDIMP.DMS
Strings MVAPPEXP.DMS
MVAPPIMP.DMS
Messages MVAPPEXP.DMS
MVAPPIMP.DMS
XML Service Information MVPRDEXP.DMS
MVPRDIMP.DMS
Setup Manager and Optimization Models MVAPPEXP.DMS
MVAPPIMP.DMS
Pagelet Wizard MVUPX16E.DMS
See Also
"Applying Application Changes," Loading Data for Data Conversion."Applying Application Changes," Loading Data to Complete System Setup.
Copyright © 2016, Oracle and/or its affiliates. All Rights Reserved.

Planning Your Application Changes Chapter 1
38
Properties
Database Orientation
Pass Type Products Platforms Languages
Target Initial All All All
Task 1-7: Backing Up the New Release Demo Database
Back up your New Release Demo database now. This upgrade requires you to run scripts on this database. Before the upgrade starts, you need to take a backup of this environment to preserve your Oracle-delivered demo implementation.
Properties
Database Orientation
Pass Type Products Platforms Languages
Source Initial All All All
Task 1-8: Updating Statistics
This section discusses:
• Understanding Updating Statistics• Running Initial Update Statistics for DB2 zOS• Generating the Initial RUNSTATS Report for DB2 LUW• Running Initial Update Statistics for DB2 LUW• Generating Initial Update Stats Script for Oracle• Running Initial Update Statistics for Oracle• Running Initial Update Statistics for Microsoft
Understanding Updating StatisticsThis task updates statistics on your Target database to improve the performance of your compare and copy processes. Later in the upgrade, your statistics will be updated again due to changes in the database structure.See Getting Started on Your PeopleSoft Upgrade, Appendix: "Improving Performance."
Task 1-8-1: Running Initial Update Statistics for DB2 zOSContact your database administrator to have the statistics updated on your DB2 zOS database before proceeding with your upgrade.
Copyright © 2016, Oracle and/or its affiliates. All Rights Reserved.

Chapter 1 Planning Your Application Changes
39
Properties
Database Orientation
Pass Type Products Platforms Languages
Target All All DB2 z/OS All
Task 1-8-2: Generating the Initial RUNSTATS Report for DB2 LUWThis script creates the RUNSTATS.DAT file for the script to update the statistics for DB2 for Linux, UNIX and Windows.
Properties
Database Orientation
Pass Type Products Platforms Languages
Target All All DB2 LUW All
Task 1-8-3: Running Initial Update Statistics for DB2 LUWThis step runs RUNSTATS.SQL to update statistics on your DB2 for Linux, UNIX and Windows database.
Properties
Database Orientation
Pass Type Products Platforms Languages
Target All All DB2 LUW All
Task 1-8-4: Generating Initial Update Stats Script for OracleThis step runs the PTGENTABSTATS.SQL script to create the PTUPDTABSTATS.SQL script. PTUPDTABSTATS.SQL will be run in the next step to update statistics on your Oracle database for populated PeopleSoft tables.
Properties
Database Orientation
Pass Type Products Platforms Languages
Target All All Oracle All
Copyright © 2016, Oracle and/or its affiliates. All Rights Reserved.

Planning Your Application Changes Chapter 1
40
Task 1-8-5: Running Initial Update Statistics for OracleThis step runs the PTUPDTABSTATS.SQL script, which was generated in the previous step. This script updates statistics on your Oracle database for populated PeopleSoft tables in order to improve the performance of the compare and copy processes.
Properties
Database Orientation
Pass Type Products Platforms Languages
Target All All Oracle All
Task 1-8-6: Running Initial Update Statistics for MicrosoftThis step runs the UPDSTATS.SQL script to update statistics on your Microsoft SQL Server database to improve the performance of the compare and copy processes.
Properties
Database Orientation
Pass Type Products Platforms Languages
Target All All Microsoft SQL Server All
Task 1-9: Running Initial Audit Reports
This section discusses:
• Understanding Running Initial Audit Reports• Running the Initial DDDAUDIT Report• Running the Initial SYSAUDIT Report• Running the Initial SWPAUDIT Report• Creating the INITALTAUD Project• Running the Initial Alter Audit• Reviewing the Initial Audits
Understanding Running Initial Audit ReportsIn this task, you run and review your initial DDDAUDIT, SYSAUDIT, SYSAUD01 (if applicable), SWPAUDIT,and Alter Audit reports. Running these reports ensures that your database is as clean as possible for the remainder of the upgrade.
Copyright © 2016, Oracle and/or its affiliates. All Rights Reserved.
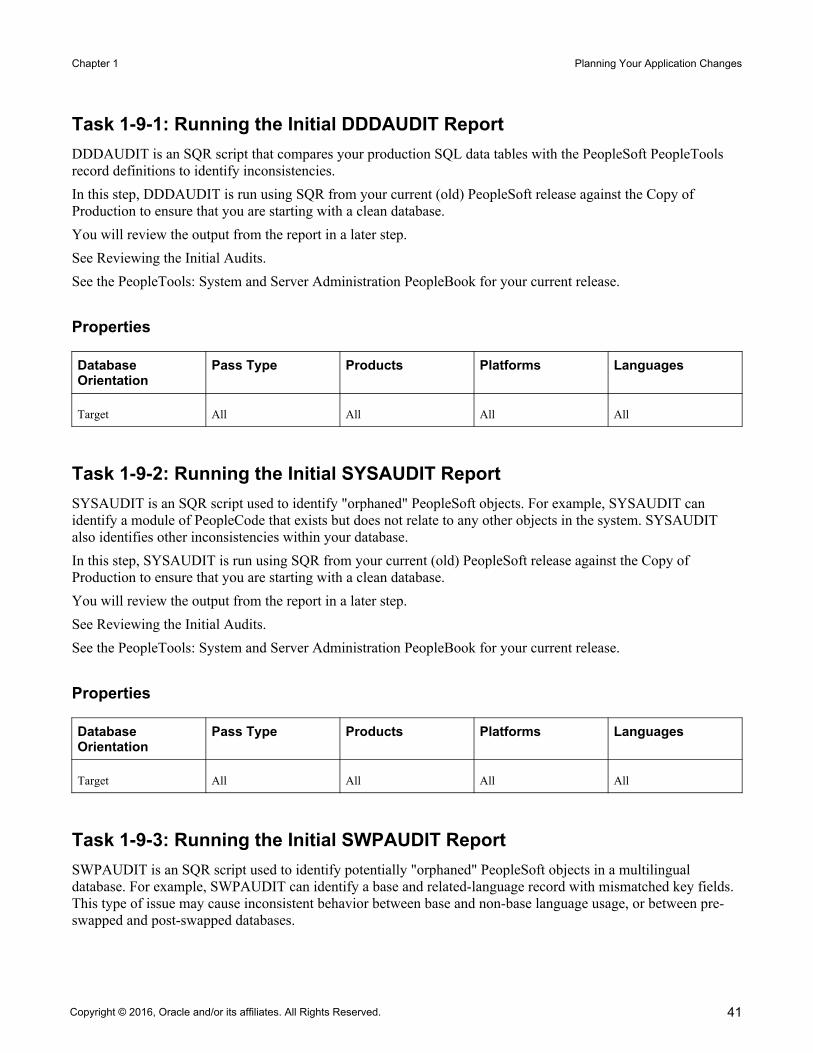
Chapter 1 Planning Your Application Changes
41
Task 1-9-1: Running the Initial DDDAUDIT ReportDDDAUDIT is an SQR script that compares your production SQL data tables with the PeopleSoft PeopleTools record definitions to identify inconsistencies.In this step, DDDAUDIT is run using SQR from your current (old) PeopleSoft release against the Copy of Production to ensure that you are starting with a clean database.You will review the output from the report in a later step.See Reviewing the Initial Audits.See the PeopleTools: System and Server Administration PeopleBook for your current release.
Properties
Database Orientation
Pass Type Products Platforms Languages
Target All All All All
Task 1-9-2: Running the Initial SYSAUDIT ReportSYSAUDIT is an SQR script used to identify "orphaned" PeopleSoft objects. For example, SYSAUDIT can identify a module of PeopleCode that exists but does not relate to any other objects in the system. SYSAUDIT also identifies other inconsistencies within your database.In this step, SYSAUDIT is run using SQR from your current (old) PeopleSoft release against the Copy of Production to ensure that you are starting with a clean database.You will review the output from the report in a later step.See Reviewing the Initial Audits.See the PeopleTools: System and Server Administration PeopleBook for your current release.
Properties
Database Orientation
Pass Type Products Platforms Languages
Target All All All All
Task 1-9-3: Running the Initial SWPAUDIT ReportSWPAUDIT is an SQR script used to identify potentially "orphaned" PeopleSoft objects in a multilingual database. For example, SWPAUDIT can identify a base and related-language record with mismatched key fields. This type of issue may cause inconsistent behavior between base and non-base language usage, or between pre-swapped and post-swapped databases.
Copyright © 2016, Oracle and/or its affiliates. All Rights Reserved.

Planning Your Application Changes Chapter 1
42
SWPAUDIT should be run against your database before you run the PeopleSoft Data Mover command SWAP_BASE_LANGUAGE. It can optionally be run again after a swap, or any time, to check database integrity in a multilingual context. If you are upgrading a database that has already been swapped, it is not mandatory to run SWPAUDIT again before proceeding with the upgrade.In this step, SWPAUDIT is run using SQR from your current (old) PeopleSoft release against the Copy of Production. You will review the output from the report in a later step.See Reviewing the Initial Audits.See the PeopleTools: Global Technology PeopleBook for your current release, "Using Related Language Tables," Swapping the Base Language.
Properties
Database Orientation
Pass Type Products Platforms Languages
Target All All All All Non-English
Task 1-9-4: Creating the INITALTAUD ProjectIn this step, you create the INITALTAUD project and use it to run your initial Alter Audit. Creating this new project now ensures that all of the records with the type Table in your system are audited. This project also includes any custom records that you created in your system.
Properties
Database Orientation
Pass Type Products Platforms Languages
Target All All All All
Task 1-9-5: Running the Initial Alter AuditTo verify that the PeopleSoft PeopleTools definitions are synchronized with the underlying SQL data tables in your database, run the PeopleSoft PeopleTools alter record process on all records in your system. This process, called an Alter Audit, compares the data structures of your database tables with the PeopleSoft PeopleTools definitions to identify inconsistencies. The Alter Audit then creates SQL scripts with the data definition language (DDL) changes that are required to synchronize your database with the PeopleSoft PeopleTools definitions.
Properties
Database Orientation
Pass Type Products Platforms Languages
Target All All All All
Copyright © 2016, Oracle and/or its affiliates. All Rights Reserved.

Chapter 1 Planning Your Application Changes
43
Task 1-9-6: Reviewing the Initial AuditsIn this step, you review the audits that you performed earlier in this task. Review the audits before proceeding with the upgrade.Review the output from the SYSAUDIT, SYSAUD01 (if applicable), SWPAUDIT, and DDDAUDIT reports and correct any discrepancies. When application tables are deleted from PeopleSoft Application Designer, they are notautomatically deleted from the system tables. Oracle takes this precaution in case you have customized information that you want to preserve. When you review your DDDAUDIT listing, these tables are listed as a discrepancy between the PeopleSoft application and the database.Now you must decide whether to drop these tables or retain them. In most cases, you will want to drop the tables, using your SQL tool to drop the tables from the system catalogs. If you have customized information or processesthat access these tables, you may want to retain them in the system tables even though they will no longer be accessed or updated by the PeopleSoft system. Drop any unnecessary deleted tables now so that your future DDDAUDIT reports will be as clean as possible.The Alter Audit produces the scripts INITALTAUD_ALTTBL.SQL, INITALTAUD_CRTIDX.SQL, and INITALTAUD_CRTTRG.SQL. These scripts contain SQL that corrects any discrepancies between your PeopleSoft PeopleTools record definitions and the database system catalog table definitions. Review the Alter Audit output and correct any discrepancies.
Note. Triggers are always dropped and re-created during the alter process and will always show up in the generated Alter Audit script. You can ignore the generated script for triggers.
Note. For Microsoft SQL Server and DB2 LUW platforms, if your database has tables containing the MSSCONCATCOL or DBXCONCATCOL column, you will see SQL alter the tables and re-create their associated indexes, even though the underlying tables and indexes may not have changed.
Note. You will rerun the DDDAUDIT, SYSAUDIT, SYSAUD01 (if applicable), and SWPAUDIT SQR (if applicable) scripts later in the upgrade. If you want to preserve the log files generated by PeopleSoft Change Assistant from this run, you will need to rename the files manually after completing this task.
Note. Additionally, you may choose to clean up the discrepancies listed in these audits directly in production if they are also an issue in your production database.
See the PeopleTools: System and Server Administration PeopleBook for your current release.
Properties
Database Orientation
Pass Type Products Platforms Languages
Target All All All All
Copyright © 2016, Oracle and/or its affiliates. All Rights Reserved.


45
Chapter 2
Performing Pre-Upgrade Application Setup Tasks
This chapter discusses:
• Understanding Pre-Upgrade Application Setup Tasks
Understanding Pre-Upgrade Application Setup Tasks
In this chapter, you perform application-specific tasks in preparation for the upgrade. Unless otherwise noted, run these tasks on your Copy of Production database (not the New Release Demo database). These tasks do not use the new PeopleSoft release. You should use your current codeline and current PeopleSoft PeopleTools release to perform these tasks unless instructed otherwise.
Note. Not all applications will have pre-upgrade tasks to perform in this chapter. If your upgrade has no tasks in this chapter, you can continue to the next chapter.
Important! You must read the documentation Getting Started on Your PeopleSoft Upgrade before you continue with your upgrade. This getting started guide explains the upgrade process, terminology, and setup tasks that mustbe performed prior to starting your upgrade.
Copyright © 2016, Oracle and/or its affiliates. All Rights Reserved.


47
Chapter 3
Preparing for Application Changes
This chapter discusses:
• Understanding Database Preparation• Reviewing Table Row Counts• Preparing Your Database• Renaming Records and Fields• Organizing Customizations• Preparing for the Application Upgrade• Backing Up After Preparing Your Database
Understanding Database Preparation
In this chapter, you continue reviewing and checking your database in preparation for the upgrade. Unless otherwise noted, run these tasks on your Copy of Production database (not the New Release Demo database). These tasks do not use the new PeopleSoft release. You should use your current codeline and current PeopleSoft PeopleTools release to perform these tasks unless instructed otherwise.
Task 3-1: Reviewing Table Row Counts
You may find it helpful to run a report that identifies any table without rows; that is, any table not used in your production database. This information can help you determine whether to accept a change from the New Release Demo database. The UPGCOUNT process reports the row counts of all PeopleSoft tables in your database. You can find the resulting report, UPGCOUNT.LIS, in the TEMP directory specific to your machine.
Properties
Database Orientation
Pass Type Products Platforms Languages
Target Initial All All All
Task 3-2: Preparing Your Database
This section discusses:
Copyright © 2016, Oracle and/or its affiliates. All Rights Reserved.

Preparing for Application Changes Chapter 3
48
• Understanding Database Preparation• Verifying Database Integrity• Cleaning the PSOBJCHNG Table
Understanding Database PreparationIn this task, you perform a variety of steps in preparation for the PeopleSoft PeopleTools upgrade. These steps prevent errors in tasks later in the upgrade.
Task 3-2-1: Verifying Database IntegrityHave a database consistency check performed on your Target database to ensure that it is clean and to minimize any potential upgrade errors due to possible database corruption. Work with your database administrator to ensurethat the check that is run is similar to the one shown for your database platform in the following table.This table lists database platforms and commands to run a database consistency check:
Platform Command
DB2 LUW db2dart
Microsoft SQL Server DBCC CHECKDB
Oracle dbv
Properties
Database Orientation
Pass Type Products Platforms Languages
Target All All DB2 LUW
MS SQL Server
Oracle
All
Task 3-2-2: Cleaning the PSOBJCHNG TableThis step deletes all data stored in the PSOBJCHNG table, which contains all renamed records and fields. The data stored in the PSOBJCHNG table must be deleted before starting your upgrade. The build process looks in this table when running alter renames. PeopleSoft Change Assistant will execute the following SQL:DELETE FROM PSOBJCHNG
Note. Move to Production: If you rename records or fields later in your upgrade, you should expect to see rows in the PSOBJCHNG table at the end of the upgrade pass. During the Move to Production pass, these rows will be copied from your old Copy of Production database to your new Copy of Production database. Thus, this step is not necessary during the Move to Production pass.
See "Applying Application Changes," Modifying the Database Structure.
Copyright © 2016, Oracle and/or its affiliates. All Rights Reserved.

Chapter 3 Preparing for Application Changes
49
Properties
Database Orientation
Pass Type Products Platforms Languages
Target Initial All All All
Task 3-3: Renaming Records and Fields
This section discusses:
• Understanding Renaming Records and Fields• Exporting the Rename Utility• Importing the Rename Utility• Building the Rename Utility Project• Editing the Rename Project Script• Running the Rename Project Script• Exporting Rename Utility Data• Importing Rename Utility Data
Understanding Renaming Records and FieldsDuring the development of new releases, Oracle sometimes renames records, fields, or specific occurrences of a field on a record (recfield renames). In this task, you will generate and execute scripts to rename those same objects in your Copy of Production database.With these commands, PeopleSoft Data Mover renames the objects in the record and field definitions in PeopleSoft Application Designer and then logs an entry on the table PSOBJCHNG. This process also changes all references to these objects in pages and PeopleCode. This will not rename the objects on the database tables at this time.Later in the upgrade, you will generate the SQL that will alter the tables on the database. This alter process reads PSOBJCHNG and will rename these tables and fields. The SQL generated to perform that task will be different depending on the build options that you select and your database platform, however the result is the same. For record renames, the old table no longer exists and the new table contains the data from the old tables. For field and recfield renames, any affected tables will contain the new column with data from the old column; the old column no longer exists on the tables.If a field rename does not go through this process, the alter SQL will not recognize it as a rename. After the alter, both old and new columns exist on the table and a data conversion process is required to copy the data from the old column to the new column. This is an important distinction to make.
Important! It is very important to resolve any errors with these rename scripts. Do not skip any lines that error. Itis not possible to recover from missed renames. The consequences of skipping a rename are evident later in the upgrade when you are in the middle of running data conversion programs.
Copyright © 2016, Oracle and/or its affiliates. All Rights Reserved.

Preparing for Application Changes Chapter 3
50
A few different things could happen: the conversion program could error because the PeopleSoft system is expecting only the new column on the table, but you have both old and new, or you may lose data. Because of the rename, the PeopleSoft system expects the data to be handled in the SQL alter process. If the data doesn't move inthe SQL alter process, and you don't write a data conversion program to move the data, the process drops the old column without having copied the data to the new column.There are several advantages to using this rename process. Any references to the renamed records or fields in yourcustomizations will also be modified. The number of differences on the compare reports is reduced. The SQL alter moves the data from old to new efficiently and no additional data conversion steps are required.
Task 3-3-1: Exporting the Rename UtilityThis step copies the UPG_RENAMES project to file. This project contains the UPG_REN_DMS and UPG_REN_SQL Application Engine programs and their related objects.
Properties
Database Orientation
Pass Type Products Platforms Languages
Source All All All All
Task 3-3-2: Importing the Rename UtilityThis step imports the UPG_RENAMES project into your Copy of Production database.
Properties
Database Orientation
Pass Type Products Platforms Languages
Target All All All All
Task 3-3-3: Building the Rename Utility ProjectThis step generates the UPG_RENAMES.SQL script that will be used to create and/or alter the records that are delivered in the UPG_RENAMES project.
Properties
Database Orientation
Pass Type Products Platforms Languages
Target All All All All
Copyright © 2016, Oracle and/or its affiliates. All Rights Reserved.

Chapter 3 Preparing for Application Changes
51
Task 3-3-4: Editing the Rename Project ScriptIn this step, you edit the UPG_RENAMES.SQL script that was generated in the previous step for tablespace names and sizing. If you are running on an RDBMS platform that uses tablespaces, and you are not using the PeopleSoft tablespace names, have your database administrator review this script and modify the tablespace names appropriately. The script can be found in your PeopleSoft Change Assistant output directory for this upgrade path.
Properties
Database Orientation
Pass Type Products Platforms Languages
Target All All DB2 z/OS
DB2 LUW
Oracle
All
Task 3-3-5: Running the Rename Project ScriptThis step runs the generated UPG_RENAMES.SQL script to create and/or alter the records that are delivered in the UPG_RENAMES project.
Properties
Database Orientation
Pass Type Products Platforms Languages
Target All All All All
Task 3-3-6: Exporting Rename Utility DataThis step runs the PUUPX98E.DMS script, which exports messages and rename data from the New Release Demo database.
Properties
Database Orientation
Pass Type Products Platforms Languages
Source All All All All
Copyright © 2016, Oracle and/or its affiliates. All Rights Reserved.

Preparing for Application Changes Chapter 3
52
Task 3-3-7: Importing Rename Utility DataThis step runs the PUUPX98I.DMS script, which updates your Copy of Production database with messages and rename data from the New Release Demo database.
Properties
Database Orientation
Pass Type Products Platforms Languages
Target All All All All
Task 3-4: Organizing Customizations
This section discusses:
• Understanding the UPGCUST Project Creation• Creating the UPGCUST Project• Running the UPGCUST Filter Script
Understanding the UPGCUST Project CreationIn this task, all of your customizations will be placed in an Application Designer project on the Copy of Production database.
Task 3-4-1: Creating the UPGCUST ProjectThis step creates an Application Designer project on your Copy of Production database called UPGCUST and populates it with customized objects. The project contains all comparable objects that were last modified by a userother than PPLSOFT.
Properties
Database Orientation
Pass Type Products Platforms Languages
Target Initial All All All
Task 3-4-2: Running the UPGCUST Filter ScriptThis step removes all of the following object types from the UPGCUST project:
• Feed categories• Feed data types
Copyright © 2016, Oracle and/or its affiliates. All Rights Reserved.

Chapter 3 Preparing for Application Changes
53
• Feed definitions• File reference type codes• IB queues• Java portlet user preferences• Messages• Message schemas• Portal registry user favorites• Portal registry user home pages• Service operation routings• Service operations• Service operations handlers• Service operation versions• Services• WSDLPortal registry user home pages, portal registry user favorites, file reference type codes, and Java portlet user preferences remain in the Copy of Production environment and are not copied from the New Release Demo database. Integration Broker objects will be compared later in the upgrade. Even though Feed objects were previously comparable, they are now ADS objects and managed as such during the upgrade. This step is used to isolate only custom objects in the UPGCUST project.The script name for your upgrade is:PUUPX95.DMS
See Appendix: "Using the Comparison Process."
Properties
Database Orientation
Pass Type Products Platforms Languages
Target Initial All All All
Task 3-5: Preparing for the Application Upgrade
This section discusses:
• Creating a Copy of RecField Definitions• Loading the Alter Analyzer Data• Deleting Old Pagelet Wizard Data
Note. In this task, you perform a variety of steps in preparation for the application portion of the upgrade. These steps will prevent errors in tasks later in the upgrade.
Copyright © 2016, Oracle and/or its affiliates. All Rights Reserved.

Preparing for Application Changes Chapter 3
54
Task 3-5-1: Creating a Copy of RecField DefinitionsThis step creates a copy of the contents of PSRECFIELD, before the upgrade is begun. It is used by the data conversion code to determine the structure of tables that may have been impacted by fixes you applied. The script name is:PUUPX07.DMS
Properties
Database Orientation
Pass Type Products Platforms Languages
Target All All All All
Task 3-5-2: Loading the Alter Analyzer DataPeopleSoft Change Assistant displays and runs this step only if you are upgrading from PeopleSoft PeopleTools 8.50 or higher. In this step, you run the PTALTDATLOAD Application Engine program for the Move to Production pass. This process preserves the database structure from your current release into temporary tables to be used later in the upgrade.
Properties
Database Orientation
Pass Type Products Platforms Languages
Target MTP All All All
Task 3-5-3: Deleting Old Pagelet Wizard DataThis step is only applicable if you have already upgraded your production application to PeopleSoft PeopleTools 8.46 or greater.In this step, you run a script to delete the Common Component Pagelet Wizard (PW) data to ensure that when the UPGPT846PP conversion program is run subsequently, the old existing Common Components Pagelet Wizard data is not re-entered into the PeopleTools Pagelet Wizard tables. If you do not run the script, then items that wereremoved from the PeopleSoft PeopleTools version of Pagelet Wizard, but still exist in the Common Components version of Pagelet Wizard, will be copied back into the PeopleSoft PeopleTools version when the UPGPT846PP conversion program is run.The script also updates the Common Component portal option tables with the existing values in the PeopleSoft PeopleTools portal options tables. If you do not run the script, then changes made to the current PeopleSoft PeopleTools options tables may be overwritten with values from the Common Components portal options when the UPGPT846PP conversion program is run. The affected values include the default registry prefix, default owner ID, and the default style sheet.Only run the script if both of the following conditions are met.
Copyright © 2016, Oracle and/or its affiliates. All Rights Reserved.

Chapter 3 Preparing for Application Changes
55
• Your current production application release database is already on PeopleSoft PeopleTools 8.46 or greater.• The table PS_EOPPB_LINKPATHS exists on the Target database.If both of the above conditions are met, then run the following script:PTPPB_EOPPB.DMS
Properties
Database Orientation
Pass Type Products Platforms Languages
Target All All All All
Task 3-6: Backing Up After Preparing Your Database
Back up your Copy of Production database now. This enables you to restart your upgrade from this point, should you experience any database integrity problems during the remaining tasks in the upgrade process.
Properties
Database Orientation
Pass Type Products Platforms Languages
Target All All All All
Copyright © 2016, Oracle and/or its affiliates. All Rights Reserved.


57
Chapter 4
Applying PeopleTools Changes
This chapter discusses:
• Understanding PeopleTools Changes• Performing Updates to PeopleTools System Tables• Turning Off Change Control• Populating Tablespace Data• Creating Updated PeopleTools Views• Updating Process Request Tables• Setting Object Version Numbers• Configuring the Scheduler and Server
Understanding PeopleTools Changes
To implement a successful upgrade, you must apply the necessary PeopleSoft PeopleTools changes. This involvesupdating the following PeopleSoft PeopleTools features: system tables, copying and building projects, loading seed data, and converting objects. From this point forward, you run all steps using your newly installed version of the software.
Note. Unless otherwise indicated, all scripts can be found in your new release PeopleSoft codeline PS_HOME\SCRIPTS directory. The actual script name is indicated in the description of each step in uppercase letters.
Task 4-1: Performing Updates to PeopleTools System Tables
This section discusses:
• Understanding Updating PeopleTools System Tables• Exporting Installation Data• Updating the Product License Code• Exporting PeopleTools System Tables• Importing PeopleTools System Tables• Rerunning Update Statistics for DB2 zOS• Rerunning the RUNSTATS Report for DB2 LUW• Rerunning Update Statistics for DB2 LUW• Regenerating Update Statistics Script for Oracle
Copyright © 2016, Oracle and/or its affiliates. All Rights Reserved.
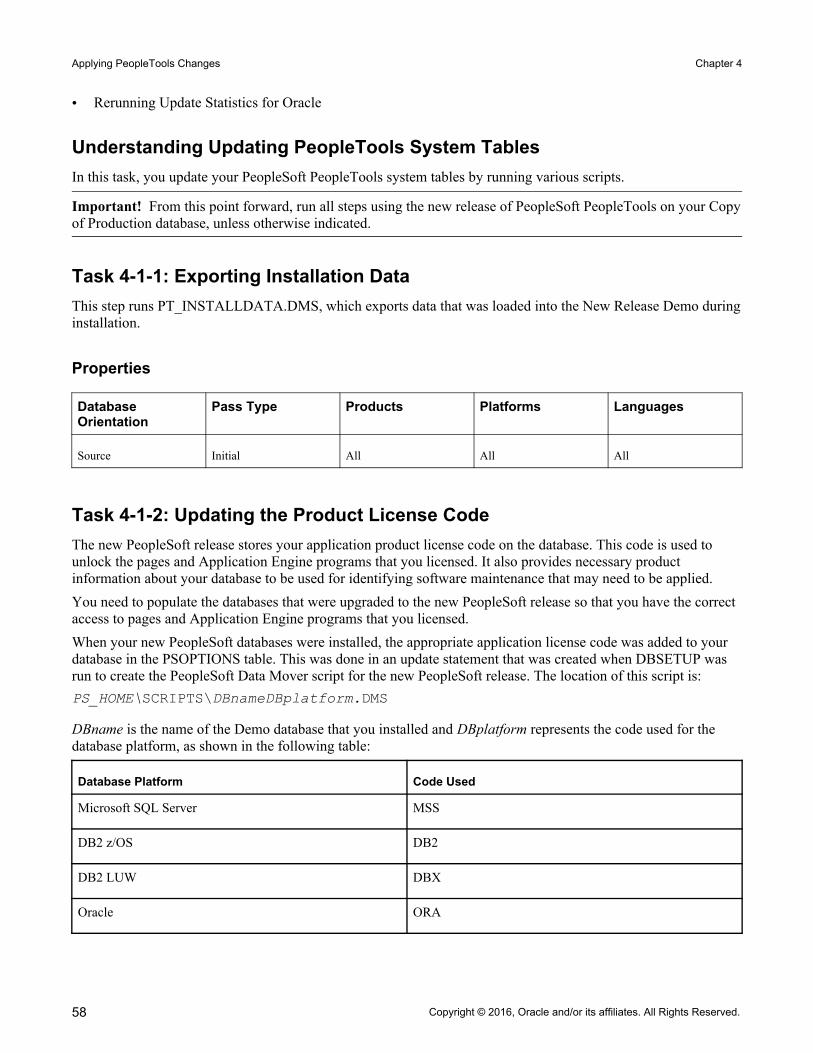
Applying PeopleTools Changes Chapter 4
58
• Rerunning Update Statistics for Oracle
Understanding Updating PeopleTools System TablesIn this task, you update your PeopleSoft PeopleTools system tables by running various scripts.
Important! From this point forward, run all steps using the new release of PeopleSoft PeopleTools on your Copyof Production database, unless otherwise indicated.
Task 4-1-1: Exporting Installation DataThis step runs PT_INSTALLDATA.DMS, which exports data that was loaded into the New Release Demo duringinstallation.
Properties
Database Orientation
Pass Type Products Platforms Languages
Source Initial All All All
Task 4-1-2: Updating the Product License CodeThe new PeopleSoft release stores your application product license code on the database. This code is used to unlock the pages and Application Engine programs that you licensed. It also provides necessary product information about your database to be used for identifying software maintenance that may need to be applied.You need to populate the databases that were upgraded to the new PeopleSoft release so that you have the correct access to pages and Application Engine programs that you licensed.When your new PeopleSoft databases were installed, the appropriate application license code was added to your database in the PSOPTIONS table. This was done in an update statement that was created when DBSETUP was run to create the PeopleSoft Data Mover script for the new PeopleSoft release. The location of this script is:PS_HOME\SCRIPTS\DBnameDBplatform.DMS
DBname is the name of the Demo database that you installed and DBplatform represents the code used for the database platform, as shown in the following table:
Database Platform Code Used
Microsoft SQL Server MSS
DB2 z/OS DB2
DB2 LUW DBX
Oracle ORA
Copyright © 2016, Oracle and/or its affiliates. All Rights Reserved.

Chapter 4 Applying PeopleTools Changes
59
This step runs PT_LICENSECODE.DMS, which updates your upgrade database with the same license code and license group that was used to install the New Release Demo database. You will be able to access the pages and Application Engine programs that you licensed after running the script.
Properties
Database Orientation
Pass Type Products Platforms Languages
Target Initial All All All
Task 4-1-3: Exporting PeopleTools System TablesThe script for this step exports the content of the PeopleSoft PeopleTools tables from the Copy of Production database during your Move to Production passes. During the initial pass, you run programs to convert some objects, like PeopleCode and fields. You perform analysis to decide which objects, such as records and menus, to bring over to your production database and which customized objects to keep. At the end of the initial pass, you reapply customizations or make other changes, such as modifying your permission lists. You do not need to repeatthose tasks in the Move to Production pass because this script exports all of your changes to the PeopleSoft PeopleTools objects.The script name for your upgrade path is:MVPRDEXP.DMS
Properties
Database Orientation
Pass Type Products Platforms Languages
Source MTP All All All
Task 4-1-4: Importing PeopleTools System TablesThe script for this step imports the content of the PeopleSoft PeopleTools tables into your New Copy of Production database during your Move to Production passes.These MVPRD* scripts replace tasks and steps performed in the initial pass. These tasks and steps may include:
• Renaming Records and Fields• Running New Release Compare Reports• Running the New Release Upgrade CopyIf your RDBMS uses tablespaces, edit this script for the proper DDL information.The script name for your upgrade path is:MVPRDIMP.DMS
Copyright © 2016, Oracle and/or its affiliates. All Rights Reserved.

Applying PeopleTools Changes Chapter 4
60
Properties
Database Orientation
Pass Type Products Platforms Languages
Target MTP All All All
Task 4-1-5: Rerunning Update Statistics for DB2 zOSEarlier in the upgrade process, you updated your statistics for DB2 z/OS. Due to changes in the database structure,you must update statistics again to improve the performance of your compare and copy. Contact your database administrator to have the statistics updated on your database before proceeding with your upgrade.
Note. When you are performing an application-only upgrade, this step does not run in the initial pass of the upgrade; it only runs during Move to Production passes.
Properties
Database Orientation
Pass Type Products Platforms Languages
Target MTP All DB2 z/OS All
Task 4-1-6: Rerunning the RUNSTATS Report for DB2 LUWThis script creates the RUNSTATS.DAT file for the script to update the statistics for DB2 for Linux, UNIX and Windows.
Note. When you are performing an application-only upgrade, this step does not run in the initial pass of the upgrade; it only runs during Move to Production passes.
Properties
Database Orientation
Pass Type Products Platforms Languages
Target MTP All DB2 LUW All
Task 4-1-7: Rerunning Update Statistics for DB2 LUWEarlier in the upgrade process, you updated your statistics for DB2 for Linux, UNIX and Windows. Due to changes in the database structure, you must update statistics again to improve the performance of your compare and copy. This step runs RUNSTATS.SQL to update statistics on your database.
Copyright © 2016, Oracle and/or its affiliates. All Rights Reserved.
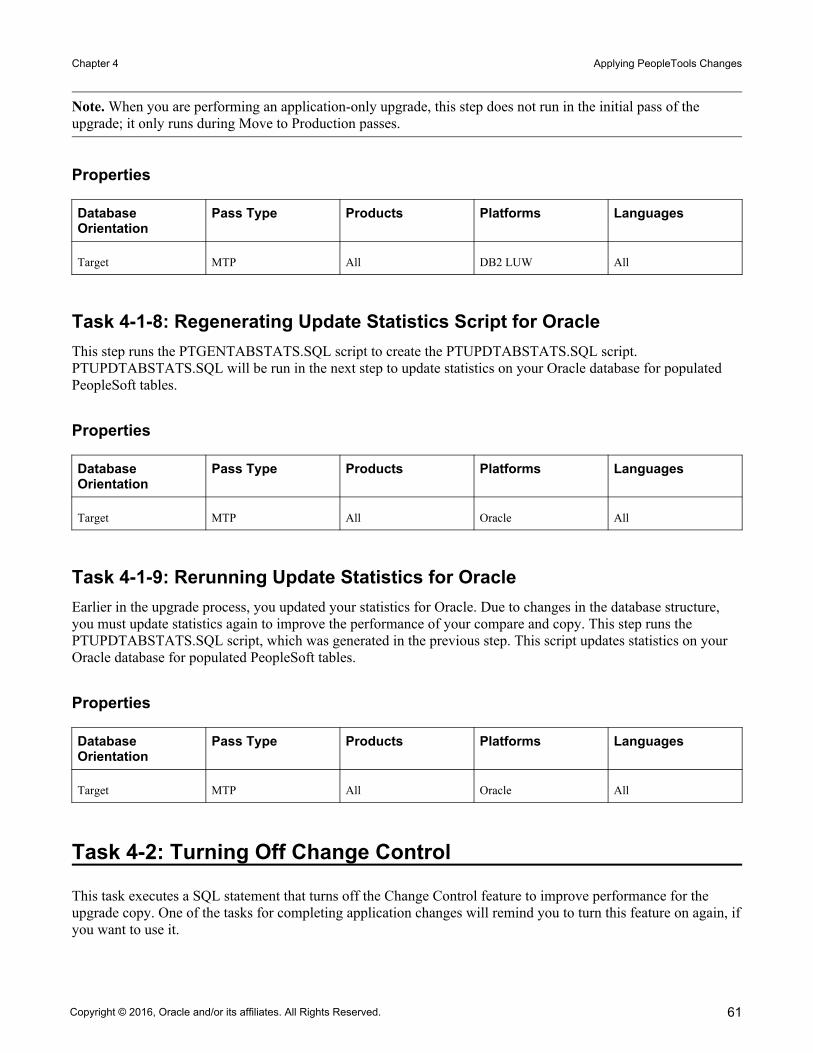
Chapter 4 Applying PeopleTools Changes
61
Note. When you are performing an application-only upgrade, this step does not run in the initial pass of the upgrade; it only runs during Move to Production passes.
Properties
Database Orientation
Pass Type Products Platforms Languages
Target MTP All DB2 LUW All
Task 4-1-8: Regenerating Update Statistics Script for OracleThis step runs the PTGENTABSTATS.SQL script to create the PTUPDTABSTATS.SQL script. PTUPDTABSTATS.SQL will be run in the next step to update statistics on your Oracle database for populated PeopleSoft tables.
Properties
Database Orientation
Pass Type Products Platforms Languages
Target MTP All Oracle All
Task 4-1-9: Rerunning Update Statistics for OracleEarlier in the upgrade process, you updated your statistics for Oracle. Due to changes in the database structure, you must update statistics again to improve the performance of your compare and copy. This step runs the PTUPDTABSTATS.SQL script, which was generated in the previous step. This script updates statistics on your Oracle database for populated PeopleSoft tables.
Properties
Database Orientation
Pass Type Products Platforms Languages
Target MTP All Oracle All
Task 4-2: Turning Off Change Control
This task executes a SQL statement that turns off the Change Control feature to improve performance for the upgrade copy. One of the tasks for completing application changes will remind you to turn this feature on again, ifyou want to use it.
Copyright © 2016, Oracle and/or its affiliates. All Rights Reserved.
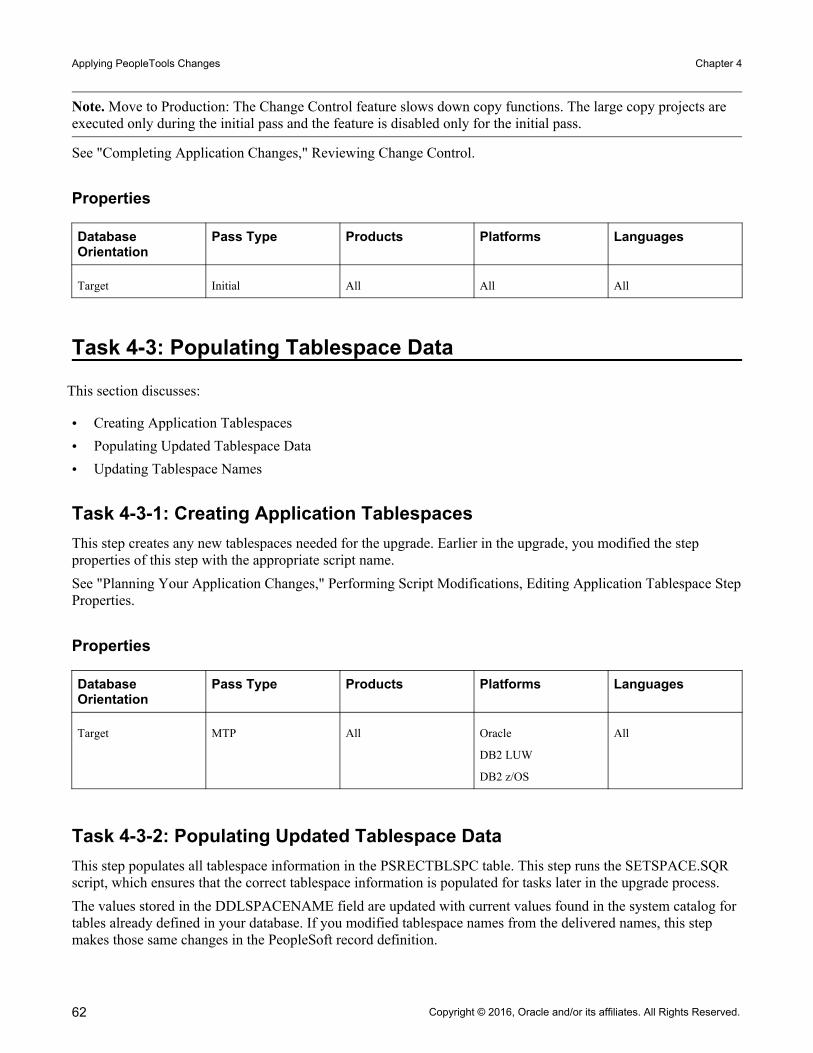
Applying PeopleTools Changes Chapter 4
62
Note. Move to Production: The Change Control feature slows down copy functions. The large copy projects are executed only during the initial pass and the feature is disabled only for the initial pass.
See "Completing Application Changes," Reviewing Change Control.
Properties
Database Orientation
Pass Type Products Platforms Languages
Target Initial All All All
Task 4-3: Populating Tablespace Data
This section discusses:
• Creating Application Tablespaces• Populating Updated Tablespace Data• Updating Tablespace Names
Task 4-3-1: Creating Application TablespacesThis step creates any new tablespaces needed for the upgrade. Earlier in the upgrade, you modified the step properties of this step with the appropriate script name.See "Planning Your Application Changes," Performing Script Modifications, Editing Application Tablespace StepProperties.
Properties
Database Orientation
Pass Type Products Platforms Languages
Target MTP All Oracle
DB2 LUW
DB2 z/OS
All
Task 4-3-2: Populating Updated Tablespace DataThis step populates all tablespace information in the PSRECTBLSPC table. This step runs the SETSPACE.SQR script, which ensures that the correct tablespace information is populated for tasks later in the upgrade process.The values stored in the DDLSPACENAME field are updated with current values found in the system catalog for tables already defined in your database. If you modified tablespace names from the delivered names, this step makes those same changes in the PeopleSoft record definition.
Copyright © 2016, Oracle and/or its affiliates. All Rights Reserved.

Chapter 4 Applying PeopleTools Changes
63
If you receive any errors when you run this script, correct them by creating the needed tablespace or changing the tablespace definition on the record object. Then run the script again to validate that you have created all tablespaces.
Note. When you are performing an application-only upgrade, this step does not run in the initial pass of the upgrade; it only runs during Move to Production passes.
Properties
Database Orientation
Pass Type Products Platforms Languages
Target MTP All Oracle
DB2 LUW
DB2 z/OS
All
Task 4-3-3: Updating Tablespace NamesThe SETSPACE SQR script identifies the tables with an invalid tablespace or database name/tablespace combination. However, the PeopleSoft PeopleTools metadata tables in your Copy of Production (Target) databasecontain the database/tablespace values from the Demo (Source) database. For DB2 z/OS, this also occurs if your Demo and Copy of Production databases are in the same DB2 subsystem after the upgrade/copy is completed. SETSPACE.SQR corrects these values for those tables defined in DB2. For those tables that are defined in the PeopleSoft PeopleTools metadata tables, but have not been defined in DB2, you need to review the SETSPACE SQR script for those tables that are reported as not defined in the database, but where the database/tablespace combination is valid. If the report shows an invalid database/tablespace combination, or shows your Demo (Source) database and tablespace names instead of your Copy of Production (Target) database and tablespace names, you can correct the database and tablespace names.Additionally, if you are upgrading from 8.53 or higher on DB2 LUW, review the output from the LOBDB2TS.SQR script in order to review the reassignment of any PeopleTools records with Long, Image, or Attachment field types to a tablespace with a sufficiently large page size. Any problematic records reported by theSQR were inserted into the PTUPGLOBDB2TS project for your convenience and automatically reassigned to the PSIMAGE2 tablespace. If there are no records fitting this criteria then both the SQR report and the project will beempty.To correct the database and/or tablespace names use one of the following options:
• Generate the alter/create scripts and globally edit the scripts, changing the database/tablespace values to those of your Copy of Production database.
• Directly update the PSRECTBLSPC table with your Target database names before generating the alter/create scripts.This will ensure that the database name/tablespace names in the generated alter/create scripts will be correct. The syntax to update the PSRECTBLSPC table is as follows:
UPDATE PSRECTBLSPC SET DBNAME = dbname, DDLSPACENAME = tablespace name⇒ WHERE DDLSPACENAME = tablespace identified in SETSPACE OUTPUT AND⇒ DBNAME = database identified in SETSPACE OUTPUT;
If you are using the delivered tablespaces, you can omit the references to DDLSPACENAME in the SQL statement above.
Copyright © 2016, Oracle and/or its affiliates. All Rights Reserved.

Applying PeopleTools Changes Chapter 4
64
Note. You will re-run the LOBDB2TS.SQR later in the upgrade. If you want to preserve the log files or the PTUPGLOBDB2TS project generated by PeopleSoft Change Assistant from this run, you will need to rename thefiles or project manually after completing this step.
Properties
Database Orientation
Pass Type Products Platforms Languages
Target MTP All DB2 z/OS
DB2 LUW
All
Task 4-4: Creating Updated PeopleTools Views
This step creates all views defined in the PPLTLS84CUR project. These are PeopleTools views that have changedand are required for tasks later in the upgrade.When you are performing an application-only upgrade, this step does not run in the initial pass of the upgrade; it only runs during Move to Production passes.
Properties
Database Orientation
Pass Type Products Platforms Languages
Target MTP All All All
Task 4-5: Updating Process Request Tables
This task runs the MGRPRCSTBL Application Engine program, which updates existing processes with the correct values for your environment.
Properties
Database Orientation
Pass Type Products Platforms Languages
Target All All All All
Copyright © 2016, Oracle and/or its affiliates. All Rights Reserved.
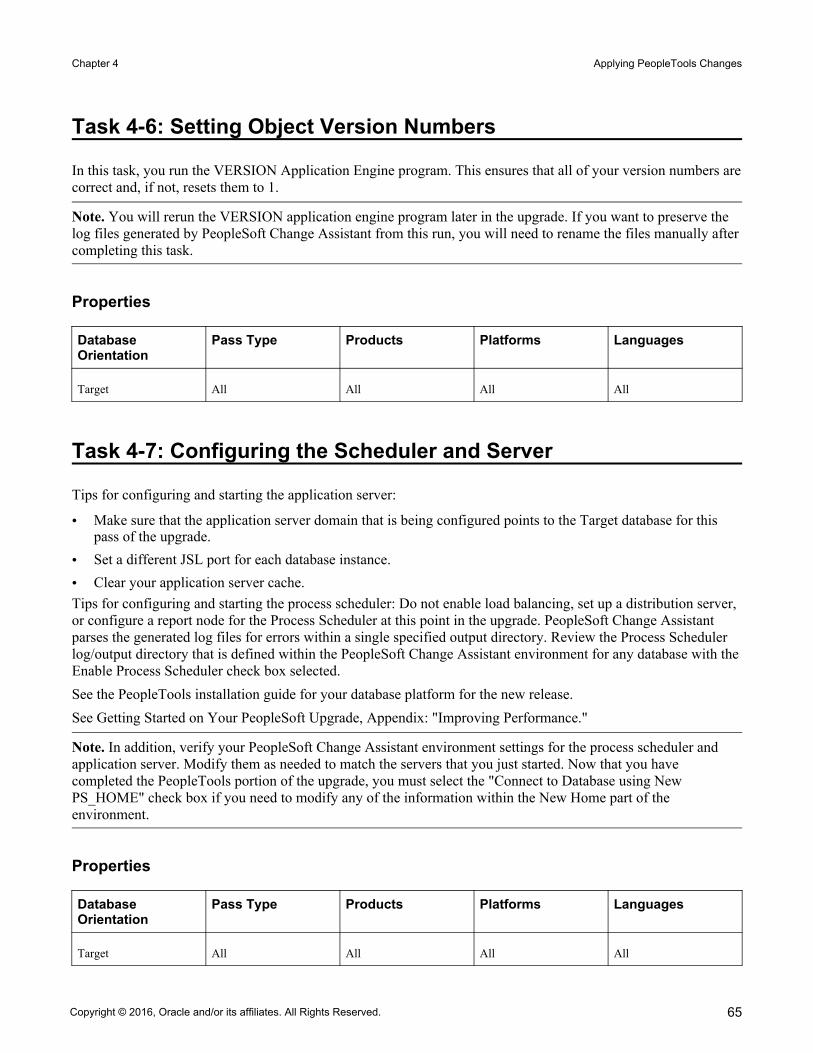
Chapter 4 Applying PeopleTools Changes
65
Task 4-6: Setting Object Version Numbers
In this task, you run the VERSION Application Engine program. This ensures that all of your version numbers arecorrect and, if not, resets them to 1.
Note. You will rerun the VERSION application engine program later in the upgrade. If you want to preserve the log files generated by PeopleSoft Change Assistant from this run, you will need to rename the files manually aftercompleting this task.
Properties
Database Orientation
Pass Type Products Platforms Languages
Target All All All All
Task 4-7: Configuring the Scheduler and Server
Tips for configuring and starting the application server:
• Make sure that the application server domain that is being configured points to the Target database for this pass of the upgrade.
• Set a different JSL port for each database instance.• Clear your application server cache.Tips for configuring and starting the process scheduler: Do not enable load balancing, set up a distribution server, or configure a report node for the Process Scheduler at this point in the upgrade. PeopleSoft Change Assistant parses the generated log files for errors within a single specified output directory. Review the Process Scheduler log/output directory that is defined within the PeopleSoft Change Assistant environment for any database with theEnable Process Scheduler check box selected. See the PeopleTools installation guide for your database platform for the new release.See Getting Started on Your PeopleSoft Upgrade, Appendix: "Improving Performance."
Note. In addition, verify your PeopleSoft Change Assistant environment settings for the process scheduler and application server. Modify them as needed to match the servers that you just started. Now that you have completed the PeopleTools portion of the upgrade, you must select the "Connect to Database using New PS_HOME" check box if you need to modify any of the information within the New Home part of the environment.
Properties
Database Orientation
Pass Type Products Platforms Languages
Target All All All All
Copyright © 2016, Oracle and/or its affiliates. All Rights Reserved.


67
Chapter 5
Running and Reviewing Compare Reports
This chapter discusses:
• Understanding Compare Reports• Running Preliminary Application Changes• Running the Alter Analyzer Loader• Renaming Tables• Running New Release Compare Reports• Reviewing New Release Compare Reports
Understanding Compare Reports
Now that your Copy of Production database is at the same PeopleSoft PeopleTools release as your new release, you can compare the two databases to see the differences. In this chapter you run and review compare reports to make decisions regarding your upgrade. Be sure that you have plenty of space to run these reports, as some can berather large.
Task 5-1: Running Preliminary Application Changes
This section discusses:
• Exporting Project Definitions• Importing Project Definitions
Note. This task contains several unrelated steps that are required before you continue the upgrade.
Task 5-1-1: Exporting Project DefinitionsIn this step, you export from your Demo database the project definitions that will be used later in this upgrade. This step is run in the initial and Move to Production passes; therefore, during the Move to Production pass, the export is not run against the Demo database. You will import these definitions in the next step.The script for your upgrade is:DLUPX08E.DMS
Copyright © 2016, Oracle and/or its affiliates. All Rights Reserved.

Running and Reviewing Compare Reports Chapter 5
68
Properties
Database Orientation
Pass Type Products Platforms Languages
Source All All All All
Task 5-1-2: Importing Project DefinitionsIn this step you will import the project definitions into your Copy of Production database. These projects will be used later in this upgrade.The script for your upgrade is:DLUPX08I.DMS
Properties
Database Orientation
Pass Type Products Platforms Languages
Target All All All All
Task 5-2: Running the Alter Analyzer Loader
In this step, you run the PTALTDATLOAD Application Engine program. This process preserves the database structure from your current release in temporary tables to be used later in the upgrade.
Properties
Database Orientation
Pass Type Products Platforms Languages
Target Initial All All All
Task 5-3: Renaming Tables
This section discusses:
• Understanding Renaming Tables• Running the SQL Table Rename Utility• Reviewing the SQL Table Rename Utility Output• Renaming SQL Tables
Copyright © 2016, Oracle and/or its affiliates. All Rights Reserved.

Chapter 5 Running and Reviewing Compare Reports
69
Understanding Renaming TablesIn this task you run the UPG_REN_SQL Application Engine program to generate the RNUPGTBLS.SQL renamescript. You will then run the generated script to rename tables at the database level to temporary table names.Near the end of the upgrade tasks, you run a DDDAUDIT report again. On the report, these temporary tables will be listed in the section for "SQL Table defined in the Database and not found in the Application Designer." Eitherat that point or later, when you are comfortable with the results of the data conversion, you can drop these temporary tables.
Task 5-3-1: Running the SQL Table Rename UtilityThis step runs the Application Engine program UPG_REN_SQL, which populates the rename SQL script with thecommands that are appropriate for your environment. The generated SQL rename script is RNUPGTBLS.SQL. The dependent indexes and views are also included in the SQL script, which may include custom indexes and views. The UPG_REN_SQL Application Engine program validates the rename candidates and only those objects that actually need renaming are written to the rename SQL script.
Properties
Database Orientation
Pass Type Products Platforms Languages
Target All All All All
Task 5-3-2: Reviewing the SQL Table Rename Utility OutputThe Application Engine program UPG_REN_SQL populated the RNUPGTBLS.SQL with the renames specific toyour environment. Review the log file generated by the UPG_REN_SQL Application Engine program and analyze the generated scripts to familiarize yourself with the renames that will be executed during the upgrade. You will want to see how many SQL renames were written to the generated SQL. Depending on your environment and old release patch level, you may not see any renames written to a rename script.
Note. If there are no renames to be run for your upgrade path, mark the step "Renaming SQL Tables" as complete.
Note. For DB2 z/OS customers, edit the SQL rename script RNUPGTBLS.SQL. Uncomment and modify the set owner ID command within the script, as in the following example:
set current sqlid = '<OwnerId In Upper Case>';
Properties
Database Orientation
Pass Type Products Platforms Languages
Target All All All All
Copyright © 2016, Oracle and/or its affiliates. All Rights Reserved.

Running and Reviewing Compare Reports Chapter 5
70
Task 5-3-3: Renaming SQL TablesThis step runs RNUPGTBLS.SQL to rename tables at the database level to temporary table names. The script does not change the Record Definition. These temporary tables will be used in the data conversion programs in a later step.In some database platforms, the related indexes and views must be dropped before the table can be renamed. Oracle includes drop statements for these objects in the SQL script that is generated by the rename Application Engine program UPG_REN_SQL.
Properties
Database Orientation
Pass Type Products Platforms Languages
Target All All All All
Task 5-4: Running New Release Compare Reports
This section discusses:
• Understanding the New Release Compare• Preserving the Local Message Node• Copying the UPGCUST Project to File• Running the UPGCUST Compare from File• Running the New Release UPGCUST Compare• Populating the UPGIB Project• Creating the UPGIB_TGT Project• Copying the UPGIB_TGT Project to File• Copying the UPGIB_TGT Project from File• Merging the UPGIB and UPGIB_TGT Projects• Copying the UPGIB Project to File• Running the UPGIB Compare from File• Creating the UPGIB Project
Understanding the New Release CompareIn this task you will compare your customizations to the new release objects by running a project compare againstthe Demo database.
Copyright © 2016, Oracle and/or its affiliates. All Rights Reserved.
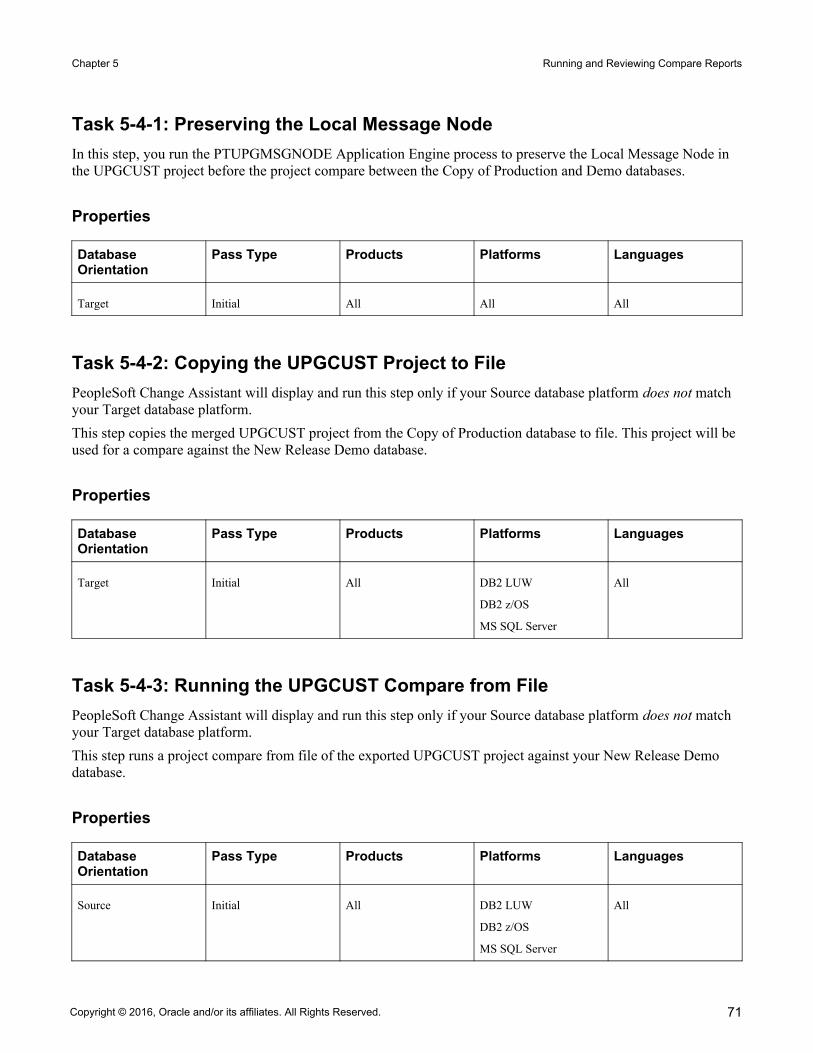
Chapter 5 Running and Reviewing Compare Reports
71
Task 5-4-1: Preserving the Local Message NodeIn this step, you run the PTUPGMSGNODE Application Engine process to preserve the Local Message Node in the UPGCUST project before the project compare between the Copy of Production and Demo databases.
Properties
Database Orientation
Pass Type Products Platforms Languages
Target Initial All All All
Task 5-4-2: Copying the UPGCUST Project to FilePeopleSoft Change Assistant will display and run this step only if your Source database platform does not match your Target database platform.This step copies the merged UPGCUST project from the Copy of Production database to file. This project will be used for a compare against the New Release Demo database.
Properties
Database Orientation
Pass Type Products Platforms Languages
Target Initial All DB2 LUW
DB2 z/OS
MS SQL Server
All
Task 5-4-3: Running the UPGCUST Compare from FilePeopleSoft Change Assistant will display and run this step only if your Source database platform does not match your Target database platform.This step runs a project compare from file of the exported UPGCUST project against your New Release Demo database.
Properties
Database Orientation
Pass Type Products Platforms Languages
Source Initial All DB2 LUW
DB2 z/OS
MS SQL Server
All
Copyright © 2016, Oracle and/or its affiliates. All Rights Reserved.

Running and Reviewing Compare Reports Chapter 5
72
Task 5-4-4: Running the New Release UPGCUST ComparePeopleSoft Change Assistant will display and run this step only if your Source database platform matches your Target database platform.This step runs a project compare of comparable objects in the UPGCUST project.
Properties
Database Orientation
Pass Type Products Platforms Languages
Source Initial All All All
Task 5-4-5: Populating the UPGIB ProjectPeopleSoft Change Assistant will display and run this step only if your Source database platform does not match your Target database platform.This step creates the UPGIB Project in your New Release Demo database and inserts the Integration Broker objects. Because a database compare cannot be run for your configuration, this project will be copied to file and used to copy new release Integration Broker objects to the Copy of Production, as well as to delete obsolete Integration Broker objects from the Copy of Production.
Properties
Database Orientation
Pass Type Products Platforms Languages
Source Initial All DB2 LUW
DB2 z/OS
MS SQL Server
All
Task 5-4-6: Creating the UPGIB_TGT ProjectPeopleSoft Change Assistant will display and run this step only if your Source database platform does not match your Target database platform.This step creates the UPGIB_TGT project in the Copy of Production database with the Integration Broker objects.Because a database compare cannot be run for your configuration, this project definition will be used to compare from file the Integration Broker objects with the Source database to identify and preserve customizations, if any.
Copyright © 2016, Oracle and/or its affiliates. All Rights Reserved.
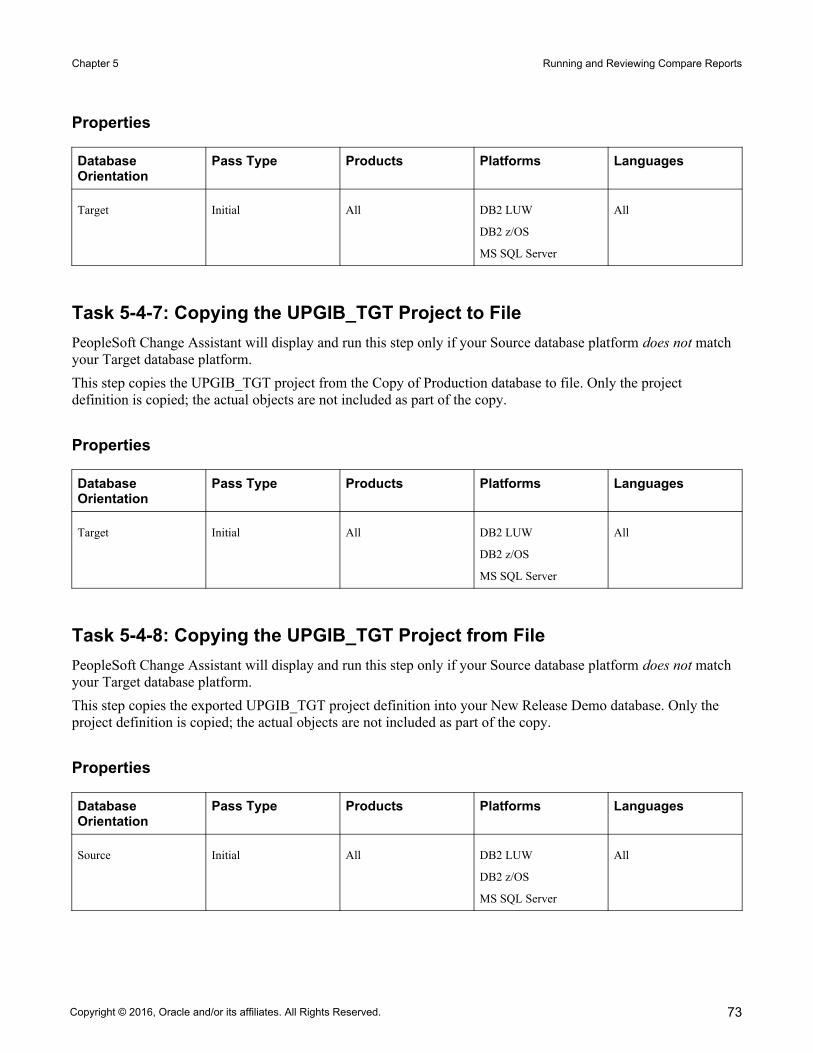
Chapter 5 Running and Reviewing Compare Reports
73
Properties
Database Orientation
Pass Type Products Platforms Languages
Target Initial All DB2 LUW
DB2 z/OS
MS SQL Server
All
Task 5-4-7: Copying the UPGIB_TGT Project to FilePeopleSoft Change Assistant will display and run this step only if your Source database platform does not match your Target database platform.This step copies the UPGIB_TGT project from the Copy of Production database to file. Only the project definition is copied; the actual objects are not included as part of the copy.
Properties
Database Orientation
Pass Type Products Platforms Languages
Target Initial All DB2 LUW
DB2 z/OS
MS SQL Server
All
Task 5-4-8: Copying the UPGIB_TGT Project from FilePeopleSoft Change Assistant will display and run this step only if your Source database platform does not match your Target database platform.This step copies the exported UPGIB_TGT project definition into your New Release Demo database. Only the project definition is copied; the actual objects are not included as part of the copy.
Properties
Database Orientation
Pass Type Products Platforms Languages
Source Initial All DB2 LUW
DB2 z/OS
MS SQL Server
All
Copyright © 2016, Oracle and/or its affiliates. All Rights Reserved.

Running and Reviewing Compare Reports Chapter 5
74
Task 5-4-9: Merging the UPGIB and UPGIB_TGT ProjectsPeopleSoft Change Assistant will display and run this step only if your Source database platform does not match your Target database platform.This step merges the UPGIB_TGT project into the UPGIB project in your New Release Demo database. This merged project definition now contains a listing of all Integration Broker-related objects that exist in both the New Release Demo and Copy of Production databases.
Properties
Database Orientation
Pass Type Products Platforms Languages
Source Initial All DB2 LUW
DB2 z/OS
MS SQL Server
All
Task 5-4-10: Copying the UPGIB Project to FilePeopleSoft Change Assistant will display and run this step only if your Source database platform does not match your Target database platform.This step copies the UPGIB project to file from your New Release Demo database because a database compare cannot be run for your configuration.
Properties
Database Orientation
Pass Type Products Platforms Languages
Source Initial All DB2 LUW
DB2 z/OS
MS SQL Server
All
Task 5-4-11: Running the UPGIB Compare from FilePeopleSoft Change Assistant will display and run this step only if your Source database platform does not match your Target database platform.This step runs a project compare from file of the exported UPGIB project against your Target database.
Copyright © 2016, Oracle and/or its affiliates. All Rights Reserved.

Chapter 5 Running and Reviewing Compare Reports
75
Properties
Database Orientation
Pass Type Products Platforms Languages
Target Initial All DB2 LUW
DB2 z/OS
MS SQL Server
All
Task 5-4-12: Creating the UPGIB ProjectPeopleSoft Change Assistant will display and run this step only if your Source database platform matches your Target database platform.This step creates a project on your New Release Demo database called UPGIB and executes a database compare of Integration Broker objects. This project will be used to copy new release Integration Broker objects to the Copyof Production and to delete obsolete Integration Broker objects from the Copy of Production.
Properties
Database Orientation
Pass Type Products Platforms Languages
Target Initial All All All
Task 5-5: Reviewing New Release Compare Reports
This section discusses:
• Reviewing New Release Changes• Reviewing New Release Changes from File• Reviewing Additional Upgrade Projects• Reviewing Additional Upgrade Projects from File
Task 5-5-1: Reviewing New Release ChangesPeopleSoft Change Assistant will display this step only if your Source database platform matches your Target database platform.In this step, you analyze the UPGCUST project and related compare reports. On the Copy of Production database,select the Upgrade flags for the customizations that you wish to retain. Compare reports are viewable when you open the project in PeopleSoft Application Designer. You can use these reports to determine your copy action for each object in the project. By default, all Upgrade flags in the project are deselected, meaning no action will take place.
Copyright © 2016, Oracle and/or its affiliates. All Rights Reserved.
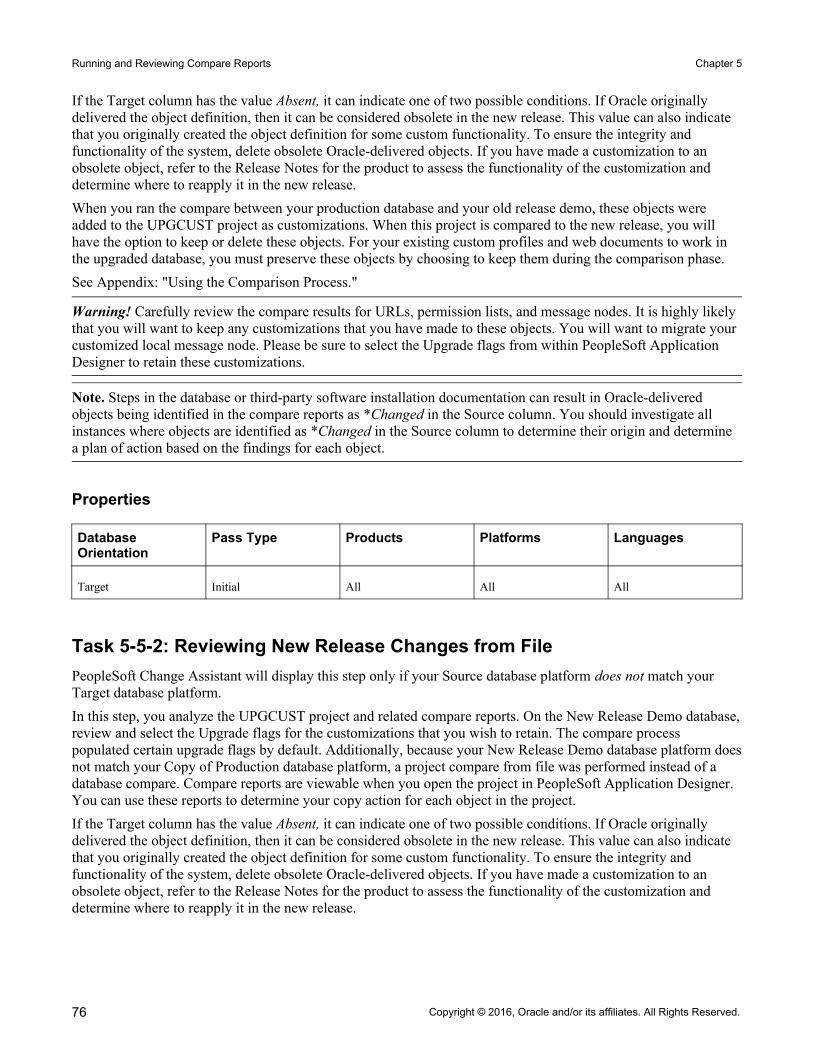
Running and Reviewing Compare Reports Chapter 5
76
If the Target column has the value Absent, it can indicate one of two possible conditions. If Oracle originally delivered the object definition, then it can be considered obsolete in the new release. This value can also indicate that you originally created the object definition for some custom functionality. To ensure the integrity and functionality of the system, delete obsolete Oracle-delivered objects. If you have made a customization to an obsolete object, refer to the Release Notes for the product to assess the functionality of the customization and determine where to reapply it in the new release.When you ran the compare between your production database and your old release demo, these objects were added to the UPGCUST project as customizations. When this project is compared to the new release, you will have the option to keep or delete these objects. For your existing custom profiles and web documents to work in the upgraded database, you must preserve these objects by choosing to keep them during the comparison phase.See Appendix: "Using the Comparison Process."
Warning! Carefully review the compare results for URLs, permission lists, and message nodes. It is highly likely that you will want to keep any customizations that you have made to these objects. You will want to migrate your customized local message node. Please be sure to select the Upgrade flags from within PeopleSoft Application Designer to retain these customizations.
Note. Steps in the database or third-party software installation documentation can result in Oracle-delivered objects being identified in the compare reports as *Changed in the Source column. You should investigate all instances where objects are identified as *Changed in the Source column to determine their origin and determine a plan of action based on the findings for each object.
Properties
Database Orientation
Pass Type Products Platforms Languages
Target Initial All All All
Task 5-5-2: Reviewing New Release Changes from FilePeopleSoft Change Assistant will display this step only if your Source database platform does not match your Target database platform.In this step, you analyze the UPGCUST project and related compare reports. On the New Release Demo database,review and select the Upgrade flags for the customizations that you wish to retain. The compare process populated certain upgrade flags by default. Additionally, because your New Release Demo database platform doesnot match your Copy of Production database platform, a project compare from file was performed instead of a database compare. Compare reports are viewable when you open the project in PeopleSoft Application Designer. You can use these reports to determine your copy action for each object in the project.If the Target column has the value Absent, it can indicate one of two possible conditions. If Oracle originally delivered the object definition, then it can be considered obsolete in the new release. This value can also indicate that you originally created the object definition for some custom functionality. To ensure the integrity and functionality of the system, delete obsolete Oracle-delivered objects. If you have made a customization to an obsolete object, refer to the Release Notes for the product to assess the functionality of the customization and determine where to reapply it in the new release.
Copyright © 2016, Oracle and/or its affiliates. All Rights Reserved.

Chapter 5 Running and Reviewing Compare Reports
77
When you ran the compare between your production database and your old release demo, these objects were added to the UPGCUST project as customizations. When this project is compared to the new release, you will have the option to keep or delete these objects. For your existing custom profiles and web documents to work in the upgraded database, you must preserve these objects by choosing to keep them during the comparison phase.See Appendix: "Using the Comparison Process."
Warning! Carefully review the compare results for URLs, permission lists, and message nodes. It is highly likely that you will want to keep any customizations that you have made to these objects. You will want to migrate your customized local message node. Please be sure to select the Upgrade flags from within PeopleSoft Application Designer to retain these customizations.
Note. Steps in the database or third-party software installation documentation can result in Oracle-delivered objects being identified in the compare reports as *Changed in the Source column. You should investigate all instances where objects are identified as *Changed in the Source column to determine their origin and determine a plan of action based on the findings for each object.
Properties
Database Orientation
Pass Type Products Platforms Languages
Source Initial All DB2 LUW
DB2 z/OS
MS SQL Server
All
Task 5-5-3: Reviewing Additional Upgrade ProjectsPeopleSoft Change Assistant will display this step only if your Source database platform matches your Target database platform.In this step, analyze the UPGIB project and related compare reports, and the UPGNONCOMP project.The UPGIB project is created in your Demo database by running a full database compare. It contains Integration Broker object definitions. The database compare produces compare reports that you can view by opening the project in PeopleSoft Application Designer. You can use these reports to determine your copy action for each object in the project. Analyze the UPGIB project and select the Upgrade flags for the customizations that you wish to retain. If the Source column has the value Absent, it can indicate one of two possible conditions. If Oracle originally delivered the object definition, then the object can be considered obsolete in the new release. Or, this value can indicate that you originally created the object definition for custom functionality. To ensure the integrity and functionality of the system, delete obsolete Oracle-delivered objects. If you have made a customization to an obsolete object, refer to the Release Notes for the product to assess the functionality of the customization and to determine where to reapply it in the new release. The UPGNONCOMP project is delivered in your Demo database. It contains object definitions that cannot be compared using PeopleSoft Application Designer. The UPGNONCOMP project for your upgrade may contain some or all objects of the following object types: trees, access groups, roles, dimensions, cube definitions, and cube instance definitions. These object definitions are required for your upgraded database to function correctly. You need to review this project to see whether you customized any of the objects. You then need to reapply those customizations later in the upgrade.
Copyright © 2016, Oracle and/or its affiliates. All Rights Reserved.

Running and Reviewing Compare Reports Chapter 5
78
See Appendix: "Using the Comparison Process."
Properties
Database Orientation
Pass Type Products Platforms Languages
Source Initial All All All
Task 5-5-4: Reviewing Additional Upgrade Projects from FilePeopleSoft Change Assistant will display this step only if your Source database platform does not match your Target database platform.In this step, analyze the UPGIB project and related compare reports, and the UPGNONCOMP project.The UPGIB project is created in your Copy of Production database by running a project compare from file. Because your New Release Demo database platform does not match your Copy of Production database platform, a project compare from file was performed instead of a database compare. The project compare produces comparereports that you can view by opening the project in PeopleSoft Application Designer. You can use these reports todetermine your copy action for each object in the project. On the Copy of Production database, review and analyze the UPGIB project and select the Upgrade flags for the customizations that you wish to retain.If the Source column has the value Absent, it can indicate one of two possible conditions. If Oracle originally delivered the object definition, then the object can be considered obsolete in the new release. Or, this value can indicate that you originally created the object definition for custom functionality. To ensure the integrity and functionality of the system, delete obsolete Oracle-delivered objects. If you have made a customization to an obsolete object, refer to the Release Notes for the product to assess the functionality of the customization and to determine where to reapply it in the new release.The UPGNONCOMP project is delivered in your Demo database. It contains object definitions that cannot be compared using PeopleSoft Application Designer. The UPGNONCOMP project for your upgrade may contain some or all objects of the following object types: trees, access groups, roles, dimensions, cube definitions, and cube instance definitions. These object definitions are required for your upgraded database to function correctly. You need to review this project to see whether you customized any of the objects. You then need to reapply those customizations later in the upgrade. Because your New Release Demo database platform does not match your Copy of Production database platform, the project will be migrated using DataMover instead of database copy.See Appendix: "Using the Comparison Process."
Properties
Database Orientation
Pass Type Products Platforms Languages
Source Initial All DB2 LUW
DB2 z/OS
MS SQL Server
All
Copyright © 2016, Oracle and/or its affiliates. All Rights Reserved.

79
Chapter 6
Applying Application Changes
This chapter discusses:
• Understanding Application Changes• Running the New Release Upgrade Copy• Updating Database Overrides• Backing Up After the Upgrade Copy• Preparing for Data Conversion Analysis• Modifying the Database Structure• Loading Data for Data Conversion• Applying Updates Before Data Conversion• Running the Data Conversion Analyzer• Backing Up Before Data Conversion• Running Data Conversion • Backing Up After Data Conversion• Finalizing the Database Structure• Loading Data to Complete System Setup• Loading Stored Statements• Running Final Update Statistics• Updating Language Data• Updating Object Version Numbers• Running the Final Audit Reports• Restoring the New Release Demo
Understanding Application Changes
Earlier in the upgrade, you made various application changes. Now it is time to apply these application changes toyour Copy of Production database.
Task 6-1: Running the New Release Upgrade Copy
This section discusses:
• Exporting Selected PeopleTools Tables
Copyright © 2016, Oracle and/or its affiliates. All Rights Reserved.

Applying Application Changes Chapter 6
80
• Importing Selected PeopleTools Tables• Copying the UPGCUST Project from File• Copying the UPGCUST Project• Reviewing Copy Results• Updating Target Values• Copying the UPGIB Project from File• Copying the UPGIB Project• Exporting the UPGNONCOMP Project• Importing the UPGNONCOMP Project• Copying the UPGNONCOMP Project• Reviewing Project Copy Results• Exporting New Release Objects• Importing New Release Objects• Resetting Object Version Numbers
Task 6-1-1: Exporting Selected PeopleTools TablesDepending on your upgrade path, you will need to export one or more PeopleSoft PeopleTools tables to preserve values on your Copy of Production database. This step exports PeopleSoft PeopleTools tables in the Copy of Production before the upgrade copy has occurred.The script for your upgrade path is:DLUPX96E.DMS
Properties
Database Orientation
Pass Type Products Platforms Languages
Target Initial All All All
Task 6-1-2: Importing Selected PeopleTools TablesDepending on your upgrade path, you will need to import one or more PeopleSoft PeopleTools tables to preserve values on your Copy of Production database. This step imports PeopleSoft PeopleTools tables into the Demo database before the upgrade copy occurs.The script for your upgrade path is:DLUPX96I.DMS
Copyright © 2016, Oracle and/or its affiliates. All Rights Reserved.

Chapter 6 Applying Application Changes
81
Properties
Database Orientation
Pass Type Products Platforms Languages
Source Initial All All All
Task 6-1-3: Copying the UPGCUST Project from FilePeopleSoft Change Assistant will display and run this step only if your Source database platform does not match your Target database platform.This step copies the exported UPGCUST project from file into your New Release Demo database. Earlier in the upgrade, you set the upgrade flags for the UPGCUST project definition on the New Release Demo database. The Reset Done Flags copy option is deselected to ensure that Change Assistant will use the updated project definitionstored in the New Release Demo database to determine the scope of objects to copy in this step.
Properties
Database Orientation
Pass Type Products Platforms Languages
Source Initial All DB2 LUW
DB2 z/OS
MS SQL Server
All
Task 6-1-4: Copying the UPGCUST ProjectPeopleSoft Change Assistant will display and run this step only if your Source database platform matches your Target database platform.This step copies your customized PeopleSoft PeopleTools and application objects from the Copy of Production database to your Demo database.
Properties
Database Orientation
Pass Type Products Platforms Languages
Source Initial All All All
Task 6-1-5: Reviewing Copy ResultsReview the results of the project copies that were performed in this task. For each of the projects copied, review the copy logs for any errors. Also, verify in PeopleSoft Application Designer that each of the projects copied shows the Done options are selected for those objects that you expected to be copied.
Copyright © 2016, Oracle and/or its affiliates. All Rights Reserved.

Applying Application Changes Chapter 6
82
There are many different types of errors that you can find in the copy logs, depending on which objects you choseto copy or not copy. For example, if you chose not to copy a record definition, but neglected to deselect the PeopleCode Upgrade check box for that record, you will receive errors when trying to copy the PeopleCode. PeopleSoft Application Designer maintains PeopleSoft PeopleTools integrity during the copy and will not copy PeopleCode for records that do not exist.Review any errors that you receive during the copy process and determine whether they are acceptable cases or unacceptable errors that need correction. In the example above, either the PeopleCode error is acceptable because you do not intend to copy the record definition, or the error is unacceptable and you should copy the record and then copy the PeopleCode for that record again.You may get messages similar to "Warning: FIELDNAME is a key field and has been appended to the end of the RECORDNAME record." This is an acceptable message and you can ignore it.The following error occurs when copying a Portal Registry Structure that has a different PORTAL_OBJNAME but the same PORTAL_URLTEXT as an existing registry object.
Duplicate Key. Portal: portalname, Obj name: objectname, CP: nodename, URL⇒ (1st 50 char): URL
At this point in the upgrade, your Source database will have all of the customizations that you decided to keep. For SQL tables, the database structures and metadata may not be in sync and you might want to consider altering the tables on the UPGCUST project using Application Designer. This is not a mandatory action unless your customizations affected system data tables. If your system data tables were affected, the step Exporting Application System Data, in the task Loading Data to Complete System Setup later in this chapter will not run successfully.See the product documentation for PeopleTools: Application Designer Developer's Guide for your new release formore information about altering tables.
Properties
Database Orientation
Pass Type Products Platforms Languages
Source Initial All All All
Task 6-1-6: Updating Target ValuesThis step updates the Message Node table on the Demo database to keep the assignment of the Local Node defined in the Copy of Production. The update uses the copy of the Message Node table taken earlier in the upgrade.The script for your upgrade path is:DLUPX97.DMS
Copyright © 2016, Oracle and/or its affiliates. All Rights Reserved.

Chapter 6 Applying Application Changes
83
Properties
Database Orientation
Pass Type Products Platforms Languages
Source Initial All All All
Task 6-1-7: Copying the UPGIB Project from FilePeopleSoft Change Assistant will display and run this step only if your Source database platform does not match your Target database platform.This step copies the exported UPGIB project from file into the Copy of Production database. Earlier in the upgrade, you set the upgrade flags for the UPGIB project definition on the Copy of Production database. The Reset Done Flags copy option is deselected to ensure that Change Assistant will use the updated project definitionstored in the Copy of Production database to determine the scope of objects to copy in this step.
Properties
Database Orientation
Pass Type Products Platforms Languages
Target Initial All DB2 LUW
DB2 z/OS
MS SQL Server
All
Task 6-1-8: Copying the UPGIB ProjectPeopleSoft Change Assistant will display and run this step only if your Source database platform matches your Target database platform.This step copies new release Integration Broker objects from the Demo database to your Copy of Production database. This step also deletes obsolete Integration Broker objects from your Copy of Production database.
Properties
Database Orientation
Pass Type Products Platforms Languages
Target Initial All All All
Task 6-1-9: Exporting the UPGNONCOMP ProjectPeopleSoft Change Assistant will display and run this step only if your Source database platform does not match your Target database platform.
Copyright © 2016, Oracle and/or its affiliates. All Rights Reserved.

Applying Application Changes Chapter 6
84
This step exports the UPGNONCOMP project from the New Release Demo database. The script for your upgradepath is:DLUPX26E.DMS
Properties
Database Orientation
Pass Type Products Platforms Languages
Source Initial All DB2 LUW
DB2 z/OS
MS SQL Server
All
Task 6-1-10: Importing the UPGNONCOMP ProjectPeopleSoft Change Assistant will display and run this step only if your Source database platform does not match your Target database platform.This step imports the UPGNONCOMP Project, exported in the previous step, into the Copy of Production database. The script for your upgrade path is:DLUPX26I.DMS
Properties
Database Orientation
Pass Type Products Platforms Languages
Target Initial All DB2 LUW
DB2 z/OS
MS SQL Server
All
Task 6-1-11: Copying the UPGNONCOMP ProjectPeopleSoft Change Assistant will display and run this step only if your Source database platform matches your Target database platform.In this step, copy the non-compare project, UPGNONCOMP. This project consists of object types that you cannotcompare and object types that are not included in your compare project. In a previous step, you reviewed this Oracle-delivered project and modified the Upgrade check box for any objects that you did not want to copy.
Copyright © 2016, Oracle and/or its affiliates. All Rights Reserved.
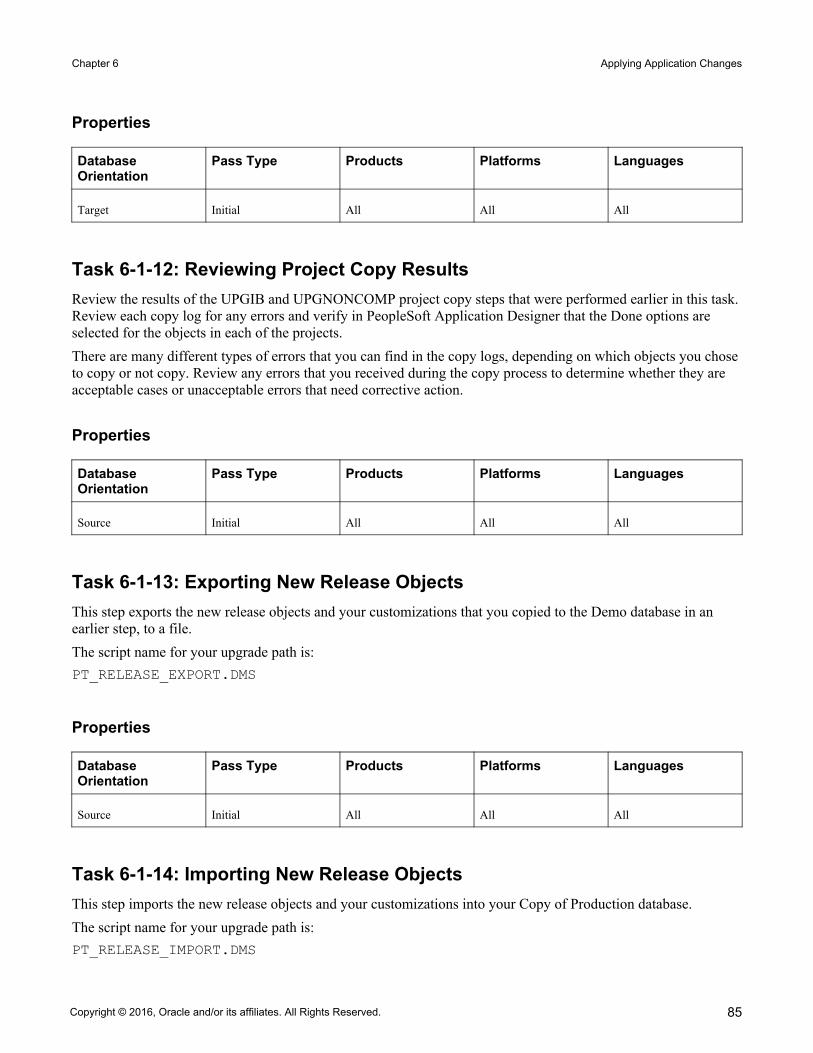
Chapter 6 Applying Application Changes
85
Properties
Database Orientation
Pass Type Products Platforms Languages
Target Initial All All All
Task 6-1-12: Reviewing Project Copy ResultsReview the results of the UPGIB and UPGNONCOMP project copy steps that were performed earlier in this task.Review each copy log for any errors and verify in PeopleSoft Application Designer that the Done options are selected for the objects in each of the projects.There are many different types of errors that you can find in the copy logs, depending on which objects you choseto copy or not copy. Review any errors that you received during the copy process to determine whether they are acceptable cases or unacceptable errors that need corrective action.
Properties
Database Orientation
Pass Type Products Platforms Languages
Source Initial All All All
Task 6-1-13: Exporting New Release ObjectsThis step exports the new release objects and your customizations that you copied to the Demo database in an earlier step, to a file. The script name for your upgrade path is:PT_RELEASE_EXPORT.DMS
Properties
Database Orientation
Pass Type Products Platforms Languages
Source Initial All All All
Task 6-1-14: Importing New Release ObjectsThis step imports the new release objects and your customizations into your Copy of Production database.The script name for your upgrade path is:PT_RELEASE_IMPORT.DMS
Copyright © 2016, Oracle and/or its affiliates. All Rights Reserved.
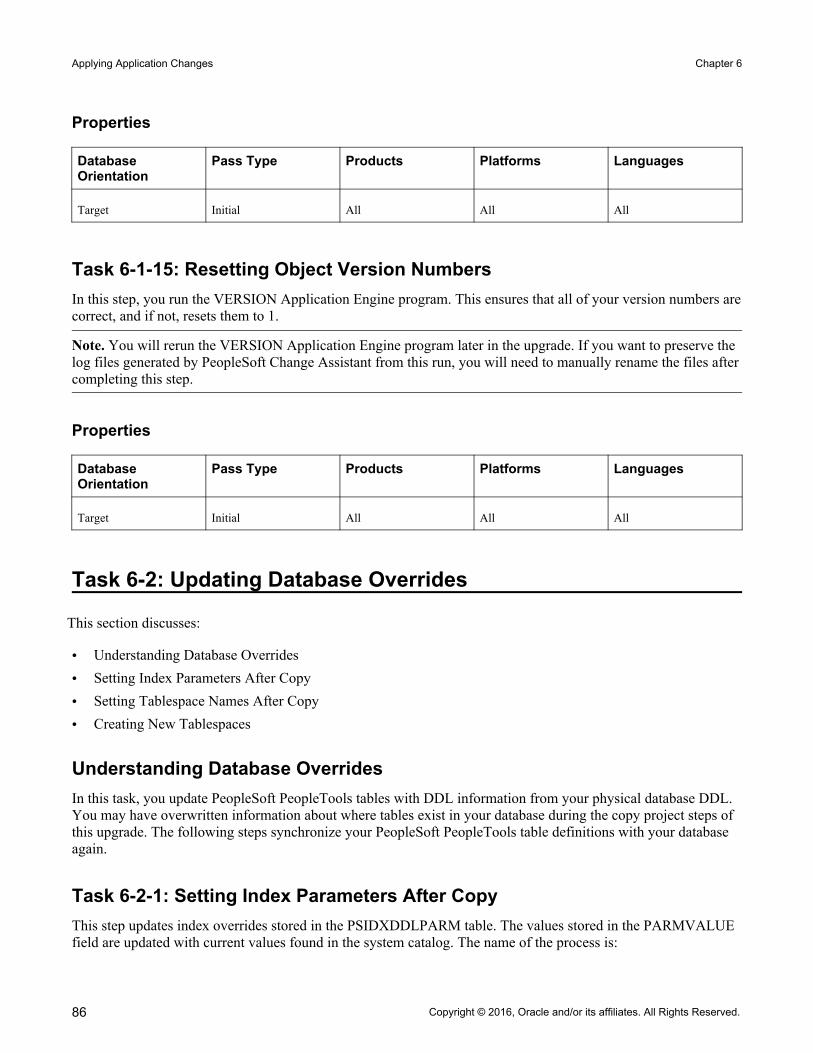
Applying Application Changes Chapter 6
86
Properties
Database Orientation
Pass Type Products Platforms Languages
Target Initial All All All
Task 6-1-15: Resetting Object Version NumbersIn this step, you run the VERSION Application Engine program. This ensures that all of your version numbers arecorrect, and if not, resets them to 1.
Note. You will rerun the VERSION Application Engine program later in the upgrade. If you want to preserve the log files generated by PeopleSoft Change Assistant from this run, you will need to manually rename the files aftercompleting this step.
Properties
Database Orientation
Pass Type Products Platforms Languages
Target Initial All All All
Task 6-2: Updating Database Overrides
This section discusses:
• Understanding Database Overrides• Setting Index Parameters After Copy • Setting Tablespace Names After Copy• Creating New Tablespaces
Understanding Database OverridesIn this task, you update PeopleSoft PeopleTools tables with DDL information from your physical database DDL. You may have overwritten information about where tables exist in your database during the copy project steps of this upgrade. The following steps synchronize your PeopleSoft PeopleTools table definitions with your database again.
Task 6-2-1: Setting Index Parameters After Copy This step updates index overrides stored in the PSIDXDDLPARM table. The values stored in the PARMVALUE field are updated with current values found in the system catalog. The name of the process is:
Copyright © 2016, Oracle and/or its affiliates. All Rights Reserved.
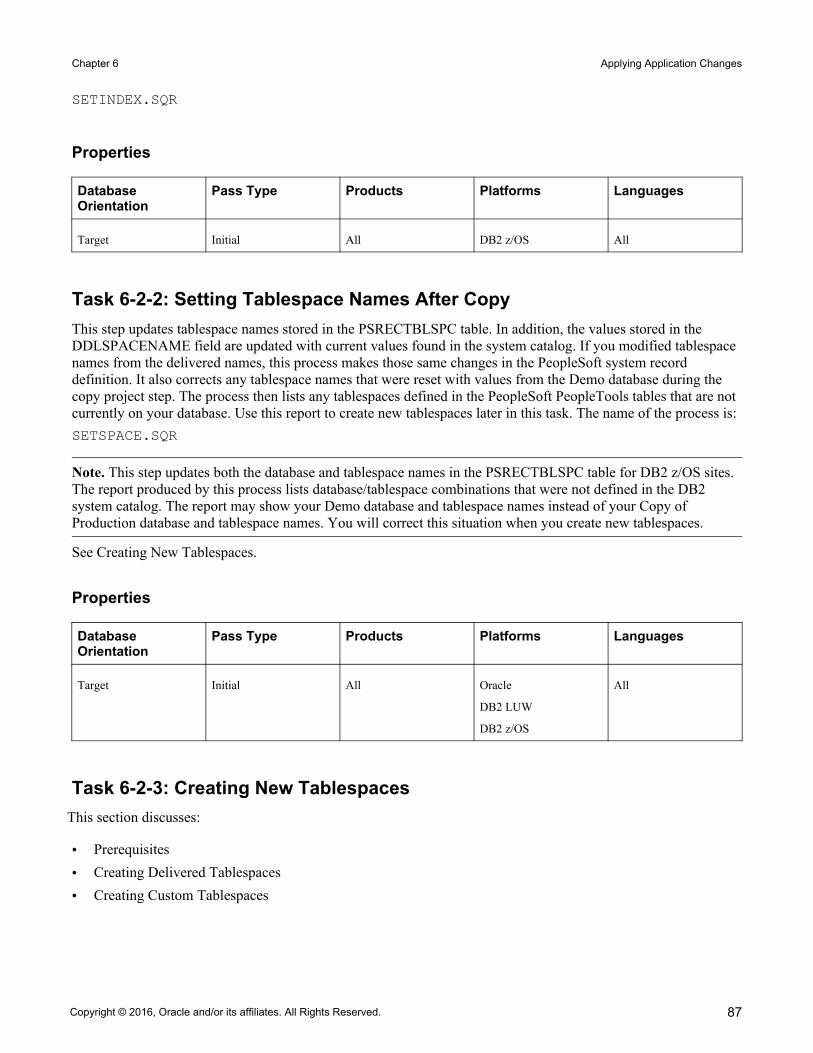
Chapter 6 Applying Application Changes
87
SETINDEX.SQR
Properties
Database Orientation
Pass Type Products Platforms Languages
Target Initial All DB2 z/OS All
Task 6-2-2: Setting Tablespace Names After CopyThis step updates tablespace names stored in the PSRECTBLSPC table. In addition, the values stored in the DDLSPACENAME field are updated with current values found in the system catalog. If you modified tablespace names from the delivered names, this process makes those same changes in the PeopleSoft system record definition. It also corrects any tablespace names that were reset with values from the Demo database during the copy project step. The process then lists any tablespaces defined in the PeopleSoft PeopleTools tables that are not currently on your database. Use this report to create new tablespaces later in this task. The name of the process is:SETSPACE.SQR
Note. This step updates both the database and tablespace names in the PSRECTBLSPC table for DB2 z/OS sites. The report produced by this process lists database/tablespace combinations that were not defined in the DB2 system catalog. The report may show your Demo database and tablespace names instead of your Copy of Production database and tablespace names. You will correct this situation when you create new tablespaces.
See Creating New Tablespaces.
Properties
Database Orientation
Pass Type Products Platforms Languages
Target Initial All Oracle
DB2 LUW
DB2 z/OS
All
Task 6-2-3: Creating New TablespacesThis section discusses:
• Prerequisites• Creating Delivered Tablespaces • Creating Custom Tablespaces
Copyright © 2016, Oracle and/or its affiliates. All Rights Reserved.
Applying Application Changes Chapter 6
88
Prerequisites
Before you perform this step, you must make sure that your database administrator has created all new tablespaces that will be used in new tables.
Note. DB2 z/OS sites need to create databases as well as tablespaces at this time.
Creating Delivered Tablespaces
If you use delivered tablespace names, be aware that there may be new ones in this release. The report that you produced when you set tablespace names after copying provides a list of tablespaces that are missing from your database.See Setting Tablespace Names After Copy.You need to create all the tablespaces on the report listed as missing on the database. Once you create all the tablespaces, you can rerun the SETSPACE.SQR; the report should show that no additional modifications are needed.Oracle delivered a shell SQL script containing the DDL commands to create all the delivered tablespaces. Edit thescript to create just the new tablespaces and to set up the script for your environment.The script supplied by Oracle to create tablespaces for your upgrade is:
• CSDDL.SQL for Oracle• CSDDLDMS.SQL for DB2 UNIX/NT ANSI• CSDDLDMSU.SQL for DB2 z/OS Unicode
Note. For DBX sites, create all the tablespaces on the report listed as missing on the database in addition to the corresponding index (IDX) tablespace.
Note. For DB2 z/OS some tables were reassigned to larger tablespaces because they now require a 32-KB buffer pool. You must manually edit the Create Table statements in the upgrade scripts to replace the tablespace names with an appropriate tablespace name in your implementation that utilizes a 32-KB buffer pool.
DB2 z/OS sites must also consider how database names are assigned. After the upgrade/copy is completed, some of the PeopleSoft PeopleTools metadata tables in your Copy of Production database will contain the database values from the Demo database. Review the SETSPACE SQR report for those tables that are reported as not defined in the database. If the report shows your Demo database names instead of your Copy of Production database names, you can reset them with the following SQL:UPDATE PSRECTBLSPC SET DBNAME = 'Copy of Production dbname'WHERE DBNAME = 'Demo dbname'
Creating Custom Tablespaces
If you will use custom tablespaces, create those tablespaces now. Choose one of the following two methods to get the information into PeopleSoft PeopleTools:
• Update PeopleSoft PeopleTools for each record you will put into a custom tablespace. You can do this directly through PeopleSoft Application Designer, or you can update PSRECTBLSPC directly by using the appropriate SQL for your site, as follows:DB2 z/OS sites:
Copyright © 2016, Oracle and/or its affiliates. All Rights Reserved.

Chapter 6 Applying Application Changes
89
UPDATE PSRECTBLSPC
SET DBNAME = 'new dbname', DDLSPACENAME = 'new tablespacename'
WHERE DBNAME = 'current dbname'
AND DDLSPACENAME = 'current tablespacename';
All other sites: UPDATE PSRECTBLSPC
SET DDLSPACENAME = 'new tablespacename'
WHERE DDLSPACENAME = 'current tablespacename';
To update each table individually, add the following clause to the predicate of the above statement, making sure you use the record name in this clause:AND RECNAME = record name
The SETSPACE report contains the table name. The record name will not have the "PS_" prefix.You can double-check that you created all tablespaces by rerunning the SETSPACE.SQR report. If you created all tablespaces for records defined in PeopleSoft PeopleTools, the report will be empty.
• When you edit the Create and Alter scripts, you can change the SQL to create the tables in the correct tablespaces. Later in this task you will set tablespace names, which will update PeopleSoft PeopleTools with the correct tablespaces or database/tablespace in DB2 z/OS. The report should be empty at that time.
Note. For DB2 z/OS sites, the SETSPACE report may list some database/tablespace combinations as "Table Undefined - DB/TS OK" when in fact the database name is one that was defined for your Demo database. This occurs if your Demo and Copy of Production databases are in the same DB2 subsystem. The SETSPACE.SQR detected that the database/tablespace combinations do exist in the subsystem and are therefore valid. Make sure that you update these database/tablespace names to match those that exist in your Copy of Production, using the instructions above.
Note. During the Move to Production pass, you will create these tablespaces when you populate tablespace data. You can reuse this script, or you can create a new script for your production environment. To reuse the script you have created for this task, save it and copy it into the PS_APP_HOME\SCRIPTS directory that you use during theMove to Production pass.
See the PeopleTools installation guide for DB2 for z/OS for your new release, "Creating a Database," Correcting Invalid Database/Tablespace Combinations.See Modifying the Database Structure, Editing the Create and Alter Scripts.See Modifying the Database Structure, Setting Tablespace Names.See "Applying PeopleTools Changes," Populating Tablespace Data.See "Applying Changes to the Production Database," Performing the Move to Production.
Copyright © 2016, Oracle and/or its affiliates. All Rights Reserved.

Applying Application Changes Chapter 6
90
Properties
Database Orientation
Pass Type Products Platforms Languages
Target Initial All Oracle
DB2 z/OS
DB2 LUW
All
Task 6-3: Backing Up After the Upgrade Copy
This section discusses:
• Backing Up Your Database After Upgrade Copy• Backing Up the New Release Demo Again
Task 6-3-1: Backing Up Your Database After Upgrade CopyBack up your database now. This enables you to restart your upgrade from this point, should you experience any database integrity problems during the remaining tasks in the upgrade process.
Properties
Database Orientation
Pass Type Products Platforms Languages
Target Initial All All All
Task 6-3-2: Backing Up the New Release Demo AgainBack up your New Release Demo database now. This enables you to restart your upgrade from this point, should you experience any database integrity problems during the remainder of the tasks in the upgrade process.
Properties
Database Orientation
Pass Type Products Platforms Languages
Source Initial All All All
Copyright © 2016, Oracle and/or its affiliates. All Rights Reserved.

Chapter 6 Applying Application Changes
91
Task 6-4: Preparing for Data Conversion Analysis
This section discusses:
• Understanding Data Conversion Analysis Preparation• Generating Update Stats Script Again for Oracle• Updating Statistics Again for Oracle• Populating the Initial Alter Analyzer Repository• Populating the MTP Alter Analyzer Repository
Understanding Data Conversion Analysis PreparationPrior to running data conversion, you will need to determine the database structure differences between your current release and the new release. This task runs the PTALTANLYZR application engine program to determine those differences.
Task 6-4-1: Generating Update Stats Script Again for OracleThis step runs the PTGENTABSTATS.SQL script to create the PTUPDTABSTATS.SQL script. PTUPDTABSTATS.SQL will be run in the next step to update statistics on your Oracle database for populated PeopleSoft tables.
Properties
Database Orientation
Pass Type Products Platforms Languages
Target All All Oracle All
Task 6-4-2: Updating Statistics Again for OracleEarlier in the upgrade process, you updated your statistics for Oracle. In order to improve the performance of the next step, Populating the Initial Alter Analyzer Repository, we strongly advise you to update statistics again. This step runs the PTUPDTABSTATS.SQL script, which was generated in the previous step. This script updates statistics on your Oracle database for populated PeopleSoft tables.
Properties
Database Orientation
Pass Type Products Platforms Languages
Target All All Oracle All
Copyright © 2016, Oracle and/or its affiliates. All Rights Reserved.

Applying Application Changes Chapter 6
92
Task 6-4-3: Populating the Initial Alter Analyzer RepositoryThis step runs the PTALTANLYZR Application Engine program. This program determines how the database structure is different between your current release and the new release.
Properties
Database Orientation
Pass Type Products Platforms Languages
Target Initial All All All
Task 6-4-4: Populating the MTP Alter Analyzer RepositoryPeopleSoft Change Assistant displays and runs this step only if you are upgrading from PeopleSoft PeopleTools 8.50 or later.This task runs the PTALTANLYZR Application Engine program for the Move to Production pass. This program determines how the database structure is different between your current release and the new release.
Properties
Database Orientation
Pass Type Products Platforms Languages
Target MTP All All All
Task 6-5: Modifying the Database Structure
This section discusses:
• Understanding Modifying the Database Structure• Backing Up for DB2• Creating the DB2 Tablespace Audit Project• Auditing DB2 Tablespace Assignments Again• Generating DB2 Tablespace Migration Scripts• Editing DB2 Tablespace Migration Scripts• Altering DB2 Tablespace Migration Tables• Creating DB2 Tablespace Migration Indexes• Creating DB2 Tablespace Migration Triggers• Updating Tablespace Names Again• Building the Upgrade Tables Script• Re-Creating Upgrade Tables
Copyright © 2016, Oracle and/or its affiliates. All Rights Reserved.
Chapter 6 Applying Application Changes
93
• Creating the Upgrade Projects• Building the Alter Temporary Tables Script• Building the Optional Temporary Tables Script• Creating the ALLTABS Project• Building the Create and Alter Scripts• Recycling Tablespace Version Numbers• Editing the Create and Alter Scripts• Re-Creating Required Temporary Tables• Re-Creating Optional Temporary Tables• Creating Tables• Altering Tables• Creating Indexes• Re-Creating Triggers• Reviewing Tablespace and Index States• Reviewing the Create Indexes Log• Setting Index Parameters• Setting Temporary Table Tablespace Names• Setting Tablespace Names• Generating the DB2 LUW RUNSTATS Script • Updating Statistics for DB2 LUW• Updating Statistics for DB2 zOS• Generating Update Statistics Script for Oracle• Updating Statistics for Oracle
Understanding Modifying the Database StructureIn this task you create and run various scripts and processes that will modify your database structure, including creating new tables and indexes, altering tables that have changed, and re-creating modified indexes. For DB2 customers, tables that will contain LOB fields in the new application release must be migrated to appropriately sized tablespaces.
Note. In the PeopleSoft Change Assistant job, some of the steps may complete without error, but display a Warning icon indicating that warning messages exist in the log file.
See the product documentation for PeopleTools: Change Assistant and Update Manager for your new release for information about error handling.
Task 6-5-1: Backing Up for DB2If you are using the DB2 z/OS platform, back up your database now. This enables you to restart your upgrade from this point if you should experience any database integrity problems during the remaining tasks in the upgrade process.
Copyright © 2016, Oracle and/or its affiliates. All Rights Reserved.
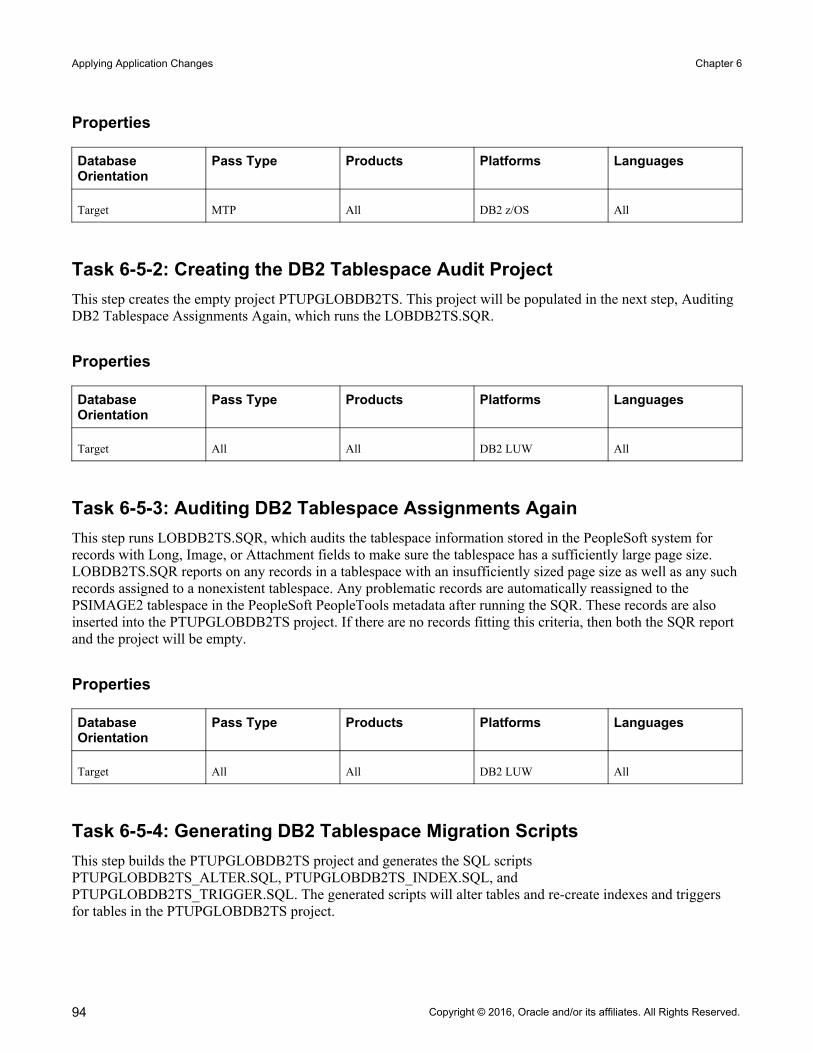
Applying Application Changes Chapter 6
94
Properties
Database Orientation
Pass Type Products Platforms Languages
Target MTP All DB2 z/OS All
Task 6-5-2: Creating the DB2 Tablespace Audit ProjectThis step creates the empty project PTUPGLOBDB2TS. This project will be populated in the next step, Auditing DB2 Tablespace Assignments Again, which runs the LOBDB2TS.SQR.
Properties
Database Orientation
Pass Type Products Platforms Languages
Target All All DB2 LUW All
Task 6-5-3: Auditing DB2 Tablespace Assignments AgainThis step runs LOBDB2TS.SQR, which audits the tablespace information stored in the PeopleSoft system for records with Long, Image, or Attachment fields to make sure the tablespace has a sufficiently large page size. LOBDB2TS.SQR reports on any records in a tablespace with an insufficiently sized page size as well as any such records assigned to a nonexistent tablespace. Any problematic records are automatically reassigned to the PSIMAGE2 tablespace in the PeopleSoft PeopleTools metadata after running the SQR. These records are also inserted into the PTUPGLOBDB2TS project. If there are no records fitting this criteria, then both the SQR report and the project will be empty.
Properties
Database Orientation
Pass Type Products Platforms Languages
Target All All DB2 LUW All
Task 6-5-4: Generating DB2 Tablespace Migration ScriptsThis step builds the PTUPGLOBDB2TS project and generates the SQL scripts PTUPGLOBDB2TS_ALTER.SQL, PTUPGLOBDB2TS_INDEX.SQL, and PTUPGLOBDB2TS_TRIGGER.SQL. The generated scripts will alter tables and re-create indexes and triggers for tables in the PTUPGLOBDB2TS project.
Copyright © 2016, Oracle and/or its affiliates. All Rights Reserved.

Chapter 6 Applying Application Changes
95
Properties
Database Orientation
Pass Type Products Platforms Languages
Target All All DB2 LUW All
Task 6-5-5: Editing DB2 Tablespace Migration ScriptsReview the output from the LOBDB2TS.SQR script in order to review the reassignment of any PeopleTools records with Long, Image, or Attachment field types to a tablespace with a sufficiently large page size. Any problematic records reported by the SQR were inserted into the PTUPGLOBDB2TS project for your convenienceand automatically reassigned to the PSIMAGE2 tablespace. If there are no records fitting this criteria, then both the SQR report and the project will be empty.In this step, you edit the DB2 tablespace migration scripts for tablespace names and sizing. If you are not using the PeopleSoft tablespace names, you need to review and modify the script created previously in the step Generating DB2 Tablespace Migration Scripts. Have your database administrator review these scripts and modify the tablespace names appropriately. You can find the script in your PeopleSoft Change Assistant output directory for this upgrade pass.The script names for your upgrade path are:PTUPGLOBDB2TS_ALTER.SQLPTUPGLOBDB2TS_INDEX.SQLPTUPGLOBDB2TS_TRIGGER.SQL
Ensure that all corresponding LOB tablespaces exist, or reassign to another tablespace as needed. When the migration scripts are generated, PeopleTools assumes that the matching LOB tablespaces exist for the base tablespace.
Properties
Database Orientation
Pass Type Products Platforms Languages
Target All All DB2 LUW All
Task 6-5-6: Altering DB2 Tablespace Migration TablesThis step runs the PTUPGLOBDB2TS_ALTER.SQL script. This will alter the existing tables to a tablespace witha sufficiently large page size as well as any new release changes.
Copyright © 2016, Oracle and/or its affiliates. All Rights Reserved.
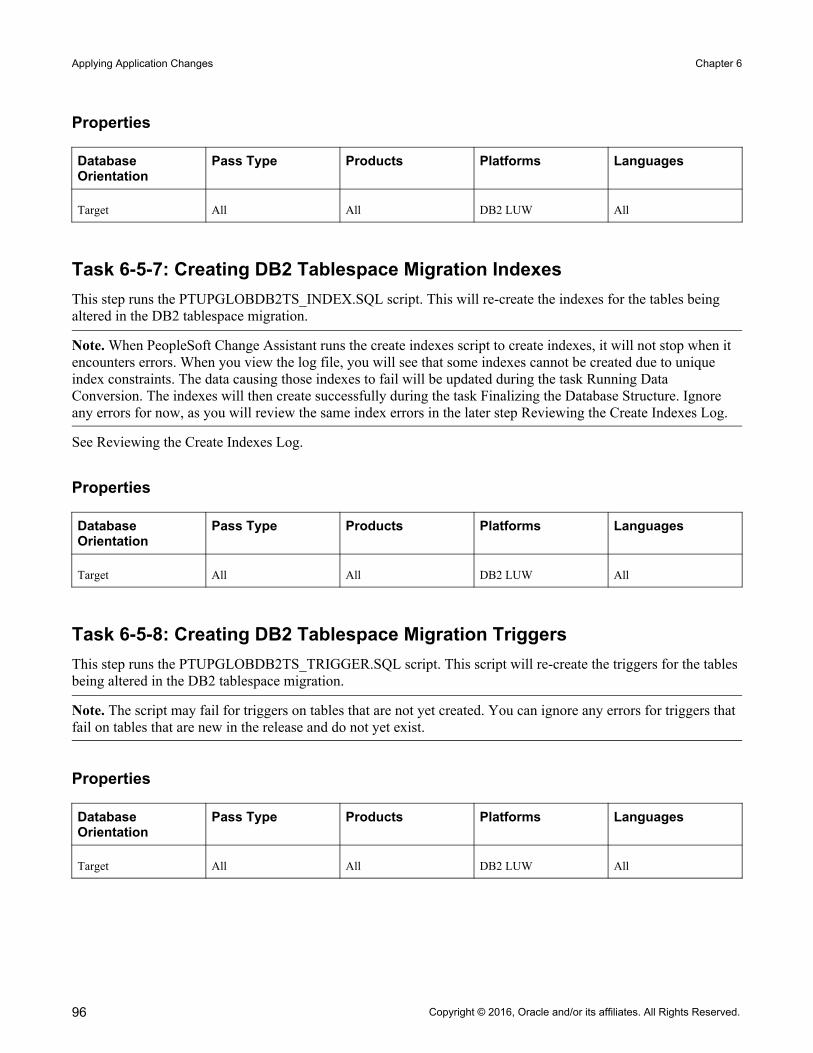
Applying Application Changes Chapter 6
96
Properties
Database Orientation
Pass Type Products Platforms Languages
Target All All DB2 LUW All
Task 6-5-7: Creating DB2 Tablespace Migration IndexesThis step runs the PTUPGLOBDB2TS_INDEX.SQL script. This will re-create the indexes for the tables being altered in the DB2 tablespace migration.
Note. When PeopleSoft Change Assistant runs the create indexes script to create indexes, it will not stop when it encounters errors. When you view the log file, you will see that some indexes cannot be created due to unique index constraints. The data causing those indexes to fail will be updated during the task Running Data Conversion. The indexes will then create successfully during the task Finalizing the Database Structure. Ignore any errors for now, as you will review the same index errors in the later step Reviewing the Create Indexes Log.
See Reviewing the Create Indexes Log.
Properties
Database Orientation
Pass Type Products Platforms Languages
Target All All DB2 LUW All
Task 6-5-8: Creating DB2 Tablespace Migration TriggersThis step runs the PTUPGLOBDB2TS_TRIGGER.SQL script. This script will re-create the triggers for the tables being altered in the DB2 tablespace migration.
Note. The script may fail for triggers on tables that are not yet created. You can ignore any errors for triggers that fail on tables that are new in the release and do not yet exist.
Properties
Database Orientation
Pass Type Products Platforms Languages
Target All All DB2 LUW All
Copyright © 2016, Oracle and/or its affiliates. All Rights Reserved.

Chapter 6 Applying Application Changes
97
Task 6-5-9: Updating Tablespace Names AgainThis step populates all tablespace information in the PSRECTBLSPC table. The values stored in the DDLSPACENAM field are updated with current values found in the system catalog. If you modified tablespace names when you edited the SQL script PTUPGLOBDB2TS_ALTER.SQL from the delivered names, this will make those same changes in the PeopleSoft record definition. The name of the process is:SETSPACE.SQR
Properties
Database Orientation
Pass Type Products Platforms Languages
Target All All DB2 LUW All
Task 6-5-10: Building the Upgrade Tables ScriptThis step generates the SQL script to drop and re-create all the tables in the project named UPGCONVERT. These tables will be used during data conversion by Application Engine programs. They can be safely dropped at this time because they do not contain application data required by your PeopleSoft system. The script name for your upgrade path is:UPGCONVERT_CRTTBL.SQL
Properties
Database Orientation
Pass Type Products Platforms Languages
Target All All All All
Task 6-5-11: Re-Creating Upgrade TablesThis step runs the SQL script you generated to re-create all the tables in the project named UPGCONVERT.The script name for your upgrade path is:UPGCONVERT_CRTTBL.SQL
Properties
Database Orientation
Pass Type Products Platforms Languages
Target All All All All
Copyright © 2016, Oracle and/or its affiliates. All Rights Reserved.

Applying Application Changes Chapter 6
98
Task 6-5-12: Creating the Upgrade ProjectsPeopleSoft Change Assistant displays and runs this step only if you are upgrading from PeopleSoft PeopleTools 8.50 or later. In this step, you run the PTIAPOPPROJ Application Engine program. This program generates multiple project definitions and inserts record definitions into the generated projects in your Copy of Production database. Later inthe upgrade, create and alter SQL scripts are generated for each of the projects created in this step.
Properties
Database Orientation
Pass Type Products Platforms Languages
Target All All All All
Task 6-5-13: Building the Alter Temporary Tables ScriptPeopleSoft Change Assistant displays and runs this step only if you are upgrading from PeopleSoft PeopleTools 8.50 or later. This step generates the SQL script to drop and re-create the records of the type Temporary Table in the UPGCRTTMPTBL project. Processes use the temporary tables dynamically in your system. They can be safely dropped at this time because they do not contain transaction data required by your PeopleSoft system.The script name for your upgrade path is:UPGCRTTMPTBL_CRTTBL.SQL
Note. This step is required.
Properties
Database Orientation
Pass Type Products Platforms Languages
Target All All All All
Task 6-5-14: Building the Optional Temporary Tables ScriptPeopleSoft Change Assistant displays and runs this step only if you are upgrading from PeopleSoft PeopleTools 8.50 or later. This step generates a SQL script to drop and re-create the Temporary Table record type in the UPGCRTTMPTBLOPT project. Processes use the temporary tables dynamically in your system. They can be safely dropped at this time because they do not contain transaction data required by your PeopleSoft system. The script name for your upgrade path is: UPGCRTTMPTBLOPT_CRTTBL.SQL
Copyright © 2016, Oracle and/or its affiliates. All Rights Reserved.

Chapter 6 Applying Application Changes
99
Note. This step is optional.
Properties
Database Orientation
Pass Type Products Platforms Languages
Target All All All All
Task 6-5-15: Creating the ALLTABS ProjectThis step creates a project named ALLTABS and inserts all records of the type Table.
Properties
Database Orientation
Pass Type Products Platforms Languages
Target All All All All
Task 6-5-16: Building the Create and Alter ScriptsThis step generates the SQL script to create all new records of the type Table. The script name is:ALLTABS_CRTTBL.SQL
This step generates the SQL script to alter all existing records of the type Table. This script is referred to as Alter Without Deletes. The tables are altered to add new columns, rename existing columns and change columns that have modified properties, such as length. Columns that will eventually be deleted will still exist on the tables afterthis script is executed. The script name is:ALLTABS_ALTTBL.SQL
This step also generates the SQL script to create new indexes and to re-create modified indexes as needed for the tables in the first two scripts. The script name is:ALLTABS_CRTIDX.SQL
Note. This step also creates the script ALLTABS_CRTTRG.SQL, which re-creates all database triggers. You do not need to run this script, because all database triggers will be created in the Finalizing the Database Structure task.
Note. For DB2 z/OS sites, if this step takes an exceptionally long time, performing a RUNSTATS on the system catalog tablespace SYSDBASE may improve performance.
See Finalizing the Database Structure.
Copyright © 2016, Oracle and/or its affiliates. All Rights Reserved.

Applying Application Changes Chapter 6
100
Properties
Database Orientation
Pass Type Products Platforms Languages
Target All All All All
Task 6-5-17: Recycling Tablespace Version NumbersThe PeopleSoft PeopleTools alter processing for DB2 z/OS was designed to prevent DB2 from creating an excessive number of tablespace versions by carefully controlling which table alters are committed per tablespace. However, it is possible that DB2 may still create the maximum number of tablespace versions when running the alter script, if there are shared tablespaces already close to the maximum 255 version numbers.To minimize the possibility that the alter script will stop with SQL code -4702 (exceeding the maximum number of tablespace versions), find any tablespaces that may be close to the maximum allowed version number and run the Reorg Tablespace and Modify Recovery utilities.See the product documentation for PeopleTools: Data Management for your new release for more information about administering PeopleSoft databases on DB2 for z/OS.
Properties
Database Orientation
Pass Type Products Platforms Languages
Target All All DB2 z/OS All
Task 6-5-18: Editing the Create and Alter ScriptsIn this step, you will edit the SQL create and alter scripts for tablespace names and sizing. The script names for your upgrade path are:ALLTABS_CRTTBL.SQL
ALLTABS_ALTTBL.SQL
ALLTABS_CRTIDX.SQL
The following scripts may or may not appear in your database. If they are present, edit them for tablespace names and sizing: UPGCRTTMPTBL_CRTTBL.SQL
UPGCRTTMPTBLOPT_CRTTBL.SQL
Note. For Oracle platforms, ensure that global temporary tables are assigned to the right type of tablespace. Global temporary tables must utilize temporary tablespaces and cannot be placed in a regular tablespace.
Copyright © 2016, Oracle and/or its affiliates. All Rights Reserved.

Chapter 6 Applying Application Changes
101
If you are not using the PeopleSoft tablespace names, you will need to review and modify the scripts above. Whenthe new record was copied to the Copy of Production database, the PeopleSoft default tablespace name was copied as well. When you performed the step Creating New Tablespaces, you were given the option to correct the tablespace names online or to wait and edit the scripts. After you have completed running these scripts, you will run the programs that synchronize the PeopleSoft PeopleTools definitions with the database catalog again. Therefore, any changes you make to the scripts now will be reflected in the PeopleSoft PeopleTools definition. Have your database administrator review these scripts and modify the tablespace names appropriately.Many of the new tables and indexes will be populated during the upgrade. If they are not sized appropriately for your database, the conversion programs will stop with errors. After the upgrade is complete, you may want your database administrator to review and make adjustments to the amount of free space left in some of the tables or tablespaces.
Properties
Database Orientation
Pass Type Products Platforms Languages
Target All All DB2 z/OS
DB2 LUW
Oracle
All
Task 6-5-19: Re-Creating Required Temporary TablesPeopleSoft Change Assistant displays and runs this step only if you are upgrading from PeopleSoft PeopleTools 8.50 or later. This step runs the SQL script you generated to create records of the type Temporary Table in the UPGCRTTMPTBL project. The script name for your upgrade path is:UPGCRTTMPTBL_CRTTBL.SQL
Properties
Database Orientation
Pass Type Products Platforms Languages
Target All All All All
Task 6-5-20: Re-Creating Optional Temporary TablesPeopleSoft Change Assistant displays and runs this step only if you are upgrading from PeopleSoft PeopleTools 8.50 or later. This step runs the SQL script generated to create records of the type Temporary Table in the UPGCRTTMPTBLOPT project. The script name for your upgrade path is:UPGCRTTMPTBLOPT_CRTTBL.SQL
Copyright © 2016, Oracle and/or its affiliates. All Rights Reserved.

Applying Application Changes Chapter 6
102
Properties
Database Orientation
Pass Type Products Platforms Languages
Target All All All All
Task 6-5-21: Creating TablesThis step runs the SQL script you generated to create all the records of the type Table. This step creates new table structures in your database. The script name for your upgrade path is:ALLTABS_CRTTBL.SQL
Properties
Database Orientation
Pass Type Products Platforms Languages
Target All All All All
Task 6-5-22: Altering TablesThis step runs the SQL script you generated to alter the existing records of type Table. This step alters existing PeopleSoft table structures to comply with your new PeopleSoft release.The script name for your upgrade path is:ALLTABS_ALTTBL.SQL
Note. PeopleSoft Change Assistant disables auto-commit when it runs SQL scripts. This is designed to prevent DB2 from creating an excessive number of tablespace versions.
Properties
Database Orientation
Pass Type Products Platforms Languages
Target All All All All
Task 6-5-23: Creating IndexesThis step runs the SQL script you generated to create indexes on records of the type Table. This step creates or modifies indexes as required. The script name for your upgrade path is:
Copyright © 2016, Oracle and/or its affiliates. All Rights Reserved.
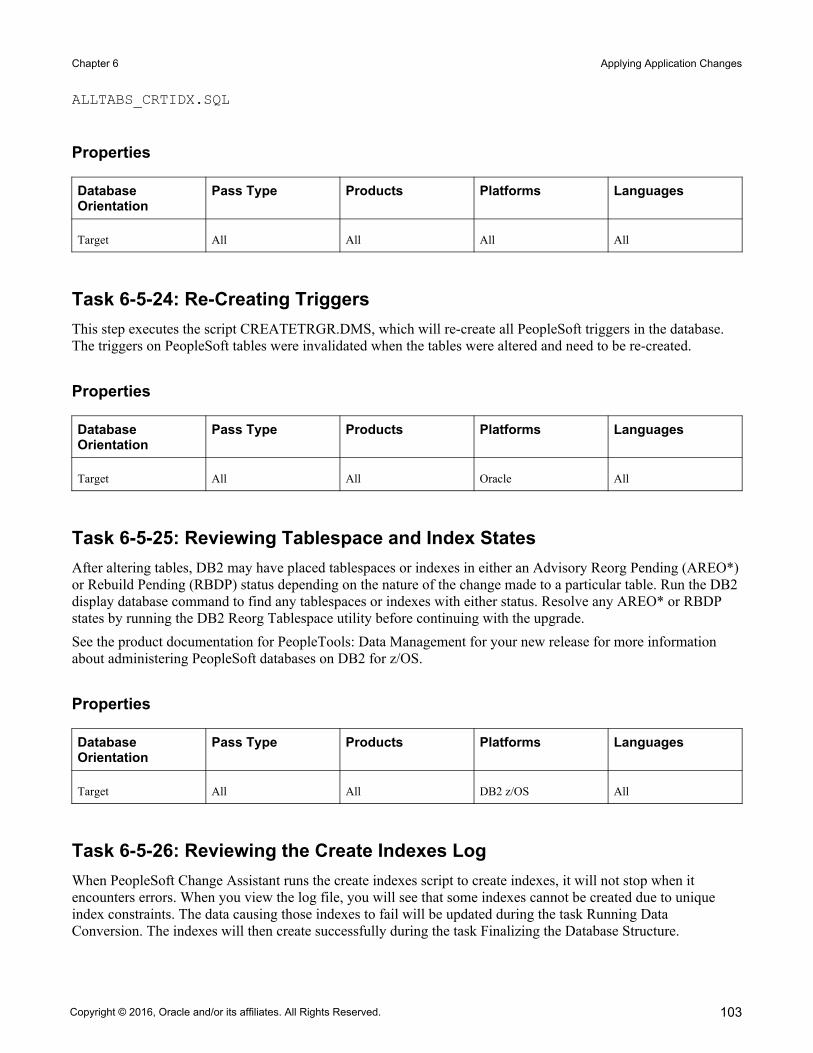
Chapter 6 Applying Application Changes
103
ALLTABS_CRTIDX.SQL
Properties
Database Orientation
Pass Type Products Platforms Languages
Target All All All All
Task 6-5-24: Re-Creating TriggersThis step executes the script CREATETRGR.DMS, which will re-create all PeopleSoft triggers in the database. The triggers on PeopleSoft tables were invalidated when the tables were altered and need to be re-created.
Properties
Database Orientation
Pass Type Products Platforms Languages
Target All All Oracle All
Task 6-5-25: Reviewing Tablespace and Index StatesAfter altering tables, DB2 may have placed tablespaces or indexes in either an Advisory Reorg Pending (AREO*)or Rebuild Pending (RBDP) status depending on the nature of the change made to a particular table. Run the DB2 display database command to find any tablespaces or indexes with either status. Resolve any AREO* or RBDP states by running the DB2 Reorg Tablespace utility before continuing with the upgrade.See the product documentation for PeopleTools: Data Management for your new release for more information about administering PeopleSoft databases on DB2 for z/OS.
Properties
Database Orientation
Pass Type Products Platforms Languages
Target All All DB2 z/OS All
Task 6-5-26: Reviewing the Create Indexes LogWhen PeopleSoft Change Assistant runs the create indexes script to create indexes, it will not stop when it encounters errors. When you view the log file, you will see that some indexes cannot be created due to unique index constraints. The data causing those indexes to fail will be updated during the task Running Data Conversion. The indexes will then create successfully during the task Finalizing the Database Structure.
Copyright © 2016, Oracle and/or its affiliates. All Rights Reserved.

Applying Application Changes Chapter 6
104
Review the errors in the log file. Unique constraint errors are acceptable. If you see any other types of index creation errors, such as space problems, you must correct them before you continue with the upgrade. If you do not correct the errors, it may degrade your performance during data conversion. The log file name for your upgrade path is:ALLTABS_CRTIDX.LOG
See Running Data Conversion.See Finalizing the Database Structure.
Properties
Database Orientation
Pass Type Products Platforms Languages
Target All All All All
Task 6-5-27: Setting Index ParametersThis step updates index overrides stored in the PSIDXDDLPARM table. The values stored in the PARMVALUE field are updated with current values found in the system catalog. The name of the process is:SETINDEX.SQR
Properties
Database Orientation
Pass Type Products Platforms Languages
Target All All DB2 z/OS All
Task 6-5-28: Setting Temporary Table Tablespace NamesThis step populates the PeopleSoft PeopleTools table PSRECTBLSPC with the table name, database name, and tablespace name information for the temporary table instances created on the database in a previous step. This information will be required by processes that perform in-stream RUNSTATS (%UpdateStats) on the temporary table instances. The name of the process is:SETTMPIN.SQR
Properties
Database Orientation
Pass Type Products Platforms Languages
Target All All DB2 z/OS All
Copyright © 2016, Oracle and/or its affiliates. All Rights Reserved.

Chapter 6 Applying Application Changes
105
Task 6-5-29: Setting Tablespace NamesThis step populates all tablespace information in the PSRECTBLSPC table. The values stored in the DDLSPACENAM field are updated with current values found in the system catalog. If you modified tablespace names when you edited the SQL script that created your new tables from the delivered names, this will make those same changes in the PeopleSoft record definition. The name of the process is:SETSPACE.SQR
Properties
Database Orientation
Pass Type Products Platforms Languages
Target All All Oracle
DB2 LUW
DB2 z/OS
All
Task 6-5-30: Generating the DB2 LUW RUNSTATS Script This step executes the RUNSTATS.SQR that creates the RUNSTATS.SQL to update the statistics on DB2 LUW.
Properties
Database Orientation
Pass Type Products Platforms Languages
Target All All DB2 LUW All
Task 6-5-31: Updating Statistics for DB2 LUWEarlier in the upgrade process, you updated your statistics. Now that you have copied your new objects and created new indexes, update your statistics again. Run the RUNSTATS.SQL script created in the previous step to improve performance of your data conversions and generation of the Alter with Delete script.
Properties
Database Orientation
Pass Type Products Platforms Languages
Target All All DB2 LUW All
Copyright © 2016, Oracle and/or its affiliates. All Rights Reserved.

Applying Application Changes Chapter 6
106
Task 6-5-32: Updating Statistics for DB2 zOSEarlier in the upgrade process, you updated your statistics. Now that you have copied your new objects and created new indexes, update your statistics again to improve performance of your data conversions and generationof the Alter with Delete script. Contact your database administrator to have the statistics updated on your databasebefore proceeding with your upgrade.
Properties
Database Orientation
Pass Type Products Platforms Languages
Target All All DB2 z/OS All
Task 6-5-33: Generating Update Statistics Script for OracleThis step runs the PTGENTABSTATS.SQL script to create the PTUPDTABSTATS.SQL script. PTUPDTABSTATS.SQL will be run in the next step to update statistics on your Oracle database for populated PeopleSoft tables.
Properties
Database Orientation
Pass Type Products Platforms Languages
Target All All Oracle All
Task 6-5-34: Updating Statistics for OracleEarlier in the upgrade process, you updated your statistics. Now that you have copied your new objects and created new indexes, update your statistics again to improve performance of your data conversions and generationof the Alter with Delete script. This step runs the PTUPDTABSTATS.SQL script, which was generated in the previous step. This script updates statistics on your Oracle database for populated PeopleSoft tables.
Properties
Database Orientation
Pass Type Products Platforms Languages
Target All All Oracle All
Copyright © 2016, Oracle and/or its affiliates. All Rights Reserved.
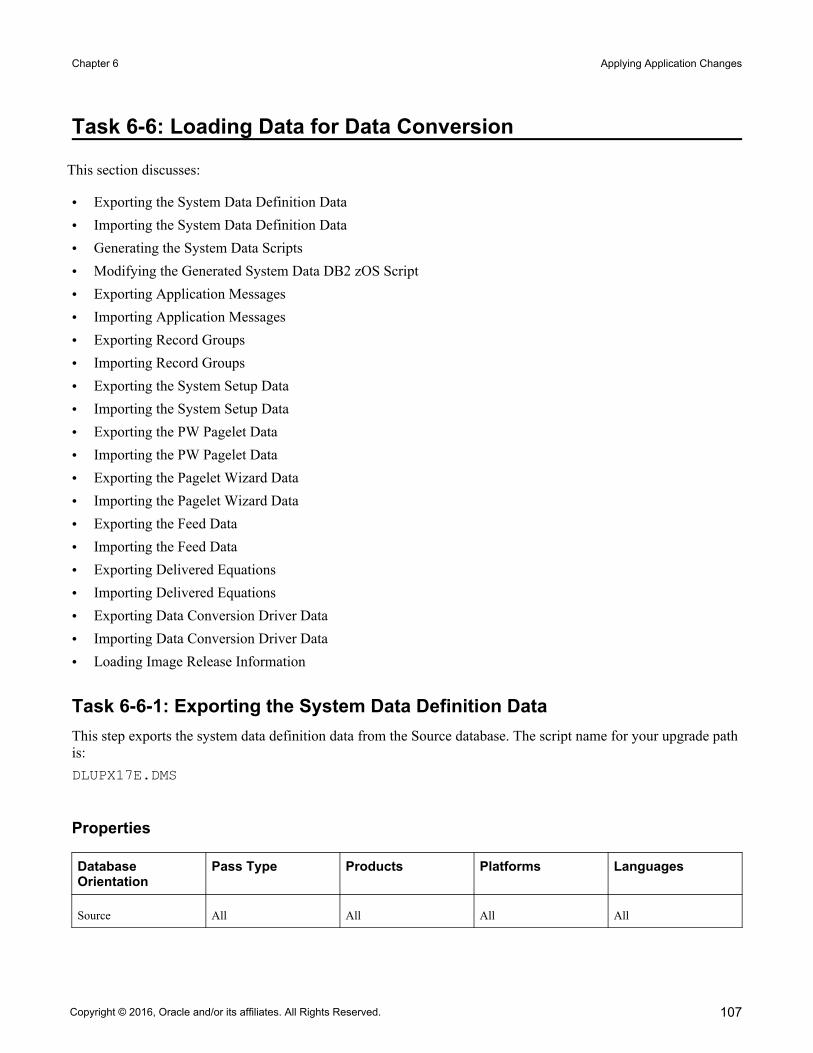
Chapter 6 Applying Application Changes
107
Task 6-6: Loading Data for Data Conversion
This section discusses:
• Exporting the System Data Definition Data• Importing the System Data Definition Data• Generating the System Data Scripts• Modifying the Generated System Data DB2 zOS Script• Exporting Application Messages• Importing Application Messages• Exporting Record Groups• Importing Record Groups• Exporting the System Setup Data • Importing the System Setup Data• Exporting the PW Pagelet Data• Importing the PW Pagelet Data• Exporting the Pagelet Wizard Data• Importing the Pagelet Wizard Data• Exporting the Feed Data• Importing the Feed Data• Exporting Delivered Equations• Importing Delivered Equations• Exporting Data Conversion Driver Data• Importing Data Conversion Driver Data• Loading Image Release Information
Task 6-6-1: Exporting the System Data Definition DataThis step exports the system data definition data from the Source database. The script name for your upgrade pathis:DLUPX17E.DMS
Properties
Database Orientation
Pass Type Products Platforms Languages
Source All All All All
Copyright © 2016, Oracle and/or its affiliates. All Rights Reserved.

Applying Application Changes Chapter 6
108
Task 6-6-2: Importing the System Data Definition DataThis step imports the system data definition data into your Copy of Production database. The script name for yourupgrade path is:DLUPX17I.DMS
Properties
Database Orientation
Pass Type Products Platforms Languages
Target All All All All
Task 6-6-3: Generating the System Data ScriptsThis step generates the system data scripts used later in the upgrade to migrate system data and related-language system data from the Source database to the Copy of Production database.
Note. During Move to Production passes when the system is stable with no new fixes applied, you can reuse the scripts that were created by this step. If you decide to reuse the files, you can skip the two previous steps (Exporting the System Data Definition Data and Importing the System Data Definition Data) and this step Generating the System Data Scripts.
To do this, set the Apply Type property in the PeopleSoft Change Assistant template from All to Initial Pass for each above mentioned step and save the job. Then copy the DLUPSYSE.DMS, DLUPSYSI.DMS, DLUPLASYSE.DMS, and DLUPLASYSI.DMS scripts from the output directory of your previous upgrade and place them in the output directory of your current Move to Production pass.
Properties
Database Orientation
Pass Type Products Platforms Languages
Source All All All All
Task 6-6-4: Modifying the Generated System Data DB2 zOS ScriptPerform this step only if your database platform is DB2 z/OS.To modify the generated system data DB2 z/OS script, perform the following steps:1. Open the DLUPSYSI.DMS script.2. Uncomment the following line and insert the appropriate owner ID in uppercase characters:
set execute_sql set current sqlid = 'OWNERID (in uppercase)';
Copyright © 2016, Oracle and/or its affiliates. All Rights Reserved.
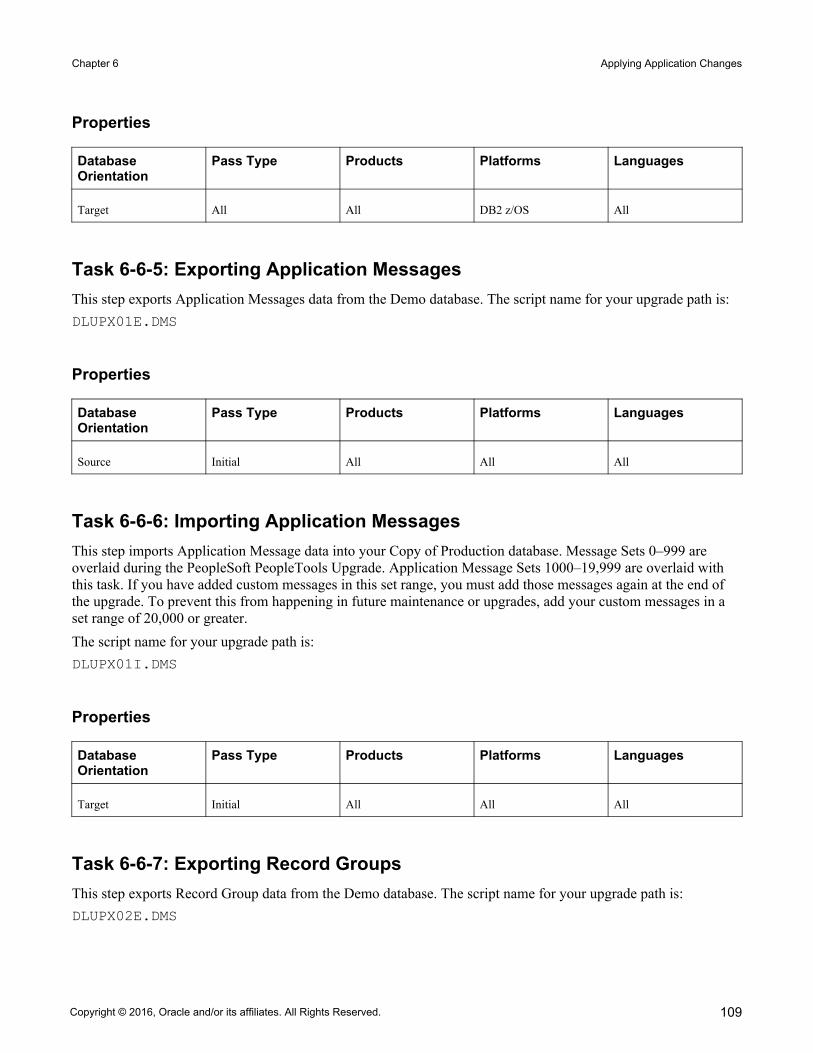
Chapter 6 Applying Application Changes
109
Properties
Database Orientation
Pass Type Products Platforms Languages
Target All All DB2 z/OS All
Task 6-6-5: Exporting Application MessagesThis step exports Application Messages data from the Demo database. The script name for your upgrade path is:DLUPX01E.DMS
Properties
Database Orientation
Pass Type Products Platforms Languages
Source Initial All All All
Task 6-6-6: Importing Application MessagesThis step imports Application Message data into your Copy of Production database. Message Sets 0–999 are overlaid during the PeopleSoft PeopleTools Upgrade. Application Message Sets 1000–19,999 are overlaid with this task. If you have added custom messages in this set range, you must add those messages again at the end of the upgrade. To prevent this from happening in future maintenance or upgrades, add your custom messages in a set range of 20,000 or greater.The script name for your upgrade path is:DLUPX01I.DMS
Properties
Database Orientation
Pass Type Products Platforms Languages
Target Initial All All All
Task 6-6-7: Exporting Record GroupsThis step exports Record Group data from the Demo database. The script name for your upgrade path is:DLUPX02E.DMS
Copyright © 2016, Oracle and/or its affiliates. All Rights Reserved.

Applying Application Changes Chapter 6
110
Properties
Database Orientation
Pass Type Products Platforms Languages
Source Initial All All All
Task 6-6-8: Importing Record GroupsThis step imports Record Group data and populates Set Control data in your Copy of Production database. The following records are related to Record Groups and Set Control data:
• REC_GROUP_REC• REC_GROUP_TBL• SET_CNTRL_TBL • SET_CNTRL_GROUP • SET_CNTRL_REC• SETID_TBLThe import script deletes from, and then reloads, the Record Group tables, REC_GROUP_REC and REC_GROUP_TBL. These are the tables that are modified when you use PeopleTools, Utilities, Administration, Record Group. The script then rebuilds the related setID tables, PS_SET_CNTRL_GROUP and PS_SET_CNTRL_REC. The PS_SET_CNTRL_TBL and PS_SETID_TBL tables contain the setIDs you use in your system; this script does not update PS_SET_CNTRL_TBL. However, it does check for orphan setID references in PS_SET_CNTRL_REC and adds the missing setIDs to PS_SETID_TBL.If you have moved an Oracle-delivered record into a custom added record group, and deleted the record from the Oracle-delivered record group, this script will put the record back into the Oracle-delivered record group and remove it from the custom added record group.If you have created a new record group, it will be deleted in this step if all of its records are assigned to Oracle-delivered record groups in the new release. To continue using your custom record group, you will need to re-create it in the Reapplying Customizations task.This script creates an output file and uses it to create a temporary table.The script name for your upgrade path is:DLUPX02I.DMS
Properties
Database Orientation
Pass Type Products Platforms Languages
Target Initial All All All
Copyright © 2016, Oracle and/or its affiliates. All Rights Reserved.

Chapter 6 Applying Application Changes
111
Task 6-6-9: Exporting the System Setup Data This script exports the contents of the Message, Strings, Stored Statements, Record Group, data conversion driver,EDI, and Mass Change tables from the Copy of Production database during your Move to Production passes. During the initial pass, you ran other scripts to load this data and in some cases had to reapply customizations. This script exports the entire contents of these tables, including customizations, so that you will not need to reapply them after the Move to Production. The script name for your upgrade path is:MVAPPEXP.DMS
Properties
Database Orientation
Pass Type Products Platforms Languages
Source MTP All All All
Task 6-6-10: Importing the System Setup DataThis script imports the data exported in the previous step into your New Copy of Production database during your Move to Production passes. This script replaces many scripts that you ran in the initial pass. It will move all data in these tables so that any customizations you have added to these tables during your initial pass will be moved to your New Copy of Production database. Also, it will rebuild the Set Control tables using the Record Groups from the Copy of Production database and your current Set Control values on the New Copy of Production database. The script name for your upgrade path is:MVAPPIMP.DMS
Properties
Database Orientation
Pass Type Products Platforms Languages
Target MTP All All All
Task 6-6-11: Exporting the PW Pagelet DataThis script exports the application-specific Pagelet Wizard pagelet definition, header, footer, and category tables from the Demo database in the initial pass. The script name for your upgrade path is:DLUPX14E.DMS
Copyright © 2016, Oracle and/or its affiliates. All Rights Reserved.

Applying Application Changes Chapter 6
112
Properties
Database Orientation
Pass Type Products Platforms Languages
Source Initial All All All
Task 6-6-12: Importing the PW Pagelet DataThis script imports the application-specific data for the Pagelet Wizard pagelet definition, header, footer, and category tables into your Copy of Production database during the initial pass. This data is needed for the data conversion. The script name for your upgrade path is:DLUPX14I.DMS
Properties
Database Orientation
Pass Type Products Platforms Languages
Target Initial All All All
Task 6-6-13: Exporting the Pagelet Wizard DataThis script exports the contents of the Pagelet Wizard tables from the Copy of Production database during your Move to Production passes. During the initial pass, you ran programs and scripts to load this data and, in some cases, had to make changes. This script exports the entire contents of these tables, including changes, so that you will not need to reapply them after the Move to Production. This data is needed for the data conversion. The scriptname for your upgrade path is:MVUPX16E.DMS
Properties
Database Orientation
Pass Type Products Platforms Languages
Source MTP All All All
Task 6-6-14: Importing the Pagelet Wizard DataThis script imports the Pagelet Wizard tables from the Copy of Production database into the New Copy of Production during your Move to Production passes. This script replaces processes that you ran in the initial pass. It will move all data in the affected tables so that any changes you have made during your initial pass will be moved to your New Copy of Production database. This data is needed for the data conversion. The script name foryour upgrade path is:
Copyright © 2016, Oracle and/or its affiliates. All Rights Reserved.

Chapter 6 Applying Application Changes
113
MVUPX16I.DMS
Properties
Database Orientation
Pass Type Products Platforms Languages
Target MTP All All All
Task 6-6-15: Exporting the Feed DataThis script exports the application-specific Feed Definitions, Feed Data Type Definitions, and other Feed-related system data from the Demo database in the initial upgrade pass. The script name for your upgrade path is:PTUPGPTFPEXP.DMS
Properties
Database Orientation
Pass Type Products Platforms Languages
Source Initial All All All
Task 6-6-16: Importing the Feed DataThis script imports the application-specific Feed Definitions, Feed Data Type Definitions, and other Feed-related system data into your Copy of Production database during the initial upgrade pass. The script name for your upgrade path is:PTUPGPTFPIMP.DMS
Properties
Database Orientation
Pass Type Products Platforms Languages
Target Initial All All All
Task 6-6-17: Exporting Delivered EquationsThis script exports the equations delivered in the new PeopleSoft release to copy them to your Copy of Productiondatabase. During data conversion your equations will be converted to the new structure but the equations delivered in the previous release will not be upgraded. The script name for your upgrade path is:DLCSFAG02E.DMS
Copyright © 2016, Oracle and/or its affiliates. All Rights Reserved.

Applying Application Changes Chapter 6
114
Properties
Database Orientation
Pass Type Products Platforms Languages
Source All All All All
Task 6-6-18: Importing Delivered EquationsThis script imports the equations delivered in the new PeopleSoft release Demo database. During data conversion your equations will be converted to the new structure but the equations delivered in the previous release will not be upgraded. The script name for your upgrade path is:DLCSFAG02I.DMS
Properties
Database Orientation
Pass Type Products Platforms Languages
Target All All All All
Task 6-6-19: Exporting Data Conversion Driver DataThis step exports data conversion Application Engine driver data from the Demo database. The script name for your upgrade path is:PTIADCEX.DMS
Properties
Database Orientation
Pass Type Products Platforms Languages
Source Initial All All All
Task 6-6-20: Importing Data Conversion Driver DataThis step imports data conversion Application Engine driver data into your Copy of Production database.The script name for your upgrade path is:PTIADCIM.DMS
Copyright © 2016, Oracle and/or its affiliates. All Rights Reserved.

Chapter 6 Applying Application Changes
115
Properties
Database Orientation
Pass Type Products Platforms Languages
Target Initial All All All
Task 6-6-21: Loading Image Release InformationThis step loads the PeopleSoft Image value for your upgrade that is used during data conversion to run the proper code.
Properties
Database Orientation
Pass Type Products Platforms Languages
Target All All All All
Task 6-7: Applying Updates Before Data Conversion
You should have downloaded and applied Required at Upgrade updates just after you installed your Demo database. Now you should check My Oracle Support again for any new postings, and apply them now. This is just one place that you can apply updates. There are other places in the upgrade process where applying updates may be applicable as well. How you apply the update varies depending on where you are in the upgrade.See My Oracle Support, your application upgrade home page, Updates and Fixes Required at Upgrade.
Important! Apply all Required at Upgrade fixes even if you have not licensed the products in your application. There are many interdependencies between products and database objects. If you do not apply the fix, you may beintroducing another error in a different area of the conversion code.
To apply PeopleSoft project fixes before data conversion:1. After applying the update to your Demo database, review any included documentation.
See the PeopleTools: Change Assistant PeopleBook for your current release.2. The project is now loaded on your Demo database. You should run a project compare to make sure the objects
in the fix will not overwrite any of your customizations. If you find customizations, you must decide how to deal with them before you copy the fix to your Copy of Production.
3. If you are performing a Move to Production upgrade pass, first migrate the Change Packages into the Source database for this upgrade pass. If needed, first set up PeopleSoft Change Assistant with the environment information for your Source database. If you customized any of the objects delivered in the Change Package, you should repackage the fix to include your customizations. If you did not customize any objects delivered inthe fix, you may directly apply it to the Source database.
4. Migrate the Change Packages into the Target database for this upgrade pass. If needed, first set up PeopleSoft Change Assistant with the environment information for your Target database.
Copyright © 2016, Oracle and/or its affiliates. All Rights Reserved.
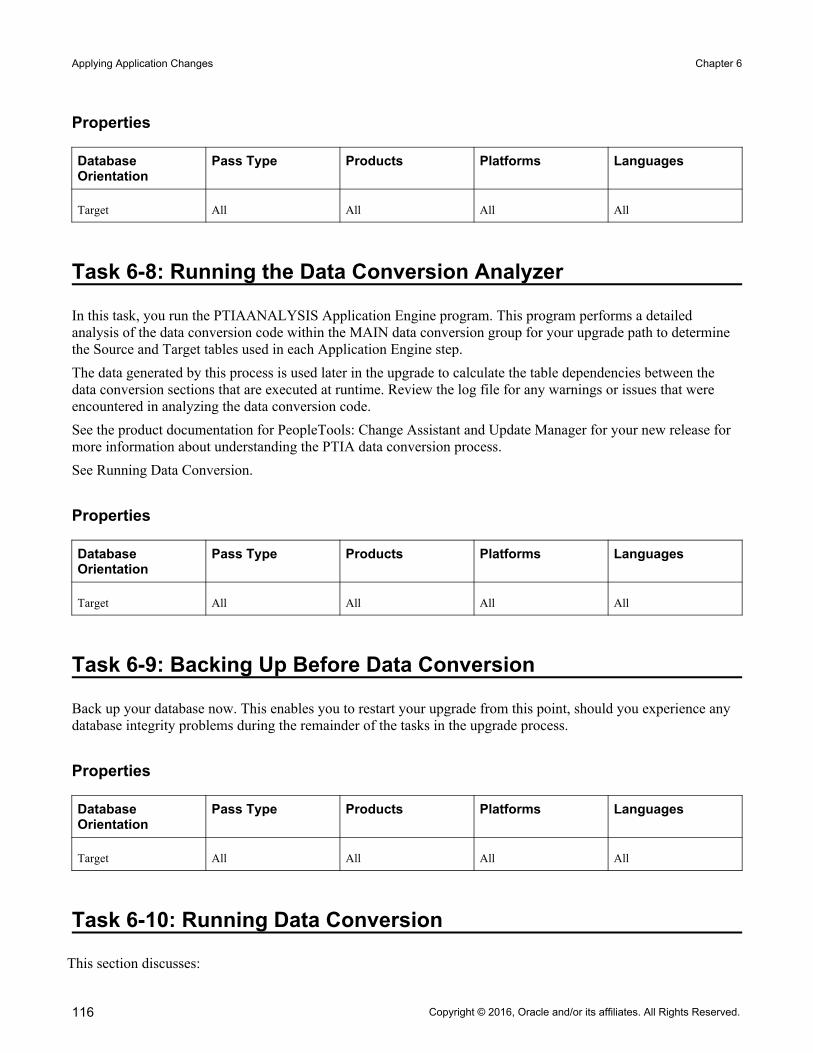
Applying Application Changes Chapter 6
116
Properties
Database Orientation
Pass Type Products Platforms Languages
Target All All All All
Task 6-8: Running the Data Conversion Analyzer
In this task, you run the PTIAANALYSIS Application Engine program. This program performs a detailed analysis of the data conversion code within the MAIN data conversion group for your upgrade path to determine the Source and Target tables used in each Application Engine step.The data generated by this process is used later in the upgrade to calculate the table dependencies between the data conversion sections that are executed at runtime. Review the log file for any warnings or issues that were encountered in analyzing the data conversion code. See the product documentation for PeopleTools: Change Assistant and Update Manager for your new release for more information about understanding the PTIA data conversion process.See Running Data Conversion.
Properties
Database Orientation
Pass Type Products Platforms Languages
Target All All All All
Task 6-9: Backing Up Before Data Conversion
Back up your database now. This enables you to restart your upgrade from this point, should you experience any database integrity problems during the remainder of the tasks in the upgrade process.
Properties
Database Orientation
Pass Type Products Platforms Languages
Target All All All All
Task 6-10: Running Data Conversion
This section discusses:
Copyright © 2016, Oracle and/or its affiliates. All Rights Reserved.

Chapter 6 Applying Application Changes
117
• Understanding Data Conversion• Reviewing Data Conversion Tips• Turning Trace On• Performing Data Conversion Concurrently• Turning Trace Off
Understanding Data ConversionIn this task you will populate new tables and columns. Earlier, you altered tables and added all new and modified columns. You did not, however, remove obsolete columns. The following steps will move data from the obsolete columns to the new columns and tables. Later in this chapter, in the task Finalizing the Database Structure, you will generate and run SQL to delete those obsolete columns.
Task 6-10-1: Reviewing Data Conversion TipsThis section discusses:
• Reviewing the Upgrade Driver Programs• Using the Data Conversion Documentation• Writing Data Conversion for Your Non-Oracle Records• Reviewing Data Conversion Errors Expected During the Initial Upgrade Pass• Restarting Data Conversion
Reviewing the Upgrade Driver Programs
PTIADATACONV is an Application Engine program designed to run upgrade data conversions that are defined in the PS_PTIA_DCAEPGMS table. PTIADATACONV leverages dependency analysis to optimize the runtime of the data conversion. Multiple instances of the PTIADATACONV Application Engine program are designed to be run in parallel to execute against a single set of dependency information. You can review the sections that are called by the Upgrade Driver program by accessing the Define Data Conversion page on the Demo database. See the product documentation for PeopleTools: Change Assistant and Update Manager for your new release for more information about reviewing the data conversion report.
Using the Data Conversion Documentation
Each section called by the Upgrade Driver program contains comments describing the underlying conversion. By running the PTIA0010.SQR report, you can find which sections are called by the Upgrade Driver program and what they are doing.See the product documentation for PeopleTools: Change Assistant and Update Manager for your new release for more information about reviewing the data conversion report.
Copyright © 2016, Oracle and/or its affiliates. All Rights Reserved.

Applying Application Changes Chapter 6
118
Writing Data Conversion for Your Non-Oracle Records
The data conversion code delivered for this upgrade was written to handle only Oracle-delivered records. You may have added your own records to the system. To convert data in the underlying tables, you may need to create your own Application Engine library. The Upgrade Driver program can call an Application Engine library sectionthat you create. To have the Upgrade Driver program call your custom section during this task, you will need to add the section on the Define Data Conversion page.See the product documentation for PeopleTools: Change Assistant and Update Manager for your new release for more information about reviewing custom data conversion code.
Reviewing Data Conversion Errors Expected During the Initial Upgrade Pass
During your initial upgrade pass you can expect to have data conversion programs fail. This is because your PeopleSoft software installation is unique, which makes it difficult to write data conversions that will work for everyone all of the time. Your database may be larger than most, you may have customized Oracle-defined records, or you may not have copied all object deletions onto your Copy of Production. These differences will cause data conversion to fail. You must fix each problem on your initial Copy of Production and restart the Application Engine program. Your fixes will be automatically copied to your New Copy of Production during the Move to Production passes and data conversion will run smoothly.If you have customized records that are delivered from Oracle, you may need to make changes to the Application Engine programs to handle these customizations. For example, here are two situations in which you may need to customize data conversion code:
• If you added fields to an Oracle-delivered record, you may need to add your additional fields to the conversioncode for those records.
• If an Oracle-delivered record that you customized will be deleted, you may need to add your own conversions to move the data to a new location.
Use the Find In feature of PeopleSoft Application Designer to determine which Application Engine programs affect your customized records.To use the Find In feature:1. Create a project and add all Application Engine programs and related objects that have a name starting with
UPG and save the project.2. Select Edit, Find In.3. Enter each customized record name in the Find What field and your project name in the Project field.4. Click Find.
The results will appear in the output window.Document any changes you make to data conversion programs. This way, if a new version of the program is delivered on My Oracle Support, you will know exactly what changes you have made. You can then reapply the changes to the new version of the program.If your database is large, you may have data conversion programs that fail due to running out of space as you move data from one table to another. This problem can happen on all RDBMS platforms, but is more of a problem on those platforms using tablespaces. If your data conversion terminates abnormally with a space error, examine the Application Engine SQL statements that caused the problem. Determine where the data is coming from and how much will be moved. Have your database administrator adjust the allocated space accordingly. The data conversion can then be restarted.
Copyright © 2016, Oracle and/or its affiliates. All Rights Reserved.

Chapter 6 Applying Application Changes
119
If you get a data conversion error because a field does not exist on a table, and the field is not one you have customized, check your field renames. If a field appears on a record that is deleted in the new PeopleSoft release but was not deleted in your compare and copy, your table will be out of sync with what is expected by data conversion. If you had deleted the record, the rename would not happen on the physical table and the field would have the old name. This is what the data conversion program expects. If you did not delete the record, the field was renamed during the altering of tables and the data conversion program will terminate abnormally. Edit the Application Engine SQL to use the name, which is now on your table, and then restart the data conversion.See Appendix: "Using the Comparison Process."
Restarting Data Conversion
Processes that are run through the PeopleSoft Change Assistant Application Engine step type do not automaticallyrename the old log files on restart. Therefore, before restarting a data conversion step that is run through the PeopleSoft Change Assistant Application Engine step type, rename the log file. PeopleSoft Change Assistant usesthe same log file name each time you start or restart an Application Engine program. This means that the restartedApplication Engine program will replace the original log file if it is not renamed. Processes that are run through the PeopleSoft Change Assistant Process Scheduler step type automatically renamethe old log files and create a new log file on restart. The PeopleSoft Change Assistant Log Viewer only displays the logs from the current run process. However, logs from the previous (unsuccessful) runs are retained and accessible in the PeopleSoft Change Assistant Log Directory. If your data conversion program fails, fix the problem on your Copy of Production and restart the program. When you set the data conversion step to Restart in your PeopleSoft Change Assistant job, it will rerun the program using the PROCESS_INSTANCE and RUN_CNTL_ID from the initial run and the conversion will restart right after the last committed SQL command. Application Engine keeps track of data committed to the database in the table PS_AERUNCONTROL, keyed by PROCESS_INSTANCE and RUN_CNTL_ID.See Finalizing the Database Structure.
Properties
Database Orientation
Pass Type Products Platforms Languages
Target Initial All All All
Task 6-10-2: Turning Trace OnSet the Application Engine tracing level to include TraceAE = 16384 for the Process Scheduler prior to running data conversion. This allows details on Application Engine execution time for SQL steps and PeopleCode SQL statements to be collected. This information can be analyzed and used to tune long-running data conversion steps, as reported by PTIA0005.SQR.See the product documentation for PeopleTools: Change Assistant and Update Manager for your new release for more information about reviewing the execution report by step.See the product documentation for PeopleTools: Application Engine for your new release for more information about tracing Application Engine programs.
Copyright © 2016, Oracle and/or its affiliates. All Rights Reserved.
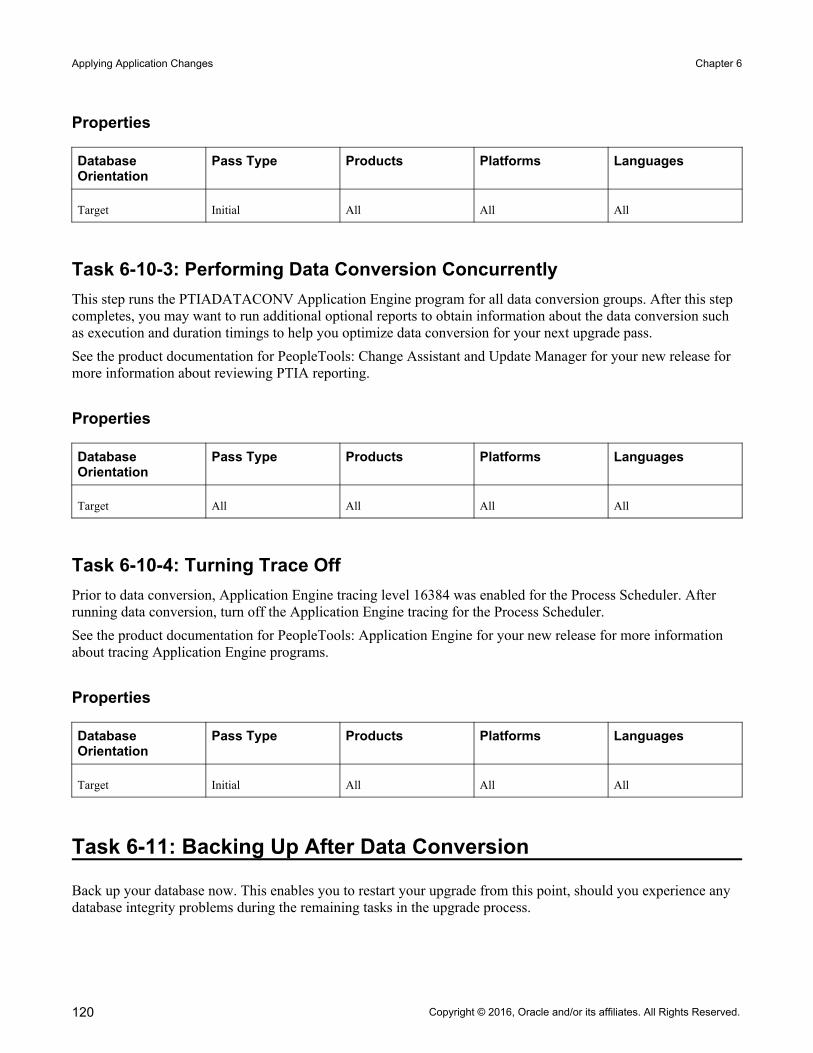
Applying Application Changes Chapter 6
120
Properties
Database Orientation
Pass Type Products Platforms Languages
Target Initial All All All
Task 6-10-3: Performing Data Conversion ConcurrentlyThis step runs the PTIADATACONV Application Engine program for all data conversion groups. After this step completes, you may want to run additional optional reports to obtain information about the data conversion such as execution and duration timings to help you optimize data conversion for your next upgrade pass.See the product documentation for PeopleTools: Change Assistant and Update Manager for your new release for more information about reviewing PTIA reporting.
Properties
Database Orientation
Pass Type Products Platforms Languages
Target All All All All
Task 6-10-4: Turning Trace OffPrior to data conversion, Application Engine tracing level 16384 was enabled for the Process Scheduler. After running data conversion, turn off the Application Engine tracing for the Process Scheduler.See the product documentation for PeopleTools: Application Engine for your new release for more information about tracing Application Engine programs.
Properties
Database Orientation
Pass Type Products Platforms Languages
Target Initial All All All
Task 6-11: Backing Up After Data Conversion
Back up your database now. This enables you to restart your upgrade from this point, should you experience any database integrity problems during the remaining tasks in the upgrade process.
Copyright © 2016, Oracle and/or its affiliates. All Rights Reserved.
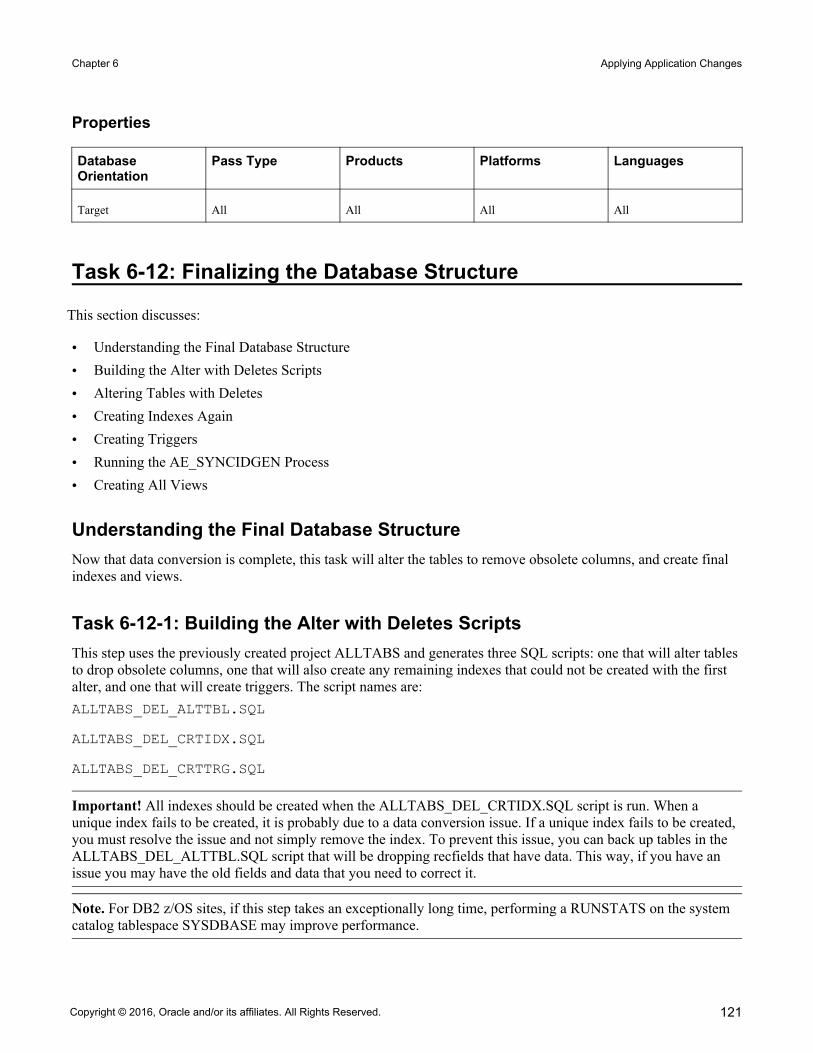
Chapter 6 Applying Application Changes
121
Properties
Database Orientation
Pass Type Products Platforms Languages
Target All All All All
Task 6-12: Finalizing the Database Structure
This section discusses:
• Understanding the Final Database Structure• Building the Alter with Deletes Scripts• Altering Tables with Deletes• Creating Indexes Again• Creating Triggers• Running the AE_SYNCIDGEN Process• Creating All Views
Understanding the Final Database StructureNow that data conversion is complete, this task will alter the tables to remove obsolete columns, and create final indexes and views.
Task 6-12-1: Building the Alter with Deletes ScriptsThis step uses the previously created project ALLTABS and generates three SQL scripts: one that will alter tablesto drop obsolete columns, one that will also create any remaining indexes that could not be created with the first alter, and one that will create triggers. The script names are: ALLTABS_DEL_ALTTBL.SQL
ALLTABS_DEL_CRTIDX.SQL
ALLTABS_DEL_CRTTRG.SQL
Important! All indexes should be created when the ALLTABS_DEL_CRTIDX.SQL script is run. When a unique index fails to be created, it is probably due to a data conversion issue. If a unique index fails to be created, you must resolve the issue and not simply remove the index. To prevent this issue, you can back up tables in the ALLTABS_DEL_ALTTBL.SQL script that will be dropping recfields that have data. This way, if you have an issue you may have the old fields and data that you need to correct it.
Note. For DB2 z/OS sites, if this step takes an exceptionally long time, performing a RUNSTATS on the system catalog tablespace SYSDBASE may improve performance.
Copyright © 2016, Oracle and/or its affiliates. All Rights Reserved.

Applying Application Changes Chapter 6
122
Properties
Database Orientation
Pass Type Products Platforms Languages
Target All All All All
Task 6-12-2: Altering Tables with DeletesThis step executes the script ALLTABS_DEL_ALTTBL.SQL, which was generated in the previous step.
Properties
Database Orientation
Pass Type Products Platforms Languages
Target All All All All
Task 6-12-3: Creating Indexes AgainThis step executes the script ALLTABS_DEL_CRTIDX.SQL, which was generated in the previous step. All indexes should be created at this time.
Important! Review the log to find any unique indexes that might have failed to be created. All indexes should be created at this time, so those errors are not acceptable and should be corrected. When a unique index fails to be created, it is probably due to a data conversion issue.
Properties
Database Orientation
Pass Type Products Platforms Languages
Target All All All All
Task 6-12-4: Creating TriggersThis step executes the script ALLTABS_DEL_CRTTRG.SQL, which was generated in a previous step.
Copyright © 2016, Oracle and/or its affiliates. All Rights Reserved.

Chapter 6 Applying Application Changes
123
Properties
Database Orientation
Pass Type Products Platforms Languages
Target All All All All
Task 6-12-5: Running the AE_SYNCIDGEN ProcessThis step executes the AE_SYNCIDGEN Application Engine program to regenerate synchronization IDs. PeopleSoft PeopleTools uses synchronization IDs to give each row a unique identifier. For any tables with the Sync ID column set to the default value of zero, the AE_SYNCIDGEN program will populate the column with the next valid Sync ID value.
Properties
Database Orientation
Pass Type Products Platforms Languages
Target All All All All
Task 6-12-6: Creating All ViewsThis step runs CREATEVW.DMS to re-create all views in the Copy of Production database. The script will try to create every view in Application Designer. If there is an error on one view, it will keep going until it gets to the end of the list.
Important! Review the log to find any views that failed to be created. All views should be created at this time, sothose errors are not acceptable and should be corrected.
Properties
Database Orientation
Pass Type Products Platforms Languages
Target All All All All
Task 6-13: Loading Data to Complete System Setup
This section discusses:
• Exporting Strings• Importing Strings• Exporting EDI Statements
Copyright © 2016, Oracle and/or its affiliates. All Rights Reserved.

Applying Application Changes Chapter 6
124
• Importing EDI Statements• Exporting Mass Change Data• Importing Mass Change Data• Exporting XML Service Information• Importing XML Service Information• Exporting Related-Language System Data• Importing Related-Language System Data• Exporting Application System Data• Importing Application System Data• Exporting Common Portal System Options• Importing Common Portal System Options• Exporting Setup Data• Importing Setup Data• Exporting Activity Guide Data• Importing Activity Guide Data• Exporting Authorization Service Data• Importing Authorization Service Data• Exporting File Extension Lists• Importing File Extension Lists• Exporting Interwindow Communication Data• Importing Interwindow Communication Data• Exporting Pivot Grid Data• Importing Pivot Grid Data• Exporting Related Content Data• Importing Related Content Data• Exporting WorkCenter Data• Importing WorkCenter Data• Setting Portal System Options• Setting Menu Pagelet Values
Task 6-13-1: Exporting StringsThis script exports Strings data from the Demo database. The script name for your upgrade path is:DLUPX04E.DMS
This data will be exported during Move to Production by the script MVAPPEXP.DMS.
Copyright © 2016, Oracle and/or its affiliates. All Rights Reserved.

Chapter 6 Applying Application Changes
125
Properties
Database Orientation
Pass Type Products Platforms Languages
Source Initial All All All
Task 6-13-2: Importing StringsThis script imports Strings data into the Copy of Production database. The script name for your upgrade path is:DLUPX04I.DMS
This data will be imported during Move to Production by the script MVAPPIMP.DMS.
Properties
Database Orientation
Pass Type Products Platforms Languages
Target Initial All All All
Task 6-13-3: Exporting EDI StatementsThis script exports EDI Statements from the Demo database. The script name for your upgrade path is:DLUPX05E.DMS
This data will be exported during Move to Production by the script MVPRDEXP.DMS.
Properties
Database Orientation
Pass Type Products Platforms Languages
Source Initial All All All
Task 6-13-4: Importing EDI StatementsThis script imports the EDI Statements into the Copy of Production database. The script name for your upgrade path is:DLUPX05I.DMS
This data will be imported during Move to Production by the script MVPRDIMP.DMS.
Copyright © 2016, Oracle and/or its affiliates. All Rights Reserved.

Applying Application Changes Chapter 6
126
Properties
Database Orientation
Pass Type Products Platforms Languages
Target Initial All All All
Task 6-13-5: Exporting Mass Change DataThis script exports Mass Change tables from the Demo database. The script name for your upgrade path is:DLUPX06E.DMS
This data will be exported during Move to Production by the script MVAPPEXP.DMS.
Properties
Database Orientation
Pass Type Products Platforms Languages
Source Initial All All All
Task 6-13-6: Importing Mass Change DataThis script imports Mass Change tables into the Copy of Production database. The script name for your upgrade path is:DLUPX06I.DMS
This data will be imported during Move to Production by the script MVAPPIMP.DMS.
Properties
Database Orientation
Pass Type Products Platforms Languages
Target Initial All All All
Task 6-13-7: Exporting XML Service InformationThis script exports XML service data from the Demo database. The script name for your upgrade path is:DLUPX13E.DMS
This data will be exported during Move to Production by the script MVPRDEXP.DMS.
Copyright © 2016, Oracle and/or its affiliates. All Rights Reserved.
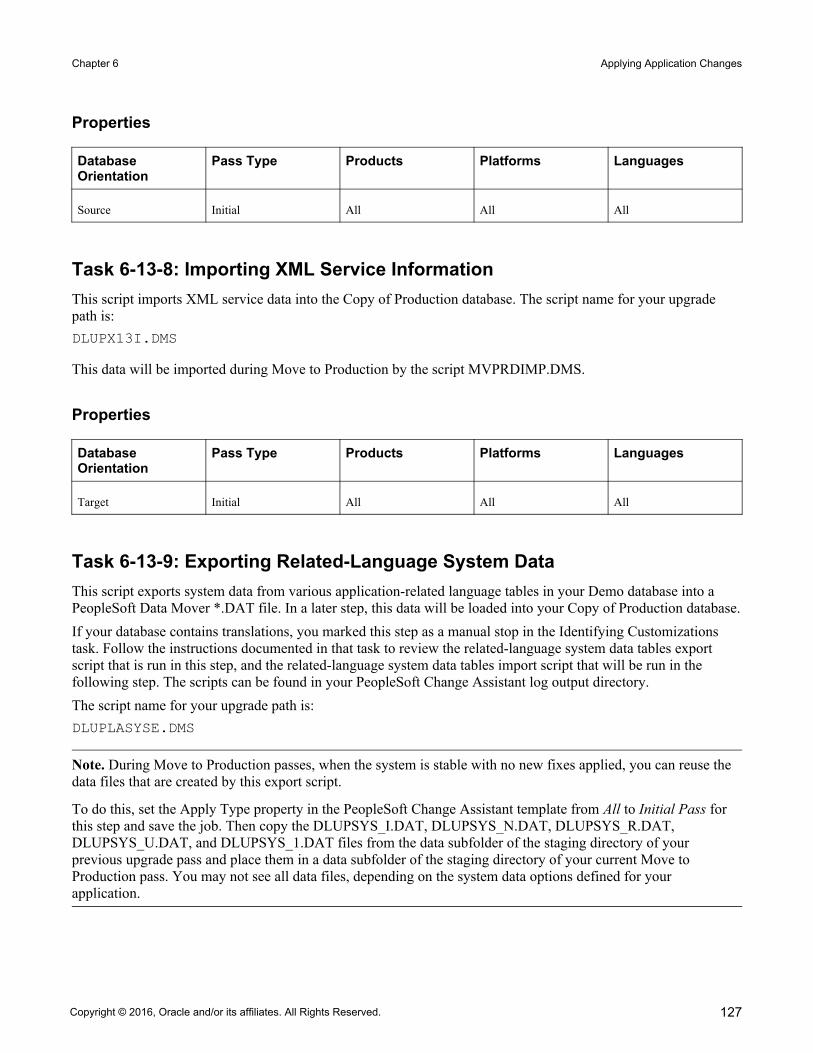
Chapter 6 Applying Application Changes
127
Properties
Database Orientation
Pass Type Products Platforms Languages
Source Initial All All All
Task 6-13-8: Importing XML Service InformationThis script imports XML service data into the Copy of Production database. The script name for your upgrade path is:DLUPX13I.DMS
This data will be imported during Move to Production by the script MVPRDIMP.DMS.
Properties
Database Orientation
Pass Type Products Platforms Languages
Target Initial All All All
Task 6-13-9: Exporting Related-Language System DataThis script exports system data from various application-related language tables in your Demo database into a PeopleSoft Data Mover *.DAT file. In a later step, this data will be loaded into your Copy of Production database.If your database contains translations, you marked this step as a manual stop in the Identifying Customizations task. Follow the instructions documented in that task to review the related-language system data tables export script that is run in this step, and the related-language system data tables import script that will be run in the following step. The scripts can be found in your PeopleSoft Change Assistant log output directory.The script name for your upgrade path is:DLUPLASYSE.DMS
Note. During Move to Production passes, when the system is stable with no new fixes applied, you can reuse the data files that are created by this export script.
To do this, set the Apply Type property in the PeopleSoft Change Assistant template from All to Initial Pass for this step and save the job. Then copy the DLUPSYS_I.DAT, DLUPSYS_N.DAT, DLUPSYS_R.DAT, DLUPSYS_U.DAT, and DLUPSYS_1.DAT files from the data subfolder of the staging directory of your previous upgrade pass and place them in a data subfolder of the staging directory of your current Move to Production pass. You may not see all data files, depending on the system data options defined for your application.
Copyright © 2016, Oracle and/or its affiliates. All Rights Reserved.
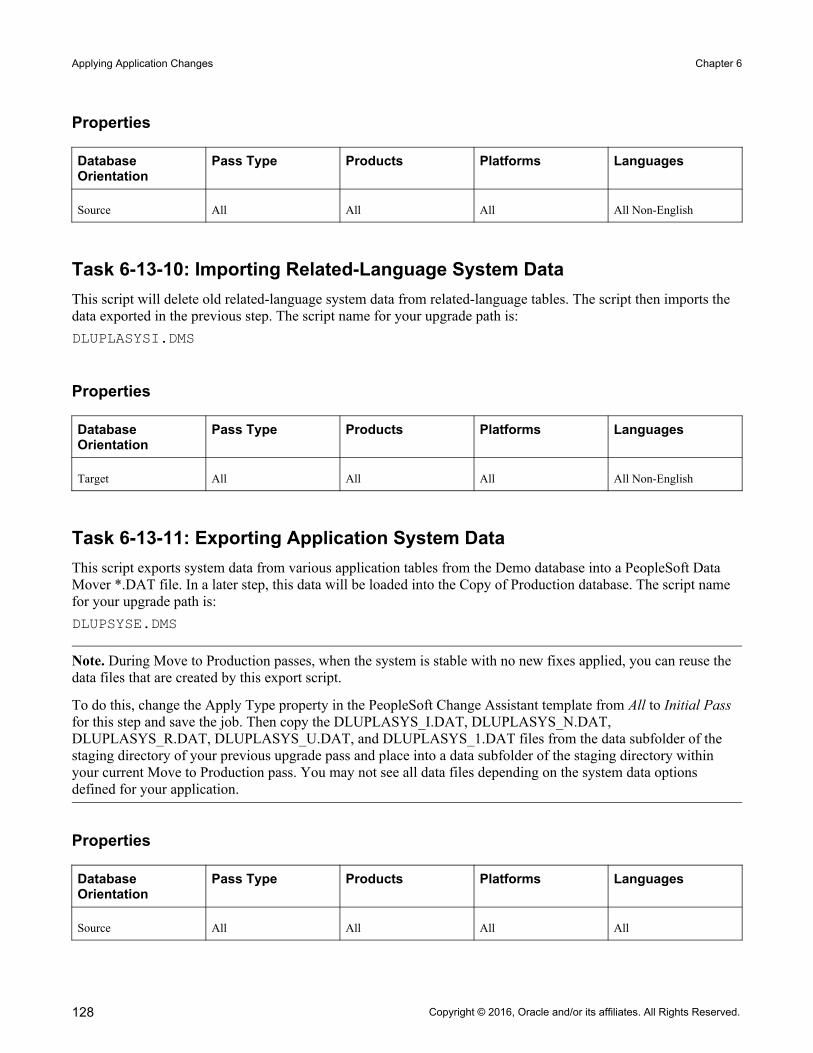
Applying Application Changes Chapter 6
128
Properties
Database Orientation
Pass Type Products Platforms Languages
Source All All All All Non-English
Task 6-13-10: Importing Related-Language System DataThis script will delete old related-language system data from related-language tables. The script then imports the data exported in the previous step. The script name for your upgrade path is:DLUPLASYSI.DMS
Properties
Database Orientation
Pass Type Products Platforms Languages
Target All All All All Non-English
Task 6-13-11: Exporting Application System DataThis script exports system data from various application tables from the Demo database into a PeopleSoft Data Mover *.DAT file. In a later step, this data will be loaded into the Copy of Production database. The script name for your upgrade path is:DLUPSYSE.DMS
Note. During Move to Production passes, when the system is stable with no new fixes applied, you can reuse the data files that are created by this export script.
To do this, change the Apply Type property in the PeopleSoft Change Assistant template from All to Initial Pass for this step and save the job. Then copy the DLUPLASYS_I.DAT, DLUPLASYS_N.DAT, DLUPLASYS_R.DAT, DLUPLASYS_U.DAT, and DLUPLASYS_1.DAT files from the data subfolder of the staging directory of your previous upgrade pass and place into a data subfolder of the staging directory within your current Move to Production pass. You may not see all data files depending on the system data options defined for your application.
Properties
Database Orientation
Pass Type Products Platforms Languages
Source All All All All
Copyright © 2016, Oracle and/or its affiliates. All Rights Reserved.
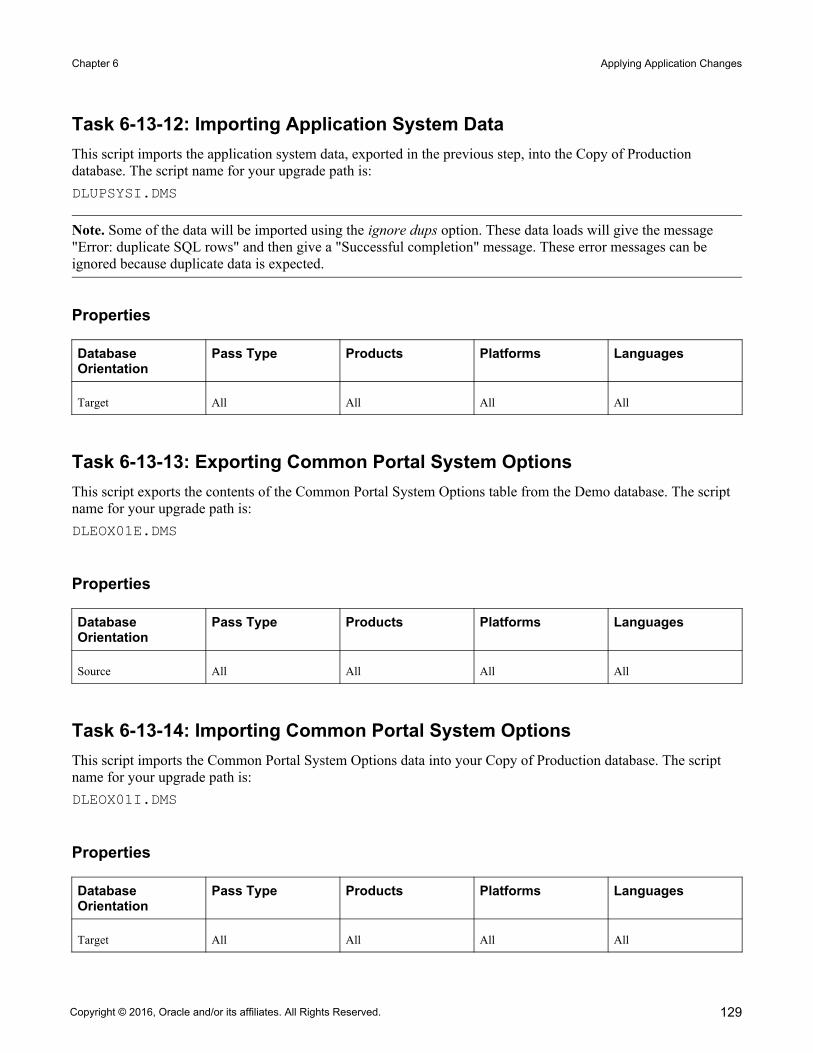
Chapter 6 Applying Application Changes
129
Task 6-13-12: Importing Application System DataThis script imports the application system data, exported in the previous step, into the Copy of Production database. The script name for your upgrade path is:DLUPSYSI.DMS
Note. Some of the data will be imported using the ignore dups option. These data loads will give the message "Error: duplicate SQL rows" and then give a "Successful completion" message. These error messages can be ignored because duplicate data is expected.
Properties
Database Orientation
Pass Type Products Platforms Languages
Target All All All All
Task 6-13-13: Exporting Common Portal System OptionsThis script exports the contents of the Common Portal System Options table from the Demo database. The script name for your upgrade path is:DLEOX01E.DMS
Properties
Database Orientation
Pass Type Products Platforms Languages
Source All All All All
Task 6-13-14: Importing Common Portal System OptionsThis script imports the Common Portal System Options data into your Copy of Production database. The script name for your upgrade path is:DLEOX01I.DMS
Properties
Database Orientation
Pass Type Products Platforms Languages
Target All All All All
Copyright © 2016, Oracle and/or its affiliates. All Rights Reserved.

Applying Application Changes Chapter 6
130
Task 6-13-15: Exporting Setup DataThis script exports setup data from the Demo database. The script name for your upgrade path is:DLUPX16E.DMS
This data will be exported during Move to Production by the script MVAPPEXP.DMS.
Properties
Database Orientation
Pass Type Products Platforms Languages
Source Initial All All All
Task 6-13-16: Importing Setup DataThis script imports setup data into the Copy of Production database. The script name for your upgrade path is:DLUPX16I.DMS
This data will be imported during Move to Production by the script MVAPPIMP.DMS.
Properties
Database Orientation
Pass Type Products Platforms Languages
Target Initial All All All
Task 6-13-17: Exporting Activity Guide DataThis script exports Activity Guide lists and items from the Demo database during the initial upgrade pass. The script name for your upgrade path is:PTUPGPTAIEXP.DMS
Properties
Database Orientation
Pass Type Products Platforms Languages
Source Initial All All All
Copyright © 2016, Oracle and/or its affiliates. All Rights Reserved.
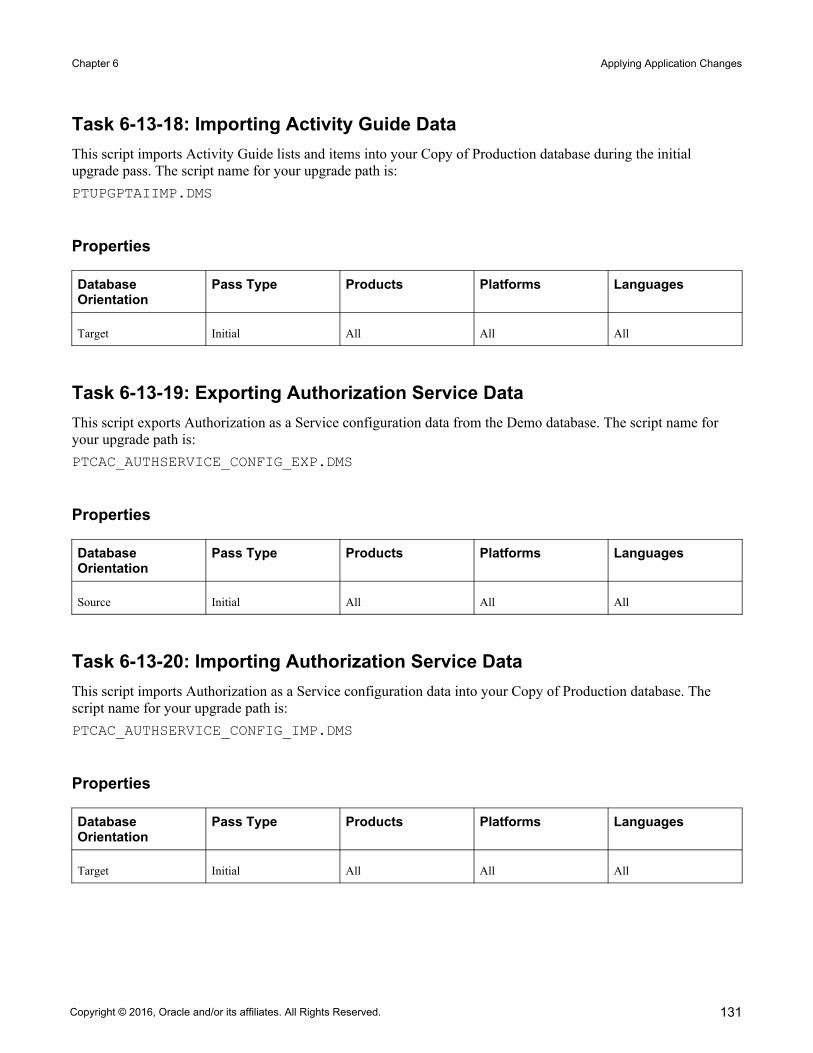
Chapter 6 Applying Application Changes
131
Task 6-13-18: Importing Activity Guide DataThis script imports Activity Guide lists and items into your Copy of Production database during the initial upgrade pass. The script name for your upgrade path is:PTUPGPTAIIMP.DMS
Properties
Database Orientation
Pass Type Products Platforms Languages
Target Initial All All All
Task 6-13-19: Exporting Authorization Service DataThis script exports Authorization as a Service configuration data from the Demo database. The script name for your upgrade path is:PTCAC_AUTHSERVICE_CONFIG_EXP.DMS
Properties
Database Orientation
Pass Type Products Platforms Languages
Source Initial All All All
Task 6-13-20: Importing Authorization Service DataThis script imports Authorization as a Service configuration data into your Copy of Production database. The script name for your upgrade path is:PTCAC_AUTHSERVICE_CONFIG_IMP.DMS
Properties
Database Orientation
Pass Type Products Platforms Languages
Target Initial All All All
Copyright © 2016, Oracle and/or its affiliates. All Rights Reserved.
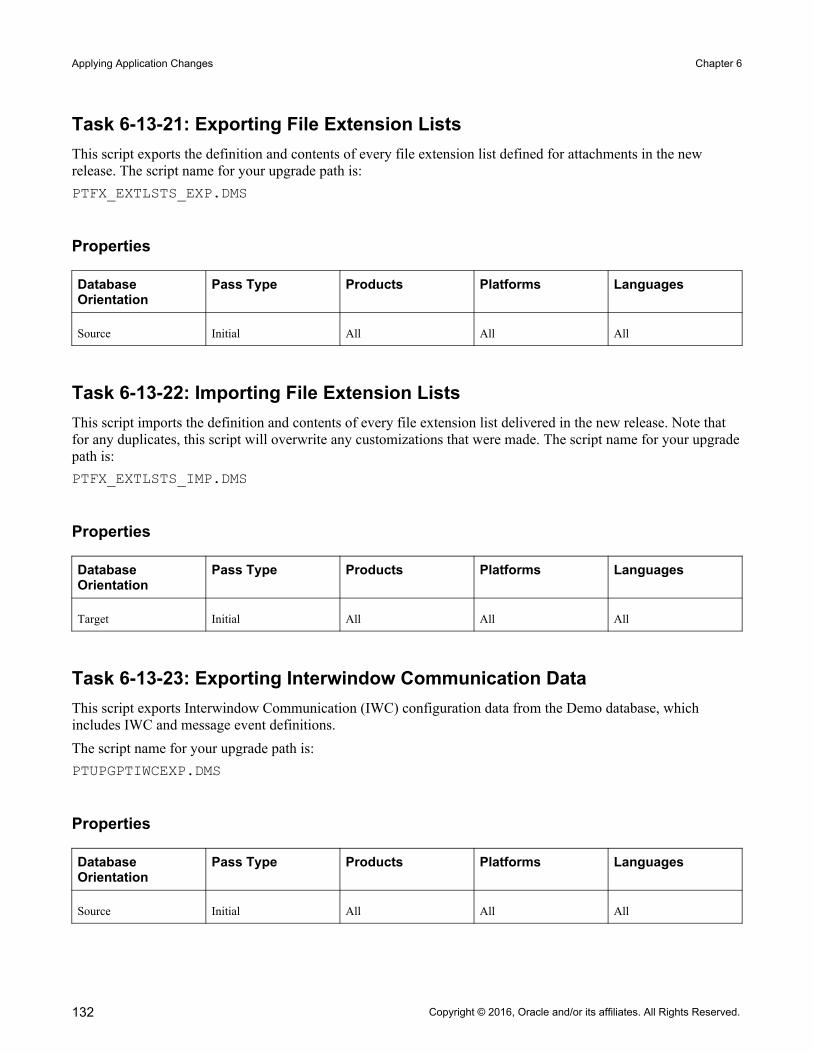
Applying Application Changes Chapter 6
132
Task 6-13-21: Exporting File Extension ListsThis script exports the definition and contents of every file extension list defined for attachments in the new release. The script name for your upgrade path is:PTFX_EXTLSTS_EXP.DMS
Properties
Database Orientation
Pass Type Products Platforms Languages
Source Initial All All All
Task 6-13-22: Importing File Extension ListsThis script imports the definition and contents of every file extension list delivered in the new release. Note that for any duplicates, this script will overwrite any customizations that were made. The script name for your upgradepath is:PTFX_EXTLSTS_IMP.DMS
Properties
Database Orientation
Pass Type Products Platforms Languages
Target Initial All All All
Task 6-13-23: Exporting Interwindow Communication DataThis script exports Interwindow Communication (IWC) configuration data from the Demo database, which includes IWC and message event definitions.The script name for your upgrade path is:PTUPGPTIWCEXP.DMS
Properties
Database Orientation
Pass Type Products Platforms Languages
Source Initial All All All
Copyright © 2016, Oracle and/or its affiliates. All Rights Reserved.
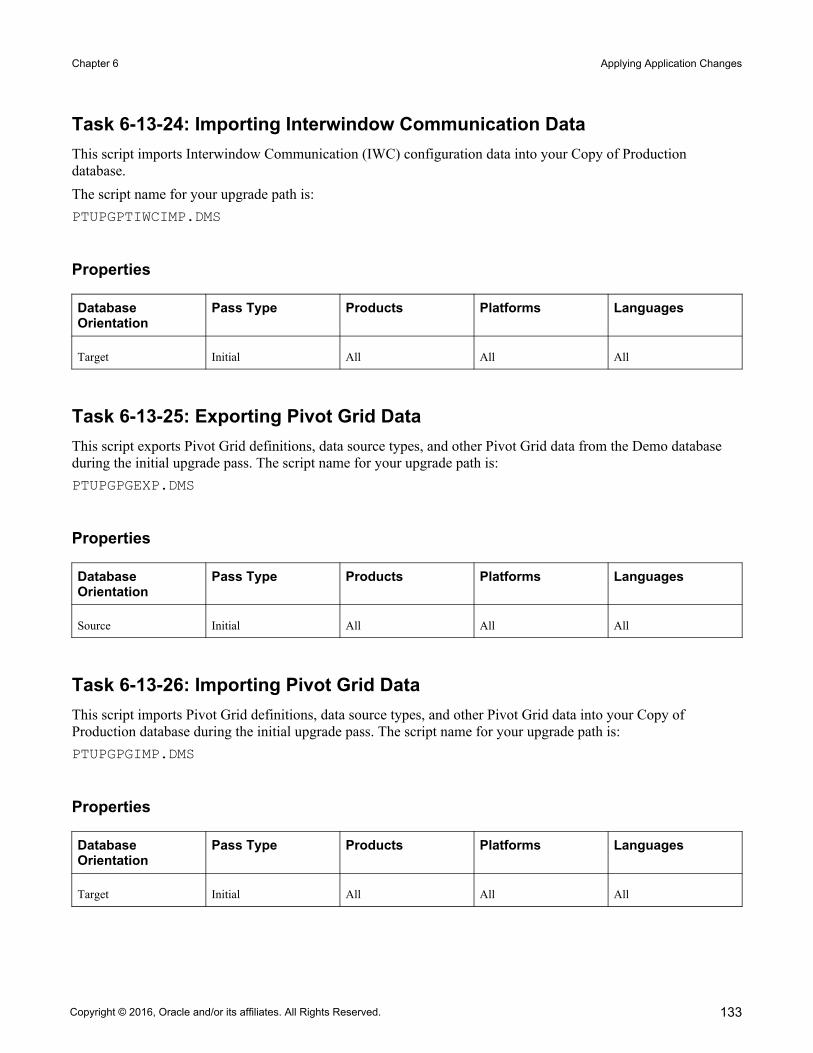
Chapter 6 Applying Application Changes
133
Task 6-13-24: Importing Interwindow Communication DataThis script imports Interwindow Communication (IWC) configuration data into your Copy of Production database.The script name for your upgrade path is:PTUPGPTIWCIMP.DMS
Properties
Database Orientation
Pass Type Products Platforms Languages
Target Initial All All All
Task 6-13-25: Exporting Pivot Grid DataThis script exports Pivot Grid definitions, data source types, and other Pivot Grid data from the Demo database during the initial upgrade pass. The script name for your upgrade path is:PTUPGPGEXP.DMS
Properties
Database Orientation
Pass Type Products Platforms Languages
Source Initial All All All
Task 6-13-26: Importing Pivot Grid DataThis script imports Pivot Grid definitions, data source types, and other Pivot Grid data into your Copy of Production database during the initial upgrade pass. The script name for your upgrade path is:PTUPGPGIMP.DMS
Properties
Database Orientation
Pass Type Products Platforms Languages
Target Initial All All All
Copyright © 2016, Oracle and/or its affiliates. All Rights Reserved.

Applying Application Changes Chapter 6
134
Task 6-13-27: Exporting Related Content DataThis script exports Related Content services and service definitions from the Demo database during the initial upgrade pass. The script name for your upgrade path is: PTUPGPTRCEXP.DMS
Properties
Database Orientation
Pass Type Products Platforms Languages
Source Initial All All All
Task 6-13-28: Importing Related Content DataThis script imports Related Content services and service definitions from the Demo database during the initial upgrade pass. The script name for your upgrade path is: PTUPGPTRCIMP.DMS
Properties
Database Orientation
Pass Type Products Platforms Languages
Target Initial All All All
Task 6-13-29: Exporting WorkCenter DataThis script exports WorkCenter configuration data from the Demo database. The script for your upgrade path is:PTUPGALEXP.DMS
Properties
Database Orientation
Pass Type Products Platforms Languages
Source Initial All All All
Task 6-13-30: Importing WorkCenter DataThis script imports WorkCenter configuration data into your Copy of Production database. The script name for your upgrade path is:
Copyright © 2016, Oracle and/or its affiliates. All Rights Reserved.

Chapter 6 Applying Application Changes
135
PTUPGALIMP.DMS
Properties
Database Orientation
Pass Type Products Platforms Languages
Target Initial All All All
Task 6-13-31: Setting Portal System OptionsThis step runs a script to enable the SWAN look and feel on your system and the new grid defaults. The script name for your upgrade path is:DLUPX25_01.DMS
Properties
Database Orientation
Pass Type Products Platforms Languages
Target Initial All All All
Task 6-13-32: Setting Menu Pagelet ValuesThis script replaces the menu navigation pagelet with the "Top Menu Features" pagelet. The script name for your upgrade path is:PTREMOVEMENUPGLT.DMS
Properties
Database Orientation
Pass Type Products Platforms Languages
Target Initial All All All
Task 6-14: Loading Stored Statements
This section discusses:
• Understanding Loading Stored Statements• Setting PSOPTIONS for COBOL• Running the STOREAD Script
Copyright © 2016, Oracle and/or its affiliates. All Rights Reserved.
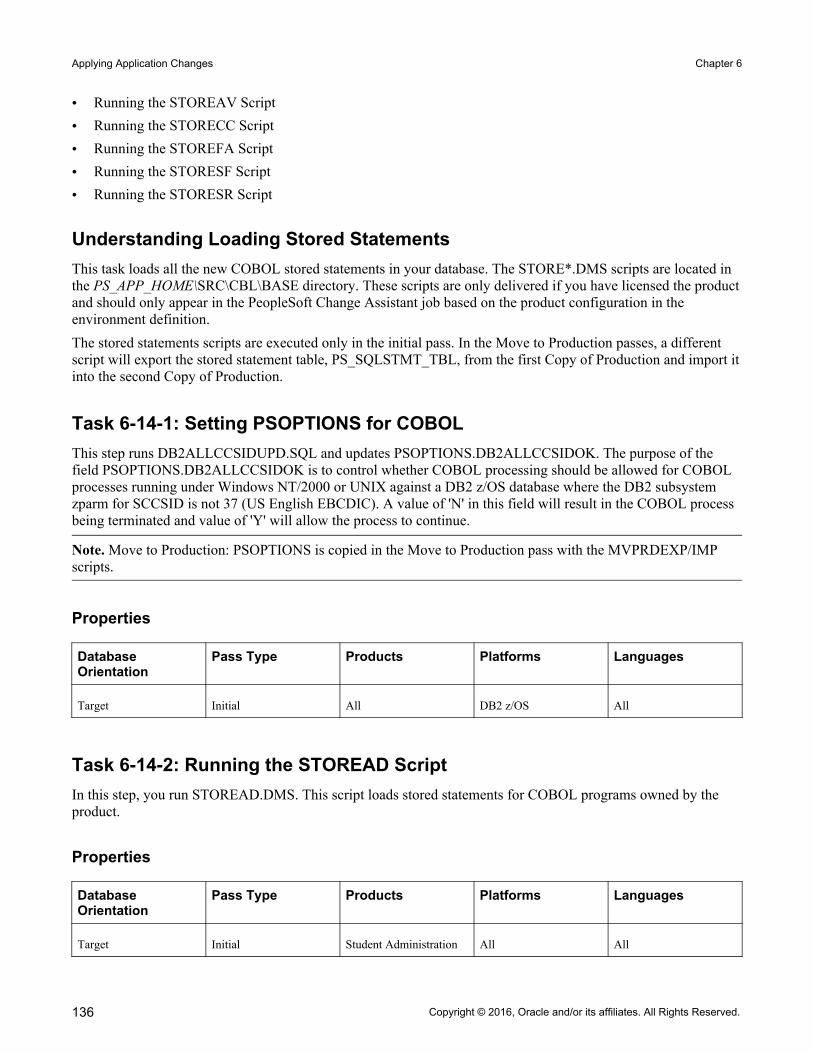
Applying Application Changes Chapter 6
136
• Running the STOREAV Script• Running the STORECC Script• Running the STOREFA Script• Running the STORESF Script• Running the STORESR Script
Understanding Loading Stored StatementsThis task loads all the new COBOL stored statements in your database. The STORE*.DMS scripts are located in the PS_APP_HOME\SRC\CBL\BASE directory. These scripts are only delivered if you have licensed the productand should only appear in the PeopleSoft Change Assistant job based on the product configuration in the environment definition.The stored statements scripts are executed only in the initial pass. In the Move to Production passes, a different script will export the stored statement table, PS_SQLSTMT_TBL, from the first Copy of Production and import itinto the second Copy of Production.
Task 6-14-1: Setting PSOPTIONS for COBOLThis step runs DB2ALLCCSIDUPD.SQL and updates PSOPTIONS.DB2ALLCCSIDOK. The purpose of the field PSOPTIONS.DB2ALLCCSIDOK is to control whether COBOL processing should be allowed for COBOL processes running under Windows NT/2000 or UNIX against a DB2 z/OS database where the DB2 subsystem zparm for SCCSID is not 37 (US English EBCDIC). A value of 'N' in this field will result in the COBOL process being terminated and value of 'Y' will allow the process to continue.
Note. Move to Production: PSOPTIONS is copied in the Move to Production pass with the MVPRDEXP/IMP scripts.
Properties
Database Orientation
Pass Type Products Platforms Languages
Target Initial All DB2 z/OS All
Task 6-14-2: Running the STOREAD ScriptIn this step, you run STOREAD.DMS. This script loads stored statements for COBOL programs owned by the product.
Properties
Database Orientation
Pass Type Products Platforms Languages
Target Initial Student Administration All All
Copyright © 2016, Oracle and/or its affiliates. All Rights Reserved.

Chapter 6 Applying Application Changes
137
Task 6-14-3: Running the STOREAV ScriptIn this step, you run STOREAV.DMS. This script loads stored statements for COBOL programs.
Properties
Database Orientation
Pass Type Products Platforms Languages
Target Initial Student Administration All All
Task 6-14-4: Running the STORECC ScriptIn this step, you run STORECC.DMS. This script loads stored statements for COBOL programs owned by the product.
Properties
Database Orientation
Pass Type Products Platforms Languages
Target Initial Student Administration All All
Task 6-14-5: Running the STOREFA ScriptIn this step, you run STOREFA.DMS. This script loads stored statements for COBOL programs owned by the product.
Properties
Database Orientation
Pass Type Products Platforms Languages
Target Initial Student Administration All All
Task 6-14-6: Running the STORESF ScriptIn this step, you run STORESF.DMS. This script loads stored statements for COBOL programs owned by the product.
Copyright © 2016, Oracle and/or its affiliates. All Rights Reserved.

Applying Application Changes Chapter 6
138
Properties
Database Orientation
Pass Type Products Platforms Languages
Target Initial Student Administration All All
Task 6-14-7: Running the STORESR ScriptIn this step, you run STORESR.DMS. This script loads stored statements for COBOL programs owned by the product.
Properties
Database Orientation
Pass Type Products Platforms Languages
Target Initial Student Administration All All
Task 6-15: Running Final Update Statistics
This section discusses:
• Generating Final RUNSTATS for DB2 LUW• Running Final Statistics for DB2 LUW• Running Final Statistics for DB2 zOS• Generating Final Update Stats Script for Oracle• Running Final Statistics for Oracle
Task 6-15-1: Generating Final RUNSTATS for DB2 LUWThis step executes the RUNSTATS.SQR that creates the RUNSTATS.SQL to update statistics on DB2 LUW.
Properties
Database Orientation
Pass Type Products Platforms Languages
Target All All DB2 LUW All
Copyright © 2016, Oracle and/or its affiliates. All Rights Reserved.

Chapter 6 Applying Application Changes
139
Task 6-15-2: Running Final Statistics for DB2 LUWEarlier in the upgrade process you updated your statistics. Now that you have converted all of your data and modified all indexes, update your statistics again to improve performance of your post upgrade processes and testing. Run the RUNSTATS.SQL script created in the previous step.
Properties
Database Orientation
Pass Type Products Platforms Languages
Target All All DB2 LUW All
Task 6-15-3: Running Final Statistics for DB2 zOSEarlier in the upgrade process you updated your statistics. Now that you have converted all of your data and modified all indexes, update your statistics again to improve performance of your post upgrade processes and testing. Contact your database administrator to have the statistics updated on your database before proceeding with your upgrade.
Properties
Database Orientation
Pass Type Products Platforms Languages
Target All All DB2 z/OS All
Task 6-15-4: Generating Final Update Stats Script for OracleThis step runs the PTGENTABSTATS.SQL script to create the PTUPDTABSTATS.SQL script. PTUPDTABSTATS.SQL will be run in the next step to update statistics on your Oracle database for populated PeopleSoft tables.
Properties
Database Orientation
Pass Type Products Platforms Languages
Target All All Oracle All
Copyright © 2016, Oracle and/or its affiliates. All Rights Reserved.

Applying Application Changes Chapter 6
140
Task 6-15-5: Running Final Statistics for OracleEarlier in the upgrade process you upgraded your statistics. Now that you have converted all of your data and modified all indexes, update your statistics again to improve performance of your post upgrade processes. This step runs the PTUPDTABSTATS.SQL script, which was generated in the previous step. This script updates statistics on your Oracle database for populated PeopleSoft tables.
Properties
Database Orientation
Pass Type Products Platforms Languages
Target All All Oracle All
Task 6-16: Updating Language Data
This section discusses:
• Understanding Updating Language Data• Running the TSRECPOP Script
Understanding Updating Language DataIn this task, you run scripts to modify data in PeopleSoft PeopleTools-related language tables.
Note. For DB2 z/OS customers, Oracle recommends that you run RUNSTATS against the system catalog tables at this time.
Task 6-16-1: Running the TSRECPOP ScriptIn this step, the TSRECPOP script initializes and modifies the data in PeopleSoft PeopleTools-related language architecture tables.
Properties
Database Orientation
Pass Type Products Platforms Languages
Target Initial All All All
Copyright © 2016, Oracle and/or its affiliates. All Rights Reserved.

Chapter 6 Applying Application Changes
141
Task 6-17: Updating Object Version Numbers
In this task, you run the VERSION Application Engine program. This ensures that all of your version numbers arecorrect and, if not, resets them to 1.
Properties
Database Orientation
Pass Type Products Platforms Languages
Target All All All All
Task 6-18: Running the Final Audit Reports
This section discusses:
• Running the Final DDDAUDIT Report• Running the Final SYSAUDIT Report• Running the Final SWPAUDIT Report• Creating the FNLALTAUD Project• Running the Final Alter Audit• Reviewing the Final Audits• Running the Final SETINDEX Report
Task 6-18-1: Running the Final DDDAUDIT ReportDDDAUDIT is an SQR that compares your production SQL data tables with the PeopleSoft PeopleTools record definitions to uncover inconsistencies. You can expect some errors from this report. You will review the output from the report in another step.
Properties
Database Orientation
Pass Type Products Platforms Languages
Target All All All All
Task 6-18-2: Running the Final SYSAUDIT ReportSYSAUDIT is an SQR that identifies orphaned PeopleSoft objects. For example, SYSAUDIT will identify a module of PeopleCode that exists but does not relate to any other objects in the system. SYSAUDIT also identifies other inconsistencies within your database.
Copyright © 2016, Oracle and/or its affiliates. All Rights Reserved.

Applying Application Changes Chapter 6
142
Properties
Database Orientation
Pass Type Products Platforms Languages
Target All All All All
Task 6-18-3: Running the Final SWPAUDIT ReportSWPAUDIT is an SQR that checks database integrity in a multilingual context. For example, SWPAUDIT can identify a base and related-language record with mismatched key fields.
Properties
Database Orientation
Pass Type Products Platforms Languages
Target All All All All non-English
Task 6-18-4: Creating the FNLALTAUD ProjectIn this step, you create the FNLALTAUD project and use it to run your final Alter Audit. Creating this new project now ensures that all the records in your system are audited, including SQL tables. This project also includes any custom records that you have created in your system.
Properties
Database Orientation
Pass Type Products Platforms Languages
Target All All All All
Task 6-18-5: Running the Final Alter AuditRun the PeopleSoft PeopleTools alter record process on all tables in your system to check whether the PeopleSoft PeopleTools definitions are synchronized with the underlying SQL data tables in your database. This process is called an Alter Audit. An Alter Audit compares the data structures of your database tables with the PeopleSoft PeopleTools definitions to uncover inconsistencies. The Alter Audit then creates an SQL script with the DDL changes needed to synchronize your database with the PeopleSoft PeopleTools definitions.The Alter Audit script is built using the FNLALTAUD project created in the previous step.
Copyright © 2016, Oracle and/or its affiliates. All Rights Reserved.
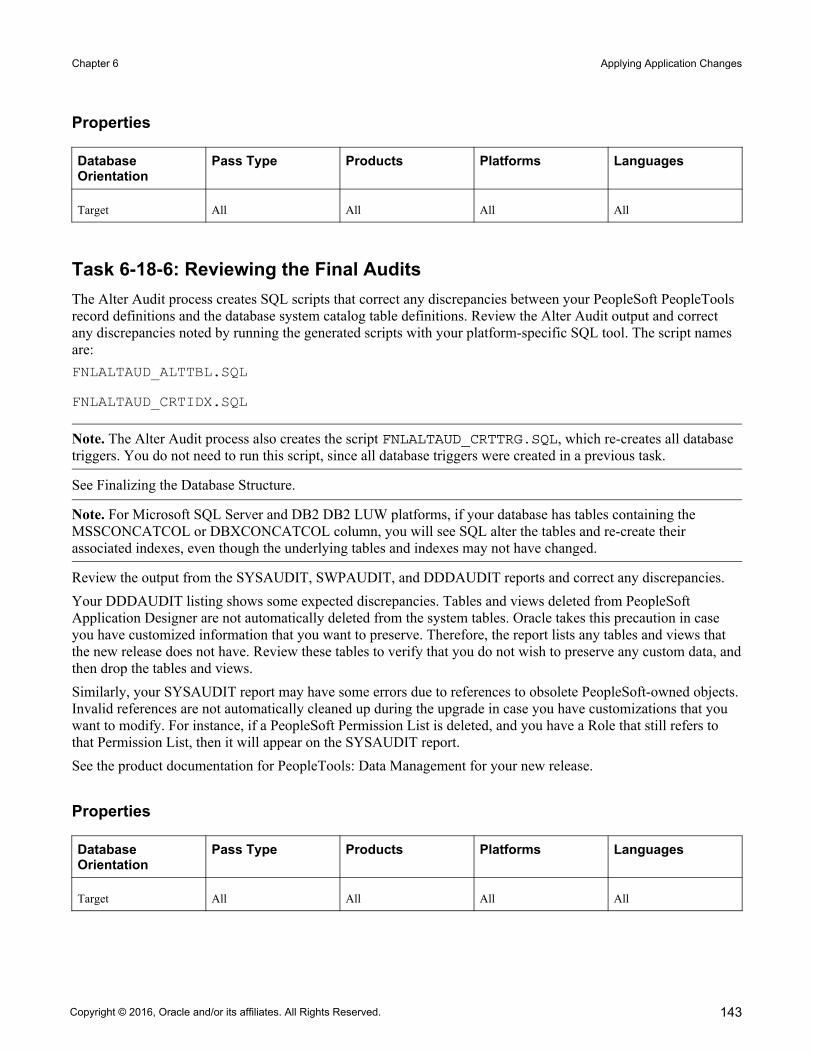
Chapter 6 Applying Application Changes
143
Properties
Database Orientation
Pass Type Products Platforms Languages
Target All All All All
Task 6-18-6: Reviewing the Final AuditsThe Alter Audit process creates SQL scripts that correct any discrepancies between your PeopleSoft PeopleTools record definitions and the database system catalog table definitions. Review the Alter Audit output and correct any discrepancies noted by running the generated scripts with your platform-specific SQL tool. The script names are:FNLALTAUD_ALTTBL.SQL
FNLALTAUD_CRTIDX.SQL
Note. The Alter Audit process also creates the script FNLALTAUD_CRTTRG.SQL, which re-creates all database triggers. You do not need to run this script, since all database triggers were created in a previous task.
See Finalizing the Database Structure.
Note. For Microsoft SQL Server and DB2 DB2 LUW platforms, if your database has tables containing the MSSCONCATCOL or DBXCONCATCOL column, you will see SQL alter the tables and re-create their associated indexes, even though the underlying tables and indexes may not have changed.
Review the output from the SYSAUDIT, SWPAUDIT, and DDDAUDIT reports and correct any discrepancies.Your DDDAUDIT listing shows some expected discrepancies. Tables and views deleted from PeopleSoft Application Designer are not automatically deleted from the system tables. Oracle takes this precaution in case you have customized information that you want to preserve. Therefore, the report lists any tables and views that the new release does not have. Review these tables to verify that you do not wish to preserve any custom data, andthen drop the tables and views.Similarly, your SYSAUDIT report may have some errors due to references to obsolete PeopleSoft-owned objects.Invalid references are not automatically cleaned up during the upgrade in case you have customizations that you want to modify. For instance, if a PeopleSoft Permission List is deleted, and you have a Role that still refers to that Permission List, then it will appear on the SYSAUDIT report.See the product documentation for PeopleTools: Data Management for your new release.
Properties
Database Orientation
Pass Type Products Platforms Languages
Target All All All All
Copyright © 2016, Oracle and/or its affiliates. All Rights Reserved.

Applying Application Changes Chapter 6
144
Task 6-18-7: Running the Final SETINDEX ReportThe SETINDEX SQR updates index overrides stored in the PSIDXDDLPARM table. The SQR updates the values stored in the PARMVALUE field with current values found in the system catalog. Running SETINDEX cleans up fragmentation issues that may have occurred during data conversion.
Properties
Database Orientation
Pass Type Products Platforms Languages
Target All All DB2 z/OS All
Task 6-19: Restoring the New Release Demo
Restore your New Release Demo database from the backup made earlier in the chapter "Planning Your Application Changes." The backup was taken before projects were copied and scripts were run against the New Release Demo. This is done to restore the environment to an Oracle-delivered Demo implementation.
Properties
Database Orientation
Pass Type Products Platforms Languages
Source Initial All All All
Copyright © 2016, Oracle and/or its affiliates. All Rights Reserved.

145
Chapter 7
Performing Environment Configuration
This chapter discusses:
• Understanding Environment Configuration• Configuring the Upgrade Environment• Reapplying Customizations• Setting Up Security• Completing Portal Data Conversion
Understanding Environment Configuration
Now that you have completed data conversion, you will need to configure the rest of your environment to proceedwith the upgrade. This includes updating your PeopleSoft system to display your customizations.
Note. If you see the Fluid User Interface by default when you sign in to your application, you can refer to the step Using the Fluid User Interface in the installation guide for your application for more information.
Task 7-1: Configuring the Upgrade Environment
This section discusses:
• Configuring the Web Server• Configuring Portal
Task 7-1-1: Configuring the Web ServerRunning PeopleSoft Portal requires a fully functional web server. In this step, configure your web server. Make sure that you also configure your web server for PeopleSoft Online Help (PeopleBooks) so that you can easily refer to the documentation while reviewing the new release.See the PeopleTools installation guide for your database platform on your new release.
Copyright © 2016, Oracle and/or its affiliates. All Rights Reserved.
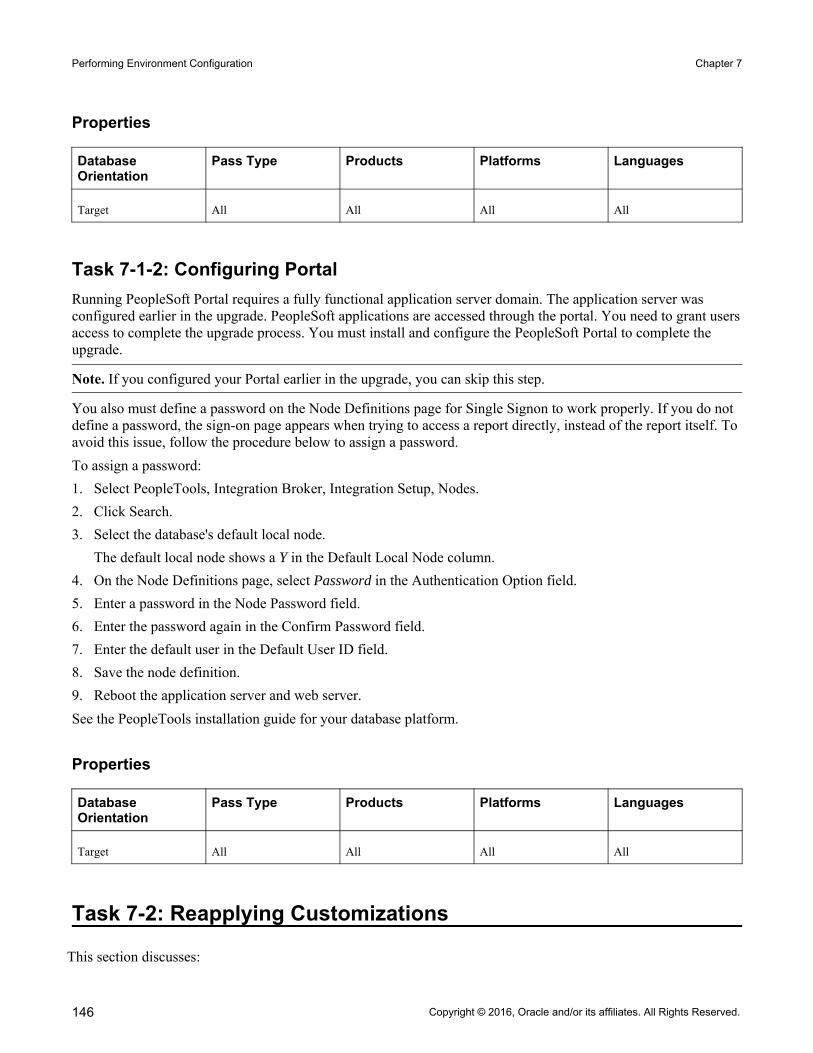
Performing Environment Configuration Chapter 7
146
Properties
Database Orientation
Pass Type Products Platforms Languages
Target All All All All
Task 7-1-2: Configuring PortalRunning PeopleSoft Portal requires a fully functional application server domain. The application server was configured earlier in the upgrade. PeopleSoft applications are accessed through the portal. You need to grant usersaccess to complete the upgrade process. You must install and configure the PeopleSoft Portal to complete the upgrade.
Note. If you configured your Portal earlier in the upgrade, you can skip this step.
You also must define a password on the Node Definitions page for Single Signon to work properly. If you do not define a password, the sign-on page appears when trying to access a report directly, instead of the report itself. To avoid this issue, follow the procedure below to assign a password.To assign a password:1. Select PeopleTools, Integration Broker, Integration Setup, Nodes.2. Click Search.3. Select the database's default local node.
The default local node shows a Y in the Default Local Node column.4. On the Node Definitions page, select Password in the Authentication Option field.5. Enter a password in the Node Password field.6. Enter the password again in the Confirm Password field.7. Enter the default user in the Default User ID field.8. Save the node definition.9. Reboot the application server and web server.See the PeopleTools installation guide for your database platform.
Properties
Database Orientation
Pass Type Products Platforms Languages
Target All All All All
Task 7-2: Reapplying Customizations
This section discusses:
Copyright © 2016, Oracle and/or its affiliates. All Rights Reserved.
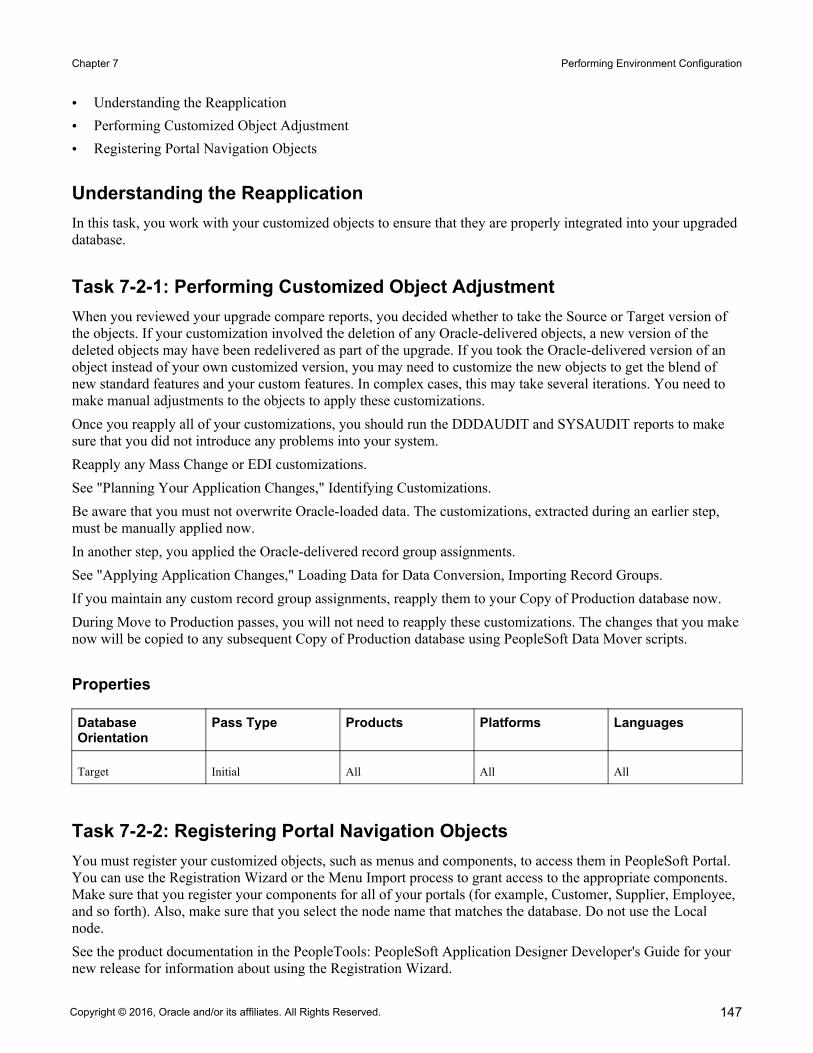
Chapter 7 Performing Environment Configuration
147
• Understanding the Reapplication• Performing Customized Object Adjustment• Registering Portal Navigation Objects
Understanding the ReapplicationIn this task, you work with your customized objects to ensure that they are properly integrated into your upgraded database.
Task 7-2-1: Performing Customized Object AdjustmentWhen you reviewed your upgrade compare reports, you decided whether to take the Source or Target version of the objects. If your customization involved the deletion of any Oracle-delivered objects, a new version of the deleted objects may have been redelivered as part of the upgrade. If you took the Oracle-delivered version of an object instead of your own customized version, you may need to customize the new objects to get the blend of new standard features and your custom features. In complex cases, this may take several iterations. You need to make manual adjustments to the objects to apply these customizations.Once you reapply all of your customizations, you should run the DDDAUDIT and SYSAUDIT reports to make sure that you did not introduce any problems into your system.Reapply any Mass Change or EDI customizations.See "Planning Your Application Changes," Identifying Customizations.Be aware that you must not overwrite Oracle-loaded data. The customizations, extracted during an earlier step, must be manually applied now.In another step, you applied the Oracle-delivered record group assignments.See "Applying Application Changes," Loading Data for Data Conversion, Importing Record Groups.If you maintain any custom record group assignments, reapply them to your Copy of Production database now. During Move to Production passes, you will not need to reapply these customizations. The changes that you makenow will be copied to any subsequent Copy of Production database using PeopleSoft Data Mover scripts.
Properties
Database Orientation
Pass Type Products Platforms Languages
Target Initial All All All
Task 7-2-2: Registering Portal Navigation ObjectsYou must register your customized objects, such as menus and components, to access them in PeopleSoft Portal. You can use the Registration Wizard or the Menu Import process to grant access to the appropriate components. Make sure that you register your components for all of your portals (for example, Customer, Supplier, Employee, and so forth). Also, make sure that you select the node name that matches the database. Do not use the Local node.See the product documentation in the PeopleTools: PeopleSoft Application Designer Developer's Guide for your new release for information about using the Registration Wizard.
Copyright © 2016, Oracle and/or its affiliates. All Rights Reserved.

Performing Environment Configuration Chapter 7
148
See the product documentation for PeopleTools: Portal Technology for your new release for information about administering portals.
Properties
Database Orientation
Pass Type Products Platforms Languages
Target Initial All All All
Task 7-3: Setting Up Security
This section discusses:
• Understanding Security• Performing Security Setup• Synchronizing CREF Permissions• Granting Access to Personalize the Homepage
Understanding SecurityIn this task you perform steps to set up security, grant access to the user ID, set up permissions lists, and grant access to navigation and homepages.
Task 7-3-1: Performing Security SetupThis section discusses:
• Understanding Security Setup
Understanding Security Setup
Select the PeopleTools, Security folder now to add the new PeopleSoft PeopleTools and application menus, deleteold menus, and set up appropriate operator security for your system.Many menu additions and deletions have occurred. Examine the menu compare report and the Demo database for details of the required security changes, then decide which of your roles and permission lists should have access to each of the new menus.Many tasks in this chapter instruct you to select a specific menu within the new PeopleSoft release. To perform these tasks, set up appropriate security for each of the menus referenced in each of the tasks.See the product documentation for PeopleSoft Portal Solutions: Portal and Site Administration for PeopleSoft Interaction Hub for information on PeopleSoft-delivered security.
Note. Move to Production: If you changed the user profiles in your production system after you froze your PeopleSoft PeopleTools, you must manually apply the changes to your Copy of Production database before the end of the final Move to Production.
Copyright © 2016, Oracle and/or its affiliates. All Rights Reserved.

Chapter 7 Performing Environment Configuration
149
Properties
Database Orientation
Pass Type Products Platforms Languages
Target Initial All All All
Task 7-3-2: Synchronizing CREF PermissionsThis step runs the Application Engine program PORTAL_CSS, which synchronizes Portal Registry Structures and Permission Lists for all Portal Registry Definitions in the Upgrade database. The Portal Registry Structures, as copied from the new release, do not initially reference any permission lists on the Upgrade database. The synchronization process matches the existing permission lists to the appropriate Registry Structures. Review any messages received during the running of this process with your Portal Administrator.See the product documentation for PeopleTools: Portal Technology for your new release.
Note. If the permission lists for your upgrade user do not allow you access to a component, you will encounter this error when running the security synchronization process for that page: Security synchronization failed for Portal Object. This error may indicate other problems with the component or folder, but you should check your security first.
Properties
Database Orientation
Pass Type Products Platforms Languages
Target Initial All All All
Task 7-3-3: Granting Access to Personalize the HomepageThis section discusses:
• Understanding Access to the Portal Homepage• Updating the Homepage Personalization Permission List• Adding the Portal User Role
Understanding Access to the Portal Homepage
You must complete this step if you use any of the PeopleSoft Portal Pack products or pagelets. To add, remove, orchange the layout of the homepage, you must grant homepage personalization security access to all users that are not guest users.
Updating the Homepage Personalization Permission List
To update the homepage personalization permission list:
Copyright © 2016, Oracle and/or its affiliates. All Rights Reserved.
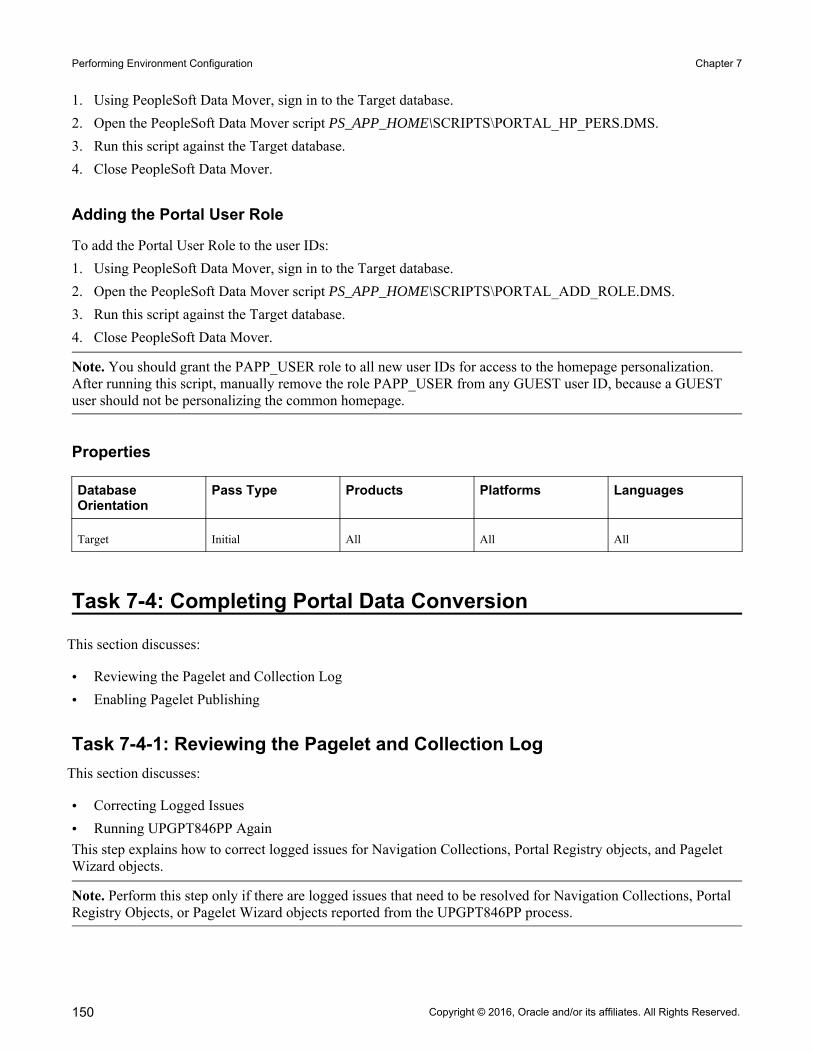
Performing Environment Configuration Chapter 7
150
1. Using PeopleSoft Data Mover, sign in to the Target database.2. Open the PeopleSoft Data Mover script PS_APP_HOME\SCRIPTS\PORTAL_HP_PERS.DMS.3. Run this script against the Target database.4. Close PeopleSoft Data Mover.
Adding the Portal User Role
To add the Portal User Role to the user IDs:1. Using PeopleSoft Data Mover, sign in to the Target database.2. Open the PeopleSoft Data Mover script PS_APP_HOME\SCRIPTS\PORTAL_ADD_ROLE.DMS.3. Run this script against the Target database.4. Close PeopleSoft Data Mover.
Note. You should grant the PAPP_USER role to all new user IDs for access to the homepage personalization. After running this script, manually remove the role PAPP_USER from any GUEST user ID, because a GUEST user should not be personalizing the common homepage.
Properties
Database Orientation
Pass Type Products Platforms Languages
Target Initial All All All
Task 7-4: Completing Portal Data Conversion
This section discusses:
• Reviewing the Pagelet and Collection Log• Enabling Pagelet Publishing
Task 7-4-1: Reviewing the Pagelet and Collection LogThis section discusses:
• Correcting Logged Issues• Running UPGPT846PP AgainThis step explains how to correct logged issues for Navigation Collections, Portal Registry objects, and Pagelet Wizard objects.
Note. Perform this step only if there are logged issues that need to be resolved for Navigation Collections, Portal Registry Objects, or Pagelet Wizard objects reported from the UPGPT846PP process.
Copyright © 2016, Oracle and/or its affiliates. All Rights Reserved.

Chapter 7 Performing Environment Configuration
151
Correcting Logged Issues
Review the log from running the data conversion UPGPT846PP Application Engine program in the chapter "Applying PeopleTools Changes," task Converting PeopleTools Objects, Completing the PeopleTools Conversionin your PeopleTools upgrade job. Or, if you did not perform a PeopleTools upgrade, run UPGPT846PP now and review the log. Correct the issues from the log using the instructions in the MAIN section comments of the UPGPT846PP program. If you need to print the instructions, you can run PTUCONV.SQR manually.See "Applying PeopleTools Changes," Converting PeopleTools Objects, Completing the PeopleTools Conversionin your PeopleTools upgrade job.
Running UPGPT846PP Again
In this step, you run the UPGPT846PP process again.
Note. The Application Engine process UPGPT846PP can be run repeatedly, if necessary, as you resolve data issues.
To run UPGPT846PP again:1. Run the Application Engine conversion process UPGPT846PP with the upgrade user ID.
The program can be run from the command line with the following:
$PS_HOME\bin\client\winx86\psae -CD dbname -CT dbtype -CS dbservername⇒ -CO oprid -CP oprpswd -R 1 -AI UPGPT846PP
2. Review the log file according to the instructions in the previous step.3. If there are any remaining issues, correct them and rerun UPGPT846PP.4. Repeat steps 2 and 3, if necessary, until there are no remaining issues for Navigation Collections, Portal
Registry objects, or Pagelet Wizard objects.
Properties
Database Orientation
Pass Type Products Platforms Languages
Target All All All All
Task 7-4-2: Enabling Pagelet PublishingThis step enables the creation of homepage pagelets for Navigation Collections and Pagelet Wizard. The script name for your upgrade path is:PTPP_PORTAL_PACK.DMS
Copyright © 2016, Oracle and/or its affiliates. All Rights Reserved.

Performing Environment Configuration Chapter 7
152
Properties
Database Orientation
Pass Type Products Platforms Languages
Target All All All All
Copyright © 2016, Oracle and/or its affiliates. All Rights Reserved.

153
Chapter 8
Finalizing Application Setup Tasks
This chapter discusses:
• Understanding Application Setup Tasks• Truncating Data from Obsolete HCM Tables• Reviewing Oracle SES-Enabled Transactions
Understanding Application Setup Tasks
In this chapter you will perform various tasks to configure application-specific features.
Task 8-1: Truncating Data from Obsolete HCM Tables
As part of your upgrade to Campus Solutions 9.2, you may be creating a separate independent instance of CampusSolutions for the first time; or you may have already separated your Campus Solutions and HCM 9.x databases. As part of your upgrade project, you might want to take this opportunity to minimize unnecessary data sets that are kept in the respective database instances. Certain HCM tables will no longer be used in your Campus Solutions 9.2 instance so the associated table data is no longer needed. Truncating data sets can help reduce data storage needs, provide better data control, and improve system efficiency.To assist in this effort, Oracle provides information and documents to help guide your decisions on which data sets to truncate. For more information about truncating data sets, see "CS - HCM Instance Separation: Data Truncation" on My Oracle Support (Doc ID 1436155.1), HR_Tables_To_Truncate_In_CS92_<Month>_<Year>' spreadsheet.
Properties
Database Orientation
Pass Type Products Platforms Languages
Target All All All All
Copyright © 2016, Oracle and/or its affiliates. All Rights Reserved.

Finalizing Application Setup Tasks Chapter 8
154
Task 8-2: Reviewing Oracle SES-Enabled Transactions
PeopleSoft Search Framework is a PeopleTools indexed search technology that relies on the Oracle Secure Enterprise Search (SES) engine by way of PeopleSoft Integration Broker. PeopleSoft Integration Broker provides the interface between PeopleSoft Search Framework and the Oracle SES engine to deploy PeopleSoft Search, build the indexes, and return the search results.
Important! Before installing Oracle's Secure Enterprise Search (SES), we highly recommend that you review ourdeployment and sizing recommendations provided in "Oracle Secure Enterprise Search Deployment Considerations for PeopleSoft 9.2" (Document ID: 1684035.1) found on My Oracle Support. This article providesinformation regarding the essential hardware for SES and information to help ensure capacity for peak concurrent usage of your PeopleSoft 9.2 environment. Failing to follow these recommendations can impact the performance and stability of your PeopleSoft 9.2 environment.
See the PeopleSoft Search Framework information in the product documentation for PeopleTools: PeopleSoft Search Technology for your new release for details about Oracle SES configuration for PeopleSoft Search.As part of PeopleSoft Search, PeopleSoft HCM offers a number of pre-configured Global Searches and component Keyword Search pages using Oracle SES. You should review the information for Understanding PeopleSoft Search Framework Implementation for HCM in the product documentation for PeopleSoft HCM: Application Fundamentals for your new release to determine the extent to which PeopleSoft Search can be enabled for your environment.In addition, SES is implemented in specific products and functionality where Verity was provided in releases prior to PeopleSoft 9.2. You should review the PeopleSoft HCM product documentation for your new release to determine the extent to which SES is enabled for your environment.
Properties
Database Orientation
Pass Type Products Platforms Languages
Target All All All All
Copyright © 2016, Oracle and/or its affiliates. All Rights Reserved.

155
Chapter 9
Completing Application Changes
This chapter discusses:
• Understanding Database Changes• Enabling Oracle Transparent Data Encryption• Enabling Oracle Fine Grained Auditing• Preparing the Content Provider Registry• Updating the Portal Options Data• Deleting Rename Data• Stamping the Database• Reviewing Change Control• Backing Up Before Testing• Testing Your Copy of Production
Understanding Database Changes
Many changes were made in the previous chapters of this documentation. In this chapter, you complete these changes so that you can begin testing your Copy of Production. By testing your Copy of Production, you ensure that you can still operate day-to-day processes on your new PeopleSoft release.
Task 9-1: Enabling Oracle Transparent Data Encryption
PeopleSoft Change Assistant will display this step only if you are upgrading from PeopleSoft PeopleTools 8.50 orlater. Oracle's Transparent Data Encryption (TDE) feature was disabled at the beginning of the upgrade. If you had TDE enabled prior to the upgrade, then after finishing the final Move to Production pass of the upgrade, you need to re-enable TDE by running scripts in the sequence specified in the following procedure.To re-enable TDE:1. Run PS_HOME\SCRIPTS\POSTUPGTDEPROCESS1.SQL.
The script POSTUPGTDEPROCESS1.SQL performs similarly to the script PREUPGTDEPROCESS.SQL, which you ran at the beginning of the upgrade, to find any tables that are encrypted, generate a list of fields that need to have the PeopleSoft metadata encryption attribute re-enabled, and create the ENCRYPTEDTBLSA project. The ENCRYPTEDTBLSB project is compared with the ENCRYPTEDTBLSA project, and the resulting list of differences between the recfields is input to the script POSTUPGTDEPROCESS2.SQL.See "Planning Your Application Changes," Preserving PeopleTools Configuration Data, Saving Transparent Data Encryption Information.
Copyright © 2016, Oracle and/or its affiliates. All Rights Reserved.

Completing Application Changes Chapter 9
156
2. Run PS_HOME\SCRIPTS\POSTUPGTDEPROCESS2.SQL. The script POSTUPGTDEPROCESS2.SQL generates four scripts, which you will run in the next step to reapply TDE to the records identified by the POSTUPGTDEPROCESS1.SQL. Review the generated scripts (particularly PSTDEREBUILDFUNCIDX.SQL) to make sure that the syntax, sizing, and tablespace information is intact and is not split at the end of a line. If necessary, modify the scripts as needed for your environment.
3. Run the scripts that were generated when you ran POSTUPGTDEPROCESS2.SQL in the following order:
• PSTDEDROPFUNCIDX.SQL• PSTDEREENCRYPT.SQL• PSTDEREBUILDFUNCIDX.SQL• PSTDEREENCRYPTMETADATA.SQL
4. Run PS_HOME\SCRIPTS\POSTUPGTDEVALIDATION.SQL.The script POSTUPGTDEVALIDATION.SQL validates that all tables and columns that were encrypted before the upgrade have maintained encryption. It lists any records that contain encrypted fields but were not included in the ENCRYPTEDTBLSB project. It also sets the value for the TDE algorithm defined within PSOPTIONS.
See the product documentation for PeopleTools: Data Management for your new release for more information about administering PeopleSoft databases on Oracle.
Properties
Database Orientation
Pass Type Products Platforms Languages
Target MTP All Oracle All
Task 9-2: Enabling Oracle Fine Grained Auditing
After completing the final pass of the upgrade, you can re-enable Oracle Fine Grained Auditing (FGA).To re-enable FGA:1. Review the log file generated by running PREUPGFGAREPORT.SQL at the beginning of the upgrade.2. Edit the script PSCREATEFGA.SQL, generated earlier in the upgrade, to remove any entries that no longer
apply to the new release as some of the tables and columns referenced in the script may have been removed during the upgrade.You may want to enable FGA on additional tables and columns in the new release.
3. After editing the script, run the PSCREATEFGA.SQL script to re-enable Oracle Fine Grained Auditing.See "Planning Your Application Changes," Preserving PeopleTools Configuration Data, Saving Oracle Fine Grained Auditing Information.See the product documentation for PeopleTools: Data Management for your new release for more information about administering databases on Oracle.
Copyright © 2016, Oracle and/or its affiliates. All Rights Reserved.
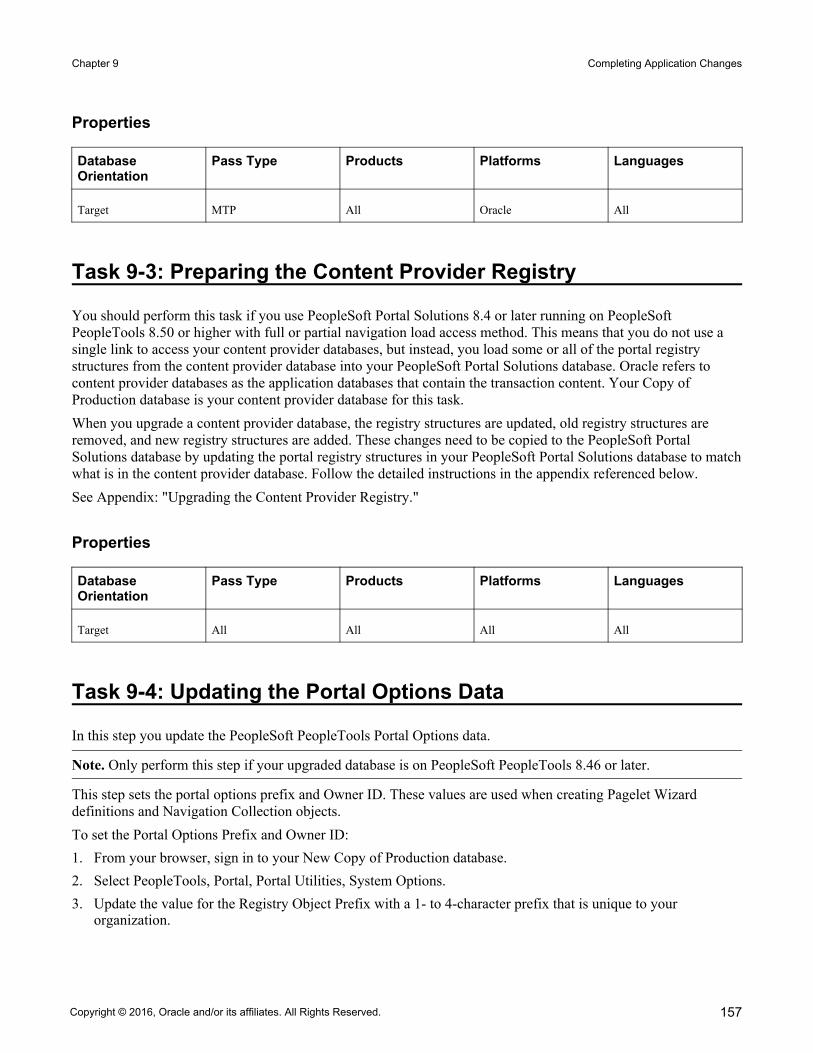
Chapter 9 Completing Application Changes
157
Properties
Database Orientation
Pass Type Products Platforms Languages
Target MTP All Oracle All
Task 9-3: Preparing the Content Provider Registry
You should perform this task if you use PeopleSoft Portal Solutions 8.4 or later running on PeopleSoft PeopleTools 8.50 or higher with full or partial navigation load access method. This means that you do not use a single link to access your content provider databases, but instead, you load some or all of the portal registry structures from the content provider database into your PeopleSoft Portal Solutions database. Oracle refers to content provider databases as the application databases that contain the transaction content. Your Copy of Production database is your content provider database for this task.When you upgrade a content provider database, the registry structures are updated, old registry structures are removed, and new registry structures are added. These changes need to be copied to the PeopleSoft Portal Solutions database by updating the portal registry structures in your PeopleSoft Portal Solutions database to matchwhat is in the content provider database. Follow the detailed instructions in the appendix referenced below.See Appendix: "Upgrading the Content Provider Registry."
Properties
Database Orientation
Pass Type Products Platforms Languages
Target All All All All
Task 9-4: Updating the Portal Options Data
In this step you update the PeopleSoft PeopleTools Portal Options data.
Note. Only perform this step if your upgraded database is on PeopleSoft PeopleTools 8.46 or later.
This step sets the portal options prefix and Owner ID. These values are used when creating Pagelet Wizard definitions and Navigation Collection objects.To set the Portal Options Prefix and Owner ID:1. From your browser, sign in to your New Copy of Production database.2. Select PeopleTools, Portal, Portal Utilities, System Options.3. Update the value for the Registry Object Prefix with a 1- to 4-character prefix that is unique to your
organization.
Copyright © 2016, Oracle and/or its affiliates. All Rights Reserved.

Completing Application Changes Chapter 9
158
Note. Do not use PAPP, PAPX, PAPQ, PAPI, PRTL, EO, or PT. Do not use any product line specific prefix (such as CR, HC, EP, or CI). Do not use a blank value.
4. Enter the Owner ID value with your organization's specific owner ID.
Note. The Owner ID is a translate value on the PeopleSoft PeopleTools field OBJECTOWNERID. Do not useany delivered product Owner ID. If you do not have an Owner ID, then either create one, or leave the Owner ID value as a blank space.
5. Click Save.
Properties
Database Orientation
Pass Type Products Platforms Languages
Target MTP All All All
Task 9-5: Deleting Rename Data
After completing the final Move to Production pass, delete all the data stored in the PSOBJCHNG table. Do not delete this data if you have not completed your final Move to Production pass. The application rename data storedin the PSOBJCHNG table must be deleted before starting your next PeopleTools-only upgrade. The build process looks in this table when running alter renames.Run the following SQL on your Target database:DELETE FROM PSOBJCHNG
Important! Perform this task only once, after you complete your final Move to Production pass.
Properties
Database Orientation
Pass Type Products Platforms Languages
Target MTP All All All
Task 9-6: Stamping the Database
In this step, you set the database to the release level of the Demo database. The values that you enter here appear whenever you view the Help, About PeopleTools dialog.To stamp the database:1. Launch PeopleSoft Application Designer on your Copy of Production database using the new PeopleSoft
release.
Copyright © 2016, Oracle and/or its affiliates. All Rights Reserved.

Chapter 9 Completing Application Changes
159
2. Select Tools, Upgrade, Stamp Database.3. Fill in all three of the PeopleSoft Release fields with the appropriate value for your product line and release
number:Campus Solutions, 9.20.00
4. The release you are upgrading to is not a service pack, therefore enter 0 in the service pack field.5. Click Stamp.6. Close PeopleSoft Application Designer.
Properties
Database Orientation
Pass Type Products Platforms Languages
Target All All All All
Task 9-7: Reviewing Change Control
Earlier in the upgrade process, in the beginning of the chapter "Applying PeopleTools Changes," the Change Control feature was disabled. In this step, you re-enable Change Control, if your site uses this functionality.To turn on Change Control:1. Sign in to the Target database using PeopleSoft Application Designer.2. Select Tools, Change Control, Administrator.
The following example shows the options available on the Change Control Administrator dialog box:
Change Control Administrator dialog box
3. Set "Use change control locking" and "Use change control history" according to your site specifications.
Note. Move to Production: The Change Control feature slows down copy functions. The large copy projects are only executed during the initial pass, and the feature is only disabled during the initial pass. If you enable the feature at this point, it will remain enabled during future test Move to Production passes.
See "Applying PeopleTools Changes," Turning Off Change Control.
Copyright © 2016, Oracle and/or its affiliates. All Rights Reserved.

Completing Application Changes Chapter 9
160
Properties
Database Orientation
Pass Type Products Platforms Languages
Target Initial All All All
Task 9-8: Backing Up Before Testing
Back up your Copy of Production database now. This enables you to restart your upgrade from this point, should you experience any database integrity problems during the remaining tasks in the upgrade process.
Properties
Database Orientation
Pass Type Products Platforms Languages
Target All All All All
Task 9-9: Testing Your Copy of Production
In this task, you test your Copy of Production. Testing your Copy of Production will ensure that you can still operate your day-to-day processes on your new release. After you have reviewed your DDDAUDIT and SYSAUDIT reports, verify that the system is working properly by reviewing the system online. After you are comfortable that the system is working properly, you can perform the Test Move to Production upgrade pass.See Getting Started on Your PeopleSoft Upgrade, Appendix: "Planning for Upgrade Testing."
Properties
Database Orientation
Pass Type Products Platforms Languages
Target All All All All
Copyright © 2016, Oracle and/or its affiliates. All Rights Reserved.
161
Chapter 10
Applying Changes to the Production Database
This chapter discusses:
• Understanding the Move to Production• Testing the Move to Production• Testing Once More• Performing the Move to Production
Understanding the Move to Production
Once you complete all of the necessary tasks to launch your system into production, you are ready to begin your Test Move to Production passes or to move your system into production.
Task 10-1: Testing the Move to Production
This section discusses:
• Understanding the Test Move to Production Passes• Understanding the Test Move to Production Steps• Creating a New Change Assistant Job
Understanding the Test Move to Production PassesEverything you have done to this point is the initial pass of the upgrade process. Now you are ready to start the Test Move to Production pass. The initial pass is very time consuming and requires a lot of analysis at different steps of the process to troubleshoot issues. The Test Move to Production pass is a different series of steps, which includes a subset of the previous tasks, and takes advantage of the tasks performed during the first upgrade pass.You should perform as many Test Move to Production passes as necessary to work out any issues and to be comfortable with the process. During each Test Move to Production pass you will be able to refine the process so that you can save time and avoid manual processes. These test passes will also let you know how long the processtakes so that you can plan your production downtime for your Move to Production weekend.
Copyright © 2016, Oracle and/or its affiliates. All Rights Reserved.

Applying Changes to the Production Database Chapter 10
162
Task 10-1-1: Understanding the Test Move to Production StepsThe following text is a high level view of what you will be doing in the Move to Production (MTP) test pass. In the remaining steps in this task, you will prepare your test environment. For example, you may need to move some scripts generated in the initial pass to a new PeopleSoft Change Assistant staging directory. Next you will create a new PeopleSoft Change Assistant job, setting the Apply Type property to Move to Production. That will give you a job with the steps filtered to include only those steps that apply to the MTP test pass. From that point forward, you will simply follow the steps as they exist in your new job.One of those first steps will be to take a Copy of Production. This second Copy of Production is sometimes referred to as the "New Copy of Production." The first Copy of Production, or "old" Copy of Production, will nowbe the Source database. (It was the Target database in the initial test pass.) The New Copy of Production is now the Target database.The steps executed in the MTP pass vary in several ways. Many of the tasks and steps in the initial test pass will be replaced in the MTP pass with PeopleSoft Data Mover export and import scripts. In the initial pass, some stepsrequired you to make functional decisions and take time to manually set up data. That data can be copied from thefirst database to the next, saving you setup time and eliminating the chance for manual error or typos.Also, the MTP pass does not repeat the database compare/copy steps. You made the decisions once; there is no need to repeat these steps. Instead, a PeopleSoft Data Mover script, MVPRDEXP, will export all of the tables thatcontain the PeopleSoft PeopleTools objects like records and PeopleCode from the first database. Another PeopleSoft Data Mover script, MVPRDIMP, will import those tables into the second database. Anything you have done to PeopleSoft PeopleTools objects while executing or testing the first pass—copied objects from the Demo database, reapplied customizations, applied updates from the My Oracle Support website—will be moved to the second Copy of Production with these scripts.Another important difference in the MTP pass is the handling of SQL scripts that create and alter tables. In the initial pass, you generate and sometimes edit, then execute the SQL scripts. In the MTP pass, you may be able to skip the generation steps and use the SQL that you previously generated. This is another way to save time in your critical go-live window and is the ultimate goal, but it is an incremental process to get to that point.In the first MTP pass, you must regenerate the SQL. There are small differences between the initial and MTP passes that require the SQL to be regenerated in at least one MTP pass. The PeopleSoft Change Assistant templates are generated with the steps set this way.In subsequent MTP passes, you may choose to "turn off" the generation steps if possible. If you have not changed any records at the end of one MTP pass, then you can reuse the SQL in your next pass. If you have done anything to change records, you should generate the SQL again. This can include changes such as applying updates from My Oracle Support that involve record changes or making additional customizations to records.If you choose to skip some of these steps, do one of the following: mark the step complete in your job, or change the step properties in the template so that the step will never show up in your MTP filtered job again. To change the step properties, double-click the step to open the Step Properties dialog, and change the Apply Type property to Initial Pass. In addition, copy the SQL scripts from the previous pass output directory to the new pass output directory. PeopleSoft Change Assistant will look for the SQL scripts in the output directory set on the job's Database Configuration. Therefore, ensure that PeopleSoft Change Assistant will find the scripts when it tries to run them. The steps that are eligible for this treatment will contain Move to Production documentation notes indicating this option.If you have made any changes to your trees, tree structures, or PS/Query objects since the upgrade began, you may want information on how to preserve those changes.See Appendix: "Preserving Queries and Tree Objects."
Copyright © 2016, Oracle and/or its affiliates. All Rights Reserved.

Chapter 10 Applying Changes to the Production Database
163
Properties
Database Orientation
Pass Type Products Platforms Languages
Target All All All All
Task 10-1-2: Creating a New Change Assistant JobYou need to create a new PeopleSoft Change Assistant job for each test Move to Production pass.To create a new PeopleSoft Change Assistant job:1. Create new output and staging directories.
Oracle recommends that you use new output and staging directories for each new test pass.2. From PeopleSoft Change Assistant, select Tools, Options and specify the new output and staging directories
on the General tab of the Update Manager Options page.
Note. You must be in the Update Manager action.
3. Select File, Open Database to modify the database environment, if necessary.If the database is not yet defined, select File, New Database and define the database.
4. Select Tools, Upgrade Application.5. On the Change Package Settings page, select the download directory, for Apply Type select Move to
Production, and click Next.6. On the Select Upgrade Target Database page, select the target database and click Next.7. On the Select Upgrade Source Database page, select the source database and click Next.8. On the Application Upgrade page, select the packages in the download directory to apply and click Next.9. Review the checks on the Check Compatibility page and click Next.10. Review the Apply Summary page and click Finish.
A new upgrade job is created and will start running automatically. The new job will contain steps that were not in the initial upgrade pass and will exclude some steps that were in the initial upgrade pass, based on the step properties.
11. To view the documentation, select Edit, Set Documentation Directory.12. Select the directory where the documentation is located and click OK.13. Continue running the upgrade job.
Properties
Database Orientation
Pass Type Products Platforms Languages
Target All All All All
Copyright © 2016, Oracle and/or its affiliates. All Rights Reserved.

Applying Changes to the Production Database Chapter 10
164
Task 10-2: Testing Once More
As in any implementation project, you must consider planning, resources, development, and training. Testing alsoneeds to be an integral part of your implementation project. Testing your database once more, after you have completed the upgrade, ensures that you can still operate your day-to-day processes on your new PeopleSoft release.The level of testing in this task will focus primarily on the strategies to employ before moving into production.
Properties
Database Orientation
Pass Type Products Platforms Languages
Target All All All All
Task 10-3: Performing the Move to Production
When you are ready, you can move the system into production. Take your system out of production and perform all of the steps involved in testing the Move to Production against your production database.See Testing the Move to Production.
Properties
Database Orientation
Pass Type Products Platforms Languages
Target MTP All All All
Copyright © 2016, Oracle and/or its affiliates. All Rights Reserved.

165
Chapter 11
Appendices
Understanding Appendices
The appendices portion of this documentation contains information you may need for your upgrade. The appendices have been referenced throughout the upgrade documentation for further understanding of the upgrade you are performing. Oracle recommends that you read each appendix as it is referenced in the documentation.
Copyright © 2016, Oracle and/or its affiliates. All Rights Reserved.


167
Appendix A
Preserving Queries and Tree Objects
This appendix discusses:
• Understanding Preserving Queries and Trees• Preparing the Database• Creating a New Project• Comparing the New Project• Copying the Project• Testing the Project• Re-Exporting the PeopleTools Tables
Understanding Preserving Queries and Trees
This appendix contains information for preserving queries, trees, and tree structures. At the beginning of your upgrade, you should have informed your end-users and development team that your PeopleSoft system was frozen, meaning that no changes should have been made to any PeopleSoft PeopleTools tables or objects including queries, trees, and tree structures. The freeze on PeopleSoft PeopleTools changes is important because you will lose any changes to these objects made during an upgrade to PeopleSoft PeopleTools tables. Occasionally, however, end-users may have to make critical changes to trees, tree structures, and PS/Query objects. If this has happened in your system, you can perform a process to preserve those additions and changes totrees, tree structures, and queries. You will have to work with your end-users and developers to obtain a list of queries, trees, and tree structures that you need to preserve.You will run through the test Move to Production (MTP) steps several times for practice and testing purposes. Please note that you have the option to perform the preserving queries and trees procedure during each of your test Move to Production runs, but you must perform it during the last run of the test Move to Production. If you donot perform this procedure during your last run to preserve the trees, tree structures, and queries that have been changed since the beginning of your upgrade, they will be lost.
Note. The process outlined in this appendix to preserve trees and queries should be performed prior to data conversion so that any additional conversion would be taken care of by the appropriate data conversion programs.
This appendix includes instructions to prepare your database and create a project on which to preserve your queries, trees, and tree structure changes.
Task A-1: Preparing the Database
In this step, you create a new copy of your current production database, perform steps on the new copy, and run scripts against the new copy to update the release level.
Copyright © 2016, Oracle and/or its affiliates. All Rights Reserved.

Preserving Queries and Tree Objects Appendix A
168
To prepare the database:1. At the beginning of the test Move to Production, you should make a new copy of your current production
database. To preserve queries and trees, you need to make not only that Copy of Production but also an additional copy of your current production database. For clarity, Oracle refers to this additional copy of your production database as the Tree/Query Copy of Production database. So now you should have a Copy of Production database and a Tree/Query Copy of Production database.
2. Perform the test Move to Production on your Copy of Production database.3. To obtain the queries and trees that you want to preserve, the Tree/Query Copy of Production database needs
to be at the same PeopleSoft PeopleTools release level as the Copy of Production database on which you just completed the test Move to Production. Go to My Oracle Support and search for the PeopleSoft PeopleTools upgrade homepage for your new PeopleSoft PeopleTools release. Follow those instructions to upgrade your Tree/Query Copy of Production database to the new PeopleSoft PeopleTools release.
Task A-2: Creating a New Project
Now that your Tree/Query Copy of Production is at the same release as your Copy of Production database, you create a project in the Tree/Query Copy of Production that contains all of the queries, trees, and tree structures that you want to preserve.To create a new project:1. Sign in to the Tree/Query Copy of Production using a valid PeopleSoft user ID and launch PeopleSoft
Application Designer.2. Select File, New...3. Select Project for Object Type.4. Select File, Save Project and enter a project name; for example, PRESERVED.
5. Select the Upgrade tab in PeopleSoft Application Designer.
Note. Queries and trees do not appear in projects under the Development tab in PeopleSoft Application Designer. To see the queries and trees that you will insert into the PRESERVED project in the next step, you must make sure that you are using the Upgrade view of PeopleSoft Application Designer.
6. Select Insert, Definitions into Project...7. Select Queries from the Definition Type drop-down list box and click Insert.8. Using your list of identified queries that need to be preserved, highlight each one of those queries in the
PeopleSoft Application Designer list.You can highlight more than one by holding down the Control (CTRL) key while you click the name of the query.
9. After you have highlighted all of the queries that you want to preserve, click Insert, then click Close.Under the PRESERVED project name in the Upgrade view of PeopleSoft Application Designer, you will see Queries as an object type in the project.
10. Double-click Queries under the PRESERVED project.A list of all of the queries to preserve appears in the right-hand window of PeopleSoft Application Designer.
11. Select File, Save Project.12. Repeat steps 6 through 11 for trees and tree structures.
Now your PRESERVED project should contain all of the queries, trees, and tree structures that you want to
Copyright © 2016, Oracle and/or its affiliates. All Rights Reserved.

Appendix A Preserving Queries and Tree Objects
169
preserve.
Task A-3: Comparing the New Project
In this step, you compare the queries, trees, and tree structures that are in your PRESERVED project against your Copy of Production database. Because the tree objects in your PRESERVED project are not comparable objects in PeopleSoft Application Designer, you must manually compare the tree objects that you want to preserve. During the query and tree structure compare process, the Application Upgrade utility sets the project flags. These flags determine whether the following actions will occur:
• Changes will be performed on the Copy of Production (Target) database when you perform the export and copy.
• Changes will be tagged as Copy or Delete operations.• The project flags will be set to automatically take these actions or not.These settings are determined based on whether or not the objects in the project currently exist on the Copy of Production (Target) database.To compare the new project:1. Sign in to the Tree/Query Copy of Production using a valid PeopleSoft User ID and launch PeopleSoft
Application Designer.2. Select File, Open...3. For Definition, select Project and click Open to display the list of projects.4. Select the PRESERVED project and click Open.5. Select Tools, Compare and Report.6. Sign in to your Copy of Production.7. From the Object Type box, select Queries and Tree Structures.
8. Click Options…9. Select PeopleSoft Vanilla for the Target Orientation.10. Select Project for the Compare Type.11. Verify that the Compare Report output directory is set to the correct location.12. Select the Report Filter tab and set the report filter check boxes appropriately for your compare.13. Click OK.14. Select Compare.15. Review the compare reports for queries and tree structures. In addition, perform a manual compare of the trees
that you want to preserve. Based on the results of this review, set the Action and Upgrade check box appropriately in the PRESERVED project.
Task A-4: Copying the Project
In the following steps, you copy the PRESERVED project to the Target database. This is the Copy of Production database on which you ran the test Move to Production.To copy the project:1. Sign in to the Tree/Query Copy of Production using a valid PeopleSoft User ID and launch PeopleSoft
Copyright © 2016, Oracle and/or its affiliates. All Rights Reserved.

Preserving Queries and Tree Objects Appendix A
170
Application Designer.2. Select File, Open...3. For Definition, select Project and click Open to display the list of projects.4. Select the PRESERVED project and click Open.5. Select Tools, Upgrade, Copy.6. Sign in to your Copy of Production database.7. Make sure that the Reset Done Flags and Copy Project check boxes are selected.8. Click Select All.9. Click Copy.10. Using the Upgrade view of the PRESERVED project in PeopleSoft Application Designer, review the Done
flags in the project to make sure that all of the objects that you wanted to preserve were copied to the Target database.
Task A-5: Testing the Project
Now that the queries, trees, and tree structures that you wanted to preserve are in the Copy of Production database, you must test and retest and make any necessary changes if the test results are not what you expected.
Task A-6: Re-Exporting the PeopleTools Tables
Once you are satisfied with the test results, you must re-export the PeopleSoft PeopleTools tables to actually preserve the queries, trees, and tree structures. During your test Move to Production, you ran MVPRDEXP.DMS to export the PeopleSoft PeopleTools tables. You will use the output files created from running this job as input files during your Move to Production. Because these files were created before copying the queries, trees, and tree structures that you wanted to preserve, the files do not contain the preserved objects, so you must run the MVPRDEXP.DMS script again. Running the MVPRDEXP.DMS script again ensures that you have the most current PeopleSoft PeopleTools tables.To re-export the PeopleTools tables:1. As a PeopleSoft user, launch PeopleSoft Data Mover against your Copy of Production database and run the
following script:\PS_HOME\SCRIPTS\MVPRDEXP.DMS
2. Use the output files created during your final Move to Production.
Copyright © 2016, Oracle and/or its affiliates. All Rights Reserved.

171
Appendix B
Upgrading the Content Provider Registry
This appendix discusses:
• Understanding Content Provider Registry Upgrade• Copying Your Portal Solutions Database• Upgrading PeopleTools for Portal Solutions • Updating Registry Permission Lists• Creating the Portal Project• Comparing the Portal Project• Reviewing the Portal Project• Copying the Portal Project• Copying the Portal Project to Production• Deleting Obsolete Folders• Updating Registry Folder Permissions
Understanding Content Provider Registry Upgrade
You should perform this task if you use PeopleSoft Portal Solutions 8.4 or later running on PeopleSoft PeopleTools 8.50 or later with the full navigation load access method. This means that you do not use a single link to access your content provider database, but instead load some or all of the portal registry structures from thecontent provider database into your PeopleSoft Portal Solutions database. Oracle refers to its application databases that contain the transaction content as Content Provider databases. Your Copy of Production database isyour Content Provider database for this task.When you upgrade a content provider database, the registry structures are updated, removed, and added. These changes need to be copied to the PeopleSoft Portal Solutions database. This task will update the portal registry structures in your PeopleSoft Portal Solutions database to match what is in the Content Provider database. This is accomplished by the following:
• Upgrade the PeopleSoft PeopleTools on a copy of the PeopleSoft Portal Solutions database.This allows a project compare to run between the PeopleSoft Portal Solutions and the Content Provider database.
• Create a portal project in the PeopleSoft Portal Solutions database containing all of the existing Content Provider registry structures.Copy the portal project (definition only) to the Content Provider database.
• Create a portal project in the Content Provider database containing all of the current Content Provider registry structures, then merge the project definition copied from the PeopleSoft Portal Solutions database into this project.
Copyright © 2016, Oracle and/or its affiliates. All Rights Reserved.

Upgrading the Content Provider Registry Appendix B
172
You will have a complete list of all registry structures for the Content Provider, including what is current and what should be deleted.
• Compare the complete list of registry structures in the Content Provider database to what exists in the PeopleSoft Portal Solutions, using project compare.This marks the missing registry structures as delete and the updated or added registry structures as copy in the portal project definition.
• Copy the portal project from the Content Provider database to the PeopleSoft Portal Solutions database.This deletes, updates, and adds registry structures to the PeopleSoft Portal Solutions database, which syncs it up with what is current in the Content Provider database.
If you use PeopleSoft Portal Solutions 8 SP2, Oracle recommends that you upgrade your PeopleSoft Portal Solutions to the latest available release.If you do upgrade your PeopleSoft Portal Solutions database, you must be on PeopleSoft PeopleTools 8.46 or later.
Note. If you use PeopleSoft Portal Solutions 8.4 you do not need to upgrade to PeopleSoft Portal Solutions 8.8. You can still upgrade to PeopleSoft PeopleTools 8.46 or later.
See Enterprise Portal 8.1x – Managing Information Architecture for additional information on this topic. Go to My Oracle Support and search for Enterprise Portal 8.1x – Managing Information Architecture.In this appendix, you load your new Portal Registry definitions from your Copy of Production database to a copy of your PeopleSoft Portal Solutions database.
Note. You must complete the tasks in the appendix for each of your separately installed PeopleSoft Portal Solutions databases that correspond to one of the four Portal Registry definitions: EMPLOYEE, CUSTOMER, SUPPLIER, and PARTNER. If your installed PeopleSoft Portal Solutions uses all the registries, then complete this task for each of the portal registries using the same copy of the single PeopleSoft Portal Solutions database.
In the first task of this appendix, you create a copy of your PeopleSoft Portal Solutions database. You use this copy for all subsequent steps for the initial and test Move to Production upgrade passes. For the final Move to Production, do not make a copy. Instead perform the steps on the production PeopleSoft Portal Solutions database.This document uses the term "target PeopleSoft Portal Solutions database" to refer to the PeopleSoft Portal Solutions database used in the upgrade steps. Use the table below to determine the correct version of your PeopleSoft Portal Solutions database for each upgrade pass:
Upgrade Pass Target PeopleSoft Portal Solutions Database
Initial pass Copy of the PeopleSoft Portal Solutions database
Test Move to Production Copy of the PeopleSoft Portal Solutions database
Final Move to Production PeopleSoft Portal Solutions production database
Task B-1: Copying Your Portal Solutions Database
You initially upgrade the Content Provider registry on a copy of your PeopleSoft Portal Solutions database, then test the results of the upgrade. During your test Move to Production, you perform this task against another Copy of the PeopleSoft Portal Solutions.
Copyright © 2016, Oracle and/or its affiliates. All Rights Reserved.
Appendix B Upgrading the Content Provider Registry
173
Create a copy of your current PeopleSoft Portal Solutions production database now. Use this database as your target PeopleSoft Portal Solutions database.
Note. During your final Move to Production, you copy the registry definitions directly to your PeopleSoft Portal Solutions production database. Therefore, you do not need to execute this step during your final Move to Production.
Task B-2: Upgrading PeopleTools for Portal Solutions
During the initial upgrade pass, your PeopleSoft Portal Solutions database must run on the same PeopleSoft PeopleTools release level as your Copy of Production database so that you can do the compare step. Because you do not need to run the compare step during your Move to Production passes, you can skip this task during Move to Production passes.If the release level of PeopleSoft PeopleTools on your target PeopleSoft Portal Solutions database is not the same as your Copy of Production database release level, upgrade your PeopleSoft PeopleTools now.Go to My Oracle Support and search for the PeopleSoft PeopleTools upgrade documentation for the new release.
Task B-3: Updating Registry Permission Lists
This section discusses:
• Understanding Registry Permission List Updates• Updating the Portal Registry• Deleting the Database Cache
Understanding Registry Permission List UpdatesThis task applies only to the initial upgrade pass.Earlier in this upgrade you copied portal registry data from the Demo database to your Copy of Production database. You must update this registry data to include your permission list changes. After updating the portal registry permission lists, delete the database cache.This process takes between a few minutes and a few hours, depending on the volume of the portal data.
Note. The user ID that invokes this process must have the security role Portal Administrator, or the process may terminate with an abend.
Note. You must have a process scheduler started for your Copy of Production database.
Task B-3-1: Updating the Portal RegistryFollow the steps below to update your portal registry permission lists.To update the portal registry permission lists:1. On your Copy of Production database, select PeopleTools, Portal, Portal Security Sync.2. Select the Add a New Value tab.
Copyright © 2016, Oracle and/or its affiliates. All Rights Reserved.

Upgrading the Content Provider Registry Appendix B
174
3. Add a run control as follows:a. Enter a value for the run control ID. The run control ID is SECURITY_SYNC_XXXX, where XXXX
represents the portal registry name (EMPLOYEE, CUSTOMER, SUPPLIER, or PARTNER).b. Click Add.
4. Enter a value for the portal name.This value must match the portal registry name that you used to replace the XXXX in the run control ID.
5. Click Save.6. Click Run.7. Set up the process scheduler information and click OK.8. Click the Process Monitor link to view the progress of the process.
Task B-3-2: Deleting the Database CacheFollow the steps below to delete the database cache.To delete the database cache:1. Delete the Copy of Production database application server cache.2. Stop and restart the Copy of Production database web server service.
Task B-4: Creating the Portal Project
This section discusses:
• Understanding Portal Project Creation• Creating the Target Portal Solutions Project• Cleaning the Target Portal Solutions Project• Deleting the Target Portal Solutions Database Cache• Copying the Target Portal Solutions Project Definition• Creating the Copy of Production Portal Project• Cleaning the Copy of Production Portal Project• Deleting the Copy of Production Database Cache
Understanding Portal Project CreationThis task applies only to the initial upgrade pass. In this task, you create and modify a project on your target PeopleSoft Portal Solutions database. Then you copy the project definition to the Copy of Production database, where you further modify the project.
Task B-4-1: Creating the Target Portal Solutions ProjectFollow the steps below to create the target PeopleSoft Portal Solutions project.To create the target PeopleSoft Portal Solutions project:1. Launch PeopleSoft Application Designer and sign in to your target PeopleSoft Portal Solutions database.
Copyright © 2016, Oracle and/or its affiliates. All Rights Reserved.

Appendix B Upgrading the Content Provider Registry
175
2. Select Insert, Definitions into Project…3. Select the following values on the Insert into Project dialog box, as illustrated by this example:
a. In the Definition Type field, select Portal Registry Structures.
b. Leave the Portal Name field blank.c. In the Owner ID field, select All Owners.
d. Do not select any values in the Related Definitions field.
Insert into Project dialog box
4. Click Insert.5. Click Select All, and then click Insert again6. Click Close.
7. From PeopleSoft Application Designer, select File, Save Project As….8. Enter the project name PORTAL_PA84X_REGISTRY.
9. Close PeopleSoft Application Designer.
Task B-4-2: Cleaning the Target Portal Solutions ProjectIn this step, you clean the target PeopleSoft Portal Solutions Project so that it contains only the existing Content Provider registry structure content references.To clean the target PeopleSoft Portal Solutions project:1. In your PeopleSoft Portal Solutions database, select PeopleTools, Portal, Portal Utilities, Clean Portal Project.
Copyright © 2016, Oracle and/or its affiliates. All Rights Reserved.

Upgrading the Content Provider Registry Appendix B
176
Warning! Do not follow the instructions on the Clean Portal Project page. Instead, follow the instructions below.
2. Add the run control ID CLEAN_PORTAL_XXXXXXXX where XXXXXXXX represents the portal definition name: EMPLOYEE, CUSTOMER, SUPPLIER or PARTNER for example.
3. In the Project Name field, enter the project name PORTAL_PA84X_REGISTRY.
4. Enter a value in the Portal Name field; EMPLOYEE for example.5. Enter a value in the Content Provider Name field; CRM for example.
Note. Before running the Clean Portal Project you must enter the node URI text for the message node that youselected.
6. Select Full Navigation.
7. Click Save.8. Click Run.9. Set up the Process Scheduler information and click OK.10. Select the Process Monitor link to view the progress of the process.
Task B-4-3: Deleting the Target Portal Solutions Database CacheIn this step, you delete the target PeopleSoft Portal Solutions database cache.To delete the target PeopleSoft Portal Solutions database cache:1. On your target PeopleSoft Portal Solutions database, launch Configuration Manager.2. On the Startup tab, click Purge Cache Directories.3. Select the target PeopleSoft Portal Solutions database name.4. Click Delete.5. Click OK.6. Click Close.7. Click OK to close Configuration Manager.
Task B-4-4: Copying the Target Portal Solutions Project DefinitionIn this step, you copy the target PeopleSoft Portal Solutions project definition to your Copy of Production database.To copy the target PeopleSoft Portal Solutions project definition:1. Using PeopleSoft Data Mover, sign in to your target PeopleSoft Portal Solutions database.2. Run the following PeopleSoft Data Mover script:
PS_APP_HOME\SCRIPTS\UVUPX10E.DMS
3. Close PeopleSoft Data Mover.4. Using PeopleSoft Data Mover, sign in to the Copy of Production database.5. Run the following PeopleSoft Data Mover script:
PS_APP_HOME\SCRIPTS\UVUPX10I.DMS
Copyright © 2016, Oracle and/or its affiliates. All Rights Reserved.

Appendix B Upgrading the Content Provider Registry
177
6. Close PeopleSoft Data Mover.
Task B-4-5: Creating the Copy of Production Portal ProjectCreate a project containing all Portal Registry data on your Copy of Production database.To create the Copy of Production Portal project:1. Launch PeopleSoft Application Designer and sign in to your Copy of Production database.
2. Select Insert, Definitions into Project….3. In the Definition Type field, select Permission Lists, as shown in the following example:
Insert into Project dialog box: Definition Type Permission Lists
4. Click Insert.5. Click Select All, and then click Insert again.6. Select the following values, as shown in the example:
a. In the Definition Type field, select Portal Registry Definitions.
b. In the Name field, enter the PeopleSoft Portal Solutions database's default portal name (EMPLOYEE, CUSTOMER, SUPPLIER or PARTNER).
c. In the Owner ID field, select All Owners.
Copyright © 2016, Oracle and/or its affiliates. All Rights Reserved.
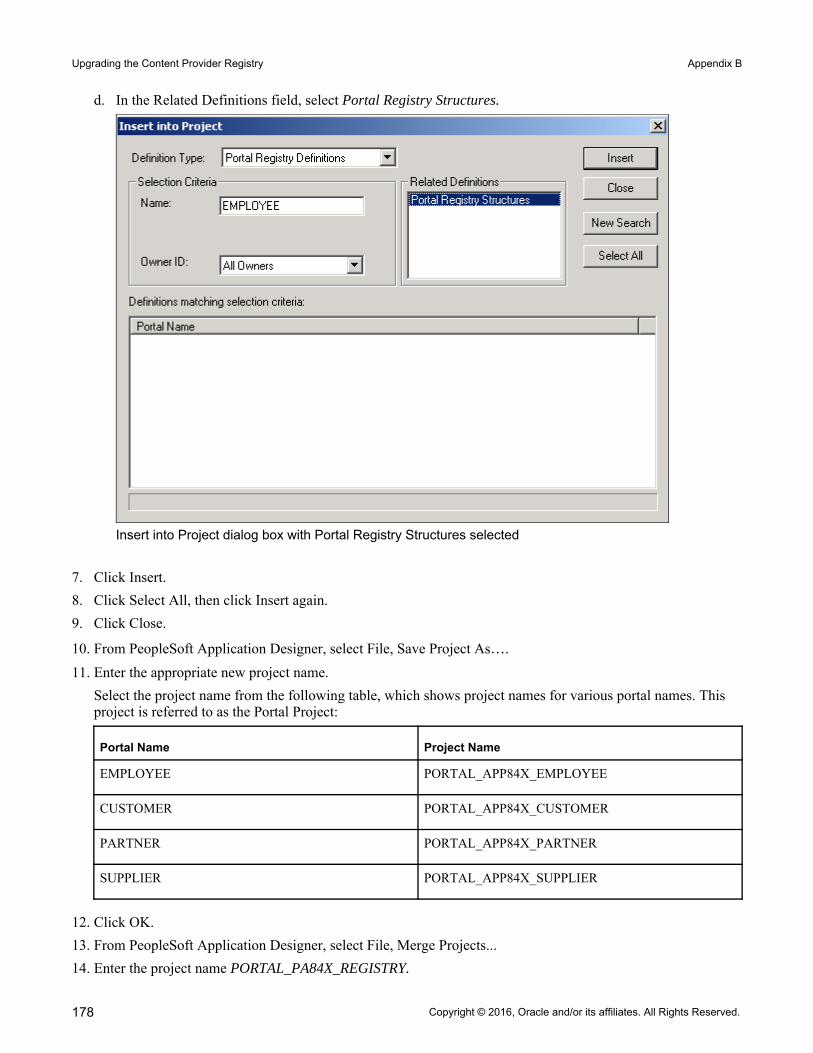
Upgrading the Content Provider Registry Appendix B
178
d. In the Related Definitions field, select Portal Registry Structures.
Insert into Project dialog box with Portal Registry Structures selected
7. Click Insert.8. Click Select All, then click Insert again.9. Click Close.
10. From PeopleSoft Application Designer, select File, Save Project As….11. Enter the appropriate new project name.
Select the project name from the following table, which shows project names for various portal names. This project is referred to as the Portal Project:
Portal Name Project Name
EMPLOYEE PORTAL_APP84X_EMPLOYEE
CUSTOMER PORTAL_APP84X_CUSTOMER
PARTNER PORTAL_APP84X_PARTNER
SUPPLIER PORTAL_APP84X_SUPPLIER
12. Click OK.13. From PeopleSoft Application Designer, select File, Merge Projects...14. Enter the project name PORTAL_PA84X_REGISTRY.
Copyright © 2016, Oracle and/or its affiliates. All Rights Reserved.
Appendix B Upgrading the Content Provider Registry
179
This merges the objects from the PORTAL_PA84X_REGISTRY project into your newly created Portal Project.
15. Select File, Save Project to save the updated Portal Project.16. Close PeopleSoft Application Designer.
Task B-4-6: Cleaning the Copy of Production Portal ProjectIn this step, you clean the Copy of Production Portal project so that it contains only the Content Provider registry data.
Important! Before using the Copy of Production Portal project, you must run the Clean Portal Project on the Copy of Production database. Follow the directions on the Clean Portal Project Page.
To clean the Copy of Production Portal project:1. In your Copy of Production database, select PeopleTools, Portal, Portal Utilities, Clean Portal Project.2. Add the run control ID, CLEAN_PORTAL_XXXXXXXX, where XXXXXXXX represents the portal definition
name; EMPLOYEE, CUSTOMER, SUPPLIER, or PARTNER, for example.3. In the Project Name field, enter the Portal Project name that you created in the Creating the Copy of
Production Portal Project step (PORTAL_APP84X_<your portal name>). 4. Enter a value in the Portal Name field; EMPLOYEE, for example.5. Enter a value in the Content Provider Name field; CRM, for example.
Important! Before running the Clean Portal Project, you must enter the Node URI text for the Message Node you selected.
6. Select Full Navigation.
7. Click Save.8. Click Run.9. Set up the Process Scheduler information and click OK.10. Select the Process Monitor link to view the progress of the process.
Task B-4-7: Deleting the Copy of Production Database CacheIn this step, you delete the Copy of Production database cache.To delete the Copy of Production database cache:1. On your Copy of Production database, start Configuration Manager.2. On the Startup tab, click Purge Cache Directories.3. Select the Copy of Production database name.4. Click Delete.5. Click OK.6. Click Close.7. Click OK to close Configuration Manager.
Copyright © 2016, Oracle and/or its affiliates. All Rights Reserved.
Upgrading the Content Provider Registry Appendix B
180
Task B-5: Comparing the Portal Project
This task applies only to the initial upgrade pass.In this step, you compare the Portal project that you created in the previous step and then review the compare results. This will enable you to adjust the Portal project as necessary before copying it into the PeopleSoft Portal Solutions database.To compare the Portal project:1. Launch PeopleSoft Application Designer and sign in to your Copy of Production database.2. Select Tools, Compare and Report....3. Enter the Portal Project name that you specified in the Creating the Copy of Production Portal Project step
(PORTAL_APP84X_<your portal name>).4. Enter the database name of your target PeopleSoft Portal Solutions database, and the user ID and password.5. Click the Options button.6. In the Compare Type field, select Project, and click OK.7. Select all object types and click OK.8. Close PeopleSoft Application Designer.
Task B-6: Reviewing the Portal Project
This task applies only to the initial upgrade pass.Review the Portal project (PORTAL_APP84X_<your portal name>) on the Copy of Production database, lookingfor customizations that you have applied to your database. Object definitions that you changed have *Changed or *Unchanged in the Target column of the compare report. The asterisk (*) indicates that the change was not made by Oracle. Review each of these objects carefully. If Oracle delivered the object, the Source column of the report will read Changed. Note the changes that you made to the object. After you complete the upgrade, when you test the system, you can decide whether you still need the customization. You can reapply the customization at that time.See Appendix: "Using the Comparison Process."
Task B-7: Copying the Portal Project
This section discusses:
• Understanding Portal Project Copying• Copying the Portal Project to the Portal Solutions Database• Deleting the Portal Solutions Database Cache
Understanding Portal Project CopyingThis task applies only to the initial upgrade pass.
Copyright © 2016, Oracle and/or its affiliates. All Rights Reserved.

Appendix B Upgrading the Content Provider Registry
181
In this step, you copy the project from your Copy of Production database to your target PeopleSoft Portal Solutions database.
Task B-7-1: Copying the Portal Project to the Portal Solutions DatabaseFollow the steps below to copy the Portal Project to the PeopleSoft Portal Solutions database.
Important! Before exporting the Portal Project from the Content Provider database, you must successfully clean the Copy of Production Portal Project. If you proceed with this step without cleaning the project, you will overwrite critical PeopleSoft Portal Solutions data.
See Creating the Portal Project, Cleaning the Copy of Production Portal Project.To copy the Portal Project:1. Launch PeopleSoft Application Designer and sign in to your Copy of Production database.2. Select File, Open...3. In the Definition field, select Project and click Open.4. Highlight the newly created Portal Project name (PORTAL_APP84X_<your portal name>) and click Open
again.5. Select Tools, Copy Project, To Database...6. Enter the name of your target PeopleSoft Portal Solutions database, and the user ID and password.7. Click Select All.8. Click Copy.
This may take a few minutes.9. Close PeopleSoft Application Designer.
Note. You do not need to create or alter any records or views.
Task B-7-2: Deleting the Portal Solutions Database CacheIn this step, you delete the PeopleSoft Portal Solutions database cache.To delete the PeopleSoft Portal Solutions database cache:1. Delete the target PeopleSoft Portal Solutions database application server cache.2. Stop and restart the target PeopleSoft Portal Solutions database web server service.
Task B-8: Copying the Portal Project to Production
This section discusses:
• Understanding Portal Project to Production Copying• Copying the Portal Project to File• Copying the Portal Project from File• Deleting the Portal Solutions Database Cache Again
Copyright © 2016, Oracle and/or its affiliates. All Rights Reserved.

Upgrading the Content Provider Registry Appendix B
182
Understanding Portal Project to Production CopyingYou must perform this step during both your test and final Move to Production upgrade passes.
Task B-8-1: Copying the Portal Project to FileFollow the steps below to copy the Portal Project to file.
Note. If your Copy of Production and target PeopleSoft Portal Solutions databases run on the same PeopleSoft PeopleTools release and database platform, you can copy the project directly to the target PeopleSoft Portal Solutions database from within the Copy of Production Application Designer and skip the rest of this step.
To copy the Portal Project to file:1. Launch PeopleSoft Application Designer and sign in to your Copy Production database.2. Select File, Open....3. In the Definition field, select Project and then click Open.4. Highlight the newly created Portal Project name (PORTAL_APP84X_<your portal name>) and click Open
again.5. Select Tools, Copy Project, To File....6. Click the Browse button for the Export Directory.7. Select a temporary directory and then click OK.8. Click Select All.9. Click Copy.
This may take a few minutes.10. Close PeopleSoft Application Designer.
Task B-8-2: Copying the Portal Project from FileIn this step, you copy the Portal Project from file.To copy the Portal Project from file:1. Launch PeopleSoft Application Designer and sign in to your target PeopleSoft Portal Solutions database.2. Select Tools, Copy Project, From File....3. Browse to the Copy of Production database server's temporary directory.
If you cannot access the Copy of Production database server's temporary directory, then copy the Portal Project folder and files from the temporary directory to the target PeopleSoft Portal Solutions database server'sPS_APP_HOME\PROJECTS directory, and browse to that directory.
4. Select the Portal Project name that you just copied to file in the previous step.5. Click Open.6. Click Select All.7. Set the project language options as follows:
a. Click Options.b. In the Copy Options tab, select English, and COMMON.
Copyright © 2016, Oracle and/or its affiliates. All Rights Reserved.

Appendix B Upgrading the Content Provider Registry
183
c. If your PeopleSoft Portal Solutions database is a multi-language database, then also select the languages that you have installed on your PeopleSoft Portal Solutions database.
d. Click OK.8. Click Copy.9. Select the Upgrade tab and view the Output window.
All objects should have copied successfully.10. Close PeopleSoft Application Designer.
Note. After the copy, you do not need to create or alter any records or views on the target PeopleSoft Portal Solutions database.
Task B-8-3: Deleting the Portal Solutions Database Cache AgainIn this step, you delete the PeopleSoft Portal Solutions database cache.To delete the PeopleSoft Portal Solutions database cache:1. Delete the target PeopleSoft Portal Solutions database's application server cache.2. Stop and restart the target PeopleSoft Portal Solutions database web server service.
Task B-9: Deleting Obsolete Folders
This section discusses:
• Understanding Obsolete Folder Deletion• Deleting Obsolete Folders on Portal Solutions 8.4• Deleting Obsolete Folders on Portal Solutions 8.8
Understanding Obsolete Folder DeletionThis task applies to all upgrade passes: Initial, Test Move to Production, and Final Move to Production.In this step, you delete folders on your target PeopleSoft Portal Solutions database that the Portal Registry Structures no longer reference. The process that you run depends on your version of PeopleSoft Portal Solutions.
Task B-9-1: Deleting Obsolete Folders on Portal Solutions 8.4Follow this procedure to delete obsolete folders on PeopleSoft Portal Solutions 8.4.To delete obsolete folders on PeopleSoft Portal Solutions 8.4:1. Using PeopleSoft Data Mover, sign in to your target PeopleSoft Portal Solutions database.2. Run the following PeopleSoft Data Mover script, located in the PeopleSoft Portal Solutions
PS_APP_HOME\SCRIPTS directory:PORTAL_REG_FOLDER_DEL.DMS
3. Close PeopleSoft Data Mover.
Copyright © 2016, Oracle and/or its affiliates. All Rights Reserved.

Upgrading the Content Provider Registry Appendix B
184
Task B-9-2: Deleting Obsolete Folders on Portal Solutions 8.8Follow this procedure to delete obsolete folders on PeopleSoft Portal Solutions 8.8 or higher.To delete obsolete folders on PeopleSoft Portal Solutions 8.8 or higher:1. On your target PeopleSoft Portal Solutions database, navigate accordingly:
a. For PeopleSoft Portal Solutions 8.8: Portal Administration, Navigation, Run Folder Cleanup.b. For PeopleSoft Portal Solutions 8.9 or higher: Portal Administration, Navigation, Delete Empty Folders.
2. Add a run control as follows:a. Enter a value for the run control ID. The run control ID is FOLDER_CLEAN_XXXX, where XXXX
represents the portal registry name (EMPLOYEE, CUSTOMER, PARTNER, or SUPPLIER).b. Click Add.
3. Enter a value in the Portal Name field.This value must match the portal registry name that you used to replace XXXX in the run control ID (EMPLOYEE, CUSTOMER, PARTNER, or SUPPLIER).
4. Click Save.5. Click Run.6. Set up the process scheduler information and click OK.7. Click the Process Monitor link to view the progress of the process.
Task B-10: Updating Registry Folder Permissions
This section discusses:
• Understanding Registry Folder Permissions Updates• Updating Portal Solutions Registry Folder Permissions• Deleting the Portal Solutions Cache
Understanding Registry Folder Permissions UpdatesThis task applies to all upgrade passes: Initial, Test Move to Production, and Final Move to Production.Portal data from different Content Provider databases may share a common portal folder. After copying the registry projects, you must update the folder permissions to reflect the changes. After you update the folder permissions, you must delete the target PeopleSoft Portal Solutions database cache files to propagate the changes.
Task B-10-1: Updating Portal Solutions Registry Folder PermissionsFollow this procedure to update your PeopleSoft Portal Solutions registry folder permissions.
Note. This process will take between a few minutes to a few hours, depending on the volume of portal data. The user ID that invokes this process must have the security role Portal Administrator, or the process may terminate with an abend.
To update the PeopleSoft Portal Solutions folder permissions:
Copyright © 2016, Oracle and/or its affiliates. All Rights Reserved.

Appendix B Upgrading the Content Provider Registry
185
1. On your target PeopleSoft Portal Solutions database, select PeopleTools, Portal, Portal Security Sync.2. Add a run control as follows:
a. Enter a value for the run control ID.The run control ID is SECURITY_SYNC_XXXX, where XXXX represents the portal registry name (EMPLOYEE, CUSTOMER, PARTNER, or SUPPLIER).
b. Click Add.3. Enter a value in the Portal Name field.
This value must match the portal registry name that you used to replace XXXX in the run control ID (EMPLOYEE, CUSTOMER, PARTNER, or SUPPLIER).
4. Click Save.5. Click Run.6. Set up the process scheduler information and click OK.7. Click the Process Monitor link to view the progress of the process.
Task B-10-2: Deleting the Portal Solutions CacheIn this step delete the PeopleSoft Portal Solutions cache.To delete the PeopleSoft Portal Solutions cache:1. Delete the target PeopleSoft Portal Solutions database application server cache.2. Stop and restart the target PeopleSoft Portal Solutions database web server service.
Copyright © 2016, Oracle and/or its affiliates. All Rights Reserved.

187
Appendix C
Using the Comparison Process
This appendix discusses:
• Understanding the Comparison Process• Understanding Upgrade Compare Reports
Task C-1: Understanding the Comparison Process
This section discusses:
• Reviewing the Source and Target Columns• Reviewing the Action Column• Reviewing the Upgrade Column• Putting It All TogetherDuring the upgrade you run a compare process and then review the resulting reports. The compare process first compares every property of an object definition on the Source database to the properties of object definitions on the Target database. The PeopleSoft system tracks object changes using the contents of the PSRELEASE table, and the value of two fields, LASTUPDDTTM, and LASTUPDOPRID, used in the PeopleSoft PeopleTools tables,as follows:
• The PSRELEASE table maintains the Comparison Release Level. This table contains rows of data for every release level at which the database has ever existed. The first column in this table, RELEASEDTTM, containsa date/time stamp identifying when each release level was "stamped." The second column, RELEASELABEL,identifies the release level. The format of a release label is M XX.XX.XX.YYY, where M is the market code, XX is an integer from 0 to 99, and YYY is an integer from 0 to 999. A release label has two parts: the PeopleSoft release number (M XX.XX.XX) and the customer release number (YYY). Each time you customize your production database, you can stamp it with a new customer release level to help you track your changes over time. You should not change any portion of the PeopleSoft release number unless specifically instructed to do so.
• The LASTUPDDTTM field in our PSobjectDEFN tables—such as PSRECDEFN, PSPNLDEFN, and so on—stores a date/time stamp of when each object was last modified.
• The LASTUPDOPRID field stores the operator ID of the user who made the modification. If Oracle made the modification, the proprietary ID PPLSOFT is used.
Note. Maintain Security prevents you from creating an operator named PPLSOFT.
If an object definition is defined differently in the Source database than in the Target database, the compare process will check to see whether either object definition has changed since the comparison release. If the object's LASTUPDDTTM value is greater than the RELEASEDTTM value for the comparison release level (stored in PSRELEASE), the object has changed. If the object's LASTUPDDTTM value is equal to or less than RELEASEDTTM, the object has not changed (since the comparison release). Whether the compared
Copyright © 2016, Oracle and/or its affiliates. All Rights Reserved.

Using the Comparison Process Appendix C
188
object has changed or not, if it has ever been changed prior to the comparison release by someone other than Oracle (LASTUPDOPRID does not equal 'PPLSOFT'), the object is identified as a customization.After you run a compare report, you see the following information when you open an object type in the upgrade project from the Upgrade Tab of PeopleSoft Application Designer. This is called the PeopleSoft Application Designer Upgrade Definition window.
Task C-1-1: Reviewing the Source and Target ColumnsThe status of each object is reported as it appears on the Source database and the Target database. The following table explains the various status types:
Status Type Definition
Unknown The object has not been compared. This is the default status for all objects inserted manually into a project and the permanent status of all non-comparison objects.
Absent The object was found in the other database, but not in this one. When upgrading to a new PeopleSoft release, all of our new objects should have Absent status in the Target databaseand all of your new objects should have Absent status in the Source database.
Changed The object has been compared, its LASTUPDOPRID value is PPLSOFT, and its LASTUPDTIME value is greater than the date/time stamp of the comparison release database. In other words, Oracle modified the object since the comparison release.
Unchanged The object has been compared, its LASTUPDOPRID value is PPLSOFT, and its LASTUPDTIME value is less than or equal to the date/time stamp of the comparison release database. In other words, Oracle last modified the object prior to the comparison release.
*Changed The object has been compared, its LASTUPDOPRID value is not PPLSOFT, and its LASTUPDTIME value is greater than the date/time stamp of the comparison release database. In this case, the customer has modified the object since the comparison release.
*Unchanged The object has been compared, its LASTUPDOPRID value is not PPLSOFT, and its LASTUPDTIME value is less than or equal to the date/time stamp of the comparison release database. In this case, the customer last modified the object prior to the comparison release.
Copyright © 2016, Oracle and/or its affiliates. All Rights Reserved.

Appendix C Using the Comparison Process
189
Status Type Definition
Same The object has been compared and is defined as the same in both databases. When an object in one database has this status, so will its counterpart in the other database. This status would never be seen when performing a database comparison because in that case, the project is only populated with objects defined differently. However, it can occur when performing a project comparison because in a project comparison, the project contents are static; the project is not repopulated based on the comparison results.
Task C-1-2: Reviewing the Action ColumnThe default actions for each object that you compared are reported in the Action column. The compare sets the action column based on what you need to do to make the Target database consistent with the Source database. You should not change these actions. You can decide whether or not to accept each action by setting the Upgrade value. The following table explains the various action types:
Action Type Definition
Copy Object will be added to the Target database
Copy Prop (Records and Fields only) Object will be added to the Target database
Delete Object will be deleted from the Target database.
None No action will be taken on this object.
The PeopleSoft system assigns one of these action types to every object in a comparison project and in the compare reports. However, these actions are not necessarily carried out during the copy process. The value of the Upgrade column for each object makes that determination.
Task C-1-3: Reviewing the Upgrade ColumnThe Upgrade values for each object – YES or NO – determine whether the object action will be carried out duringthe copy process. The upgrade orientation you assign during the compare process determines these settings. You can orient the Upgrade to keep Oracle changes or to retain your changes in the Target database. Whichever orientation you choose, you will still have the option to set each Upgrade value individually before launching the copy process.You may find that after the compare process, your project contains objects that show up as Unchanged on the Demo database and Changed on the Copy of Production and the Upgrade column is not checked. What this status combination means is that the PeopleSoft object on your Copy of Production was changed more recently than on the Demo database. In these instances, Oracle recommends that you accept the Demo database version of the object.
Copyright © 2016, Oracle and/or its affiliates. All Rights Reserved.

Using the Comparison Process Appendix C
190
Task C-1-4: Putting It All TogetherThe following chart summarizes every possible Status, Action, and Upgrade value that could be set by the compare process to a single object:
Source Status Target Status Action Oracle-delivered Keep Customizations
(Any) Absent COPY YES YES
Absent Changed or Unchanged
DELETE YES YES
Absent Changed* or Unchanged*
DELETE NO NO
Changed Changed or Unchanged
COPY YES YES
Changed Changed* or Unchanged*
COPY YES NO
Unchanged Changed COPY NO NO
Unchanged Unchanged COPY YES YES
Unchanged Changed* or Unchanged*
COPY YES NO
Changed* Changed or Unchanged
COPY NO YES
Changed* Changed* or Unchanged*
COPY YES YES
Unchanged* Changed or Unchanged
COPY NO YES
Unchanged* Changed* COPY NO NO
Unchanged* Unchanged* COPY YES YES
Task C-2: Understanding Upgrade Compare Reports
This section discusses:
• Reviewing Report Columns• Using Reports
Copyright © 2016, Oracle and/or its affiliates. All Rights Reserved.

Appendix C Using the Comparison Process
191
When you run the compare process, it creates reports to help you understand what objects differ between the Source and Target databases, and how they differ. If you have documentation of your database modifications, youshould retrieve it before reviewing these reports. This will help you understand how the Target objects have changed and enable you to better compare the Target version of the object with the Source version. If you are upgrading to a new PeopleSoft release, you should also review the release notes for your product. These notes will identify and explain object changes in the New Release Demo database.Upgrade reports can be a little intimidating at first glance, until you understand what data you are looking for and how best to use it. This section includes information to help you use the reports.
Task C-2-1: Reviewing Report ColumnsFor the most part, the columns in upgrade reports correspond with the columns you see in PeopleSoft Application Designer's upgrade definition window. Moving from left to right, you see the Name of the object, then other key columns that vary by object type, then the Source and Target status, the Action value and Upgrade flag (Yes or No).After these columns are three more that are not included in PeopleSoft Application Designer. The first is Attribute. This tells you the type of difference that was found between the two objects. For example, record field attribute values include Use/Edit, which identifies key or audit differences, and Default Field Name (Def. Fldnm),which identifies differences in a default value. Lastly, there is a Source column and a Target column. These wide columns display the actual differences between the object definitions. For example, on a Use/Edit attribute recfield difference, the Source column might contain Xlat Table Edit while the Target column is empty. This means that the Source record field has a translate table edit while the Target record field does not.If you are unsure of the meaning of any value in the last three report columns, open the PeopleSoft PeopleTools tool that edits the particular object. The values in these columns correspond directly to dialog options in the tool.
Task C-2-2: Using ReportsOracle delivers several cross-reference reports that you can run to provide information about the inter-relationships between various objects. Oracle delivers these reports in the form of SQRs (found in PS_HOME\SQR) and Queries.The following table describes the various cross-reference reports:
Object Type(s) Report Name Report Description
Applications and Fields XRFAPFL Lists all application windows, such as General Tables, in alphabetical order, as well as the fields within each window. For each field, the report details the Field Name, Field Type, Length, and Format, as well as all the record and page definitions that containthe field (within the window).
Fields Referenced by PeopleCode Programs
XRFFLPC Lists all PeopleCode programs in alphabetical order by associated record definition/field. The report includes type of field and lists all fields referenced in the PeopleCode program.
Copyright © 2016, Oracle and/or its affiliates. All Rights Reserved.

Using the Comparison Process Appendix C
192
Object Type(s) Report Name Report Description
Fields and Panels XRFFLPN Lists all fields in alphabetical order. The report includes the names of all record and page definitions in which each field is used, as well as the Long Name of each field.
Records and Fields XRFFLRC Lists all fields in alphabetical order. The report details the Long Name, FieldType, Field Length, and Formatting specified for the field, and includes the names of all record definitions that contain the field.
Field Listing XRFIELDS Lists all fields in alphabetical order. The report includes Field Type, Length,Format, Long Name and Short Name.
Menu Listing XRFMENU Lists application windows in alphabetical order. The report details allmenus within each window, and all page definitions within each menu. It also includes the associated search record definition name and detail page definition name.
Panel Listing XRFPANEL Lists all page definitions in alphabeticalorder.
PeopleCode Programs and Field References
XRFPCFL Lists record definitions that contain fields with PeopleCode program attributes. The report includes the Field Name, as well as the associated record definitions and fields referenced in the PeopleCode program.
Panels with PeopleCode XRFPNPC Lists all pages that contain fields with PeopleCode attributes. For each page, the report includes the name of the record definition(s) that contain the field as well as the Field Name and Type.
Fields and Records XRFRCFL Lists all fields in alphabetical order by associated record definition name. The report details the Long Name, Field Type, Field Length, and Formatting specified for the field.
Records and Panels XRFRCPN Lists all record definitions in alphabetical order. The report includes the menu and page definitions associated with each record definition.
Copyright © 2016, Oracle and/or its affiliates. All Rights Reserved.

Appendix C Using the Comparison Process
193
Object Type(s) Report Name Report Description
Window Listing XRFWIN Lists all application windows in alphabetical order.
In addition to using our standard cross-reference reports, you can also generate ad hoc reports to extract the exact combination of information you need. Or, you can create permanent custom reports for information you extract ona regular basis.Oracle recommends that you mark your upgrade reports using a color-coding system to help you quickly identify what you need to do to certain objects.If you have several people reviewing sections of the reports, a good documentation policy is to have everyone on your review cycle initial and date the action defaults and overrides they select.You may also find it easier to change some objects manually after the upgrade, rather than copying the new versions from the Source database.
Copyright © 2016, Oracle and/or its affiliates. All Rights Reserved.
