peignoir femme penelope / women penelope bathrobe …
TRANSCRIPT

PETITCITRON.COM
© Perrine Colignon 2007-2021 - www.petitcitron.com
Difficulté: Facile | Durée 2-3 Heures | Pages: 22Difficulty: Medium| Duration 2-3 Hours | Pages: 22
PEIGNOIR FEMME PENELOPE / WOMEN PENELOPE BATHROBE
34-56

Prévoyez plus de tissu si le vôtre est à motifs ou rayures.
matériel nécessairetissu (éponge, nid d’abeille, piqué, tissu poursweat-shirt, polaire)fil assortioptionel: biais pour finir les coutures visibles
correspondance tailles
métrage en cm)taille 34 36 38 40 42 44 46 48 50 52 54 56
en 110 cm 260 260 260 260 260 270 270 270 270 270 280 280
en 140 cm 230 230 230 240 240 240 240 240 240 240 240 250
mesures du vêtement fini (en cm)
Ce peignoir a tout pour plaire : des poches plaquées, une capuche douillette et une ceinture à nouer pour vous garder bien au chaud et bien au chaud. Concernant le tissu, choisissez une maille pour sweat-shirt, du tissu éponge, du piqué ou un jersey épais. On peut même utiliser de la polaire. Retrouvez nos conseils de couture dans ce guide.
Partagez ! Nous adorons voir ce que vous faites! N’oubliez pas de taguer vos projets #PCPei-gnoirPenelope et @petitcitroncoud.
taille 34 36 38 40 42 44 46 48 50 52 54 56
tour de poitrine 80 84 88 92 96 100 104 110 116 122 128 134
tour de taille 62 66 70 74 78 82 86 90 94 98 102 106
longueur bras 58.3 58.3 58.3 58.3 58.3 58.3 58.3 58.3 58.3 58.3 58.3 58.3
taille 34 36 38 40 42 44 46 48 50 52 54 56A tour hanches/taille 108 110 112 114 116 118 120 123 126 129 132 135B longueur de bras 61 62 63 63 64 65 65 66 67 68 69 70C longueur dos 88 89 89 90 90 90 91 91 92 92 93 93D profondeur ca-puche
28 28 29 29 29 29 30 30 30 30 31 31
- 2 -
Avant de commencer
À l’aide du tableau des tailles de la page précédente, trouvez votre taille. Si vous êtes entre les deux, vous pouvez dessiner une nouvelle ligne de motif entre les deux tailles ou simplement choisir la taille la plus grande.
Déterminer la taille
Sur la première page du patron PDF, il y a un carré de test de 5 cm sur 5. Mesurez ce carré avec une règle pour vérifier que le patron est de la bonne taille, puis découpez chaque rec-tangle. Collez les pièces ensemble en faisant correspondre les losanges gris, puis découpez la bonne
Assembler le patron
Disposer les pièces sur le tissuDisposez les pièces du patron sur le tissu plié en deux en respectant le droit fil et en plaçant les pièces indiquées sur la pliure. Utilisez des épingles ou des poids pour garder votre patron en place. Si vous utilisez un tissu à carreaux ou à rayures, assurez-vous d’aligner les rayures.
Tracez les contours du patron sur le tissu en utilisant de la craie, un crayon ou du papier carbone. Transférez tous les marquages, encoches, fléches et lignes du milieu dos et devant. Faites-le, ce n’est vraiment pas amusant de revenir les marquer plus tard.
Tracer le patron
Coupez en rajoutant 1 cm pour les coutures et 2 à 4 cm pour les ourlets.
Couper
Ce patron ne contient pas de marge de couture.
Marge de couture
Si c’est la première fois que vous cousez ce modèle, c’est toujours une bonne idée de faire une toile pour tester la coupe et vous assurer qu’elle convient à votre mor-
phologie. Une toile vous permet également de savoir quels endroits doivent être modifiés.
Pour modifier rapidement ou si vous avez des questions sur l’ajustement, rendez-vous sur petitcitron.com
- 3 -
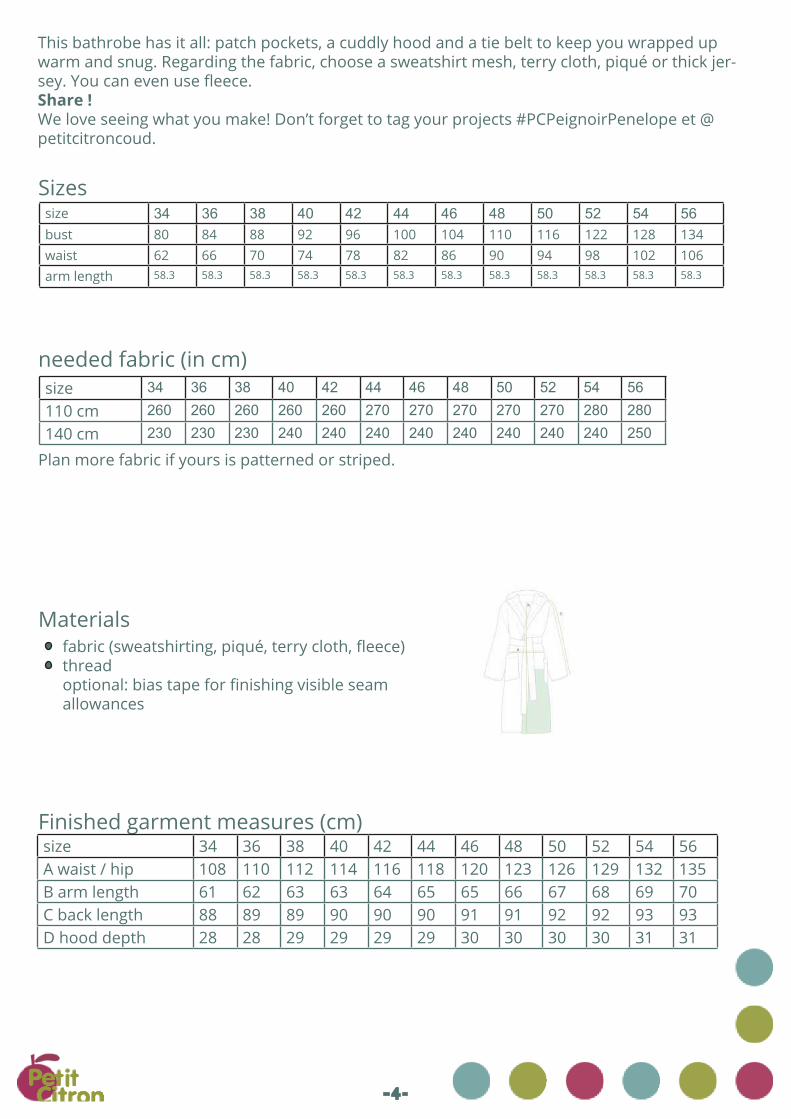
Plan more fabric if yours is patterned or striped.
Materialsfabric (sweatshirting, piqué, terry cloth, fleece)threadoptional: bias tape for finishing visible seam allowances
Sizes
needed fabric (in cm)
Finished garment measures (cm)
This bathrobe has it all: patch pockets, a cuddly hood and a tie belt to keep you wrapped up warm and snug. Regarding the fabric, choose a sweatshirt mesh, terry cloth, piqué or thick jer-sey. You can even use fleece.Share !We love seeing what you make! Don’t forget to tag your projects #PCPeignoirPenelope et @petitcitroncoud.
size 34 36 38 40 42 44 46 48 50 52 54 56
bust 80 84 88 92 96 100 104 110 116 122 128 134
waist 62 66 70 74 78 82 86 90 94 98 102 106
arm length 58.3 58.3 58.3 58.3 58.3 58.3 58.3 58.3 58.3 58.3 58.3 58.3
size 34 36 38 40 42 44 46 48 50 52 54 56
110 cm 260 260 260 260 260 270 270 270 270 270 280 280
140 cm 230 230 230 240 240 240 240 240 240 240 240 250
size 34 36 38 40 42 44 46 48 50 52 54 56A waist / hip 108 110 112 114 116 118 120 123 126 129 132 135B arm length 61 62 63 63 64 65 65 66 67 68 69 70C back length 88 89 89 90 90 90 91 91 92 92 93 93D hood depth 28 28 29 29 29 29 30 30 30 30 31 31
- 4 -
First Things First
Using the size chart on the previous page, find your size. If you are in between, you can draw a new pattern line between the two sizes or simply choose the larger size.
FIND YOUR SIZE
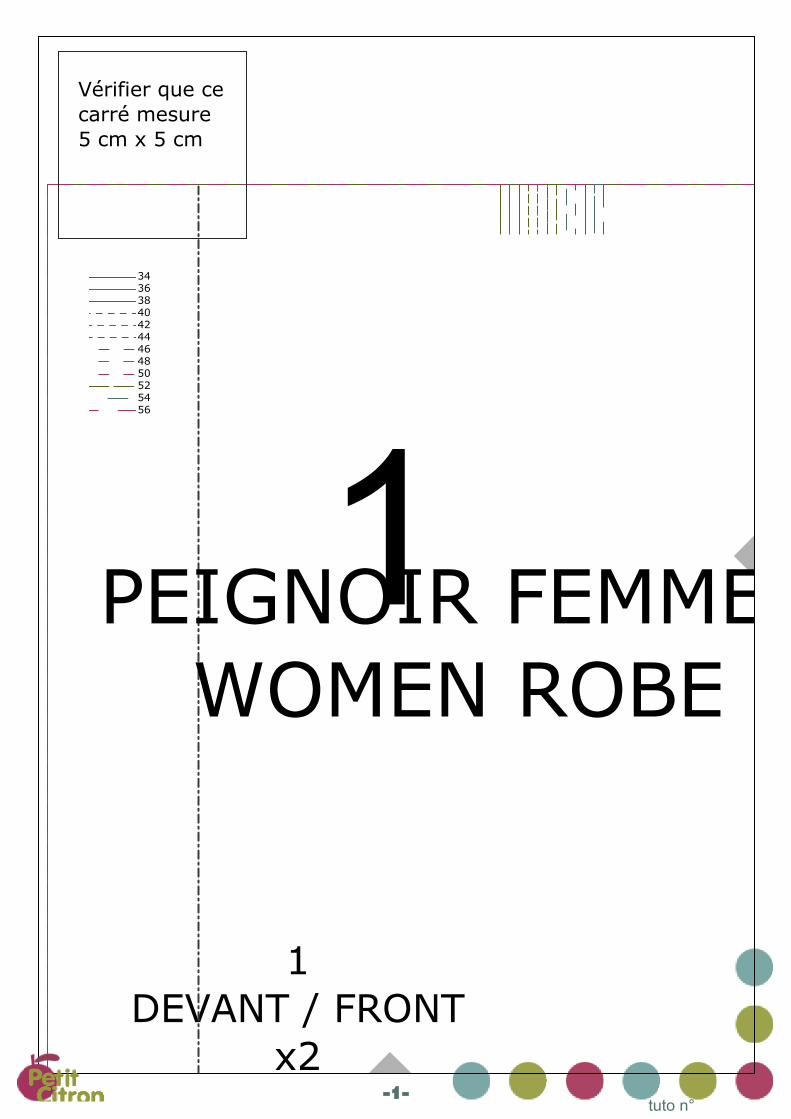
On the first page, there is a 5cm x 5cm test square. Measure this square with a ruler to verify that the pattern is the correct size and then cut out each rectangle. Tape the pieces together matching the colors/letters/numbers, then cut out your pattern size.
PIECE TOGETHER YOUR PATTERN
LAY OUT YOUR PATTERNUsing the fabric layout in the Fabric Usage section as a guide, lay out your pattern pieces. Use either pins or pattern weights (we like the latter option) to keep your pattern in place. Pay attention to the fabric grain line and, if using a plaid or stripe fabric, make sure to line up
race your pattern edges onto your fabric by using chalk, pencil, or carbon paper. Transfer all markings, notches, darts and center front and back lines. Trust us. It’s really no fun to have to come back and mark them later.
TRACE THE PATTERN
Cut and add a 1 cm seam allowance (and 2 to 4 cm for the hems).
CUT IT OUT
This pattern does not include any seam allowances.
SEAM ALLOWANCE
If this is your first time making this pattern, it’s always a good idea to make a mus-lin to test the fit and make sure it flatters your body type. A muslin also lets you
know what areas need to be altered. For a quick alteration guide or if you have any fit questions, go to petitcitron.com
- 5 -

© P
errine C
olig
non 2
007-2
021. w
ww
.petitc
itro
n.c
om
Ce patron est destiné à un usage personnel uniquement. La reproduction totale ou partielle de ce docu-ment est strictement interdite.This pattern is for personal use only. Total or partial reproduction of this document is strictly prohibited.
2
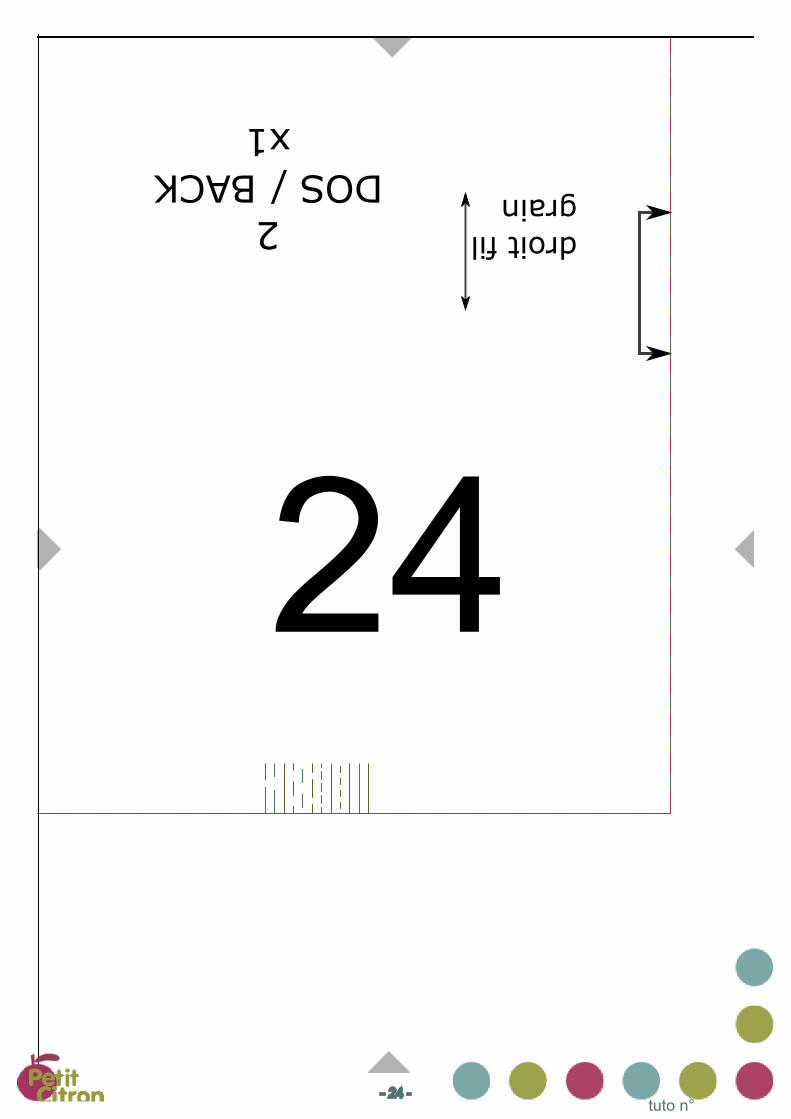
DOS / BACK
x1
droit fil
grain
3
MANCHES / SLEEVES
x4
droit fil
grain
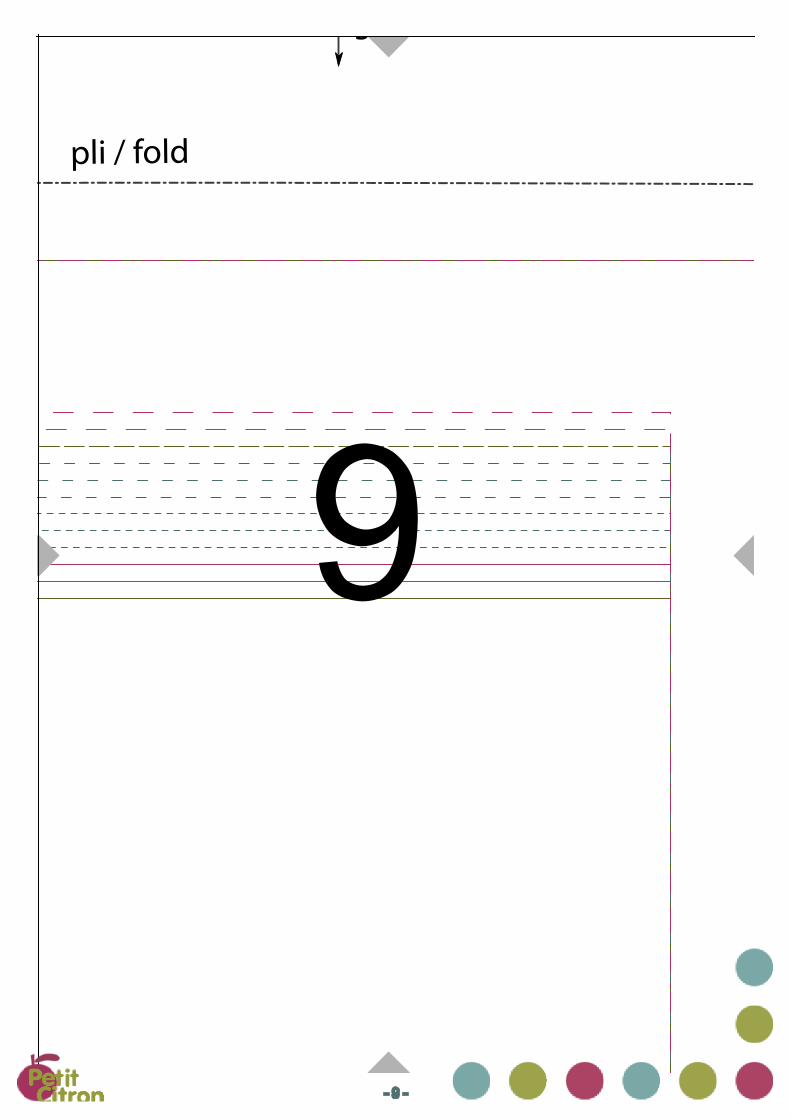
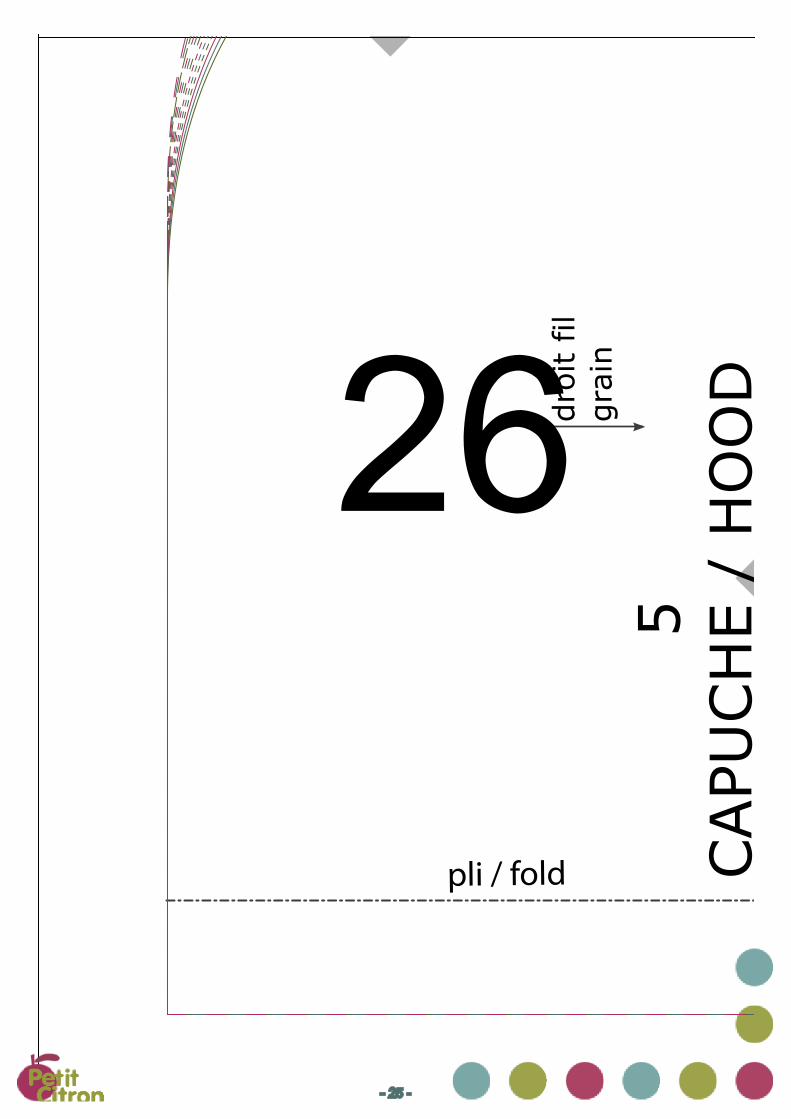
pli / fold
1
DEVANT / FRONT
x2
pli / fold
pli / fold
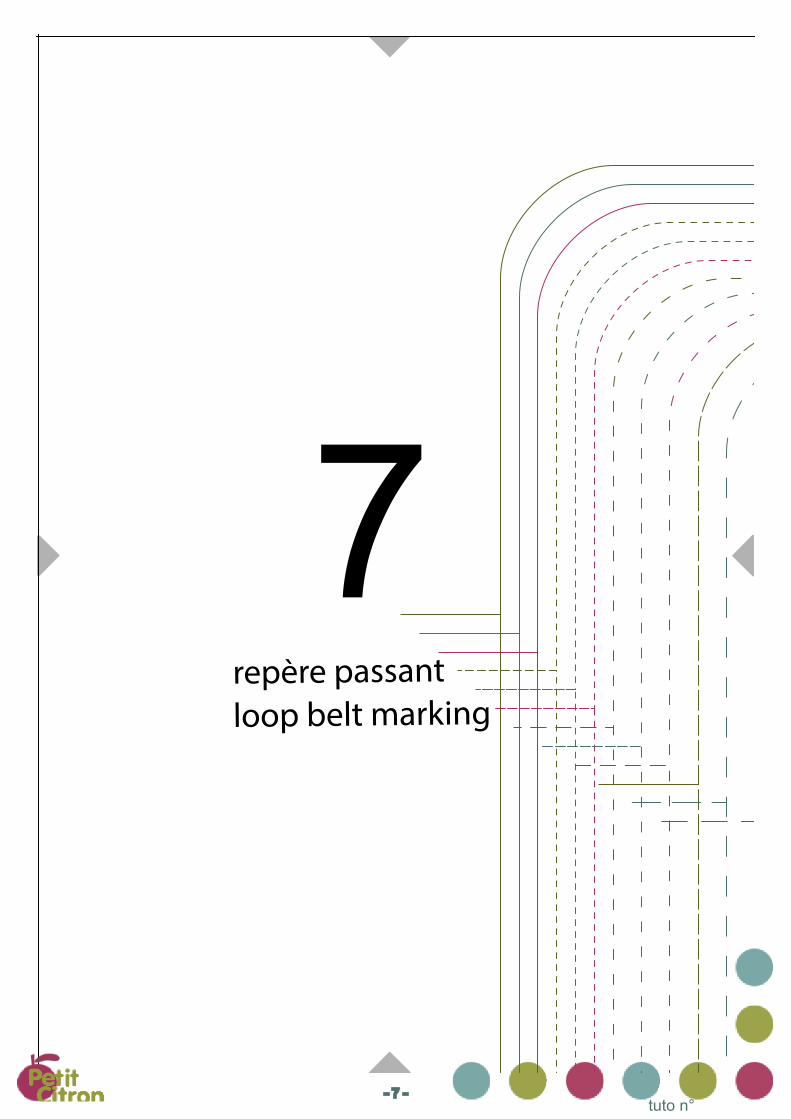
repère passant
loop belt marking
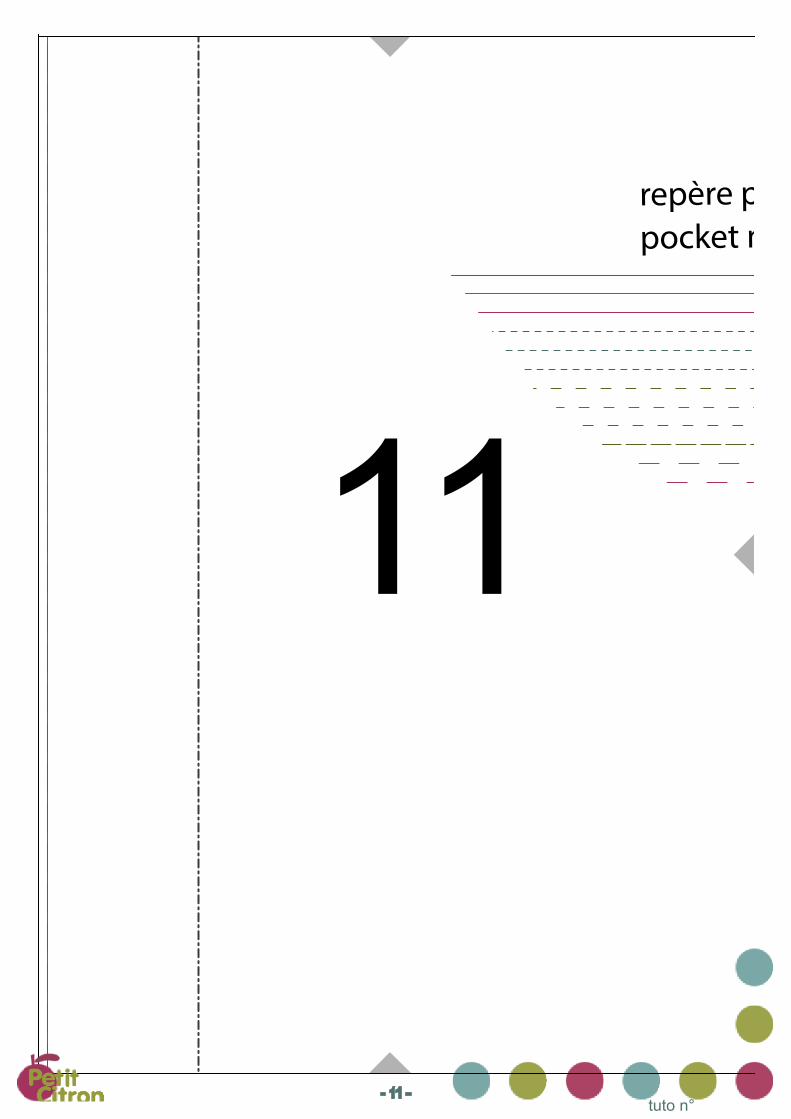
repère poche
pocket marking
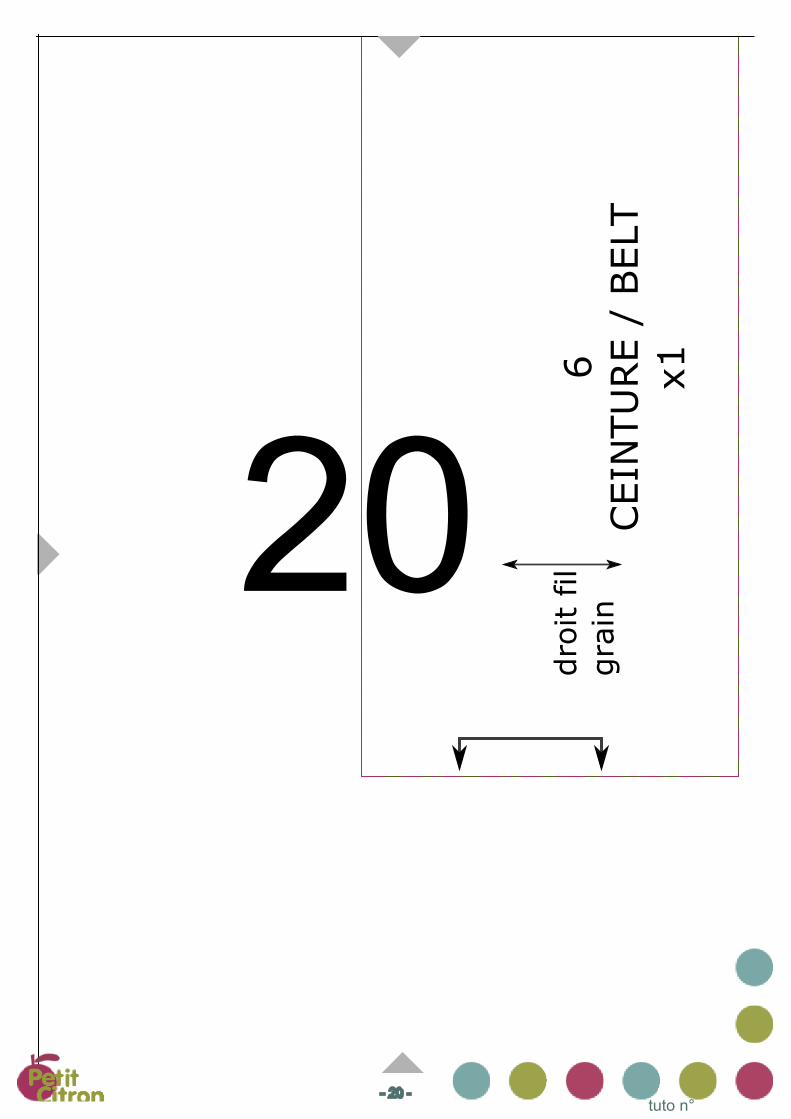
6
CEIN
TU
RE /
BELT
x1
dro
it fil
gra
in
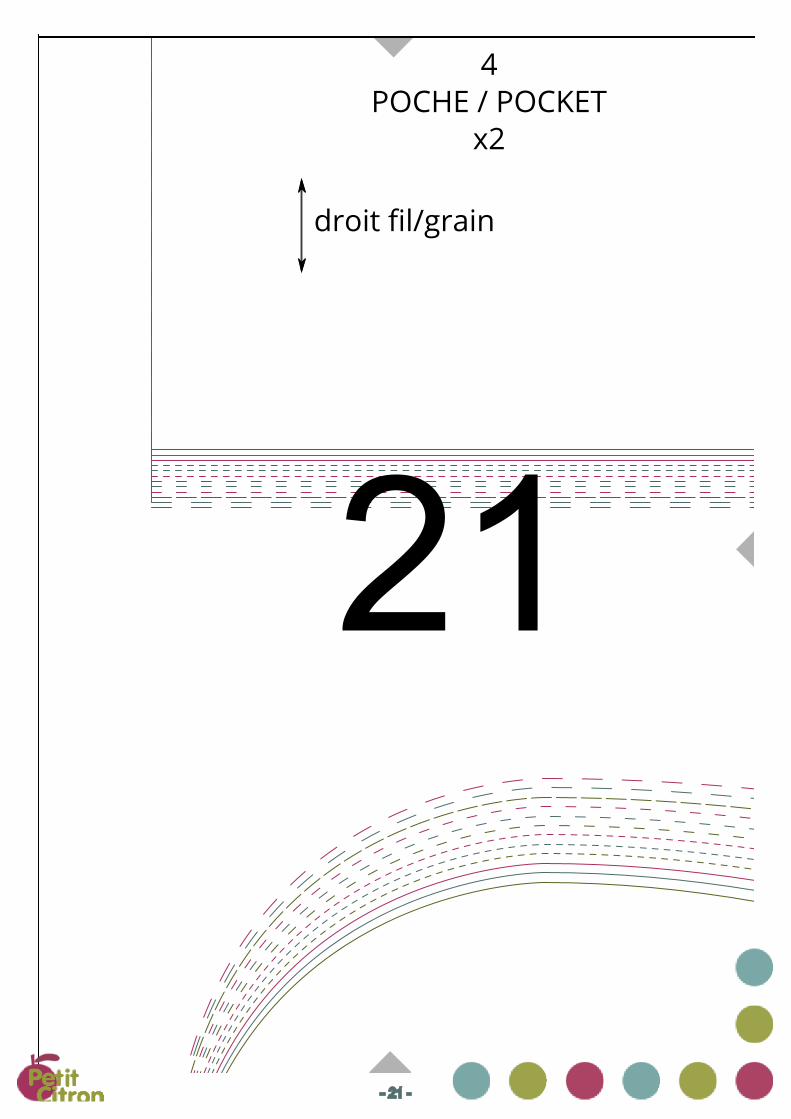
4POCHE / POCKET
x2
droit fil/grain
7
PASSAN
T /
BELT L
OO
P
x2
1 2 3
6 7 8
11 12 13
4
9
14
5
10
15
16 17 18 19 20
1 2 3
5 6 7
9 10 11
4
8
12
5
10
15
13 14 15 16 20
pli / fold
5CAPU
CH
E /
HO
OD
x2
dro
it fil
gra
in
PEIGNOIR FEMMESWOMEN ROBE
Vérifier que ce carré mesure5 cm x 5 cm
343638404244464850525456
22 23 24 25
27 28 29 30
4
POCHE / POCKETx2
droit fil/grain
26
Ne pasimprimer
Ne pasimprimer
Ne pasimprimer
- 1 -
tuto n°
1
DEVANT / FRONT
x2
4
POCHE / POCKETx2
droit fil/grain
1 2 3
6 7 8
11 12 13
4
9
14
5
10
15
16 17 18 19 20
1 2 3
5 6 7
9 10 11
4
8
12
5
10
15
13 14 15 16 20
PEIGNOIR FEMMESWOMEN ROBE
Vérifier que ce carré mesure5 cm x 5 cm
343638404244464850525456
22 23 24 25
27 28 29 30
4
POCHE / POCKETx2
droit fil/grain
26
Ne pasimprimer
Ne pasimprimer
Ne pasimprimer
- 1 -
tuto n°
4
POCHE / POCKETx2
droit fil/grain
1 2 3
6 7 8
11 12 13
4
9
14
5
10
15
16 17 18 19 20
1 2 3
5 6 7
9 10 11
4
8
12
5
10
15
13 14 15 16 20
MESE
22 23 24 25
27 28 29 30
4
POCHE / POCKETx2
droit fil/grain
26
Ne pasimprimer
Ne pasimprimer
Ne pasimprimer
- 2 -
tuto n°
4
POCHE / POCKETx2
droit fil/grain
1 2 3
6 7 8
11 12 13
4
9
14
5
10
15
16 17 18 19 20
1 2 3
5 6 7
9 10 11
4
8
12
5
10
15
13 14 15 16 20
22 23 24 25
27 28 29 30
4
POCHE / POCKETx2
droit fil/grain
26
Ne pasimprimer
Ne pasimprimer
Ne pasimprimer
- 3 -

tuto n°
3
MANCHES / SLEEVES
x4
droit fil
grain
4
POCHE / POCKETx2
droit fil/grain
1 2 3
6 7 8
11 12 13
4
9
14
5
10
15
16 17 18 19 20
1 2 3
5 6 7
9 10 11
4
8
12
5
10
15
13 14 15 16 20
22 23 24 25
27 28 29 30
4
POCHE / POCKETx2
droit fil/grain
26
Ne pasimprimer
Ne pasimprimer
Ne pasimprimer
- 4 -
tuto n°
4
POCHE / POCKETx2
droit fil/grain
1 2 3
6 7 8
11 12 13
4
9
14
5
10
15
16 17 18 19 20
1 2 3
5 6 7
9 10 11
4
8
12
5
10
15
13 14 15 16 20
22 23 24 25
27 28 29 30
4
POCHE / POCKETx2
droit fil/grain
26
Ne pasimprimer
Ne pasimprimer
Ne pasimprimer
- 5 -
tuto n°
x2
4
POCHE / POCKETx2
droit fil/grain
1 2 3
6 7 8
11 12 13
4
9
14
5
10
15
16 17 18 19 20
1 2 3
5 6 7
9 10 11
4
8
12
5
10
15
13 14 15 16 20
22 23 24 25
27 28 29 30
4
POCHE / POCKETx2
droit fil/grain
26
Ne pasimprimer
Ne pasimprimer
Ne pasimprimer
- 6 -
tuto n°
repère passant
loop belt marking
4
POCHE / POCKETx2
droit fil/grain
1 2 3
6 7 8
11 12 13
4
9
14
5
10
15
16 17 18 19 20
1 2 3
5 6 7
9 10 11
4
8
12
5
10
15
13 14 15 16 20
22 23 24 25
27 28 29 30
4
POCHE / POCKETx2
droit fil/grain
26
Ne pasimprimer
Ne pasimprimer
Ne pasimprimer
- 7 -
tuto n°
4
POCHE / POCKETx2
droit fil/grain
1 2 3
6 7 8
11 12 13
4
9
14
5
10
15
16 17 18 19 20
1 2 3
5 6 7
9 10 11
4
8
12
5
10
15
13 14 15 16 20
22 23 24 25
27 28 29 30
4
POCHE / POCKETx2
droit fil/grain
26
Ne pasimprimer
Ne pasimprimer
Ne pasimprimer
- 8 -
grain
pli / fold
4
POCHE / POCKETx2
droit fil/grain
1 2 3
6 7 8
11 12 13
4
9
14
5
10
15
16 17 18 19 20
1 2 3
5 6 7
9 10 11
4
8
12
5
10
15
13 14 15 16 20
22 23 24 25
27 28 29 30
4
POCHE / POCKETx2
droit fil/grain
26
Ne pasimprimer
Ne pasimprimer
Ne pasimprimer
- 9 -

tuto n°
4
POCHE / POCKETx2
droit fil/grain
7
PASSAN
T /
BELT L
OO
P
x2
1 2 3
6 7 8
11 12 13
4
9
14
5
10
15
16 17 18 19 20
1 2 3
5 6 7
9 10 11
4
8
12
5
10
15
13 14 15 16 20
22 23 24 25
27 28 29 30
4
POCHE / POCKETx2
droit fil/grain
26
Ne pasimprimer
Ne pasimprimer
Ne pasimprimer
- 10 -
tuto n°
repère poche
pocket mar
4
POCHE / POCKETx2
droit fil/grain
1 2 3
6 7 8
11 12 13
4
9
14
5
10
15
16 17 18 19 20
1 2 3
5 6 7
9 10 11
4
8
12
5
10
15
13 14 15 16 20
22 23 24 25
27 28 29 30
4
POCHE / POCKETx2
droit fil/grain
26
Ne pasimprimer
Ne pasimprimer
Ne pasimprimer
- 11 -
tuto n°
e poche
pocket marking
4
POCHE / POCKETx2
droit fil/grain
1 2 3
6 7 8
11 12 13
4
9
14
5
10
15
16 17 18 19 20
1 2 3
5 6 7
9 10 11
4
8
12
5
10
15
13 14 15 16 20
22 23 24 25
27 28 29 30
4
POCHE / POCKETx2
droit fil/grain
26
Ne pasimprimer
Ne pasimprimer
Ne pasimprimer
- 12 -
tuto n°
4
POCHE / POCKETx2
droit fil/grain
1 2 3
6 7 8
11 12 13
4
9
14
5
10
15
16 17 18 19 20
1 2 3
5 6 7
9 10 11
4
8
12
5
10
15
13 14 15 16 20
22 23 24 25
27 28 29 30
4
POCHE / POCKETx2
droit fil/grain
26
Ne pasimprimer
Ne pasimprimer
Ne pasimprimer
- 13 -

tuto n°
4
POCHE / POCKETx2
droit fil/grain
1 2 3
6 7 8
11 12 13
4
9
14
5
10
15
16 17 18 19 20
1 2 3
5 6 7
9 10 11
4
8
12
5
10
15
13 14 15 16 20
22 23 24 25
27 28 29 30
4
POCHE / POCKETx2
droit fil/grain
26
Ne pasimprimer
Ne pasimprimer
Ne pasimprimer
- 14 -

tuto n°
4
POCHE / POCKETx2
droit fil/grain
1 2 3
6 7 8
11 12 13
4
9
14
5
10
15
16 17 18 19 20
1 2 3
5 6 7
9 10 11
4
8
12
5
10
15
13 14 15 16 20
22 23 24 25
27 28 29 30
4
POCHE / POCKETx2
droit fil/grain
26
Ne pasimprimer
Ne pasimprimer
Ne pasimprimer
- 15 -
tuto n°
pli / fold
pli / fold
4
POCHE / POCKETx2
droit fil/grain
1 2 3
6 7 8
11 12 13
4
9
14
5
10
15
16 17 18 19 20
1 2 3
5 6 7
9 10 11
4
8
12
5
10
15
13 14 15 16 20
22 23 24 25
27 28 29 30
4
POCHE / POCKETx2
droit fil/grain
26
Ne pasimprimer
Ne pasimprimer
Ne pasimprimer
- 16 -
tuto n°
4
POCHE / POCKETx2
droit fil/grain
1 2 3
6 7 8
11 12 13
4
9
14
5
10
15
16 17 18 19 20
1 2 3
5 6 7
9 10 11
4
8
12
5
10
15
13 14 15 16 20
22 23 24 25
27 28 29 30
4
POCHE / POCKETx2
droit fil/grain
26
Ne pasimprimer
Ne pasimprimer
Ne pasimprimer
- 17 -

tuto n°
4
POCHE / POCKETx2
droit fil/grain
1 2 3
6 7 8
11 12 13
4
9
14
5
10
15
16 17 18 19 20
1 2 3
5 6 7
9 10 11
4
8
12
5
10
15
13 14 15 16 20
22 23 24 25
27 28 29 30
4
POCHE / POCKETx2
droit fil/grain
26
Ne pasimprimer
Ne pasimprimer
Ne pasimprimer
- 18 -

tuto n°
4
POCHE / POCKETx2
droit fil/grain
1 2 3
6 7 8
11 12 13
4
9
14
5
10
15
16 17 18 19 20
1 2 3
5 6 7
9 10 11
4
8
12
5
10
15
13 14 15 16 20
22 23 24 25
27 28 29 30
4
POCHE / POCKETx2
droit fil/grain
26
Ne pasimprimer
Ne pasimprimer
Ne pasimprimer
- 19 -
tuto n°
6
CEIN
TU
RE /
BELT
x1
dro
it fil
gra
in
4
POCHE / POCKETx2
droit fil/grain
1 2 3
6 7 8
11 12 13
4
9
14
5
10
15
16 17 18 19 20
1 2 3
5 6 7
9 10 11
4
8
12
5
10
15
13 14 15 16 20
22 23 24 25
27 28 29 30
4
POCHE / POCKETx2
droit fil/grain
26
Ne pasimprimer
Ne pasimprimer
Ne pasimprimer
- 20 -
4
POCHE / POCKETx2
droit fil/grain
1 2 3
6 7 8
11 12 13
4
9
14
5
10
15
16 17 18 19 20
1 2 3
5 6 7
9 10 11
4
8
12
5
10
15
13 14 15 16 20
22 23 24 25
27 28 29 30
4
POCHE / POCKETx2
droit fil/grain
26
Ne pasimprimer
Ne pasimprimer
Ne pasimprimer
- 21 -
tuto n°
4
POCHE / POCKETx2
droit fil/grain
1 2 3
6 7 8
11 12 13
4
9
14
5
10
15
16 17 18 19 20
1 2 3
5 6 7
9 10 11
4
8
12
5
10
15
13 14 15 16 20
22 23 24 25
27 28 29 30
4
POCHE / POCKETx2
droit fil/grain
26
Ne pasimprimer
Ne pasimprimer
Ne pasimprimer
- 22 -
tuto n°
4
POCHE / POCKETx2
droit fil/grain
1 2 3
6 7 8
11 12 13
4
9
14
5
10
15
16 17 18 19 20
1 2 3
5 6 7
9 10 11
4
8
12
5
10
15
13 14 15 16 20
22 23 24 25
27 28 29 30
4
POCHE / POCKETx2
droit fil/grain
26
Ne pasimprimer
Ne pasimprimer
Ne pasimprimer
- 23 -
tuto n°
2
DOS / BACK
x1
droit fil
grain
4
POCHE / POCKETx2
droit fil/grain
1 2 3
6 7 8
11 12 13
4
9
14
5
10
15
16 17 18 19 20
1 2 3
5 6 7
9 10 11
4
8
12
5
10
15
13 14 15 16 20
22 23 24 25
27 28 29 30
4
POCHE / POCKETx2
droit fil/grain
26
Ne pasimprimer
Ne pasimprimer
Ne pasimprimer
- 24 -
4
POCHE / POCKETx2
droit fil/grain
1 2 3
6 7 8
11 12 13
4
9
14
5
10
15
16 17 18 19 20
1 2 3
5 6 7
9 10 11
4
8
12
5
10
15
13 14 15 16 20
pli / fold
5CAPU
CH
E /
HO
OD
dro
it fil
gra
in
22 23 24 25
27 28 29 30
4
POCHE / POCKETx2
droit fil/grain
26
Ne pasimprimer
Ne pasimprimer
Ne pasimprimer
- 25 -
tuto n°
4
POCHE / POCKETx2
droit fil/grain
1 2 3
6 7 8
11 12 13
4
9
14
5
10
15
16 17 18 19 20
1 2 3
5 6 7
9 10 11
4
8
12
5
10
15
13 14 15 16 20
CAPU
CH
E /
HO
OD
x2
22 23 24 25
27 28 29 30
4
POCHE / POCKETx2
droit fil/grain
26
Ne pasimprimer
Ne pasimprimer
Ne pasimprimer
- 26 -

tuto n°
4
POCHE / POCKETx2
droit fil/grain
1 2 3
6 7 8
11 12 13
4
9
14
5
10
15
16 17 18 19 20
1 2 3
5 6 7
9 10 11
4
8
12
5
10
15
13 14 15 16 20
22 23 24 25
27 28 29 30
4
POCHE / POCKETx2
droit fil/grain
26
Ne pasimprimer
Ne pasimprimer
Ne pasimprimer
- 27 -
tuto n°
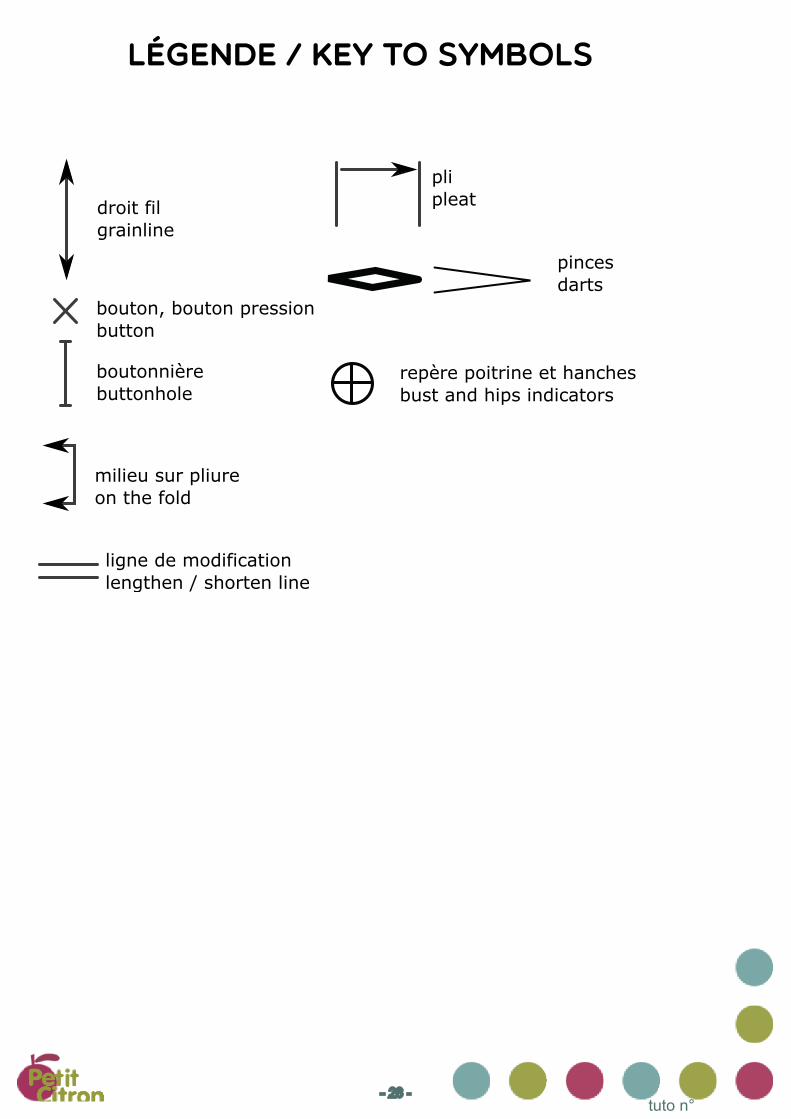
droit filgrainline
Légende / key to symbols
bouton, bouton pressionbutton
plipleat
boutonnièrebuttonhole
milieu sur pliureon the fold
repère poitrine et hanchesbust and hips indicators
pincesdarts
ligne de modificationlengthen / shorten line
- 28 -
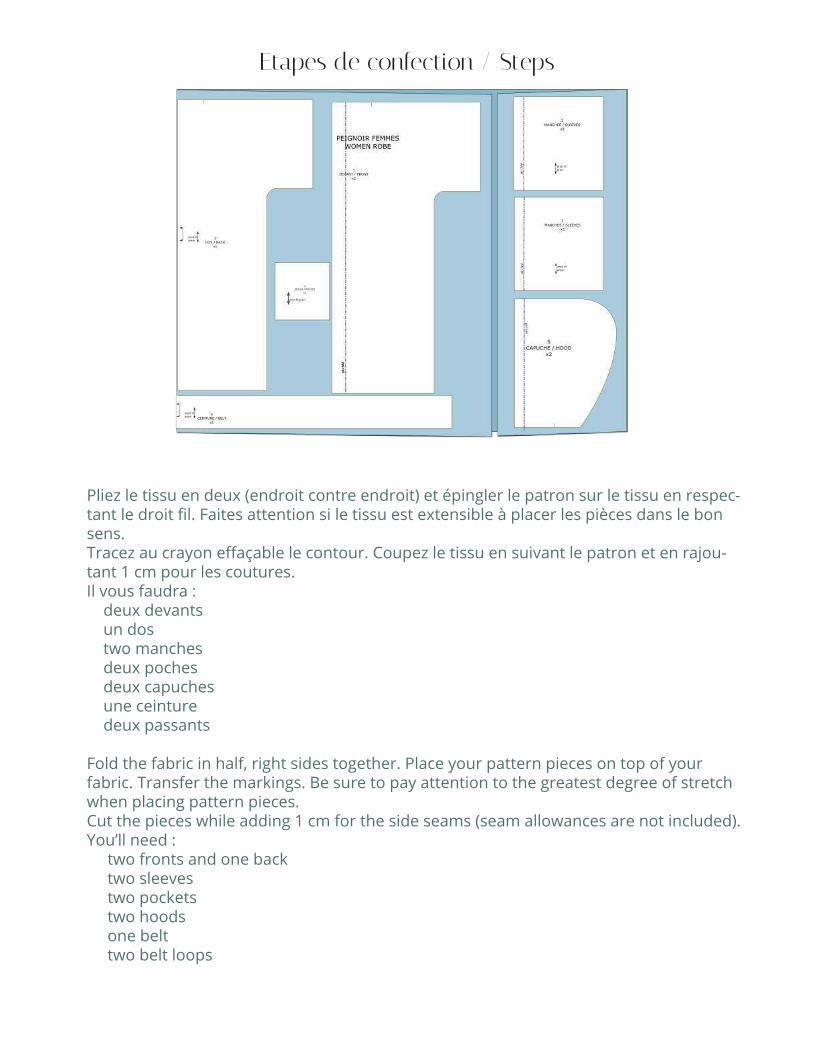
Pliez le tissu en deux (endroit contre endroit) et épingler le patron sur le tissu en respec-tant le droit fil. Faites attention si le tissu est extensible à placer les pièces dans le bon sens.Tracez au crayon effaçable le contour. Coupez le tissu en suivant le patron et en rajou-tant 1 cm pour les coutures.Il vous faudra : deux devants un dos two manches deux poches deux capuches une ceinture deux passants
Fold the fabric in half, right sides together. Place your pattern pieces on top of your fabric. Transfer the markings. Be sure to pay attention to the greatest degree of stretch when placing pattern pieces.Cut the pieces while adding 1 cm for the side seams (seam allowances are not included).You’ll need : two fronts and one back two sleeves two pockets two hoods one belt two belt loops
Etapes de confection / Steps
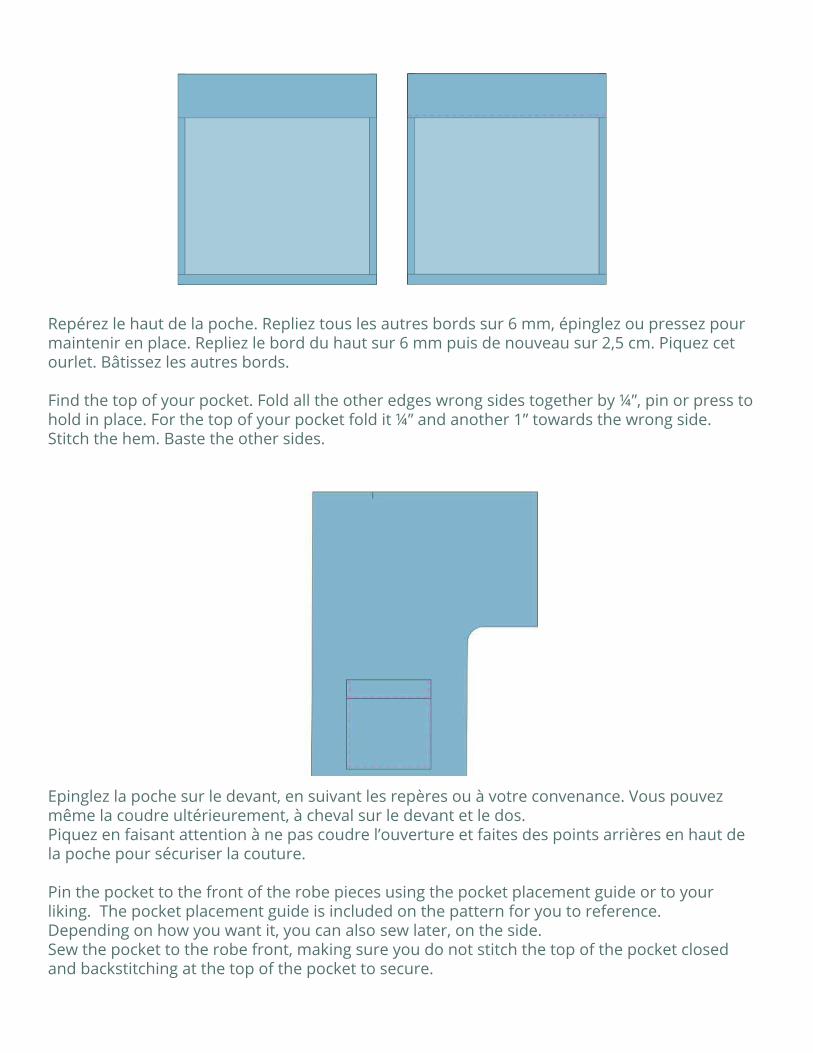
Repérez le haut de la poche. Repliez tous les autres bords sur 6 mm, épinglez ou pressez pour maintenir en place. Repliez le bord du haut sur 6 mm puis de nouveau sur 2,5 cm. Piquez cet ourlet. Bâtissez les autres bords.
Find the top of your pocket. Fold all the other edges wrong sides together by ¼”, pin or press to hold in place. For the top of your pocket fold it ¼” and another 1” towards the wrong side.Stitch the hem. Baste the other sides.
Epinglez la poche sur le devant, en suivant les repères ou à votre convenance. Vous pouvez même la coudre ultérieurement, à cheval sur le devant et le dos. Piquez en faisant attention à ne pas coudre l’ouverture et faites des points arrières en haut de la poche pour sécuriser la couture.
Pin the pocket to the front of the robe pieces using the pocket placement guide or to your liking. The pocket placement guide is included on the pattern for you to reference. Depending on how you want it, you can also sew later, on the side.Sew the pocket to the robe front, making sure you do not stitch the top of the pocket closed and backstitching at the top of the pocket to secure.
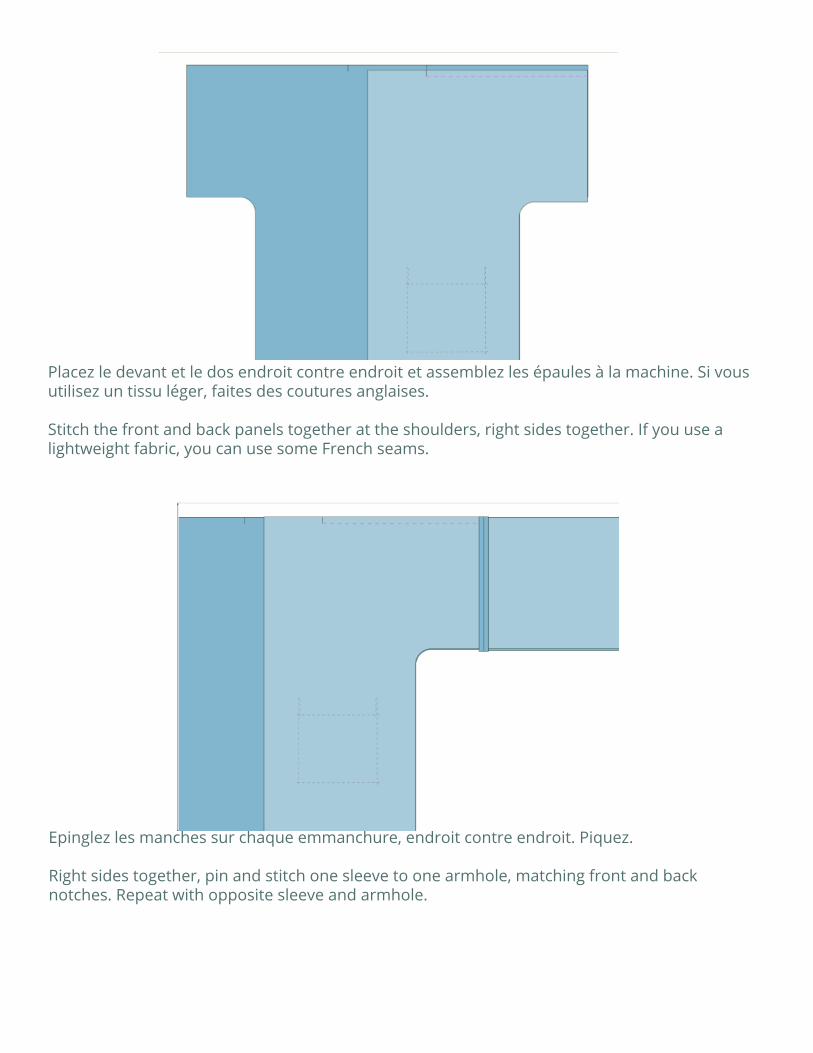
Placez le devant et le dos endroit contre endroit et assemblez les épaules à la machine. Si vous utilisez un tissu léger, faites des coutures anglaises.
Stitch the front and back panels together at the shoulders, right sides together. If you use a lightweight fabric, you can use some French seams.
Epinglez les manches sur chaque emmanchure, endroit contre endroit. Piquez.
Right sides together, pin and stitch one sleeve to one armhole, matching front and back notches. Repeat with opposite sleeve and armhole.
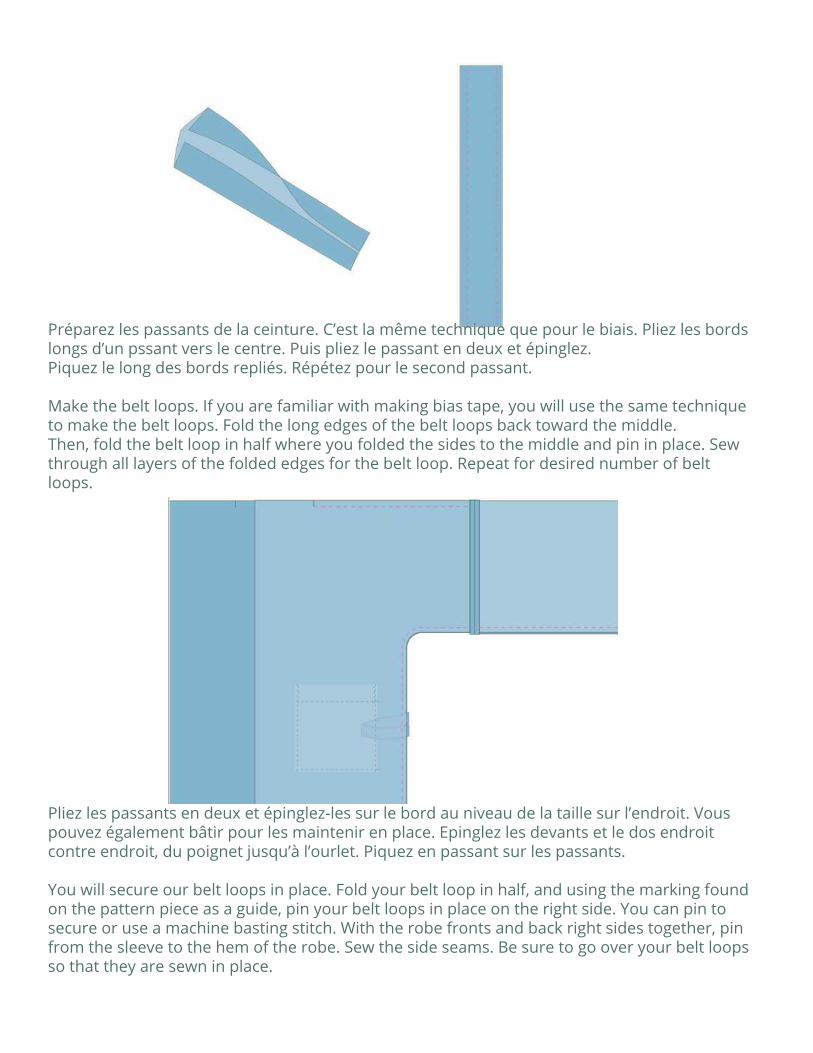
Préparez les passants de la ceinture. C’est la même technique que pour le biais. Pliez les bords longs d’un pssant vers le centre. Puis pliez le passant en deux et épinglez. Piquez le long des bords repliés. Répétez pour le second passant.
Make the belt loops. If you are familiar with making bias tape, you will use the same technique to make the belt loops. Fold the long edges of the belt loops back toward the middle. Then, fold the belt loop in half where you folded the sides to the middle and pin in place. Sew through all layers of the folded edges for the belt loop. Repeat for desired number of belt loops.
Pliez les passants en deux et épinglez-les sur le bord au niveau de la taille sur l’endroit. Vous pouvez également bâtir pour les maintenir en place. Epinglez les devants et le dos endroit contre endroit, du poignet jusqu’à l’ourlet. Piquez en passant sur les passants.
You will secure our belt loops in place. Fold your belt loop in half, and using the marking found on the pattern piece as a guide, pin your belt loops in place on the right side. You can pin to secure or use a machine basting stitch. With the robe fronts and back right sides together, pin from the sleeve to the hem of the robe. Sew the side seams. Be sure to go over your belt loops so that they are sewn in place.
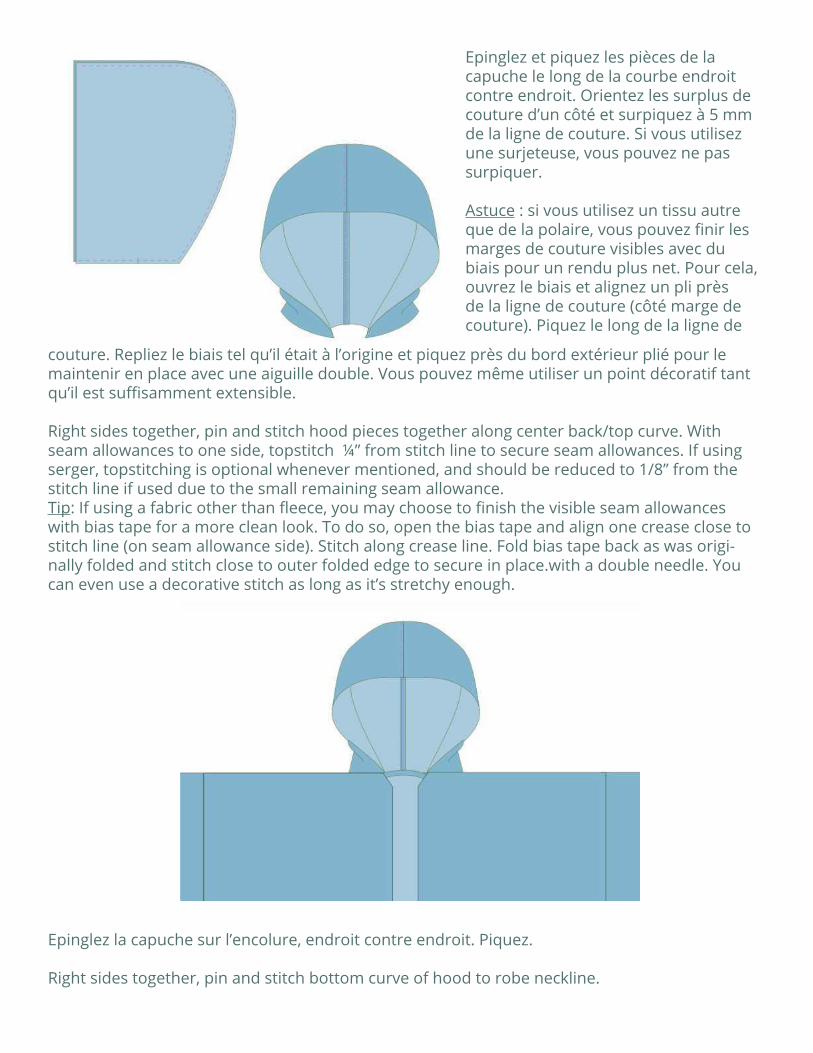
couture. Repliez le biais tel qu’il était à l’origine et piquez près du bord extérieur plié pour le maintenir en place avec une aiguille double. Vous pouvez même utiliser un point décoratif tant qu’il est suffisamment extensible.
Right sides together, pin and stitch hood pieces together along center back/top curve. With seam allowances to one side, topstitch ¼” from stitch line to secure seam allowances. If using serger, topstitching is optional whenever mentioned, and should be reduced to 1/8” from the stitch line if used due to the small remaining seam allowance.Tip: If using a fabric other than fleece, you may choose to finish the visible seam allowances with bias tape for a more clean look. To do so, open the bias tape and align one crease close to stitch line (on seam allowance side). Stitch along crease line. Fold bias tape back as was origi-nally folded and stitch close to outer folded edge to secure in place.with a double needle. You can even use a decorative stitch as long as it’s stretchy enough.
Epinglez la capuche sur l’encolure, endroit contre endroit. Piquez.
Right sides together, pin and stitch bottom curve of hood to robe neckline.
Epinglez et piquez les pièces de la capuche le long de la courbe endroit contre endroit. Orientez les surplus de couture d’un côté et surpiquez à 5 mm de la ligne de couture. Si vous utilisez une surjeteuse, vous pouvez ne pas surpiquer.
Astuce : si vous utilisez un tissu autre que de la polaire, vous pouvez finir les marges de couture visibles avec du biais pour un rendu plus net. Pour cela, ouvrez le biais et alignez un pli près de la ligne de couture (côté marge de couture). Piquez le long de la ligne de
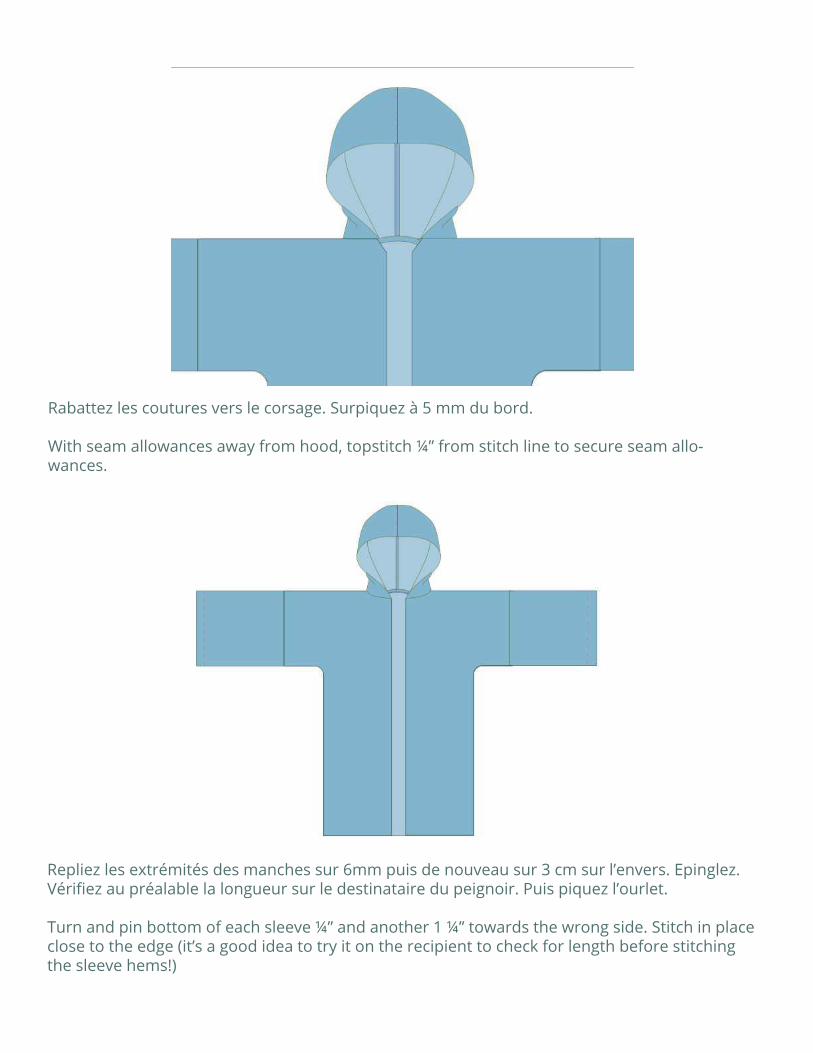
Rabattez les coutures vers le corsage. Surpiquez à 5 mm du bord.
With seam allowances away from hood, topstitch ¼” from stitch line to secure seam allo-wances.
Repliez les extrémités des manches sur 6mm puis de nouveau sur 3 cm sur l’envers. Epinglez. Vérifiez au préalable la longueur sur le destinataire du peignoir. Puis piquez l’ourlet.
Turn and pin bottom of each sleeve ¼” and another 1 ¼” towards the wrong side. Stitch in place close to the edge (it’s a good idea to try it on the recipient to check for length before stitching the sleeve hems!)
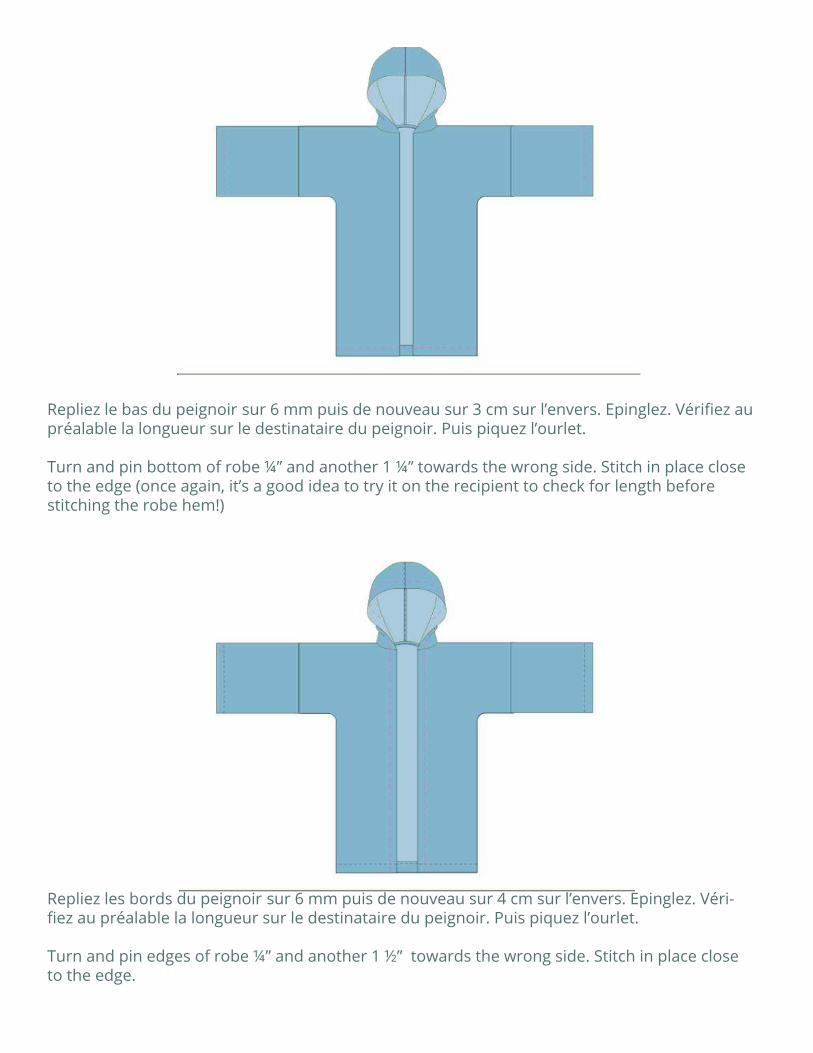
Repliez le bas du peignoir sur 6 mm puis de nouveau sur 3 cm sur l’envers. Epinglez. Vérifiez au préalable la longueur sur le destinataire du peignoir. Puis piquez l’ourlet.
Turn and pin bottom of robe ¼” and another 1 ¼” towards the wrong side. Stitch in place close to the edge (once again, it’s a good idea to try it on the recipient to check for length before stitching the robe hem!)
Repliez les bords du peignoir sur 6 mm puis de nouveau sur 4 cm sur l’envers. Epinglez. Véri-fiez au préalable la longueur sur le destinataire du peignoir. Puis piquez l’ourlet.
Turn and pin edges of robe ¼” and another 1 ½” towards the wrong side. Stitch in place close to the edge.
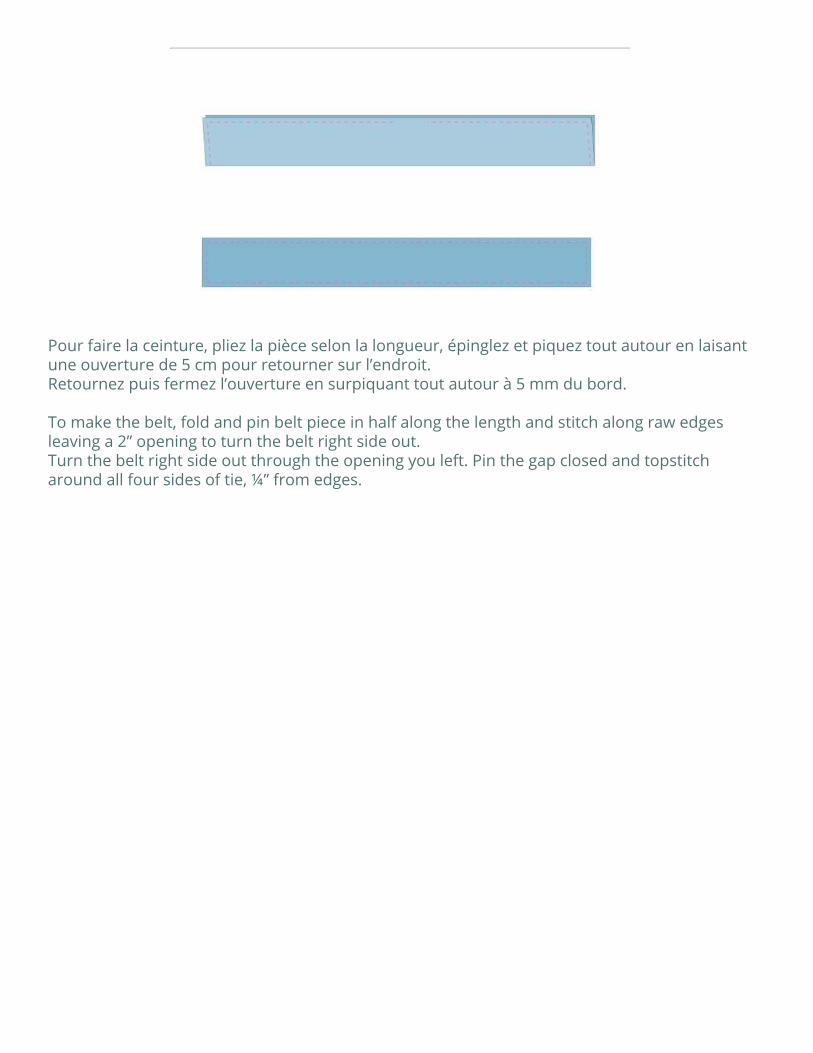
Pour faire la ceinture, pliez la pièce selon la longueur, épinglez et piquez tout autour en laisant une ouverture de 5 cm pour retourner sur l’endroit. Retournez puis fermez l’ouverture en surpiquant tout autour à 5 mm du bord.
To make the belt, fold and pin belt piece in half along the length and stitch along raw edges leaving a 2” opening to turn the belt right side out.Turn the belt right side out through the opening you left. Pin the gap closed and topstitch around all four sides of tie, ¼” from edges.