part no.: ga68-00120a printed in korea€¦ · samsung dcs system august 2001 ds 24d/ds 24s keyset...
TRANSCRIPT

Part No.: GA68-00120APrinted in Korea

SAMSUNG DCS SYSTEM
AUGUST 2001
DS 24D/DS 24SKEYSET USER GUIDE

TABLE OF CONTENTS
ABOUT THIS BOOK ..........................................................1
THINGS YOU SHOULD KNOW ............................2–6
ASSEMBLING YOUR KEYSET ..................................7
OUTSIDE CALLSMaking an Outside Call ......................................................................8Answering an Outside Call ..................................................................8Universal Answer ................................................................................8Recall Dial Tone ..................................................................................9Sending a Flash ..................................................................................9Busy Line Queuing with Callback ......................................................9Cancelling Callback ............................................................................9
INTERCOM CALLSCalling Other Stations ......................................................................10Answering Intercom Calls..................................................................10Voice Announce Mode ......................................................................10Auto Answer Mode ............................................................................10Busy Station Callback ......................................................................11Busy Station Camp-on ......................................................................11Calling Your System Operator ..........................................................11
CALL PROCESSINGHolding Calls................................................................................12–13Transferring Calls ..............................................................................14Transfer with Camp-On......................................................................14Transfer to Voice Mail ........................................................................15Call Waiting........................................................................................15Conference Calls ..............................................................................15Forwarding Calls ..........................................................................16–18Call Pickup ........................................................................................18

DIALLING FEATURESSpeed Dialling ..................................................................................19Programming Personal Speed Dial Numbers ............................19–20One Touch Speed Dialling ................................................................20Last Number Redial ..........................................................................20Save Number with Redial ..................................................................20Chain Dialling ....................................................................................21Automatic Redial/Retry ......................................................................21Pulse to Tone Changeover ................................................................21
PAGING AND MESSAGINGMaking an Internal Page....................................................................22Making an External Page ..................................................................22All Page..............................................................................................22Meet Me Page....................................................................................23Call Park and Page............................................................................23Messages—Set and Cancel..........................................................23–24Returning Messages..........................................................................24Programmed Messages ....................................................................24
CONVENIENCE FEATURESDo Not Disturb ..................................................................................25One Time DND ..................................................................................25Mute ..................................................................................................25Background Music ............................................................................25Appointment Reminder/Alarm Clock ................................................26Door Phone Calls ........................................................................26–27Executive/Secretary Hotline ..............................................................27Group Listening ................................................................................27Account Codes ..................................................................................28Locking Your Keyset ..........................................................................28Off-Hook Voice Announce ..........................................................28–29OHVA Block ......................................................................................29OHVA Reject ......................................................................................29In Group/Out of Group ......................................................................29

CUSTOMIZING YOUR KEYSETSelect Ring Tone................................................................................30Change Your Passcode ....................................................................30Set Answer Mode ..............................................................................30Automatic Hold ..................................................................................30Headset Operation ............................................................................31Hot Keypad ........................................................................................31Key Confirmation Tone ......................................................................31Rejoining a Page ..............................................................................31Ring Preference ................................................................................32
DISPLAY FEATURESInteractive Display Keys ....................................................................33Directory Information ...................................................................... 33Dial by Directory ................................................................................34Call Progress Displays ......................................................................34Display Number Dialled ....................................................................34Call Duration Timer............................................................................34Auto Timer ........................................................................................35Timer Function ..................................................................................35Viewing Message Indications............................................................35Alarm Reminder Messages ........................................................35–36Personal Speed Dial Names ............................................................36Station Names ..................................................................................37Managing Key Assignments..............................................................37Caller ID ......................................................................................38–40LCR with Clear ..................................................................................40
SYSTEM ACCESS CODES ........................................42
PERSONAL SPEED DIAL NUMBERS ........43–44

1
ABOUT THIS GUIDE
Your DS 24D/DS 24S are the most visible part of your telephone system. Nomatter what model keyset you are using telephone calls are handled thesame way.
Please take the time to study this guide and to become familiar with the op-eration of your keyset. Keep this guide handy. You may need to look up in-structions for infrequently used features.
Learning to use your keyset correctly will make everyday telephone commu-nications a breeze.
NOTE: DS 24D/DS 24S are avaliable only for Samsung DCS-24, DCS-12,DCS-12i, DX408 and DX816 phone systems.
2
THINGS YOU SHOULD KNOWUSER ORIENTATIONDS 24D/DS 24S telephones are called “keysets.” They contain buttons or“keys” that are used to access or activate the many features of your officephone system. The keys with paper designation strips are programmablekeys. This means they can be programmed for a specific function on yourkeyset and that same button can be something different on another keyset.See the system manager to get your most frequently used features assignedto your programmable keys. When changes are made, be sure that your pro-grammable keys are relabeled properly.
Lines from the telephone company are “C.O. lines.” Calls on these lines arereferred to as “outside calls.” Your system can have individual C.O. line keysor lines may be assigned to groups. When they are in a group, you accessa line by dialling an access code or pressing a route button. For example,dial 0 or press a “LOCAL” key to get a local outside line. If Least Cost Routingis used, pressing the “LCR” key will automatically select a preprogrammedC.O. line according to what digits are dialled. Each line in the system isnumbered, beginning with 701, then 702, 703, etc.
Direct Station Selection (DSS) keys are programmed to ring specific sta-tions. You can press a DSS key instead of dialling the extension number. ADSS key lights red when that station is busy (Busy Lamp Indication).
DS 24D/DS 24S keysets provide distinctive ring patterns:
• Outside calls have a double ring tone repeated.• Internal calls have a single ring tone repeated.• Door phone calls and alarm/appointment reminders have a short ring
tone repeated very quickly.
CALL INDICATIONSThe keys on your phone have light emitting diodes (LEDs). These are tri-col-oured LEDs that light green, red or amber (green and red together).
Intercom calls, also called internal calls, always appear on your CALL but-tons. They will always light green. You can have up to four CALL buttons, butat least two are recommended.
Outside calls appear on individual line keys if they are assigned. When anindividual line is not assigned to its own key, it will appear on a CALL button.

3
Your outside calls will light green on your keyset and red on other keysets.You never lose sight of your calls while they are on hold. They stay rightwhere you put them and are identified with a green flashing light.
Some simple rules to remember:
• Any steady LED indicates the line or feature is in use.• A fast flashing green LED indicates a new call ringing in.• A slow flashing green or red LED indicates a call is on hold.• A slow flashing amber LED indicates a recall to your keyset.
SPEAKERPHONEDS 24D/DS 24S are speaker phones. Pressing ANS/RLS or SPEAKER keywill answer or release a call on the speakerphone. Switching from the hand-set to the speakerphone is easy. Press the SPEAKER key and hang up thehandset.
VOLUME CONTROLSThe DS 24D/DS 24S use the UP and DOWN keys to adjust the ringer volumewhile the keyset is ringing, the speaker volume while the speakerphone is inuse and the handset volume while you are listening. These three levels willbe stored in memory until changed. If background music is turned on at yourkeyset, the volume keys will also control the level of music. The volume ofpages heard through the speaker of a keyset can be adjusted during a pageannouncement by using the volume keys. There are 16 levels for each vol-ume setting, except Ring volume, Off-Hook volume and Handset volume.There are 8 levels for Ring volume, Off-Hook volume and Handset volume.The volume of off-hook ring is controlled by a user-programmable setting.
FEATURE ACCESS CODESThis user guide is written based on the default access code for using systemfeatures. If the system numbering plan has been changed some of theaccess codes may not be correct. Your installing company can inform youof the correct codes.

4
SYSTEM TONESThe system provides several tones to assist you. Some of these tones arealready familiar to you.
WARNINGThe handset receiver on the Keyset may retain metallicobjects. Care should be taken when using the handset
in the vicinity of small metal objects.

5
DS 24D KEYSET32 CHARACTER DISPLAYTwo lines with 16 characters each.
SOFT KEYSUsed to activatefeatures via thedisplay.
SCROLL KEYUsed to scrollthrough displays.
16 PROGRAMMABLE KEYSWITH RED LIGHTS Used to call stations directly, toindicate busy conditions of otherstations, for One Touch diallingand many other system features.
VOLUME CONTROL KEYSUsed to set independentlevels for handset, speaker,background music, ring andpage volumes.
MICROPHONE For handsfree operation.
HOLD KEY
SPEAKER For handsfreeoperation andringing.
SPEAKER KEYTRANSFER KEY
REDIAL KEY
8 PROGRAMMABLE KEYSWITH TRI-COLOURED LIGHTS Used to call stations directly, toindicate busy conditions of otherstations, for One Touch diallingand many other system features.

6
DS 24S KEYSET
16 PROGRAMMABLE KEYSWITH RED LIGHTS Used to call stations directly, toindicate busy conditions of otherstations, for One Touch diallingand many other system features.
VOLUME CONTROL KEYSUsed to set independentlevels for handset, speaker,background music, ring andpage volumes.
MICROPHONE For handsfree operation.
HOLD KEY
SPEAKER For handsfreeoperation andringing.
SPEAKER KEYTRANSFER KEY
REDIAL KEY
NOT USED
8 PROGRAMMABLE KEYSWITH TRI-COLOURED LIGHTS Used to call stations directly, toindicate busy conditions of otherstations, for One Touch diallingand many other system features.

7
ASSEMBLING YOUR KEYSET• Place the keyset face down on a flat surface.
• Remove the base pedestal by placing your thumbs over the attachmentclips and press outward while simultaneously pressing down on the key-set body with your fingertips.
• Plug the handset cord into the jack marked with the symbol.
• Route the handset cord out the RIGHT side of the keyset as you look atit face down.
• Reattach the base pedestal.
• Plug the line cord into the jack on the base of the keyset marked with the symbol and route it through one of the cable channels in the bottom of the base pedestal.
8
OUTSIDE CALLSMAKING AN OUTSIDE CALL• Lift the handset and press an idle outside line button, line group button
or dial a line access code to receive dial tone—OR—press an idle outsideline button, line group button or dial a line access code to receive dialtone through the speaker—OR—press SPEAKER receive intercom dialtone and dial a line access code.
• Dial the telephone number.• Finish the call by replacing the handset or pressing the ANS/RLS key.
NOTE: You will receive No More Calls tone when you attempt to make a calland there is no key available for that line.
• If Least Cost Routing is enabled on your phone system, this button maybe labeled LCR or accessed by dialling an access code (usually 0).
• If your system is programmed to require an authorization code beforemaking a call, dial plus a valid code before selecting a C.O. line.
• If your system is programmed to require an account code before mak-ing a call, press the ACCT button or dial 47 plus a valid code, press theACCT button again and then select a C.O. line.
For more information on authorization and account codes, see your systemadministrator.
NOTE: If the Hot Keypad feature has been turned off, you must first lift thehandset or press the SPEAKER key before dialling.
ANSWERING AN OUTSIDE CALL• Lift the handset and you are automatically connected to the ringing call.
See Ring Preference under Customizing Your Keyset—OR—press theANS/RLS or SPEAKER key to automatically answer on the speaker-phone.
NOTE: If a call is flashing at your keyset but not ringing, you must press theflashing button to answer.
UNIVERSAL ANSWEROutside lines may be programmed to ring a general alerting device. To an-swer calls ringing this device, dial 67 or press the UA key. This device canoperate in the Day or Night mode.

9
NOTE: If the Hot Keypad feature has been turned off, you must first lift thehandset or press the SPEAKER key before dialling.
RECALL DIAL TONEPress the NEW button to disconnect your existing call, wait for dial tone andthen make a new call on the same line.
NOTE: If this button does not appear on your keyset, the FLASH key maybe programmed to recall dial tone.
SENDING A FLASHWhile on an outside call, press the FLASH key to send a flash to the tele-phone company. This is required for some custom calling features or CEN-TREX use.
BUSY LINE QUEUING WITH CALLBACKIf you receive a busy signal when you are selecting an outside line, thismeans that the line or group of lines is busy.
• Press the CBK key or dial 44. You will hear confirmation tone.• When the line becomes free, the system will call you back.• Lift the handset or press the ANS/RLS key to answer, wait for dial tone
and dial the telephone number or speed dial number again.
NOTES:1. A callback will be canceled if not answered within 30 seconds. If you
have set a callback, your CBK key will light.2. If the Hot Keypad feature has been turned off, you must first lift the hand-
set or press the SPEAKER key before dialling.
CANCELLING CALLBACKA callback will be canceled if not answered within 30 seconds. If you haveset a callback, your CBK key will light.
Your phone may have a maximum of five callbacks on stations and/or linesset at a time. To cancel a callback:
• Press the CBK key or dial 44. You will hear confirmation tone.• While you are listening to confirmation tone, press the HOLD key. This
will cancel the oldest callback that you have set.
NOTES:1. If the hot keypad feature is turned off, you must first lift the handset or
press the SPEAKER key before dialling.

10
INTERCOM CALLSCALLING OTHER STATIONS• Dial the extension number or group number.• Wait for the party to answer. If you hear a brief tone burst instead of ring-
back tone, the station you called is set for Voice Announce or AutoAnswer. Begin speaking immediately after the tone.
• Finish the call by replacing the handset or pressing the ANS/RLS key.
NOTES:1. If you have a DSS key assigned to an extension or station group, you
may press this key instead of dialling the number.2. If the Hot Keypad feature has been turned off, you must first lift the hand-
set or press the SPEAKER key before you begin dialling.
ANSWERING INTERCOM CALLS• When your keyset rings, simply lift the handset—OR—press the ANS/RLS
or SPEAKER key to be connected to the calling station. • Finish the call by replacing the handset or pressing the ANS/RLS or
SPEAKER key.
See Ring Preference under Customizing Your Keyset.
VOICE ANNOUNCE MODE(INTERCOM CALLS ONLY)When another station calls you, your keyset will sound a brief attention toneand you will hear the caller’s announcement.
• Press ANS/RLS or SPEAKER to turn on the microphone and speakhandsfree—OR— lift the handset to reply.
• To finish the call, replace the handset or press the ANS/RLS or SPEAK-ER key.
AUTO ANSWER MODE(INTERCOM CALLS ONLY)When another station calls you, your keyset will sound a brief attention toneand then automatically answer the call.
11
• Your microphone and speaker are turned on and you can speak hands-free. For privacy, use the handset.
• To finish the call, replace the handset or press the ANS/RLS or SPEAK-ER key.
BUSY STATION CALLBACKWhen you call another station and receive a busy signal:
• Press the CBK key or dial 44.• When the busy station becomes free, your keyset will ring. • Lift the handset or press ANS/RLS or SPEAKER to call the now idle sta-
tion.
NOTES:1. A callback will be cancelled if not answered within 30 seconds. If you
have set a callback, your CBK key will light.2. If the Hot Keypad feature has been turned off, you must first lift the hand-
set or press the SPEAKER key before dialling.
BUSY STATION CAMP-ONWhen you call another station and receive a busy signal but you do not wantto wait for a callback:
• Press the CAMP key or dial 45.• The called station will receive off-hook ring tone repeated every few sec-
onds and its first available CALL button will flash green to indicate yourcall is waiting.
• Wait for the called party to answer.• The called station must release its first call or place it on hold before an-
swering your camp-on.
NOTES:1. If you receive No More Calls tone, that station has no available key to ac-
cept your call. Hang up or leave a message.2. If the Hot Keypad feature has been turned off, you must first lift the hand-
set or press the SPEAKER key before you begin dialling.
CALLING YOUR SYSTEM OPERATOR• Dial 9 to call your system operator or group of operators.• If you want to call a specific operator, dial that person’s extension num-
ber.
NOTE: If the Hot Keypad feature has been turned off, you must first lift thehandset or press the SPEAKER key before you begin dialling.

12
CALL PROCESSINGSYSTEM HOLD• When you are connected to any call, press HOLD. The call will flash
green at your keyset. If this call appears on a line key at other keysets,it will flash red at those keysets.
• To take the caller off hold, press that key and the green flashing light willgo steady green again. Resume the conversation.
NOTE: While on a call, pressing a line key, route key or flashing CALL but-ton will automatically put your first call on hold and connect you to the newcall. See Automatic Hold under Customizing Your Keyset.
EXCLUSIVE HOLDTo place an outside call on hold at your phone so that other users cannot get it:
• Press the HOLD button twice. The call will flash green on your keysetand this line will show a steady red light on other keysets.
• To retrieve the call, press the flashing green line button or press theHOLD button a third time.
NOTE: Intercom calls will always be placed on exclusive hold.
REMOTE HOLDWhen you wish to place a call on hold at another station. Press TRANSFERand dial the station number (or press the appropriate DSS key). Press theHOLD key. This will place the call on system hold on an available CALL but-ton or Line Key at the remote station and return you to dial tone.
NOTES:1. If the destination station does not have any free CALL buttons or line
keys you will hear No More Calls tone and must return to the other partyby pressing the TRANSFER key (or the RETURN soft key in the display).
2. Intercom calls cannot be remote held.
HOLD RECALLIf you leave a call on hold longer than the hold timer, it will recall your sta-tion. The button that the call appears on will have a slow flashing amber light.
• When your phone rings, lift the handset or press the ANS/RLS orSPEAKER key to answer the recall.

13
• If you do not answer this recall within a pre-programmed period of time,it will go to the system operator.
CONSULTATION HOLDWhen you are talking on an outside line and it is necessary to consult withanother extension:
• Press the TRANSFER key; you will receive transfer dial tone. Your call isplaced on transfer hold.
• Dial the extension number.• Consult with the internal party. • Press TRANSFER to return to the outside party or hang up to transfer
the call.
NOTE: Repeatedly pressing the TRANSFER key will toggle between theoutside party and internal extension.
RETRIEVING CALLS HELD AT ANOTHER STATIONWhen a line is on hold and it appears on your keyset, press the line buttonwith the red flashing light.
When a line is on hold and it does not appear on your keyset, dial 12 plusthe line number or the extension number of the station that placed the callon hold.
NOTE: If the Hot Keypad feature has been turned off, you must first lift thehandset or press the SPEAKER key before you begin dialling.
CALL PARKYou can park an outside call in one of 10 “parking orbits”.
• Press the PARK key and dial the orbit number required (0-9); the keywhich the call was on will flash.OR
• Press a dedicated PARK key which will also flash.• To have the call picked up by another station notify the station user of
the parking orbit number.
To pick up a parked call.
• Press the PARK key followed by the orbit umber required or press theflashing PARK key.

14
TRANSFERRING CALLSTransfer is used to send any call to another extension in one of two ways.You can do a screened transfer by informing the other extension who is call-ing or you can do a blind transfer without notification.
• While on a call, press the TRANSFER key and dial an extension numberor group number. Your call is automatically put on transfer hold. ORPress a DSS key or station group key. Your call is automatically put ontransfer hold.
• Hang up when you hear ringing (this is an unscreened or blind transfer).ORWait for the called party to answer and advise him/her of the call andhang up. If the transfer is refused, you will be reconnected to the outsideline when the called station hangs up or you can press TRANSFER toreturn to the outside party. If you wish to send the call to another exten-sion without waiting for the first station to hang up, simply press anoth-er DSS button. ORPress the CALL button or C.O. line key to return to the outside party andbegin the transfer process again.
When you are transferring a call to a keyset set for Voice Announce or AutoAnswer, the transferred call will always ring.
NOTES:1. After the inside party answers, you may alternate back and forth
between the parties by pressing the TRANSFER key.2. If you receive No More Calls tone, that station has no key available to re-
ceive another call. Press TRANSFER to return to the other party.3. You cannot transfer an Intercom call by pressing a DSS key. You must
press the TRANSFER key and dial the destination extension number.
TRANSFER WITH CAMP-ONWhen you are transferring a call to another station and you receive a busysignal, you may camp the call on to this station. Simply hang up when youhear the busy signal. The called party will be alerted that a call is waiting forthem.
NOTE: If you receive No More Calls tone, that station has no key availableto receive another call. Press TRANSFER to return to the outside caller.

15
TRANSFER TO VOICE MAILThis feature is used to send a call directly to a voice mailbox. Your keysetmust have a correctly programmed VT key to accomplish this. To transfer acall directly to a voice mailbox:
• While on a call, press the VT key and dial the mailbox number.• Hang up when dialling is completed.
CALL WAITINGIf an outside call has been camped-on to your phone or another station hascamped-on to you:
• Your keyset will ring and the call that is waiting for you (camped-on) willflash green.
• Press the flashing button to answer; your other call will go on hold auto-matically if your station has the Automatic Hold feature set. If not, youmust press HOLD and then the flashing button. ORFinish the first call and hang up; the waiting call will ring.
• Lift the handset or press the ANS/RLS or SPEAKER key to answer.
NOTE: Intercom calls will not go on Automatic Hold.
CONFERENCE CALLSYou may conference up to five parties (you and four others) with a maximumof 2 external parties (eg outside lines or remote extensions) in any order.
• While engaged in a conversation, press the CONF key and receive con-ference tone.
• Make another call, either intercom or outside, press the CONF key andreceive conference tone.
• Make another call or press the CONF key to join all parties.• Repeat the last step until all parties are added.
NOTE: When attempting to add another party to the conference and you arenot able to reach the desired person, hang up. Simply press the CONF keyagain to return to your previous conversation.
To drop a party from your conference call:
• Press CONF and dial the extension or line number that is to be dropped.• Press CONF again to reestablish the conference.
NOTE: To leave the conference, hang up. Control is passed to the next inter-nal station. If there are no internal stations and you wish to leave outside

16
lines connected together in a trunk to trunk conference, press the CONF keyplus the CALL button that the call appears on or follow the instructions todrop a party and use your extension number. When they hang up, the lineswill release automatically. Press CONF to rejoin a trunk to trunk conference.
FORWARDING CALLS You may forward your calls to another station, group of stations or an exter-nal telephone number. Program a destination for the type of forwarding youwant as detailed below. If you have FWD ALL, FWD BUSY and FWD NOANSWER keys, press one to turn that forward feature on. A steady red lightreminds you what forward condition is activated.
You can clear all call forward conditions set at your station by lifting the hand-set and dialling 600.
FORWARD ALL CALLSTo forward all your calls under any condition to another station:
• Dial 601 plus the extension or group number.• Receive confirmation tone and hang up.
NOTES:1. If the Hot Keypad feature has been turned off, you must first lift the hand-
set or press the SPEAKER key before you begin dialling.2. The station that receives a Forwarded All call can transfer the call to the
forwarded station. This is useful when you are expecting an importantcall but you do not wish to be disturbed by other calls.
3. When a station user places his/her keyset in Forward All mode andhe/she does not have a FORWARD ALL key, the TRANSFER key willlight to indicate Forward All has been set and calls to this station havebeen transferred elsewhere.
FORWARD BUSYTo forward calls to another station when you are on the phone:
• Dial 602 plus the extension or group number.• Receive confirmation tone and hang up.
NOTE: If the Hot Keypad feature has been turned off, you must first lift thehandset or press SPEAKER before you begin dialling.

17
FORWARD NO ANSWERTo forward calls to another station when you do not answer:
• Dial 603 plus the extension or group number.• Receive confirmation tone and hang up.
NOTE: If the Hot Keypad feature has been turned off, you must first lift thehandset or press the SPEAKER key before you begin dialling.
FORWARD BUSY/NO ANSWERIf you have both a Forward on Busy destination and a Forward No Answerdestination programmed, you may set both of these at the same time:
• Dial 604.• Receive confirmation tone and hang up.
NOTE: If the Hot Keypad feature has been turned off, you must first lift thehandset or press the SPEAKER key before you begin dialling.
FORWARD FOLLOW MEWhen you want all calls to your extension forwarded to the extension whereyou are now:
• Dial 605 plus your extension number.• Receive confirmation tone and hang up.
If you want a specific extension’s calls forwarded to your phone (RemoteCall Forward):
• Dial 605 plus the desired extension number.• Receive confirmation tone and hang up.
NOTE: If the Hot Keypad feature has been turned off, you must first lift thehandset or press the SPEAKER key before you begin dialling.
FORWARD TO AN EXTERNAL NUMBERTo forward outside calls to a number outside of your business, you musthave a FWD EXTERNAL button on your keyset.
• While on-hook, press TRANSFER and then dial 102.• Dial 5.• Dial the trunk or trunk group access code followed by the telephone
number that you want.• Press TRANSFER to store.

18
• Press FWD EXTERNAL to turn the feature on and press it again to turnthe feature off.
NOTES:1. External Call Forward will cancel all other call forwarding instructions.2. If the Hot Keypad feature has been turned off, you must first lift the hand-
set or press the SPEAKER key before you begin dialling.
CALL FORWARD OPTIONSA display keyset may review or change call forward options and destina-tions. Call forward access can be done via the keypad or by accessing thekeyset display features. To review or change call forward options:
• Press TRANSFER 102.• Dial 0-5 to select the forward type (e.g., 1) OR
Press UP or DOWN to select the forward typePress the right soft key to move the cursor
• Dial the destination number (e.g., 202) ORPress UP or DOWN to select the destinationPress the right soft key to move the cursor
• Dial 1 to set ORPress UP or DOWN to select YES or NO
• Press TRSF to store and exit
STATION CALL PICKUPTo pick up (answer) a call ringing at another station, lift the handset and dial65 plus the extension number of the ringing phone.
NOTE: If the Hot Keypad feature has been turned off, you must first lift thehandset or press the SPEAKER key before you begin dialling.
GROUP CALL PICKUPTo pick up (answer) a call ringing in any pickup group, lift the handset anddial 66 plus the desired group number 01–08 or press the flashing GROUPPICKUP key if available.
NOTES:1. A group pickup key can have an extender for a specific pickup group.2. If the Hot Keypad feature has been turned off, you must first lift the hand-
set or press the SPEAKER key before dialling the access code.3. Station and group pickup features cannot be used to answer recalls to
a station, only new ringing calls and operator recalls.

19
DIALLING FEATURESSPEED DIALLING You can dial a preprogrammed telephone number stored in the system-widespeed dial list of numbers 500–799 or from your personal list of numbers00–49:
• With the handset on-hook, press the MEMORY key or dial 16.• Dial the desired speed dial number.• The telephone number is automatically dialled for you.
NOTE: If the Hot Keypad feature has been turned off, you must first lift thehandset or press the SPEAKER key before you begin dialling.
PROGRAMMING PERSONAL SPEEDDIAL NUMBERSYou can program frequently dialled telephone numbers in a personal speeddial list. A station may be assigned up to fifty numbers, 00–49. See your sys-tem administrator to determine the amount assigned to your station.
• While on-hook, press TRANSFER and then dial 105.• Dial a speed dial number (00–49).• Dial a line or line group access code.• Dial the telephone number to be stored (18 digits maximum). It can in-
clude #, , FLASH and PAUSE.• Press TRANSFER to store the number.
NOTE: If the Hot Keypad feature hasbeen turned off, you must first lift thehandset or press the SPEAKER keybefore you begin dialling.
For the purposes of programmingspeed dial numbers, the programma-ble keys are known as A, B, C, D, Eand F and are defined below.
DS 24D/DS 24SDEFAULT
PROGRAMMINGKEYS LAYOUT

20
• The A key is not used.• The B key inserts a flash.• The C key inserts a pause.• The D key is used for pulse to tone conversion. If your system uses
rotary (or pulse) dialling C.O. lines, pressing D while entering a speeddial number causes all subsequent digits to be sent as DTMF tones.
• The E key is used to hide digits. Display keyset users may want to hidesome speed dial numbers so that they will not show in the display. Whenyou are entering a telephone number, press E. All subsequent digits willbe hidden. Press E again to begin displaying digits.
• The F key is used to enter a name. See Personal Speed Dial Namesunder Display Features.
• Use the HOLD key to clear a speed dial number.
ONE TOUCH SPEED DIALLINGYou may assign any speed dial number to an already existing One TouchSpeed Dial button for quick and easy dialling of frequently used numbers.
• While on-hook, press TRANSFER and then dial 107.• Press a One Touch Speed Dial button.• Dial the speed dial number (00–49 or 500–799) that you want assigned
to this button.• Press TRANSFER to store your selection.
To call this telephone number, just press the One Touch Speed Dial button.NOTE: If the Hot Keypad feature has been turned off, you must first lift thehandset or press the SPEAKER key before you begin dialling.
LAST NUMBER REDIALTo redial the last telephone number you dialled, press the LNR key or dial 19.
NOTES:1. If the Hot Keypad feature has been turned off, you must first lift the hand-
set or press the SPEAKER key before you begin dialling.2. Redial does not apply to intercom calls.
SAVE NUMBER WITH REDIAL To save the number you just dialled for later use, press the SNR key beforehanging up.
To redial this saved number at any time, press the SNR key or dial 17. Thesame line will be selected for you.

21
NOTES:1. If the Hot Keypad feature has been turned off, you must first lift the hand-
set or press the SPEAKER key before you begin dialling.2. The saved telephone number is stored in memory until you save anoth-
er number.3. Redial does not apply to intercom calls.
CHAIN DIALLINGYou may manually dial additional digits following a speed dial number orchain as many speed dial numbers together as required:
• After the first speed number is dialled, press SPD again and dial anoth-er speed number OR manually dial additional digits following a speeddial number.
AUTOMATIC REDIAL/RETRYWhen you are making an outside call and you receive a busy signal, the sys-tem can automatically redial the number for you. It will automatically redialat a pre-programmed interval for up to 15 attempts.
• When you hear a busy signal, press the RETRY button.• The system will reserve the line and automatically redial the same num-
ber for you. You will hear the call being made through the keyset speak-er. The microphone is muted.
• When the called party answers, you must pick up the handset or pressthe ANS/RLS or SPEAKER key before you can begin speaking. Youmust answer within 10 seconds.
NOTES:1. If you make another call, auto-redial is canceled. 2. To cancel a retry, lift and replace the handset.
PULSE TO TONE CHANGEOVERWhen making an outside call on a dial pulse line, press #. All digits dialledafter the # with be sent as tones.

22
PAGING AND MESSAGINGMAKING AN INTERNAL PAGETo make an announcement through the keyset speakers:
• Lift the handset.• Press the PAGE key or dial 55.• Dial the desired zone number 1, 2, 3 or 4.
ORDial 0 to page all internal zones.
• After the attention tone, make your announcement.
NOTE: If you have a dedicated page zone key, it is not necessary to pressPAGE and dial a zone number.
MAKING AN EXTERNAL PAGETo make an announcement through the external paging speakers:
• Lift the handset.• Press the PAGE key or dial 55.• Dial the desired zone number 5.• After the attention tone, make your announcement.
NOTE: If you have a dedicated page zone key, it is not necessary to pressPAGE and dial a zone number.
ALL PAGETo page all designated keysets and external speakers at the same time:
• Lift the handset.• Press the PAGE key or dial 55.• Dial or press the ALL PAGE key.• After the attention tone, make your announcement.
NOTE: The LED on the ALL PAGE key will only light when an All Page is inprogress.
23
MEET ME PAGE• Lift the handset.• Press the Meet Me Page (MMPG) key or dial 54.• Dial the desired zone number.• After the attention tone, instruct the paged person to dial 56.• Press WAIT or TRANSFER.• Remain off-hook until the person dials 56 from any phone.• The paged person will be automatically connected with you.
CALL PARK AND PAGEWhen you have an outside call for someone who is not at his/her desk, youcan park the call and page the requested party:
• While in conversation, press the PAGE button. The call is automaticallyparked at your station.
• Dial the desired page zone and announce “park” and your extensionnumber or the line number. Hang up.
To retrieve a parked call:
• Dial 10 plus the number that was announced. If you have a PARK key,press it and dial the number that was announced.
• You will be connected to the parked call.
NOTES:1. If the parked call is not retrieved within a pre-programmed period of
time, it will recall your keyset and have a slow flashing amber light. Youcannot park and page intercom calls.
2. If the Hot Keypad feature has been turned off, you must first lift the hand-set or press the SPEAKER key before you begin dialling.
SETTING A MESSAGE INDICATIONWhen you are calling another station and no one answers or you receive abusy signal, you can leave a message indication:
• Press the MESSAGE key or dial 43 and receive confirmation tone.• Hang up. The MESSAGE key on the called station will light. Standard
telephones receive special dial tone as a message indication.
NOTES:1. A station can have up to five message indications.2. If the Hot Keypad feature has been turned off, you must first lift the hand-
set or press the SPEAKER key before you begin dialling.
24
CANCELLING MESSAGESTo cancel a message indication that you left at another station, dial 42 plusthe extension number of the station at which you left a message.
To cancel all message indications left at your keyset, dial 42 plus your exten-sion. Your MESSAGE light will go out.
NOTE: If the Hot Keypad feature has been turned off, you must first lift thehandset or press the SPEAKER key before you begin dialling.
RETURNING MESSAGES• Press the MESSAGE key or dial 43. The first station that left a message
will be called automatically. If that station does not answer, your MES-SAGE light will stay on.
• Repeat until all messages have been returned in the order received.• Your MESSAGE light will turn off when all messages have been re-
turned.
NOTES:1. Display keyset users can view message indications and return them in
any order. See Viewing Message Indications under Display Features.2. If the Hot Keypad feature has been turned off, you must first lift the hand-
set or press the SPEAKER key before you begin dialling.3. If a message has been left at your keyset by a keyset in Auto Answer,
you must manually cancel the message after it has been returned.
PROGRAMMED MESSAGESWhen you will be away from your phone for any length of time, leave a pro-grammed station message. Display stations calling you will see this mes-sage and be informed of your status or follow your instructions.
• Dial 48 plus any of the message codes 01–20 listed on the back of thisuser guide.
• To cancel this message, dial 48 plus 00.
NOTE: If the Hot Keypad feature has been turned off, you must first lift thehandset or press the SPEAKER key.
You can have multiple programmed message keys and each one can havea different message code:
• Press any programmed message key to set the message. Press the keyagain to turn off.
• Pressing another programmed message key will turn the previous oneoff and set a new programmed message.

25
CONVENIENCE FEATURESDO NOT DISTURBUse this feature when you want to block calls to your keyset.
• While on-hook, press the DND key or dial 401. The DND key flashes toremind you of this mode.
• To cancel DND, press the DND key again or dial 400. The DND lightturns off. You can make calls while in the DND mode.
NOTES:1. If the Hot Keypad feature has been turned off, you must first lift the hand-
set or press the SPEAKER key.2. If you place your keyset in DND mode and you do not have a DND key,
your KEYSET STATUS INDICATOR will flash to indicate DND status.
ONE TIME DNDIf you are on a call and you do not wish to be interrupted while on that call,you can press the DND key and place your station in Do Not Disturb. Whenyou hang up at the end of the call, DND will be automatically canceled andyour keyset will be able to receive new calls. This feature requires a DNDkey.
MUTEYou can mute the handset transmitter or the microphone during any conver-sation:
• Press the MUTE key. It will light red.• To resume speaking, press the MUTE button again. The light turns off.
BACKGROUND MUSICWhen a music source is supplied, you may listen to music through thespeaker in your keyset:
• While on-hook, press the HOLD button to hear music.• Press the HOLD button again to turn music off.
You can set the level of background music by using the VOLUME keys whilelistening to the music. This does not affect the speakerphone level.

26
APPOINTMENT REMINDER/ALARMCLOCKThis feature works like an alarm clock. Use it to remind yourself of an ap-pointment later in the day (TODAY ONLY) or as a daily reminder every day(DAILY). You can set up to two alarms. Each one can be either a TODAYONLY or a DAILY alarm.
When the alarm rings, you will hear three short rings repeated three times.Lift the handset to answer the alarm. If you do not, the alarm will alert youtwo more times at five minute intervals.
To set alarms:
• Press TRANSFER and then dial 112.• Dial the alarm number 1 or 2.• Dial the time at which you want the alarm to sound. Enter the time as
HHMM (hours and minutes) using the 24 hour clock.• Dial 0 (NOT SET), 1 (TODAY ONLY) or 2 (DAILY) to select the alarm type.• Press TRANSFER to save.• Repeat for each alarm if needed.
To cancel individual alarms:
• Press TRANSFER and then dial 112.• Dial alarm number 1 or 2.• Press the HOLD key.
NOTE: Display keysets can show a reminder message. See Alarm Remind-er Messages under Display Features.
ANSWERING THE DOOR PHONEWhen you are programmed to receive calls from a door phone:
• You will receive three short rings repeated.• Lift the handset or press ANS/RLS or SPEAKER key. You are connect-
ed to the door phone.• If an electric door lock release is installed, dial 13 to unlock the door.
27
CALLING THE DOOR PHONE/ROOMMONITORYou may call the door phone and listen to what may be happening outsideor in another room.
• Dial the extension number of the door phone.• You will be connected to the door phone and you can listen or have a
conversation.• If an electric door lock release is installed, dial 13 to unlock the door.
NOTE: If the Hot Keypad feature has been turned off, you must first lift thehandset or press the SPEAKER key.
EXECUTIVE/SECRETARY HOT LINEIf programmed, an executive and a secretary can have a hot line betweenthem. When the executive station is in the DND mode, all of its calls will ringthe secretary station.
• Either person can press the BOSS key to make a voice call to the otherstation.
• Using the hot line will override DND at the other station. This key will lightred when the other station is in use.
To transfer a call to a Boss Station in DND:
• Press the TRANSFER key followed by the BOSS key.• Wait for the BOSS to answer to announce the call and hang up to com-
plete the transfer OR• Hang up to complete a blind transfer after pressing the BOSS key.
GROUP LISTENINGWhen you are engaged on a call and you are using the handset, you maywant other people to hear the distant party’s voice over the speaker:
• Press the LISTEN key to turn on the speaker. The microphone is not inuse, so the distant party does not hear other parties present in your of-fice.
• Press LISTEN again to turn the speaker off and resume private conver-sation.
• Repeat if necessary.

28
NOTE: Depending on speaker volume and the acoustics of your office, itmay be advisable to turn the group listening feature off before hanging up.This will eliminate a momentary squeal.
ACCOUNT CODESWhen equipped with optional equipment, your system will allow calls to becharged to a specific account:
• During any outside C.O. call, press the account (ACCT) key.• Enter the account code (maximum 12 characters including and #).
Press the ACCT key again. Your conversation will not be interrupted.
NOTE: If you make an error before you complete the account code, pressthe ACCT key twice and redial the correct code. Only the last account codedialled will be printed.
LOCKING YOUR KEYSETYou can lock your keyset to prevent other people from making or receivingcalls with it while you are away. You can unlock it when you return.
• While on-hook, press TRANSFER and then dial 100.• Dial your four digit station passcode.• Dial 1 to lock outside call only, 2 to lock all calls or 0 to unlock.• Press TRANSFER to store your selection.
OFF-HOOK VOICE ANNOUNCEKeysets may receive a voice announcement while on another call. The call-ing station must have an OHVA key. When you are in DND, you cannotreceive OHVA calls. The OHVA feature will work with intercom and trans-ferred calls.
To make an off-hook voice announcement:
• Dial the extension number or press the DSS key.• When you receive a busy signal, press the OHVA key.• After the attention tone, begin speaking.• Finish the call by replacing the handset or pressing the ANS/RLS or
SPEAKER key.
NOTES:1. When you are voice announcing to a station close to you, use the hand-
set to avoid an echo effect.2. You cannot off-hook voice announce to single line telephones.

29
When you receive an off-hook voice announcement, if you are using thehandset, you will hear the announcement in the handset receiver. If you areusing the speakerphone, you will hear the announcement over the keysetspeaker. In both cases, you can continue to speak to the original party.
• Press the flashing CALL button on your keyset. This will place the origi-nal party on hold and allow you to talk to the announcing party.
• To return to your first party, press the key corresponding to your originalcall. This will disconnect the OHVA call.
OHVA BLOCKYour keyset can be programmed with an OHVA Block (BLOCK) key. Press-ing this key will prevent anyone from making an OHVA to you until you pressthe button again and cancel the blocking.
OHVA REJECTYour keyset can be programmed with an OHVA Reject (REJECT) key. Press-ing this key while receiving an OHVA call will disconnect the voice announc-ing party and return you to your original call.
IN GROUP/OUT OF GROUPIf your keyset is assigned to a station ring group, you can remove your key-set from the group and then put it back in. While you are out of the group,you can receive calls to your extension number but not calls to the groupnumber. If you have an IN/OUT key:
• Press the IN/OUT key. It will light red when your keyset is in the group.• Press the IN/OUT key again to exit the group and turn the light off. Re-
peat as necessary.
If you do not have an IN/OUT key:
• Dial 53 plus the group number plus 0 to exit the group or 1 to enter thegroup. Repeat as necessary.
NOTE: If the Hot Keypad feature has been turned off, you must first lift thehandset or press SPEAKER key.
The IN/OUT key can include an extender to indicate the specific group thatthis key will affect. This means that if you are in multiple groups, you can de-cide for which groups you will receive calls.

30
CUSTOMIZING YOUR KEYSETSELECT RING TONEEach keyset user can select any one of eight ring frequencies:
• While on-hook, press TRANSFER and then dial 111.• Dial 1–8 or press the UP and DOWN keys to hear each tone.• When you hear the tone that you prefer, press TRANSFER to save it.
CHANGE YOUR PASSCODEFrom the factory, your station passcode is 1234. You can change your sta-tion passcode whenever you desire.
• While on-hook, press TRANSFER and then dial 101.• Dial your old passcode.• Dial a new passcode (must be four characters). You can use 0–9.• Redial the new passcode to verify. If successful, you will hear two beeps.
Four beeps indicate an incorrect code. Reenter the code again.• Press TRANSFER to store the new passcode.
SET ANSWER MODEYou can receive internal calls in one of three modes (see Answering IntercomCalls under Intercom Calls for descriptions):
• While on-hook, press TRANSFER and then dial 103.• Dial 0 for Ringing, 1 for Auto Answer or 2 for Voice Announce.• Press TRANSFER to store your selection.
NOTE: When your keyset is programmed for Auto Answer and you have For-ward No Answer (FNA) turned on, you must answer screened transfers bypressing the ANS/RLS key before your FNA timer expires or the call will for-ward.
AUTOMATIC HOLDWhile on an outside call, pressing a line key, route key or a flashing CALLbutton will automatically put your call on hold and connect you to the nextcall. This feature can be turned on or off at your keyset.
• With the handset on-hook, press TRANSFER and then dial 110.• Dial 01 to turn Automatic Hold on or 00 to turn it off.• Press TRANSFER to store your selection.

31
NOTE: Intercom calls can be automatically put on hold by pressing TRANS-FER.
HEADSET OPERATIONKeyset users can switch between headset mode and handset mode. Whenusing headset mode, press the ANS/RLS key to answer and release calls.
• With the handset on-hook, press TRANSFER and then dial 110.• Dial 21 to use the headset or 20 to use the handset.• Press TRANSFER to store your selection.
Your keyset may be equipped with a Headset mode key. If it is so equippedpressing this key while the light is out will cause the keyset to enter headsetmode and the light will illuminate to indicate this. Pressing the key while thelight is lit will cause the keyset to return to handset mode and the light willgo out.
HOT KEYPADOn your phone system your keyset’s keypad can be made “live” or “hot”so that it is not necessary to lift the handset or press the SPEAKER keybefore you begin dialling. Calls can be made and features activated by sim-ply dialling the C.O. line number, trunk group access code, intercom num-ber or feature access code. To activate this feature:
• With the handset on-hook, press TRANSFER and then dial 110.• Dial 31 to turn the Hot Keypad on or 30 to turn it off.• Press TRANSFER to store your selection.
KEY CONFIRMATION TONEYou can hear a short beep (confirmation tone) each time you press a buttonon the dial pad. This tone can be turned on or off.
• While on-hook, press TRANSFER and then dial 110.• Dial 40 to turn tones off or 41 to turn tones on.• Press TRANSFER to store your selection.
REJOINING A PAGEThis feature allows you to hear the remaining portion of an ongoing internalpage after you return your keyset to idle. To enable this feature:
• With the handset on-hook, press TRANSFER and then dial 110.• Dial 51 to turn this feature on or 50 to turn it off.• Press TRANSFER to store your selection.

32
RING PREFERENCEThis feature automatically answers ringing calls when you lift the handset orpress the ANS/RLS key. This method will always answer calls in the orderthey arrived at your keyset. When you turn ring preference off, you mustpress the flashing button to answer a call, allowing you to answer calls in theorder you choose.
• With the handset on-hook, press TRANSFER and then dial 110.• Dial 61 to turn ring preference on or 60 to turn it off.• Press TRANSFER to store your selection.

33
DISPLAY FEATURESINTERACTIVE DISPLAY KEYSThe three keys below the display are substitutes for dedicated feature keysand access codes. Pressing one of these keys has the same effect as press-ing a programmable key. These keys are called soft keys as their functionsare not fixed. They change to present you with the best options for that callcondition. The use of soft keys allows the programmable keys to be used formore DSS and speed dial keys.
The SCROLL key is used to display options available to the user at a partic-ular time or during a specific procedure. Press this key once while in the idlestate to view the three main categories available.
201: STN NAMECALL OTHER ANS
ANSWER: Guides you through the options to answer calls.OTHER: Guides you through features other than making or answering calls.CALL: Guides you through the options to make a call.
Select one of the main categories: CALL, OTHER or ANS (ANSWER). Pressthe SCROLL key to display additional options available under each of thethree main categories. The symbol displayed as the last character on thelower line of the display indicates that there are additional options. Press theSCROLL key to display these additional options.
User instructions will be displayed in lower case letters. Options assigned tosoft keys will be in upper case letters.
DIRECTORY INFORMATIONAn 11 character directory name can be assigned to each extension number.Display keyset users can view the name of the called or calling station beforeanswering.
Each outside line can have an 11 character directory name. Incoming callscan be easily identified and answered with different greetings.
Outside and internal calls ringing to a station group will display [CALL FORxxx] where xxx is the station group number. This allows you to answer callsdirected to you differently than calls directed to your group.

34
DIAL BY DIRECTORYEach station or speed dial number can have an associated directory name.A station or speed dial number can be selected by scrolling alphabeticallythrough a directory name list. This on-line “phone book” allows the user tolook up and dial any station or speed dial number in seconds.
• Press the DIR key (DIRECTORY).• Select the directory you wish to use: PERS (personal speed dial num-
bers), SYS (system speed dial numbers) or STN (station names).• Dial the key on the keypad that corresponds to the first letter of the name
you wish to search for.• Use the UP and DOWN arrows to scroll through the names.• Press the DIAL soft key to dial the number.
NOTE: A DIR key can have an extender to take you directly to one of theabove lists.
CALL PROGRESS DISPLAYS During everyday call handling, your keyset display will provide informationthat is helpful and in some cases invaluable. Displays like [CALL FROM 203],[TRANSFER TO 202], [701: RINGING], [TRANSFER FM 203], [708 busy],[Camp on to 204], [Recall from 204], [Call for 501], [message frm 204] and[FWD ALL to 204] keep you informed of what is happening and where youare. In some conditions you are prompted to take an action and in othercases you receive directory information.
DISPLAY NUMBER DIALLEDDisplay keysets begin showing digits as they are dialled. They will stay in thedisplay until the call duration timer comes on automatically or the TIMERbutton is pressed. If the call duration timer is not used, the number dialledwill be displayed until the call is released, transferred or put on hold.
CALL DURATION TIMERThe system can be set to automatically time outside calls. A few secondsafter you dial a telephone number, the timer appears in the display. Itappears immediately for incoming calls. The call timer continues for the du-ration of the call. Call duration times are displayed in minutes and seconds.If a call lasts longer than 60 minutes, the timer restarts.
You can press the TIMER key to manually begin timing a call. Press it againto stop timing. If you press it while the automatic timer is on, the call dura-tion time is restarted.

35
AUTO TIMERDisplay keyset users may have the timer automatically start when theyanswer incoming calls or after a short delay on an outgoing call.
• With the handset on-hook, press TRSF and then dial 110.• Dial 11 to turn the auto timer on or 10 to turn it off.• Press TRSF to store your selection.
TIMER FUNCTIONDisplay keyset users may use this feature as a simple stopwatch.
• When the keyset is idle, press the TIMER button to start timing.• Press the TIMER button again to stop timing.• Read the elapsed time in the display.• Lift the handset and replace it. The display will return to date and time.
VIEWING MESSAGE INDICATIONSYou can view all of your message indications before you return them:
• With the handset on-hook, press the MSG key with the red flashing light.• The first station that left a message indication will be displayed.• Press the UP and DOWN arrows to scroll through the stations that left
message indications. Use the soft keys to reply, clear or advance to thenext message.
• Press the ANS/RLS key to return your keyset to the idle condition.
ALARM REMINDER MESSAGESWhen you use the alarm/appointment reminder feature, you create a 16character reminder message. When the alarm rings, your message will ap-pear instead of [ALARM REMINDER]. To program reminder messages:
• Press TRANSFER and then dial 116.• Dial the alarm number 1 or 2.• Dial the time you want the alarm to go off. Enter the time as HHMM
(hours and minutes) using the 24 hour clock.• Dial 0 (NOT SET), 1 (TODAY) or 2 (DAILY) to select the alarm type.• Write your message using the dial pad keys. Each press of a key selects
a character. Pressing the next key moves the cursor to the next position.For example, if your message is “TAKE MEDICATION,” press 8 once toget the letter “T.” Press 2 once to get “A.” Press 5 twice to get “K.” Con-tinue selecting characters from the following table to complete yourmessage.
• Press the TRANSFER key to store the alarm and reminder message.• Repeat for each alarm if needed.

36
COUNT 1 2 3 4 5
DIAL 0 < > . ) 0
DIAL 1 space ? , ! 1
DIAL 2 A B C @ 2
DIAL 3 D E F # 3
DIAL 4 G H I $ 4
DIAL 5 J K L % 5
DIAL 6 M N O ^ 6
DIAL 7 P Q R S 7
DIAL 8 T U V 8
DIAL 9 W X Y Z 9
DIAL : = [ ]
NOTES:1. When the character you want appears on the same dial pad key as the
previous character, press UP to move the cursor one space to the right.2. Other symbols are available for DIAL #.
To cancel an individual alarm and reminder message:
• Press TRANSFER and then dial 112.• Dial alarm number 1 or 2.• Press the HOLD key.• Press the TRANSFER key.
PERSONAL SPEED DIAL NAMESEach personal speed dial number can have an 11 character name assignedto it. This name is used to select the speed dial bin when you are dialling bydirectory.
• Press TRANSFER and then dial 106.• Dial the speed dial bin number 00–49.• Write your message using the procedure described in Alarm Reminder
Messages.• Press the TRANSFER key to store the speed dial name.• Repeat for each speed dial bin if necessary.

37
STATION NAMESYou can assign an 11 character name to your keyset. This allows other dis-play keyset users to call you using the directory dial feature.
To program a station name:
• Press TRANSFER and then dial 104.• Enter the 11 character name using the procedure described in Alarm Re-
minder Messages.• Press TRANSFER to store the name.
MANAGING KEY ASSIGNMENTSYou can view your key assignments and add extenders to some of your pro-grammable keys for easy one touch operation of frequently used features.
An extender is a number that makes an otherwise general key very specific.Adding the digit “4” to a PAGE key defines this key for paging zone four.Adding “225” to a different pickup key will define this key as pickup for ex-tension 225 only. The key must already be assigned by the technician.
• While on-hook, press TRANSFER and then dial 107.• Use the VOLUME keys to scroll through all of your programmable keys
ORPress the programmable key to which you want to add the extender.
• When you reach a key listed below, dial the corresponding extender.• Press TRANSFER to store and exit programming.
KEY DESCRIPTION EXTENDER
BOSS . . . . . . .Boss/Secretary . . . . . .1–4DP . . . . . . . . . .Direct Pickup . . . . . . .Extension or station group numberDS . . . . . . . . . .Direct Station . . . . . . . .Any extension numberFWRD . . . . . . .Call Forwarding . . . . .0–5GPIK . . . . . . . .Group Pick-Up . . . . . .01–08IG . . . . . . . . . .In/Out of Group . . . . . .Any group you are part of 5XXMMPG . . . . . .Meet Me Page . . . . . .0–5, PSMG . . . . . . .Programmed Message 01–20PAGE . . . . . . .Page . . . . . . . . . . . . . .0–5, SG . . . . . . . . . .Station Group . . . . . . .5XXSPD . . . . . . . .Speed Dialling . . . . . .00–49, 500–799DIR . . . . . . . . .Directory . . . . . . . . . . .PERS (1), SYS (2) or STN (3)VT . . . . . . . . . .Voice Mail Transfer . . .Voice Mail Group (5XX)
NOTE: Confirm that the cursor is placed correctly before you enter the ex-tender.

38
WHAT IS CALLER ID?Caller ID or Calling Line ID Presentation (CLIP) is the name given to theTelephone Company provided feature that delivers the telephone numberand sometimes the name of the person calling your phone.
The Samsung DCS system supports Caller ID and in fact in the case wherethe number only is delivered, the system can be programmed to insert aname for a specific telephone number received. Up to a maximum of 200numbers depending on the type of DCS Telephone system you haveinstalled.
Caller ID is provided by telephone companies as a charged service on bothISDN and analog PSTN lines. However, there are some circumstanceswhere you will not receive the information. The most common reasons forthis are:
• The caller has requested the Telephone Company to stop their tele-phone number being sent.
• The Caller is calling from an area that cannot provide Caller ID eg.International calls.
• Callers are ringing from a Pay phone.• The Caller ID information is corrupted when received from the telephone
company.• The Telephone Company does not send the Caller ID.• The Telephone Company may send the name MOBILE to the system.
SELECTING YOUR CALLER ID/CLIPDISPLAYYou can decide if you want to see the CLIP name or CLIP number in the dis-play. Regardless of which one is selected, you can press the NND key toview the other pieces of CLIP information. To select the type of Caller IDinformation you wish to view first:
• With the handset on-hook, press TRANSFER and then dial 119.• Dial 0 for CLIP options.• Dial 0 if you do not wish to view CLIP information, 1 to view the NUM-
BER first or 2 to view the NAME first.• Press TRANSFER to exit and store your selection.

39
VIEWING THE NEXT CLIP CALLIn the event that you have a call waiting or a camped-on call at your keyset,you can press the NEXT key to display the Caller ID information associatedwith the call in queue at your keyset. Either the CLIP name or CLIP numberwill show in the display depending on your Name/Number selection.
To view Caller ID information for calls that have been camped-on to yourkeyset, press the NEXT key. If your keyset does not have a NEXT key, pressthe CLIP key and then the NEXT soft key.
SAVING THE CID NUMBER At any time during an incoming call that provides CLIP information, you maypress the SAVE key to save the CLIP number. If your keyset does not havea SAVE key, press the CLIP key, the SCROLL key and then the SAVE softkey. The system must be using LCR to dial the saved number.
REDIALLING A SAVED CLIP NUMBERTo redial a number that has been saved, press the SAVE key or dial 17.
NOTES:1. Your telephone system must have LCR correctly programmed to redial
the saved number.2. If the Hot Keypad feature has been turned off, you must first lift the hand-
set or press the SPEAKER key before you begin dialling.
STORING A CLIP NUMBERAt any time during an incoming call that provides CLIP information, you maysave the CLIP number as a speed dial number in your personal speed diallist. To store a Caller ID number in a personal speed dial bin:
• Press the STORE key. The system displays the speed dial bin in whichthe number was stored OR
• Press the CLIP key and then press the SCROLL key.• Press the STORE soft key.• The system displays the speed dial bin in which the number was stored.
NOTE: Your telephone system must have LCR correctly programmed to re-dial the saved number. If LCR is not being used on your system, you will notbe allowed to STORE CLIP numbers.

40
INQUIRE CLIP PARK/HOLD INFOIf you are informed that an incoming call is on hold or has been parked foryou, you may view the Caller ID information before you retrieve the call. Thismay influence how you choose to handle the call.
From an idle keyset:
• Press the INQUIRE key ORPress the CLIP key and then the INQUIRE soft key.
• Dial the trunk number.• You may now answer the call by pressing the ANS key OR
You may use NND to view more information about this call ORYou can return to the idle condition by pressing IGNORE.
If you are on a call:
• Press the INQUIRE key. Your existing call will go on hold ORPress the CLIP key and then the INQUIRE soft key to place the first callon hold.
• Dial the trunk number.• You may now answer the call by pressing the ANS key OR
You may use NND to view more information about this call ORYou can return to the idle condition by pressing IGNORE.
NOTES: 1. If you are on an intercom call or you have Automatic Hold turned off, you
must finish the existing call or place it on hold before inquiring.2. If you inquire about an outgoing call, you will receive a [call no longer
available] display.

41
REVIEWING PAST CLIP CALLSThis feature allows you to review CLIP information for calls sent to your key-set. This list can contain 10–50 calls in a first-in, first-out basis. The list in-cludes calls that you answered and calls that rang your keyset but that youdid not answer. When reviewing this list, you can press one button to dialthe person back. The system must be using LCR to dial the stored number.To access the CLIP information stored in your REVIEW list:
• Press the REVIEW key ORPress the CLIP key and then press the REVIEW soft key.
• If you have entries in your review list, the oldest call will be shown first. • You can now CLEAR this entry OR
Use NND to view more information about this call ORPress DIAL to call this person back ORPress SCROLL and then press STORE to save this number in a person-al speed dial bin.
NOTES: 1. Each keyset defaults with ten review bins. Please see your system ad-
ministrator to determine the number of bins assigned to your keyset.2. Your system must have LCR correctly programmed to allow you to DIAL
numbers from the review list or to STORE entries from the review list.
LCR WITH CLEARWhen you are making an outside call using LCR and dial an incorrect digit,you can press the CLEAR soft key to cancel the digit and continue diallingthe telephone number.
This feature does not operate if you have ISDN connected to your system.

42
SYSTEM ACCESS CODES
The DCS telephone system has the following pre-set (default) feature accesscodes. These codes can be used if a key is not available for the feature youwant to use. Standard telephone users must always dial these codes.
9 Call attendant or system operator 53+grp+1 In group10 + xxx Retrieve parked calls 54+zone Meet Me Page11 Put calls on and take calls off hold 55 + 0 Page all internal zones12 +xxx Retrieve calls on hold at another station 55 + 1 Page internal zone 113 Door lock release 55 + 2 Page internal zone 216 + xxx Make speed dial calls 55 + 3 Page internal zone 317 Save number and redial it 55 + 4 Page internal zone 418 Recall dial tone for new call 55 + 5 Page external zone 119 Last number redial 55 + * All Page2xx Extension numbers 56 Meet Me Answer400 Cancel Do not Disturb 57 Alarm sensor clear401 Set Do Not Disturb 58 DISA alarm clear41 Set Message No Ring 59 Walking class of service42 + xxx Cancel message 600 Cancel all call forwarding43 Set/return messages 601 + xxx Set Forward All Calls44 Busy station/line callback 602 + xxx Set Forward Busy45 Busy station camp-on 603 + xxx Set Forward No Ans46 Set up a conference 604 + xxx Set Fwd Busy/No Ans47 Enter account code 605 + xxx Set Fwd Follow me48 Set programmed station message 65 Directed call pickup49 Send flash to outside line 66 Group call pickup500 Station hunt group 67 Universal Answerto 7xx Individual line numbers509 Station hunt group 8x Line groups53+grp+0 Out of group 0 Line group 0 (Local)

43
PERSONAL SPEED DIAL NUMBERS
CODE NAME TELEPHONE NUMBER
00 _________________________ _________________________
01 _________________________ _________________________
02 _________________________ _________________________
03 _________________________ _________________________
04 _________________________ _________________________
05 _________________________ _________________________
06 _________________________ _________________________
07 _________________________ _________________________
08 _________________________ _________________________
09 _________________________ _________________________
10 _________________________ _________________________
11 _________________________ _________________________
12 _________________________ _________________________
13 _________________________ _________________________
14 _________________________ _________________________
15 _________________________ _________________________
16 _________________________ _________________________
17 _________________________ _________________________
18 _________________________ _________________________
19 _________________________ _________________________
20 _________________________ _________________________
21 _________________________ _________________________
22 _________________________ _________________________
23 _________________________ _________________________
24 _________________________ _________________________
44
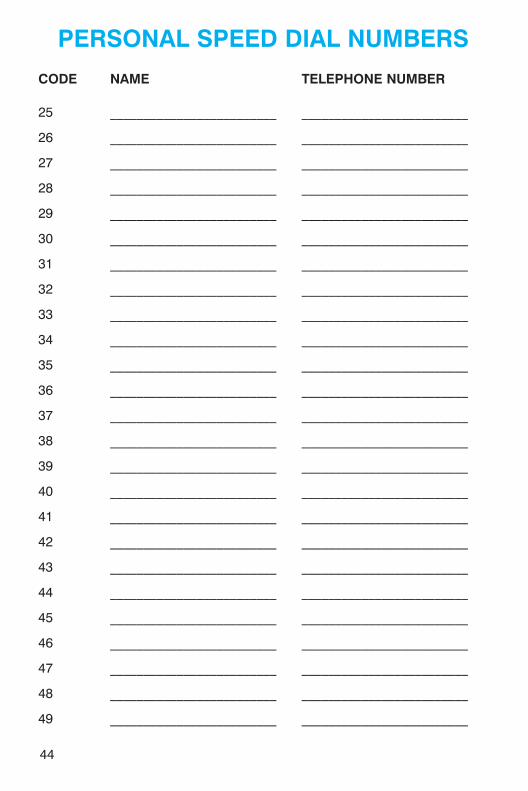
PERSONAL SPEED DIAL NUMBERS
CODE NAME TELEPHONE NUMBER
25 _________________________ _________________________
26 _________________________ _________________________
27 _________________________ _________________________
28 _________________________ _________________________
29 _________________________ _________________________
30 _________________________ _________________________
31 _________________________ _________________________
32 _________________________ _________________________
33 _________________________ _________________________
34 _________________________ _________________________
35 _________________________ _________________________
36 _________________________ _________________________
37 _________________________ _________________________
38 _________________________ _________________________
39 _________________________ _________________________
40 _________________________ _________________________
41 _________________________ _________________________
42 _________________________ _________________________
43 _________________________ _________________________
44 _________________________ _________________________
45 _________________________ _________________________
46 _________________________ _________________________
47 _________________________ _________________________
48 _________________________ _________________________
49 _________________________ _________________________