part 1: namelist modifications part 2: code modifications part 3: … · 2015-08-13 · part 1:...
TRANSCRIPT

Namelist and Code Modifications
Part 1: Namelist Modifications Part 2: Code Modifications Part 3: Quiz
Cecile Hannay, CAM Science Liaison Atmospheric Modeling and Predictability Section Climate and Global Dynamics Division
.

“I can only show you the door. You're the one that has to walk through it”
(The Matrix, 1999)

Part 1: Namelist Modifications
In this section, we will: - review the “CESM flow” and how to make namelist changes,
- see where to find documentation for namelist variables
- as an illustration, we will customize the output history files to get high frequency output

Review: The 4 commands to run CESM
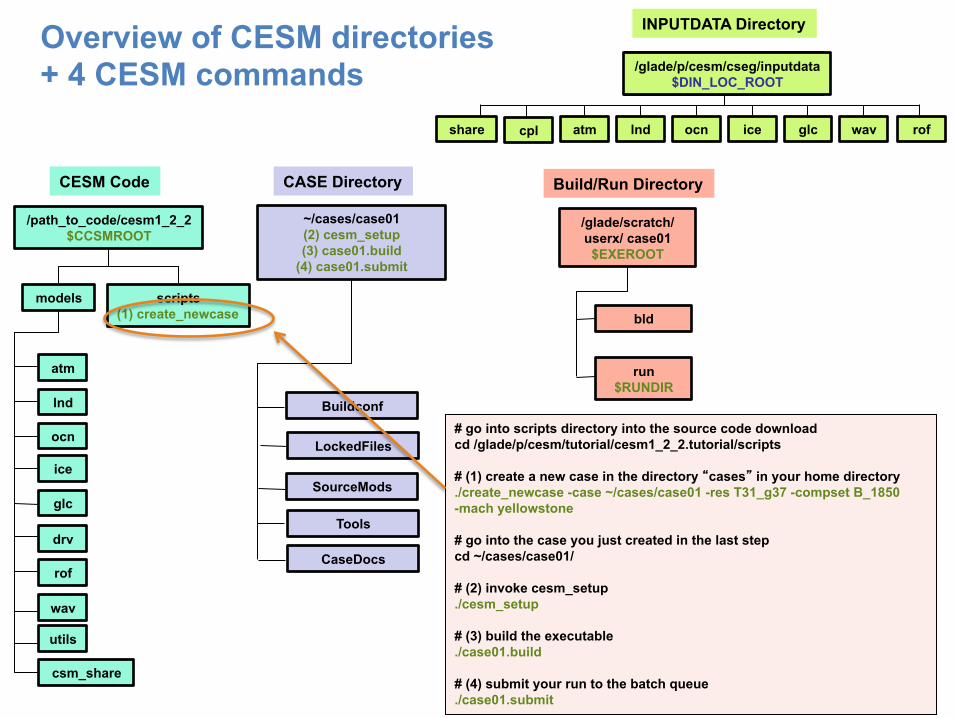
# go into scripts directory into the source code download cd /glade/p/cesm/tutorial/cesm1_2_2.tutorial/scripts # (1) create a new case in the directory “cases” in your home directory ./create_newcase -case ~/cases/case01 -res T31_g37 -compset B_1850 -mach yellowstone # go into the case you just created in the last step cd ~/cases/case01/ # (2) invoke cesm_setup ./cesm_setup # (3) build the executable ./case01.build # (4) submit your run to the batch queue ./case01.submit
Set of commands to build and run the model on a supported machine: ”yellowstone”

Overview of CESM directories + 4 CESM commands
models scripts (1) create_newcase
/path_to_code/cesm1_2_2 $CCSMROOT
CESM Code
atm
lnd
ocn
ice
glc
csm_share
rof
drv
wav
utils
~/cases/case01 (2) cesm_setup (3) case01.build
(4) case01.submit
SourceMods
CASE Directory
Tools
CaseDocs
Buildconf
LockedFiles
/glade/p/cesm/cseg/inputdata
atm lnd ocn ice glc wav
/glade/p/cesm/cseg/inputdata $DIN_LOC_ROOT
INPUTDATA Directory
rof share cpl
run $RUNDIR
/glade/scratch/userx/ case01
$EXEROOT
Build/Run Directory
bld
# go into scripts directory into the source code download cd /glade/p/cesm/tutorial/cesm1_2_2.tutorial/scripts # (1) create a new case in the directory “cases” in your home directory ./create_newcase -case ~/cases/case01 -res T31_g37 -compset B_1850 -mach yellowstone # go into the case you just created in the last step cd ~/cases/case01/ # (2) invoke cesm_setup ./cesm_setup # (3) build the executable ./case01.build # (4) submit your run to the batch queue ./case01.submit
This is when you modify the namelists

Overview of CESM directories + namelist files
models scripts (1) create_newcase
/path_to_code/cesm1_2_2 $CCSMROOT
CESM Code
atm
lnd
ocn
ice
glc
csm_share
rof
drv
wav
utils
~/cases/case01 (2) cesm_setup (3) case01.build
(4) case01.submit user_nl_cam user_nl_cice user_nl_clm user_nl_cpl
user_nl_pop2 user_nl_rtm
CASE Directory
/glade/p/cesm/cseg/inputdata
atm lnd ocn ice glc wav
/glade/p/cesm/cseg/inputdata $DIN_LOC_ROOT
INPUTDATA Directory
rof share cpl
run $RUNDIR
atm_in drv_flds_in
drv_in ice_in lnd_in
pop2_in rof_in
/glade/scratch/userx/ case01
$EXEROOT
Build/Run Directory
bld SourceMods
Tools
CaseDocs atm_in
drv_flds_in drv_in ice_in lnd_in
pop2_in rof_in
Buildconf
LockedFiles
cesm_setup creates namelist modification files user_nl_xxx this is where you modify your namelists
CaseDocs contains copy of the namelists for reference only (should not be edited)
Here
The build script creates namelists in the run directory This is used by the model at runtime (should not be edited)

Part 1: Namelist Modifications
In this section, we will: - review the “CESM flow” and how to make namelist changes,
- see where to find documentation for namelist variables
- as an illustration, we will customize the output history files to get high frequency output

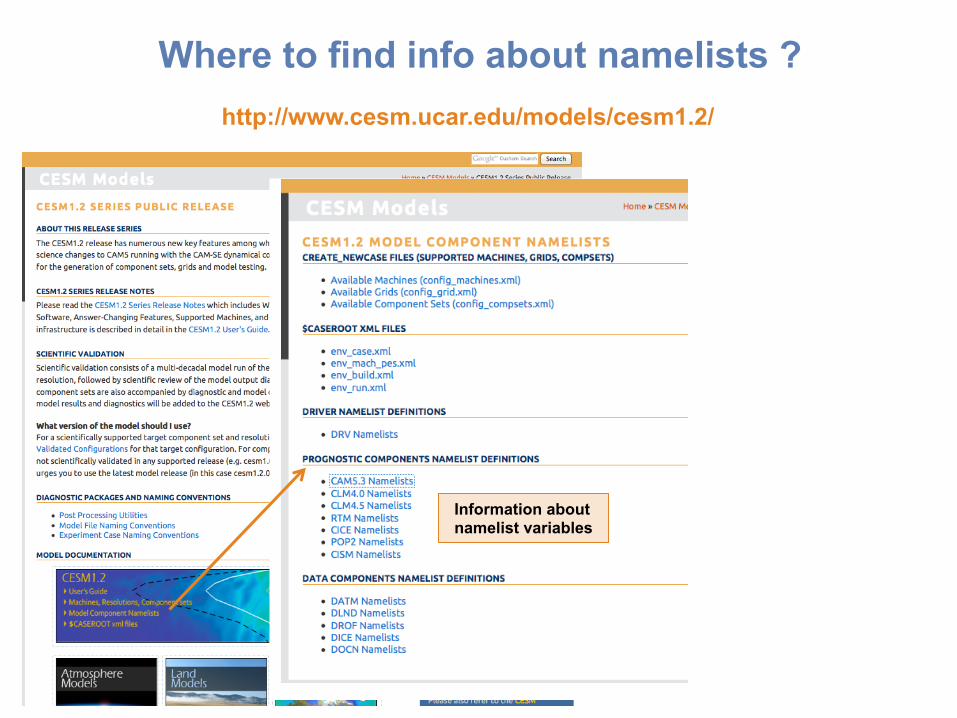
Where to find info about namelists ? http://www.cesm.ucar.edu/models/cesm1.2/
Information about namelist variables
Where to find info about namelists ? http://www.cesm.ucar.edu/models/cesm1.2/
Information about namelist variables

Where to find info about namelists ? http://www.cesm.ucar.edu/models/cesm1.2/
Search or browse variables names

Where to find info about namelists ? http://www.cesm.ucar.edu/models/cesm1.2/
Useful information about namelist variables can also be found in the user guide of each component

Part 1: Namelist Modifications
In this section, we will: - review the “CESM flow” and how to make namelist changes,
- see where to find documentation for namelist variables
- as an illustration, we will customize the output history files to get high frequency output

Let’s change the output frequency in CAM**
By default, CESM outputs monthly average history files. To change the output frequency of a CAM history file from monthly average to daily average, we use the namelist variable: nhtfrq=-24 ** In this tutorial, most examples will be coming from the atmospheric and land model. Concepts are transferable to other model components.

Search CAM namelist documentation
Search for nhtfrq
Namelist group
How to set it
type daily average: nhtfrq=-24
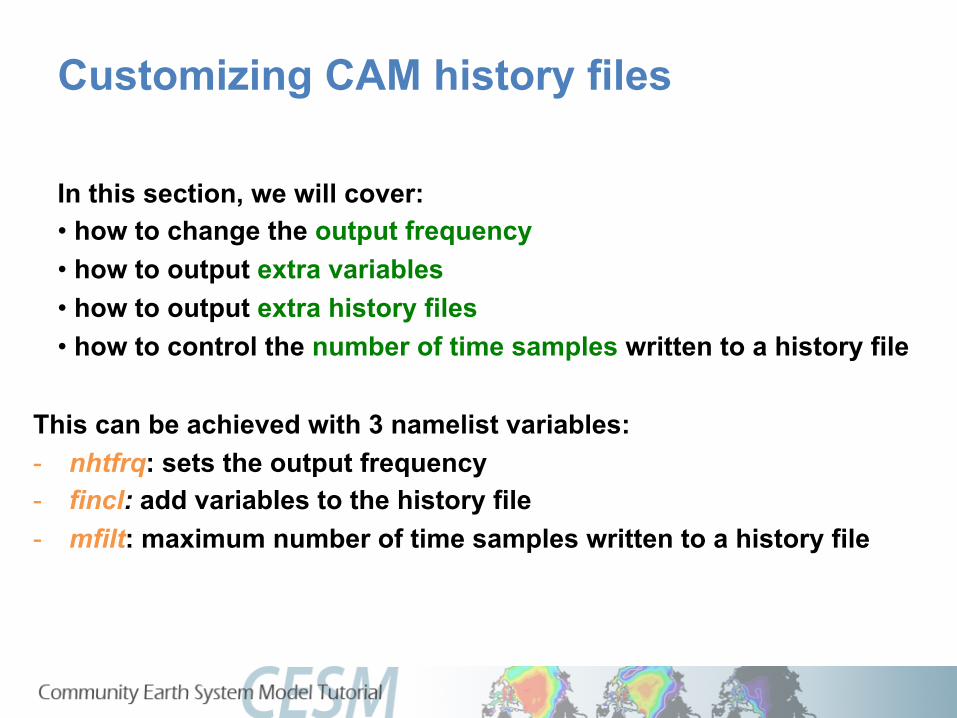
Customizing CAM history files
In this section, we will cover: • how to change the output frequency • how to output extra variables • how to output extra history files • how to control the number of time samples written to a history file
This can be achieved with 3 namelist variables: - nhtfrq: sets the output frequency - fincl: add variables to the history file - mfilt: maximum number of time samples written to a history file

Customizing CAM history files: nhtfrq, mfilt
The default history file from CAM is a monthly average. We can change the output frequency with the namelist variable nhtfrq If nhtfrq=0, the file will be a monthly average If nhtfrq>0, frequency is input as number of timesteps. If nhtfrq<0, frequency is input as number of hours. For instance to change the history file from monthly average to daily average, we set the namelist variable: nhtfrq = -24 To control the number of timesteps in the history file, we can use the variable mfilt For instance, to specify that we want one time sample on each history file, we set the namelist variable: mfilt = 1

Customizing CAM history files: fincl
You can output up to 6 history files: “h0”, “h1”, …, “h5”.
For the files “h1” to “h5”, the user has to specify the variables to output.
The file “h0” contains the default variables (in the code: “call add_default”). This includes the variables necessary for the AMWG package.
h0 h1 … h5 fincl1 fincl2 … fincl6
To control the list of fields in the history files we can use the namelist variables For instance, the line:
fincl1 = ‘PRECT’ is used to add the field ‘PRECT’ to the file “h0” The added fields must be in Master Field List (= fields that can be written to the history files). http://www.cesm.ucar.edu/models/cesm1.2/cam/docs/ug5_3/ug.html#model_out

Customizing CAM history files: fincl
Using a ":" following a field gives the averaging flag for the output field. Valid flags are: I for instantaneous, A for average, M for minimum, X for maximum. For instance, the line: fincl1 = ‘PRECT:M’ is used to add the minimum of ‘PRECT’ to the file “h0”

Example of customizing history files
For instance, in addition to the monthly history file “h0”, we want to output a file “h1” with instantaneous values of T, Q, U, V and OMEGA every 3 hour. We can use: fincl2 = 'T:I','Q:I','U:I','V:I’,‘OMEGA:I’ nhtfrq = 0, -3 Notice that it is equivalent to: fincl2 = 'T:I','Q:I','U:I','V:I’, ‘OMEGA:I’ nhtfrq(1) = 0 nhtfrq(2) = -3
NB: If you plan to run the AMWG diagnostic package, it is recommended to leave the “h0” file untouched and to add extra history files.
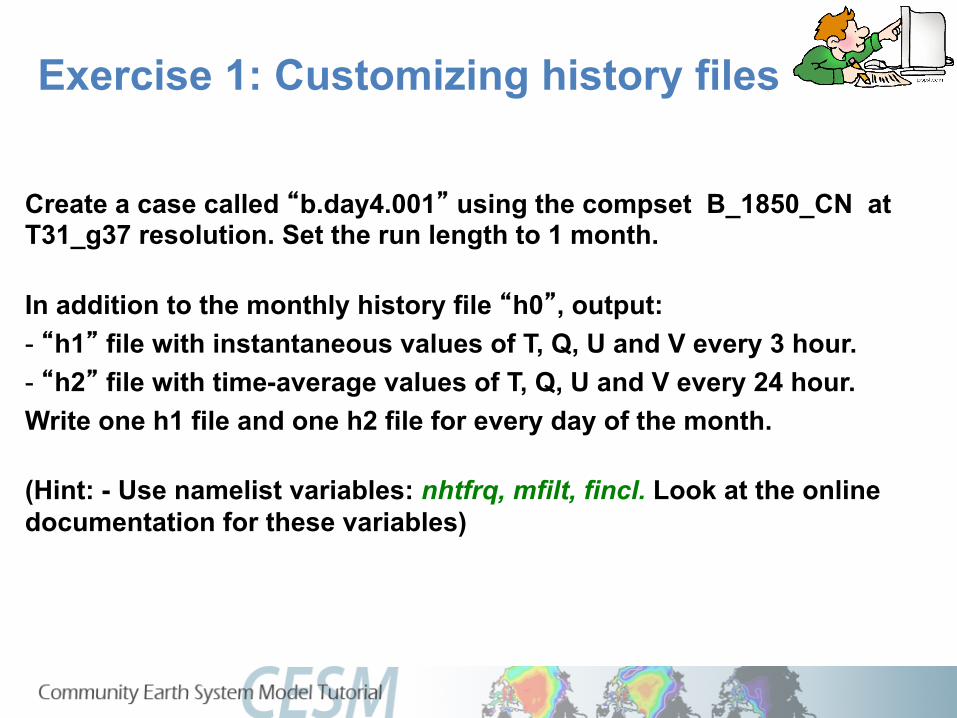
Exercise 1: Customizing history files
Create a case called “b.day4.001” using the compset B_1850_CN at T31_g37 resolution. Set the run length to 1 month. In addition to the monthly history file “h0”, output: - “h1” file with instantaneous values of T, Q, U and V every 3 hour. - “h2” file with time-average values of T, Q, U and V every 24 hour. Write one h1 file and one h2 file for every day of the month. (Hint: - Use namelist variables: nhtfrq, mfilt, fincl. Look at the online documentation for these variables)

Exercise 1: Check your solution
When your run is completed, (1) check that your archive directory contains the files:
(2) Compare the contents of the h1 and h2 files using “ncdump”. ncdump –h b.day4.001.cam.h1.0001-01-01-00000.nc ncdump –h b.day4.001.cam.h2.0001-01-01-00000.nc
Look at the variables attributes. What is the difference between the 2 files ?
b.day4.001.cam.h0.0001-‐01.nc
b.day4.001.cam.h1.0001-‐01-‐01-‐00000.nc b.day4.001.cam.h1.0001-‐01-‐02-‐00000.nc … b.day4.001.cam.h1.0001-‐01-‐31-‐00000.nc
b.day4.001.cam.h2.0001-‐01-‐01-‐00000.nc b.day4.001.cam.h2.0001-‐01-‐02-‐00000.nc … b.day4.001.cam.h2.0001-‐01-‐31-‐00000.nc

Outputting high frequency data in other components
Here is a few variables to control output frequency of land, ice and ocean CLM hist_nhtfrq: output frequency of the history file hist_mfilt: number of samples on each history file hist_fincl: adding variables and auxiliary history files
Example user_nl_clm to output 4 extra history files with daily, six-hourly, hourly, and every time-step values of TG and TV (leaving the primary history files as monthly): hist_fincl2 = 'TG', 'TV’ hist_fincl3 = 'TG', 'TV' hist_fincl4 = 'TG', 'TV' hist_fincl5 = 'TG', 'TV' hist_nhtfrq = 0, -24, -6, -1, 1 http://www.cesm.ucar.edu/models/cesm1.2/clm/models/lnd/clm/doc/UsersGuide/book1.html

Outputting high frequency data in other components
CICE histfreq: Frequency of output written to history files ('1', 'm', 'd', 'y', …) histfreq_n: Frequency history data is written to history files hist_avg: if false => instantaneous values
if true => time-averages
Example user_nl_cice to output an extra history file with daily values (leaving the primary history file as monthly):
histfreq = 'm','d','x','x','x' histfreq_n = 1,1,1,1,1 See: http://www.cesm.ucar.edu/models/cesm1.2/cice/doc/node8.html#table:setup_nml

Outputting high frequency data in other components
POP2 tavg_freq = frequency at which the model fields are written tavg_freq_opt = units of time for 'tavg_freq’ ('nmonth’, 'nhour’, 'once’,…) tavg_file_freq = frequency at which the model files are written tavg_file_freq_opt = units of time for 'tavg_file_freq’ ('nmonth’, 'nhour’, …) See: http://www.cesm.ucar.edu/models/cesm1.2/pop2/doc/users/node77.html
Changing tavg_nml variables is non standard Do not modify these variables directly in user_nl_pop2 Use the workaround explained in user_nl_pop2
For instance, to output a timeseries of daily averages bundled into a monthly file: tavg_freq_opt = 'nday' tavg_freq = 1 tavg_file_freq_opt = 'nmonth' tavg_file_freq = 1
Part 2: Code Modification
In this section, we will learn how to do simple code modifications such changing a parameter in the code or adding a new variable

Your choice: The Red Pill or the Blue Pill
The Matrix (1999): Neo, the main character is offered the choice between a red pill and a blue pill.
- The blue pill would allow him to remain in the Matrix (a fictional computer-generated world)
- The red pill would lead to his "escape" from the Matrix into the real world and embracing the sometimes painful truth of reality.
Courtesy: Andrew Gettelman

Principles for modifying the code
Never modify the CESM root itself. Your modifications to the code should go into: SourceMods

Principles for modifying the code
~/cases/case01 (2) cesm_setup (3) case01.build
(4) case01.submit
SourceMods
CASE Directory
Tools
CaseDocs
Buildconf
LockedFiles
/glade/p/cesm/cseg/inputdata
atm lnd ocn ice glc wav
/glade/p/cesm/cseg/inputdata $DIN_LOC_ROOT
INPUTDATA Directory
rof share cpl
run $RUNDIR
/glade/scratch/userx/ case01
$EXEROOT
Build/Run Directory
bld
models scripts (1) create_newcase
/path_to_code/cesm1_2_2 $CCSMROOT
CESM Code
atm
lnd
ocn
ice
glc
csm_share
rof
drv
wav
utils
…
src.clm
src.pop2
src.cam
src.cice
This is where you put your modifications
These modifications only affect the current case
Not here These modifications affect all the cases
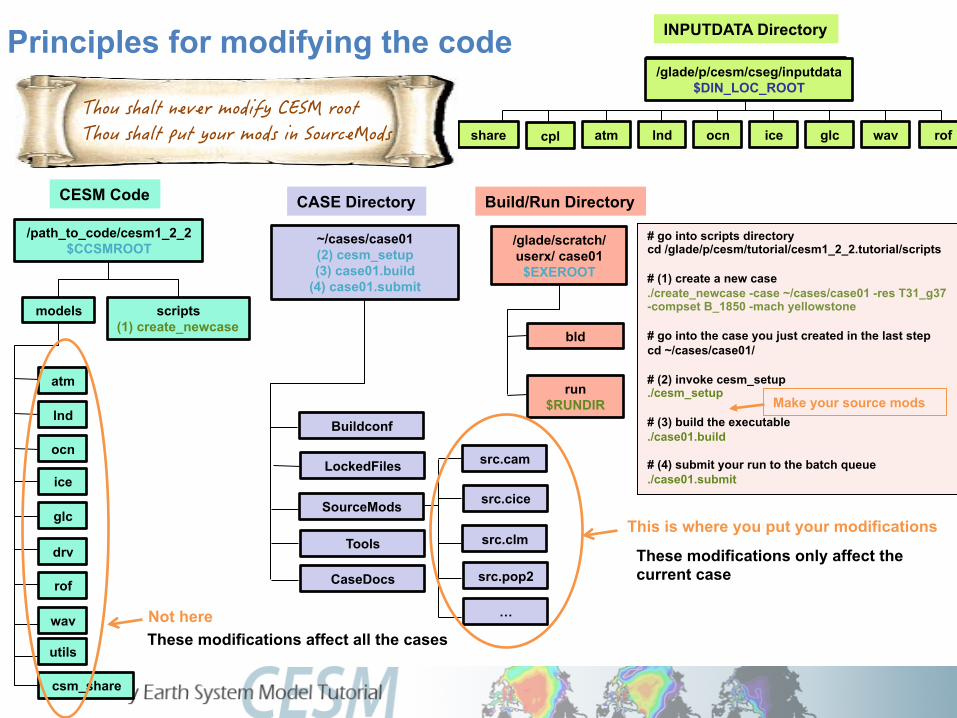
# go into scripts directory cd /glade/p/cesm/tutorial/cesm1_2_2.tutorial/scripts # (1) create a new case ./create_newcase -case ~/cases/case01 -res T31_g37 -compset B_1850 -mach yellowstone # go into the case you just created in the last step cd ~/cases/case01/ # (2) invoke cesm_setup ./cesm_setup # (3) build the executable ./case01.build # (4) submit your run to the batch queue ./case01.submit
Principles for modifying the code
~/cases/case01 (2) cesm_setup (3) case01.build
(4) case01.submit
SourceMods
CASE Directory
Tools
CaseDocs
Buildconf
LockedFiles
/glade/p/cesm/cseg/inputdata
atm lnd ocn ice glc wav
/glade/p/cesm/cseg/inputdata $DIN_LOC_ROOT
INPUTDATA Directory
rof share cpl
run $RUNDIR
/glade/scratch/userx/ case01
$EXEROOT
Build/Run Directory
bld
This is where you put your modifications
models scripts (1) create_newcase
/path_to_code/cesm1_2_2 $CCSMROOT
CESM Code
atm
lnd
ocn
ice
glc
csm_share
rof
drv
wav
utils
…
src.clm
src.pop2
src.cam
src.cice
Not here
These modifications only affect the current case
These modifications affect all the cases
Make your source mods

Modifying a subroutine
Steps to modify the code: - Find the subroutine you want to modify
- Copy this subroutine in SourceMods
- Make your mods
- Compile and run the model

Example: Modify a parameter, zlnd Let’s modify a tuning parameter in the CLM code zlnd = roughness length for soil (m) “tuning parameter”
- parameter weakly constrained by observation - can be adjusted to achieve agreement with observations
1. Find the subroutine you want. Go in the CESM code and look for zlnd (for instance, you can use: grep -r zlnd *) zlnd is in the subroutine clm_varcon.F90
2. Copy this subroutine in SourceMods Go your case directory and copy clm_varcon.F90 into SourceMods/src.clm
3. Make your modifications Edit the value of zlnd in SourceMods/src.clm/clm_varcon.F90
4. Compile and run the model

Exercise 2: Modify a parameter, zlnd Create a case called “b.day4.002” using the compset B_1850_CN at T31_g37 resolution. Change the value of zlnd (roughness length for soil ) to zlnd = 0.02_r8 and make a 1-month run. Hint: Locate your subroutine using grep -r zlnd * The compset B_1850_CN is using ‘clm4_0’ and not ‘clm4_5’ Check your solution: Compare the land file for “b.day4.001” and “b.day4.002” and make sure that the 2 runs are different. You can use ncdiff to look at the difference between the 2 runs. ncdiff /glade/scratch/$user/archive/b.day4.002/lnd/hist/b.day4.002.clm2.h0.0001-01.nc /glade/scratch/$user/archive/b.day4.001/lnd/hist/b.day4.001.clm2.h0.0001-01.nc diff.nc
How does it affect the fraction of ground covered by snow ?

Output an extra variable
• One common thing you may want to do is to add code to output a new variable • For instance, CAM has a field to output the temperature at 500 mbar (T500) but not at 750mb. Let’s add a field to output the temperature at 750 mbar (T750)
This can be done by a succession of calls:
call addfld (’T750’, …) call add_default (’T750’,…) call outfld(’T750’, … )
Add a field to master field list Add this field to “h0” by default (optional)
Collect values for this field and write to history file

Syntax: addfld
addfld = Add a field to master field list subroutine addfld (fname, units, numlev, avgflag, &
long_name, decomp_type, [Optional arguments]) Example: call addfld ('T500',’K',1,'A','Temperature at 500 mbar pressure surface', phys_decomp)
Field name Units Number of vertical levels: single level :1 multi-level: pver or pverp
Averaging flag: A = average I = instantaneous
Field full name Decomposition type (phys_decomp or dyn_decomp)
There are several optional arguments (not covered here. See documentation for more information about optional arguments)

Syntax: add_default
add_default = Add a field to the list of default fields on history file subroutine add_default (name, tindex, flag) Example: call add_default ('CLOUD ', 1, ' ')
Field name Averaging flag: A = average (default) I = instantaneous
history tape index

Syntax: outfld
outfld = accumulate (or take min, max, etc. as appropriate) input field into its history buffer for appropriate tapes
subroutine outfld (fname, field, idim, c) Example: call outfld('CLOUD', cld, pcols, lchnk)
Field name Longitude dimension of field array
Array containing field values chunk (physics) or latitude
(dynamics) index
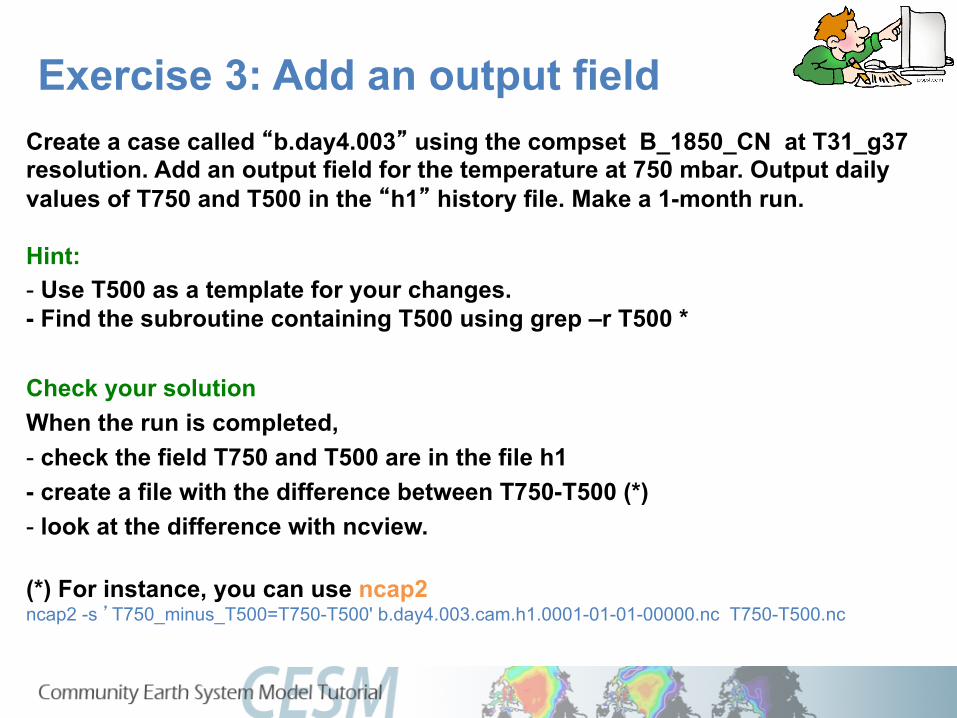
Exercise 3: Add an output field Create a case called “b.day4.003” using the compset B_1850_CN at T31_g37 resolution. Add an output field for the temperature at 750 mbar. Output daily values of T750 and T500 in the “h1” history file. Make a 1-month run. Hint: - Use T500 as a template for your changes. - Find the subroutine containing T500 using grep –r T500 *
Check your solution When the run is completed, - check the field T750 and T500 are in the file h1 - create a file with the difference between T750-T500 (*) - look at the difference with ncview. (*) For instance, you can use ncap2 ncap2 -s ’T750_minus_T500=T750-T500' b.day4.003.cam.h1.0001-01-01-00000.nc T750-T500.nc

Exercise Overview
• Exercise 1: Namelist modification Customize your history output
• Exercise 2: Code modification
Change a tuning parameter • Exercise 3: Namelist + Code modification
Add a new output field to the code

Where to find help ? http://www.cesm.ucar.edu/models/cesm1.2/
CESM webpage is a gold mine for model documentation
If you cannot find an answer in the model documentation, post your question on the CESM Bulletin Board

Where to find help ? http://www.cesm.ucar.edu/models/cesm1.2/
CESM webpage is a gold mine for model documentation
The CESM Bulletin Board is a forum to ask your questions and to facilitate communication within the CESM community
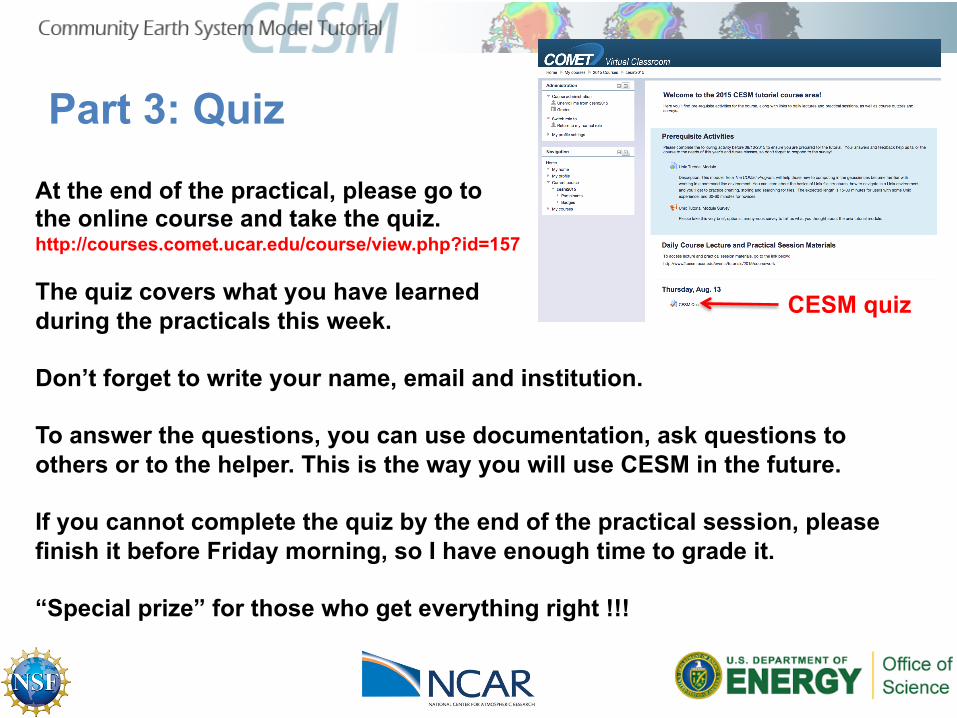
Part 3: Quiz
At the end of the practical, please go to the online course and take the quiz. http://courses.comet.ucar.edu/course/view.php?id=157 The quiz covers what you have learned during the practicals this week. Don’t forget to write your name, email and institution. To answer the questions, you can use documentation, ask questions to others or to the helper. This is the way you will use CESM in the future. If you cannot complete the quiz by the end of the practical session, please finish it before Friday morning, so I have enough time to grade it. “Special prize” for those who get everything right !!!
CESM quiz

Reminder: Rules for compiling
During the tutorial (this week only) Yellowstone can only handle a certain number compilations at the same time. If too many students compile at the same time, the machine will hang. Compilation time will increase from 10 minutes to 2+ hours. We have determined how many compilations the machine can handle. This is the reason of the “compile cards”. Please compile on the assigned node. Please don’t compile several jobs at the same time. Please respect the rule (if you don’t, you penalize not only yourself but everybody in the room and all the yellowstone users over the country)