paleo cookbook - amazon s3 · 3 dried fruit is a healthy and paleo-friendly snack option. there are...
TRANSCRIPT


1
Paleo Cookbook

2
Contents
Pg 3 Benefits Of Homemade Dried Fruit Pg 4 Methods For Drying Fruit Pg 8 Preparation and Drying Notes Pg 12 Homemade Fruit Leather Pg 14 Storing & Using Your Homemade Dried Fruit Pg 16 Dried Fruit Tips
www.paleocookbook.com
© Nikki Young 2011
All rights reserved. No part of this publication may be reproduced, stored in a retrieval system or transmitted in any form or by any means, electronic, mechanical, photocopying,
recording or otherwise without the prior written permission of the author.

3
Dried fruit is a healthy and Paleo-friendly snack option. There are many types of dried fruit available for sale in grocery stores and health food markets; however, these often include unhealthy chemicals or preservatives, non-Paleo ingredients and/or they are very expensive. Making homemade dried fruit is a great way to control the quality and health benefits as well as to keep costs down. Benefits Of Homemade Dried Fruit Before we get into the finer points of making homemade dried fruit, let’s take a closer look at its benefits.
1. Quality Control. When you make your own dried fruit, you have complete control over the quality. You get to select the original piece(s) of fruit, any additional flavorings or ingredients and the method used. This insures that the finished product is perfectly Paleo and that it meets your standards.
2. Extended Shelf Life Without Chemicals. By its very nature, dehydrating fruit preserves the fruit and extends its shelf life. However, many commercially produced dried fruits are treated with sulfur dioxide in order to preserve their bright colors. When you dry fruit yourself, you keep it all natural and avoid the chemical treatment.
3. Eliminate Waste. When you embrace making your own homemade dried fruit, you never again have to let your fruit go to waste. In fact, you can comfortably stock up on your favorite fruits whenever they are in season and on sale because you know they will not go to waste. Instead, they’ll meet a new life as a delicious dried fruit snack.

4
5
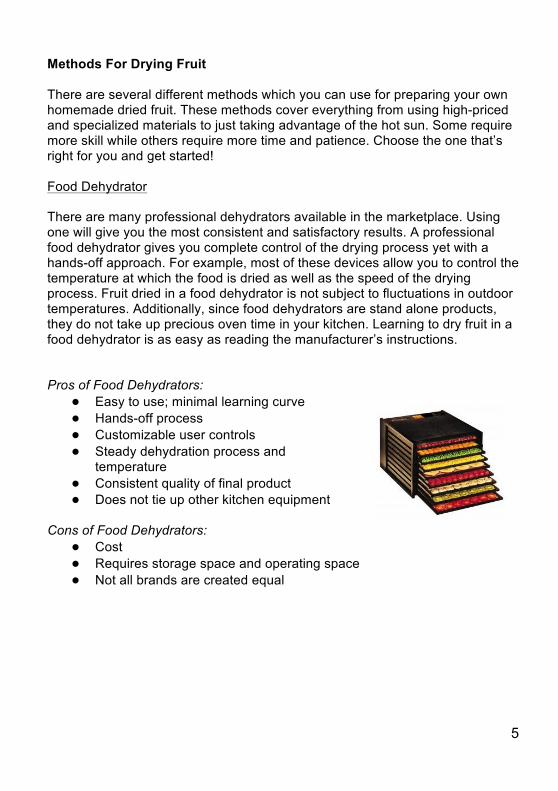
Methods For Drying Fruit There are several different methods which you can use for preparing your own homemade dried fruit. These methods cover everything from using high-priced and specialized materials to just taking advantage of the hot sun. Some require more skill while others require more time and patience. Choose the one that’s right for you and get started! Food Dehydrator There are many professional dehydrators available in the marketplace. Using one will give you the most consistent and satisfactory results. A professional food dehydrator gives you complete control of the drying process yet with a hands-off approach. For example, most of these devices allow you to control the temperature at which the food is dried as well as the speed of the drying process. Fruit dried in a food dehydrator is not subject to fluctuations in outdoor temperatures. Additionally, since food dehydrators are stand alone products, they do not take up precious oven time in your kitchen. Learning to dry fruit in a food dehydrator is as easy as reading the manufacturer’s instructions. Pros of Food Dehydrators:
● Easy to use; minimal learning curve ● Hands-off process ● Customizable user controls ● Steady dehydration process and
temperature ● Consistent quality of final product ● Does not tie up other kitchen equipment
Cons of Food Dehydrators:
● Cost ● Requires storage space and operating space ● Not all brands are created equal
6
Oven Drying This method uses a common household oven to dry the fruits at a low heat for a long period of time. This is probably the best method for beginners or for those who are only occasionally going to dry fruits because it does not require any extra equipment. However, oven drying requires patience and it can get expensive if done frequently since the oven needs to be on for many hours. The method involves placing prepared slices of fruit on a baking sheet covered with waxed paper or parchment paper and then drying in a very low oven (175 degrees) for several hours. This requires frequent checking of the fruit so that it is caught at the right point - when it is completely dried, but before it has dried too much and become brittle. Also, oven dried foods often turn out darker and more brittle than foods dried by other methods. (Please note, if you have an oven that can not obtain temperatures lower than 200 degrees, you’ll need to use a different method.) Pros of Oven Drying:
● Does not require the purchase of special equipment ● Fairly easy for beginners ● Good introductory method to food dehydration
Cons of Oven Drying:
● The oven needs to be on for a long time ● Requires patience and frequent monitoring of the food ● Fruits turn out darker and more brittle
Sun or Solar Dehydration Sun and Solar dehydration both involve taking advantage of the sun and heat to naturally dry fruits. Sun drying requires little more than a suitable surface (ie. a clean blanket, drying rack or table) to spread the fruit on. Then the fruit is allowed to naturally dehydrate in the sun for several days. However, this method requires supervision to ward off any curious and hungry animals and to move the fruit indoors if the weather turns. This method results in a lower quality due to airborne dirt and grit that may settle on the fruit. However, these concerns can be alleviated a bit by covering the fruit with a drying rack or cheese cloth and by making sure you have a
7
protected and covered area where you can quickly move the fruit if it begins to rain. Solar drying frequently involves many specialized pieces of equipment you can purchase if you plan to make this a frequent event. These items include drying racks and solar ovens. It is possible to make these by hand based on special instructions if you do not want to invest in the professional equipment. Solar ovens work similar to sun drying in that they require several days of extreme heat and sun to completely dry the fruit, although the resulting product is more hygienic and uniform in color and flavor. Pros of Sun Drying:
● Little to no cost involved Cons of Sun Drying:
● Requires near-constant supervision to keep animals away and to protect from changing weather*
● Requires a climate (or season) where the weather is continuously hot and sunny
● May result in a gritty, unhygienic product due to airborne particles* ● Fruit needs several days to dry
*Cover the fruit with a drying rack or cheesecloth to slightly reduce these risks. Pros of Solar Drying:
● A fairly hands-off approach ● Final product is consistently high quality with uniform color and flavor ● May be easily portable, depending on the model of oven ● Protects the fruit from outside forces
Cons of Solar Drying:
● Requires purchase or building of special equipment ● Still susceptible to changes in the weather ● Fruit needs several days to dry

8
9
Pretreating Fruit For Dehydration One of the most important steps when dehydrating fruit is to make sure that the fruit is properly pretreated for the drying process ahead of time. This step, although somewhat time involved, helps the fruit to retain its natural color without turning brown or even blackening as it dries and is exposed to air. There are a few different methods for pretreating fruit for drying. You should always begin with ripe fruit with any bruised areas cut away or removed. Peel and slice the fruit before pretreating. (See below guide on cutting suggestions.) Please Note - Not all fruits are suitable for each method. Recommendations for which type of fruit works best with each method is at the end of each description.
1. Blanching - Bring a large pot of water to a boil and add fruits either directly or in a colander that will fit inside the pot. Boil for five minutes and then immediately transfer to to an ice bath (a bowl filled with cold water and ice cubes) for several minutes to stop the cooking process. Drain fruit and dry with towels. This method is best used for apricots and apples.
2. Ascorbic Acid Dip - Combine ½ cup bottled or freshly squeezed lemon
or lime juice or 2 tablespoons straight ascorbic acid with one quart of water. Dip the fruit into the mixture, let sit for about a minute, then remove with a slotted spoon to towels for air drying. This method can be used with all fruits.
3. Juice Dip - Combine 1 quart of pineapple juice with 1 quart of water and
¼ cup lemon juice. Dip fruit in mixture and air dry on towels. This method is best used for peaches, apples and bananas.

10
Specific Preparation and Drying Notes For Different Fruits Regardless of the pretreating method you opt to use for your fruits, one thing you will need to do is properly prepare the fruit for drying. This often involves cutting and peeling. Fruit Preparation Guidelines:
Apples Peel and core the apples. Cut into ¼ inch slices or ½ inch rings.
Apricots Peel, cut in half and turn inside out. Bananas Peel and cut into ¼ inch slices. Cherries Cut in half and remove pits.
Grapes Briefly dip into boiling water to loosen skins. Peel and remove seeds, if any.
Mangoes Peel, cut away from core and cut into ¼ inch slices or wedges.
Melons Cut in half; remove rind and seeds. Cut into ¼ inch think slices.
Papayas Cut in half and remove seeds. Peel and cut into ¼ inch wide strips.
Peaches Peel and cut into halves or quarters. Pears Peel and cut into ¼ inch slices. Pineapple Core and cut into ¼ inch slices or ½ inch dices. Strawberries Remove stem and cut in half or into ¼ inch slices.
Tomatoes Cut an “X” in the bottom of each tomato and briefly dip in boiling water to loosen skin. Peel, seed and cut into slices or wedges.

11
The length of time which it takes for your fruits to dry will vary widely depending on the type of fruit and method used. Below you will find the general times it will take for certain fruits to dry in a food dehydrator set to 135 degrees. Decrease the amount of time listed a bit for oven drying and increase for sun or solar drying. And remember, keep an eye on the fruit. These are just guidelines. Testing the fruit yourself is the only way to ensure maximum quality. Apples 6 to 12 hours, until pliable Apricots 8 to 20 hours, until pliable Bananas 8 to 16 hours, until pliable or crisp, to your preference Blueberries 10 to 20 hours, until leathery Cherries 18 - 26 hours, until leathery and slightly sticky Melons 6 to 16 hours, until pliable and slightly sticky Papaya 8 to 20 hours, until leathery Peaches 6 to 20 hours, until pliable Pears 6 to 20 hours, until leathery Pineapple 6 to 16 hours, until pliable and not sticky Strawberries 6 to 16 hours, until pliable and almost crisp Tomatoes 6 to 12 hours, until pliable or crisp, to your preference
12

13
Homemade Fruit Leather Preparing homemade fruit leather is a fun variant to making dried fruit. It is a relatively simple process that results in a sweetly satisfying treat that is loved by many, especially children. To make fruit leather, select the fruit that you’d like to use. You can use a single fruit or combine two or more (such as apples and apricots) for added flavor. Prepare the fruit by washing, removing the core, seeds or pits, peeling if desired and cutting into cubes. Place the prepped fruit in a saucepan and cover with water. Bring to a boil and cook until the fruit is softened. Transfer the fruit to a blender or food processor and process until pureed. Pour the fruit puree onto a baking sheet lined with plastic wrap or lightly greased parchment paper and spread into an even layer. Dehydrate using one of the previously discussed methods. The usual drying time for fruit leather is anywhere from a few hours in a low oven to several days in the sun. The finished product should be tacky but not sticky. After drying your fruit leather, allow it to cool completely. Then, cut it into strips or squares and roll up. Use plastic wrap as you roll to ease in the unrolling process, if desired. Store in a plastic bag or glass jar. Here are a few recipe suggestions and combination ideas for delicious fruit leather combinations:
1. Peaches and apricots with ground nutmeg, added to taste 2. Apples and pears with ground cinnamon, added to taste 3. Strawberries, blueberries and raspberries combined to make a Mixed
Berry flavor 4. Strawberries and kiwis (Remove seeds from kiwis first.) 5. Mangoes and apricots with ground ginger, added to taste 6. Peaches and blueberries 7. Tomatoes with minced fresh basil (Makes a fun savory twist to
traditionally sweet fruit leather.) 8. Orange, pineapple and banana 9. Mango, papaya and pineapple with some freshly grated coconut 10. Apples and cubed pumpkin, with a mixture of nutmeg, allspice and
cinnamon added to taste

14

15
Storing & Using Your Homemade Dried Fruit Preparing your own homemade dried fruit is a great way to preserve an abundance of fruit and to have quality, healthy snacks on hand at all times. After you have finished the work of drying your fruit, it’s important to make sure you handle and store it properly. It would be a shame to invest all of that time to have to later throw away your hard work because it was not stored properly. As the drying method itself preserves the fruit, storage guidelines are pretty simple and straightforward. Before packaging your fruit for long term storage, a good idea is to purify the fruit. This is an easy process that involves placing the dried fruits in a deep freeze at 0 degrees for a few days. You will not receive the benefits of the purification process by using just the freezer compartment of a standard refrigerator. Purifying will help to kill any germs and keep the fruit preserved for a longer period of time. However, it is not a necessary step and can be skipped if you choose. The most important thing to keep in mind when storing your dried fruit is that it must be kept moisture-free at all times. Also, since dried fruit will collect moisture from the air, it needs to be stored in a completely airtight container. Zippered storage bags and glass jars are two of the recommended storage containers. After your fruit has been packaged up, it is best kept in a cool, dark and dry environment. You might even want to consider placing the packaged fruit in a brown paper bag to insure that it stays free from light. The optimal recommended storage time for dried fruit is 6 months to 1 year. Fruit that is kept in a cooler environment, around 60 degrees, will stay fresh longer. If you begin to see mold on your fruit or if you notice a degradation in taste, it’s time to throw it away. Dried fruit makes a wonderful and satisfying snack on its own, eaten straight from the packaging. It’s also a fantastic addition to many recipes. Dried fruit adds nice texture and taste to a salad, a trail mix, baked goods and savory dishes. When a recipe calls for adding cut dried fruit to a recipe, put it in the refrigerator for a few minutes first. This will make it much easier to cut. Reconstituting dried fruit is another great way to add it to other recipes. In some cases, you can use this reconstituted fruit much like you would use fresh or frozen fruit. This is especially true for blueberries and cherries. To reconstitute dried fruit, place it in a bowl and cover with boiling water. Let it sit for about 10 minutes, adding more boiling water as needed, until the fruit is plumped back up to nearly fresh size and it is softened. Drain and use as desired.
16

17
Dried Fruit Tips If you still have questions about preparing homemade dried fruit, here are some tips to help you along. - If you accidentally over dry your fruit, it is possible to save it. Over dried fruit will become brittle and hard. While it’s still edible, it will not have a very pleasing texture for straight eating. One option is to dice the fruit into small pieces and use with a Paleo-friendly granola or other treat. Also, you can attempt to soften the fruit by placing it in boiling water for about 15 seconds. - If you notice moisture inside the packaging of your dried fruit it can be saved, as long as the fruit has not developed mold! One option is to place the fruit in new packaging and store in the freezer for the duration. Also, you can spread the fruit on a baking sheet and bake in a low oven (150 to 175 degrees) for about 30 minutes. Allow the fruit to cool completely and repackage. However, make sure that you do throw away any fruit that shows signs of molding! - Fruits that have not been pretreated will discolor (turning either dark brown or black) as they dry. Although they may not be very pleasing to the eye, these fruits are still perfectly safe to eat. - Drying fruit requires patience. You can not speed up the process by making your oven hotter. If you turn up the heat, you are likely to burn, scorch or completely dry out the fruit. You will not be happy with the result. - Almost all of the fruits are safe for beginners. However, apples and bananas tend to be the optimal choice for beginners. The learning curve with drying fruit is small, but it may take a time or two for you to be completely comfortable with the process and happy with your finished result. When it comes to making homemade dried fruit, patience and trial and error are your best friends! - Purifying fruit that has been dried in the sun is the best way to make sure you’ve killed any bugs and/or eggs that may be on your fruit. To purify your fruit, follow the freezing method outlined earlier. Conversely, you can also place the dried fruit on a baking tray and bake in a low oven for about 30 minutes.