origenarp primer: how to perform isotopic depletion … nuclear science and technology division...
TRANSCRIPT

ORNL/TM-2010/43
OrigenArp Primer: How to Perform Isotopic Depletion and Decay Calculations with SCALE/ORIGEN
April 2010 Prepared by S. M. Bowman I. C. Gauld

DOCUMENT AVAILABILITY Reports produced after January 1, 1996, are generally available free via the U.S. Department of Energy (DOE) Information Bridge. Web site http://www.osti.gov/bridge Reports produced before January 1, 1996, may be purchased by members of the public from the following source. National Technical Information Service 5285 Port Royal Road Springfield, VA 22161 Telephone 703-605-6000 (1-800-553-6847) TDD 703-487-4639 Fax 703-605-6900 E-mail [email protected] Web site http://www.ntis.gov/support/ordernowabout.htm Reports are available to DOE employees, DOE contractors, Energy Technology Data Exchange (ETDE) representatives, and International Nuclear Information System (INIS) representatives from the following source. Office of Scientific and Technical Information P.O. Box 62 Oak Ridge, TN 37831 Telephone 865-576-8401 Fax 865-576-5728 E-mail [email protected] Web site http://www.osti.gov/contact.html
This report was prepared as an account of work sponsored by an agency of the United States Government. Neither the United States Government nor any agency thereof, nor any of their employees, makes any warranty, express or implied, or assumes any legal liability or responsibility for the accuracy, completeness, or usefulness of any information, apparatus, product, or process disclosed, or represents that its use would not infringe privately owned rights. Reference herein to any specific commercial product, process, or service by trade name, trademark, manufacturer, or otherwise, does not necessarily constitute or imply its endorsement, recommendation, or favoring by the United States Government or any agency thereof. The views and opinions of authors expressed herein do not necessarily state or reflect those of the United States Government or any agency thereof.
ORNL/TM-2010/43
Nuclear Science and Technology Division
OrigenArp PRIMER: HOW TO PERFORM ISOTOPIC DEPLETION AND DECAY CALCULATIONS WITH SCALE/ORIGEN
S. M. Bowman
I. C. Gauld
Date Published: April 2010 Prepared by OAK RIDGE NATIONAL LABORATORY P.O. Box 2008 Oak Ridge, Tennessee 37831-6285 managed by UT-BATTELLE, LLC for the U.S. DEPARTMENT OF ENERGY under contract DE-AC05-00OR22725


iii
CONTENTS
Page
LIST OF FIGURES .................................................................................................................................... vii
LIST OF TABLES ....................................................................................................................................... ix
ABSTRACT ................................................................................................................................................. xi
1. INTRODUCTION .................................................................................................................................. 1 1.1 PURPOSE ..................................................................................................................................... 1 1.2 MANUAL ORGANIZATION ...................................................................................................... 1
2. GETTING STARTED ............................................................................................................................ 3 2.1 STARTING THE PROGRAM ...................................................................................................... 3 2.2 SETUP OPTIONS ......................................................................................................................... 3 2.3 EDITOR SETUP ........................................................................................................................... 4 2.4 SAMPLE PROBLEMS ................................................................................................................. 5
3. TOOLBARS ........................................................................................................................................... 9 3.1 TOP TOOLBAR ........................................................................................................................... 9 3.2 LEFT TOOLBAR – DETAIL MODE ........................................................................................ 10 3.3 LEFT TOOLBAR – EXPRESS MODE ...................................................................................... 11
4. MENUS ................................................................................................................................................ 13 4.1 FILE MENU ................................................................................................................................ 13 4.2 EDIT MENU ............................................................................................................................... 13 4.3 VIEW MENU .............................................................................................................................. 14 4.4 WINDOW MENU ....................................................................................................................... 14 4.5 HELP MENU .............................................................................................................................. 14
5. UO2 EXPRESS FORM ........................................................................................................................ 15 5.1 FUEL TYPE ................................................................................................................................ 16 5.2 URANIUM .................................................................................................................................. 16 5.3 ENRICHMENT ........................................................................................................................... 16 5.4 BURNUP ..................................................................................................................................... 16 5.5 CYCLES ..................................................................................................................................... 16 5.6 LIBRARIES PER CYCLE .......................................................................................................... 16 5.7 COOLING TIME ........................................................................................................................ 17 5.8 MODERATOR DENSITY.......................................................................................................... 17 5.9 POWER HISTORY ..................................................................................................................... 17 5.10 OPEN AND SAVE BUTTONS .................................................................................................. 17
6. MOX EXPRESS FORM ...................................................................................................................... 19 6.1 HEAVY METAL ........................................................................................................................ 19 6.2 PERCENT PU AND AM IN HEAVY METAL ......................................................................... 20 6.3 REFERENCE AND LOADING DATES ................................................................................... 20 6.4 HEAVY METAL DISTRIBUTION ........................................................................................... 20
7. DETAIL FORMS ................................................................................................................................. 21 7.1 COMPOSITIONS ....................................................................................................................... 21
7.1.1 Enter Composition Data .................................................................................................. 21 7.1.2 How to Delete a Nuclide from the Composition Form ................................................... 22 7.1.3 Automatic Calculation of Uranium Isotopic Concentrations .......................................... 22

iv
CONTENTS (continued) Page
7.1.4 Restarting from an Existing Data File ............................................................................. 24
7.2 NEUTRON GROUPS ................................................................................................................. 25 7.3 GAMMA GROUPS .................................................................................................................... 26 7.4 CASE DATA ............................................................................................................................... 27 7.5 IRRADIATION CASE ............................................................................................................... 27 7.6 FILL FORM OPTION FOR IRRADIATION CASES ............................................................... 29 7.7 OPTIONS FOR IRRADIATION CASES ................................................................................... 29 7.8 DECAY CASE ............................................................................................................................ 30 7.9 FILL FORM OPTION FOR DECAY CASES ............................................................................ 32 7.10 OPTIONS FOR DECAY CASES ............................................................................................... 33 7.11 INSERT CASE ............................................................................................................................ 34 7.12 DELETE CASE ........................................................................................................................... 34 7.13 ELEMENT FRACTIONS ........................................................................................................... 35 7.14 SUMMARY VIEW ..................................................................................................................... 36 7.15 PLOT SETUP .............................................................................................................................. 36
8. SAMPLE PROBLEM 1: EXPRESS FORM ........................................................................................ 39 8.1 USE EXPRESS FORM TO SET UP THE PROBLEM .............................................................. 39 8.2 SET UP PLOT DATA ................................................................................................................. 39 8.3 EXECUTE SCALE ..................................................................................................................... 40 8.4 VIEW PLOT ............................................................................................................................... 41
9. SAMPLE PROBLEM 2: DETAIL FORMS ........................................................................................ 43 9.1 START IN DETAIL MODE ....................................................................................................... 44 9.2 ENTER COMPOSITION DATA AND ENRICHMENT ........................................................... 45 9.3 ENTER NEUTRON AND GAMMA ENERGY GROUPS ........................................................ 47 9.4 ENTER CASE DATA ................................................................................................................. 48 9.5 SET UP PLOT ............................................................................................................................. 58 9.6 EXECUTE SCALE ..................................................................................................................... 61 9.7 VIEW OUTPUT .......................................................................................................................... 62 9.8 VIEW PLOT ............................................................................................................................... 63
10. SAMPLE PROBLEM 3: DECAY ONLY PROBLEM ........................................................................ 67 10.1 START IN DETAIL MODE ....................................................................................................... 67 10.2 ENTER COMPOSITION DATA ................................................................................................ 67 10.3 ENTER GAMMA ENERGY GROUPS ..................................................................................... 68 10.4 ENTER CASE DATA ................................................................................................................. 69 10.5 SET UP PLOT ............................................................................................................................. 70 10.6 EXECUTE SCALE ..................................................................................................................... 70 10.7 VIEW OUTPUT .......................................................................................................................... 71 10.8 VIEW PLOT ............................................................................................................................... 72
11. PLOTTING RESULTS ........................................................................................................................ 73 11.1 PLOTOPUS ................................................................................................................................. 73
12. IMPORTING ORIGEN-ARP INPUT FILES ...................................................................................... 75
13. REQUIRED DATA SETS ................................................................................................................... 77 13.1 ARPDATA.TXT ......................................................................................................................... 77 13.2 OR_ARP_GROUPLIBOPTIONS.DAT ...................................................................................... 77

v
CONTENTS (continued) Page
13.3 OR_ARP_NEUTRONGROUPS.DAT ........................................................................................ 77 13.4 OR_ARP_GAMMAGROUPS.DAT ........................................................................................... 77 13.5 OR_ARP_NUCLIDES.DAT ....................................................................................................... 78 13.6 A.BAT ......................................................................................................................................... 78 13.7 ORIGENARPHELP.CHM .......................................................................................................... 78
14. HOW TO ADD NEW NEUTRON AND GAMMA ENERGY GROUP STRUCTURES .................. 79
15. ADVANCED FEATURES .................................................................................................................. 81 15.1 EXECUTE AN EXTERNALLY MODIFIED INPUT FILE ...................................................... 81 15.2 SETTING URANIUM ENRICHMENT FRACTIONS .............................................................. 81 15.3 ACCELERATOR KEYS ............................................................................................................ 83
16. TROUBLESHOOTING ....................................................................................................................... 85 16.1 MISSING DATA ........................................................................................................................ 85 16.2 RUNNING ORIGENARP OR PLOTOPUS WITH FOREIGN LANGUAGE
VERSIONS OF WINDOWS....................................................................................................... 85 16.3 TECHNICAL SUPPORT ............................................................................................................ 85
APPENDIX A INPUT FILES FOR EXAMPLE PROBLEMS ................................................................ A-1


vii
LIST OF FIGURES
Page
Fig. 1. Initial OrigenArp screen display ................................................................................................. 3 Fig. 2. Default Settings form. ................................................................................................................. 4 Fig. 3. Editor Setup form. ...................................................................................................................... 5 Fig. 4. Summary display of Demonstration.arp example. ...................................................................... 6 Fig. 5. DOS window for execution of SCALE. ..................................................................................... 7 Fig. 6. SCALE output file. ..................................................................................................................... 8 Fig. 7. UO2 Express form. ................................................................................................................... 15 Fig. 8. Power history input. .................................................................................................................. 17 Fig. 9. MOX Express form................................................................................................................... 19 Fig. 10. Reference and loading dates input. ........................................................................................... 20 Fig. 11. Compositions form. .................................................................................................................. 21 Fig. 12. Set Enrichment form. ................................................................................................................ 23 Fig. 13. Fuel Distribution form. ............................................................................................................. 24 Fig. 14. Restart from existing data file option. ...................................................................................... 25 Fig. 15. Neutron groups form................................................................................................................. 26 Fig. 16. Case data form. ......................................................................................................................... 27 Fig. 17. Irradiation case form. ................................................................................................................ 28 Fig. 18. Irradiation output options form. ................................................................................................ 29 Fig. 19. Decay case form. ...................................................................................................................... 31 Fig. 20. Decay output options form. ...................................................................................................... 33 Fig. 21. Case data form. ......................................................................................................................... 34 Fig. 22. Delete case form. ...................................................................................................................... 34 Fig. 23. Element fractions form. ............................................................................................................ 35 Fig. 24. Summary view. ......................................................................................................................... 36 Fig. 25. Plot setup form. ......................................................................................................................... 37 Fig. 26. Express form for sample problem 1. ......................................................................................... 39 Fig. 27. Plot setup form. ......................................................................................................................... 40 Fig. 28. DOS window for execution of sample problem 1. ................................................................... 41 Fig. 29. Plot of decay heat for sample problem 1. ................................................................................. 42 Fig. 30. Detail mode. .............................................................................................................................. 44 Fig. 31. Composition data form. ............................................................................................................ 45 Fig. 32. Set enrichment form. ................................................................................................................ 46 Fig. 33. Completed compositions form. ................................................................................................. 46 Fig. 34. Neutron energy spectra form. ................................................................................................... 47 Fig. 35. Gamma energy spectra form. .................................................................................................... 48 Fig. 36. Case data form. ......................................................................................................................... 48 Fig. 37. Irradiation case form. ................................................................................................................ 49 Fig. 38. Irradiation case data for Cycle 1. .............................................................................................. 50 Fig. 39. Decay case form. ...................................................................................................................... 51 Fig. 40. Decay case for refueling after Cycle 1. ..................................................................................... 52 Fig. 41. Irradiation case for Cycle 2. ...................................................................................................... 53 Fig. 42. Decay case for refueling after Cycle 2. ..................................................................................... 54 Fig. 43. Irradiation case for Cycle 3. ...................................................................................................... 55 Fig. 44. Final decay case for 5-year discharge. ...................................................................................... 56 Fig. 45. Final decay case for 5-year discharge with intermediate time steps filled. .............................. 57 Fig. 46. PlotOPUS case input form for plot 1. ....................................................................................... 58 Fig. 47. PlotOPUS case input form for plot 2. ....................................................................................... 59 Fig. 48. PlotOPUS case input form for plot 3. ....................................................................................... 60

viii
LIST OF FIGURES (continued) Page Fig. 49. DOS window for execution of sample problem 2. ................................................................... 61 Fig. 50. Beginning of output file for sample problem 2. ........................................................................ 62 Fig. 51. Plot of radioactivity in Becquerels for sample problem 2. ....................................................... 63 Fig. 52. Total neutron spectra plot for sample problem 2. ..................................................................... 64 Fig. 53. Gamma spectra plot for sample problem 2. .............................................................................. 65 Fig. 54. Plot data table of radioactivity in Becquerels for sample problem 2. ....................................... 66 Fig. 55. Composition data form for 60Co decay problem. ...................................................................... 67 Fig. 56. Gamma energy spectra form for 60Co decay problem. ............................................................. 68 Fig. 57. Decay case form for 60Co decay problem. ................................................................................ 69 Fig. 58. PlotOPUS case input form for 60Co decay problem. ................................................................ 70 Fig. 59. Gamma spectra in output file for sample problem 3. ............................................................... 71 Fig. 60. Plot of 60Co gamma spectra for sample problem 3. .................................................................. 72 Fig. 61. PlotOPUS case input form. ....................................................................................................... 73 Fig. 62. Modified input file warning dialog. .......................................................................................... 81 Fig. 63. Fuel distribution form. .............................................................................................................. 82

ix
LIST OF TABLES
Page Table 1. Detailed operating history for GE 10X10-8 fuel assembly ...................................................... 43 Table 2. Keyboard accelerator keys ........................................................................................................ 83


xi
ABSTRACT
The SCALE (Standardized Computer Analyses for Licensing Evaluation) computer software system developed at Oak Ridge National Laboratory is widely used and accepted around the world for nuclear analyses. ORIGEN-ARP is a SCALE isotopic depletion and decay analysis sequence used to perform point-depletion calculations with the well-known ORIGEN-S code using problem-dependent cross sections. Problem-dependent cross-section libraries are generated using the ARP (Automatic Rapid Processing) module using an interpolation algorithm that operates on pre-generated libraries created for a range of fuel properties and operating conditions. Methods are provided in SCALE to generate these libraries using one-, two-, and three-dimensional transport codes. The interpolation of cross sections for uranium-based fuels may be performed for the variables burnup, enrichment, and water density. An option is also available to interpolate cross sections for mixed-oxide (MOX) fuels using the variables burnup, plutonium content, plutonium isotopic vector, and water moderator density. This primer is designed to help a new user understand and use ORIGEN-ARP with the OrigenArp Windows graphical user interface in SCALE. It assumes that the user has a college education in a technical field. There is no assumption of familiarity with nuclear depletion codes in general or with SCALE/ORIGEN-ARP in particular. The primer is based on SCALE 6 but should be applicable to earlier or later versions of SCALE. Information is included to help new users, along with several sample problems that walk the user through the different input forms and menus and illustrate the basic features. References to related documentation are provided. The primer provides a starting point for the nuclear analyst who uses SCALE/ORIGEN-ARP. Complete descriptions are provided in the SCALE documentation. Although the primer is self-contained, it is intended as a companion volume to the SCALE documentation. (The SCALE Manual is provided on the SCALE installation DVD.)


1
1. INTRODUCTION
1.1 PURPOSE
ORIGEN-ARP is a calculational sequence in the SCALE code system to perform rapid and accurate point-depletion and decay calculations. The Automatic Rapid Processing (ARP) module interpolates pregenerated cross-section libraries to create problem-dependent cross sections for use with the ORIGEN code. Interpolation of cross-section libraries for uranium fuel systems is performed on the following variables: burnup, enrichment, and optionally moderator density. For mixed-oxide (MOX) fuels, additional interpolations are performed on the initial plutonium isotopic concentrations. The OrigenArp Windows graphical user interface (GUI) provides an easy-to-use input processor for the ORIGEN-ARP depletion analysis sequence that provides menus, toolbars, and forms that help a user set up a SCALE input file to execute ARP and ORIGEN. OrigenArp is coupled with the PlotOPUS Windows plotting program that plots calculated results from ORIGEN.
1.2 MANUAL ORGANIZATION
To make the primer easy to use, there is a standard set of notations that you need to know. The text of this primer is set in Times New Roman font. Information that you type into an input file (or provide to OrigenArp) is set in Courier font. Characters in the Courier font represent commands, keywords, or data that would be used as computer input. References to items displayed on the screen by OrigenArp are highlighted in bold font. Because the primer often references the SCALE Manual, these references will be set in square brackets, for example, [see SCALE Manual Section x]. This manual is divided into the following sections.
Introduction contains general information about the manual.
Getting Started provides the setup options and a simple example.
Toolbars lists the functions of the various toolbar buttons.
Menus lists all menu options.
UO2 Express Form is used to generate detailed input based on a minimum amount of information for a UO2 fuel depletion simulation.
MOX Express Form is used to generate detailed input based on a minimum amount of information for a MOX fuel depletion simulation.
Detail Forms are used to view, enter, or modify the OrigenArp detail input data.
Sample Problem 1: Express Form provides an example of how to use the “Express” form to generate ORIGEN-ARP detailed input quickly.
Sample Problem 2: Detail Forms provides a detailed example of how to generate ORIGEN-ARP input files and execute SCALE on the Windows PC.
Sample Problem 3: Decay Only Problem provides an example of hot to calculate a radioactive decay problem.

2
Plotting Results provides instructions for plotting results using PlotOPUS.
Importing ORIGEN-ARP Input Files provides instructions on how to import existing ORIGEN-ARP input files to create OrigenArp detail data.
Required Data Sets describes data sets that are required in order to execute OrigenArp.
How to Add New Neutron and Gamma Energy Group Structures provides instructions on how to add new energy group structures to the OrigenArp menus for neutron and gamma spectra calculations.
Advanced Features provides information on shortcuts and features that are not documented elsewhere in this manual.
Troubleshooting provides helpful hints and suggestions on what to do when things go wrong.

3
2. GETTING STARTED
2.1 STARTING THE PROGRAM
Launch OrigenArp by double-clicking on the OrigenArp shortcut in the SCALE 6 folder on your Windows desktop. The initial screen display should look like Fig. 1.
Fig. 1. Initial OrigenArp screen display
2.2 SETUP OPTIONS
Click the Options button on the left toolbar to access setup options. The Default Settings form (Fig. 2) allows you to override default settings for a few basic parameters. Note that the option to select Activation Mode is only available if OrigenArp finds activation libraries in its path. No activation libraries are supplied with SCALE. These must be generated and supplied by the user. This advanced feature is beyond the scope of this primer. The Reset Defaults button resets all setup options to the original installation settings.

4
Fig. 2. Default Settings form.
2.3 EDITOR SETUP
Click the Editor Setup button on the Default Settings form to open the Editor Setup form (Fig. 3) to specify your preferred text editor. The default editor is the Programmer’s File Editor (PFE) that is distributed and installed with SCALE. The editor you select (e.g., PFE, EditPad, Wordpad) must allow the name of a file to be passed as an argument to the editor. When the user clicks the Editor button, the SCALE input file for the current job is opened and displayed in the specified editor. Similarly, when the user clicks the Output button, the corresponding SCALE output file is opened in the editor.

5
Fig. 3. Editor Setup form.
2.4 SAMPLE PROBLEMS
The OrigenArp\Examples folder under the SCALE installation directory (e.g., C:\scale6\OrigenArp\Examples) contains several sample problems. Files with an extension “.arp” are binary files that are readable by OrigenArp and represent an input case for an ORIGEN-ARP sequence calculation. We will step through a simple example input file named “Demonstration.arp.” • Start OrigenArp by clicking on the shortcut in the SCALE6 folder on your desktop. • Click on the Open button on the top toolbar. • Navigate to the \scale6\OrigenArp\Examples folder. • Click on the file named “Demonstration.arp.” Once the file is opened, click on the Summary button on the left toolbar to display a summary of the input in the main window, as shown in Fig. 4.

6
Fig. 4. Summary display of Demonstration.arp example.
Press the Run button to create the SCALE input file and execute the problem. A DOS window will automatically open and display the progress of the calculation in SCALE, as shown in Fig. 5.

7
Fig. 5. DOS window for execution of SCALE.
When the calculation is complete, close the DOS window by clicking on the “X” in the upper right corner of the window. Then click on the Output button in the OrigenArp top toolbar to open the SCALE output file in the text editor that you previously specified in Editor Setup. The output file for this case is displayed in the default PFE editor in Fig. 6.

8
Fig. 6. SCALE output file.

9
3. TOOLBARS
OrigenArp displays two toolbars at any given time: the top toolbar and the left toolbar. In addition to the main toolbars, selected input forms contain specific toolbars with functions relevant to the form. If OrigenArp is displaying the “Origen Express” form, the top toolbar displays buttons relevant to the Express data. If OrigenArp is displaying the “Detail” input forms, the top toolbar displays buttons to allow editing, executing, plotting, and viewing of the Detail input data. The Express/Detail toolbar button allows you to switch between Express mode and Detail mode.
3.1 TOP TOOLBAR
The top toolbar can be docked or moved to any location on the screen. At startup the toolbar is docked.
New. This button initializes all forms to create a new OrigenArp problem. If there are existing data, the user is given the option to save the data or cancel before proceeding.
Open. This button is the same as the Open option under the File menu. The active folder will be opened, and a file dialog box will allow the user to select the appropriate binary .arp input file to display.
Save. This button is the same as the Save option under the File menu. If the file was previously saved, OrigenArp will save the data to the current path and filename. If this is a new problem, a file dialog will be presented so that the user can specify the path and filename. Both a SCALE input text file with an .inp extension and a binary .arp file are saved.
Print. This option prints the contents of the Summary View to the default printer. It is the same as the Print option under the File menu.
Help. This is the context-sensitive Help button. The OrigenArp help files are displayed, with help information for the active form. Context-sensitive help can also be displayed by pressing the F1 key.

10
Run. The Run button saves the SCALE input text file with an .inp extension and a binary .arp file, opens a DOS window, and proceeds to execute the problem in SCALE as shown in Fig. 5. Once the job is completed, you should close the DOS execution window. You cannot start another calculation in SCALE until the previous DOS window has been closed.
Output. The Output button displays the output from SCALE using the text editor specified in Editor Setup.
Plot. This button calls the interactive PlotOPUS plotting program to display plots that were generated during the SCALE calculation.
Tables. The Tables button opens the text editor to display the tables of the plot data generated during the SCALE calculation.
Editor. The Editor button allows you to view and/or edit the SCALE input file (.inp) using the text editor specified in Editor Setup.
Express/Detail. This button changes the input form from “Detail” to “Express” if the button text is “Express” or from “Express” to “Detail” if the button text is “Detail.”
3.2 LEFT TOOLBAR – DETAIL MODE
The left toolbar buttons may be used to view or modify the data in any of the existing forms.
In Detail mode, the Left toolbar contains seven buttons.
Options. The Options dialog includes default setting for several items. There is a Reset Defaults button that will reset all setup options to the original installation settings.
Comps. The Compositions form is activated, showing the last page of composition input. The composition input may span several pages.
Neutron. The Neutron Groups form displays the energy group structure used to calculate neutron source terms.

11
Gamma. The Gamma Groups form displays the energy group structure used to calculate gamma source terms.
Cases. The Case Data dialog allows you to create, edit, insert, or delete irradiation and decay cases.
Summary. The Summary screen displays a summary of the input data.
Plot Setup. This option allows the user to specify information needed to create plots using the OPUS post-processing program for ORIGEN.
3.3 LEFT TOOLBAR – EXPRESS MODE
In Express mode, the Left toolbar contains two buttons.
Options. The Options dialog includes default settings for several items. There is a Reset Defaults button that will reset all setup options to the original installation settings.
Plot Setup. This option allows the user to specify information needed to create plots using the OPUS post-processing program for ORIGEN.


13
4. MENUS
4.1 FILE MENU
The File menu contains the following selections:
• New – clears memory to start a new problem
• Open – opens an existing input file
• Close – closes the active file; user is given option to save unsaved data
• Save – saves the active file, using the present filename and path
• Save As – saves the active file with new filename or path
• Import – imports existing ORIGEN-ARP text input files
• Print – prints the Summary View to the default printer
• Print Preview – previews the Summary View before printing
• Print Setup – starts the Printer Setup dialog
• Execute SCALE – saves input file and executes SCALE in new temporary working directory
• Execute SCALE w/out saving – does not save input file before executing SCALE; this option allows user to modify input file in text editor prior to running SCALE
• Execute SCALE6.BAT (in TMPDIR) – saves input file and executes SCALE in default TMPDIR; this option allows user to access input or output files in temporary working directory before or after running SCALE
• Exit – terminates OrigenArp; user is given option to save unsaved data
4.2 EDIT MENU
The Edit menu has the following selections:
• Setup Options – opens Default Settings form; same as Options button
• Setup Editor – opens Editor Setup form to specify text editor
• Edit File – opens input file with text editor; same as Editor button
• Setup OPUS Cases – setup input for generating plot data; same as Plot Setup button
• Edit Enrichment Fractions – opens Enrichment Fractions form to specify fuel enrichment factors
• Undo – reverses the last change displayed in the active edit field
• Cut – cuts highlighted item in active edit field to clipboard
• Copy – copies highlighted item in active edit field to clipboard
• Paste – pastes clipboard item into active edit field

14
4.3 VIEW MENU
The View menu contains the following selections:
• Toolbar – toggles display of left toolbar
• Status Bar – toggles display of status bar at bottom of main window
• Set Font – sets the font for the Summary View menu
4.4 WINDOW MENU
The Window menu contains the following selections:
• Cascade – presents all form windows in a cascaded order
• Tile – presents all form windows in a tiled format
4.5 HELP MENU
The Help menu contains the following selections:
• OrigenArp Help Topics – starts the OrigenArp interactive help system
• About OrigenArp – displays the OrigenArp version number and creation date

15
5. UO2 EXPRESS FORM
The Express mode is designed to perform an OrigenArp calculation using a minimum amount of user input. All data are input on one form – the Origen Express form. Express forms are available for both UO2 and MOX fuel types. Calculations can be executed directly from the Express mode. After entering data in the Express form, the user has the option to toggle to Detail mode and access the Detail forms, allowing the user to modify any information that was generated automatically by the Express mode. However, once the user switches to the Detail mode, the user cannot toggle back to the Express form without losing information because not all options available in the Detail mode are available in the Express mode.
The OrigenArp UO2 Express form (Fig. 7) is used to quickly generate detailed input based on a minimum amount of information for UO2 fuel including fuel type, total uranium, enrichment, burnup, and power history. Click on the Express button to switch from Detail to Express mode. Note that the UO2 Express form is not available when OrigenArp is in Activation mode.
Fig. 7. UO2 Express form.

16
5.1 FUEL TYPE
The fuel assembly configuration types available to OrigenArp are specified in a file named ARPDATA.TXT, which is installed as part of the SCALE system (see Section 13.1). Users may add other fuel assembly types to ARPDATA.TXT for libraries that they create. Techniques for creating ARP libraries are described in the [SCALE Manual Sect. D1.A.2].
5.2 URANIUM
Uranium represents the total initial concentration of uranium in grams for generating the U-234, U-235, U-236, and U-238 concentrations when the concentrations are generated using the Enrichment Fractions Algorithm. The default is 1.00E+6 (i.e., 1 MTU). It is possible for the user to modify the concentrations or insert other isotopes of uranium using the Composition Data form.
5.3 ENRICHMENT
The values input for the wt% U-235 and the Uranium concentration are used by the Enrichment Fractions Algorithm to determine initial concentrations of U-234, U-235, U-236, and U-238. The range of acceptable values for enrichment is specified in ARPDATA.TXT. Though OrigenArp checks the value entered for enrichment to determine if it falls within the allowed range, the user may choose to ignore the warning and generate SCALE ORIGEN-ARP input with enrichment outside the allowed range. However, values that are outside the range may cause ORIGEN-ARP to fail.
5.4 BURNUP
The value entered for Burnup represents the total burnup of the fuel over all cycles. The burnup value will be divided by the number of cycles to determine the burnup per cycle. The value is entered in MWd/MTU. The allowed range for burnup is determined by the maximum burnup value in ARPDATA.TXT for the selected fuel type.
5.5 CYCLES
The user specifies the number of fuel cycles (irradiation case for power operation followed by decay case for shutdown/refueling) to represent the irradiation history. OrigenArp will generate as many irradiation/decay cases as needed to represent the problem. An updated cross-section library is interpolated by ARP for each cycle based on the mid-cycle burnup.
5.6 LIBRARIES PER CYCLE
The user may enter the minimum number of libraries to generate per cycle. There will be a new irradiation case for each library. ARP will produce a burnup-dependent library based on the midpoint burnup of each irradiation case. The cross sections remain constant throughout the irradiation case. Increasing the number of libraries increases the accuracy of the cross-section data because the burnup range where cross sections remain constant decreases.
OrigenArp limits irradiation cases to a maximum of 1000 days. If the 1000-day limitation requires that a cycle be divided into additional irradiation cases, then the number of libraries per cycle actually used will be greater than that requested by the user.

17
5.7 COOLING TIME
Cooling time is the final decay time after fuel is discharged from the reactor. When using the Express form, the final case will be a decay case.
5.8 MODERATOR DENSITY
Moderator density (g/cm3) must be within the range of densities specified in ARPDATA.TXT at which the ARP basic libraries for the selected fuel type were generated. For libraries that do not have variable moderator density (e.g., the libraries were generated using average hot full power values), this input field is not used, and the value in the field represents the value associated with the library.
5.9 POWER HISTORY
Power history specifies the average specific power level in units of MW/MTU. The ratio of irradiation time (uptime) to the total time (uptime + downtime between cycles) that the fuel resides in the reactor can be set using the slide bar (Fig. 8). If this value is set less than 100%, decay cases are automatically included between each cycle to account for the downtime, such as reactor refueling.
Fig. 8. Power history input.
5.10 OPEN AND SAVE BUTTONS
OrigenArp Express data can be saved in a binary format .uo2 file by pressing the Save button. Saved express data can later be selected to initialize the UO2 Express form using the Open button. Pressing the OK or Detail button converts the data to detailed data that can be edited using the Detail forms that have been discussed previously. Once the data are converted to detailed format, the data can no longer be displayed in Express mode.


19
6. MOX EXPRESS FORM
The MOX Express form (Fig. 9) is used to quickly generate detailed input for mixed-oxide (MOX) fuel assemblies based on a minimum amount of information including fuel type, uranium and plutonium distribution, enrichment, burnup, and power history. Once the input is generated using the Express form, the user may elect to view and modify the data using the Detail forms or to execute SCALE immediately from within the Express form.
Pressing the MOX button on the UO2 Express form (Fig. 7) switches to the MOX Express form. Note that only the input fields on this form that differ from the UO2 Express form are discussed below.
Fig. 9. MOX Express form.
6.1 HEAVY METAL
Heavy Metal represents the total initial concentration in grams of Pu-238, Pu-239, Pu-240, Pu-241, Pu-242, U-234, U-235, U-236, U-238, and Am-241.

20
6.2 PERCENT PU AND AM IN HEAVY METAL
The (%Pu + Am) / Heavy Metal represents the percentage of all Pu isotopes and Am-241 in the heavy metal. The %Am / (Pu + Am) represents the percentage of Am-241 in Pu + Am. These values are used to characterize the fuel isotopic distribution.
6.3 REFERENCE AND LOADING DATES
The Reference Date and Loading Date input fields (Fig. 10) have a built-in calendar to assist in specifying the data.
Reference date is the date for which the fuel isotopic compositions were specified prior to irradiation.
Loading date is the date when the first irradiation case begins. Any difference between the reference and loading dates is used to correct the input isotopic distributions for the decay of Pu-241 to Am-241.
Fig. 10. Reference and loading dates input.
6.4 HEAVY METAL DISTRIBUTION
The Heavy Metal Distribution table allows the user to enter either the weight percent or the mass (grams) of the specified isotopes. If gram values are entered, the first three fields beneath Fuel Type cannot be edited. These fields are automatically updated based on the grams entered for each isotope.
If weight percent values are entered, the sum of the Pu isotopes must be 100, and the sum of the U isotopes must be 100. The amount of Pu-241 must be greater than zero. OrigenArp will check that the %Pu/Heavy Metal and the weight percent of Pu-239 are within the library range specified in ARPDATA.TXT for the selected Fuel Type.

21
7. DETAIL FORMS
The OrigenArp detail forms are used to input or modify detailed input data. Ultimately, it is the detailed input that is used to generate the SCALE input file to execute ARP and ORIGEN. The detailed input can be created directly by using these forms, by importing previously created input files, or by using the OrigenArp Express mode.
7.1 COMPOSITIONS
Nuclide compositions are required input for ORIGEN to define the initial configuration of the system being analyzed. Radio buttons on the top left of the Compositions form (Fig. 11) allow the user to select Enter composition data or Restart from existing data file. Depending on the option selected, the screen will display those data items that are required.
Fig. 11. Compositions form.
7.1.1 Enter Composition Data
If Enter composition data is selected, the Units field gives the user a choice of input units (grams, gram-atoms, or curies). The user selects each nuclide by Element from an alphabetical menu and then selects the Isotope (e.g., “U” and “235” for U-235 and “Xe” and “135m” for Xe-135 metastable). The “Natural” option provides a natural distribution of the element instead of a specific isotope. This option is available for most light elements.

22
The user then selects the Library. The choices are “light element,” “actinide,” or “fission product,” and only valid choices for the specified nuclide are displayed. The selection of the library should be based on the origin of the nuclide and the desired grouping for output edits in ORIGEN. If the nuclide appears in only one library, the program automatically fills the field with the appropriate library.
The last field in each row is the Concentration. The concentration is input in the units selected. The concentration that is input for each nuclide determines the “basis” of the problem (e.g., fuel assembly or metric ton of uranium). Note that the problem basis is very important because it determines the values of other input parameters (e.g., power for irradiation cases) and the units of output parameters (e.g., nuclide concentrations or source terms per basis unit).
Fuel Type is selected from the list of fuel assembly types in the ARPDATA.TXT file, which is required by OrigenArp and is located in the SCALE data directory.
The allowed range of input values for Moderator Density for each fuel type is obtained from ARPDATA.TXT. If cross-section data were generated at multiple moderator densities, ARP interpolates the cross sections versus moderator density. If cross-section data were generated for only one moderator density, the default value for this field cannot be changed.
The Uranium concentration in grams is automatically calculated and displayed in this field. This value provides the user with confirmation of the basis for the problem (e.g., 1 g U, 1000000 g U = 1 MTU, etc.). Additional data written to the ARP input file include the average power history in MW/MTU for each irradiation case. The power history entered in Irradiation Case data is converted from MW/basis unit to MW/MTU using the MTU per basis unit (or metric ton heavy metal for mixed-oxide fuel) in the Compositions input. Note that the Uranium field is not calculated or displayed when the input units are curies. Curies are allowed as input units only for decay-only jobs.
Enrichment is automatically calculated from the composition data if input units are grams or gram-atoms. This value is used by ARP to interpolate the cross sections versus enrichment. For MOX fuel types, the label is Heavy Metals.
7.1.2 How to Delete a Nuclide from the Composition Form
To delete a nuclide, highlight the nuclide to delete, then press the Delete key or use the Delete button on the toolbar. The entire row will be cleared.
7.1.3 Automatic Calculation of Uranium Isotopic Concentrations
An option is available to automatically generate uranium isotopic concentrations based on the initial enrichment using the Enrich button. This button displays a form (Fig. 12) for the user to enter the initial U-235 enrichment and total uranium mass in grams. The allowed range of enrichments associated with the selected fuel type is displayed to the right of the enrichment field. Clicking OK fills the Composition form with the defined uranium isotopic data. Note that initial amounts of U-234 and U-236 are defined by the default enrichment fractions specified in the Enrichment Fractions form, which can be accessed by pressing Alt+E.

23
Fig. 12. Set Enrichment form.
Alternatively, the user may define initial uranium isotopic concentrations using the Fuel Dist button, which opens the Fuel Distribution form (Fig. 13). This option performs a function similar to the Enrich button, except that the default enrichment fractions are not used, and any distribution may be specified. The code can automatically calculate the Weight Percent value for the last isotope selected such that the total will yield 100 %. To activate, double-click on the first column (Name) in the row of that isotope. The “Fill to 100%” label then appears. Click on the label to automatically adjust that isotope’s weight percent.

24
Fig. 13. Fuel Distribution form.
7.1.4 Restarting from an Existing Data File
To have ORIGEN restart using nuclide compositions read from a data set written by a previous ORIGEN job, the user must select the Restart from existing data file radio button at the top of the Compositions form (Fig. 14). All nuclide fields are removed. Note: any composition data previously entered on the form will be lost.
The user is required to enter the unit number, position, and name of the restart file.

25
Fig. 14. Restart from existing data file option.
The unit number is the input/output (I/O) unit number of the data set. The unit number defaults to 71 as this is the unit where the ORIGEN restart file is typically written and read by ORIGEN.
The position is the position of the concentrations in the file. ORIGEN restart files can contain data from numerous time steps in calculation. Note that ORIGEN prints the position in the file when it writes the data. If the user inserts either position number 0 or 1, ORIGEN reads from the first position in the file.
Click the Browse button to select the restart file. When the open file dialog box opens, it will initially display only files with .f71 extensions. To find a file with a different extension, click on “Files of Type” dropdown box and select “All Files (*.*).”
OrigenArp will expect a name of the form “filename.f71,” where the filename is the prefix from the active OrigenArp problem and the “71” is the unit number specified by the user. During execution of SCALE, the restart file will be copied to a file named “ft71f001” in the SCALE temporary directory. If the user selects a restart unit number other than “71,” the file created will be “ft##f001,” where “##” is the unit number.
IMPORTANT NOTE: If the user is reading from a position prior to the last one in the file, the data that follow may be overwritten if new restart data are saved. If the user reads restart data and saves results in the same job, ORIGEN begins writing data in the file position immediately following the one from which it read. It does not search for the end of file.
7.2 NEUTRON GROUPS
This option specifies the energy group structure for neutron source term spectra edits. These edits are printed for individually selected time steps in the decay cases for which source terms are desired. This form (Fig. 15) is required to obtain neutron source term output. The first field on the screen provides a multiple-choice list of energy group structures corresponding to commonly used neutron cross-section

26
libraries. Selecting “Other” allows you to input a user-defined group structure. If you are running only irradiation cases or do not want these edits, select “None.”
Fig. 15. Neutron groups form.
You can add a new energy group structure to the list by modifying the files OR_ARP_GroupLibOptions.dat and OR_ARP_NeutronGroups.dat (for neutron groups) or OR_ARP_GammaGroups.dat (for gamma groups). For more information on this topic, refer to “How to Add New Neutron and Gamma Energy Group Structures” in this primer.
If you select one of the standard group structures or “None,” no other input is required. If “Other” is selected, then you must specify the number of energy groups and click Apply or OK. OrigenArp displays a set of edit boxes equal to the number of groups plus one. You must input the maximum-energy cutoff in electron volts (eV) for each group, beginning with group 1 (the highest-energy group). The final edit box contains the minimum-energy cutoff for the last energy group. OrigenArp verifies that the energies are entered in order from highest to lowest.
7.3 GAMMA GROUPS
Similar to the Neutron Groups form, this option specifies the energy group structure for gamma source term spectra edits. Please refer to the previous section on “Neutron Groups” for details on how to use this form.

27
7.4 CASE DATA
The Case Data dialog allows you to create a new case or edit an existing case (Fig. 16).
Fig. 16. Case data form.
To create new case, click the button for the case type (Irradiation or Decay) that you wish to create. Depending upon which button you click, either the Irradiation Case form or the Decay Case form is displayed. The new case is added after the last specified case. If there is no previous case, the new case is the first case.
To select existing case, highlight the case that you wish to edit and click the OK button. The appropriate form for that case is displayed.
Each case is limited to ten time steps, because this is the maximum number that fit across a page of the ORIGEN output. Each case has a Title and a Basis. The Basis is a subtitle in the ORIGEN output that describes the basis for the calculations performed as determined by the concentrations input (e.g., a fuel assembly or 1 MTU). The order in which cases are entered determines the order in which they appear in the ORIGEN input file and is reflected by the case number that is displayed in OrigenArp.
7.5 IRRADIATION CASE
Each irradiation case consists of a series of time steps where the fuel is irradiated. The power level (MW/basis unit) and the cumulative time from the case beginning time are input for each time step on

28
the Irradiation Case form (Fig. 17). The beginning time for the first case is zero. The beginning time for subsequent cases defaults to the ending time of the previous irradiation case unless the Start ALL Irradiation Cases at Time Zero box is checked for the first case.
The Options button displays a dialog that allows you to specify output options. The Insert and Delete buttons allow you to insert or delete a case. A case is inserted immediately before the present case. The Delete button deletes the current case. The Fill button is used to quickly generate irradiation input data at a specified power level for a specified amount of time, as explained in the next section.
IMPORTANT NOTE: The power must be consistent with the basis for the calculation (e.g., fuel assembly, MTU) in order for the calculated results to be correct.
Fig. 17. Irradiation case form.
The power and time input values are used to calculate burnup for each case. The burnup values are input to the ARP module that produces problem-dependent ORIGEN cross-section libraries by interpolating on enrichment, burnup, and moderator density in the case of UO2 fuel.
Typically each irradiation case represents an operating cycle for a reactor. The maximum time increment for each time step in an irradiation case is 100 days with a minimum of 3 time steps per case. If the cycle history requires more than 10 time steps, the cycle history may span multiple irradiation cases. To specify downtime during an irradiation case, input zero for the power. For downtime at the end of a cycle or that exceeds 100 days, a decay case should be used.
OrigenArp checks that the cumulative time for each step is greater than that for the previous step. If a time step increment exceeds 100 days or the number of time steps is less than 3, OrigenArp prints a warning message. You can insert additional time steps or allow OrigenArp to insert additional time steps. If you want to use a constant power level for the entire case, you may enter the power and final time in the first row of the power time/time data, and use the Fill Form option to generate intermediate time steps for the total time specified.

29
Once additional time steps are inserted, you must again enter Apply or OK to cause the changes to take effect. You can modify the time steps generated by OrigenArp by simply editing the fields. OrigenArp checks the data whenever the form is validated (i.e., when you select OK, Apply, Previous, or Next).
The option to write restart data for a time step is set by clicking the Save Results check box for the desired time step. Results may be saved for any or all time steps. Only results from saved time steps are available to plot.
7.6 FILL FORM OPTION FOR IRRADIATION CASES
Fill. The Fill button allows you to quickly generate irradiation input time steps at a constant power level for the entire case. To use this option, insert a power level and total time for the case in the first row of the power/time table and then click the Fill button. OrigenArp will generate time steps at the specified power level using as many cases as needed such that the increment for each time step is no more than 100 days.
7.7 OPTIONS FOR IRRADIATION CASES
Options. The Irradiation Output Options form is accessed by pressing the Options button on the Irradiation Case form (Fig. 18).
Fig. 18. Irradiation output options form.
This form controls the output options for the ORIGEN irradiation calculations only. When generating additional irradiation cases, the options are copied from the previous irradiation case. Output Tables may

30
be output for Nuclides (i.e., individual isotopes), Elements, Both nuclides and elements, or None to turn off irradiation case output. Separate output tables are generated for Light Elements, Actinides, and Fission Products. The Table Cutoff value specifies that any nuclide or element whose fractional contribution to the total is less than the cutoff will be omitted from the output. The Output Units may be Grams or Gram-Atoms.
7.8 DECAY CASE
A decay case consists of a series of time steps in which the compositions undergo radioactive decay and are specified on the Decay Case form (Fig. 19). The beginning time defaults to zero unless the previous case is also a decay case. If so, the beginning time for the current decay case is the ending time from the previous case. OrigenArp checks that the cumulative time for each time step is greater than that for the previous step. The recommended maximum initial time step is 100 days, or 0.3 years, and the cumulative time for subsequent steps should not exceed 3.3 times the cumulative time for the previous time step. Because the nuclides decay exponentially, this factor ensures accurate results. This rule is commonly known as the “Rule of 3’s.” If the time step increments violate the Rule of 3's, OrigenArp displays an error message. The user must then insert additional steps (up to the maximum of 10 steps per case) such that the input does not violate the Rule of 3's.
Alternatively, the user may choose to enter only the final time and use the Fill button to generate data for the time specified (this option is generally recommended). The time steps generated by OrigenArp may be modified by simply editing the fields. OrigenArp checks the data for validity whenever the user selects the Apply or OK button.

31
Fig. 19. Decay case form.
The Source Spectra check boxes are used to request neutron and gamma source term spectra edits for any specified time step. These are printed by ORIGEN according to the energy group structures designated in the Neutron and Gamma Groups forms. If “None” is selected for group structures on both of those forms, requesting an edit on this screen has no effect.
The option to write restart data for a time step is set by clicking the Save Results check box for the desired time step. Results may be saved for any or all time steps. Only results from saved time steps are available to plot.
The Options button displays a dialog that allows the user to specify output options. The default options may be sufficient for most user needs. The Insert and Delete buttons allow the user to insert or delete a case. New cases may be inserted before any existing case. By default, the new case is inserted immediately before the present case. Likewise, the Delete option may be used to delete any case in the sequence and defaults to the current case.
Neutron and gamma source options are listed on the upper right-hand side of the form. These include (Alpha,n), (Alpha,n) Cutoff, Alpha Groups, Bremsstrahlung, and Gamma Library.
(Alpha,n) specifies the composition matrix type used in the (alpha,n) neutron source calculation. There are three options: “UO2,” “Borosilicate Glass,” and “Problem Specific.” “UO2” and “Borosilicate Glass” use fixed compositions for these materials regardless of the compositions in the case. “Problem Specific” uses the compositions as specified in the case. For materials other than UO2 or borosilicate glass, the “Problem Specific” option should be selected.

32
(Alpha,n) Cutoff allows the user to drop low-importance sources and target nuclides in the (alpha,n) calculation.
Alpha Groups sets the number of alpha energy bins used to represent the continuous alpha slowing-down expression used in solving the (alpha,n) neutron yield. The default value is 200 groups. The (alpha,n) sources are then calculated by representing the continuous slowing down of each alpha particle in the medium between its initial energy (Emax) to its final energy (zero) in 200 discrete energy bins. The default value is adequate for most applications.
Bremsstrahlung defines the medium used to generate the Bremsstrahlung component of the gamma radiation source.
Gamma Library selects the group of nuclides (Total, Light Elements, Actinides, Fission Products) used to generate the gamma radiation source.
Print Neutron Source Calculation Details turns on flag for this optional output edit.
For more information on these options, please refer to the [SCALE Manual Sect. F7 (ORIGEN-S)].
7.9 FILL FORM OPTION FOR DECAY CASES
The Fill button allows the user to quickly generate decay input data for a given period of time. To use this option, the user inserts a total time in the first row of the time table and then clicks the Fill button. OrigenArp will generate time steps that do not violate the Rule of 3’s, using as many pages as needed such that each page contains no more than ten time points. For example, with a total time of 3000, OrigenArp will generate time steps of 1, 3, 10, 30, 100, 300, 1000, and 3000. This feature is designed to allow the user to specify only the total time for a decay cycle and then let OrigenArp determine the time steps needed to ensure accurate results.
33
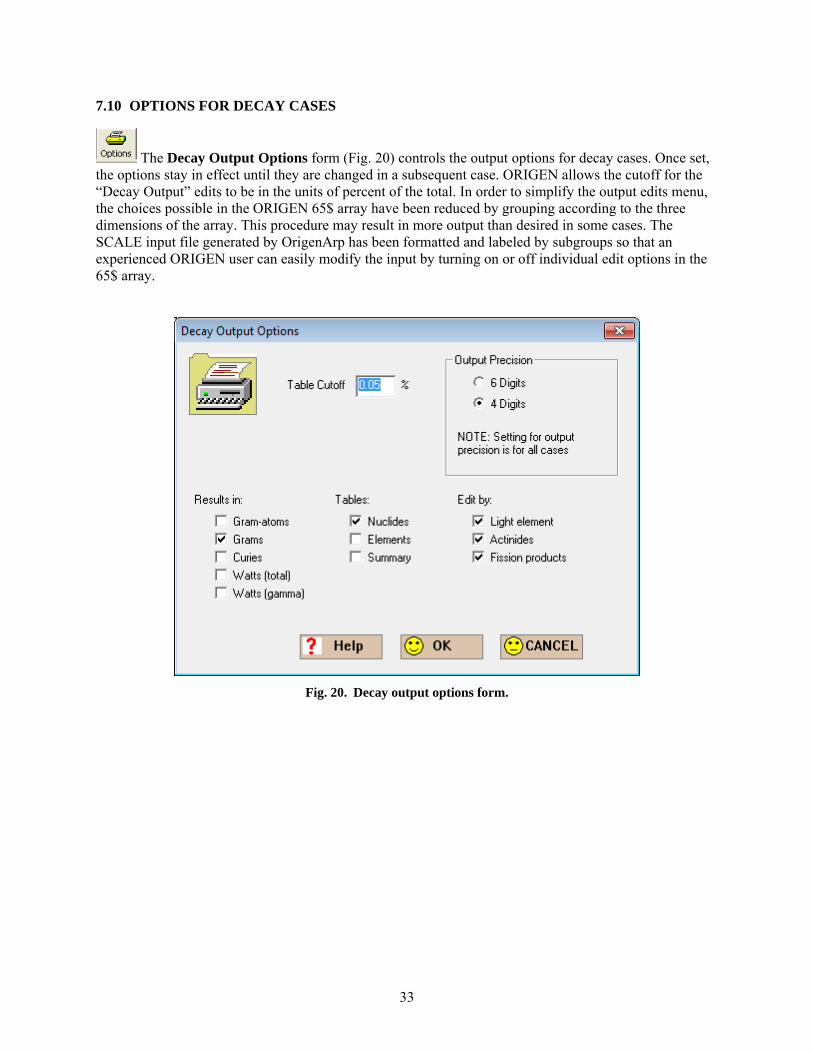
7.10 OPTIONS FOR DECAY CASES
The Decay Output Options form (Fig. 20) controls the output options for decay cases. Once set, the options stay in effect until they are changed in a subsequent case. ORIGEN allows the cutoff for the “Decay Output” edits to be in the units of percent of the total. In order to simplify the output edits menu, the choices possible in the ORIGEN 65$ array have been reduced by grouping according to the three dimensions of the array. This procedure may result in more output than desired in some cases. The SCALE input file generated by OrigenArp has been formatted and labeled by subgroups so that an experienced ORIGEN user can easily modify the input by turning on or off individual edit options in the 65$ array.
Fig. 20. Decay output options form.

34
7.11 INSERT CASE
The Insert Case form (Fig. 21) allows you to specify the type of case to insert (i.e., Decay or Irradiation) and the insert location. The new case will be inserted immediately before the selected case.
Fig. 21. Case data form.
7.12 DELETE CASE
The Delete Case form (Fig. 22) allows you to specify a case to delete. Select a case from the list and click the Delete button.
Fig. 22. Delete case form.

35
7.13 ELEMENT FRACTIONS
The Element Fractions form (Fig. 23) is an optional screen that allows you to keep or remove all or a fraction of the specified elements from the previous case. This option can be used to approximate keeping (or removing) a portion of the elements that are of particular interest. For example, to obtain a cobalt-only source, specify the Keep option and select the element cobalt (Co). In the example shown in Fig. 23, the Remove option is used to remove all of the xenon (Xe) inventory from the problem by setting the removal fraction to unity. Elements are removed at the start of the case in which the fractions are set. The Select Elements list box is a multiple-selection list box. To select a single element, simply click that item. To select additional elements, the Ctrl key should be held down while making the selection. To select a range of items, hold down the Shift key.
Fig. 23. Element fractions form.

36
7.14 SUMMARY VIEW
The Summary View (Fig. 24) displays the data for the active input in text mode. The purpose is to aid the user in reviewing, understanding, documenting, or debugging input. Print or Print Preview (in the File pulldown menu) can be used to print a copy of the summary.
Fig. 24. Summary view.
7.15 PLOT SETUP
The Plot Setup form (Fig. 25) allows you to request specific output quantities tabulated in a text table that contains only the requested data. This table may be plotted by PlotOPUS or imported into another program for analysis and/or visualization. The requested results may include nuclide data, element data, neutron spectra, or gamma spectra. The available isotopic and element units are selected from the Output Units pulldown menu and include for Nuclides and Elements: Grams, Gram-atoms (moles), Curies, Becquerels, Kilograms, Atoms% Wt%, Total Watts, Gamma Watts, Atoms/(barn-cm), Grams/cm3, Absorptions, Air Toxicity, and Water Toxicity. Note that the results generated from the Plot Setup form are independent of the ORIGEN output. That is, the user does not need to also request these quantities in the ORIGEN output options. However, any data points that are desired must have been

37
requested using the Save results check box associated with each time step in the irradiation or decay case data. The Output Units for Gamma Spectra are photons/s/mev or energy/s/mev. There are no options for Total Neutron Spectra, (Alpha,n) Reactions, or Spontaneous Fission.
Fig. 25. Plot setup form.
The units of Atoms% and Wt% have special meaning. When selected, the user must set the Plot Type radio button to Elements and then select the element(s) for which plot data are desired in the Nuclides to Plot dialog. OrigenArp will then produce a table of the isotopic distribution (in weight percent or atom percent) for all isotopes of the selected element(s). To activate the dialog box, it must be clicked once to activate. Once activated, any nuclide or element selected by clicking on it will appear in the Selected box to the right. A range of nuclides may be selected by holding the Shift key after the first selection, and then making a second selection. To remove any nuclide from the Selected field, simply click on it.You can skip to any part of the nuclide list by typing the first letter of the desired nuclide. For most plots types, if no nuclides are explicitly requested, the top-ranking nuclides are automatically printed in the output table. Selecting several nuclides will ensure they also appear in the output table, regardless of their relative ranking. If the user selects nuclides and then checks Only plot selected nuclides, only the selected nuclides will be plotted and no others.

38
Library Type refers to the group of nuclides to be included in the output plot tables. The default is All which includes light elements (structural materials), actinides, and fission products. For example, if the total decay heat is requested, the output table will include any nuclide that contributes significantly to the decay heat, regardless of origin. The total value, listed in the output table (and plotted), represents the total for all nuclides in the problem (not just those listed). If the user were to select the Library Type Actinides, then only the actinide nuclides will be included, and the total will represent the total actinide contribution to the problem. After plot data are specified in the Plot Setup form, the user may add more plots by clicking the New button on the toolbar at the top of the form. The additional plots will be added to the Select Plot field from which previously defined plots can be selected and edited, or deleted. A separate plot file and table in the output file will be generated for each plot requested.

39
8. SAMPLE PROBLEM 1: EXPRESS FORM
This problem models three cycles of a Westinghouse 17 × 17 PWR fuel assembly (i.e., w17x17) with an Enrichment of 2.8 wt % 235 U. The basis for this model is 1 MTU of fuel (i.e., 1e+006 g Uranium). The Power History indicates that the reactor is in operation 80% of the time with an assembly Average Power of 25 MW/MTU for 2 Cycles with a Burnup of 25000 MWd/MTU. Cooling Time after final discharge is 5 years. The Moderator Density is fixed at the default value in ARPDATA.TXT.
The following steps are used to create, execute, and generate plots for this sample demonstration problem.
8.1 USE EXPRESS FORM TO SET UP THE PROBLEM
Enter the input data specified above in the Express form as shown in Fig. 26.
Fig. 26. Express form for sample problem 1.
8.2 SET UP PLOT DATA
Click on the Plot Setup button to request plot data for the Final Decay case (5-year cooling time) after discharge. OrigenArp will automatically turn on the Save Results flags for each time step in the final decay case. In this example, we will plot the decay heat. In the PlotOPUS Case Input form (Fig. 27), select Total Watts for the Output Units. Note we will use the default Plot Type of Nuclides and the

40
Library Type of ALL to obtain the data from the largest contributors for all nuclides. Click OK on the top toolbar to save the data and close the form.
Fig. 27. Plot setup form.
8.3 EXECUTE SCALE
Execute SCALE by pressing the Run button. The Save As dialog form will open. Go to the folder where you want to save your input and output files. Enter the file name sample_problem1 for the File name. A DOS window will open and display the progress of the calculation. When the calculation is complete, the DOS window appearance should be similar to Fig. 28. You may close the DOS window once execution is completed.

41
Fig. 28. DOS window for execution of sample problem 1.
8.4 VIEW PLOT
You may view the plot results using the PlotOPUS program by selecting the Plot button. The plot should be similar to the one in Fig. 29. The nuclide list on the right side of the plot lists the primary contributors in order of importance. Note that PlotOPUS plots the data for the first 14 contributors by default. You can click on the nuclide list to select or de-select nuclides to display. The Ctrl and Shift keys can be used in combination with the mouse to select multiple nuclides or a group of nuclides similar to other Windows programs.

42
Fig. 29. Plot of decay heat for sample problem 1.

43
9. SAMPLE PROBLEM 2: DETAIL FORMS
This problem models three-cycle irradiation of a GE 10X10-8 fuel assembly with enrichment of 3.2 wt % 235U. The basis for this model is 1 MTU of fuel. The operating history is shown in Table 1. Assume the moderator density is 0.63 g/cc. The following subsections outline the steps used to set up and run this problem with OrigenArp.
Table 1. Detailed operating history for GE 10X10-8 fuel assembly
Cycle number
Power (MW/MTU)
Cumulative time (days)
1 38 100 40 175 41 250 35 300 37 350
Refueling Decay case 49 2 35 100 0 130 34 215 38 300 33 405
Refueling Decay case 70 3 16 200 15 455
Discharge after Cycle 3
Decay case 5 years

44
9.1 START IN DETAIL MODE
Start OrigenArp in Detail mode. If the Express form is displayed at startup, select the Detail button. Click the New button to clear any data from a previous problem. The screen should look like the example in Fig. 30.
Fig. 30. Detail mode.

45
9.2 ENTER COMPOSITION DATA AND ENRICHMENT
Select the Comps (Compositions) button to access the Composition Data form and select the Fuel Type (Fig. 31). Select ge10x10-8 for the Fuel Type.
Fig. 31. Composition data form.

46
Select the Enrichment button and enter a value of 3.2 for Enrichment on the Set Enrichment form (Fig. 32). Use the default value of 1000000 for Total Uranium and select OK.
Fig. 32. Set enrichment form.
Once you set the Moderator Density to 0.63, the Composition Data form is complete (Fig. 33). Click OK to close the form.
Fig. 33. Completed compositions form.

47
9.3 ENTER NEUTRON AND GAMMA ENERGY GROUPS
To obtain neutron and/or gamma radiation source terms, you must specify the energy group structures that you want ORIGEN to use when it calculates the source terms. Click on the Neutron button to open the Neutron Energy Spectra form. Select 238GrpSCALE (238GrpENDF5 in older versions) as the Group Structure (Fig. 34). Click OK to close the form.
Fig. 34. Neutron energy spectra form.

48
Click on the Gamma button to open the Gamma Energy Spectra form. Select 18GrpSCALE5 (18GrpSCALE in older versions) as the Group Structure (Fig. 35). Click OK to close the form.
Fig. 35. Gamma energy spectra form.
9.4 ENTER CASE DATA
To enter irradiation (i.e., power history) data, select the Cases button to open the Case Data form (Fig. 36).
Fig. 36. Case data form.

49
Select Irradiation to open the Irradiation form for Case 1 (Fig. 37).
Fig. 37. Irradiation case form.

50
Enter the irradiation data for Cycle 1 (Fig. 38). Once the data for Cycle 1 are complete, select the Next button. You will be returned to the Case Data form. Select Decay under Create New Case to create the refueling case after Cycle 1.
Fig. 38. Irradiation case data for Cycle 1.

51
The Decay Case form will be displayed (Fig. 39). Enter 49 for the Cumulative Time in Days, which are the default Time Units on the form.
Fig. 39. Decay case form.

52
Click on the Fill button so that OrigenArp will automatically fill the form with intermediate time steps (Fig. 40).
Fig. 40. Decay case for refueling after Cycle 1.

53
Click Next and create a new irradiation case for Cycle 2. When you complete the form and click Next, you will see a warning message “Time step exceeds 100 days,” which is the recommended maximum size in ORIGEN-ARP. Check the box “DO NOT WARN me…Just make the time adjustments” and click Yes. OrigenArp automatically divides the time step into multiple steps that are less than or equal to 100 days. In this case, the final time step that was 105 days long is divided into two equal steps of 52.5 days. The completed form should appear as shown in Fig. 41.
Fig. 41. Irradiation case for Cycle 2.

54
Click Next and create a new decay case for the refueling after Cycle 2. Enter 70 for the Cumulative Time and click on the Fill button so that OrigenArp automatically fills the form with intermediate time steps. The completed form should look like Fig. 42.
Fig. 42. Decay case for refueling after Cycle 2.

55
Create a new irradiation case for Cycle 3 (Fig. 43).
Fig. 43. Irradiation case for Cycle 3.

56
Finally, create a new decay case for discharge after Cycle 3 (Fig. 44). Change the Time Units to Years, specify 5 as the Cumulative Time and check the Source Spectra and Save Results boxes as shown in Fig. 44. Because source terms and plots are desired for this final case, the Source Spectra and Save Results check boxes must be checked.
Fig. 44. Final decay case for 5-year discharge.

57
Click the Fill button to have OrigenArp automatically fill in the needed intermediate time steps. The form should look like Fig. 45. Click OK to close the form and save data.
Fig. 45. Final decay case for 5-year discharge with intermediate time steps filled.

58
9.5 SET UP PLOT
We will generate 3 plots: (1) Radioactivity in Becquerels, (2) Neutron spectra, and (3) Gamma spectra. Click on the Plot Setup button. Select the final case 6 Decay as the Case(s) to Plot, and set Output Units to “Becquerels.” The form should look like Fig. 46.
Fig. 46. PlotOPUS case input form for plot 1.

59
Click the New button on the top toolbar to save this form and create a new plot. For the second plot, click on the Total Neutron Spectra button under Plot Type and select case 6 Decay as the Case(s) to Plot. The form should look like Fig. 47.
Fig. 47. PlotOPUS case input form for plot 2.

60
Click the New button on the top toolbar to save this form and create a new plot. For the third plot, click on the Gamma Spectra button under Plot Type and select case 6 Decay as the Case(s) to Plot. Select Photons/s/mev as the Output Units. These are the recommended units for gamma source data. The form should look like Fig. 48. Click OK to close the form.
Fig. 48. PlotOPUS case input form for plot 3.

61
9.6 EXECUTE SCALE
Execute SCALE by pressing the Run button. The Save As dialog form will open. Go to the folder where you want to save your input and output files. Enter the file name sample_problem2 for the File name. A DOS window will open and display the progress of the calculation. It is important to watch for SCALE error codes as well as indications that the problem has executed successfully. Note that three SCALE modules are executed (i.e., ARP, ORIGEN, and OPUS). OPUS is called three times, once for each plot that was requested. OPUS extracts the requested plot data from the ORIGEN results.
When the calculation is complete, the DOS window appearance should be similar to Fig. 49. You may close the DOS window once execution is completed.
Fig. 49. DOS window for execution of sample problem 2.

62
9.7 VIEW OUTPUT
To view the output results with your default text editor, select the Output button. The top of the output file contains information about the version of SCALE and the location of input and output files. This section is followed by echo of input for each SCALE module called, the time and date when called, the completion code (non-zero code indicates an error), and the CPU time used (Fig. 50). At the end of the output file are listings of the plot data by OPUS for the three plots that were requested.
Fig. 50. Beginning of output file for sample problem 2.

63
9.8 VIEW PLOT
You may view the plot results using the PlotOPUS program by selecting the Plot button. The plot displayed will be the first plot requested, radioactivity in Becquerels (Fig. 51). The nuclide list on the right side of the plot lists the primary contributors in order of importance. Note that PlotOPUS plots the data for the first 14 contributors by default. You can click on the nuclide list to select or de-select nuclides to display. The Ctrl and Shift keys can be used in combination with the mouse to select multiple nuclides or a group of nuclides similar to other Windows programs.
Fig. 51. Plot of radioactivity in Becquerels for sample problem 2.

64
To view the other plots, click on Window in the menu bar at the top of the PlotOPUS window to see a list of all plots generated for the current job. The plot file names are numbered in order of the plots requested in OrigenArp. Select the desired plot to view. The total neutron spectra plot is shown in Fig. 52, and the gamma spectra plot is shown in Fig. 53.
Fig. 52. Total neutron spectra plot for sample problem 2.

65
Fig. 53. Gamma spectra plot for sample problem 2.

66
Press on the Tables button to open the plot data tables for the plots in the text editor. The plot data table for the first plot is shown in Fig. 54.
Fig. 54. Plot data table of radioactivity in Becquerels for sample problem 2.

67
10. SAMPLE PROBLEM 3: DECAY ONLY PROBLEM
For problems that require generating neutron and/or gamma source terms from radioactive material that is not being irradiated in a reactor, only a decay case is required. The material may or may not contain fissile material. In this sample problem, we will calculate the gamma source term from a 0.1 gram 60Co source.
10.1 START IN DETAIL MODE
Start OrigenArp in Detail mode. If the Express form is displayed at startup, select the Detail button. Click the New button to clear any data from a previous problem. 10.2 ENTER COMPOSITION DATA
Select the Comps (Compositions) button to access the Composition Data form. Because there is no irradiation case in this problem, the selection of the Fuel Type has no impact on the calculation. The Fuel Type designates which cross-section library to use, but cross sections are not used in a decay case. The same decay data are used, regardless of the Fuel Type chosen.
For Element, select Co and for Isotope, select 60. Enter 0.1 for the Concentration in Units of Grams. The form should look like Fig. 55.
Fig. 55. Composition data form for 60Co decay problem.

68
Click OK. The warning message “Value is outside the recommended range for enrichment. Do you wish to ignore this limit?” This message is displayed because there is no uranium in the composition data. Click Yes to ignore the limit for this case. The limit can be ignored because fuel is not being irradiated in this problem. 10.3 ENTER GAMMA ENERGY GROUPS
Click on the Gamma button to open the Gamma Energy Spectra form. Select 47GrpSCALE6 for the Group Structure (Fig. 56). Click OK to close the form.
Fig. 56. Gamma energy spectra form for 60Co decay problem.

69
10.4 ENTER CASE DATA
Select the Cases button to open the Case Data form. Then select the Decay button to create a new decay case. Enter Co-60 Decay Case for the Title. Because we want an instantaneous source, change the Time Units to Seconds and enter 1 for the Cumulative Time. Check the Source Spectra and Save Results boxes. The form should look like Fig. 57. Click OK to close form.
Fig. 57. Decay case form for 60Co decay problem.

70
10.5 SET UP PLOT
Select Plot Setup button to specify a spectra plot for this problem. Click on Gamma Spectra for the Plot Type. Select the case 1 Decay as the Case(s) to Plot, and set Output Units to “Photons/s/mev.” The form should look like Fig. 58. Click OK to close the form.
Fig. 58. PlotOPUS case input form for 60Co decay problem.
10.6 EXECUTE SCALE
Execute SCALE by pressing the Run button. The Save As dialog form will open. Go to the folder where you want to save your input and output files. Enter the file name sample_problem3 for the File name. A DOS window will open and display the progress of the calculation. It is important to watch for SCALE error codes as well as indications that the problem has executed successfully. Note that only the SCALE modules ORIGEN and OPUS were executed. ARP is not called, because no cross-section interpolation is performed for a decay-only problem.

71
10.7 VIEW OUTPUT
To view the output results with your default text editor, select the Output button. Use the Find option in your text editor (click on blue magnifying glass icon in PFE) to search for the phrase “gamma spectra.” The output displayed should look like Fig. 59. The listing gives the gamma spectra by energy group with the energy boundaries for each group. After group 47, the total source is listed as 8.851E+12 photons/s (not shown in Fig. 59).
Fig. 59. Gamma spectra in output file for sample problem 3.

72
10.8 VIEW PLOT
You may view the plot results using the PlotOPUS program by selecting the Plot button. The gamma spectra plot displayed should look like Fig. 60.
Fig. 60. Plot of 60Co gamma spectra for sample problem 3.

73
11. PLOTTING RESULTS
The following steps may be used to plot results from an OrigenArp run.
1. Create an OrigenArp problem or open an existing problem.
2. Ensure that the Save Results boxes are checked for the times steps in the case data for the case(s) to be plotted.
3. Use Plot Setup to specify desired plot(s).
4. Execute SCALE.
5. Upon successful completion, select Plot button to start the PlotOPUS program and display your plotted results.
6. Click on the Tables button in OrigenArp or PlotOPUS to open the table of plot data in the text editor.
The Plot Setup toolbar button presents the PlotOPUS Case Input form (Fig. 61). The same form is used whether OrigenArp is in Express mode or Detail mode. The list of available output units is dependent on the selected Case Type and Plot Type. Therefore, you should first select these options prior to selecting the Output Units.
Fig. 61. PlotOPUS case input form.
11.1 PlotOPUS
Upon successful completion of a SCALE job with plot data specified, you may view your results by selecting the Plot button on the top toolbar. Alternatively, you may view the plot files executing

74
PlotOPUS from its shortcut in the SCALE start menu folder. The plot files generated have a “.plt” extension. The plot filename generated from OrigenArp is constructed by appending “_plot###.plt” to the filename for the related case. The “###” symbols represent a plot number, beginning with “000.”
For example, if you are generating plots from a case named “test,” the input to SCALE will be stored in “test.inp,” an OrigenArp binary representation will be stored in “test.arp,” and plot data for two plots would be stored in “test._plot000.plt” and “test._plot001.plt.” Note that this file name syntax may vary slightly between different SCALE versions.
If the SCALE job does not execute successfully, no plot files will be created.

75
12. IMPORTING ORIGEN-ARP INPUT FILES
The OrigenArp Import command is used to “import” an existing ORIGEN-ARP input file in text format (.inp file) to populate data for the OrigenArp Detail forms. The Import option can be used to import files created with earlier versions of OrigenArp or input files created by other means (i.e., no .arp file exists). Only those ORIGEN options available in OrigenArp are allowed in the input file. If the input file includes ORIGEN options that are not compatible with OrigenArp, import may fail.
To execute the Import command, select Import under the File menu or use the shortcut key Ctrl+R. Once activated, a file dialog is presented, allowing you to select the file to be imported.


77
13. REQUIRED DATA SETS
The following data sets are needed by OrigenArp and are installed with SCALE.
ARPDATA.TXT OR_ARP_GroupLibOptions.dat OR_ARP_NeutronGroups.dat OR_ARP_GammaGroups.dat OR_ARP_nuclides.dat a.bat OrigenArpHelp.chm
13.1 ARPDATA.TXT
The file named ARPDATA.TXT contains the input describing the pregenerated cross section library types available for ARP to use. For each reactor or fuel type there are corresponding entries that provide the filenames of the associated data libraries, the enrichment range, and the burnup range. For more information on ARPDATA.TXT, refer to the [SCALE Manual Sect. D1.A.2].
The file named ARPDATA.TXT is read by ARP during the execution of SCALE. It is also read by OrigenArp. OrigenArp reads ARPDATA.TXT from the SCALE data folder (e.g., \scale6\data).
13.2 OR_ARP_GroupLibOptions.dat
The energy group structures that are available to OrigenArp are defined in this file. New group structures that you create can be used by OrigenArp if a record is added in this file. The added record should include the number of groups and the name of the group structure, separated by one or more spaces. The neutron group structures are listed following the entry “//neutron” and the gamma group structures are listed following the entry “//gamma.” The actual energy groups for the structure must be specified in OR_ARP_NeutronGroups.dat or OR_ARP_GammaGroups.dat. This data file is located in the OrigenArpUI folder in the SCALE data folder (e.g., \scale6\data\OrigenArpUI).
13.3 OR_ARP_NeutronGroups.dat
The neutron energy group structures listed in OR_ARP_GroupLibOptions.dat are specified in this file. This data file is also located in the OrigenArpUI folder in the SCALE data folder (e.g., \scale6\data\OrigenArpUI).
The format for this file requires that the group structure name be listed on one record followed by the energy group bounds from upper bound to lower bound on subsequent records in free format. The number of energy group boundaries must be one greater than the number of groups. This pattern is repeated for each group structure available.
13.4 OR_ARP_GammaGroups.dat
The gamma energy group structures listed in OR_ARP_GroupLibOptions.dat are specified in this file. This data file is also located in the OrigenArpUI folder in the SCALE data folder (e.g., \scale6\data\OrigenArpUI).

78
The format for this file requires that the group structure name be listed on one record followed by the energy group bounds from upper bound to lower bound on subsequent records in free format. This pattern is repeated for each group structure available.
13.5 OR_ARP_nuclides.dat
OR_ARP_nuclides.dat contains information about each isotope that is available in OrigenArp. This data set should not be modified by the user. This data file is also located in the OrigenArpUI folder in the SCALE data folder (e.g., \scale6\data\OrigenArpUI).
13.6 a.bat
When the run button is pressed, OrigenArp constructs the arguments to this file and calls it to execute SCALE in DOS mode. It is recommended that you do not modify this file. OrigenArp requires that this file be in the same directory as the OrigenArp executable (e.g., \scale6\OrigenArp).
13.7 OrigenArpHelp.chm
OrigenArpHelp.chm is the compiled HTML help file that contains all the help information included in the OrigenArp help files. OrigenArp requires that this file be in the same directory as the OrigenArp executable (e.g., \scale6\OrigenArp).

79
14. HOW TO ADD NEW NEUTRON AND GAMMA ENERGY GROUP STRUCTURES
The neutron and gamma energy group structures are used by ORIGEN to create the multigroup source spectra from the continuous and/or discrete line emission data. Any energy group structure may be used. If you create a new energy group structure for neutron or gamma sources, it can be applied in OrigenArp as a new group structure option by adding a line in the file OR_ARP_GroupLibOptions.dat.
The new line should be inserted under “//neutron” for neutron groups or under “//gamma” for gamma groups. The line should include the number of groups and the name of the group structure separated by one or more blanks. For example, to add a 25-group gamma group structure named 25GrpSpecial, the OR_ARP_GroupLibOptions.dat file would be modified as shown below (changes are shown in blue): //neutron 27 27GrpSCALE6 44 44GrpENDF5 47 47GrpBUGLE 200 200GrpSCALE6 238 238GrpSCALE //gamma 18 18GrpSCALE5 18 18GrpORIGEN2 20 20GrpBUGLE 47 47GrpSCALE6 25 25GrpSpecial
The actual energy groups must be specified in OR_ARP_NeutronGroups.dat or OR_ARP_GammaGroups.dat. The format for these files requires that the name of each energy group structure appear on one line followed by the energy group boundaries from upper bound to lower bound in free format on following lines. The number of energy group boundaries must be one greater than the number of groups. OrigenArp requires the user to input the maximum-energy cutoff in electron volts (eV) for each group, beginning with group 1 (the highest-energy group). The field following the maximum-energy cutoff for the lowest-energy group must contain the minimum-energy cutoff for that group. For example, to add a 25-group structure named “25GrpSpecial” for gammas, the OR_ARP_GammaGroups.dat file would be modified as shown below (changes are shown in blue): 18GrpSCALE5 1.E+7 8.E+6 6.5E+6 5.E+6 4.E+6 3.E+6 2.5E+6 2.E+6 1.66E+6 1.33E+6 1.E+6 8.E+5 6.E+5 4.E+5 3.E+5 2.E+5 1.E+5 5.E+4 1.E+4 18GrpORIGEN2 1.1E+7 8.E+6 6.E+6 4.E+6 3.E+6 2.5E+6 2.E+6 1.5E+6 1.E+6 7.E+5 4.5E+5 3.E+5 1.5E+5 1.E+5 7.E+4 4.5E+4 3.E+4 2.E+4 0.E+0 20GrpBUGLE 1.4E+7 1.E+7 8.E+6 7.E+6 6.E+6 5.E+6 4.E+6 3.E+6 2.E+6 1.5E+6 1.E+6 8.E+5 7.E+5 6.E+5 4.E+5 2.E+5 1.E+5 6.E+4 3.E+4 2.E+4 1.E+4 47GrpSCALE6 2.0E+7 1.4E+7 1.2E+7 1.E+7 8.E+6 7.5E+6 7.E+6 6.5E+6 6.E+6 5.5E+6 5.0E+6 4.5E+6 4.E+6 3.5E+6 3.E+6 2.75E+6 2.5E+6 2.35E+6 2.15E+6 2.E+6 1.8E+6 1.66E+6 1.57E+6 1.5E+6 1.44E+6 1.33E+6 1.2E+6 1.E+6 9.0E+5 8.0E+5 7.0E+5 6.0E+5 5.12E+5 5.1E+5 4.5E+5

80
4.0E+5 3.0E+5 2.6E+5 2.0E+5 1.5E+5 1.0E+5 7.5E+4 7.0E+4 6.0E+4 4.5E+4 3.0E+4 2.0E+4 1.0E+4 25GrpSpecial 1.4E+7 1.E+7 8.E+6 7.E+6 6.E+6 5.E+6 4.E+6 3.E+6 2.E+6 1.5E+6 1.E+6 9.E+5 8.E+5 7.E+5 6.E+5 5.E+6 4.E+5 3.E+5 2.5E+5 2.E+5 1.5E+5 1.E+5 6.E+4 3.E+4 2.E+4 1.E+4

81
15. ADVANCED FEATURES
15.1 EXECUTE AN EXTERNALLY MODIFIED INPUT FILE
There may be occasions when you want to use a text editor to modify the input file created by OrigenArp and then execute this modified file using SCALE from within OrigenArp. This can be useful to select special options that are available in ORIGEN but are not currently supported by OrigenArp.
A SCALE input file (.inp) created by OrigenArp may be manually modified by selecting the Editor button to open the file in a text editor. If it is modified and saved in the text editor, OrigenArp will recognize that the file has been modified when you attempt to run it using the Run button. A warning dialog such as Fig. 62 will appear on the screen. If you select Yes, OrigenArp will run the modified .inp file. If you select No, OrigenArp will regenerate the .inp input file from the .arp binary file last saved by OrigenArp, overwriting any modifications that you made in the text editor. If you select Cancel, no action is taken.
Alternatively, you may select Execute SCALE w/o Saving under the File menu to execute the modified .inp file. This action is the same as selecting Yes in the warning dialog.
Fig. 62. Modified input file warning dialog.
15.2 SETTING URANIUM ENRICHMENT FRACTIONS
If the user inputs enrichment, then the initial uranium isotopic vector is determined using built in isotopic ratios for U-234 and U-236 shown below.
wt % U-234 = 0.0089 * wt % U-235
wt % U-236 = 0.0046 * wt % U-235

82
wt % U-235 = enrichment (wt % U-235)
wt % U-238 = 100 − wt % U-234 − wt % U-235 − wt % U-236 The default enrichment factors were taken from O.W. Hermann et al., Technical Support for a Proposed Decay Heat Guide Using SAS2H/ORIGEN Data, NUREG/CR-5625 (ORNL-6698), Martin Marietta Energy Systems, Inc., Oak Ridge National Laboratory, September 1994, and are based on a review of historical enrichment data.
The isotopic ratio factors for U-234 (i.e., 0.0089) and U-236 (i.e., 0.0046) can be modified by the user. To modify these factors, select Edit Enrichment Fractions under the Edit menu. The modified values are saved in the OrigenArp initialization file on exit from OrigenArp. The default values can be restored if the user selects the Reset Defaults button in Default Settings (opened via the Options button). The user can override these factors for an individual case by clicking the Fuel Dist button on the Composition Data form toolbar to open the Fuel Distribution form (Fig. 63).
Fig. 63. Fuel distribution form.

83
15.3 ACCELERATOR KEYS
Table 2 shows keyboard accelerator keys. Most of these shortcuts require that related views or windows be active and/or in focus.
Table 2. Keyboard accelerator keys
Key Operation Ctrl + C Copy highlighted item to clipboard
Ctrl + D Delete row in Compositions or Case Data
Alt + E Edit Enrichment Fractions
Ctrl + E Edit input file with external editor
Alt + F Change font in Summary View
Ctrl + I Insert row in Case Data
Ctrl + N New file
Alt + O Enter plot setup
Ctrl + O Open file
Alt + P Execute PlotOPUS
Ctrl + P Print summary view
Ctrl + R Import file
Alt + S Setup options
Ctrl + S Save file
Ctrl + Alt + T Run SCALE, saving temporary files in SCALE default temporary directory
Alt + U Update Express (retain compositions)
Ctrl + V Paste from clipboard into edit box
Ctrl + W Close form currently in focus
Ctrl + X Cut highlighted item in edit box to clipboard


85
16. TROUBLESHOOTING
16.1 MISSING DATA
When you first execute OrigenArp, it verifies the existence of the required data sets. An error message stating that one of the required data sets is missing means that OrigenArp did not find the indicated data set in the expected location where it should have been installed with SCALE. Please make sure that all of the required data sets are available and in the appropriate directory. You may need to reinstall SCALE.
16.2 RUNNING OrigenArp OR PlotOPUS WITH FOREIGN LANGUAGE VERSIONS OF WINDOWS
Please refer to the SCALE Getting Started file or the SCALE Notebook for information on running with a foreign language version of Windows.
16.3 TECHNICAL SUPPORT
For technical support, address your e-mail to [email protected] or visit the SCALE website at http://www.ornl.gov/scale where you can find answers to commonly asked questions in the SCALE Notebook and the OrigenArp Notebook.


APPENDIX A
Input Files for Example Problems

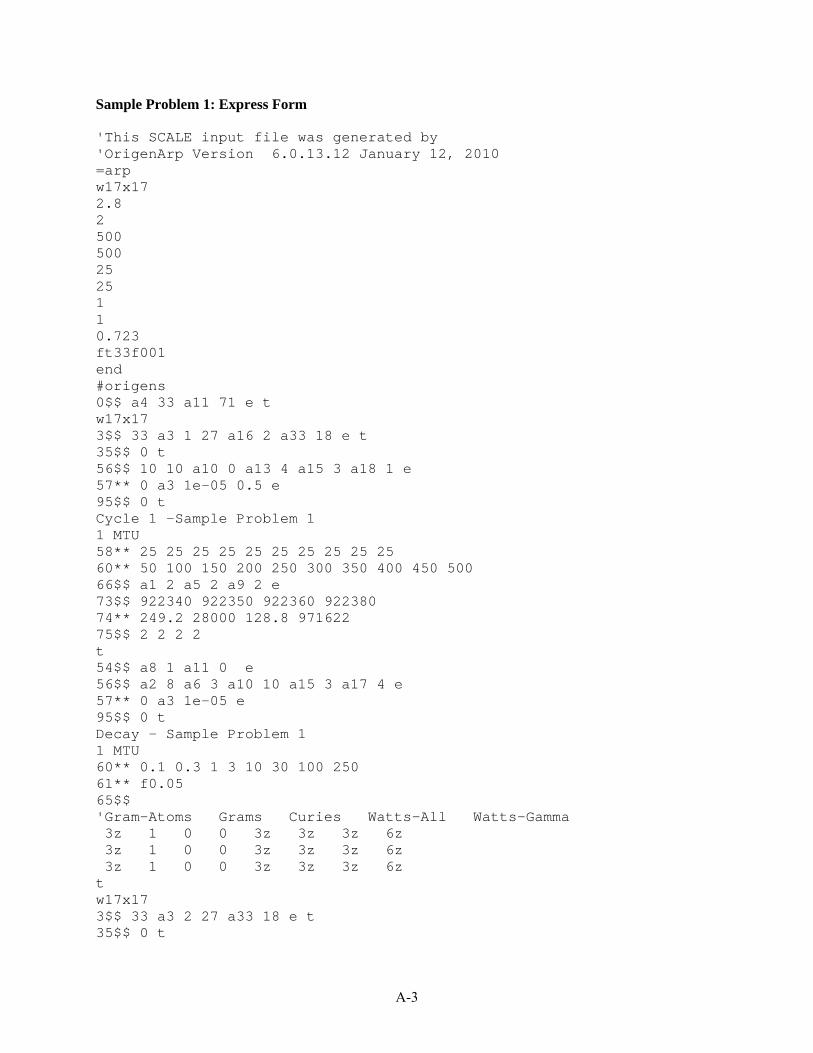
A-3
Sample Problem 1: Express Form 'This SCALE input file was generated by 'OrigenArp Version 6.0.13.12 January 12, 2010 =arp w17x17 2.8 2 500 500 25 25 1 1 0.723 ft33f001 end #origens 0$$ a4 33 a11 71 e t w17x17 3$$ 33 a3 1 27 a16 2 a33 18 e t 35$$ 0 t 56$$ 10 10 a10 0 a13 4 a15 3 a18 1 e 57** 0 a3 1e-05 0.5 e 95$$ 0 t Cycle 1 -Sample Problem 1 1 MTU 58** 25 25 25 25 25 25 25 25 25 25 60** 50 100 150 200 250 300 350 400 450 500 66$$ a1 2 a5 2 a9 2 e 73$$ 922340 922350 922360 922380 74** 249.2 28000 128.8 971622 75$$ 2 2 2 2 t 54$$ a8 1 a11 0 e 56$$ a2 8 a6 3 a10 10 a15 3 a17 4 e 57** 0 a3 1e-05 e 95$$ 0 t Decay - Sample Problem 1 1 MTU 60** 0.1 0.3 1 3 10 30 100 250 61** f0.05 65$$ 'Gram-Atoms Grams Curies Watts-All Watts-Gamma 3z 1 0 0 3z 3z 3z 6z 3z 1 0 0 3z 3z 3z 6z 3z 1 0 0 3z 3z 3z 6z t w17x17 3$$ 33 a3 2 27 a33 18 e t 35$$ 0 t

A-4
56$$ 10 10 a10 8 a15 3 a18 1 e 57** 500 a3 1e-05 0.5 e 95$$ 0 t Cycle 2 -Sample Problem 1 1 MTU 58** 25 25 25 25 25 25 25 25 25 25 60** 550 600 650 700 750 800 850 900 950 1000 66$$ a1 2 a5 2 a9 2 e t 54$$ a8 1 a11 0 e 56$$ a2 9 a6 1 a10 10 a14 5 a15 3 a17 2 e 57** 0 a3 1e-05 e 95$$ 0 t Cycle 2 Down - Sample Problem 1 1 MTU 60** 0.001 0.003 0.01 0.03 0.1 0.3 1 3 5 61** f0.05 65$$ 'Gram-Atoms Grams Curies Watts-All Watts-Gamma 3z 1 0 0 3z 3z 3z 6z 3z 1 0 0 3z 3z 3z 6z 3z 1 0 0 3z 3z 3z 6z 81$$ 2 0 26 1 a7 200 e 82$$ 2 2 2 2 2 2 2 2 2 e 83** 1.0000000e+07 8.0000000e+06 6.5000000e+06 5.0000000e+06 4.0000000e+06 3.0000000e+06 2.5000000e+06 2.0000000e+06 1.6600000e+06 1.3300000e+06 1.0000000e+06 8.0000000e+05 6.0000000e+05 4.0000000e+05 3.0000000e+05 2.0000000e+05 1.0000000e+05 5.0000000e+04 1.0000000e+04 e 84** 2.0000000e+07 8.1873000e+06 6.4340000e+06 4.8000000e+06 3.0000000e+06 2.4790000e+06 2.3540000e+06 1.8500000e+06 1.4000000e+06 9.0000000e+05 4.0000000e+05 1.0000000e+05 2.5000000e+04 1.7000000e+04 3.0000000e+03 5.5000000e+02 1.0000000e+02 3.0000000e+01 1.0000000e+01 8.1000000e+00 6.0000000e+00 4.7500000e+00 3.0000000e+00 1.7700000e+00 1.0000000e+00 6.2500000e-01 4.0000000e-01 3.7500000e-01 e t 56$$ 0 0 a10 1 e t 56$$ 0 0 a10 2 e t 56$$ 0 0 a10 3 e t 56$$ 0 0 a10 4 e t 56$$ 0 0 a10 5 e t 56$$ 0 0 a10 6 e t 56$$ 0 0 a10 7 e t 56$$ 0 0 a10 8 e t 56$$ 0 0 a10 9 e t 56$$ f0 t end =opus LIBUNIT=33 TYPARAMS=NUCLIDES UNITS=WATTS LIBTYPE=ALL
A-5
TIME=YEARS NPOSITION=1 2 3 4 5 6 7 8 9 end end #shell copy ft71f001 "C:\scale6\OrigenArp\Examples\sample_problem1.f71" del ft71f001 end

A-6
Sample Problem 2: Detail Forms 'This SCALE input file was generated by 'OrigenArp Version 6.0.13.12 January 12, 2010 =arp ge10x10-8 3.2 3 350 375 455 38.5 34.893333 15.43956 1 1 1 0.63 ft33f001 end #origens 0$$ a4 33 a11 71 e t ge10x10-8 3$$ 33 a3 1 238 a16 2 a33 18 e t 35$$ 0 t 56$$ 5 5 a10 0 a13 4 a15 3 a18 1 e 57** 0 a3 1e-05 0.2966102 e 95$$ 0 t Cycle 1 1 MTU 58** 38 40 41 35 37 60** 100 175 250 300 350 66$$ a1 2 a5 2 a9 2 e 73$$ 922340 922350 922360 922380 74** 284.8 32000 147.2 967568 75$$ 2 2 2 2 t 54$$ a8 1 a11 0 e 56$$ a2 9 a6 3 a10 5 a15 3 a17 4 e 57** 0 a3 1e-05 e 95$$ 0 t refueling after cycle 1 1 MTU 60** 0.01 0.03 0.1 0.3 1 3 10 30 49 61** f0.05 65$$ 'Gram-Atoms Grams Curies Watts-All Watts-Gamma 3z 1 0 0 3z 3z 3z 6z 3z 1 0 0 3z 3z 3z 6z 3z 1 0 0 3z 3z 3z 6z t

A-7
ge10x10-8 3$$ 33 a3 2 238 a33 18 e t 35$$ 0 t 56$$ 6 6 a10 9 a15 3 a18 1 e 57** 350 a3 1e-05 0.3177966 e 95$$ 0 t Cycle 2 1 MTU 58** 35 0 34 38 33 33 60** 450 480 565 650 702.5 755 66$$ a1 2 a5 2 a9 2 e t 54$$ a8 1 a11 0 e 56$$ a2 9 a6 3 a10 6 a15 3 a17 4 e 57** 0 a3 1e-05 e 95$$ 0 t refueling after cycle 2 1 MTU 60** 0.01 0.03 0.1 0.3 1 3 10 30 70 61** f0.05 65$$ 'Gram-Atoms Grams Curies Watts-All Watts-Gamma 3z 1 0 0 3z 3z 3z 6z 3z 1 0 0 3z 3z 3z 6z 3z 1 0 0 3z 3z 3z 6z t ge10x10-8 3$$ 33 a3 3 238 a33 18 e t 35$$ 0 t 56$$ 5 5 a10 9 a15 3 a18 1 e 57** 725 a3 1e-05 0.3855932 e 95$$ 0 t Cycle 3 1 MTU 58** 16 16 15 15 15 60** 825 925 1025 1102.5 1180 66$$ a1 2 a5 2 a9 2 e t 54$$ a8 1 a11 0 e 56$$ a2 9 a6 1 a10 5 a14 5 a15 3 a17 2 e 57** 0 a3 1e-05 e 95$$ 0 t Discharge after Cycle 3 1 MTU 60** 0.001 0.003 0.01 0.03 0.1 0.3 1 3 5 61** f0.05 65$$ 'Gram-Atoms Grams Curies Watts-All Watts-Gamma 3z 1 0 0 3z 3z 3z 6z 3z 1 0 0 3z 3z 3z 6z 3z 1 0 0 3z 3z 3z 6z 81$$ 2 0 26 1 a7 200 e 82$$ 2 2 2 2 2 2 2 2 2 e 83**

A-8
1.0000000e+07 8.0000000e+06 6.5000000e+06 5.0000000e+06 4.0000000e+06 3.0000000e+06 2.5000000e+06 2.0000000e+06 1.6600000e+06 1.3300000e+06 1.0000000e+06 8.0000000e+05 6.0000000e+05 4.0000000e+05 3.0000000e+05 2.0000000e+05 1.0000000e+05 5.0000000e+04 1.0000000e+04 e 84** 2.0000000e+07 1.7332990e+07 1.5683000e+07 1.4550000e+07 1.3840000e+07 1.2840000e+07 1.0000000e+07 8.1873000e+06 6.4340000e+06 4.8000000e+06 4.3040000e+06 3.0000000e+06 2.4790000e+06 2.3540000e+06 1.8500000e+06 1.5000000e+06 1.4000000e+06 1.3560000e+06 1.3170000e+06 1.2500000e+06 1.2000000e+06 1.1000000e+06 1.0100000e+06 9.2000000e+05 9.0000000e+05 8.7500000e+05 8.6110000e+05 8.2000000e+05 7.5000000e+05 6.7900000e+05 6.7000000e+05 6.0000000e+05 5.7300000e+05 5.5000000e+05 4.9952000e+05 4.7000000e+05 4.4000000e+05 4.2000000e+05 4.0000000e+05 3.3000000e+05 2.7000000e+05 2.0000000e+05 1.5000000e+05 1.2830000e+05 1.0000000e+05 8.5000000e+04 8.2000000e+04 7.5000000e+04 7.3000000e+04 6.0000000e+04 5.2000000e+04 5.0000000e+04 4.5000000e+04 3.0000000e+04 2.5000000e+04 1.7000000e+04 1.3000000e+04 9.5000000e+03 8.0300000e+03 6.0000000e+03 3.9000000e+03 3.7400000e+03 3.0000000e+03 2.5800000e+03 2.2900000e+03 2.2000000e+03 1.8000000e+03 1.5500000e+03 1.5000000e+03 1.1500000e+03 9.5000000e+02 6.8300000e+02 6.7000000e+02 5.5000000e+02 3.0500000e+02 2.8500000e+02 2.4000000e+02 2.1000000e+02 2.0750000e+02 1.9250000e+02 1.8600000e+02 1.2200000e+02 1.1900000e+02 1.1500000e+02 1.0800000e+02 1.0000000e+02 9.0000000e+01 8.2000000e+01 8.0000000e+01 7.6000000e+01 7.2000000e+01 6.7500000e+01 6.5000000e+01 6.1000000e+01 5.9000000e+01 5.3399990e+01 5.2000000e+01 5.0599990e+01 4.9200000e+01 4.8299990e+01 4.7000000e+01 4.5200000e+01 4.4000000e+01 4.2399990e+01 4.1000000e+01 3.9599990e+01 3.9099990e+01 3.8000000e+01 3.7000000e+01 3.5500000e+01 3.4599990e+01 3.3750000e+01 3.3250000e+01 3.1750000e+01 3.1250000e+01 3.0000000e+01 2.7500000e+01 2.5000000e+01 2.2500000e+01 2.1000000e+01 2.0000000e+01 1.9000000e+01 1.8500000e+01 1.7000000e+01 1.6000000e+01 1.5100000e+01 1.4400000e+01 1.3750000e+01 1.2900000e+01 1.1900000e+01 1.1500000e+01 1.0000000e+01 9.0999990e+00 8.0999990e+00 7.1500000e+00 7.0000000e+00 6.7500000e+00 6.5000000e+00 6.2500000e+00 6.0000000e+00 5.4000000e+00 5.0000000e+00 4.7500000e+00 4.0000000e+00 3.7300000e+00 3.5000000e+00 3.1500000e+00 3.0499990e+00 3.0000000e+00 2.9699990e+00 2.8700000e+00 2.7700000e+00 2.6699990e+00 2.5700000e+00 2.4699990e+00 2.3799990e+00 2.2999990e+00 2.2099990e+00 2.1200000e+00 2.0000000e+00 1.9400000e+00 1.8600000e+00 1.7700000e+00 1.6799990e+00 1.5899990e+00 1.5000000e+00 1.4500000e+00 1.4000000e+00 1.3499990e+00 1.2999990e+00 1.2500000e+00 1.2249990e+00 1.2000000e+00 1.1749990e+00 1.1500000e+00 1.1399990e+00 1.1299990e+00 1.1200000e+00 1.1100000e+00 1.0999990e+00 1.0899990e+00 1.0800000e+00 1.0700000e+00 1.0599990e+00 1.0499990e+00 1.0400000e+00 1.0300000e+00 1.0200000e+00 1.0099990e+00 1.0000000e+00 9.7500000e-01 9.5000000e-01 9.2500000e-01 9.0000000e-01 8.5000000e-01 8.0000000e-01 7.5000000e-01 7.0000000e-01 6.5000000e-01 6.2500000e-01 6.0000000e-01 5.5000000e-01 5.0000000e-01 4.5000000e-01 4.0000000e-01 3.7500000e-01 3.5000000e-01 3.2500000e-01 3.0000000e-01 2.7500000e-01 2.5000000e-01 2.2500000e-01 2.0000000e-01 1.7500000e-01 1.5000000e-01 1.2500000e-01 9.9999960e-02 8.9999970e-02 7.9999980e-02 6.9999990e-02 6.0000000e-02 5.0000000e-02 4.0000000e-02 3.0000000e-02 2.5300000e-02 9.9999980e-03 7.4999970e-03 4.9999990e-03 3.9999970e-03 3.0000000e-03 2.5000000e-03 2.0000000e-03 1.5000000e-03 1.2000000e-03

A-9
9.9999990e-04 7.4999990e-04 4.9999980e-04 9.9999990e-05 1.0000000e-05 e t 56$$ 0 0 a10 1 e t 56$$ 0 0 a10 2 e t 56$$ 0 0 a10 3 e t 56$$ 0 0 a10 4 e t 56$$ 0 0 a10 5 e t 56$$ 0 0 a10 6 e t 56$$ 0 0 a10 7 e t 56$$ 0 0 a10 8 e t 56$$ 0 0 a10 9 e t 56$$ f0 t end =opus LIBUNIT=33 TYPARAMS=NUCLIDES UNITS=BEQUERELS LIBTYPE=ALL TIME=YEARS NPOSITION=1 2 3 4 5 6 7 8 9 end end =opus LIBUNIT=33 TYPARAMS=NSPECTRUM LIBTYPE=ALL TIME=YEARS NPOSITION=1 2 3 4 5 6 7 8 9 end end =opus LIBUNIT=33 TYPARAMS=GSPECTRUM UNITS=GRAMS TIME=YEARS NPOSITION=1 2 3 4 5 6 7 8 9 end end #shell copy ft71f001 "C:\scale6\OrigenArp\Examples\sample_problem2.f71" del ft71f001 end

A-10
Sample Problem 3: Decay Only Problem 'This SCALE input file was generated by 'OrigenArp Version 6.0.13.12 January 12, 2010 #origens 0$$ a11 71 e t Decay Case 3$$ 21 1 1 0 a16 2 a33 47 e t 35$$ 0 t 54$$ a8 1 a11 0 e 56$$ a2 1 a6 1 a10 0 a13 1 a14 1 a15 3 a17 2 e 57** 0 a3 1e-05 e 95$$ 0 t Co-60 Decay Case 0 MTU 60** 1 61** f0.05 65$$ 'Gram-Atoms Grams Curies Watts-All Watts-Gamma 3z 1 0 0 3z 3z 3z 6z 3z 1 0 0 3z 3z 3z 6z 3z 1 0 0 3z 3z 3z 6z 81$$ 2 0 26 1 e 82$$ 2 e 83** 2.0000000e+07 1.4000000e+07 1.2000000e+07 1.0000000e+07 8.0000000e+06 7.5000000e+06 7.0000000e+06 6.5000000e+06 6.0000000e+06 5.5000000e+06 5.0000000e+06 4.5000000e+06 4.0000000e+06 3.5000000e+06 3.0000000e+06 2.7500000e+06 2.5000000e+06 2.3500000e+06 2.1500000e+06 2.0000000e+06 1.8000000e+06 1.6600000e+06 1.5700000e+06 1.5000000e+06 1.4400000e+06 1.3300000e+06 1.2000000e+06 1.0000000e+06 9.0000000e+05 8.0000000e+05 7.0000000e+05 6.0000000e+05 5.1200000e+05 5.1000000e+05 4.5000000e+05 4.0000000e+05 3.0000000e+05 2.6000000e+05 2.0000000e+05 1.5000000e+05 1.0000000e+05 7.5000000e+04 7.0000000e+04 6.0000000e+04 4.5000000e+04 3.0000000e+04 2.0000000e+04 1.0000000e+04 e 73$$ 270600 74** 0.1 75$$ 1 t 56$$ 0 0 a10 1 e t 56$$ f0 t end =opus LIBUNIT=21 TYPARAMS=GSPECTRUM UNITS=GRAMS TIME=SEC NPOSITION=1 end end #shell copy ft71f001 "C:\scale6\OrigenArp\Examples\sample_problem3.f71" del ft71f001 end