oregon fuels tax system user guide bulk distributor …
TRANSCRIPT

OREGON FUELS TAX SYSTEM – USER GUIDE
Use Fuel User Reporting REV 07 - 2019
1
BULK DISTRIBUTOR REPORTING
This procedure details the manual process of entering data for registered Bulk Distributor reporting.
Data may also be entered by Microsoft Excel spreadsheet upload. This process is detailed in a
separate user guide.
To create a Tax Session, select the “Tax Filing” tab at the top left of the Oregon Fuels Tax System
screen. From the drop-down list, select “Tax Sessions”. The following screen is displayed:
Figure 1. Tax session screen
Click “Add New Record” to create a new tax session. The following box appears:
Figure 2. Creating a tax session

OREGON FUELS TAX SYSTEM – USER GUIDE
Use Fuel User Reporting REV 07 - 2019
2
Select “DLRBK – Registered Bulk Distributor” from the drop down box.
The appropriate ending date should prefill based on your beginning period date. Each report will
start with the first day of the reporting period, regardless of when operations began during that
period.
The tax report will now appear on the Tax Sessions screen.
Click on the tax session and select “Schedule Transactions” from the pop-up menu.
Figure 3. Select a line to bring up the menu
There are three schedule options for the Registered Bulk Distributor report:
Schedule 2 - Gallons Handled (receipts);
Schedule 5 - Gallons Delivered Tax Collected; and
Schedule 6 - Gallons Delivered Tax Not Collected.
Each schedule contains similar information:

OREGON FUELS TAX SYSTEM – USER GUIDE
Use Fuel User Reporting REV 07 - 2019
3
2. Gallons Handled
Figure 4. Schedule example
A red asterisk indicates a required field. When the field has a black triangle on the right side of the
box, entry options can be selected from the drop down list.
Where the is displayed, functions may be performed outside of this entry window.
Product Code select appropriate fuel code from drop-down box (e.g., 170 – Bio-diesel)
Carrier select the company delivering the fuel from the drop-down box
The alphabetical list displayed shows the first 25 records in the list. To
display more, click on the “Items 1-25 out of xxx” text at the bottom of the
list. Each click will add the next 25 items to the list. Scroll down to find
the carrier name.
You may also begin typing the name of the carrier and the list will
automatically display and shorten based on what you continue to type.
Select the correct record.
If you cannot locate the correct record, it is because you are using a
name other than the one they are registered with or they are not
registered with the Fuels Tax Group. If you cannot ascertain the
correct name from the carrier or from contacting the Fuels Tax Group,
you may need to enter the company into the system separately.
NOTE: You may not find them in the list because the Carrier
designation may not have been added to the Business Entity record.
SEE Creating Business Entities tutorial for details on adding
designations to existing records.
Mode select the mode of delivery used (e.g., truck, pipeline, etc.) from the drop-
down box
Origin select the origin of the fuel delivered – may be a terminal location different

OREGON FUELS TAX SYSTEM – USER GUIDE
Use Fuel User Reporting REV 07 - 2019
4
than the Sellers name
If the origin is not found in the drop-down box, it may be added using
the feature.
Destination select the name of the company where fuel was delivered
If the destination is not found in the drop-down box, it may be added
using the feature.
An Origin is the storage facility from which the fuel was removed. This may be a terminal location or
the supplier’s bulk location. If the terminal is known, enter the terminal location. The applicable
Oregon choices are:
T93OR4453 Tosco Corp. - Coos Bay
T93OR4454 SFPP, LP
T91OR4465 Union Pacific Railroad Co.
T93OR4451 Sfpp, Lp
T91OR4450 Aircraft Service International, Inc
T93OR4455 BP West Coast Products LLC
T93OR4456 Chevron USA, Inc.- Portland
T93OR4457 Kinder Morgan Liquid Terminals, LLC
T93OR4458 McCall Oil and Chemical Corp.
T93OR4459 Shore Terminals LLC - Portland
T93OR4460 Kinder Morgan Tank Storage Terminal
T93OR4461 Shell Oil Products US
T93OR4462 Shore Terminals Llc
T93OR4463 Time Oil Co. - Portland
T93OR4464 ConocoPhillips PL - Portland
T93OR4464 Phillips 66 PL - Portland
T93OR4465 Arc Terminals Holdings LLC
T93OR4452 Tidewater Terminal - Umatilla
Begin entering the terminal number or partial name and the list will narrow the possible matches
until you see the one you need.
Destinations are the storage facilities where the fuel was delivered. This may be your location or the
final destination in the case of resales. The Fuels Tax Group assigns all locations a unique number. A
list of each location number by address is available on the Fuels Tax Group website at
https://www.oregon.gov/odot/ftg/pages/index.aspx
Select the Facility Locations IDs document under Tax Information.
Please contact us if you need assistance in finding the correct destination.
If you need to create an Origin or Destination record, you may leave this entry screen and create the
record. SEE Creating Locations tutorial.
As mentioned above, you may also create a Location record directly from this entry screen by
selecting the feature.

OREGON FUELS TAX SYSTEM – USER GUIDE
Use Fuel User Reporting REV 07 - 2019
5
Supplier/Buyer select the name of the company selling/buying the fuel
Date Received enter date or select from pop-up calendar next to field
Document Number enter Bill of Lading (BOL) or invoice number
Net Gallons enter Net gallons from BOL or invoice
Gross Gallons enter Gross gallons from BOL or invoice
Billed Gallons enter Billed gallons from the BOL or invoice
If only Billed gallons is available, enter that figure in all three fields
Click the “Insert” button at the bottom of the window. The system will display a notice in red at the
top of the window that the record was inserted. The fields are blank again and another record may
entered.
When you have completed your schedule entries, return to “Tax Sessions” and select the period you
have entered.
Figure 5. Viewing the report
Select “Session Details” from the pop-up menu.

OREGON FUELS TAX SYSTEM – USER GUIDE
Use Fuel User Reporting REV 07 - 2019
6
Figure 5. Session Details screen
In the Session Details window, click the “Save and Regenerate” button at the bottom and close the
window.
Select the tax session again and then click on “View Tax Report” in the pop up menu. The report will
be displayed as part of the system window (depending on your system, it may be a new window that
is opened). Review the report for completeness and accuracy.
Return to “Tax Sessions” and select the line for the report. Select “File Tax Return” from the pop up
menu.
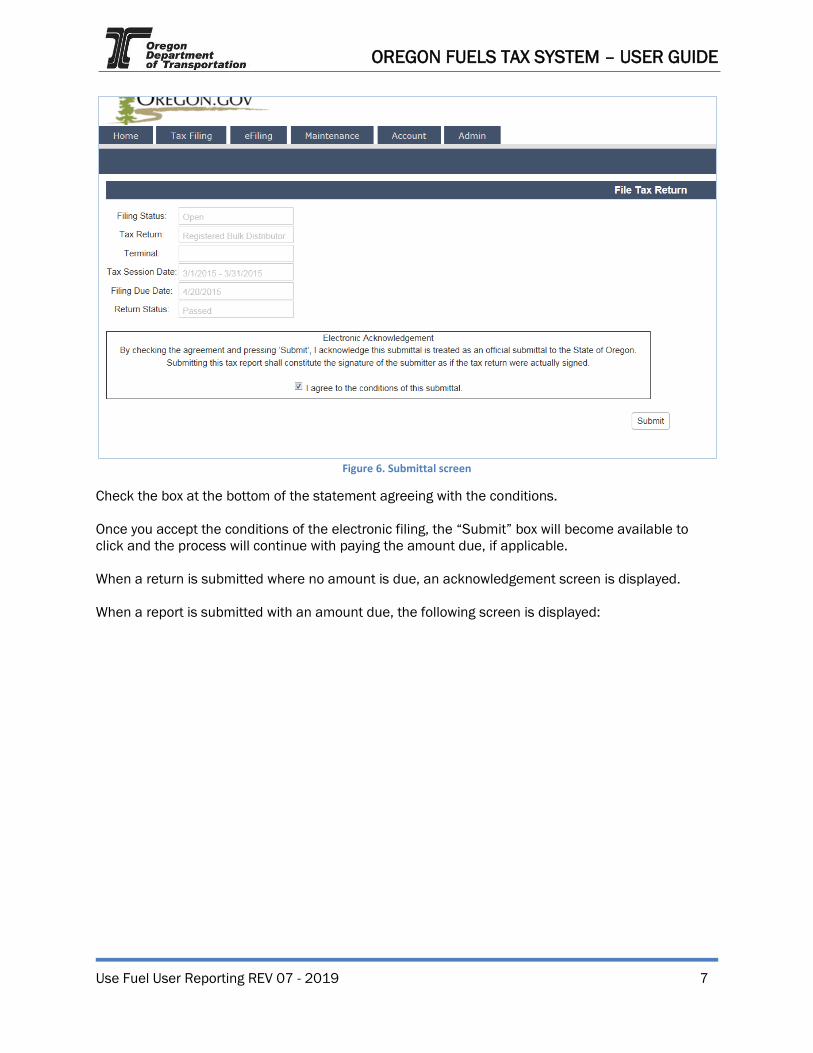
The File Tax Return screen is displayed.
OREGON FUELS TAX SYSTEM – USER GUIDE
Use Fuel User Reporting REV 07 - 2019
7
Figure 6. Submittal screen
Check the box at the bottom of the statement agreeing with the conditions.
Once you accept the conditions of the electronic filing, the “Submit” box will become available to
click and the process will continue with paying the amount due, if applicable.
When a return is submitted where no amount is due, an acknowledgement screen is displayed.
When a report is submitted with an amount due, the following screen is displayed:

OREGON FUELS TAX SYSTEM – USER GUIDE
Use Fuel User Reporting REV 07 - 2019
8
Figure 7. Select payment amount screen
The Payment Amount displayed is the amount due from the tax report being submitted. This is the
minimum amount that can be paid.
If you have amounts due from previous tax report errors or adjustments, they will show in the
“Outstanding Balance Due:” field.
When also paying on an outstanding balance, enter the new amount being paid in the “Payment
Amount” field and click the “Submit” button. The “Select Payment Date” screen is displayed.

OREGON FUELS TAX SYSTEM – USER GUIDE
Use Fuel User Reporting REV 07 - 2019
9
Figure 8. Select payment date screen
The payment may be made as soon as the report is finished or can be delayed until the due date.
Enter the date you want the payment to process in the “Payment Date” field and click the “Submit”
button.
If this is the first time a payment is being made in the system, One Time Payment is the only option
available.
Figure 9. Payment type screen
Click the “Submit” button to proceed to the US Bank site and enter the account information for the
initial setup.
OREGON FUELS TAX SYSTEM – USER GUIDE
Use Fuel User Reporting REV 07 - 2019
10
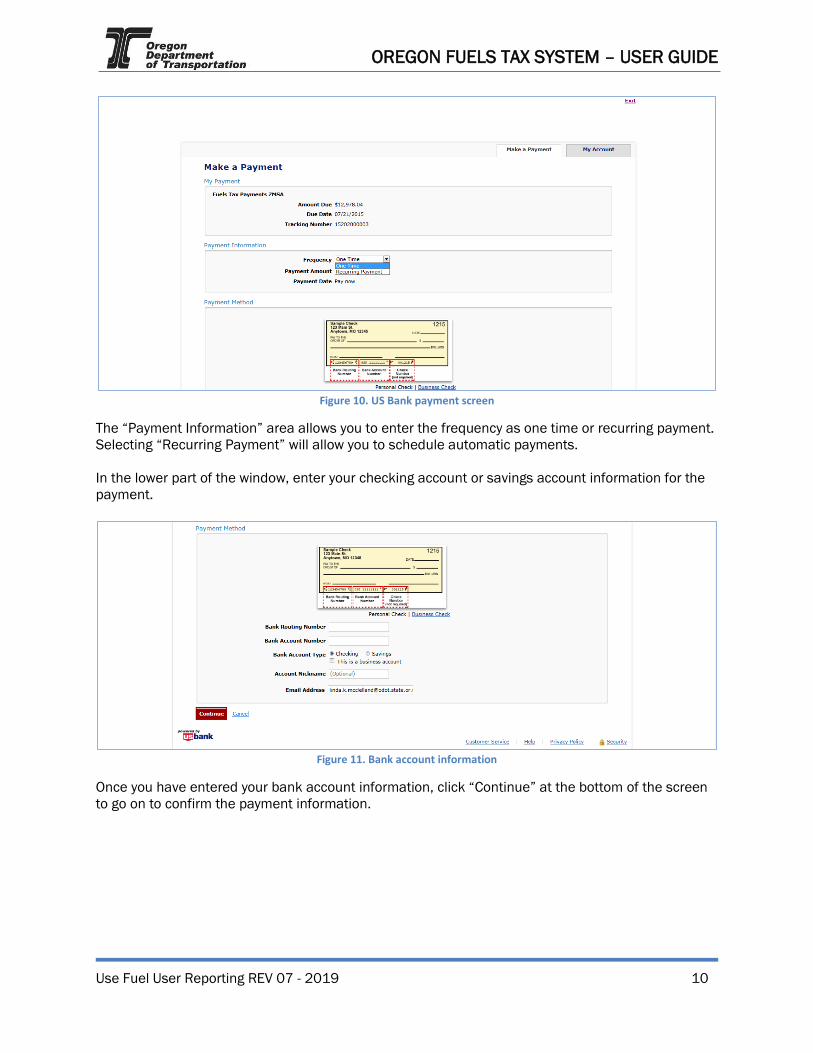
Figure 10. US Bank payment screen
The “Payment Information” area allows you to enter the frequency as one time or recurring payment.
Selecting “Recurring Payment” will allow you to schedule automatic payments.
In the lower part of the window, enter your checking account or savings account information for the
payment.
Figure 11. Bank account information
Once you have entered your bank account information, click “Continue” at the bottom of the screen
to go on to confirm the payment information.

OREGON FUELS TAX SYSTEM – USER GUIDE
Use Fuel User Reporting REV 07 - 2019
11
Figure 12. Review payment screen
Check the box at the bottom of the electronic statement to accept the Terms and Conditions and
then click “Confirm” to continue to the payment review.
Figure 13. Verifying the payment information
When your payment has been completed, the confirmation screen showing the reference number
and payment details will be displayed.

OREGON FUELS TAX SYSTEM – USER GUIDE
Use Fuel User Reporting REV 07 - 2019
12
Figure 14. Payment confirmation page
Click the “Continue” button to leave the US Bank site. The Fuels Tax System “Payment History”
confirmation screen will be displayed. This screen shows the date the payment was created, tracking
number, the status and amount.
Figure 15. Payment history screen
The Status will show as Pending until the payment processes through the bank.
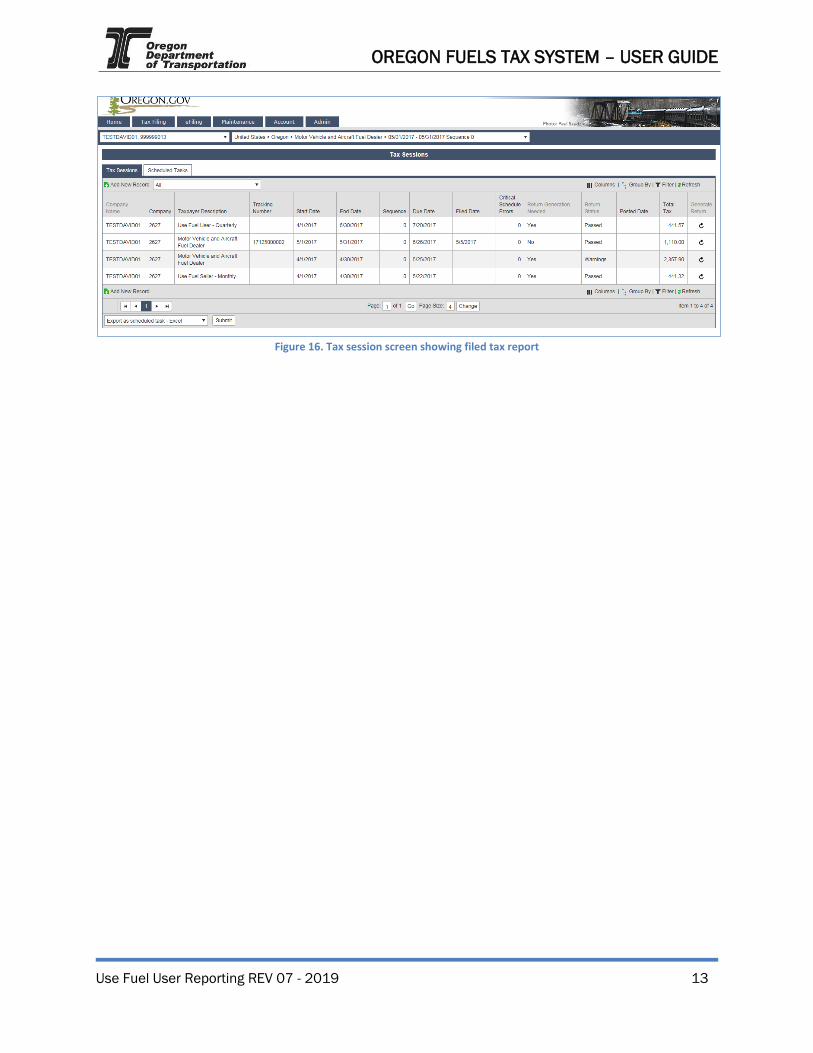
Return to the “Tax Sessions” screen. The tax session will now display a date in the “Filed Date”
column and the Fuels tax System confirmation number in the “Tracking Number” field.
OREGON FUELS TAX SYSTEM – USER GUIDE
Use Fuel User Reporting REV 07 - 2019
13
Figure 16. Tax session screen showing filed tax report