operating, use and maintenance instructions …media.oem.se/archive/filesarchive/124853.pdf ·...
TRANSCRIPT
®
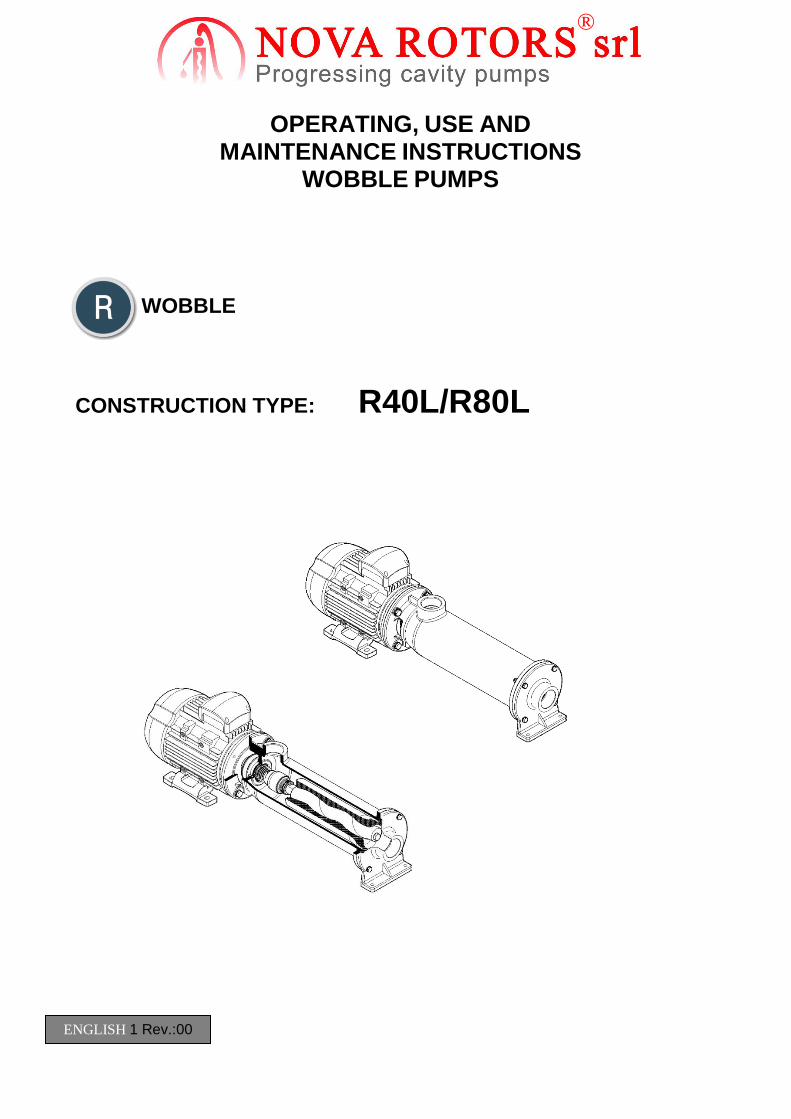
OPERATING, USE AND MAINTENANCE INSTRUCTIONS
WOBBLE PUMPS
WOBBLE
CONSTRUCTION TYPE: R40L/R80L
ENGLISH 1 Rev.:00

Operating Use and
Maintenance Instructions
page 1 Wobble pump R40L/R80L EN 1 Rev.:00
®
INDEX
1. INTRODUCTION ....................................................................................................................................................... 3
1.1 CONCERNING THIS MANUAL .................................................................................................................................. 3 1.2 USER'S MANUAL RECIPIENTS ................................................................................................................................. 3 1.3 PRESERVATION OF THE USER MANUAL .................................................................................................................. 3 1.4 CE WARRANTY LIMITATION AND USE INSTRUCTION ............................................................................................. 3 1.5 GENERAL WARNING ............................................................................................................................................. 4
2. STANDARD DATA PLATE ...................................................................................................................................... 4
2.1 MANUFACTURER ................................................................................................................................................... 4 2.2 DESIGNAZIONE DELLA MACCHINA ........................................................................................................................ 4 2.3 IDENTIFIES THE PUMP SPEED MANUFACTURER ..................................................................................................... 4 2.4 COMPLIANCE OF PUMP WITH CE ........................................................................................................................... 4
3. CAUTIONS AND GENERAL SAFETY RULES .................................................................................................... 5
3.1 DEFINITIONS. ........................................................................................................................................................ 5 3.2 SAFETY GUIDELINES RELATING TO MAINTENANCE INSPECTION AND ASSEMBLY WORKS ....................................... 5 3.3 USE PROHIBITED AND REASONABLY FORESEEABLE MISUSE .................................................................................. 6 3.4 SYMBOLS AND DESCRIPTION ................................................................................................................................. 6
4. GENERAL PUMP DESCRIPTION .......................................................................................................................... 8
4.1 PROPER USE .......................................................................................................................................................... 8 4.2 PUMP OPERATING PRINCIPLE ................................................................................................................................. 8 4.3 MACHINE COMPOSITION ........................................................................................................................................ 8 4.4 WOBBLE STATOR .................................................................................................................................................. 8 4.5 NOISE .................................................................................................................................................................... 9 4.6 TECHNICAL DATA ................................................................................................................................................. 9 4.7 ELECTRICAL PUMPS DATA ..................................................................................................................................... 9
5. INSTALLATION AND ASSEMBLY ....................................................................................................................... 9
5.1 DELIVERY OF THE WOBBLE PUMP .......................................................................................................................... 9 5.2 PREDISPOSITIONS BY THE USER ............................................................................................................................. 9 5.3 MOUNTING THE PUMP ......................................................................................................................................... 10 5.4 ELECTRICAL CONNECTIONS ................................................................................................................................ 11
6. USE INSTRUCTION ................................................................................................................................................ 12
6.1 PREPARATION FOR START UP ............................................................................................................................... 12 6.1.1 DIRECTION OF ROTATION .................................................................................................................................... 12 6.1.2 FILLING THE PUMP .............................................................................................................................................. 12 6.2 STARTING ........................................................................................................................................................... 12 6.3 TEMPORARY STOP ............................................................................................................................................... 12 6.4 PROLONGED STOP ............................................................................................................................................... 12
7. MAINTENANCE ...................................................................................................................................................... 13
7.1 INTRODUCTION OPERATIONS ............................................................................................................................... 13 7.2 STATOR DISASSEMBLY/REASSEMBLY .................................................... FEL! BOKMÄRKET ÄR INTE DEFINIERAT. 7.3 SUBSTITUTION OF ROTOR AND CONNECTION JOINT ............................................................................................. 13 7.4 MECHANICAL SEAL REPLACEMENT ....................................................... FEL! BOKMÄRKET ÄR INTE DEFINIERAT.
8. PUMP PARTS AND SPARE PARTS ..................................................................................................................... 23
8.1 EXPLODED VIEW DRAWING: CAST IRON WOBBLE PUMP R24/R28 R44/R48 R64/R68.......................................... 23 8.2 SPARE PART LIST FOR R24/R28 R44/R48 R64/R68 CAST IRON WOBBLE PUMP .................................................. 24 8.3 SPARE PART LIST FOR R84-R88 CAST IRON WOBBLE PUMP .................. FEL! BOKMÄRKET ÄR INTE DEFINIERAT. 8.4 EXPLODED VIEW DRAWING: CAST IRON WOBBLE PUMP: R84-R88 ........ FEL! BOKMÄRKET ÄR INTE DEFINIERAT.

Operating Use and
Maintenance Instructions
EN 1 Rev.:00 Wobble pump R40L/R80L page 2
®
8.5 EXPLODED VIEW DRAWING: STAINLESS STEEL WOBBLE PUMP: R24/R28 R44/R48 R64/R68 ... FEL! BOKMÄRKET
ÄR INTE DEFINIERAT. 8.6 SPARE PARTS LIST FOR R24/R28 R44/R48 R64/R68 STAINLESS STEEL WOBBLE PUMP ....... FEL! BOKMÄRKET ÄR
INTE DEFINIERAT.
9. TRANSPORT PACKING AND STORAGE .......................................................................................................... 27
9.1 TRANSPORT AND PACKING .................................................................................................................................. 27 9.2 STORAGE ............................................................................................................................................................ 27
10. DISPOSAL OF THE MACHINE ........................................................................................................................ 27
11. TROUBLESHOOTING ....................................................................................................................................... 28
12. WARRANTY AND CONTRACTUAL CONDITIONS .................................................................................... 30
13. TESTING .............................................................................................................................................................. 30
14. DISPUTES............................................................................................................................................................. 30

Operating Use and
Maintenance Instructions
page 3 Wobble pump R40L/R80L EN 1 Rev.:00
®
1. INTRODUCTION
1.1 Concerning this manual
This manual includes the instructions concerning the use and maintenance of the Nova Rotors pump type:
Wobble pump
Being the pump a machinery such the art. 1 of the Italian law D.Lgs. n.17/2010 this manual was made to
comply with the basic safety requirements set out in these applicable directives point. 1.7 of the above
mentioned law:.
1.2 User's manual recipients
This manual is intended for users of the pump, namely:
workers who use it;
maintenance to ensure the conservation of its functionality;
workers involved in its transportation and its storage;
workers who are responsible for its installation at the site of use;
workers involved in its transfer to another site, again for use;
workers involved in its removal for disposal of all its parts.
All users of the wobble pump must be able to consult this manual at any time.
The information included in the manual apply to the user, who must read and fully understand it before using
the pumps. This instruction manual must always be available to the user for reference.
1.3 Preservation of the user manual
The manual is an integral part of each pump; therefore, it must be kept and equip the pump also in the event
that the pump may be made available to a different user.
The manual is part of the machine, therefore, must accompany him in case of sale, rental or concession use
for other users.
If this manual is lost or irreparably damaged, in the ten years following the date on the declaration of
conformity, you can ask for a copy to the Nova Rotors Ltd, which reserves the right to seek reimbursement of
the costs of printing and delivery of the copy the original CE Warranty limitation and use instruction
1.4 CE Warranty limitation and use instruction
The manual contains instructions for use and safe maintenance of floating pump stator maintained in
its original setting.
The ordinary and extraordinary maintenance that do not affect safety-related parts can be performed
without affecting the validity of the CE marking machine, and then this manual, provided only that they are
used parts and / or original spare parts, or they are declared compatible by Nova Rotors srl.
If the pump is affected by changes in excess of the extraordinary maintenance, replacement, removal and /
or addition of parts not supplied by the Nova Rotors srl, the author of the amendment goes directly to replace
the Nova Rotors srl in the role of Manufacturer. The machine thus modified is no longer guaranteed by the

Operating Use and
Maintenance Instructions
EN 1 Rev.:00 Wobble pump R40L/R80L page 4
®
Nova Rotors srl and can be used only after the author of the amendment has completed the procedure for
placing the new machine on the market fulfilling all the obligations incumbent on the manufacturer.
1.5 General Warning
WARNING! – The manufacturer is not held accountable for any improper use of the pump should
the manual be read in part or not read at all.
NOVA ROTORS S.r.l. is entitled to alter the specifications included in this manual or the features of every
pump. Some pictures in this manual may show parts that might be slightly different from the ones assembled
on the pump.
2. STANDARD DATA PLATE
2.1 Manufacturer
1) Company : Nova Rotors S.r.l.
2) Address: Via Villa, 29
Town: 36020 Villaga (VI)
Tel +39. 444. 888151
Fax +39. 444. 888152
2.2 Designazione della macchina
3) POMPA - PUMP: Identifies the pump model and version
4) SERIAL NUMBER : Identifies the pump serial number
5) M³/H: Identifies the pump flow rate
6) PRESS. Bar: Identifies the pump pressure
7) R.P.M. : Identifies the pump speed
8) Date: Identifies the year of manufacture of the pump
9) Arrow: Identifies the direction of rotation sense
2.3 Identifies the pump speed Manufacturer
Build year 20...
2.4 Compliance of pump with CE
Each progressing cavity pump is provided with a CE-compliance certificate issued by
NOVA ROTORS™ S.r.l.
The pump was made to comply with the basic safety requirements set out in these applicable directives:
Directive on machinery: 2006/42/CE.
Directive on low tension: 2006/95/CE
Directive 2004/108/CE (Electromagnetic Compatibility Directive, implemented in Italy law D.L. n.
194/2007).
A copy of this manual can be requested to the manufacturer.
1 3
4
6
8
9
2
5
7

Operating Use and
Maintenance Instructions
page 5 Wobble pump R40L/R80L EN 1 Rev.:00
®
3. CAUTIONS AND GENERAL SAFETY RULES
3.1 Definitions.
The definitions below are taken from the normative UNI EN ISO 12100-1.
Harm: Physical injury or damage to health.
Hazard: potential source of damage.
Specific hazard: danger that is defined as present in the machine or associated with the same.
Dangerous situation: circumstance in which a person is exposed to at least a danger. The exposure
can result in damage immediately or after a period of time.
Risk: combination of the probability of occurrence of harm and the severity of that harm.
Residual risk: risk that remains after taking protective measures.
Fixed cover: shield fixed in such a way (for example with screws, nuts, welding) can be opened or
removed only through the use of tools or by the destruction of the fixing means.
Removable cover: Protection that can be moved without use of tools.
Adjustable casing: Fixed or removable cover that can be Adjustable whole, or where a big part of it is
adjustable . The adjustment remains fixed during a particular operation.
Protection device: fixed system protection different than a cover.
3.2 Safety guidelines relating to maintenance inspection and assembly works
In this manual there are used different types of warning, see below:
HAZARD! This warning is always accompanied by a triangular symbol black on a yellow
background and a caption. The symbol can be of danger, or can be referred to a specific hazard. In
both cases, the caption specifies the nature of the hazard to which the warning refers. Finding the
words "Danger!" The user is warned that if the danger is manifest in the caption specified, all subjects
are exposed to the same dangerous situation.
CAUTION! This warning is always accompanied by a triangular symbol black on a yellow
background with an exclamation mark with a caption. Caption specifies the precaution type to be
taken to prevent the onset of certain dangerous situations. After discovering the "Warning!" The user
is warned that the omission of precaution can result specified by the caption, more or less rapidly, can
lead to a dangerous situation.
FORBIDDEN! This warning is always accompanied by round symbol with a diagonal lane red and a
caption. This symbol can be to ban general or specific prohibition, in which case, the white
background is the object of the prohibition. In both cases the caption specifies the type of prohibition
about the warning refers. After discovering the indication "No!" The user is warned that if he violates
this indication, the result will personally answer for his actions.
NOTE! The warning was accompanied by a caption without symbol. The caption specifies the
position about the warning is reported, and describes the actions to be taken to preserve the normal and
safe operation of the machine.

Operating Use and
Maintenance Instructions
EN 1 Rev.:00 Wobble pump R40L/R80L page 6
®
3.3 Use prohibited and reasonably foreseeable misuse
The wobble pump should be used only for the application specified in chapter § 4.1.
ATTENTION! Any use of the machine other than the one provided at chapter § 4.1 is
prohibited!
Nova Rotors S.r.l., in designing the machine has identified the following possible misuses, all strictly
prohibited:
use of the machine by unauthorized personnel, not informed, or correctly formed and trained;
use against the law and regulation in the country where the pump is sold;
use of the machine not installed correctly according such specifications;
use of the installed machine with wrong voltage or phase and Hz ;
Using of the machine in bad conditions of maintenance, out of order or because they have been used
parts unsuitable or because the interventions were performed by unqualified personnel..
WARNING! Failure to comply with the safety standards described in this manual and those
relating to common sense can cause danger to people and the environment and damage the machine.
3.4 Symbols and description
IS FORBIDDEN TO USE THE WOBBLE PUMP WHEN THE PROTECTION DEVICES
ARE SHOOTING AND / OR ARE DISABLED OR BROKEN.
DON’T REMOVE THE PROTECTION COVER! While the pump is being used the safety
devices provided must be present and correctly installed on the machine. Do not carry out any operation on
the safety devices while the pump is operating. The system must be inspected regularly to check for
damage and to ensure that all safety devices are in good working order.
IS FORBIDDEN LUBRICATE THE PUMP WITH PARTS IN MOTION! The gears, shafts
and joints for the transmission of the motion must never be approached during operation of the pump. The
covers installed to prevent contact with moving parts, can be removed only by authorized personnel to
perform maintenance. At the end of each maintenance the casing must be repositioned and secured
properly.
Additional Information.

Operating Use and
Maintenance Instructions
page 7 Wobble pump R40L/R80L EN 1 Rev.:00
®
WARNING IS FORBIDDEN TO WORK ON THE PUMP IF CONNECTED
ON THE POWER SUPPLY! Before beginning maintenance on the pump remember to disconnect the
power supply by means of the circuit breakers. All the devices must be secured against automatic or
accidental restart. (Where possible turn the main switch to OFF or unplug the power). In particular
situations where you need to run the pump while servicing at least 2 persons must be present so that in the
event of danger one person will be able to disconnect the power supply or raise the alarm. Once
maintenance has been completed remember to restore the safety devices and check that they are in good
working order.
WARNING! Before of the use of the pump check the perfect condition of the electrical wires
system and connection. Check devices and electric actuators that must be maintained in a perfect state of
efficiency and conservation. In case of failure or damage to the electrical components of the machine, the
same must be secured in the shortest time. The damaged component must be replaced before the use of the
machine.
FORBIDDEN! before connecting the power supply, it is absolutely necessary to have completed
the installation of the pump . All maintenance work must be carried out with the machine shut off from the
power supply.
CAUTION! The structure of the pump must be connected to ground present at the installation
site so that it is satisfied the relation : RE × Idn ≤ UL, where:RE is the resistance of the earth plate measured
in ohm,
Idn is nominal electrical supply of the differential protection of the installed power, in amperes,
UL = 50 is the contact Volt measure.
CAUTION! The user must ensure that all installation, maintenance, inspection and assembly
operations related to the wobble pumps are carried out by qualified technicians.
Technicians must carefully read this instruction manual before acting on the pump. Only authorised and
trained personnel are permitted to work on the progressing cavity pump.
HAZARD ! The wobble pump was designed and built to be used under operating conditions
specified in § 4.7. Exceeding the specified limits is not permitted under any circumstances and voids the
warranty.
CAUTION! The wobble pump never run dry! Only few turn of the rotor without fluid can
produce a fatal damage of the pump !
Operating Use and
Maintenance Instructions
EN 1 Rev.:00 Wobble pump R40L/R80L page 8
®
4. GENERAL PUMP DESCRIPTION
4.1 Proper use
The wobble pump can be used for the transfer and the dosage of liquids with a viscosity medium - high,
even non-Newtonian, generally not homogeneous in which are also dissolved gas, solid fragments and / or
fragments fibrosis.
4.2 Pump operating principle
The wobble pump is a volumetric rotary machine. The theoretical flow rate is directly proportional to the
number of revolutions .
This particular type of volumetric pump, can transfer the pumped fluid in condition of movement strictly
laminate, without unrest within the fluid stream. The rotor, rotating within the stator, is forced to perform a
hypocycloid roto-translational movement. This coupling of the two elements always creates a line of contact
along the profile that guarantees the seal between them. This movement creates an chamber that shifts with a
helical movement, from the suction casing to the delivery casing. Without having suction and discharge
valves, the pump delivers a flow rate thus uniform and proportional to the number of revolutions.
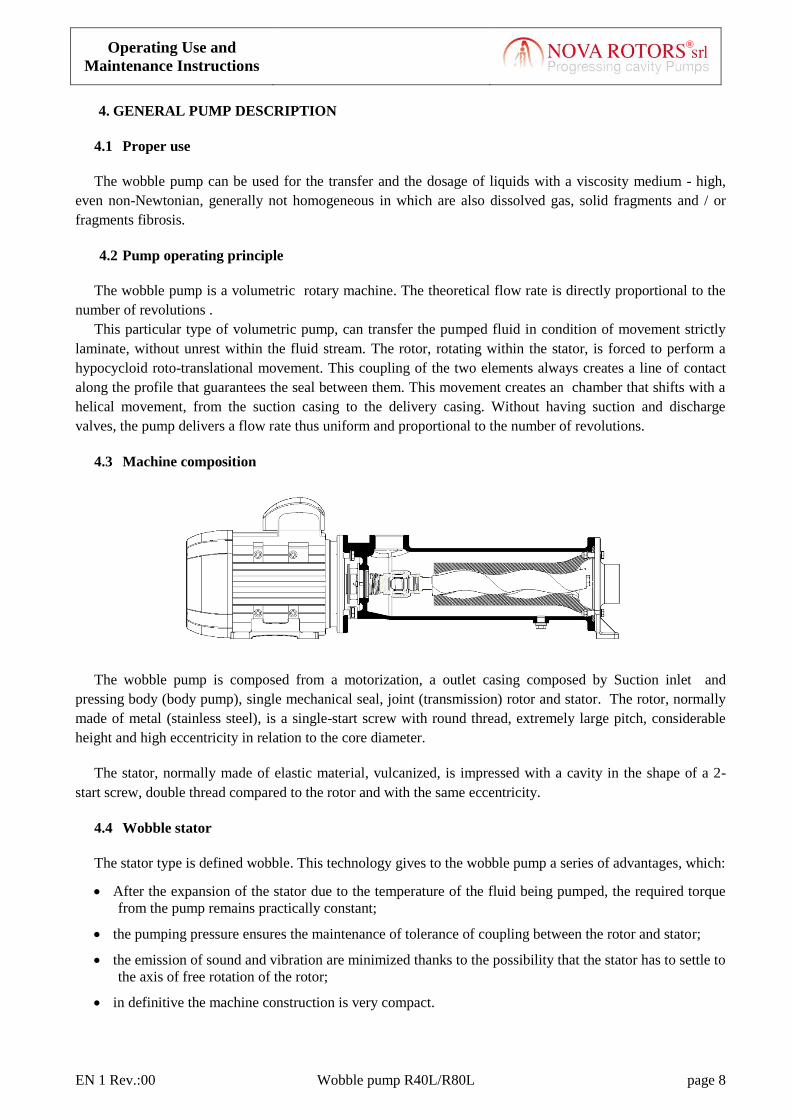
4.3 Machine composition
The wobble pump is composed from a motorization, a outlet casing composed by Suction inlet and
pressing body (body pump), single mechanical seal, joint (transmission) rotor and stator. The rotor, normally
made of metal (stainless steel), is a single-start screw with round thread, extremely large pitch, considerable
height and high eccentricity in relation to the core diameter.
The stator, normally made of elastic material, vulcanized, is impressed with a cavity in the shape of a 2-
start screw, double thread compared to the rotor and with the same eccentricity.
4.4 Wobble stator
The stator type is defined wobble. This technology gives to the wobble pump a series of advantages, which:
After the expansion of the stator due to the temperature of the fluid being pumped, the required torque
from the pump remains practically constant;
the pumping pressure ensures the maintenance of tolerance of coupling between the rotor and stator;
the emission of sound and vibration are minimized thanks to the possibility that the stator has to settle to
the axis of free rotation of the rotor;
in definitive the machine construction is very compact.
Operating Use and
Maintenance Instructions
page 9 Wobble pump R40L/R80L EN 1 Rev.:00
®
4.5 Noise
Has been measured near the machine of emission sound pressure level according to the weighting curve A.
The level does not exceed 70 dB (A).
4.6 Technical data
The wobble pumps are available with electric drive 3F 230/400V- 50 Hz and 230V single phase drive - 50
Hz. The maximum allowable head pumps with cast iron and stainless steel is 4 bar.
size R40L – R80L can be mounted with drive in B3-B5 reduced type such as in the follows table or with
mechanical motovariator for the flanged pumps RF40L e RF80L .
4.7 Pump’s electrical data
Pump type Power kW Pole Rpm Pump type Power kW Pole Rpm
R40L 1”1/2” 1,5 4 1400 R80L 2” 4 4 1400
R40L 1”1/2” 1,1 6 900 R80L 2” 2,2 6 900
R40L 1 1/2 ” 0,55 8 700 R80L 2” 1,5 8 700
Refer to the attached specifications and the manufacturer's manual. Check the degree of protection
(IP..) The drive protection is standard IP-55 (protection against dust and water jets).
5. INSTALLATION AND ASSEMBLY
5.1 Delivery of the wobble pump
Wobble pumps are packed in specific containers (boxes on pallets, crates) unless the user/ buyer specifies a
different system and delivered directly to the buyer or such as agree in the order. The time and date of delivery
is corresponding to the moment of unloading by the forwarder .
The packages are marked and useful handling information is applied to them. Upon receipt check for
damages incurred in transit. All damages incurred during transit must be reported immediately to the carrier.
Use suitable transportation and storage equipment and ensure that appropriate safety measures are
observed.
Depending on the weight, the machine can be moved manually or with suitable transport or lifting
equipment.
Remove the protection and safety elements used in the packaging and any screws used to secure the
packaging to the machine. Check and remove any plugs from the suction flange and the delivery flange.
This pump was designed in compliance with pre-determined operating condition. The specifications related to
pump operation are to be meant as maximum values and cannot be exceeded in any case.
5.2 Predispositions by the user
The Nova Rotors S.r.l. pump supply include only the wobble pump. All other components of the plant, must
be provided by the user.
The connections for the power to the pump and one for his connection to the grounding must be performed by
the user.

Operating Use and
Maintenance Instructions
EN 1 Rev.:00 Wobble pump R40L/R80L page 10
®
5.3 Mounting the pump
The pump must be horizontally installed, with an
approx. 45-cm space (L) all around it so as to leave
room for maintenance work and enable the motor to
cool easily.
The pump must be horizontally installed, with an approx. 30-cm space all around it so as to leave room for
maintenance work and enable the motor to cool easily.
Pipes must be the same size as the suction and delivery pump ports. Delivery is located on the central port,
close to electric motor; suction is opposed respect to the electric motor (see Fig.1).
Make sure that the direction of motor rotation must be clockwise and never counterclockwise, as shown by the
arrow on the name plates in the pump. The pipes must have the same diameter of the inlet and outlet of the
pump. The discharge is located approximately in the center of the pump, close to the electric drive, while the
suction mouth is to the right (see the diagram below).
The suction pipe must be free of sharp bends and must be as short as possible.
The two pipes, suction and discharge, must be fixed to a supporting structure so that they do not rest on the
body of the pump. To facilitate installation and removal is necessary to provide grafts flanged joints or three
pieces on the suction and discharge.
When the prevalence of the downstream circuit exceed 10 meters of water column, it is appropriate to install a
check valve on the discharge pipe in order to prevent the weight of the fluid column serious constantly on the
pump.
To limit the propagation of vibrations produced by the pump along the inlet pipes and discharge may be
appropriate to install the dampers.
CAUTION! If on the delivery pipe is installed an on-off valve, between outlet casing and on-off valve
is necessary to install a safety valve capable of limiting the discharge pressure (with by-pass). In this case, is
necessary prevent the switch on of the pump until the valve is closed.
Fig.1 (cast iron)

Operating Use and
Maintenance Instructions
page 11 Wobble pump R40L/R80L EN 1 Rev.:00
®
5.4 Electrical connections
See the attached specifications and the manual supplied by the drive manufacturer attached to the drive
(for the brand name refer to confirmation order.
All the electrical connections must be made by authorized and qualified personnel.
The electrical connection of machines fitted with electrical motors must be made by the user in compliance
with the guidelines contained in the standard CEI EN 60204-1:2005.
Ensure that the voltage and frequency correspond to the information on the data plate provided by the
manufacturer of the drive. Carefully read the motor manufacturer’s instructions in the user’s guide.
The electrical connection must include a thermal-switch for safe the drive, or a thermal fuse and must be
connected to ground as shown in the above standard.
The electrical cable must be of the type with double insulation and self-extinguishing with a suitable section
for each phase. The neutral connection must be consistent with the protection system in the place of
installation (TT - TN etc..).
Before switch-on the pump, Particular care should be taken:
Voltage, line frequency and number of phases must be as specified on the electric motor.
when selecting the section of the conductors
when connecting the conductive parts of the pump to the earth circuit,
to comply with the data on the drive plate,
with the star/delta connection of the drive,
with the phase connection, in order to obtain the rotating direction indicated on the pump.
5.5 By pass (on request)
WARNING!
The valve pressure setting must be discussed and agreed on with Nova Rotors. The operating
limitations must be in accordance with the details specified in the order confirmation and related
documents.
by-pass functioning principle

Operating Use and
Maintenance Instructions
EN 1 Rev.:00 Wobble pump R40L/R80L page 12
®
6. USE INSTRUCTION
6.1 Preparation for start up
6.1.1 Direction of rotation
Run the pump motor for a few seconds. Make sure that the pumping direction is correct. Check the
direction of rotation (see the arrow in the plate affixed to the pump). If the sense of rotation is the inverse of
the one shown by the arrow, then reverse the electrical connection of the two phases.
Running the pump in the wrong direction could result in damage to the pump itself. The direction of
rotation of the pump determines the fluid flow direction.
IT IS FORBIDDEN TO TURN THE PUMP IN THE OPPOSITE DIRECTION OF
ROTATION TO THAT INDICATED BY ARROW.
THE WOBBLE PUMP NEVER RUN DRY!!!
Few turns without fluid may damage the stators !!!!
6.1.2 Filling the pump
Before start up, the pump must be filled with liquid. This initial procedure is not needed for priming
purposes, but serves to provide the necessary lubrication for the stator until the pump primes the process
fluid.
Dry running increases friction between the rotor and the stator thereby generating unacceptable high
temperatures. This heat develops rapidly and completely ruins the contact surfaces between the rotor and
the stator with possible breaking of the pump.
6.2 Starting
After performing the preliminary checks described in the two preceding paragraphs the pump can be
started. To this end it is sufficient to power the electric motor.
6.3 Temporary stop
ATTENTION! If the pump remains inactive for a long period of time rotate the shaft once a month.
In other case After stopping the pump, in the cases described below the pump should be drained and
cleaned if necessary:
If the fluid is subject to environment temperature may solidify or freeze, especially if the pump is used
to cold weather outside;
If the pumped fluid may cause scaling on seals and mechanical parts.
6.4 Prolonged stop
The machine must be stored in a safe, dry place sheltered from weather conditions.
Sometimes prolonged storage can lead to problems with various pump parts:
If the pump is inactive for a prolonged period (more of 3 months), the rotor can permanently warp the
stator surfaces. So it is advisable to remove the stator, pack it so that it is protected from light and air and
store it in a cool, dry place.
Where more pumps are installed in the battery, the pump on stand-by, auxiliary to the main pump must be
initiated from time to time.

Operating Use and
Maintenance Instructions
page 13 Wobble pump R40L/R80L EN 1 Rev.:00
®
7. MAINTENANCE
7.1 Introduction operations
ATTENTION! All operations must be carried out with the pump shut off and disconnected from
the electrical power supply..
Before any intervention on the pump:
wait until the temperature of the pumped fluid has lowered (ambience temperature is better!);
discharge the plant pressure and check if it is without pressure;
close the valves and/or stop suction/discharge valves;
disconnecting the suction and discharge pipes.
7.2 Unmounting of stator, rotor and body pump
Referring to the exploded view drawing shown in chapter Fel! Hittar inte referenskälla. on page Fel!
Bokmärket är inte definierat., to replace the pump parts rotor stator and the transmission joint is necessary:
1. Unscrew the hex nuts hexagonal screws (503)(504) and remove
the corresponding washer (502) of the outlet casing(300) so
remain unblocked the inlet casing (500).
2. Remove the inlet casing (500).
Fel! Hittar inte referenskälla./ 1
3. Unthread stator (400) helping with screwdriver taking care not to damage the elastomer stator; you can also lubricate the stator (400) using liquid products or slightly viscous product (natural soap, silicone spray, etc.) to facilitate unscrewing.
Fel! Hittar inte referenskälla./ 2

Operating Use and
Maintenance Instructions
EN 1 Rev.:00 Wobble pump R40L/R80L page 14
®
4. Use a screwdriver to move the splash ring (602) until the coupling pin (601) is visible.
5. Press lightly the rotor towards the drive a bit 'in pressure to facilitate the extraction of the coupling pin.
6. Remove the coupling pin (601) from the hollow shaft using an ejector pin and hammer.
Fel! Hittar inte referenskälla./ 3
7. slide out the rotor (800) together the hollow shaft with joint and mechanic seal (600) taking care to not damage the seal (rotating part+ stationary part) (203).
NOTE! The stationary part of the seal can remain within the body pressure. Carefully remove it, by pulling it out from the same once removed altogether the transmission shaft. Even a little visible damage can impair the functionality of the fixed part of the mechanical seal.
Fel! Hittar inte referenskälla./ 4
8. Unscrew the hex head screws (403), remove the washers (402) from the outlet casing(300), remove the pump from the drive and remove the splash ring (602).
Fel! Hittar inte referenskälla./ 5
602
600
203
800

Operating Use and
Maintenance Instructions
page 15 Wobble pump R40L/R80L EN 1 Rev.:00
®
9. Place a wrench on the screw which is located on the head of
the rotor; insert a wrench in the slot of the transmission shaft.
10. By force with the two keys unscrew the rotor (800) from the drive shaft.
Fel! Hittar inte referenskälla./ 6
7.3 Disassembly of the joints
NOTA! È The operations can also be carried out after having disassembled the complete transmission as described above. In that case we recommend using a suitable clamping tool so the operations can be carried out easily and quickly.
The operations must be carried out with the transmission locked, however do not use devices that interfere with the disassembly operations. By identifying suitable fixing positions for each stage you will significantly simplify each separate operation to be carried out on the joint.
For disassembling the joints follows the operations below:
1. Remove the rotating part of the mechanical seal (203) and place it separately with the stationary part previously removed (see Fel! Hittar inte referenskälla./ fig. 4).
2. Identify the clamp (704) and fastening clip.
3. Open the clamp (704) picking to the fastening clip without damaging the sleeve (705), using a rubber mallet and a flat-blade screwdriver
Release the clip without nicking or damaging the elastomer sleeve.
7.3 / 1

Operating Use and
Maintenance Instructions
EN 1 Rev.:00 Wobble pump R40L/R80L page 16
®
4. Use external retaining ring pliers to unscrew the retaining ring (709). Pull it away as soon as it slips out of its groove in the opposite direction to the joint cover and as far back as possible.
7.3 / 2
5. Move the joint cover (708) in the same direction as the retaining ring. To facilitate the operation lubricate the contact area with the sleeve and if it is difficult to extract tap lightly with a rubber hammer. Alternatively place a copper shim between the hammer and the joint cover to prevent damaging the latter.
7.3 / 3
6. Remove the elastomer sleeve (705). Use a flat blade screwdriver for the operations.
NOTE! Removing the sleeve there can be a slight leakage of the lubricating oil contained within.
7.3 / 4
7. Remove the spiral retaining ring (706). Use a flat blade screwdriver
7.3 / 5
8. Pull out the pin (701). If the pin is difficult to remove due to seizure or damage, use a pin ejector and hammer.
7.3 / 6
9. Bend the drive shaft (700).
10. using the pin ejector and hammer to eject the guide bush (702) as illustrated
11. bend the shaft the other way
12. using the pin ejector and hammer and remove the opposing bush.
If the bushes do not need replacing, move them to a position which will allow you to remove the drive shaft.
7.3/ 7
706

Operating Use and
Maintenance Instructions
page 17 Wobble pump R40L/R80L EN 1 Rev.:00
®
13. Slide out the drive shaft (700) from the joint casing.
7.3 / 8
14. Remove the O-Ring (707) from the joint casing.
7.3 / 9
15. Position the drive shaft (700) in a pneumatic or hand press capable of splining/extracting the guide bushes (703) from the lodging and place it on the special table.
16. Insert the special tool in the bush and extract it with a punch extraction. The extractor drift must be centred with the guide bush, on which the special tool is inserted.
If the bushings are not worn it is not necessary remove them. In the case skip this step.
7.3 / 10
7.4 Mechanical seal replacement
Refer to chapter Fel! Hittar inte referenskälla./ figure 4 for dismantle the mechanical seal . (stationary +
rotating part) form the outlet casing and slip off from the transmission shaft (hollow shaft+ rotor).
Take the outlet casing (300) place from the motor side, unscrew the screws that hold the seal housing (303) and washers (302) remove the 'O-ring (304), clean everything and keep it aside.
If it not necessary for cleaning or changing the o-ring, this operation can be avoided, so take mounted the seal housing in the outlet casing (300). Refer to chapter Fel! Hittar inte referenskälla./ figure 4 for dismantle the mechanical seal .
Fel! Hittar inte referenskälla./ 1
304
303
302

Operating Use and
Maintenance Instructions
EN 1 Rev.:00 Wobble pump R40L/R80L page 18
®
7.5 Pump and relative mechanical seal assembly
The complete procedure for assembling the pump in sequential order is set out below. See the relevant sections
for the specific operations relating to the assembly of the joints, the seal and the connections to the drive.
NOTE!
Select the sequences according to your servicing needs and the type of operation to be carried out.
1. Take the outlet casing (300) on the motor side, insert the O-ring (304) on the seal housing (200).
2. Mount the seal housing to the outlet casing and fix it with the hexagonal head screw (303) and relatives washers (302).
Fel! Hittar inte referenskälla. / 1
3. Insert the rotating part of the mechanical seal in the hollow shaft and immediately after the stationary part of the seal (203), after having proceeded to clean so that it does not have process residues. In case mechanical seal damaged, substitute it.
Assemble the joint as described in the procedures set out in Chapter 7.6, rotor side. N.B.: If the transmission has been completely assembled on the bench it will not be necessary to act on the joints and corresponding components. In that case take care not to damage the seal parts when inserting the rotating unit .
Fel! Hittar inte referenskälla. / 2
4. Inset the splash ring (602) on the motor shaft and after insert the outlet casing (300) checking in the side slot of the outlet casing to not crush the splash ring.
5. Tighten the hex head screws (403), after entering in the same washers (402) in the outlet casing (300), and tighten to the drive, making sure to check the position of the ring splash (602).
Fel! Hittar inte referenskälla. / 3
304
302
303
302

Operating Use and
Maintenance Instructions
page 19 Wobble pump R40L/R80L EN 1 Rev.:00
®
6. Insert the complete transmission with the rotor and mechanical seal in the outlet casing until his seat placed in the bottom of the outlet casing; In the same time with the help of your other hand insert the splash ring into the hollow shaft, through the inspection slot / place in the outlet casing.
Fel! Hittar inte referenskälla. / 4
7. Turn the splash ring (602) until is visible the plug hole in the hollow shaft.
8. Insert the drive pin pushing on the motor side the transmission shaft with rotor.
9. Back into position the splash ring (601) until cover the pin drive just inserted .
10. Mount the stator (400). In case is possible Lubricate the stator (400) with liquid or slightly viscous products (soap, vaseline, silicone spray…) to facilitate the mounting onto the rotor.
Fel! Hittar inte referenskälla. / 5
11. Mount the inlet casing (500) and fix it with Hexagonal head screw (504) and relatives washers (502). In the opposite side tighten the nuts (503) and relatives washers (502).
Fel! Hittar inte referenskälla. / 6
7.6 Assembly the transmission joint.
1. Position the drive shaft (700) in a pneumatic or hand press capable of splining /extracting the transmission bushes (703) from the lodging and place it on the special table. Insert the special tool in the bush and proceed with the splining.
N.B.: The extractor drift must be centred with the transmission bush, on which the special tool is inserted.
If the transmission bush is not worn or has not been removed, skip this step.
7.6 / 1

Operating Use and
Maintenance Instructions
EN 1 Rev.:00 Wobble pump R40L/R80L page 20
®
2. Mount the l'O-Ring (707) in the hollow shaft. Take care not to damage the O-ring in any way as this could affect its sealing efficiency.
7.6 / 2
3. Position the guide bushes (702) as illustrated using the special tool.
7.6 / 3
4. Insert the drive shaft (700) in the hollow shaft (600).
5.
Align respectively the hollow shaft with the drive shaft, so the guide bush holes, are aligned with the drive shaft holes.
7.6 / 4
6. Insert the pin (701) then use the special tool to position the guide bushes.
Verify that the pin slides easily, that its movement is not blocked. Verify the correct mobility of the drive shaft. If it does not move tap the drive shaft gently with a rubber hammer after step 7.6/10.
7.6 / 5
7. Insert the spiral retaining ring (707)in the respective seat.
7.6 / 6

Operating Use and
Maintenance Instructions
page 21 Wobble pump R40L/R80L EN 1 Rev.:00
®
8. Position the joint cover as illustrated (708), onto the hollow shaft and move it back until the sleeve seat are accessible.
7.6 / 7
9. Move the sleeve (705) as illustrated in the respective seat.
7.6 / 8
10. Position the joint cover (708) up against the retaining ring taking care not to dislocate the sleeve (705). To facilitate the operation lubricate the contact area with the sleeve and if it is difficult to position tap lightly with a rubber hammer. Alternatively place a copper shim between the hammer and the joint cover to prevent damaging the latter.
11.
Position the retaining ring (709) so that it locks the joint cover.
Fel! Hittar inte referenskälla. / 9
12. Lubricate the joint. The recommended lubricants are listed in the table below.
WARNING! The use of high quality synthetic oils is fundamental to ensure optimal duration of the joints. The lubricants tested by Nova Rotors guarantee performance and compatibility with the elastomers used for the joint protection sleeves. Lubricants other than those mentioned below are not entirely guaranteed as they have not been tested and could cause premature wear or breakage of one or more components of the joint. We recommend checking and replacing the lubricant in the joint every 8000 hours.
7.6 / 10
The oil volumes that the joints can contain are given below in the table. The quantities set out below will guarantee perfect operation and maximum duration of the joints. It is not recommended to use less than 70% of the quantity of lubricant specified below. Do not use different lubricants within the same joint and prevent it from coming into contact with other lubricants both before and after filling the joint.
Model oil vol.
[cm³]
NOT
FOOD GRADE
FOOD GRADE
Certificate NSF/H1
R40L 10 LUBCON TURMOPOLOIL
220/320 EP (PAG)
LUBCON TURMOSYNTHOIL
220/320 PG (PAG)
R80L 10 MaconOil Sint 220/320 HT (PAG) MaconOil Sintofluid 220/320
(PAO)
Joint lubrication table
709 708 705

Operating Use and
Maintenance Instructions
EN 1 Rev.:00 Wobble pump R40L/R80L page 22
®
Apply the clamps (704) using the special tool and ensure that the joint is sealed. Make sure that the punching is deep enough to secure the clip.
7.6 / 12
Check the tightness of the clamp as illustrated. If it is too tight it could break the sleeve and affect the functionality of the joint after just a few hours of operation.
7.6 / 13

Operating Use and
Maintenance Instructions
page 23 Wobble pump R40L/R80L EN 1 Rev.:00
®
8. PUMP PARTS AND SPARE PARTS
8.1 Exploded view drawing: cast iron and stainless steel wobble pump R40L / R80L

Operating Use and
Maintenance Instructions
EN 1 Rev.:00 Wobble pump R40L/R80L page 24
®
8.2 Spare part list for R40L R80L Cast iron and stainless steel wobble pump
KEY
R = RICAMBIO CONSIGLIATO SOGGETTO A USURA GRAVOSA
RECOMMENDED REPLACEMENT FOR HIGH WEAR PART
r = RICAMBIO CONSIGLIATO NON SOGGETTO A USURA O A USURA GRAVOSA
RECOMMENDED REPLACEMENT FOR PART NOT SUBJECT TO WEAR OR HIGH WEAR
POS. Qty Descrizione \Description R40L R80L NOTE/NOTES
200 1 Alloggiamento tenuta /Seal housing
203 1 Tenuta meccanica (parte fissa + rotante) / Mechanical seal (Stationary part + rotating part)
R
300 1 Corpo pompa / Outlet casing
302 2 Rondella / Washer
303 2 Vite / Screw
304 1 O - ring / O - ring R
305 1 Tappo filettato / Threaded plug
400 1 Statore / Stator R
402 4 Rondella / Washer
403 4 Vite testa esagonale / Hexagonal head screw
500 1 Bocchettone / Inlet casing
502 4 Rondella / Washer
503 4 Dado esagonale / Hex nut
504 4 Vite testa esagonale / Hexagonal head screw
600 1 Albero cavo / Hollow shaft
601 1 Spina di collegamento / Coupling pin
602 1 Anello para spruzzi / Splash ring
700 1 Albero di trasmissione /Trasmission shaft
701 1 Spinotto / Pin
702 2 Bussola guida / Guide bush
703 1 Bussola trasmissione / Transmission bush
704 1 Fascetta / Clamp R
705 1 Manicotto / Sleeve R
706 1 Anello di arresto a spirale / Spiral retaining ring R
707 1 O - ring / O - ring R
708 1 Anello copri snodo / Joint cover
709 1 Anello di arresto filo / Wire retaining ring
710 1 Vite testa esagonale / Hexagonal head screw
800 1 Rotore / rotor R

Operating Use and
Maintenance Instructions
page 25 Wobble pump R40L/R80L EN 1 Rev.:00
®
9. SIZE DRAWING DIMENSION
9.1 Dimensional drawing for wobble R40L e R80L with standard drive
Wobble cast iron and S.S. Aisi304/316 dimensions
Model A B C D E F G H I J K L M N/O P Kg
R40L 729 354 90 90 483 125 235 140 110 9 10 14 165 1”1/2 3/8” 28
R80L 886 471 100 112 618 137 289 190 130 9 12 16 190 2” 3/8” 55
by pass on request. Optional Available at request: base plate, trolley and inverter. In that case refer to the dimensional drawing given to the pump.

Operating Use and
Maintenance Instructions
EN 1 Rev.:00 Wobble pump R40L/R80L page 26
®
9.2 Dimensional drawing for Flanged wobble RF40L e RF80L
Flanged wobble cast iron and Stainless Steel Aisi 304 / 316 dimensions
Model A B C D E F H I J K M N/O P Q R S T U V W Kg
RF40L 552 354 90 90 12 490 60 110 9 14 165 1”1/2 3/8” 8 h9 4 130 165 200 27,5 24F8 25
RF80L 669 471 100 112 15 610 60 130 9 14 190 2” 3/8” 8 h9 4 180 215 250 31,5 28F8 37
by pass on request. Optional Available at request: base plate, trolley and inverter. In that case refer to the dimensional drawing given to the pump.

Operating Use and
Maintenance Instructions
page 27 Wobble pump R40L/R80L EN 1 Rev.:00
®
10. TRANSPORT PACKING AND STORAGE
10.1 Transport and packing
Wobble pumps are packed in specific containers (boxes on pallets, crates) unless the user/ buyer specifies a
different system.
The packages are marked and useful handling information is applied to them. Upon receipt check for damages
incurred in transit. All damages incurred during transit must be reported immediately to the carrier.
Damage due to transport are excluded from the warranty.
Use suitable transportation and storage equipment and ensure that appropriate safety measures are observed.
Depending on the weight, the machine can be moved manually or with suitable transport or lifting equipment.
Bring the packaged pump as close as possible to the installation site and leave it packaged for as long as
possible.
Remove the protection and safety elements used in the packaging and any screws used to secure the packaging
to the machine. Check and remove any plugs from the suction flange and the delivery flange.
If the machine is not supplied with a base or lifting lugs, use ropes. The ropes must be placed around the
machine and positioned in such a way as to ensure a balanced lift.
Warning! Suspended load! The machines must always, and only, be placed horizontally.
Do not lift the complete wobble pump by means of the motor or reduction unit lugs. The lugs are intended
solely for transporting the motor or the reduction unit.
As the machine configurations are all very different the instructions given here are of a general nature but they
do provide sufficient guidelines to ensure that qualified personnel handle the pump correctly.
If in doubt contact the supplier or request more detailed information concerning your specific machine.
When handling trailer-mounted pumps:
Before moving the machine, make sure that the motor is locked out and that it cannot be started accidentally.
Move the unit slowly and with care, particularly on uneven or sloping ground.
10.2 Storage
Warning: warehousing and incorrect storage can lead to damage.
The machine must be stored in a safe, dry place sheltered from weather conditions.
Pumps, unless other arrangement, are protected for transport in an appropriate way to avoid accidental
breakage during transport.
In case you think to have a long time storage, proceed as follows:
Stator: if inactive for a prolonged period, the rotor can permanently warp the stator surfaces. So it is
advisable to remove the stator, pack it so that it is protected from light and air and store it in a cool, dry
place.
Rotor: avoid damaging the rotor by protecting it from knocks and blunt instruments.
Stainless steel pump parts: do not require protection. Other unpainted pump parts: grease the parts.
Drive: follow the manufacturer’s instructions.
Outlet casing and inlet casing: put it back in its packaging.
Drive and motorization in general: Follows the supplier instruction.
11. DISPOSAL OF THE MACHINE
When the life cycle of the machine is finished, proceed with separating scrap metal parts from plastic parts,
the electric / electronic parts, following closely the law of the country where the pump is used.

Operating Use and
Maintenance Instructions
EN 1 Rev.:00 Wobble pump R40L/R80L page 28
®
12. TROUBLESHOOTING
Trouble Possible cause Adjustment
Pump won't start. 1) Motor wired incorrectly.
2) Obstruction in pump.
3) Swollen stator; elastomer cannot
withstand the product being pumped.
4) Product settled and hardened in pump.
5) Excessive temperature of product; stator
expands excessively.
6)Adhesion between rotor and stator even
if new or in perfect condition due to
prolonged inactivity.
1) Check order specifications.
Check motor wiring.
2) Disassemble pump, clean and repair any
possible damage.
3) Check that the fluid being pumped is up
to order specifications. Replace stator
material if necessary.
4) Clean and rinse pump out at each
delivery.
5) If temperature cannot be lowered, ask
NOVA ROTORS technical staff for
support.
6)Lubricate and move the stator with the
special tool.
Failure to suction. 1) Suction pipe leakage.
2) Stator worn.
3) Stator material becoming brittle.
4) Rotor worn.
5) Mechanical seal leakage.
1) Check gaskets, tighten outlet flange and
mounting screws.
2) Replace stator.
3) Install new stator. Check that the liquid
being delivered is up to order
specifications. Replace stator material if
necessary.
4) Replace rotor; find out the cause: wear,
corrosion, cavitation; choose a different
material if necessary.
5) Replace seal.
Insufficient flow
and/or pressure
too low.
1) Motor wired incorrectly.
2) Excessive flow pressure.
3) Air in suction pipe.
4) Mechanical seal leakage.
5) Pump running dry.
6) Stator worn.
7) Rotor worn.
8) Suction lift too high or hydrostatic head
too low (cavitation).
1) Check order specifications
Check motor wiring.
2) Use a manometer to check pressure level
and see if it is up to order specifications.
3) Prevent air from entering the pump;
prevent turbulence on inlet side.
4) Replace seal.
5) Fill pump body with fluid; install dry
running preventing device; place pipes
differently.
6) Replace stator.
7) Replace rotor.
8) Reduce obstruction on suction side;
install pump to lower base.
Noisy operation. 1) Stator worn.
2) Rotor worn.
3) Joint worn.
4) Air inside pipes.
1) Replace stator.
2) Replace rotor.
3) Replace joint.
4) Increase fluid level on suction side.
Prevent air from entering the pump; prevent
turbulence on inlet side.

Operating Use and
Maintenance Instructions
page 29 Wobble pump R40L/R80L EN 1 Rev.:00
®
Diminished
stator/rotor life.
1) Excessive pressure.
2) Excessive temperature of product.
3) Product settled and hardened in pump.
4) Stator material becoming brittle.
5) Pump running dry.
1) Use a manometer to check pressure and
see if it is up to order specifications.
2) If temperature cannot be lowered, ask
NOVA ROTORS technical staff for
support.
3) Clean and rinse pump out at each
delivery.
4) Install new stator. Check that the liquid
being delivered is up to order
specifications. Replace stator material if
necessary.
5) Fill pump body with fluid; install dry
running preventing device; place pipes
differently.

Operating Use and
Maintenance Instructions
EN 1 Rev.:00 Wobble pump R40L/R80L page 30
®
13. WARRANTY AND CONTRACTUAL CONDITIONS
The company warrants the pump for a period of one year from the date of shipment. This warranty only
applies to manufacturing defects in the product made by NOVA ROTORS.
The warranty covers the replacement or repair in our workshop - done by us at our works - of the pump or
part deemed as defective. However, you are not entitled to any claim for damages under any circumstances.
The warranty does not cover any failure due to incorrect wiring, lack of adequate protection, faulty
assembly, improper use or negligence in performing the operations related to the pump system.
Furthermore, the warranty does not cover any of the following:
– failures in materials due to any kind of corrosion or abrasion caused by the fluid being pumped; to this
purpose, reference will be made to the specifications provided by the customer upon offering and ordering
the pump;
bad functioning caused by unworkmanlike installation work;
poor, unsuitable or excessive use of pump;
customer not up to date with payments.
NOVA ROTORS accepts no responsibility for any material or physical damages which may be caused by
our pumps.
Also, the warranty does not cover any material which is dismounted, repaired or mishandled by anyone
who is not explicitly authorised by us to do so.
Any defective material must be returned to our works carriage free and once it is deemed that the company
is accountable for the defect, it is returned as warranty replacement according to contractual conditions.
14. TESTING
Testing is done at our works before the delivery for every pumps. The customer may attend the testing
upon his request. The certificate of internal testing is sent to you any time by making reference to the code
number on the plate.
Please note that the standard internal testing is done by using water; other products may be used upon the
customer's request.
15. DISPUTES
The COURT OF LAW IN VICENZA will settle any dispute which may arise, also in the event of payment by
draft.

Operating Use and
Maintenance Instructions
page 31 Wobble pump R40L/R80L EN 1 Rev.:00
®
Via Villa, 29
36020 TOARA di VILLAGA (VI)
ITALY
Tel: +39-0444-888151
Fax: +39-0444-888152
E mail: [email protected]
Web: www.novarotors.com
ISO 9001: 2008
CERTIFICATE
No: FM 551921
CEC 07
ATEX 110-Rev.1
®
Nova Rotors is a registered trademark of Nova Rotors® Srl. © Copyright 2012 Nova Rotors® Srl. All right reserved. Printed in ITALY .
OHSAS 18001:2007
CERTIFICATE
No: 2010/915-A/1
ATTENZIONE! – Questo manuale deve accompagnare la macchina durante tutta la sua vita. WARNING!– This owner’s manual must stay with the machine for all its life. ATTENTION! – Le manuel doit accompagner la machine pour toute sa vie. ACHTUNG! - Dieses Anweisungsheft muß das Gerät während seiner gesamten Lebensdauer begleiten. ¡ATENCIÓN! - Este manual debe acompañar a la máquina durante toda su vida útil.