operating instructions - panasonic...• for more information on the electronic pen and remote...
TRANSCRIPT

Operating InstructionsWhiteBoard Software 5.2
Thank you for purchasing this Panasonic product.
■ Before using this software, please read the instructions carefully.
Windows
DPQP1030ZF/X1(E)
- 2 -
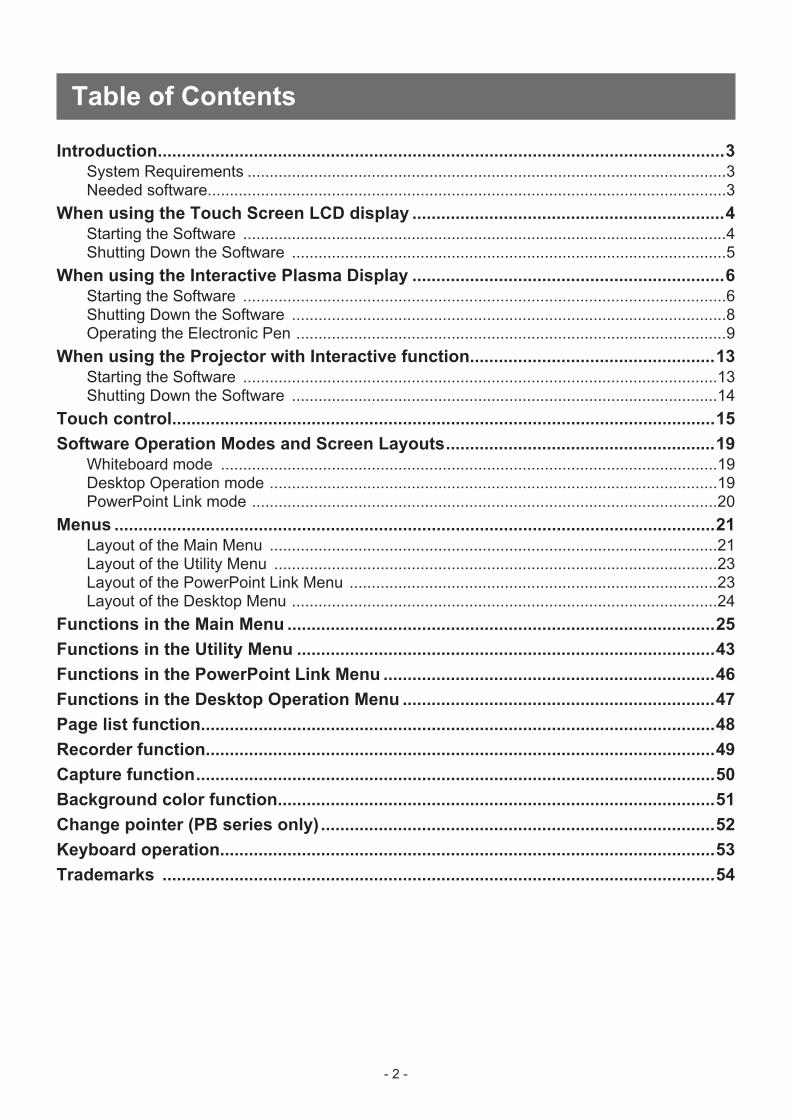
Table of Contents
Introduction ......................................................................................................................3System Requirements ............................................................................................................3Needed software.....................................................................................................................3
When using the Touch Screen LCD display .................................................................4Starting the Software .............................................................................................................4Shutting Down the Software ..................................................................................................5
When using the Interactive Plasma Display .................................................................6Starting the Software .............................................................................................................6Shutting Down the Software ..................................................................................................8Operating the Electronic Pen .................................................................................................9
When using the Projector with Interactive function ...................................................13Starting the Software ...........................................................................................................13Shutting Down the Software ................................................................................................14
Touch control .................................................................................................................15Software Operation Modes and Screen Layouts ........................................................19
Whiteboard mode ................................................................................................................19Desktop Operation mode .....................................................................................................19PowerPoint Link mode .........................................................................................................20
Menus .............................................................................................................................21Layout of the Main Menu .....................................................................................................21Layout of the Utility Menu ....................................................................................................23Layout of the PowerPoint Link Menu ...................................................................................23Layout of the Desktop Menu ................................................................................................24
Functions in the Main Menu .........................................................................................25Functions in the Utility Menu .......................................................................................43Functions in the PowerPoint Link Menu .....................................................................46Functions in the Desktop Operation Menu .................................................................47Page list function ...........................................................................................................48Recorder function ..........................................................................................................49Capture function ............................................................................................................50Background color function ...........................................................................................51Change pointer (PB series only) ..................................................................................52Keyboard operation .......................................................................................................53Trademarks ...................................................................................................................54

- 3 -
IntroductionThis software offers effective and innovative presentations using Touch Screen LCD Display, Interactive Plasma Display, or Projector with Interactive function.
System Requirements
Computer IBM® PC/AT compatible
CPU Intel Architecture (Intel Core 2 processor or later)
Operating System Windows 10 (Home, Pro)Windows 8.1 (except for Windows RT version)
Interface USB 2.0
Memory 32-bit version: 2GB or more 64-bit version: 4GB or more
Disk Space 250MB or more of free space (In some cases, an additional 1.5 GB is necessary for installing the Microsoft® .NET Framework.)
Display Resolution: XGA (1024x768) - 4K (3840x2160)Colors: 32 bit or more *Only the primary monitor is supported when using multiple monitors.
Notes• In this document, the screenshots and operating procedure of Windows 10 are provided for
purposes of illustrating the operation. Depending on your model, there may be differences from the illustrations and screenshots in this document.
• If a user does not have administrative rights, the user should log off and log in again as a user with the administrative rights.
Needed software
Microsoft .NET Framework .NET Framework 3.5.1 or later (except for .NET Framework 4.5.2)
Microsoft Office PowerPoint PowerPoint 2010 (32bit), PowerPoint 2013 (32bit)

- 4 -
When using the Touch Screen LCD displayThe software supports LFB/BF/BFE/BQ series touch screen LCD displays. * For the latest information on supported models, see "Whiteboard Software" on the Panasonic
website (https://panasonic.net/cns/prodisplays/download/software/).
Starting the Software
The software does not need to be installed. It can be started directly from the executable file.
1. Connect a computer to the Touch Screen LCD display using a video cable.
2. Connect the computer to the Touch Screen LCD display using a USB cable.
3. Double tap the “WhiteBoard.exe” file.
Notes• Make sure to set the screen resolution of the computer to the range supported by the software
before starting the software. For information on the screen resolution, refer to “System Requirements”. ( page 3)
1. Right-click on the Desktop and click “Screen Resolution”. 2. Click the drop-down list for “Resolution” and select a resolution. 3. Click “Apply”. 4. A confirmation screen is displayed after changing the resolution. Click “Keep changes”.
• Perform setting changes for the Windows theme and Windows Aero while the software is not running. If the settings are changed while the software is running, the software may not work properly.

- 5 -
Shutting Down the Software
1. Tap the “Exit from the application” button in the menu.
2. Disconnect the computer from the Touch Screen LCD display.
Note• If you prefer not to see the effects when touching the screen, change the “Show visual feed-
back when touching the screen” settings on the computer. [For Windows 10 users]
1. Click the [Start] button on the Desktop screen.2. Click [Settings] -> [Ease of Access].3. Select [Cursor & pointer] and set “Show visual feedback around the touch points when I
touch the screen” of “Change touch feedback” to “Off”.[For Windows 8.1 users]
1. Display the charms on the Desktop screen. 2. Click [Settings] -> [Control Panel]. 3. Click [Hardware and Sound] and click [Pen and touch].
* If [Hardware and Sound] is not shown, just click [Pen and touch]. 4. Select the [Touch] tab and uncheck [Show visual feedback when touching the screen] in
[Touchfeedback]. 5. Click [OK].

- 6 -
When using the Interactive Plasma DisplayThe software supports electronic pens for PB series interactive plasma displays. * For the latest information on supported models, see "Whiteboard Software" on the Panasonic
website (https://panasonic.net/cns/prodisplays/download/software/).
Notes• For more information on the electronic pen and remote pointer kits, see the supplied operating
instructions. • Use both PB1 and PB2 pens in combination with their respective electronic pen adapters. For
example, a combined use of PB2 pen and the electronic pen adapter for PB1 pen will prevent the proper operation of the PB2 pen.
• The electronic pen response may be delayed or the software may malfunction if other appli-cations, anti-virus software, etc. are active. If the electronic pen is slow to respond, it may be affected by other USB devices. Remove devices other than the electronic pen from the USB connectors.
• The electronic pen can be used as a remote pointer when combined with an optical attach-ment.
Starting the Software
The software does not need to be installed. It can be started directly from the executable file.
1. Connect a computer to the Interactive Plasma Display.
2. Turn on the electronic pen.
3. Connect the electronic pen adapter to the USB port of the computer.
4. Double tap the “WhiteBoard.exe” file.
Notes• To use the electronic pen, the setting for the Interactive Plasma Display touch pen needs to be
turned on. See the supplied operating instructions for details. • Before using the electronic pens, the registration to the electronic pen adapter is required.
See “Registering Electronic Pens” for details on how to register pens. ( page 11)

- 7 -
• Make sure to set the screen resolution of the computer to the range supported by the software before starting the software. For information on the screen resolution, refer to “System Requirements”. ( page 3)
1. Right-click on the Desktop and click “Screen Resolution”. 2. Click the drop-down list for “Resolution” and select a resolution. 3. Click “Apply”. 4. A confirmation screen is displayed after changing the resolution. Click “Keep changes”.
• Rotate the screen display of your computer if the Interactive Plasma Display is installed in por-trait orientation. The operating system has a screen rotation function.
1. Right-click on the Desktop and click “Screen Resolution”. 2. Select the desired orientation (portrait or landscape) of the screen you want to rotate in
the “Orientation” field. 3. Click “Apply”. 4. A confirmation screen is displayed after changing the orientation. Click “Keep changes”.
• Perform setting changes for the Windows theme and Windows Aero while the software is not running. If the settings are changed while the software is running, the software may not work properly.
• If double-clicking does not work well when using the remote pointer kit, change the computer-side setting to “Single-click to open”. [For Windows 10 users]
1. Click the [Start] button on the Desktop screen.2. Click [Windows System] -> [Control Panel].3. Click [Appearance and Personalization] and click “Specify single- or double-click to open”
in [File Explorer Options].4. Select the “General” tab and select “Single-click to open an item (point to select)” of “Click
items as follows”.5. Select either “Underline icon titles consistent with my browser” or “Underline icon titles
only when I point at them”.6. Click [OK].
[For Windows 8.1 users]1. Display the charms on the Desktop screen.2. Click [Settings] -> [Control Panel].3. Click [Appearance and Personalization] and then [Folder Options].
* If [Appearance and Personalization] is not shown, just click [Folder Options]. 4. Select the [General] tab and select [Single-click to open an item (point to select)] of [Click
items as follows]. 5. Click [OK].

- 8 -
Shutting Down the Software
1. Tap the “Exit from the application” button in the menu.
2. Disconnect the electronic pen adapter from the USB port of the computer.
3. Turn off the electronic pen.
4. Disconnect the computer from the Interactive Plasma Display.
Notes• If you prefer not to see the effects when touching the screen, change the “Show visual feed-
back when touching the screen” settings on the computer. ( page 5)• If double-clicking does not work well when using the remote pointer kit, change the computer-
side setting to “Single-click to open”. ( page 7)

- 9 -
Operating the Electronic Pen
Up to four electronic pens can be operated simultaneously. The electronic pen can be used by registering with the electronic pen adapter. The electronic pen can be used as a remote pointer when combined with an optical attachment.
J Features of the Electronic Pen
There are two different ways to use the electronic pen.
1. “Using as an electronic pen” Touch the screen with the tip of the electronic pen to operate.
2. “Using as a remote pointer” The electronic pen, when equipped with the optical attachment, becomes a remote pointer that allows remote control of the pointer.

- 10 -
The following operations can be performed with the electronic pen or remote pointer.
•Drawing Write or draw characters or pictures.
•Selection Select various settings or functions by touching the menu buttons. Select the drawn character or picture, or an image loaded from a file.
•Dragging Move the selected content.
Note• For details, see the supplied operating instructions.

- 11 -
JRegistering Electronic Pens
Pairing Tool is used to register electronic pens.
1. Start Pairing Tool. Starting Pairing Tool from this software will reset the pen’s color information stored in this ap-plication to the default setting, irrespective of whether pairing or status check are executed.
- Tap the “Settings” button in the Main Menu of the software to display the Settings dialog. - Tap “Start Pairing Tool”. - The Pairing Tool is started.
2. Tap “Pairing”. - Tap “Cancel” to cancel registration.
3. Move the electronic pen that you want to register closer to the electronic pen adapter. For PB1 pen, turn on the power of the electronic pen while hold-ing down both “Button 2 (Mouse/pen selection button)” and “Button 3 (Function button)”.
For PB2 pen, turn on the power of the electronic pen while hold-ing down both “Remote Draw Button” and “Remote Erase But-ton” at once.
- Tap “Cancel” to cancel registration.
4. The “Pairing Completed” screen is displayed when the electronic pen is regis-tered. Tap “OK”.
Notes• No more than four electronic pens can be registered for one electronic pen adapter. • The electronic pen cannot be registered if four electronic pens have already been registered. • Only Step 3 needs to be performed when registering the first electronic pen. Perform Step 1
onward to register a second, third or fourth electronic pen. • The registrated electronic pen can only be used with the registered electronic pen adapter until
re-registering. • Electronic pens may malfunction if multiple Interactive Plasma Displays are used close togeth-
er. • Turn off nearby Interactive Plasma Displays when registering or unregistering electronic pens. • For details, see the supplied operating instructions.
- 12 -
JUnregistering the Electronic Pen
The Pairing Tool is used to unregister electronic pens.
1. Start Pairing Tool. Starting Pairing Tool from this software will reset the pen's color information stored in this ap-plication to the default setting, irrespective of whether pairing or status check are executed.
- Tap the “Settings” button in the Main Menu of the software to display the Settings dialog. - Tap “Start Pairing Tool”. - The Pairing Tool is started.
2. Tap “Unpairing All”.
3. The “Unpairing Completed” screen is displayed when the electronic pen is un-registered.
Notes• All registered electronic pens are unregistered when unregistration is performed. • Unregistered electronic pens need to be reregistered before they can be used again. • For details, see the supplied operating instructions.
JChecking Registration of the Electronic Pen
The Pairing Tool is used to check registration of the electronic pen (No. of pens paired, No. of pens which can be paired).
1. Start Pairing Tool. Starting Pairing Tool from this software will reset the pen's color information stored in this ap-plication to the default setting, irrespective of whether pairing or status check are executed.
- Tap the “Settings” button in the Main Menu of the software to display the Settings dialog. - Tap “Start Pairing Tool”. - The Pairing Tool is started.
2. The pairing status is displayed. Confirm, and tap “Exit”.

- 13 -
When using the Projector with Interactive functionThe software supports projectors with the interactive function (hereinafter referred to as “projectors”). * For the latest information on supported models, see "Whiteboard Software" on the Panasonic
website (https://panasonic.net/cns/projector/download/).
Starting the Software
The software does not need to be installed. It can be started directly from the executable file.
1. Connect the computer to the projector using a video cable.
2. Connect the computer to the projector using a USB cable.
3. Perform calibration.
4. Turn on the pen supplied with the projector.
5. Double tap the “WhiteBoard.exe” file.
Notes• SPDriver installation and calibration are required before using the software. See the interactive
software operating instructions of the projector for details. • Make sure to set the screen resolution of the computer to the range supported by the software
before starting the software. For information on the screen resolution, refer to “System Requirements”. ( page 3)
1. Right-click on the Desktop and click “Screen Resolution”. 2. Click the drop-down list for “Resolution” and select a resolution. 3. Click “Apply”. 4. A confirmation screen is displayed after changing the resolution. Click “Keep changes”.
• Perform setting changes for the Windows theme and Windows Aero while the software is not running. If the settings are changed while the software is running, the software may not work properly.

- 14 -
Shutting Down the Software
1. Tap the “Exit from the application” button in the menu.
2. Turn off the pen supplied with the projector.
3. Disconnect the computer from the projector.
Note• If you prefer not to see the effects when touching the screen with the electronic pen supplied
with the projector, change the “Show visual feedback when touching the screen” settings on the computer. ( page 5)

- 15 -
Touch controlThe software can be operated via touch control when using a separately sold optional optical touch panel with the PB series, when using the LFB/BF/BFE/BQ series, or when using a projector.
The software has two operation modes, “single mode” that supports gestures and “multi mode” that enables for multiple touch controls simultaneously.
J Single Mode Switch between touch control drawing and gesture supporting mode.
Notes• The single mode only allows one touch control drawing. • Multiple gestures cannot be used simultaneously. • The software is set to the single mode by default. • Gesture control can be performed on the projector using two supplied pens. To do so, tap the
“Select object” button in the main menu, and then perform the gestures. (If the “Select object” button is not tapped, unwanted points may be drawn.)
• When using the projector, gestures may be difficult depending on the projection environment.
J Multi Mode Switch to the mode that enables simultaneous multi-touch control.
Notes• Operations using gestures are not supported by the multi mode. • Function switches such as drawing color and width, etc., are applied to all touch controls si-
multaneously.

- 16 -
JGesture type
The single mode allows for drawing and operation using the following gestures.
Name Operating image Operation
Select with two fingers
■ Selecting an objectSelects the object when performed on an object.
Flick, or drag with two fingers
■ Changing a pageChange a page when performed on the screen of the Whiteboard mode or a slide of the PowerPoint Link mode.
■ Scrolling a pageScrolls the page zoomed in the Whiteboard mode.
Zoom-in, zoom-out ■ Zooming an objectZooms the selected object in/out when performed on the object.
■ Zooming a screenZooms the screen display in/out when performed on the Whiteboard screen.
• Cannot zoom a straight line in/out. ( page 27)
Rotate ■ Rotating an objectRotates the selected object when performed on the object.
• Cannot rotate straight lines. ( page 27)
Note• Multiple gestures cannot be performed simultaneously.

- 17 -
JGesture settings
When using a supported touch device, the “Gesture” table is displayed in the settings for setting gestures.
Enable rotation using gestures Check to enable rotation using gestures.
Enable the board eraser using gestures Check to enable the board eraser function using gestures.

- 18 -
JBoard eraser function (LFB/BF/BFE/BQ series only)
The eraser can be used by touching an area larger than the standard contact area on the screen with the palm of your hand, the board eraser supplied with the LFB/BF/BFE/BQ series, etc. It is useful when erasing a large area because the eraser can be used to erase drawn contents with-out switching the menu selection.
Board eraser function Touch an area larger than the standard contact area on the screen.
Note• When the board eraser function is not being used, it can be disabled in the “Gesture” tab of the
settings.

- 19 -
Software Operation Modes and Screen LayoutsThe software has three operation modes for effective presentations.
Note• Only the primary monitor is supported when using multiple monitors.
Whiteboard mode
The display is used as a whiteboard, and drawings and images can be inserted onto the screen. Also, up to 100 pages can be added, and content can be saved.
You can change the whiteboard's background using the background color button. For details, see the background color function. ( page 51)
Note• The desktop and other software shown on the screen cannot be operated on a transparent
screen background.
Desktop Operation mode
Other software and the desktop displayed on the screen can be operated.
Note• It is not possible to draw on the screen in this mode.

- 20 -
PowerPoint Link mode
Characters and pictures can be drawn on a slide during PowerPoint slideshow playback.
•Operation 1. Tap the “Change Mode” button in the menu to enter the PowerPoint Link mode. 2. Select a PowerPoint file.
- If PowerPoint is already running, a list of currently open PowerPoint files will be displayed. 3. Tap the “Change Page” button in the menu to switch between slides. 4. Tap the “Marker” button or the “Highlighter button in the menu to write or draw on a slide. 5. Tap the “End PowerPoint Link” button to exit the PowerPoint Link mode.
- The drawn characters and pictures on the slide can be saved in the PowerPoint file.
Notes• PowerPoint 2010 (32-bit version) or 2013 (32-bit version) needs to be installed on the comput-
er. • The PowerPoint link mode cannot be used if you use PowerPoint Viewer only.• You can use PowerPoint set to a file being marked as read-only or final in PowerPoint link
mode, but you cannot save characters or pictures that you have drawn on the slide.• When using PowerPoint 2013, the password for a password-protected PowerPoint file cannot
be entered at the start of PowerPoint Link mode. Enter the password in advance to open the PowerPoint file, and then start PowerPoint Link mode.
• If using PowerPoint 2013, the set screen transition effects will be disabled. • When using PowerPoint 2013 and linking a PowerPoint file with many pages, the file may be
linked as read-only after a message saying “Press the ESC key to cancel opening the docu-ment.” appears. In such cases, open the PowerPoint file before linking it.
• PowerPoint Link is not supported when an audio clip is inserted to PowerPoint 2013 files run-ning on Windows 8.1.
• When using the PB series, a drawing made with the Pressure-sensitive Sensor of the PB2 pen enabled is treated as if drawn with the Pressure-sensitive Sensor disabled when the object is saved in a PowerPoint file.

- 21 -
MenusThe menus contain various functions such as changing the color and thickness of the marker, or printing. The functions in the menus differ according to the operation mode.
Layout of the Main Menu
This menu is displayed in the Whiteboard mode and the PowerPoint Link mode. Tap the “Switch the menu” button will switch between the detailed menu and the simple menu.The menu changes to a tab by tapping the “Close Menu” button in the Whiteboard mode. In the PowerPoint Link mode it changes to the PowerPoint linkage menu. The menu position (height) can be changed by touching the bottom end of the menu and dragging up or down.
Change Mode
Close menu
Change page
Zoom in/Zoom out
Insert text
Select object
Highlighter
Other colors/Select background
Width
Erase all
Utility
Single mode
Exit from the application
Switch to the Simple Menu
Scroll
Undo/Redo
Straight Line/Assist Shape
Drawing
Marker
Color
Eraser
Multi mode
Settings
File operation
[Detailed menu]
Change Mode
Close menu
Select object
Highlighter
Color
Erase all
Single Mode
Exit from the application
Switch to Detailed Menu
Undo/Redo
Straight Line/ Assist Shape
Drawing
Marker
Width
Insert text
Multi Mode
File operation
[Simple menu]
Note• The single mode and multi mode are displayed only when using a separately sold optional
optical touch panel with the PB series, when using the LFB/BF/BFE/BQ series, or when using a projector.

- 22 -
J Switch the menu Switch between the detailed menu and the simple menu.
Button Description
Switch to the detailed menu.
Switch to the simple menu.

- 23 -
Layout of the Utility Menu
Tap the “Utility” button in the Main Menu to display this menu. For information on Utility Menu operations, see “Functions in the Utility Menu”. ( page 43)
Presentation Tool
Recorder
Information
Capture
Layout of the PowerPoint Link Menu
The tab menu is displayed when you tap the “Close Menu“ button in the main menu in the PowerPoint Link mode. Tap the tab to display the Main Menu. The menu position (height) can be changed by touching “Show menu” in the menu and dragging it up or down. For information on PowerPoint Link Menu operations, see “Functions in the PowerPoint Link Menu”. ( page 46)
Change page
Show menu
Display page list
End PowerPoint Link

- 24 -
Layout of the Desktop Menu
The menu is displayed in the Desktop Operation mode. The menu position (height) can be changed by touching the top or bottom end of the menu and dragging up or down. For information on Desktop Menu operations, see “Functions in the Desktop Operation Menu”. ( page 47)
PowerPoint Link mode
Whiteboard mode
Capture
Recorder
Desktop operation mode
Close menu

- 25 -
Functions in the Main Menu
J Close menuClose the menu.
J Show menu Display the menu.
J Change Mode Switch between the Desktop Operation mode, the Whiteboard mode and the PowerPoint Link mode.
Button Mode
Desktop Operation mode
Whiteboard mode
PowerPoint Link mode
J Change page Update pages.
Notes• In the Whiteboard mode, the screen switches to the next or previous page. • In the PowerPoint Link mode, the next or previous slide is displayed.
J Zoom in/Zoom out The screen can be zoomed in/out by 100 to 300%, in increments of 25%.
Note• When the screen is zoomed in, smoothing will be automatically enabled.
J Scroll Scroll across the screen when it is zoomed in.

- 26 -
J Undo/Redo Operations such as drawing will be erased, and the returned operation can be executed again. The Undo and Redo function are not available for a operation of a whitebaord page such as the addition, deletion and duplication.
Note• Up to 50 actions can be undone.
J Insert text Inserts text. Tap the screen to decide the text insertion position. Then the “Text properties” panel appears for changing text settings.
Item DescriptionFont name Selects a font.
Font size Selects a font size.
Font color Selects a font color.
Applies/releases bolding.
Applies/releases italicizing.
Applies/releases underlining.
Displays the tablet PC input panel.

- 27 -
Notes• Some combinations of computer environment and font types may prevent characters from dis-
playing properly. • When using the PB series, “Text properties” settings will be memorized on a per-pen basis and
will be carried over to the next text insertion and character recognition. However, if a change has been made in the character recognition tab in the Settings dialog, the change will be re-flected in the settings of every pen.
• When using the tablet PC input panel, operations of [Help topics] and [Options] in [Tools] need to be performed in the Desktop Operation mode.
J Straight Line/Assist Shape Drawing Draw a straight line or a shape.
Button DescriptionDraw straight a line.The angle of the straight line can be changed in increments of 15 degrees.
Draw a circle.Draw a straight line with horizontal or vertical operation.
Draws a rectangle.A straight line can be drawn through horizontal or vertical operation.
Draws a triangle.A straight line can be drawn through horizontal or vertical operation.
Note• Zooming in/out and rotation of straight lines using gestures are not supported.

- 28 -
J Select Object Select an object from among the characters, pictures and images drawn, and move, zoom in/out or rotate the object. Selection is performed for one object at a time. An object is one continuous line or one imported image.
Selecting an Object Objects can be selected in two ways. The selected object is surrounded by a dotted-line square.
• Touching an object Touch an object to select it. When some objects are touched continuously, only the object touched at the end is cho-sen.
• Surrounding an object Touch a point where there is no object and drag to draw a line that indicates the selection area. Objects in the area surrounded by the line are selected.
Moving an Object While still touching inside the dotted line surrounding the selected object, drag to move the object.
Zooming In/Out an Object Drag one of the square dots ( ) on the sides and corners of the dotted-line square sur-rounding the selected object to zoom in or out the object.
Rotating an Object Drag the round dot ( ) on the dotted-line square surrounding the selected object to rotate the object.
Deselecting an Object Touch outside the drawn area to deselect all objects.

- 29 -
The Object operation menu
The Object operation menu is displayed when the “Object operation menu” button indicat-ed on the selected object is tapped.
In addition, when the selected object is locked, the “Object operation menu” button chang-es to . Pressing it will display the following menu.
The following operations are available through the Object operation menu.
• Cut Cuts a selected object.
• Copy Copies a selected object.
• Paste Pastes a previously cut or copied object.
• Delete Delete a selected object.
• Duplicate Duplicate a selected object.

- 30 -
• Character recognition Displays a list of candidates for converting a selected object’s freeform lines into text. Se-lect any text candidate and touch “OK” to convert the object into text.
• Edit text Displays the “Text properties” panel, which allows re-editing of a selected text object. For information on how to use the “Text properties” panel, see “Insert text”. ( page 26)
• Lock - Lock (Not editable) All edit operations will be disabled for the currently selected object.
- Move only With the exception of moving the currently selected object, all edit operations will be dis-abled.
- Move and rotate With the exception of moving and rotating the currently selected object, all edit opera-tions will be disabled.
- Unlock All edit operations will be enabled for the currently selected object.
• Group Multiple objects being simultaneously selected can be combined into a single object.
• Ungroup A group of selected objects is ungrouped.

- 31 -
Notes• Zooming in/out and rotating cannot be performed when multiple objects are selected at once.
* If objects are combined into a group, zooming in/out and rotating can be performed because those objects are treated as a single object.
• Grouped objects cannot be ungrouped if the size of the grouped objects zoomed out is less than a certain size. To ungroup the objects, zoom in and make them larger than the fixed size. Note that when ungrouping is disabled the ungroup menu turns grey, indicating the disable state.
• When character recognition cannot be used due to OS restrictions, etc., the “Character recog-nition” menu will be inoperable.
• The Cut, Delete, Duplicate and Lock operations in the Object operation menu affect all the selected objects.
The Paste object menu If a location without an object is tapped without having selected an object, the Paste object menu will be displayed.
• Paste Pastes an object when there is data that can be pasted, such as an image / text, on the clipboard.
Notes• Not selectable when there is no data on the clipboard that can be pasted. • While the Paste object menu is displayed, drawing, operation and operation of the keyboard
cannot be performed.

- 32 -
J Marker Write or draw characters or pictures freely.
Note• Free drawn or written lines may be distorted if smoothing is enabled, depending on the writing
speed. * Smoothing can be enabled/disabled in the Settings dialog box.
J Highlighter Write or draw characters or pictures freely in translucent color. This is ideal for highlighting words or pictures that you want to emphasize.
Note• Free drawn or written lines may be distorted if smoothing is enabled, depending on the writing
speed. * Smoothing can be enabled/disabled in the Settings dialog box.
J Color Switch the drawing color.
J Other colors/Select background Switch the drawing color or the color and type of screen background.
Notes• If the screen background is transparent, the desktop or open programs are shown but cannot
be operated. • Switch to the Desktop Operation mode to operate the desktop.
J Width Change the width of selected marker, highlight marker and eraser.

- 33 -
J Eraser Erase written and drawn content.
Notes• Each deletion removes one line segment drawn with a single stroke.
* Partial freeform line erase can be enabled/disabled in the “Setting” dialog box. * An object being drawn using Straight Line/Assist Shape Drawing cannot be partially erased.
• The eraser operation may slow down when a number of lines or objects have been drawn, or when the partial erase is enabled.
• The image cannot be erased with the eraser. Use Delete in the Object operation menu.
J Erase all Erase all characters or pictures drawn on the screen. However, locked characters, shapes, images or text will be left undeleted.
J Multi Mode (Touch control only) Switch to the mode that enables simultaneous multi-touch control.
Notes• Operations using gestures are not supported by the multi mode. • Function switches such as drawing color and width, etc., are applied to all touch controls si-
multaneously.
J Single Mode (Touch control only) Switch between touch control drawing and gesture supporting mode.
Notes• The single mode only allows one touch control drawing. • Multiple gestures cannot be used simultaneously. • The software is set to the single mode by default. • Gesture control can be performed on the projector using two supplied pens.
To do so, tap the “Select object” button in the main menu, and then perform the gestures. (If the “Select object” button is not tapped, unwanted points may be drawn.)
• When using the projector, gestures may be difficult depending on the projection environment.

- 34 -
J Settings Configure settings relating to the entire software. Tap the “OK” button to apply the settings.
•General tab Configures the general settings of the software.

- 35 -
Menu position One Side : Display one menu on the left or right side of the screen and close the other.
Both Sides : Display the menus on both sides of the screen.
Set save destination A destination folder can be indicated to save files created with the software.
Start-up mode Whiteboard mode: Starts the software in the whiteboard mode.Desktop Operation mode: Starts the software in the Desktop Operation mode.
Whiteboard back-ground color master setting
Sets the screen background color used when starting a project or adding a new page.
Drawing settings Automatically groups free lines:Check to automatically group free lines written within a certain time inter-val.
Enable the smoothing process for the free line:Check this box to smooth drawn free lines.
Enable partial freeform line erase:Check this box to partially erase a freeform line.
Enable Color Univer-sal Design
Check this box when using color palettes or graphic tools that support Color Universal Design. The software will automatically restart whenever Color Universal Design is enabled or disabled.
Enable UI animations Check this box to use animation when switching menus.
Show the tablet PC input panel to select a file/folder
Check this to display the tablet PC input panel to select a file and a folder.
Automatically hide minimized menus
[PB series only]Check to hide minimized menus automatically. To redisplay the menus, move the electronic pen closer to where the menus were.• This is disabled when you are using the separately sold optional optical
touch panel.
Autosave project files Check to automatically save a project file as recovery data.In such cases as when the software was aborted or terminated abnormally, data recovery from the autosaved project may be possible after the next software startup.
Notes• The tablet PC input panel may be shown when the edge of the screen is touched even if [Show
the tablet PC input panel to select a file/folder] is unchecked. This can be prevented by selecting [Tool] -> [Option] and removing the check mark from [Use the input panel tab].
• The Autosave projects function is not intended to be used in place of “Save project”. Even if a project has been autosaved, it is still necessary to save the project at the end of a session.
• “Automatically group free lines” will be disabled from touch control in the multi mode. • Color Universal Design (CUD) refers to the design that carefully considers the use of color to
ensure that information is conveyed correctly to people who see color differently from ordinary people (due to congenital color blindness, cataracts caused by aging, glaucoma, or equivalent).

- 36 -
•Character recognition tab Configures the default settings for text insertion and character recognition.

- 37 -
Language selection Selects a language for character recognition.
Font Name Selects the font type of the text.
Size Selects the font size of the text.
Applies/releases bolding.
Applies/releases Italicing.
Applies/releases underlining.
Notes• For the character recognition on the object operation menu, the font size is determined from
the size of the object. • When character recognition cannot be used due to OS restrictions, etc., “Language selection”
will not be available.

- 38 -
•Recorder tab Configures the settings related to the recorder.

- 39 -
Minimize the operation window at the start of recording
Check to minimize the operation window of the recorder automatically at the start of recording.
File format Specifies a file format for saving a movie file. Select either AVI or WMV.
Recording mode Specifies the image quality for saving movies. Select from among Image quality priority, Balance or Recording time priority.
Record sounds Check to include sounds when saving a movie.
Set save destination Sets the save destination for movies.
Select folder Selects the save destination for movies.
Free disk space Shows the available space on the destination disk. Use as a guide for recording.
Expected recording time Shows the maximum time a recording is expected to take with the speci-fied settings. Use as a guide for recording.
Notes• To record sounds, it is necessary for the computer to be equipped with a microphone or similar
recording device. • If a location other than a local hard disk such as a removable disk is selected as a save desti-
nation, recording may not be successful due to insufficient writing speed.

- 40 -
•Pen tab (PB series only) When the PB series electronic pen is used, the “Pen” tab is displayed in the settings for set-ting the electronic pen.

- 41 -
Expand Pen Button Function
For PB1 penSelects a function to assign to Button 2 (Mouse/pen selection button).Selects a function to assign to Button 3 (Function button).
For PB2 penSelect the function to be assigned to the plus button.Select the function to be assigned to the minus button.
Next Page/Page Down : Move to the next page.Previous Page/Page Up : Return to the previous page.Zoom in : Scales up the screen.Zoom out : Scales down the screen.None : Disable the expansion function.
Enable Pen Color Set-ting function
You will change the color with the Button 3 (Func-tion button) when using PB1 pen without the optical attachment attached.PB2 pen is not available.
Pressure-sensitive Sensor function set-ting
Enable the pressure-sensitive sensor:Draws a line varying in thickness along its length.
Enable smoothing for pressure-sensitive drawing:Check this box to smooth the character or figure line drawn using the Pres-sure-sensitive Sensor function.* Enabling the Pressure-sensitive Sensor function may slow down drawing.* You can only use PB2 pens compatible with the Pressure-sensitive func-
tion.
Start Pairing Tool Start “Pairing Tool” to register/unregister/check registration of the electronic pen.
Notes• “Expand Pen Button Function” -> “Enable Pen Color Setting function” is available when PB1
pen is not equipped with the optical attachment. It is not available when using the PB2 pen. For information, see “When using the Interactive Plasma Display”. ( page 6)
• You cannot use the Pressure-sensitive Sensor function when the electronic pen, equipped with the optical attachment, is used as a remote pointer.
• When a drawing made with the Pressure-sensitive Sensor of the PB2 pen enabled is saved in a PowerPoint file, the drawing is treated as if drawn with the Pressure-sensitive Sensor dis-abled.
• The Pressure-sensitive Sensor function is only good for freeform lines drawn with the marker. • If you set up the Pressure-sensitive Sensor function to enable smoothing, a freeform line(s)
drawn or written may be distorted, depending on the writing speed or variations in thickness. • The Pressure-sensitive Sensor function is only available when using a PB2 pen that supports
pressure sensitivity. For information, see “When using the Interactive Plasma Display”. ( page 6)
• For information on pairing electronic pens, see “Registering Electronic Pens”. ( page 11)

- 42 -
J Utility Display the Utility Menu. ( page 23)
J File Operation Tap the “File Operation” button will display the following submenu. Written and drawn content can be saved in various formats by selecting the desired format from the submenu.
Submenu Item Description File format Applicable PagesImport Image File Imports an image from a file
and inserts it in the screen.JPEG, PNG or
BMP formatCurrent page of the Whiteboard mode
Create new project Create a new project. WBP/WBPX file formats
All pages in Whiteboard mode
Read project Read data drawn in the White-board mode.
WBP/WBPX file formats
All pages in Whiteboard mode
Save project Save overwrite the data in the Whiteboard mode.
WBPX file format All pages in Whiteboard mode
Save as project Save data drawn in the White-board mode.
WBPX file format
All pages in Whiteboard mode
Save as PDF (All pages)
Convert the data drawn in the current mode to PDF and save.
PDF All pages drawn in the selected mode
Save as PDF (Current page)
Convert the data drawn in the current mode to PDF and save.
PDF The current page in the selected mode
Save as image (Current page)
Convert the data drawn in the current mode to an image and save.
JPEG or BMP format
The current page in the selected mode
Notes• Files are saved to the destination indicated in “Settings” in the Main Menu. • Images up to 50 MB in total can be inserted into each page.
J Exit from the application Exit the application.

- 43 -
Functions in the Utility Menu
J MailThe default email software is opened. A PDF file is created from all pages drawn in the current operation mode and attached to an email in the email software.
Notes• Pages with no written or drawn content are not converted to PDF. • PDF files are created in the destination indicated in “Main Menu” -> “Settings”.
J Print Print the page displayed in the current operation mode.
Normal print Output the page to the printer set in “Default Printer”.
Advanced print Print manually using the standard print dialog of the operating system.
Notes• The screen will not be captured correctly and may not be printed correctly if other software do
not allow screen captures. • Only the current page is printed, regardless of the number of pages displayed in the standard
print dialog of the operating system when performing “Advanced print”. • Printer information may not be obtained correctly for certain printers or versions of printer driv-
ers, causing the page not to be printed correctly.
J Capture Displays the Capture operation panel. Capturing can be performed by operating the displayed panel. For information on the Capture operation, see “Capture function”. ( page 50)
J Recorder Displays the recorder operation panel. Operate the recorder operation panel to save movies. For information on how to operate the recorder, see “Recorder function”. ( page 49)

- 44 -
J Information Display the Information Menu.
Download the latest version
Close submenu
Version Information
Operating Instructions
Operating Instructions The software support site is displayed in a web browser.
Download the latest version The software support site is displayed in a web browser.
Version Information Display the version information of the software. In addition, pressing the “Download the latest version” button displays the software support web-site in a web browser.

- 45 -
J Presentation Tool Display the presentation operation panel. The presentation operation panel is used to start each presentation tool.
Button Description
Magnifier
Display a magnifier.Changes the size : Drag and drop the edge of the windowMoves the display position: Drag the windowChanges the enlargement factor: Press to select an enlargement factor.
Screen Shade
Display the shade that covers the entire screen.Changes the size : Drag and drop an area close to the upper, bottom, left or right handle.Moves the display position: Drag the center of the shade.• Drawing and object operations cannot be performed when started from
the shade.• End the spotlight if it is displayed.
Spotlight
Display the shade that covers the screen with the exception of the area (spot) specified using the range selection.
Changes the size : Drag and drop the edge of the spotMoves the display position: Drag the shaded area• Drawing and object operations cannot be performed when started from
the shade.• End the screen shade if it is displayed.
Fade-out Marker
Drawing switches to a drawing made using the Fade-out Marker that fades out after the elapse of a certain period of time.
• Select another drawing tool to cancel the Fade-out Marker.• Erasing using the eraser, object selection, and project saving cannot be
performed.• This tool is not available in the Desktop Operation mode.
Fade-out Highlighter
Drawing switches to a drawing made using the Fade-out Highlighter that fades out after the elapse of a certain period of time.
• Select another drawing tool to cancel the Fade-out Marker.• This tool is not available in the Desktop Operation mode.• Erasing using the eraser, object selection, and project saving cannot be
performed.
Note• The screen shade and the spotlight cover some menus of the software itself.
When using the menus, adjust the position of the shade so that the menus can be seen.

- 46 -
Functions in the PowerPoint Link Menu
J Change page Display the next or previous slide.
J Return to Top Returns to the first slide.
J Page list Displays a list of page thumbnails at the bottom of the screen. Touching a page thumbnail will switch the display to the corresponding page. For information on how to operate the page list, see “Page list function”. ( page 48)
J End PowerPoint Link End the PowerPoint Link mode.
J Recorder (recording) Displayed only when recording with the recorder. Pauses recording and opens the recorder op-eration panel. For information on how to operate the recorder, see “Recorder function”. ( page 49)
Notes• A dialog asking if you would like to save written and drawn content in a PowerPoint file is dis-
played when exiting PowerPoint Link mode. • If you do not save the content in a PowerPoint file, it will be saved in the destination indicated
in “Settings” in the Main Menu. The file name consists of the original file name and a serial number.

- 47 -
Functions in the Desktop Operation Menu
J Close menuClose the menu.
J Change mode Switch between the Desktop Operation mode, the Whiteboard mode and the PowerPoint Link mode.
Button Mode
Desktop Operation mode
Whiteboard mode
PowerPoint Link mode
J Capture
Displays the Capture operation panel. Capturing can be performed by operating the displayed panel. For information on the Capture operation, see “Capture function”. ( page 50)
J Recorder Displays the recorder operation panel. Operate the recorder operation panel to save movies. For information on how to operate the recorder, see “Recorder function”. ( page 49)
J Recorder (recording) Displayed only when recording with the recorder. Pauses recording and opens the recorder op-eration panel. For information on how to operate the recorder, see “Recorder function”. ( page 49)

- 48 -
Page list function
Page list button Displays a list of page thumbnails at the bottom of the screen.
Touching an individual thumbnail page will switch the display to the corresponding page. In Whiteboard mode, the “Page operation menu display” button is displayed on the page being selected on the page list.
Item DescriptionDelete page Deletes the selected pages.
Duplicate Duplicates the selected pages and inserts them after the applicable page.
Add new page Inserts a new page after the selected page.
The page order can be changed by dragging and dropping a touched page. Pages that are not displayed on the page list can be displayed by tapping the triangular arrow on each side of the page list. In addition, by continually tapping the triangular arrow, it is pos-sible to sequentially page up or down.
Notes• The page list cannot be operated by multiple touch controls at once. • Likewise, the page list cannot be operated by multiple electronic pens at once if using the PB
series. • The page list cannot be operated by gestures.
Recorder button Displays the recorder operation panel.
The recorder button changes to , and pressing the button pauses recording and opens the recorder operation menu.

- 49 -
Recorder functionRecords/saves the screen area selected with the recorder operation panel as a movie.
Button Description
Starts recording the entire screen.
Starts recording the area specified in the window.Specifying a window to record will cause recording to start.Even if the window is moved after recording starts, the specified area will con-tinue being recorded.
Starts recording inside the area specified using the range selection.Specify an area to record. Releasing the drag will cause recording to start.
0 : 00 : 00 Displays the amount of time that has elapsed since the start of recording.
Pauses recording.(This only appears during recording when the operation panel's minimize function is disabled.)
Resumes recording.
Stops and saves a recording.
Configures settings.
Notes• If you want to disable the function that minimizes the operation panel when recording starts, do
so from the Recorder tab of the settings menu.• Even when the recorder operation panel is minimized while recording is in progress, the re-
cording will continue without being interrupted. To redisplay the minimized recorder operation panel, press the recorder button.

- 50 -
Capture functionOn the capture operation panel, the screen can be saved as an image in a Whiteboard page or a file.
Button Description
Captures the entire screen.
Captures the selected window.
Captures the selected area.
Save image as
Select the save destination for the captured image from the following.
• New pageInserts a new page in Whiteboard mode and pastes the captured image.
• Current pagePastes the captured image to the page selected in Whiteboard mode.
• ClipboardStores the captured image on the clipboard.
• File save (JPEG)Saves the captured image as a JPEG format image.
• File save (BMP)Saves the captured image as a BMP format image.
Note• When other software programs that do not permit screen capturing are open, the screen cap-
ture may not be successful.

- 51 -
Background color functionIn Whiteboard mode, you can change the screen's background color to transparent with one touch using the background color button.Pressing the button again restores the color specified as the master setting for the whiteboard background color.
[Background button]
Notes• If the master setting for the whiteboard background color is set to transparent, the background
color will be changed to white.• The background of the screen can be changed to a color or pattern other than transparent in
“Other colors/Select background”.

- 52 -
Change pointer (PB series only)
J Change PointerThe pointer can be changed.
•In the Whiteboard mode or the PowerPoint Link mode Select from the Utility Menu in the Main Menu (detailed menu).
[Utility menu]
•In the Desktop Operation mode
Select from the Desktop Operation mode menu.
Note• The pointer cannot be shown on the tablet PC input panel.

- 53 -
Keyboard operationThis software can be operated with the keyboard.
Keyboard operation Description
Ctrl + Z Undoes a operation such as drawing.
Ctrl + Y Redoes the undone action.
Ctrl + C Copies the currently selected object.
Ctrl + X Cuts the currently selected object.
Ctrl + V Pastes the copied object.
Delete Deletes the currently selected object.
Esc Exits the PowerPoint Link mode.
→ or ↓ Moves to the next slide page in PowerPoint Link mode.
← or ↑ Moves to the previous slide page in PowerPoint Link mode.

https://panasonic.net/cns/projector/© Panasonic Corporation 2016
Trademarks • Microsoft, Windows, PowerPoint, and Aero are either registered trademarks or trademarks of
Microsoft Corporation in the United States and/or other countries. • IBM is a registered trademark or trademark of International Business Machines Corporation in
the United States. • Intel and Intel Core 2 are registered trademarks or trademarks of Intel Corporation in the Unit-
ed States and/or other countries. • All other names such as company names and product names are trademarks or registered
trademarks of their respective companies.
W0316AM5010 -PS