one drive - university of ottawa
TRANSCRIPT

One Drive
Background OneDrive is a cloud storage service that comes with Office365. It has become the go to resource for
storing and sharing files in the cloud. Associates from within and outside of uOttawa can access, change
and share documents.
Why Use It You can synchronize files between the cloud and a local folder. You can access files from multiple devices (compatible with Windows and Mac operating systems). Eases collaboration by sharing access to files with internal and external parties.
How to Access From within a web browser navigate to office.com Sign in with your uOttawa email address. Click on the OneDrive icon either from the left hand side menu options or from the series of icons
located at the top of your screen.
How to Upload You can create a new document (Word, Excel, PowerPoint, etc.) from within OneDrive by
clicking on New and selecting the document type you would like to create.

o You will be creating a document using a web application so you may notice a reduction
in formatting features available for use.
Alternatively, you can upload a document that you’ve already created on your local computer
drives by clicking on Upload. Choose the document or folder you would like to upload into
OneDrive.
o You can also drag and drop your documents into OneDrive.
How to Share To share a folder a file, hover your mouse over to the left of the folder/file name until a radio
button becomes active.

Click on the radio button so you can activate additional options to the right of the folder/file
name.
Click on the three vertical dots to view a variety of options related to folder/file.
Click on the Share arrow to view a variety of sharing options. A new pop-up window will appear.

Specify whether the recipients of the link are allowed to edit the documents shared with them
by clicking on the “People you specify can view” arrow.
Use the checkbox to indicate if recipients are allowed to edit the document(s).
Remember to click apply to save your settings.

Copy the link and enter into an Outlook email message to share with the desired parties.
Or enter a series of email addresses from within OneDrive, add a message to the recipients and
click on the Send Button.
If a sharing option is unavailable, check with your IT team, as they may need to configure
external sharing.

How to Un-share Documents Click on radio button on the left of a folder/file to activate additional options.
In the upper right hand corner of your screen click on the “I” icon for additional information on
the selected folder/file.
A side bar appears where you can view recent activity and manage current access to the
folder/file.
Click on the Manage Access hyperlink

o From within Manage Access you can access the link you had previously generated to share
access, copy it and share the link again.
o From within Manage Access you can also remove /deactivate access. Click on the three
vertical dots.

o Click on the “X” besides the link to remove access to the link.
Please note the link shared with others will not expire. Users will continue to have access to your
folder/file in perpetuity without your management. If you want to remove user’s access to the files, you
must remove access directly within OneDrive.
Options As the amount of files in your OneDrive grows, you may find it easier to change the listing views of your
OneDrive’s content.
Use the Sort options to sort through contents by document name, document type (Word, Excel,
PDF) last modified, etc.
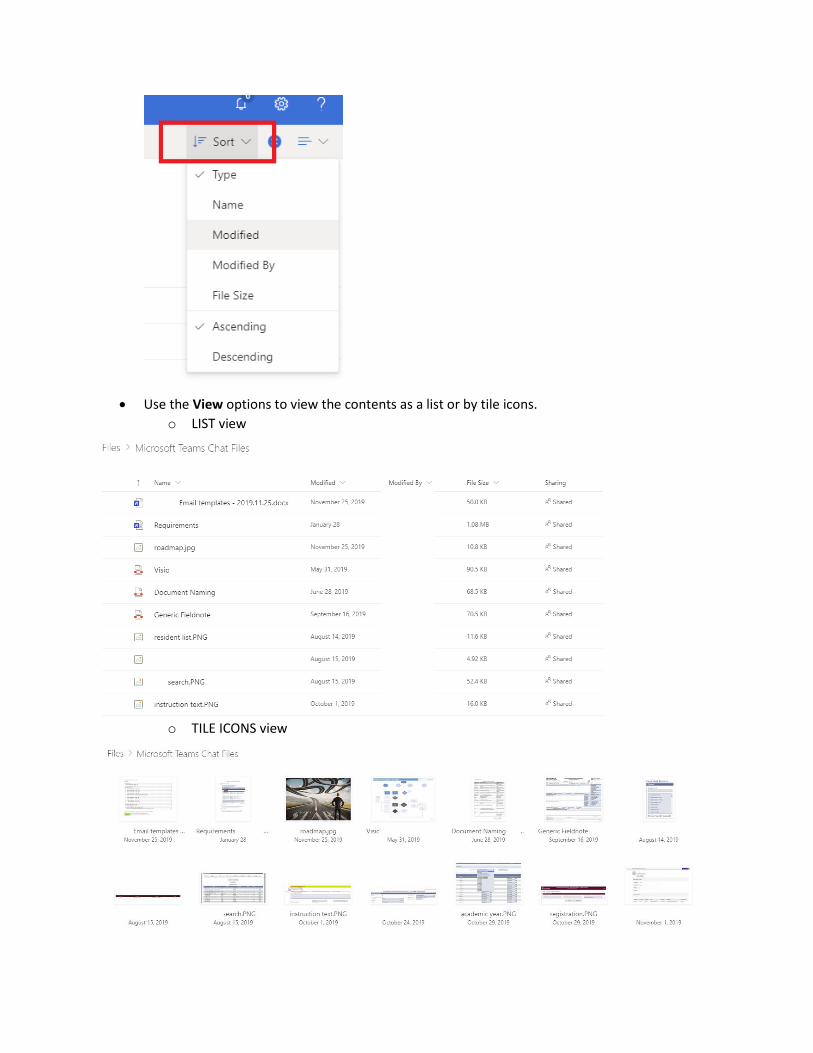
Use the View options to view the contents as a list or by tile icons.
o LIST view
o TILE ICONS view