omap/osp isp approval job aid · web viewa separate window will pop up showing a calendar. begin...
TRANSCRIPT

Learning Management System Logistics Manager Job Aid
Learning Management System Logistics Manager Job Aid
Contents
Purpose..........................................................................................................................................2Job Aid Organization.....................................................................................................................2Your Tasks.....................................................................................................................................3Accessing the Administrative Menu...............................................................................................4Create a Course............................................................................................................................5Assign training role(s) to a course.................................................................................................8Create/Edit a Facility....................................................................................................................12Create a room in a facility............................................................................................................17Create a course offering..............................................................................................................22Create and upload courseware....................................................................................................29Create a module and assign courseware to a module................................................................47Enroll a student in a course.........................................................................................................51Unenroll a student in a course.....................................................................................................58Batch enroll students...................................................................................................................65Create a certified investigator course or exam............................................................................68Create a certified investigator course offering.............................................................................72
Version 2.0 Page 1

Learning Management System Logistics Manager Job Aid
PurposeThe Home and Community Services Information System (HCSIS) project is using a Learning Management System (LMS) to assist in maintaining training logistics, including registration and tracking attendance. Currently, end user information is loaded into the LMS. The LMS generates a User ID, password, and instructions on accessing the LMS, which is distributed via email to the end user.
Job Aid OrganizationThis job aid is organized with the following subsections:
Your Tasks: The Tasks section outlines the steps necessary to complete this job aid. In addition, this section identifies the HCSIS screens used to complete the tasks.
Version 2.0 Page 2
Learning Management System Logistics Manager Job Aid
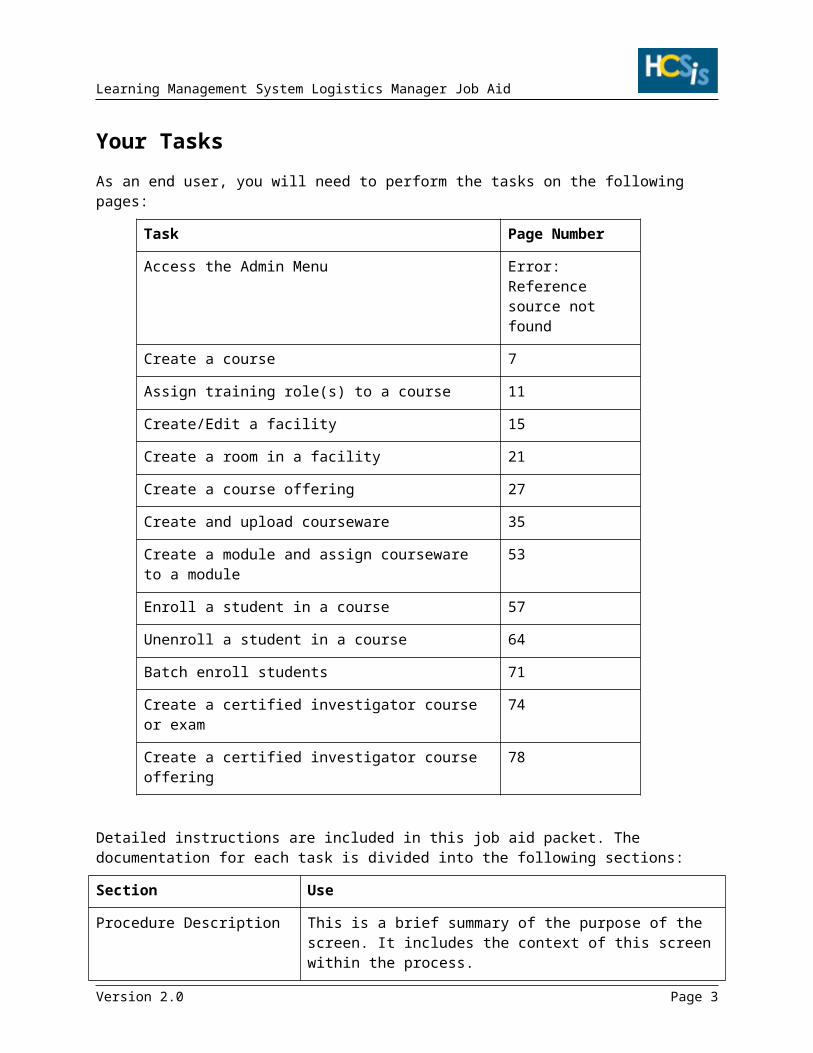
Your TasksAs an end user, you will need to perform the tasks on the following pages:
Task Page Number
Access the Admin Menu Error: Reference source not found
Create a course 5
Assign training role(s) to a course 8
Create/Edit a facility 12
Create a room in a facility 17
Create a course offering 22
Create and upload courseware 29
Create a module and assign courseware to a module 47
Enroll a student in a course 51
Unenroll a student in a course 58
Batch enroll students 65
Create a certified investigator course or exam 68
Create a certified investigator course offering 72
Detailed instructions are included in this job aid packet. The documentation for each task is divided into the following sections:
Section Use
Procedure Description This is a brief summary of the purpose of the screen. It includes the context of this screen within the process.
Dependencies The steps that precede the start of a procedure.
Steps This describes the steps for completing the procedure.
Version 2.0 Page 3

Learning Management System Logistics Manager Job Aid
Accessing the Administrative MenuProcedure DescriptionSelect Admin Menu from the left or top menu bar to display the LMS Administration menu. The menu contains the following sections:
Instructor-led Courses Web based training Reporting
Dependencies You will not have access to the Admin Menu until the System Administrator has
assigned you the security role of Logistics Manager.
You must log onto the LMS in the following location: www.humanservices-r.state.pa.us/hcsislms
Steps1. Choose the “Admin Menu” link.
NOTE: Click on the link on the left menu or the top menu bar to access the Administrative Menu. If the Admin Menu is not displaying on the left menu bar, click on the plus (+) sign next to LMS Admin.
Version 2.0 Page 4

Learning Management System Logistics Manager Job Aid
Create a CourseProcedure DescriptionAdd a training course to the LMS.
Dependency You must click “Admin Menu” to access this page.
Steps1. Click “Courses.”
Version 2.0 Page 5

Learning Management System Logistics Manager Job Aid
Create a Course (continued)The Courses by Training Type screen displays:
2. Click “Create a course.”
NOTE: If you have system administrator permissions, you will need to select a Training Type for the listing of courses to appear.
Version 2.0 Page 6

Learning Management System Logistics Manager Job Aid
Create a Course (continued)The Enter or Edit Course Information screen displays:
3. Complete the following fields:
Course Name Enter the Name of the course, beginning with the course ID.
Description Enter a brief description of the course, including course objectives.
Audience List the roles that should attend this course.
Requirements List the prerequisites in order to take this course.
Training Hours Leave this field blank unless this course qualifies as continuing education credits.
Allocate By Course Check this field if you wish to allocate a specific number of seats to each entity.
4. Click [Save].
Version 2.0 Page 7
Tip: Fields marked with are required fields and must be completed in order to save information on the screen.

Learning Management System Logistics Manager Job Aid
Assign training role(s) to a courseProcedure DescriptionAfter you save your new course, the LMS automatically adds it to the list of courses. You must edit the course to assign training role(s). When a role is assigned to a course, users that have the assigned role can register for course classes.
Note: If you assign a role to a course immediately after creating the course, the LMS will automatically direct you to the list of courses to edit. Otherwise, you must click “Admin Menu” again and then click “Courses.”
Dependencies A course must be created in the LMS.
You must click “Courses” from the Admin menu.
Steps1. Click “Edit” to the right of the course to assign it a role.
Version 2.0 Page 8

Learning Management System Logistics Manager Job Aid
Assign training role(s) to a course (continued)The Enter or Edit Course Information screen displays:
2. Click “Add a new role.”
Version 2.0 Page 9

Learning Management System Logistics Manager Job Aid
Assign training role(s) to a course (continued)The Link a Role to a Course screen displays:
3. Select a role from the Training roles list.
4. Click the right arrow [] button to move the roles to the Assign roles list box.
Version 2.0 Page 10

Learning Management System Logistics Manager Job Aid
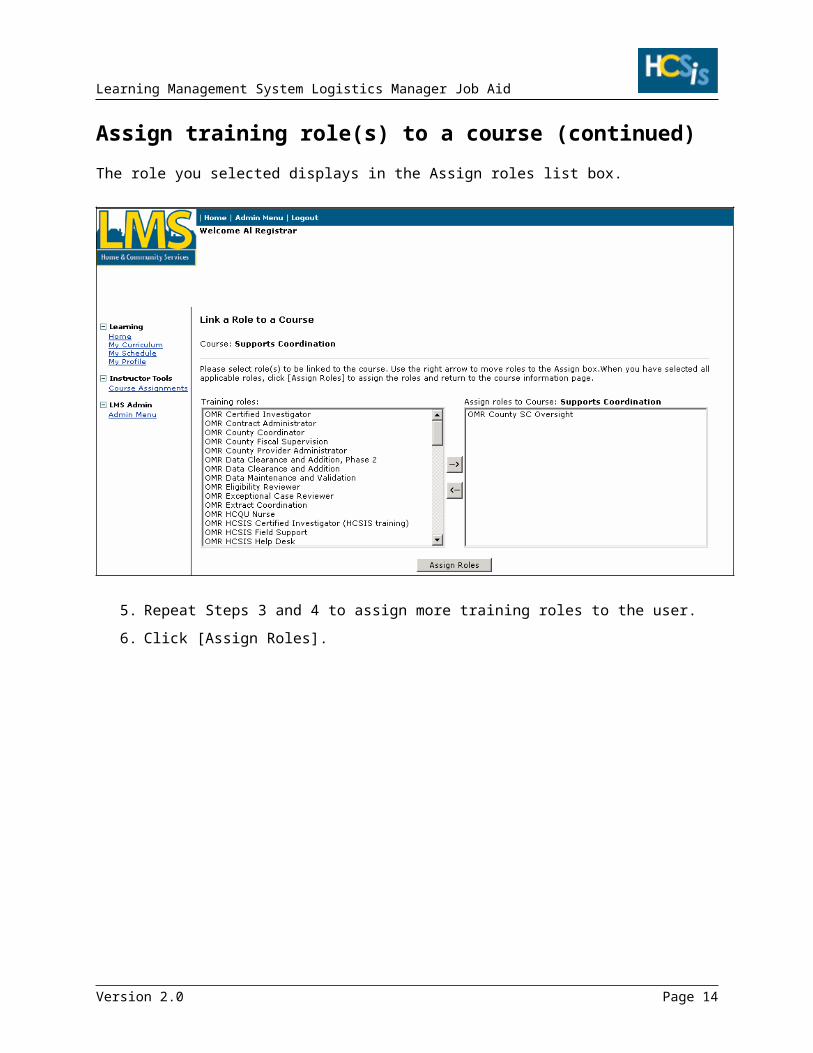
Assign training role(s) to a course (continued)The role you selected displays in the Assign roles list box.
5. Repeat Steps 3 and 4 to assign more training roles to the user.
6. Click [Assign Roles].
Version 2.0 Page 11

Learning Management System Logistics Manager Job Aid
Create/Edit a FacilityProcedure DescriptionIn order for an Instructor-led Training class to take place, the class must have a facility associated with it. Facilities are created from “Admin Menu.”
Dependencies A course must be created in the LMS.
Arrangements must be made with the facility to host a class on specific dates. This is a manual process that is done outside of the LMS.
Steps1. Click “Facilities.”
Version 2.0 Page 12

Learning Management System Logistics Manager Job Aid
Create/Edit a Facility (continued)The Facility Management screen displays:
2. Click “Create New Site.”
Version 2.0 Page 13
Learning Management System Logistics Manager Job Aid
Create/Edit a Facility (continued)The Facility Create/Edit screen displays:
3. Complete the following fields:
Version 2.0 Page 14

Learning Management System Logistics Manager Job Aid
Create/Edit a Facility (continued)Name Enter the name of the facility.
County Select the county of the facility from the drop down box.
Street 1 Enter the first street address line of the facility.
Street 2 If applicable, enter the second street address line of the facility.
City Enter the city of the facility
State Select the state of the facility from the drop down box.
Zip Code Enter the zip code of the facility.
Contact Name Enter the name of the person at the facility who will be the onsite contact when/if questions, issues or concerns arise at the facility. This person may also be the person who made the arrangements to reserve the facility for the class.
Phone Enter the phone number of the contact person.
Fax Enter the fax number of the contact person.
Email Enter the email address of the contact person
Parking spaces Enter the number of parking spaces that are available at the facility for class use.
Directions Enter directions to the facility; include on-site and off-site parking availability.
Catering Select the catering box if catering is available at the facility.
Catering costs If catering is available at the facility, enter the cost of the catering.
4. Click [Save].
Version 2.0 Page 15

Learning Management System Logistics Manager Job Aid
Create/Edit a Facility (continued)The Facility Management screen displays:
The new facility is listed.
Note: If the facility information needs to be edited (that is, updated directions or adding an additional room), click “Edit” to the right of the facility. The screen on the previous page will be displayed and the facility can be edited as necessary.
Version 2.0 Page 16

Learning Management System Logistics Manager Job Aid
Create a room in a facilityProcedure DescriptionSeveral rooms may actually be available at the facility. A class must have a room within a facility associated with it. Facility rooms are created from “Admin Menu.”
Dependencies A course must be created in the LMS.
Arrangements must be made with the facility to host a class on a specific date(s). This is a manual process that is done outside of the LMS.
A facility must be saved in the LMS.
Steps
1. Click “Facilities.”
Version 2.0 Page 17

Learning Management System Logistics Manager Job Aid
Create a room in a facility (continued)The Facility Management screen displays:
2. Click “Edit” to the right of the facility in which to associate a room.
Version 2.0 Page 18

Learning Management System Logistics Manager Job Aid
Create a room in a facility (continued)The Facility Create/Edit screen displays:
3. Click “Insert Additional Room.”
Version 2.0 Page 19

Learning Management System Logistics Manager Job Aid
Create a room in a facility (continued)The Insert Room to a Site screen displays:
4. Complete the following fields:
Room Name Enter the name of the room.
Capacity Enter room capacity. This number will be used as a default class size when a course offering is created.
Cost Enter the cost of the room.
Unit of Cost Enter the unit of the cost of the room.
Connection Type Enter the computer network connection type of the room – i.e T1 or T3.
Equipment Click in the box(es) of the equipment that is available in the room.
Equipment Cost Enter the cost if there is a cost for the equipment selected in the previous field.
5. Click [Save].
Version 2.0 Page 20

Learning Management System Logistics Manager Job Aid
Create a room in a facility (continued)The Facility Create/Edit screen displays:
The room is listed for the facility.
Version 2.0 Page 21

Learning Management System Logistics Manager Job Aid
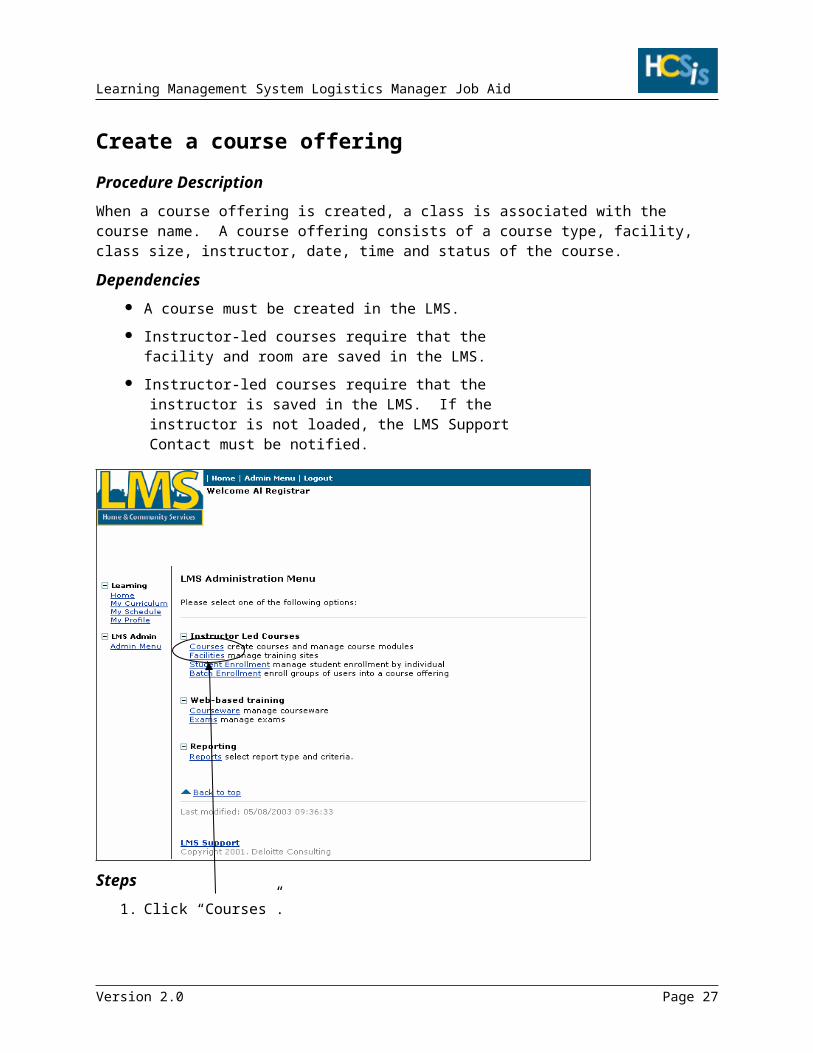
Create a course offeringProcedure DescriptionWhen a course offering is created, a class is associated with the course name. A course offering consists of a course type, facility, class size, instructor, date, time and status of the course.
Dependencies A course must be created in the LMS.
Instructor-led courses require that the facility and room are saved in the LMS.
Instructor-led courses require that the instructor is saved in the LMS. If the instructor is not loaded, the LMS Support Contact must be notified.
Steps1. Click “Courses”.
Version 2.0 Page 22

Learning Management System Logistics Manager Job Aid
Create a course offering (Continued)The Courses by Training Type page displays:
2. Click “Edit” to the right of the course to have a course offering assigned.
Version 2.0 Page 23

Learning Management System Logistics Manager Job Aid
Create a course offering (continued)The Enter or Edit Course Information page displays:
3. Click “Create new offering.”
Version 2.0 Page 24

Learning Management System Logistics Manager Job Aid
Create a course offering (continued)Instructor Led Training The Enter or Edit Course Offering Information page displays:
Version 2.0 Page 25
Tip: Fields marked with are required fields and must be completed in order to save information on the screen.

Learning Management System Logistics Manager Job Aid
Create a course offering (continued)Instructor Led Training (continued)
4. Complete the following fields:
Course Notes Enter notes about the course.
Course Type Course type defaults to Instructor Led Training.
Facility Select a facility from the drop down box.
Class Size Enter the maximum number of students that can enroll in the course coffering.
Instructor Select an instructor from the drop down box.
Asst Instructor If needed, select an assistant instructor from the drop down box.
Begin Date Enter the first date of the course in mm/dd/yyyy format or choose a calendar date from the date picker. A separate window will pop up showing a calendar.
Begin Time Enter the starting time of the course in 24-hour hh:mm format.
End Date Enter the last date of the course in mm/dd/yyyy format or choose a calendar date from the date picker. A separate window will pop up showing a calendar.
End Time Enter the stop time of the course in 24-hour hh:mm format.
Class Status Select Active from the drop down box.
5. Click [Save].
Version 2.0 Page 26
Tip: When Instructor Led Training is selected as the Course Type, the instructor led training fields display and the online training (Web based training and job aid) fields are hidden.
Learning Management System Logistics Manager Job Aid
Create a course offering (continued)Web Based Training or Job Aid
1. Select Web Based Training or Job Aid from the Course Type drop down box.
Version 2.0 Page 27

Learning Management System Logistics Manager Job Aid
Create a course offering (continued)Web Based Training or Job Aid (continued)
2. Complete the following fields:
Course Notes Enter notes about the course.
Course Type Select the course type from the drop down box.
Online Training Date Enter the date that the courseware is available online in mm/dd/yyyy format or choose a calendar date from the date picker. A separate window will pop up showing a calendar.
Class Status Select Active from the drop down box.
3. Click [Save].
Version 2.0 Page 28
Tip: When Web Based Training or Job Aid is selected as the Course Type, the online training fields display and the instructor led training fields are hidden.

Learning Management System Logistics Manager Job Aid
Create and upload coursewareProcedure DescriptionCourseware is created in a separate program and then uploaded to the LMS and associated with a course. Courseware may be a single file such as a Microsoft Word document, a Click2Learn Web based training course or a Microsoft PowerPoint presentation. Courseware is uploaded to the course from “Admin Menu.” The process for each type of upload varies slightly.
Dependencies A course must be created in the Learning Management
System.
Courseware is created in a separate program.
Click “Admin Menu” to access this page.
Steps
1. Click “Courseware.”
Version 2.0 Page 29

Learning Management System Logistics Manager Job Aid
Create and upload courseware (continued)The following screen displays:
2. Click “Add Content.”
Version 2.0 Page 30

Learning Management System Logistics Manager Job Aid
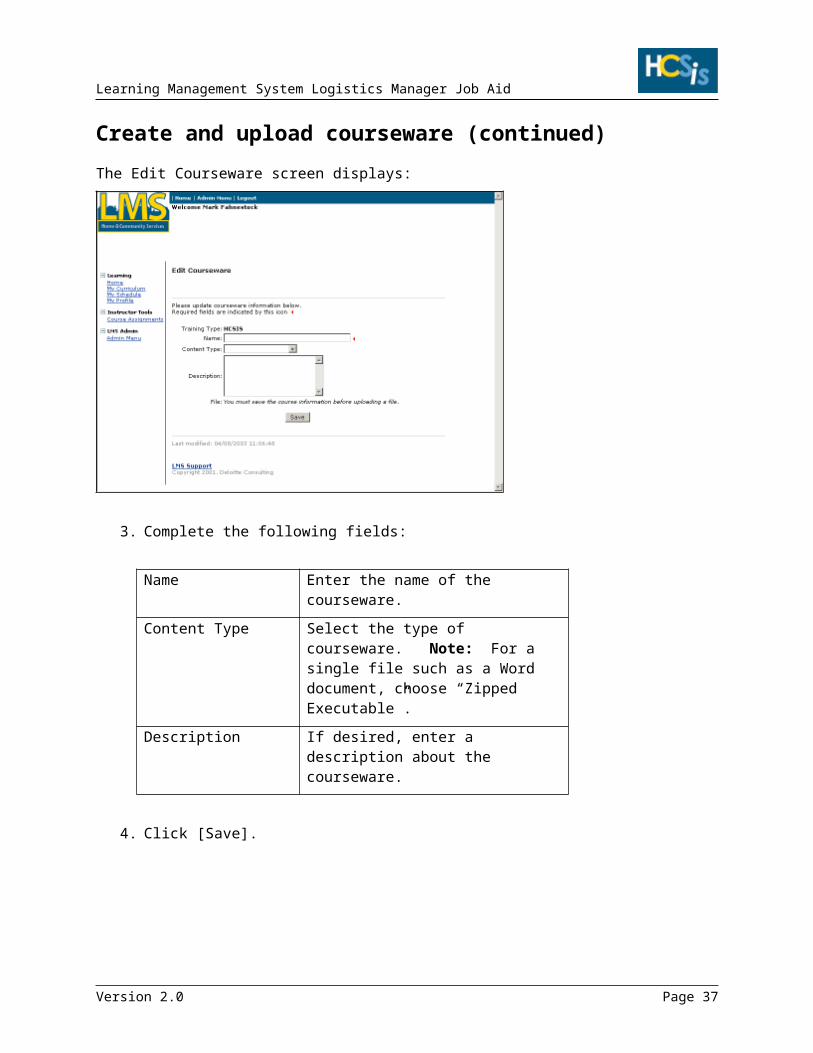
Create and upload courseware (continued)The Edit Courseware screen displays:
3. Complete the following fields:
Name Enter the name of the courseware.
Content Type Select the type of courseware. Note: For a single file such as a Word document, choose “Zipped Executable”.
Description If desired, enter a description about the courseware.
4. Click [Save].
Version 2.0 Page 31

Learning Management System Logistics Manager Job Aid
Create and upload courseware (continued)The Courseware by Training Type and Content Type screen displays:
The new courseware appears in the list.
5. Click “Edit” to the right of the courseware to upload courseware content.
Version 2.0 Page 32

Learning Management System Logistics Manager Job Aid
Create and upload courseware (continued)Upload a Click2Learn Toolbook courseDependencies
The content type for the courseware must be saved as “Toolbook”.
The Edit Courseware screen displays:
Steps1. Click “Upload Content.”
Version 2.0 Page 33

Learning Management System Logistics Manager Job Aid
Create and upload courseware (continued)Upload a Click2Learn Toolbook courseThe Upload Courseware screen displays:
2. Using the mouse, right click in the white area of the File box.
Version 2.0 Page 34

Learning Management System Logistics Manager Job Aid
Create and upload courseware (continued)Upload a Click2Learn Toolbook courseThis menu appears on the screen:
3. Click “Select Folder”.
Version 2.0 Page 35

Learning Management System Logistics Manager Job Aid
Create and upload courseware (continued)Upload a Click2Learn Toolbook courseThe Browse window displays:
4. Select the folder for the Toolbook course.
5. Check the “Include sub-folders” checkbox.
6. Click [Scan]
Version 2.0 Page 36
Learning Management System Logistics Manager Job Aid
Create and upload courseware (continued)Upload a Click2Learn Toolbook courseThe files display in the file box.
7. Using the mouse, right click in the file box.
Version 2.0 Page 37

Learning Management System Logistics Manager Job Aid
Create and upload courseware (continued)Upload a Click2Learn Toolbook courseThe menu displays:
8. Click “Upload”.
This window displays the progress of the files uploading to the Learning Management System. The process is complete when the bars reach the right side of the box. The screen then automatically redirects to the “Edit Courseware” screen where you can preview the course. If an error occurs, contact the HCSIS Help Desk.
Version 2.0 Page 38

Learning Management System Logistics Manager Job Aid
Create and upload courseware (continued) Upload a single fileDependencies
“Zipped Executable” must be saved as the Content type.
Steps1. Create or edit a courseware record (pages 29 to 31).
2. Follow the steps on pages 32 to 34 to select the courseware and display the upload screen.
This menu appears on the screen:
3. Click “Select Files.”
Version 2.0 Page 39

Learning Management System Logistics Manager Job Aid
Create and upload courseware (continued)Upload a single fileThe Select Files window displays:
4. From this screen, choose the file to upload. You may need to click “My Network Places” or “My Documents” to choose the file in the appropriate folder.
5. Select the file and click [Open].
Version 2.0 Page 40

Learning Management System Logistics Manager Job Aid
Create and upload courseware (continued)Upload a single fileThe file displays in the File box.
6. Using the mouse, right click in the File box.
Version 2.0 Page 41

Learning Management System Logistics Manager Job Aid
Create and upload courseware (continued)Upload a single fileThe following menu displays:
7. Click “Upload.”
This window displays the progress of the file uploading to the Learning Management System. The process is complete when the bars reach the right side of the box. The screen then automatically redirects to the “Edit Courseware” screen where you can preview the course. If an error occurs, contact the HCSIS Help Desk.
Version 2.0 Page 42

Learning Management System Logistics Manager Job Aid
Create and upload courseware (continued)Upload a Multiple File PresentationThis option can be used to upload a demo or presentation that requires multiple files, for example Power Point or an HTML walk through.
Dependencies PowerPoint must be saved as the Content type.
Steps1. Create or edit a courseware record (pages 29 to 31).
2. Follow the steps on pages 32 to 34 to select the courseware and display the upload screen.
3. Click “Select Folder”.
Version 2.0 Page 43

Learning Management System Logistics Manager Job Aid
Create and upload courseware (continued)Upload a Multiple File PresentationThe Browse window displays:
4. Select the folder for the Presentation.
5. Check the “Include sub-folders” checkbox.
6. Click [Scan]
Version 2.0 Page 44

Learning Management System Logistics Manager Job Aid
Create and upload courseware (continued)Upload a Multiple File Presentation
The files display in the File box.
7. Enter the name of the file that starts the presentation or demo in the box labeled “Page”.
8. Using the mouse, right click in the File box.
Version 2.0 Page 45

Learning Management System Logistics Manager Job Aid
Create and upload courseware (continued)Upload a Multiple File PresentationThe following menu displays:
9. Click on “Upload”.
This window displays the progress of the file uploading to the Learning Management System. The process is complete when the bars reach the right side of the box. The screen then automatically redirects to the “Edit Courseware” screen where you can preview the course. If an error occurs, contact the HCSIS Help Desk.
Version 2.0 Page 46

Learning Management System Logistics Manager Job Aid
Create a module and assign courseware to a moduleProcedure DescriptionAfter the courseware is uploaded into the Learning Management System, the courseware is linked to a course. Courseware is linked to the course from “Admin Menu.”
Dependencies A course must be created in the LMS.
Courseware must be uploaded to the LMS.
Click “Admin Menu” to access this page.
Steps
1. Click “Courses.”
Version 2.0 Page 47

Learning Management System Logistics Manager Job Aid
Create a module and assign courseware to a module (continued)The Courses by Training Type screen displays:
2. Click “Edit” to the right of the course in which to link courseware.
Version 2.0 Page 48

Learning Management System Logistics Manager Job Aid
Create a module and assign courseware to a module (continued)The Enter or Edit Course Information screen displays:
3. Click “Create New Module.”
Version 2.0 Page 49

Learning Management System Logistics Manager Job Aid
Create a module and assign courseware to a module (continued)The Create/Edit Module screen displays:
4. Complete the following fields:
Name Enter the name of the course module.
Description If desired, enter a description about the course module.
Sequence Enter a 1 to denote that this is the first course module for this course. Enter other numbers for sequential course modules.
Courseware Select the appropriate courseware from the dropdown box.
Exam Select from the dropdown box.
5. Click [Save].
Version 2.0 Page 50

Learning Management System Logistics Manager Job Aid
Enroll a student in a courseProcedure DescriptionOnce a course is created and has course offering linked to it, students can enroll in the class. Students enroll in the course from “Admin Menu.”
Dependencies A course must be created in the Learning Management System.
A course offering must be linked to the course in the Learning Management System.
A student must be registered in the Learning Management System.
Steps1. Click “Student Enrollment.”
Version 2.0 Page 51

Learning Management System Logistics Manager Job Aid
Enroll a student in a course (continued)The Enroll/Unenroll Students in Classes screen displays:
2. Select the first letter for the student’s last name.
3. Next, you may either type the first few letters of the user’s last name or you may scroll through the list of all users.
4. Click the user name to select it.
5. Click [Edit Enrollment].
Version 2.0 Page 52

Learning Management System Logistics Manager Job Aid
Enroll a student in a course (continued)The selected student’s Curriculum screen displays:
This screen lists available courses for the student in which to enroll. Courses are determined by the role of the student. The role of the student is created when the student is registered in the Learning Management System.
6. Click “Register” to the right of the course in which to enroll the student.
Version 2.0 Page 53
Tip: Use the Print my transcript link to create the selected user’s transcript report in Adobe

Learning Management System Logistics Manager Job Aid
Enroll a student in a course (continued)The Enroll Student in a Course screen displays:
This screen lists the possible class dates and locations for the course. The Seats Available column lists the number of seats left in the class. If Seats Available equals 0, then the course has met its seating capacity.
7. Click “Enroll” to the right of the class date and location in which to enroll the student.
Note: If “Enroll” does not appear in the Action column, the student is currently enrolled in another class. Before you can enroll this student in a new class, you must unenroll them from the other class.
Note: If seats are allocated by course, you may see the message, “There are no allocated seats remaining for {student’s entity}.” You can override and enroll the student in the course.
Note: If seats are allocated by course offering, only the course offerings that are not allocated or are allocated to the student’s entity will display in the list.
Version 2.0 Page 54

Learning Management System Logistics Manager Job Aid
Enroll a student in a course (continued)The Course Confirmation screen displays:
This screen confirms the registration of the class for the student.
8. Click [Register] to confirm the class registration. If the student should not be registered for the listed class, click [Cancel].
Version 2.0 Page 55

Learning Management System Logistics Manager Job Aid
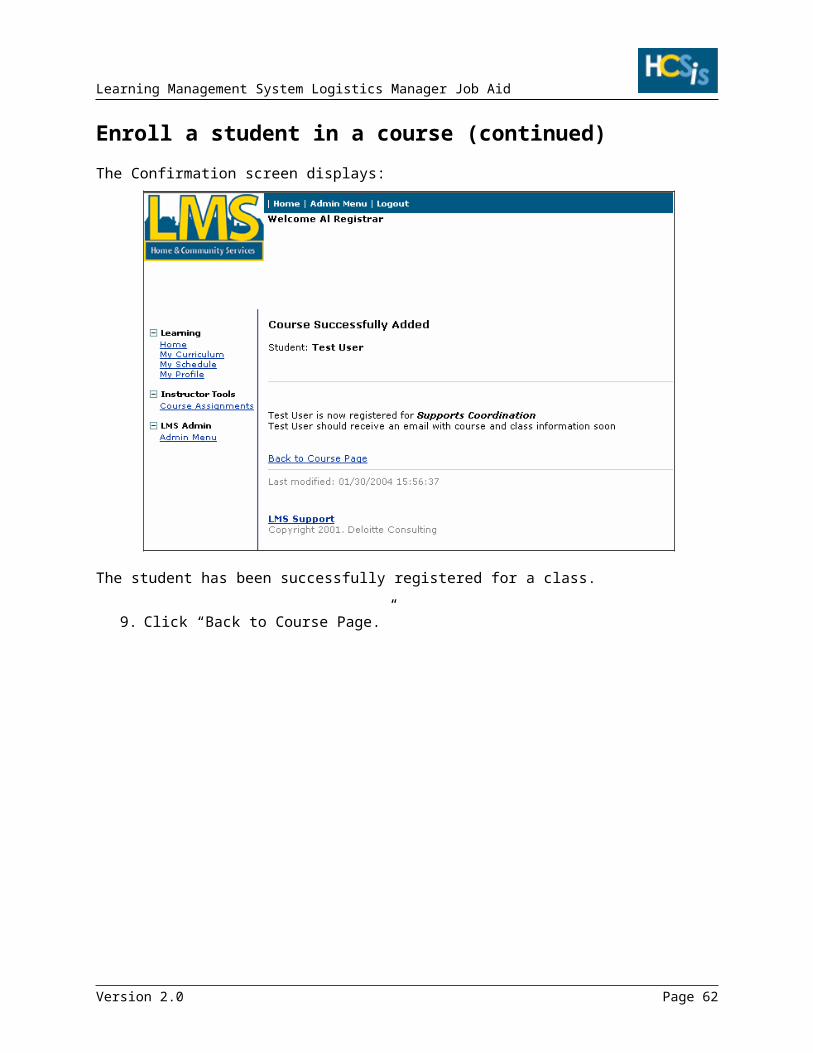
Enroll a student in a course (continued)The Confirmation screen displays:
The student has been successfully registered for a class.
9. Click “Back to Course Page.”
Version 2.0 Page 56

Learning Management System Logistics Manager Job Aid
Enroll a student in a course (continued)The Enroll Student in a Course screen redisplays:
Version 2.0 Page 57

Learning Management System Logistics Manager Job Aid
Unenroll a student in a courseProcedure DescriptionIf a student should not be registered for a course, then the student should be unenrolled from the class. Students unenroll from the course from “Admin Menu.”
Dependencies A course must be created in the LMS.
A course offering must be linked to the course in the LMS.
A student must be registered in the LMS.
A student must be enrolled in a course offering in the LMS.
Steps
1. Click “Student Enrollment.”
Version 2.0 Page 58

Learning Management System Logistics Manager Job Aid
Unenroll a student in a course (continued)The Enroll/Unenroll Students in Classes screen displays:
2. Select the first letter for the student’s last name.
3. Next, you may either type the first few letters of the user’s last name or you may scroll through the list of all users.
4. Click the user name to select it.
5. Click [Edit Enrollment].
Version 2.0 Page 59

Learning Management System Logistics Manager Job Aid
Unenroll a student in a course (continued)The selected student’s Curriculum screen displays:
This screen lists all available courses for the student.
6. Click “Register” to the right of the course in which to unenroll the student.
Version 2.0 Page 60

Learning Management System Logistics Manager Job Aid
Unenroll a student in a course (continued)The Enroll Student in a Course screen displays:
A red X appears to the right of the course that the student is currently enrolled.
7. Click “Unenroll” to the right of the course in which to unenroll the student.
Version 2.0 Page 61
Learning Management System Logistics Manager Job Aid
Unenroll a student in a course (continued)The Confirmation screen displays:
This screen confirms the student is unenrolled from the class.
8. Click [Unregister] to confirm the class unenrollment. If the student should not be unenrolled for the listed class, click [Cancel].
Version 2.0 Page 62

Learning Management System Logistics Manager Job Aid
Unenroll a student in a course (continued)The Confirmation screen redisplays with the confirmation message:
The student has been successfully removed from a class.
9. Click “Back to Course Page.”
Version 2.0 Page 63

Learning Management System Logistics Manager Job Aid
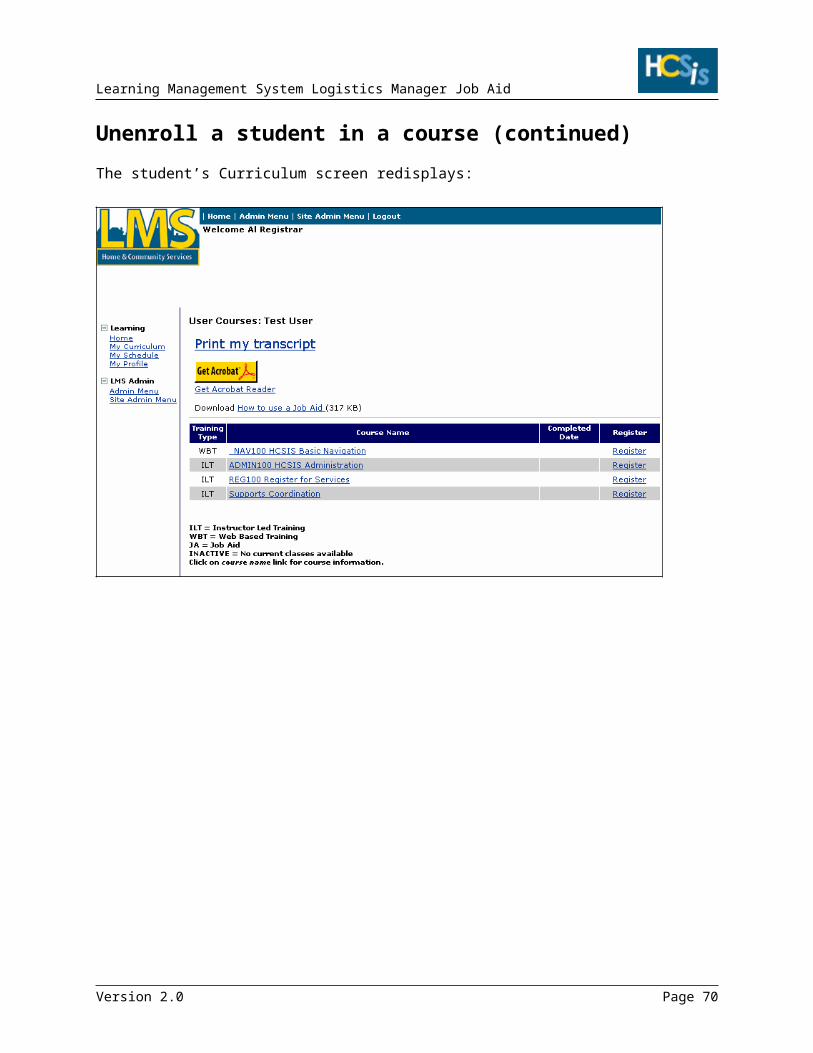
Unenroll a student in a course (continued)The student’s Curriculum screen redisplays:
Version 2.0 Page 64

Learning Management System Logistics Manager Job Aid
Batch enroll studentsProcedure DescriptionSeveral students with the same role can be registered for a class simultaneously. This process is called batch enrollment. Students are batch enrolled for the course from “Admin Menu.” In the LMS, a “course offering” refers to a specific location and time for which the course will be taught.
Dependencies A course must be created in the LMS.
A course offering must be linked to the course in the LMS.
Students must be registered in the LMS.
Steps
1. Click “Batch Enrollment.”
Version 2.0 Page 65

Learning Management System Logistics Manager Job Aid
Batch enroll students (continued)The Batch Enroll screen displays:
2. Select the appropriate role for the course in the Role drop down box.
3. Select the appropriate course from the Course drop down box. The courses listed are the ones associated with the role that was chosen in the previous box.
Version 2.0 Page 66

Learning Management System Logistics Manager Job Aid
Batch enroll students (continued)The list of students displays:
This screen lists all students who have been registered in the Learning Management System with the role that was selected and are not currently enrolled in the selected course.
4. Select the class date and time in the Offering drop down box. The fraction indicates how many seats are taken per how many seats are available.
5. Click in the box(es) to the right of the student(s) to enroll in the class.
6. Click [Enroll].
The screen listed above displays again if there are students with the selected role that are not yet enrolled in the course. You can choose another course offering and enroll more students.
Version 2.0 Page 67

Learning Management System Logistics Manager Job Aid
Create a certified investigator course or exam Procedure DescriptionCertified Investigator candidates are able to register for the Pennsylvania Certified Investigator course and/or exam facilitated by Labor Relations Alternatives (LRA). As the Logistics Manager, you will create a course and/or exam within the LMS.
Dependencies You must click “Admin Menu” to access this page.
You must be associated with the Investigation Program training type.
Steps1. Click “Courses.”
Version 2.0 Page 68

Learning Management System Logistics Manager Job Aid
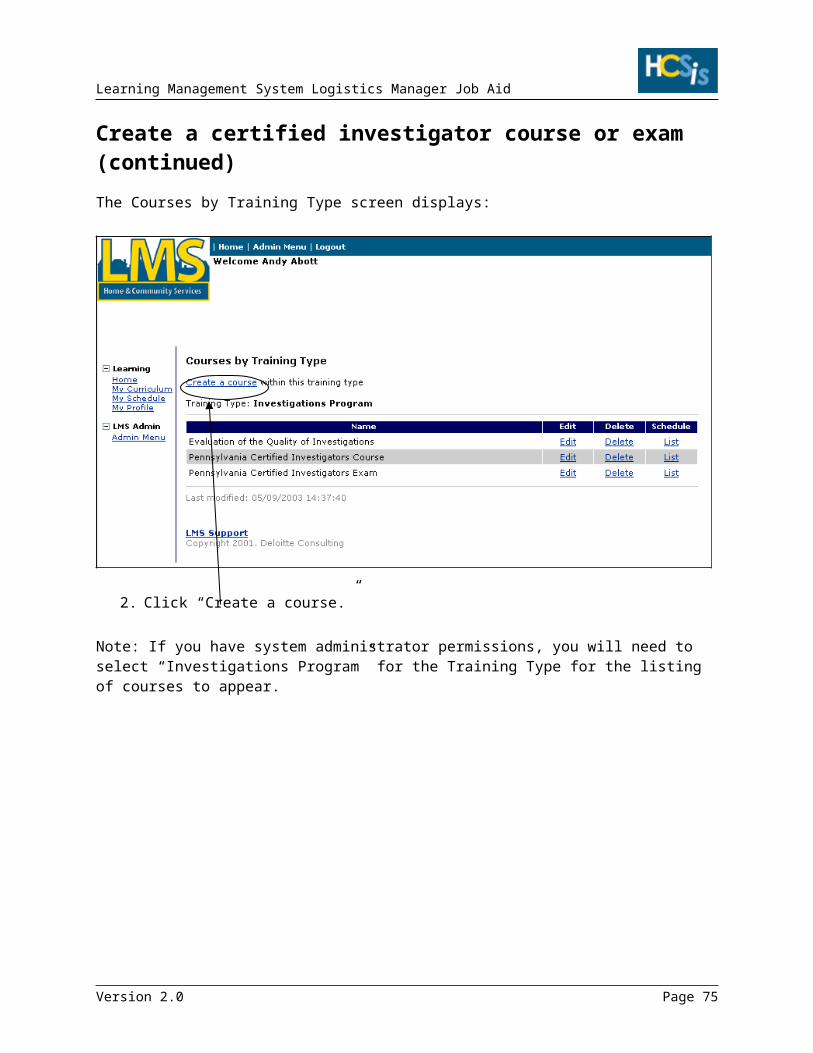
Create a certified investigator course or exam (continued)The Courses by Training Type screen displays:
2. Click “Create a course.”
Note: If you have system administrator permissions, you will need to select “Investigations Program” for the Training Type for the listing of courses to appear.
Version 2.0 Page 69
Learning Management System Logistics Manager Job Aid
Create a certified investigator course or exam (continued)The Enter of Edit Course Information screen displays:
Version 2.0 Page 70
Tip: Fields marked with are required fields and must be completed in order to save information on the screen.

Learning Management System Logistics Manager Job Aid
Create a certified investigator course or exam (continued)3. Complete the following fields:
Course Name Enter the name of the course, beginning with the course ID.
If you are creating an exam, you must include the word “exam” in the name.
Description Enter a brief description of the course, including course objectives.
Audience List the roles that should attend this course.
Requirements List the prerequisites in order to take this course.
Training Hours Leave this field blank unless this course qualifies as continuing education credits.
Course Exam Select the name of the exam associated with the course from the drop down box.
Exam Check this box if the course is an exam.
4. Click [Save].
Version 2.0 Page 71

Learning Management System Logistics Manager Job Aid
Create a certified investigator course offeringProcedure DescriptionWhen a course offering is created, a class is associated with the course name. A course offering consists of a course type, facility, instructor, date, time and status of the course.
Dependencies A course must be created in the LMS.
Instructor-led courses require that the facility and room are saved in the LMS.
Instructor-led courses require that the instructor is saved in the LMS. If the instructor is not loaded, LRA must be notified.
You must click “Courses” from the Admin Menu.
Steps1. Click “Edit” to the right of the course to have a course offering assigned.
Version 2.0 Page 72

Learning Management System Logistics Manager Job Aid
Create a course certified investigator offering (continued)The Enter or Edit Course Information screen displays:
2. Click “Create new offering.”
Version 2.0 Page 73

Learning Management System Logistics Manager Job Aid
Create a certified investigator course offering (continued)The Enter or Edit Course Offering Information screen displays:
Version 2.0 Page 74
Tip: Fields marked with are required fields and must be completed in order to save information on the screen.
Learning Management System Logistics Manager Job Aid
Create a certified investigator course offering (continued)3. Complete the following fields:
Course Notes Enter notes about the course.
Course Type Course type is defaulted to Instructor-led + WBT. Select the radio button as needed.
Facility Select a facility from the drop down box.
Class Size Enter the maximum number of students that can enroll in the course offering.
Instructor Select an instructor from the drop down box.
Asst Instructor If needed, select an assistant instructor from the drop down box.
Begin Date Enter the first date of the course in mm/dd/yyyy format or choose a calendar date from the date picker. A separate window will pop up showing a calendar.
Begin Time Enter the starting time of the course in 24-hour hh:mm format.
End Date Enter the last date of the course in mm/dd/yyyy format or choose a calendar date from the date picker. A separate window will pop up showing a calendar.
End Time Enter the stop time of the course in 24-hour hh:mm format.
Course Exam Select the exam that is to be associated with the course offering from the drop down box.
Class Status Select Active from the drop down box.
4. Click [Save].
You have completed this Job Aid.
Version 2.0 Page 75