of fellowship euurtohpieearns magazine l
TRANSCRIPT
blank1
Published by the
MAGAZINELuthiersEuropeanFellowship of
Magazine for luthiers, designers and lovers of stringed musical instruments Number 6 - 2014 / I
LuthiersEuropeanFellowship of

Page intentionally left blank

1
EDITORIAL
Leo Lospennato is luthier, author of books on lutherie
and chief editor of SUSTAIN Magazine.
He lives in Berlin, Germany.
Visit www.lospennato.com
Here we go again
This adventure called SUSTAIN begins its second year. Two things made it possible:
1) Our readers’ support. Your letters, com-ments, feedback and encouragement.2) Our authors’ contribution. Your articles are the heart and soul of the magazine. By shar-ing your experiences you have enriched us all.Some of you are professionals, some are am-ateurs; some have been in the trade for dec-
ades, and others just discovered this fascinat-ing world. Many of you like working amidst the sawdust; others prefer the artistic side of lutherie. But all of you, dear lovers of all kinds of musical instruments, are the cause and the objective of this magazine.
This past year we made new friends, we learned things, and we welcomed a growing number of Fellows with the same interests. For all that, I thank you.
And of course, here we go again, looking for-ward to another year talking about these won-derful chunks of wood we love to make music with.
2
Imprint
Product news
Letters
Research
Laser Harps: Plucking Strings of Light By Cem Öcek
This issue’s cover
Speed 2: The Making of a Winning Design By Leo Lospennato
Woodworking
Measuring Moisture Content in TonewoodAn interview with Flavia Santana Pohl
Interview
A Brief Guide to Copyright Law for LuthiersAdvice from Dr. Baltazar Avendaño Rimini

3
CONTENTS
Research
Hyper-guitar: The Best of Two WorldsAn interview with musician Jaydev Mistry
Publishing
Writing an Article on Lutherie 101By Leo Lospennato
Praxis
Glues: the Best and the RestBy Wim Stout
Book Reviews
“Guerrilla Music Marketing Handbook”By Neal Soloponte
Film reviews
“Stradivari” (1988)By Neal Soloponte
The Intern’s Column
Inspirations

4
Sustain Magazine is produced with the collaboration of luthiers, and edited and published by the Fellowship of european Luthiers. The contents in this magazine are either original or reproduced with authorization of the copyright holders. Any eventual contents without identification of copyright are reproduced as with “no known copyright restrictions” when the editor is unaware of any copyright restrictions on its use. We endeav-or to provide information that we possess about the copyright status of the Content and to identify any other terms and conditions that may apply (such as trademarks, rights of privacy or publicity, donor restrictions,
etc.); however, the editor can offer no guarantee or assurance that all pertinent information is provided or that the information is correct in each circumstance. It is the reader’s responsibility to determine what permission(s) you need in order to use the content and, if necessary, to obtain such permission. If you are, or know, the author or rights holder of any content in this magazine please write us an email and we will gladly include the corresponding credit in future editions.Additional Photo credits: Photo in “The Intern’s Column” by flickr.com/davitydave. All rights reserved. No part of this magazine covered by copyrights hereon may be reproduced or copied without written permission, except in the case of brief quotations embodied in articles and reviews, citing the source. Please address all requests to [email protected]. Reselling this magazine issue in any format is not authorized to third parties. Printed in the USA - ISBN-13: 978-1499183382
Frank Filippone was born in Australia where he works on all things wood: he is a picture framer, publisher of a magazine for the framing industry, and he runs a business that provides quality tone woods for luthiers. As well as being an amateur luthier Frank has been a guitar collector for many years. Visit www.southerntonewoods.com.au
Cem Öcek, born in Turkey, is a computer engineer currently working for HP, based in Izmir. He is the author of two books (in Turkish): “Electric Guitars” and “Amplifiers and Effect Devices of Electric Guitars”, and of many articles on new music technologies, unusual musical instruments, and sound art & sculptures. He has been designing and making electric and bass guitars for 20 years.
Helmuth Lemme, born in Germany, was building phones and electric
motors already at 11. He started to develop his own pickups in 1975,
and became an expert in industrial electronics. He is a guitar collector
and author of several books on electronics of guitars and amplifiers.
http://www.gitarrenelektronik.de
Wim Stout, born in The Netherlands, has 20 years of experience as a paint chemist. He lives with his wife and kids in a 100 year old house where he builds beautiful electric guitars that end up finished with lacquers of his own formula. Visit:http://www.DutchHandmadeGuitars.com
IMPRINT
Editor in chief
Advisory Council
Published by
Website
Leo Lospennato
Wim Stout
Helmut Lemme
The Fellowship of European Luthiers
www.FellowLuthiers.com
Contributors in this issue:
Brett Lock is a South African bass guitarist living in London. He has a
background in magazine writing, editing and design. He and his
partner Chris now own a small media company producing websites and
mobile applications, but modify and restore guitars for relaxation.
Visit www.tunemewhat.com
Gary Swift, our new contributing editor, is a true Rennaisance man. A mechanical
engineer by training, Gary was also a submarine officer, a public school
teacher, a magazine editor, and a part-time rock band player. These days he is
getting more deeply involved in lutherie, with his sights locked on his next project:
building a custom electric guitar.

5
Let’s first consider the ques-tion of quantity. How many screws are necessary to firmly hold a neck in place? In terms
of physical ‘degrees of freedom’, two screws would be enough—but the joint would be too weak. If the guitar falls head first, the neck might break at the joint more easily than if it had, for example, four screws. Some guitars have three screws, which create a stable joint and better fit in a rounded, more ergonomic neck heel. But there might be a problem: the truss rod, which runs inside the neck, might get just in the way of the central screw. Four screws are a sort of standard: they form a stable, symmetrical joint, with all screws well away from the central axis of the neck (the “truss rod zone”).
Why use more than four screws? That is supposedly justified by a benefit in terms of sustain, but we don’t know of any research showing that the extra screws produce any measureable effect.
We have seen basses with 9, 10, 11 and even more screws. But there is indeed something as “too many screws”.
Let’s take things to the extreme and imagine that you place 20—no, make it 40 (!) screws
LETTERS
When designing a bolt-on neck joint for guitar, are there any important rules to follow regarding the placing
the screws themselves? I have seen some joined with 5 screws but haven’t exactly gained a good answer as to why.
-Ryan Dandurant (Louisville, Kentucky, USA)
How many screws should I use in a bolt-on neck joint?
The Fender layout (a rectangular arrange-ment) works great, but if the heel of your in-strument has a different, asymmetric shape, then you can arrange the screws in a way more adapted to its lines.
Q:
A:
on a guitar or bass. The heel would have all screws placed right next to each other in or-der to fit in the heel. That’s a lot of holes. And when you make a hole you take wood off the heel, weakening it. It is not a solid piece of wood anymore, but something that looks like a colander. So paradoxically, what was sup-posed to add strength has created the oppo-site effect. If the guitar falls, the heel would break very easily.
Using 5 or 6 screws is perfectly fine, particu-larly in basses with 5 strings or more. But also in guitars, if that extra screw or two creates the idea of more sustain and solidity in your mind, then go ahead. But for an instrument with a standard design, 4 screws are enough, and more than 6 is probably overkill.
Regarding placing: keep the screws away from the truss rod zone (the central axis of the instrument), unless you know for a fact that the truss rod doesn’t reach that far. Also, keep a safe distance from the border of the heel. In a Stratocaster this distance is about 9mm, measured from the center of the screw hole:

6
Fill n’ Finish promises to be the new best friend of luthiers in need of repair-ing finishes in a professional way.
It works either as a drop fill repair, or as a finishing product that can be sprayed or brushed. If used with an accelerator (also provided by the same vendor) it will dry super fast, and it will stay flexible and resilient. It can be easily polished for a high gloss and it won’t crack over timeThe producer claims that its carcinogenic free formula (it doesn’t contain chloroform, ben-zene, or paraformaldehyde) has a longer shelf life than any glue in the market. More infor-mation on www.gearupproducts.com. .
DEALING WITH DINGS AND DENTS
S mall files sent via email get lost in the way sometimes. But try to send any-thing bigger than a few megabytes,
and it will fail for sure. The solution is WeTransfer, a website that
allows you to send files up to 2 GB, free, and safely. And it is fast, too; in practice, it is as fast as your own internet connec-tion. Huge files can be transmit-ted in just minutes. There’s no registration: just enter your email and there you go. Of top of all this, the interface
is the coolest we have seen in a long time: completely intuitive and easy to use (see picture on the right). As we said, WeTransfer is com-
pletely free—no test periods, no software to install. But for €10/month, you can personalize your
SEND FILES FAST & FREE
PRODUCT NEWS
own page in order to make your business look really professional. We at Sustain use it to distribute the digi-
tal issue of the magazine, and it works like a charm. Next time you need to send some files, give this service a chance: it will simplify your life, and it doesn’t cost a penny.
7
PRODUCT NEWS

8
THIS ISSUE’S COVER
THE MAKING OF A
WINNINGDESIGN
We normally include some in-formation about the cover of the magazine in a small box in page 5. This time, however,
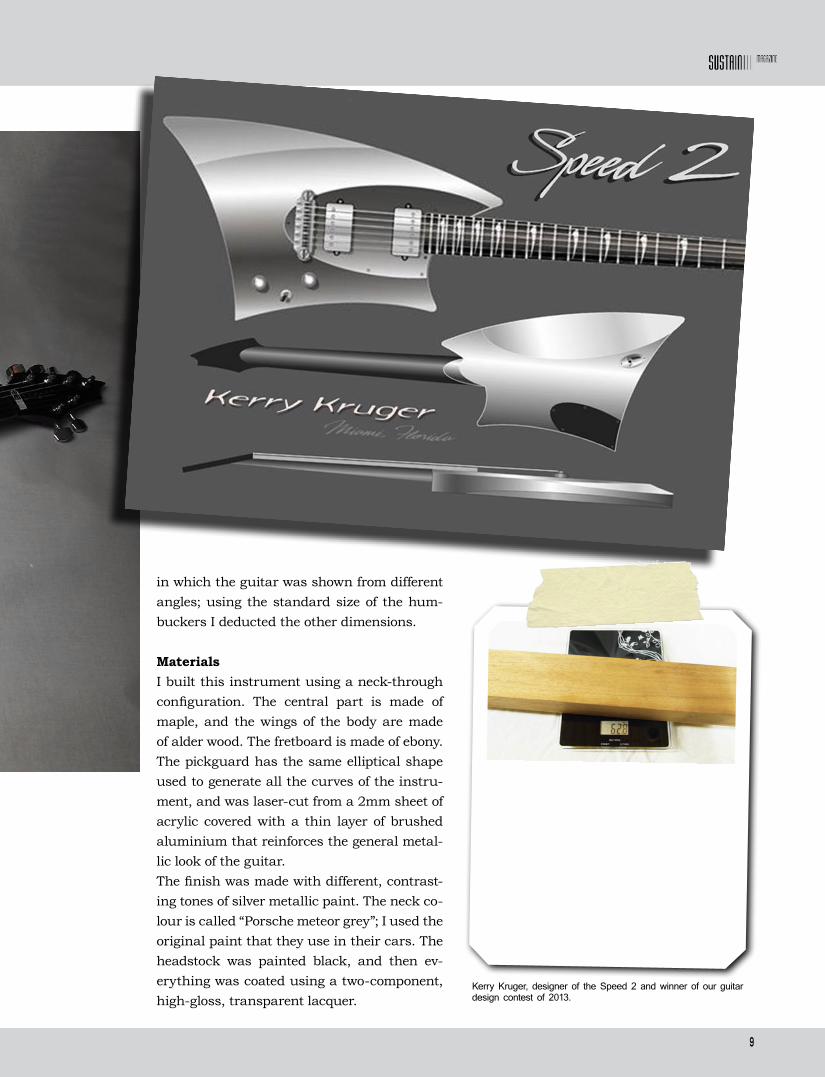
the cover deserved a little more space: this is-sue’s cover shows the real life version of the guitar whose design won our contest last year.The Speed 2, designed by Kerry Kruger from Miami, Florida, is a design that is simple and
bold at the same time. The shapes of body and the headstock are generated from a single el-lipse (the main axis is 2.5 times longer than the other one), resulting in an elegant and fu-turistic artifact.
I had the pleasure of building this instrument based on a rendering that accompanied its en-try in the contest (see picture on next page)
BY LEO LOSPENNATO
9
DESIGN
in which the guitar was shown from different angles; using the standard size of the hum-buckers I deducted the other dimensions.
MaterialsI built this instrument using a neck-through configuration. The central part is made of maple, and the wings of the body are made of alder wood. The fretboard is made of ebony.The pickguard has the same elliptical shape used to generate all the curves of the instru-ment, and was laser-cut from a 2mm sheet of acrylic covered with a thin layer of brushed aluminium that reinforces the general metal-lic look of the guitar.The finish was made with different, contrast-ing tones of silver metallic paint. The neck co-lour is called “Porsche meteor grey”; I used the original paint that they use in their cars. The headstock was painted black, and then ev-erything was coated using a two-component, high-gloss, transparent lacquer.
Kerry Kruger, designer of the Speed 2 and winner of our guitar design contest of 2013.
10
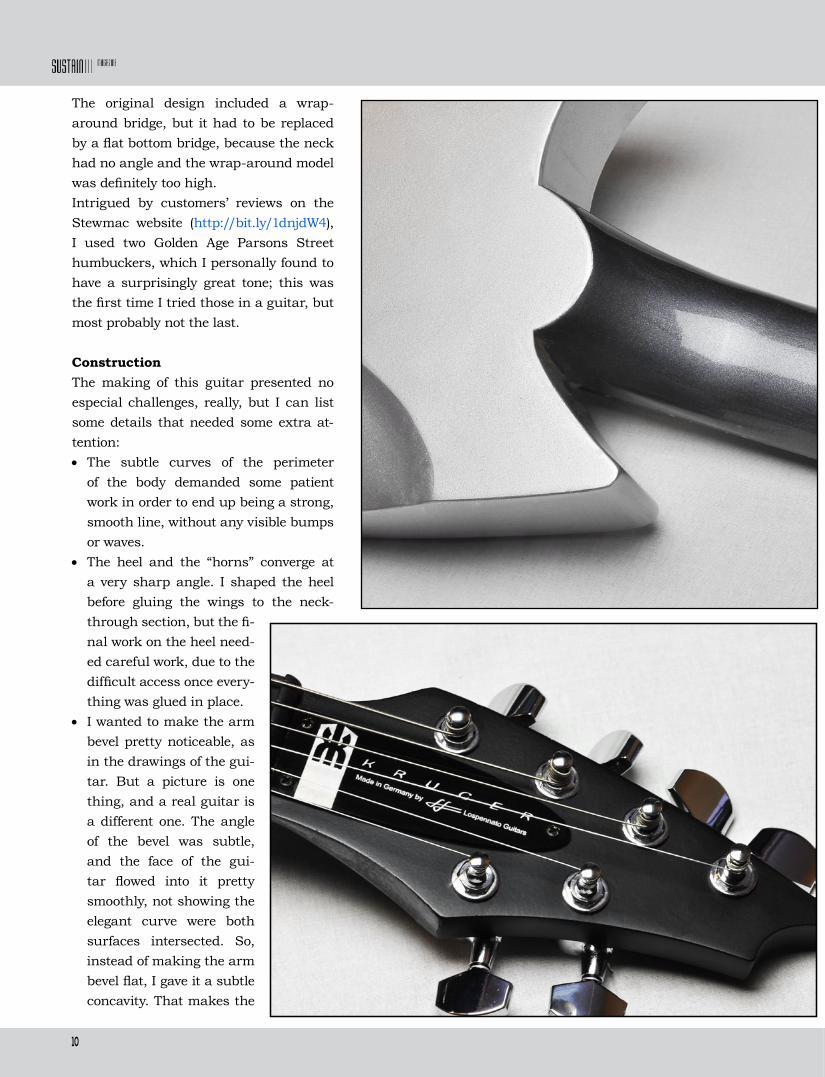
The original design included a wrap-around bridge, but it had to be replaced by a flat bottom bridge, because the neck had no angle and the wrap-around model was definitely too high. Intrigued by customers’ reviews on the Stewmac website (http://bit.ly/1dnjdW4), I used two Golden Age Parsons Street humbuckers, which I personally found to have a surprisingly great tone; this was the first time I tried those in a guitar, but most probably not the last.
ConstructionThe making of this guitar presented no especial challenges, really, but I can list some details that needed some extra at-tention:• The subtle curves of the perimeter
of the body demanded some patient work in order to end up being a strong, smooth line, without any visible bumps or waves.
• The heel and the “horns” converge at a very sharp angle. I shaped the heel before gluing the wings to the neck-through section, but the fi-nal work on the heel need-ed careful work, due to the difficult access once every-thing was glued in place.
• I wanted to make the arm bevel pretty noticeable, as in the drawings of the gui-tar. But a picture is one thing, and a real guitar is a different one. The angle of the bevel was subtle, and the face of the gui-tar flowed into it pretty smoothly, not showing the elegant curve were both surfaces intersected. So, instead of making the arm bevel flat, I gave it a subtle concavity. That makes the

11
Giving shape to the arm bevel. While waiting for the arriving of the curved scrapers I ordered, a sharpened Stratocaster jack plate had to do—it had the perfect curvature!
line of intersection with the guitar’s face much more defined (see picture on the left).
For the rest, the making of this guitar proved uncomplicated, which is always an advantage vis-á-vis an eventual production in series.
AcknowledgementsThe guitar was integrally built with parts pro-vided by Stewart-McDonald. Jay Hostetler and his team offered as always their kind sup-port to the contest and to the magazine, for which we are very grateful. Finally, I want to thank Kerry Kruger for his patience during the long months this beauty had to wait in line until it got finally made, and again, compliments to him for winning the contest and a real prototype of one of his awesome designs.
12
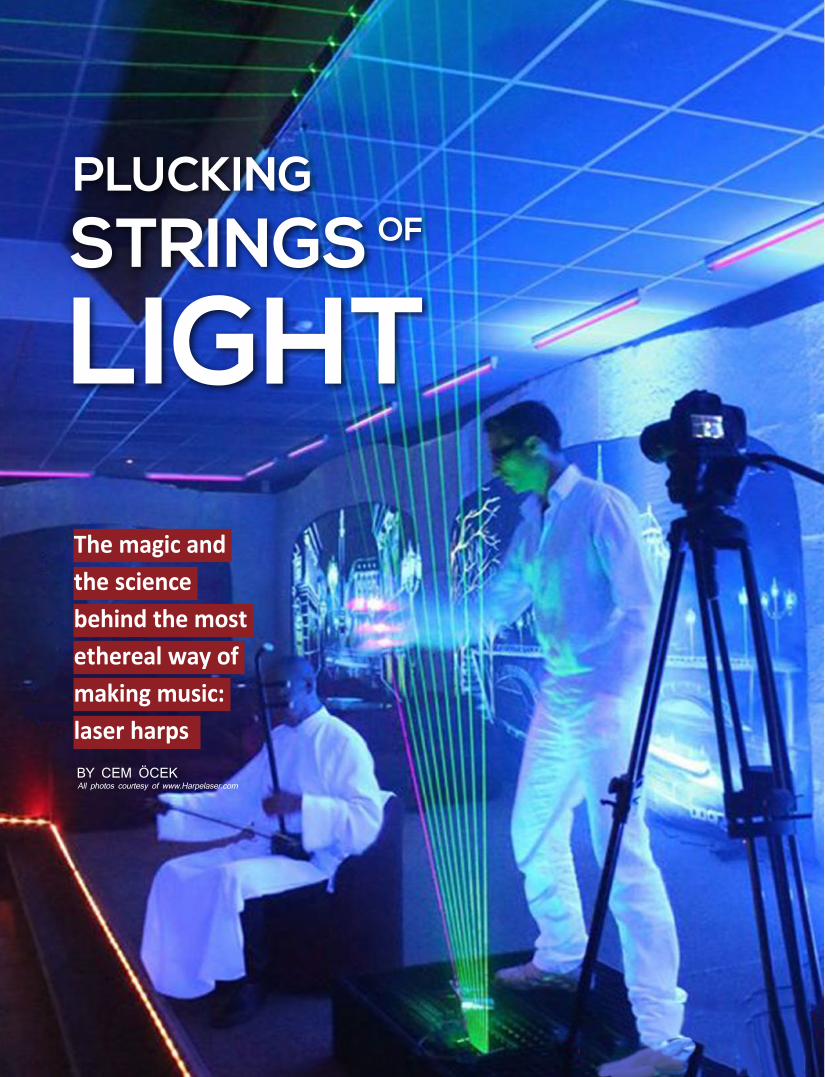
OFSTRINGS PLUCKING
LIGHTThe magic and the science behind the most ethereal way of making music: laser harps BY CEM ÖCEKAll photos courtesy of www.Harpelaser.com
13
L aser harps exist on the outskirts. They are a musical instrument, but not really. They are stringed, but not really. They are harps... but not
really. One thing is certain though: they are spectacular.
A laser harp is an electronic musical instru-ment invented back in 70’s and popularized by French musician Jean Michel Jarre. He started using the laser harp in his concerts in 1981, and this hi-tech device has been part of his artistic identity ever since. During its heyday some people thought that
the laser harp was a fake, that it couldn’t pro-duce any sounds, and that there was another device making the sound as playback. In or-der to convince the public, Jarre made some mistakes on purpose when he was playing la-ser harp in some concerts. Today, a select group of enthusiasts and a
few commercial firms not only keep this in-strument alive, but also take part in its cur-rent evolution.
DesignIn some ways, a laser harp looks similar to
the traditional instrument from which it took the name, since the way of producing the sound is similar to plucking the strings of an acoustic harp. But these strings are made of light.The laser harp is more a musical interface
than a real musical instrument. Although there are number of different designs, a laser harp basically consists of several laser beams, close to each other, which can be blocked by the musician’s hand in order to trigger syn-thesized, sampled, or computer generated sounds. The characteristic sound of the laser harp in Jarre’s performances, for example is generated by an Elka Synthex, an old synthe-sizer made in Italy.
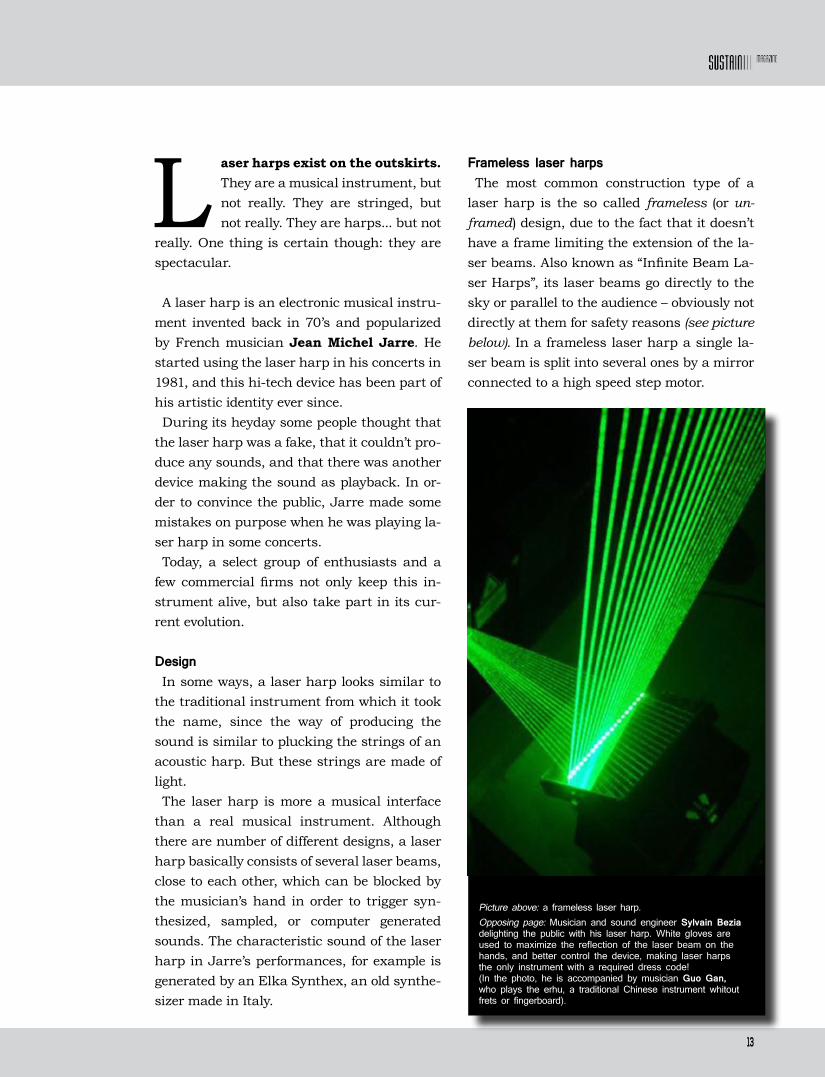
Frameless laser harpsThe most common construction type of a
laser harp is the so called frameless (or un-framed) design, due to the fact that it doesn’t have a frame limiting the extension of the la-ser beams. Also known as “Infinite Beam La-ser Harps”, its laser beams go directly to the sky or parallel to the audience – obviously not directly at them for safety reasons (see picture below). In a frameless laser harp a single la-ser beam is split into several ones by a mirror connected to a high speed step motor.
Picture above: a frameless laser harp. Opposing page: Musician and sound engineer Sylvain Bezia delighting the public with his laser harp. White gloves are used to maximize the reflection of the laser beam on the hands, and better control the device, making laser harps the only instrument with a required dress code! (In the photo, he is accompanied by musician Guo Gan, who plays the erhu, a traditional Chinese instrument whitout frets or fingerboard).
14
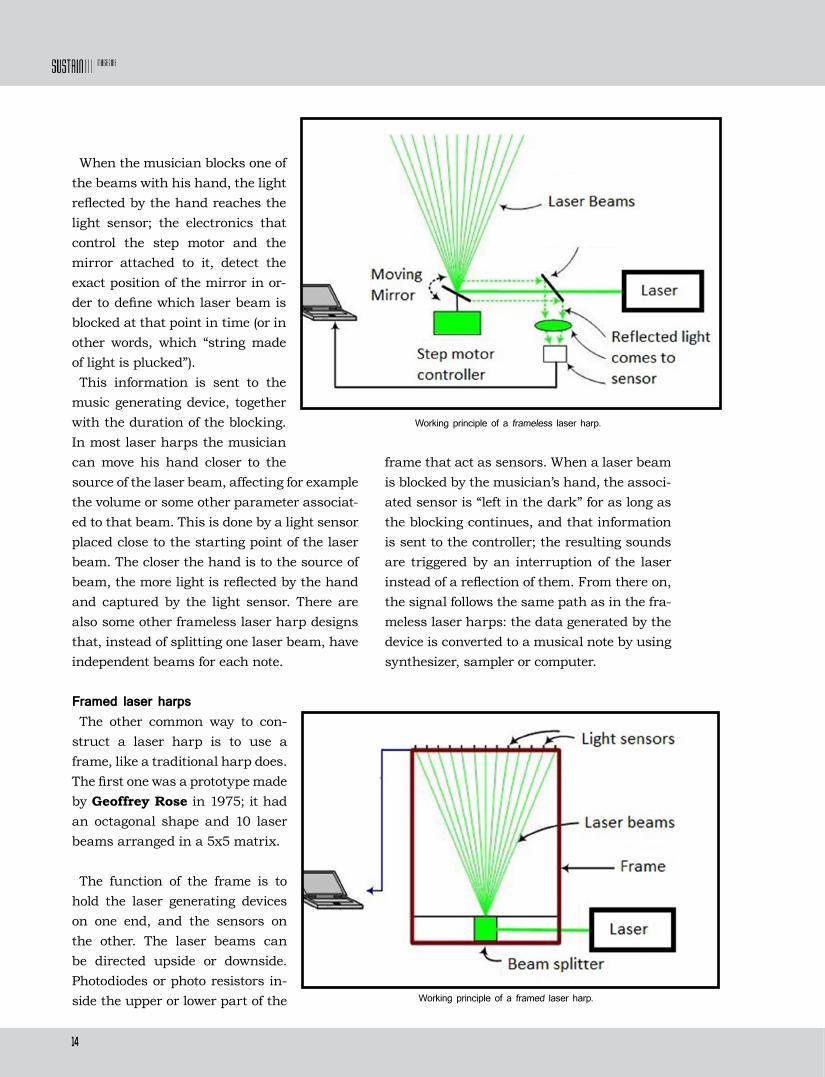
When the musician blocks one of the beams with his hand, the light reflected by the hand reaches the light sensor; the electronics that control the step motor and the mirror attached to it, detect the exact position of the mirror in or-der to define which laser beam is blocked at that point in time (or in other words, which “string made of light is plucked”). This information is sent to the
music generating device, together with the duration of the blocking. In most laser harps the musician can move his hand closer to the source of the laser beam, affecting for example the volume or some other parameter associat-ed to that beam. This is done by a light sensor placed close to the starting point of the laser beam. The closer the hand is to the source of beam, the more light is reflected by the hand and captured by the light sensor. There are also some other frameless laser harp designs that, instead of splitting one laser beam, have independent beams for each note.
Framed laser harpsThe other common way to con-
struct a laser harp is to use a frame, like a traditional harp does. The first one was a prototype made by Geoffrey Rose in 1975; it had an octagonal shape and 10 laser beams arranged in a 5x5 matrix.
The function of the frame is to hold the laser generating devices on one end, and the sensors on the other. The laser beams can be directed upside or downside. Photodiodes or photo resistors in-side the upper or lower part of the
frame that act as sensors. When a laser beam is blocked by the musician’s hand, the associ-ated sensor is “left in the dark” for as long as the blocking continues, and that information is sent to the controller; the resulting sounds are triggered by an interruption of the laser instead of a reflection of them. From there on, the signal follows the same path as in the fra-meless laser harps: the data generated by the device is converted to a musical note by using synthesizer, sampler or computer.
Working principle of a frameless laser harp.
Working principle of a framed laser harp.

15
Laser harps owe their reputation to Jean
Michel Jarre (seen in the photo on the right
during a concert in Helsinki in 2009).
He used a laser harp in almost every con-
cert, including the Rendes-vouz Houston
concert (with an estimated audience of 1.5
million people—second photo on the right),
and the biggest concert in history: On Bas-
tille Day, 1990, he performed a concert at
the ultramodern district of La Défense, in
Paris, attended by an estimated of 2.5 mil-
lion people (photos: Creative Commons).

16
Some laser harps use a camera as sensor, instead. The camera is placed in front of the laser beams and connected to a computer to detect which laser beam is blocked, the dura-tion of that blocking, and the intensity of the reflected light by musician’s hand. This data is then are converted to MIDI and sent to a music generating device.Since there is a frame to limit the laser
beams, the size of the instrument can vary depending on the need—from very small ones, to very large stage instruments. Some of the framed laser harps have an
additional functionality to change octaves, sounds or any programmed settings of the in-strument by blocking the laser beams. Some may also have several switch modes to play a sound sample to the end once it is triggered, or to play a sound until the beam is blocked a second time.
Some framed laser harps (it is a copyrighted idea) use acrylic rods as a light pipes: the la-ser beams run inside the rods, treated with some fluorescent medium added to them. This increases the responsiveness of the interface, and has the added benefit of making unnec-essary the use of gloves. It also reduces the number of sensors to one, no matter the num-ber of ‘strings’. It costs more, though, and it makes the instrument bigger and heavier.Frameless laser harps can work as if they
were framed. This is called the “ceiling” mode: the ceiling of the room in which the frame-less harp is played acts as a frame. The sensor works like in the frame mode, then; that is, detecting a blockage of the light instead of a reflection of it. If the reflection of a laser beam disappears from the ceiling (when the hand is placed between the laser and the ceiling) the note is triggered.
The components of a laser harp. See also their block diagram representation in page 16. Compare with the size of the match on the right, for reference.
17
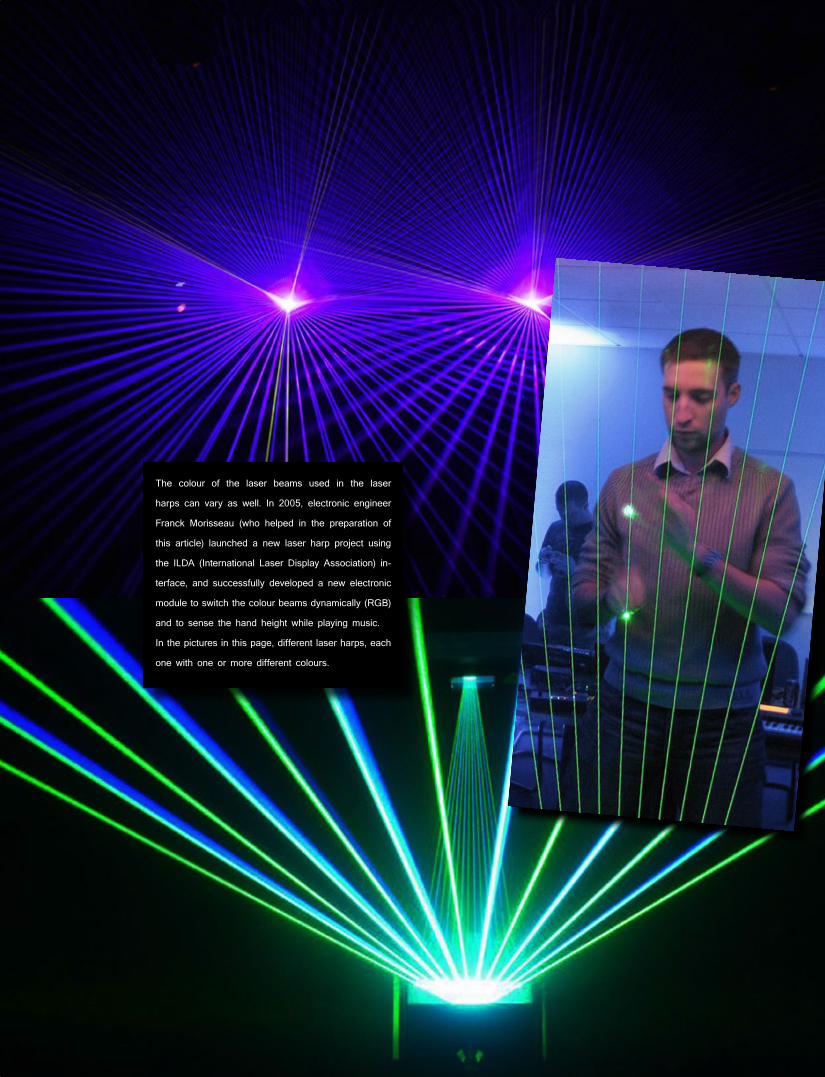
The colour of the laser beams used in the laser
harps can vary as well. In 2005, electronic engineer
Franck Morisseau (who helped in the preparation of
this article) launched a new laser harp project using
the ILDA (International Laser Display Association) in-
terface, and successfully developed a new electronic
module to switch the colour beams dynamically (RGB)
and to sense the hand height while playing music.
In the pictures in this page, different laser harps, each
one with one or more different colours.

18
LasersThe minimum requirement of laser power
is about 300mW. This means that the device needs to use class IIIb or IV lasers, which can be hazardous for the musician’s eyes. The use of protective goggles is required. The beam (once split, at least) is not damaging to the skin—the original, single laser beam could be, though; the use of gloves is intended to im-prove the reflection of the light in a frameless laser harp, and to give audiences a more visu-al impression of the instrument being played. Thanks to the limited distances between
laser generators and sensors, framed laser harps are able to use lasers with lower power. Since the notes are triggered by simply block-ing the beam, gloves aren’t necessary at all. However, laser harps need another element:
there has to be a means to generate smoke. A smoke machine generating a steady and low
The power supply provides the necessary energy for all components. The analog-to-digital converter and the analog scaling device transform the analog signal picked up by the sensor (the reflection of the laser coming from the player’s hands) and converts it in a digital signal. The Micro Controller Unit runs the firmware, which is the laser harp program. All functions are accessed via the control panel, which has an LCD display, 3 buttons, and 1 potentiometer. The EEPROM is a memory that stores data tracks and playlists. The ILDA interface brings together the laser harp with it laser unit. Finally, the signal is sent via the MIDI connectors to a synthesizer, computer, or a sampler in order to produce sound (graphic courtesy of www.harpelaser.com).
output of smoke is ideal—otherwise the la-sers wouldn’t be visible at all. And that goes not only for the player and the audience, but also for the sensor: it perceives the subtle echo light in the hand of the player and in the surrounding smoke. The more homogeneous the smoke, the better is the response of the system—this obviously makes things harder when it comes to playing outdoors. Well, we said that laser harps were spectac-
ular, but nobody said they were simple.
Additional information:Harpelaser.com is the best resource available on the subject. It offers free plans, manuals, and oth-er documentation necessary to build a laser harp; they even provide the builder with the right firm-ware for the device. Sylvain Bezia’s: www.sylvainbezia.com Guo Gan’s: www.guogan.fr

19
20
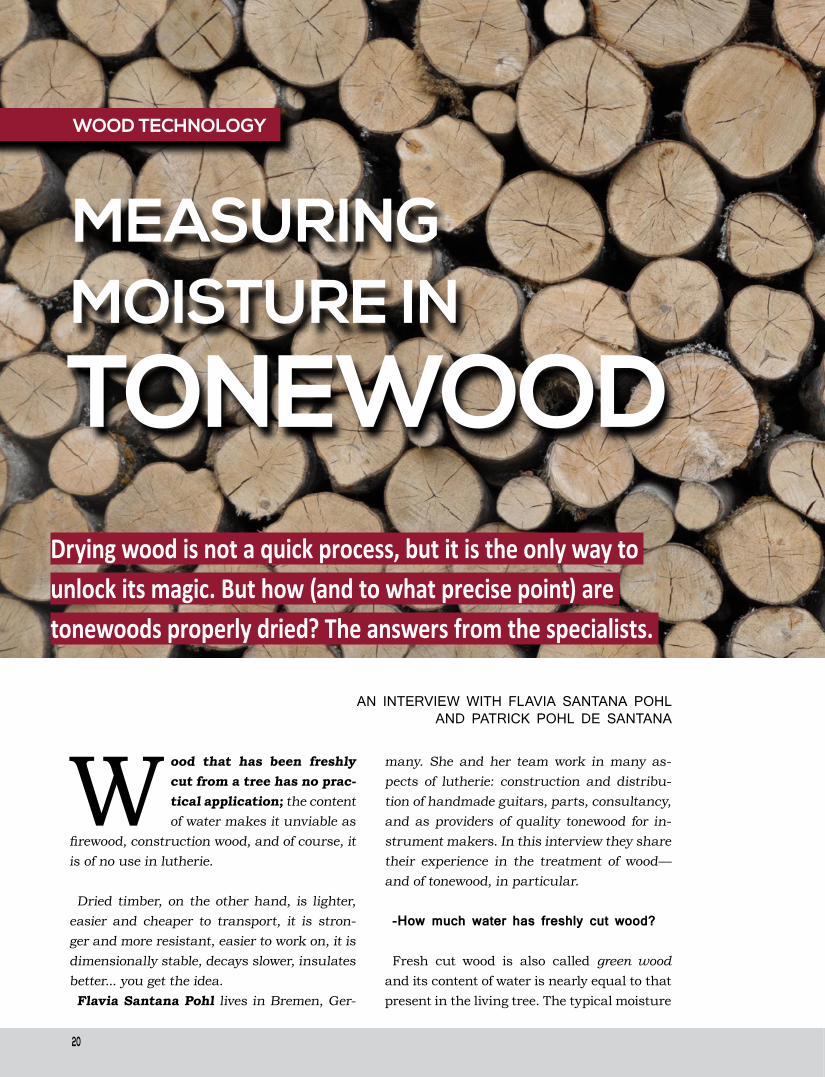
MOISTURE IN
AN INTERVIEW WITH FLAVIA SANTANA POHL AND PATRICK POHL DE SANTANA
Drying wood is not a quick process, but it is the only way to unlock its magic. But how (and to what precise point) are tonewoods properly dried? The answers from the specialists.
TONEWOOD
WOOD TECHNOLOGY
MEASURING
W ood that has been freshly cut from a tree has no prac-tical application; the content of water makes it unviable as
firewood, construction wood, and of course, it is of no use in lutherie.
Dried timber, on the other hand, is lighter, easier and cheaper to transport, it is stron-ger and more resistant, easier to work on, it is dimensionally stable, decays slower, insulates better... you get the idea.Flavia Santana Pohl lives in Bremen, Ger-
many. She and her team work in many as-pects of lutherie: construction and distribu-tion of handmade guitars, parts, consultancy, and as providers of quality tonewood for in-strument makers. In this interview they share their experience in the treatment of wood—and of tonewood, in particular.
-How much water has freshly cut wood?
Fresh cut wood is also called green wood and its content of water is nearly equal to that present in the living tree. The typical moisture

21
percentage depends on the species, and on which part of the tree the wood comes from. Many hardwoods, for example, have an aver-
age of 70% to 100% of water, measured in re-lation the wood in dry state. Contrary to this, pinewood (which is softwood), in the centre of the trunk (the so called old wood) contains about 35 – 50% of water; the sapwood has much more: between 100 and 150% water. Note: At first glance, it may seem impossible for a piece of wood to have more than 100% moisture. But it makes sense when you re-member that the percentage moisture is de-fined relative to DRY wood.
How are those percentages calculated?
The wood is first weighed in its wet condi-tion (let’s call that simply “wet”) and later, in
its dry state (“dry”). So we can calculate the percentage of water as follows:• The difference between both (wet minus
dry) is obviously the quantity of water the log has lost in order to go from one state to the other.
• That quantity of water, divided by the (now) dry weight, allows us to calculate the per-centage of water the log had in relation to dry wood: Water(%) = (water / dry) x 100
Note that what we call “dry wood” is actu-ally wood that has lost most of his water con-tent, but that still has some moisture in it, in equilibrium with its environment. In fact, if the wood gets too dry, it loses flexibility; that’s something you don’t want to happen to a mu-sical instrument, and it is the reason valu-able instruments are stored with a humidor
Some thick trunks of softwood (conifers) in a sawmill in south Germany, waiting to be converted in guitar tops (photo: A. Figari)
22
or in an environment with controlled humidity. If the wood dries too much, it can crack. But the opposite prob-
lem can happen, too. If you build a guitar with wood that has acclimated to a dry geography (plac-es with humidity levels of 20% or less, reaching sometimes the single dig-its), and then you trans-port it for example to Europe, where 60% hu-midity is not at all unusu-al during some months of the year, the wood expands so much that it can warp and break from compressive stress rather than tensile stress.
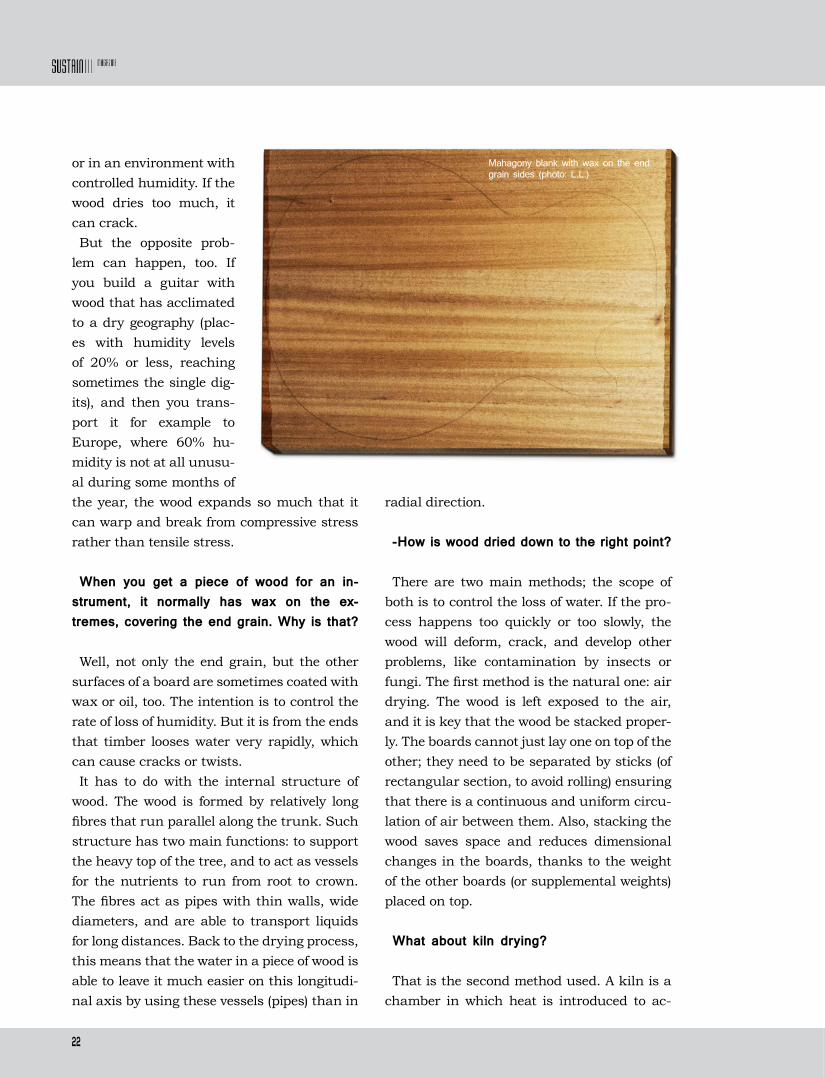
When you get a piece of wood for an in-strument, it normally has wax on the ex-tremes, covering the end grain. Why is that?
Well, not only the end grain, but the other surfaces of a board are sometimes coated with wax or oil, too. The intention is to control the rate of loss of humidity. But it is from the ends that timber looses water very rapidly, which can cause cracks or twists. It has to do with the internal structure of
wood. The wood is formed by relatively long fibres that run parallel along the trunk. Such structure has two main functions: to support the heavy top of the tree, and to act as vessels for the nutrients to run from root to crown. The fibres act as pipes with thin walls, wide diameters, and are able to transport liquids for long distances. Back to the drying process, this means that the water in a piece of wood is able to leave it much easier on this longitudi-nal axis by using these vessels (pipes) than in
radial direction.
-How is wood dried down to the right point?
There are two main methods; the scope of both is to control the loss of water. If the pro-cess happens too quickly or too slowly, the wood will deform, crack, and develop other problems, like contamination by insects or fungi. The first method is the natural one: air drying. The wood is left exposed to the air, and it is key that the wood be stacked proper-ly. The boards cannot just lay one on top of the other; they need to be separated by sticks (of rectangular section, to avoid rolling) ensuring that there is a continuous and uniform circu-lation of air between them. Also, stacking the wood saves space and reduces dimensional changes in the boards, thanks to the weight of the other boards (or supplemental weights) placed on top.
What about kiln drying?
That is the second method used. A kiln is a chamber in which heat is introduced to ac-
Mahagony blank with wax on the end grain sides (photo: L.L.)
23
celerate the drying process. Not only the tem-perature, but also the humidity of the air and its circulation are controlled. Each species react in a different way. The so
called highly refractory woods (heavy, dense timbers) need to be dried using a very slow and controlled process; at the other extreme we have woods that are non-refractory (like pine and other softwoods with a simpler structure): they need to be dried quickly in or-der to avoid discolouration and the developing of microorganisms in its surface.Kilns used in drying non-refractory woods
operate at a top temperature of about 116°C (240°F). Hardwoods, which are normally mod-erately refractory, are dried in kilns operating at no more than 82 °C (180°F). Highly refrac-tory species, instead, need a slower drying process. They are kiln dried at temperatures not above 60°C (140°F).
How do you choose one of these methods (air, or kiln drying)? Which one is better?
Air drying doesn’t need any energy put into it, so it is generally cheaper—even if there are some storage and speed-to-market costs (air dried timber takes longer to be ready for sale). It is considered that air drying produces wood with better final quality, though, but again, it may take several months or even years to air-dry the wood, depending on the climate. The advantage of kiln drying is that climate
stops being a factor; most commercial tim-ber is dried this way. It is consequently much faster than air drying, creating an output of dry wood in weeks or even days, instead of months. But other costs go up, though: chambers, fuel (or solar energy equipment), air control machines... And kilns, especially industrial ones, have an impact on the envi-ronment, of course. At the end of the day it all comes down to an evaluation of costs and benefits, as in any other aspect of our lives.In any case, the process is completed once the wood has achieved a natural moisture equi-librium with is environment, which keep di-
24
mensional changes down to a minimum. This percentage of moisture lies generally between 8% and 28%.
-What is the minimum content of water that allows the use of wood for musical instru-ment making?
When it comes to tonewoods, we luthiers should use wood with a content of water be-tween 12 and 15%. After the fresh cut wood has been given the size for its intended ap-plication (e.g. body blanks, neck blanks, etc.) the wood should be dried, preferably by air, for a few years. It should be stacked in an indoor area with a good circulation of air.
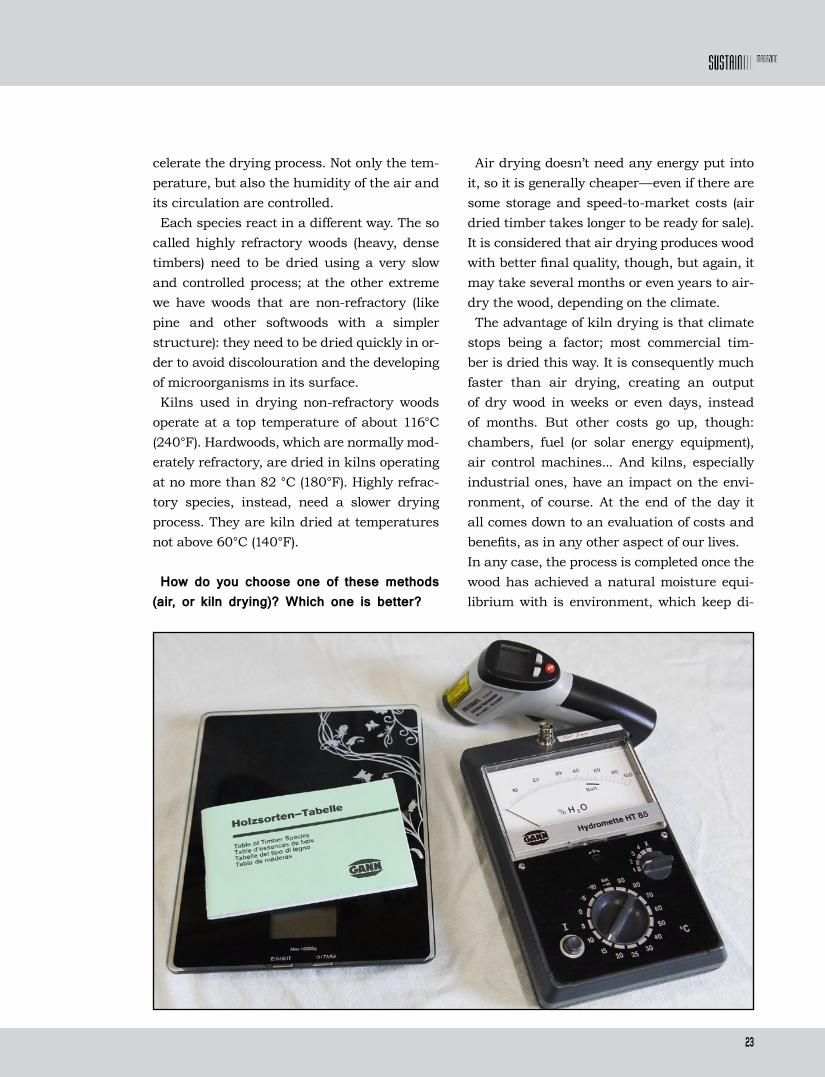
-How is moisture measured in an already dried wood?
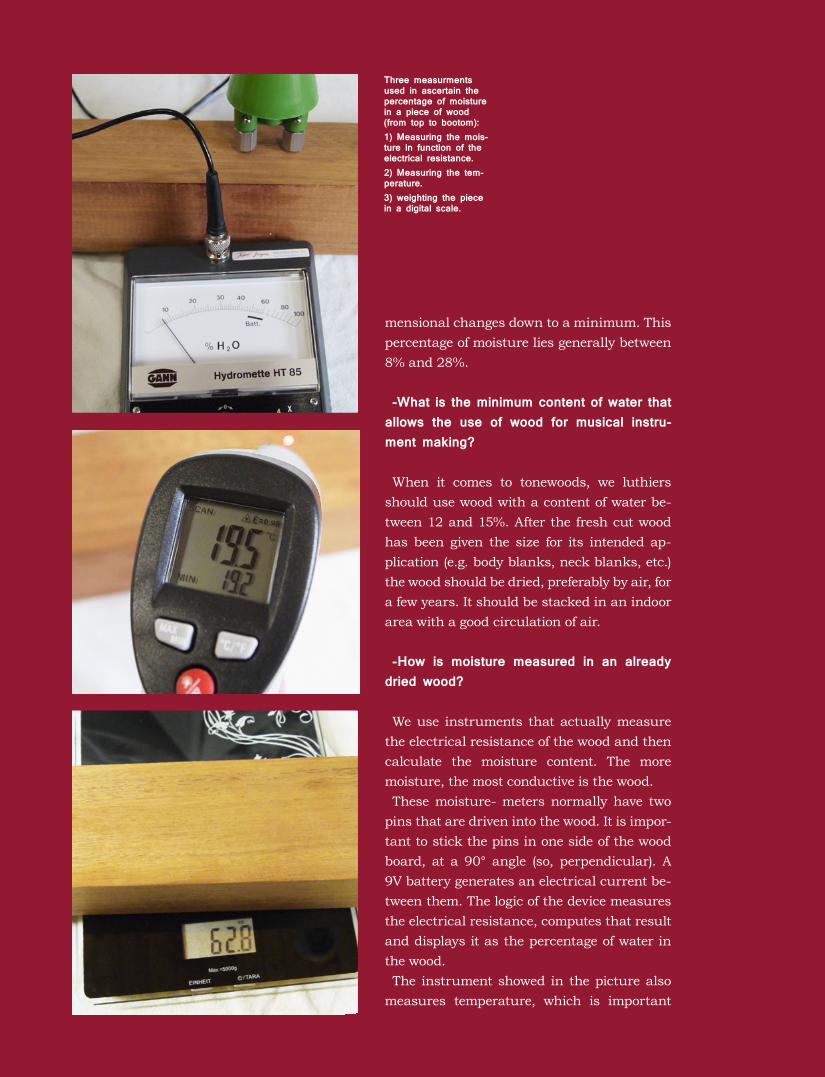
We use instruments that actually measure the electrical resistance of the wood and then calculate the moisture content. The more moisture, the most conductive is the wood.These moisture- meters normally have two
pins that are driven into the wood. It is impor-tant to stick the pins in one side of the wood board, at a 90° angle (so, perpendicular). A 9V battery generates an electrical current be-tween them. The logic of the device measures the electrical resistance, computes that result and displays it as the percentage of water in the wood.The instrument showed in the picture also
measures temperature, which is important
Three measurments used in ascertain the percentage of moisture in a piece of wood (from top to bootom):1) Measuring the mois-ture in function of the electrical resistance. 2) Measuring the tem-perature. 3) weighting the piece in a digital scale.
25
because the higher the temperature, the lower the resistance. Finally, we see a digital scale, used to weight the wood in wet and dry state, in order to calculate the original water per-centage. It is important that the probe points are
sharp in order to ensure a good penetration in the wood fibres; otherwise the reading can be affected. Some modern instruments do not use pins,
but radio waves, instead, and scales of indus-trial size, of course.In any case, in order to perform a correct
measurement, it is important to adjust the temperature in the instrument, and to choose a spot in the wood avoiding water conden-sation, ice, dirt, and other substances that might alter the reading.
So the finish in a guitar will also have an impact in the dynamics of the humidity of the wood.Certainly. The finishing acts as a barrier,
reducing the exchange of humidity between the wood and the atmosphere. Wood is hygro-scopic; it does not only release humidity into the air, but also absorbs it. This dynamic is reduced by the finishing. Some luthiers go a step further and lightly
coat the inside of the body of acoustic guitars with shellac, which slows down the exchange of water the instrument’s wood undergoes during its lifetime; the ensuing cycles of ex-pansions and contractions are the cause of wood cracking. And getting back to humidi-fiers, forgetting to keep them wet is equivalent to stimulate these variations.
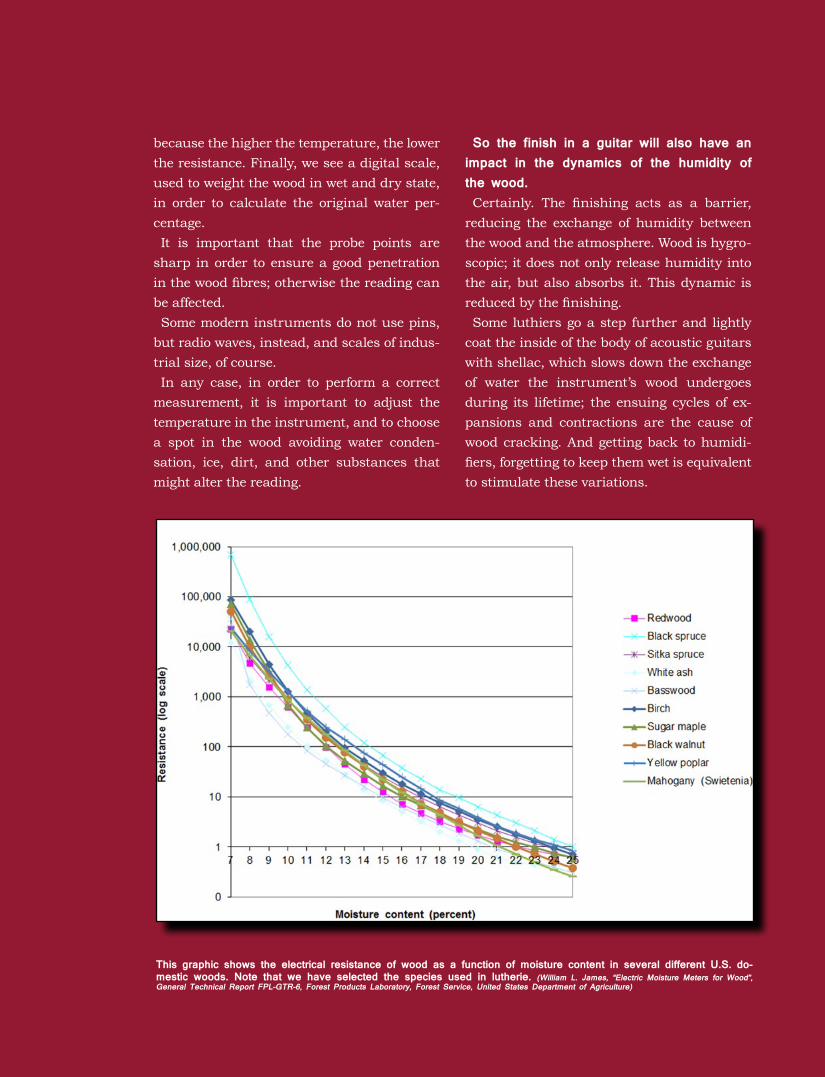
This graphic shows the electrical resistance of wood as a function of moisture content in several different U.S. do-mestic woods. Note that we have selected the species used in lutherie. (William L. James, “Electric Moisture Meters for Wood”, General Technical Report FPL-GTR-6, Forest Products Laboratory, Forest Service, United States Department of Agriculture)
26
Binding has the same function, too. Even if now is mostly an aesthetic addition, the func-tion of binding was originally to seal the bor-ders of a guitar top (especially the end-grain of the top wood), which is where the most ex-change of humidity takes place, as explained above.
Some environmental recommendations are always in order. Please, share yours.
What about these three?1) When possible, use local timbers.
2) Explore alternative species, do not just stick to the traditional, especially not any en-dangered ones. We use of olive wood, for ex-ample, which allow us to put a touch of Medi-terranean spirit in our instruments.3) If you can, recycle nice timber from old
furniture and transform it to tonewood. The advantage are obvious: the wood is already dry, since it was cut years or decades before; no new trees need to be cut; we are able to give old wood a new life as a musical instru-ment. Art, handwork, and nature can have a harmonic coexistence.

27

28
A BRIEF GUIDE TO
COPYRIGHT LAW LUTHIERS
Like any other products of creative activity, musical
instruments are subject to plagiarism. This interview
discuss how to protect our brands and designs
FOR
AN INTERVIEW WITH BALTAZAR AVENDAÑO RIMINI
BY LEO LOSPENNATO
Baltazar Avendaño’s first job was as a guitar teacher, back when he was only 14. I met him not long af-ter that, when I was looking for a
bassist for my new band, one intended to revo-lutionize rock music. The band never formed, but Baltazar and I remained best friends since then, almost 30 years ago. These days, his day job description includes
scaring the living hell out of any lawyers who happen to find themselves face to face against him in a court of law. He also authors legal

29
texts, defends the rights of his clients, and enjoys his wonderful family (a lovely wife and two daughters). And of course, he still finds the time to play any object capable of produc-ing music that falls in his hands.
L.L.: I have designed this new beautiful guitar shape, and of course it will carry my brand. How do I protect them from being copied?
B.A.: It depends on where you live; every country implements their particular copy-right laws differently. But there are some com-mon principles. The very first step is to register your intellec-
tual creation, so it becomes intellectual prop-erty. Such registration is made at the patent office of each country, and (even if there are variations from one country to another) it gen-erally follows these steps:
1) Registration. if it is a design, you fill a form that has the value of an affidavit (a sworn declaration) stating that you are the creator of such design. It has to include any documents that precisely describe the design; it cannot just be a generic description. Dimensions, components, proportions, working principles, and any other technical information... it all has to be enclosed in the registration.
2) Publication. In some countries the regis-tration is published in an official bulletin, in order to make it public. After a period of time without opposition, the design is then official-ly registered as your intellectual property.
3) Branding. You can also register the brand and the model name of the design. Doing so improves your position in case you need to consider a legal action.
Dr. Avendaño at the university, teaching a seminar on processal law to a group of students and graduates.
3030
For how long do you keep this right on the design?
First of all it is important to understand the differences between the several legal instru-ments that are used to protect one’s creations. They are:
• Patents, documents that grant rights on inventions. An invention is understood as a solution to a specific technological prob-lem, which may be a product or a process.
• Copyrights, instead, protect intellectual creations—a wide range of conceptual, intellectual or artistic forms. Copyrights do not cover ideas or concepts themselves, but only the form or manner in which they are expressed.
• A trademark regards identity: signs, lo-gos, brand names, and every element that
distinguish your products or services from your competitors’.
• Industrial design rights protect the vi-sual design of technological objects such as shapes, configurations, color patterns, etc., deemed to contain aesthetic value.
• A trade secret is a formula, process, or data not publicly disclosed, by which a business can obtain a commercial advan-tage over competitors or customers. Mis-appropriation of trade secrets is a federal crime almost everywhere.
So, let’s go back to the duration terms of these different instruments. In the USA a pat-ent filed today will have a term of 15 years; in Germany that period is 20 years. A copyright in the USA will be valid for the whole life of the author plus 70 additional years. Again, it all varies from country to country (note from the
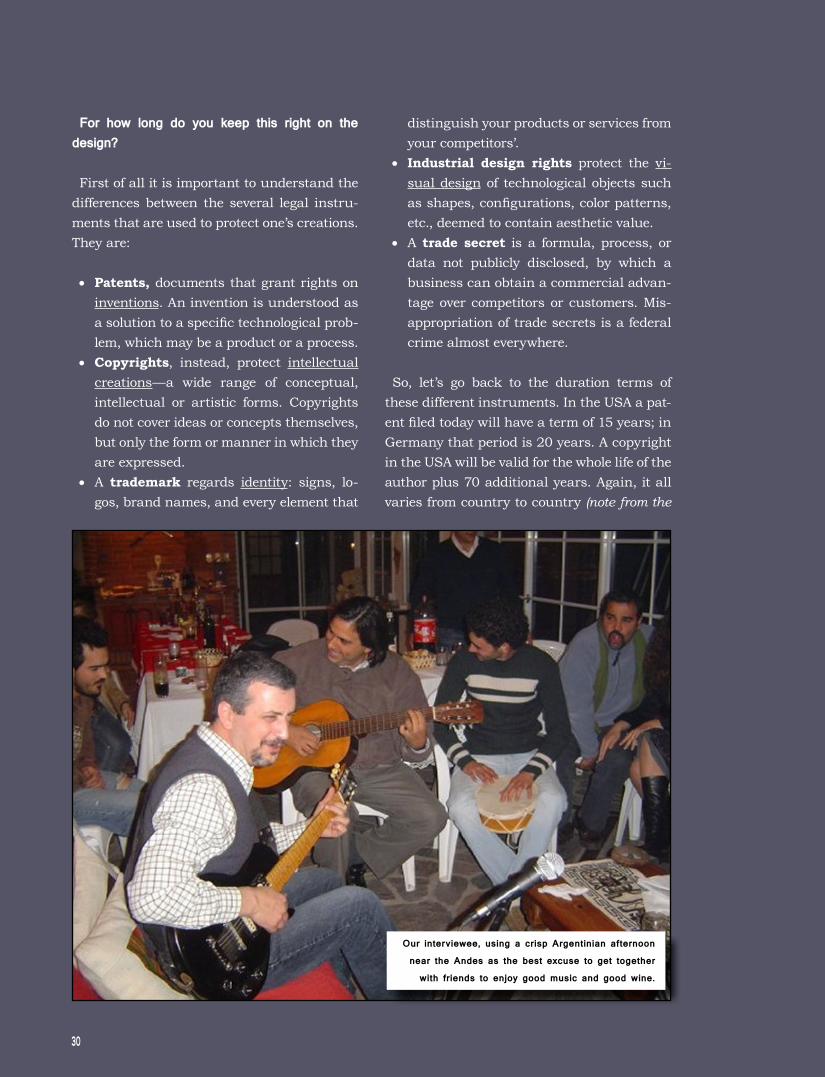
Our interviewee, using a crisp Argentinian afternoon
near the Andes as the best excuse to get together
with friends to enjoy good music and good wine.

3131
editor: see this list of copyright lengths: http://bit.ly/OhYpno).
Suppose that one of my registered designs gets copied by someone. What should I do?
First of all it is important to understand that copyright law is very complex. In the event of a real case of potential infringement (by or against you) searching for legal counsel is the first and most obvious step. Look for a spe-cialized lawyer, if you can afford one. But, in general, if you consider that your
rights have been infringed, you have the right to demand the other part to cease and desist–that is, to demand the infringing person or company to immediately stop replicating your design, brand or creation. Then you can claim a monetary compensation, as long as the in-
fringing part made money by using your de-sign. If that demand is not met, daily penalties apply. Enforcing this compensation normally implies going to court over the matter.
What if the copy regards only one specific aspect of my design; for example, the shape of a guitar’s body?
In that case we are talking about something called surreptitious copy, which is always harder to prove. But as long as that specific aspect of the design is correctly registered and described in the patent (that’s why the additional, technical information attached to the patent filing form is important) it is more likely that you can successfully defend your position. One example is the so-called “Ibanez lawsuit” guitars. Gibson filed a suit against Ibanez claiming that they copied the “moustache-shape” of the headstock of their instruments, and their logo, too. The case was settled out of court to Gibson’s advantage and closed in 1978.
What if the person copying my design resides in a foreign country? Which country’s law is applied—mine or theirs?
The law, by default, applies in the country of registration of the patent or copyright and automatically in other countries with which there is a treaty in place. In some countries (Germany, for example), during the patent registration process, you can choose the geo-graphical reach of your patent (i.e. the coun-
Dr. Avendaño (sitting), editor Leo Lospennato (on the right), and guitarist H. Schauvinhold, ca. 1986—many years and several kilos ago.
32
try, the European continent, or an interna-tional patent). The cost proportional to the geographical coverage, reaching the hundreds or thousands of dollars/euros in the case of an international one.
So, if I invent a new model of violin, for ex-ample, the only way to be sure that my rights on that design are fully protected is to file an international patent?
Not really; even if you do file an international patent there will still be gaps. The World Intel-lectual Property Organization (WIPO, a Unit-ed Nations specialized agency) was created in order to promote the protection of copyrights at an international level, but some countries won’t become members precisely to avoid be-ing forced to subscribe such treaties. If an ob-vious replica of your violin is made in a coun-try that is indeed a member of the WIPO, you may be facing a long trial. But if the clones of your violin are made in one of the non-
member countries, then the complications, costs and duration of an international process make most legal actions impractical, even for big companies—and especially for small ones.
So, sometimes suing isn’t worth our while?
Defending our rights is always worth our while, at least in principle. But, as in every aspect of our lives, a sense of practicality de-mands a cost/benefit evaluation. We have to decide (1) whether to invest money in register-ing a design, or not; and (2) whether to invest money in a legal action in case our copyright has been infringed—or not.If you are Gibson or Fender and you discover
that thousands of cheap copies of your guitars are illegally being produced somewhere, you may have no choice but to sue in order to war-rant the survival of your company. If on the contrary you are an independent luthier who produces only a handful of custom made in-strument per year, and you happen to discover
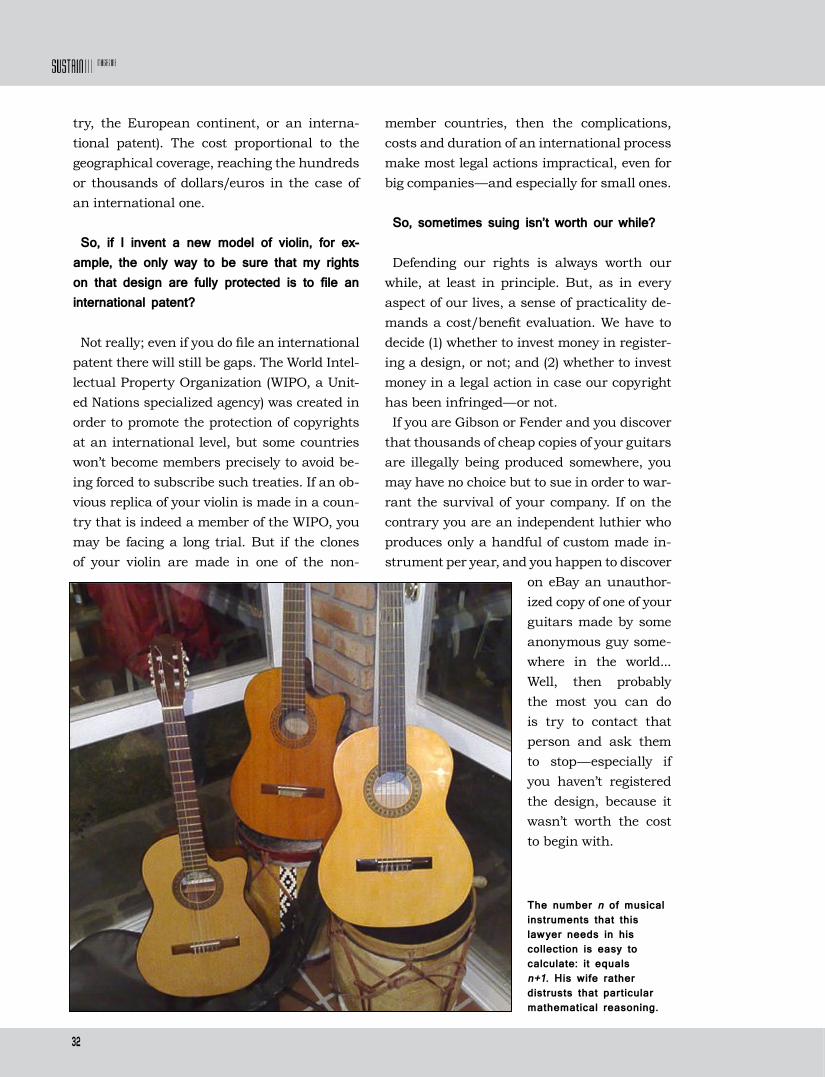
on eBay an unauthor-ized copy of one of your guitars made by some anonymous guy some-where in the world... Well, then probably the most you can do is try to contact that person and ask them to stop—especially if you haven’t registered the design, because it wasn’t worth the cost to begin with.
The number n of musical instruments that this lawyer needs in his collection is easy to calculate: it equals n+1. His wife rather distrusts that particular mathematical reasoning.

33
This means, if I haven’t registered, I can’t sue.
That is correct. The intellectual property right is born with the registration. And even if that is not the case in your country, your stance may be too weak to successfully make a legal claim, anyway.
Okay, this is the worst case scenario I can come up with: Suppose that somebody copies a design of mine, and on top of that, they reg-ister the design as their own. Can I prove that I am the real creator of that design if I haven’t registered it?
In such case you would have the odds decid-edly stacked against you. You would have to demonstrate that the design is your creation in order to demand the nullification of the oth-er person’s patent, and to register the design as belonging to you. But again, this is very difficult to prove.
A famous example regards the invention of the telephone. Italian inventor Antonio Meuc-ci researched the principles of voice trans-mission via electromagnetic means, finally succeeding in producing a working device in 1856. He filed a caveat (an announcement of an invention) which was not renewed in time due to financial hardships. Alexander Gra-ham Bell, who also contributed to the device’s development, was ultimately the one who filed the patent, and is today widely recognized as the inventor of the telephone. So you see, law is not necessarily the same as justice; it is merely an approximation to it. Sadly, law is generally not about what’s fair, but about what you can prove in court.

34
THEBESTOF TWO WORLDSThe hyper-guitar blends traditional playing styles with percusive resources, extending the limits of conventional performance
AN INTERVIEW WITH JAYDEV MISTRY
Jaydev Mistry is an award-ed musician who composes music for theatre and radio and plays in the band Gi-
ant Star. Born and living in the UK, he is also a researcher: in the context of his master s degree pursue, he de-veloped a very particular musical in-strument: the Hyper-guitar. We had the pleasure to talk with this gentle
35
INTERVIEW
and interesting man about his musical and technical quest. (L.L.)
That is an unusual guitar. What is the con-cept behind it?
(J.M.): I am a percussionist and a guitarist; I have always had an equal love for both instru-ments and as a result, I have a very percus-sive style of playing the guitar. The idea for the hyper-guitar came about through observ-ing acoustic guitar players such as Preston Reed and Andy McKee, who are masters of playing multiple parts at the same time. They tap the various parts of the guitar’s body, cre-ating percussive grooves that accompany the melody. I am also influenced by music styles such as Hip Hop and Drum & Bass. I started to wonder what it would be like to incorporate those styles to my guitar playing, which was not possible to do with a conventional instru-ment.
Tell us about its development.
Well, just at the time I conceived this instru-ment I was considering doing a Masters De-gree by research, and I was fortunate to get a place at Huddersfield University (West York-shire, UK) under the supervision of Professor Monty Adkins. So I put both things together, starting in 2011. The aim of the research was to build an ergonomically designed electric guitar that integrates and extends a regular guitar’s capabilities for composition and per-formance. It does so by including sensors that control modeled sounds, trigger samplers, and create controller messages for sound and effects manipulation.
So, this is a synthesized guitar?
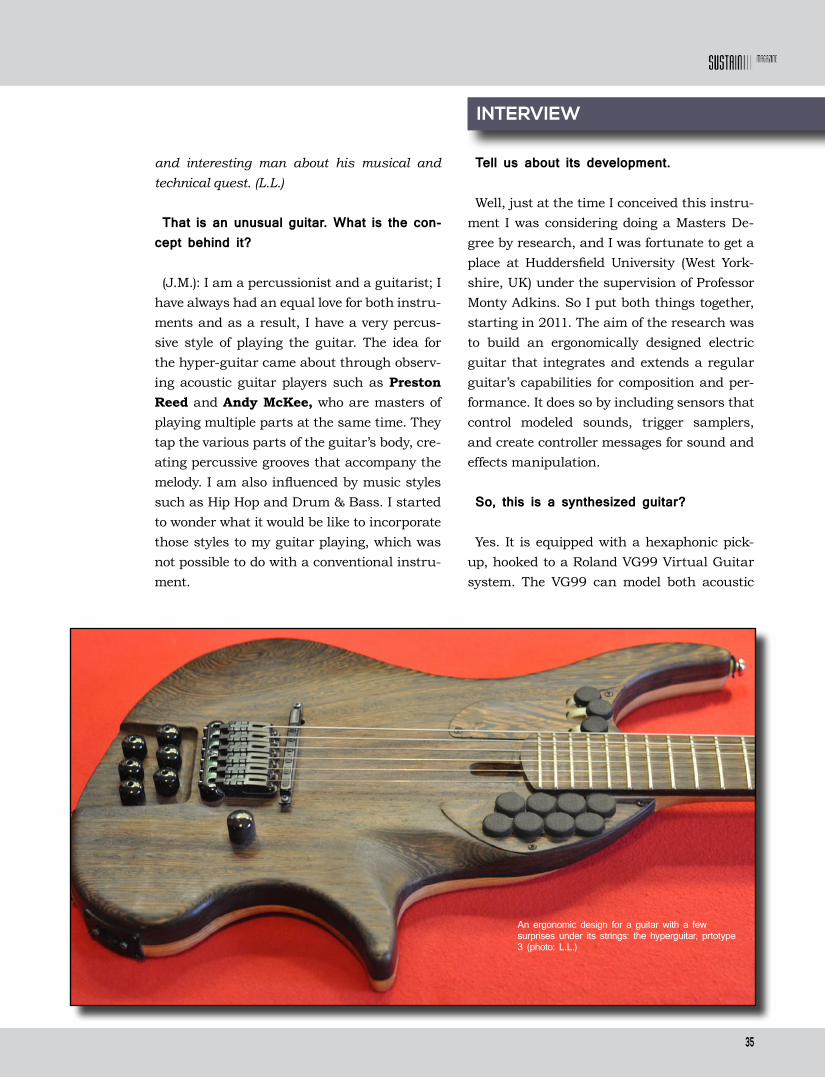
Yes. It is equipped with a hexaphonic pick-up, hooked to a Roland VG99 Virtual Guitar system. The VG99 can model both acoustic
An ergonomic design for a guitar with a few surprises under its strings: the hyperguitar, prtotype 3 (photo: L.L.)
36
and electric guitar sounds very accurately. The unit is highly editable, allowing the user to build hybrid guitar models, not possible in the real world. The VG-99 also models realistic bass sounds,
and of other stringed instruments such as a Sitar, for example.
How do the pads work?
I initially started by researching how elec-tronic drum triggers work. They convert the mechanical energy of the impact into electri-cal impulses. The impulses are then fed to a drum module (also known as a “drum brain”) which converts them into MIDI information, which in turn triggers a drum sound or sam-ple. There are two main types of sensors used by
electronic drums manufacturers. Piezo Elec-tric Transducers (also known as piezo pick-ups), and Force Sensitive Resistors, referred to as FSR’s.Piezo pickups convert vibrations into an
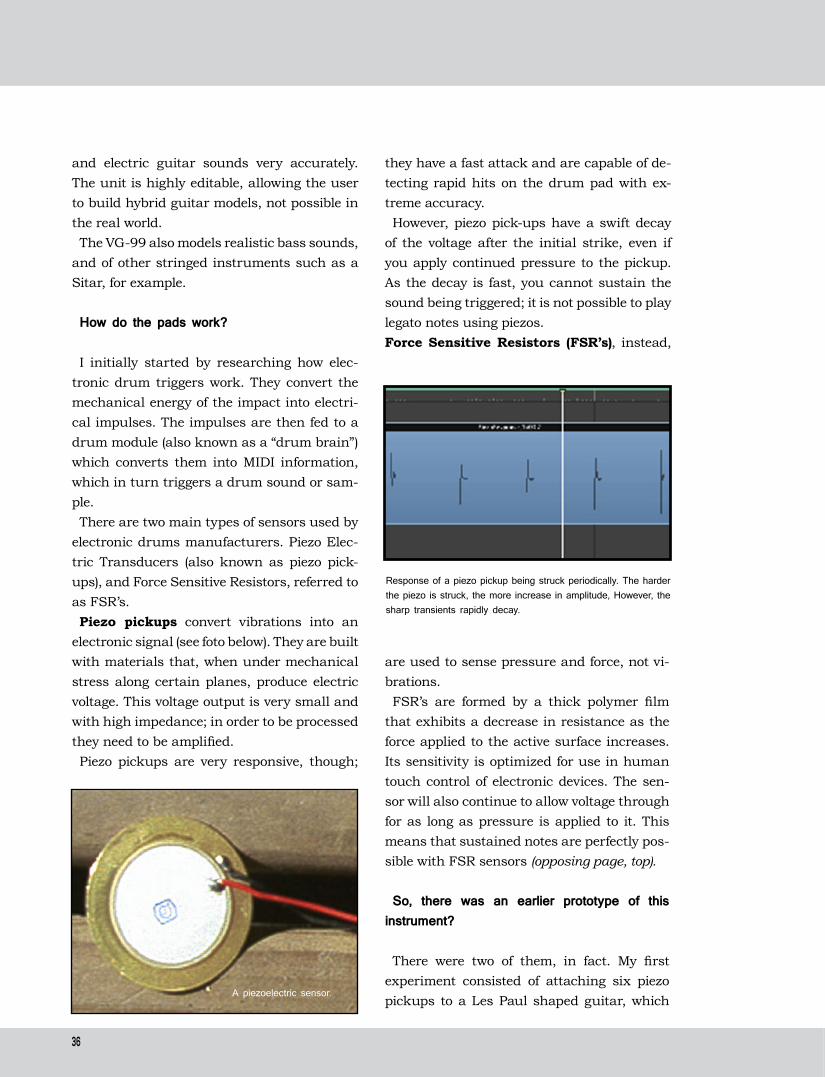
electronic signal (see foto below). They are built with materials that, when under mechanical stress along certain planes, produce electric voltage. This voltage output is very small and with high impedance; in order to be processed they need to be amplified. Piezo pickups are very responsive, though;
they have a fast attack and are capable of de-tecting rapid hits on the drum pad with ex-treme accuracy. However, piezo pick-ups have a swift decay
of the voltage after the initial strike, even if you apply continued pressure to the pickup. As the decay is fast, you cannot sustain the sound being triggered; it is not possible to play legato notes using piezos. Force Sensitive Resistors (FSR’s), instead,
Response of a piezo pickup being struck periodically. The harder the piezo is struck, the more increase in amplitude, However, the sharp transients rapidly decay.
are used to sense pressure and force, not vi-brations.FSR’s are formed by a thick polymer film
that exhibits a decrease in resistance as the force applied to the active surface increases. Its sensitivity is optimized for use in human touch control of electronic devices. The sen-sor will also continue to allow voltage through for as long as pressure is applied to it. This means that sustained notes are perfectly pos-sible with FSR sensors (opposing page, top).
So, there was an earlier prototype of this instrument?
There were two of them, in fact. My first experiment consisted of attaching six piezo pickups to a Les Paul shaped guitar, which
A piezoelectric sensor.

37
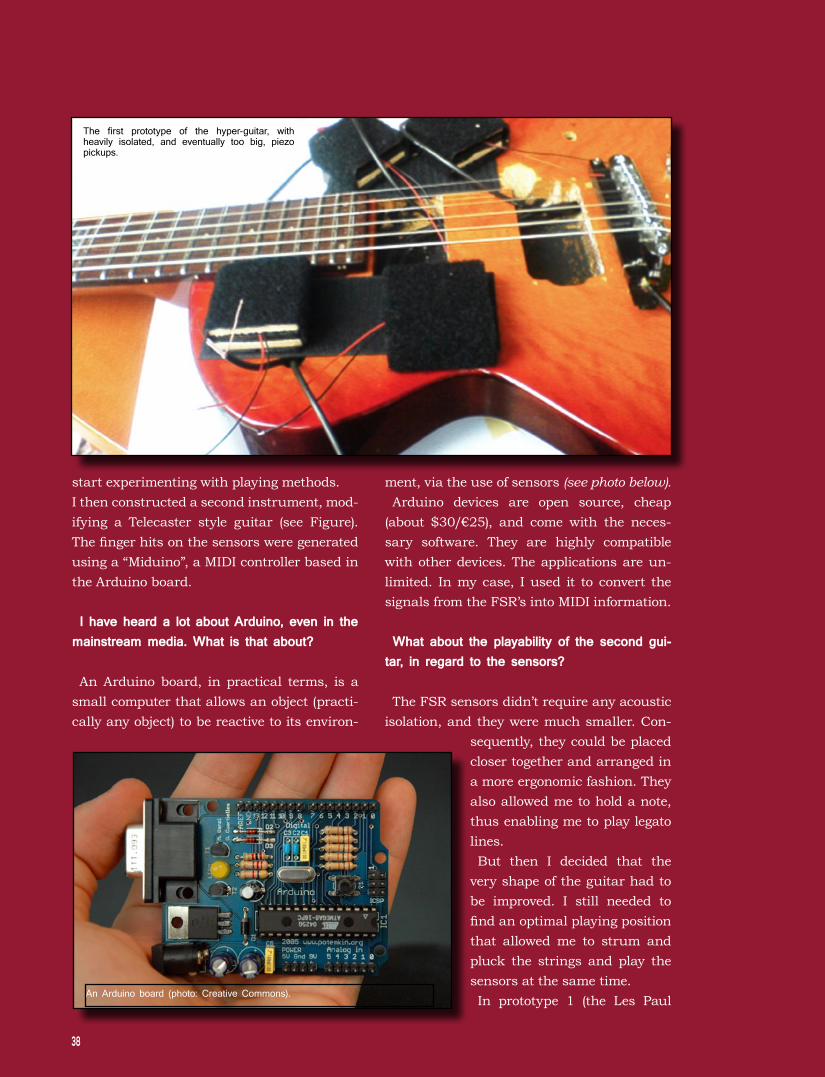
were fed to a drum interface in order to con-vert the impulses into MIDI information. The MIDI output was then fed into a computer to trigger drum samples. So I had a guitar from which I could also create percussion sounds.But I found some problems. As piezo pick-
ups respond to vibrations there is a problem with cross talk between individual pickups, which creates false triggering. It was neces-sary to isolate each pickup somehow, in order to prevent the piezos from picking up vibra-tions from the guitar body. After several tries I succeeded, but the space taken up by the
isolation materials reduced the number of drum pads that could be placed on the gui-tar body (see photo of the first protoype in next page, top). Also, as we saw, piezo sensors only produce short transients, which don’t allow sending sustained notes to the computer. As I wanted to play instruments sounds other than drum sounds, the piezo pickups proved to be unsuitable for the project.This exercise, however, allowed me to try the
concept out quickly and cheaply, enabling me to test how it would feel to have sensors posi-tioned in the way that I had envisaged and to
The curve shows how the FSR reacts with a decreasing resistance as more force is applied. This effect allows to measure the force which the FSR is impacted with, and consequently to use it to generate a dynamic signal.
38
start experimenting with playing methods.I then constructed a second instrument, mod-ifying a Telecaster style guitar (see Figure). The finger hits on the sensors were generated using a “Miduino”, a MIDI controller based in the Arduino board.
I have heard a lot about Arduino, even in the mainstream media. What is that about?
An Arduino board, in practical terms, is a small computer that allows an object (practi-cally any object) to be reactive to its environ-
ment, via the use of sensors (see photo below). Arduino devices are open source, cheap
(about $30/€25), and come with the neces-sary software. They are highly compatible with other devices. The applications are un-limited. In my case, I used it to convert the signals from the FSR’s into MIDI information.
What about the playability of the second gui-tar, in regard to the sensors?
The FSR sensors didn’t require any acoustic isolation, and they were much smaller. Con-
sequently, they could be placed closer together and arranged in a more ergonomic fashion. They also allowed me to hold a note, thus enabling me to play legato lines. But then I decided that the
very shape of the guitar had to be improved. I still needed to find an optimal playing position that allowed me to strum and pluck the strings and play the sensors at the same time. In prototype 1 (the Les Paul
The first prototype of the hyper-guitar, with heavily isolated, and eventually too big, piezo pickups.
An Arduino board (photo: Creative Commons).
38
39
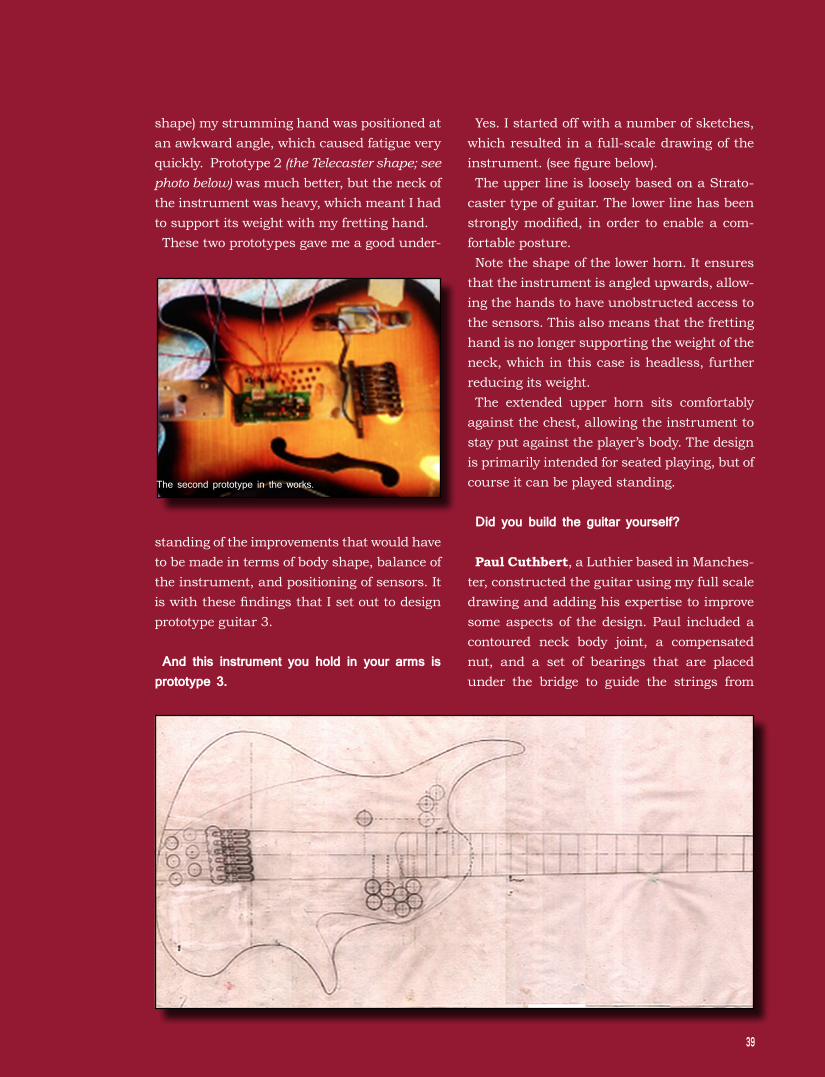
shape) my strumming hand was positioned at an awkward angle, which caused fatigue very quickly. Prototype 2 (the Telecaster shape; see photo below) was much better, but the neck of the instrument was heavy, which meant I had to support its weight with my fretting hand. These two prototypes gave me a good under-
The second prototype in the works.
standing of the improvements that would have to be made in terms of body shape, balance of the instrument, and positioning of sensors. It is with these findings that I set out to design prototype guitar 3.
And this instrument you hold in your arms is prototype 3.
Yes. I started off with a number of sketches, which resulted in a full-scale drawing of the instrument. (see figure below). The upper line is loosely based on a Strato-
caster type of guitar. The lower line has been strongly modified, in order to enable a com-fortable posture.Note the shape of the lower horn. It ensures
that the instrument is angled upwards, allow-ing the hands to have unobstructed access to the sensors. This also means that the fretting hand is no longer supporting the weight of the neck, which in this case is headless, further reducing its weight.The extended upper horn sits comfortably
against the chest, allowing the instrument to stay put against the player’s body. The design is primarily intended for seated playing, but of course it can be played standing.
Did you build the guitar yourself?
Paul Cuthbert, a Luthier based in Manches-ter, constructed the guitar using my full scale drawing and adding his expertise to improve some aspects of the design. Paul included a contoured neck body joint, a compensated nut, and a set of bearings that are placed under the bridge to guide the strings from
39

40
the bridges to the Steinberger gearless tun-ers. This prototype has an upgrade in terms of the electronics, too. The Arduino has been replaced by an Eowave Eobody2 OEM ana-logue/digital USB converter, which allows the connection of sensors directly to a computer through a high-speed USB connection. The assignment of sensors to sounds is also less time consuming than in the case of the Ar-duino.
What species of wood were used in this in-strument?
The core of the body is made from Swamp Ash. It is a light wood, and resonates well across all frequencies. It also transfers tran-sients from the guitar strings extremely well, giving the guitar a very percussive attack. That s a feature I specifically requested, as I wish to play in a percussive style. The neck is constructed from three pieces of
curly maple. The central piece of maple has
the grain running in the opposite direction to the two pieces sandwiching it. This gives the neck greater strength and stability. The fret-board and the top of the body are made from Wenge, chosen purely for aesthetic reasons.
What is the next step you intend to take, regarding this line of research?
I have learned a lot from the current proto-type; this instrument has enabled me to ex-plore new performance techniques and gener-ate compositional ideas that I probably would not have thought of without it. I aim to build another version of the guitar soon. One of the things I want to try is processing each string separately, applying different sounds and ef-fects to each one, to see where does that takes me in terms of performance.
Additional information
Giant Star´s Facebook page: https://www.facebook.
com/giantstarmusic
A view of the back of the hyper-guitar. Note the profuse presence of electronics and the unusual way the strings are directed to the tuners.

41
42
AN
ON LUTHERIEARTICLE
WRITING101
Do you have something to share with your fellow luthiers? Techniques, research activities,
the chronology of a repair...Let the rest of us know about it!
Writing an article in Sustain (or in any other magazine) has several benefits:
1. It positions you as a expert in the field.2. By promoting your article you also pro-
mote your product or services.3. Receiving compliments and feedback from
your readers is always rewarding.4. It connects you with a growing commu-
nity of fellows, including prospects and colleagues across more than 20 countries. BY LEO LOSPENNATO
42

43
We thought it might be useful to put together some simple submission guidelines. Not all subjects can (or should), be written this way—but many of them can be. So, if it helps, use these simple steps to create the first draft.
Anatomy of an article
1) The introduction. The introduction pres-ents the subject; it tells the reader what are you going to talk about and why it’s impor-tant, interesting, or worth mentioning. For example, let’s say that you want to pres-
ent an ingenious repairing technique that you’ve developed. Why is it valuable or inter-esting? Possible answers: because it is more precise, faster, easier, cheaper, etc. No extensive justification is necessary at this
point. Remember, the introduction is about what—not about how. Here you only present the topic and its value. The details come later on.
2) Present the context. A bit of history about your subject could be interesting. What are its origins? When (and where) was this thing first used/made/invented? By whom? How was it done back then?
3) Define the main concepts. What pre-cisely is your article talking about? Concen-trate on explaining the central concept - or concepts - that might be new to most read-ers—don t define obvious things. Describe the fundamental principles at play (for example, relevant chemical or physical processes). Stay focused on the main subject though.
4) Explain processes and techniques. This is the heftier part of the article, the one that fulfils the promise made in the introduction. Here you explain in full detail how things work, how to accomplish some desired results, etc. If relevant, name also:• The tools involved (hand tools, power-
tools, machines, software, etc.) • Any recipes or formulas (for example for a
varnish, a dye, etc.)• Tips and tricks• Legal implications• Safety related advice
Go as deep into the subject as you need to go, but do not spend too much time in technicali-ties. Keep it interesting and practical.
5) Present alternatives and compare them. Consider a comparison of different types, qualities, or brands available, and the advan-tages and disadvantages of those different op-tions. Some topics may require a comparison of an entirely different nature, though. For example, the article on copyrights included in this issue (page 28) compares how intellec-tual property laws work in different countries, and the article on humidity in wood (page 20) compares water content in hardwoods versus softwoods.
6) Talk about the future. Where is this thing going? How can it evolve? Are there any open questions on the subject? Will it be re-placed, improved, or become extinct? Is there any call-to-action that you want to make to your readers?
7) Offer recommendations and conclu-sions. Which one of the discussed options would you recommend (or not)? Is this your personal opinion, or there is some consensus on this?
Pictures and graphics
“An image is worth a thousand words”, they say—and we believe they’re wrong: An image is worth much more than that. The power of a good graphic is enormous,
conveying information that it would take for-ever to explain with words.
43

44
Do not hesitate to include pictures and graphics along with the article - but make sure that you hold the copyright (i.e. you took the pictures or you drew the graphics your-self), or you have the authorization to repro-duce that graphic content. Using a picture just lifted from the internet without permission is not allowed; however, in our experience, if you ask, the rights owner will say “okay” most of the time. Also, your graphics don’t have to be rendered
by using the latest graphic software: you can just send us a darft version of it and we will draw a handsomer one ourselves. Submit pictures in the highest resolution available, though.
Your personal touch In a magazine article (unlike in a scientific
paper) your personal opinions, experiences and anecdotes are valuable; they enrich the article and make it more interesting. It is im-portant however that any personal views on a subject are clearly identified as such. Readers like to come to their own conclusions, so they must be able to tell apart opinion from fact.
Including referencesMuch of our knowledge came to us in non-
formal ways. Most things we know we picked them up somewhere we don’t remember, or we learnt them from a friend or mentor, or we just discovered them by ourselves. That makes cit-ing sources difficult. However, including refer-ences greatly adds value and credibility to an article. It enables readers to find out more by
themselves. If you are including facts taken from a book, magazine, website... or if you just happen to remember who told you about a particular data or fact, please name that re-frence.
Spelling and grammarTypos and punctuation will be taken care
right before publication. Don’t be concerned about them. Send us your draft and we will work together to make it into a valuable ar-ticle.
You could try to describe the subtle curve of the scroll of a Stradivarius for hours... But if you see a picture of it, you understand immediately—that‘s the power of adding images in your article (Photo: courtesy The Henry Ford Foundation)

45
SUSTAIN is published in English, but even if English is not your first language, don’t let that stop you submitting. Our editors will en-sure that articles are appropriately edited for English style, vernacular and grammar.
Danger ZoneBe especially careful with regard to:• Criticism. We hold opinions about many
subjects (materials, brands, products, procedures, etc.) that may be not the most positive ones. And that’s okay. But it is also opinion, not fact; others may think differ-ently. Be as objective as possible when criticizing something. Avoid too many ad-jectives, and refer to hard data as much as possible. Negative criticism of persons, groups, and other media is discouraged.
• Covert advertising. The opposite of criti-cism is exaggerated praise. SUSTAIN has paid advertising, and also presents prod-ucts in the form of news (free of charge - see page 10). But we do not allow product placement or covert advertising in our ar-ticles, either paid or not. The remedy, how-ever, is simple: praise products, tools or media that deserve it, keeping the praise objective.
• Cut & Paste. SUSTAIN magazine is com-mitted to presenting original, previously unpublished articles. Contents from other sources is only included in the context of cooperation with other media. Authors are requested not to reproduce paragraphs from other sources—especially not from Wikipedia!
WikipediaShould Wikipedia be considered a trusted
source? How can it be credible if anyone can log in and edit the contents?This is the amazing thing with Wikipedia:
even if some ‘trolls’ here and there sabotage
some controversial articles, Wikipedia has proved to be a fantastic experiment based in human trust and disinterested contribution. Wikipedia contents are ever developing, both in quantity and quality, thanks to the support of experts in the most varied areas. However, its inherently dynamic nature makes it incon-venient to include Wikipedia entries as refer-ence in a serious article. The secret is the following: instead of refer-
encing directly that Wikipedia entry, check the original source of that particular bit of information by visiting the links listed at the bottom of each Wikipedia page; then you cite that original source, which is the safe (and ethical) way to go.
Are contributions paid?No. SUSTAIN magazine is produced at prac-
tically no profit, and to an educational end; all contributions are, just like in the case of a journal, voluntary and free. Authors who con-tribute with some regularity though, receive a complimentary subscription and the possibil-ity of including an ad promoting their prod-ucts or services, free of charge, for a whole year (value: $700/€500).
Every journey starts with one stepYour article doesn’t have to be absolutely
complete to be submitted; it all begins with a draft, or even just an outline. The editing comes later on: we will review your draft, make additional questions, suggest additions or removals, and so on.
What to do nextSend us a short email to hello@fellowlu-
thiers.com and tell us about the subject you would like to write about. We will take it from there.
So, any ideas, yet?


47

48
BESTTHE
AND THE REST BY WIM STOUT
GLUES
We read that many luthiers praise the so called hot Hide glue and the yellow wood glue. Why is this so?
Is it because of historical reasons? Is it maybe a question of habit or tradition? What about
In lutherie we use several types of glue, but... Are we using the
right one for the job at hand?
Photo
courtesy
of Hen
kel A
G (http://www.
henk
el.com
)
49
epoxy glues (rarely used in lutherie) or cyano-acrylates? In this article we will try to explain the differences between them, their advan-tages, and their setbacks too—all based on actual research data.Let’s start with some definitions.
AdhesivesAn adhesive is a polymer (a chemical com-
pound with large molecules composed of oth-er, smaller molecules which repeat a similar pattern over and over) designed to bond to-gether two non-sticky surfaces such as wood, paper, plastic, metal, and so on. Its strength depends, among other things, on the struc-ture of the polymer that composes the adhe-sive, its size, its bonding groups, and the sur-face structure. There are three types of adhesion: Mechani-
cal, physical, and chemical.
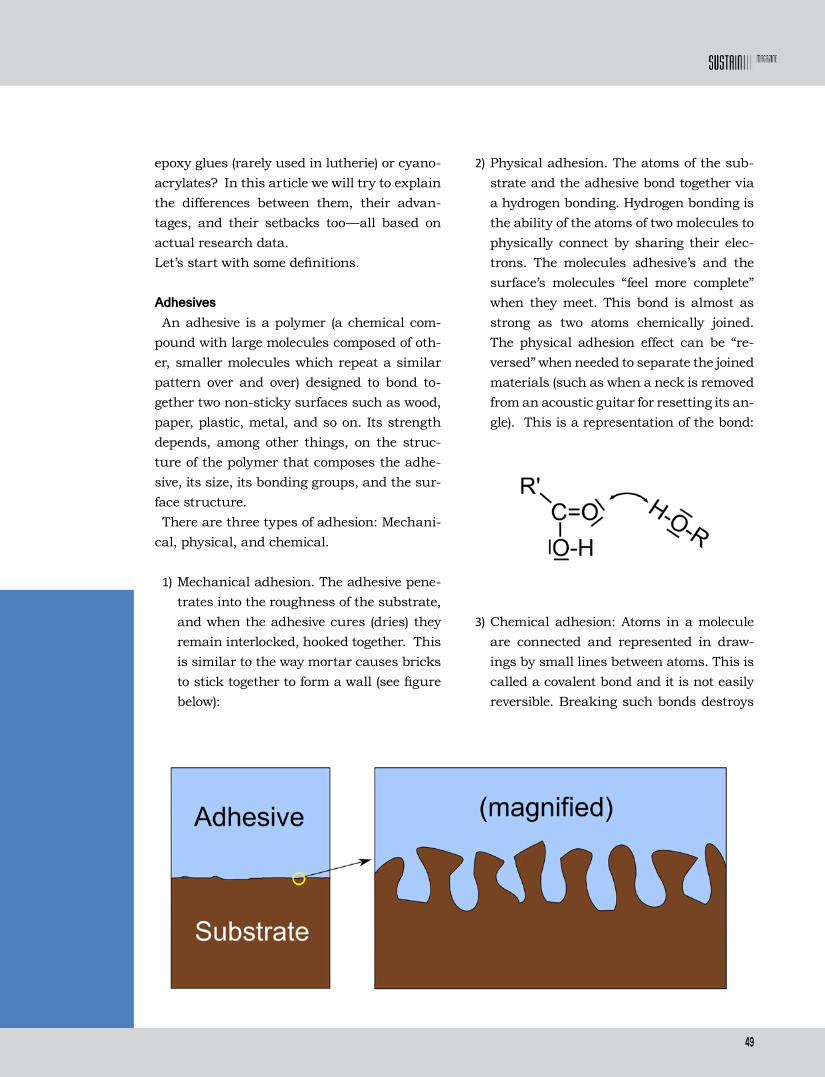
1) Mechanical adhesion. The adhesive pene-trates into the roughness of the substrate, and when the adhesive cures (dries) they remain interlocked, hooked together. This is similar to the way mortar causes bricks to stick together to form a wall (see figure below):
2) Physical adhesion. The atoms of the sub-strate and the adhesive bond together via a hydrogen bonding. Hydrogen bonding is the ability of the atoms of two molecules to physically connect by sharing their elec-trons. The molecules adhesive’s and the surface’s molecules “feel more complete” when they meet. This bond is almost as strong as two atoms chemically joined. The physical adhesion effect can be “re-versed” when needed to separate the joined materials (such as when a neck is removed from an acoustic guitar for resetting its an-gle). This is a representation of the bond:
3) Chemical adhesion: Atoms in a molecule are connected and represented in draw-ings by small lines between atoms. This is called a covalent bond and it is not easily reversible. Breaking such bonds destroys

50
the molecule and it cannot be formed again. This requires extreme energy input to happen. Covalent bonds are formed by the cross-linking of two-component adhe-sives (and also coatings) during the cur-ing process. Such cross-linking mecha-nism is not limited to the adhesive itself, but also involves surface molecules as well—as long as the curing mechanism finds the correct structures to react with. Some curing mechanisms release small molecules such as formaldehyde or water, some do not. These small molecules will evaporate and not further influence the newly formed bonds:
Horizontal bond strength, instead, is mea-sured by sliding surfaces apart. One object is pulled to the left, and the other object is either fixed or moved to the right. Glues that cure by chemical reaction (as opposed to those that cure by evaporation, etc.–explained below) form one big molecule, showing significant bond strength, in both the vertical and hori-zontal directions.
Adhesion strengthAn adhesive’s strength is defined by its re-
sistance to forces applied from different di-rections. We saw that the chemical bonds between substrate and polymer molecular chains can withstand forces acting to pull them apart in opposite directions. This resis-tance is called vertical bond strength, exerted by the long polymer chains hooked together in the glue film.
But in general, glues are best at resisting perpendicular forces (vertical). Physically bonded glues show much weaker horizontal bond strength as the force influences the mo-lecular orientation, which is reversible. Such effect is the reason why luthiers like to use cyanoacrylates to glue nuts to the fretboard: A small tap from the side loosens the nut and a repair or exchange can be done without de-stroying wood fibres.
Surface preparationTo achieve maximum bond strength of an ad-hesive, the surface must be not glazed, and must be clean and free of fat, resins and dust. Glazing. Dull chisels or planning blades
hit the wood and crush the fibres, forming a shiny surface on the wood, which we call glaz-ing. To test if the surface of the wood piece to be glued is glazed or not, put a drop of water on it. If it takes more than 30 seconds to be absorbed by the wood, or to spread over the wood surface, it means the wood is glazed. The wood fibres cannot be properly wet, and will not accept enough glue. Similar effects are seen at sawn wood edges where the saw crushed and splintered the wood, or when the

51
wood is planed against the grain. If you glue two glazed wood pieces, the glue line will al-ways be visible and will “ghost” through the coating no matter how much sanding is done afterwards. Glazing can be removed by lightly sanding the surfaces to be glued.Dust acts like a barrier. It absorbs water very
easily, preventing the glue from actually wet-ting and penetrating the wood surface.Fat may originate from resinous substances
in the wood, or come from your fingers when handling the wood. Fat and resins do not like water and repel it. They inhibit a proper glue and substrate contact, weakening the bond. Resinous wood needs to be sanded and cleaned, and glued within 1 hour after that preparation to ensure that no new resin migration will interfere with the adhesive’s strength.
Different types of glue
White glue White glue is based on a compound called
PVAc (polyvinyl acetate). It is sometimes in-
correctly shortened to “PVA glue”. In fact, PVA glue (polyvinyl acrylate glue), even if it is used for the same purposes, is a different glue with different properties.White glue is currently the most used wood-
working glue and can be found under alterna-tive names such as carpenter’s glue, and El-mer’s glue (a trademark of Elmer’s Products, Inc.).The “poly” in “polyvinyl” means “many”; vi-
nyl forms a straight-chain molecule that is important for glue flexibility, and finally, the tough molecules of the acetate are responsible for the adhesion. PVAc glues, which feel some-what slippery to the touch, are designed to al-low time for the repositioning of the items be-fore clamping. To increase its flexibility, PVAc glues are mixed with plasticisers. White glue comes in standard versions that
have a long open time or pot time (which means that it will not dry immediately in contact with air), and are also available in express ver-sions, which will hold the pieces together after just a few minutes of contact, reducing the re-position time (the time the user has to correct
Applying white glue on a headstock blank. Note the masking tape, which re-duces the mess caused by the glue squeezed out when the pieces are clamped together (photo L.L.)

52
the position of the pieces before they stick too tightly together). When used on hardwoods it may be applied on both gluing surfaces to in-crease wood/glue contact.Advantages of white glue:• Easy to work with, no mixing required• Its emulsion form, when still wet, allows
an easy cleaning with water.• It is non-toxic and non-flammable.• It has a long shelf live
Disadvantages• It is not waterproof.• Should be kept from freezing when stored.• Freezing can cause the bond to break.Exterior white wood glue is another ver-
sion of white glue, usually based on PVA (poly vinyl acrylate) or PA (poly acrylate). Although acrylate and acetate have a similar molecular structure, acrylates are significantly more re-sistant to moisture and therefore better suit-able for outdoor use.
Yellow glue Yellow glue is usually based on white wood
glue (PVAc) but with the addition of an amber
coloured substance and small quantities of tackifier resin. The yellow colour, therefore, is just an added colour. Its properties are similar to those of the
white glue (non-toxic, non-flammable, etc.), but it presents some differences regarding the use. Yellow glue sets very quickly, not allowing the reposition of the pieces (for example, when laminating). The pieces must be placed in the correct position as quickly as possible and clamped together precisely, in order to prevent any movement; otherwise, the glue strength is compromised.
Hot Hide glue Hide glue is based on a protein extracted from
animal connective tissue. Similar glues can be extracted from blood, bones, fish bladder, and other animal parts. The first use of glues derived from animal proteins (coming mainly from cattle) dates back to literally thousands of years ago. As the characteristics of the pro-tein have an impact on the final property as glue, some of them yield better results than others.
Granulated animal glue (Photo: Creative Commons)
53
Hide glue, in order to be applied, is kept hot either in a double boiler (the glue container is kept warm inside a larger pot, which provides a bath of hot water) or by using an electric glue pot. Then it is applied using a brush or a spatula. Advantages: • It is reversible and repairable. It allows un-
gluing the different parts of an instrument (e.g. a violin top or back that needs to be removed for repair) by using steam, be-cause most Hide glues are water soluble. PVA glues, instead, would require much more heat and steam, which are poten-tially damaging to the varnish.
• Hide glue sticks to itself; two parts of an instrument can be glued again by simply adding more Hide glue, without having to remove all of the original glue residue. The hot water re-dissolves the old glue, and af-ter drying, the two glues become one. PVA glues, on the contrary, do not adhere to themselves once dried. The old glue has to be removed completely, including the wood fibres which it is adhered to.
Disadvantages: • Only small quantities should be prepared
at a time, because once water has been added to the glue, the remaining glue can-not be reused and has to be discarded.
• Its use is only possible within some nar-row limitations in terms of temperature (if it gets too hot, its strength is destroyed; if it is too cold, it won’t work either).
• It has a very short open time: once applied on the pieces, the user has one minute or less before sticking the pieces together. This makes difficult to glue big pieces, for example the top of a cello.
This is the type of glue used by the Cremo-nese masters and by many modern violin makers too, and its main use today is rele-gated to some acoustic instruments. It is by many luthiers the glue of choice for areas that may need repairs within the life span of an instrument. In modern instruments, though (like solid body electric guitars), Hide glue has been almost completely replaced by other types of glue.

54
Hide glue is said to have an unlimited shelf life as long as it is not contaminated with mi-croorganisms or moisture.
Liquid Hide glue It is the same as hot Hide glue, but already
sold in liquid form. To make it stable for stor-age, the glue is pasteurized and a biocide—a product that kills germs—is added. It is gener-ally only good to use up to about 12 months after the production date.
Epoxy glue Epoxies are based on the reaction of two
components: a resin and a hardener. The resin is based on a compound called glycidil ether (correct name for epoxy). It is very reactive with amines, which are present in the hard-ener. It forms one big molecule and chemically connects to the substrate.Epoxy adhesives cure at ambient tempera-
ture. However, a complete curing only happens at elevated temperatures up to 180°C. This is due to the following: when a two-component system cures, the molecular weight (and its size) goes up and it has more trouble to re-orientate and find another reactive group for further curing. At elevated temperatures, in-stead, the adhesive molecules can re-orient themselves (this happens when a parameter of the adhesives called glass transition tem-perature (symbolized “Tg”) allowing for a full cure. Epoxy adhesives when cured at ambient temperature are already very strong, but they remain flexible somehow, because without ex-tra heat they cure below their Tg.The use of epoxy adhesives in lutherie is
convenient when some gap filling is needed; for example, when installing neck reinforce-ments. Its full cure and high chemical resis-tance makes this glue a product of choice for applications where moisture may be an issue. Some luthiers like to use thoroughly dried wood (down to 8% of moisture content, or even less) and take advantage of the effect of an
epoxy adhesive to avoid water permeability. Such instruments are always coated with a 2k (two components) polyester coating, which shows similar chemical properties as epoxies.Advantages of epoxy glue:• It fills cracks and holes.• It has a reasonable “pot life” • It can withstand vibration and shock pret-
ty well.Disadvantage:• Epoxy glues are highly toxic and easily ir-
ritate skin. Always use gloves when work-ing with any reactive products (not only adhesives) and work in well ventilated ar-eas.
Two bronze bars used to reinforce a neck joint, fixed in place with epoxy (photo L.L.)
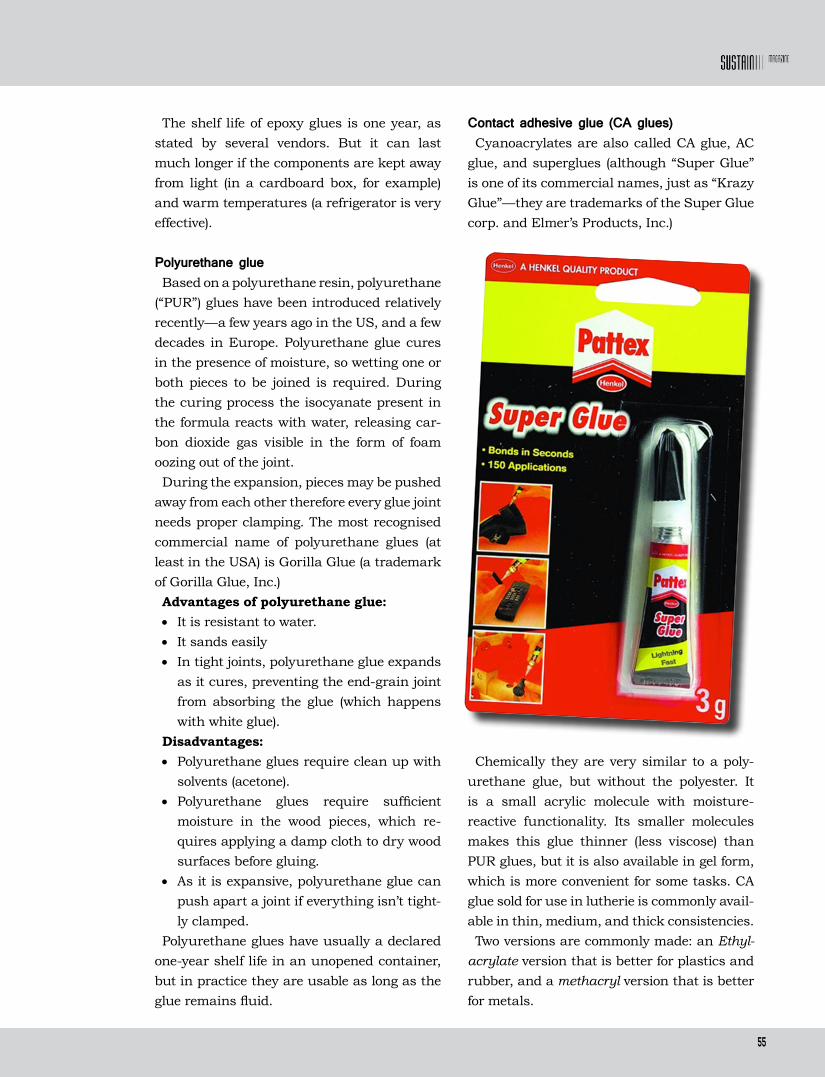
55
The shelf life of epoxy glues is one year, as stated by several vendors. But it can last much longer if the components are kept away from light (in a cardboard box, for example) and warm temperatures (a refrigerator is very effective).
Polyurethane glueBased on a polyurethane resin, polyurethane
(“PUR”) glues have been introduced relatively recently—a few years ago in the US, and a few decades in Europe. Polyurethane glue cures in the presence of moisture, so wetting one or both pieces to be joined is required. During the curing process the isocyanate present in the formula reacts with water, releasing car-bon dioxide gas visible in the form of foam oozing out of the joint. During the expansion, pieces may be pushed
away from each other therefore every glue joint needs proper clamping. The most recognised commercial name of polyurethane glues (at least in the USA) is Gorilla Glue (a trademark of Gorilla Glue, Inc.)Advantages of polyurethane glue:• It is resistant to water.• It sands easily• In tight joints, polyurethane glue expands
as it cures, preventing the end-grain joint from absorbing the glue (which happens with white glue).
Disadvantages:• Polyurethane glues require clean up with
solvents (acetone). • Polyurethane glues require sufficient
moisture in the wood pieces, which re-quires applying a damp cloth to dry wood surfaces before gluing.
• As it is expansive, polyurethane glue can push apart a joint if everything isn’t tight-ly clamped.
Polyurethane glues have usually a declared one-year shelf life in an unopened container, but in practice they are usable as long as the glue remains fluid.
Contact adhesive glue (CA glues)Cyanoacrylates are also called CA glue, AC
glue, and superglues (although “Super Glue” is one of its commercial names, just as “Krazy Glue”—they are trademarks of the Super Glue corp. and Elmer’s Products, Inc.)
Chemically they are very similar to a poly-urethane glue, but without the polyester. It is a small acrylic molecule with moisture-reactive functionality. Its smaller molecules makes this glue thinner (less viscose) than PUR glues, but it is also available in gel form, which is more convenient for some tasks. CA glue sold for use in lutherie is commonly avail-able in thin, medium, and thick consistencies.Two versions are commonly made: an Ethyl-
acrylate version that is better for plastics and rubber, and a methacryl version that is better for metals.
56
Both versions work well on wood; the ethyl-acrylate version is more flexible, the other one more stiff. The ethyl-acrylate version is also the one commonly sold in hardware shops; the methacryl variety are generally not in stock, but are acquired by special order.Suppliers do list CA glues as suitable for glu-
ing woods, but that’s not their primary appli-cation. However, they come in handy for cer-tain uses in lutherie: • For applying plastic binding to a guitar’s
top• For gluing frets in place (requires clamp-
ing until cured to avoid foam created by interaction with the air’s moisture, which can push the frets out the slots)
• Sometimes a very small drop of CA glue is used to glue a nut to the fret board. The nut will stay in place, but it is cleanly re-moved by tapping it with a hammer (use a piece of wood as buffer and tap the nut from a side; never hit the nut directly).
If you tried CA glues on wood you might have noted that when the wood is too dry the bind-ing won’t stick well. A damp cloth is needed to add moisture to the surfaces. Also, some accelerators are available on the market, which contain water and some reactive sol-vent with alcohol functionality. When acceler-ated, the glue releases carbon dioxide (just as polyurethane glues do), and we see the glue foaming up. CA glues should only be applied wearing the proper protective equipment such as gloves and goggles. Its extreme adhesive power to skin and its reactivity with moisture (present in the eyes, for example) have caused many hospital visits.CA glues Advantages: • Flows easily into cracks.• Once dry it sands easily• Instant and strong gluing power
Disadvantages:• They are toxic• They adhere very well to skin
• They dry very quickly, and the reposition-ing of objects weakens the bond’s strength
Cyanoacrylates have a shelf life of 12-18 months inside the original, unopened con-tainer. Once you open it, it can be used only for as long as it remains fluid (which is about a month).
JointsIn the process of building a musical instru-ment, the joints we create belong to one of these types:
1) Tight joints2) Snug joints3) Loose jointsAs we have discussed, each type of glue is
developed for a certain purpose, which means that some glue that is perfect for one job can be disastrous when used in a different appli-cation. For example, water based glues will lose 50% of their volume as they cure, so they will shrink; epoxy glues, on the contrary, cure by chemical reaction, not evaporation. They will obviously perform very differently in the case of a loose joint. Making sure that the glue we are using is the
correct one for the type of joint we are working on is critical. But clearly a good joint depends first and foremost on the pieces to be glued to one another. If the surfaces to be glued don t match well together, the glue will certainly not provide a magical solution; on the contrary, it might make things worse. If the glue shrinks (by evaporation), or if it expands (by creation of gases and the consequent foam in the case of polyurethane glues) there will not be enough contact surface or structural strength within the glue. The bigger the gap, the less strength both the glue and the joint will have.
Glue flexibility Glues can be formulated to be flexible (most
of them are), or brittle, like polyurethane and contact adhesives. Joints glued with Hide glue are relatively brittle, too. If the instrument
57
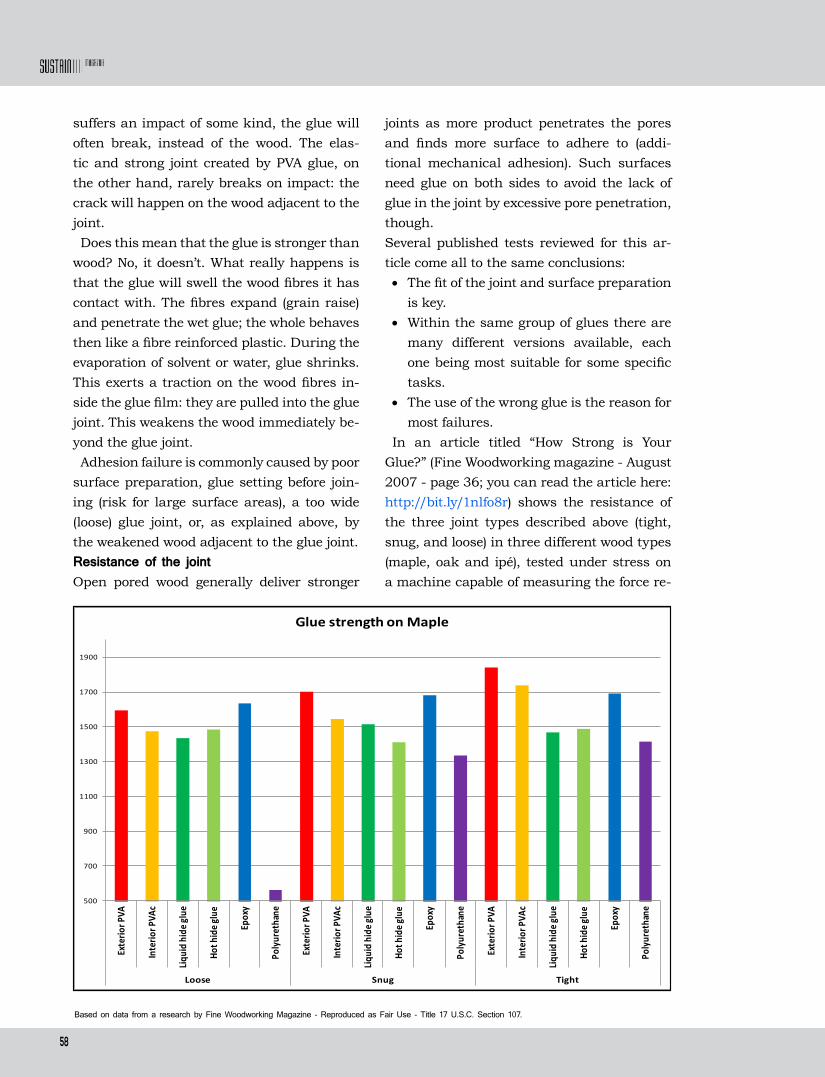
58
suffers an impact of some kind, the glue will often break, instead of the wood. The elas-tic and strong joint created by PVA glue, on the other hand, rarely breaks on impact: the crack will happen on the wood adjacent to the joint.Does this mean that the glue is stronger than
wood? No, it doesn’t. What really happens is that the glue will swell the wood fibres it has contact with. The fibres expand (grain raise) and penetrate the wet glue; the whole behaves then like a fibre reinforced plastic. During the evaporation of solvent or water, glue shrinks. This exerts a traction on the wood fibres in-side the glue film: they are pulled into the glue joint. This weakens the wood immediately be-yond the glue joint. Adhesion failure is commonly caused by poor
surface preparation, glue setting before join-ing (risk for large surface areas), a too wide (loose) glue joint, or, as explained above, by the weakened wood adjacent to the glue joint.Resistance of the jointOpen pored wood generally deliver stronger
joints as more product penetrates the pores and finds more surface to adhere to (addi-tional mechanical adhesion). Such surfaces need glue on both sides to avoid the lack of glue in the joint by excessive pore penetration, though.Several published tests reviewed for this ar-ticle come all to the same conclusions:• The fit of the joint and surface preparation
is key.• Within the same group of glues there are
many different versions available, each one being most suitable for some specific tasks.
• The use of the wrong glue is the reason for most failures.
In an article titled “How Strong is Your Glue?” (Fine Woodworking magazine - August 2007 - page 36; you can read the article here: http://bit.ly/1nlfo8r) shows the resistance of the three joint types described above (tight, snug, and loose) in three different wood types (maple, oak and ipé), tested under stress on a machine capable of measuring the force re-
500
700
900
1100
1300
1500
1700
1900
Exte
rior P
VA
Inte
rior P
VAc
Liqui
d hi
de gl
ue
Hot h
ide g
lue
Epox
y
Poly
uret
hane
Exte
rior P
VA
Inte
rior P
VAc
Liqui
d hi
de gl
ue
Hot h
ide g
lue
Epox
y
Poly
uret
hane
Exte
rior P
VA
Inte
rior P
VAc
Liqui
d hi
de gl
ue
Hot h
ide g
lue
Epox
y
Poly
uret
hane
Loose Snug Tight
Glue strength on Maple
Based on data from a research by Fine Woodworking Magazine - Reproduced as Fair Use - Title 17 U.S.C. Section 107.
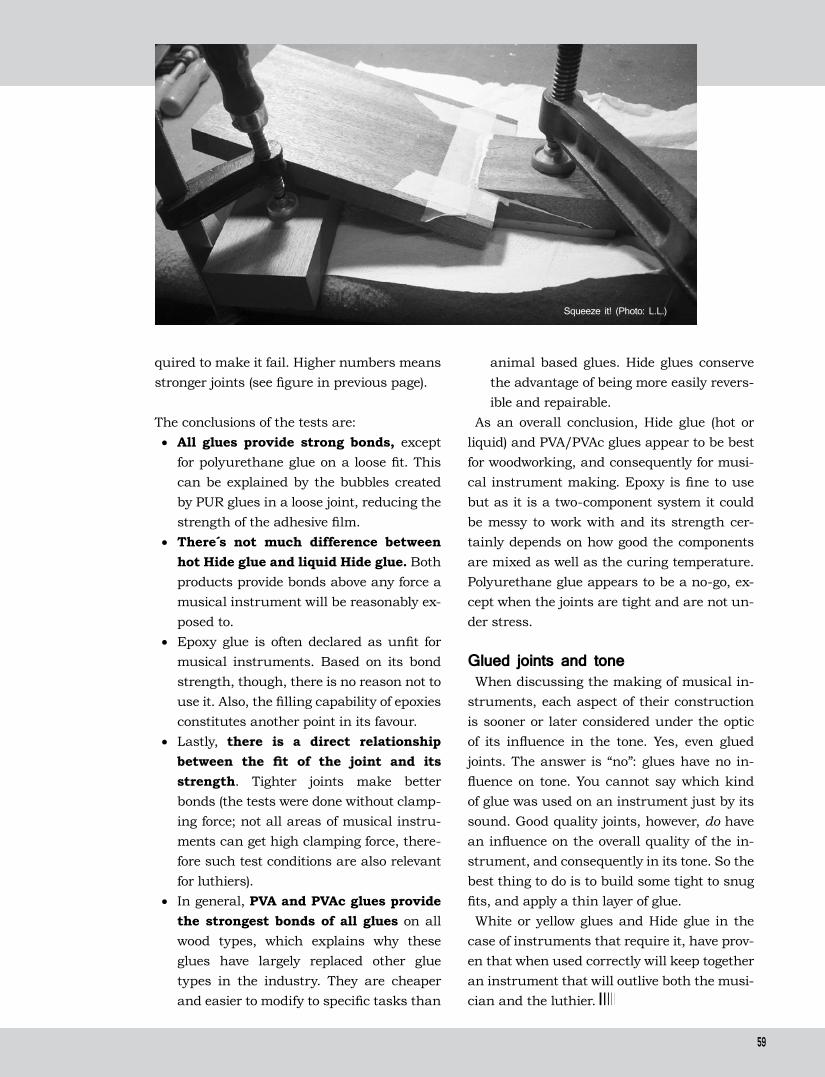
59
quired to make it fail. Higher numbers means stronger joints (see figure in previous page).
The conclusions of the tests are:• All glues provide strong bonds, except
for polyurethane glue on a loose fit. This can be explained by the bubbles created by PUR glues in a loose joint, reducing the strength of the adhesive film.
• There s not much difference between hot Hide glue and liquid Hide glue. Both products provide bonds above any force a musical instrument will be reasonably ex-posed to.
• Epoxy glue is often declared as unfit for musical instruments. Based on its bond strength, though, there is no reason not to use it. Also, the filling capability of epoxies constitutes another point in its favour.
• Lastly, there is a direct relationship between the fit of the joint and its strength. Tighter joints make better bonds (the tests were done without clamp-ing force; not all areas of musical instru-ments can get high clamping force, there-fore such test conditions are also relevant for luthiers).
• In general, PVA and PVAc glues provide the strongest bonds of all glues on all wood types, which explains why these glues have largely replaced other glue types in the industry. They are cheaper and easier to modify to specific tasks than
animal based glues. Hide glues conserve the advantage of being more easily revers-ible and repairable.
As an overall conclusion, Hide glue (hot or liquid) and PVA/PVAc glues appear to be best for woodworking, and consequently for musi-cal instrument making. Epoxy is fine to use but as it is a two-component system it could be messy to work with and its strength cer-tainly depends on how good the components are mixed as well as the curing temperature. Polyurethane glue appears to be a no-go, ex-cept when the joints are tight and are not un-der stress.
Glued joints and toneWhen discussing the making of musical in-
struments, each aspect of their construction is sooner or later considered under the optic of its influence in the tone. Yes, even glued joints. The answer is “no”: glues have no in-fluence on tone. You cannot say which kind of glue was used on an instrument just by its sound. Good quality joints, however, do have an influence on the overall quality of the in-strument, and consequently in its tone. So the best thing to do is to build some tight to snug fits, and apply a thin layer of glue. White or yellow glues and Hide glue in the
case of instruments that require it, have prov-en that when used correctly will keep together an instrument that will outlive both the musi-cian and the luthier.
Squeeze it! (Photo: L.L.)

60
Somebody said that independent luthiers spend half the time building instru-ments, and the other half trying to sell
them. Most luthiers I know enjoy the building part a lot, and the marketing part a lot less. Are you one of them? Well, some tricks you already know: You take
some nice pictures of your instruments and you build a nice website. Showing your instru-ments in music fairs cannot harm, of course. But, what about branding, positioning, adver-tising, and pricing? Right now there are no books dealing specifi-
cally with marketing of musical instruments.
BOOK REVIEW
Marketing for the Small GuySo for now, “Guerrilla Music Marketing Hand-book”, by Bob Baker, will have to do.Musicians and luthiers are not very different
kinds of animal, after all. Like modern Don Quixote’s, both have to face the big brands that dominate the market by means of sheer advertising power. So, is there any way to el-bow ourselves in? Sure there is: Guerrilla!The key of guerrilla marketing is to promote
your products at low (or null) cost, in highly interactive, creative ways. Our ideas are the ammunition, the Internet is the weapon. This book suggests many ways in which you can use the web for promoting your business: blogs, social networks, press releases, and a long et cetera. You only have to translate those tactics intended for bands or solo musicians into actions suitable for the lutherie trade.
Plus points of this book:• It was written thinking in the small guy.• It is absolutely to the point—both in con-
ceptual and tactical terms.• It is a quick and stimulating read. • If you also like to play and record your
own music, then it might by doubly inter-esting.
The edition we got our hands on was out-dated (e.g. it referenced some websites that, back then, were so hot, and today are not) so if you decide to get the book, go for the 2013 updated and revised edition. All in all: This is not a step-by-step market-ing guide, but a generator of ideas. Have a pen and paper at hand to make a list of the tricks that may apply to your business. With a little inspiration, you will have the elements to de-velop a simple guerrilla marketing strategy. If you (like many of us) need to spend more time trying to sell your instruments, this book might come in handy. (N.S.)

61

62
“Stradivari” (1988)
Anthony playsAntonio
FILM REVIEW
Did you know that Antonio was ac-tually born in Chihuahua, México? Not Antonio Stradivari, mind you:
Antonio Rodolfo Quinn Oaxaca, Anthony Quinn, who plays the role of his namesake in this film from 1988 directed by Giacomo Bat-tiato.
“Stradivari” never hit the cinemas; it was produced as a miniseries by Rete Italia (in English), and it is a historical dramatization, not a biographic account. It couldn’t be oth-erwise: we know very little about the most famous luthier in history. There are no con-temporary portraits of him; we know nothing about his childhood or adolescence (not even the precise year he was born—1643? 1648?); we know nothing about his first marriage, and almost nothing about his personality. We only know that he had 11 children and that he built 1116 instruments, of which 650 are still around—all masterpieces. So it was natural that someone with a vivid imagination (writer Ernesto Gastaldi) decided to fill the historical gaps with a little fantasy: he wrote the novel Stradivari Cremonensis (only published in Italian) on which the film is based.
In fact, it was Quinn himself who contacted Gastaldi in order to use his novel in a movie, saying “it’s the most beautiful romanticized story I have ever read”. So it began as a Quinn
business, and it stayed as one, too: Lorenzo, Francesco and Danny Quinn (sons of Antho-ny) play the roles of the young Antonio and of Antonio’s sons, respectively.The film includes touches of innocent humor
(one night little Antonio borrows a stool from
BY NEAL SOLOPONTE
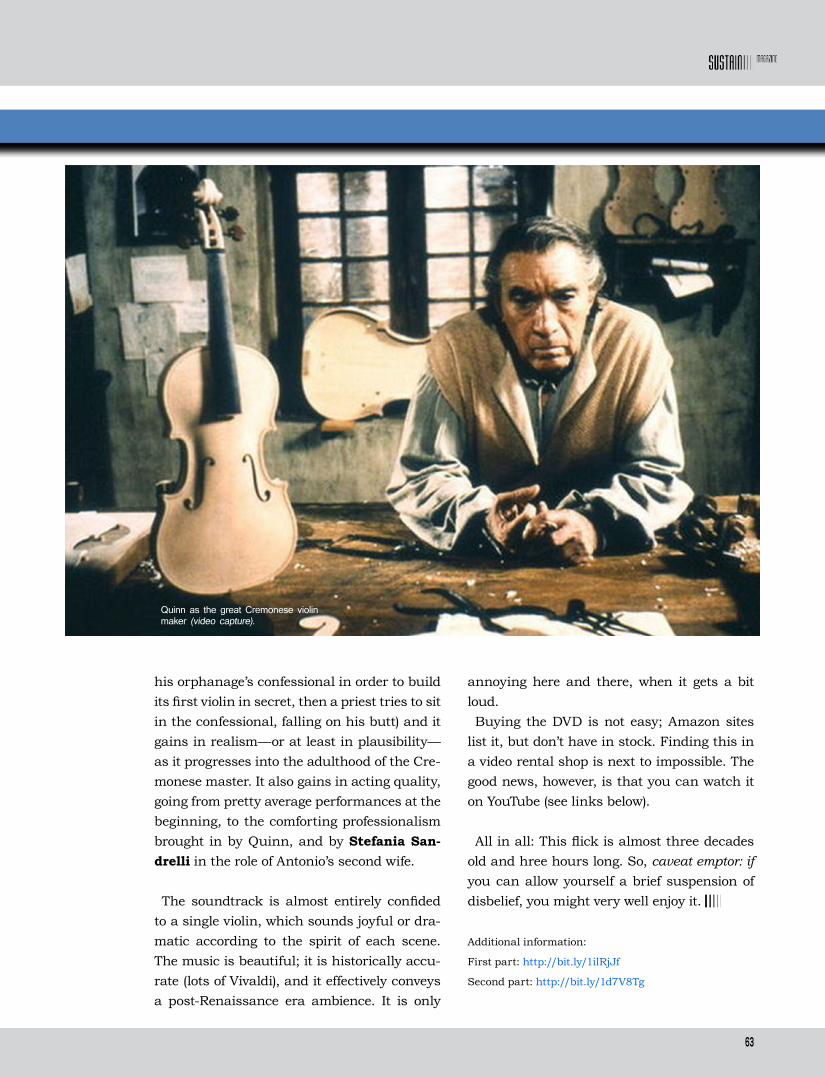
63
his orphanage’s confessional in order to build its first violin in secret, then a priest tries to sit in the confessional, falling on his butt) and it gains in realism—or at least in plausibility—as it progresses into the adulthood of the Cre-monese master. It also gains in acting quality, going from pretty average performances at the beginning, to the comforting professionalism brought in by Quinn, and by Stefania San-drelli in the role of Antonio’s second wife.
The soundtrack is almost entirely confided to a single violin, which sounds joyful or dra-matic according to the spirit of each scene. The music is beautiful; it is historically accu-rate (lots of Vivaldi), and it effectively conveys a post-Renaissance era ambience. It is only
annoying here and there, when it gets a bit loud.Buying the DVD is not easy; Amazon sites
list it, but don’t have in stock. Finding this in a video rental shop is next to impossible. The good news, however, is that you can watch it on YouTube (see links below).
All in all: This flick is almost three decades old and hree hours long. So, caveat emptor: if you can allow yourself a brief suspension of disbelief, you might very well enjoy it. Additional information:
First part: http://bit.ly/1ilRjJf
Second part: http://bit.ly/1d7V8Tg
Quinn as the great Cremonese violin maker (video capture).
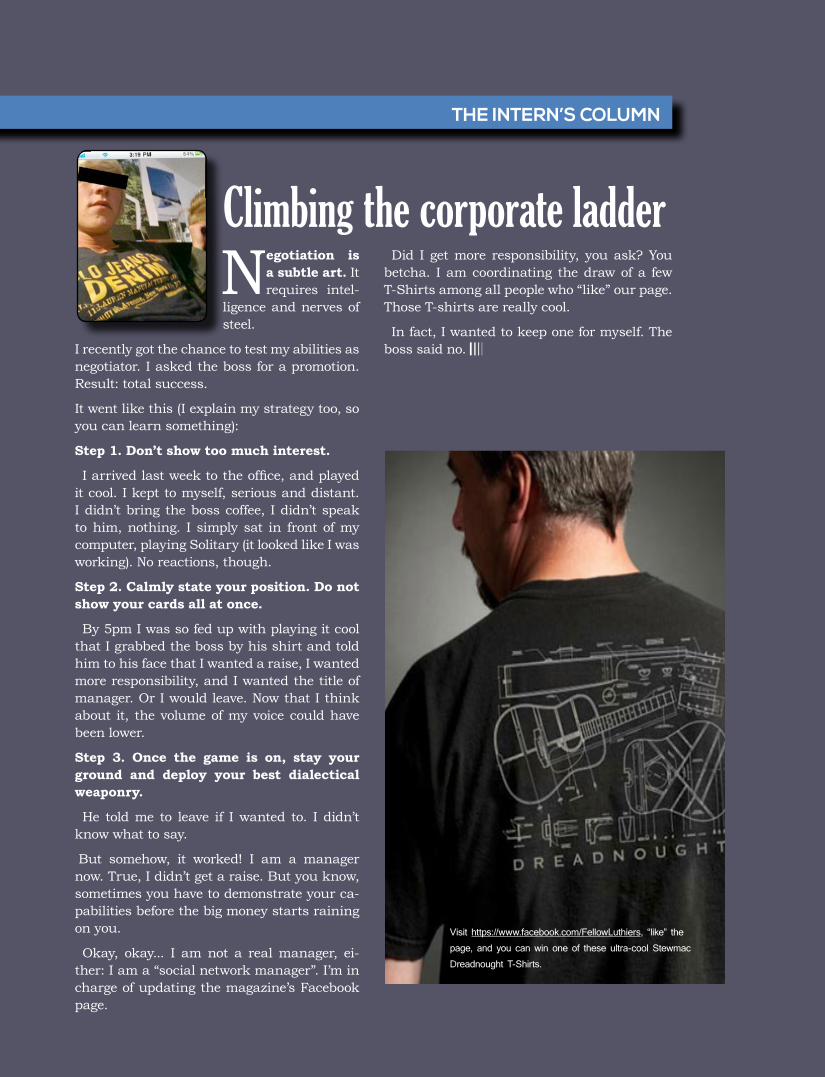
64
Negotiation is a subtle art. It requires intel-
ligence and nerves of steel.
I recently got the chance to test my abilities as negotiator. I asked the boss for a promotion. Result: total success.
It went like this (I explain my strategy too, so you can learn something):
Step 1. Don’t show too much interest.
I arrived last week to the office, and played it cool. I kept to myself, serious and distant. I didn’t bring the boss coffee, I didn’t speak to him, nothing. I simply sat in front of my computer, playing Solitary (it looked like I was working). No reactions, though.
Step 2. Calmly state your position. Do not show your cards all at once.
By 5pm I was so fed up with playing it cool that I grabbed the boss by his shirt and told him to his face that I wanted a raise, I wanted more responsibility, and I wanted the title of manager. Or I would leave. Now that I think about it, the volume of my voice could have been lower.
Step 3. Once the game is on, stay your ground and deploy your best dialectical weaponry.
He told me to leave if I wanted to. I didn’t know what to say.
But somehow, it worked! I am a manager now. True, I didn’t get a raise. But you know, sometimes you have to demonstrate your ca-pabilities before the big money starts raining on you.
Okay, okay... I am not a real manager, ei-ther: I am a “social network manager”. I’m in charge of updating the magazine’s Facebook page.
THE INTERN’S COLUMN
Did I get more responsibility, you ask? You betcha. I am coordinating the draw of a few T-Shirts among all people who “like” our page. Those T-shirts are really cool.
In fact, I wanted to keep one for myself. The boss said no.
Visit https://www.facebook.com/FellowLuthiers, “like” the page, and you can win one of these ultra-cool Stewmac Dreadnought T-Shirts.
Climbing the corporate ladder

65
INSPIRATIONS
The picture shows an original and sober inlay that will be
used in basses and guitars (acous-tic and electric) of the Sadowsky Select Series.
This beautiful 12th fret marker was designed and made by Jaime Aulson of Aulson Inlay for the gui-tar making company of Long Island City, NY.
In this case, the neck is for a 5-string bass, made of flamed roasted maple and a Brazilian rose-wood fingerboard. Truly inspiring indeed.
http://www.sadowsky.com/http://aulsoninlay.com/
A Beautiful Inlay Skyline
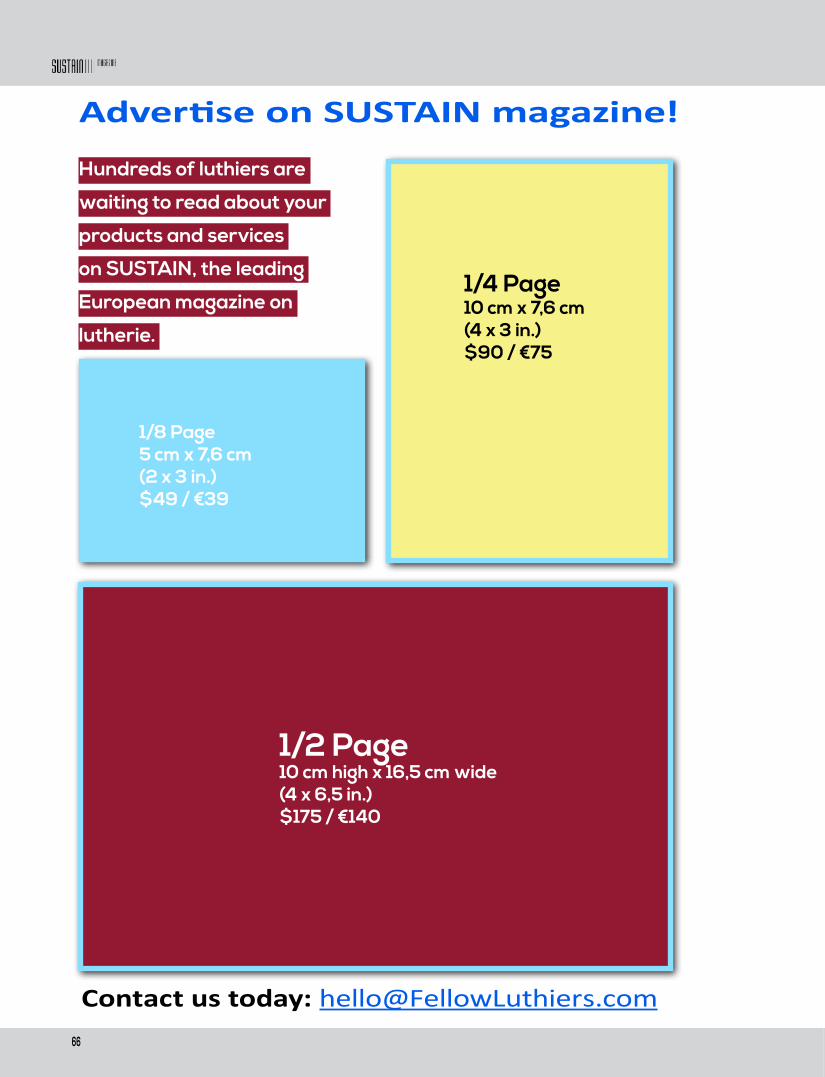
66
Hundreds of luthiers are
waiting to read about your
products and services
on SUSTAIN, the leading
European magazine on
lutherie.
1/8 Page5 cm x 7,6 cm (2 x 3 in.)$49 / €39
1/2 Page10 cm high x 16,5 cm wide(4 x 6,5 in.)$175 / €140
Advertise on SUSTAIN magazine!
Contact us today: [email protected]
1/4 Page10 cm x 7,6 cm (4 x 3 in.)$90 / €75

67
Page intentionally left blank

68
Published by the
MAGAZINELuthiersEuropeanFellowship of
Magazine for luthiers, designers and lovers of stringed musical instruments Number 6 - 2014 / I
LuthiersEuropeanFellowship of