next level 1 rapid infuser. next previousintroduction the level 1 rapid infuser is a fast flow rate...
TRANSCRIPT

Next
Level 1 Rapid Level 1 Rapid InfuserInfuser
NextPrevious
IntroductionIntroduction The Level 1 rapid infuser is a fast flow rate The Level 1 rapid infuser is a fast flow rate
fluid warmer fluid warmer With the D-300 disposable tubing the flow With the D-300 disposable tubing the flow
rate can be from 30ml/min to 1100ml/min rate can be from 30ml/min to 1100ml/min with a maximal rate of 1400ml/minwith a maximal rate of 1400ml/min
The temperature of the fluids delivered to The temperature of the fluids delivered to the patient is between 36-40 degrees the patient is between 36-40 degrees Celsius and depends on the rate of Celsius and depends on the rate of infusion infusion
The gas vent filter is designed to remove The gas vent filter is designed to remove micro bubbles of gas from the line that micro bubbles of gas from the line that results from the IV fluids being heated results from the IV fluids being heated

NextPrevious
Indications for Use Indications for Use
To provide rapid warm fluids such as, To provide rapid warm fluids such as, crystalloid and/or blood to patients crystalloid and/or blood to patients suffering from:suffering from:– HypovolemiaHypovolemia– HypothermiaHypothermia

NextPrevious
ContraindicationsContraindications
Do not use for the infusing of:Do not use for the infusing of:– Warming plateletsWarming platelets– Cryo-precipitatesCryo-precipitates– Granulocyte suspensionsGranulocyte suspensions

NextPrevious
ED PolicyED Policy
ED policy:ED policy: At least one person must be dedicated to At least one person must be dedicated to
operate the Level 1 rapid infuser during its operate the Level 1 rapid infuser during its use use – person can be either a nurse or a paramedic that person can be either a nurse or a paramedic that
has been through training has been through training After every 2 liters of crystalloids the After every 2 liters of crystalloids the
physicians will be made aware and the physicians will be made aware and the question will be ask question will be ask – Do you want more crystalloids or would you like Do you want more crystalloids or would you like
to order blood? to order blood?

NextPrevious
The Warming ProcessThe Warming Process
The distilled water located in the The distilled water located in the water tank reservoir is heated as it is water tank reservoir is heated as it is pumped through the heat exchanger, pumped through the heat exchanger, which is part of the disposable setwhich is part of the disposable set
The distilled water is continuously The distilled water is continuously recirculated through the unit and recirculated through the unit and remains isolated from the patient remains isolated from the patient and the IV fluids and the IV fluids

NextPrevious
Models Currently In UseModels Currently In Use
The Adult ED has 2 types of Level I The Adult ED has 2 types of Level I InfusersInfusers– The only difference is one has an air The only difference is one has an air
detector clamp the other does notdetector clamp the other does not– Set up and use are the same except for Set up and use are the same except for
placing the tubing into the air detector placing the tubing into the air detector clampclamp
NextPrevious
Set Up Procedure For Level 1 Set Up Procedure For Level 1 WithoutWithout Air Detection Device Air Detection Device Step 1: Push the end of the heat Step 1: Push the end of the heat
exchanger into the #1 socketexchanger into the #1 socket Step 2: Insert the heat exchanger Step 2: Insert the heat exchanger
into the exchanger guide and slide into the exchanger guide and slide the #2 socket down over the top of the #2 socket down over the top of the heat exchanger tubethe heat exchanger tube
Step 3: Snap the gas vent filter Step 3: Snap the gas vent filter assembly into the #3 socketassembly into the #3 socket
Step 4: Turn the unit on Step 4: Turn the unit on

NextPrevious
Set Up Procedure For Level 1 Set Up Procedure For Level 1 WithWith Air Detector Device Air Detector Device
Step 1: Push the end of the heat exchanger into Step 1: Push the end of the heat exchanger into the #1 socketthe #1 socket
Step 2: Insert the heat exchanger into the Step 2: Insert the heat exchanger into the exchanger guide and slide the #2 socket down exchanger guide and slide the #2 socket down over the top of the heat exchanger tubeover the top of the heat exchanger tube
Step 3: Install the gas vent filter assembly Step 3: Install the gas vent filter assembly – Slide the patient line up under the bottom edge of the Slide the patient line up under the bottom edge of the
clamp slot door and into the #3 clamp slot, the clamp clamp slot door and into the #3 clamp slot, the clamp slot door holds the patient line in placeslot door holds the patient line in place
– Next place the gas vent filter assembly, orange cap up, Next place the gas vent filter assembly, orange cap up, in the #4 block with the bottom white cap against the in the #4 block with the bottom white cap against the bottom edge of the block, the patient line from the gas bottom edge of the block, the patient line from the gas vent filter assembly aligns with the #3 clamp slot vent filter assembly aligns with the #3 clamp slot
Step 4: Place the toggle switch on each pressure Step 4: Place the toggle switch on each pressure chamber in the minus (-) position chamber in the minus (-) position

NextPrevious
Set Up Procedure For Level 1 Set Up Procedure For Level 1 WithWith Air Detector Device Air Detector Device
Step 5: Turn on the machine by pressing Step 5: Turn on the machine by pressing the ON button the ON button – The air detection clamp runs its power on test, The air detection clamp runs its power on test,
upon completion of the power on test the air upon completion of the power on test the air detector clamp enters unclamp modedetector clamp enters unclamp mode
– The automatic operation indicator on the fluid The automatic operation indicator on the fluid warmer illuminateswarmer illuminates
– If the disposable set is incorrectly installed, the If the disposable set is incorrectly installed, the fluid warmer’s check disposables attention fluid warmer’s check disposables attention indicator illuminates and the audible attention indicator illuminates and the audible attention signal sounds, check the disposable to ensure signal sounds, check the disposable to ensure correct installationcorrect installation

NextPrevious
Set Up Procedure For Level 1 Set Up Procedure For Level 1 WithWith Air Detector Device Air Detector Device
Step 6: Test the visual and audible alarm signals of Step 6: Test the visual and audible alarm signals of the rapid infuser by pressing and holding the alarm the rapid infuser by pressing and holding the alarm test button on the fluid warmer control paneltest button on the fluid warmer control panel– All visual alarm indicators illuminate and the audible All visual alarm indicators illuminate and the audible
alarm signal soundsalarm signal sounds– If any of the visual indicators do not illuminate or audible If any of the visual indicators do not illuminate or audible
alarm does not sound, discontinue use of the device and alarm does not sound, discontinue use of the device and remove from serviceremove from service
– When the alarm test button is released, the over When the alarm test button is released, the over temperature alarm will continue to be active, this is temperature alarm will continue to be active, this is normal, to clear the alarm turn the Level 1 off and then normal, to clear the alarm turn the Level 1 off and then back onback on
– The air detector clamp will run its power on test and enter The air detector clamp will run its power on test and enter the unclamp modethe unclamp mode
Step 7: Prime the tubing Step 7: Prime the tubing
NextPrevious
Removing Air From The IV Removing Air From The IV Bag Bag
To remove air from the IV bag one of To remove air from the IV bag one of two methods may be usedtwo methods may be used– Method A:Method A:
Invert solution bagInvert solution bag Using aseptic technique, sink needle into Using aseptic technique, sink needle into
injection portinjection port Squeeze bag, exhausting all airSqueeze bag, exhausting all air Promptly remove needle from injection port Promptly remove needle from injection port
without allowing air to re-enter bagwithout allowing air to re-enter bag

NextPrevious
Removing Air From IV Bag Removing Air From IV Bag
– Method B:Method B: Invert solution bag Invert solution bag Using aseptic technique, pierce membrane Using aseptic technique, pierce membrane
of the bag port with the spike of the Level 1 of the bag port with the spike of the Level 1 rapid infusion disposable set, then withdraw rapid infusion disposable set, then withdraw the spikethe spike
Squeeze the bag, exhausting all the airSqueeze the bag, exhausting all the air Promptly replace spike without allowing air Promptly replace spike without allowing air
to re-enter bag to re-enter bag

NextPrevious
Priming The Tubing Priming The Tubing
Verify the air detector clamp is in Verify the air detector clamp is in unclamp modeunclamp mode– The yellow indicator next to the unclamp The yellow indicator next to the unclamp
button should be illuminated and the button should be illuminated and the audible signal should beep once every 5 audible signal should beep once every 5 secondsseconds
– To place the air detector clamp into To place the air detector clamp into unclamped mode, press the unclamp buttonunclamped mode, press the unclamp button
Close the disposable set clamps on the Close the disposable set clamps on the tubing for the D-300 these are the ones tubing for the D-300 these are the ones below the drip chambers below the drip chambers
NextPrevious
Priming The Tubing Priming The Tubing Hang the spiked fluid bags from the IV poleHang the spiked fluid bags from the IV pole Squeeze the drip chambers until one half Squeeze the drip chambers until one half
filled with fluidfilled with fluid Remove the male luer cap from the distal Remove the male luer cap from the distal
end of the patient line end of the patient line Open clamp below the primed drip chambersOpen clamp below the primed drip chambers Close the clamp, roller clamp or ratchet Close the clamp, roller clamp or ratchet
clamp located after the gas vent filter clamp located after the gas vent filter assembly when the line is primed (no air assembly when the line is primed (no air present)present)– The gas vent filter assembly will self primeThe gas vent filter assembly will self prime

NextPrevious
Priming The TubingPriming The Tubing
Press the unclamp button on the air Press the unclamp button on the air detector clamp to set the air detector detector clamp to set the air detector clamp to automatic operationclamp to automatic operation– The yellow indicator next to the unclamp The yellow indicator next to the unclamp
button will not be illuminated and the audible button will not be illuminated and the audible signal, beep will stopsignal, beep will stop
– The green automatic operation indicator on the The green automatic operation indicator on the air detector clamp will illuminateair detector clamp will illuminate
– The air detector clamp is set to clamp the The air detector clamp is set to clamp the patient line if air is detected in the gas vent patient line if air is detected in the gas vent filter assemblyfilter assembly

NextPrevious
WarningWarning
The functional test for the air detector The functional test for the air detector clamp accessory must be performed clamp accessory must be performed before each usebefore each use
If the device does not function If the device does not function correctly, air in the IV line may not be correctly, air in the IV line may not be detected and patient line may not be detected and patient line may not be clamped resulting in patient death or clamped resulting in patient death or serious injuryserious injury
Remove the device from service Remove the device from service
NextPrevious
Priming The Tubing Priming The Tubing
Test the operation of the air detector Test the operation of the air detector clamp clamp – Move the top of the gas vent filter assembly Move the top of the gas vent filter assembly
away from the air detector sensoraway from the air detector sensor– The following should occurThe following should occur
Patient line clamp closesPatient line clamp closes Red clamped indicator illuminates Red clamped indicator illuminates Audible warning signal soundsAudible warning signal sounds
– If any of the above three events does not If any of the above three events does not occur, discontinue use of the medical device occur, discontinue use of the medical device and remove from serviceand remove from service

NextPrevious
Priming The TubingPriming The Tubing
Press the top of the gas vent filter Press the top of the gas vent filter assembly back into the #4 block assembly back into the #4 block
Unclamp the patient line by pressing Unclamp the patient line by pressing the unclamp button on the air the unclamp button on the air detector clampdetector clamp– The yellow indicator next to the unclamp The yellow indicator next to the unclamp
button illuminates and the audible alarm button illuminates and the audible alarm beeps beeps
NextPrevious
Priming The Tubing Priming The Tubing
Remove the gas vent filter assembly Remove the gas vent filter assembly from the #4 blockfrom the #4 block– The fluid warmer’s check disposable The fluid warmer’s check disposable
attention signal will activateattention signal will activate– Gently tap the gas vent filter assembly Gently tap the gas vent filter assembly
against the cabinet of the fluid warmer to against the cabinet of the fluid warmer to release all air trapped on the fluid filterrelease all air trapped on the fluid filter
Replace the gas vent filter assembly Replace the gas vent filter assembly in the #4 block, the check disposable in the #4 block, the check disposable attention will silence attention will silence

NextPrevious
Priming The TubingPriming The Tubing
Press the unclamp button on the air Press the unclamp button on the air detector clampdetector clamp– The air detector enters automatic The air detector enters automatic
operation mode and automatic operation mode and automatic operation indicator on the air detector operation indicator on the air detector clamp illuminatesclamp illuminates
Priming is complete Priming is complete
NextPrevious
Warning Warning
All air must be removed from fluid bags All air must be removed from fluid bags before connecting the IV line to the patientbefore connecting the IV line to the patient– Failure to do so can result in death or serious Failure to do so can result in death or serious
injury to the patientinjury to the patient Do not reuse partially full fluid bagsDo not reuse partially full fluid bags
– Fluid bags that have been partially drained, Fluid bags that have been partially drained, unspiked and then reinstalled may contain airunspiked and then reinstalled may contain air Which if used can result in the infusion of air into the Which if used can result in the infusion of air into the
patientpatient
– Use only new fluid bags from which the air has Use only new fluid bags from which the air has been removed been removed
NextPrevious
WarningWarning Do not leave the tubing in a closed clamp position Do not leave the tubing in a closed clamp position
for longer than 3 hours, as this may lead to for longer than 3 hours, as this may lead to deformation of the tubing that could result in deformation of the tubing that could result in diminished flow which could be detrimental to the diminished flow which could be detrimental to the patient patient
Replace the gas vent filter assembly every 3 hours, Replace the gas vent filter assembly every 3 hours, or when the filter becomes clogged, or when air is or when the filter becomes clogged, or when air is slowly ventedslowly vented– Failure to do so will result in a reduction of flow rate and Failure to do so will result in a reduction of flow rate and
could be detrimental to the patientcould be detrimental to the patient Replacement of the gas vent filter must be fully Replacement of the gas vent filter must be fully
primed before continuing the infusionprimed before continuing the infusion– Failure to do so may result in the patient receiving an air Failure to do so may result in the patient receiving an air
bolus bolus
NextPrevious
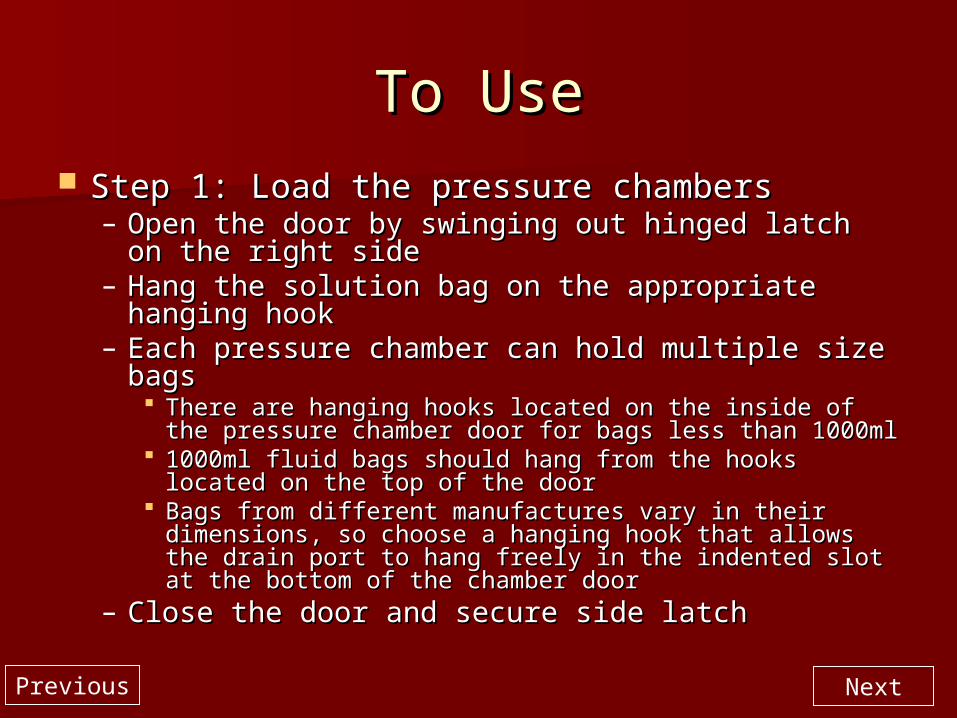
To UseTo Use Step 1: Load the pressure chambersStep 1: Load the pressure chambers
– Open the door by swinging out hinged latch on the Open the door by swinging out hinged latch on the right sideright side
– Hang the solution bag on the appropriate hanging Hang the solution bag on the appropriate hanging hookhook
– Each pressure chamber can hold multiple size bagsEach pressure chamber can hold multiple size bags There are hanging hooks located on the inside of the There are hanging hooks located on the inside of the
pressure chamber door for bags less than 1000mlpressure chamber door for bags less than 1000ml 1000ml fluid bags should hang from the hooks located on 1000ml fluid bags should hang from the hooks located on
the top of the doorthe top of the door Bags from different manufactures vary in their Bags from different manufactures vary in their
dimensions, so choose a hanging hook that allows the dimensions, so choose a hanging hook that allows the drain port to hang freely in the indented slot at the drain port to hang freely in the indented slot at the bottom of the chamber doorbottom of the chamber door
– Close the door and secure side latch Close the door and secure side latch

NextPrevious
To UseTo Use
Step 2: Pressurize the pressure chamberStep 2: Pressurize the pressure chamber– With the Level 1 on, move the toggle switch With the Level 1 on, move the toggle switch
located at the top of the pressure chamber to located at the top of the pressure chamber to the plus (+) sidethe plus (+) side
– The pressure gauge should inflate to The pressure gauge should inflate to approximately 280-300mm/Hg approximately 280-300mm/Hg pressure is not adjustable on this devicepressure is not adjustable on this device the Level 1 must be ON for the pressure chambers to the Level 1 must be ON for the pressure chambers to
operateoperate
Step 3: Make patient connection and begin Step 3: Make patient connection and begin infusion infusion
NextPrevious
CautionCaution
Be careful when loading IV bags into Be careful when loading IV bags into the pressure chambers select the the pressure chambers select the correct hook for the size of the bag, so correct hook for the size of the bag, so that the drain port is not obstructedthat the drain port is not obstructed– If the drain port is obstructed diminished If the drain port is obstructed diminished
flow rate could occur resulting in patient flow rate could occur resulting in patient treatment being compromised treatment being compromised
Do not use the Level 1 fluid warmer or Do not use the Level 1 fluid warmer or accessories if any evidence of accessories if any evidence of malfunction or damage exists malfunction or damage exists
NextPrevious
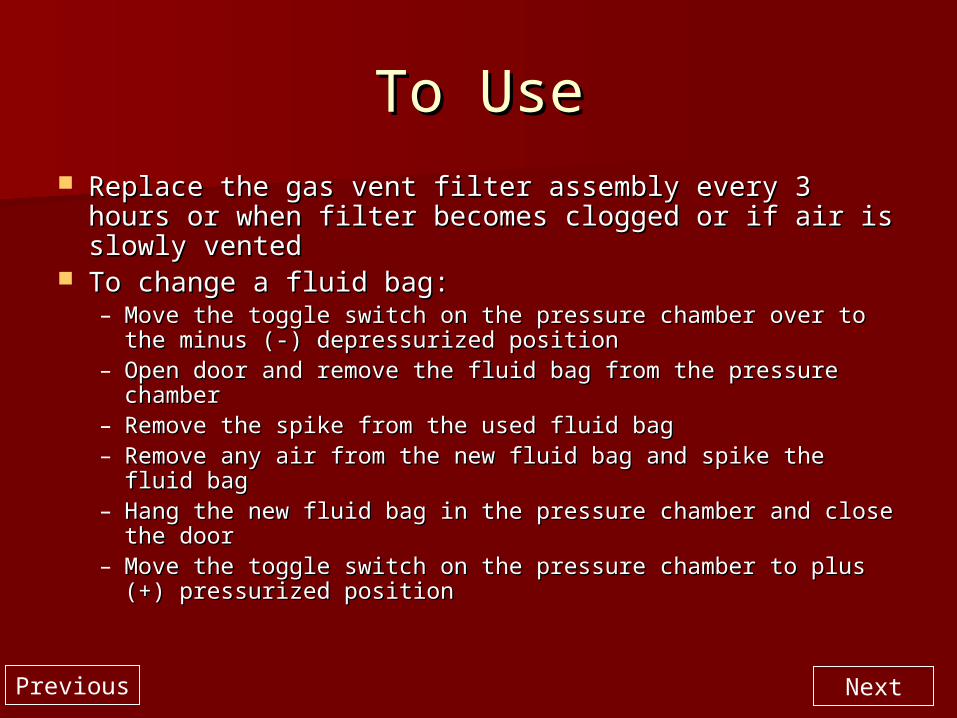
To UseTo Use Replace the gas vent filter assembly every 3 hours or Replace the gas vent filter assembly every 3 hours or
when filter becomes clogged or if air is slowly ventedwhen filter becomes clogged or if air is slowly vented To change a fluid bag:To change a fluid bag:
– Move the toggle switch on the pressure chamber over to the Move the toggle switch on the pressure chamber over to the minus (-) depressurized positionminus (-) depressurized position
– Open door and remove the fluid bag from the pressure Open door and remove the fluid bag from the pressure chamberchamber
– Remove the spike from the used fluid bagRemove the spike from the used fluid bag– Remove any air from the new fluid bag and spike the fluid Remove any air from the new fluid bag and spike the fluid
bagbag– Hang the new fluid bag in the pressure chamber and close Hang the new fluid bag in the pressure chamber and close
the doorthe door– Move the toggle switch on the pressure chamber to plus (+) Move the toggle switch on the pressure chamber to plus (+)
pressurized positionpressurized position

NextPrevious
Level 1 Fluid Warmer Power Level 1 Fluid Warmer Power And Alarm Test Panel And Alarm Test Panel
The green button on the front of the The green button on the front of the Level 1 is the ON buttonLevel 1 is the ON button– When the level 1 is set up correctly and When the level 1 is set up correctly and
the system is operating properly the the system is operating properly the green light should illuminategreen light should illuminate
The orange button located to the right The orange button located to the right of the on button is the OFF buttonof the on button is the OFF button– When this button is pushed the unit will When this button is pushed the unit will
power off and the green operating light power off and the green operating light will go out will go out

NextPrevious
Level 1 Fluid Warmer Power Level 1 Fluid Warmer Power And Alarm Test Panel And Alarm Test Panel
H-1000 alarm signal test is located just below the on button H-1000 alarm signal test is located just below the on button and has the picture of the triangle in the center of itand has the picture of the triangle in the center of it
This button is used to confirm proper operation of the visual This button is used to confirm proper operation of the visual and audible alarm indicatorsand audible alarm indicators
To test the alarms:To test the alarms:– Press and hold the button Press and hold the button – All visual and audible alarms indicators should be activated, All visual and audible alarms indicators should be activated,
the visual alarms should be illuminated and the audible alarms the visual alarms should be illuminated and the audible alarms should soundshould sound
– When the button is released, the over temperature visual and When the button is released, the over temperature visual and audible warning indicators will continue to be activeaudible warning indicators will continue to be active
This is normal operation, to clear the alarm condition turn the unit This is normal operation, to clear the alarm condition turn the unit off and then back on off and then back on
If the visual and audible alarms do not activate, discontinue If the visual and audible alarms do not activate, discontinue use of the device and remove from serviceuse of the device and remove from service
NextPrevious
Level 1 Fluid Warmer Power Level 1 Fluid Warmer Power And Alarm Test Panel And Alarm Test Panel
Over temperature test button is located under the Over temperature test button is located under the orange off buttonorange off button
It is used to confirm the proper operation of the It is used to confirm the proper operation of the over temperature circuitryover temperature circuitry
To test the over temperature alarm:To test the over temperature alarm:– With the fluid warmer at operating temperature 41 With the fluid warmer at operating temperature 41
degrees Celsius, press and hold the over temperature degrees Celsius, press and hold the over temperature buttonbutton
– The visual and audible alarm indicators should activateThe visual and audible alarm indicators should activate– If the visual and/or audible alarms do not activate If the visual and/or audible alarms do not activate
discontinue the use and remove the unit from servicediscontinue the use and remove the unit from service– Remember when the button is released, the over Remember when the button is released, the over
temperature alarm indicators are still activated temperature alarm indicators are still activated – This is normal operation, to clear the alarm condition, This is normal operation, to clear the alarm condition,
turn the unit off and then back on turn the unit off and then back on
NextPrevious
Level 1 Fluid Warmer Display Level 1 Fluid Warmer Display PanelPanel
Depending on the model of the Level 1 the Depending on the model of the Level 1 the display panel may be differentdisplay panel may be different
The model without the air detector device The model without the air detector device will have words that correspond with will have words that correspond with illuminating lights:illuminating lights:– First display is a thermometer with a symbol First display is a thermometer with a symbol
that represents water this indicator is for the that represents water this indicator is for the circulating water bath temperaturecirculating water bath temperature The temperature of the circulating water is displayed The temperature of the circulating water is displayed
in degree Celsius (note this is not the temperature of in degree Celsius (note this is not the temperature of the fluid delivered to the patient, but the temperature the fluid delivered to the patient, but the temperature of the water bath)of the water bath)
NextPrevious
Level 1 Fluid Warmer Display Level 1 Fluid Warmer Display PanelPanel
– Automatic operationAutomatic operation The green indicator illuminates when the The green indicator illuminates when the
power is ON and the disposable set has been power is ON and the disposable set has been properly installedproperly installed
It indicates that the fluid warmer is It indicates that the fluid warmer is operating properlyoperating properly
– Check disposables Check disposables Yellow indicator illuminates and an audible Yellow indicator illuminates and an audible
alarm sounds, if the disposable is not alarm sounds, if the disposable is not correctly installedcorrectly installed
If this occurs remove the disposable set and If this occurs remove the disposable set and re-install itre-install it
NextPrevious
Level 1 Fluid Warmer Display Level 1 Fluid Warmer Display PanelPanel
– Add waterAdd water This yellow indicator illuminates and an audible alarm This yellow indicator illuminates and an audible alarm
sounds when the water reservoir is lowsounds when the water reservoir is low Correct this by adding more distilled water to the Correct this by adding more distilled water to the
reservoirreservoir Distilled water is kept in the service centerDistilled water is kept in the service center
– Over temperature Over temperature Is a red warning indicator and an audible alarm will Is a red warning indicator and an audible alarm will
soundsound This signals that the water bath is over the This signals that the water bath is over the
recommended temperature for the unitrecommended temperature for the unit If this alarm illuminates and sounds discontinue use If this alarm illuminates and sounds discontinue use
of the unit and remove from serviceof the unit and remove from service

NextPrevious
H-30 Air Detector/ Clamp H-30 Air Detector/ Clamp Alarm Control Panel Alarm Control Panel
This panel has one switch and four This panel has one switch and four indicators to confirm that the air indicators to confirm that the air detector device is operating properlydetector device is operating properly
Unclamped- the yellow button on the Unclamped- the yellow button on the air detector/clamp control panel air detector/clamp control panel – Used to enter and exit unclamped modeUsed to enter and exit unclamped mode– When the air detector/clamp is in the When the air detector/clamp is in the
unclamped mode, air detection is unclamped mode, air detection is disableddisabled

NextPrevious
H-30 Air Detector/ Clamp H-30 Air Detector/ Clamp Alarm Control PanelAlarm Control Panel
– If the air detector/clamp is in the If the air detector/clamp is in the unclamped mode the yellow indicator unclamped mode the yellow indicator next to this button is illuminated and an next to this button is illuminated and an audible signal soundsaudible signal sounds When in the unclamped mode with a When in the unclamped mode with a
disposable set installed and primed, pressing disposable set installed and primed, pressing this button places the air detector/clamp in this button places the air detector/clamp in Automatic Operation modeAutomatic Operation mode
When in Automatic Operation mode, When in Automatic Operation mode, pressing this button will place the air pressing this button will place the air detector/clamp in unclamped mode detector/clamp in unclamped mode

NextPrevious
H-30 Air Detector/ Clamp H-30 Air Detector/ Clamp Alarm Control PanelAlarm Control Panel
Automatic Operation- is a green Automatic Operation- is a green indicator that illuminates indicator that illuminates – When the Level 1 power is ON and the air When the Level 1 power is ON and the air
detector/clamp is receiving power, a detector/clamp is receiving power, a primed disposable is installed in the fluid primed disposable is installed in the fluid warmer and the patient line from the gas warmer and the patient line from the gas vent filter assembly is properly placed in vent filter assembly is properly placed in the clamp slot of the air detector/clampthe clamp slot of the air detector/clamp

NextPrevious
H-30 Air Detector/ Clamp H-30 Air Detector/ Clamp Alarm Control PanelAlarm Control Panel
Check Tubing- yellow indicator illuminates Check Tubing- yellow indicator illuminates and an audible signal sounds when the and an audible signal sounds when the patient line tubing from the gas vent filter patient line tubing from the gas vent filter assembly is not correctly placed in the assembly is not correctly placed in the clamp slotclamp slot
Clamped- red warning indicator illuminates Clamped- red warning indicator illuminates and an audible warning signal sounds and an audible warning signal sounds indicating that air has been detected in indicating that air has been detected in the gas vent filter assembly and the the gas vent filter assembly and the patient line has been clamped patient line has been clamped

NextPrevious
H-2 Pressure Chamber Control H-2 Pressure Chamber Control PanelPanel
The H-2 pressure chamber has one switch The H-2 pressure chamber has one switch and one gauge used to indicate its and one gauge used to indicate its operational stateoperational state
Pressurized/Depressurized Switch - used to Pressurized/Depressurized Switch - used to apply pressure or decrease pressure on the apply pressure or decrease pressure on the IV bagsIV bags– When the Level 1 is ON place the toggle switch When the Level 1 is ON place the toggle switch
in the plus (+) position to apply pressure to the in the plus (+) position to apply pressure to the IV bagIV bag
– Place the toggle switch in the minus (-) position Place the toggle switch in the minus (-) position to release the pressure on the IV bagsto release the pressure on the IV bags

NextPrevious
H-2 Pressure Chamber Control H-2 Pressure Chamber Control PanelPanel
Pressure Gauge- this gauge indicates Pressure Gauge- this gauge indicates the operating pressure of the the operating pressure of the pressure chamber, when the toggle pressure chamber, when the toggle switch is in the plus (+) positionswitch is in the plus (+) position– The operating pressure should be 280-The operating pressure should be 280-
300 mm/Hg300 mm/Hg

NextPrevious
After UseAfter Use
Discontinue infusionDiscontinue infusion Turn the Level 1 offTurn the Level 1 off Unload the pressure chambers:Unload the pressure chambers:
– First release the pressure from the pressure First release the pressure from the pressure chamber before opening the chamber doorchamber before opening the chamber door
– To do this move the toggle switch to the minus To do this move the toggle switch to the minus (-) position(-) position
– Open the door and remove the IV bag Open the door and remove the IV bag Remove the disposable set from the Level Remove the disposable set from the Level
1 and air detector clamp 1 and air detector clamp

Previous Close
After UseAfter Use
Dispose the disposable set in a red Dispose the disposable set in a red bag trash linerbag trash liner
Visually check the condition of the Visually check the condition of the equipment and tubing for any signs equipment and tubing for any signs of damage or malfunctionof damage or malfunction
Clean the device with warm soapy Clean the device with warm soapy water water