newborn blood spot collection and screening...• newborn screening is one of the most effective...
TRANSCRIPT

Newborn Blood Spot Collection and Screening
2019
Leah Bjornskov Wessenberg, RN, FNP-CNurse Educator, Oregon State Public Health Laboratory
Nurse Practitioner, OHSU Metabolic [email protected]

Three types of newborn screening
• Bloodspot• CCHD/pulse ox• Hearing
GOAL of Newborn Screening: Diagnose and treat disor ders before
they cause permanent harm- we screen because we can treat!

What clinicians need to know about bloodspot newborn screening
Why it’s important:
− Prevents death and/or disability
− Babies may look and act healthy at birth
− The disorders are not very common
− The disorders we screen for have treatments
− It’s not just the “PKU” test!

Blood Spot• Cystic Fibrosis• Endocrine disorders• Congenital hypothyroidism• Fatty Acid disorders• Amino Acid disorders• Organic Acid disorders• Immune disorders• Galactosemia• Hemoglobin disorders
• LSD (lysosomal storage disorders, currently screened for in Oregon)

Detecting Disorders Saves Lives
• About 1:900 babies will be diagnosed with a treatable disorder.
• About 90% are detected on the first screen, but some disorders are routinely detected on the 2nd screen.
• Newborn Screening is one of the most effective public health campaigns ever in terms of cost and prevention-comparable to vaccination.
• Screening is mandated in all 50 states, though what is screened for is legislated individually by each state

Newborn Screening Process - 1st ScreenDRIED BLOOD SPOTS: THE HEEL POKE
BirthCollection
@24hrs Shipping
ASAPLab
testingResults
Newborn Blood Spot Screening 503-693-4174

Newborn Screening Process - 2nd Screen
Hospital discharge
Collection@2 weeks of age with PCP
ShippingASAP
Lab testing
Results

Timing of Specimen Collection
• Normal newborns should be tested at 24-48 hours old. Do it as soon as the baby has achieved 24 hours of life, or at hospital discharge if prior to 24 hours.
• The second screen for a normal newborn is collected between 10-14 days of age (typically at the 2 week follow up visit). In states that screen for LSDs, some babies may have a 3rd screen depending on weight.
• NICU infants are screened at 24-36 hours of life (or before transfusion, whichever is first), then between 10-14 days of life (48-72 hours if transfused), and then at 28 days or shortly thereafter-even if they have discharged home.
9
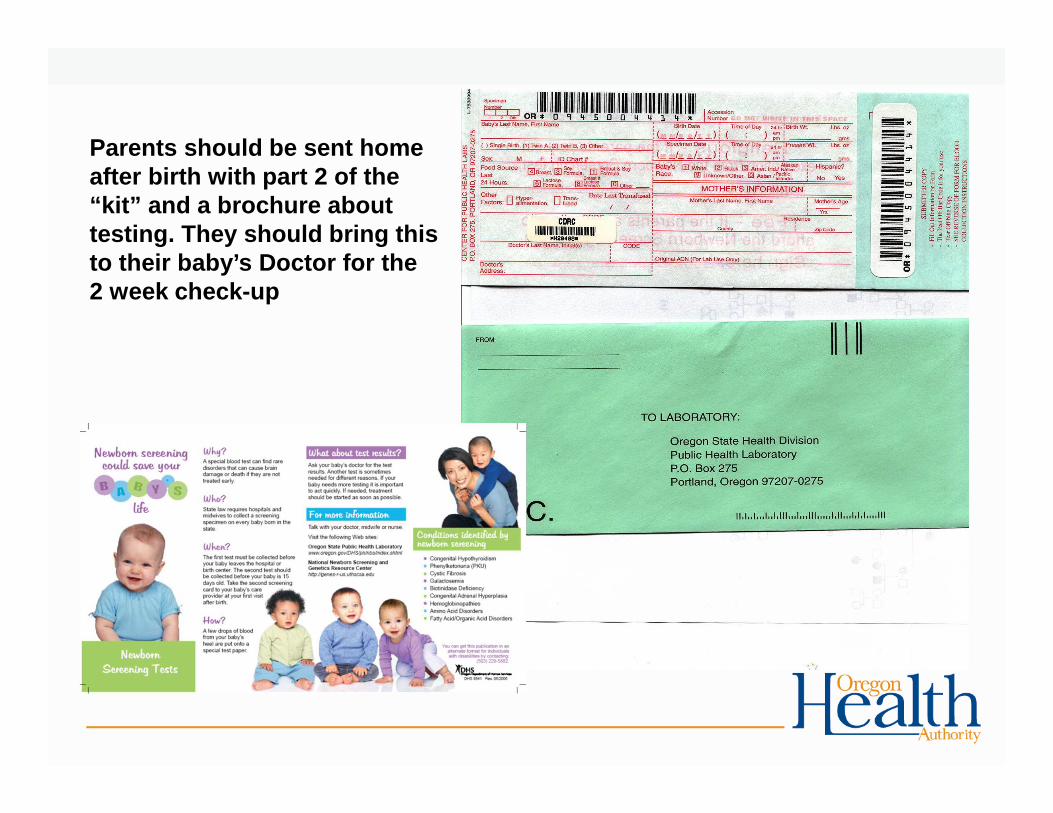
Parents should be sent homeafter birth with part 2 of the“kit” and a brochure abouttesting. They should bring thisto their baby’s Doctor for the2 week check-up

Laboratory: located in Hillsboro

What to tell parents?
• Know your pediatrician or provider at time of birth– we need to know where to result out to or who to
contact. This is so important and often missed!• Ask your provider about the results
– don’t assume no news is good news• Look for the card that is part 2 of the “kit” and bring it to
your baby’s doctor• It is not going to hurt the baby

Place Your Logo Here - Align Center
Dry Blood Spot Collection
• DBS is whole blood collected on filter paper from a heel stick
• Screening infants includes proper specimen collection, proper handling and packaging, prompt shipment to the state lab for testing, appropriate follow up or re-screening as needed.
• An issue in any of these areas can result in a unsatisfactory screening attempt! This can delay a life-saving diagnosis!

Step 1: Gather your supplies
You will need:
• Blood collection card (Part 1 or Part 2, depending if this is the first or second screen)
• Gloves• Alcohol wipe and gauze• Heel warmer• Lancet device (one
specific for DBS collection!)

Step 2: Choose your collection Site
• A Heel Stick is preferred
• IV and central lines (sometimes used in NICU) not recommended (must be flushed)
• Cord Blood NOT acceptable

Do not use Capillary Tubes or Needles when applying blood to filter paper
• Scratches or tears filter paper
• Causes uneven saturation
• Needles lyse the red cells, which leads to false negative or positive results!

Heel Stick Procedure, step -by-step:• Fill out the demographic data on the card. It must be complete-
every detail counts when we are interpreting the results or need to follow up
• Use appropriate patient identification technique. Make sure you have the right filter paper kit (Part 1 or 2)
• Don’t touch the filter paper- handle properly• Apply heat pack (only use chemical ones made for this purpose)• Clean the site on the baby’s heel with alcohol swab and air dry• Lance the site, and wipe away the first drop of blood (it will be
contaminated)• Allow one large drop to collect, and gently touch drop to the filter
paper so that it fills up the circle completely. Continue for each circle
• Apply pressure to heel until bleeding stops• Allow parent to comfort baby

Important Considerations
• Always use Universal Safety Precautions (as with any other specimen collection)
• Do not touch or contaminate filter paper on the card with hands, gloves, bodily fluids, powder, formula, water, coffee, or anything else
• Be careful not to crush or compress filter paper while it is being stored for use, or by addressograph machines, or put anything on top of the card- it will keep the blood from saturating properly

More to consider…
• Neatness does not count!• You can use either side of the filter paper to fill, but only
fill from one side• Fill circles completely• Don’t superimpose or put blood drops on top of each
other (”layering”)• Don’t “milk” the heel- you will get serosanguinous fluid
and we need whole blood only• If the blood flow is slow, restick! A warm heel bleeds
better…
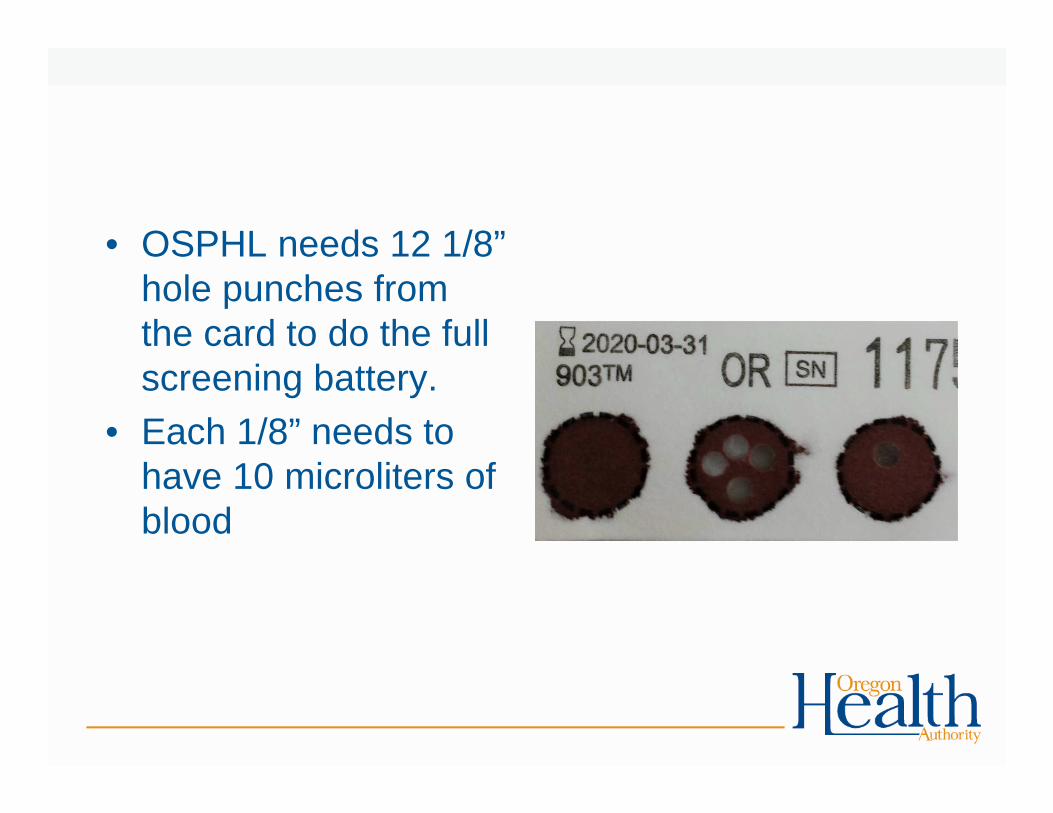
• OSPHL needs 12 1/8” hole punches from the card to do the full screening battery.
• Each 1/8” needs to have 10 microliters of blood

Proper Handling Post-Collection
• Take care not to touch or smear your blood spots• Allow to air-dry horizontally for 3-4 hours at room temp• Do not hang filter paper in a dependent position• Keep away from direct sunlight• Do not heat, stack or allow the blood spots to touch other
surfaces during the drying process• Do not cover blood spots with end paper until dry• Do not store or ship blood spots in plastic bags

And then ship to The Lab
• Place the protective cover over the DBS• When stacking multiple cards, reverse ends so blood spots don’t
touch• Make sure all demographic data is complete and card is fully filled
out. Inspect to be sure the DBS are adequate.• Prepare a packing list of the specimens• Put the specimens into their sealable paper envelopes• Ship the same day by courier or a postal service. Don’t accumulate
specimens. Consider weather and holidays.• Should be received by OSPHL within 1-2 days of coll ection- and
definitely no later than 5 days under any circumsta nces!

Weekends and Holidays
• Keep your specimens in a cool, dry, and at room temperature until able to send out. AVOID sunlight, heat, humidity, hot mail boxes, etc
• Send by overnight or express mail on the following business day. Even considering holidays, we should get ever y specimen within 5 days of collection.
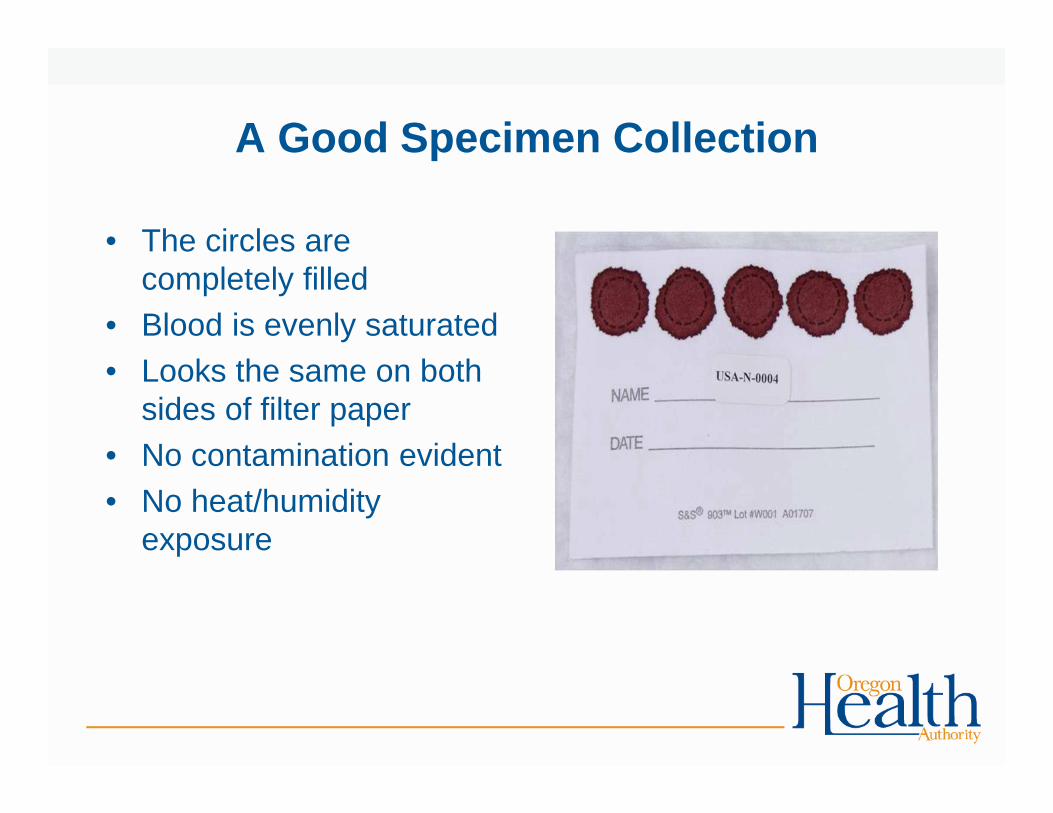
A Good Specimen Collection
• The circles are completely filled
• Blood is evenly saturated• Looks the same on both
sides of filter paper• No contamination evident• No heat/humidity
exposure

Uneven Saturation
• When some parts of the blood spot look darker than others- color of each spot should be uniform throughout.
• When multiple drops are used to fill circle
• Touching filter paper with gloves or hands
• Other contamination or damage to paper
• Hanging them to dry• You will often notice that the back
of the card does not look the same as the front- the blood will often soak unevenly through the card.

Quantity Not Sufficient
- Not enough blood applied to fill circles- Drop not large enough to soak evenly all the way through the paper- the front and back
should look the same- Compression of filter paper from storage can effect the ability of the filter paper to allow
blood to saturate through- Inadequate blood flow- you need to make sure your blood flow is enough to produce large
drops to apply to each circle on the paper. Small drops do not saturate the paper.- Make sure you inspect your card on both sides after collection

Place Your Logo Here - Align Center
Scratched or Abraded
• Applying blood with a capillary tube or a needle can cause scratches
Place Your Logo Here - Align Center
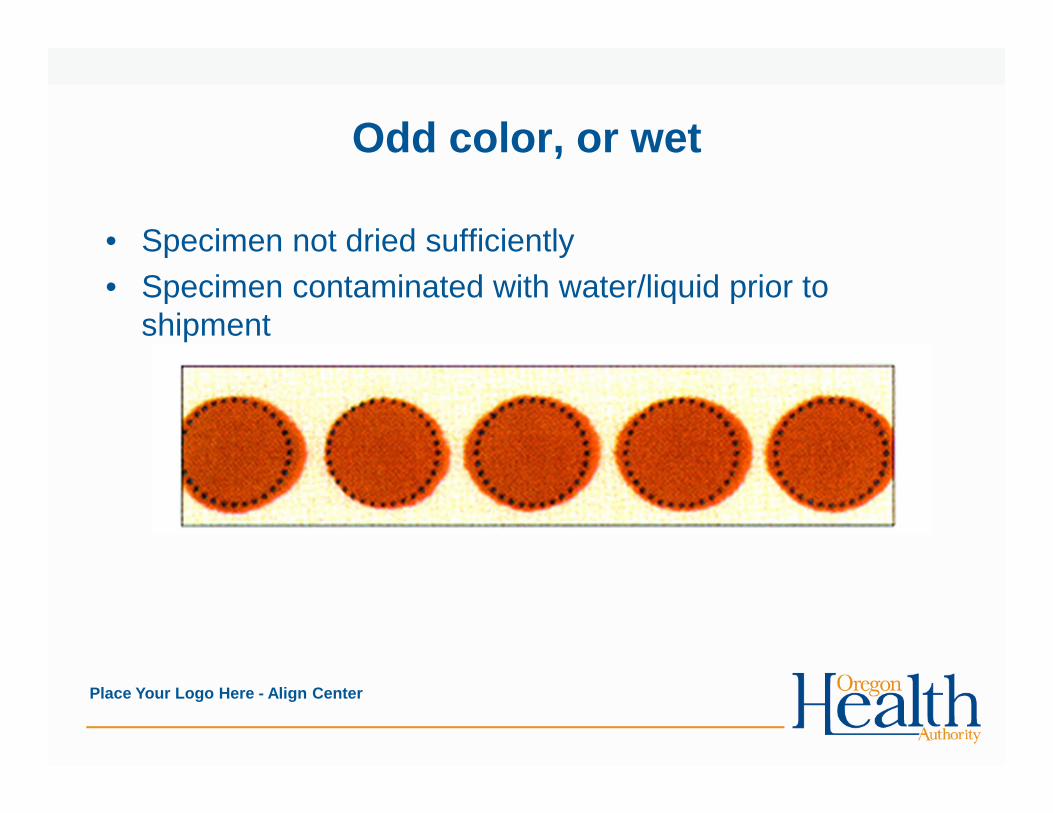
Odd color, or wet
• Specimen not dried sufficiently• Specimen contaminated with water/liquid prior to
shipment

Place Your Logo Here - Align Center
Clotted, Layered, or super-saturated
• Applying excess blood, usually from a device • Blood applied from both sides of the filter paper• Blood applied on top of dried or semi-dried or already-
saturated blood- usually when a re-stick should have been done due to insufficient blood flow.

Place Your Logo Here - Align Center
Hemolyzed, discolored, contaminated
• Squeezing or “milking” the heel• Not wiping away the first drop• Filter paper compressed or contaminated with other
substances• Blood spots exposed to direct heat (dried in the sun, heater,
etc)

Place Your Logo Here - Align Center
Serum Rings
• Not letting alcohol dry• Contamination• Milking heel• Improper drying• Cap tubes

Place Your Logo Here - Align Center
No blood
