network & system administration class 1
TRANSCRIPT

Network & SystemAdministrationClass 1
Introduction to Linux

Agenda
▪ Introductions and expectations
▪ CLI (command line interface) preview▪ Lab – working session
▪ Introduction to Linux▪ Lab – Installing CentOS 7 locally
▪ System navigation and administration▪ Lab – command line usage, user management and system commands
▪ Common Linux tools▪ Lab – Working with Linux tools

Introductions and expectations
> This week I want everyone in the class to upload a recent picture of themselves to Canvas (if not already done) and post a brief introduction about themselves covering:
1. Linux experience
2. Primary goal for this course
3. Optional: something about yourself you want to share, kids, pets, sports, interesting show or movie you have seen, really whatever you feel like sharing.
> Course expectations
– Speak up in class, participate in discussions and breakouts, attempt to complete all labs and assignments. Monitor the class TEAMS site channels

Preview
What we are going to cover:▪ Linux command line
Takeaways from this session:▪ What to expect at a command prompt
▪ Simple navigation tips

Linux command line in a browser
Open a browser and go to: https://cocalc.com/doc/linux.html
Click “Run Linux Now” and we expect to see Linux terminal in a browser.

Class 1 Unit 1
What we are going to cover:▪ CentOS/RHEL basics
▪ System admin basics
Takeaways from this session:▪ Understand relationship between Red Hat and
CentOS.
▪ Install requirements
▪ Major system changes and updates
▪ How to elevate your rights with su or sudo
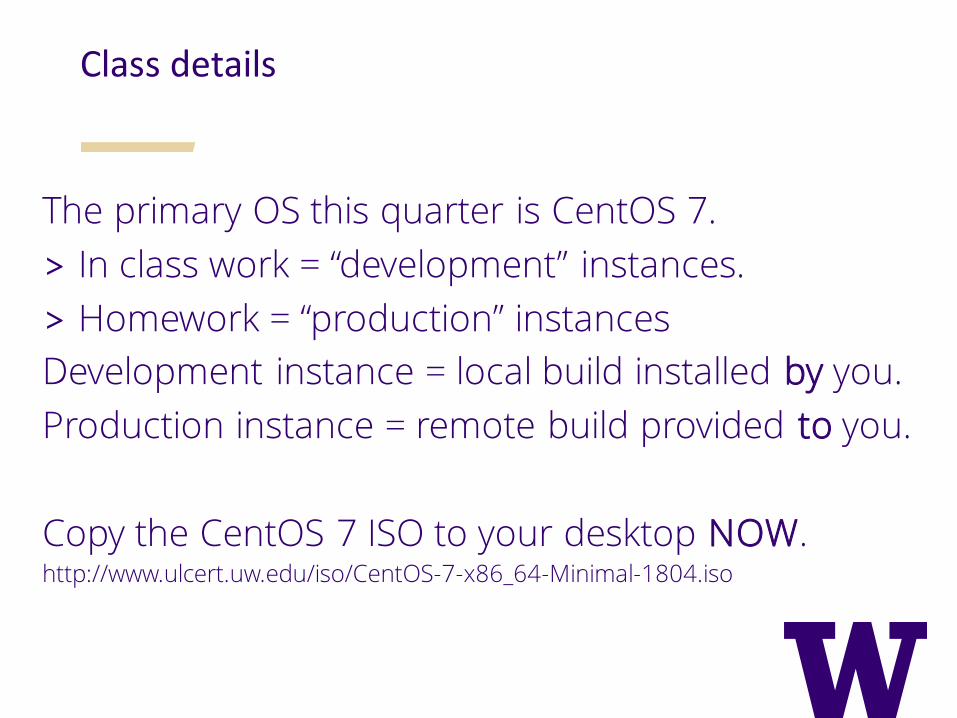
Class details
The primary OS this quarter is CentOS 7.
> In class work = “development” instances.
> Homework = “production” instances
Development instance = local build installed by you.
Production instance = remote build provided to you.
Copy the CentOS 7 ISO to your desktop NOW. http://www.ulcert.uw.edu/iso/CentOS-7-x86_64-Minimal-1804.iso

About Linux
> Roots from Unix and Multics
> Ken Thompson and Dennis Ritchie
> Free and Open-source
> Linux released 1991 by Linus Torvalds

Community enterprise Operating System
> Free, based on Red Hat Enterprise Linux (RHEL)
> Red Hat releases all source code
> A core group of CentOS developers compile that code
> Commercial support available
> Support provided for at least 7 years. – https://access.redhat.com/documentation/en-us/
> New public key with each major version
> ABI and API stability
> Single base install vs RHEL

What’s new in RHEL 7
> GRUB2
> firewalld
> Systemd
> Gnome3
> Filesystem defaults to XFS vs ext4
> Kernel update to 3.10.0
> Support for Linux Containers
> and more.

A peak at the shell
We will be working from the command line this quarter.
We will be using standard user accounts
We will have access to root or admin rights

System requirements
> 64bit architecture..– No 32bit support
> 512 MB.– 1GB recommended.
> 4 GB hard drive required.– 20 GB hard drive recommended.
> Network access to install updates.

Updated tools on CentOS/RHEL 7
What might be NEW for you:
/usr/sbin/ip
/usr/sbin/ss
/bin/systemctl
What has been deprecated:
/usr/bin/arp
/usr/bin/ifconfig
/usr/bin/netstat
/usr/bin/route
/sbin/service
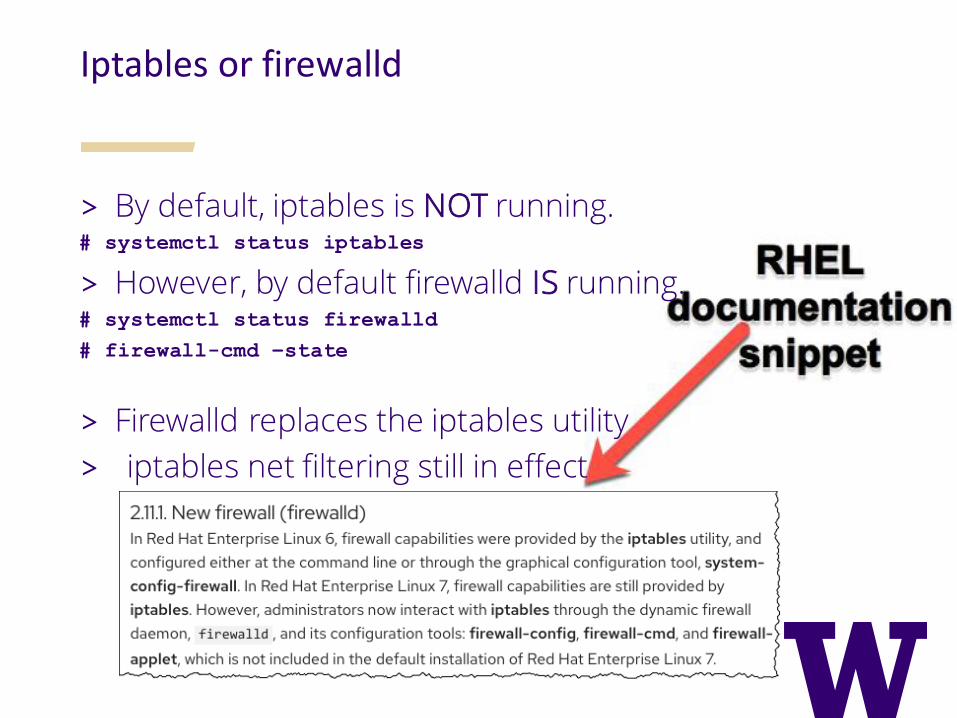
Iptables or firewalld
> By default, iptables is NOT running.# systemctl status iptables
> However, by default firewalld IS running.# systemctl status firewalld
# firewall-cmd –state
> Firewalld replaces the iptables utility
> iptables net filtering still in effect
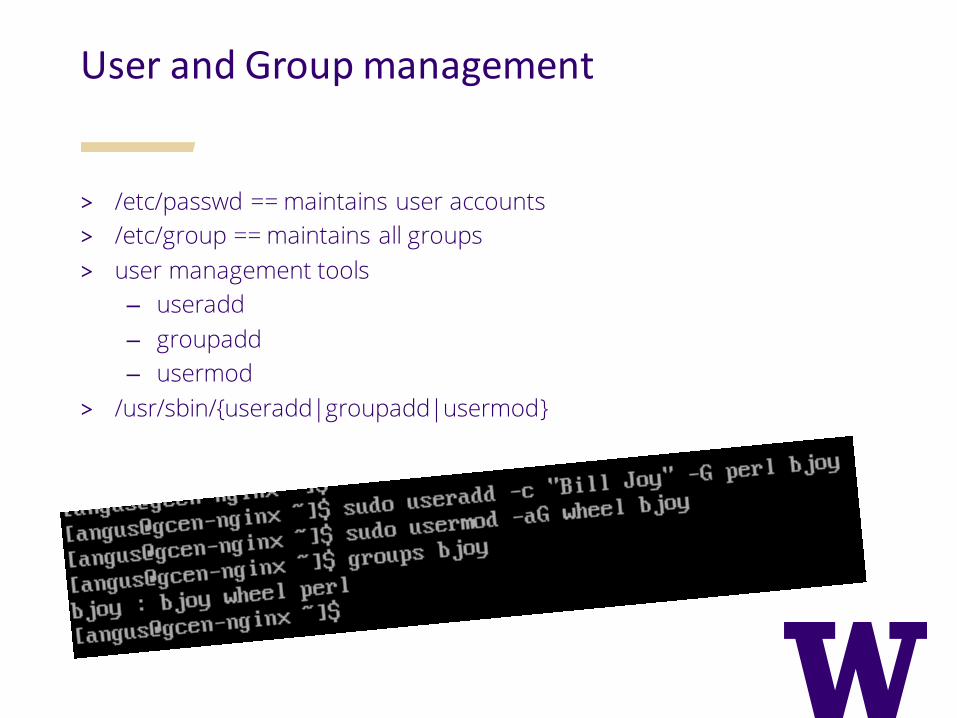
User and Group management
> /etc/passwd == maintains user accounts
> /etc/group == maintains all groups
> user management tools
– useradd
– groupadd
– usermod
> /usr/sbin/{useradd|groupadd|usermod}

Switch User SU
> Best practice – don’t login as “ROOT”.
> When required SU to ”ROOT”
user@localhost $) su root
*user@localhost $) su – root
> Run explicit commands as another user
user@localhost $) su root -c “cmd”
user@localhost $) su root -c “cat /etc/shadow”
*Note the addition of the “-”, spawn new shell.

sudo – “su” do
Grant rights to run commands as root or another user withoutsharing passwords.
Sudo creates an audit trail
Best practice:
edit the sudoers with visudo
/usr/sbin/visudo
*image source http://xkcd.com/149/

sudo configuration
The sudo configuration file is found here: /etc/sudoers
The best utility for editing this file is visudo
/usr/sbin/visudo
The sudo binary is found here: /usr/local/bin/sudo
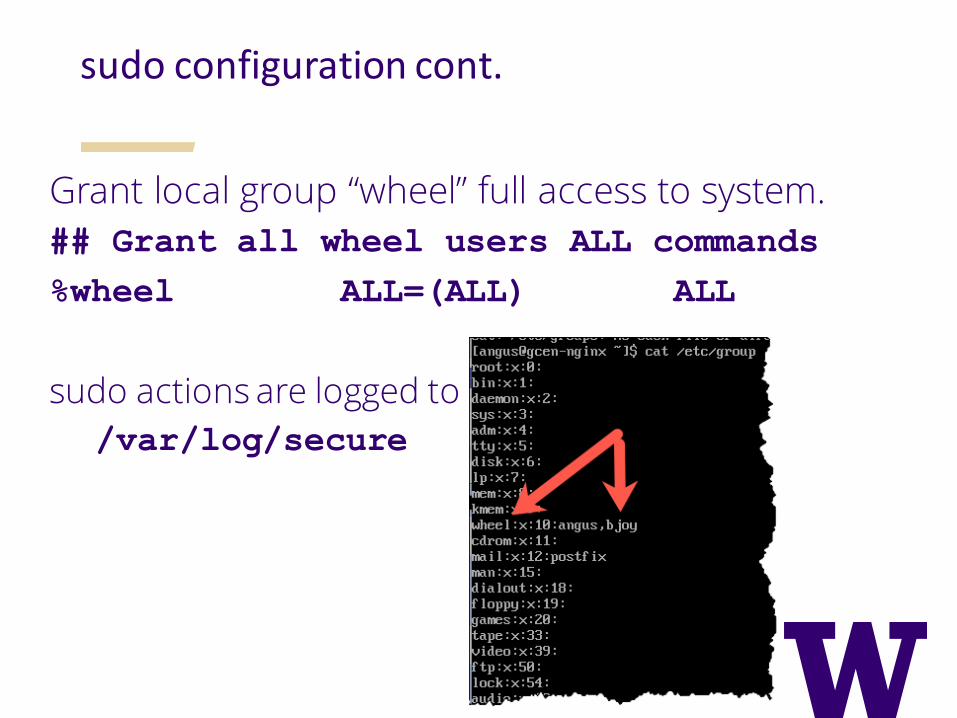
sudo configuration cont.
Grant local group “wheel” full access to system.
## Grant all wheel users ALL commands
%wheel ALL=(ALL) ALL
sudo actions are logged to
/var/log/secure

Review
Support available for both CentOS and Red Hat.
Documentation provided by Red Hat.
Red Hat == multiple installations distributions
CentOS == one installation distribution.
User management useradd, usermod, groupadd,
Elevated user rights with su and sudo.
No 32bit install support
ifconfig replaced by ip, netstat replaced by ss
sbin/service replaced by systemctl and systemd.
iptables replaced by firewalld

Lab 1
Lab notes for this session can be found in canvas.

Class 1, Unit 2
>What we are going to cover:
–The FHS design.
–Terminal navigation.
>Takeaways from this session:
– standard files and directory structure.
–Terminal navigation

Filesystem Hierarchy Standard
> Red Hat adheres to the FHS structure*. https://refspecs.linuxfoundation.org/FHS_3.0/fhs-3.0.pdf
> Maintained by the Linux Foundation
> Supported by: IBM, Dell, Red Hat, and HP…

It all starts at slash, root, /
> Consider “/” to be the root or base.
> Everything else hangs from this point.
> Some of the common directories under /
/bin, /boot, dev, /etc, /home, /lib, /proc, /usr, and /var.

/
/bin /usr
/usr/bin/usr/local
/home

Linux file system details
> /boot = static files required to boot (kernel)
> /dev = device nodes, represent attached physical or virtual devices to the system
> /etc = local host configuration files
> /lib = files needed to execute binaries (/bin /sbin)
> /media = used for removable media (dvd, usb…)
> /mnt = mounted file systems (nfs, dvd, cdrom)

Linux file system details cont.
▪ /proc = virtual filesystem, exposing kernel details.
▪ /sbin = executables used by root
▪ /sys = virtual filesystem, similar to /proc.
▪ /usr = sharable executables, often read-only.
▪ /usr/local used for software that is local to the host. should be safe during upgrades.
▪ /var = stores variable data files
▪ /opt = most 3rd party app software packages
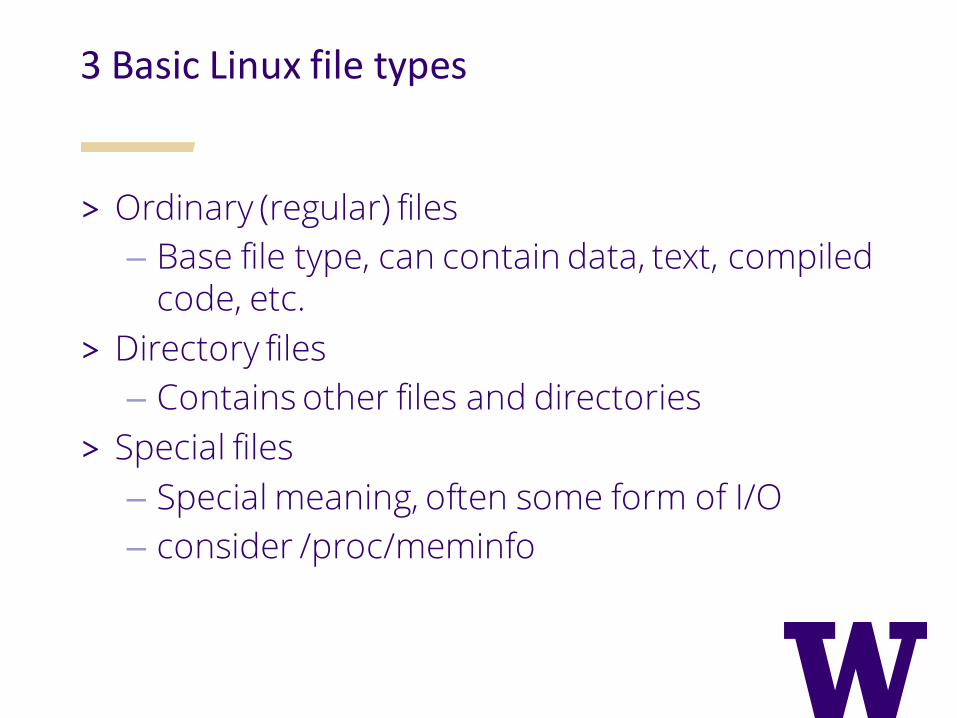
3 Basic Linux file types
> Ordinary (regular) files
– Base file type, can contain data, text, compiled code, etc.
> Directory files
– Contains other files and directories
> Special files
– Special meaning, often some form of I/O
– consider /proc/meminfo

The Shell
The primary program for interacting with the host system.
Use your shell to run other commands and programs.
The shell can also be a programming environment.

What is a shell?
Linux based on two broad categories:
kernel and utilities.
> The kernel is at the core of the system. It is loaded into memory at boot and remains there until the system is halted
> Utilities exist on disk and are brought into memory as required.
> The shell is just another utility that is loaded into memory as needed.

/bin/sh The Bourne Shell
> A common Linux shell is the Bourne Shell.
> Replaced by Bourne Again SHell /bin/bash.
> Other example shells include the Korn Shell /bin/ksh and the C shell /bin/csh.
> Each shell includes slightly different commands, options and features.

Basic command whoami and ”who am i”
Once you find yourself at the shell maybe you want to know, who am i?
Another common option is to use whoami which will show you the effective UserID vs real UserID.

Basic command echo.
The echo command prints to the terminal whatever is passed in next.
echo will drop or ignore extraneous white space.

Basic commands cat and ls
> /bin/cat will print the contents of the file or file.
> /bin/ls will list the files in a directory.
Most commands exist in your $PATH so you can just use cat or ls and not use /bin/cat or /bin/lsWe will talk about $PATH in more detail later in the course
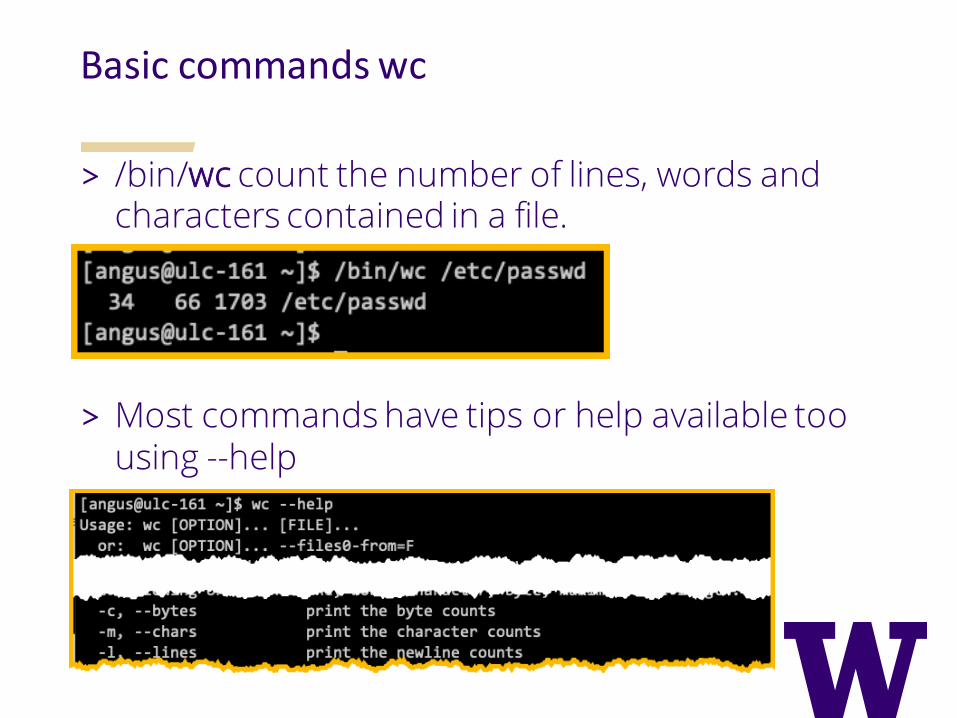
Basic commands wc
> /bin/wc count the number of lines, words and characters contained in a file.
> Most commands have tips or help available too using --help

Basic commands cp and mv
/bin/cp used to copy a file.
/bin/mv. Move or rename a file. This commands involves a move and a delete.

Basic command rm
> /bin/rm to remove or delete a file.
No warnings about deleting files.
Remember you can use “ls” to list the files

Basic commands cd and pwd
> /bin/cd used to Change Directories. Defaults to home.
> A successful login redirects to home by default.
> Home location maintained in /etc/passwd
> Moving from home to /usr/local requires cd
/bin/cd /usr/local
> Confirm current directory using /bin/pwd
– Print Working Directory (pwd)

Basic commands mkdir, rmdir and rm -r
Make a directory using /bin/mkdir.
/bin/mkdir /tmp/TEST
Creates a directory under /tmp called TEST.
Remove this directory with /bin/rmdir
/bin/rmdir /tmp/TEST
Will not remove directories with files.
Remove directory and any files with rm -r
/bin/rm –r /tmp/TEST

Basic commands options and man pages
>All commands have additional options.
> Invoke an option using a “-” dash
> Force rm to confirm a delete using -i
/bin/rm –i /bin/TEST
>Use the /bin/man <cmd>
> /bin/man rm
>/bin/rm --help
>To review options and help available.

Review
> FHS File System Hierarchy standard– Everything starts at /
– Common directories /usr /bin /etc /home /lib /var
– User space programs are found under /usr
>Shell is a utility. Shell interacts with the kernel
>The System is divided between kernel and utilities.
>Linux file types: Ordinary, Directory, Special files
>Common commands, who, echo, cat, ls, wc, cp, mv, rm, cd, pwd, mkdir, rmdir.
>Learn about options and help using /bin/man

Lab 2
Lab notes for this session can be found in canvas.

Class 1, Unit 3
>What we are going to cover:
– Common Linux utilities.
>Takeaways from this session:
– Regular expression basics
– Common tools and combinations

Common tools in review…
> cut>paste> sed> tr>grep> sort
> uniq
> awk
> xargs
> find

Common tools in review…
But first … Regular Expressions - regex.
Regular expressions are sets of symbols and syntactic elements used to match patterns of text.
Many common Linux tools support regex.

A very quick look at Regular Expressions
* means zero or more, very greedy…
? Means zero or one of the preceding character
[…] means any characters in the brackets
[0123] or [A-Z] [4-9] [a-zA-Z]
. Means single character except line break.
^ beginning of line
$ end of line
\ means escape the special meaning.

Now back to tools with cut
■Used to extract fields of data.cut –c<chars> file or data
cut –c 4-8 /etc/passwd
■Cut can be used with files and can interpret delimiters for the data.-d = delimiter (default is tab) use ‘ ‘ for space.
-f = fields
cut -d: -f4 /etc/passwd

paste
■Paste the opposite of cut, paste lines together
paste /etc/services /etc/passwd
■Insert delimiters use –d ‘<value>’
paste –d ‘#’ /etc/passwd /etc/services
To paste files in serial, one at a time use –s
Paste –s /etc/passwd /etc/services
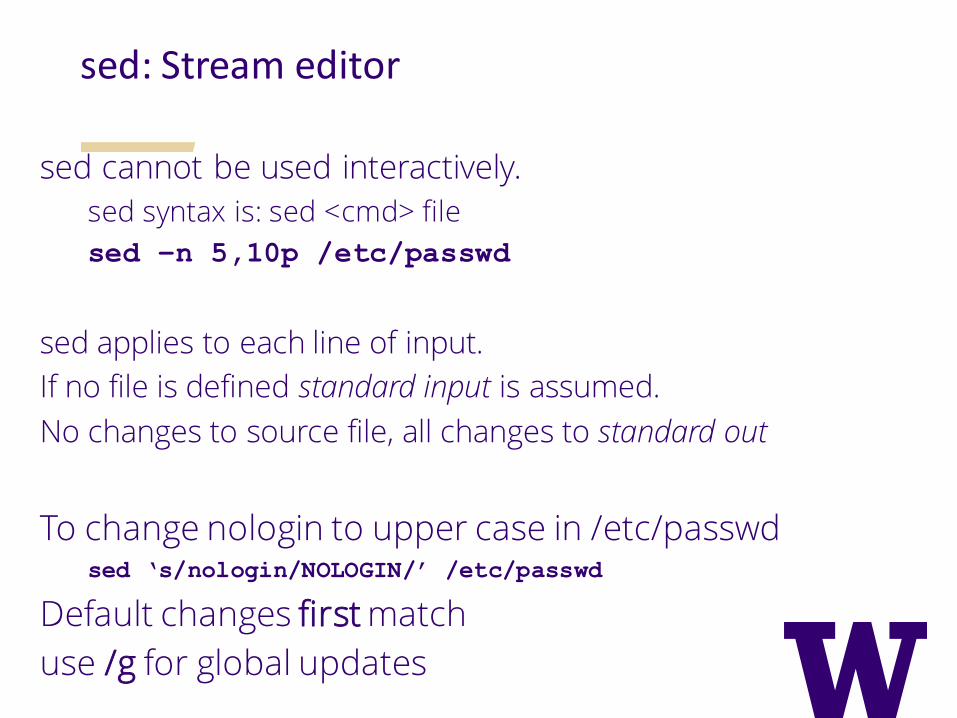
sed: Stream editor
sed cannot be used interactively.
sed syntax is: sed <cmd> file
sed –n 5,10p /etc/passwd
sed applies to each line of input.
If no file is defined standard input is assumed.
No changes to source file, all changes to standard out
To change nologin to upper case in /etc/passwdsed ‘s/nologin/NOLOGIN/’ /etc/passwd
Default changes first match
use /g for global updates

Sed cont.
sed display characters used for delimiterssed –n ‘l’ /path/to/file = list out tabs notations
delete lines in a file with –d #sed ‘1d’ /etc/passwd
sed '3,6d' /etc/passwd
Delete first line with “root”sed ‘/root/d’ /etc/passwd

tr – translate or transliterate
tr is used to translate characters from stdin.
tr always expects input from standard in
The basic format is "tr from-char to-char"
tr takes two sets of characters and replaces the second set with those from the first set.
tr matches in order between character groups.

tr cont.
Use -s option to remove repeat characters
tr -s ' ' ' ' < /etc/services
Use -d option to delete a character
tr -d '\11' </etc/services\11 represents the octal value for tab.
switch case using either
'[a-z]' '[A-Z]' or '[:lower:]' '[:upper:]'tr '[:lower:]' '[:upper:]'
</etc/passwd
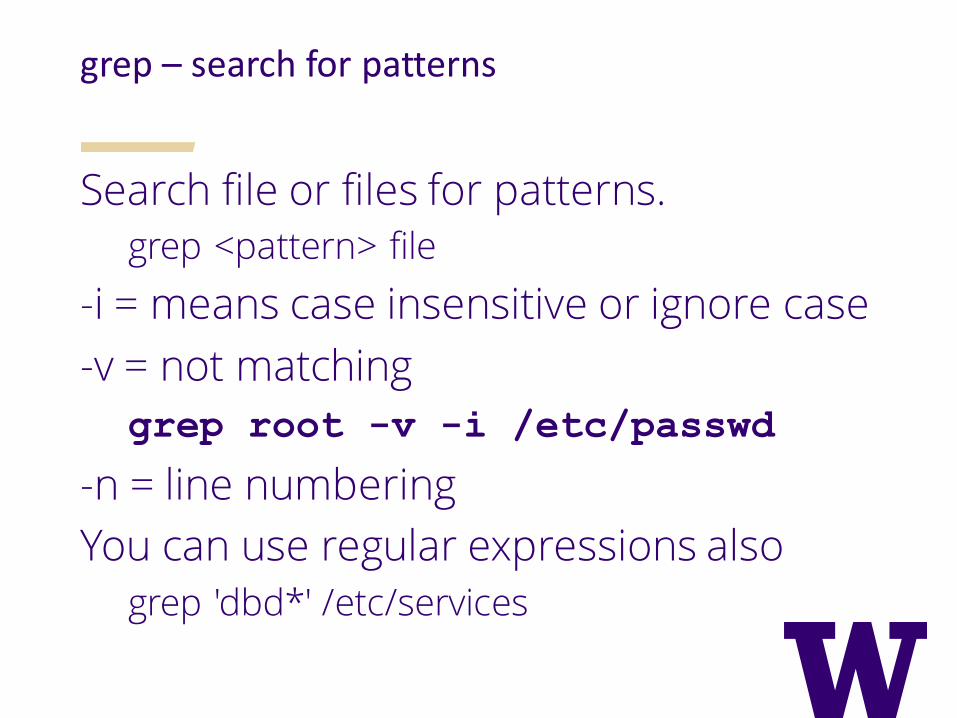
grep – search for patterns
Search file or files for patterns.grep <pattern> file
-i = means case insensitive or ignore case
-v = not matching
grep root -v -i /etc/passwd
-n = line numbering
You can use regular expressions also
grep 'dbd*' /etc/services
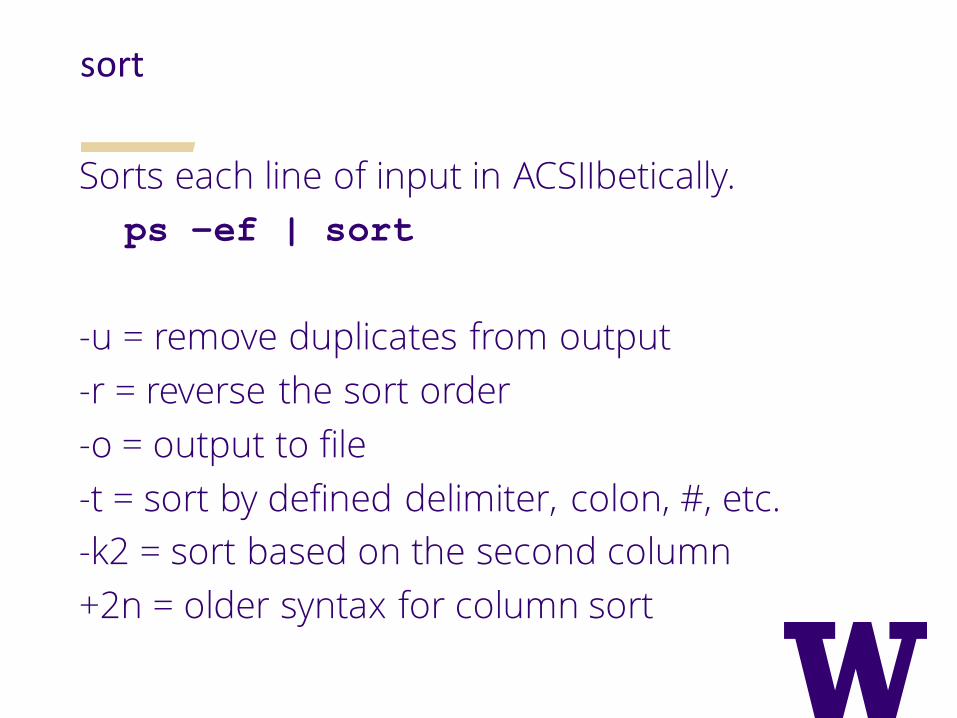
sort
Sorts each line of input in ACSIIbetically.
ps –ef | sort
-u = remove duplicates from output
-r = reverse the sort order
-o = output to file
-t = sort by defined delimiter, colon, #, etc.
-k2 = sort based on the second column
+2n = older syntax for column sort

uniq
Finds duplicates in a file.
-d write out only the duplicates from a file
-c provides numbers of duplicate lines

awk
Named after the creators; Alfred Aho, Peter Weinberger and Brian Kernighan
A pattern scanning and processing language.
awk is similar to C and can be complex
print a column
who | awk '{print $2}‘
print the entire line
who | awk ‘{print $0}’
number of fields
who | awk ‘{print NF $0}’
awk can do math, create formatted output, and more

xargs
Accepts arguments from other commands
Some utilities have limited input. xargsworks on streams and has no limit.ls 4*txt | xargs echo
find /tm/ -name [1-999].txt | xargs rm
Recursive text searchfind /tmp/*txt | xargs grep -i test

find
A powerful Linux command
Common syntax isfind <path> -name <argument> -
find /var –name “*log*” –print
Other options include
-mtime (modified time) –atime (access time), -size ( -size +500k, -size +10M), etc.
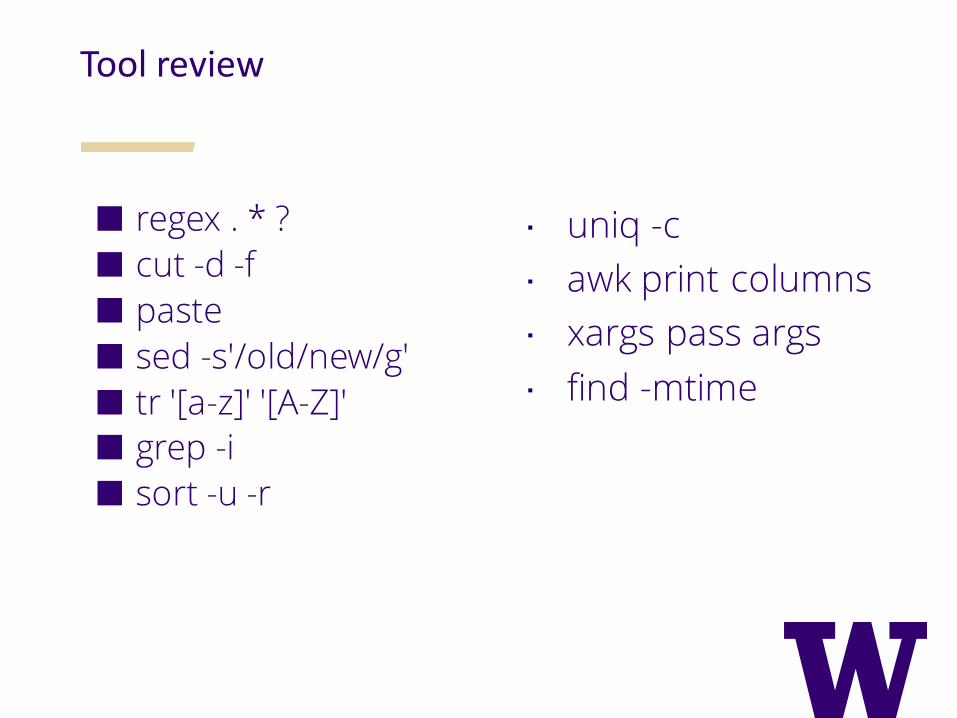
Tool review
uniq -c
awk print columns
xargs pass args
find -mtime
■ regex . * ?
■ cut -d -f
■ paste
■ sed -s'/old/new/g'
■ tr '[a-z]' '[A-Z]'
■ grep -i
■ sort -u -r

Lab 3
Lab notes for this session can be found in canvas.

Class 1, Unit 4
>What we are going to cover:
– Vi or Vim.
>Takeaways from this session:
– Ability to edit files at the command line
Introduction to Vi or Vim
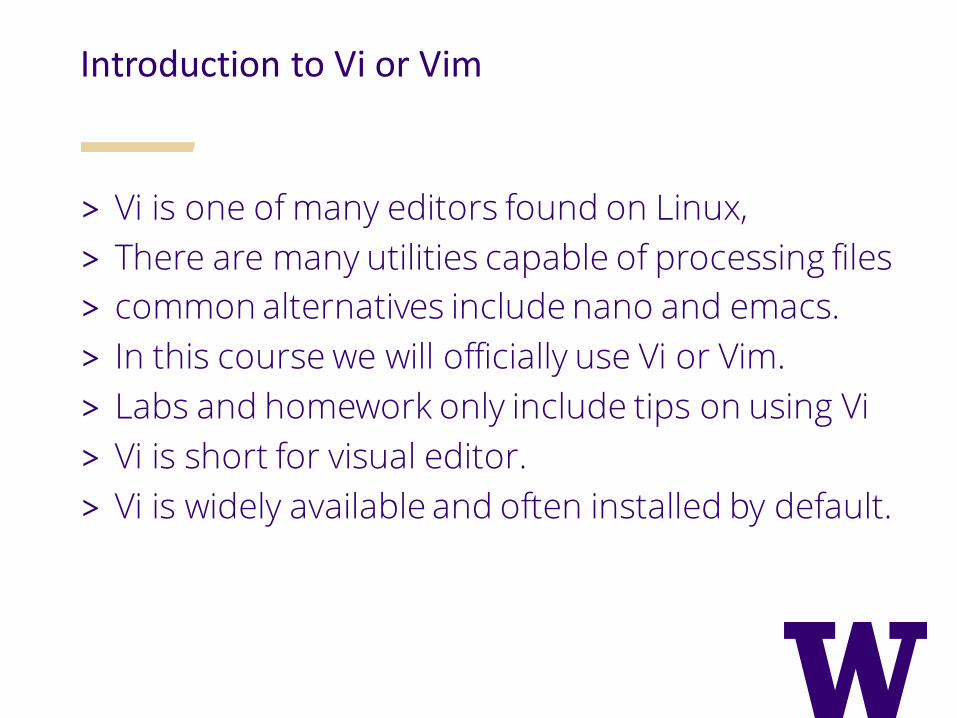
> Vi is one of many editors found on Linux,
> There are many utilities capable of processing files
> common alternatives include nano and emacs.
> In this course we will officially use Vi or Vim.
> Labs and homework only include tips on using Vi
> Vi is short for visual editor.
> Vi is widely available and often installed by default.

Common tools in review…
> Command mode vs insert mode
> “Command mode”, managing the file
> ”Insert mode”, editing the file
> Typically, Vi commands are:
– Case-sensitive
– Are not echoed on the screen.
– Do not require an <ENTER> after the command.

The 3 modes of Vi
> Command mode– Default mode when opening a file
> Enter commands to initiate a function such as find a pattern, move to end of file etc.
> Insert or Entry mode
– Used to enter text into a file.
> Visual mode– Allows for the visual selection
of an area of text to edit.

Edit a file with vi
Creating or editing a file:
/usr/bin/vim [filename]
If the file exists you will load the contents in to memory.
Vi displays the contents from memory to the user for editing.
Only when you save your edits is the original file overwritten.
Vi works with a copy of the source file.
It is possible to open a read only file with vi; however,
attempts to save your changes to the source may fail.
In most cases this can be remedied.
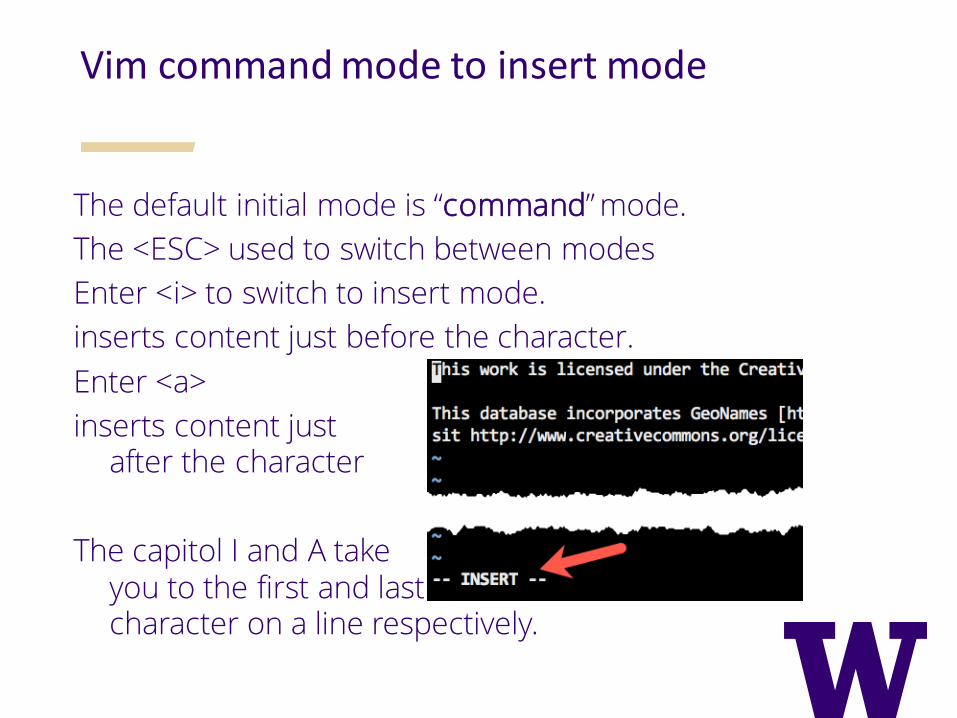
Vim command mode to insert mode
The default initial mode is “command” mode.
The <ESC> used to switch between modes
Enter <i> to switch to insert mode.
inserts content just before the character.
Enter <a>
inserts content just after the character
The capitol I and A take you to the first and last character on a line respectively.
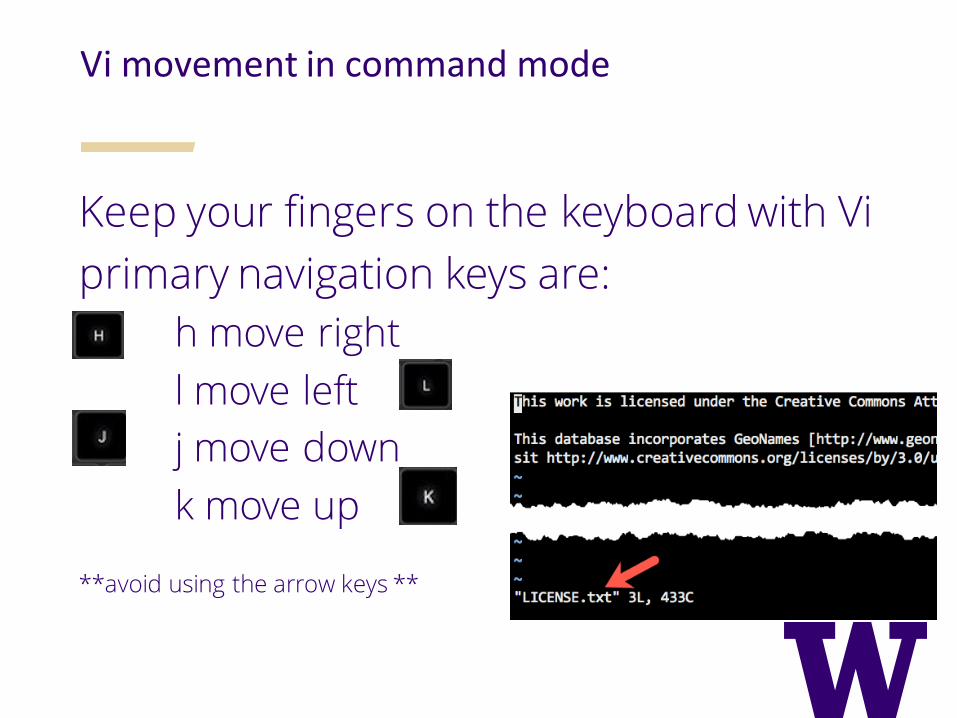
Vi movement in command mode
Keep your fingers on the keyboard with Vi
primary navigation keys are:
h move right
l move left
j move down
k move up
**avoid using the arrow keys **

VIM save and edit
To save a file enter <ESC> colon and <w>.
:<w>
To save a file and exit the file end with <q> for quit
:<wq>
To force a save use <!>
:<wq!>

The Vim Tutor
The vimtutor is a Vi tutorial
To start logon to your server and type vimtutor
/usr/bin/vimtutor <enter>
Next follow the prompts.
If the command is not found, install the package
/usr/bin/yum install vim-enhanced

Vim Review
> There are many editor options, in this course we will assume you are using vi or vim but you can use another editor if you choose.
> Do not use the arrow keys to navigate in Vim
> The three primary modes for vi are:Command mode, Insert mode, and visual mode.
> Files are read into a buffer (memory) any changes you make do not effect the source file until you save them.
> Use vimtutor to learn Vim

Lab 4
Lab notes for this session can be found in canvas.

Homework
> All assignments must be attempted.
> You must successfully complete 8 out of 10 assignments to pass the course.
> You must attend 6 out of 10 classes in real time.
> This week’s assignment will be posted on Canvas.