mx one administrator guide operational directions
TRANSCRIPT

MiVoice MX-ONEAdministrator Guide - Operational DirectionsRelease 7.1August 14, 2019

NoticeThe information contained in this document is believed to be accurate in all respects but is not warranted by Mitel Networks™ Corporation (MITEL®). The information is subject to change without notice and should not be construed in any way as a commit-ment by Mitel or any of its affiliates or subsidiaries. Mitel and its affiliates and subsidiaries assume no responsibility for any errors or omissions in this document. Revisions of this document or new editions of it may be issued to incorporate such changes.No part of this document can be reproduced or transmitted in any form or by any means - electronic or mechanical - for any purpose without written permission from Mitel Networks Corporation.
TrademarksThe trademarks, service marks, logos and graphics (collectively “Trademarks”) appearing on Mitel's Internet sites or in its publi-cations are registered and unregistered trademarks of Mitel Networks Corporation (MNC) or its subsidiaries (collectively "Mitel") or others. Use of the Trademarks is prohibited without the express consent from Mitel. Please contact our legal department at [email protected] for additional information. For a list of the worldwide Mitel Networks Corporation registered trademarks, please refer to the website: http://www.mitel.com/trademarks.
®,™ Trademark of Mitel Networks Corporation© Copyright 2019, Mitel Networks Corporation
All rights reserved

Contents
Chapter: 1 General . . . . . . . . . . . . . . . . . . . . . . . . . . . . . . . . . . . . 1Glossary . . . . . . . . . . . . . . . . . . . . . . . . . . . . . . . . . . . . 1Managing the MiVoice MX-ONE . . . . . . . . . . . . . . . . . . . . . . . 1
Terminal Interface . . . . . . . . . . . . . . . . . . . . . . . . . . 1Characteristics of Load Programs . . . . . . . . . . . . . . . . . . . . . . 2
Chapter: 2 Market . . . . . . . . . . . . . . . . . . . . . . . . . . . . . . . . . . . . 3
Chapter: 3 Backup and Restore . . . . . . . . . . . . . . . . . . . . . . . . . . . . . 4Data Backup . . . . . . . . . . . . . . . . . . . . . . . . . . . . . . . . . . 5
Initiate a Data Backup . . . . . . . . . . . . . . . . . . . . . . . . 6Restore From a Data Backup . . . . . . . . . . . . . . . . . . . . 6
Perform Data Backup Often . . . . . . . . . . . . . . . . . . . . . . . . . 6Reload Data and System Database Data . . . . . . . . . . . . . . 7Set Environment Variable . . . . . . . . . . . . . . . . . . . . . . 7Data Backup Alarm . . . . . . . . . . . . . . . . . . . . . . . . . . 7
Mirror Configuration to MIVOICE MX-ONE SN 1 . . . . . . . . . . . . . . 7Create a Configuration Mirror . . . . . . . . . . . . . . . . . . . . 8Restore a Configuration Mirror . . . . . . . . . . . . . . . . . . . 8
Safety Backup . . . . . . . . . . . . . . . . . . . . . . . . . . . . . . . . . 8Create a Safety Backup . . . . . . . . . . . . . . . . . . . . . . . 8Restore From a Safety Backup . . . . . . . . . . . . . . . . . . . 9
Schedule Automatic Backup . . . . . . . . . . . . . . . . . . . . . . . . . 9Activate Automatic Backup . . . . . . . . . . . . . . . . . . . . . 9Change Scheduled Automatic Backup . . . . . . . . . . . . . . .10Deactivate Automatic Backup . . . . . . . . . . . . . . . . . . . .11
Chapter: 4 System Start, Restart, and Reload . . . . . . . . . . . . . . . . . . . . 12Start . . . . . . . . . . . . . . . . . . . . . . . . . . . . . . . . . . . . . .13Restart . . . . . . . . . . . . . . . . . . . . . . . . . . . . . . . . . . . . .13Reload . . . . . . . . . . . . . . . . . . . . . . . . . . . . . . . . . . . . .13

Program Unit Status . . . . . . . . . . . . . . . . . . . . . . . . . . . . .14Program Unit Type . . . . . . . . . . . . . . . . . . . . . . . . . . . . . .14Subsystem Level (TypeExt) . . . . . . . . . . . . . . . . . . . . . . . . . .15Start and Restart System . . . . . . . . . . . . . . . . . . . . . . . . . . .16Restart Program Unit . . . . . . . . . . . . . . . . . . . . . . . . . . . . .16Reload System . . . . . . . . . . . . . . . . . . . . . . . . . . . . . . . . .16Shut Down System . . . . . . . . . . . . . . . . . . . . . . . . . . . . . .16Reload Program Unit . . . . . . . . . . . . . . . . . . . . . . . . . . . . .16Shut Down System . . . . . . . . . . . . . . . . . . . . . . . . . . . . . .17
Chapter: 5 Using the Recovery image . . . . . . . . . . . . . . . . . . . . . . . . 18Create a bootable USB-stick . . . . . . . . . . . . . . . . . . . . . . . . .18Set Hardware Clock . . . . . . . . . . . . . . . . . . . . . . . . . . . . . .18Recovery Image for MiVoice MX-ONE Service Node . . . . . . . . . . . .19
Chapter: 6 License Handling . . . . . . . . . . . . . . . . . . . . . . . . . . . . . . 20Register and Receive a License File . . . . . . . . . . . . . . . . . . . . .20Install License File . . . . . . . . . . . . . . . . . . . . . . . . . . . . . . .22Print License File . . . . . . . . . . . . . . . . . . . . . . . . . . . . . . .22License Usage Reports . . . . . . . . . . . . . . . . . . . . . . . . . . . .22
Customer Group License Reports . . . . . . . . . . . . . . . . . .23
Chapter: 7 Add or Remove System Database Node . . . . . . . . . . . . . . . . . 24
Chapter: 8 Media Gateway Unit . . . . . . . . . . . . . . . . . . . . . . . . . . . 25Setup Media Gateway Ethernet Ports . . . . . . . . . . . . . . . . . . . .25Initiation of MGU . . . . . . . . . . . . . . . . . . . . . . . . . . . . . . .25Virtual Boards . . . . . . . . . . . . . . . . . . . . . . . . . . . . . . . . .25Update and Upgrade of MGU Software . . . . . . . . . . . . . . . . . . .25Start and Restart Media Gateway . . . . . . . . . . . . . . . . . . . . . .25LED Indications in the Media Gateway . . . . . . . . . . . . . . . . . . .26MG Unit Resource Load Sharing Considerations . . . . . . . . . . . . . .26
Chapter: 9 Media Server . . . . . . . . . . . . . . . . . . . . . . . . . . . . . . . . 27Initiation of Media Server . . . . . . . . . . . . . . . . . . . . . . . . . .27Update and Upgrade Software . . . . . . . . . . . . . . . . . . . . . . .27Start and Restart Media Server . . . . . . . . . . . . . . . . . . . . . . .27Media Server Resource Load Sharing Considerations . . . . . . . . . . .27
Chapter: 10 Load-Balancing/Load-Sharing Principles in the ASP 113 System . . . 28
Chapter: 11 Selection of an Alternative Media Server or MGU . . . . . . . . . . . 29

Chapter: 12 Changing Of Load-Sharing Load Levels . . . . . . . . . . . . . . . . . . 30
Chapter: 13 Inter-Media Gateway RTP Communication . . . . . . . . . . . . . . . 31Print RTP Resource Information . . . . . . . . . . . . . . . . . . . . . . .31
Chapter: 14 MiVoice MX-ONE Service Node User Administration . . . . . . . . . . 32
Chapter: 15 Synchronization . . . . . . . . . . . . . . . . . . . . . . . . . . . . . . 33Define Synchronization Sources . . . . . . . . . . . . . . . . . . . . . . .33Deactivate Synchronization Sources . . . . . . . . . . . . . . . . . . . .33
Chapter: 16 Blocking and Deblocking . . . . . . . . . . . . . . . . . . . . . . . . . 34Block a Device . . . . . . . . . . . . . . . . . . . . . . . . . . . . . . . . .34Deblock a Device . . . . . . . . . . . . . . . . . . . . . . . . . . . . . . .34List Blocked or Disturbance Marked Devices . . . . . . . . . . . . . . . .34
Chapter: 17 Alarm Handling and SNMP . . . . . . . . . . . . . . . . . . . . . . . . 35
Chapter: 18 Server Hardening . . . . . . . . . . . . . . . . . . . . . . . . . . . . . 36IPTables . . . . . . . . . . . . . . . . . . . . . . . . . . . . . . . . . . . .36SSH Configuration . . . . . . . . . . . . . . . . . . . . . . . . . . . . . . .36Seccheck . . . . . . . . . . . . . . . . . . . . . . . . . . . . . . . . . . . .36
Chapter: 19 Fault Location . . . . . . . . . . . . . . . . . . . . . . . . . . . . . . . 38Trace Functionality . . . . . . . . . . . . . . . . . . . . . . . . . . . . . .38Trace Types . . . . . . . . . . . . . . . . . . . . . . . . . . . . . . . . . .38Perform a Trace . . . . . . . . . . . . . . . . . . . . . . . . . . . . . . . .39
Chapter: 20 Swap and Repair . . . . . . . . . . . . . . . . . . . . . . . . . . . . . . 41Server . . . . . . . . . . . . . . . . . . . . . . . . . . . . . . . . . . . . .41Media Gateway . . . . . . . . . . . . . . . . . . . . . . . . . . . . . . . .41
Chapter: 21 MiVoice MX-ONE Service Node File Structure . . . . . . . . . . . . . 42Folders . . . . . . . . . . . . . . . . . . . . . . . . . . . . . . . . . . . . .42Configuration Files Templates . . . . . . . . . . . . . . . . . . . . . . . .43Installation and Upgrading Configuration Files . . . . . . . . . . . . . . .44Active Configuration Files . . . . . . . . . . . . . . . . . . . . . . . . . .44Reload Data and System Backup Files . . . . . . . . . . . . . . . . . . . .44Transfer of PCRegen Files for Restoring Data . . . . . . . . . . . . . . . .45
Chapter: 22 Hard Disk Maintenance . . . . . . . . . . . . . . . . . . . . . . . . . . 46

1
GLOSSARYCHAPTER 1 GENERAL
General
This guide covers administrator tasks in the MX-ONE excluding telephony features. For information about telephony feature maintenance, see the documents in the CPI library folder Operation and Maintenance.
GlossaryFor a complete list of abbreviations and glossary, see the description for ACRONYMS, ABBREVIATIONS AND GLOSSARY.
Managing the MiVoice MX-ONEThe MX-ONE can be managed in different ways. The tasks described in this document are mainly managed from the command line on the Linux server (the MX-ONE Service Node).The MX-ONE can also be managed and configured using the MX-ONE Service Node Manager. see the directions for use for MX-ONE SERVICE NODE MANAGER USER GUIDE.
Terminal Interface
The Linux operation system can be modified for local needs in a flexible way through localization. Envi-ronment variables determine language and country specific settings, like the format of date and time, how numbers are written, and what character encoding to use.By locale settings the MX-ONE user can use the characters of their own language when entering local data, like users names, to the system.To see how the localization is set, use the Linux locale command. It will list the variables on standard output, for example, asLANG=en_US.UTF-8 LC_CTYPE=en_US.UTF-8 and so on.The locale values have the form
language[_territory][.codeset]
, where the language codes usually are the two-letter codes defined in ISO 639-1 and the country codes (in territory) the two-letter codes defined in ISO 3166-1. Use the command locale -a to find the available locales and locale -m for the available character encoding.In Europe many languages can use the ISO8859-1 encoding, but UTF-8 is more complete.When operating the system (remotely) over SSH, for example, using the puTTY terminal emulation program, it is vital that the same character encoding is used in both puTTY as in the connected system. (In puTTY the character encoding can be modified through “Translations” from the “Change Settings” menu).Both parties must have the same settings for the communication to work.

2
CHARACTERISTICS OF LOAD PROGRAMSCHAPTER 1 GENERAL
Characteristics of Load ProgramsThe MX-ONE Service Node SW consists mainly of two types of load programs, the program units and the UNIX commands.The characteristics of a program unit are:• Identified with unique number and name• Runs continuously in a working system• Can be restarted (restart command)• Can be reloaded (reload command)• Communicates directly with other program units by sending and receiving messages
For a detailed information about the program units see the parameter description for UNIT, in the Tech-nical Reference Guide, MML parameters.The characteristics of a UNIX command are:• Uses dynamic program numbers• Communicates with other programs using the Application Message Proxy• Runs only when the command is typed
3
CHAPTER 2 MARKET
Market
Market is selected during first time setup, see the installation instructions for INSTALLING AND CONFIG-URING MIVOICE MX-ONE. If it is necessary to reconfigure the market parameters, see command description TECHNICAL REFERENCE GUIDE, MML COMMANDS (PARNUM parameters) and TECH-NICAL REFERENCE GUIDE, UNIX COMMANDS for details.Detailed market characteristics for each market can be found in the documents in the Market Character-istics folder.

4
CHAPTER 3 BACKUP AND RESTORE
Backup and Restore
The backup procedure consists of two different steps:1. Make a data backup. The backup of the exchange is stored on each MX-ONE Service Node and
should be done often. See chapter Perform Data Backup Often for details.This backup is used for data reload by the system.2. Create a configuration mirror on MX-ONE Service Node 1. Store the data backups and configuration
information from MX-ONE System to MX-ONE Service Node 1. This backup contains all data for the system and can be used for repair of server. The config_mirror command provides an option to create a safety backup when creating the configuration mirror.
3. Copy the safety backup from MX-ONE Service Node 1 to another media.
This is an external backup of the complete system and can be used for repair of server or to restore a complete system when all hardware is lost.
Figure 1: The Backup StepsThe above steps do not have to be performed at the same time. Allows to make a data backup without creating a configuration mirror, and to create a configuration mirror without making a safety backup.By using crontab, allows you to create automatic data backups and configuration mirrors including a safety backup.When there is inconsistency in the exchange data in the system it is necessary to restore from a backup. The restore procedure consist of three corresponding steps:1. Restore a safety backup. Restore the safety backup to MX-ONE Server Node 1.2. Restore a configuration mirror from MX-ONE Server 1. Restore the data backups and configuration
information from MX-ONE Server 1 to all servers in the MX-ONE System.
3. Restore a data backup. Restore the data backups on all MX-ONE Service Nodes.

5
DATA BACKUPCHAPTER 3 BACKUP AND RESTORE
As for the backup procedure, the three steps do not have to be performed at the same time. If there are inconsistencies in the exchange data, it may be sufficient to restore the last data backup.
Data BackupAt a data backup, the exchange data for program units is stored in the file system. When a program unit is reloaded, exchange data for all program units is restored to prevent exchange data inconsistency.Restore of exchange data can result in loss of exchange data. However, the exchange data in the system is consistent after a complete data restore.As part of certain error recovery routines, the exchange data will be restored from the backup in order to revert the system to the last known state with data consistency.Exchange data includes:• System configuration data• Application data (for example, extensions and trunks). The application data are altered either by
command (for example, adding extensions) or by extension procedure (for example, call diversion)
Exchange data should be saved to a backup regularly. The data should also be stored after:• Loading the system initially• Changing hardware configuration• Upgrading a program unit• Altering application data by command (for example, adding extensions)
A new directory is created for each backup in the directory: /var/opt/eri_sn/<version>/xdata/ where <version> is the version of MX-ONE Service Node. The backup directory is named xdata_y_z, where y is MX-ONE Service Node number and z is a time stamp (date and time). A backup file for each program unit that has exchange data is created in the backup directory. Only program units that have exchange data have files in the backup directory. Cassandra CQL CSV files are also created in the backup directory. The CQL CSV file contains a snapshot of the exchange data in the system database at the time for the backup. The system database data is stored in Cassandra Query Language Format.Information about valid backups are stored in the Cassandra Database. The three latest backups are stored. If more backups are made, the oldest backup is deleted.At a data restore, the newest valid backup is used. Exchange data in the entire system is restored from the data backup and the start phase after data restore is executed in all program units in the system.To succeed with a backup, all program units in the system must have status Started. A program unit must have status Alive, Half-started, or Started to restore any data.Restore of exchange data can result in loss of exchange data. However, the exchange data in the system is consistent after a complete data restore.As part of certain error recovery routines, the exchange data will be restored from the backup in order to revert the system to the last known state with data consistency.Exchange data includes:• System configuration data• Application data (for example, extensions and trunks). The application data are altered either by
command (for example, adding extensions) or by extension procedure (for example, call diversion)
Exchange data should be saved to backup regularly. The data should also be stored after:

6
PERFORM DATA BACKUP OFTENCHAPTER 3 BACKUP AND RESTORE
• Loading the system initially• Changing hardware configuration• Upgrading a program unit• Altering application data by command (for example, adding extensions)
A new directory is created for each backup in the directory /var/opt/eri_sn/xdata/xdata_<version> where <version> is the version of MX-ONE Service Node. The backup directory is named xdata_y_z, where y is MX-ONE Service Node number and z is a time stamp (date and time). A backup file for each program unit that has exchange data is created in the backup directory. Only program units that have exchange data have files in the backup directory. Cassandra CQL CSV files are also created in the backup directory. The CQL CSV file contains a snapshot of the exchange data in the system database at the time for the backup. The system database data is stored in Cassandra Query Language Format.The latest backup directories are stored. If more backups are made, the oldest backup directory is deleted.At a data restore, the newest valid backup file is used. Exchange data in the entire system is restored from the data backup and the start phase after data restore is executed in all program units in the system.To succeed with a backup, all program units in the system must have status Started. A program unit must have status Alive, Half-started, or Started to restore any data.
Initiate a Data Backup
Use the command data_backup to initiate a backup. The command can be executed on any MX-ONE Service Node (not in stand-by server).Restore from data backup is sometimes done automatically by the system.
Restore From a Data Backup
When there is inconsistency in the exchange data in the system it is necessary to restore from a data backup.Use the command data_restore to restore exchange data. The command can be executed on any MX-ONE Service Node.
Perform Data Backup OftenThe data_backup command is more light-weight, and the data_restore operation is heavier. The more un-committed changes there are, the heavier the data_restore operation will be.The data in the CQL CSV files are compared to the data currently in the system database (Cassandra). It then uses the CQL write operations to write all the changes needed in the system database to make it match the data in the CQL CSV file. If there is much data that needs to be changed to make the system database match the CQL CSV file, the operation becomes very slow and heavy.Make it a habit to always commit all configuration changes, by doing a data_backup at once. During peak traffic, it is not recommended to do any bigger configuration changes. At any time, when a bigger config-uration changes is made (with respect to traffic disturbance), a data_backup should be made.

7
MIRROR CONFIGURATION TO MIVOICE MX-ONE SN 1CHAPTER 3 BACKUP AND RESTORE
Reload Data and System Database Data
As exchange data configuration data is stored as a mix of reload data and system database data, and system actions are needed to make sure they are consistent with each other. Until these operations are completed, the system is in an inconsistent and unstable state. The duration of this inconsistent and unstable state must be kept as short as possible. To achieve this the differences between the current system database data and the most recent CQL CSV file must be kept small, by doing frequent data backups.
Set Environment Variable
To avoid getting dangerously large differences between the system database data and the most recent CQL CSV files, both mdsh and the new commands have logic to check this and remind the administrator. This behavior can be configured by using of the $_MD_BACKUP_OPTION environment variable.The environment variable $_MD_BACKUP_OPTION can be set to:AUTOmeaning that data_backup will be done automatically when needed for system stability. Manual data_backup is still needed to commit changes done after the automatic data_backup.WARN-AUTOmeaning that warnings will be printed when data_backup is needed for system stability. When critically needed for system stability, an automatic data_backup will be done. (Manual data_backup is still needed to commit changes done after the automatic data_backup.) (WARN-AUTO is the default if $_MD_BACK-UP_OPTION is unset.)WARN-BLOCKmeaning that warnings will be printed when data_backup is needed for system stability. When data_backup is critically needed for system stability, data changes will be blocked until a manual data_backup is done.UNSAFE-GDSX-MODEget a functionality that is generally very stupid, but that is needed for some GDS-X tests. This mode jeop-ardizes system stability. Never use this mode except for some specific GDS-X tests. Never use this mode in production systems.
Data Backup Alarm
The alarm code 1:37, Data backup needed, run data_backup, will be raised when the amount of uncom-mitted changes (the differences between the system database data and the most recent CQL CSV file) becomes dangerously large.
Mirror Configuration to MIVOICE MX-ONE SN 1When creating a configuration mirror, all data backups and configuration files of each server in the MX-ONE System are stored on MX-ONE Service Node 1.

8
SAFETY BACKUPCHAPTER 3 BACKUP AND RESTORE
The command config_mirror creates a data storage in the directory /mxone/mirror on MX-ONE Service Node 1. The data from MX-ONE Service Node 1 itself and all other data needed to reconfigure the system is also stored in this directory.It is recommended to create a safety backup when creating the configuration mirror. For more information, see Safety Backup.For each server in the MX-ONE System, there is a tar file on MX-ONE Server 1 containing all necessary configuration files together with data backup files.The command config_mirror restores a configuration mirror by distributing the data backup files and the configuration files from MX-ONE Server 1 to all servers in the MX-ONE System (including MX-ONE Server 1 itself).When done, the complete system can be restored by running the command data_restore.
Create a Configuration Mirror
Use the command config_mirror to create a configuration mirror on MX-ONE Server 1. See config_mirror -help for option to do a data backup and a safety backup as part of creating the configuration mirror. The command is executed on MX-ONE Server 1.NOTE: The command config_mirror is CPU and memory intensive and can easily lead to too slow responses on traffic events and result in MX-ONE Service Node calls throttled alarms. Ensure that command config_mirror is always run at low traffic times.
Restore a Configuration Mirror
When there is inconsistency in the exchange data in the system and in the data backup it may be neces-sary to restore from a configuration mirror.Use the command config_restore to restore a configuration mirror from MX-ONE Server 1 to all servers in the MX-ONE System. The command is executed on MX-ONE Server 1.See config_mirror -help for information about additional actions needed to complete the restore of the MX-ONE system.
Safety BackupA safety backup can be done as part of creating the configuration mirror.If there is an inconsistency in the MX-ONE Service Node data, the safety backup can be restored to MX-ONE Server 1. After restoring the configuration mirror to all servers, the MX-ONE Service Node data backup can be restored.NOTE: If possible ensure that memory intensive processes, such as safety backup, are always set to run at low traffic time.
Create a Safety Backup
Use the command config_mirror with option --safetybackup to create a configuration mirror on MX-ONE Server 1 (see config_mirror --help).

9
SCHEDULE AUTOMATIC BACKUPCHAPTER 3 BACKUP AND RESTORE
Restore From a Safety Backup
If there is an inconsistency in the MX-ONE Service Node data (for example, mismatch between exchange data and configuration files), or if the MX-ONE Service Node has reported a missing or faulty exchange data file or configuration file, it is necessary to restore from a safety backup.It is recommended to restore all the files from the backup since only restoring a subset of files is likely to cause inconsistency. The safety backup should match the installed MX-ONE Service Node programs.1. Make the safety backup to be used is available on MX-ONE Server 1.2. See config_restore --help for procedure and actions needed to restore the system from the
safety backup.
Schedule Automatic BackupInclude the backup commands (data_backupand/or config_mirror) in the table for scheduled commands on MX-ONE Service Node 1, crontab, to activate automatic backup of the MX-ONE system.crontab uses the editor specified by certain environment variables. Use the command man crontab to find out which environment variables. To check the environment variables, use the command echo $variablename. If the editor is unfamiliar, it is possible to change it.For more information, such as the format of the crontab command, see the online reference manual pages for crontab. Use the command man 5 crontab.Use MX-ONE Service Node Administrator user (mxone_admin) when executing the crontab command.
Activate Automatic Backup
1. Enter the command crontab -e to open an editor.2. Add lines containing when to run scheduled commands. The first 5 fields specify when to run the
command and the remaining field what command to run (see examples below). It is recommended to allow at least 30 minutes between the different jobs.
The fields must be separated by at least one space. Use a header line (starting with #) to make the infor-mation easier to read.
3. Save the file and close the editor. Crontab installs the new table for scheduled commands.
Example 1:Make a data backup on every night at 01:30.
Example 2:Make a data backup on every night at 01:30 and generate an alarm if data backup fails.
min hour day month weekday command
30 01 * * * /opt/eri_sn/bin/mdsh -c data_backup

10
SCHEDULE AUTOMATIC BACKUPCHAPTER 3 BACKUP AND RESTORE
Example 3:Make a data backup on every Thursday night (4th day of week) and Sunday night (7th day of week) at 00:45.
Example 4:Make a data backup every Monday (1st day of week) and Friday (5th day of week) at 22:00. Create a configuration mirror including a data backup every Friday at 23:00.
Example 5:Make a data backup on every night at 02:00. Create a configuration mirror including a data backup and safety backup on every Sunday night (7th day of week) at 02:30.
Change Scheduled Automatic Backup
1. Enter the command crontab -e to open an editor.2. Update the lines specifying when the commands are scheduled with new time and date.
3. Save the file and close the editor. Crontab installs the new table for scheduled commands.
min hour day month weekday command
30 01 * * * /opt/eri_sn/bin/mdsh -c data_backup ; if [ $? != 0 ] ; then /opt/eri_sn/bin/alarm -i -C 1 -D 10000 --alarm-severity 3 --alarm-text "Automatic data backup failed" ; fi
min hour day month weekday command
45 00 * * 4,7 /opt/eri_sn/bin/mdsh -c data_backup
min hour day month weekday command
00 22 * * 1,5 /opt/eri_sn/bin/mdsh -c data_backup
00 23 * * 5 /opt/mxone_install/bin/config_mirror --databackup
min hour day month weekday command
00 02 * * * /opt/eri_sn/bin/mdsh -c data_backup
30 02 * * 7 /opt/eri_sn/bin/config_mirror --databackup --safetybackup

11
SCHEDULE AUTOMATIC BACKUPCHAPTER 3 BACKUP AND RESTORE
Deactivate Automatic Backup
1. Enter the command crontab -e to open an editor.2. Remove the lines containing scheduling of commands.
3. Save the file and close the editor. Crontab installs the new table for scheduled commands.

12
CHAPTER 4 SYSTEM START, RESTART, AND RELOAD
System Start, Restart, and Reload
NOTE: Do not mix up the system start/restart/reload with the Linux start/restart/reload.Start/Restart phase 1The system (or program unit) is cleared from traffic and the system information is cleared.Start phase 1.3System configuration data is updated.Start phase 1.5System information (other than system configuration data, for example, links between program units) are updated.Start/restart phase 2The system (or program unit) is prepared for traffic.Start after data restoreThe system updates data to match exchange data restored from backup (for example, an extension that was added after the last backup occasion is removed).
Event Start
Phase 1 Restart Phase 1
Start Phase 1.3
Start Phase 1.5
Start Phase 2
Restart Phase 2
Start After Data
Restore
Initial start 1-All 2-All 3-All 4-All
Data restore 1-All
Data backup
Restart program unit
1-PU in question
2-All 3-PU in question
(Restart MX-ONE Service Node)
(1-All PUin MX-ONE Service Node)
(2-All) (3-All PU in MX-ONE Service Node)
Restart system
1-All 2-All 3-All
System start (also called coordination start)
1-All 2-All

13
STARTCHAPTER 4 SYSTEM START, RESTART, AND RELOAD
NOTE: A start after data restore is preceded by restore of exchange data from backup. The numbers (1/2/3/4) indicate the start phase sequence.
StartA program unit must have status Halfstarted or Started to perform a start. A start does not affect the traffic.
RestartA program unit must have status Alive, Halfstartedor Startedto perform a restart. At a restart of one program unit, connections may be disrupted depending on the function of the program unit.At a system restart (restart of all program units in the system), all traffic is stopped.
ReloadThe program unit is terminated. The program unit is reloaded from the hard disk and the data for the program unit are restored from the backup. The program unit is restarted. Restore of data in the entire system and start after data restore follows.
Reload program unit/Program unit termination
1 - PU in question
2-All 3-PU in question
4-All
Recovery from Media Gateway error
3-All 2-All PU in MX-ONE Service Node
Event Start
Phase 1 Restart Phase 1
Start Phase 1.3
Start Phase 1.5
Start Phase 2
Restart Phase 2
Start After Data
Restore
14
PROGRAM UNIT STATUSCHAPTER 4 SYSTEM START, RESTART, AND RELOAD
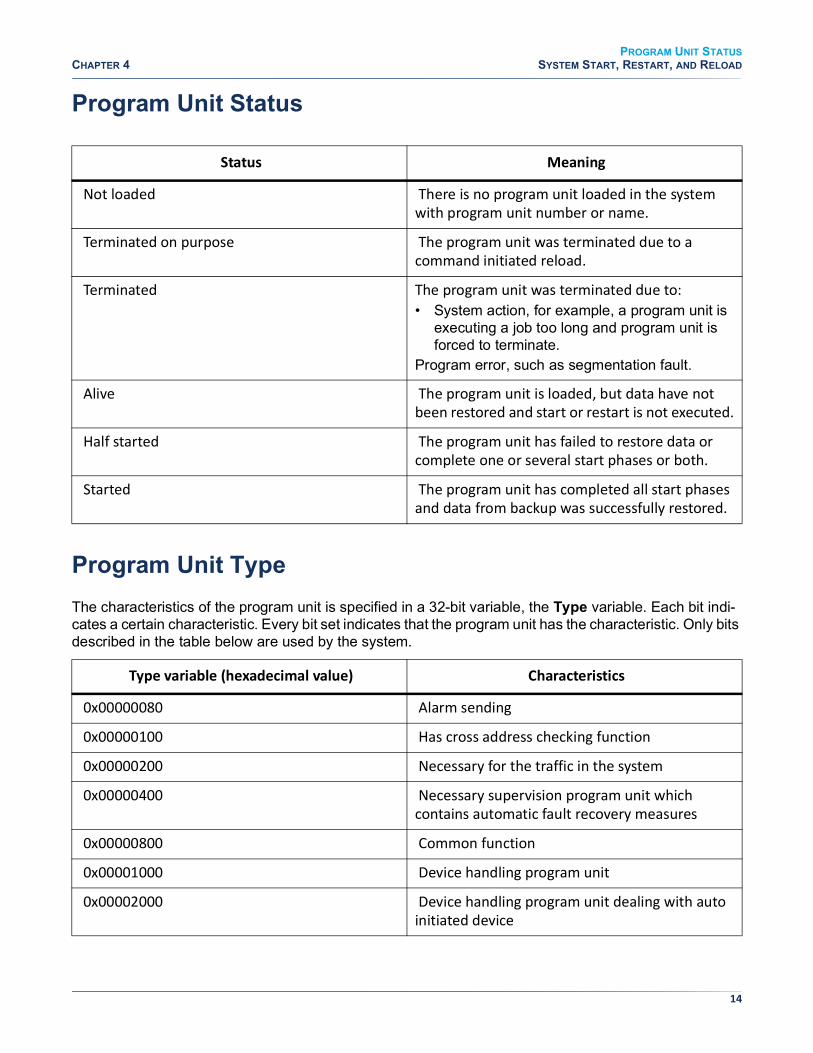
Program Unit Status
Program Unit TypeThe characteristics of the program unit is specified in a 32-bit variable, the Type variable. Each bit indi-cates a certain characteristic. Every bit set indicates that the program unit has the characteristic. Only bits described in the table below are used by the system.
Status Meaning
Not loaded There is no program unit loaded in the system with program unit number or name.
Terminated on purpose The program unit was terminated due to a command initiated reload.
Terminated The program unit was terminated due to:• System action, for example, a program unit is
executing a job too long and program unit is forced to terminate.
Program error, such as segmentation fault.
Alive The program unit is loaded, but data have not been restored and start or restart is not executed.
Half started The program unit has failed to restore data or complete one or several start phases or both.
Started The program unit has completed all start phases and data from backup was successfully restored.
Type variable (hexadecimal value) Characteristics
0x00000080 Alarm sending
0x00000100 Has cross address checking function
0x00000200 Necessary for the traffic in the system
0x00000400 Necessary supervision program unit which contains automatic fault recovery measures
0x00000800 Common function
0x00001000 Device handling program unit
0x00002000 Device handling program unit dealing with auto initiated device

15
SUBSYSTEM LEVEL (TYPEEXT)CHAPTER 4 SYSTEM START, RESTART, AND RELOAD
Example: If the Type variable has the value 0x00000180, the program unit is alarm sending and has cross address checking function.
Subsystem Level (TypeExt)The function of the program unit at subsystem level is specified in a 32-bits variable, the TypeExt variable. The TypeExt variable consists of the sub-variables described in the table below.
0x00004000 Program unit requiring information whether the MX-ONE Service Node, where the program unit is located, is isolated
0x00008000 Program unit capable of handling external synchronization
0x00040000 Cannot be removed by command
0x00080000 Does not have exchange data
TypeExt sub-variable Bit(s) in variable Meaning
PCSUBSYST B0-B3 Indicates which subsystem the program unit belongs to.
PCPUTYPE B4-B8 Indicates if a device or unit belongs to a certain type. (Commonly used to mark the presence of optional programs or blocks.) The value of this sub-variable varies for the different subsystems.
PCHANDLERINTERFACE B13 The program unit has an interface to a handler unit.
PCDISTRIBUTIONINTERFACE B14 The program unit has an interface to a distribution unit.
PCHWINTERFACE B15 The program unit has an interface to hardware (that is, it is a device board handling program unit).
Type variable (hexadecimal value) Characteristics

16
START AND RESTART SYSTEMCHAPTER 4 SYSTEM START, RESTART, AND RELOAD
Start and Restart SystemTo start the system, enter the command start and specify system.start --systemTo restart the system, enter the command restart and specify system.restart --system
Restart Program UnitTo restart a program unit, enter the command restart and specify the program unit.restart -u XAMPLE -l 1restart --unit XAMPLE --Lim1
Reload SystemAll the program units in the system are reloaded. A valid backup must be available before attempting to reload.To reload the system, enter the command reload and specify system.reload --system
Shut Down System1. Enter the command media_gateway_start and specify shutdown to shutdown the Media Gateway.2. Enter the command systemctl stop mxone_sn to shutdown the MX-ONE Service Node.
NOTE: Must be executed with root privileges.
Reload Program UnitThe program unit is terminated. The program unit is reloaded from the hard disk. Exchange data of the program unit is restored from the backup. The program unit is restarted. Restore of data in the entire system and start after data restore follows. A valid backup must be available before attempting to reload.To reload a program unit, enter the command reload and specify the program unit.reload -unit XAMPLE
17
SHUT DOWN SYSTEMCHAPTER 4 SYSTEM START, RESTART, AND RELOAD
Shut Down System1. Enter the command media_gateway_start and specify shutdown to shutdown the Media Gateway.2. Enter the command systemctl stop mxone_sn to shutdown the MX-ONE Service Node.
NOTE: Must be executed with root privileges.

18
CREATE A BOOTABLE USB-STICKCHAPTER 5 USING THE RECOVERY IMAGE
Using the Recovery image
In case you need to reinstall your system and restore data, follow the instructions below.NOTE: The Recovery Image procedure deletes everything on the server, including existing data backups. If you intend to reuse any files, such as configuration files and data backups that exist on the server that you are going to do a recovery on, then you must transfer these files and data backups to another location (for example, to a USB memory stick).In the following instructions the phases of waiting for the system to boot and transfer files are skipped. In some steps an estimated time is given.
Create a bootable USB-stickTo create a bootable USB-stick:1. Download the Recovery Image from the Knowledge Base. Check the md5 sum of the file before using
it. If not correct, download again.2. On a Windows PC open the ISO image with a proper program such as daemon tools.
3. The USB stick MUST be formatted with fat32.
4. Copy the content (not the ISO image) from the Recovery Image to a USB-stick.
5. Install bootloader on the USB drive, from command prompt in Windows. (Make sure you are running the command prompt as administrator in Win 7 above).
X:syslinux.exe --directory /boot/x86_64/loader --force --mbr --active X:Replace X: with the drive letter the USB drive shows up as (DO NOT USE C:). If it seems like nothing happened, it is usually done.NOTE: A file named ldlinux.sysmay appear on the USB drive, that is normal.The USB should now in theory be bootable.When booting from USB: Select USB as boot device in BIOS.A startup screen will show up:• Type install to start the installation.
Set Hardware ClockBefore using the Recovery Image it is necessary to set the server hardware clock to a relatively accurate current time. Enter BIOS mode. Set the current date. Save and exit.NOTE: If the clock is too far off the recovery will fail.

19
RECOVERY IMAGE FOR MIVOICE MX-ONE SERVICE NODECHAPTER 5 USING THE RECOVERY IMAGE
Recovery Image for MiVoice MX-ONE Service NodeOne recovery image is provided for the recovery of a MX-ONE Service Node Mitel ASU Lite or Mitel ASU-II.NOTE: SW RAID 1 is used if Mitel ASU-II have two hard disc drives. SW RAID 1 is not supported together with Cassandra DB.1. Boot the server from the USB.2. Press F3-key to change display resolution to 800X600.
3. Select Installation from the menu. If no selection is made in the boot choice menu the default instal-lation type is executed automatically, for example, boot from hard disk.
The installation starts installing LINUX and the MX-ONE Service Node software during approximately 25-30 minutes. After installation is complete the message “Please Reboot System now” will be shown.
4. Logon as user root with password changeme, then type command reboot and press Enter. Wait for system to reboot.
5. The server is now in the same default status as it was when delivered from the factory (Turnkey).
6. Select Yes when the following message is displayed: Welcome to MX-ONE. You have to configure your system before starting the MX-ONE. Do you want to configure your server now?
7. Continue with installation and configuration of the system, see the installation instructions for INSTALLING AND CONFIGURING MIVOICE MX-ONE section NETWORK AND SYSTEM CONFIGURATION.

20
REGISTER AND RECEIVE A LICENSE FILECHAPTER 6 LICENSE HANDLING
License Handling
The MX-ONE is currently shipped with a 20 days trial license file. This means that the exchange can be set up fully functional during installation without any other license file.NOTE: If no commercial license file is installed within 20 days, the MX-ONE Service Node will not function. Contact your local dealer/distributor to get access to the Aastra Connect and register you in the system to get a license file.The MX-ONE Service Node contains a license server to prevent unauthorized use of system resources.Each license consists of a license tag of up to 40 characters, the product number for licenses, the number of currently used licenses, and a maximum number of licenses. The maximum number of licenses must not be exceeded unless the trial period is activated. The trial period will allow an unlimited use of all licensed sales objects for a limited period.The principle for license handling in the MX-ONE Service Node is that a unique MX-ONE Service Node hardware ID is checked towards an encrypted license file. If the license file does not include the correct hardware ID, it will not be possible to change customer data controlled by licenses.
Register and Receive a License FileDo as follows:NOTE: Contact your local dealer/distributor to get access to Aastra Connect.1. Open Mitel Connect, https://connect.mitel.com/connect. The Mitel Connect is displayed.2. Type your user name in the field User Name.
3. Type your password in the field Password.
4. Click Login. The welcome page is displayed.
5. Select Licenses Services.The Mitel Licenses Services page is displayed.
6. Type or Paste the voucher number you got via e-mail in the field Voucher under Register voucher.
NOTE: You can search the voucher number if you do not know the voucher ID but have order information such as Mitel order number or partner order number.
7. Click Register voucher. The step Voucher input is displayed. Under Voucher contents you will see all information of your voucher registration.
NOTE: The progress line on the top, guides you in the registration flow, green boxes indicate successful entering information.
NOTE: You can create more than one voucher at a time.8. Click Next. The step System data is displayed.
9. Type the license number (for MX-ONE, hwid=Hardware ID) in the field EID/Serial*, for example hwid 12345-12345-12345-12345-12345, 29 characters.
NOTE: For a new system you need to type a new hwid, and for an add-on you have to type an already registered hwid.
21
REGISTER AND RECEIVE A LICENSE FILECHAPTER 6 LICENSE HANDLING
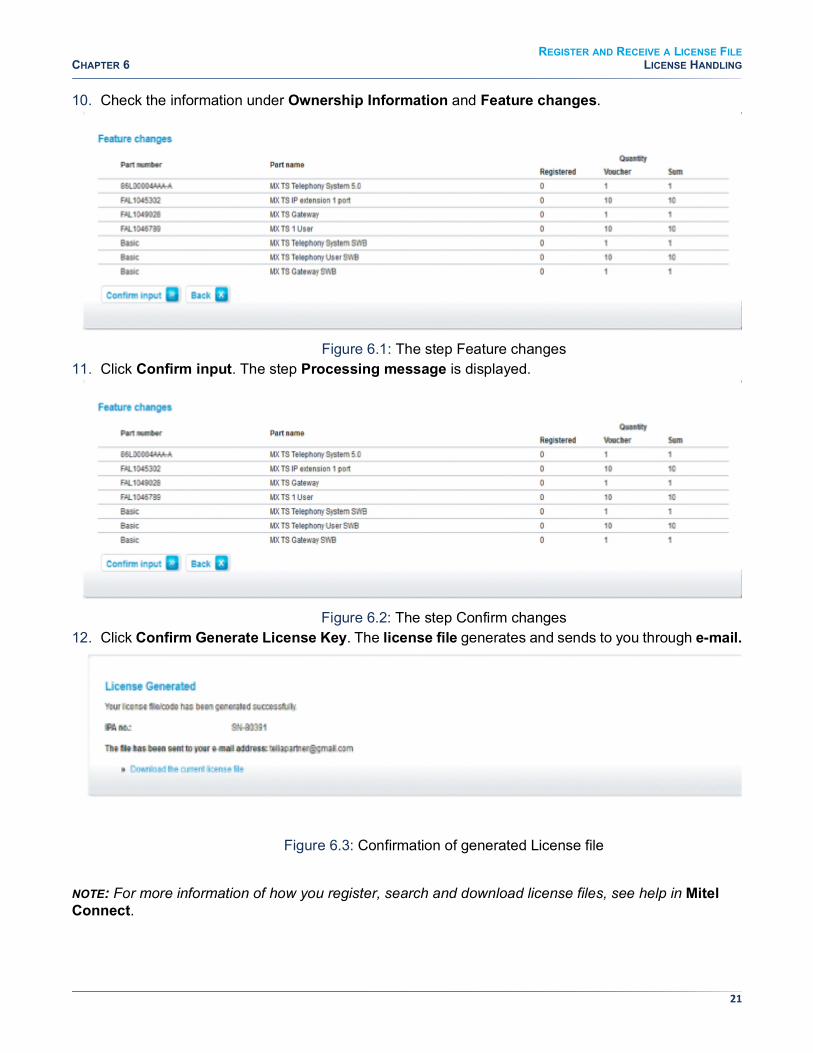
10. Check the information under Ownership Information and Feature changes.
Figure 6.1: The step Feature changes11. Click Confirm input. The step Processing message is displayed.
Figure 6.2: The step Confirm changes12. Click Confirm Generate License Key. The license file generates and sends to you through e-mail.
Figure 6.3: Confirmation of generated License file
NOTE: For more information of how you register, search and download license files, see help in Mitel Connect.
22
INSTALL LICENSE FILECHAPTER 6 LICENSE HANDLING
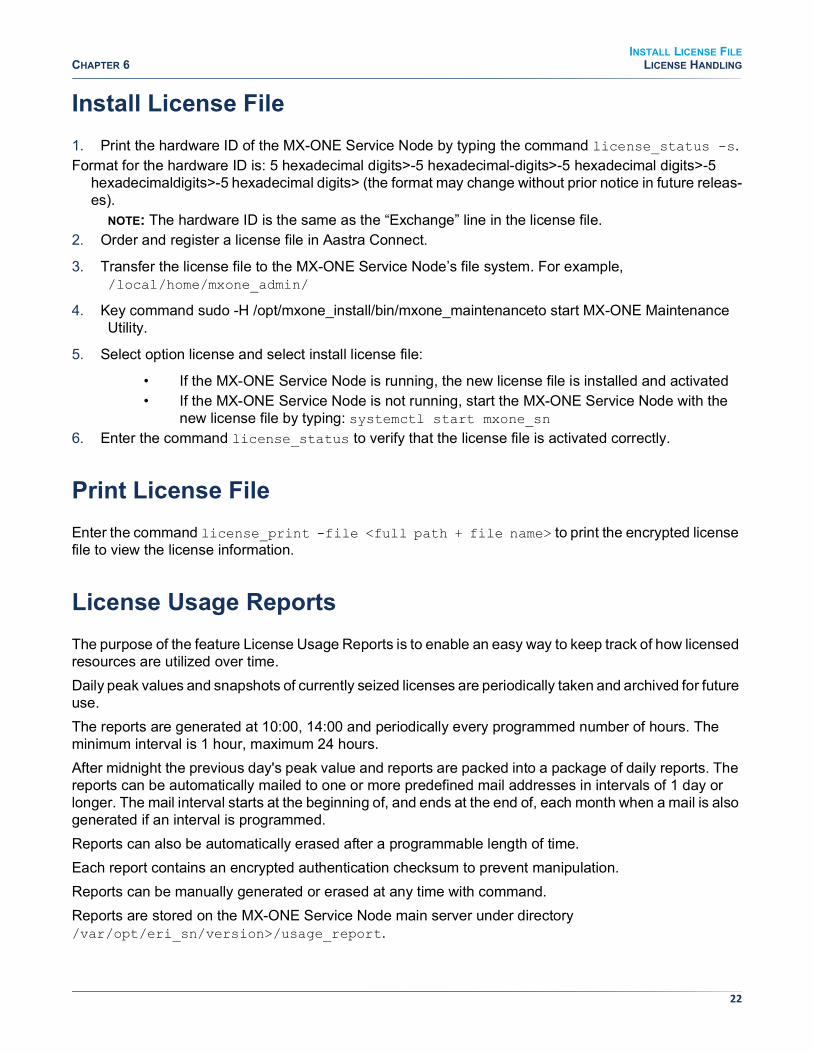
Install License File1. Print the hardware ID of the MX-ONE Service Node by typing the command license_status -s.Format for the hardware ID is: 5 hexadecimal digits>-5 hexadecimal-digits>-5 hexadecimal digits>-5
hexadecimaldigits>-5 hexadecimal digits> (the format may change without prior notice in future releas-es).
NOTE: The hardware ID is the same as the “Exchange” line in the license file.2. Order and register a license file in Aastra Connect.
3. Transfer the license file to the MX-ONE Service Node’s file system. For example, /local/home/mxone_admin/
4. Key command sudo -H /opt/mxone_install/bin/mxone_maintenanceto start MX-ONE Maintenance Utility.
5. Select option license and select install license file:
• If the MX-ONE Service Node is running, the new license file is installed and activated• If the MX-ONE Service Node is not running, start the MX-ONE Service Node with the
new license file by typing: systemctl start mxone_sn6. Enter the command license_status to verify that the license file is activated correctly.
Print License FileEnter the command license_print -file <full path + file name> to print the encrypted license file to view the license information.
License Usage ReportsThe purpose of the feature License Usage Reports is to enable an easy way to keep track of how licensed resources are utilized over time.Daily peak values and snapshots of currently seized licenses are periodically taken and archived for future use.The reports are generated at 10:00, 14:00 and periodically every programmed number of hours. The minimum interval is 1 hour, maximum 24 hours.After midnight the previous day's peak value and reports are packed into a package of daily reports. The reports can be automatically mailed to one or more predefined mail addresses in intervals of 1 day or longer. The mail interval starts at the beginning of, and ends at the end of, each month when a mail is also generated if an interval is programmed.Reports can also be automatically erased after a programmable length of time.Each report contains an encrypted authentication checksum to prevent manipulation.Reports can be manually generated or erased at any time with command.Reports are stored on the MX-ONE Service Node main server under directory /var/opt/eri_sn/version>/usage_report.
23
LICENSE USAGE REPORTSCHAPTER 6 LICENSE HANDLING
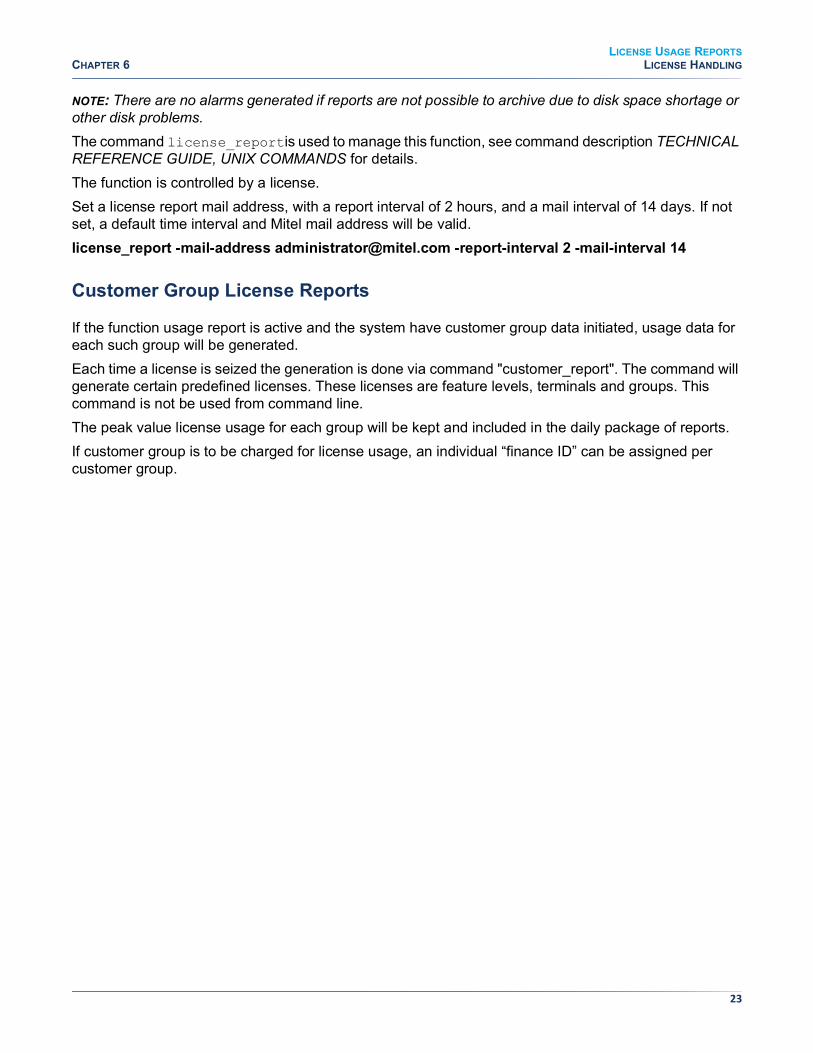
NOTE: There are no alarms generated if reports are not possible to archive due to disk space shortage or other disk problems.The command license_reportis used to manage this function, see command description TECHNICAL REFERENCE GUIDE, UNIX COMMANDS for details.The function is controlled by a license.Set a license report mail address, with a report interval of 2 hours, and a mail interval of 14 days. If not set, a default time interval and Mitel mail address will be valid.license_report -mail-address [email protected] -report-interval 2 -mail-interval 14
Customer Group License Reports
If the function usage report is active and the system have customer group data initiated, usage data for each such group will be generated.Each time a license is seized the generation is done via command "customer_report". The command will generate certain predefined licenses. These licenses are feature levels, terminals and groups. This command is not be used from command line.The peak value license usage for each group will be kept and included in the daily package of reports.If customer group is to be charged for license usage, an individual “finance ID” can be assigned per customer group.

24
CHAPTER 7 ADD OR REMOVE SYSTEM DATABASE NODE
Add or Remove System Database Node
The system database in the MX-ONE can be expanded or reduced; for example, can add or remove nodes. For description of the system database functions, see the SYSTEM DATABASE (CASSANDRA) DESCRIPTION.To add or remove a node in the system database:1. Key command sudo -H /opt/mxone_install/bin/mxone_maintenanceto start MX-ONE Main-
tenance Utility.2. Select the wanted option, for example Add Cassandra nodeor Remove Cassandra node, and follow
the on-screen instructions.

25
SETUP MEDIA GATEWAY ETHERNET PORTSCHAPTER 8 MEDIA GATEWAY UNIT
Media Gateway Unit
The Media Gateway Unit is a hardware based media gateway, see the MGU DESCRIPTION and MGU2 DESCRIPTION.
Setup Media Gateway Ethernet PortsFor more information, see the installation instructions for INSTALLING AND CONFIGURING MIVOICE MX-ONE.
Initiation of MGUSee the installation instructions for INSTALLING AND CONFIGURING MIVOICE MX-ONE.
Virtual BoardsFor information on virtual boards, see the parameter description for BRDID, in Technical Reference Guide, MML parameters.
Update and Upgrade of MGU SoftwareThe Media Gateway Unit comes fully functioning, with a bootable Linux Operating System and with an operable version of the MGU software, which will be started at power on. It may be necessary to upgrade the MGU to a newer version. This MGU firmware update/upgrade has to be initiated manually.For more information, see the installation instructions for INSTALLING AND CONFIGURING MIVOICE MX-ONE or see the installation instructions for UPGRADING AND UPDATING.When the firmware has been updated or upgraded, the Media Gateway is restarted automatically. After restart, the new firmware is installed on the Media Gateway.
Start and Restart Media GatewayThe Media Gateway Unit is automatically started and connected to the MX-ONE Service Node once it is powered on.

26
LED INDICATIONS IN THE MEDIA GATEWAYCHAPTER 8 MEDIA GATEWAY UNIT
LED Indications in the Media GatewayThere is a LED indication on the Media Gateway Unit’s front panel: green light indicates OK, and red light not OK. See the MGU DESCRIPTION or MGU2 DESCRIPTION for details.
MG Unit Resource Load Sharing ConsiderationsSee the section,Media Server resource load sharing considerations.

27
INITIATION OF MEDIA SERVERCHAPTER 9 MEDIA SERVER
Media Server
The Media Server is automatically started and connected to the MX-ONE Service Node once it is powered on.
Initiation of Media ServerSee the installation instructions for INSTALLING AND CONFIGURING MIVOICE MX-ONE.
Update and Upgrade SoftwareThe Media Server software is installed on the Service Node server or any server where the MS shall run, and is automatically started at startup of the operating system. Upgrading of the MS will be performed by upgrading or updating the MX-ONE Service Node through the mxone_maintenance tool.For more information, see the installation instructions for INSTALLING AND CONFIGURING MIVOICE MX-ONE or see the installation instructions for UPGRADING AND UPDATING.
Start and Restart Media ServerThe Media Server is a software based media gateway, with functionality similar to the MGU, see the MEDIA SERVER DESCRIPTION.
Media Server Resource Load Sharing ConsiderationsIn larger systems, with several SN servers, and several Media Servers (or MGUs), there is a load sharing and load balancing functionality, which allows seizure of media resources in several alternative Media Servers or MGU, if the use case allows it, in up to 15 different MS within the same LIM/SN server, and in up to 10 different overflow LIMs/SN servers.For this functionality to be feasible, the system should have only or almost only IP end-points, since TDM end-points could not allow selection of an alternative MS.

28
CHAPTER 10 LOAD-BALANCING/LOAD-SHARING PRINCIPLES IN THE ASP 113 SYSTEM
Load-Balancing/Load-Sharing Principles in the ASP 113 System
Load balancing (of MS or MGU resources) means the ability to spread the seizure of media resources (RTP) on several Media Servers or MGUs in an ASP 113 system. A Service Node in the system may reserve and use a media resource in any MS or MGU, in up to 10 overflow LIMs/SN servers. This is referred to as “Media Gateway Load-sharing”.The algorithm for load sharing of media gateways in ASP113 is as follows:First a list of LIMs and Media gateways is created, based on the possible choices (including own LIM). If overflow LIMs are programmed, only these LIMs (including own LIM) and media gateways will be on the list. Primarily a media gateway in own LIM is selected, but if resources are not available in own LIM’s media gateways, other LIMs can be searched for alternative media gateways.

29
CHAPTER 11 SELECTION OF AN ALTERNATIVE MEDIA SERVER OR MGU
Selection of an Alternative Media Server or MGU
The first LIM where a media gateway, that is below overflow limit threshold is found, will be selected. In a LIM, if more than one media gateway is below overflow limit threshold, the one with the lowest usage will be selected.If a media gateway is above the overflow limit threshold, it will not be selected during overflow. It will be selected when the overflow returns to originating LIM. The overflow LIM sequence is based on round-robin, and decided in the originating LIM. If no selectable media gateway is found, the selection is returned to originating LIM.If an overflow threshold is programmed and no overflow LIM is programmed, the overflow will take place according to the list of possible LIMs without a round-robin. If a LIM has no overflow limit, but contains a selectable media gateway, this media gateway is always selected.Note that in many cases we are bound by previous call processing and types of involved end-points to select a certain gateway.Thus, in ASP113 a general round-robin distribution is used for the selection, but combined with a "least connection load" selection, in order to seize RTP resources in the Media Server (or MGU) with the lowest load.

30
CHAPTER 12 CHANGING OF LOAD-SHARING LOAD LEVELS
Changing Of Load-Sharing Load Levels
The load sharing function has a default configuration, which can be adjusted using the media_gate-way_load_sharing command.

31
PRINT RTP RESOURCE INFORMATIONCHAPTER 13 INTER-MEDIA GATEWAY RTP COMMUNICATION
Inter-Media Gateway RTP Communication
In an MX-ONE system with several Media Gateways with local MX-ONE Service Nodes, it is necessary to set up RTP resources for inter-Media gateway communication to be able to make calls between the Media Gateways without using IP trunks.The rtp_resource handling commands can be used for viewing RTP resources for an MX-ONE. For more information, see TECHNICAL REFERENCE GUIDE, UNIX COMMANDS for details.When connecting a TDM device to an IP device, the RTP resource will be booked in the same gateway where the TDM device is situated.When connecting two IP devices with forced gateway, or of a auxiliary device towards a IP device, the order to try to book the RTP resources will be in the following order.1. Media Server in the same IP domain as at least one of the IP devices2. Any Media Server.
3. Media Gateway in the same IP domain as at least one of the IP devices.
4. Any Media Gateway.
At multiple choices the load will be distributed equally.
Print RTP Resource InformationPrint RTP resource information for a MX-ONE Classic. Use the command rtp_resource -lim 1,2 to print information for Media Gateway 1 and 2.Print codec information for the MX-ONE Classic. Use the command rtp_resource rtp_resource to print information for Media Gateway 1 and 2.Print busy RTP resources for a MX-ONE Classic. Use the command rtp_resource -lim 3 -print busy to print information for node 3.

32
CHAPTER 14 MIVOICE MX-ONE SERVICE NODE USER ADMINISTRATION
MiVoice MX-ONE Service Node User Admin-istration
After a first-time setup there is only one user on the MX-ONE Service Node and this user (root) has no restrictions. The commands in the MX-ONE Service Node are divided into eight levels, and it is recom-mended to analyze the need of several administrator levels on the server.For more information about command levels, see the command description for COMMANDS IN MX-ONE SERVICE NODE.For more information about user accounts on the Linux server, see the operational directions for USER ACCOUNT MANAGEMENT.

33
DEFINE SYNCHRONIZATION SOURCESCHAPTER 15 SYNCHRONIZATION
Synchronization
The synchronization function is used to receive synchronization from an external source, give sync to the system, display the external sources and rate the preferred source with class and priority.Perform a re-synchronization after the sources are defined. If no source is specified, the Media Gateway or the MX-ONE Classic is using the internal clock.Use the command trsp_synchronization to display external synchronization sources, define the external synchronization sources and re-synchronization of external synchronization sources in the Media Gateway.Class “a” represents the highest quality on a synchronization source and class “d” the lowest quality. Priority “1” is chosen first and “3” last. The chosen synchronization source is the source defined with the best class. If several sources are defined with same class, priority is used.
Define Synchronization Sources1. Display the external synchronization sources for media gateway 2A.trsp_synchronization -mgw 2A2. Rate the preferred sources with class and priority.
trsp_synchronization -bpos 2A-0-00 -class b -prio 13. Re-synchronize after the sources are defined.
trsp_synchronization -resync -mgw 2A
Deactivate Synchronization Sources1. Reset not preferred synchronization sources -class no and -priority no. trsp_synchronization
-bpos 1B-0-00 -class no -prio no2. Re-synchronize after the sources are defined. trsp_synchronization -resync -mgw 1B

34
BLOCK A DEVICECHAPTER 16 BLOCKING AND DEBLOCKING
Blocking and Deblocking
The blocking function is used for repairing. Ongoing traffic is not terminated but no new traffic is permitted for the devices that are blocked.An alarm is generated when a device is blocked.The deblocking function is used to cancel (erase) manual blockings and all types of system generated blockings or fault markings.
Block a DeviceTo block a device, use the command block.block -bpos 1A-2-20
Deblock a DeviceTo deblock a device, use the command deblock.deblock -bpos 1A-2-20
List Blocked or Disturbance Marked DevicesTo list blocked and disturbance marked devices, use the command block_list.block_list -lim 1

35
CHAPTER 17 ALARM HANDLING AND SNMP
Alarm Handling and SNMP
For more information, see the operational directions for ALARM HANDLING and see the operational directions for MIVOICE MX-ONE SNMP SUPPORT, ALARM NOTIFICATION AND EMERGENCY CALL EVENTS

36
IPTABLESCHAPTER 18 SERVER HARDENING
Server Hardening
The MX-ONE has been endowed with a set of configurations aiming to increase the system’s security, reliability and resiliency to a number of malicious attacks.
IPTablesIPTables is a packet filter built into the Linux kernel. The filter has been configured to prevent that certain services running on the server for the MX-ONE Service Node, necessary for the server’s correct func-tioning, can be reached from the corporate network (eth0). The following services have been blocked for incoming connections on eth0:Additionally, ICMP echo reply messages (ping) are limited to one response per second.To display the actual IPTables configuration, type iptables -LTo remove a rule, for instance the one blocking the daytime protocol on eth0, type iptables -D INPUT -i eth0 -p udp -m udp -dport daytime -REJECTFor more information about how to configure IPTables, refer to the IPTables manual pages, type man iptables.• vat• postgresql• clvm-cfg• kerberos• nfs• sunrpc• rmiregistry• daytime• tftp
SSH ConfigurationThe MX-ONE is configured to not accept any SSH connection logging in as root. In case root privileges are required, it is necessary to log on as another user and then to use the command su -.The SSH configuration is saved in the /etc/ssh/sshd_config file.
SeccheckSeccheck is a security tool used by the Suse Linux Enterprise Server Operating System. Seccheck comprises three scripts that are run respectively each day, each week and each month (as cron jobs). In case something is detected that might indicate a security breach, a mail is sent to the root user with a description of the problem.The seccheck scripts are stored in the /usr/lib/secchk directory.

37
SECCHECKCHAPTER 18 SERVER HARDENING
The seccheck script can also be run manually by typing:• /usr/lib/secchk/security-daily.shor• /usr/lib/secchk/security-weekly.shor• /usr/lib/secchk/security-mothly.sh
The weekly and monthly seccheck scripts are very CPU and memory intensive and can easily lead to too slow responses on traffic events and result in MX-ONE Service Node calls throttled alarms. If possible ensure that these checks are always run at low traffic times. Check the settings in /etc/cron.d/seccheck on when the checks are executed. For operations where degrading of the tele-phony throughput is not acceptable or for other reasons the checks can be removed.To remove the security check do the following:Log-in as user mxone_admin, and key the command sudo -H /opt/mxone_in-stall/bin/mxone_-maintenance and select option seccheck and follow the instructions on screen.

38
TRACE FUNCTIONALITYCHAPTER 19 FAULT LOCATION
Fault Location
For more information regarding fault location, see the fault locating instructions for MIVOICE MX-ONE FAULT LOCATION.
Trace FunctionalityThe Trace functions in the MX-ONE Service Node is an integrated part of the system. The function consist of the following parts.• Commands to administer the function – trace• Program unit running on the processor – LOGGER• Components integrated into the signaling mechanisms• Code components specified in design rules• Code provided from the designer
The Trace functions make it possible for the administrator to analyze the system performance and trace error conditions. The Trace functions can be used when integrating the system to verify the intended func-tions or to find problems in a system with traffic.
Trace TypesThe MX-ONE handles basically the following types of trace data:• Trace error log This log is dedicated to trace individual 0. This trace individual is always active and
will record any abnormality detected in the MX-ONE. The log is cyclic, that is, overwrites the oldest entries when the log becomes full, filters which signals to store (is set), and it is possible to alter the size of the storage (1 up to 5000 entries, default is 500). The error trace cannot be removed or stopped.
• Unit trace Can be initiated on the MX-ONE program units in one or all MX-ONE Service Nodes.
• Sequence trace Sequence trace can be initiated in several ways depending on what is known of the function that is to be analyzed. It is possible to start on a specific signal, with or without specific data and to start on a known directory number, or a known EQU position.
Exception: LLP and dynamically loaded commands or daemons (for example, board_sw and snmpd). Unit trace is set up by command and has no restrictions on options like filter etc.

39
PERFORM A TRACECHAPTER 19 FAULT LOCATION
Sequence trace is set up by command and has no restrictions on options like filter etc.• Hardware trace Hardware trace is performed by copying all signals to or from hardware positions. The
trace is started on a complete 32 group in the addressing range. It is possible to exclude individual in the 32 group from the trace by setting a mask. Each signal sent in the HW interface will be recorded twice, once in signal format and once in raw format. This is done to help the debugging of signaling to and from a new interface board. (Filtering can be used to omit the unwanted copy.)
Hardware trace is set up by command and has no restrictions on options like filter etc.
Perform a TraceInitiation1. Enter the command trace -display to check if there are free trace individuals.2. Initiate the trace by using one of the commands below:
– Trace started on a specific program unit. trace -lim -unit– Trace started on a specific signal number. trace -lim -unit -signo [-byte]– Trace started on a specific signal name. trace -lim -unit -signam [-byte]– Trace started on a directory number. trace -dir– Trace started in a equipment position. trace -equ– Trace started on a backplane 32 group. trace -hwpos [-mask]– Trace started on the switch specific functions (LSU/DSU or Media Gateway internal functions).
trace -hwpos -switch [-mask]
ModificationIt is possible to modify the behavior of the trace individual.NOTE: The change command can be used any number of times as long as the trace has not started.The following can be changed:• The trace individual• The trace individual can stop when maximum copies are received or overwrite the oldest• The size of the trace buffer• The signals to include or omit in the trace• The kind of text trace copies to include in the trace• A stop signal that will stop the trace if included in the trace• Stop conditions if an error signal is received• An information text to the trace individual (reminder or message to other users)
NOTE: Several trace individuals can use the same stop condition.
Exception: The directory number must be associated to a terminal, that is, not a group number. EQU positions must be an interface, for example, trunk line interface, extension line interface or operator line interface, not auxiliary device interfaces.

40
PERFORM A TRACECHAPTER 19 FAULT LOCATION
Start TraceEnter the command trace -start to start the trace or traces.NOTE: Several traces can be started with the same command.Stop TraceEnter the command trace -stop to stop the traces.NOTE: Several traces can be stopped with the same command.Display Trace StatusYou can check the status of the traces at any time. Status information can be printed without stating a trace individual. This will give a print of all 16 trace individuals statuses. If only one trace individual is given, only that trace individual will be printed.If there is no LIM parameter, all buffer counters of the MX-ONE Service Nodes are added and printed. If there is a LIM parameter, the counter from that MX-ONE Service Node is printed. Depending on what type of trace that is initiated, different layouts will be used. All parameters entered are presented. Some addi-tional information like pointers and program units, where a directory number resides, are also printed to help the administrator to identify the right data in the trace printout.Related command and parameters are. trace -display [-lim]Print Trace ResultWhen a trace is stopped it is possible to print the trace result. In a multi Server system, the trace copies will be printed in chronological order. It is possible to print from a specific MX-ONE Service Node with the LIM parameter. It is also possible to print copies containing a certain signal number, or to print a range of copies. To change the printout format a show parameter can be given to omit the parts of the signal that are regarded as irrelevant in the printout format.Related command and parameters are: trace -print [-lim] [-from] [-to] [-signo] [-show]NOTE: The trace information and status are always printed in the header before the actual trace informa-tion, so that the trace setup can be examined when analyzing the result.Clear the Trace BufferEnter the command trace -clear to clear the content of the trace buffer.NOTE: Several traces can be cleared with the same command.Remove a Trace IndividualIf a trace individual is not needed any more, free the trace individual by removing the trace configuration and placing the trace individual in idle state. The related command and parameter is: trace -remove

41
SERVERCHAPTER 20 SWAP AND REPAIR
Swap and Repair
ServerFor replacement of the server, see the operational directions for REPLACING MISCELLANEOUS HARD-WARE or see the operational directions for REPLACING BOARDS IN MIVOICE MX-ONE MEDIA GATE-WAYS section Replacing Mitel ASU Lite or Mitel ASU II.
Media GatewayFor replacement of the Media Gateway, see the operational directions for REPLACING MISCELLA-NEOUS HARDWARE section REPLACING MEDIA GATEWAY or see the operational directions for REPLACING BOARDS IN MIVOICE MX-ONE MEDIA GATEWAYS.

42
FOLDERSCHAPTER 21 MIVOICE MX-ONE SERVICE NODE FILE STRUCTURE
MiVoice MX-ONE Service Node File Struc-ture
FoldersMX-ONE Service Node follows the typical structure of a Linux directory tree:Table 21.1:Application executable files, static configuration files and configuration file templates
/opt/eri_sn/bin
/opt/eri_sn/etc
/opt/eri_sn/install
/opt/eri_sn/lib
/opt/eri_sn/sbin
/opt/eri_sn/upgrade
Table 21.2:Install packages, scripts, and utilities
/opt/mxone_install/bin
/opt/mxone_install/install_sw
/opt/mxone_install/target
Table 21.3:Active configuration files
/etc/opt/eri_sn
Table 21.4:Configuration files for the system database
/usr/share/cassandra/conf/cassandra.yaml
/usr/share/cassandra/conf/cassandra-env.sh
/usr/share/cassandra/conf/cassandra-rackdc.properties
/usr/share/cassandra/conf/cassandra-topology.properties
/usr/share/cassandra/conf/vm.options

43
CONFIGURATION FILES TEMPLATESCHAPTER 21 MIVOICE MX-ONE SERVICE NODE FILE STRUCTURE
The directory /opt/eri_sn and the sub directories are write protected. The directories /etc/opt/eri_sn and /var/opt/eri_sn are write enabled.
Configuration Files TemplatesThe following configuration files are located in the directory /opt/eri_sn/etc:• alarm_severity.conf• alarm_text.conf• awdb.conf• board_characteristics.conf• market.conf• start_order.conf• sudaem.conf• swdb.conf
Table 21.5:Install configuration file
/etc/opt/mxone_install
Table 21.6:Reload data and system backup files
/var/opt/eri_sn/call_logging
/var/opt/eri_sn/traffic_recording
/var/opt/eri_sn/usage_reports
/var/opt/eri_sn/xdata
Table 21.7:System database data and log files
/var/opt/cassandra/data
/var/opt/cassandra/commit
Table 21.8:Miscellaneous log files
/var/log/mxone
Table 21.9:Configuration files saved at uninstall
/tmp/mxone/mxone_install/savedAtUninstall
44
INSTALLATION AND UPGRADING CONFIGURATION FILESCHAPTER 21 MIVOICE MX-ONE SERVICE NODE FILE STRUCTURE
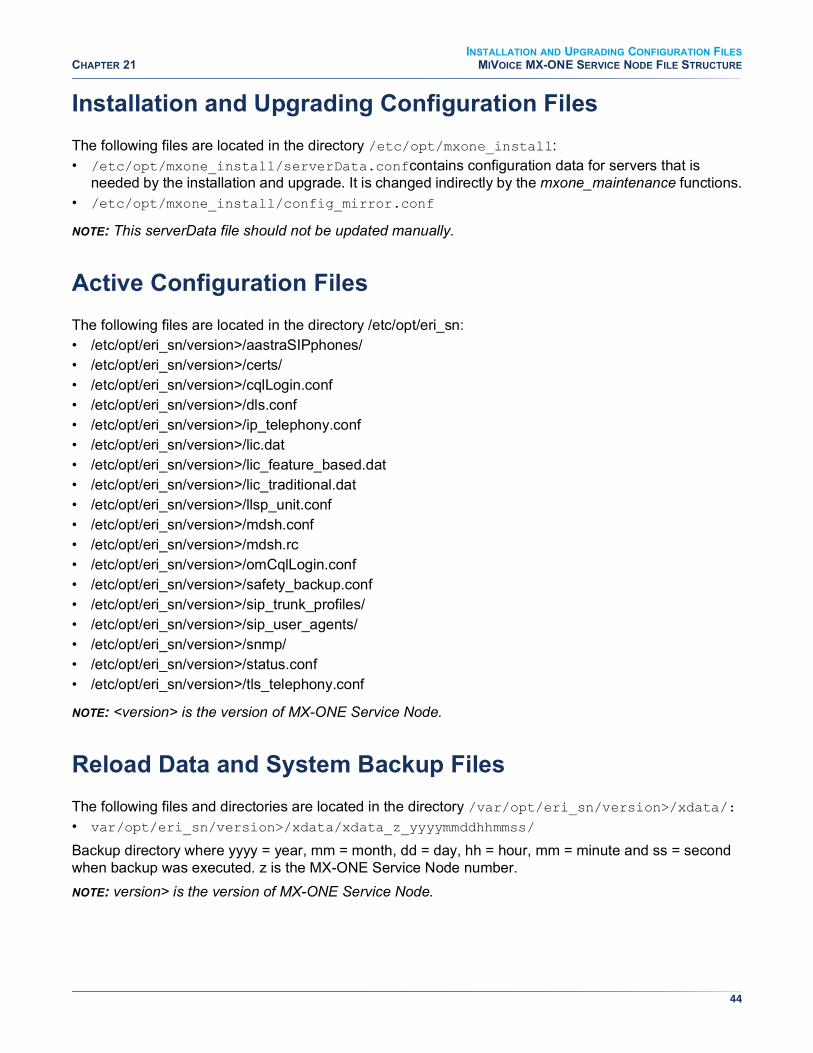
Installation and Upgrading Configuration FilesThe following files are located in the directory /etc/opt/mxone_install:• /etc/opt/mxone_install/serverData.confcontains configuration data for servers that is
needed by the installation and upgrade. It is changed indirectly by the mxone_maintenance functions.• /etc/opt/mxone_install/config_mirror.conf
NOTE: This serverData file should not be updated manually.
Active Configuration FilesThe following files are located in the directory /etc/opt/eri_sn:• /etc/opt/eri_sn/version>/aastraSIPphones/• /etc/opt/eri_sn/version>/certs/• /etc/opt/eri_sn/version>/cqlLogin.conf• /etc/opt/eri_sn/version>/dls.conf• /etc/opt/eri_sn/version>/ip_telephony.conf• /etc/opt/eri_sn/version>/lic.dat• /etc/opt/eri_sn/version>/lic_feature_based.dat• /etc/opt/eri_sn/version>/lic_traditional.dat• /etc/opt/eri_sn/version>/llsp_unit.conf• /etc/opt/eri_sn/version>/mdsh.conf• /etc/opt/eri_sn/version>/mdsh.rc• /etc/opt/eri_sn/version>/omCqlLogin.conf• /etc/opt/eri_sn/version>/safety_backup.conf• /etc/opt/eri_sn/version>/sip_trunk_profiles/• /etc/opt/eri_sn/version>/sip_user_agents/• /etc/opt/eri_sn/version>/snmp/• /etc/opt/eri_sn/version>/status.conf• /etc/opt/eri_sn/version>/tls_telephony.conf
NOTE: <version> is the version of MX-ONE Service Node.
Reload Data and System Backup FilesThe following files and directories are located in the directory /var/opt/eri_sn/version>/xdata/:• var/opt/eri_sn/version>/xdata/xdata_z_yyyymmddhhmmss/
Backup directory where yyyy = year, mm = month, dd = day, hh = hour, mm = minute and ss = second when backup was executed. z is the MX-ONE Service Node number.NOTE: version> is the version of MX-ONE Service Node.

45
TRANSFER OF PCREGEN FILES FOR RESTORING DATACHAPTER 21 MIVOICE MX-ONE SERVICE NODE FILE STRUCTURE
Transfer of PCRegen Files for Restoring DataTo get correct Restore Data, copy the files using text mode for transfer. Do not ZIP the Print files.

46
CHAPTER 22 HARD DISK MAINTENANCE
Hard Disk Maintenance
The service node software takes a bit more than 1 GB disk space. When the service node is to be upgraded disk space is needed for the current software, which might need to be restored in a roll back procedure. Disk space is also needed for the new software and during the upgrade procedure disk space is needed for temporary files.In all 5 GB of free disk space must be available on the root partition in each MX-ONE Service Node before a new version of the service node can be installed. When more disk memory is needed manually remove possible core dump files and unused service node versions.To remove unused files or packages use the maintenance script:1. Package handling2. Remove

The step Feature changes 21The step Confirm changes 21Confirmation of generated License file 21

© Copyright 2019, Mitel Networks Corporation. All Rights Reserved. The Mitel word and logo are trademarks of Mitel NetworksCorporation, including itself and subsidiaries and authorized entities. Any reference to third party trademarks are for reference only and Mitelmakes no representation of ownership of these marks.mitel.com